
Above and Below
2015
Develop your village, assign villagers to vital jobs, and explore a cavern filled with treasures, resources, and unpredictable stories.
90
minutes
2 - 4
player(s)
13+
Medium


About this board game
Above and Below is a town-building and storytelling board game for 2–4 players, with games lasting about 90 minutes. Compete to build the most well-developed village both on the surface and in the vast caverns beneath it.
After escaping a village destroyed by barbarians, you must establish a new home. Build houses, develop your settlement, and send villagers to perform important jobs. Each villager has unique skills and abilities, so deciding how to use your limited workforce is an essential part of building a stronger community.
- Assign villagers to jobs such as exploring caves, harvesting resources, and constructing houses.
- Develop your personal village board by placing villagers in different work areas.
- Build houses above ground as well as underground.
- Compete to create the best-developed village by the end of the game.
The caverns bring a distinctive storytelling element to Above and Below. When you send an expedition underground, another player reads an encounter from a book of paragraphs. You then choose how to respond, with the outcome often depending on which villagers joined the expedition and whether you are willing to sacrifice someone to succeed.
Every visit to the depths can reveal a different adventure, including opportunities to discover shiny treasures, rare resources, and unexpected challenges. You may need to choose between sending a capable villager on an expedition or keeping them home to teach important skills to a younger villager.
Balance village development, exploration, and the abilities of your villagers as you work toward a settlement strong enough to face whatever comes next. In Above and Below, the player with the most well-developed village wins.

Board Game Rules for
Above and Below
Prologue

Your last village was ransacked by barbarians. You barely had time to pick up the baby and your favorite fishing pole before they started the burning and pillaging.
You ran from that place in the dark of night.
And wandered over a cruel desert….
Braving frozen peaks and crossing a rough sea filled with sharks.
Then you found it! The perfect place to make your new home.
But as soon as you had the first hut built, you discovered a vast network of caverns underground…
…brimming with shiny treasures, rare resources, and endless adventure!
Now, you’re organizing expeditions and building your village above and below…
Components
- 1 Reputation Board
- 4 Player Boards
- 1 Encounter Book
- 25 House Cards
- 4 Starting House Cards
- 24 Outpost Cards
- 9 Key House Cards (Notice the Key Symbol)
- 6 Star House Cards (Notice the Star Symbol)
- 25 Cave Cards
- 12 Starting Villagers
- 18 Villagers
- 6 Special Villagers
- 81 Goods Tokens (12 fruit, 12 fish, 12 mushroom, 10 pots, 10 rope, 10 paper, 8 ore, 7 amethyst)
- 7 Dice
- 1 Round Marker
- 4 Cubes (in 4 colors)
- 1 First-Player Card
- Coins (36 ones, 6 fives, 8 tens)
- 20 Potion Tokens
- 10 Cider Tokens

Setting up the Game
- Player Setup: Give each player a player board, seven coins, 1 starting house card, and 1 of each type of starting villager (3 villagers total for each player). The starting villagers have a house on the back of the token. The 3 villagers should have the symbols depicted at “1A” (opposite page), and start in the large grass area furthest to the left on the player board—the “ready area”.
If playing with four players: place the two starting villagers that do not have a hammer symbol in the grass area with a moon symbol—the “exhausted area”. (In the first round of play, each player will only be able to use one villager. The two villagers that start in the exhausted area will move to the “ready area” at the end of round one. The symbol pictured below can be found on the reputation board next to the round track and is meant to remind you of this rule.)

Four-Player Rule Reminder Symbol - Star and Key Houses: Place the 6 star house cards face up on the table in a row. Shuffle the 9 key house cards and draw 4 at random, placing them in a row, face up, below the star house cards. The remaining key house cards are placed in the box and are not used for this game.
- Reputation Board and Villagers: Put the reputation board in the center of the table. Put any unused starting villagers in the box. Place the special villagers aside (special villagers have a cave on the back of the token). Place the remaining villagers face down in a pile and draw five, putting them along the top of the reputation board in a row.
- Round Marker: Place the round marker on the top chamber in the string of seven caves on the reputation board.
- Supply: Place the coin tokens, goods tokens, cider tokens, and potion tokens near the side. This is the supply. Place one cider token on the reputation board in the area with a cider symbol.
- Cave Cards: Shuffle the cave cards and place them in a pile face up next to the reputation board.
- Player Cubes: Give each player a wooden cube that matches the color of the banner in the top left corner of their player board. Each player places this cube on the torch space on the reputation board.
- First Player & Extra Coins: Decide who will be the first player. Turn order is in clockwise direction. Give the first player the first-player card.
- If playing with two players, give the second player one extra coin.
- If playing with three players, give the second and third players one extra coin.
- If playing with four players, give the fourth player one extra coin.
- House and Outpost Decks: Shuffle the house cards and the outpost cards and place them in two piles face down underneath the reputation board. Draw the top four cards of each deck and place them face up in a row next to their respective decks.
- Encounter Book and Dice: Place the encounter book and dice near the play area.

Turn Overview
Above and Below is played in rounds. Each round, players take turns assigning their villagers to take actions. When a player wishes to take no more actions in the round, he states that he wishes to pass. When all players have passed, the round ends (this means that some players will sometimes have more turns than others).
After seven rounds, the game is over.
Starting with the first player (the player with the first-player card) and continuing in clockwise order, each player may take one action per turn until all players have passed. The available actions are:
 Explore
Villagers explore the cavern in an attempt to find a place for an underground outpost.
- Draw Cave Card & Assign Villagers: First, the player draws a cave card from the top of the cave card deck and places it to the left of his player board (near the rocks in the corner). He then slides two or more villagers from the ready area on his player board to the card (there is no limit to the amount of villagers he may send exploring, but he must send at least two).
- Roll for Encounter: He then rolls a die and compares it to the grid of numbers on the lower half of the new cave card—the resulting number indicates which paragraph should be read to him from the encounter book.
- Read Paragraph: The player to his left turns to the indicated paragraph in the encounter book and reads it to him. The reader reads the entire paragraph, including any choices below the description (in BOLD CAPS) AND the associated explore numbers. The only thing the reader does not read aloud are the possible rewards after each explore number (in parentheses).
An encounter paragraph might look like this:
You descend a deep chasm until you reach a wide, dark chamber. Rancid, cloudy water covers the cave floor, and soon you see glowing red eyes in all directions. You raise your lantern and realize that you’re surrounded by giant rats, their brown, oily coats slick and wet. They close in, ready to make your party their next meal. Do you try to run and hide from the rats, or do you stand and fight?
RUN AND HIDE: Explore 3 (coin), Explore 4 (mushroom)
STAND AND FIGHT: Explore 7 (five coins, ore)
After reading the description, the reader reads the two available choices like this: “Run and hide—explore 3 or 4. Stand and fight—explore 7.”
- Choose an Option: The active player then selects one of the available choices (for example: “run and hide”). He must state aloud his choice. The active player must then attempt to meet or exceed at least one of the explore numbers following that choice.
- Roll Dice for Villagers: The active player rolls one die for each villager that was sent into the cavern (on the cave card). He must indicate for which villager he is rolling each time he rolls. Once rolled, he places the die on the villager. The amount of lanterns gained by the villager depends on the roll.

After all dice have been rolled, the player adds the total number of lanterns from his villagers. If the total is equal to or greater than one of the explore numbers associated with his choice, he succeeds. If he does not have a sufficient number of lanterns, or he wants more lanterns to reach a higher explore number, he may then choose to Exert one or more of the villagers from the cave card to gain extra lanterns.

Exerting Villagers
To Exert a villager, the player removes the villager from the cave card and places him or her in the injured area on his player board. Each exerted villager gives the player one extra lantern.
Resolving the Explore Action
- Success: If the final total of lanterns meets or exceeds one of the explore numbers associated with the player’s choice, he succeeds and gains the rewards from the highest-reached explore number.
For example, if the player chose “run and hide” from the explore paragraph on page six, and he rolled a total of 5 lanterns, he would gain the reward from “Explore 4”: a mushroom.
After the player gains the reward, he moves any villagers remaining on the cave card to the exhausted area on his player board. He places the cave card to the right of his player board, underneath his row of houses, in the same row as other cave cards and outposts he already owns. - Failure: If the player does not have enough lanterns to meet or exceed at least one of the explore numbers associated with his choice, he fails and does not gain the cave card or any rewards. He moves any villagers remaining on the cave card to the exhausted area of his player board and puts the cave card at the bottom of the cave card deck. Some paragraphs have failure descriptions, which must be read if a player fails a specific choice. If the failure description includes a penalty, this is applied to the player.
NOTE: For more details on reading encounters, see the first page of the encounter book.
 Build
A villager builds a house, a star house, a key house, or an outpost.
- First, the player slides one of his villagers from the ready area of his player board to the exhausted area of his player board. The villager must have a
 hammer symbol.
- The player may then choose to purchase one of the available house cards, star house cards, key house cards, or outpost cards. He must pay an amount of coins to the supply equal to the cost of the card.
- Placing Buildings:
- If a player wants to purchase an outpost, he must have an open, available cave card (that he gained from a previous explore action). He places the new outpost on top of the available cave card.
- Houses, key houses, and star houses are placed in a row next to the starting house.
- Outposts are placed in a row underneath the row of houses.
- Houses, key houses, star houses, and outposts give the player a special ability, increased income, and/or other benefits. These are described in the “Symbols” section.
- After the player has finished placing his new card, if he built a house or outpost, he then must draw a new card so that there are four available choices for the next player.


 Harvest
Villagers harvest goods from houses or outposts.
- First, the player slides one or more of his villagers from the ready area of his player board to the exhausted area of his player board.
- For each villager the player exhausts, he may take one goods token from one of his houses or outposts.
- He places that good next to his coins and may either:
- Keep it there for later,
- Place it for sale in the top left corner of his player board, or
- Place it in his advancement track.
Placing goods in the advancement track is described further under “Other Rules”. Selling and buying goods is described later in the “Free Actions” section.
 Train
A villager trains a new villager.
- First, the player slides one of his villagers from the ready area of his player board to the exhausted area of his player board. The villager must have a
 quill symbol.
- The player may then pay to train a new villager from the reputation board. He may select any of the available villagers. He must pay the cost in coins to the supply. The cost is listed on the reputation board below each villager.
- The player places the newly-trained villager in the exhausted area of his player board.
- The player does not draw a new villager for the reputation board. (This will be done at the end of the round.)
 Labor
Villagers labor to gain more coins.
- First, the player slides one or more of his villagers from the ready area of his player board to the exhausted area of his player board.
- For each villager the player exhausts, he gains one coin.
- Additionally, the first player to labor each round gains the cider token on the reputation board. If there is no cider on the reputation board, the player only gains coins.
Free Actions Overview
Free actions can be performed on a player’s turn without exhausting villagers. A player may perform as many free actions as he likes before he performs a normal action. After he performs a normal action, he may not perform any free actions.
Buy From a Player
A player may purchase from another player any good, cider, or potion that has been placed for sale in the top left corner of the seller’s player board. The player may bargain, make offers, etc., but may only pay in coins, and he must pay at least 3 coins. The seller may refuse the offer for any reason. If the seller agrees to sell the good, potion, or cider, the player pays him the agreed upon amount of coins and takes the good.
Put Something for Sale
- A player may place one of his goods, a cider, or a potion for sale by placing it in the circle at the top left corner of his player board. Other players may attempt to purchase it on their turns.
- A player may remove the good that is for sale, or replace it with something else, only on his turn.
- A player may only have one good for sale at a time.
Refresh Building Row
If a player wants new options of houses or outposts to purchase, he may pay one coin to replace all four available cards in one of the rows. He takes the four current houses or outposts in the row and places them at the bottom of the deck, then draws four new cards from the top of the deck and places them face up in the row. He may do this only once per turn. It is not possible to refresh the key houses or star houses.
Pass
When a player is done taking actions, he declares “I pass”. He may not take any more actions or free actions in this round.
A player that does not have any villagers in the ready area of his player board at the start of his turn must choose to pass. He may take free actions before he passes.
2. End the Round
When all players have passed, the round ends. Follow these steps before the next round starts:
- Round Marker: Slide the round marker one chamber down the string of seven caves on the reputation board. If the round marker cannot move, the game is over. Follow the instructions in the section titled “Game End”.
- Cider: Place a cider on the cider icon on the reputation board if it does not already have one.
- New Villagers: Slide any remaining villagers on the reputation board to the left so that they occupy the lower cost slots and fill any open slots to their right by drawing new villagers from the villager pile.
- Rest Villagers: Now all players may refresh the villagers on their player boards:
- First, players may spend any potions or ciders:
- If a player spends a potion (
 ), he may move one villager from the injured area to the exhausted area.
- If a player spends a cider (
 ), he may move one villager from the exhausted area to the ready area.
- A player may use both a potion and cider on the same villager.
- If a player spends a potion (
- Now, players may move one villager from injured to exhausted, or from exhausted to ready for each bed (
 ) he has on his house and outpost cards. A villager cannot sleep in two beds (the villager wouldn’t be able to move from injured to ready by using two beds).
- First, players may spend any potions or ciders:
- Collect Income: Now all players collect coins based on their income level. Players start at 4 income, but their income level increases depending on the number of different goods in their advancement track at the bottom of their player board. Players also collect income from any house or outpost cards that give extra income.


- Refresh Goods on Buildings: If any player owns a house or outpost with an arrow symbol next to a good, and there is currently not a good on the card, place one of the appropriate goods there.

Replenishing Good Symbol Example - Pass First-Player card to the Left: The first player passes the first-player card to the player on his left, who places it face up in front of him.
- Start the Next Round: If seven rounds have not passed, begin the next round.
Advancement Track
A player’s advancement track is the row of circles along the bottom of his player board. A player may place available goods on this track at any time.
- He must place goods from left to right, not leaving any empty slots.
- Once a good has been placed, if the player wishes to place another good of the same type, it must go on the same slot (slots can contain multiple goods of the same type).
- Goods can be placed in any order.
In the example below, any future fruit goods that the player chooses to place in the advancement track would have to be stacked on the third slot from the left. If the player wanted to place a mushroom good next, he would have to place it in the fourth slot from the left.
- Village Points: There are two numbers at the top of each goods slot. The left number indicates how many village points each good in that pile is worth at the end of the game. In the example below, if a player had two fruit goods at the end of the game, each of those goods would be worth 2 village points (for a total of 4 village points).
- Income: The right number above each slot is an indication of the player’s current income. In the example below, the player would collect 6 coins (listed above fruit), at the end of each round (he would not also collect the coins listed above any of the other goods—only the good furthest to the right).
- Once a good has been placed in the advancement track, it cannot be removed.

Reputation
The reputation track is a measure of how well-known and esteemed a player’s village is. All players start on the torch symbol on the track. If a player gains reputation, he moves his cube down the track, toward the bottom of the cave. If a player loses reputation, he moves his cube up the track, toward the surface.
- Players with higher reputation will earn more village points at the end of the game.
- Reputation is gained or lost as a result of choices made during the Explore action.
Special Villagers
There are six special villagers in the base game. They are the Liquid Woman, Glogo, Cave Cat (two of these), and Metal Man (two of these) villagers. At the start of the game, place these villagers face up near the play area. They can only be obtained through specific encounters in the encounter book. Each of these villagers has special rules:
- Liquid Woman:
 The liquid woman is unsettling. When she joins your village, you lose one reputation.
- Glogo:
 The glogo is adept at building. If you use him to build, pay one fewer coin than normal.
- Cave Cat:
 The cave cat doesn’t like to obey orders. Each time you use the cat you must roll a die. If you roll a 3-6, the cat will perform the task you assign it. If you roll a 1-2, the cat moves to the exhausted area without performing any task. If the cave cat does not perform the task, you do not lose your action this turn. You may exhaust another villager to perform an action.
- Metal Man:
 The metal man uses his own bed each day. He does not use beds on your buildings. He cannot use cider or potions.
End of Game
After seven rounds have passed, the game ends and players count up village points. Players gain village points for the following:
Advancement Track
Players count up village points for each good on the advancement track. The amount each good is worth is indicated just above the slot on the board. In the example below, if a player had four fruit on the third slot, he would gain 2 village points each for a total of 8 village points. If he had one rope and one fish, he would gain 1 village point each.

Buildings
Each building is worth 1 village point. This includes houses, key houses, star houses, and outposts. This does not include empty cave cards a player owns. This does include a player’s starting house.
Reputation
- At the end of the game, the player with the most reputation gains 5 extra village points.
- The player with the second-most reputation gains 3 extra village points.
- The player with the third-most reputation gains 2 extra village points.
- If playing with two players: only the player with the most reputation gets the bonus: he gains 3 points (this is why there is a person symbol with the number “2” in this village point symbol).
- Ties for reputation: add the two appropriate reputation rewards together and divide by 2 (rounding up), giving each player an equal number of points. Example: Tom and Sarah are tied for most reputation. They add 5+3 village points (because they are “1st” and “2nd” place), divide by 2, and each player gets 4 village points.
- Players also gain or lose village points indicated by a smaller village point symbol next to their position on the track. For example, if a player ended the game with his cube on the highest space on the track, near the surface, he would lose 2 village points.
Card Bonuses
Some buildings give bonus village points. In many cases, the points are simply listed at the bottom of the card.

Some cards give bonus village points for owning specific items.

- The card above on the left gives a player 4 bonus village points, plus 2 bonus village points for each potion and each ore he owns (to give points, goods must be in the advancement track or in the player’s supply—not on a building).
- The card above on the right gives a player 3 bonus village points, plus 2 points for each house/key house/star house he owns. Remember: each house or outpost also gives 1 additional village point because it is a building.
Compare Total & Ties
Players compare their total village points. The player with the most village points is the winner!
- If tied, the player with the most coins wins the tie.
- If still tied, the player with the most villagers wins the tie.
- If still tied, the player with the most buildings wins the tie.
Goods Types
Note: The order of goods from top to bottom indicates how often they appear in the game, with mushrooms being the most common and easiest to obtain.
Common Goods
 Mushroom
 Fish
 Fruit
Uncommon Goods
 Rope
 Clay Pot
 Paper
Rare Goods
 Ore
 Amethyst
Game & Card Symbols
 Village Points: The player with the most village points at the end of the game is the winner. A card with this symbol would give 3 extra village points.
 Coins: Coins are used to purchase buildings and train new villagers. They can also be used in some encounters.
 Beds: For each bed symbol on a card a player owns, he may move one villager from “injured” to “exhausted” OR “exhausted” to “ready” on his player board.
 Train to Ready: If a player owns a card with this symbol, he may place newly-trained villagers in the “ready” area instead of the “exhausted” area.
 Gain a Coin When Building: If a player owns a card with this symbol, he gains 1 coin after he purchases a building card. He must pay the full amount for the building before collecting the bonus coin. A player does not collect a coin when he builds this card (only other cards).
 Reroll: These symbols allow a player to reroll when performing an explore action. He must always keep the rerolled number. (In this case, because there are 2 symbols, the player could reroll twice per encounter).
 Gain a Coin when Exploring: If a player owns a card with this symbol, he gains 1 coin after completing a successful encounter.
 Cider/Potions as Coins: A card with one of these symbols allows the player to spend ciders or potions as if they were coins.
 Explore: These symbols represent how adept a villager is at exploring. For the left symbol, a roll of 1 or higher would give one lantern. For the right symbol, a roll of 4 or higher would give two lanterns.
- Hammer: A villager with this symbol can complete the Build action.
- Quill: A villager with this symbol can complete the Train action.
 Hammer/Quill Plus: A villager with one of these symbols can complete a Build/Train action, and he pays one fewer coin when doing so.
 Cave Cat: This symbol belongs to the cave cat. It means that each time a player assigns the cave cat to do an action, he must roll a die. On a roll of 1-2, the cat does not complete the action and is placed directly in the “exhausted” area.
 Bad Reputation: A villager with this symbol causes the player to lose one reputation when the villager is gained.
 Metal Man: These symbols belong to the Metal Man villager. They represent that this villager has his own bed, and that neither cider nor potions can be used on him.
 Gain Reputation: When a player buys a card with this symbol, he immediately gains 1 reputation (only once).
 Village Points for Villagers: This symbol gives 2 village points per villager the player owns.
 Goods (on card): When a player buys a card with this symbol, he immediately places 2 goods of the specified type on it. The goods can be harvested from the card. The card never makes additional goods.
 Replenishing Goods (on card): When a player buys a card with this symbol, he immediately places 1 good of the specified type on it. The good can be harvested from the card. At the end of the round, if the card does not have a good on it, the player places 1 of the specified good on it.
 Income for (Goods): This card grants one income for each amethyst and one income for each ore the player has in his advancement track.
 Potion (on card): When a player purchases a card with this symbol, he immediately gains 1 potion.
 Potion Income (on card): At the end of each round, the player collects one potion.
 Income (on card): If a player owns a card with this symbol, he collects 1 extra coin at the end of each round.
 Village Points for Things: If a player owns a card with this symbol, he gains bonus village points for owning specified goods/etc. In this case, the player would gain 2 village points per potion and 2 village points per ore he owned at the end of the game.
 Village Points for Empty Caves: This symbol gives 1 village point per empty cave card (with no outpost) that the player owns.
Round Structure Quick Reference
1. Player Actions
- Explore: Read an encounter, gain a cave card.
- Harvest: Pick up good(s) from your cards.
- Build: Buy any available house or outpost.
- Train: Gain a new villager.
- Labor: Gain one coin per villager sent.
Free Actions
- Buy From a Player
- Put Something For Sale
- Refresh a Building Row (Pay a coin.)
Pass
When you have no more actions or choose not to take any.
2. End the Round
- Round Marker: Advance marker down cave track.
- New Cider: Place cider on reputation board if empty.
- New Villagers: Slide remaining villagers left and refill row.
- Rest Villagers: Spend potions/ciders, then assign beds to rest villagers.
- Collect Income: Collect coins based on advancement track and building bonuses.
- Refresh Goods on Buildings: Replenish goods on cards with arrows.
- Pass 1st-Player Card to the Left: Start the next round.
Villager Recovery Summary
- Cider: Exhausted to Ready (spend)
- Potion: Injured to Exhausted (spend)
- Bed: Exhausted to Ready OR Injured to Exhausted
Credits
- Game Design: Ryan Laukat
- Illustration: Ryan Laukat
- Development and Editing: Malorie Laukat
- Writing: Ryan Laukat, Alf Seegert, Malorie Laukat
- Playtesters: Malorie Laukat, Brandon Laukat, Rachel Green, Matt Green, Alf Seegert, Benson J. Whitney, Ryan Butcher AKA Thinkbomb, Michael Mindes AKA Awesomeness, Jeremy Tritchler, Shawn Tritchler, Michael Brown, Alison Brown, Mike Risley, Barbara Allen, Matt Allen. Thank you to everyone who contributed to the development of this game.
- Special thanks to all the Kickstarter backers that made this game possible!
- Copyright 2015 Red Raven Games
Introduction & Components
Prologue
Your last village was ransacked by barbarians. You barely had time to pick up the baby and your favorite fishing pole before they started the burning and pillaging.
You ran from that place in the dark of night.
And wandered over a cruel desert….
Braving frozen peaks and crossing a rough sea filled with sharks.
Then you found it! The perfect place to make your new home.
But as soon as you had the first hut built, you discovered a vast network of caverns underground…
…brimming with shiny treasures, rare resources, and endless adventure!
Now, you’re organizing expeditions and building your village above and below…
Components
- 1 Reputation Board
- 4 Player Boards
- 1 Encounter Book
- 25 House Cards
- 4 Starting House Cards
- 24 Outpost Cards
- 9 Key House Cards (Notice the Key Symbol)
- 6 Star House Cards (Notice the Star Symbol)
- 25 Cave Cards
- 12 Starting Villagers
- 18 Villagers
- 6 Special Villagers
- 81 Goods Tokens (12 fruit, 12 fish, 12 mushroom, 10 pots, 10 rope, 10 paper, 8 ore, 7 amethyst)
- 7 Dice
- 1 Round Marker
- 4 Cubes (in 4 colors)
- 1 First-Player Card
- Coins (36 ones, 6 fives, 8 tens)
- 20 Potion Tokens
- 10 Cider Tokens
Setup
Setting up the Game
- Player Setup: Give each player a player board, seven coins, 1 starting house card, and 1 of each type of starting villager (3 villagers total for each player). The starting villagers have a house on the back of the token. The 3 villagers should have the symbols depicted at “1A” (opposite page), and start in the large grass area furthest to the left on the player board—the “ready area”.
If playing with four players: place the two starting villagers that do not have a hammer symbol in the grass area with a moon symbol—the “exhausted area”. (In the first round of play, each player will only be able to use one villager. The two villagers that start in the exhausted area will move to the “ready area” at the end of round one. The symbol pictured below can be found on the reputation board next to the round track and is meant to remind you of this rule.)
Four-Player Rule Reminder Symbol - Star and Key Houses: Place the 6 star house cards face up on the table in a row. Shuffle the 9 key house cards and draw 4 at random, placing them in a row, face up, below the star house cards. The remaining key house cards are placed in the box and are not used for this game.
- Reputation Board and Villagers: Put the reputation board in the center of the table. Put any unused starting villagers in the box. Place the special villagers aside (special villagers have a cave on the back of the token). Place the remaining villagers face down in a pile and draw five, putting them along the top of the reputation board in a row.
- Round Marker: Place the round marker on the top chamber in the string of seven caves on the reputation board.
- Supply: Place the coin tokens, goods tokens, cider tokens, and potion tokens near the side. This is the supply. Place one cider token on the reputation board in the area with a cider symbol.
- Cave Cards: Shuffle the cave cards and place them in a pile face up next to the reputation board.
- Player Cubes: Give each player a wooden cube that matches the color of the banner in the top left corner of their player board. Each player places this cube on the torch space on the reputation board.
- First Player & Extra Coins: Decide who will be the first player. Turn order is in clockwise direction. Give the first player the first-player card.
- If playing with two players, give the second player one extra coin.
- If playing with three players, give the second and third players one extra coin.
- If playing with four players, give the fourth player one extra coin.
- House and Outpost Decks: Shuffle the house cards and the outpost cards and place them in two piles face down underneath the reputation board. Draw the top four cards of each deck and place them face up in a row next to their respective decks.
- Encounter Book and Dice: Place the encounter book and dice near the play area.
Player Actions
Turn Overview
Above and Below is played in rounds. Each round, players take turns assigning their villagers to take actions. When a player wishes to take no more actions in the round, he states that he wishes to pass. When all players have passed, the round ends (this means that some players will sometimes have more turns than others).
After seven rounds, the game is over.
Starting with the first player (the player with the first-player card) and continuing in clockwise order, each player may take one action per turn until all players have passed. The available actions are:
Explore
Villagers explore the cavern in an attempt to find a place for an underground outpost.
- Draw Cave Card & Assign Villagers: First, the player draws a cave card from the top of the cave card deck and places it to the left of his player board (near the rocks in the corner). He then slides two or more villagers from the ready area on his player board to the card (there is no limit to the amount of villagers he may send exploring, but he must send at least two).
- Roll for Encounter: He then rolls a die and compares it to the grid of numbers on the lower half of the new cave card—the resulting number indicates which paragraph should be read to him from the encounter book.
- Read Paragraph: The player to his left turns to the indicated paragraph in the encounter book and reads it to him. The reader reads the entire paragraph, including any choices below the description (in BOLD CAPS) AND the associated explore numbers. The only thing the reader does not read aloud are the possible rewards after each explore number (in parentheses).
An encounter paragraph might look like this:
You descend a deep chasm until you reach a wide, dark chamber. Rancid, cloudy water covers the cave floor, and soon you see glowing red eyes in all directions. You raise your lantern and realize that you’re surrounded by giant rats, their brown, oily coats slick and wet. They close in, ready to make your party their next meal. Do you try to run and hide from the rats, or do you stand and fight?
RUN AND HIDE: Explore 3 (coin), Explore 4 (mushroom)
STAND AND FIGHT: Explore 7 (five coins, ore)
After reading the description, the reader reads the two available choices like this: “Run and hide—explore 3 or 4. Stand and fight—explore 7.”
- Choose an Option: The active player then selects one of the available choices (for example: “run and hide”). He must state aloud his choice. The active player must then attempt to meet or exceed at least one of the explore numbers following that choice.
- Roll Dice for Villagers: The active player rolls one die for each villager that was sent into the cavern (on the cave card). He must indicate for which villager he is rolling each time he rolls. Once rolled, he places the die on the villager. The amount of lanterns gained by the villager depends on the roll.
After all dice have been rolled, the player adds the total number of lanterns from his villagers. If the total is equal to or greater than one of the explore numbers associated with his choice, he succeeds. If he does not have a sufficient number of lanterns, or he wants more lanterns to reach a higher explore number, he may then choose to Exert one or more of the villagers from the cave card to gain extra lanterns.
Exerting Villagers
To Exert a villager, the player removes the villager from the cave card and places him or her in the injured area on his player board. Each exerted villager gives the player one extra lantern.
Resolving the Explore Action
- Success: If the final total of lanterns meets or exceeds one of the explore numbers associated with the player’s choice, he succeeds and gains the rewards from the highest-reached explore number.
For example, if the player chose “run and hide” from the explore paragraph on page six, and he rolled a total of 5 lanterns, he would gain the reward from “Explore 4”: a mushroom.
After the player gains the reward, he moves any villagers remaining on the cave card to the exhausted area on his player board. He places the cave card to the right of his player board, underneath his row of houses, in the same row as other cave cards and outposts he already owns. - Failure: If the player does not have enough lanterns to meet or exceed at least one of the explore numbers associated with his choice, he fails and does not gain the cave card or any rewards. He moves any villagers remaining on the cave card to the exhausted area of his player board and puts the cave card at the bottom of the cave card deck. Some paragraphs have failure descriptions, which must be read if a player fails a specific choice. If the failure description includes a penalty, this is applied to the player.
NOTE: For more details on reading encounters, see the first page of the encounter book.
Build
A villager builds a house, a star house, a key house, or an outpost.
- First, the player slides one of his villagers from the ready area of his player board to the exhausted area of his player board. The villager must have a hammer symbol.
- The player may then choose to purchase one of the available house cards, star house cards, key house cards, or outpost cards. He must pay an amount of coins to the supply equal to the cost of the card.
- Placing Buildings:
- If a player wants to purchase an outpost, he must have an open, available cave card (that he gained from a previous explore action). He places the new outpost on top of the available cave card.
- Houses, key houses, and star houses are placed in a row next to the starting house.
- Outposts are placed in a row underneath the row of houses.
- Houses, key houses, star houses, and outposts give the player a special ability, increased income, and/or other benefits. These are described in the “Symbols” section.
- After the player has finished placing his new card, if he built a house or outpost, he then must draw a new card so that there are four available choices for the next player.
Harvest
Villagers harvest goods from houses or outposts.
- First, the player slides one or more of his villagers from the ready area of his player board to the exhausted area of his player board.
- For each villager the player exhausts, he may take one goods token from one of his houses or outposts.
- He places that good next to his coins and may either:
- Keep it there for later,
- Place it for sale in the top left corner of his player board, or
- Place it in his advancement track.
Placing goods in the advancement track is described further under “Other Rules”. Selling and buying goods is described later in the “Free Actions” section.
Train
A villager trains a new villager.
- First, the player slides one of his villagers from the ready area of his player board to the exhausted area of his player board. The villager must have a quill symbol.
- The player may then pay to train a new villager from the reputation board. He may select any of the available villagers. He must pay the cost in coins to the supply. The cost is listed on the reputation board below each villager.
- The player places the newly-trained villager in the exhausted area of his player board.
- The player does not draw a new villager for the reputation board. (This will be done at the end of the round.)
Labor
Villagers labor to gain more coins.
- First, the player slides one or more of his villagers from the ready area of his player board to the exhausted area of his player board.
- For each villager the player exhausts, he gains one coin.
- Additionally, the first player to labor each round gains the cider token on the reputation board. If there is no cider on the reputation board, the player only gains coins.
Free Actions
Free Actions Overview
Free actions can be performed on a player’s turn without exhausting villagers. A player may perform as many free actions as he likes before he performs a normal action. After he performs a normal action, he may not perform any free actions.
Buy From a Player
A player may purchase from another player any good, cider, or potion that has been placed for sale in the top left corner of the seller’s player board. The player may bargain, make offers, etc., but may only pay in coins, and he must pay at least 3 coins. The seller may refuse the offer for any reason. If the seller agrees to sell the good, potion, or cider, the player pays him the agreed upon amount of coins and takes the good.
Put Something for Sale
- A player may place one of his goods, a cider, or a potion for sale by placing it in the circle at the top left corner of his player board. Other players may attempt to purchase it on their turns.
- A player may remove the good that is for sale, or replace it with something else, only on his turn.
- A player may only have one good for sale at a time.
Refresh Building Row
If a player wants new options of houses or outposts to purchase, he may pay one coin to replace all four available cards in one of the rows. He takes the four current houses or outposts in the row and places them at the bottom of the deck, then draws four new cards from the top of the deck and places them face up in the row. He may do this only once per turn. It is not possible to refresh the key houses or star houses.
Pass
When a player is done taking actions, he declares “I pass”. He may not take any more actions or free actions in this round.
A player that does not have any villagers in the ready area of his player board at the start of his turn must choose to pass. He may take free actions before he passes.
End of Round
2. End the Round
When all players have passed, the round ends. Follow these steps before the next round starts:
- Round Marker: Slide the round marker one chamber down the string of seven caves on the reputation board. If the round marker cannot move, the game is over. Follow the instructions in the section titled “Game End”.
- Cider: Place a cider on the cider icon on the reputation board if it does not already have one.
- New Villagers: Slide any remaining villagers on the reputation board to the left so that they occupy the lower cost slots and fill any open slots to their right by drawing new villagers from the villager pile.
- Rest Villagers: Now all players may refresh the villagers on their player boards:
- First, players may spend any potions or ciders:
- If a player spends a potion (), he may move one villager from the injured area to the exhausted area.
- If a player spends a cider (), he may move one villager from the exhausted area to the ready area.
- A player may use both a potion and cider on the same villager.
- If a player spends a potion (
- Now, players may move one villager from injured to exhausted, or from exhausted to ready for each bed () he has on his house and outpost cards. A villager cannot sleep in two beds (the villager wouldn’t be able to move from injured to ready by using two beds).
- First, players may spend any potions or ciders:
- Collect Income: Now all players collect coins based on their income level. Players start at 4 income, but their income level increases depending on the number of different goods in their advancement track at the bottom of their player board. Players also collect income from any house or outpost cards that give extra income.
- Refresh Goods on Buildings: If any player owns a house or outpost with an arrow symbol next to a good, and there is currently not a good on the card, place one of the appropriate goods there.
Replenishing Good Symbol Example - Pass First-Player card to the Left: The first player passes the first-player card to the player on his left, who places it face up in front of him.
- Start the Next Round: If seven rounds have not passed, begin the next round.
Key Mechanics & Special Villagers
Advancement Track
A player’s advancement track is the row of circles along the bottom of his player board. A player may place available goods on this track at any time.
- He must place goods from left to right, not leaving any empty slots.
- Once a good has been placed, if the player wishes to place another good of the same type, it must go on the same slot (slots can contain multiple goods of the same type).
- Goods can be placed in any order.
In the example below, any future fruit goods that the player chooses to place in the advancement track would have to be stacked on the third slot from the left. If the player wanted to place a mushroom good next, he would have to place it in the fourth slot from the left.
- Village Points: There are two numbers at the top of each goods slot. The left number indicates how many village points each good in that pile is worth at the end of the game. In the example below, if a player had two fruit goods at the end of the game, each of those goods would be worth 2 village points (for a total of 4 village points).
- Income: The right number above each slot is an indication of the player’s current income. In the example below, the player would collect 6 coins (listed above fruit), at the end of each round (he would not also collect the coins listed above any of the other goods—only the good furthest to the right).
- Once a good has been placed in the advancement track, it cannot be removed.
Reputation
The reputation track is a measure of how well-known and esteemed a player’s village is. All players start on the torch symbol on the track. If a player gains reputation, he moves his cube down the track, toward the bottom of the cave. If a player loses reputation, he moves his cube up the track, toward the surface.
- Players with higher reputation will earn more village points at the end of the game.
- Reputation is gained or lost as a result of choices made during the Explore action.
Special Villagers
There are six special villagers in the base game. They are the Liquid Woman, Glogo, Cave Cat (two of these), and Metal Man (two of these) villagers. At the start of the game, place these villagers face up near the play area. They can only be obtained through specific encounters in the encounter book. Each of these villagers has special rules:
- Liquid Woman: The liquid woman is unsettling. When she joins your village, you lose one reputation.
- Glogo: The glogo is adept at building. If you use him to build, pay one fewer coin than normal.
- Cave Cat: The cave cat doesn’t like to obey orders. Each time you use the cat you must roll a die. If you roll a 3-6, the cat will perform the task you assign it. If you roll a 1-2, the cat moves to the exhausted area without performing any task. If the cave cat does not perform the task, you do not lose your action this turn. You may exhaust another villager to perform an action.
- Metal Man: The metal man uses his own bed each day. He does not use beds on your buildings. He cannot use cider or potions.
Game End & Scoring
End of Game
After seven rounds have passed, the game ends and players count up village points. Players gain village points for the following:
Advancement Track
Players count up village points for each good on the advancement track. The amount each good is worth is indicated just above the slot on the board. In the example below, if a player had four fruit on the third slot, he would gain 2 village points each for a total of 8 village points. If he had one rope and one fish, he would gain 1 village point each.
Buildings
Each building is worth 1 village point. This includes houses, key houses, star houses, and outposts. This does not include empty cave cards a player owns. This does include a player’s starting house.
Reputation
- At the end of the game, the player with the most reputation gains 5 extra village points.
- The player with the second-most reputation gains 3 extra village points.
- The player with the third-most reputation gains 2 extra village points.
- If playing with two players: only the player with the most reputation gets the bonus: he gains 3 points (this is why there is a person symbol with the number “2” in this village point symbol).
- Ties for reputation: add the two appropriate reputation rewards together and divide by 2 (rounding up), giving each player an equal number of points. Example: Tom and Sarah are tied for most reputation. They add 5+3 village points (because they are “1st” and “2nd” place), divide by 2, and each player gets 4 village points.
- Players also gain or lose village points indicated by a smaller village point symbol next to their position on the track. For example, if a player ended the game with his cube on the highest space on the track, near the surface, he would lose 2 village points.
Card Bonuses
Some buildings give bonus village points. In many cases, the points are simply listed at the bottom of the card.
Some cards give bonus village points for owning specific items.
- The card above on the left gives a player 4 bonus village points, plus 2 bonus village points for each potion and each ore he owns (to give points, goods must be in the advancement track or in the player’s supply—not on a building).
- The card above on the right gives a player 3 bonus village points, plus 2 points for each house/key house/star house he owns. Remember: each house or outpost also gives 1 additional village point because it is a building.
Compare Total & Ties
Players compare their total village points. The player with the most village points is the winner!
- If tied, the player with the most coins wins the tie.
- If still tied, the player with the most villagers wins the tie.
- If still tied, the player with the most buildings wins the tie.
Symbols & Goods Reference
Goods Types
Note: The order of goods from top to bottom indicates how often they appear in the game, with mushrooms being the most common and easiest to obtain.
Common Goods
- Mushroom
- Fish
- Fruit
Uncommon Goods
- Rope
- Clay Pot
- Paper
Rare Goods
- Ore
- Amethyst
Game & Card Symbols
- Village Points: The player with the most village points at the end of the game is the winner. A card with this symbol would give 3 extra village points.
- Coins: Coins are used to purchase buildings and train new villagers. They can also be used in some encounters.
- Beds: For each bed symbol on a card a player owns, he may move one villager from “injured” to “exhausted” OR “exhausted” to “ready” on his player board.
- Train to Ready: If a player owns a card with this symbol, he may place newly-trained villagers in the “ready” area instead of the “exhausted” area.
- Gain a Coin When Building: If a player owns a card with this symbol, he gains 1 coin after he purchases a building card. He must pay the full amount for the building before collecting the bonus coin. A player does not collect a coin when he builds this card (only other cards).
- Reroll: These symbols allow a player to reroll when performing an explore action. He must always keep the rerolled number. (In this case, because there are 2 symbols, the player could reroll twice per encounter).
- Gain a Coin when Exploring: If a player owns a card with this symbol, he gains 1 coin after completing a successful encounter.
- Cider/Potions as Coins: A card with one of these symbols allows the player to spend ciders or potions as if they were coins.
- Explore: These symbols represent how adept a villager is at exploring. For the left symbol, a roll of 1 or higher would give one lantern. For the right symbol, a roll of 4 or higher would give two lanterns.
- Hammer: A villager with this symbol can complete the Build action.
- Quill: A villager with this symbol can complete the Train action.
- Hammer/Quill Plus: A villager with one of these symbols can complete a Build/Train action, and he pays one fewer coin when doing so.
- Cave Cat: This symbol belongs to the cave cat. It means that each time a player assigns the cave cat to do an action, he must roll a die. On a roll of 1-2, the cat does not complete the action and is placed directly in the “exhausted” area.
- Bad Reputation: A villager with this symbol causes the player to lose one reputation when the villager is gained.
- Metal Man: These symbols belong to the Metal Man villager. They represent that this villager has his own bed, and that neither cider nor potions can be used on him.
- Gain Reputation: When a player buys a card with this symbol, he immediately gains 1 reputation (only once).
- Village Points for Villagers: This symbol gives 2 village points per villager the player owns.
- Goods (on card): When a player buys a card with this symbol, he immediately places 2 goods of the specified type on it. The goods can be harvested from the card. The card never makes additional goods.
- Replenishing Goods (on card): When a player buys a card with this symbol, he immediately places 1 good of the specified type on it. The good can be harvested from the card. At the end of the round, if the card does not have a good on it, the player places 1 of the specified good on it.
- Income for (Goods): This card grants one income for each amethyst and one income for each ore the player has in his advancement track.
- Potion (on card): When a player purchases a card with this symbol, he immediately gains 1 potion.
- Potion Income (on card): At the end of each round, the player collects one potion.
- Income (on card): If a player owns a card with this symbol, he collects 1 extra coin at the end of each round.
- Village Points for Things: If a player owns a card with this symbol, he gains bonus village points for owning specified goods/etc. In this case, the player would gain 2 village points per potion and 2 village points per ore he owned at the end of the game.
- Village Points for Empty Caves: This symbol gives 1 village point per empty cave card (with no outpost) that the player owns.
Quick Reference & Credits
Round Structure Quick Reference
1. Player Actions
- Explore: Read an encounter, gain a cave card.
- Harvest: Pick up good(s) from your cards.
- Build: Buy any available house or outpost.
- Train: Gain a new villager.
- Labor: Gain one coin per villager sent.
Free Actions
- Buy From a Player
- Put Something For Sale
- Refresh a Building Row (Pay a coin.)
Pass
When you have no more actions or choose not to take any.
2. End the Round
- Round Marker: Advance marker down cave track.
- New Cider: Place cider on reputation board if empty.
- New Villagers: Slide remaining villagers left and refill row.
- Rest Villagers: Spend potions/ciders, then assign beds to rest villagers.
- Collect Income: Collect coins based on advancement track and building bonuses.
- Refresh Goods on Buildings: Replenish goods on cards with arrows.
- Pass 1st-Player Card to the Left: Start the next round.
Villager Recovery Summary
- Cider: Exhausted to Ready (spend)
- Potion: Injured to Exhausted (spend)
- Bed: Exhausted to Ready OR Injured to Exhausted
Credits
- Game Design: Ryan Laukat
- Illustration: Ryan Laukat
- Development and Editing: Malorie Laukat
- Writing: Ryan Laukat, Alf Seegert, Malorie Laukat
- Playtesters: Malorie Laukat, Brandon Laukat, Rachel Green, Matt Green, Alf Seegert, Benson J. Whitney, Ryan Butcher AKA Thinkbomb, Michael Mindes AKA Awesomeness, Jeremy Tritchler, Shawn Tritchler, Michael Brown, Alison Brown, Mike Risley, Barbara Allen, Matt Allen. Thank you to everyone who contributed to the development of this game.
- Special thanks to all the Kickstarter backers that made this game possible!
- Copyright 2015 Red Raven Games
Rules explaination videos
Expansions for
Above and Below

Above and Below: G@mebox Building Promo Card
2016
Add a free end-of-round villager swap with this convention-exclusive promo.
120
minutes
View expansion

Above and Below: Mystic’s Hut Promo Card
2015
A Star House Card offering a Potion, rerolls, and Quill-based scoring.
90
minutes
View expansion
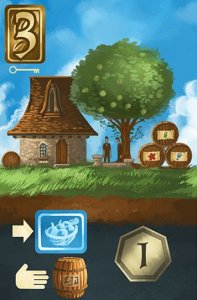
Above and Below: Watch It Played Building Promo Card
2016
Add a cider-producing building and a Watch It Played tribute to your village.
120
minutes
Medium Heavy

View expansion
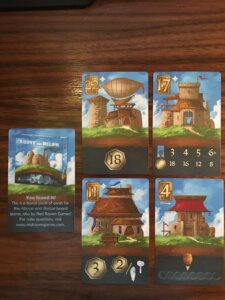
Above and Below: Megaland Bonus Cards
2018
Four bonus cards to add to your Above and Below collection.
90
minutes
Medium Heavy
View expansion
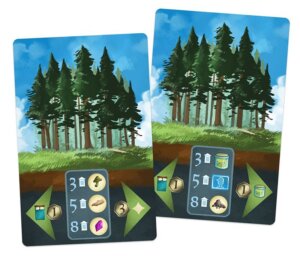
Above and Below: Groves
2016
Explore ancient groves, choose your rewards, and grow your village.
120
minutes
Medium
View expansion

Above and Below: Expanded Edition Exclusives
2015
A substantial 2015 expansion bundle filled with exclusive tokens, goods, and villagers.
120
minutes
Medium
View expansion
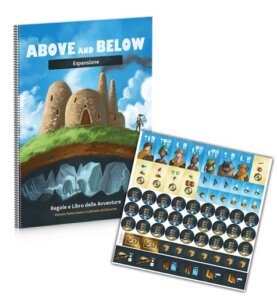
Above and Below: Desert Labyrinth and Underforest Encounter Book
2015
Add more stories and encounter events to the explore action.
Medium
View expansion
