
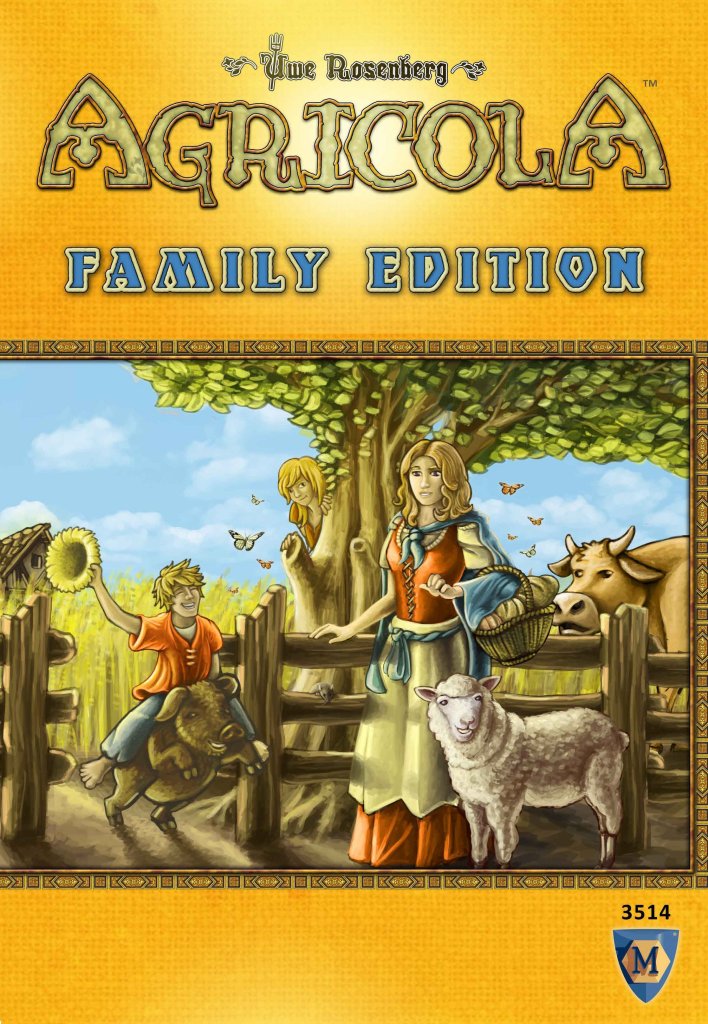
Agricola: Family Edition
2016
Build a better farm, grow your household, and manage limited actions through 14 rounds and six harvest stages.
45
minutes
1 - 4
player(s)
8+
Medium

About this board game
Agricola: Family Edition is a turn-based farming board game for 1–4 players, played in about 45 minutes. Each player begins with a spouse, two meeples, a wooden shack, and very little else.
Every round, each of your two meeples can take one action. You might collect resources, build meadows, expand your house, or choose from other farm-related possibilities. Since each action can be taken by only one player per round, deciding what to claim first is an important part of developing your farm.
The game lasts 14 rounds divided into six stages. A harvest takes place after Rounds 4, 7, 9, 11, 13, and 14, creating regular points in the game when your farm’s progress matters.
- Start with two working meeples and gain more possibilities as the rounds unfold.
- Expand your house before having children, then use your growing household to accomplish more work.
- Develop your farm with resources, meadows, and buildings.
- Score for everything you have achieved, with no negative points or point limits.
A fixed additional action becomes available each round, giving the game a steadily expanding range of choices. Compared with the family game of its predecessor, this edition removes stone and vegetables and replaces major improvements with buildings that score points for leftover resources at the end of the game.
There are no building restrictions and no player boards, keeping the focus on choosing actions and improving your farm. In Agricola: Family Edition, careful timing helps you expand your home, support your family, and turn a humble shack into a productive farm.

Board Game Rules for
Agricola: Family Edition
Hi! My name is Uwe Rosenberg; I’m the designer of this game. I will guide you through this rule book and give you tips.
What Is This Game About?
Your goal is to build a farm for yourself and your family. At the start, you just have a wooden house with only two rooms, providing shelter for your first two people (the farmer and his spouse). During the course of the game, you can add more rooms to your house in order to grow your family. The more people you have, the more actions you can take. But you also have to feed your people during the harvest. To do so, you will need to plow fields and breed animals. Certain improvements may help you with that.
After 14 rounds, the game ends. The player whose farm is worth the most points wins.
Components
- 1 Game Board (with action spaces)
- 2 Game Board Extensions (with additional spaces on both sides)
- 1 Round Counter
- 1 Rooster
- 4 Starting Houses
- 12 Wood/Clay Rooms
- 16 large Pastures
- 20 small Pastures/Fields
- 11 Improvements
- 10 Stables
- 20 People (5 per color)
- 44 “1 Food” Markers
- 7 “5 Food” Markers
- 5 Begging Markers
- 9 Substitute Markers
- Animals and Resources:
- 18 Sheep
- 15 Boar
- 13 Cattle
- 25 Grain
- 30 Wood
- 25 Clay
- 15 Reed

Substitute Markers
The following components are limited: people, stables, rooms, pastures, and fields. If they run out, they are gone. Goods and food are unlimited; if you run out of them you can use the substitute markers provided in the game.
- Game Board: Place the game board in the middle and place the round counter on space 1.
- Game Board Extension: Attach the appropriate game board extension. The symbol should match the number of players. (The board in the illustration is set up for a three-player game.)
- Improvements: Place the Windmill, Basketmaker‘s Workshop, Pottery, Joinery, and Depot next to spaces 7, 9, 10, 11, and 14 respectively. Place the remaining improvements above the game board.
- Supply: Place all the animals (sheep, boar, and cattle), resources (wood, clay, and reed), grain, stables, and food markers next to the board. These will act as the general supply for all players.
- Rooms, Fields, and Pastures: Place the rooms next to the game board. The wood room side should be facing up. Place the fields and pastures next to the board. The pastures can be organized by their size if you wish.
- Begging and Substitute Markers: You will rarely need the begging and substitute markers. Place them somewhere along the edge of your game board.
- Player Houses and People: Each player should choose a color and place the starting house of that color in front of them. Each player should take two people of their chosen color and place one in each room of their starting house. Leave the remaining people in the general supply; you will gain access to them as the game goes on.
- Starting Player: Determine the starting player randomly. That player receives the rooster token and 2 food. Give 3 food to each other player.

Agricola Family Edition is played over 14 rounds and each round has three phases: preparation, work, and returning home. Between some rounds there is a harvest.
1. Preparation Phase
At the start of each round (including round 1), you must place new goods on the game board wherever a colored arrow (

 ) is pictured. Place a number of goods equal to the number to the left of the goods. Do this even if there are already goods there.
Do not place boar and cattle until the round counter has reached them (in rounds 6 and 8, respectively). Start placing them from then on.
Tip: Only one player should do this so you don‘t miss a space or replenish some spaces twice.
2. Work Phase
Starting with the player who has the rooster, players place one of their people on an action space on the game board. Proceed clockwise in order until all players have placed their people on action spaces.
The action spaces show the actions they provide. You must carry out the actions immediately. If an action space is occupied, it is blocked and won‘t be available until the next round.

3. Returning Home Phase (End of Round)
At the end of the round, take your people off the action spaces and place them back on your house.
Tip: Towards the end of the game, you may need to place multiple people into the same room. This has no consequences for you.

Now move the round counter one space forward. This unlocks a new action space. (Action spaces along the path that the round counter has not reached yet are not available.)

Then move the round counter one space forward and replenish the action spaces with an arrow.
The player with the rooster goes first. If no player took the rooster action last round, the same player goes first again. This continues until a player places a person on the rooster action space.

Harvest Timing
When the round counter passes a harvest symbol  the game pauses until the harvest is resolved. This happens at the end of rounds 4, 7, 9, 11, 13, and 14. During the harvest you must feed your people but there are also some advantages.
You take actions by placing your people on action spaces. The icons will remind you what each space does, but the following provides expanded descriptions of each action space.
Tip: You can develop your farm in five areas: family planning and housing, sustenance, farming, animal husbandry, and improvements.
Resource Spaces
If an action space has an arrow, take all of the goods that have accumulated there and place them in your supply.

On an action space like this, take the number of goods shown on the space and place them in your supply.

The icons in this action space mean that you may choose one of the shown resources, twice.
For example, you could take 1 wood and 1 clay, or 2 reed.

Sustenance
Tip: You need food to feed your people during the harvest.
The following action spaces provide food for free.
Start Player
If you place a person on this space, you take the rooster and 1 food. You will go first during the next round.
Tip: The player with the rooster always goes first until another player takes it from them, which is only possible on this action space.

Fishing
This space allows you to take all the accumulated food.

Grain
This space allows you to take 1 grain from the general supply.
Note: Grain is worth no points at the end of the game, though it does act as a tie breaker.

Family Planning and Housing
You must grow your family in order to take more than two actions. The following action spaces help you with that.
Your starting house has just enough room for the two people you start the game with. To get a third person, you must add at least one room to your house. Your people require room in your house even when they aren‘t home because they have been placed on action spaces!
Family Growth
This action space allows you to get a new person. However, you must have enough room for all your people. So to go from two to three people you must first build a third room. The new person is placed on the action space, and you retrieve the new person at the end of the round when your people return home.

Family Growth Without Room Space (Round 12+)
This action space becomes available in round 12. It provides a new person regardless of how many rooms you have. This is the only way to have more people than rooms. Place the new person on the action space to be retrieved during the returning home phase.
Please note that your new people cannot take actions on the same round they are born!
 Each person is worth 3 points at the end of the game.

On either action space, you only get a single new person per action, even if you have free rooms for more. Also, your family is limited to five people. If you have all five people in play, you cannot use these action spaces any longer.
To expand your house, use the following action spaces.
Housing
These action spaces allow you to add rooms to your house:
- The first space lets you build wood rooms for 5 wood and 2 reed each.
- The second space lets you build clay rooms for 3 clay and 1 reed each.
Your entire house must be made of the same material. So, you need to renovate your wood rooms before you can add clay rooms. Take the rooms from the general supply and add them to your house (with the appropriate side facing up).
If you like, these spaces can also be used to build stables. Each stable costs 2 wood and is placed in or next to one of your pastures. Each pasture can only have one stable.
Tip: You don‘t have to build rooms in order to build stables, and vice versa. You may do both but you don‘t have to. If you surround your house completely with other tiles, you may not add any more rooms to it.

Renovation
This action space converts your wood house to clay. For 3 clay and 1 reed, flip all your rooms to the clay side. This action also gives you a free stable.
 Each clay room is worth 1 point at the end of the game.
- A black arrow means you may take an action any number of times.
- A plus sign means you take the listed number of items from the general supply at no cost. For example, on the renovation space you take one stable.
- If there is more than one action on a space you may take both or only one of them in any order.
Tip: You build the stable as described in “Housing”. If you just want the stable, you don‘t have to renovate.

Farming
Tip: Although grain is worth 1 food if you eat it directly, it is much better used as a seed crop in farming. Farming is tiresome: not only do you need grain, then to plow a field, and then sow. All of these cost actions. Your grain is harvested automatically during the harvest.
Use the following action spaces for farming.
Plow a Field
This action allows you to take a field from the general supply and place it next to one of your tiles.

Sow
Place one grain from your supply on up to 3 of your fields. Next, add two grain from the general supply to each of these fields.
Tip: Planted grain remains in your fields until it is harvested. You can‘t access it until then.

Plow a Field and Sow
This action allows you to add a new field and sow up to three fields.
Each field and each grain on a field tile is worth 1 point at the end of the game.

Animal Husbandry
Tip: Like farming, animal husbandry is a very important part of this game. There are three types of animals: sheep, boar, and cattle. You must keep them in stables and pastures. And if you have enough space, they will breed and produce offspring.
Use the following action spaces for animal husbandry.
Fences
This action allows you to build any number of pastures. Each pasture costs a certain amount of wood, which is printed on the tile. Pay the wood to the general supply and place the pastures in front of you, next to another one of your tiles.
Pastures also have a paw symbol, which indicates how many animals it can hold. If you have a stable in your supply you may place it on a new pasture.
Each pasture is worth 1 point at the end of the game. Each stable on a pasture is also worth 1 point.

Animal Markets (Sheep Market, Boar Market, Cattle Market)
Take all animals that accumulated on one of these action spaces. You must place them on pastures, or convert them to food immediately. Converting animals to food requires specific improvements explained below.
Each animal is worth 1 point at the end of the game.

Pastures and Stables Rules
Each pasture can hold a limited number of animals as indicated by the number next to the paw on the tile. All animals in a pasture must be of the same type.
- A pasture with a stable can hold twice as many animals as is printed on the tile.
- Each stable outside of a pasture can hold exactly one animal.
- You can keep exactly one animal in your starting house (your house cannot hold 1 animal per room but only 1 animal total).
Each stable in a pasture is worth 1 point at the end of the game. Stables outside of pastures are not worth anything.


Building Improvements
Tip: Improvements like the aforementioned Fireplace and Cooking Hearth help you feed your people by exchanging animals for food and Baking Bread. The Wind Mill turns grain into food without the need to bake it.
To build an improvement, place one of your people on its action space and pay the cost in the top right corner. Then take the corresponding tile and place it next to another tile in front of you.

Improvements above the Board Action Space
On this action space, you can build one of the improvements above the game board: a Fireplace, Cooking Hearth, or Clay Oven.
Please note that Fireplaces, Cooking Hearths, and Clay Ovens differ in cost even among themselves.
You may build both copies of an improvement but only one improvement can be built per action.

Improvements on the Board Action Spaces
These action spaces only provide the improvement that is placed on them.
If the improvement tile has been taken from an action space, the action space becomes useless, of course.
Each improvement is worth 1 point at the end of the game.

There are two types of actions in this game:
- Actions that you can take when you place a person on an action space.
- Actions that you can take at any time, whenever you want, without placing a person.
Use an Improvement (at any time)
If you have an improvement, you can use it at any time, even right after you built it. To use an improvement, you don‘t have to place a person. There are eight different improvements.
Improvements above the Game Board
Tip: Fireplaces and Cooking Hearths allow you to exchange animals for food and Bake Bread. Clay Ovens can only Bake Bread.
- Fireplace: This improvement allows you to exchange animals for food at any time as indicated on the tile. You can also Bake Bread by trading 1 grain and 1 wood for 2 food.
- Cooking Hearth: This improvement allows you to exchange animals for food at any time, as indicated on the tile. You can also Bake Bread, trading 1 grain and 1 wood for 3 food.
- Clay Oven: This improvement allows you to Bake Bread by trading 1 grain and 1 wood for 5 food.

Converting Animals to Food
If you build a Fireplace or Cooking Hearth, you can exchange animals for food at any time, even right after you take them from an action space.
- Fireplace: Allows you to exchange sheep and boar for 2 food each and cattle for 3 food. It also allows you to trade 1 grain and 1 wood for 2 food.
- Cooking Hearth: Allows you to exchange 1 sheep for 2 food, 1 boar for 3 food, and 1 cattle for 4 food. It also allows you to trade 1 grain and 1 wood for 3 food.
If you take animals from an action space that you cannot accommodate or exchange for food, you must return the excess animals to the general supply.

Improvements on the Game Board
- Basketmaker‘s Workshop: Each harvest, this improvement allows you to exchange 1 reed for 3 food. You may only do this once per harvest. At the end of the game, this improvement allows you to score 1 point for every 2 reed in your supply.
- Pottery: Each harvest, this improvement allows you to exchange 1 clay for 2 food. You may only do this once per harvest. At the end of the game, this improvement allows you to score 1 point for every 2 clay in your supply.
- Joinery: Each harvest, this improvement allows you to exchange 1 wood in your supply for 2 food. You can only do this once per harvest. At the end of the game you get 1 point for every 2 wood in your supply.
- Wind Mill: Each harvest this improvement allows you to exchange 1 grain for 1 food. You may only do this once per harvest. At the end of the game, the improvement allows you to score 1 point for every 2 grain in your supply.
- Depot: At the end of the game, you can store your remaining wood, clay, reed, and grain in this improvement. You score 1 point for every 3 goods of any type.
The illustration on the tile shows how to get points from it: at the end of the game, every pair of reed/clay/wood/grain is worth 1 point.

Eat Mush (at any time)
You can exchange 1 grain for 1 food at any time.
Tip: Just to be clear: this is not true for animals! Without a Fireplace or Cooking Hearth, you can only let your animals live, without getting any food for them. Also note that you cannot sow food. So don‘t exchange your grain for food unless you really have to.
Redistribute Animals (at any time)
You may redistribute the animals on your farm at any time to make better use of the space in your stables and pastures. Just make sure all of your animals are accommodated afterward, or they will run away.
Reminders:
- All of the above actions do not require placing a person.
- You may own both copies of the same improvement.
- You can only spend grain in your supply. You can‘t access the grain in your fields.
Any time the round counter moves over the harvest symbol , pause the game and resolve the harvest as detailed below.
During this, you harvest grain from your fields and your animals breed. Also, you must feed your people.
The Harvest comes after the 4th, 7th, 9th, 11th, 13th, and 14th Round. It goes through three Phases:
- Field Phase: First harvest grain from your fields. Take 1 grain from each of your fields and place it in your supply. If grain remains on a field leave it there until the next harvest. (Until then, you can‘t access it.)
- Feeding Phase: Next you must feed your people. Each person requires 2 food. If you have 2 people on the same action space they require 3 food instead of 4.
If you couldn‘t pay enough food, you must take 1 begging marker for each missing food.
 At the end of the game, you lose 3 points per begging marker.
Tip: You may exchange grain in your supply for 1 food. Baking Bread is worth more, though.
Tip: Remember that you may use your improvements at any time, even during the Feeding Phase. So you can still Bake Bread or exchange animals for food when you are about to feed your people. Since you lose 3 points per begging marker, you should really make sure to have enough food. - Breeding Phase: Finally, your animals breed. If you have two or more animals of a given type, you get exactly one additional animal of that type. You must accommodate this newborn animal or set it free.

Breeding Rules and Clarifications
- It doesn‘t matter where your animals live on your farm. (Parent animals do not even need to be living together.)
- You get at most 1 new animal of each type, not 1 animal per pair of animals.
- If you can‘t place the newborn animal, you won‘t get it. You cannot exchange the newborn for food.

After round 14, there is one final harvest. The game is now over.
Add up your points:
- People: Each person in your house is worth 3 points.
- Begging: You lose 3 points for each begging marker.
- Tiles: Each tile in front of you is worth 1 point, except the wood rooms. (This includes pastures regardless of size, fields, clay rooms, and all improvements.)
- Animals & Crops: Each grain in your fields and each animal on your farm is worth 1 point. Resources and grain in your supply aren‘t worth any points, unless you have the appropriate improvements.
- Stables: Each stable in a pasture is worth 1 point. (Stables outside of pastures are not worth anything.)
- Bonus Improvement Points: Each improvement is worth 1 point per se because it is a tile. The following improvements can provide additional points: Wind Mill, Depot, Basketmaker‘s Workshop, Pottery, and Joinery.
Victory
The player with the most points wins. In case of a tie, the player with the most food wins. If there is still a tie, multiple players share the victory.
Overview & Components
Hi! My name is Uwe Rosenberg; I’m the designer of this game. I will guide you through this rule book and give you tips.
What Is This Game About?
Your goal is to build a farm for yourself and your family. At the start, you just have a wooden house with only two rooms, providing shelter for your first two people (the farmer and his spouse). During the course of the game, you can add more rooms to your house in order to grow your family. The more people you have, the more actions you can take. But you also have to feed your people during the harvest. To do so, you will need to plow fields and breed animals. Certain improvements may help you with that.
After 14 rounds, the game ends. The player whose farm is worth the most points wins.
Components
- 1 Game Board (with action spaces)
- 2 Game Board Extensions (with additional spaces on both sides)
- 1 Round Counter
- 1 Rooster
- 4 Starting Houses
- 12 Wood/Clay Rooms
- 16 large Pastures
- 20 small Pastures/Fields
- 11 Improvements
- 10 Stables
- 20 People (5 per color)
- 44 “1 Food” Markers
- 7 “5 Food” Markers
- 5 Begging Markers
- 9 Substitute Markers
- Animals and Resources:
- 18 Sheep
- 15 Boar
- 13 Cattle
- 25 Grain
- 30 Wood
- 25 Clay
- 15 Reed
Substitute Markers
The following components are limited: people, stables, rooms, pastures, and fields. If they run out, they are gone. Goods and food are unlimited; if you run out of them you can use the substitute markers provided in the game.
Setup
- Game Board: Place the game board in the middle and place the round counter on space 1.
- Game Board Extension: Attach the appropriate game board extension. The symbol should match the number of players. (The board in the illustration is set up for a three-player game.)
- Improvements: Place the Windmill, Basketmaker‘s Workshop, Pottery, Joinery, and Depot next to spaces 7, 9, 10, 11, and 14 respectively. Place the remaining improvements above the game board.
- Supply: Place all the animals (sheep, boar, and cattle), resources (wood, clay, and reed), grain, stables, and food markers next to the board. These will act as the general supply for all players.
- Rooms, Fields, and Pastures: Place the rooms next to the game board. The wood room side should be facing up. Place the fields and pastures next to the board. The pastures can be organized by their size if you wish.
- Begging and Substitute Markers: You will rarely need the begging and substitute markers. Place them somewhere along the edge of your game board.
- Player Houses and People: Each player should choose a color and place the starting house of that color in front of them. Each player should take two people of their chosen color and place one in each room of their starting house. Leave the remaining people in the general supply; you will gain access to them as the game goes on.
- Starting Player: Determine the starting player randomly. That player receives the rooster token and 2 food. Give 3 food to each other player.
Course of Play
Agricola Family Edition is played over 14 rounds and each round has three phases: preparation, work, and returning home. Between some rounds there is a harvest.
1. Preparation Phase
At the start of each round (including round 1), you must place new goods on the game board wherever a colored arrow () is pictured. Place a number of goods equal to the number to the left of the goods. Do this even if there are already goods there.
Do not place boar and cattle until the round counter has reached them (in rounds 6 and 8, respectively). Start placing them from then on.
Tip: Only one player should do this so you don‘t miss a space or replenish some spaces twice.
2. Work Phase
Starting with the player who has the rooster, players place one of their people on an action space on the game board. Proceed clockwise in order until all players have placed their people on action spaces.
The action spaces show the actions they provide. You must carry out the actions immediately. If an action space is occupied, it is blocked and won‘t be available until the next round.
3. Returning Home Phase (End of Round)
At the end of the round, take your people off the action spaces and place them back on your house.
Tip: Towards the end of the game, you may need to place multiple people into the same room. This has no consequences for you.
Now move the round counter one space forward. This unlocks a new action space. (Action spaces along the path that the round counter has not reached yet are not available.)
Then move the round counter one space forward and replenish the action spaces with an arrow.
The player with the rooster goes first. If no player took the rooster action last round, the same player goes first again. This continues until a player places a person on the rooster action space.
Harvest Timing
When the round counter passes a harvest symbol the game pauses until the harvest is resolved. This happens at the end of rounds 4, 7, 9, 11, 13, and 14. During the harvest you must feed your people but there are also some advantages.
Action Spaces
You take actions by placing your people on action spaces. The icons will remind you what each space does, but the following provides expanded descriptions of each action space.
Tip: You can develop your farm in five areas: family planning and housing, sustenance, farming, animal husbandry, and improvements.
Resource Spaces
If an action space has an arrow, take all of the goods that have accumulated there and place them in your supply.
On an action space like this, take the number of goods shown on the space and place them in your supply.
The icons in this action space mean that you may choose one of the shown resources, twice.
For example, you could take 1 wood and 1 clay, or 2 reed.
Sustenance
Tip: You need food to feed your people during the harvest.
The following action spaces provide food for free.
Start Player
If you place a person on this space, you take the rooster and 1 food. You will go first during the next round.
Tip: The player with the rooster always goes first until another player takes it from them, which is only possible on this action space.
Fishing
This space allows you to take all the accumulated food.
Grain
This space allows you to take 1 grain from the general supply.
Note: Grain is worth no points at the end of the game, though it does act as a tie breaker.
Family Planning and Housing
You must grow your family in order to take more than two actions. The following action spaces help you with that.
Your starting house has just enough room for the two people you start the game with. To get a third person, you must add at least one room to your house. Your people require room in your house even when they aren‘t home because they have been placed on action spaces!
Family Growth
This action space allows you to get a new person. However, you must have enough room for all your people. So to go from two to three people you must first build a third room. The new person is placed on the action space, and you retrieve the new person at the end of the round when your people return home.
Family Growth Without Room Space (Round 12+)
This action space becomes available in round 12. It provides a new person regardless of how many rooms you have. This is the only way to have more people than rooms. Place the new person on the action space to be retrieved during the returning home phase.
Please note that your new people cannot take actions on the same round they are born!
Each person is worth 3 points at the end of the game.
On either action space, you only get a single new person per action, even if you have free rooms for more. Also, your family is limited to five people. If you have all five people in play, you cannot use these action spaces any longer.
To expand your house, use the following action spaces.
Housing
These action spaces allow you to add rooms to your house:
- The first space lets you build wood rooms for 5 wood and 2 reed each.
- The second space lets you build clay rooms for 3 clay and 1 reed each.
Your entire house must be made of the same material. So, you need to renovate your wood rooms before you can add clay rooms. Take the rooms from the general supply and add them to your house (with the appropriate side facing up).
If you like, these spaces can also be used to build stables. Each stable costs 2 wood and is placed in or next to one of your pastures. Each pasture can only have one stable.
Tip: You don‘t have to build rooms in order to build stables, and vice versa. You may do both but you don‘t have to. If you surround your house completely with other tiles, you may not add any more rooms to it.
Renovation
This action space converts your wood house to clay. For 3 clay and 1 reed, flip all your rooms to the clay side. This action also gives you a free stable.
Each clay room is worth 1 point at the end of the game.
- A black arrow means you may take an action any number of times.
- A plus sign means you take the listed number of items from the general supply at no cost. For example, on the renovation space you take one stable.
- If there is more than one action on a space you may take both or only one of them in any order.
Tip: You build the stable as described in “Housing”. If you just want the stable, you don‘t have to renovate.
Farming
Tip: Although grain is worth 1 food if you eat it directly, it is much better used as a seed crop in farming. Farming is tiresome: not only do you need grain, then to plow a field, and then sow. All of these cost actions. Your grain is harvested automatically during the harvest.
Use the following action spaces for farming.
Plow a Field
This action allows you to take a field from the general supply and place it next to one of your tiles.
Sow
Place one grain from your supply on up to 3 of your fields. Next, add two grain from the general supply to each of these fields.
Tip: Planted grain remains in your fields until it is harvested. You can‘t access it until then.
Plow a Field and Sow
This action allows you to add a new field and sow up to three fields.
Each field and each grain on a field tile is worth 1 point at the end of the game.
Animal Husbandry
Tip: Like farming, animal husbandry is a very important part of this game. There are three types of animals: sheep, boar, and cattle. You must keep them in stables and pastures. And if you have enough space, they will breed and produce offspring.
Use the following action spaces for animal husbandry.
Fences
This action allows you to build any number of pastures. Each pasture costs a certain amount of wood, which is printed on the tile. Pay the wood to the general supply and place the pastures in front of you, next to another one of your tiles.
Pastures also have a paw symbol, which indicates how many animals it can hold. If you have a stable in your supply you may place it on a new pasture.
Each pasture is worth 1 point at the end of the game. Each stable on a pasture is also worth 1 point.
Animal Markets (Sheep Market, Boar Market, Cattle Market)
Take all animals that accumulated on one of these action spaces. You must place them on pastures, or convert them to food immediately. Converting animals to food requires specific improvements explained below.
Each animal is worth 1 point at the end of the game.
Pastures and Stables Rules
Each pasture can hold a limited number of animals as indicated by the number next to the paw on the tile. All animals in a pasture must be of the same type.
- A pasture with a stable can hold twice as many animals as is printed on the tile.
- Each stable outside of a pasture can hold exactly one animal.
- You can keep exactly one animal in your starting house (your house cannot hold 1 animal per room but only 1 animal total).
Each stable in a pasture is worth 1 point at the end of the game. Stables outside of pastures are not worth anything.
Building Improvements
Tip: Improvements like the aforementioned Fireplace and Cooking Hearth help you feed your people by exchanging animals for food and Baking Bread. The Wind Mill turns grain into food without the need to bake it.
To build an improvement, place one of your people on its action space and pay the cost in the top right corner. Then take the corresponding tile and place it next to another tile in front of you.
Improvements above the Board Action Space
On this action space, you can build one of the improvements above the game board: a Fireplace, Cooking Hearth, or Clay Oven.
Please note that Fireplaces, Cooking Hearths, and Clay Ovens differ in cost even among themselves.
You may build both copies of an improvement but only one improvement can be built per action.
Improvements on the Board Action Spaces
These action spaces only provide the improvement that is placed on them.
If the improvement tile has been taken from an action space, the action space becomes useless, of course.
Each improvement is worth 1 point at the end of the game.
Anytime Actions & Improvements
There are two types of actions in this game:
- Actions that you can take when you place a person on an action space.
- Actions that you can take at any time, whenever you want, without placing a person.
Use an Improvement (at any time)
If you have an improvement, you can use it at any time, even right after you built it. To use an improvement, you don‘t have to place a person. There are eight different improvements.
Improvements above the Game Board
Tip: Fireplaces and Cooking Hearths allow you to exchange animals for food and Bake Bread. Clay Ovens can only Bake Bread.
- Fireplace: This improvement allows you to exchange animals for food at any time as indicated on the tile. You can also Bake Bread by trading 1 grain and 1 wood for 2 food.
- Cooking Hearth: This improvement allows you to exchange animals for food at any time, as indicated on the tile. You can also Bake Bread, trading 1 grain and 1 wood for 3 food.
- Clay Oven: This improvement allows you to Bake Bread by trading 1 grain and 1 wood for 5 food.
Converting Animals to Food
If you build a Fireplace or Cooking Hearth, you can exchange animals for food at any time, even right after you take them from an action space.
- Fireplace: Allows you to exchange sheep and boar for 2 food each and cattle for 3 food. It also allows you to trade 1 grain and 1 wood for 2 food.
- Cooking Hearth: Allows you to exchange 1 sheep for 2 food, 1 boar for 3 food, and 1 cattle for 4 food. It also allows you to trade 1 grain and 1 wood for 3 food.
If you take animals from an action space that you cannot accommodate or exchange for food, you must return the excess animals to the general supply.
Improvements on the Game Board
- Basketmaker‘s Workshop: Each harvest, this improvement allows you to exchange 1 reed for 3 food. You may only do this once per harvest. At the end of the game, this improvement allows you to score 1 point for every 2 reed in your supply.
- Pottery: Each harvest, this improvement allows you to exchange 1 clay for 2 food. You may only do this once per harvest. At the end of the game, this improvement allows you to score 1 point for every 2 clay in your supply.
- Joinery: Each harvest, this improvement allows you to exchange 1 wood in your supply for 2 food. You can only do this once per harvest. At the end of the game you get 1 point for every 2 wood in your supply.
- Wind Mill: Each harvest this improvement allows you to exchange 1 grain for 1 food. You may only do this once per harvest. At the end of the game, the improvement allows you to score 1 point for every 2 grain in your supply.
- Depot: At the end of the game, you can store your remaining wood, clay, reed, and grain in this improvement. You score 1 point for every 3 goods of any type.
The illustration on the tile shows how to get points from it: at the end of the game, every pair of reed/clay/wood/grain is worth 1 point.
Eat Mush (at any time)
You can exchange 1 grain for 1 food at any time.
Tip: Just to be clear: this is not true for animals! Without a Fireplace or Cooking Hearth, you can only let your animals live, without getting any food for them. Also note that you cannot sow food. So don‘t exchange your grain for food unless you really have to.
Redistribute Animals (at any time)
You may redistribute the animals on your farm at any time to make better use of the space in your stables and pastures. Just make sure all of your animals are accommodated afterward, or they will run away.
Reminders:
- All of the above actions do not require placing a person.
- You may own both copies of the same improvement.
- You can only spend grain in your supply. You can‘t access the grain in your fields.
Harvest
Any time the round counter moves over the harvest symbol , pause the game and resolve the harvest as detailed below.
During this, you harvest grain from your fields and your animals breed. Also, you must feed your people.
The Harvest comes after the 4th, 7th, 9th, 11th, 13th, and 14th Round. It goes through three Phases:
- Field Phase: First harvest grain from your fields. Take 1 grain from each of your fields and place it in your supply. If grain remains on a field leave it there until the next harvest. (Until then, you can‘t access it.)
- Feeding Phase: Next you must feed your people. Each person requires 2 food. If you have 2 people on the same action space they require 3 food instead of 4.
If you couldn‘t pay enough food, you must take 1 begging marker for each missing food.
At the end of the game, you lose 3 points per begging marker.
Tip: You may exchange grain in your supply for 1 food. Baking Bread is worth more, though.
Tip: Remember that you may use your improvements at any time, even during the Feeding Phase. So you can still Bake Bread or exchange animals for food when you are about to feed your people. Since you lose 3 points per begging marker, you should really make sure to have enough food. - Breeding Phase: Finally, your animals breed. If you have two or more animals of a given type, you get exactly one additional animal of that type. You must accommodate this newborn animal or set it free.
Breeding Rules and Clarifications
- It doesn‘t matter where your animals live on your farm. (Parent animals do not even need to be living together.)
- You get at most 1 new animal of each type, not 1 animal per pair of animals.
- If you can‘t place the newborn animal, you won‘t get it. You cannot exchange the newborn for food.
End of Game & Scoring
After round 14, there is one final harvest. The game is now over.
Add up your points:
- People: Each person in your house is worth 3 points.
- Begging: You lose 3 points for each begging marker.
- Tiles: Each tile in front of you is worth 1 point, except the wood rooms. (This includes pastures regardless of size, fields, clay rooms, and all improvements.)
- Animals & Crops: Each grain in your fields and each animal on your farm is worth 1 point. Resources and grain in your supply aren‘t worth any points, unless you have the appropriate improvements.
- Stables: Each stable in a pasture is worth 1 point. (Stables outside of pastures are not worth anything.)
- Bonus Improvement Points: Each improvement is worth 1 point per se because it is a tile. The following improvements can provide additional points: Wind Mill, Depot, Basketmaker‘s Workshop, Pottery, and Joinery.
Victory
The player with the most points wins. In case of a tie, the player with the most food wins. If there is still a tie, multiple players share the victory.
