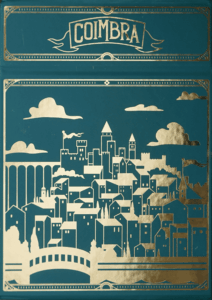
Coimbra
2018
Compete for influential citizens, strengthen monastery ties, and fund expeditions through an innovative dice-drafting system.
90
minutes
2 - 4
player(s)
14+
Medium Heavy


About this board game
Coimbra is a board game for 2–4 players, with games lasting about 90 minutes, set in Portugal during the 15th and 16th centuries. As the head of one of Coimbra’s oldest houses, you seek to earn prestige in a thriving nation shaped by the Age of Discovery.
The city of Coimbra is a cultural center, and its influential citizens can help advance your ambitions. Vie for their favors, offering coin or protective detail as you pursue relationships with nearby monasteries and support expeditions of the era.
At the heart of Coimbra is an innovative dice-drafting mechanism. The dice you draft each round are used in multiple ways, affecting many aspects of your decision making. Every roll presents opportunities to assess, prioritize, and optimize your plans.
- Draft dice that influence several parts of your turn.
- Compete for the favors of Coimbra’s most influential citizens.
- Deepen relationships with nearby monasteries.
- Fund expeditions connected to the Age of Discovery.
- Pursue prestige through many possible paths to victory.
Success depends on making the most of each roll while responding to the changing possibilities presented by the game. The citizens, expeditions, and monasteries create new synergies from one game to the next, encouraging you to look for different ways to turn your choices into prestige.
With its combination of dice drafting, shifting synergies, and varied routes to victory, Coimbra offers a fresh challenge every time it reaches the table. No two games are ever the same, making each decision and every opportunity matter.
Thematics
Mechanics
Designers
Illustrator
Useful links
 View board game on
Board Game Geek
Board Game Rules for
Coimbra
It is the Age of Discovery and Portugal’s largest cities are prospering: Lisbon, Porto, and especially Coimbra with its famous university.
As the head of one of Coimbra’s long-established houses, you sense that the city’s growing wealth is also causing a feeling of insecurity among its citizens.
So you employ your legion of security guards to offer protection to the city’s most influential council members, merchants, clerics and scholars. After all, you want to clinch favors from some of them and not all can be persuaded with money.
There are many ways to victory. But whether you focus on increasing your monetary income, recruiting new guards, fostering academic progress, furthering your relations with the surrounding monasteries or investing in the voyages of this era – in the end, you will be victorious only if you discover and use the ever changing synergies that each new game provides. On top of that, the struggle for Coimbra’s most useful citizens is sure to be exciting, thanks to a special dice drafting and placement mechanism in which each chosen die not only determines the order of play and the cost of your bribe but also what kind of income you will later receive.
After 4 rounds, the game ends with a final scoring and the player with the most points wins.
Components
- 1 game board
- 4 player boards (1 for each player)
- 13 dice (3x gray, 3x orange, 3x purple, 3x green, 1x white)
- 24 monasteries (12x I, 8x II, 4x III)
- 15 voyage cards
- 56 character cards (14x Council members, 14x Merchants, 14x Clerics, 14x Scholars; with 8x I-back, 24x II-back, 24x III-back)
- 4 favor tiles
- 4 influence scoring tiles (Front: 2/3 players, Back: 4 players)
- 5 die tokens
- 1 cap tile
- 12 die holders (3 of each player color)
- 100 disks (25 of each player color)
- 4 pilgrims (1 of each player color)
- 4 lions (1 of each player color)
- 8 markers (2 of each player color)
- 4 crown tokens

Board and Pool Setup
- Place the game board in the middle of the table.
- Sort the monasteries by their backs and form one stack for each (I, II, III). Shuffle each stack separately and place these three stacks face down beside the game board.
- Draw 8 tiles from the I-stack and place one of them at random face up onto each blue monastery space (I) on the pilgrim map.
- Next draw 4 tiles from the II-stack and place one of them at random face up onto each brown monastery space (II) on the pilgrim map.
- Finally, draw 2 tiles from the III-stack and place one of them at random face up onto each ruby monastery space (III) on the pilgrim map.
- Return the remaining monasteries to the box.
- Shuffle the 4 influence scoring tiles and place one at random onto each influence scoring space above the 4 influence tracks. Make sure that each tile’s face-up side matches your player count (2/3 or 4).
- Take the 5 die tokens:
- In a 4-player game: Return all 5 die tokens to the box. They are not needed.
- In a 3-player game: Place one of the die tokens onto the upper city of the game board. Place the
 token onto the central city. Place the other die token onto the lower city. Return the remaining two tokens to the box.
- In a 2-player game: Place a die token and another die token onto the upper city of the game board. Place a die token and the other die token onto the central city. Place a die token onto the lower city.
- Shuffle the voyage cards, draw 6 at random and place one face up onto each voyage card space at the bottom of the game board. Return the remaining voyage cards to the box.

- Take the 13 dice:
- In a 4-player game: Place all 13 dice beside the game board as the dice pool.
- In a 3-player game: Remove 1 purple and 1 green die and return them to the box. Then place the remaining 11 dice beside the game board as the dice pool.
- In a 2-player game: Remove 1 gray, 1 orange, 2 purple and 2 green dice and return them to the box. Then place the remaining 7 dice beside the game board as the dice pool.
- Each player chooses a player color and receives the following items of that color:
- The player board, which he places in front of him.
- The 3 die holders, which he places onto their shutter spaces on his player board.
- The 2 markers, which he places onto his player board: one onto space 7 of the coin track and the other onto space 7 of the guard track.
- The pilgrim, which he places next to his player board for now.
- The 25 disks:
- One onto space 0 of each of the four influence tracks on the game board.
- One onto space 0 of the game board’s score track.
- The remaining 20 disks are placed beside his player board as a supply.
- Determine player order at random. The first player places his lion onto the player order flag with the 1, the second player onto flag 2, the third (if any) onto flag 3, and the fourth (if any) onto flag 4.
- Sort the character cards by their backs, form one stack for each number (I, II, III) and shuffle each stack separately. Take the II-stack and place it face down onto the face-down III-stack. This combined stack is called the character stack and is placed above the game board. Next to it, leave room for a discard pile. Keep the I-stack ready for step 13.
- Display the 4 favor tiles in a row next to the upper left of the game board (beside the castle) and place the cap tile above the favor tile with 2 crowns.
- Set up the 12 cards of the character display:
- Draw 4 cards from the character stack and display them in a face-up row to the left of the upper city.
- Draw another 4 cards and display them in a face-up row to the left of the central city.
- Draw another 4 cards and display them in a face-up row to the left of the lower city.
- Take the 4 crown tokens and distribute them to the character cards: Go from top to bottom through the fourth column, then through the third column, then (if necessary) the second and finally the first column. Onto the first card of each class encountered, place the crown token of that class’ type until all 4 crown tokens have been placed. If a class is not present in the display, its crown token is left unused.
- Take the I-stack with start character cards:
- In a 4-player game: Form 4 groups of 2 random cards face up next to the game board.
- In a 3-player game: Form 3 groups of 2 random cards face up next to the game board. Return the 2 remaining cards to the box.
- In a 2-player game: Form 2 groups of 2 random cards face up next to the game board. Return the 4 remaining cards to the box.


Choosing the Individual Start Conditions
In reverse player order (starting with the player whose order marker is on flag with the highest number), each player chooses one of the following two actions:
- a) Take both character cards of one of the available groups made in step 13 of the setup and place them face up in front of you.
- OR b) Place your pilgrim onto a free starting corner of Coimbra in the center of the pilgrim map.
After each player has carried out one of these actions, each player – now in forward player order – carries out the other of these two actions.
Once done, each player has their pilgrim on a different starting corner and 2 start character cards. Finally, each player gains the influence values as well as any immediate bonuses of their two start character cards.
The Start Character Cards
For each of your 2 start character cards, do the following:
- On the influence track matching the card’s class, move your disk up as many spaces as the card’s influence value.
- Apply bonuses:
- If the card has an immediate bonus (
 ), gain it once, then place the card to the right of your player board in the immediate bonus zone.
- If the card shows a phase C bonus (
 ), place it below your player board in the phase C bonus zone. This bonus triggers in phase C of each round.
- If the card has an immediate bonus (
The Other Character Cards
The cards acquired during the game show in their upper left corner either a guard icon or a coin icon, indicating which resource you must spend to acquire them.
Each card also has:
- A class and an influence value.
- Either an immediate bonus (), a phase E bonus (
 ), or a game end bonus (
 ).
- Some cards show one or two diploma icons (5 regular types and 1 wild diploma icon).


Coimbra is played over 4 rounds. Each round comprises the following phases:
- Phase A: Rolling dice – The first player creates the dice pool by rolling the dice.
- Phase B: Drafting and placing dice – In player order, players choose one die each and place it onto a city location until each player has placed 3 dice.
- Phase C: Retrieving dice – In an order determined by the position of their dice, players retrieve their dice from city locations to gain favor tiles and acquire character cards.
- Phase D: New player order – The new player order is determined by the number of crowns each player has.
- Phase E: Influence income – In player order, players receive influence income according to the color of their chosen dice.
- Phase F: Invest in a voyage – In player order, each player can invest in one voyage.
Afterwards, the new round is set up and 12 new character cards are put in the character display. The game ends after the fourth round.
Phase A: Rolling Dice
The first player takes all dice from the dice pool, rolls them once, and creates the dice pool for this round.
Phase B: Drafting and Placing Dice
In player order, starting with the first player, players take turns selecting one die from the dice pool, placing it inside one of their die holders, and then placing it onto one of the 4 city locations:
- Castle: All dice present must form a row of ascending values from left to right (1 to 6). Place your die to the right of lower/equal value dice and to the left of higher value dice.
- Upper city, Central city, Lower city: All dice present must form a row of descending values from left to right (6 to 1). Place your die to the right of higher/equal value dice and to the left of lower value dice.
Note: In games with fewer than 4 players, die tokens in a location count as regular dice of a neutral color.
Keep placing one die at a time in player order until each player has placed 3 dice.

Phase C: Retrieving Dice
This phase is not played in player order. Instead, the sequence is determined by the order of the dice in each of the 4 city locations, evaluated from top to bottom:
- First the Castle
- Then the Upper city
- Then the Central city
- And finally the Lower city
When a location is evaluated, each die there from left to right is triggered once. The owner performs the location’s action and then retrieves their triggered die with its holder onto an empty shutter space of their player board.
Action in the Castle: Take one of the available favor tiles
Take one available favor tile next to the castle, carry out its immediate bonus(es), and keep the tile until the end of the round. Each favor tile adds between 0 and 3 crowns to your total for player order in Phase D. Taking a favor tile is free of charge.

Action in the Upper, Central or Lower city: Acquire one character card
Choose one card from the row next to the location and pay its cost:
- Cost currency is determined by the card icon (guards or coins).
- Cost amount equals the value of your triggered die.
- Gain influence on the card’s class track equal to its influence value.
- Resolve bonus: Immediate bonus (), Phase E bonus (), or Game end bonus ().
- Check for any Phase C bonuses from your start character cards.
- If there is a crown token on the card, take it.
Distress Action
If you cannot or do not want to take a location’s action, gain up to 2 coins AND up to 2 guards instead.
Evaluating Die Tokens (Fewer than 4 Players)
When a die token is triggered in a city location:
- Remove the character card with the highest influence value from that row and place it face up on the discard pile (if tied, discard the leftmost of tied cards).
- Flip the triggered die token face down.
- Continue triggering the next leftmost die.
After the last die in a city location has been triggered, discard any remaining character cards from that row and flip any face-down die tokens face up again.

Phase D: New Player Order
Each player calculates their total number of crowns from:
- Crowns on crown tokens collected this round.
- Crowns on favor tiles taken this round.
- Crowns next to their current player order flag.
The player with the most crowns moves to flag 1, second most to flag 2, etc. In case of a tie, the relative player order between tied players is reversed.
Phase E: Influence Income
In new player order, players activate each of their 3 drafted dice in any order to collect income rewards from matching influence tracks:
- Gray die: Guards income (move guard marker forward).
- Orange die: Coins income (move coin marker forward).
- Purple die: Pilgrim steps income (move pilgrim on the map).
- Green die: Victory points income (move score disk forward).
- White die: Collect income reward of an influence track of your choice.
The income reward received depends on the current position of your disk on that influence track.
Resource Limit: A player can never have more than 20 guards or 20 coins. Excess is forfeited.
Phase F: Invest in a Voyage
In player order, each player may choose to invest in one voyage card at the bottom of the board that they have not yet invested in:
- Pay the cost printed in the upper left corner in coins or guards as indicated by the banner.
- Place one of your disks onto the rose of that card (stack on top if others are present).
- Each voyage scores victory points at game end.

End of the Round
Check if the character stack is empty. If so, the 4th round has ended and proceed to End of the Game. Otherwise, set up the next round:
- Display 4 favor tiles with the cap tile over the 2-crown tile.
- Draw and display 12 new character cards (4 per city row).
- Distribute crown tokens.
- Score victory points for investments in voyages: Score each voyage card that holds your disk based on its specific task.
- Award points for majorities on influence tracks: For each track:
- 1st place (farthest up): VPs printed at the top of the scoring tile.
- 2nd place: VPs printed in the middle of the tile.
- 3rd place (4-player games only): VPs printed at the bottom of the tile.
- Ties: The disk lower in the stack (reached the space earlier) is considered ahead.
- In 2-player games: 2nd place is only awarded if within 3 spaces of the 1st place disk.
- Disks on space 0 score nothing.
- Score victory points for sets of diplomas: Form sets of up to 5 different diploma icons (wild diplomas count as any):
- Set of 5 different diplomas: 12 VP
- Set of 4 different diplomas: 8 VP
- Set of 3 different diplomas: 4 VP
- Set of 2 different diplomas: 2 VP
- Single diploma: 1 VP
- Score victory points for character cards with game end bonuses: Score according to each card’s task.
- Score victory points for guards, coins and crowns: Sum remaining guards, coins, and crowns (as in Phase D), divide by 2, and round down to gain that many victory points.
The player with the most victory points wins! In case of a tie, the tied player earlier in player order wins.


Bonus Overview & Rules
- Mint green banners: Represent rewards gained by the player.
- Differently colored top banner: Beige indicates requirements, red indicates costs.
- Multiply symbol (
 ): Gain the reward as many times as you meet the requirement.
- Slash (/): Choose one of the depicted rewards.
Most Common Rewards
Reward: Move Your Pilgrim
- Move your pilgrim up to the indicated number of steps along map roads.
- With your very first step, move from your starting corner along the one-way road to a stopover. You can never return to the starting corner.
- Monasteries: Place a disk above the monastery if you don’t already have one there. Gain its immediate or permanent bonus.
- You can visit multiple monasteries in a single turn if you have sufficient movement.

Resource & Track Limits
- Track limits: Maximum 20 guards, 20 coins, and space 15 on influence tracks. Excess is forfeited.
Favor Tiles
- Invest in a Voyage discount: Pay 2 fewer coins/guards when investing in voyages for as long as this tile is in front of you. May also allow immediate investment.
- Cap Tile & 4 VP: Place the cap tile over a die in upper, central, or lower city to increase its value by +3 (up to 9), moving its position accordingly.
- 2 VP and Pilgrim movement: Gain 2 VP and move pilgrim up to 3 steps.
- 7 Guards or 7 Coins: Gain either 7 guards or 7 coins immediately.

Character & Monastery Bonuses


Tasks of the Voyage Cards

- Tanger: Gain 2 VP for each voyage card that has your disk on it (including this one).
- Madeira: Gain 1 VP for each diploma you have (regardless of kind).
- Cabo Verde & Sansibar: Check values reached on the two depicted influence tracks, sum them, and divide by 2 (rounded down) for VP.
- Ceuta: Gain 1 VP for each monastery that does not have your disk above it.
- Calicut: Sum guards, coins, and crowns; divide by 2 (rounded down) for VP.
- Maskat: Double the value of your least developed influence track space and gain that many VP.
- Barbados: Gain 1 VP for each monastery that has your disk above it.
- Brasil: Gain 2 VP for each monastery with a “I” that has your disk above it.
- Ilhas dos Açores: Gain 3 VP for each character card beyond your tenth (11 cards = 3 VP, 12 cards = 6 VP, etc.).
- Goa: Gain 9 victory points directly.
- Macau / Malaca / Ceilão / Diu: Gain 2 VP for each character card of the depicted class.
Introduction & Components
It is the Age of Discovery and Portugal’s largest cities are prospering: Lisbon, Porto, and especially Coimbra with its famous university.
As the head of one of Coimbra’s long-established houses, you sense that the city’s growing wealth is also causing a feeling of insecurity among its citizens.
So you employ your legion of security guards to offer protection to the city’s most influential council members, merchants, clerics and scholars. After all, you want to clinch favors from some of them and not all can be persuaded with money.
There are many ways to victory. But whether you focus on increasing your monetary income, recruiting new guards, fostering academic progress, furthering your relations with the surrounding monasteries or investing in the voyages of this era – in the end, you will be victorious only if you discover and use the ever changing synergies that each new game provides. On top of that, the struggle for Coimbra’s most useful citizens is sure to be exciting, thanks to a special dice drafting and placement mechanism in which each chosen die not only determines the order of play and the cost of your bribe but also what kind of income you will later receive.
After 4 rounds, the game ends with a final scoring and the player with the most points wins.
Components
- 1 game board
- 4 player boards (1 for each player)
- 13 dice (3x gray, 3x orange, 3x purple, 3x green, 1x white)
- 24 monasteries (12x I, 8x II, 4x III)
- 15 voyage cards
- 56 character cards (14x Council members, 14x Merchants, 14x Clerics, 14x Scholars; with 8x I-back, 24x II-back, 24x III-back)
- 4 favor tiles
- 4 influence scoring tiles (Front: 2/3 players, Back: 4 players)
- 5 die tokens
- 1 cap tile
- 12 die holders (3 of each player color)
- 100 disks (25 of each player color)
- 4 pilgrims (1 of each player color)
- 4 lions (1 of each player color)
- 8 markers (2 of each player color)
- 4 crown tokens
Setup & Starting Conditions
Board and Pool Setup
- Place the game board in the middle of the table.
- Sort the monasteries by their backs and form one stack for each (I, II, III). Shuffle each stack separately and place these three stacks face down beside the game board.
- Draw 8 tiles from the I-stack and place one of them at random face up onto each blue monastery space (I) on the pilgrim map.
- Next draw 4 tiles from the II-stack and place one of them at random face up onto each brown monastery space (II) on the pilgrim map.
- Finally, draw 2 tiles from the III-stack and place one of them at random face up onto each ruby monastery space (III) on the pilgrim map.
- Return the remaining monasteries to the box.
- Shuffle the 4 influence scoring tiles and place one at random onto each influence scoring space above the 4 influence tracks. Make sure that each tile’s face-up side matches your player count (2/3 or 4).
- Take the 5 die tokens:
- In a 4-player game: Return all 5 die tokens to the box. They are not needed.
- In a 3-player game: Place one of the die tokens onto the upper city of the game board. Place the token onto the central city. Place the other die token onto the lower city. Return the remaining two tokens to the box.
- In a 2-player game: Place a die token and another die token onto the upper city of the game board. Place a die token and the other die token onto the central city. Place a die token onto the lower city.
- Shuffle the voyage cards, draw 6 at random and place one face up onto each voyage card space at the bottom of the game board. Return the remaining voyage cards to the box.
- Take the 13 dice:
- In a 4-player game: Place all 13 dice beside the game board as the dice pool.
- In a 3-player game: Remove 1 purple and 1 green die and return them to the box. Then place the remaining 11 dice beside the game board as the dice pool.
- In a 2-player game: Remove 1 gray, 1 orange, 2 purple and 2 green dice and return them to the box. Then place the remaining 7 dice beside the game board as the dice pool.
- Each player chooses a player color and receives the following items of that color:
- The player board, which he places in front of him.
- The 3 die holders, which he places onto their shutter spaces on his player board.
- The 2 markers, which he places onto his player board: one onto space 7 of the coin track and the other onto space 7 of the guard track.
- The pilgrim, which he places next to his player board for now.
- The 25 disks:
- One onto space 0 of each of the four influence tracks on the game board.
- One onto space 0 of the game board’s score track.
- The remaining 20 disks are placed beside his player board as a supply.
- Determine player order at random. The first player places his lion onto the player order flag with the 1, the second player onto flag 2, the third (if any) onto flag 3, and the fourth (if any) onto flag 4.
- Sort the character cards by their backs, form one stack for each number (I, II, III) and shuffle each stack separately. Take the II-stack and place it face down onto the face-down III-stack. This combined stack is called the character stack and is placed above the game board. Next to it, leave room for a discard pile. Keep the I-stack ready for step 13.
- Display the 4 favor tiles in a row next to the upper left of the game board (beside the castle) and place the cap tile above the favor tile with 2 crowns.
- Set up the 12 cards of the character display:
- Draw 4 cards from the character stack and display them in a face-up row to the left of the upper city.
- Draw another 4 cards and display them in a face-up row to the left of the central city.
- Draw another 4 cards and display them in a face-up row to the left of the lower city.
- Take the 4 crown tokens and distribute them to the character cards: Go from top to bottom through the fourth column, then through the third column, then (if necessary) the second and finally the first column. Onto the first card of each class encountered, place the crown token of that class’ type until all 4 crown tokens have been placed. If a class is not present in the display, its crown token is left unused.
- Take the I-stack with start character cards:
- In a 4-player game: Form 4 groups of 2 random cards face up next to the game board.
- In a 3-player game: Form 3 groups of 2 random cards face up next to the game board. Return the 2 remaining cards to the box.
- In a 2-player game: Form 2 groups of 2 random cards face up next to the game board. Return the 4 remaining cards to the box.
Choosing the Individual Start Conditions
In reverse player order (starting with the player whose order marker is on flag with the highest number), each player chooses one of the following two actions:
- a) Take both character cards of one of the available groups made in step 13 of the setup and place them face up in front of you.
- OR b) Place your pilgrim onto a free starting corner of Coimbra in the center of the pilgrim map.
After each player has carried out one of these actions, each player – now in forward player order – carries out the other of these two actions.
Once done, each player has their pilgrim on a different starting corner and 2 start character cards. Finally, each player gains the influence values as well as any immediate bonuses of their two start character cards.
The Start Character Cards
For each of your 2 start character cards, do the following:
- On the influence track matching the card’s class, move your disk up as many spaces as the card’s influence value.
- Apply bonuses:
- If the card has an immediate bonus (), gain it once, then place the card to the right of your player board in the immediate bonus zone.
- If the card shows a phase C bonus (), place it below your player board in the phase C bonus zone. This bonus triggers in phase C of each round.
- If the card has an immediate bonus (
The Other Character Cards
The cards acquired during the game show in their upper left corner either a guard icon or a coin icon, indicating which resource you must spend to acquire them.
Each card also has:
- A class and an influence value.
- Either an immediate bonus (), a phase E bonus (), or a game end bonus ().
- Some cards show one or two diploma icons (5 regular types and 1 wild diploma icon).
Round Structure & Gameplay
Coimbra is played over 4 rounds. Each round comprises the following phases:
- Phase A: Rolling dice – The first player creates the dice pool by rolling the dice.
- Phase B: Drafting and placing dice – In player order, players choose one die each and place it onto a city location until each player has placed 3 dice.
- Phase C: Retrieving dice – In an order determined by the position of their dice, players retrieve their dice from city locations to gain favor tiles and acquire character cards.
- Phase D: New player order – The new player order is determined by the number of crowns each player has.
- Phase E: Influence income – In player order, players receive influence income according to the color of their chosen dice.
- Phase F: Invest in a voyage – In player order, each player can invest in one voyage.
Afterwards, the new round is set up and 12 new character cards are put in the character display. The game ends after the fourth round.
Phase A: Rolling Dice
The first player takes all dice from the dice pool, rolls them once, and creates the dice pool for this round.
Phase B: Drafting and Placing Dice
In player order, starting with the first player, players take turns selecting one die from the dice pool, placing it inside one of their die holders, and then placing it onto one of the 4 city locations:
- Castle: All dice present must form a row of ascending values from left to right (1 to 6). Place your die to the right of lower/equal value dice and to the left of higher value dice.
- Upper city, Central city, Lower city: All dice present must form a row of descending values from left to right (6 to 1). Place your die to the right of higher/equal value dice and to the left of lower value dice.
Note: In games with fewer than 4 players, die tokens in a location count as regular dice of a neutral color.
Keep placing one die at a time in player order until each player has placed 3 dice.
Phase C: Retrieving Dice
This phase is not played in player order. Instead, the sequence is determined by the order of the dice in each of the 4 city locations, evaluated from top to bottom:
- First the Castle
- Then the Upper city
- Then the Central city
- And finally the Lower city
When a location is evaluated, each die there from left to right is triggered once. The owner performs the location’s action and then retrieves their triggered die with its holder onto an empty shutter space of their player board.
Action in the Castle: Take one of the available favor tiles
Take one available favor tile next to the castle, carry out its immediate bonus(es), and keep the tile until the end of the round. Each favor tile adds between 0 and 3 crowns to your total for player order in Phase D. Taking a favor tile is free of charge.
Action in the Upper, Central or Lower city: Acquire one character card
Choose one card from the row next to the location and pay its cost:
- Cost currency is determined by the card icon (guards or coins).
- Cost amount equals the value of your triggered die.
- Gain influence on the card’s class track equal to its influence value.
- Resolve bonus: Immediate bonus (), Phase E bonus (), or Game end bonus ().
- Check for any Phase C bonuses from your start character cards.
- If there is a crown token on the card, take it.
Distress Action
If you cannot or do not want to take a location’s action, gain up to 2 coins AND up to 2 guards instead.
Evaluating Die Tokens (Fewer than 4 Players)
When a die token is triggered in a city location:
- Remove the character card with the highest influence value from that row and place it face up on the discard pile (if tied, discard the leftmost of tied cards).
- Flip the triggered die token face down.
- Continue triggering the next leftmost die.
After the last die in a city location has been triggered, discard any remaining character cards from that row and flip any face-down die tokens face up again.
Phase D: New Player Order
Each player calculates their total number of crowns from:
- Crowns on crown tokens collected this round.
- Crowns on favor tiles taken this round.
- Crowns next to their current player order flag.
The player with the most crowns moves to flag 1, second most to flag 2, etc. In case of a tie, the relative player order between tied players is reversed.
Phase E: Influence Income
In new player order, players activate each of their 3 drafted dice in any order to collect income rewards from matching influence tracks:
- Gray die: Guards income (move guard marker forward).
- Orange die: Coins income (move coin marker forward).
- Purple die: Pilgrim steps income (move pilgrim on the map).
- Green die: Victory points income (move score disk forward).
- White die: Collect income reward of an influence track of your choice.
The income reward received depends on the current position of your disk on that influence track.
Resource Limit: A player can never have more than 20 guards or 20 coins. Excess is forfeited.
Phase F: Invest in a Voyage
In player order, each player may choose to invest in one voyage card at the bottom of the board that they have not yet invested in:
- Pay the cost printed in the upper left corner in coins or guards as indicated by the banner.
- Place one of your disks onto the rose of that card (stack on top if others are present).
- Each voyage scores victory points at game end.
End of the Round
Check if the character stack is empty. If so, the 4th round has ended and proceed to End of the Game. Otherwise, set up the next round:
- Display 4 favor tiles with the cap tile over the 2-crown tile.
- Draw and display 12 new character cards (4 per city row).
- Distribute crown tokens.
End of the Game & Final Scoring
- Score victory points for investments in voyages: Score each voyage card that holds your disk based on its specific task.
- Award points for majorities on influence tracks: For each track:
- 1st place (farthest up): VPs printed at the top of the scoring tile.
- 2nd place: VPs printed in the middle of the tile.
- 3rd place (4-player games only): VPs printed at the bottom of the tile.
- Ties: The disk lower in the stack (reached the space earlier) is considered ahead.
- In 2-player games: 2nd place is only awarded if within 3 spaces of the 1st place disk.
- Disks on space 0 score nothing.
- Score victory points for sets of diplomas: Form sets of up to 5 different diploma icons (wild diplomas count as any):
- Set of 5 different diplomas: 12 VP
- Set of 4 different diplomas: 8 VP
- Set of 3 different diplomas: 4 VP
- Set of 2 different diplomas: 2 VP
- Single diploma: 1 VP
- Score victory points for character cards with game end bonuses: Score according to each card’s task.
- Score victory points for guards, coins and crowns: Sum remaining guards, coins, and crowns (as in Phase D), divide by 2, and round down to gain that many victory points.
The player with the most victory points wins! In case of a tie, the tied player earlier in player order wins.
General Rules & Rewards
Bonus Overview & Rules
- Mint green banners: Represent rewards gained by the player.
- Differently colored top banner: Beige indicates requirements, red indicates costs.
- Multiply symbol (): Gain the reward as many times as you meet the requirement.
- Slash (/): Choose one of the depicted rewards.
Most Common Rewards
Reward: Move Your Pilgrim
- Move your pilgrim up to the indicated number of steps along map roads.
- With your very first step, move from your starting corner along the one-way road to a stopover. You can never return to the starting corner.
- Monasteries: Place a disk above the monastery if you don’t already have one there. Gain its immediate or permanent bonus.
- You can visit multiple monasteries in a single turn if you have sufficient movement.
Resource & Track Limits
- Track limits: Maximum 20 guards, 20 coins, and space 15 on influence tracks. Excess is forfeited.
Tiles & Cards Reference
Favor Tiles
- Invest in a Voyage discount: Pay 2 fewer coins/guards when investing in voyages for as long as this tile is in front of you. May also allow immediate investment.
- Cap Tile & 4 VP: Place the cap tile over a die in upper, central, or lower city to increase its value by +3 (up to 9), moving its position accordingly.
- 2 VP and Pilgrim movement: Gain 2 VP and move pilgrim up to 3 steps.
- 7 Guards or 7 Coins: Gain either 7 guards or 7 coins immediately.
Character & Monastery Bonuses
Tasks of the Voyage Cards
- Tanger: Gain 2 VP for each voyage card that has your disk on it (including this one).
- Madeira: Gain 1 VP for each diploma you have (regardless of kind).
- Cabo Verde & Sansibar: Check values reached on the two depicted influence tracks, sum them, and divide by 2 (rounded down) for VP.
- Ceuta: Gain 1 VP for each monastery that does not have your disk above it.
- Calicut: Sum guards, coins, and crowns; divide by 2 (rounded down) for VP.
- Maskat: Double the value of your least developed influence track space and gain that many VP.
- Barbados: Gain 1 VP for each monastery that has your disk above it.
- Brasil: Gain 2 VP for each monastery with a “I” that has your disk above it.
- Ilhas dos Açores: Gain 3 VP for each character card beyond your tenth (11 cards = 3 VP, 12 cards = 6 VP, etc.).
- Goa: Gain 9 victory points directly.
- Macau / Malaca / Ceilão / Diu: Gain 2 VP for each character card of the depicted class.