
Dead of Winter: The Long Night
2016
Explore the dangerous Raxxon facility, face stronger enemies, and decide how your colony will survive the undead horde.
120
minutes
2 - 5
player(s)
14+
Medium Heavy


About this board game
Dead of Winter: The Long Night is a standalone expansion for Dead of Winter: A Crossroads Game for 2–5 players, with an approximate play time of 120 minutes. It places players at a new colony location, where new survivors face brand new challenges.
The most striking addition is Raxxon, a pharmaceutical location filled with the potential for powerful items—and terrible consequences. Exploring it can help your group uncover its mysteries, but it may also release stronger enemies into the town. The horrors of Raxxon will spill out unless players can contain them.
Survival demands difficult choices throughout the game. Players may need to respond when members of other colonies launch raids, decide how far to explore the Raxxon facility, or invest in upgrades that help the colony withstand the undead horde.
- Explore Raxxon to seek powerful items and unravel its mysteries.
- Contain the horrible experiments before they spread into the town.
- Deal with raids from members of other colonies.
- Upgrade the colony to better withstand the undead horde.
Dead of Winter: The Long Night offers a new setting, new survivors, and new challenges while preserving the tense survival decisions at the heart of the series. Players can also mix survivors and cards from the original set into this game to increase the variety even further.

Board Game Rules for
Dead of Winter: The Long Night
Introduction
Stop! If you want us to teach you how to play, you can visit plaidhatgames.com and watch a video explanation.
If you have played the first Dead of Winter, and just want to review what is new in Dead of Winter: The Long Night. See the Long Night Rules section on page 16.
Roleplaying, Secret Objectives and Game Balance
In Dead of Winter each player takes on the role of a survivor of the zombie apocalypse. That survivor leads a group of other likeminded survivors. That group of survivors is a part of a larger colony of survivors who are all trying to live through a harsh winter in a broken world.
Each player starts the game with a secret objective. That secret objective represents the psychological bearing, or secret aspirations, of that player and her following. Most players are driven to see the colony succeed but they also have other compulsions that run so deep that they too must be achieved.
Betrayal secret objectives represent a survivor who is actively working against the colony. An exiled secret objective represents the reaction of that group of survivors to being exiled. Some secret objectives may be more difficult to complete than others.
Components List
- 8 – Dual-Sided Main Objective Cards
- 24 – Secret Objective Cards
- 11 – Betrayal Secret Objective Cards
- 5 – Exiled Secret Objective Cards
- 20 – Survivor Cards
- 5 – Player Reference Sheets
- 1 – First Player Token
- 25 – Starting Item Cards
- 20 – Police Station Item Deck Cards
- 20 – Grocery Store Item Deck Cards
- 20 – School Item Deck Cards
- 20 – Gas Station Item Deck Cards
- 20 – Library Item Deck Cards
- 20 – Hospital Item Deck Cards
- 20 – Raxxon Item Deck Cards
- 22 – Crisis Cards
- 10 – Improvement Cards
- 12 – Raxxon Experiment Cards
- 6 – Raxxon Pill Side Effect Cards
- 61 – Crossroads Cards
- 9 – Adult Only Crossroads Cards
- 25 – Wound Tokens
- 20 – Helpless Survivor Tokens
- 20 – Food Tokens
- 20 – Noise Tokens
- 20 – Barricade Tokens
- 6 – Starvation Tokens
- 20 – Bandit Standees
- 2 – Track Markers
- 30 – Zombie Standees
- 19 – Raxxon Experiment Standees
- 20 – Zombie Tokens (use if you run out of standees)
- 20 – Survivor Standees
- 100 – Plastic Standee Stands
- 1 – Colony Board
- 9 – Location Cards
- 1 – Rulebook
- 30 – Action Dice
- 1 – Exposure Die
- 12 – Despair Tokens
- 12 – Advancement Tokens
- 10 – Improvement Tokens
Component Anatomy
Main Objective Cards

- Name: This is the name of the main objective.
- Setup: How to set up the board for this scenario.
- Goal: The task(s) that must be accomplished in order to complete the main objective.
- Time: An estimate of how long this main objective will take to complete.
- Short = 45-90 minutes.
- Medium = 90-120 minutes.
- Long = 120-210 minutes.
Secret Objective Cards

- Name: This is the name of the secret objective.
- Goal: The task(s) that you must accomplish in order to win the game.
Note: Cards in the Dead of Winter: The Long Night are marked with a moon icon  in the lower right corner to help distinguish them from cards included in other Dead of Winter sets.
Survivor Cards

- Name: This is the name of the survivor.
- Occupation: The survivor’s occupation before the zombie apocalypse (This has no game effect).
- Influence Value: The survivor’s place within the hierarchy of the colony.
- Attack Value: The survivor’s proficiency in a fight.
- Search Value: The survivor’s proficiency at finding items.
- Ability Location: The location the survivor must be at to use their ability.
- Ability: A unique effect the survivor has on the game.
Item Cards

- Name: This is the name of the item.
- Symbol Type: There are 7 different types of item cards.
- Ability: A unique effect the card has when played.
- Location: This determines what deck this item card starts in at the beginning of the game.
Item Card Symbol Types
 Weapon
 Fuel
 Education
 Food
 Medicine
 Tool
 Survivor
Player Reference Sheet

- Round Summary: This reminds players of the order in which things happen each round.
- Player Turn Actions: This reminds a player what actions are available to him on his turn.
- Group Leader: The player’s group leader is placed face-up in this area.
- Secret Objective: The player’s secret objective is placed face down in this area.
- Followers: The player’s remaining survivors are placed in this area.
- Unused Action Dice Pool: After rolling action dice the results are placed here.
- Used Action Dice Pool: When a player uses an action die it is placed here.
Crisis Cards

- Name: This is the name of the crisis.
- Prevent: This shows the type of items a player must contribute to the crisis to prevent its effect from happening.
- Effect: The negative effect that happens if the crisis is not prevented.
- Optional: Players may contribute these items to the crisis, in addition to the required items, to gain this specified effect.
- Bandit Placement: These numbers tell you what locations to place Bandits at when playing with the Bandits Module.
Crossroads Cards

- Name: This is the name of the crossroad.
- Trigger: The italicized text is the trigger. It is the event that must happen for this card to take effect.
- Options: The options given to choose from when the card triggers.
Important Note: Some crossroads cards have mature themes like sex, language, suicide, alcohol use, etc. These cards are marked with this symbol:  . Players may choose to remove these cards prior to the game.
Additional Tokens and Standees
- First Player Token: This token identifies who is the first player. The first player goes first in a round and breaks all ties.
- Survivor and Zombie Standees: These represent the survivors and zombies on the game board. Insert the bottom of the standees into the plastic standee stands.
- Barricade Tokens: One side is a normal barricade and the other side is an explosive trap.
- Wound Tokens: One side is a regular wound and the other is a frostbite wound.
- Noise Tokens: These are added to locations to represent noise that was made there.
- Food Tokens: These are added to and removed from the food supply by various game effects.
- Starvation Tokens: These are added to the food supply when there is not enough food to feed the colony.
- Action Dice: These are rolled each round and used to perform certain types of actions.
- Exposure Die: This is rolled by various game effects to determine if a survivor has been wounded, frostbitten, or bitten.
- Despair Tokens: Some card effects apply despair tokens to survivors. Despair tokens are wounds that cannot be removed except by effects that explicitly remove despair tokens.
- Advancement Tokens: These tokens are added to improvement cards to mark progress toward completing construction of that improvement.
- Helpless Survivor Tokens: These represent helpless members of the community. One side represents a normal helpless survivor and the other represents an unruly helpless survivor.
Game Board & Locations
The game board is made up of 10 different locations, including the colony board and 9 location cards.
Colony Board

- Name
- Entrances: Numbered entrances. Zombies placed at the colony are placed in order of entrance number.
- Entrance Spaces: Spaces where zombies, barricades, and explosive traps may be placed.
- Survivor Spaces: Spaces where survivors may be placed.
- Morale Track: This track shows where the colony’s morale is. Morale is affected negatively when a survivor dies, when there are too many cards in the waste pile, when there is not enough food, and sometimes as the result of a crisis or crossroads card.
- Round Track: This track shows how many rounds remain.
- Food Supply: Food tokens are added here by various game effects.
- Main Objective: This is where the main objective card is placed.
- Waste Pile: Cards are placed here when they are played.
- Crisis Deck: This is where the crisis deck is placed.
- Crisis Contributions: This is where cards contributed to the crisis are placed.
Location Cards

- Name: This is the name of the location.
- Survivor Spaces: Spaces where survivors may be placed.
- Entrance Spaces: Spaces where zombies, barricades, and explosive traps may be placed.
- Item Deck: Item cards that players draw from when searching the location.
- Noise: Noise tokens are placed here. Only 4 noise tokens may be placed at any single location during a round.
- Item Symbols: The order from left to right is the likelihood of finding items of this type when searching at this location.
Note: The graveyard looks like a location but is really just a place to organize survivor cards and standees for survivors who have died. It has no gameplay effect other than possible crossroad cards.
Game Setup
- Place the colony board in the center of the play area and place the 6 location cards and the Graveyard around it as shown or as best accommodates your table.
- Each player collects a player reference sheet.
- Players may decide which standard main objective they would like to play or pick 1 randomly. (Note: We suggest the first time you play you choose the “Tribute” main objective.) Place the main objective card in its space on the colony board and set up the game board according to the main objective’s setup instructions. See Adding Zombies on page 13 for more details on adding zombies to colony entrance spaces.
- Shuffle the non-betrayal secret objective cards and set aside 2 (facedown) per player. Return the rest of the non-betrayal cards to the game box. Shuffle the betrayal secret objective cards and add 1 of them (facedown) to the non-betrayal cards that were set aside. Return the remainder of the betrayal secret objective cards to the game box. Shuffle all of the set aside cards together and deal 1 to each player. Return the remaining secret objective cards to the game box without looking at them. A player cannot reveal his secret objective card to other players.
- Shuffle the crisis cards and place the deck on its space on the colony board.
- Shuffle and make decks of the survivor, exiled objective and crossroad cards and place the decks off to the side of the play area. (Important Note: Some crossroads cards have mature themes like sex, language, suicide, alcohol use, etc. These cards are marked with this symbol . Players may choose to remove these cards prior to the game.)
- Shuffle all of the starter item cards and deal 5 to each player. Return any remaining cards to the game box.
- Separate the remaining item cards into separate decks according to their location. Shuffle each deck and place it on its corresponding location card.
- Deal 4 survivor cards to each player. Each player then chooses 2 to keep and returns the others to the deck. Re-shuffle the survivor deck.
- Each player makes 1 of those 2 survivors her group leader, placing that survivor card in the respective space on her reference card.
- The other survivor card is placed in the player’s following, below their player reference sheet.
- The corresponding survivor standees for each player’s survivors are added to the colony.
- Separate the remaining standees and tokens, placing them within easy reach of all players.
- The player whose group leader has the highest influence value receives the first player token and will take the first turn of the game.
Note: When setting up the game board according to the main objective, use the blue marker to keep track of morale and the red marker to keep track of rounds.

To add A survivor standee to the colony: Survivor standees are placed on the dashed circles in the “Colony Occupants” section of the colony board.

Round Order
Dead of Winter is played over a series of rounds. Each round is divided into 2 phases that must be played in order:
- Player Turns Phase
- Colony Phase
Player Turns Phase
During the player turns phase resolve the following 3 effects in order:
- Reveal Crisis: Reveal the top card of the crisis deck. This card’s effect will take place during the colony phase if it is not prevented. Crisis cards can be prevented if players contribute enough of the correct type of cards to that crisis.
- Roll Action Dice: At this time each player removes any action dice remaining in her used and unused action dice pool. Then each player receives 1 action die, plus 1 additional action die for each survivor she controls (so players will start the game with 3 action dice). Each player must roll all of her action dice and keep the results in her unused action dice pool for use during her turn. Even though a player receives 1 action die per survivor she controls, the action die does not belong to that survivor, but to that player’s group of survivors. A player can spend multiple action dice to perform multiple actions with a single survivor over the course of her turn.
- Player Turns: During the player turn phase, each player, starting with the first player, will take a turn. At the beginning of a player’s turn the player to her right draws a crossroads card (applying its effects to the player taking the turn if, at any time during that turn, they meet the trigger requirement). On a player’s turn she may perform multiple actions. Once a player has performed all of the actions she wishes to perform (or if she runs out of actions she is able to perform), play passes to the player on her left. Play will continue clockwise around the table until each player has taken a turn. Once each player has taken a turn the player turns phase is over and the colony phase begins.
Resolving Crossroads Cards
At the beginning of each player’s turn, the player to her right will draw a crossroads card. That player must keep the crossroads card secret, only revealing it if its trigger happens. The text on that card applies to the player taking a turn. If at any time on the player’s turn she meets the requirements of the trigger, all of the card’s text is read aloud by the player who drew it. Most crossroads cards provide 2 options to choose from, all of the text from these options is read out loud. The player the card applies to must then choose 1 of the options. That option immediately takes effect and the card is removed from the game. If the card doesn’t trigger, place it on the bottom of the crossroads deck. If a player is unable to meet the conditions of an option on a crossroads card, she must choose the other option.
Note: Some crossroads cards trigger when a player performs an action. This trigger takes place after the action being taken has been resolved (unless the card says otherwise).
Note: Some crossroads effects have you search a deck for a specific card. After searching a deck, shuffle it.
Turn Actions Overview
Some actions require spending an action die and others do not. To spend an action die, a player removes the appropriate die from his unused action die pool and moves it to his used action die pool. Some actions require that the action die be a specific result (from having rolled it during the roll action dice step).
Actions that require an Action Die 
Attack
To perform an attack, a player must choose a survivor he controls and spend an action die equal to or higher than the attack value of that survivor. That player may then choose a target for that attack. The target must be a zombie or a survivor that shares a location with the attacking survivor.
- If a zombie is chosen: Kill it and remove it from the game board. Roll for exposure on the survivor that attacked (see Rolling for Exposure on page 11 for details).
- If a survivor is chosen: Roll the spent action die. If the result is equal to or less than the chosen survivor’s attack value place a wound marker on the chosen survivor and take a card at random from the hand of the player that controls that survivor.
Note: The exposure die is not rolled when attacking another survivor.
A player may attack multiple times with the same survivor in a single turn. An action die equal to or higher than the attack value of that survivor must be spent each time that survivor attacks. A player cannot have a survivor he controls attack another survivor he controls. A player cannot attack a helpless survivor.


Search
A player can search at any location except the colony. To perform a search, a player must choose a survivor he controls and spend an action die equal to or higher than the search value of that survivor. He may then draw 1 card from the item deck of the location that survivor is on, looking at it but not yet adding it to his hand. He may then choose to either:
- add that card to his hand and end his search action, or
- make noise by placing a noise token on an empty noise space at his location to draw and look at an additional card. He may draw additional cards as long as there are still empty noise spaces for the corresponding noise tokens.
When the player has decided he has made enough noise or can no longer make any more noise, he must keep 1 of the drawn cards, adding it to his hand, and place the rest on the bottom of that item deck. A player may search multiple times with the same survivor in a single turn. An action die equal to or higher than the search value of that survivor must be spent each time that survivor searches.

Barricade
To perform a barricade action, a player must choose a survivor he controls and spend an action die of any result to place a barricade token on any empty entrance space at the chosen survivor’s location.
Clean Waste
A player may perform a clean waste action if he controls at least 1 survivor at the colony. To perform a clean waste action, that player must spend 1 action die of any result and remove the top 3 cards of the waste pile from the game.
Attract
To perform an attract action, a player must choose a survivor he controls and spend an action die of any result to move 2 zombies from any location to any empty entrance spaces at the chosen survivor’s location.
Survivor Ability
Some survivor abilities require an action die to be spent. When this is the case it will be signified by a number in front of the ability’s text. The action die spent must meet or exceed that number in order for it to be used. A player may use the same survivor’s ability multiple times in a single turn, unless the ability says otherwise.
Actions that do not require an Action Die
Play a Card
As many times as he likes during his turn, a player may play a card from his hand. To play a card, place it on top of the waste pile. When an event item card is played do not place it in the waste pile but instead remove it from the game.
Reminder: For every 10 cards in the waste pile during the check waste step, the colony will lose 1 morale.
A card with an equip ability is not placed in the waste pile, instead a player may equip it to any survivor he controls by placing that card next to that survivor. That survivor now has the effect listed on that item card. Once a card is equipped it cannot be unequipped unless it is being added to a crisis or is being handed off. If a survivor with 1 or more equipped cards dies at the colony, the equipped cards are added back to the controlling player’s hand. If a survivor with 1 or more equipped cards dies at a non-colony location, the equipped cards are shuffled into that location’s item deck.
Add a Card to the Crisis
A player may add 1 or more cards from his hand and/or cards that are equipped to survivors he controls to the currently revealed crisis card. Cards added to a crisis from a player’s hand are added face down so that no other player can see them. Adding cards that match a symbol shown in the prevent area of the crisis card helps to prevent that crisis from happening. Each card added that does not match a symbol helps cause the crisis to happen.
Note: Some food cards add multiple food tokens to the food supply when they are played. Those food cards still only count as 1 card played into the crisis.
Move a Survivor
A Player may move each survivor he controls once during his turn. A survivor may be moved to any location that has an empty survivor space. After each time a player moves a survivor, he must roll for exposure.
Note: If the result of rolling for exposure was a bitten, when it is spread it spreads to a survivor in the location that the moved survivor just moved to.
Spend Food Tokens
A player may spend 1 or more food tokens by removing them from the food supply area on the colony board. That player increases any 1 unused action die he controls by 1 for every food token he spends.
Request
During his turn a player may request 1 or more item cards from other players. Other players may give the requesting player an item card from their hand, if they do, that card must be revealed and immediately played. The requested card cannot be added to the crisis.
Hand Off
During his turn a player may have a survivor he controls that has an item equipped hand that item off to another survivor at the same location. When an item is handed off it is unequipped from the survivor that is handing it off and is immediately equipped to the survivor that it is being handed to.
Note: If the item has a once per round ability and it has already been used that round it cannot be used again by handing it off to another survivor.
Vote to Exile
Once during each of his turns a player may choose another player and initiate a vote to exile that player. Initiating a vote forces all players to simultaneously cast a vote of yes (thumbs up) or no (thumbs down) to determine whether or not the chosen player is exiled. A player cannot initiate a vote to exile themself. Remember all ties are broken by the first player, this includes votes to exile (see the Exile section on page 14 for details).
Colony Phase Steps
During the colony phase, resolve the following 7 effects in order:
- Pay Food: Remove 1 food token from the food supply for every 2 survivors in the colony (rounded up). Remember that helpless survivor tokens count as survivors for this purpose.
Note: Survivors at non-colony locations do not count towards the total number of survivors in the colony. They are considered to be foraging food for themselves and so do not require food be paid from the supply.
If there are not enough food tokens do the following in order:- Do not remove any food tokens.
- Add a starvation token to the food supply.
- Decrease morale by 1 for each starvation token currently in the food supply.
- Check Waste: Count the cards in the waste pile. For every 10 cards (rounded down), decrease morale by 1.
- Resolve Crisis: Shuffle the cards that were added face-down to the crisis during the player turns phase. Reveal them one at a time. Each item card added that has a symbol matching a symbol in the prevent section of the crisis is worth 1 point. Each card that doesn’t have a symbol matching a symbol in the prevent section of the crisis subtracts 1 point. After revealing all of the cards, if the combined point total is lower than the number of non-exiled players then immediately resolve the crisis. If the point total equals or exceeds the number of non-exiled players the crisis is prevented. Additionally, if the point total exceeds the number of non-exiled players by 2 or more the colony gains 1 morale. After resolving the crisis, remove all cards added to the crisis from the game.
- Add Zombies: Add 1 zombie to the colony for every 2 survivors (including helpless survivors) present there (rounded up). Add 1 zombie to each non-colony location for every 1 survivor present at that location. One at a time remove each noise token at a location and flip it like a coin. Add a zombie to that location for each token that lands on the “!!!” side. (See Adding Zombies on the next page for details on adding zombies to the colony.)
- Check Main Objective: Check to see if the goal on the main objective has been achieved. If it has been achieved the game immediately ends.
- Move Round Tracker: Move the round tracker down 1 space on the round track. If it is moved onto 0 the game immediately ends.
- Pass First Player Token: At the end of each round, any player may initiate a vote to prevent the first player token from being passed to the next player. If the vote passes, the first player token remains with the current first player, otherwise the first player passes the first player token to the player on his right. A new round begins starting with the reveal crisis section of the player turns phase.

Rolling for Exposure
Immediately after a survivor moves to a new location or kills a zombie, the player that controls that survivor must roll for exposure by rolling this die. Each die face has an effect that is triggered when that result is rolled.
Exposure Die Effects
 Blank: Nothing happens.
 Wound: The survivor receives 1 wound token.
 Frostbite: The survivor receives 1 frostbite wound token. This is considered a wound. At the beginning of each of your turns, each survivor you control that has 1 or more frostbite wound tokens on it receives an additional wound token.
 Bitten: The survivor is killed and the bite effect spreads.
Spreading a Bite Effect
When a survivor is killed as a result of a bitten roll, the bite effect spreads to the survivor with the lowest influence that shared a location with the bitten survivor. Each time a bite effect spreads, the player that controls the survivor it spread to must choose from the following options:
- Option 1: Kill the survivor that the bite effect spread to. The bite effect stops spreading.
- Option 2: Roll the exposure die again. On a blank result, the survivor that the bite effect spread to is not killed and the bite effect stops spreading. On any other result, the survivor that the bite effect spread to is killed and the bite effect spreads again. The bite effect will continue to spread until a player either chooses option 1, rolls a blank result after choosing option 2, or there are no more survivors at the location.
Remember: Whenever a survivor is killed by any game effect the colony loses 1 morale.
Adding Zombies
Whenever adding zombies, they are added 1 at a time until all zombies that need to be added have been added.
When adding zombies to the colony, always place the first zombie on any empty space in entrance 1, the second zombie on any empty space in entrance 2, the third zombie on any empty space in entrance 3, etc. until all of the zombies that need to be added have been placed. When adding a seventh zombie, place it on any empty space in entrance 1 again, an eighth zombie on any empty space in entrance 2, etc.
If there are no empty entrance spaces in the entrance the zombie would be placed but there is a barricade token in one of those spaces, destroy that barricade token and remove the zombie that would have been placed.
If there are no empty spaces and no barricade tokens, the entrance has been overrun, remove that zombie and kill the survivor at the colony that has the lowest influence value. If there are only helpless survivors at the colony, kill a helpless survivor. If there are no survivors at the colony remove the zombie that would have been placed without further effect.
Every time a survivor is killed (including a helpless survivor), decrease morale by 1.
When adding zombies to non-colony locations follow all of the same rules, except there is only 1 entrance to place zombies in so all of the zombies are placed in spaces at that entrance.
In the rare case that players ever have to add zombies and there are no more zombie standees left, use the zombie tokens included in the game to add the additional zombies.

Killing Zombies
Whenever a zombie is attacked it is killed. Whenever a zombie is killed by an attack or card effect, the player that controls the survivor that killed that zombie must roll for exposure on that survivor. When killing a zombie at the colony, choose which zombie to kill. It may come from any entrance. A zombie that is killed or otherwise removed from the game board is placed back into the pile of unused zombies.
Adding Survivors
Some game effects will cause a player to add a new survivor to her following. Whenever a survivor is added to the game, its corresponding standee is added to the “Colony Occupants” section of the colony board. The player who controls the new survivor may use that survivor during her turn, but does not roll an additional action die for it until the roll action dice step of the player turns phase. If there are no empty survivor spaces remaining at the colony, then players cannot trigger crossroads cards that would add survivors (including helpless survivors) and cannot play item cards that would add survivors.
Killing Survivors
- When zombies overrun a location entrance a survivor is killed.
- When a survivor has 3 or more wound tokens it is killed. This includes frostbite and despair tokens.
- When a survivor is bitten it is killed.
- Some card effects may kill a survivor.
When a survivor is killed, remove its survivor standee from the game board, decrease morale by 1, and remove its survivor card from the game. If that survivor had any cards equipped to it and that survivor is at the colony those cards are added to the hand of the player that controlled that survivor. If the survivor is at any other location those cards are shuffled into that location’s item deck.
If a player’s group leader is killed (or otherwise lost), she must choose a survivor from her following and make it her group leader.
If a player’s last remaining survivor would be killed (or otherwise lost), that player immediately removes from the game all cards in her hand, draws a new survivor card, adds it to the game, and makes that survivor her new group leader.
If a helpless survivor is killed (by the effects of a card or as the result of a zombie overrun where there are only helpless survivors in the location), remove a helpless survivor token and reduce morale by 1.
Note: Some card effects remove survivors from the game. This is not the same thing as killing a survivor. You do not lose morale when removing a survivor unless the card directs you to.
Exile
If the players vote in favor of exiling a player, the exiled player must immediately draw 1 exiled secret objective card. This card will adjust his secret objective. The exiled player must move all of the survivors he controls that are in the colony to non-colony locations of his choice. Those survivors follow all of the normal rules for movement, except this move does not count as the 1 move survivors are allowed to make during his turn. Some new rules apply to the exiled player:
- The exiled player cannot add cards to a crisis.
- When the exiled player is directed to add helpless survivor tokens to the colony those tokens are not added.
- If the exiled player plays a survivor item card to add a survivor to the game it is placed at a non-colony location of his choice rather than at the colony.
- The exiled player cannot spend food tokens to increase his action die results, but may play food cards to increase an action die result by 1 for each food card played rather than carrying out the effect listed on the food card.
- The exiled player cannot vote.
- The colony does not lose morale when a survivor the exiled player controls is killed.
- When the exiled player plays a card, instead of placing it in the waste pile, he removes it from the game.
Important note: If at any time during the game there are 2 exiled players and neither had a betrayal secret objective, morale immediately drops to 0.
Voting
During the game players may be given the option to vote with a thumbs up or down, either because a player initiated a vote to exile or because a crossroads card called for a vote to be cast. Players may take time to deliberate before casting their vote. Once players are ready to vote, count down from 3, with every player simultaneously casting his vote on 0.
Winning and Losing the Game
When the game ends for any reason, if a player has completed his secret objective he wins. If he has not, he loses. Some players may win in a game that other players lost; there can be multiple winners. It is also possible for everyone to lose if no one has completed his secret objective when the game ends.
The game can end in a variety of ways:
- If the morale track reaches 0 the game ends immediately. Do not check to see if the main objective has been completed.
- If the round track reaches 0 the game ends immediately. Do not check to see if the main objective has been completed.
- The main objective is completed.
Card Text & Priority
When a card effect contradicts the rulebook, the card effect takes precedence. If 2 game effects would ever seem to trigger simultaneously, the first player decides in which order they will resolve. An item card cannot be played to interrupt an effect currently taking place.
Example: A medicine card cannot be played to prevent a wound, it can only be played after receiving a wound, so if a survivor receives their third wound they cannot be saved by playing a medicine card, they will be killed.
Searching a Deck
Any time a game effect allows a player to search a location’s entire item deck, that player should shuffle the deck afterwards.
Roll a Die
Many cards instruct you to roll a die to determine the result of an effect. Whenever an effect instructs you to roll a die, take an action die not in use by any player and roll that die. After you have determined the results of the effect, return it to the pile of action dice not in use.
Random Locations
Cards in The Long Night may direct you to choose a random location. In order to choose a random location, roll a 6-sided die. The location whose number matches the die result is chosen. The colony has no location number and some of the locations have a number above 6, thus some locations are never chosen randomly.
Co-Op Variant
Players may choose to play the game cooperatively. Use the hardcore side of the main objective card and do not assign secret objectives. Each player’s only objective is to complete the main objective. Players cannot vote to exile a player. During setup, remove from the game every card showing the non co-op symbol  on the bottom right corner of the card.
2 Player Variant
Follow the same rules as the Co-Op Variant. When setting up each player receives 7 starting item cards instead of 5 and receives 4 survivors and keeps 3 of them instead of keeping only 2 of them.
Betrayer Variant
During the setup players may choose to add only 1 non-betrayal secret objective per player rather than 2, greatly increasing the odds of a betrayer.
Hardcore Variant
Instead of playing with the standard side of the main objective, players may choose to play the normal game but use the hardcore side of the main objective for a greater challenge.

Player Elimination Variant
Players may choose to play the game with the player elimination variant. If a player’s last remaining survivor would be killed (or otherwise lost), remove from the game all cards in her hand. That player is out of the game.
The Long Night Overview
Dead of Winter: The Long Night uses all the same rules as the Dead of Winter base set, with slight modifications and added twists. Some rules are used every time you play The Long Night. In addition, 3 modules are included which can be optionally added to the game. Each module comes with its own additional rules and components.
Preparing for The Long Night
Before setting up a game of Dead of Winter: The Long Night, decide which modules you want to use. You may add the 3 modules in any combination, or none of them. Start by gathering all cards marked with the moon icon on the lower right of the card. Then, for each module being used, add in the cards marked with the icon for that module.
All cards and components from the Dead of Winter: A Crossroads Game base set may be used with The Long Night as desired. Whenever search decks are combined from more than one Dead of Winter product, shuffle each location deck and deal out 20 cards facedown to form a search deck for that location. Remove the undealt cards from the game. Important note: Combining cards in this way may make the game more or less difficult. Players may choose to pick cards to add or remove to create a personal experience.
Some item cards in The Long Night are multiuse. If a multiuse item has an effect related to a module you are not using this game, that item can only be used for its other effect. If you are playing without the Bandits module, ignore the Bandit portion of crisis cards.
New Rules for Every Game
The following rules apply to The Long Night regardless of whether any modules are used:
First Player Vote
At the end of each round, any player may initiate a vote to prevent the first player token from being passed to the next player. If the vote passes, the first player token remains with the current first player.
Random Locations
Cards in The Long Night may direct you to choose a random location. In order to choose a random location, roll a 6-sided die. The location whose number matches the die result is chosen. The colony has no location number and some of the locations have a number above 6, thus some locations are never chosen randomly.
The Graveyard
The graveyard looks like a location but is really just a place to organize survivor cards and standees for survivors who have died. It has no gameplay effect other than possible crossroads cards.
Despair
A survivor may gain despair due to crossroads cards, crisis cards, or other game effects. Despair is added to a survivor by placing a despair token on a survivor’s card for each despair gained.
Despair tokens count as normal wounds for all intents and purposes, except that they cannot be removed by any effect that removes wounds of any kind. Despair tokens may only be removed by effects that specifically remove despair.
Unruly Helpless Survivors
Helpless survivors may become (or start out) unruly due to crossroads cards, crisis cards, or other game effects. Show that a helpless survivor is unruly by placing that helpless survivor’s token with the unruly side facing up.
Unruly helpless survivors count as two helpless survivors when counting survivors during the Pay Food and Add Zombies steps of the Colony Phase.
The active player may flip an unruly survivor token to its normal helpless survivor side by placing a medicine card in the waste pile without using its effect.
Explosive Traps
Some game effects may result in an explosive trap token being placed in an entrance space. Explosive traps work exactly like barricades, except that when the explosive trap is destroyed due to attempting to add a zombie to its space, in addition to removing the token, also remove all zombies already at that entrance.
The Long Night Modules
Important note: There are special scenarios introduced starting on page 20 that will teach you the rules to the Long Night modules as you play without having to read through the new rules.
These modules can be left out or added to the game as desired. Components for each module are marked with that module’s icon. When setting up a game, for each included module, follow the instructions below.
The Improvements Module
Improvements can be built to improve life at the colony. To set up the Improvements module:
- Add the crisis, survivor, crossroads, and objective cards marked with the hammer icon
 to their respective decks.
- At the start of the game, shuffle the improvements deck and draw 4 improvement cards, placing them in a row faceup near the colony.
During the game, items and other game effects will allow players to place advancement tokens on improvements. If at any time an improvement has advancement tokens equal to or greater than the number indicated on the card, that improvement’s ongoing effects are now active. Place the improvement card or its corresponding improvement token, whichever you prefer, in the center of the colony blueprint.
The Bandits Module
Bandits are non-zombie characters that the players don’t control. Bandits appear at non-colony locations and take up survivor spaces when they are placed. To set up the Bandits module:
- Add the crisis, survivor, crossroads, and objective cards marked with the bandit icon
 to their respective decks.
- Add the Bandits’ Hideout location to the play area. The Bandits’ Hideout does not have a search deck.
- Place the Bandit standees near the Bandit’s Hideout.
Bandits affect the game in the following ways:
Placing Bandits
When revealing a new crisis card during the Reveal Crisis step of the Player Turns Phase, place any bandits as instructed on the bandit placement section of the crisis card. When placing a bandit at a location, if there are no available survivor spaces, do not place that bandit.
Note: If you would like to use the crisis cards from the original Dead of Winter that do have bandit placement listed on them you may place 2 bandits at random locations when a crisis card without them is revealed. You may also not place bandits during that round for easier play.
Attacking a Bandit
When performing an attack action with a survivor, you may choose a bandit that shares a location with that survivor as the target of the attack. Follow the same rules for attacking a bandit as for attacking a survivor with an attack value of 4 and remove the bandit if the attack is successful.
Adding Zombies
Each bandit counts as a survivor for the purpose of adding zombies during the Add Zombies step of the Colony Phase. When a location is overrun, if there are no survivors at that location, remove all bandits from that location.
Bandits Scavenge
After resolving the Add Zombies step of the Colony Phase, each bandit scavenges for resources. For each active bandit, draw one card from the search deck at that bandit’s location and place it faceup on the Bandits’ Hideout.
Bandits’ Hideout
The Bandits’ Hideout is a special location. To interact with the Bandits’ Hideout, follow the instructions on the Bandits’ Hideout location card.

Becoming Leader of the Bandits
An exiled player who was not the betrayer becomes the leader of the bandits. In addition to other rules related to exiled players, whenever bandits are placed during the Reveal Crisis step of the Player Turns phase, the exiled player decides where to place those bandits.
The Raxxon Module
Raxxon is a new location with special rules that players can add to the game. To set up the Raxxon module:
- Add the crisis, survivor, crossroads, and objective cards marked with the skull and crossbone icon
 to their respective decks.
- Add the Raxxon location card to the play area and set up its search deck normally.
- Shuffle the Raxxon experiments deck and place it on the Raxxon location with the Raxxon Audio Logs side face up. Players may read the Audio Logs of the top card of the Raxxon experiments deck at any time.
- Take the Raxxon side effect deck and place it near the Raxxon location card. The Raxxon side effect deck does not need to be shuffled and players may look through it at any time.
Searching at Raxxon
Any time you perform a search at Raxxon, after the search, roll for exposure for the survivor who performed the search.
Pill Item Effects
Pill items in the Raxxon search deck contain events which may equip a card from the Raxxon side effect deck to a survivor. To use a pill item:
- Choose a survivor you control to take the pill.
- Roll a die and follow the card’s instructions.
- If you are instructed to equip a side effect card, search the Raxxon side effect deck and equip it to the chosen survivor. Raxxon side effect cards cannot be unequipped.
The Containment Code
Terrifying experiments are pouring out of the Raxxon facility each round unless the players contain them. During a player’s turn, while he controls a survivor at Raxxon, he may place action dice from his unused dice pool on the Raxxon location.
At the beginning of the colony phase, if there are 2 action dice on the Raxxon location matching the containment code shown on the Audio Log side of the top card of Raxxon experiment deck, all players vote with a thumbs up or thumbs down, with the most popular option taking effect:
- Thumbs Up Option: Discard the top Raxxon Experiment card without triggering its placement effect.
- Thumbs Down Option: The first player chooses a single location (including the colony). During the Add Zombies step of the Colony Phase, reduce the number of zombies placed at that location by 3.
Containment Code Failure or Thumbs Down
At the beginning of the colony phase, if there are not 2 action dice on the Raxxon location matching the containment code, or if the Thumbs Down option was chosen above, place the zombies listed on the Audio Logs side of the top card of the Raxxon experiments deck using the matching standees. When more than 1 zombies is placed by the card, roll for each zombie’s placement one at a time.
When placing a special zombie standee, if there is no entrance space available, trigger explosive traps, remove barricades, or trigger an overrun as usual, and do not place the zombie as usual, discarding the experiment card instead.
After one or more special zombies are placed, flip the experiment card to the encounter side and place it near the colony so that all players can see it.
Special zombies can only be killed with a regular attack. Other game effects such as items and character abilities that do not involve an attack, or explosive traps that would normally kill a zombie do not affect special zombies. Special zombies cannot be moved by any game effects except for those listed on their encounter cards. When performing an attack, you must target a special zombie before you may target a standard zombie, survivor, or bandit if the survivor you are attacking with shares a location with a special zombie.
When a survivor attacks a special zombie, roll for exposure as normal unless a character ability, equipped item, or other effect prevents the survivor from rolling for exposure when attacking. Then, if the survivor is still alive, roll a die and apply the corresponding effect of the special zombie encounter card. If the special zombie is removed and there are no more special zombies of this type in play, discard its encounter card.


Introduction to Scenarios
These scenarios and their related main objective cards are intended to introduce the rules and background story for the Raxxon and Bandits modules that come with The Long Night. We recommend using each of these objectives as your starting point for experiencing the modules of The Long Night.
To set up any of these scenarios, follow the setup instructions for the scenario. You do not need to read all of the rules for a module before you start one of these scenarios. The scenario will instruct you when you need the module’s rules.
The Chimp and the Code (Raxxon Scenario)
To set up the Raxxon introductory scenario, set up the game as if you are playing with the Raxxon module as instructed on page 18 of this rulebook, with the following adjustments:
- Place barricades on every entrance and survivor space on the Raxxon location. Survivors may not move to Raxxon at the beginning of the game. Do not use the Raxxon module pill item effect rules or containment code rules.
- Remove Blue and Emma Han from the survivor deck and set them aside.
- Instead of using a normal main objective card, use Special Objective card R1.
- Have one player read the italicized text below aloud at the beginning of the game.
The colony is starting to feel like home. But like any relief since the outbreak, it’s only temporary. A bigger, better colony means more noise and traffic, which leads to more and more zombies banging on our entrances. And despite our barricades, when it comes to zombies, quantity has a quality all its own.
I was planning on leaving for good the night Emma brought home new hope. While exploring, she had discovered the blueprints to the abandoned Raxxon Pharmaceutical facility. I’d always assumed Raxxon Pharmaceutical was just a pill factory, but the blueprints reveal the full breadth of Raxxon’s operation: medical research, experimental technology, even military-grade weapons.
Add Emma Han’s standee to the colony and add her survivor card to the following of the first player. Then, find the Raxxon Blueprints in the Raxxon search deck and equip them to Emma.
None of us ever ventured into Raxxon since the main entrance is heavily barricaded. But now we have a good reason to explore. The plan is to gather the supplies necessary to blow open Raxxon’s entrance. Best case scenario, we’ll get in and find something to deal with the zombies at the colony. At the very least, the explosion should draw zombies away from the colony temporarily. And in this world, temporary relief is the best we can hope for.
You may now begin the game with Special Main Objective Card R1.
The next section should be read once Special Main Objective R1 has been completed.
It should be read and followed by the player with the fewest survivors in their following. If there is a tie, the player who controls the survivor with the highest influence among tied players should read it.
The boom of the explosion shook the ground and illuminated the night sky. We watched the high-reaching flames from the colony. By early morning the smoke had dissipated, and I headed for Raxxon. I was pleased to see less zombies hanging around the colony. The barricades sealing off the Raxxon entrance were gone so I headed inside.
Remove all barricades from the Raxxon location card. Place a survivor you control at Raxxon. For the rest of the game, players may move survivors to Raxxon and search. Read the Searching at Raxxon rules on page 18 of this rulebook. Remove any 3 zombies from the colony and place them at Raxxon.
As I turned a hallway corner, a shrieking beast met me face-to-face! My body involuntarily jumped backwards and to the floor. But it wasn’t a zombie, it was a chimp. Her yells spoke anger but her eyes betrayed her fear. A cry for help!
She ran past me, limping, then looked back, hoping I’d follow. I ran after her to a room near the entrance, its walls crumbling from our explosion. The chimp climbed the rubble in one corner, digging in desperation, but a freshly injured arm kept her from making any progress. A muffled voice struggled beneath the pile. “Blue! Good girl! Hurry! I’m bleeding! I don’t know how long I’ll be…”
The voice faded out and Blue shrieked furiously. I knew the chimp’s panic all too well. I knew we had to help before it was too late.
Add Blue’s survivor card to your following and place her standee at Raxxon. (If there isn’t enough room for her move a survivor of the first player’s choice back to the colony. This does not count as move.) Add 1 wound to her card. At the beginning of the next round, remove the Special Main Objective R1 card from the game and place the Special Main Objective R2 card on the colony board. Complete the objective to save Blue’s friend.
Read and apply the Raxxon module’s pill item effect rules from page 18 of this rulebook when playing a card from the Raxxon search deck. Do NOT apply the Raxxon module’s containment code rules.
You may now continue the game with Special Main Objective Card R2.
This Section should be read once Special Main Objective R2 has been completed.
Our combined digging effort uncovered Blue’s friend alive but in bad shape. The man’s body is badly injured, his scraggly, long white hair and beard covering deep cuts around his face and neck. He’s been unconscious since we got him out, yet he moans in pain. Blue hasn’t left his side.
Remove all dice placed on the Raxxon location card. Take all survivor standees from Raxxon and place them at the colony.
Against all odds, the old man wakes up! His speech is weak and labored. “Blue, sweet girl. Thank you my friend.” Blue lays her head on the man’s chest. “Wh-where are we? Are we at Raxxon?”
“You’re at a survivor’s colony,” I tell him. “We had to take you out of Raxxon. It’s not safe there since the explosion. No barricades. Too many zombies.”
“Zombies…” he trails off, thinking. “Those experiments are why we needed to be at Raxxon. To keep them in!” He attempts to sit up, but is denied by the pain. “The code… the containment code!”
“Look, I don’t know about any codes,” I say, “but zombies have roamed this area for a long time now. Nothing we can’t handle. Get some rest, ok?”
“No. No. No no no no NO. You haven’t seen them. Not the real horrors, the true demons of Raxxon. For months, Blue, we were faithful to contain them. What happened??”
Blue sobs on his chest. The old man utters his last: “Woe to us. They’re on their way! You must contain them! Blue knows, she knows how. Contain them!”
At the beginning of the next round, remove the Special Main Objective R2 card from the game and place the Special Main Objective R3 card on the colony board.
Read the Raxxon module’s containment code rules as explained on page 18 of this rulebook. Apply them starting with the next round and for the rest of the game. If there are 2-3 non-exiled players, immediately draw 2 Raxxon experiment cards and place their special zombies. If there are 4 or more non-exiled players, immediately draw 3 Raxxon experiment cards and place their special zombies.
You may now continue the game with Special Main Objective Card R3. Complete the objective to end the game.
Bandit Blitz (Bandit Scenario)
To set up the Bandit introductory scenario, set up the game as if you are playing with the Bandit module as explained on page 17 of this rulebook, with the following adjustments:
- Instead of using a normal main objective card, use Special Main Objective card B1.
- When constructing the stack of facedown secret objectives to deal to players, instead of adding 1 random betrayal secret objective card, add the BANDIT BETRAYAL secret objective. Then shuffle the secret objectives and deal them out as normal. This betrayal secret objective is unique; you may read it aloud before shuffling it in if you wish. It requires that the special Main Objective card B2 be completed for the betrayer to win, so the betrayer will need to help ensure that the colony gets at least that far.
- Have one player read the italicized text below aloud at the beginning of the game.
Our bandit problem has worsened lately. The misfits have set up camp a couple miles away. Now we’re stuck playing survival of the fittest against people who are so unwilling to get along with others that they don’t even qualify for our dysfunctional family.
So it was a surprise when a couple of them showed up unarmed at the colony this morning. Undernourished and weak, they begged us for food. They insisted that any conflicts we’ve had were miscommunications, and their group needs our help to survive. Normally appealing to our humanity wouldn’t budge us, but they brought gifts.
Each player may draw 1 card from the hospital search deck and add it to their hand.
The gifts are just what we needed, and the colony leaders are eager to improve relations with the bandits. Now, instead of worrying about ourselves, we’re collecting food for neighbors. I’m personally against it, but their gifts won the colony over. How did they know exactly what we would want? Sometimes I wonder if one of them isn’t among our ranks.
Read and apply the Reveal Crisis, Bandits Scavenge, and Adding Zombies rules related to the Bandit module, on page 17 of this rulebook. Other Bandit module rules do not yet apply. You may now begin the game with Special Main Objective Card B1.
The next section should be read once Special Main Objective B1 has been completed.
It should be read and followed by the player who controls the human survivor with the lowest influence.
It’s risky to go to the bandit hideout alone, and no one else was willing to deliver the food with our fearless leader, so, lucky me. We’ve packed up and we’re on our way. Our leader is confident. I have my doubts.
Remove all food from the food supply. Place the survivor with the highest influence and the human survivor with the lowest influence at the Bandits’ Hideout.
We approach their shanty town at dusk and immediately, something seems off. The place is a ghost town. We press on among the crude shelters.
“Stop yer walkin’, ya colony scumbags,” a voice calls out. Shadowy figures surround us out of nowhere. We turn back-to-back the way we would against a zombie horde. “Ya’ll think ya run this town? Well we about had enough of yer rule, ya tyrants. It’s time to show ya who controls this town.”
“RUN!” my partner cries. We turn and bolt, but shots ring out and soon I’m running alone. I don’t slow down or look back even though I hear the bandits’ yelps and can feel a piercing pain from a bullet in my left arm.
Kill the survivor with the highest influence, lowering morale as usual. Add a wound to the human survivor with the lowest influence unless that survivor already has 2 wounds. Place that survivor back at the colony.
A consensus is quickly reached when I return home and deliver the news: We will get revenge. We will kill those animals.
Read and apply the Attacking a Bandit and Bandits’ Hideout rules on page 17 of this rulebook for the rest of the game.
At the beginning of the next round, remove the Special Main Objective B1 card from the game and place the Special Main Objective B2 card on the colony board. You may now continue the game with Special Main Objective Card B2.
This page should be read out loud once Special Main Objective B2 has been completed.
The moment of truth nears as we sit in attack position. Revenge is at hand. As we wait for the right moment to strike, the calm before the storm gets me thinking. Before long, I’ve got a sinking feeling that something is wrong. As I look around at my fellow attackers, I wonder if one of them is working for the enemy.
Special Exile Phase
Players should now discuss whether they believe any player is the betrayer. Starting with the player holding the first player marker and going clockwise, each player may initiate 1 vote to exile.
After the special exile phase, if no betrayer has been exiled and the betrayer has completed the special bandit betrayal objective, they may reveal it to immediately win the game. The betrayer can then read the story below. If the betrayer has not completed their objective, they should keep their betrayer status secret, and the following requirement is now added to their betrayal card: “Morale is at 0.”
If a non-betrayer is exiled, follow normal exile rules: The exiled player becomes leader of the bandits and read the following text aloud: “You! You’re one of the bandits!” Our guns point at the one we suspect. Our attack plan is ruined, but we couldn’t risk a sabotage. The accused walks away in shock, into the bandit hideout. The words spoken haunt me: “I wasn’t one of them. But now I understand their hatred.” Read and apply the Becoming Leader of the Bandits rules for the bandit module on page 17 of this rulebook.
If the betrayer is exiled, follow normal exile rules for the betrayer and read the following text aloud: “You! You’re one of the bandits!” Our guns point at the guilty party. In my barrel’s sights, I see telling eyes that confirm we’re right. The betrayer! “I… am sorry.” The betrayer walks away, not toward the bandit hideout, but toward the horizon. Might they change their ways?
After the special Exile Phase, unless the game is over, read the following aloud: The whole ordeal has us all shaken up. We decide to go home and work on plan B. There’s no reason to face them on their home turf. Let’s just make sure they’ll never cross our territory ever again. Place all survivors from the Bandit Hideout belonging to non-exiled players back at the colony.
At the beginning of the next round, remove Special Main Objective B2 card from the game and place the Special Main Objective B3 card on the colony board. You may now continue the game with Special Main Objective Card B3.
Bandit Betrayer Victory Story
If the betrayer wins the game when special Main Objective B2 is completed, the betrayer should read the following text aloud:
“Alright, are we ready?” I can hardly hold back my smile. Their doubt about this plan having been quelled, we march forward. I lag behind, just as I had suggested. My fellow survivors creep forward. A little closer. A little closer. Suddenly, I fire two shots into the air. The signal! Out of every crevice of our shanty town, my fellow bandits charge forward, ambushing those fools. They don’t last long. The smile takes over my face as I inspect their bullet-riddled bodies. At last, our plan is at hand. We can destroy that wretched colony for good!
Credits
- Game Designers: Isaac Vega, Jon Gilmour
- Producer: Colby Dauch
- Illustrator: Fernanda Suarez, Joshua Panelo of Gunship Revolution
- Content Design: Joseph Ellis
- Writers: Mr. Bistro, Jerry Hawthorne, Colby Dauch
- Graphic Designers: David Richards, Peter Wocken
- Editors: Jonathan Liu, Nate Rethorn, Timothy John Meyer, Jack Fleming
- Lead Playtesters: James Sitz, Joseph Ellis
Introduction & Components
Introduction
Stop! If you want us to teach you how to play, you can visit plaidhatgames.com and watch a video explanation.
If you have played the first Dead of Winter, and just want to review what is new in Dead of Winter: The Long Night. See the Long Night Rules section on page 16.
Roleplaying, Secret Objectives and Game Balance
In Dead of Winter each player takes on the role of a survivor of the zombie apocalypse. That survivor leads a group of other likeminded survivors. That group of survivors is a part of a larger colony of survivors who are all trying to live through a harsh winter in a broken world.
Each player starts the game with a secret objective. That secret objective represents the psychological bearing, or secret aspirations, of that player and her following. Most players are driven to see the colony succeed but they also have other compulsions that run so deep that they too must be achieved.
Betrayal secret objectives represent a survivor who is actively working against the colony. An exiled secret objective represents the reaction of that group of survivors to being exiled. Some secret objectives may be more difficult to complete than others.
Components List
- 8 – Dual-Sided Main Objective Cards
- 24 – Secret Objective Cards
- 11 – Betrayal Secret Objective Cards
- 5 – Exiled Secret Objective Cards
- 20 – Survivor Cards
- 5 – Player Reference Sheets
- 1 – First Player Token
- 25 – Starting Item Cards
- 20 – Police Station Item Deck Cards
- 20 – Grocery Store Item Deck Cards
- 20 – School Item Deck Cards
- 20 – Gas Station Item Deck Cards
- 20 – Library Item Deck Cards
- 20 – Hospital Item Deck Cards
- 20 – Raxxon Item Deck Cards
- 22 – Crisis Cards
- 10 – Improvement Cards
- 12 – Raxxon Experiment Cards
- 6 – Raxxon Pill Side Effect Cards
- 61 – Crossroads Cards
- 9 – Adult Only Crossroads Cards
- 25 – Wound Tokens
- 20 – Helpless Survivor Tokens
- 20 – Food Tokens
- 20 – Noise Tokens
- 20 – Barricade Tokens
- 6 – Starvation Tokens
- 20 – Bandit Standees
- 2 – Track Markers
- 30 – Zombie Standees
- 19 – Raxxon Experiment Standees
- 20 – Zombie Tokens (use if you run out of standees)
- 20 – Survivor Standees
- 100 – Plastic Standee Stands
- 1 – Colony Board
- 9 – Location Cards
- 1 – Rulebook
- 30 – Action Dice
- 1 – Exposure Die
- 12 – Despair Tokens
- 12 – Advancement Tokens
- 10 – Improvement Tokens
Component Anatomy
Main Objective Cards
- Name: This is the name of the main objective.
- Setup: How to set up the board for this scenario.
- Goal: The task(s) that must be accomplished in order to complete the main objective.
- Time: An estimate of how long this main objective will take to complete.
- Short = 45-90 minutes.
- Medium = 90-120 minutes.
- Long = 120-210 minutes.
Secret Objective Cards
- Name: This is the name of the secret objective.
- Goal: The task(s) that you must accomplish in order to win the game.
Note: Cards in the Dead of Winter: The Long Night are marked with a moon icon in the lower right corner to help distinguish them from cards included in other Dead of Winter sets.
Survivor Cards
- Name: This is the name of the survivor.
- Occupation: The survivor’s occupation before the zombie apocalypse (This has no game effect).
- Influence Value: The survivor’s place within the hierarchy of the colony.
- Attack Value: The survivor’s proficiency in a fight.
- Search Value: The survivor’s proficiency at finding items.
- Ability Location: The location the survivor must be at to use their ability.
- Ability: A unique effect the survivor has on the game.
Item Cards
- Name: This is the name of the item.
- Symbol Type: There are 7 different types of item cards.
- Ability: A unique effect the card has when played.
- Location: This determines what deck this item card starts in at the beginning of the game.
Item Card Symbol Types
- Weapon
- Fuel
- Education
- Food
- Medicine
- Tool
- Survivor
Player Reference Sheet
- Round Summary: This reminds players of the order in which things happen each round.
- Player Turn Actions: This reminds a player what actions are available to him on his turn.
- Group Leader: The player’s group leader is placed face-up in this area.
- Secret Objective: The player’s secret objective is placed face down in this area.
- Followers: The player’s remaining survivors are placed in this area.
- Unused Action Dice Pool: After rolling action dice the results are placed here.
- Used Action Dice Pool: When a player uses an action die it is placed here.
Crisis Cards
- Name: This is the name of the crisis.
- Prevent: This shows the type of items a player must contribute to the crisis to prevent its effect from happening.
- Effect: The negative effect that happens if the crisis is not prevented.
- Optional: Players may contribute these items to the crisis, in addition to the required items, to gain this specified effect.
- Bandit Placement: These numbers tell you what locations to place Bandits at when playing with the Bandits Module.
Crossroads Cards
- Name: This is the name of the crossroad.
- Trigger: The italicized text is the trigger. It is the event that must happen for this card to take effect.
- Options: The options given to choose from when the card triggers.
Important Note: Some crossroads cards have mature themes like sex, language, suicide, alcohol use, etc. These cards are marked with this symbol: . Players may choose to remove these cards prior to the game.
Additional Tokens and Standees
- First Player Token: This token identifies who is the first player. The first player goes first in a round and breaks all ties.
- Survivor and Zombie Standees: These represent the survivors and zombies on the game board. Insert the bottom of the standees into the plastic standee stands.
- Barricade Tokens: One side is a normal barricade and the other side is an explosive trap.
- Wound Tokens: One side is a regular wound and the other is a frostbite wound.
- Noise Tokens: These are added to locations to represent noise that was made there.
- Food Tokens: These are added to and removed from the food supply by various game effects.
- Starvation Tokens: These are added to the food supply when there is not enough food to feed the colony.
- Action Dice: These are rolled each round and used to perform certain types of actions.
- Exposure Die: This is rolled by various game effects to determine if a survivor has been wounded, frostbitten, or bitten.
- Despair Tokens: Some card effects apply despair tokens to survivors. Despair tokens are wounds that cannot be removed except by effects that explicitly remove despair tokens.
- Advancement Tokens: These tokens are added to improvement cards to mark progress toward completing construction of that improvement.
- Helpless Survivor Tokens: These represent helpless members of the community. One side represents a normal helpless survivor and the other represents an unruly helpless survivor.
Game Board & Locations
The game board is made up of 10 different locations, including the colony board and 9 location cards.
Colony Board
- Name
- Entrances: Numbered entrances. Zombies placed at the colony are placed in order of entrance number.
- Entrance Spaces: Spaces where zombies, barricades, and explosive traps may be placed.
- Survivor Spaces: Spaces where survivors may be placed.
- Morale Track: This track shows where the colony’s morale is. Morale is affected negatively when a survivor dies, when there are too many cards in the waste pile, when there is not enough food, and sometimes as the result of a crisis or crossroads card.
- Round Track: This track shows how many rounds remain.
- Food Supply: Food tokens are added here by various game effects.
- Main Objective: This is where the main objective card is placed.
- Waste Pile: Cards are placed here when they are played.
- Crisis Deck: This is where the crisis deck is placed.
- Crisis Contributions: This is where cards contributed to the crisis are placed.
Location Cards
- Name: This is the name of the location.
- Survivor Spaces: Spaces where survivors may be placed.
- Entrance Spaces: Spaces where zombies, barricades, and explosive traps may be placed.
- Item Deck: Item cards that players draw from when searching the location.
- Noise: Noise tokens are placed here. Only 4 noise tokens may be placed at any single location during a round.
- Item Symbols: The order from left to right is the likelihood of finding items of this type when searching at this location.
Note: The graveyard looks like a location but is really just a place to organize survivor cards and standees for survivors who have died. It has no gameplay effect other than possible crossroad cards.
Setup
Game Setup
- Place the colony board in the center of the play area and place the 6 location cards and the Graveyard around it as shown or as best accommodates your table.
- Each player collects a player reference sheet.
- Players may decide which standard main objective they would like to play or pick 1 randomly. (Note: We suggest the first time you play you choose the “Tribute” main objective.) Place the main objective card in its space on the colony board and set up the game board according to the main objective’s setup instructions. See Adding Zombies on page 13 for more details on adding zombies to colony entrance spaces.
- Shuffle the non-betrayal secret objective cards and set aside 2 (facedown) per player. Return the rest of the non-betrayal cards to the game box. Shuffle the betrayal secret objective cards and add 1 of them (facedown) to the non-betrayal cards that were set aside. Return the remainder of the betrayal secret objective cards to the game box. Shuffle all of the set aside cards together and deal 1 to each player. Return the remaining secret objective cards to the game box without looking at them. A player cannot reveal his secret objective card to other players.
- Shuffle the crisis cards and place the deck on its space on the colony board.
- Shuffle and make decks of the survivor, exiled objective and crossroad cards and place the decks off to the side of the play area. (Important Note: Some crossroads cards have mature themes like sex, language, suicide, alcohol use, etc. These cards are marked with this symbol . Players may choose to remove these cards prior to the game.)
- Shuffle all of the starter item cards and deal 5 to each player. Return any remaining cards to the game box.
- Separate the remaining item cards into separate decks according to their location. Shuffle each deck and place it on its corresponding location card.
- Deal 4 survivor cards to each player. Each player then chooses 2 to keep and returns the others to the deck. Re-shuffle the survivor deck.
- Each player makes 1 of those 2 survivors her group leader, placing that survivor card in the respective space on her reference card.
- The other survivor card is placed in the player’s following, below their player reference sheet.
- The corresponding survivor standees for each player’s survivors are added to the colony.
- Separate the remaining standees and tokens, placing them within easy reach of all players.
- The player whose group leader has the highest influence value receives the first player token and will take the first turn of the game.
Note: When setting up the game board according to the main objective, use the blue marker to keep track of morale and the red marker to keep track of rounds.
To add A survivor standee to the colony: Survivor standees are placed on the dashed circles in the “Colony Occupants” section of the colony board.
Round Structure & Player Turns Phase
Round Order
Dead of Winter is played over a series of rounds. Each round is divided into 2 phases that must be played in order:
- Player Turns Phase
- Colony Phase
Player Turns Phase
During the player turns phase resolve the following 3 effects in order:
- Reveal Crisis: Reveal the top card of the crisis deck. This card’s effect will take place during the colony phase if it is not prevented. Crisis cards can be prevented if players contribute enough of the correct type of cards to that crisis.
- Roll Action Dice: At this time each player removes any action dice remaining in her used and unused action dice pool. Then each player receives 1 action die, plus 1 additional action die for each survivor she controls (so players will start the game with 3 action dice). Each player must roll all of her action dice and keep the results in her unused action dice pool for use during her turn. Even though a player receives 1 action die per survivor she controls, the action die does not belong to that survivor, but to that player’s group of survivors. A player can spend multiple action dice to perform multiple actions with a single survivor over the course of her turn.
- Player Turns: During the player turn phase, each player, starting with the first player, will take a turn. At the beginning of a player’s turn the player to her right draws a crossroads card (applying its effects to the player taking the turn if, at any time during that turn, they meet the trigger requirement). On a player’s turn she may perform multiple actions. Once a player has performed all of the actions she wishes to perform (or if she runs out of actions she is able to perform), play passes to the player on her left. Play will continue clockwise around the table until each player has taken a turn. Once each player has taken a turn the player turns phase is over and the colony phase begins.
Resolving Crossroads Cards
At the beginning of each player’s turn, the player to her right will draw a crossroads card. That player must keep the crossroads card secret, only revealing it if its trigger happens. The text on that card applies to the player taking a turn. If at any time on the player’s turn she meets the requirements of the trigger, all of the card’s text is read aloud by the player who drew it. Most crossroads cards provide 2 options to choose from, all of the text from these options is read out loud. The player the card applies to must then choose 1 of the options. That option immediately takes effect and the card is removed from the game. If the card doesn’t trigger, place it on the bottom of the crossroads deck. If a player is unable to meet the conditions of an option on a crossroads card, she must choose the other option.
Note: Some crossroads cards trigger when a player performs an action. This trigger takes place after the action being taken has been resolved (unless the card says otherwise).
Note: Some crossroads effects have you search a deck for a specific card. After searching a deck, shuffle it.
Player Actions
Turn Actions Overview
Some actions require spending an action die and others do not. To spend an action die, a player removes the appropriate die from his unused action die pool and moves it to his used action die pool. Some actions require that the action die be a specific result (from having rolled it during the roll action dice step).
Actions that require an Action Die
Attack
To perform an attack, a player must choose a survivor he controls and spend an action die equal to or higher than the attack value of that survivor. That player may then choose a target for that attack. The target must be a zombie or a survivor that shares a location with the attacking survivor.
- If a zombie is chosen: Kill it and remove it from the game board. Roll for exposure on the survivor that attacked (see Rolling for Exposure on page 11 for details).
- If a survivor is chosen: Roll the spent action die. If the result is equal to or less than the chosen survivor’s attack value place a wound marker on the chosen survivor and take a card at random from the hand of the player that controls that survivor.
Note: The exposure die is not rolled when attacking another survivor.
A player may attack multiple times with the same survivor in a single turn. An action die equal to or higher than the attack value of that survivor must be spent each time that survivor attacks. A player cannot have a survivor he controls attack another survivor he controls. A player cannot attack a helpless survivor.
Search
A player can search at any location except the colony. To perform a search, a player must choose a survivor he controls and spend an action die equal to or higher than the search value of that survivor. He may then draw 1 card from the item deck of the location that survivor is on, looking at it but not yet adding it to his hand. He may then choose to either:
- add that card to his hand and end his search action, or
- make noise by placing a noise token on an empty noise space at his location to draw and look at an additional card. He may draw additional cards as long as there are still empty noise spaces for the corresponding noise tokens.
When the player has decided he has made enough noise or can no longer make any more noise, he must keep 1 of the drawn cards, adding it to his hand, and place the rest on the bottom of that item deck. A player may search multiple times with the same survivor in a single turn. An action die equal to or higher than the search value of that survivor must be spent each time that survivor searches.
Barricade
To perform a barricade action, a player must choose a survivor he controls and spend an action die of any result to place a barricade token on any empty entrance space at the chosen survivor’s location.
Clean Waste
A player may perform a clean waste action if he controls at least 1 survivor at the colony. To perform a clean waste action, that player must spend 1 action die of any result and remove the top 3 cards of the waste pile from the game.
Attract
To perform an attract action, a player must choose a survivor he controls and spend an action die of any result to move 2 zombies from any location to any empty entrance spaces at the chosen survivor’s location.
Survivor Ability
Some survivor abilities require an action die to be spent. When this is the case it will be signified by a number in front of the ability’s text. The action die spent must meet or exceed that number in order for it to be used. A player may use the same survivor’s ability multiple times in a single turn, unless the ability says otherwise.
Actions that do not require an Action Die
Play a Card
As many times as he likes during his turn, a player may play a card from his hand. To play a card, place it on top of the waste pile. When an event item card is played do not place it in the waste pile but instead remove it from the game.
Reminder: For every 10 cards in the waste pile during the check waste step, the colony will lose 1 morale.
A card with an equip ability is not placed in the waste pile, instead a player may equip it to any survivor he controls by placing that card next to that survivor. That survivor now has the effect listed on that item card. Once a card is equipped it cannot be unequipped unless it is being added to a crisis or is being handed off. If a survivor with 1 or more equipped cards dies at the colony, the equipped cards are added back to the controlling player’s hand. If a survivor with 1 or more equipped cards dies at a non-colony location, the equipped cards are shuffled into that location’s item deck.
Add a Card to the Crisis
A player may add 1 or more cards from his hand and/or cards that are equipped to survivors he controls to the currently revealed crisis card. Cards added to a crisis from a player’s hand are added face down so that no other player can see them. Adding cards that match a symbol shown in the prevent area of the crisis card helps to prevent that crisis from happening. Each card added that does not match a symbol helps cause the crisis to happen.
Note: Some food cards add multiple food tokens to the food supply when they are played. Those food cards still only count as 1 card played into the crisis.
Move a Survivor
A Player may move each survivor he controls once during his turn. A survivor may be moved to any location that has an empty survivor space. After each time a player moves a survivor, he must roll for exposure.
Note: If the result of rolling for exposure was a bitten, when it is spread it spreads to a survivor in the location that the moved survivor just moved to.
Spend Food Tokens
A player may spend 1 or more food tokens by removing them from the food supply area on the colony board. That player increases any 1 unused action die he controls by 1 for every food token he spends.
Request
During his turn a player may request 1 or more item cards from other players. Other players may give the requesting player an item card from their hand, if they do, that card must be revealed and immediately played. The requested card cannot be added to the crisis.
Hand Off
During his turn a player may have a survivor he controls that has an item equipped hand that item off to another survivor at the same location. When an item is handed off it is unequipped from the survivor that is handing it off and is immediately equipped to the survivor that it is being handed to.
Note: If the item has a once per round ability and it has already been used that round it cannot be used again by handing it off to another survivor.
Vote to Exile
Once during each of his turns a player may choose another player and initiate a vote to exile that player. Initiating a vote forces all players to simultaneously cast a vote of yes (thumbs up) or no (thumbs down) to determine whether or not the chosen player is exiled. A player cannot initiate a vote to exile themself. Remember all ties are broken by the first player, this includes votes to exile (see the Exile section on page 14 for details).
Colony Phase
Colony Phase Steps
During the colony phase, resolve the following 7 effects in order:
- Pay Food: Remove 1 food token from the food supply for every 2 survivors in the colony (rounded up). Remember that helpless survivor tokens count as survivors for this purpose.
Note: Survivors at non-colony locations do not count towards the total number of survivors in the colony. They are considered to be foraging food for themselves and so do not require food be paid from the supply.
If there are not enough food tokens do the following in order:- Do not remove any food tokens.
- Add a starvation token to the food supply.
- Decrease morale by 1 for each starvation token currently in the food supply.
- Check Waste: Count the cards in the waste pile. For every 10 cards (rounded down), decrease morale by 1.
- Resolve Crisis: Shuffle the cards that were added face-down to the crisis during the player turns phase. Reveal them one at a time. Each item card added that has a symbol matching a symbol in the prevent section of the crisis is worth 1 point. Each card that doesn’t have a symbol matching a symbol in the prevent section of the crisis subtracts 1 point. After revealing all of the cards, if the combined point total is lower than the number of non-exiled players then immediately resolve the crisis. If the point total equals or exceeds the number of non-exiled players the crisis is prevented. Additionally, if the point total exceeds the number of non-exiled players by 2 or more the colony gains 1 morale. After resolving the crisis, remove all cards added to the crisis from the game.
- Add Zombies: Add 1 zombie to the colony for every 2 survivors (including helpless survivors) present there (rounded up). Add 1 zombie to each non-colony location for every 1 survivor present at that location. One at a time remove each noise token at a location and flip it like a coin. Add a zombie to that location for each token that lands on the “!!!” side. (See Adding Zombies on the next page for details on adding zombies to the colony.)
- Check Main Objective: Check to see if the goal on the main objective has been achieved. If it has been achieved the game immediately ends.
- Move Round Tracker: Move the round tracker down 1 space on the round track. If it is moved onto 0 the game immediately ends.
- Pass First Player Token: At the end of each round, any player may initiate a vote to prevent the first player token from being passed to the next player. If the vote passes, the first player token remains with the current first player, otherwise the first player passes the first player token to the player on his right. A new round begins starting with the reveal crisis section of the player turns phase.
Hazards, Exposure & Casualties
Rolling for Exposure
Immediately after a survivor moves to a new location or kills a zombie, the player that controls that survivor must roll for exposure by rolling this die. Each die face has an effect that is triggered when that result is rolled.
Exposure Die Effects
- Blank: Nothing happens.
- Wound: The survivor receives 1 wound token.
- Frostbite: The survivor receives 1 frostbite wound token. This is considered a wound. At the beginning of each of your turns, each survivor you control that has 1 or more frostbite wound tokens on it receives an additional wound token.
- Bitten: The survivor is killed and the bite effect spreads.
Spreading a Bite Effect
When a survivor is killed as a result of a bitten roll, the bite effect spreads to the survivor with the lowest influence that shared a location with the bitten survivor. Each time a bite effect spreads, the player that controls the survivor it spread to must choose from the following options:
- Option 1: Kill the survivor that the bite effect spread to. The bite effect stops spreading.
- Option 2: Roll the exposure die again. On a blank result, the survivor that the bite effect spread to is not killed and the bite effect stops spreading. On any other result, the survivor that the bite effect spread to is killed and the bite effect spreads again. The bite effect will continue to spread until a player either chooses option 1, rolls a blank result after choosing option 2, or there are no more survivors at the location.
Remember: Whenever a survivor is killed by any game effect the colony loses 1 morale.
Adding Zombies
Whenever adding zombies, they are added 1 at a time until all zombies that need to be added have been added.
When adding zombies to the colony, always place the first zombie on any empty space in entrance 1, the second zombie on any empty space in entrance 2, the third zombie on any empty space in entrance 3, etc. until all of the zombies that need to be added have been placed. When adding a seventh zombie, place it on any empty space in entrance 1 again, an eighth zombie on any empty space in entrance 2, etc.
If there are no empty entrance spaces in the entrance the zombie would be placed but there is a barricade token in one of those spaces, destroy that barricade token and remove the zombie that would have been placed.
If there are no empty spaces and no barricade tokens, the entrance has been overrun, remove that zombie and kill the survivor at the colony that has the lowest influence value. If there are only helpless survivors at the colony, kill a helpless survivor. If there are no survivors at the colony remove the zombie that would have been placed without further effect.
Every time a survivor is killed (including a helpless survivor), decrease morale by 1.
When adding zombies to non-colony locations follow all of the same rules, except there is only 1 entrance to place zombies in so all of the zombies are placed in spaces at that entrance.
In the rare case that players ever have to add zombies and there are no more zombie standees left, use the zombie tokens included in the game to add the additional zombies.
Killing Zombies
Whenever a zombie is attacked it is killed. Whenever a zombie is killed by an attack or card effect, the player that controls the survivor that killed that zombie must roll for exposure on that survivor. When killing a zombie at the colony, choose which zombie to kill. It may come from any entrance. A zombie that is killed or otherwise removed from the game board is placed back into the pile of unused zombies.
Adding Survivors
Some game effects will cause a player to add a new survivor to her following. Whenever a survivor is added to the game, its corresponding standee is added to the “Colony Occupants” section of the colony board. The player who controls the new survivor may use that survivor during her turn, but does not roll an additional action die for it until the roll action dice step of the player turns phase. If there are no empty survivor spaces remaining at the colony, then players cannot trigger crossroads cards that would add survivors (including helpless survivors) and cannot play item cards that would add survivors.
Killing Survivors
- When zombies overrun a location entrance a survivor is killed.
- When a survivor has 3 or more wound tokens it is killed. This includes frostbite and despair tokens.
- When a survivor is bitten it is killed.
- Some card effects may kill a survivor.
When a survivor is killed, remove its survivor standee from the game board, decrease morale by 1, and remove its survivor card from the game. If that survivor had any cards equipped to it and that survivor is at the colony those cards are added to the hand of the player that controlled that survivor. If the survivor is at any other location those cards are shuffled into that location’s item deck.
If a player’s group leader is killed (or otherwise lost), she must choose a survivor from her following and make it her group leader.
If a player’s last remaining survivor would be killed (or otherwise lost), that player immediately removes from the game all cards in her hand, draws a new survivor card, adds it to the game, and makes that survivor her new group leader.
If a helpless survivor is killed (by the effects of a card or as the result of a zombie overrun where there are only helpless survivors in the location), remove a helpless survivor token and reduce morale by 1.
Note: Some card effects remove survivors from the game. This is not the same thing as killing a survivor. You do not lose morale when removing a survivor unless the card directs you to.
Exile & Voting
Exile
If the players vote in favor of exiling a player, the exiled player must immediately draw 1 exiled secret objective card. This card will adjust his secret objective. The exiled player must move all of the survivors he controls that are in the colony to non-colony locations of his choice. Those survivors follow all of the normal rules for movement, except this move does not count as the 1 move survivors are allowed to make during his turn. Some new rules apply to the exiled player:
- The exiled player cannot add cards to a crisis.
- When the exiled player is directed to add helpless survivor tokens to the colony those tokens are not added.
- If the exiled player plays a survivor item card to add a survivor to the game it is placed at a non-colony location of his choice rather than at the colony.
- The exiled player cannot spend food tokens to increase his action die results, but may play food cards to increase an action die result by 1 for each food card played rather than carrying out the effect listed on the food card.
- The exiled player cannot vote.
- The colony does not lose morale when a survivor the exiled player controls is killed.
- When the exiled player plays a card, instead of placing it in the waste pile, he removes it from the game.
Important note: If at any time during the game there are 2 exiled players and neither had a betrayal secret objective, morale immediately drops to 0.
Voting
During the game players may be given the option to vote with a thumbs up or down, either because a player initiated a vote to exile or because a crossroads card called for a vote to be cast. Players may take time to deliberate before casting their vote. Once players are ready to vote, count down from 3, with every player simultaneously casting his vote on 0.
Game End & General Rules
Winning and Losing the Game
When the game ends for any reason, if a player has completed his secret objective he wins. If he has not, he loses. Some players may win in a game that other players lost; there can be multiple winners. It is also possible for everyone to lose if no one has completed his secret objective when the game ends.
The game can end in a variety of ways:
- If the morale track reaches 0 the game ends immediately. Do not check to see if the main objective has been completed.
- If the round track reaches 0 the game ends immediately. Do not check to see if the main objective has been completed.
- The main objective is completed.
Card Text & Priority
When a card effect contradicts the rulebook, the card effect takes precedence. If 2 game effects would ever seem to trigger simultaneously, the first player decides in which order they will resolve. An item card cannot be played to interrupt an effect currently taking place.
Example: A medicine card cannot be played to prevent a wound, it can only be played after receiving a wound, so if a survivor receives their third wound they cannot be saved by playing a medicine card, they will be killed.
Searching a Deck
Any time a game effect allows a player to search a location’s entire item deck, that player should shuffle the deck afterwards.
Roll a Die
Many cards instruct you to roll a die to determine the result of an effect. Whenever an effect instructs you to roll a die, take an action die not in use by any player and roll that die. After you have determined the results of the effect, return it to the pile of action dice not in use.
Random Locations
Cards in The Long Night may direct you to choose a random location. In order to choose a random location, roll a 6-sided die. The location whose number matches the die result is chosen. The colony has no location number and some of the locations have a number above 6, thus some locations are never chosen randomly.
Gameplay Variants
Co-Op Variant
Players may choose to play the game cooperatively. Use the hardcore side of the main objective card and do not assign secret objectives. Each player’s only objective is to complete the main objective. Players cannot vote to exile a player. During setup, remove from the game every card showing the non co-op symbol on the bottom right corner of the card.
2 Player Variant
Follow the same rules as the Co-Op Variant. When setting up each player receives 7 starting item cards instead of 5 and receives 4 survivors and keeps 3 of them instead of keeping only 2 of them.
Betrayer Variant
During the setup players may choose to add only 1 non-betrayal secret objective per player rather than 2, greatly increasing the odds of a betrayer.
Hardcore Variant
Instead of playing with the standard side of the main objective, players may choose to play the normal game but use the hardcore side of the main objective for a greater challenge.
Player Elimination Variant
Players may choose to play the game with the player elimination variant. If a player’s last remaining survivor would be killed (or otherwise lost), remove from the game all cards in her hand. That player is out of the game.
The Long Night Rules & Modules
The Long Night Overview
Dead of Winter: The Long Night uses all the same rules as the Dead of Winter base set, with slight modifications and added twists. Some rules are used every time you play The Long Night. In addition, 3 modules are included which can be optionally added to the game. Each module comes with its own additional rules and components.
Preparing for The Long Night
Before setting up a game of Dead of Winter: The Long Night, decide which modules you want to use. You may add the 3 modules in any combination, or none of them. Start by gathering all cards marked with the moon icon on the lower right of the card. Then, for each module being used, add in the cards marked with the icon for that module.
All cards and components from the Dead of Winter: A Crossroads Game base set may be used with The Long Night as desired. Whenever search decks are combined from more than one Dead of Winter product, shuffle each location deck and deal out 20 cards facedown to form a search deck for that location. Remove the undealt cards from the game. Important note: Combining cards in this way may make the game more or less difficult. Players may choose to pick cards to add or remove to create a personal experience.
Some item cards in The Long Night are multiuse. If a multiuse item has an effect related to a module you are not using this game, that item can only be used for its other effect. If you are playing without the Bandits module, ignore the Bandit portion of crisis cards.
New Rules for Every Game
The following rules apply to The Long Night regardless of whether any modules are used:
First Player Vote
At the end of each round, any player may initiate a vote to prevent the first player token from being passed to the next player. If the vote passes, the first player token remains with the current first player.
Random Locations
Cards in The Long Night may direct you to choose a random location. In order to choose a random location, roll a 6-sided die. The location whose number matches the die result is chosen. The colony has no location number and some of the locations have a number above 6, thus some locations are never chosen randomly.
The Graveyard
The graveyard looks like a location but is really just a place to organize survivor cards and standees for survivors who have died. It has no gameplay effect other than possible crossroads cards.
Despair
A survivor may gain despair due to crossroads cards, crisis cards, or other game effects. Despair is added to a survivor by placing a despair token on a survivor’s card for each despair gained.
Despair tokens count as normal wounds for all intents and purposes, except that they cannot be removed by any effect that removes wounds of any kind. Despair tokens may only be removed by effects that specifically remove despair.
Unruly Helpless Survivors
Helpless survivors may become (or start out) unruly due to crossroads cards, crisis cards, or other game effects. Show that a helpless survivor is unruly by placing that helpless survivor’s token with the unruly side facing up.
Unruly helpless survivors count as two helpless survivors when counting survivors during the Pay Food and Add Zombies steps of the Colony Phase.
The active player may flip an unruly survivor token to its normal helpless survivor side by placing a medicine card in the waste pile without using its effect.
Explosive Traps
Some game effects may result in an explosive trap token being placed in an entrance space. Explosive traps work exactly like barricades, except that when the explosive trap is destroyed due to attempting to add a zombie to its space, in addition to removing the token, also remove all zombies already at that entrance.
The Long Night Modules
Important note: There are special scenarios introduced starting on page 20 that will teach you the rules to the Long Night modules as you play without having to read through the new rules.
These modules can be left out or added to the game as desired. Components for each module are marked with that module’s icon. When setting up a game, for each included module, follow the instructions below.
The Improvements Module
Improvements can be built to improve life at the colony. To set up the Improvements module:
- Add the crisis, survivor, crossroads, and objective cards marked with the hammer icon to their respective decks.
- At the start of the game, shuffle the improvements deck and draw 4 improvement cards, placing them in a row faceup near the colony.
During the game, items and other game effects will allow players to place advancement tokens on improvements. If at any time an improvement has advancement tokens equal to or greater than the number indicated on the card, that improvement’s ongoing effects are now active. Place the improvement card or its corresponding improvement token, whichever you prefer, in the center of the colony blueprint.
The Bandits Module
Bandits are non-zombie characters that the players don’t control. Bandits appear at non-colony locations and take up survivor spaces when they are placed. To set up the Bandits module:
- Add the crisis, survivor, crossroads, and objective cards marked with the bandit icon to their respective decks.
- Add the Bandits’ Hideout location to the play area. The Bandits’ Hideout does not have a search deck.
- Place the Bandit standees near the Bandit’s Hideout.
Bandits affect the game in the following ways:
Placing Bandits
When revealing a new crisis card during the Reveal Crisis step of the Player Turns Phase, place any bandits as instructed on the bandit placement section of the crisis card. When placing a bandit at a location, if there are no available survivor spaces, do not place that bandit.
Note: If you would like to use the crisis cards from the original Dead of Winter that do have bandit placement listed on them you may place 2 bandits at random locations when a crisis card without them is revealed. You may also not place bandits during that round for easier play.
Attacking a Bandit
When performing an attack action with a survivor, you may choose a bandit that shares a location with that survivor as the target of the attack. Follow the same rules for attacking a bandit as for attacking a survivor with an attack value of 4 and remove the bandit if the attack is successful.
Adding Zombies
Each bandit counts as a survivor for the purpose of adding zombies during the Add Zombies step of the Colony Phase. When a location is overrun, if there are no survivors at that location, remove all bandits from that location.
Bandits Scavenge
After resolving the Add Zombies step of the Colony Phase, each bandit scavenges for resources. For each active bandit, draw one card from the search deck at that bandit’s location and place it faceup on the Bandits’ Hideout.
Bandits’ Hideout
The Bandits’ Hideout is a special location. To interact with the Bandits’ Hideout, follow the instructions on the Bandits’ Hideout location card.
Becoming Leader of the Bandits
An exiled player who was not the betrayer becomes the leader of the bandits. In addition to other rules related to exiled players, whenever bandits are placed during the Reveal Crisis step of the Player Turns phase, the exiled player decides where to place those bandits.
The Raxxon Module
Raxxon is a new location with special rules that players can add to the game. To set up the Raxxon module:
- Add the crisis, survivor, crossroads, and objective cards marked with the skull and crossbone icon to their respective decks.
- Add the Raxxon location card to the play area and set up its search deck normally.
- Shuffle the Raxxon experiments deck and place it on the Raxxon location with the Raxxon Audio Logs side face up. Players may read the Audio Logs of the top card of the Raxxon experiments deck at any time.
- Take the Raxxon side effect deck and place it near the Raxxon location card. The Raxxon side effect deck does not need to be shuffled and players may look through it at any time.
Searching at Raxxon
Any time you perform a search at Raxxon, after the search, roll for exposure for the survivor who performed the search.
Pill Item Effects
Pill items in the Raxxon search deck contain events which may equip a card from the Raxxon side effect deck to a survivor. To use a pill item:
- Choose a survivor you control to take the pill.
- Roll a die and follow the card’s instructions.
- If you are instructed to equip a side effect card, search the Raxxon side effect deck and equip it to the chosen survivor. Raxxon side effect cards cannot be unequipped.
The Containment Code
Terrifying experiments are pouring out of the Raxxon facility each round unless the players contain them. During a player’s turn, while he controls a survivor at Raxxon, he may place action dice from his unused dice pool on the Raxxon location.
At the beginning of the colony phase, if there are 2 action dice on the Raxxon location matching the containment code shown on the Audio Log side of the top card of Raxxon experiment deck, all players vote with a thumbs up or thumbs down, with the most popular option taking effect:
- Thumbs Up Option: Discard the top Raxxon Experiment card without triggering its placement effect.
- Thumbs Down Option: The first player chooses a single location (including the colony). During the Add Zombies step of the Colony Phase, reduce the number of zombies placed at that location by 3.
Containment Code Failure or Thumbs Down
At the beginning of the colony phase, if there are not 2 action dice on the Raxxon location matching the containment code, or if the Thumbs Down option was chosen above, place the zombies listed on the Audio Logs side of the top card of the Raxxon experiments deck using the matching standees. When more than 1 zombies is placed by the card, roll for each zombie’s placement one at a time.
When placing a special zombie standee, if there is no entrance space available, trigger explosive traps, remove barricades, or trigger an overrun as usual, and do not place the zombie as usual, discarding the experiment card instead.
After one or more special zombies are placed, flip the experiment card to the encounter side and place it near the colony so that all players can see it.
Special zombies can only be killed with a regular attack. Other game effects such as items and character abilities that do not involve an attack, or explosive traps that would normally kill a zombie do not affect special zombies. Special zombies cannot be moved by any game effects except for those listed on their encounter cards. When performing an attack, you must target a special zombie before you may target a standard zombie, survivor, or bandit if the survivor you are attacking with shares a location with a special zombie.
When a survivor attacks a special zombie, roll for exposure as normal unless a character ability, equipped item, or other effect prevents the survivor from rolling for exposure when attacking. Then, if the survivor is still alive, roll a die and apply the corresponding effect of the special zombie encounter card. If the special zombie is removed and there are no more special zombies of this type in play, discard its encounter card.
Special Scenarios
Introduction to Scenarios
These scenarios and their related main objective cards are intended to introduce the rules and background story for the Raxxon and Bandits modules that come with The Long Night. We recommend using each of these objectives as your starting point for experiencing the modules of The Long Night.
To set up any of these scenarios, follow the setup instructions for the scenario. You do not need to read all of the rules for a module before you start one of these scenarios. The scenario will instruct you when you need the module’s rules.
The Chimp and the Code (Raxxon Scenario)
To set up the Raxxon introductory scenario, set up the game as if you are playing with the Raxxon module as instructed on page 18 of this rulebook, with the following adjustments:
- Place barricades on every entrance and survivor space on the Raxxon location. Survivors may not move to Raxxon at the beginning of the game. Do not use the Raxxon module pill item effect rules or containment code rules.
- Remove Blue and Emma Han from the survivor deck and set them aside.
- Instead of using a normal main objective card, use Special Objective card R1.
- Have one player read the italicized text below aloud at the beginning of the game.
The colony is starting to feel like home. But like any relief since the outbreak, it’s only temporary. A bigger, better colony means more noise and traffic, which leads to more and more zombies banging on our entrances. And despite our barricades, when it comes to zombies, quantity has a quality all its own.
I was planning on leaving for good the night Emma brought home new hope. While exploring, she had discovered the blueprints to the abandoned Raxxon Pharmaceutical facility. I’d always assumed Raxxon Pharmaceutical was just a pill factory, but the blueprints reveal the full breadth of Raxxon’s operation: medical research, experimental technology, even military-grade weapons.
Add Emma Han’s standee to the colony and add her survivor card to the following of the first player. Then, find the Raxxon Blueprints in the Raxxon search deck and equip them to Emma.
None of us ever ventured into Raxxon since the main entrance is heavily barricaded. But now we have a good reason to explore. The plan is to gather the supplies necessary to blow open Raxxon’s entrance. Best case scenario, we’ll get in and find something to deal with the zombies at the colony. At the very least, the explosion should draw zombies away from the colony temporarily. And in this world, temporary relief is the best we can hope for.
You may now begin the game with Special Main Objective Card R1.
The next section should be read once Special Main Objective R1 has been completed.
It should be read and followed by the player with the fewest survivors in their following. If there is a tie, the player who controls the survivor with the highest influence among tied players should read it.
The boom of the explosion shook the ground and illuminated the night sky. We watched the high-reaching flames from the colony. By early morning the smoke had dissipated, and I headed for Raxxon. I was pleased to see less zombies hanging around the colony. The barricades sealing off the Raxxon entrance were gone so I headed inside.
Remove all barricades from the Raxxon location card. Place a survivor you control at Raxxon. For the rest of the game, players may move survivors to Raxxon and search. Read the Searching at Raxxon rules on page 18 of this rulebook. Remove any 3 zombies from the colony and place them at Raxxon.
As I turned a hallway corner, a shrieking beast met me face-to-face! My body involuntarily jumped backwards and to the floor. But it wasn’t a zombie, it was a chimp. Her yells spoke anger but her eyes betrayed her fear. A cry for help!
She ran past me, limping, then looked back, hoping I’d follow. I ran after her to a room near the entrance, its walls crumbling from our explosion. The chimp climbed the rubble in one corner, digging in desperation, but a freshly injured arm kept her from making any progress. A muffled voice struggled beneath the pile. “Blue! Good girl! Hurry! I’m bleeding! I don’t know how long I’ll be…”
The voice faded out and Blue shrieked furiously. I knew the chimp’s panic all too well. I knew we had to help before it was too late.
Add Blue’s survivor card to your following and place her standee at Raxxon. (If there isn’t enough room for her move a survivor of the first player’s choice back to the colony. This does not count as move.) Add 1 wound to her card. At the beginning of the next round, remove the Special Main Objective R1 card from the game and place the Special Main Objective R2 card on the colony board. Complete the objective to save Blue’s friend.
Read and apply the Raxxon module’s pill item effect rules from page 18 of this rulebook when playing a card from the Raxxon search deck. Do NOT apply the Raxxon module’s containment code rules.
You may now continue the game with Special Main Objective Card R2.
This Section should be read once Special Main Objective R2 has been completed.
Our combined digging effort uncovered Blue’s friend alive but in bad shape. The man’s body is badly injured, his scraggly, long white hair and beard covering deep cuts around his face and neck. He’s been unconscious since we got him out, yet he moans in pain. Blue hasn’t left his side.
Remove all dice placed on the Raxxon location card. Take all survivor standees from Raxxon and place them at the colony.
Against all odds, the old man wakes up! His speech is weak and labored. “Blue, sweet girl. Thank you my friend.” Blue lays her head on the man’s chest. “Wh-where are we? Are we at Raxxon?”
“You’re at a survivor’s colony,” I tell him. “We had to take you out of Raxxon. It’s not safe there since the explosion. No barricades. Too many zombies.”
“Zombies…” he trails off, thinking. “Those experiments are why we needed to be at Raxxon. To keep them in!” He attempts to sit up, but is denied by the pain. “The code… the containment code!”
“Look, I don’t know about any codes,” I say, “but zombies have roamed this area for a long time now. Nothing we can’t handle. Get some rest, ok?”
“No. No. No no no no NO. You haven’t seen them. Not the real horrors, the true demons of Raxxon. For months, Blue, we were faithful to contain them. What happened??”
Blue sobs on his chest. The old man utters his last: “Woe to us. They’re on their way! You must contain them! Blue knows, she knows how. Contain them!”
At the beginning of the next round, remove the Special Main Objective R2 card from the game and place the Special Main Objective R3 card on the colony board.
Read the Raxxon module’s containment code rules as explained on page 18 of this rulebook. Apply them starting with the next round and for the rest of the game. If there are 2-3 non-exiled players, immediately draw 2 Raxxon experiment cards and place their special zombies. If there are 4 or more non-exiled players, immediately draw 3 Raxxon experiment cards and place their special zombies.
You may now continue the game with Special Main Objective Card R3. Complete the objective to end the game.
Bandit Blitz (Bandit Scenario)
To set up the Bandit introductory scenario, set up the game as if you are playing with the Bandit module as explained on page 17 of this rulebook, with the following adjustments:
- Instead of using a normal main objective card, use Special Main Objective card B1.
- When constructing the stack of facedown secret objectives to deal to players, instead of adding 1 random betrayal secret objective card, add the BANDIT BETRAYAL secret objective. Then shuffle the secret objectives and deal them out as normal. This betrayal secret objective is unique; you may read it aloud before shuffling it in if you wish. It requires that the special Main Objective card B2 be completed for the betrayer to win, so the betrayer will need to help ensure that the colony gets at least that far.
- Have one player read the italicized text below aloud at the beginning of the game.
Our bandit problem has worsened lately. The misfits have set up camp a couple miles away. Now we’re stuck playing survival of the fittest against people who are so unwilling to get along with others that they don’t even qualify for our dysfunctional family.
So it was a surprise when a couple of them showed up unarmed at the colony this morning. Undernourished and weak, they begged us for food. They insisted that any conflicts we’ve had were miscommunications, and their group needs our help to survive. Normally appealing to our humanity wouldn’t budge us, but they brought gifts.
Each player may draw 1 card from the hospital search deck and add it to their hand.
The gifts are just what we needed, and the colony leaders are eager to improve relations with the bandits. Now, instead of worrying about ourselves, we’re collecting food for neighbors. I’m personally against it, but their gifts won the colony over. How did they know exactly what we would want? Sometimes I wonder if one of them isn’t among our ranks.
Read and apply the Reveal Crisis, Bandits Scavenge, and Adding Zombies rules related to the Bandit module, on page 17 of this rulebook. Other Bandit module rules do not yet apply. You may now begin the game with Special Main Objective Card B1.
The next section should be read once Special Main Objective B1 has been completed.
It should be read and followed by the player who controls the human survivor with the lowest influence.
It’s risky to go to the bandit hideout alone, and no one else was willing to deliver the food with our fearless leader, so, lucky me. We’ve packed up and we’re on our way. Our leader is confident. I have my doubts.
Remove all food from the food supply. Place the survivor with the highest influence and the human survivor with the lowest influence at the Bandits’ Hideout.
We approach their shanty town at dusk and immediately, something seems off. The place is a ghost town. We press on among the crude shelters.
“Stop yer walkin’, ya colony scumbags,” a voice calls out. Shadowy figures surround us out of nowhere. We turn back-to-back the way we would against a zombie horde. “Ya’ll think ya run this town? Well we about had enough of yer rule, ya tyrants. It’s time to show ya who controls this town.”
“RUN!” my partner cries. We turn and bolt, but shots ring out and soon I’m running alone. I don’t slow down or look back even though I hear the bandits’ yelps and can feel a piercing pain from a bullet in my left arm.
Kill the survivor with the highest influence, lowering morale as usual. Add a wound to the human survivor with the lowest influence unless that survivor already has 2 wounds. Place that survivor back at the colony.
A consensus is quickly reached when I return home and deliver the news: We will get revenge. We will kill those animals.
Read and apply the Attacking a Bandit and Bandits’ Hideout rules on page 17 of this rulebook for the rest of the game.
At the beginning of the next round, remove the Special Main Objective B1 card from the game and place the Special Main Objective B2 card on the colony board. You may now continue the game with Special Main Objective Card B2.
This page should be read out loud once Special Main Objective B2 has been completed.
The moment of truth nears as we sit in attack position. Revenge is at hand. As we wait for the right moment to strike, the calm before the storm gets me thinking. Before long, I’ve got a sinking feeling that something is wrong. As I look around at my fellow attackers, I wonder if one of them is working for the enemy.
Special Exile Phase
Players should now discuss whether they believe any player is the betrayer. Starting with the player holding the first player marker and going clockwise, each player may initiate 1 vote to exile.
After the special exile phase, if no betrayer has been exiled and the betrayer has completed the special bandit betrayal objective, they may reveal it to immediately win the game. The betrayer can then read the story below. If the betrayer has not completed their objective, they should keep their betrayer status secret, and the following requirement is now added to their betrayal card: “Morale is at 0.”
If a non-betrayer is exiled, follow normal exile rules: The exiled player becomes leader of the bandits and read the following text aloud: “You! You’re one of the bandits!” Our guns point at the one we suspect. Our attack plan is ruined, but we couldn’t risk a sabotage. The accused walks away in shock, into the bandit hideout. The words spoken haunt me: “I wasn’t one of them. But now I understand their hatred.” Read and apply the Becoming Leader of the Bandits rules for the bandit module on page 17 of this rulebook.
If the betrayer is exiled, follow normal exile rules for the betrayer and read the following text aloud: “You! You’re one of the bandits!” Our guns point at the guilty party. In my barrel’s sights, I see telling eyes that confirm we’re right. The betrayer! “I… am sorry.” The betrayer walks away, not toward the bandit hideout, but toward the horizon. Might they change their ways?
After the special Exile Phase, unless the game is over, read the following aloud: The whole ordeal has us all shaken up. We decide to go home and work on plan B. There’s no reason to face them on their home turf. Let’s just make sure they’ll never cross our territory ever again. Place all survivors from the Bandit Hideout belonging to non-exiled players back at the colony.
At the beginning of the next round, remove Special Main Objective B2 card from the game and place the Special Main Objective B3 card on the colony board. You may now continue the game with Special Main Objective Card B3.
Bandit Betrayer Victory Story
If the betrayer wins the game when special Main Objective B2 is completed, the betrayer should read the following text aloud:
“Alright, are we ready?” I can hardly hold back my smile. Their doubt about this plan having been quelled, we march forward. I lag behind, just as I had suggested. My fellow survivors creep forward. A little closer. A little closer. Suddenly, I fire two shots into the air. The signal! Out of every crevice of our shanty town, my fellow bandits charge forward, ambushing those fools. They don’t last long. The smile takes over my face as I inspect their bullet-riddled bodies. At last, our plan is at hand. We can destroy that wretched colony for good!
Credits
Credits
- Game Designers: Isaac Vega, Jon Gilmour
- Producer: Colby Dauch
- Illustrator: Fernanda Suarez, Joshua Panelo of Gunship Revolution
- Content Design: Joseph Ellis
- Writers: Mr. Bistro, Jerry Hawthorne, Colby Dauch
- Graphic Designers: David Richards, Peter Wocken
- Editors: Jonathan Liu, Nate Rethorn, Timothy John Meyer, Jack Fleming
- Lead Playtesters: James Sitz, Joseph Ellis
Expansions for
Dead of Winter: The Long Night

Dead of Winter: Giggles
2019
A birthday clown promo bringing Giggles to the Dead of Winter series.
100
minutes
View expansion

Dead of Winter: Meryl Wolfe
2017
Add journalist Meryl Wolfe to the Dead of Winter series
100
minutes
Medium

View expansion
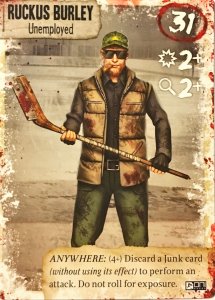
Dead of Winter: Ruckus Burley
2017
Add Ruckus Burley and a new Crossroads card to Dead of Winter
120
minutes
Medium Heavy
View expansion
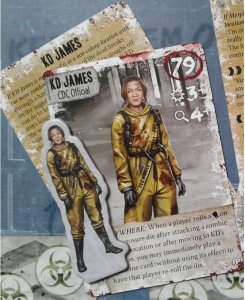
Dead of Winter: KD James
2017
Add CDC Official KD James to your Dead of Winter collection.
100
minutes
Medium
View expansion
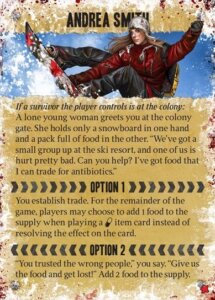
Dead of Winter: Andrea Smith
2015
A 2015 promo featuring a new Crossroads Card for Dead of Winter
100
minutes
Medium
View expansion
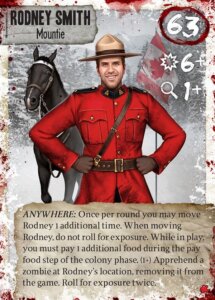
Dead of Winter: Rodney Smith
2016
A 2016 Dead of Winter promo featuring Rodney Smith and a new Crossroads card
100
minutes
Medium
View expansion
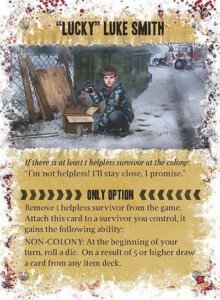
Dead of Winter: Lucky Luke Smith
2014
A promotional Crossroads card from the Dead of Winter series
100
minutes
View expansion

Dead of Winter: Rich Sommer
2016
A 2016 Dead of Winter promo featuring a new character and Crossroads card.
100
minutes
View expansion
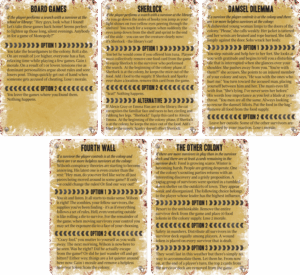
Dead of Winter: BGG Crossroads Promo Cards
2017
Five community-created Crossroads cards in an officially printed promo pack.
210
minutes
Medium
View expansion
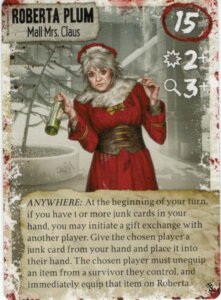
Dead of Winter: Roberta Plum
2015
Add a new Crossroads Card to your Dead of Winter game.
100
minutes
Medium
View expansion
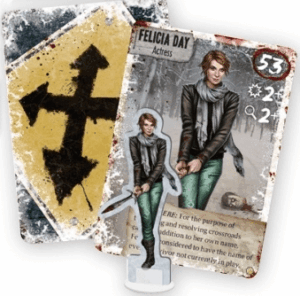
Dead of Winter: Felicia Day
2015
A 2015 promo adding a character, standee, and Crossroads Card
100
minutes
Medium
View expansion

Dead of Winter: Warring Colonies
2017
Two colonies clash in a tense fight for territory amid a frozen apocalypse.
120
minutes
Medium Heavy
View expansion

Dead of Winter: Kodiak Colby
2014
Add Kodiak Colby, a new character and promotional content to your game.
100
minutes
Medium
View expansion
