
Runebound (Third Edition)
2015
Choose a hero, explore Terrinoth, and pursue quests in a fantasy adventure against a dragon or an undead king.
180
minutes
2 - 4
player(s)
14+
Medium


About this board game
Runebound (Third Edition) is a fantasy adventure board game for 2–4 players, with games lasting about 180 minutes. Set in the realm of Terrinoth, it invites each player to take the role of one of six heroes and embark on a dangerous journey.
Terrinoth faces a growing threat as evil awakens once more. Depending on the scenario, you may need to confront Margath the Dragonlord or stop the undead menace led by Vorakesh, the Corpse King. Only the heroes have a chance of preventing the realm from being consumed by darkness.
Two distinct scenarios shape your adventure, offering different challenges and goals. Along the way, explore lost ruins and forgotten forests, take on quests across the realm, and face the dangers that stand between you and victory.
- Play as one of six heroes, from spellcasting mages to powerful warriors.
- Customize your character with more than one hundred different skills and assets.
- Experience new adventure and story cards tied to each scenario.
- Challenge a dragon or battle the undead in the fantasy world of Terrinoth.
The combination of scenario-specific cards, quests, exploration, and character customization gives every game a distinct sense of adventure. Your chosen hero and the skills and assets you develop help shape the journey as you seek to overcome the threat facing the realm.
Whether you are facing a dragon or outwitting an undead king, Runebound offers an expansive fantasy experience for players ready to venture into lost places, accept dangerous quests, and defend Terrinoth from the darkness.

Board Game Rules for
Runebound (Third Edition)
Introduction
Runebound is an adventure game set in the realm of Terrinoth. It is a dangerous place that is home to powerful wizards, mighty warriors, and noble barons. But only the greatest hero will become a legend and live forever in the hearts and minds of the people of Terrinoth.
Game Overview
Each player controls a hero who undertakes epic quests, searches for priceless artifacts, and fights monstrous beasts. Heroes start the game with no assets and little gold, but they grow in power and wealth as the game progresses.
Each scenario has its own narrative and victory conditions. In the two scenarios included in this box, players compete against each other, racing to defeat the villain and win the game.
You, the Hero
When this rulebook uses the word “you,” it refers to both the active player and his or her hero. The hero and the player are inseparable. The active player is the player who is currently taking his or her turn.
A Troubled Realm
It is a time for heroes.
An evil wind rises, and the first gusts of a great darkness blow. Beyond the Ru Plains, the demonic energies of an ancient enemy have begun to stir. In the Realm of Mist, the malevolent plots of the undying betrayer begin to take form. Sinister things awaken in deep places, and feral beasts of the nameless wild grow ever more daring and numerous.
A great kingdom once ruled this land, but now only a few far-flung baronies reluctantly stand against the stygian forces that would engulf the remnants of its people.
Terrinoth is a realm of deep forests and rolling plains–a land where majestic mountains feed great rivers and hide lost vales. In lonely places, windswept ruins and forgotten shrines stand as fading reminders of splendors long past.
It is a land of legend. The earth remembers the march of glorious banners and brave deeds; it whispers of the valor of those who vanquished the darkness of the past. Its silent song kindles the embers of hope in those who would stand against the endless night.
For forgotten magics and lost legacies wait to be rediscovered by those brave enough to seek them.
Components


- 1 Game Board
- 1 Rules Reference
- 6 Hero Cards (Double-sided)
- 6 Plastic Figures
- 120 Adventure Cards:
- 40 Combat
- 40 Exploration
- 40 Social
- 5 Terrain Dice (5 Blank Dice & 1 Sticker Sheet)
- 27 Adventure Gems:
- 9 Combat
- 9 Exploration
- 9 Social
- 20 Story Cards
- 2 Scenario Cards (Double-sided)
- 60 Combat Tokens:
- 18 Hero
- 34 Asset
- 8 Enemy
- 1 Time Token (Double-sided)
- 2 Villain Tokens
- 6 Story Quest Tokens (Double-sided)
- 60 Skill Cards
- 60 Asset Cards
- 24 Gold Tokens:
- 10 “3” Gold
- 14 “1” Gold
- 36 Damage Tokens:
- 11 “3” Damage
- 25 “1” Damage
- 24 Story Tokens (Double-sided)
Assembling Your Dice
Included in Runebound are five blank terrain dice and one sticker sheet. To assemble the dice, remove the stickers from the sticker sheet and carefully place them on the six different faces of each die. Make sure that each die has one of each of the six different stickers on it.

Game Setup
- Place the game board in the center of the play area. Players can sit around the board in whatever order they wish. Place one adventure gem faceup on each of the matching hexes on the board (purple is social, green is exploration, and orange is combat).

- Sort the remaining tokens by type to create the token bank.

- Choose a scenario. For your first game, we recommend playing The Ascendance of Margath scenario. Shuffle the corresponding story deck (the cards have art of the scenario’s villain on them) and return the other story cards to the box. Read both sides of the scenario card, and follow any setup rules listed.

- Separate the sixty non-scenario adventure cards into three decks based on their card backs. Shuffle in the adventure cards associated with the chosen scenario (as indicated by the villain art located on the bottom right of the card), and return the adventure cards from the other scenario to the box. This will leave you with 30 cards in each deck.

- Randomly determine a player to become the first player. Starting with the first player and proceeding clockwise (this is called turn order), each player chooses a hero.
Each hero card is double-sided and starts the game with the side that has a setup ability faceup.
Each player takes gold from the token bank equal to his or her starting gold and the combat tokens associated with his or her hero.

- Shuffle the skill deck. In turn order, each player draws skill cards equal to his or her hero’s maximum hand size.

- Place heroes on the map. In turn order, players place their heroes on a shrine, stronghold, or town (as shown on the hero’s card) of their choice.

- Resolve setup ability. In turn order, players resolve the setup ability on their hero cards. Then each player flips his or her hero card over to the opposite side, which has special abilities and attributes that are used for the rest of the game.
Setup Example: Elder Mok’s setup ability reads “Gain 1 trophy.” To gain a trophy, he draws the top card of any adventure deck and places it facedown next to his hero sheet. Trophies will be further explained on page 10.

- Prepare the market. Shuffle the asset deck and deal three cards faceup into each of the four markets on the side of the board (Dawnsmoor, Forge, Riverwatch, and Tamalir).

- Place the time token on the first space of the time track, which is located along the edge of the game board.
You are now ready to explore Terrinoth!

The Game Turn
Players take turns in clockwise order, starting with the first player. After all players take a turn, move the time token one space down the time track. Players continue resolving turns until a victory condition on the scenario card is fulfilled.
Actions Overview
You have three actions, represented by  , to spend during your turn. You can spend actions to do the same thing multiple times (for example, you can move three times, or train twice and then move). After you have spent all of your actions, your turn ends and the next player takes his or her turn. You can spend actions to do the following:
- Move
- Shop (city only)
- Adventure (costs two actions)
- Rest
- Train
All actions are described in detail in the following sections.
Acts 1 & 2
The time token moves through the time track twice over the course of a game. The first time through the track is known as Act 1. After the time token reaches the end of the track, the next time it moves, Act 1 ends. Return the time token to the first space of the track and flip it over to the side showing “2.” Act 2 has now begun. When the time token reaches the end of the time track for the second time, follow the instructions on the scenario card.
Story Cards
There are ten story cards for each scenario, though you will see only up to eight of them each game. Whenever the time token reaches a story space, draw the top card of the story deck.

Whenever you draw a story card, follow the instructions on the card. If it is not labeled as a “Story Quest,” discard it after resolving its effects.
If it is a “Story Quest,” the card has ongoing effects. You must be in the hex outlined in red on the card in order to interact with it. Place the card in the lowest-numbered empty space at the top of the board, and place the story quest token (that matches the numbered space) in the hex indicated on the card. This makes it easy to see where you need to be in order to interact with the card.


Refreshing Adventure Gems
When the time token reaches a gem refresh space (the 6th and 12th spaces of the time track), refresh the adventure gems on the board by flipping them faceup. Do not refresh any gems that are in the same hex as a hero.

Victory Conditions
Each scenario has its own victory conditions. Read the scenario card before starting the game to familiarize yourself with the victory conditions. In The Ascendance of Margath, you will collect lore tokens (these are story tokens) that weaken Margath. The first player to defeat Margath wins the game, but if no one stops Margath from destroying Tamalir, all players lose!
Move
You can spend one action to move. When you move, you can either move into an adjacent hex or roll terrain dice equal to your speed.

Each terrain die has various terrain symbols on it, and each hex on the board is one specific type of terrain. Small patches of other terrain (such as the shore around a lake) should be ignored when determining what terrain a hex is.
When you roll dice to move into a new hex, for each hex you want to move into, you must spend one die that has a symbol on it that matches the terrain of that hex. Wilds match all terrain.

Exerting
Many special abilities require a hero to exert in order to use them. To exert, discard 1 skill card from your hand. There is no limit to the number of times you can exert, other than the number of skill cards you have in your hand. Additionally, you can always exert to reroll 1 of your terrain dice.

Movement Rules
- Moving into Cities: You can use any terrain symbol to move into a city hex. City hexes are marked by banners and art. There are four cities: Dawnsmoor, Forge, Riverwatch, and Tamalir.
- Roads and Bridges: If you are already in a hex with a road or bridge, then you can spend any die to move into an adjacent hex along the road or across the bridge. You do not have to match the terrain of the hex you are moving into.
- Crossing Rivers: Rivers are blue lines that run between the edges of hexes and block movement. You cannot move across a river by matching the terrain on the other side of the river. Instead, you must spend one die with a water or wild symbol on it to cross a river.

Movement Example: Lyssa moves and rolls three terrain dice. She has the following results: mountain/water, hills/plains, and wild.
She uses the mountain/water to move into Mennara’s Teeth, the hills/plains to move into the Riverlands, and the wild to move into the Gardens of Tarn.

Rest
You can spend one action to rest. If you rest in a city, town, shrine, or stronghold, heal all damage.
If you rest in the wilderness (any hex outside of a city, town, shrine, or stronghold), roll five terrain dice. Heal one damage for each result that has a terrain symbol matching the hex you are in.
Rest Example: Elder Mok rests in the Wyrmwood, which is a forest hex, and rolls the following:

He heals three damage: two from the forest results and one from the wild.
Train
You can spend one action to train. Draw skill cards equal to your maximum hand size from the skill deck and add them to your hand. Then discard down to your maximum hand size. This allows you to refill your hand with skill cards and find new abilities to learn. Using skill cards is explained in detail later.

Shop
If you are in a city, you can spend one action to shop. Each city has a market, and that market has three asset cards available. Buying new assets is an important step in making sure that you are powerful enough to defeat the villain.
To shop, draw the top card of the asset deck and add it to your city’s market. There are now four cards in the market, and you must either buy or discard 1 asset card from the market. This means that there are always three assets left in the market after each shop action.
To buy an asset, pay gold equal to its cost and then take the asset card. Many assets also come with a combat token. When you buy the asset card, you also take the matching token, which is labeled with a three-digit code (such as B05).


Combat Asset Tokens: Weapons (red), Clothing (blue), Equipment (green)
While shopping, you can also sell any assets you already have before purchasing. To sell an asset, discard its card and gain gold equal to its cost.
Shop Example: Laurel of Bloodwood wants to buy the 9-cost Truesteel Axe, but she only has 4 gold. She decides to sell her Hunting Spear, which has a cost of 5, and gains 5 gold. Now she has enough to buy the Truesteel Axe! She takes combat token A06 along with the card.
Asset Limitations
A hero can have only one asset of each type at the same time. There are five different types and each card’s type is listed on the bottom of the card: weapon, clothing, equipment, movement, and goods. If you gain a second asset of the same type, you must immediately discard one of the two.

Adventure Action
If you are in the same hex as a faceup adventure gem, you can spend two actions to adventure. Flip the adventure gem facedown and draw one adventure card from the matching adventure deck. There are three different adventure decks, and players can gain gold and trophies from each one:
- Combat (
 )
- Exploration (
 )
- Social (
 )
There are three different types of cards that appear in all three adventure decks:
- Event cards are primarily found in the deck and provide you with a choice between two options.
- Quest cards are primarily found in the deck and are resolved in specific hexes.
- Enemy cards are primarily found in the deck and give you a foe to fight.
Resolving these cards is explained in detail later.
Trophies & Skills
Adventuring is the heart of the game. Each adventure card is an event, quest, or enemy. The following sections explain how to resolve each type and take it as a trophy.
Facedown adventure cards are trophies and can be spent to learn skill cards in your hand. Skills give you new abilities to use and make you more powerful. You can learn a skill before or after spending an action on your turn.
Trophies: Combat (), Exploration (), Social ()

To learn a skill, spend trophies equal to its cost: one trophy per orb, matching the trophy to the orb. You can spend any type of trophy for a gray orb.
After you learn a skill, place it faceup in front of you. Its abilities and bonuses can now be used.

Skill Limitations
Each skill card is associated with one of three attributes. You can have only a number of learned skills of each type (body, mind, spirit) equal to or less than your current attribute values. If you ever have more learned skills than an attribute, you must immediately discard learned skill cards of that type until you have an equal number.

Event Cards
When you draw an event, read the entire card aloud and then choose one of the two options to resolve. Many cards require the hero to pass an attribute test to take the card as a trophy.
You can always pick either option on an event, even if one of the options will have no effect. You must resolve as much of the effect as possible.

Attribute Tests
Many events, and some quests, enemies, skills, and assets, require you to test one of your three attributes: body ( ), mind (
 ), or spirit (
 ).

To test an attribute, reveal a number of cards from the top of the skill deck equal to your stats in that attribute, plus or minus any listed modifiers (such as +1 or –1). Some skill cards have success symbols on them. If you reveal at least one success symbol, the test succeeds and you continue resolving the card.

If you do not reveal any successes, then the test fails. If it is an event card, immediately stop resolving the card and discard it.
After revealing cards for the attribute test, but before applying the results, you can exert to reveal one extra card from the skill deck. You can continue to exert as long as you have skill cards to spend, resolving each exertion one at a time.
Test Example: Master Thorn draws “Helpful Ally” and decides to test mind. He has a mind of 3, so he reveals 3 cards from the skill deck. None of them have a success symbol, so Master Thorn exerts by discarding 1 skill card from his hand. He then reveals 1 more card from the skill deck. This one has a success symbol, so he takes “Helpful Ally” as a trophy, turning it facedown in front of him.
After resolving the test, all skill cards revealed from the deck are discarded. If the skill deck is ever empty and you need to draw or reveal cards from it, shuffle the discard pile to form a new deck.
Quest Cards
When you draw a quest, place it faceup in front of you. There is no limit to the number of quests you can have.
Each quest is tied to one or more hexes on the map, outlined in red on the quest card. To complete the quest, you must go to one of these hexes and follow the instructions listed in bold above the map.
Each quest has multiple outcomes. To resolve an outcome, fulfill one of the requirements listed under the map and then match that requirement to its outcome using the Roman numerals. Some outcomes instruct you to discard the card; you do not take the card as a trophy. Other outcomes read “No bonus,” which means you only take the card as a trophy.

Exploring
Many quests require you to explore. To explore, roll terrain dice equal to your speed. Like moving, each die can only be spent to match a single terrain symbol. Treat a wild result as any terrain type; only a wild result can match a wild requirement. If you spend enough dice to match all of the terrain symbols on the desired outcome, then you resolve that outcome and take the quest as a trophy.

Questing Example: Laurel of Bloodwood has the quest “The Twisted Path.” She travels to one of the two hexes in the Greenwood and spends an action to explore the hex. She rolls the following:

Laurel can either spend the wild die to resolve the “Wander aimlessly” outcome or exert to reroll one of the dice. She doesn’t want to, however, so she spends another action to explore again. She rolls the following:

This is a great roll! She could spend these dice to trigger any of the outcomes. She chooses to “Discover a buried artifact,” gains 3 gold, and takes the quest as a trophy.
Enemy Cards & Combat Setup
When you draw an enemy, you engage it in combat. The player to your right controls the enemy, casting tokens and making all choices for it. This allows other players to begin taking their turns while combat is resolving, if they wish.
Before combat, you and your foe each collect your own combat tokens. This includes the combat tokens from your hero plus any extra tokens you have from assets.
Each enemy uses the following combat tokens:


At the start of Act 2, enemies become master enemies and also use the following token for the rest of the game:

Villains are master enemies, but they each have a unique seventh token that they always use, as shown in the lower-left corner of their scenario card.
Rounds of Combat
Each round of combat begins by casting combat tokens. To cast tokens, shake them like dice or toss them like coins.
After tokens are cast, you and your foe alternate taking combat actions by spending the combat symbols on your tokens. While the large symbol can be spent, the small symbol on each token is only a reference for what appears on the other side.
The combatant with initiative takes the first action. Initiative is given to the player who has the most tokens with faceup gold symbols. If tied, the attacker (the hero that initiated combat) goes first.

Once all tokens are spent or both players pass, that round of combat ends. If neither combatant was defeated during the round of combat, then both players collect all of their tokens and start a new round.
Combat Actions
- (Hero only) Deal physical damage: Spend any number of
 symbols to deal physical damage equal to the total value of spent. The symbols can be spent from multiple tokens.
- (Hero only) Deal magic damage: Spend any number of
 symbols to deal magic damage equal to the total value of spent. The symbols can be spent from multiple tokens.
- (Enemy only) Deal enemy damage: Spend any number of
 symbols to deal enemy damage equal to the total value of spent. The symbols can be spent from multiple tokens.
- Use agility: Spend 1
 symbol to either flip one of your unspent tokens to its other side or force your foe to recast one of his unspent tokens (your choice).
- Trigger a surge ability: Surge abilities cost a variable number of
 symbols. Spend a number of symbols equal to the cost of a surge ability to resolve it. Each surge ability can be used only once during each round of combat.
- Double a symbol: Stack one of your unspent tokens on top of 1
 symbol. The symbols stacked on top of the are considered to be doubled. When the symbols on top are spent, the token is also removed. You cannot stack more than one token on another.
Stacking Example: If you stack a 2 on a , you now have 4 to spend during a future combat action.
You cannot recast or flip a token that has another token on top of it. If you recast or flip the token on top, it returns to the top of the token.
Shields
Whenever you are about to take damage during combat, you can spend any number of  symbols to block an equal amount of damage. This does not take a combat action and can be used against any type of damage.
Passing
If you do not wish to perform a combat action, you may pass. If you pass, you cannot perform any more combat actions during this round of combat, but you can still spend symbols. If you have no tokens left to spend, or all of your unspent tokens are dashes which have no inherent ability (marked with the  symbol), then you must pass.
Recasting & Flipping Tokens
To recast a token, you cast and randomize it like normal.
To flip a token, you turn it over to its opposite side.
Defeat & Retreating
Defeat
You and your foe will deal damage to each other during combat. Track damage with damage tokens. When a combatant has damage equal to its health, that combatant is defeated and combat ends.

If you defeat an enemy, resolve the reward listed on the bottom of the card and then take it as a trophy.
If you are defeated, discard the enemy without taking it as a trophy or resolving its reward. While defeated, you may only spend actions to rest. If you are able to heal at least 1 damage from your hero, then you are no longer defeated and can perform any action you wish.
Retreating
After you and your foe finish combat actions, before the next round of combat begins, you have the option to retreat. To retreat, roll one terrain die. You may spend that die to move, if able. If you move out of the hex you are fighting in, combat ends and the enemy is discarded. If you do not or cannot move out of the hex, then the retreat fails and a new round of combat begins.
Combat Example
Lord Hawthorne engages in combat with a Dreadbringer.

Each player collects his or her combat tokens and casts them. Because Lord Hawthorne has two initiative tokens and the attacker wins ties, he takes the first combat action.

Combat Action #1: Lord Hawthorne spends his and chooses to flip his into 2.

Combat Action #2: Normally, it would be the Dreadbringer’s opportunity to take a combat action, but Lord Hawthorne decides to use his once per combat ability and take a second combat action in a row. He spends his 3 to deal 3 physical damage. In response, the Dreadbringer spends the to block 1 of the and takes 2 damage.
The Dreadbringer places 2 damage tokens on its enemy card.

Combat Action #3: The Dreadbringer stacks one of its on top of the , doubling it.

Combat Action #4: Lord Hawthorne spends his to trigger the surge ability on the Staff of Light. He flips his foe’s stacked to a .

Combat Action #5: The Dreadbringer spends his to flip his to a .

Combat Action #6: Lord Hawthorne has no tokens left and passes. The Dreadbringer now takes another action and spends his to deal 1 damage to Lord Hawthorne.

Combat Action #7: The Dreadbringer has only 2 left, so it triggers its surge ability to heal 2 damage and then passes.

The round is now over. If Lord Hawthorne decides to stay in the battle, then he and his foe will recast all of their tokens and begin a new round of combat. If he decides to retreat, then he rolls a terrain die in an attempt to flee the fight.

Additional Rules
Below are a few more rules and terminology that you should be familiar with.
Bartering
If heroes are in the same hex, they are free to exchange gold or assets during either of their turns. This does not cost any actions.
Challenges
Some abilities allow heroes to challenge each other in combat. The hero who initiated the challenge is the attacker, and follows the same rules as fighting an enemy, except both heroes have the option to retreat each round (starting with the attacker).
Delayed Heroes
When a hero becomes delayed, set its hero figure on its side. A delayed hero must spend his or her next action to stand back up and become undelayed.
Goods
Goods are a special type of asset that have a trade value. Whenever a goods is traded, discard it; the hero who traded it gains gold equal to its trade value.
Rune Magic
The power to draw magical power from the Turning with nothing but a wizard’s own will is a very rare gift. Timmorran did this better than anyone had done before him, and likely better than anyone ever will. Late in life, Timmorran channeled his power into a great orb so that after he passed, his magic would remain.
But Timmorran was forced to shatter the orb when Waiqar the Betrayer attempted to claim it for himself. Before he died, the great wizard instructed his most trusted acolyte, Lumii Tamar, to secretly distribute the shards across the world to the wise and to the virtuous. To the healers, and to the humble.
Those fragments of pure magic, sparkling like blue gemstones, became known as the Stars of Timmorran. A wizard can draw upon the power of a Star to do great things and craft potent artifacts. The dragonlords seized many of the Stars, and broke some into small slivers, inscribing mystic runes upon them. The magic of each runebound shard has been focused and refined so that even those without magical training may unleash their unique power.
The Empty Throne
When king Falladir and his sons were killed in the Battle of the Ashen Field during the First Darkness, the line of House Penacor came to its end. Cedric Daqan, Falladir’s friend and advisor, reluctantly accepted the crown from his peers, as he did not desire its glory or power. During his reign, Daqan insisted that no king should follow him, and he often ceded his powers and decisions to the Council of Barons. It was his command that the council replace him upon his death.
The king vanished during an ambush a few years before the Second Darkness, and with heavy hearts the council assumed full governing power over the realm which they now called Terrinoth.
The body of the king was never found, so the barons could not bring themselves to remove his throne from the council chamber. It was believed that one day, in a time of great need, Daqan would return and claim the throne once more.
Over time, squabbles among the barons led to intrigue and strife, and Baron Rickheart Soulstone, the Usurper King, ensnared the throne and disbanded the Council of Barons. Not a century later, however, the Soulstone dynasty was destroyed by the Dragon Wars and Daqan’s throne was empty once more. After the Third Darkness passed the Council of barons was reinstated, and that second convocation of barons rule Terrinoth to this day.
In the great council chamber of Archaut, Daqan’s throne still sits empty.
The Free Cities
Dawnsmoor
During the Second Darkness, bands of refugees and mercenaries clustered around a small farming village on the shores of the Flametail River. Over time, the settlement became the Free City of Dawnsmoor. It is governed by the Assembly (consisting of mercenaries, merchant masters, tribal chieftains, and anyone of importance who happens to be in the city whenever the Assembly is convened).
Dawnsmoor lacks city walls or many of the other features common to other cities, and the community is ever evolving as nomadic tribes, mercenary companies, elven nobles from the Aymhelin, and exotic caravans from far away lands arrive and depart. One constant is a large population of elves who, although still in the minority, have influenced much of the city’s culture and traditions.
Forge
Before the Dragon Wars, the city of Yrthwright’s Forge was a great dwarven hold in the slopes of the sacred mountain. During the war, it was conquered by the dragonlord Avox, who enslaved dwarves and humans to work the mines deep within the mountain.
As the tide of war turned, Lady Ysbet led a daring assault on the hold and slew Avox. The freed slaves begged Ysbet to stay and help them rebuild, so she ruled the burgeoning hold for many years until her death. Today, there is an underlying tension between the descendants of the dwarves who were displaced during the war and the descendants of the humans who were brought to Forge against their will. Many of the dwarves view the humans as outsiders, or worse, invaders.
Due to the immortal flames that burn within the mountain, Forge is the home of the finest smiths and craftsmen in all of Terrinoth, most of whom are dwarven. Unlike the other Free Cities, Forge is not required to send soldiers when summoned by the Council of Barons–instead they are required to supply those soldiers with weapons and armor.
Riverwatch
Riverwatch is located at the confluence of three rivers. It has a sizable harbor which is frequented by traders from the East, and overlooked by a great statue called the Old Man. Some believe that the Old Man is King Daqan, forever guarding the realm. Others say that the Old Man is the Great Sage, holding aloft the light of knowledge. There are a dozen other tales—everyone knows at least one person who claims that his or her very own ancestor was the inspiration for the statue.
Riverwatch is also protected by a tall, grey stone castle, called simply the Watch, which has a strategic view of the Greenwood and the Southern Plains. The Lords of the Watch command the Free City and train the city’s renowned horsemen who ride across the Southern Plains to Sundergard and beyond.
One is more likely to see the presence of orc travelers in Riverwatch than in any other settlement in Terrinoth.
Tamalir
The largest and wealthiest of the Free Cities, Tamalir is located on the banks of the Red Echo River at the crossing of the Thelsvan Highway. Tamalir was once the seat of House Penacor, its great keep the fastness of the Penacor kings. After the death of King Falladir, the city of Tamalir became the first and greatest of the Free Cities, given its charter by King Daqan himself. Over the centuries, as with the all of Terrinoth’s cities and fiefdoms, the wealth of Tamalir has slowly declined. Still, in Tamalir one may catch glimpses of the craft, culture, and richness of ages past.
Though ruled by a council of Elders, Tamalir is dominated by the Merchant Guilds. Each guildmaster vies to outdo the others with contributions to the city in the form of public works and grand follies. The Great Market Square is the heart of the city, and more commerce happens there in a day than happens in most cities in a month. Travelers from across the world may be seen on Tamalir’s streets, and coins and languages from a dozen kingdoms are traded back and forth in her many markets.
The Ascendance of Margath
Zir the Black. Baalaesh. Levirax. Margath. The dragonlords and their armies struck the fair realms without warning, burning cities and toppling dynasties.
It was Margath the Unkind that killed Trevnor Soulstone, last in the line of the Usurper Kings. It was Margath who burned Tamalir. It was Margath who struck an alliance with the Black Legion, tempting the baleful warrior clan of orcs to join the Dragons’ cause with gifts of runebound shards.
But it was Baron Rolan of Kell whom ended Margath’s reign of terror. The well-travelled youth was an elf-friend and was always on the hunt for glory and destiny. He found both in the skies above the Mountains of Despair. Riding Valera, one of the rare winged horses of the elves, Rolan met Margath in his full fury.
For hours they fought before they slew one another. Man, horse, and dragon plunged to the earth in a mortal embrace, the flame and destruction of their fall crumbling the mountainside below them.
But some whisper that both dragon and baron live, that their battle still rages beneath the Mountains of Despair. Many storms haunt those peaks, and the rumblings of the earth beneath the mountains are taken as proof by the Dread—the dragon cult—that Margath will one day rise again.
The Corpse King
A great terror stirs in the black of night.
What began as a rumor whispered only by the mad and the fearful has proven true: the dead roam the land of Terrinoth once more. Mindless, bloodthirsty creatures stalk remote villages and farmsteads, laying waste to everything in their path. Those fortunate enough to escape speak of a cloaked figure in their midst, a gaunt creature, sickly pale, but with a commanding presence who seems to control the dead, bending them to his will.
A baleful name is spoken by those brave enough to tempt death itself: “Vorakesh.”
Though he bears the staff of a necromancer, the magic he commands is unlike that of Waiqar’s sorcerers. He spreads undeath like a plague, and wherever he goes, the deceased rise to destroy the living.
Who would wish such mindless terror on the people of Terrinoth? Is it mere malice that drives him? Or is he guided by some greater purpose?
Credits
- Third Edition Game Design: Lukas Litzsinger
- Third Edition Game Development: Derrick Fuchs and Lukas Litzsinger
- Producer: Derrick Fuchs
- Inspired by the Runebound 2nd Edition Design by: Martin Wallace and Darrell Hardy
- Editing and Proofreading: Adam Baker, Sean O’Leary, and Derek Tokaz
- Graphic Design: WiL Springer with Evan Simonet and Monica Skupa
- Graphic Design Manager: Brian Schomburg
- Creative Writing: Daniel Lovat Clark and Christian T. Petersen
- Cover Art: Jesper Ejsing and Edge Studio (Antonio Mainez)
- Board Art: Jake Murray with Simon Dominic
- Interior Art: Jacob Atenzia, Alex Aparin, Jon Bosco, Anna Christenson, Guillaume Ducos, Simon Eckert, Nicholas Gregory, David Griffith, Jordan Kerbow, Matt Larson, Charlène Le Scanff, Florian Stitz, Preston Stone, Sandara Tang, Damon Westenhofer, and Joe Wilson
- Art Direction: John Taillon
- Managing Art Director: Andy Christensen
- Plastic Sculpting: Nick Miller, Ben Misenar, David Richardson, and Luigi Terzi
- Plastics Coordination: Niklas Norman
- Plastics Management: Jason Beaudoin
- Quality Assurance Coordinator: Zach Tewalthomas
- Production Management: Megan Duehn and Simone Elliott
- Production Coordination: John Britton, Jason Glawe, and Johanna Whiting
- Board Game Manager: Steven Kimball
- Executive Game Designer: Corey Konieczka
- Executive Producer: Michael Hurley
- Publisher: Christian T. Petersen
- Playtesters: Brad Andres, Samuel Bailey, Simone Biga & Chiara Bertulessi, Ian Birdsall, Sam Bolton, JC Boysha, Liz Boysha, Frank Brooks, Brandon Cooper, Joseph Corbett, Robert Crandall, John Cunningham, Nick Cyr, Andrea Dell’Agnese & Julia Faeta, Kyle Dekker, Luke Evans, Silvia Faeta, Tim & Nicole Fiscus, David Fortner, Michael Gernes, Nathan I. Hajek, Geoffrey Herman, Jessikah Holmes, Alene Horner, Jason Horner, Julien Horner, Carey Jensen, Kyle Jensen, Brian Johnson, Alexander King, David King, Morgan King, Thomas King, Justin Kemppainen, Allan Kennedy, Mark Larson, Jordan Larson, Kortnee Lewis, Scott Lewis, Andrea Marmiroli, Robert Martens, Philip McNeill, Matt Newman, Rebecca Olene, Chris Olsen, Alexandar Ortloff, Jennifer Ponder, Aliza Reisburg, Andrea Russo, Eryn Roston, George Rothrock, Catherine Shen, Mark Slabinski, Lovey the Snake, Sam Stuart, Adam Sweeny, Jackson Sweeny, Jenna Sweeny, Chris Tannhauser, Britty Ukestad, Nikki Valens, and Jonathan Ying
© 2015 Fantasy Flight Publishing, Inc.
Introduction & Overview
Introduction
Runebound is an adventure game set in the realm of Terrinoth. It is a dangerous place that is home to powerful wizards, mighty warriors, and noble barons. But only the greatest hero will become a legend and live forever in the hearts and minds of the people of Terrinoth.
Game Overview
Each player controls a hero who undertakes epic quests, searches for priceless artifacts, and fights monstrous beasts. Heroes start the game with no assets and little gold, but they grow in power and wealth as the game progresses.
Each scenario has its own narrative and victory conditions. In the two scenarios included in this box, players compete against each other, racing to defeat the villain and win the game.
You, the Hero
When this rulebook uses the word “you,” it refers to both the active player and his or her hero. The hero and the player are inseparable. The active player is the player who is currently taking his or her turn.
A Troubled Realm
It is a time for heroes.
An evil wind rises, and the first gusts of a great darkness blow. Beyond the Ru Plains, the demonic energies of an ancient enemy have begun to stir. In the Realm of Mist, the malevolent plots of the undying betrayer begin to take form. Sinister things awaken in deep places, and feral beasts of the nameless wild grow ever more daring and numerous.
A great kingdom once ruled this land, but now only a few far-flung baronies reluctantly stand against the stygian forces that would engulf the remnants of its people.
Terrinoth is a realm of deep forests and rolling plains–a land where majestic mountains feed great rivers and hide lost vales. In lonely places, windswept ruins and forgotten shrines stand as fading reminders of splendors long past.
It is a land of legend. The earth remembers the march of glorious banners and brave deeds; it whispers of the valor of those who vanquished the darkness of the past. Its silent song kindles the embers of hope in those who would stand against the endless night.
For forgotten magics and lost legacies wait to be rediscovered by those brave enough to seek them.
Components & Assembly
Components
- 1 Game Board
- 1 Rules Reference
- 6 Hero Cards (Double-sided)
- 6 Plastic Figures
- 120 Adventure Cards:
- 40 Combat
- 40 Exploration
- 40 Social
- 5 Terrain Dice (5 Blank Dice & 1 Sticker Sheet)
- 27 Adventure Gems:
- 9 Combat
- 9 Exploration
- 9 Social
- 20 Story Cards
- 2 Scenario Cards (Double-sided)
- 60 Combat Tokens:
- 18 Hero
- 34 Asset
- 8 Enemy
- 1 Time Token (Double-sided)
- 2 Villain Tokens
- 6 Story Quest Tokens (Double-sided)
- 60 Skill Cards
- 60 Asset Cards
- 24 Gold Tokens:
- 10 “3” Gold
- 14 “1” Gold
- 36 Damage Tokens:
- 11 “3” Damage
- 25 “1” Damage
- 24 Story Tokens (Double-sided)
Assembling Your Dice
Included in Runebound are five blank terrain dice and one sticker sheet. To assemble the dice, remove the stickers from the sticker sheet and carefully place them on the six different faces of each die. Make sure that each die has one of each of the six different stickers on it.
Setup
Game Setup
- Place the game board in the center of the play area. Players can sit around the board in whatever order they wish. Place one adventure gem faceup on each of the matching hexes on the board (purple is social, green is exploration, and orange is combat).
- Sort the remaining tokens by type to create the token bank.
- Choose a scenario. For your first game, we recommend playing The Ascendance of Margath scenario. Shuffle the corresponding story deck (the cards have art of the scenario’s villain on them) and return the other story cards to the box. Read both sides of the scenario card, and follow any setup rules listed.
- Separate the sixty non-scenario adventure cards into three decks based on their card backs. Shuffle in the adventure cards associated with the chosen scenario (as indicated by the villain art located on the bottom right of the card), and return the adventure cards from the other scenario to the box. This will leave you with 30 cards in each deck.
- Randomly determine a player to become the first player. Starting with the first player and proceeding clockwise (this is called turn order), each player chooses a hero.
Each hero card is double-sided and starts the game with the side that has a setup ability faceup.
Each player takes gold from the token bank equal to his or her starting gold and the combat tokens associated with his or her hero.
- Shuffle the skill deck. In turn order, each player draws skill cards equal to his or her hero’s maximum hand size.
- Place heroes on the map. In turn order, players place their heroes on a shrine, stronghold, or town (as shown on the hero’s card) of their choice.
- Resolve setup ability. In turn order, players resolve the setup ability on their hero cards. Then each player flips his or her hero card over to the opposite side, which has special abilities and attributes that are used for the rest of the game.
Setup Example: Elder Mok’s setup ability reads “Gain 1 trophy.” To gain a trophy, he draws the top card of any adventure deck and places it facedown next to his hero sheet. Trophies will be further explained on page 10.
- Prepare the market. Shuffle the asset deck and deal three cards faceup into each of the four markets on the side of the board (Dawnsmoor, Forge, Riverwatch, and Tamalir).
- Place the time token on the first space of the time track, which is located along the edge of the game board.
You are now ready to explore Terrinoth!
The Game Turn & Time Track
The Game Turn
Players take turns in clockwise order, starting with the first player. After all players take a turn, move the time token one space down the time track. Players continue resolving turns until a victory condition on the scenario card is fulfilled.
Actions Overview
You have three actions, represented by , to spend during your turn. You can spend actions to do the same thing multiple times (for example, you can move three times, or train twice and then move). After you have spent all of your actions, your turn ends and the next player takes his or her turn. You can spend actions to do the following:
- Move
- Shop (city only)
- Adventure (costs two actions)
- Rest
- Train
All actions are described in detail in the following sections.
Acts 1 & 2
The time token moves through the time track twice over the course of a game. The first time through the track is known as Act 1. After the time token reaches the end of the track, the next time it moves, Act 1 ends. Return the time token to the first space of the track and flip it over to the side showing “2.” Act 2 has now begun. When the time token reaches the end of the time track for the second time, follow the instructions on the scenario card.
Story Cards
There are ten story cards for each scenario, though you will see only up to eight of them each game. Whenever the time token reaches a story space, draw the top card of the story deck.
Whenever you draw a story card, follow the instructions on the card. If it is not labeled as a “Story Quest,” discard it after resolving its effects.
If it is a “Story Quest,” the card has ongoing effects. You must be in the hex outlined in red on the card in order to interact with it. Place the card in the lowest-numbered empty space at the top of the board, and place the story quest token (that matches the numbered space) in the hex indicated on the card. This makes it easy to see where you need to be in order to interact with the card.
Refreshing Adventure Gems
When the time token reaches a gem refresh space (the 6th and 12th spaces of the time track), refresh the adventure gems on the board by flipping them faceup. Do not refresh any gems that are in the same hex as a hero.
Victory Conditions
Each scenario has its own victory conditions. Read the scenario card before starting the game to familiarize yourself with the victory conditions. In The Ascendance of Margath, you will collect lore tokens (these are story tokens) that weaken Margath. The first player to defeat Margath wins the game, but if no one stops Margath from destroying Tamalir, all players lose!
Movement, Rest & Training
Move
You can spend one action to move. When you move, you can either move into an adjacent hex or roll terrain dice equal to your speed.
Each terrain die has various terrain symbols on it, and each hex on the board is one specific type of terrain. Small patches of other terrain (such as the shore around a lake) should be ignored when determining what terrain a hex is.
When you roll dice to move into a new hex, for each hex you want to move into, you must spend one die that has a symbol on it that matches the terrain of that hex. Wilds match all terrain.
Exerting
Many special abilities require a hero to exert in order to use them. To exert, discard 1 skill card from your hand. There is no limit to the number of times you can exert, other than the number of skill cards you have in your hand. Additionally, you can always exert to reroll 1 of your terrain dice.
Movement Rules
- Moving into Cities: You can use any terrain symbol to move into a city hex. City hexes are marked by banners and art. There are four cities: Dawnsmoor, Forge, Riverwatch, and Tamalir.
- Roads and Bridges: If you are already in a hex with a road or bridge, then you can spend any die to move into an adjacent hex along the road or across the bridge. You do not have to match the terrain of the hex you are moving into.
- Crossing Rivers: Rivers are blue lines that run between the edges of hexes and block movement. You cannot move across a river by matching the terrain on the other side of the river. Instead, you must spend one die with a water or wild symbol on it to cross a river.
Movement Example: Lyssa moves and rolls three terrain dice. She has the following results: mountain/water, hills/plains, and wild.
She uses the mountain/water to move into Mennara’s Teeth, the hills/plains to move into the Riverlands, and the wild to move into the Gardens of Tarn.
Rest
You can spend one action to rest. If you rest in a city, town, shrine, or stronghold, heal all damage.
If you rest in the wilderness (any hex outside of a city, town, shrine, or stronghold), roll five terrain dice. Heal one damage for each result that has a terrain symbol matching the hex you are in.
Rest Example: Elder Mok rests in the Wyrmwood, which is a forest hex, and rolls the following:
He heals three damage: two from the forest results and one from the wild.
Train
You can spend one action to train. Draw skill cards equal to your maximum hand size from the skill deck and add them to your hand. Then discard down to your maximum hand size. This allows you to refill your hand with skill cards and find new abilities to learn. Using skill cards is explained in detail later.
Market & Assets
Shop
If you are in a city, you can spend one action to shop. Each city has a market, and that market has three asset cards available. Buying new assets is an important step in making sure that you are powerful enough to defeat the villain.
To shop, draw the top card of the asset deck and add it to your city’s market. There are now four cards in the market, and you must either buy or discard 1 asset card from the market. This means that there are always three assets left in the market after each shop action.
To buy an asset, pay gold equal to its cost and then take the asset card. Many assets also come with a combat token. When you buy the asset card, you also take the matching token, which is labeled with a three-digit code (such as B05).
Combat Asset Tokens: Weapons (red), Clothing (blue), Equipment (green)
While shopping, you can also sell any assets you already have before purchasing. To sell an asset, discard its card and gain gold equal to its cost.
Shop Example: Laurel of Bloodwood wants to buy the 9-cost Truesteel Axe, but she only has 4 gold. She decides to sell her Hunting Spear, which has a cost of 5, and gains 5 gold. Now she has enough to buy the Truesteel Axe! She takes combat token A06 along with the card.
Asset Limitations
A hero can have only one asset of each type at the same time. There are five different types and each card’s type is listed on the bottom of the card: weapon, clothing, equipment, movement, and goods. If you gain a second asset of the same type, you must immediately discard one of the two.
Adventures, Quests & Skills
Adventure Action
If you are in the same hex as a faceup adventure gem, you can spend two actions to adventure. Flip the adventure gem facedown and draw one adventure card from the matching adventure deck. There are three different adventure decks, and players can gain gold and trophies from each one:
- Combat ()
- Exploration ()
- Social ()
There are three different types of cards that appear in all three adventure decks:
- Event cards are primarily found in the deck and provide you with a choice between two options.
- Quest cards are primarily found in the deck and are resolved in specific hexes.
- Enemy cards are primarily found in the deck and give you a foe to fight.
Resolving these cards is explained in detail later.
Trophies & Skills
Adventuring is the heart of the game. Each adventure card is an event, quest, or enemy. The following sections explain how to resolve each type and take it as a trophy.
Facedown adventure cards are trophies and can be spent to learn skill cards in your hand. Skills give you new abilities to use and make you more powerful. You can learn a skill before or after spending an action on your turn.
Trophies: Combat (), Exploration (), Social ()
To learn a skill, spend trophies equal to its cost: one trophy per orb, matching the trophy to the orb. You can spend any type of trophy for a gray orb.
After you learn a skill, place it faceup in front of you. Its abilities and bonuses can now be used.
Skill Limitations
Each skill card is associated with one of three attributes. You can have only a number of learned skills of each type (body, mind, spirit) equal to or less than your current attribute values. If you ever have more learned skills than an attribute, you must immediately discard learned skill cards of that type until you have an equal number.
Event Cards
When you draw an event, read the entire card aloud and then choose one of the two options to resolve. Many cards require the hero to pass an attribute test to take the card as a trophy.
You can always pick either option on an event, even if one of the options will have no effect. You must resolve as much of the effect as possible.
Attribute Tests
Many events, and some quests, enemies, skills, and assets, require you to test one of your three attributes: body (), mind (), or spirit ().
To test an attribute, reveal a number of cards from the top of the skill deck equal to your stats in that attribute, plus or minus any listed modifiers (such as +1 or –1). Some skill cards have success symbols on them. If you reveal at least one success symbol, the test succeeds and you continue resolving the card.
If you do not reveal any successes, then the test fails. If it is an event card, immediately stop resolving the card and discard it.
After revealing cards for the attribute test, but before applying the results, you can exert to reveal one extra card from the skill deck. You can continue to exert as long as you have skill cards to spend, resolving each exertion one at a time.
Test Example: Master Thorn draws “Helpful Ally” and decides to test mind. He has a mind of 3, so he reveals 3 cards from the skill deck. None of them have a success symbol, so Master Thorn exerts by discarding 1 skill card from his hand. He then reveals 1 more card from the skill deck. This one has a success symbol, so he takes “Helpful Ally” as a trophy, turning it facedown in front of him.
After resolving the test, all skill cards revealed from the deck are discarded. If the skill deck is ever empty and you need to draw or reveal cards from it, shuffle the discard pile to form a new deck.
Quest Cards
When you draw a quest, place it faceup in front of you. There is no limit to the number of quests you can have.
Each quest is tied to one or more hexes on the map, outlined in red on the quest card. To complete the quest, you must go to one of these hexes and follow the instructions listed in bold above the map.
Each quest has multiple outcomes. To resolve an outcome, fulfill one of the requirements listed under the map and then match that requirement to its outcome using the Roman numerals. Some outcomes instruct you to discard the card; you do not take the card as a trophy. Other outcomes read “No bonus,” which means you only take the card as a trophy.
Exploring
Many quests require you to explore. To explore, roll terrain dice equal to your speed. Like moving, each die can only be spent to match a single terrain symbol. Treat a wild result as any terrain type; only a wild result can match a wild requirement. If you spend enough dice to match all of the terrain symbols on the desired outcome, then you resolve that outcome and take the quest as a trophy.
Questing Example: Laurel of Bloodwood has the quest “The Twisted Path.” She travels to one of the two hexes in the Greenwood and spends an action to explore the hex. She rolls the following:
Laurel can either spend the wild die to resolve the “Wander aimlessly” outcome or exert to reroll one of the dice. She doesn’t want to, however, so she spends another action to explore again. She rolls the following:
This is a great roll! She could spend these dice to trigger any of the outcomes. She chooses to “Discover a buried artifact,” gains 3 gold, and takes the quest as a trophy.
Combat
Enemy Cards & Combat Setup
When you draw an enemy, you engage it in combat. The player to your right controls the enemy, casting tokens and making all choices for it. This allows other players to begin taking their turns while combat is resolving, if they wish.
Before combat, you and your foe each collect your own combat tokens. This includes the combat tokens from your hero plus any extra tokens you have from assets.
Each enemy uses the following combat tokens:
At the start of Act 2, enemies become master enemies and also use the following token for the rest of the game:
Villains are master enemies, but they each have a unique seventh token that they always use, as shown in the lower-left corner of their scenario card.
Rounds of Combat
Each round of combat begins by casting combat tokens. To cast tokens, shake them like dice or toss them like coins.
After tokens are cast, you and your foe alternate taking combat actions by spending the combat symbols on your tokens. While the large symbol can be spent, the small symbol on each token is only a reference for what appears on the other side.
The combatant with initiative takes the first action. Initiative is given to the player who has the most tokens with faceup gold symbols. If tied, the attacker (the hero that initiated combat) goes first.
Once all tokens are spent or both players pass, that round of combat ends. If neither combatant was defeated during the round of combat, then both players collect all of their tokens and start a new round.
Combat Actions
- (Hero only) Deal physical damage: Spend any number of symbols to deal physical damage equal to the total value of spent. The symbols can be spent from multiple tokens.
- (Hero only) Deal magic damage: Spend any number of symbols to deal magic damage equal to the total value of spent. The symbols can be spent from multiple tokens.
- (Enemy only) Deal enemy damage: Spend any number of symbols to deal enemy damage equal to the total value of spent. The symbols can be spent from multiple tokens.
- Use agility: Spend 1 symbol to either flip one of your unspent tokens to its other side or force your foe to recast one of his unspent tokens (your choice).
- Trigger a surge ability: Surge abilities cost a variable number of symbols. Spend a number of symbols equal to the cost of a surge ability to resolve it. Each surge ability can be used only once during each round of combat.
- Double a symbol: Stack one of your unspent tokens on top of 1 symbol. The symbols stacked on top of the are considered to be doubled. When the symbols on top are spent, the token is also removed. You cannot stack more than one token on another.
Stacking Example: If you stack a 2 on a , you now have 4 to spend during a future combat action.
You cannot recast or flip a token that has another token on top of it. If you recast or flip the token on top, it returns to the top of the token.
Shields
Whenever you are about to take damage during combat, you can spend any number of symbols to block an equal amount of damage. This does not take a combat action and can be used against any type of damage.
Passing
If you do not wish to perform a combat action, you may pass. If you pass, you cannot perform any more combat actions during this round of combat, but you can still spend symbols. If you have no tokens left to spend, or all of your unspent tokens are dashes which have no inherent ability (marked with the symbol), then you must pass.
Recasting & Flipping Tokens
To recast a token, you cast and randomize it like normal.
To flip a token, you turn it over to its opposite side.
Defeat & Retreating
Defeat
You and your foe will deal damage to each other during combat. Track damage with damage tokens. When a combatant has damage equal to its health, that combatant is defeated and combat ends.
If you defeat an enemy, resolve the reward listed on the bottom of the card and then take it as a trophy.
If you are defeated, discard the enemy without taking it as a trophy or resolving its reward. While defeated, you may only spend actions to rest. If you are able to heal at least 1 damage from your hero, then you are no longer defeated and can perform any action you wish.
Retreating
After you and your foe finish combat actions, before the next round of combat begins, you have the option to retreat. To retreat, roll one terrain die. You may spend that die to move, if able. If you move out of the hex you are fighting in, combat ends and the enemy is discarded. If you do not or cannot move out of the hex, then the retreat fails and a new round of combat begins.
Combat Example
Lord Hawthorne engages in combat with a Dreadbringer.
Each player collects his or her combat tokens and casts them. Because Lord Hawthorne has two initiative tokens and the attacker wins ties, he takes the first combat action.
Combat Action #1: Lord Hawthorne spends his and chooses to flip his into 2.
Combat Action #2: Normally, it would be the Dreadbringer’s opportunity to take a combat action, but Lord Hawthorne decides to use his once per combat ability and take a second combat action in a row. He spends his 3 to deal 3 physical damage. In response, the Dreadbringer spends the to block 1 of the and takes 2 damage.
The Dreadbringer places 2 damage tokens on its enemy card.
Combat Action #3: The Dreadbringer stacks one of its on top of the , doubling it.
Combat Action #4: Lord Hawthorne spends his to trigger the surge ability on the Staff of Light. He flips his foe’s stacked to a .
Combat Action #5: The Dreadbringer spends his to flip his to a .
Combat Action #6: Lord Hawthorne has no tokens left and passes. The Dreadbringer now takes another action and spends his to deal 1 damage to Lord Hawthorne.
Combat Action #7: The Dreadbringer has only 2 left, so it triggers its surge ability to heal 2 damage and then passes.
The round is now over. If Lord Hawthorne decides to stay in the battle, then he and his foe will recast all of their tokens and begin a new round of combat. If he decides to retreat, then he rolls a terrain die in an attempt to flee the fight.
Additional Rules
Additional Rules
Below are a few more rules and terminology that you should be familiar with.
Bartering
If heroes are in the same hex, they are free to exchange gold or assets during either of their turns. This does not cost any actions.
Challenges
Some abilities allow heroes to challenge each other in combat. The hero who initiated the challenge is the attacker, and follows the same rules as fighting an enemy, except both heroes have the option to retreat each round (starting with the attacker).
Delayed Heroes
When a hero becomes delayed, set its hero figure on its side. A delayed hero must spend his or her next action to stand back up and become undelayed.
Goods
Goods are a special type of asset that have a trade value. Whenever a goods is traded, discard it; the hero who traded it gains gold equal to its trade value.
World of Terrinoth & Scenarios Lore
Rune Magic
The power to draw magical power from the Turning with nothing but a wizard’s own will is a very rare gift. Timmorran did this better than anyone had done before him, and likely better than anyone ever will. Late in life, Timmorran channeled his power into a great orb so that after he passed, his magic would remain.
But Timmorran was forced to shatter the orb when Waiqar the Betrayer attempted to claim it for himself. Before he died, the great wizard instructed his most trusted acolyte, Lumii Tamar, to secretly distribute the shards across the world to the wise and to the virtuous. To the healers, and to the humble.
Those fragments of pure magic, sparkling like blue gemstones, became known as the Stars of Timmorran. A wizard can draw upon the power of a Star to do great things and craft potent artifacts. The dragonlords seized many of the Stars, and broke some into small slivers, inscribing mystic runes upon them. The magic of each runebound shard has been focused and refined so that even those without magical training may unleash their unique power.
The Empty Throne
When king Falladir and his sons were killed in the Battle of the Ashen Field during the First Darkness, the line of House Penacor came to its end. Cedric Daqan, Falladir’s friend and advisor, reluctantly accepted the crown from his peers, as he did not desire its glory or power. During his reign, Daqan insisted that no king should follow him, and he often ceded his powers and decisions to the Council of Barons. It was his command that the council replace him upon his death.
The king vanished during an ambush a few years before the Second Darkness, and with heavy hearts the council assumed full governing power over the realm which they now called Terrinoth.
The body of the king was never found, so the barons could not bring themselves to remove his throne from the council chamber. It was believed that one day, in a time of great need, Daqan would return and claim the throne once more.
Over time, squabbles among the barons led to intrigue and strife, and Baron Rickheart Soulstone, the Usurper King, ensnared the throne and disbanded the Council of Barons. Not a century later, however, the Soulstone dynasty was destroyed by the Dragon Wars and Daqan’s throne was empty once more. After the Third Darkness passed the Council of barons was reinstated, and that second convocation of barons rule Terrinoth to this day.
In the great council chamber of Archaut, Daqan’s throne still sits empty.
The Free Cities
Dawnsmoor
During the Second Darkness, bands of refugees and mercenaries clustered around a small farming village on the shores of the Flametail River. Over time, the settlement became the Free City of Dawnsmoor. It is governed by the Assembly (consisting of mercenaries, merchant masters, tribal chieftains, and anyone of importance who happens to be in the city whenever the Assembly is convened).
Dawnsmoor lacks city walls or many of the other features common to other cities, and the community is ever evolving as nomadic tribes, mercenary companies, elven nobles from the Aymhelin, and exotic caravans from far away lands arrive and depart. One constant is a large population of elves who, although still in the minority, have influenced much of the city’s culture and traditions.
Forge
Before the Dragon Wars, the city of Yrthwright’s Forge was a great dwarven hold in the slopes of the sacred mountain. During the war, it was conquered by the dragonlord Avox, who enslaved dwarves and humans to work the mines deep within the mountain.
As the tide of war turned, Lady Ysbet led a daring assault on the hold and slew Avox. The freed slaves begged Ysbet to stay and help them rebuild, so she ruled the burgeoning hold for many years until her death. Today, there is an underlying tension between the descendants of the dwarves who were displaced during the war and the descendants of the humans who were brought to Forge against their will. Many of the dwarves view the humans as outsiders, or worse, invaders.
Due to the immortal flames that burn within the mountain, Forge is the home of the finest smiths and craftsmen in all of Terrinoth, most of whom are dwarven. Unlike the other Free Cities, Forge is not required to send soldiers when summoned by the Council of Barons–instead they are required to supply those soldiers with weapons and armor.
Riverwatch
Riverwatch is located at the confluence of three rivers. It has a sizable harbor which is frequented by traders from the East, and overlooked by a great statue called the Old Man. Some believe that the Old Man is King Daqan, forever guarding the realm. Others say that the Old Man is the Great Sage, holding aloft the light of knowledge. There are a dozen other tales—everyone knows at least one person who claims that his or her very own ancestor was the inspiration for the statue.
Riverwatch is also protected by a tall, grey stone castle, called simply the Watch, which has a strategic view of the Greenwood and the Southern Plains. The Lords of the Watch command the Free City and train the city’s renowned horsemen who ride across the Southern Plains to Sundergard and beyond.
One is more likely to see the presence of orc travelers in Riverwatch than in any other settlement in Terrinoth.
Tamalir
The largest and wealthiest of the Free Cities, Tamalir is located on the banks of the Red Echo River at the crossing of the Thelsvan Highway. Tamalir was once the seat of House Penacor, its great keep the fastness of the Penacor kings. After the death of King Falladir, the city of Tamalir became the first and greatest of the Free Cities, given its charter by King Daqan himself. Over the centuries, as with the all of Terrinoth’s cities and fiefdoms, the wealth of Tamalir has slowly declined. Still, in Tamalir one may catch glimpses of the craft, culture, and richness of ages past.
Though ruled by a council of Elders, Tamalir is dominated by the Merchant Guilds. Each guildmaster vies to outdo the others with contributions to the city in the form of public works and grand follies. The Great Market Square is the heart of the city, and more commerce happens there in a day than happens in most cities in a month. Travelers from across the world may be seen on Tamalir’s streets, and coins and languages from a dozen kingdoms are traded back and forth in her many markets.
The Ascendance of Margath
Zir the Black. Baalaesh. Levirax. Margath. The dragonlords and their armies struck the fair realms without warning, burning cities and toppling dynasties.
It was Margath the Unkind that killed Trevnor Soulstone, last in the line of the Usurper Kings. It was Margath who burned Tamalir. It was Margath who struck an alliance with the Black Legion, tempting the baleful warrior clan of orcs to join the Dragons’ cause with gifts of runebound shards.
But it was Baron Rolan of Kell whom ended Margath’s reign of terror. The well-travelled youth was an elf-friend and was always on the hunt for glory and destiny. He found both in the skies above the Mountains of Despair. Riding Valera, one of the rare winged horses of the elves, Rolan met Margath in his full fury.
For hours they fought before they slew one another. Man, horse, and dragon plunged to the earth in a mortal embrace, the flame and destruction of their fall crumbling the mountainside below them.
But some whisper that both dragon and baron live, that their battle still rages beneath the Mountains of Despair. Many storms haunt those peaks, and the rumblings of the earth beneath the mountains are taken as proof by the Dread—the dragon cult—that Margath will one day rise again.
The Corpse King
A great terror stirs in the black of night.
What began as a rumor whispered only by the mad and the fearful has proven true: the dead roam the land of Terrinoth once more. Mindless, bloodthirsty creatures stalk remote villages and farmsteads, laying waste to everything in their path. Those fortunate enough to escape speak of a cloaked figure in their midst, a gaunt creature, sickly pale, but with a commanding presence who seems to control the dead, bending them to his will.
A baleful name is spoken by those brave enough to tempt death itself: “Vorakesh.”
Though he bears the staff of a necromancer, the magic he commands is unlike that of Waiqar’s sorcerers. He spreads undeath like a plague, and wherever he goes, the deceased rise to destroy the living.
Who would wish such mindless terror on the people of Terrinoth? Is it mere malice that drives him? Or is he guided by some greater purpose?
Credits
Credits
- Third Edition Game Design: Lukas Litzsinger
- Third Edition Game Development: Derrick Fuchs and Lukas Litzsinger
- Producer: Derrick Fuchs
- Inspired by the Runebound 2nd Edition Design by: Martin Wallace and Darrell Hardy
- Editing and Proofreading: Adam Baker, Sean O’Leary, and Derek Tokaz
- Graphic Design: WiL Springer with Evan Simonet and Monica Skupa
- Graphic Design Manager: Brian Schomburg
- Creative Writing: Daniel Lovat Clark and Christian T. Petersen
- Cover Art: Jesper Ejsing and Edge Studio (Antonio Mainez)
- Board Art: Jake Murray with Simon Dominic
- Interior Art: Jacob Atenzia, Alex Aparin, Jon Bosco, Anna Christenson, Guillaume Ducos, Simon Eckert, Nicholas Gregory, David Griffith, Jordan Kerbow, Matt Larson, Charlène Le Scanff, Florian Stitz, Preston Stone, Sandara Tang, Damon Westenhofer, and Joe Wilson
- Art Direction: John Taillon
- Managing Art Director: Andy Christensen
- Plastic Sculpting: Nick Miller, Ben Misenar, David Richardson, and Luigi Terzi
- Plastics Coordination: Niklas Norman
- Plastics Management: Jason Beaudoin
- Quality Assurance Coordinator: Zach Tewalthomas
- Production Management: Megan Duehn and Simone Elliott
- Production Coordination: John Britton, Jason Glawe, and Johanna Whiting
- Board Game Manager: Steven Kimball
- Executive Game Designer: Corey Konieczka
- Executive Producer: Michael Hurley
- Publisher: Christian T. Petersen
- Playtesters: Brad Andres, Samuel Bailey, Simone Biga & Chiara Bertulessi, Ian Birdsall, Sam Bolton, JC Boysha, Liz Boysha, Frank Brooks, Brandon Cooper, Joseph Corbett, Robert Crandall, John Cunningham, Nick Cyr, Andrea Dell’Agnese & Julia Faeta, Kyle Dekker, Luke Evans, Silvia Faeta, Tim & Nicole Fiscus, David Fortner, Michael Gernes, Nathan I. Hajek, Geoffrey Herman, Jessikah Holmes, Alene Horner, Jason Horner, Julien Horner, Carey Jensen, Kyle Jensen, Brian Johnson, Alexander King, David King, Morgan King, Thomas King, Justin Kemppainen, Allan Kennedy, Mark Larson, Jordan Larson, Kortnee Lewis, Scott Lewis, Andrea Marmiroli, Robert Martens, Philip McNeill, Matt Newman, Rebecca Olene, Chris Olsen, Alexandar Ortloff, Jennifer Ponder, Aliza Reisburg, Andrea Russo, Eryn Roston, George Rothrock, Catherine Shen, Mark Slabinski, Lovey the Snake, Sam Stuart, Adam Sweeny, Jackson Sweeny, Jenna Sweeny, Chris Tannhauser, Britty Ukestad, Nikki Valens, and Jonathan Ying
© 2015 Fantasy Flight Publishing, Inc.
Expansions for
Runebound (Third Edition)
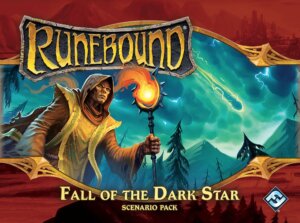
Runebound (Third Edition): Fall of the Dark Star – Scenario Pack
2016
Face a corrupted Terrinoth and search the skies for falling dark shards.
180
minutes
Medium Heavy

View expansion
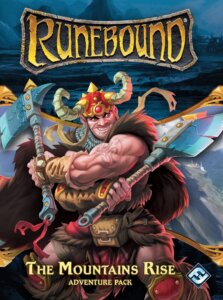
Runebound (Third Edition): The Mountains Rise – Adventure Pack
2016
Face savage creatures, gain new tools, and enter battle with Nanok.
180
minutes
Medium Heavy
View expansion
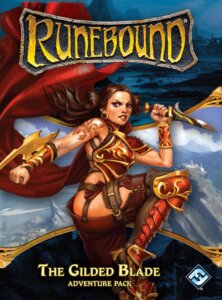
Runebound (Third Edition): The Gilded Blade – Adventure Pack
2016
Customize your hero with festival goods, flexible skills, and a deadly new hero.
180
minutes
Medium Heavy
View expansion
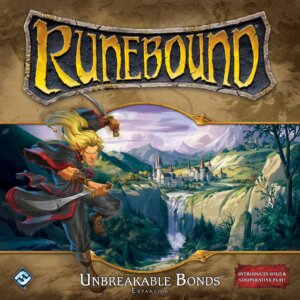
Runebound (Third Edition): Unbreakable Bonds
2017
Team up or venture alone across Terrinoth in a cooperative fantasy adventure.
180
minutes
Medium Heavy
View expansion
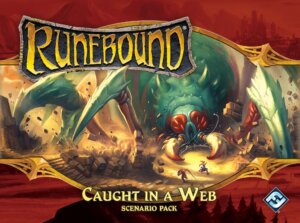
Runebound (Third Edition): Caught in a Web – Scenario Pack
2016
Face Ariad’s spider form before her webs consume Terrinoth.
180
minutes
Medium Heavy
View expansion
