
Talisman: Revised 4th Edition
2007
Build a unique fantasy character, explore three dangerous worlds, complete a Talisman quest, and battle for the Crown of Command.
90
minutes
2 - 6
player(s)
13+
Medium


About this board game
Talisman: Revised 4th Edition is a high-fantasy adventure board game for 2–6 players, with games lasting around 90 minutes. Players guide distinctive heroes, villains, wizards, thieves, and other role-playing archetypes on a quest to claim the Crown of Command.
Each player chooses from 14 characters, whose starting statistics, equipment, spells, and special abilities create different approaches to adventure. Characters develop their Life, Strength, and Craft by discovering weapons, equipment, companions, relics, and other useful encounters.
On each turn, roll a die and choose a direction of movement around the board. The outer, middle, and inner worlds offer different challenges, with spaces directing players to resolve encounters, draw cards, or face opponents already present. Creatures must be defeated before their rewards can be claimed, while player-versus-player attacks can use either Strength or Craft.
- Explore three connected worlds filled with creatures, treasures, companions, and hazards.
- Improve your character through encounters, battles, equipment, and special abilities.
- Complete a Talisman quest to gain the item required to pass through the Portal of Power.
- Race through the Inner World and confront guardians such as the Vampire’s Tower and the Werewolf.
Moving from the Outer World to the Middle World requires either a test of Strength or payment for a boatman’s ride. The Middle World brings greater dangers and more substantial encounters, while also offering the chance to obtain a Talisman. With one secured, a character who meets the required Strength or Craft can attempt the Portal of Power.
Reaching the Crown of Command transforms the adventure into a final race. Its holder can cast the Command spell to force another player to lose a Life, while every remaining rival tries to stop them before they are eliminated. Revised using the Talisman: Upgrade Pack, Talisman combines accessible movement and encounters with a dramatic race for victory.

Board Game Rules for
Talisman: Revised 4th Edition
Introduction
Talisman® is a game like no other – indeed, it is no ordinary game at all but a perilous adventure in a fantastical world of magic and monsters. As play progresses a story unfolds from turn to turn: a heroic epic of brave deeds, of daring encounters, of treasures and magic, of battles fought and sometimes lost, but always a tale that challenges and enthralls!
Our story begins with a mighty wizard, now long dead, who once ruled over the land of Talisman using the power of a magical crown, forged in the Valley of Fire by spirits cruelly enslaved to arcane magic. For many centuries the wizard reigned supreme until, after a long life spent amongst his books and spells, he sensed his days were drawing to an end. He resolved to hide his crown in the most perilous part of the most dangerous region in his realm, setting around it such fearsome guardians as his most powerful spells were able to command. Once he had done so, he perished, proclaiming with his dying breath that only a champion with the strength, wisdom, and courage to take his crown would rule in his stead.
Hundreds of years have passed, and the realm, long ungoverned and unprotected, has grown ever more dangerous, becoming infested by monsters and troubled by innumerable evils. To this very day, the ancient legend draws gallant heroes to the troubled land – each seeking the Crown of Command and the kingship of the realm of Talisman. So far no one has proven worthy of the challenge. The seekers’ bones lie bleached and broken upon the Plain of Peril or else cast idly aside to be gnawed by wild beasts and monsters.
In Talisman, up to six players assume the roles of hopeful characters–the would-be rulers of the land of Talisman. Each character is very different and has his own strengths, weaknesses, and special powers. To win the game you must journey to the heart of the land’s most perilous region to find the Crown of Command and use its ancient magic to cast a mighty spell to subdue all your rivals.
Your travels will be hard and fraught with danger – and it is in overcoming these dangers that the challenge of the game lies. Only by gradually building up your adventurer’s powers, gathering valuable allies, and winning potent magical items will you stand a chance of surviving the ultimate test that lies beyond the Portal of Power.
Object of the Game
The object of the game is to reach the Crown of Command in the centre of the board and then, by casting Command Spells, force the other characters out of the game. Characters should first adventure in the Outer and Middle Regions to build up their Strength, Craft, and lives, until they feel they are powerful enough to tackle the Inner Region. They must also first find a Talisman to permit them to enter the Valley of Fire and so reach the Crown of Command.
Number of Players
Up to six players can play a game of Talisman, but the more players that are participating, the longer the game will last. There are, however, alternative rules players may use to speed the game along (see “Alternative Rules for Faster Play”).
Components
Below is a list of all the components that you will find in your copy of Talisman Revised 4th Edition:
- 1 Rulebook
- 1 Game Board
- 104 Adventure Cards
- 24 Spell Cards
- 40 Strength Counters (8 large and 32 small red cones)
- 40 Craft Counters (8 large and 32 small blue cones)
- 40 Life Counters (8 large and 32 small green cones)
- 36 Fate Tokens
- 28 Purchase Cards
- 4 Talisman Cards
- 14 Character Cards
- 14 Plastic Character Figures
- 4 Toad Cards
- 4 Plastic Toad Figures
- 4 Alignment Cards
- 30 Gold Coins
- 6 Six-sided Dice
Component Overview
Below is a brief description of every game component.
Game Board
The game board depicts the magical land of Talisman. It is divided into three Regions (Outer, Middle, and Inner Region).

Purchase Cards
There are 28 Purchase Cards provided. These detail Objects that characters may obtain by means other than the Adventure Cards.

Adventure Cards
This deck of 104 cards contains the many creatures, events, and items that characters discover on their quest.

Talisman Cards
There are four Talisman Cards. Characters may discover Talismans in the Adventure deck or by completing a quest at the Warlock’s Cave space.

Spell Cards
There are 24 of these Spell Cards detailing the various Spells that may be cast during the game.

Character Cards
There are 14 character cards, each detailing a different character and his special abilities.

Counters
There are 120 of these cone-shaped counters in total. They are used to keep track of the characters’ Strength (red), Craft (blue), and lives (green). Each small counter is worth one point, and each large counter is worth five points. Different-sized counters of the same colour can be traded for equivalent values at any time (i.e., a player can swap five small red counters for one large red counter, or vice versa, but cannot swap green counters for red ones, etc.).

Character Figures
Each character card corresponds to a plastic figure that is used to represent that character on the board.

Fate Tokens
The game includes 36 fate tokens. Carefully punch out the tokens from the counter sheet before playing the game. Although the two sides of these tokens have a different appearance, this makes no difference in the core game.

Toad Cards and Figures
Four Toad Cards and four Toad figures are used when a character is turned into a Toad during the game. When this happens, a Toad Card overlays the character card and a Toad figure is substituted for that character’s figure for the duration of being a Toad.

Alignment Cards
There are four Alignment Cards. Each Alignment Card has a good side and an evil side. They are used to show when a character has changed alignment (with respect to what’s printed on his character card) during the game.

Gold Coins
The 30 gold coins represent the wealth and treasure characters earn during their adventures.

Six-sided Dice
There are six dice provided. These are used for moving, resolving attacks, and determining results from instructions on cards and the game board. The Talisman symbol on the die represents a “1” result.

Preparation
- The board is unfolded and placed in the centre of the playing area.
- The Adventure Cards are shuffled and placed facedown beside the board. These form the Adventure deck.
- The Spell Cards are shuffled and placed facedown beside the board. These form the Spell deck.
- The Talisman and Purchase Cards are placed faceup beside the board.
- One player takes the character cards, shuffles them, and deals one, facedown, to each player.
(Alternative rule: If all players agree, players who want more selection may be dealt three character cards each, and then choose which one of those three characters they wish play. The other characters not chosen are returned to the box and may be available if a character is killed.) - Each player places his character card faceup in front of him. This card is the character the player will play during the game. A player’s character card, Objects, Followers, counters, and other game components form his play area.
- Each player takes the plastic character figure corresponding to his character card and places it on the board according to the start space given on his character card.
- Each player receives:
- A number of life counters equal to the life value listed on his character card;
- A number of fate tokens equal to the fate value listed on his character card;
- One gold coin.
Life, fate, and gold should all be placed in the appropriate spots next to each character card. The remaining counters, tokens, and gold are placed to one side as stockpiles for use during the game.
- Any player whose character starts the game with any Spells, as detailed in the character’s special abilities, draws the designated number of Spell Cards from the Spell deck. These should not be revealed to other players.
- Any player whose character starts the game with any Objects, as detailed in the character’s special abilities, now takes the designated Object Cards from the Purchase deck.
- The Toad and Alignment Cards should be kept handy, to be used when required.
- The owner of the game takes the first turn. Play then proceeds round the board clockwise from that player.
Character Cards
Characters are the core of the experience of playing Talisman. It is through a player’s character that he interacts with the game board, travels to new Regions, attacks creatures, and gains Objects, Followers, and powerful Spells. Each player’s character card lists his character’s Strength, Craft, fate, and life values, as well as a number of special abilities.

Start Space & Special Abilities
A character’s start space is the space which he begins the game on. A character’s start space is listed on the bottom of his character card next to his alignment. In addition, each character has one or more special abilities, which are detailed on the character card.
Strength
Strength represents a character’s might, stamina, and fighting ability. It is used in battle and to overcome certain obstacles that may be encountered during the game. When a character gains Strength, this increase is recorded by placing additional Strength counters (red cones) beside the character card.
Strength counters are only taken for Strength points gained during play. Strength gained from Objects, Magic Objects, or Followers is not recorded by Strength counters but is added to the character’s Strength when required or allowed.
A character’s Strength at any time is:
- The character’s printed Strength value,
- Plus Strength counters,
- Plus any Strength gained from Followers, Magic Objects, and Objects that may be used at that time.
When a character is required to lose Strength, counters are removed accordingly and returned to their stockpile. A character’s Strength can never drop below that character’s Strength value (i.e., the number printed on the character card).

Craft
Craft represents a character’s intelligence, wisdom, and magical ability. It is a character’s main asset in psychic combat and determines how many Spells he may have. When a character gains Craft, this increase is recorded by placing additional Craft counters (blue cones) beside the character card.
Craft counters are only taken for Craft points gained during play. Craft gained from Objects, Magic Objects, or Followers is not recorded by Craft counters but is added to the character’s Craft when required or allowed.
A character’s Craft at any time is:
- The character’s printed Craft value,
- Plus Craft counters,
- Plus any Craft gained from Followers, Magic Objects, and Objects that may be used at that time.
When a character is required to lose Craft, counters are removed accordingly and returned to their stockpile. A character’s Craft can never drop below that character’s Craft value (i.e., the number printed on the character card).
Lives & Mortality
Lives represent the character’s durability. Lives are lost through battle, psychic combat, and other dangers that are encountered. A character’s lives are recorded by placing appropriate life counters (green cones) beside the character card. Characters may replenish lost lives by healing or gaining life. Each character starts the game with a number of lives equal to the life value listed on his character card.
Healing and Gaining Lives
- Healing can never replenish a character to more than his life value.
- A character can gain lives (as opposed to heal) over and above his life value.
Losing Lives
When a character is required to lose lives, counters are removed accordingly and returned to their stockpile.
Losing All Lives
Any character who loses all of his lives is immediately killed:
- All the character’s Objects, Magic Objects, Followers, and gold are placed on the space where the character was killed.
- All the character’s Strength and Craft counters and fate tokens are returned to their stockpiles.
- The character’s Spell Cards are placed on the Spell Card discard pile.
- Other cards (including the character’s trophies) and counters are placed in the appropriate stock or discard piles.
- The character card and character figure are removed from the game.
The dead character’s player may start again, on his next turn, with a new character drawn at random from the unused character cards, following steps 5–10 from the “Game Setup” section. Players may start new characters if, and only if, no character has yet reached the Crown of Command during the game. If any character has reached the Crown of Command, a player whose character is killed is out of the game.
Fate
Fate is a measure of a character’s luck and fortune. Once per die roll, a player may pay one fate token (returning it to the stockpile) to reroll one die he has just rolled under the following circumstances:
- Rolling a die for his character’s movement.
- Rolling a die to determine his character’s attack roll.
- Rolling a die due to the instructions on a card or board space.
If a player pays a fate token to reroll a die, he must accept the new result; he may not pay another fate token to reroll the same die again.

If a player rolls multiple dice (for example the Death space in the Inner Region), he may only pay one fate to reroll one of them.
Each character starts the game with a number of fate tokens equal to the fate value listed on his character card. Nothing untoward happens to a character who has used up all his fate, other than not being able to spend it until he gets more – as far as the universe is concerned, he is on his own.
A player may not pay fate tokens to reroll a die used to determine a creature’s attack roll or to reroll another player’s die roll.
Replenishing and Gaining Fate
- Fate is usually replenished as the result of encounters from Adventure Cards and board spaces. A character may only replenish fate up to his fate value.
- If an encounter allows a character to gain fate, however, he may take fate tokens over and above his fate value.
Alignment
A character’s alignment shows his personality. A good character is polite and law-abiding, an evil character is a black-hearted villain, and a neutral character falls somewhere between these two extremes. Alignment may change during the game as the result of encounters or by the use of a special ability.
Changing Alignment
When a character changes alignment, an Alignment Card is taken and placed beside the character card with the appropriate side faceup to show the character’s new alignment. When a character reverts to his original alignment, as it is printed on the character card, the Alignment Card is discarded.
- No character, including the Druid, may change Alignment more than once in any turn.
- If a character who changes alignment has any cards not permitted by a new alignment (such as the Holy Grail or Runesword), those cards must immediately be ditched in the space he occupies.
The Game Turn
On their game turns, characters move around the board, usually by the roll of the die but sometimes by the use of Spells or due to strange beings or places that they have discovered.
Having moved, characters can then encounter another character in the space they land on or follow the instructions on the space. The instructions are often to draw Adventure Cards. These cards depict the Objects, Enemies, and other things that the character meets in the space.
Gradually characters will become more powerful, until they feel that they are strong enough to head for the centre of the board and attempt to reach the Crown of Command.
More specifically, each player’s turn consists of two parts, in this order:
- Movement – The player rolls a die and moves his character that number of spaces around the board.
- Encounters – Once a character has finished his move, he must encounter either the space or a character in the space where he lands.
At the end of a character’s turn, play passes clockwise to the player to the left.
Movement in the Outer and Middle Regions
The game board depicting the magical land of Talisman is divided into three Regions (the Outer Region, the Middle Region, and the Inner Region). Each Region is sub-divided into spaces, and each space has its title and encounter instructions printed along its edge. Characters move around the spaces in the Region they are in and can cross between Regions as a result of encounters or card abilities.
To move in the Outer and Middle Regions, the player rolls one die to determine how many spaces his character must move. (Certain Spells, special abilities, and other events may enable a character to move without rolling the die. These instances are detailed on the relevant cards.)
- The character moves the full count of the die roll, either clockwise or counterclockwise at his discretion.
- Direction may not be reversed during a move except when passing between the Outer and Middle Regions (see “The Sentinel Space”).
- A character must always move, even if he starts the turn in a space with an Adventure Card or another character.
- The space where a character lands is the space where he ends his movement or the space to which he is moved to as the result of an encounter or effect.
Losing A Turn
Any instructions that result in the loss of a turn by the character encountering them ends the character’s turn immediately. This counts as a missed turn for that character if there are other cards to be encountered; otherwise, he misses his next turn instead.
Golden Rules
The following rules are Talisman’s “Golden Rules,” which supersede all others.
- Special Ability vs. Rules: In any instance where a special ability or effect is at a variance with the basic rules, the special ability or effect always overrides the rules.
- Can vs. Cannot: In any instance where a card’s effect indicates that a character cannot perform an action or use an ability (such as casting a Spell or using an Object), the character cannot do so. In other words, the forbidding effects of cards override other abilities and effects. For example, if a card indicates that no Weapons can be used when fighting a certain creature, the Warrior may not use any Weapons, despite his ability that allows him to use two Weapons at the same time.
- Natural vs. Modified Roll: If an effect or special ability refers to a die result, only the number appearing on the die is considered, not the modified result obtained by adding bonuses or subtracting penalties. For example, the Troll’s special ability allows him to regenerate whenever he rolls a “6” for his move. During the Troll’s turn, he rolls a “4” for his move. He also uses a card that allows him to add 2 to his movement roll for a total of 6. However, the Troll may not regenerate this turn since the actual die result is a “4” instead of a “6.”
- Limited Resources: All resources are limited to the number of components provided with the game. For example, if all Strength counters are in use, no additional Strength can be gained until some of those counters have been returned to the Strength counter stockpile. If a character is able to trade five 1–point counters for the corresponding one 5–point counter, he must do so.
Encounters Overview
After a character has finished his movement, he must either encounter the space he lands in or a character in that space. Characters can encounter a wide variety of monsters and personalities. Sometimes the encounters are friendly and aid the character with gifts. Other times the encounters are hostile and attack the character, or even turn him into a slimy Toad!
Characters only have encounters during their own turn, unless specifically instructed otherwise.
Encounters in the Middle and Outer Regions
Characters can only have encounters in the space where they land. They may never encounter anything in the space where they start their move.
A character must choose to encounter either one character of his choice who is in the space where he lands, or the space itself.
Encountering Another Character
An encounter with another character always takes one of two forms:
- The character whose turn it is may attack (battle or psychic combat if permitted); or
- Use one of his special abilities on the other character.
If a character kills another character during the encounter, he may take any Objects, Followers, and gold from the killed character to add to his own. Any Objects, Followers, and gold not taken are left on the space.
If a player chooses to encounter a character instead of encountering a space, his character may not visit any Stranger or Place there, nor may any Objects, Followers, and gold be taken from the space.
Encountering a Space – Draw Cards Spaces
Characters must always follow the instructions on the space where they land if their player chooses to encounter the space instead of encountering another character.
- If a space instructs a player to draw cards, the cards to be drawn are always Adventure Cards, drawn from the top of the Adventure deck.
- If there are already any cards of any type on the space (such as Adventure, Purchase, or Spell Cards), then only enough cards to make up the given number may be drawn.
- Adventure Cards must be dealt with in the order determined by their encounter number, starting with the lowest number, then the next lowest, and so on. In the case of a tie, the character encounters Adventure Cards in the order they were drawn.
- After any Enemies in the space are killed or evaded, any Stranger or Place there must be visited and any gold, Objects, and Followers may be taken.
- If a character ditches Followers or Objects onto a draw cards space, he may only draw enough cards to make up the given number that may be drawn.
- A character may ditch Followers or Objects on a space to avoid drawing more cards, but he may not take them back during the same turn. Therefore, any Followers and Objects that are left on the space become available for other characters to take if they land on that space.


Encountering a Space – Other Spaces
Characters must follow the instructions on the space if their player chooses to encounter the space instead of encountering another character. However, before they do, any Enemies in the space must first be killed or evaded. Any Stranger or Place there must be visited and any gold, Objects, and Followers may be taken.
Adventure Cards
Most of the spaces on the Talisman board instruct players to draw one or more Adventure Cards. When drawn, Adventure Cards are taken from the top of the Adventure deck and placed, faceup, in the space where they are encountered.
If there are any Adventure Cards already in a space a character lands in, his player draws only enough new cards to take the total to the number indicated for the space. For example, if a space instruction reads “Draw 2 Cards,” but there is already one card there, then the player only draws one new card to bring the total to two cards.
Adventure Cards must be dealt with in the order determined by their encounter number (the number at the bottom right corner of the card). The lowest number is tackled first, then the next lowest, and so on. In the case of a tie, the character encounters Adventure Cards in the order they were drawn.
One exception to the rule about resolving Adventure Cards in encounter number order is that Adventure Cards with instructions that result in their being placed in a space other than the one where they were drawn are dealt with first, before any other Adventure Cards are resolved. If placed elsewhere, an Adventure Card does not affect the character who drew it at that time.
Resolving Cards Without An Encounter Number
Cards that are placed on spaces and do not have an encounter number (such as the Hex Spell) must be resolved before the character encounters any other character, cards, or the instructions on the space itself.
Types of Adventure Cards
The different types of Adventure Cards and their effects are listed below. Keep in mind that Adventure Cards must be encountered in encounter number order, so only after Events and Enemies are dealt with may the more frequently beneficial cards be encountered.
- Events: The instructions on the card must be followed. Any instructions that result in the loss of a turn by the character encountering the card ends the character’s turn immediately. This counts as a missed turn for that character if there are other cards to be encountered; otherwise, he misses his next turn instead.
- Enemy – Animal, Dragon, or Monster: These Enemies attack any character encountering them by battling the character. Killed Enemies of this type may be kept as trophies to be exchanged for Strength. Enemies that defeat characters remain in the space.
- Enemy – Spirit: These Enemies attack any character encountering them by engaging that character in psychic combat. Killed Enemies of this type may be kept as trophies to be exchanged for Craft. Enemies that defeat characters remain in the space.

- Strangers: The instructions on the card must be followed. Strangers have various effects on characters that encounter them, and sometimes their reaction is based on the character’s alignment.
- Objects, Magic Objects, and Followers: These may be taken to the character’s play area, if permissible, and all Enemies on the space have been killed or evaded.
- Places: The instructions on the card must be followed. Some Places require characters to roll a die to see what they encounter, while other Places reward characters each time they visit.

Managing Cards
Having and Using Cards
Characters are considered to have anything in their possession, such as Objects, gold, fate, Followers, and Spells.
When a character implements the ability of a card’s text box, he is considered to be using the card. Using cards is optional, and a character may always choose when to use a card he has. For example, the Cross allows a character to automatically destroy Spirits without resorting to psychic combat. The character may choose not to use the Cross and may attack a given Spirit instead.
Characters may have cards that they are not permitted to use, unless a given card specifically states otherwise. For example, the Monk character may not use Weapons in battle but he may have the Holy Lance in his possession to sell to the Alchemist, deliver for a quest in the Warlock’s Cave, or simply to prevent another character from picking it up. However, the Monk may not have the Runesword, because that card states that no good character may have it. A Monk encountering a Runesword must leave it faceup in his space.
Characters are not permitted to take cards that they may not have. For example, if a character may not have Followers, he may not take one by casting the Mesmerism Spell on another character.
Ditching Followers and Objects
A character may ditch any of his Followers or Objects at any time by leaving them faceup in the space he occupies. If a character ditches any Followers or Objects, he cannot take them back during the same turn.
Talisman and Purchase Cards
Whenever a character is given or buys a Talisman or Purchase Card, the appropriate Talisman or Purchase Card should be taken.
Talisman and Purchase Cards are treated in all respects like Adventure Cards, except that instead of being placed on a discard pile when not needed, they are instead returned to their appropriate deck and are available to other characters once more. Should there be no Talisman or Purchase Cards left of a particular item, then that item is not available at that time.
Talisman and Purchase Cards may be ditched, like other Follower and Object Cards.
Gaining Talismans
There are two ways characters can acquire Talismans:
- They can be gained as encounters drawn from the Adventure deck.
- They can be acquired by undertaking a quest assigned at the Warlock’s Cave.
Warlock’s Cave
A character who lands on the Warlock’s Cave may choose to accept a quest, or not, as he wishes. If a character chooses to accept a quest, he must roll randomly to determine what it will be, as instructed on the space.
- A character may not go on more than one quest at a time.
- If a character has already completed a quest and lands on the Warlock’s Cave again, he may choose to go on another quest but must roll a die to randomly determine which quest he is assigned as normal.
- A character must attempt to complete his quest immediately if he is able to do so. In addition, the Warlock will prevent any character who has accepted a quest from opening the Portal of Power until he has first completed his quest.

Attacks Overview
Attacks are split into two types: battles and psychic combats. A battle occurs when a character is attacked by a creature whose Strength is given, and a psychic combat occurs when a character is attacked by a creature whose Craft is given. If a player decides to attack another character, they must fight a battle unless the attacker has a special ability that lets him use psychic combat instead.
Battles
Battles occur when:
- A character encounters an Enemy – a Monster, Dragon, Animal, or any creature whose Strength is given; or
- A character decides to attack another character, unless a special ability allows him to attack by psychic combat instead.
Resolving Battles vs. Creatures
Battles against creatures are resolved in the following steps:
- Evade: The character first declares whether he is evading or not. If not, then a battle takes place.
- Cast Spells: Any Spells that the player wishes to cast must be cast before the attack roll is made. Any effects or abilities that affect a character’s Strength or Craft must be implemented before the attack roll is made.
- Character Attack Roll: The character rolls one die, the result of which is considered the attack roll. The character’s attack score is the attack roll plus the character’s Strength, plus any other modifiers that may apply. Remember that only one Weapon may be used at a time.
- Creature Attack Roll: Another player now rolls a die for the creature’s attack roll and adds this to the creature’s Strength. The character may now pay one fate to reroll his attack roll if he wishes.
- Compare Attack Scores: The total of the creature’s attack roll and Strength is the creature’s attack score.
- If the character’s attack score is higher, the creature is killed.
- If the creature’s attack score is higher, the character is defeated and loses one life (use of an Object, Spell, or special ability may prevent this).
- If the attack scores are equal the result is a stand-off.
If the character is defeated or the battle ends in a stand-off, the character’s turn then immediately ends.
Stand-off
In a stand-off, neither side is harmed (characters do not lose a life and creatures are not killed) and that turn immediately ends. On the character’s next turn, the character leaves that space without again encountering whatever he fought, unless indicated otherwise.
More Than One Enemy
If there is more than one Enemy that attacks by Strength on a space and they have the same encounter number, they fight as one during the battle, adding their Strength together with just one attack roll to make a single, combined attack score.

Battles Between Two Characters
Battles between two characters are resolved in the following steps:
- Evade: The character being attacked first has the opportunity to evade. If he chooses not to, or is not successful, then battle takes place.
- Cast Spells: Both characters have the opportunity to cast Spells before the dice can be rolled. Any effects or abilities that affect a character’s Strength or Craft must be implemented before the attack roll is made.
- Determine Attack Rolls: Both characters then roll a die to determine their attack roll. Once both attack rolls have been made, the attacking character must choose first whether to pay fate to reroll. Once he has chosen, the defending character has the same option. No matter what the defender chooses, though, an attacking player who decided not to spend fate when he had the opportunity may not change his mind after the defender has made his own choice.
- Compare Attack Scores: Once the option to spend fate has been addressed, the attacking character’s attack score is determined as in battles against creatures and Enemies. The defender’s attack score is determined the same way as the attacker’s score. The character with the higher attack score wins the battle. If the scores are equal, the result is a stand-off.
- Claim Reward: The winner may either:
- Force the loser to lose one life (which may be saved by use of an Object or Spell), or
- Take one Object or one gold from the loser to add to his own.
If the winner kills the loser by forcing him to lose his last remaining life, the winner may take any Objects, Followers, and gold from the loser to add to his own. Any Objects, Followers, and gold not taken are left on the space. The turn then ends.
Psychic Combat
Psychic Combat occurs when:
- A character is attacked by an Enemy – Spirit or by any creature whose Craft is given; or
- A character whose special ability permits him to attack another character by psychic combat elects to do so.
Resolving Psychic Combat
Psychic combat is resolved in exactly the same manner as battles, except:
- Craft is substituted for Strength.
- No Object can prevent the loss of a life.
Trophies
When a character kills an Enemy, he may take it as a trophy. A character may exchange trophies at the end of his turn to gain additional Strength and Craft counters.
Gaining Strength
A character gains one Strength counter for every seven points of Strength marked on the trophies he turns in. Enemy cards thus exchanged are then placed on the Adventure Card discard pile. Excess Strength points of the trophies above a multiple of seven are lost.
Strength counters may also be gained as a result of encounters.
Gaining Craft
A character gains one Craft counter for every seven points of Craft marked on the trophies he turns in by discarding them to the Adventure Card discard pile. Excess Craft points turned in above a multiple of seven are lost.
Craft counters may also be gained as a result of encounters.
Evading
Characters sometimes have the option to evade creatures and other characters, such as by casting an Immobility or Invisibility Spell. The evading character cannot then affect or be affected by the character or creature in any way.
Only other characters can be evaded in the Inner Region; creatures from board spaces there cannot be evaded.
Encounters that may be evaded are:
- Anything that attacks a character.
- Any character attempting to attack or use a special ability.
- Creatures that appear as a result of an Event, Place, or Stranger card (e.g., the Dragon from the Cave Adventure Card).
Gold
Gold allows characters to buy Objects and pay for services. A character’s wealth is recorded by placing gold coins beside the character card.
- Each character starts the game with one gold, and additional gold is usually acquired as the result of encounters.
- Prices are given in gold coins (G). Thus “3G” represents three gold coins.
- Payments for any purchases or services that are not made to another character are paid into the gold stockpile.
- Any gold received from any source other than another character is taken from the gold stockpile.
- Gold is not considered an Object, so it does not count against a character’s Object carrying limit.
- If a character is required to lose gold and he does not have any, then there is no effect.
Objects
Both Objects and Magic Objects are classed as Objects. During the game, characters usually acquire Objects as the result of encounters. Any Objects characters have are placed below their character card and must be kept faceup.
Object Carrying Limits
No character may have more than four Objects unless he has a Mule. Any character acquiring more than four Objects must decide which to keep. The remainder are immediately placed faceup on the character’s space.

“Weapon” and “Armour” Keywords
- Weapon: Some Objects that increase a character’s fighting ability have the keyword Weapon next to the text for the card’s ability. A character may only use one Weapon during an attack.
- Armour: Some Objects that prevent the loss of life when a character is defeated have the keyword Armour next to the text for the card’s ability. A character may only use one Armour during an attack.

Followers
During the game, characters usually acquire Followers as the result of encounters. All Followers accompanying a character are kept below the character card and must be kept faceup. A character may have any number of Followers.
Losing a Follower
Any Followers that are killed (e.g., in the Chasm or the Vampire’s Tower) or that must be discarded are placed on the Adventure Card discard pile.
Spells
In the magical land of Talisman, anyone can cast Spells as long as he has enough Craft. Some characters start the game with one or more Spells, and new Spells can be found by any character as he travels around the board.
Gaining Spells
All characters may acquire and cast Spells, if their Craft is sufficient to permit this. Only those characters whose special abilities allow them to start the game with Spells do so. Otherwise, Spells are usually acquired as the result of encounters. Spells gained are taken from the top of the Spell deck. When this deck is exhausted, all of the discarded Spell Cards are shuffled and placed facedown to form a new Spell deck.
Spells are kept facedown so that the other players cannot see them, but a player may look at his own character’s Spells at any time. The effect of each Spell, and when it can be cast, are detailed on the individual Spell Cards.
The number of Spells that any character can have at one time is limited by the character’s Craft as follows:
- Craft 1–2: 0 Spells
- Craft 3: 1 Spell
- Craft 4–5: 2 Spells
- Craft 6+: 3 Spells
If at any time a character has more Spells than his Craft allows, surplus Spells must immediately be placed on the Spell Card discard pile; they cannot be cast. The character’s player chooses which Spells to discard. Spells cannot be discarded unless the character has more Spells than his Craft permits, however. The only other way to get rid of a Spell is to cast it!

Casting Spells
Castings Spells is always optional. Players may keep Spells for as many turns as they like before they choose to cast them. A Spell can only be cast as stated on the Spell Card. Once a spell is cast and its effect has ended, it is placed on the Spell Card discard pile.
- Spells affecting characters affect them wherever they are on the board, no matter which Region.
- Spells affecting creatures, however, cannot affect creatures encountered in the Inner Region.
- The maximum number of Spells a character may cast during his turn is equal to the number of Spells he had at the start of that turn.
- A character may only cast one Spell during another character’s turn. (This does not apply to the Command Spell.)

Crossing Between the Outer and Middle Regions
The Storm River, which separates the Outer Region from the Middle Region, can be crossed by:
- Using the bridge that connects the Sentinel space (in the Outer Region) to the Hills space opposite (in the Middle Region);
- Using a Raft; or
- As the result of an encounter.
The Sentinel Space
A character may cross the Sentinel bridge in either direction if the die roll for his move is sufficient to carry him across it and into the Region on the opposite side.
The Sentinel attacks a character every time he attempts to cross the Sentinel bridge from the Outer Region to enter the Middle Region.
- A character defeating or evading the Sentinel must continue his move by entering the Middle Region and continuing to move in either direction to the full value of his movement roll.
- A character defeated by the Sentinel loses one life (which may be saved by use of an Object or Spell), and his turn ends immediately in the Sentinel space.
- A character in a stand-off with the Sentinel does not lose a life, but his turn still ends immediately in the Sentinel space.
- The Sentinel does not attack characters passing through the Sentinel space while moving in the Outer Region, characters crossing back from the Middle Region to the Outer Region, or characters who end their movement on the Sentinel space.
- When crossing from one Region to another, a character may change the direction of his move upon entering the new Region.

Rafts
Any character wishing to cross the Storm River using a Raft must either build one or acquire one as the result of an encounter.
- Any character in a Woods or Forest space at the start of his turn who has an Axe may declare that he is building a Raft for that move. Instead of moving, the character takes a Raft Card from the Purchase deck (if available).
- Any character acquiring a Raft may cross the river at the start of his next turn. The character may cross the river to any space of his choice directly opposite the one he is in. This is his move for that turn; he does not roll the die to determine his movement.
- A Raft can never be left behind or taken along to be used on a future turn. Whether or not it is used, it must be placed on the Adventure Card discard pile or back with the Purchase deck after the character has either used it or decided not to do so.


Crossing Between the Middle and Inner Regions
The Portal of Power connects the Portal of Power space to the Plain of Peril space.
The Portal of Power
The Inner Region can only be entered by passing through the Portal of Power, which must be opened before it can be traversed.
- A character can only try to open the Portal if his move is sufficient to carry him beyond it. A character must attempt to open the Portal each time he passes through it; previous passage is no guarantee of future passage.
- A character attempting to open the Portal follows the instructions on the Portal of Power space. If successful, the character’s turn ends on the Plain of Peril. If unsuccessful, the character’s turn ends immediately on the Portal of Power space.
- A character wishing to pass through the Portal of Power from the Inner Region to the Middle Region does not need to open it. He simply moves from the Plain of Peril to the Portal of Power space. Doing so counts as his entire move for that turn.

The Inner Region
Movement in the Inner Region
The die is not rolled for movement in the Inner Region. Instead, a character can move only one space per turn there.
The encounter instructions on each space in the Inner Region must be completed before a character can move on toward the Crown of Command.
Turning Back
A character in the Inner Region may decide at any time to turn back and move back towards the Plain of Peril.
- A character who has turned back still only moves one space per turn, but ignores the instructions on all of the spaces on his return to the Plain of Peril.
- Once a character has declared his intention to turn back, he cannot change his mind and he must go all the way back to the Plain of Peril.
- Once there, however, the character is free to do whatever he likes, including heading back toward the Crown of Command or leaving the Inner Region through the Portal of Power.
Encounters in the Inner Region
A character does not draw Adventure Cards in the Inner Region. Instead, the encounter is detailed in the instructions for the space. The instructions must be followed, unless the character is turning back.
None of the creatures in the Inner Region can be affected by any Spell, nor may they be evaded.
Encountering a Character in the Inner Region
- In the Inner Region, a character may only encounter another character on the Plain of Peril, the Valley of Fire, and the Crown of Command.
- Encounters with other characters on the Plain of Peril and the Valley of Fire are treated exactly as encounters between characters in the Outer and Middle Regions.
- Encounters with other characters on the Crown of Command are also treated as encounters in the Outer and Inner Regions, except characters must encounter each other.
Inner Region Board Spaces
The following is additional explanation about many of the spaces in the Inner region:
Crypt
The Crypt is in ruins and a character needs Strength to shift the rubble to discover the various exit tunnels. A character must roll three dice upon entering the space and the results are totalled. The character’s Strength is subtracted from this total and the result indicates where the character will emerge from the Crypt. The character is immediately moved to the indicated space. This counts as the character’s move. A character who emerges on the Crypt itself may move away on their next turn.

Mines
Craft is needed to find the route through the labyrinthine Mines. The instructions are as those for the Crypt except that the character’s Craft (instead of Strength) is subtracted from the total of the die rolls.

Werewolf Den
Two dice are rolled for the Werewolf’s Strength each time a character lands on the space. This is the Werewolf that attacks that character, until he escapes. Each character encounters a different Werewolf.
Example: The Dwarf lands on the Werewolf Den and rolls two dice to determine the Werewolf’s Strength. He rolls a “3” and a “5” which brings the Werewolf’s Strength to 8. The Dwarf then battles the Werewolf. The Werewolf rolls a “5”, which brings the Werewolf’s attack score to 13 (8 Strength plus an attack roll of “5”). The Dwarf rolls for battle and gets an attack score of 10 which means he is defeated and loses a life. On the Dwarf’s next turn, he decides to attack the Werewolf again instead of turning back. The Werewolf battles with the same Strength of 8 but this time gets a “1” for his attack roll, which brings the Werewolf’s attack score to 9 (8 Strength plus an attack roll of “1”). If the Dwarf can get an attack score of 10 or more he will defeat the Werewolf and may move on next turn.

Pits
A die is rolled each time a character lands on the Pits space. This is the number of Pit Fiends that attack the character. The character fights the Pit Fiends one at a time, in succession, until the character is either defeated or defeats all of the Pit Fiends, whereupon that turn ends. If a character is defeated, he must then continue to fight the remaining Pit Fiends next turn or turn back. A character can move on the turn following that in which the last of the character’s allotted Pit Fiends was defeated.

Reaching the Crown of Command
The last space on the board is the Crown of Command. It can only be reached from the Valley of Fire space, which can only be entered by characters that have a Talisman. If a character does not have a Talisman, then he must turn back.

Rules at the Crown of Command
When a character is on the Crown of Command space, a character does not move but remains there instead. Characters on the Crown of Command cannot turn back.
- If there is already another character on the Crown of Command space when a character lands on it, the character there must be encountered. Once two (or more) characters are on the Crown, those characters’ turns consist only of encountering one of the other characters.
- A character who is alone on the Crown of Command space on his turn must cast one Command Spell at all other characters. To do so, the caster rolls one die:
- On a “1,” “2,” or “3”, the Spell has no effect.
- On a “4,” “5,” or “6,” all of the other characters lose one life.
- If a character is killed by the Command Spell, that player loses the game and may not start another character.
- Once any character has reached the Crown of Command, any character that gets killed is out of the game. Note that this rule stays in effect for the rest of the game, even if a character leaves the Crown of Command.
Toads
When a character is turned into a Toad for three turns, a Toad figure is substituted for the character’s figure on the board and the player lays a Toad Card on top of his character card. When the character reverts back to his original form, remove the Toad Card and exchange the Toad figure for his character figure at the end of his third turn.
- A Toad has Strength 1 and Craft 1, which are not modified by Strength and Craft counters accumulated prior to transformation. Although a Toad can gain and lose Strength and Craft, these modifications disappear when the Toad turns back into the original character. At that point, the character’s pre-transformation Strength and Craft counters are once again used and resume their effects.
- A character retains his trophies and can still gain trophies while a Toad. However, any Strength or Craft gained through trophies while the character is a Toad are lost when the character reverts to his original form (so it is usually a bad idea to trade in trophies while a Toad).
- A Toad does not roll the die for movement, but must move only one space per turn.
- Toads can neither gain nor cast Spells, but a character’s Spell Cards are not lost upon transformation into a Toad. They simply cannot be used until the character reverts back to his original form.
- A Toad’s lives are those of the original character. Thus, any lives lost or gained by the Toad affect the status of the original character.
- A Toad’s fate tokens are also those of the original character. Similarly, any fate lost or gained by the Toad affect the status of the original character. Toads may use fate as normal.
- Toads have encounters when landing on a space like any other character.
- A Toad has no special abilities. Those of the original character cannot be used while the character is a Toad.
- If a character is already a Toad and is turned into a Toad again (for example, as a result of the Random Spell), the character remains a Toad for three more turns starting from the second transformation.
Alternative Rules
If players want to use any of the rules discussed here, they should make sure that everyone understands and agrees to the rules before the game begins.
Evading Unfriendly Individuals
This alternative rule is for players who prefer more options for evading. In addition to evading characters and creatures, characters may also evade any unfriendly individual depicted on a card or space that the character does not wish to encounter, except for spaces in the Inner Region. For example, the Black Knight, Hag, or the Witch can be evaded, but the Vampire’s Tower, Werewolf Den, Death, and Pits cannot. It is up to the players’ discretion to decide which encounters can be considered an unfriendly individual in order to evade them.
Inherited Items
When a character is killed, the player’s new character may “inherit” the items that his killed character loses.
- When a character is killed, his player removes the character card and playing piece from the game, but places any Objects (including Magic Objects), gold, and Followers to one side for the moment, and returns any other Spells, trophies, fate, cards, and counters to the appropriate discard or stockpiles.
- On the player’s next turn, he starts with a new character drawn at random from the unused character cards as normal. The Objects, gold, and Followers that were put to one side are inherited by the player’s new character and may be used by him as normal. Anything that is not be taken by the new character must be placed on his start space.
- If a character kills another character during an encounter, he may not take the killed character’s Objects, gold, and Followers since these items will be inherited by a new character.
Alternative Rules for Faster Play
Talisman is an epic game of adventure – a gradually unfolding story that usually takes several hours to play to completion. Repeat games will run faster, but the more players who take part, the longer a game will last – and with more than six players, a typical game is likely to take two to three hours to complete, and possibly longer.
Since people who enjoy playing Talisman don’t always have time to finish a big game, it’s possible to adjust the rules to speed things up a little. The adjustments are especially recommended for games with five or more players, but will work equally well for games of any size where a shorter game is desired.
Strength and Craft
If players find themselves a little short on time, they can increase the rate at which Strength and Craft is earned. This speeds up the game by making characters more powerful more quickly.
The normal rule is that to gain a point of Strength or Craft, a character has to exchange trophies with a combined value of seven or more to gain the point. To speed up play, players can simply change this value to six, or to speed things up even further they can change it to five.
Starting Bonus
The first half an hour of play is often spent building up sufficient Craft or Strength to confront the various Enemies that have been encountered. If players wish to cut to the action more quickly, each player can be allowed to take one bonus Strength or Craft (his choice) at the start of the game. This doesn’t affect the characters’ normal values; it’s just an extra point of Strength or Craft as if earned in the usual way.
Talisman Bloodbath
At the start of the game, remove three cards from the available Talisman Cards instead of using all four. In addition, any player whose character is killed immediately loses the game instead of drawing a new character card. The Talisman Bloodbath alternative rule makes for a short, but very, very bloody game.
The Command Spell
A further way of speeding up play in this final stage of the game is to allow the Command Spell to be cast more easily. This is especially effective where a lot of players are involved, and therefore there are more opportunities to stop the character who is casting the Spell! Normally the Spell is cast on a die roll of “4,” “5,” or “6.” With five or more characters in the game, the Spell could be cast as follows:
- 5 players: 3, 4, 5, or 6
- 6 players: 2, 3, 4, 5, or 6
- 7 or more players: Casts automatically
Sudden Death
In Sudden Death Talisman, the first player to reach the Crown of Command wins! Reaching the Crown of Command is no easy task, and if players don’t have time to play a full game then this is a good way to end the adventure.
Another way of playing a Sudden Death game is for players to agree to stop the game at a certain time and then count up the total number of Strength and Craft counters each character has, plus gold, Spells, Followers, Objects, and Magic Objects held in addition to the number the character started the game with. The player who’s character has the highest total wins! If players are obliged to stop the game before it is properly finished, this is a satisfactory way of deciding who has won.
Talisman Encounter Sequence

Credits
Game Design: Robert Harris
Additional Game Design: John Goodenough and Rick Priestley
Editing: Mark O’Connor, Sam Stewart, and Jeff Tidball
Graphic Design: Kevin Childress, Mark Raynor, Brian Schomberg, and WiL Springer
Cover and Board Art: Ralph Horsley
Internal Art: Massimiliano Bertolini and Jeremy McHugh
Art Direction: Zoë Robinson and Zoe Wedderburn
Playtesters for Talisman 4th Edition: Dave Allen, Mike Ball, Owen Barnes, Kate Flack, Jon Gillard, Mal Green, Ragnar Karlsson, George Mann, Nelson, Mark Owen, Mark Raynor, Matthew Toone, and Zoe Wedderburn
Production Manager: Gabe Laulunen
International Production Coordinator: Sabe Lewellyn and Casey Ryan
Executive Developer: Jeff Tidball
Publisher: Christian T. Petersen
Special Thanks: Elliott Eastoe, Jon New, Richard Tatge, and all at Talisman Island!
FFG Extends a Special Thanks To: Andy Jones, Jon Gillard, and Erik Mogensen for walking the long road with us and for finally leading us to this great prize. Thank you for tolerating the pleading, cajoling, begging, prodding, and many proposals from us over the years. Also a heartfelt “thank you” to Daniel Steel for his help in the process.
For additional material, support, and information, please visit us on the web: www.FantasyFlightGames.com
Games Workshop
Licensing Manager: Owen Rees
Licensing and Acquired Rights Manager: Erik Mogensen
Head of Legal and Licensing: Andy Jones
Talisman © Games Workshop Limited 1983, 1985, 1994, 2007. This edition © Games Workshop Limited 2008. Games Workshop, Talisman, the foregoing marks’ respective logos and all associated marks, logos, characters, products and illustrations from the Talisman game are either ®, TM and/or © Games Workshop Limited 1983–2008, variably registered in the UK and other countries around the world. This edition published under license to Fantasy Flight Publishing Inc. 2008. Fantasy Flight Games, and the FFG logo are trademarks of Fantasy Flight Publishing, Inc. All Rights Reserved to their respective owners.
Introduction & Components
Introduction
Talisman® is a game like no other – indeed, it is no ordinary game at all but a perilous adventure in a fantastical world of magic and monsters. As play progresses a story unfolds from turn to turn: a heroic epic of brave deeds, of daring encounters, of treasures and magic, of battles fought and sometimes lost, but always a tale that challenges and enthralls!
Our story begins with a mighty wizard, now long dead, who once ruled over the land of Talisman using the power of a magical crown, forged in the Valley of Fire by spirits cruelly enslaved to arcane magic. For many centuries the wizard reigned supreme until, after a long life spent amongst his books and spells, he sensed his days were drawing to an end. He resolved to hide his crown in the most perilous part of the most dangerous region in his realm, setting around it such fearsome guardians as his most powerful spells were able to command. Once he had done so, he perished, proclaiming with his dying breath that only a champion with the strength, wisdom, and courage to take his crown would rule in his stead.
Hundreds of years have passed, and the realm, long ungoverned and unprotected, has grown ever more dangerous, becoming infested by monsters and troubled by innumerable evils. To this very day, the ancient legend draws gallant heroes to the troubled land – each seeking the Crown of Command and the kingship of the realm of Talisman. So far no one has proven worthy of the challenge. The seekers’ bones lie bleached and broken upon the Plain of Peril or else cast idly aside to be gnawed by wild beasts and monsters.
In Talisman, up to six players assume the roles of hopeful characters–the would-be rulers of the land of Talisman. Each character is very different and has his own strengths, weaknesses, and special powers. To win the game you must journey to the heart of the land’s most perilous region to find the Crown of Command and use its ancient magic to cast a mighty spell to subdue all your rivals.
Your travels will be hard and fraught with danger – and it is in overcoming these dangers that the challenge of the game lies. Only by gradually building up your adventurer’s powers, gathering valuable allies, and winning potent magical items will you stand a chance of surviving the ultimate test that lies beyond the Portal of Power.
Object of the Game
The object of the game is to reach the Crown of Command in the centre of the board and then, by casting Command Spells, force the other characters out of the game. Characters should first adventure in the Outer and Middle Regions to build up their Strength, Craft, and lives, until they feel they are powerful enough to tackle the Inner Region. They must also first find a Talisman to permit them to enter the Valley of Fire and so reach the Crown of Command.
Number of Players
Up to six players can play a game of Talisman, but the more players that are participating, the longer the game will last. There are, however, alternative rules players may use to speed the game along (see “Alternative Rules for Faster Play”).
Components
Below is a list of all the components that you will find in your copy of Talisman Revised 4th Edition:
- 1 Rulebook
- 1 Game Board
- 104 Adventure Cards
- 24 Spell Cards
- 40 Strength Counters (8 large and 32 small red cones)
- 40 Craft Counters (8 large and 32 small blue cones)
- 40 Life Counters (8 large and 32 small green cones)
- 36 Fate Tokens
- 28 Purchase Cards
- 4 Talisman Cards
- 14 Character Cards
- 14 Plastic Character Figures
- 4 Toad Cards
- 4 Plastic Toad Figures
- 4 Alignment Cards
- 30 Gold Coins
- 6 Six-sided Dice
Component Overview
Below is a brief description of every game component.
Game Board
The game board depicts the magical land of Talisman. It is divided into three Regions (Outer, Middle, and Inner Region).
Purchase Cards
There are 28 Purchase Cards provided. These detail Objects that characters may obtain by means other than the Adventure Cards.
Adventure Cards
This deck of 104 cards contains the many creatures, events, and items that characters discover on their quest.
Talisman Cards
There are four Talisman Cards. Characters may discover Talismans in the Adventure deck or by completing a quest at the Warlock’s Cave space.
Spell Cards
There are 24 of these Spell Cards detailing the various Spells that may be cast during the game.
Character Cards
There are 14 character cards, each detailing a different character and his special abilities.
Counters
There are 120 of these cone-shaped counters in total. They are used to keep track of the characters’ Strength (red), Craft (blue), and lives (green). Each small counter is worth one point, and each large counter is worth five points. Different-sized counters of the same colour can be traded for equivalent values at any time (i.e., a player can swap five small red counters for one large red counter, or vice versa, but cannot swap green counters for red ones, etc.).
Character Figures
Each character card corresponds to a plastic figure that is used to represent that character on the board.
Fate Tokens
The game includes 36 fate tokens. Carefully punch out the tokens from the counter sheet before playing the game. Although the two sides of these tokens have a different appearance, this makes no difference in the core game.
Toad Cards and Figures
Four Toad Cards and four Toad figures are used when a character is turned into a Toad during the game. When this happens, a Toad Card overlays the character card and a Toad figure is substituted for that character’s figure for the duration of being a Toad.
Alignment Cards
There are four Alignment Cards. Each Alignment Card has a good side and an evil side. They are used to show when a character has changed alignment (with respect to what’s printed on his character card) during the game.
Gold Coins
The 30 gold coins represent the wealth and treasure characters earn during their adventures.
Six-sided Dice
There are six dice provided. These are used for moving, resolving attacks, and determining results from instructions on cards and the game board. The Talisman symbol on the die represents a “1” result.
Game Setup
Preparation
- The board is unfolded and placed in the centre of the playing area.
- The Adventure Cards are shuffled and placed facedown beside the board. These form the Adventure deck.
- The Spell Cards are shuffled and placed facedown beside the board. These form the Spell deck.
- The Talisman and Purchase Cards are placed faceup beside the board.
- One player takes the character cards, shuffles them, and deals one, facedown, to each player.
(Alternative rule: If all players agree, players who want more selection may be dealt three character cards each, and then choose which one of those three characters they wish play. The other characters not chosen are returned to the box and may be available if a character is killed.) - Each player places his character card faceup in front of him. This card is the character the player will play during the game. A player’s character card, Objects, Followers, counters, and other game components form his play area.
- Each player takes the plastic character figure corresponding to his character card and places it on the board according to the start space given on his character card.
- Each player receives:
- A number of life counters equal to the life value listed on his character card;
- A number of fate tokens equal to the fate value listed on his character card;
- One gold coin.
Life, fate, and gold should all be placed in the appropriate spots next to each character card. The remaining counters, tokens, and gold are placed to one side as stockpiles for use during the game.
- Any player whose character starts the game with any Spells, as detailed in the character’s special abilities, draws the designated number of Spell Cards from the Spell deck. These should not be revealed to other players.
- Any player whose character starts the game with any Objects, as detailed in the character’s special abilities, now takes the designated Object Cards from the Purchase deck.
- The Toad and Alignment Cards should be kept handy, to be used when required.
- The owner of the game takes the first turn. Play then proceeds round the board clockwise from that player.
Character Anatomy & Attributes
Character Cards
Characters are the core of the experience of playing Talisman. It is through a player’s character that he interacts with the game board, travels to new Regions, attacks creatures, and gains Objects, Followers, and powerful Spells. Each player’s character card lists his character’s Strength, Craft, fate, and life values, as well as a number of special abilities.
Start Space & Special Abilities
A character’s start space is the space which he begins the game on. A character’s start space is listed on the bottom of his character card next to his alignment. In addition, each character has one or more special abilities, which are detailed on the character card.
Strength
Strength represents a character’s might, stamina, and fighting ability. It is used in battle and to overcome certain obstacles that may be encountered during the game. When a character gains Strength, this increase is recorded by placing additional Strength counters (red cones) beside the character card.
Strength counters are only taken for Strength points gained during play. Strength gained from Objects, Magic Objects, or Followers is not recorded by Strength counters but is added to the character’s Strength when required or allowed.
A character’s Strength at any time is:
- The character’s printed Strength value,
- Plus Strength counters,
- Plus any Strength gained from Followers, Magic Objects, and Objects that may be used at that time.
When a character is required to lose Strength, counters are removed accordingly and returned to their stockpile. A character’s Strength can never drop below that character’s Strength value (i.e., the number printed on the character card).
Craft
Craft represents a character’s intelligence, wisdom, and magical ability. It is a character’s main asset in psychic combat and determines how many Spells he may have. When a character gains Craft, this increase is recorded by placing additional Craft counters (blue cones) beside the character card.
Craft counters are only taken for Craft points gained during play. Craft gained from Objects, Magic Objects, or Followers is not recorded by Craft counters but is added to the character’s Craft when required or allowed.
A character’s Craft at any time is:
- The character’s printed Craft value,
- Plus Craft counters,
- Plus any Craft gained from Followers, Magic Objects, and Objects that may be used at that time.
When a character is required to lose Craft, counters are removed accordingly and returned to their stockpile. A character’s Craft can never drop below that character’s Craft value (i.e., the number printed on the character card).
Lives & Mortality
Lives represent the character’s durability. Lives are lost through battle, psychic combat, and other dangers that are encountered. A character’s lives are recorded by placing appropriate life counters (green cones) beside the character card. Characters may replenish lost lives by healing or gaining life. Each character starts the game with a number of lives equal to the life value listed on his character card.
Healing and Gaining Lives
- Healing can never replenish a character to more than his life value.
- A character can gain lives (as opposed to heal) over and above his life value.
Losing Lives
When a character is required to lose lives, counters are removed accordingly and returned to their stockpile.
Losing All Lives
Any character who loses all of his lives is immediately killed:
- All the character’s Objects, Magic Objects, Followers, and gold are placed on the space where the character was killed.
- All the character’s Strength and Craft counters and fate tokens are returned to their stockpiles.
- The character’s Spell Cards are placed on the Spell Card discard pile.
- Other cards (including the character’s trophies) and counters are placed in the appropriate stock or discard piles.
- The character card and character figure are removed from the game.
The dead character’s player may start again, on his next turn, with a new character drawn at random from the unused character cards, following steps 5–10 from the “Game Setup” section. Players may start new characters if, and only if, no character has yet reached the Crown of Command during the game. If any character has reached the Crown of Command, a player whose character is killed is out of the game.
Fate
Fate is a measure of a character’s luck and fortune. Once per die roll, a player may pay one fate token (returning it to the stockpile) to reroll one die he has just rolled under the following circumstances:
- Rolling a die for his character’s movement.
- Rolling a die to determine his character’s attack roll.
- Rolling a die due to the instructions on a card or board space.
If a player pays a fate token to reroll a die, he must accept the new result; he may not pay another fate token to reroll the same die again.
If a player rolls multiple dice (for example the Death space in the Inner Region), he may only pay one fate to reroll one of them.
Each character starts the game with a number of fate tokens equal to the fate value listed on his character card. Nothing untoward happens to a character who has used up all his fate, other than not being able to spend it until he gets more – as far as the universe is concerned, he is on his own.
A player may not pay fate tokens to reroll a die used to determine a creature’s attack roll or to reroll another player’s die roll.
Replenishing and Gaining Fate
- Fate is usually replenished as the result of encounters from Adventure Cards and board spaces. A character may only replenish fate up to his fate value.
- If an encounter allows a character to gain fate, however, he may take fate tokens over and above his fate value.
Alignment
A character’s alignment shows his personality. A good character is polite and law-abiding, an evil character is a black-hearted villain, and a neutral character falls somewhere between these two extremes. Alignment may change during the game as the result of encounters or by the use of a special ability.
Changing Alignment
When a character changes alignment, an Alignment Card is taken and placed beside the character card with the appropriate side faceup to show the character’s new alignment. When a character reverts to his original alignment, as it is printed on the character card, the Alignment Card is discarded.
- No character, including the Druid, may change Alignment more than once in any turn.
- If a character who changes alignment has any cards not permitted by a new alignment (such as the Holy Grail or Runesword), those cards must immediately be ditched in the space he occupies.
Turn Overview & Core Movement
The Game Turn
On their game turns, characters move around the board, usually by the roll of the die but sometimes by the use of Spells or due to strange beings or places that they have discovered.
Having moved, characters can then encounter another character in the space they land on or follow the instructions on the space. The instructions are often to draw Adventure Cards. These cards depict the Objects, Enemies, and other things that the character meets in the space.
Gradually characters will become more powerful, until they feel that they are strong enough to head for the centre of the board and attempt to reach the Crown of Command.
More specifically, each player’s turn consists of two parts, in this order:
- Movement – The player rolls a die and moves his character that number of spaces around the board.
- Encounters – Once a character has finished his move, he must encounter either the space or a character in the space where he lands.
At the end of a character’s turn, play passes clockwise to the player to the left.
Movement in the Outer and Middle Regions
The game board depicting the magical land of Talisman is divided into three Regions (the Outer Region, the Middle Region, and the Inner Region). Each Region is sub-divided into spaces, and each space has its title and encounter instructions printed along its edge. Characters move around the spaces in the Region they are in and can cross between Regions as a result of encounters or card abilities.
To move in the Outer and Middle Regions, the player rolls one die to determine how many spaces his character must move. (Certain Spells, special abilities, and other events may enable a character to move without rolling the die. These instances are detailed on the relevant cards.)
- The character moves the full count of the die roll, either clockwise or counterclockwise at his discretion.
- Direction may not be reversed during a move except when passing between the Outer and Middle Regions (see “The Sentinel Space”).
- A character must always move, even if he starts the turn in a space with an Adventure Card or another character.
- The space where a character lands is the space where he ends his movement or the space to which he is moved to as the result of an encounter or effect.
Losing A Turn
Any instructions that result in the loss of a turn by the character encountering them ends the character’s turn immediately. This counts as a missed turn for that character if there are other cards to be encountered; otherwise, he misses his next turn instead.
Golden Rules
The following rules are Talisman’s “Golden Rules,” which supersede all others.
- Special Ability vs. Rules: In any instance where a special ability or effect is at a variance with the basic rules, the special ability or effect always overrides the rules.
- Can vs. Cannot: In any instance where a card’s effect indicates that a character cannot perform an action or use an ability (such as casting a Spell or using an Object), the character cannot do so. In other words, the forbidding effects of cards override other abilities and effects. For example, if a card indicates that no Weapons can be used when fighting a certain creature, the Warrior may not use any Weapons, despite his ability that allows him to use two Weapons at the same time.
- Natural vs. Modified Roll: If an effect or special ability refers to a die result, only the number appearing on the die is considered, not the modified result obtained by adding bonuses or subtracting penalties. For example, the Troll’s special ability allows him to regenerate whenever he rolls a “6” for his move. During the Troll’s turn, he rolls a “4” for his move. He also uses a card that allows him to add 2 to his movement roll for a total of 6. However, the Troll may not regenerate this turn since the actual die result is a “4” instead of a “6.”
- Limited Resources: All resources are limited to the number of components provided with the game. For example, if all Strength counters are in use, no additional Strength can be gained until some of those counters have been returned to the Strength counter stockpile. If a character is able to trade five 1–point counters for the corresponding one 5–point counter, he must do so.
Encounters & Adventure Cards
Encounters Overview
After a character has finished his movement, he must either encounter the space he lands in or a character in that space. Characters can encounter a wide variety of monsters and personalities. Sometimes the encounters are friendly and aid the character with gifts. Other times the encounters are hostile and attack the character, or even turn him into a slimy Toad!
Characters only have encounters during their own turn, unless specifically instructed otherwise.
Encounters in the Middle and Outer Regions
Characters can only have encounters in the space where they land. They may never encounter anything in the space where they start their move.
A character must choose to encounter either one character of his choice who is in the space where he lands, or the space itself.
Encountering Another Character
An encounter with another character always takes one of two forms:
- The character whose turn it is may attack (battle or psychic combat if permitted); or
- Use one of his special abilities on the other character.
If a character kills another character during the encounter, he may take any Objects, Followers, and gold from the killed character to add to his own. Any Objects, Followers, and gold not taken are left on the space.
If a player chooses to encounter a character instead of encountering a space, his character may not visit any Stranger or Place there, nor may any Objects, Followers, and gold be taken from the space.
Encountering a Space – Draw Cards Spaces
Characters must always follow the instructions on the space where they land if their player chooses to encounter the space instead of encountering another character.
- If a space instructs a player to draw cards, the cards to be drawn are always Adventure Cards, drawn from the top of the Adventure deck.
- If there are already any cards of any type on the space (such as Adventure, Purchase, or Spell Cards), then only enough cards to make up the given number may be drawn.
- Adventure Cards must be dealt with in the order determined by their encounter number, starting with the lowest number, then the next lowest, and so on. In the case of a tie, the character encounters Adventure Cards in the order they were drawn.
- After any Enemies in the space are killed or evaded, any Stranger or Place there must be visited and any gold, Objects, and Followers may be taken.
- If a character ditches Followers or Objects onto a draw cards space, he may only draw enough cards to make up the given number that may be drawn.
- A character may ditch Followers or Objects on a space to avoid drawing more cards, but he may not take them back during the same turn. Therefore, any Followers and Objects that are left on the space become available for other characters to take if they land on that space.
Encountering a Space – Other Spaces
Characters must follow the instructions on the space if their player chooses to encounter the space instead of encountering another character. However, before they do, any Enemies in the space must first be killed or evaded. Any Stranger or Place there must be visited and any gold, Objects, and Followers may be taken.
Adventure Cards
Most of the spaces on the Talisman board instruct players to draw one or more Adventure Cards. When drawn, Adventure Cards are taken from the top of the Adventure deck and placed, faceup, in the space where they are encountered.
If there are any Adventure Cards already in a space a character lands in, his player draws only enough new cards to take the total to the number indicated for the space. For example, if a space instruction reads “Draw 2 Cards,” but there is already one card there, then the player only draws one new card to bring the total to two cards.
Adventure Cards must be dealt with in the order determined by their encounter number (the number at the bottom right corner of the card). The lowest number is tackled first, then the next lowest, and so on. In the case of a tie, the character encounters Adventure Cards in the order they were drawn.
One exception to the rule about resolving Adventure Cards in encounter number order is that Adventure Cards with instructions that result in their being placed in a space other than the one where they were drawn are dealt with first, before any other Adventure Cards are resolved. If placed elsewhere, an Adventure Card does not affect the character who drew it at that time.
Resolving Cards Without An Encounter Number
Cards that are placed on spaces and do not have an encounter number (such as the Hex Spell) must be resolved before the character encounters any other character, cards, or the instructions on the space itself.
Types of Adventure Cards
The different types of Adventure Cards and their effects are listed below. Keep in mind that Adventure Cards must be encountered in encounter number order, so only after Events and Enemies are dealt with may the more frequently beneficial cards be encountered.
- Events: The instructions on the card must be followed. Any instructions that result in the loss of a turn by the character encountering the card ends the character’s turn immediately. This counts as a missed turn for that character if there are other cards to be encountered; otherwise, he misses his next turn instead.
- Enemy – Animal, Dragon, or Monster: These Enemies attack any character encountering them by battling the character. Killed Enemies of this type may be kept as trophies to be exchanged for Strength. Enemies that defeat characters remain in the space.
- Enemy – Spirit: These Enemies attack any character encountering them by engaging that character in psychic combat. Killed Enemies of this type may be kept as trophies to be exchanged for Craft. Enemies that defeat characters remain in the space.
- Strangers: The instructions on the card must be followed. Strangers have various effects on characters that encounter them, and sometimes their reaction is based on the character’s alignment.
- Objects, Magic Objects, and Followers: These may be taken to the character’s play area, if permissible, and all Enemies on the space have been killed or evaded.
- Places: The instructions on the card must be followed. Some Places require characters to roll a die to see what they encounter, while other Places reward characters each time they visit.
Managing Cards
Having and Using Cards
Characters are considered to have anything in their possession, such as Objects, gold, fate, Followers, and Spells.
When a character implements the ability of a card’s text box, he is considered to be using the card. Using cards is optional, and a character may always choose when to use a card he has. For example, the Cross allows a character to automatically destroy Spirits without resorting to psychic combat. The character may choose not to use the Cross and may attack a given Spirit instead.
Characters may have cards that they are not permitted to use, unless a given card specifically states otherwise. For example, the Monk character may not use Weapons in battle but he may have the Holy Lance in his possession to sell to the Alchemist, deliver for a quest in the Warlock’s Cave, or simply to prevent another character from picking it up. However, the Monk may not have the Runesword, because that card states that no good character may have it. A Monk encountering a Runesword must leave it faceup in his space.
Characters are not permitted to take cards that they may not have. For example, if a character may not have Followers, he may not take one by casting the Mesmerism Spell on another character.
Ditching Followers and Objects
A character may ditch any of his Followers or Objects at any time by leaving them faceup in the space he occupies. If a character ditches any Followers or Objects, he cannot take them back during the same turn.
Talisman and Purchase Cards
Whenever a character is given or buys a Talisman or Purchase Card, the appropriate Talisman or Purchase Card should be taken.
Talisman and Purchase Cards are treated in all respects like Adventure Cards, except that instead of being placed on a discard pile when not needed, they are instead returned to their appropriate deck and are available to other characters once more. Should there be no Talisman or Purchase Cards left of a particular item, then that item is not available at that time.
Talisman and Purchase Cards may be ditched, like other Follower and Object Cards.
Gaining Talismans
There are two ways characters can acquire Talismans:
- They can be gained as encounters drawn from the Adventure deck.
- They can be acquired by undertaking a quest assigned at the Warlock’s Cave.
Warlock’s Cave
A character who lands on the Warlock’s Cave may choose to accept a quest, or not, as he wishes. If a character chooses to accept a quest, he must roll randomly to determine what it will be, as instructed on the space.
- A character may not go on more than one quest at a time.
- If a character has already completed a quest and lands on the Warlock’s Cave again, he may choose to go on another quest but must roll a die to randomly determine which quest he is assigned as normal.
- A character must attempt to complete his quest immediately if he is able to do so. In addition, the Warlock will prevent any character who has accepted a quest from opening the Portal of Power until he has first completed his quest.
Attacks & Combat
Attacks Overview
Attacks are split into two types: battles and psychic combats. A battle occurs when a character is attacked by a creature whose Strength is given, and a psychic combat occurs when a character is attacked by a creature whose Craft is given. If a player decides to attack another character, they must fight a battle unless the attacker has a special ability that lets him use psychic combat instead.
Battles
Battles occur when:
- A character encounters an Enemy – a Monster, Dragon, Animal, or any creature whose Strength is given; or
- A character decides to attack another character, unless a special ability allows him to attack by psychic combat instead.
Resolving Battles vs. Creatures
Battles against creatures are resolved in the following steps:
- Evade: The character first declares whether he is evading or not. If not, then a battle takes place.
- Cast Spells: Any Spells that the player wishes to cast must be cast before the attack roll is made. Any effects or abilities that affect a character’s Strength or Craft must be implemented before the attack roll is made.
- Character Attack Roll: The character rolls one die, the result of which is considered the attack roll. The character’s attack score is the attack roll plus the character’s Strength, plus any other modifiers that may apply. Remember that only one Weapon may be used at a time.
- Creature Attack Roll: Another player now rolls a die for the creature’s attack roll and adds this to the creature’s Strength. The character may now pay one fate to reroll his attack roll if he wishes.
- Compare Attack Scores: The total of the creature’s attack roll and Strength is the creature’s attack score.
- If the character’s attack score is higher, the creature is killed.
- If the creature’s attack score is higher, the character is defeated and loses one life (use of an Object, Spell, or special ability may prevent this).
- If the attack scores are equal the result is a stand-off.
If the character is defeated or the battle ends in a stand-off, the character’s turn then immediately ends.
Stand-off
In a stand-off, neither side is harmed (characters do not lose a life and creatures are not killed) and that turn immediately ends. On the character’s next turn, the character leaves that space without again encountering whatever he fought, unless indicated otherwise.
More Than One Enemy
If there is more than one Enemy that attacks by Strength on a space and they have the same encounter number, they fight as one during the battle, adding their Strength together with just one attack roll to make a single, combined attack score.
Battles Between Two Characters
Battles between two characters are resolved in the following steps:
- Evade: The character being attacked first has the opportunity to evade. If he chooses not to, or is not successful, then battle takes place.
- Cast Spells: Both characters have the opportunity to cast Spells before the dice can be rolled. Any effects or abilities that affect a character’s Strength or Craft must be implemented before the attack roll is made.
- Determine Attack Rolls: Both characters then roll a die to determine their attack roll. Once both attack rolls have been made, the attacking character must choose first whether to pay fate to reroll. Once he has chosen, the defending character has the same option. No matter what the defender chooses, though, an attacking player who decided not to spend fate when he had the opportunity may not change his mind after the defender has made his own choice.
- Compare Attack Scores: Once the option to spend fate has been addressed, the attacking character’s attack score is determined as in battles against creatures and Enemies. The defender’s attack score is determined the same way as the attacker’s score. The character with the higher attack score wins the battle. If the scores are equal, the result is a stand-off.
- Claim Reward: The winner may either:
- Force the loser to lose one life (which may be saved by use of an Object or Spell), or
- Take one Object or one gold from the loser to add to his own.
If the winner kills the loser by forcing him to lose his last remaining life, the winner may take any Objects, Followers, and gold from the loser to add to his own. Any Objects, Followers, and gold not taken are left on the space. The turn then ends.
Psychic Combat
Psychic Combat occurs when:
- A character is attacked by an Enemy – Spirit or by any creature whose Craft is given; or
- A character whose special ability permits him to attack another character by psychic combat elects to do so.
Resolving Psychic Combat
Psychic combat is resolved in exactly the same manner as battles, except:
- Craft is substituted for Strength.
- No Object can prevent the loss of a life.
Trophies
When a character kills an Enemy, he may take it as a trophy. A character may exchange trophies at the end of his turn to gain additional Strength and Craft counters.
Gaining Strength
A character gains one Strength counter for every seven points of Strength marked on the trophies he turns in. Enemy cards thus exchanged are then placed on the Adventure Card discard pile. Excess Strength points of the trophies above a multiple of seven are lost.
Strength counters may also be gained as a result of encounters.
Gaining Craft
A character gains one Craft counter for every seven points of Craft marked on the trophies he turns in by discarding them to the Adventure Card discard pile. Excess Craft points turned in above a multiple of seven are lost.
Craft counters may also be gained as a result of encounters.
Evading
Characters sometimes have the option to evade creatures and other characters, such as by casting an Immobility or Invisibility Spell. The evading character cannot then affect or be affected by the character or creature in any way.
Only other characters can be evaded in the Inner Region; creatures from board spaces there cannot be evaded.
Encounters that may be evaded are:
- Anything that attacks a character.
- Any character attempting to attack or use a special ability.
- Creatures that appear as a result of an Event, Place, or Stranger card (e.g., the Dragon from the Cave Adventure Card).
Gold, Items, Followers & Spells
Gold
Gold allows characters to buy Objects and pay for services. A character’s wealth is recorded by placing gold coins beside the character card.
- Each character starts the game with one gold, and additional gold is usually acquired as the result of encounters.
- Prices are given in gold coins (G). Thus “3G” represents three gold coins.
- Payments for any purchases or services that are not made to another character are paid into the gold stockpile.
- Any gold received from any source other than another character is taken from the gold stockpile.
- Gold is not considered an Object, so it does not count against a character’s Object carrying limit.
- If a character is required to lose gold and he does not have any, then there is no effect.
Objects
Both Objects and Magic Objects are classed as Objects. During the game, characters usually acquire Objects as the result of encounters. Any Objects characters have are placed below their character card and must be kept faceup.
Object Carrying Limits
No character may have more than four Objects unless he has a Mule. Any character acquiring more than four Objects must decide which to keep. The remainder are immediately placed faceup on the character’s space.
“Weapon” and “Armour” Keywords
- Weapon: Some Objects that increase a character’s fighting ability have the keyword Weapon next to the text for the card’s ability. A character may only use one Weapon during an attack.
- Armour: Some Objects that prevent the loss of life when a character is defeated have the keyword Armour next to the text for the card’s ability. A character may only use one Armour during an attack.
Followers
During the game, characters usually acquire Followers as the result of encounters. All Followers accompanying a character are kept below the character card and must be kept faceup. A character may have any number of Followers.
Losing a Follower
Any Followers that are killed (e.g., in the Chasm or the Vampire’s Tower) or that must be discarded are placed on the Adventure Card discard pile.
Spells
In the magical land of Talisman, anyone can cast Spells as long as he has enough Craft. Some characters start the game with one or more Spells, and new Spells can be found by any character as he travels around the board.
Gaining Spells
All characters may acquire and cast Spells, if their Craft is sufficient to permit this. Only those characters whose special abilities allow them to start the game with Spells do so. Otherwise, Spells are usually acquired as the result of encounters. Spells gained are taken from the top of the Spell deck. When this deck is exhausted, all of the discarded Spell Cards are shuffled and placed facedown to form a new Spell deck.
Spells are kept facedown so that the other players cannot see them, but a player may look at his own character’s Spells at any time. The effect of each Spell, and when it can be cast, are detailed on the individual Spell Cards.
The number of Spells that any character can have at one time is limited by the character’s Craft as follows:
- Craft 1–2: 0 Spells
- Craft 3: 1 Spell
- Craft 4–5: 2 Spells
- Craft 6+: 3 Spells
If at any time a character has more Spells than his Craft allows, surplus Spells must immediately be placed on the Spell Card discard pile; they cannot be cast. The character’s player chooses which Spells to discard. Spells cannot be discarded unless the character has more Spells than his Craft permits, however. The only other way to get rid of a Spell is to cast it!
Casting Spells
Castings Spells is always optional. Players may keep Spells for as many turns as they like before they choose to cast them. A Spell can only be cast as stated on the Spell Card. Once a spell is cast and its effect has ended, it is placed on the Spell Card discard pile.
- Spells affecting characters affect them wherever they are on the board, no matter which Region.
- Spells affecting creatures, however, cannot affect creatures encountered in the Inner Region.
- The maximum number of Spells a character may cast during his turn is equal to the number of Spells he had at the start of that turn.
- A character may only cast one Spell during another character’s turn. (This does not apply to the Command Spell.)
Traveling Between Regions & The Inner Region
Crossing Between the Outer and Middle Regions
The Storm River, which separates the Outer Region from the Middle Region, can be crossed by:
- Using the bridge that connects the Sentinel space (in the Outer Region) to the Hills space opposite (in the Middle Region);
- Using a Raft; or
- As the result of an encounter.
The Sentinel Space
A character may cross the Sentinel bridge in either direction if the die roll for his move is sufficient to carry him across it and into the Region on the opposite side.
The Sentinel attacks a character every time he attempts to cross the Sentinel bridge from the Outer Region to enter the Middle Region.
- A character defeating or evading the Sentinel must continue his move by entering the Middle Region and continuing to move in either direction to the full value of his movement roll.
- A character defeated by the Sentinel loses one life (which may be saved by use of an Object or Spell), and his turn ends immediately in the Sentinel space.
- A character in a stand-off with the Sentinel does not lose a life, but his turn still ends immediately in the Sentinel space.
- The Sentinel does not attack characters passing through the Sentinel space while moving in the Outer Region, characters crossing back from the Middle Region to the Outer Region, or characters who end their movement on the Sentinel space.
- When crossing from one Region to another, a character may change the direction of his move upon entering the new Region.
Rafts
Any character wishing to cross the Storm River using a Raft must either build one or acquire one as the result of an encounter.
- Any character in a Woods or Forest space at the start of his turn who has an Axe may declare that he is building a Raft for that move. Instead of moving, the character takes a Raft Card from the Purchase deck (if available).
- Any character acquiring a Raft may cross the river at the start of his next turn. The character may cross the river to any space of his choice directly opposite the one he is in. This is his move for that turn; he does not roll the die to determine his movement.
- A Raft can never be left behind or taken along to be used on a future turn. Whether or not it is used, it must be placed on the Adventure Card discard pile or back with the Purchase deck after the character has either used it or decided not to do so.
Crossing Between the Middle and Inner Regions
The Portal of Power connects the Portal of Power space to the Plain of Peril space.
The Portal of Power
The Inner Region can only be entered by passing through the Portal of Power, which must be opened before it can be traversed.
- A character can only try to open the Portal if his move is sufficient to carry him beyond it. A character must attempt to open the Portal each time he passes through it; previous passage is no guarantee of future passage.
- A character attempting to open the Portal follows the instructions on the Portal of Power space. If successful, the character’s turn ends on the Plain of Peril. If unsuccessful, the character’s turn ends immediately on the Portal of Power space.
- A character wishing to pass through the Portal of Power from the Inner Region to the Middle Region does not need to open it. He simply moves from the Plain of Peril to the Portal of Power space. Doing so counts as his entire move for that turn.
The Inner Region
Movement in the Inner Region
The die is not rolled for movement in the Inner Region. Instead, a character can move only one space per turn there.
The encounter instructions on each space in the Inner Region must be completed before a character can move on toward the Crown of Command.
Turning Back
A character in the Inner Region may decide at any time to turn back and move back towards the Plain of Peril.
- A character who has turned back still only moves one space per turn, but ignores the instructions on all of the spaces on his return to the Plain of Peril.
- Once a character has declared his intention to turn back, he cannot change his mind and he must go all the way back to the Plain of Peril.
- Once there, however, the character is free to do whatever he likes, including heading back toward the Crown of Command or leaving the Inner Region through the Portal of Power.
Encounters in the Inner Region
A character does not draw Adventure Cards in the Inner Region. Instead, the encounter is detailed in the instructions for the space. The instructions must be followed, unless the character is turning back.
None of the creatures in the Inner Region can be affected by any Spell, nor may they be evaded.
Encountering a Character in the Inner Region
- In the Inner Region, a character may only encounter another character on the Plain of Peril, the Valley of Fire, and the Crown of Command.
- Encounters with other characters on the Plain of Peril and the Valley of Fire are treated exactly as encounters between characters in the Outer and Middle Regions.
- Encounters with other characters on the Crown of Command are also treated as encounters in the Outer and Inner Regions, except characters must encounter each other.
Inner Region Board Spaces
The following is additional explanation about many of the spaces in the Inner region:
Crypt
The Crypt is in ruins and a character needs Strength to shift the rubble to discover the various exit tunnels. A character must roll three dice upon entering the space and the results are totalled. The character’s Strength is subtracted from this total and the result indicates where the character will emerge from the Crypt. The character is immediately moved to the indicated space. This counts as the character’s move. A character who emerges on the Crypt itself may move away on their next turn.
Mines
Craft is needed to find the route through the labyrinthine Mines. The instructions are as those for the Crypt except that the character’s Craft (instead of Strength) is subtracted from the total of the die rolls.
Werewolf Den
Two dice are rolled for the Werewolf’s Strength each time a character lands on the space. This is the Werewolf that attacks that character, until he escapes. Each character encounters a different Werewolf.
Example: The Dwarf lands on the Werewolf Den and rolls two dice to determine the Werewolf’s Strength. He rolls a “3” and a “5” which brings the Werewolf’s Strength to 8. The Dwarf then battles the Werewolf. The Werewolf rolls a “5”, which brings the Werewolf’s attack score to 13 (8 Strength plus an attack roll of “5”). The Dwarf rolls for battle and gets an attack score of 10 which means he is defeated and loses a life. On the Dwarf’s next turn, he decides to attack the Werewolf again instead of turning back. The Werewolf battles with the same Strength of 8 but this time gets a “1” for his attack roll, which brings the Werewolf’s attack score to 9 (8 Strength plus an attack roll of “1”). If the Dwarf can get an attack score of 10 or more he will defeat the Werewolf and may move on next turn.
Pits
A die is rolled each time a character lands on the Pits space. This is the number of Pit Fiends that attack the character. The character fights the Pit Fiends one at a time, in succession, until the character is either defeated or defeats all of the Pit Fiends, whereupon that turn ends. If a character is defeated, he must then continue to fight the remaining Pit Fiends next turn or turn back. A character can move on the turn following that in which the last of the character’s allotted Pit Fiends was defeated.
The Crown of Command & End of Game
Reaching the Crown of Command
The last space on the board is the Crown of Command. It can only be reached from the Valley of Fire space, which can only be entered by characters that have a Talisman. If a character does not have a Talisman, then he must turn back.
Rules at the Crown of Command
When a character is on the Crown of Command space, a character does not move but remains there instead. Characters on the Crown of Command cannot turn back.
- If there is already another character on the Crown of Command space when a character lands on it, the character there must be encountered. Once two (or more) characters are on the Crown, those characters’ turns consist only of encountering one of the other characters.
- A character who is alone on the Crown of Command space on his turn must cast one Command Spell at all other characters. To do so, the caster rolls one die:
- On a “1,” “2,” or “3”, the Spell has no effect.
- On a “4,” “5,” or “6,” all of the other characters lose one life.
- If a character is killed by the Command Spell, that player loses the game and may not start another character.
- Once any character has reached the Crown of Command, any character that gets killed is out of the game. Note that this rule stays in effect for the rest of the game, even if a character leaves the Crown of Command.
Curses: Becoming a Toad
Toads
When a character is turned into a Toad for three turns, a Toad figure is substituted for the character’s figure on the board and the player lays a Toad Card on top of his character card. When the character reverts back to his original form, remove the Toad Card and exchange the Toad figure for his character figure at the end of his third turn.
- A Toad has Strength 1 and Craft 1, which are not modified by Strength and Craft counters accumulated prior to transformation. Although a Toad can gain and lose Strength and Craft, these modifications disappear when the Toad turns back into the original character. At that point, the character’s pre-transformation Strength and Craft counters are once again used and resume their effects.
- A character retains his trophies and can still gain trophies while a Toad. However, any Strength or Craft gained through trophies while the character is a Toad are lost when the character reverts to his original form (so it is usually a bad idea to trade in trophies while a Toad).
- A Toad does not roll the die for movement, but must move only one space per turn.
- Toads can neither gain nor cast Spells, but a character’s Spell Cards are not lost upon transformation into a Toad. They simply cannot be used until the character reverts back to his original form.
- A Toad’s lives are those of the original character. Thus, any lives lost or gained by the Toad affect the status of the original character.
- A Toad’s fate tokens are also those of the original character. Similarly, any fate lost or gained by the Toad affect the status of the original character. Toads may use fate as normal.
- Toads have encounters when landing on a space like any other character.
- A Toad has no special abilities. Those of the original character cannot be used while the character is a Toad.
- If a character is already a Toad and is turned into a Toad again (for example, as a result of the Random Spell), the character remains a Toad for three more turns starting from the second transformation.
Alternative Rules & Variants
Alternative Rules
If players want to use any of the rules discussed here, they should make sure that everyone understands and agrees to the rules before the game begins.
Evading Unfriendly Individuals
This alternative rule is for players who prefer more options for evading. In addition to evading characters and creatures, characters may also evade any unfriendly individual depicted on a card or space that the character does not wish to encounter, except for spaces in the Inner Region. For example, the Black Knight, Hag, or the Witch can be evaded, but the Vampire’s Tower, Werewolf Den, Death, and Pits cannot. It is up to the players’ discretion to decide which encounters can be considered an unfriendly individual in order to evade them.
Inherited Items
When a character is killed, the player’s new character may “inherit” the items that his killed character loses.
- When a character is killed, his player removes the character card and playing piece from the game, but places any Objects (including Magic Objects), gold, and Followers to one side for the moment, and returns any other Spells, trophies, fate, cards, and counters to the appropriate discard or stockpiles.
- On the player’s next turn, he starts with a new character drawn at random from the unused character cards as normal. The Objects, gold, and Followers that were put to one side are inherited by the player’s new character and may be used by him as normal. Anything that is not be taken by the new character must be placed on his start space.
- If a character kills another character during an encounter, he may not take the killed character’s Objects, gold, and Followers since these items will be inherited by a new character.
Alternative Rules for Faster Play
Talisman is an epic game of adventure – a gradually unfolding story that usually takes several hours to play to completion. Repeat games will run faster, but the more players who take part, the longer a game will last – and with more than six players, a typical game is likely to take two to three hours to complete, and possibly longer.
Since people who enjoy playing Talisman don’t always have time to finish a big game, it’s possible to adjust the rules to speed things up a little. The adjustments are especially recommended for games with five or more players, but will work equally well for games of any size where a shorter game is desired.
Strength and Craft
If players find themselves a little short on time, they can increase the rate at which Strength and Craft is earned. This speeds up the game by making characters more powerful more quickly.
The normal rule is that to gain a point of Strength or Craft, a character has to exchange trophies with a combined value of seven or more to gain the point. To speed up play, players can simply change this value to six, or to speed things up even further they can change it to five.
Starting Bonus
The first half an hour of play is often spent building up sufficient Craft or Strength to confront the various Enemies that have been encountered. If players wish to cut to the action more quickly, each player can be allowed to take one bonus Strength or Craft (his choice) at the start of the game. This doesn’t affect the characters’ normal values; it’s just an extra point of Strength or Craft as if earned in the usual way.
Talisman Bloodbath
At the start of the game, remove three cards from the available Talisman Cards instead of using all four. In addition, any player whose character is killed immediately loses the game instead of drawing a new character card. The Talisman Bloodbath alternative rule makes for a short, but very, very bloody game.
The Command Spell
A further way of speeding up play in this final stage of the game is to allow the Command Spell to be cast more easily. This is especially effective where a lot of players are involved, and therefore there are more opportunities to stop the character who is casting the Spell! Normally the Spell is cast on a die roll of “4,” “5,” or “6.” With five or more characters in the game, the Spell could be cast as follows:
- 5 players: 3, 4, 5, or 6
- 6 players: 2, 3, 4, 5, or 6
- 7 or more players: Casts automatically
Sudden Death
In Sudden Death Talisman, the first player to reach the Crown of Command wins! Reaching the Crown of Command is no easy task, and if players don’t have time to play a full game then this is a good way to end the adventure.
Another way of playing a Sudden Death game is for players to agree to stop the game at a certain time and then count up the total number of Strength and Craft counters each character has, plus gold, Spells, Followers, Objects, and Magic Objects held in addition to the number the character started the game with. The player who’s character has the highest total wins! If players are obliged to stop the game before it is properly finished, this is a satisfactory way of deciding who has won.
Reference & Credits
Talisman Encounter Sequence
Credits
Game Design: Robert Harris
Additional Game Design: John Goodenough and Rick Priestley
Editing: Mark O’Connor, Sam Stewart, and Jeff Tidball
Graphic Design: Kevin Childress, Mark Raynor, Brian Schomberg, and WiL Springer
Cover and Board Art: Ralph Horsley
Internal Art: Massimiliano Bertolini and Jeremy McHugh
Art Direction: Zoë Robinson and Zoe Wedderburn
Playtesters for Talisman 4th Edition: Dave Allen, Mike Ball, Owen Barnes, Kate Flack, Jon Gillard, Mal Green, Ragnar Karlsson, George Mann, Nelson, Mark Owen, Mark Raynor, Matthew Toone, and Zoe Wedderburn
Production Manager: Gabe Laulunen
International Production Coordinator: Sabe Lewellyn and Casey Ryan
Executive Developer: Jeff Tidball
Publisher: Christian T. Petersen
Special Thanks: Elliott Eastoe, Jon New, Richard Tatge, and all at Talisman Island!
FFG Extends a Special Thanks To: Andy Jones, Jon Gillard, and Erik Mogensen for walking the long road with us and for finally leading us to this great prize. Thank you for tolerating the pleading, cajoling, begging, prodding, and many proposals from us over the years. Also a heartfelt “thank you” to Daniel Steel for his help in the process.
For additional material, support, and information, please visit us on the web: www.FantasyFlightGames.com
Games Workshop
Licensing Manager: Owen Rees
Licensing and Acquired Rights Manager: Erik Mogensen
Head of Legal and Licensing: Andy Jones
Talisman © Games Workshop Limited 1983, 1985, 1994, 2007. This edition © Games Workshop Limited 2008. Games Workshop, Talisman, the foregoing marks’ respective logos and all associated marks, logos, characters, products and illustrations from the Talisman game are either ®, TM and/or © Games Workshop Limited 1983–2008, variably registered in the UK and other countries around the world. This edition published under license to Fantasy Flight Publishing Inc. 2008. Fantasy Flight Games, and the FFG logo are trademarks of Fantasy Flight Publishing, Inc. All Rights Reserved to their respective owners.
Rules explaination videos
Expansions for
Talisman: Revised 4th Edition

Talisman (Revised 4th Edition): Instructor
2008
A rare bonus Adventure Card featuring the Instructor Stranger.
90
minutes
Medium Heavy

View expansion

Talisman (Revised 4th Edition): Doppelganger
2008
A bonus Monster card with a unique history of preorder and launch-event availability.
90
minutes
Medium Heavy
View expansion

Talisman (Revised 4th Edition): The Nether Realm Expansion
2013
Face the Nether Realm’s deadly enemies and seek new paths to victory.
Medium
View expansion

Talisman (Revised 4th Edition): The Blood Moon Expansion
2012
Face a shifting day-night cycle, sinister encounters, and the prowling Werewolf.
120
minutes
Medium
View expansion

Talisman (Revised 4th Edition): Danse Macabre
2009
A bonus alternative ending featuring the Grim Reaper.
90
minutes
Medium Heavy
View expansion
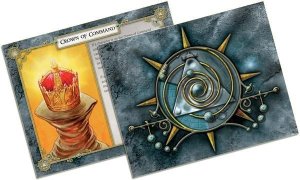
Talisman (Revised 4th Edition): Crown of Command
2009
A classic ending returns for random selection in Talisman's evolving finale system.
90
minutes
Medium
View expansion
Talisman (Revised 4th Edition): The Lost Realms
2018
Face Nether foes and cross perilous realms in search of the Crown of Command.
90
minutes
View expansion
Talisman (Revised 4th Edition): The Deep Realms Expansion
2015
Venture through haunted passages between the Dungeon and the City.
Medium
View expansion
Talisman (Revised 4th Edition): The Harbinger Expansion
2015
Face seven Omens as demons, plagues, and a shattered world threaten Talisman.
Medium
View expansion
Talisman (Revised 4th Edition): The Firelands Expansion
2014
Face the Ifrit’s fiery vengeance and survive a realm transformed by flames.
90
minutes
Medium
View expansion
Talisman (Revised 4th Edition): The Cataclysm Expansion
2016
Explore a reborn realm of lost treasures, strange mutations, and new threats.
90
minutes
Medium
View expansion
Talisman (Revised 4th Edition): The City Expansion
2013
Shop, collect bounties, and compete for the Crown of Command.
90
minutes
Medium
View expansion

Talisman (Revised 4th Edition): The Dragon Expansion
2011
Face the Dragon King in a dangerous race for the Crown of Command.
90
minutes
Medium
View expansion
Talisman (Revised 4th Edition): The Woodland Expansion
2014
Enter the fae realm, where destiny, danger, and strange treasures await.
90
minutes
Medium
View expansion
Talisman (Revised 4th Edition): The Sacred Pool Expansion
2010
Choose the light or darkness in a tense race for the Crown of Command.
90
minutes
Medium
View expansion
Talisman (Revised 4th Edition): The Frostmarch Expansion
2009
Face the Ice Queen in a bone-chilling Talisman adventure.
90
minutes
Medium
View expansion
Talisman (Revised 4th Edition): The Highland Expansion
2010
Climb the enchanted peaks, gather riches, and face the Eagle King.
90
minutes
Medium
View expansion
Talisman (Revised 4th Edition): The Dungeon Expansion
2009
Descend into a subterranean realm with new characters, cards, and adventures.
90
minutes
Medium
View expansion
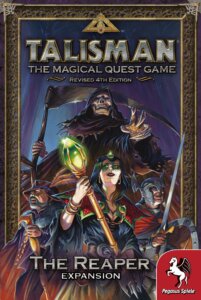
Talisman (Revised 4th Edition): The Reaper Expansion
2008
Face the Grim Reaper as four new heroes pursue the Crown of Command.
90
minutes
Medium
View expansion
