
Dungeon Lords
2009
Manage an underground complex, recruit monsters, set traps, and prepare for heroes in a strategic two-year struggle for dungeon glory.
90
minutes
2 - 4
player(s)
12+
Medium Heavy


About this board game
Dungeon Lords is a strategy board game for 2–4 players, with games lasting about 90 minutes. You take the role of an evil dungeon lord and compete to build an impressive underground complex while defending it from invading heroes.
Across two game years, you dig tunnels and rooms, hire monsters, buy traps, and gather the resources needed to manage your dungeon. Each year is divided into four seasons, and every season gives you opportunities to plan your next actions.
Players use a hand of cards to place workers at action spaces. Each action has three available spots, with different effects depending on which spot you choose. You might mine gold, recruit creatures, or purchase traps, but using your cards also carries a cost: two cards become locked and cannot be used during the following season.
- Build and manage an underground dungeon.
- Hire monsters and purchase traps.
- Choose worker-placement actions with varied effects.
- Prepare for incoming heroes and seasonal events.
At the start of each season, you can see the heroes and events expected in the following season. This forecast lets you prepare for the challenges ahead. After the first three seasons, heroes are assigned to players according to their level of evil, and each hero brings a distinct power that must be answered.
At the end of each year, the heroes descend into the dungeons to fight. In Dungeon Lords, success is measured by what you have built, the monsters you have hired, and the heroes you have captured. Plan carefully, manage your growing complex, and prove that your dungeon deserves to rule the underground.

Board Game Rules for
Dungeon Lords
They meet in a tavern. They quaff a few ales. Before the night is over, the strong warrior, the wily wizard, the committed priest and the sneaky thief form an inseparable party of adventurers, ready to rid the world of evil. And wouldn’t you know it? There just happens to be some evil within easy walking distance. A dark lord has filled a nearby hill with tunnels, traps, treasure, and trolls.
And so the next morning (or the next afternoon if too many ales were quaffed) the heroes set out to fight for Right, conquer the dungeon, and punish the wicked lord (by taking all his treasure, of course). It’s a classic scenario, and any veteran dungeon crawler will tell you that’s the way things ought to be.
But what about that dark lord? Does anyone ever think about his feelings? Those adventurers, who have never done an honest day’s work in their lives, cannot begin to imagine how much effort goes into building a respectable dungeon. They have no idea how hard it is to tunnel through granite, how expensive good traps are these days, how difficult it is to find qualified imps, or how much food it takes to feed a troll. And the bureaucracy! Dungeons must meet rigid safety specifications, gold mining is subject to strict regulations, and taxes are due whenever the Ministry of Dungeons feels like it. And as soon as the dungeon is built, some band of do-gooders comes along and hacks everything up. Life is not easy for a dungeon lord.
Support for this game comes from the Ministry of Dungeons Educational Trust Fund. We hope to refute common prejudices against dungeons and their builders while raising awareness of the destruction adventurers cause to the underground ecosystem. For aspiring dungeon lords, this text is an introduction to the subject of dungeon construction, with emphasis on moral obligations such as proper monster care and prompt payment of taxes. Finally, this game provides adventurers an opportunity to examine the question of whether it is more fun to build a dungeon or to destroy one.
Summary
Dungeon Lords is a game for 2 to 4 players. You take the role of a young aspiring dungeon lord (just 15 to 20 decades old) who is trying to get a dungeon lord license. The Ministry of Dungeons gives you a trial period during which you attempt to build a high-quality dungeon and protect it from adventurers. At the end of two years, your dungeon is visited by Ministry officials who give you points for your engineering and tactical achievements.
The rules will focus on a four-player game. The three-player game is similar, with similar strategies. The two-player game has a few additional differences and the strategy is a bit more difficult. We recommend playing your first game with three or four players.
The rules for your first game are slightly simplified. Later in the book are rules for the full version of the game.
Overview of Play
The game alternates between Building and Combat. Each phase of play is illustrated on the Progress Board, which has one side for Building and another for Combat.
Building
The game begins with Building, which lasts 4 rounds (winter, spring, summer, and fall). Each round has several phases, which are indicated by the spaces on the Progress Board. The Progress Marker advances along these spaces, indicating the current phase and round.
During Building, players expand and improve their dungeons, hire imps, recruit monsters, buy traps, and pay taxes. The dungeon lords with the nastiest reputations attract the most powerful heroes, while the weaker heroes target less threatening dungeons. A dungeon lord who is particularly evil may attract a paladin, the most powerful adventurer of all. After four rounds of Building, you must defend your dungeon.
Combat
Combat also lasts 4 rounds. In each round, the adventurers try to conquer one space of the player’s dungeon. The player uses the traps and monsters acquired during Building to eliminate the adventurers as quickly as possible, before they conquer too much of his or her dungeon.
Second Year
After the First Year’s Combat, the game enters the Second Year, which also has Building and Combat.
Scoring
After the Second Year’s Combat, players score points. The one with the highest score wins.
Set up the game boards, tokens, figures, tiles, and cards as illustrated.

- Central Board: Everyone needs to be able to reach the components on the Central Board. It should be in the middle of the table.
- Distant Lands Board: The Distant Lands Board can be off to the side somewhere. It holds cards that are not currently in use.
- Non-Player Dungeon Boards: In a two- or three-player game, take the remaining Dungeon Boards, fold them and place them this side up.
- Progress Board (Building side up): The Progress Board needs to be where everyone can see it, but only one player needs to be able to reach it.
- Dungeon Boards: Each player has his or her own Dungeon Board.
- Starting Player Token: Before the first game, put the happy face sticker on the big wooden disk to create the Starting Player Token. The nicest player gets the Starting Player Token. (Or you can choose the starting player randomly.)

Central Board
- Imp Figure Bank: The Imp Figure Bank also holds three Troll Figures. Trolls are the only monsters who like to hang out with imps.
- Trap Cards Deck: Shuffle all the Trap Cards and place the deck face down on the Central Board.
- Food Token Bank
- Gold Token Bank
- Tunnel Tile Bank
- Combat Cards for the First Year: Shuffle the 9 Combat Cards with the silver sword. Choose 4 randomly and place them face down on the town space of the Central Board. Return the other 5 cards to the box without looking at them.
- The Underground Tavern: Spaces for available Monster (or Ghost) Tiles.
- Bargain Basement Room Store: Spaces for available Room Tiles.
- Paladins: Both paladins go on the paladin space, face up. The darker one with the silver glyph is on top. The lighter one with the gold glyph will not be used until the Second Year.
- Evilometer: All players’ Evil Counters begin on the indicated space. In a two-player game, an Evil Counter in one of the non-player colors should be placed here, as well. (It doesn’t matter which color.)
- If a card or a rule tells you to “gain 1 Evil”, you move your Evil Counter one space up the Evilometer, toward the evil face
 .
- If you are told to “lose 1 Evil”, you move your Evil Counter one space down, toward the happy face
 .
- The Evilometer measures how the locals view the aspiring dungeon lords. Doing evil actions will move you up the Evilometer. Peaceful gestures and propaganda can be used to move yourself down. The most powerful adventurers attack the players highest on the Evilometer. Pay special attention to the space with the paladin icon. If your reputation gets this evil, you had better be prepared to deal with the paladin.
- If a card or a rule tells you to “gain 1 Evil”, you move your Evil Counter one space up the Evilometer, toward the evil face
Note: Tokens, Tunnel Tiles, and Imp Figures are not intended to be limited. If any bank runs out, represent the component with a suitable substitute.

Progress Board (Building side up)
- Rounds and Steps: Building has 4 rounds: winter, spring, summer, and fall. Each round has several phases, represented by the spaces on the board. (A few of the phases are skipped in the first round, so winter is shorter.) The Progress Marker is moved after each phase to keep track of the current phase and round.
- Adventurer Spaces: Adventurers arrive in spring, summer, and fall. Adventurer Tiles are placed here on one phase, and then, a few phases later, they are assigned to the players’ dungeons. At the beginning of the game, these spaces are empty.
- Events: The three Event Tiles are shuffled and placed face down on the indicated spaces of the spring, summer, and fall rounds.
- Progress Marker: This can sit next to the Progress Board during Setup. When the game begins, place it on the first space.

Distant Lands Board
Components which have not yet been used, as well as components which have left the game, are placed on the Distant Lands Board.
- Monster Stacks: Separate the Monster (or Ghost) Tiles into two groups according to their backs and mix each group up. Stack the gold-backed tiles on the indicated space. Then stack the silver-backed tiles on top of them.
- Room Stacks: Separate the Room Tiles into two groups according to their backs and mix each group up. Stack the gold-backed tiles on the indicated space. Then stack the silver-backed tiles on top of them.
- Adventurer Stacks: Separate the Adventurer Tiles into two groups according to their backs and mix each group up. Put the stacks on the indicated spaces.
- Discard Piles: Cards and tiles that leave the game do not come back. Put them on the indicated discard piles. Tiles should be discarded face up, but Trap Cards are kept face down.
- Damage Counter Bank: The little cubes represent the life force flowing through the veins of the adventurers.
- Combat Cards for the Second Year: Shuffle the Combat Cards for the Second Year and choose four of them at random to place, face down, on the Distant Lands Board. Return the rest to the box, without looking at them.

Player Board
Each player chooses a color. In your color you should have a Dungeon Board, 3 Minion Figures, an Adventuring Party Marker, an Evil Counter (the cube), 8 Orders Cards, and two Overview Cards that illustrate scoring. Place your Evil Counter on the starting space of the Evilometer.
The other components are placed according to the illustration:
- Construction Site with three Tunnel Tiles: Tunnel Tiles are placed on the three indicated squares, dark side up.
- Office with three Minion Figures: Your loyal minions, at your service.
- Pantry with three Food Tokens: Three food tokens.
- Treasury with three Gold Tokens: Three gold tokens.
- Imp Den with three Imp Figures: Here is where your imps will sleep when they are not working.
- Trap Storage: Traps are stored here.
- Battleground: Where combat steps are managed.
- Spaces for Three Orders: Your workplace where orders are issued.
- Inaccessible Orders: Shuffle your deck of Orders Cards and choose 2 at random to place here, face up.
- Orders Cards: Take the remaining six cards into your hand.
- Monster Lair: Where you keep monsters (and ghosts).
- Entrance: Where the adventurers will gather over the course of the year.
- Prison: Defeated adventurers go here.
- Dead Letter Office: Notices of overdue taxes are kept here.
- Overview Cards: Two overview cards (Scoring and Titles).

Non-Player Dungeon Boards
You will need the Dungeon Boards, Action Cards, and Minion Figures of all four colors, even in a two- or three-player game.
- In a three-player game, choose a player to handle the non-player Dungeon Board.
- In a two-player game, each player handles one non-player Dungeon Board.
- Shuffle the non-player Orders Cards and deal out three at random, face up on Inaccessible Orders.
- The remaining 5 Orders Cards form the Orders Cards Deck.
- Place Minion Figures in the Minion Office.
Leftovers
After setup, everything should be on the table except the following:
- The 5 First-Year and 5 Second-Year Combat Cards that you returned to the box.
- The Overview Cards for any colors without players.
- One Evil Counter, if it is a two- or three-player game. (In a two-player game, one of the non-player Evil Counters is placed on the Evilometer.)
- Nine Special Event Cards, which you will not be using in your first game. (Just put them back in the box.)
- Twenty Item Tokens. (Put back in the box; used in an advanced variant.)
Put the Progress Marker on the first space of the Progress Board. After each phase, you will advance the Progress Marker to the next space. The Year is divided into 4 rounds: winter, spring, summer, and fall. Each has the same phases, except that winter has no Event or Adventurers Phase.
New Round Phase
- Take 3 tiles from the top of the Monster Stack on the Distant Lands Board and place them face up in the Underground Tavern on the Central Board.
- Similarly, draw 2 tiles from the Room Stack and place them in the Bargain Basement Room Store.
- Any monsters or rooms that were left on the Central Board from a previous round should be placed in the appropriate discard piles. Each round there will be a completely new selection.
In the first three rounds, you also get a trouble forecast – a look at next round’s event and adventurers. (In fall, there is no forecast because it is the last season of the year.)
- Next Round’s Event: Turn up the Event Tile for the next round. This event does not occur immediately. It depicts what will happen at the end of the next round. This gives you two rounds to prepare. Events will be described below in the Event Phase.
- Next Round’s Adventurers: Draw four Adventurer Tiles (3 in a two- or three-player game) and place them, in order, on the 4 spaces for next round’s adventurers. Then rearrange them so that the weaker adventurers (darker, with simpler glyphs) are on the left and the more powerful adventurers (lighter, with more complex glyphs) are on the right. Tiles with the same glyph and shade should stay in order. If all the adventurers have the same glyph, place the last one drawn at the bottom of the stack and draw a new one. Keep doing this until you get a different glyph. Then re-order the adventurers.
Orders Phase
Now look at the Central Board. In the middle there are 8 places you can send your minions to. Each place has 3 spaces, which represent slightly different ways of accomplishing the task you order.
Selecting Orders
You begin the round with 6 Orders Cards in your hand. (Two inaccessible orders are face up on your Dungeon Board.) All players decide simultaneously. Choose 3 orders and place them face down on the appropriate spaces of your Dungeon Board. The order you want carried out first should be on the left.
Revealing Orders
- When everyone has placed all three orders, everyone turns their first card (the one on the left) face up. Beginning with the starting player, each player finds the place on the Central Board corresponding to the revealed order and places one of his or her Minion Figures on the first empty space (the one with the lowest number). You play in turn, clockwise around the table. If someone playing ahead of you has chosen the same place as you, your minion will have to go on the second space.
- Then everyone reveals their second order. Again, play clockwise around the table, placing your second minion on the first unoccupied space corresponding to your chosen action.
- Finally, everyone reveals their third card and places their third minion, according to the same rules.
It is possible that when it is your turn to place a minion all three spaces will be occupied. In this case, you place the minion on the Orders Card instead. This indicates that he is unable to carry out the order.

Executing Orders
The actions are always performed in the same order. You start with the Get Food action in the upper left corner and move from left to right along the top row. Then you do the actions in the second row, again from left to right.
At each place, the minions execute their orders beginning with the one on the shortest space. (Usually they act in the order in which they arrived – I, II, III – but when buying rooms or hiring monsters, they go in the opposite order, as explained below.) When it is your minion’s turn, you perform the indicated action and return your Minion Figure to your Dungeon Board. Alternatively, you can decide not to perform that action and move your Minion Figure to your Orders Card to indicate that the order was not carried out.
- Each space illustrates what you gain from that action. If there is no arrow, you get it for free. Usually, however, the action will have a cost which is indicated by the symbol to the left of the arrow. If you pay that cost, you get the thing the arrow points to.
- If the cost is gold
 or food
 , you pay it by taking the indicated number of Food or Gold Tokens from your Dungeon Board and returning them to the bank. If you do not want to pay or cannot pay, then you cannot use the action. In this case, move your Minion Figure to the Orders Card to indicate that the order was not carried out.
- You must pay the full cost or nothing at all. You cannot pay part of the cost to get part of the reward. You cannot pay double the cost to use the action twice.
- If a player does not use an action, the space remains unused. The other Minion Figures do not move up. They stay where they are.
- Sometimes the cost of an action is paid for with your reputation . This means that you move your Evil Counter one space up the Evilometer toward the evil face (unless you are already at the top). Two evil faces mean that you move up two spaces.
Description of Actions

Get Food
- Space I: Buy food with gold.
- Space II: Get food by gaining evil (threatening the villagers).
- Space III: Get food and gold by gaining 2 evil (ruining the village).

Improve Reputation
- For each smiley face , you move your Evil Counter down the Evilometer one space (unless you are already at the bottom).
- If you also get a chance to spy
 , you can look at any one of the four Combat Cards. (Usually, it is best to look at the top card, unless you spied it earlier in the round.) Be sure not to change the order of the cards.

Dig Tunnels
This action allows you to dig up to the indicated number of tunnels (2, 3, or 4). Each tunnel will require one imp. You do not have to dig all of them. You can dig fewer tunnels and use fewer imps.
- If your minion is on the third space, you must use one imp as a foreimp, even if you only dig one tunnel. Place an Imp Figure on the dungeon entrance to indicate that he is supervising. (If you choose to dig no tunnels, you do not use a foreimp.)
- If you choose to dig no tunnels, then move your Minion Figure to the Dig Tunnels Orders Card to indicate that the order was not carried out.
- Placement rules: Draw one Tunnel Tile from the bank and place it (dark side up) adjacent to a previously placed Tunnel or Room Tile. Put an Imp Figure in the upper right corner of the new tile to indicate that the imp is working on the tunnel.
- For safety reasons, the Ministry of Dungeons will not let your tunnels make a 2×2 square. This means that any 2×2 block of your Construction Site must have at least one square empty.


Mine Gold
Mining gold is analogous to digging tunnels. Your minion will get you a permit for 2, 3, or 4 imps. If you get the last permit, you need to put a foreimp at the dungeon entrance to supervise. As with digging tunnels, you can choose to use fewer than the maximum number of imps.
- Imps only mine gold in unconquered tunnels (Tunnel Tiles that are dark-side-up). Imps cannot mine gold in rooms.
- To mine gold, place an Imp Figure in the middle of the tile and draw 1 Gold from the bank.
- Two imps cannot mine the same Tunnel Tile, but an imp can mine gold in a tunnel that was dug this round. Such a tile will have one imp in the upper right corner (the one that dug it) and one imp in the center (the one mining gold).
- Imps that were used during digging cannot be re-used during mining. Each imp only does one job per round.

Recruit Imps
To recruit imps, pay the indicated cost in Food (and possibly Gold) and take the indicated number of Imp Figures from the bank. New imps will not be available for digging or mining this round because those actions have already been dealt with, but they can still help out during the Production Phase, which comes later.

Buy Traps
To buy traps, pay the indicated amount of Gold (nothing if your minion is on space II) and draw the indicated number of Trap Cards (1, 1, or 2). You keep your Trap Cards face down on your Dungeon Board, but you can look at them at any time.

Hire Monster (or Ghost)
Unlike the preceding actions, those who come later perform their actions earlier. Begin with the minion on space III (the shortest space) and proceed to II and then I.
- To hire a monster (or ghost) you choose one of the available Monster (or Ghost) Tiles and pay the cost indicated in the corner of the tile. Place your new monster (or ghost) face up in the Monster Lair of your Dungeon Board.
- Each player can hire one monster (or one ghost). The one whose minion is on space III must pay an extra food, but he or she gets to choose from all 3 available monsters (and ghosts). Those who go later must choose among the monsters (and ghosts) that are left.
- If you can’t pay the cost on the Monster (or Ghost) Tile (or if you can’t pay the extra cost on space III) you cannot use the action.
- When you hire a troll, take a Troll Token from the bank and put it in your Imp Den. If you lose the troll later, return the Troll Token to the bank.

Build Room
As with hiring monsters, players buy rooms in reverse order, beginning with the minion on space III. Each player may buy only 1 room, and only 2 rooms are available. The player on space I does not have to pay anything, but if the players on spaces III and II buy rooms (for 1 Gold) then nothing will be left. (In this case the player moves his Minion Figure from space I to the Build Room Orders Card to indicate that the order was not carried out.)
When you get a room, you replace one of your unconquered Tunnel Tiles with the Room Tile. The room must be placed according to the following limitations:
- Proper zone: A First Year room must be placed in the proper zone of the dungeon. Some rooms must be near the surface, some must be deep, some must be in the center, and some must be on the periphery. The zone is illustrated on the Room Tile. The light squares are the ones where the room is allowed to be built.
- No adjacency: Two rooms cannot be adjacent. (But it is acceptable for two rooms to share a corner or to be connected by a Tunnel Tile.)
If you have no unconquered Tunnel Tiles on squares that meet the requirements, you cannot buy that room. A tunnel can be turned into a room even if it was newly dug or mined earlier in the round. New tunnels can be attached to rooms as though the room were just another tunnel.
After Executing Orders
The Orders Phase ends when all actions in all 8 places have been dealt with. Minions who carried out orders are returned to their Dungeon Boards. The others remain on the cards of the orders that they did not carry out.
The Orders Phase with 3 Players
- Before choosing orders, choose orders for the non-player color. Pick up the 3 inaccessible orders and put them back in the deck. Shuffle the 5 cards and choose 3 at random to put on the non-player Dungeon Board, face up.
- Take the 3 non-player Minion Figures and place them on space II of the actions indicated by the new orders. Move the new Orders Cards to the spaces for inaccessible orders.
- Then everyone chooses and reveals orders as usual. The spaces occupied by the non-player minions are off limits, so the first player there gets space I and the second player gets space III. If all 3 players choose an order picked by the non-player color, one of them will be shut out.
- When it comes time for a non-player minion action, simply return the Minion Figure to the non-player Dungeon Board.
The Orders Phase with 2 Players
- Each non-player Dungeon Board should have 3 inaccessible Orders Cards. For the non-player color that you are in charge of, shuffle the 5 remaining Orders Cards and reveal 2 at random.
- Place 2 Minion Figures of that color on space I of the actions chosen. (If both non-player colors choose the same card, one goes on I and the other on II.)
- Each player is left with a hand of 3 non-player Orders Cards. When choosing your own orders, also choose a third order for your non-player color face down next to the 2 already chosen.
- Reveal the final non-player orders and place minions on space I (or II/III if doubled up).
- After orders are revealed, pick up the 3 non-player inaccessible orders, put them in the deck with the 2 unused ones, leaving the 3 used ones to become the new inaccessible orders.
Production and Orders Retrieval Phase
In this phase you can use your production rooms (even one that you built this round). You also get to take back 3 Orders Cards. All players can do this simultaneously.
Production
- Rooms that produce something indicate how many imps are required and what the imps will produce. If you have that many imps left in your Imp Den, you can move them to the room and take the indicated product from the bank. (Imps that mined gold or dug tunnels or supervised this round are not available for production.)
- A Troll Token can take the place of an Imp Figure during production. However, trolls only help out in rooms. They cannot be used for digging tunnels or mining gold.
- You can use multiple production rooms if you have them. However, in the First Year, it is only possible to use each room once per round.
Orders Retrieval
- Take back the two inaccessible Orders Cards.
- Take back the Orders Card that you chose for the first position and move the other two up to the spaces for inaccessible orders, as indicated by the arrows on your Dungeon Board.
- Exception: If you have an order that was not carried out (as indicated by a Minion Figure on the Orders Card) you can take that card back instead of the one in the first position. In any case, you may only take back 1 of the 3 cards you chose for this round. The other 2 become inaccessible.

Event Phase
No events occur in the first round (winter) but the other three rounds have an Event Phase. Events are revealed at the beginning of the round before they occur, so players have 2 rounds to prepare for them. After the event occurs, remove the Event Tile from the Progress Board. The event applies to all players in clockwise order starting from the starting player.
Each Year has the same 3 Event Tiles:
- Pay Day: On Pay Day, each player must pay the wages of his or her monsters (and ghosts). This cost is given in the corner of the Monster (or Ghost) Tile. If you are unable or unwilling to pay the cost of keeping a monster (or ghost), the monster (or ghost) leaves your dungeon. Discard the Monster (or Ghost) Tile to the Distant Lands Board. When a monster (or ghost) leaves you this way, you gain 1 Evil. Move your Evil Counter one space up the Evilometer.
- Taxes: When taxes are due, each player must pay a tax based on the size of his or her dungeon. For every 2 dungeon tiles (tunnels and rooms) you pay 1 Gold. (Round up: 3 tunnels would cost 2 Gold.) Conquered and unconquered tiles both count. For each Gold that you choose not to pay, take a Damage Counter and place it in the Dead Letter Office. At the end of the game, each of these Damage Counters will cost you 3 points. You choose how much to pay.
- Special Events: This Event Tile has no effect in your first game. Special Event Cards are only used in the full game.

Adventurers Phase
Like Event Tiles, the Adventurer Tiles for spring, summer, and fall are revealed at the beginning of the previous round. In this phase, the adventurers are assigned to the players’ dungeons.
- Each player will get one adventurer. Assign adventurers in order, beginning with the one on the left (with the simplest glyph). This one goes to the nicest dungeon lord, the one lowest on the Evilometer. Break ties according to play order: Among tied players, the starting player is nicest, the one on the starting player’s left is next, and so on.
- The next adventurer goes to the second nicest dungeon lord, and so on. The one on the far right (the most powerful) will go to the player highest on the Evilometer.
When you get your first Adventurer Tile (in spring) put it on the small space closest to your dungeon’s entrance. Your second Adventurer Tile goes on the next space, and your third goes on the last remaining space, so that adventurers enter the dungeon in the order in which they come to you.
Warrior Exception: When you get a new warrior, he pushes his way to the front. Push all the others back one space. (A new warrior will even push back a warrior from a previous round).
Assigning Adventurers to 2 Players
In a two-player game, there are 3 Adventurer Tiles and 3 Evil Counters on the Evilometer. Before assigning adventurers, move the non-player Evil Counter one space toward Evil. Assign the adventurers as though it were a 3-player game. (In case of ties, the non-player is nicer than the players.) The adventurer assigned to the non-player should be discarded to the Distant Lands Board.
End of the Round
At the end of each of the first three rounds, the Starting Player Token moves one player to the left. At the end of the last round (fall) the token does not move. Instead, Combat begins.
In any case, at this moment you move all your Imp Figures back to your Imp Den. They will be ready to work for you next round.

Paladin
Each Year has only one paladin. In the First Year, you use the weaker paladin, the one with the darker background and the silver glyph.
If your Evil Counter lands on or rises above the paladin space on the Evilometer, the paladin sets out to attack your dungeon. Take the Paladin Tile from the Central Board and put it in the large space near the entrance to the dungeon. The paladin is a special adventurer that is always at the front of the party. Any new warrior will push ahead of everyone but the paladin.
If you cross the line, you attract the paladin immediately. Once the paladin sets out, there is no way to return him to his tent. However, the paladin will move to another player’s dungeon if these two conditions are met:
- That player’s Evil Counter is at or above the paladin space.
- That player’s Evil Counter is higher than the Evil Counter of the player who currently has the paladin. (It must be higher. Being on the same space is not evil enough.)
If 2 players have simultaneously become the most evil, the paladin will go to the one who plays later in clockwise play order from the starting player.
Combat lasts 4 rounds. Any adventurers that are not eliminated after the fourth round leave your dungeon and head off to Distant Lands.
- Each round has its own Combat Card. This tells you which spell the wizards are casting (if there are any wizards) and how much damage the first adventurer will take from fatigue. You have to make your plans before the Combat Card is revealed.
- Each time the adventurers conquer a tile, you move your Evil Counter down one space on the Evilometer.
- When the number of Damage Counters on an Adventurer Tile equals or exceeds its hit points, the tile is moved immediately to Prison.
Setup
Flip over the Progress Board so that the Combat Side is up. Take the 4 Combat Cards from the Central Board and place them face down on the indicated spaces on the Progress Board (1 to 4). Put the Progress Marker on the first space.
Planning Phase
All players make choices simultaneously (or in clockwise order starting from starting player if desired):
- Choosing a Dungeon Tile: Use a Minion Figure to indicate which dungeon tile the adventurers will be attacking. You must choose among the unconquered tiles nearest the entrance. Distance is measured as though you were walking through the dungeon.
- Choosing Defense: Decide which traps and monsters (and ghosts) you will use in the battle. Traps are played face down. Monsters (and ghosts) are played face up.
- In Tunnels: You can use only 1 trap and 1 monster. You can use as many ghosts as you want.
- In Rooms: You can use only 1 trap, and it will cost you 1 Gold to do so. Put the Gold Token on the Trap Card. You can use up to 2 monsters and as many ghosts as you want.

Revealing Combat Card Phase
Once all players have chosen their traps and monsters (and ghosts), reveal the Combat Card. Players who used spies to look at the card have an advantage: the other players have to plan without knowing what the card is. The Combat Card does not take effect at this time. It is simply revealed.
Battle Phase
Battle is the last phase of the round. Players will fight their battles in order, beginning with the starting player. Place your second Minion Figure on the illustration of the first step, and move him along after each step is dealt with:
- Trap Step: Reveal your Trap Card. Pay any cost indicated on the card (and 1 Gold if fought in a room). Damage is reduced by 1 for each
 symbol on the paladin and thief tiles in the party, protecting adventurers in front first. Trap special effects cannot be prevented. Discard the Trap Card after use.
- Fast Spells Step: Occurs only if the Combat Card has the fast spell icon
 AND the party has enough magic points (wizard and paladin
 symbols ≥ the requirement shown for the round: 1 in round 1, 2 in round 2, etc.). If the spell says “withdraw” a monster, return it to Monster Lair face up.
- Monsters (and Ghosts) Step: Monsters and ghosts attack in the order you choose. After attacking (or attempting to attack), the monster/ghost is knocked out for the rest of the Year (place it face down in the Monster Lair).
 Standard Attack: First adventurer takes damage.
 Attack Anyone: You choose target adventurer.
 Attack Everyone: Each adventurer takes damage.
 Monster may not attack priests.
 Ghost may not attack the first adventurer.
 Monster returns face up (not knocked out).
 Party does not conquer and takes no fatigue.
 Skip Healing Step this round.
 Not a monster (ghost).
 Take a Troll Token.
- Slow Spells Step: Occurs only if the Combat Card has the slow spell icon
 AND the party has enough magic points. Magic points are checked at the time the spell takes effect.
- Healing Step: Occurs only if the party has at least one priest or paladin (
 ) AND at least one monster/ghost attacked this round. Remove 1 Damage Counter per healing symbol from front to back. Dead adventurers cannot be healed.
- Conquering Step: The party accumulates fatigue damage shown on the Combat Card (dealt to the first adventurer 1 point at a time; excess spills over to next in line). If at least one adventurer survives, the tile is conquered: flip it over (light side up) and lose 1 Evil. If all adventurers are eliminated, combat ends and the tile is saved.
End of Combat
There are three ways Combat in your dungeon can end:
- All adventurers are eliminated. You skip any remaining steps/rounds and wait for others to finish.
- Four rounds have been fought. Any remaining adventurers go to Distant Lands.
- No unconquered tiles are left. Each time you are supposed to pick a tile, you must release one imprisoned adventurer instead (to Distant Lands).
After all players are done with Combat, turn your monsters (and ghosts) face up again.
Moving Paladin
Because players change positions on the Evilometer during Combat (e.g. from conquered tiles), the paladin may move immediately to another player’s dungeon if they become more evil. The paladin keeps all accumulated Damage Counters. If the paladin moves to a dungeon where combat had already ended, combat resumes next round (unless it is round 4).

Notes on Selected Traps
- Poisoned Dart: Deal 1 damage to chosen adventurer. At round end (after Conquering), he takes 2 unpreventable damage even if the initial damage was prevented by a thief.
- Anti-Magic Dart: Deal 1 damage to chosen adventurer. If wizard targeted, party casts no spells this round. If priest targeted, skip Healing Step. If paladin targeted, no special effect.
After Building, three adventurers come to your dungeon to face your monsters in Combat. Although it is out of order, we will go over Combat first, so you know what things to look for during Building.


Monster (or Ghost) Tile
- Cost: The monster’s (or ghost’s) wages, which must be paid when hiring and again on Pay Day. (This is not relevant to Combat Training.)
- Abilities: What the monster (or ghost) can do in Combat.
- The back of the Monster (or Ghost) Tile indicates whether it can be hired in the First Year (silver) or the Second Year (gold). In Combat Training, we will just look at the First Year Monsters (and Ghosts).


Adventurer Tile
- The glyph: Two adventurers with the same glyph are equally powerful. Adventurers with more complex glyphs are more powerful. The power level is also indicated by the background shade – lighter adventurers are more powerful.
- Hit points: The amount of damage the adventurer can take before being eliminated.
- Special abilities: These indicate the adventurer’s profession:
 Warriors go in front.
- Thieves disarm traps.
- Priests heal.
- Wizards cast spells.
- The back of the Adventurer Tile indicates whether it appears in the First Year (silver) or the Second Year (gold). In Combat Training, we will just look at the First Year adventurers.

Trap Card
- Name of the trap
- Illustration
- Description: Effect of the trap, including any special costs. Some traps have a different strength or cost in the Second Year. We will just ignore these Second Year values in Combat Training.
- All Trap Cards have the same back. There is only one deck for both Years.

Training Dungeons
We will use Ministry-approved training dungeons for Combat Training. They look almost like real dungeons and you can find one on the back of each player’s Dungeon Board. Even if you have fewer than 4 players, you should use all 4 training dungeons – each gives a different training scenario. On each training dungeon, set up the monsters (or ghosts), traps, and adventurers depicted.
- Scenario number: Go through the training scenarios in order. The lower numbered ones are simpler.
- Entrance with pre-drawn adventurers: A party is made up of three adventurers who march in a specific order. They work together to last as long as they can in your dungeon. Warriors go first and protect the rest. Thieves keep those in front from getting harmed by traps. If the party is attacked, the priests heal them up after battle. Priority is given to protecting the first adventurer. If the first adventurer is eliminated, the next in line becomes the first adventurer. In the four training scenarios, you will use every silver-backed Adventurer Tile except for the wizards.
- Small dungeon with three tunnels: Put 3 Tunnel Tiles on the indicated squares, dark side up. The adventurers will try to conquer these tiles (and flip them over so that the light side is up). Your success can be measured by how few they conquer.
- Prison: This starts empty, but you hope to fill it with eliminated adventurers.
- Damage Counters: Damage Counters are used to keep track of damage done to adventurers. Keep some within reach. When an adventurer takes damage, put that many Damage Counters on the Adventurer Tile. If the number of Damage Counters matches or exceeds the adventurer’s hit points (red number) the adventurer is eliminated and the tile should be moved to the Prison.
- Battleground: This depicts the steps of Battle, which will be explained below. This also has places for you to put the monsters (and ghosts) and traps you use during battle.
- Treasury / Pantry: There usually isn’t much in a training dungeon, but some of the training scenarios require a Food Token or a Gold Token .
- Your combat options: Find the Trap Cards and Monster (or Ghost) Tiles with the corresponding illustrations and put them here, face up.
- Minion Figures: Minions are essential to the proper function of any dungeon.
Combat Tutorial & Steps
Combat takes place over several rounds. Each round, the adventurers try to conquer one tile of your dungeon. You try to use your monsters (and ghosts) and traps to do enough damage to eliminate them.
Combat Round
The Battleground illustrates the steps of Battle. Take a Minion Figure and put it on the first space: Planning. After completing each step, advance the figure to the next one.
Planning
- First you decide where the battle will be fought. In the beginning, this is simple: the adventurers always attack the tile closest to the entrance. Put the Adventuring Party Marker on that Tunnel Tile to mark where the battle is being fought.
- Next you decide which traps and monsters (or ghosts) to use. In a tunnel, you can only use 1 trap and 1 monster. Put the Trap Card and the Monster (or Ghost) Tile on the indicated spaces of the Battleground.
You can also choose to use a trap with no monster (or ghost), a monster (or ghost) with no trap, or nothing at all.
Traps
In this step, your trap goes off. The card explains what the trap does. Usually it deals some damage. Discard the Trap Card after using.

Example 1: Put 1 Damage Counter on each warrior and 2 on the priest in the rear.

Example 2: Put 3 Damage Counters on the first warrior. This eliminates him. Move him to the Prison and put the Damage Counters back in the bank.
Thieves have the ability to reduce the damage from your traps. For each symbol, they reduce the damage by 1. Damage to the adventurers in front is reduced first.

Example 3: The Rolling Stone does 3 damage, but the thief reduces it by 2. Put 1 Damage Counter on the warrior.

Example 4: The Wall of Fire does 1 damage to the warrior and 1 to the priest, but the thief can prevent both of these. That is the limit of her ability, so she gets 2 Damage Counters.
The thief’s damage-reduction ability can be used again each round until she is eliminated. If there are multiple thieves in the party, their abilities are cumulative. The ability only works on damage, however. If the trap has other effects, the thief cannot prevent them.

Example 5: All 3 points of damage are prevented by the thieves. No one gets any Damage Counters.

Example 6: Both points of damage are prevented, but the special effect (skip Conquering) still applies.
Monsters (and Ghosts)
Monsters (and ghosts) attack after traps go off. If you have more than one, you can decide the order in which they attack. Some monsters have two ways to attack divided by a horizontal line. You get to decide between them.
There are three types of attack:
- Standard Attack: The monster attacks the first adventurer and deals the indicated amount of damage. All the damage is applied to the first adventurer even if damage exceeds hit points.

Example: If you use the witch’s standard attack for 4, she does 4 damage to the first in line. The warrior already has 2 Damage Counters, so 4 is more than enough to eliminate him. The excess damage does not go to the next in line.
- Attack Anyone: This is like a standard attack except you get to choose the target.

Example: If you use the vampire to attack anyone for 3, you can choose to eliminate the first adventurer or the last or to give the one in the middle 3 Damage Counters.
- Attack Everyone: The monster does the indicated amount of damage to each adventurer.

Example: If you use the slime to attack everyone for 1, each adventurer will get 1 Damage Counter. This is enough to eliminate the warrior.
After attacking, the monster (or ghost) is automatically knocked out. Return the Monster (or Ghost) Tile back to its lair face down. It will not be usable in later rounds. However, you don’t lose it forever. It turns face up again after the last round of Combat.
Healing
Now the priests step in. If any adventurer was attacked, the priests will heal the party. But if no monster (or ghost) damaged the party this round, the priests do not heal, even if the adventurers have damage from traps or from previous rounds.
Each priest removes 1 Damage Counter from the party for each symbol on his Adventurer Tile. At this time, it does not matter whether the damage was from monsters (or ghosts) or traps. They simply heal all they can, beginning with the adventurer in front. A priest will heal himself, if all those in front of him have no damage.
Adventurers that were eliminated remain eliminated. The priests cannot repair the damage that eliminated them.

Example 1: The troll attacks and does 3 damage to the warrior. The priest heals one damage during Healing, so the warrior is left with 2 Damage Counters.

Example 2: The vampire attacks the thief and eliminates her. During Healing, nothing happens because neither of the remaining adventurers have damage.

Example 3: The party is already wounded when the goblin attacks. It does 2 damage to the first priest. During Healing, the priests heal 4 damage. This removes both Damage Counters from the first priest, the Damage Counter from the thief, and one of the Damage Counters from the last priest. In this case, it would have been better not to have sent the goblin.
Fatigue and Conquering
Now the adventurers try to conquer the indicated tile.
Before the party can conquer the tile, they accumulate fatigue. This is indicated by the two Damage Counters illustrated for this step.
The Damage Counters both go to the adventurer in front (because he’s under the most stress). Unlike all the other damage in the game, fatigue damage is dealt 1 point at a time. So if the first adventurer is eliminated by fatigue, the next adventurer in line will get what is left.
- If all adventurers have been eliminated after accumulating fatigue (or earlier) then Combat is over and the adventurers do not conquer that tile.
- However, if even one adventurer is left after assigning fatigue, the tile is conquered. Flip it over so that it is light side up. The next battle will be fought over the next tile.
Later Rounds
After Conquering, the round is over. The next round begins and has the same rules. Do not forget that used traps are discarded and used monsters are turned face down, so they will not be able to aid you in later rounds. Combat continues until all adventurers are eliminated or until all dungeon tiles are conquered.
Combat in Rooms
So far, we have only covered combat in tunnels. But some dungeon tiles can be rooms. There are 2 differences:
- You can send up to 2 monsters into battle (along with any number of ghosts). When it is time for them to attack, you choose the order in which they do so.
- You can use 1 trap, just as you can in a tunnel, but in a room you must pay 1 Gold.
Everything else works the same as it does in tunnels. If a Room Tile is conquered, flip it over so the back side is up.
Training Scenarios
At this moment, we can look at the scenarios in the prepared training dungeons.
Monsters Used
These are the monsters (and ghost) used in the training scenarios:

Troll: The troll has a standard attack of 3. If you pay 1 Food, it can attack for 4 instead.

Goblin: The goblin has a standard attack of 2. If it eliminates the first adventurer it gets to attack the next one for 1.

Witch: The witch has either a standard attack of 4 or two attacks of 1 on anyone. These two attacks can be on the same adventurer or on two different adventurers.

Ghost: The ghost can attack anyone for 2 except for the first adventurer. The ghost is not a monster, so limits on the number of monsters do not apply to it. In a tunnel you can send one monster and as many ghosts as you want.

Vampire: The vampire can attack anyone who is not a priest. He can either attack for 3, or make an eat-and-run attack for 2. In the second case, he is not knocked out. He returns to the Monster Lair face up, ready to be used in a later round.

Slime: The slime can either attack everyone for 1 or it can slurp around their ankles and hold them in place. This latter effect is not an attack, so it does not trigger Healing. It has the special effect that the adventurers do not conquer the tile (and do not accumulate fatigue) that round. Whether you use the slime’s attack or its effect, it is knocked out afterwards.
Solutions
Each scenario has a solution in which the adventurers only conquer one tile. If your friends don’t find the optimal solution, it doesn’t really matter. The goal is just to get them to understand the mechanics of Combat.

First Scenario
The simplest solution is to use the Rolling Stone and the troll in round 1, paying the troll 1 Food to use his bigger attack. This eliminates both warriors. The priest has no one to heal, and he takes 2 damage during Conquering. The trap is discarded, and the troll is turned face down, which leaves us with the goblin. It can easily eliminate the priest next round. Or we can leave the priest alone. Without an attack, he will not heal and then he will be eliminated by fatigue before he can conquer the next tile.
An even more efficient solution is to use the troll’s free attack, after the trap eliminates the first warrior. This will not be enough to eliminate the second warrior, and the priest will heal one point of damage, but the warrior will then be eliminated by fatigue. To eliminate the priest in the next round, attack with the goblin for 2. Even though the priest heals one, he is still eliminated by fatigue before he can conquer the second tile. The result is the same except that we have saved one Food Token for later.

Second Scenario
It looks like the trap can take out the first adventurer, but the thieves will reduce the damage down to 1.
Instead, let’s save the trap for next round and just send the witch and the ghost. The witch can eliminate the warrior, but we’ll send the ghost into battle first. We want the ghost to attack the thief in the middle and it won’t be able to do that if the thief is the first in line.
Then the warrior is eliminated by the witch, and the wounded thief falls from fatigue. We are left with just the last thief for round 2. Now we prepare the Poisoned Meal. Even though she knows she shouldn’t, the thief takes a little bite (1 damage). She is eliminated by fatigue before she can conquer the second tile.

Third Scenario
These adventurers are tougher. Has our vampire bit off more than it can chew? It can’t attack the priest, so we’ll save the Pendulum for him. But for that to be effective, we need to get rid of the thief.
In round 1 we send the vampire and the Cursed Ring. The ring only damages the thief. The vampire could eliminate the thief now, but then it would be knocked out. Instead we have the vampire attack for 2 and return face up. The priest heals 1, so the thief ends the round with 2 Damage Counters. The ring prevents Conquering and the adventurers take no damage from fatigue.
The second round is fought in the same place. We just send the vampire to finish off the thief. The vampire returns face up. The priest has no one to heal. During Conquering , the warrior takes 2 damage from fatigue.
In round 3, we finally send the Pendulum with the vampire. The pendulum does 3 damage to the priest. We’ll use the vampire’s bigger attack on the warrior. This eliminates the warrior. It also knocks out the vampire, but that doesn’t matter, as we shall see. The priest heals 1 damage. Even though his damage was from the trap, he gets to heal because the vampire damaged the warrior. The priest is eliminated by fatigue before he can conquer the second tile.

Fourth Scenario
Let’s be patient. We’ll hold back the slime and just send out the Wall of Fire. The weak thief can only reduce damage to the first priest. The thief takes 1 damage, and the priest in the rear takes 2. The priests heal no one because nothing attacked. The party conquers the first tile after the first priest accumulates 2 damage from fatigue.
In the second round, we send the Anti-Magic Dart and the Slime. Because of the thief, the dart does not wound the priest that we target, but its special effect (skip Healing) still works. The slime attacks and does 1 damage to everyone. This eliminates the first priest. The thief and the priest are each 1 point away. The priest cannot heal because of the dart. During Conquering, the first point of fatigue eliminates the thief and the second point eliminates the priest before they can conquer the second tile.
Training Scenario in a Room
Set up the first training scenario again. What if it were being fought in a room? Take a Room Tile and put it face up on the square by the entrance. You can probably figure out that if you get to use one trap and two monsters, you can win in the first round, but it will cost you 1 Food (for the troll’s bigger attack) and 1 Gold (for baiting a trap).
After Combat, the Second Year begins. Players continue with the same dungeons. Conquered rooms and tunnels cannot be repaired in any way. Your inaccessible Orders Cards for winter will be the two that you put there at the end of fall in the First Year.
- Return the 4 used Combat Cards to the box. Take the 4 gold-backed Combat Cards from Distant Lands and put them on the Central Board.
- Discard the First Year paladin; the Second Year uses only the stronger gold paladin.
- Draw new Adventurer, Monster, and Room Tiles from gold-backed stacks.
- In a two-player game, move the non-player Evil Counter 2 spaces down toward the happy face.
- Choosing a New Starting Player:
- In a 4-player game: moves 3 places to the left (opposite the First Year starter).
- In a 3-player game: moves 1 place to the left (spring starter of First Year).
- In a 2-player game: kept by the player who started fall in First Year.
- Check Evilometer for the Paladin threshold.
Rooms and Monsters in the Second Year
- Second Year rooms do not produce, but First Year production rooms can now produce twice per round (e.g., 6 imps for 2 Food).
- Second Year rooms have no zone restrictions and provide combat abilities or endgame points.
- Buying Traps in the Second Year: Draw one extra Trap Card (2 cards on spaces I and II, 3 on space III). After looking at all cards, discard any one trap face down.
- Combat is identical to the First Year.
The Scoring Track is on the Combat side of the Progress Board. Place your third Minion Figure on space 0 and score line by line according to the Overview Card:
- +2 points for each unconquered room in your dungeon.
- +1 point for each monster in your Monster Lair (face up; no points for ghosts).
- +2 points for each adventurer in your Prison.
- +5 points for each paladin in your Prison.
- –2 points for each conquered tile (room or tunnel).
- –3 points for each red mark in your Dead Letter Office.
- Bonus points for point-scoring rooms (except Hall of Fame, scored with titles).
Titles
Titles are given to players who have the most in selected categories. If one player has the most, the title is exclusive and worth 3 points (2 in 2-player). If shared, each tied player gets 2 points (1 in 2-player).
- The Lord of Dark Deeds: Highest on Evilometer (tied players share).
- The Lord of Halls: Most rooms (conquered and unconquered).
- The Tunnellord: Most tunnels (conquered and unconquered).
- The Monsterlord: Most monsters (ghosts do not count).
- The Lord of Imps: Most Imp Figures (trolls do not count).
- The Lord of Riches: Most total Gold Tokens + Food Tokens + unplayed Trap Cards.
- The Battlelord: Fewest conquered tiles (tunnels and rooms).
Winning the Game
The player with the most points wins and becomes the Underlord. Ties are shared. All players who finish with a score above zero pass the test and receive their dungeon lord licenses!
When playing the full rules, incorporate these changes:
Choosing Initial Inaccessible Orders
After the starting player is chosen, but before tiles are revealed, shuffle your 8 Orders Cards, draw 3 at random, and choose 2 to be your inaccessible orders. Reveal them simultaneously.
Special Events
Shuffle the blue Special Event Cards. Draw 2 at random face down on the Distant Lands Board (one on top of the Second Year Combat deck, one underneath). When the Special Event tile appears on the Progress Board, reveal the card and follow its instructions.
Recruiting as First Order
If you play the Recruit Monster (or Ghost) card as your first order, it costs 1 Gold. You must pay this as soon as the card is revealed. If you have no gold, your minion is placed directly on the card and the action space remains open.
Paying a Cost vs. Gaining Evil
You pay for costs by moving up the Evilometer. If you are already at the top, you cannot pay the cost. There are three situations where moving up is a cost:
- Getting food on action spaces II and III.
- Hiring certain monsters (and ghosts).
- Paying wages to monsters (and ghosts) on Pay Day or in response to Suggestion.
In all other situations (spells, events, releasing unpaid monsters), you are “gaining Evil”. If you gain Evil while already at the top, you simply remain at the top.
Full Rules Summary
A quick summary of the game round and combat flow without commentary:
- Setup: Randomly set 2 Special Events. Choose 2 of 3 random Orders as initial inaccessible orders.
- Building:
- New Round Phase: Reveal 3 Monsters, 2 Rooms, and (except round 4) next round’s Adventurers and Event.
- Orders Phase: Set 3 orders face down. Reveal sequentially. Place minions (Hire Monster as 1st order costs 1 Gold). Execute in board order.
- Production & Retrieval: Rooms produce with imps/trolls. Retrieve inaccessible orders plus first played (or failed) order.
- Event Phase: Pay Day, Taxes, or Special Event.
- Adventurers Phase: Distribute adventurers from lowest evil to highest evil. Warriors push to the front.
- End of Round: Return imps; pass Starting Player Token.
- Combat: 4 rounds. Reveal Combat Card. In planning, choose tile nearest entrance and assign traps/monsters. Battle steps: 1. Traps, 2. Fast Spells, 3. Monsters/Ghosts, 4. Slow Spells, 5. Healing, 6. Conquering (fatigue damage, flip tile if survived).
- Second Year: Stronger paladin, gold decks, First Year rooms produce twice. Draw extra trap when buying.
- Scoring: Points for rooms (+2), monsters (+1), prisoners (+2), paladin (+5), conquered tiles (–2), unpaid taxes (–3), and titles (+3 exclusive / +2 shared).
Monsters (and Ghost)
- Goblin: Standard attack 2. If it eliminates the lead adventurer, attacks next in line for 1.
- Slime: Attack everyone for 1, OR prevent conquering and fatigue this round (not an attack; does not trigger healing).
- Ghost: Not a monster (does not count toward monster limits or scoring). Standard attack 2 against anyone except the lead adventurer.
- Troll: Standard attack 3 (attack 4 for 1 Food). Provides a Troll Token that works as an imp in production rooms.
- Witch: Standard attack 4, OR two separate attacks of 1 on anyone.
- Vampire: Attack anyone (except priests) for 3, OR eat-and-run attack for 2 and return to lair face up.
- Golem: Costs 1 Gold and 1 Trap Card to hire and on Pay Day. Standard attack 4; returns to lair face up.
- Dragon: Attacks everyone for 2. Party skips Healing Step this round.
- Demon: Attacks anyone for 7. Party skips conquering and fatigue. Requires feeding a monster when hired and on Pay Day.
Production Rooms (First Year)
- Chicken Coop, Mushroom Bed: Produce Food.
- Souvenir Shop, Mint: Produce Gold.
- Workshop: Produces a Trap Card.
- Tool Shed: Digs 1 tunnel with its 2 working imps without needing a permit.
- Printing Press: Improves reputation (move down Evilometer).
- Magic Room: Produces a new Imp Figure immediately.
Combat Rooms (Second Year)
- Training Room: Trolls and goblins get +1 damage to each attack.
- Dark Room: Vampires and witches get +1 damage to each attack.
- Labyrinth: Allows 2 traps without paying gold; only 1 monster allowed.
- Anti-Magic Room: Party cannot cast spells (skip Fast and Slow Spells steps).
Point-Scoring Rooms (Second Year)
- Cafeteria: +1 point per depicted monster (troll, goblin, slime, witch).
- Chapel: +2 points per vampire and ghost.
- Pandemonium: +2 points per golem, dragon, demon.
- Hall of Fame: +2 bonus points per exclusive title earned (+1 in 2/3 player).
Introduction & Overview
They meet in a tavern. They quaff a few ales. Before the night is over, the strong warrior, the wily wizard, the committed priest and the sneaky thief form an inseparable party of adventurers, ready to rid the world of evil. And wouldn’t you know it? There just happens to be some evil within easy walking distance. A dark lord has filled a nearby hill with tunnels, traps, treasure, and trolls.
And so the next morning (or the next afternoon if too many ales were quaffed) the heroes set out to fight for Right, conquer the dungeon, and punish the wicked lord (by taking all his treasure, of course). It’s a classic scenario, and any veteran dungeon crawler will tell you that’s the way things ought to be.
But what about that dark lord? Does anyone ever think about his feelings? Those adventurers, who have never done an honest day’s work in their lives, cannot begin to imagine how much effort goes into building a respectable dungeon. They have no idea how hard it is to tunnel through granite, how expensive good traps are these days, how difficult it is to find qualified imps, or how much food it takes to feed a troll. And the bureaucracy! Dungeons must meet rigid safety specifications, gold mining is subject to strict regulations, and taxes are due whenever the Ministry of Dungeons feels like it. And as soon as the dungeon is built, some band of do-gooders comes along and hacks everything up. Life is not easy for a dungeon lord.
Support for this game comes from the Ministry of Dungeons Educational Trust Fund. We hope to refute common prejudices against dungeons and their builders while raising awareness of the destruction adventurers cause to the underground ecosystem. For aspiring dungeon lords, this text is an introduction to the subject of dungeon construction, with emphasis on moral obligations such as proper monster care and prompt payment of taxes. Finally, this game provides adventurers an opportunity to examine the question of whether it is more fun to build a dungeon or to destroy one.
Summary
Dungeon Lords is a game for 2 to 4 players. You take the role of a young aspiring dungeon lord (just 15 to 20 decades old) who is trying to get a dungeon lord license. The Ministry of Dungeons gives you a trial period during which you attempt to build a high-quality dungeon and protect it from adventurers. At the end of two years, your dungeon is visited by Ministry officials who give you points for your engineering and tactical achievements.
The rules will focus on a four-player game. The three-player game is similar, with similar strategies. The two-player game has a few additional differences and the strategy is a bit more difficult. We recommend playing your first game with three or four players.
The rules for your first game are slightly simplified. Later in the book are rules for the full version of the game.
Overview of Play
The game alternates between Building and Combat. Each phase of play is illustrated on the Progress Board, which has one side for Building and another for Combat.
Building
The game begins with Building, which lasts 4 rounds (winter, spring, summer, and fall). Each round has several phases, which are indicated by the spaces on the Progress Board. The Progress Marker advances along these spaces, indicating the current phase and round.
During Building, players expand and improve their dungeons, hire imps, recruit monsters, buy traps, and pay taxes. The dungeon lords with the nastiest reputations attract the most powerful heroes, while the weaker heroes target less threatening dungeons. A dungeon lord who is particularly evil may attract a paladin, the most powerful adventurer of all. After four rounds of Building, you must defend your dungeon.
Combat
Combat also lasts 4 rounds. In each round, the adventurers try to conquer one space of the player’s dungeon. The player uses the traps and monsters acquired during Building to eliminate the adventurers as quickly as possible, before they conquer too much of his or her dungeon.
Second Year
After the First Year’s Combat, the game enters the Second Year, which also has Building and Combat.
Scoring
After the Second Year’s Combat, players score points. The one with the highest score wins.
Setup
Set up the game boards, tokens, figures, tiles, and cards as illustrated.
- Central Board: Everyone needs to be able to reach the components on the Central Board. It should be in the middle of the table.
- Distant Lands Board: The Distant Lands Board can be off to the side somewhere. It holds cards that are not currently in use.
- Non-Player Dungeon Boards: In a two- or three-player game, take the remaining Dungeon Boards, fold them and place them this side up.
- Progress Board (Building side up): The Progress Board needs to be where everyone can see it, but only one player needs to be able to reach it.
- Dungeon Boards: Each player has his or her own Dungeon Board.
- Starting Player Token: Before the first game, put the happy face sticker on the big wooden disk to create the Starting Player Token. The nicest player gets the Starting Player Token. (Or you can choose the starting player randomly.)
Central Board
- Imp Figure Bank: The Imp Figure Bank also holds three Troll Figures. Trolls are the only monsters who like to hang out with imps.
- Trap Cards Deck: Shuffle all the Trap Cards and place the deck face down on the Central Board.
- Food Token Bank
- Gold Token Bank
- Tunnel Tile Bank
- Combat Cards for the First Year: Shuffle the 9 Combat Cards with the silver sword. Choose 4 randomly and place them face down on the town space of the Central Board. Return the other 5 cards to the box without looking at them.
- The Underground Tavern: Spaces for available Monster (or Ghost) Tiles.
- Bargain Basement Room Store: Spaces for available Room Tiles.
- Paladins: Both paladins go on the paladin space, face up. The darker one with the silver glyph is on top. The lighter one with the gold glyph will not be used until the Second Year.
- Evilometer: All players’ Evil Counters begin on the indicated space. In a two-player game, an Evil Counter in one of the non-player colors should be placed here, as well. (It doesn’t matter which color.)
- If a card or a rule tells you to “gain 1 Evil”, you move your Evil Counter one space up the Evilometer, toward the evil face .
- If you are told to “lose 1 Evil”, you move your Evil Counter one space down, toward the happy face .
- The Evilometer measures how the locals view the aspiring dungeon lords. Doing evil actions will move you up the Evilometer. Peaceful gestures and propaganda can be used to move yourself down. The most powerful adventurers attack the players highest on the Evilometer. Pay special attention to the space with the paladin icon. If your reputation gets this evil, you had better be prepared to deal with the paladin.
- If a card or a rule tells you to “gain 1 Evil”, you move your Evil Counter one space up the Evilometer, toward the evil face
Note: Tokens, Tunnel Tiles, and Imp Figures are not intended to be limited. If any bank runs out, represent the component with a suitable substitute.
Progress Board (Building side up)
- Rounds and Steps: Building has 4 rounds: winter, spring, summer, and fall. Each round has several phases, represented by the spaces on the board. (A few of the phases are skipped in the first round, so winter is shorter.) The Progress Marker is moved after each phase to keep track of the current phase and round.
- Adventurer Spaces: Adventurers arrive in spring, summer, and fall. Adventurer Tiles are placed here on one phase, and then, a few phases later, they are assigned to the players’ dungeons. At the beginning of the game, these spaces are empty.
- Events: The three Event Tiles are shuffled and placed face down on the indicated spaces of the spring, summer, and fall rounds.
- Progress Marker: This can sit next to the Progress Board during Setup. When the game begins, place it on the first space.
Distant Lands Board
Components which have not yet been used, as well as components which have left the game, are placed on the Distant Lands Board.
- Monster Stacks: Separate the Monster (or Ghost) Tiles into two groups according to their backs and mix each group up. Stack the gold-backed tiles on the indicated space. Then stack the silver-backed tiles on top of them.
- Room Stacks: Separate the Room Tiles into two groups according to their backs and mix each group up. Stack the gold-backed tiles on the indicated space. Then stack the silver-backed tiles on top of them.
- Adventurer Stacks: Separate the Adventurer Tiles into two groups according to their backs and mix each group up. Put the stacks on the indicated spaces.
- Discard Piles: Cards and tiles that leave the game do not come back. Put them on the indicated discard piles. Tiles should be discarded face up, but Trap Cards are kept face down.
- Damage Counter Bank: The little cubes represent the life force flowing through the veins of the adventurers.
- Combat Cards for the Second Year: Shuffle the Combat Cards for the Second Year and choose four of them at random to place, face down, on the Distant Lands Board. Return the rest to the box, without looking at them.
Player Board
Each player chooses a color. In your color you should have a Dungeon Board, 3 Minion Figures, an Adventuring Party Marker, an Evil Counter (the cube), 8 Orders Cards, and two Overview Cards that illustrate scoring. Place your Evil Counter on the starting space of the Evilometer.
The other components are placed according to the illustration:
- Construction Site with three Tunnel Tiles: Tunnel Tiles are placed on the three indicated squares, dark side up.
- Office with three Minion Figures: Your loyal minions, at your service.
- Pantry with three Food Tokens: Three food tokens.
- Treasury with three Gold Tokens: Three gold tokens.
- Imp Den with three Imp Figures: Here is where your imps will sleep when they are not working.
- Trap Storage: Traps are stored here.
- Battleground: Where combat steps are managed.
- Spaces for Three Orders: Your workplace where orders are issued.
- Inaccessible Orders: Shuffle your deck of Orders Cards and choose 2 at random to place here, face up.
- Orders Cards: Take the remaining six cards into your hand.
- Monster Lair: Where you keep monsters (and ghosts).
- Entrance: Where the adventurers will gather over the course of the year.
- Prison: Defeated adventurers go here.
- Dead Letter Office: Notices of overdue taxes are kept here.
- Overview Cards: Two overview cards (Scoring and Titles).
Non-Player Dungeon Boards
You will need the Dungeon Boards, Action Cards, and Minion Figures of all four colors, even in a two- or three-player game.
- In a three-player game, choose a player to handle the non-player Dungeon Board.
- In a two-player game, each player handles one non-player Dungeon Board.
- Shuffle the non-player Orders Cards and deal out three at random, face up on Inaccessible Orders.
- The remaining 5 Orders Cards form the Orders Cards Deck.
- Place Minion Figures in the Minion Office.
Leftovers
After setup, everything should be on the table except the following:
- The 5 First-Year and 5 Second-Year Combat Cards that you returned to the box.
- The Overview Cards for any colors without players.
- One Evil Counter, if it is a two- or three-player game. (In a two-player game, one of the non-player Evil Counters is placed on the Evilometer.)
- Nine Special Event Cards, which you will not be using in your first game. (Just put them back in the box.)
- Twenty Item Tokens. (Put back in the box; used in an advanced variant.)
First Year: Building Phase
Put the Progress Marker on the first space of the Progress Board. After each phase, you will advance the Progress Marker to the next space. The Year is divided into 4 rounds: winter, spring, summer, and fall. Each has the same phases, except that winter has no Event or Adventurers Phase.
New Round Phase
- Take 3 tiles from the top of the Monster Stack on the Distant Lands Board and place them face up in the Underground Tavern on the Central Board.
- Similarly, draw 2 tiles from the Room Stack and place them in the Bargain Basement Room Store.
- Any monsters or rooms that were left on the Central Board from a previous round should be placed in the appropriate discard piles. Each round there will be a completely new selection.
In the first three rounds, you also get a trouble forecast – a look at next round’s event and adventurers. (In fall, there is no forecast because it is the last season of the year.)
- Next Round’s Event: Turn up the Event Tile for the next round. This event does not occur immediately. It depicts what will happen at the end of the next round. This gives you two rounds to prepare. Events will be described below in the Event Phase.
- Next Round’s Adventurers: Draw four Adventurer Tiles (3 in a two- or three-player game) and place them, in order, on the 4 spaces for next round’s adventurers. Then rearrange them so that the weaker adventurers (darker, with simpler glyphs) are on the left and the more powerful adventurers (lighter, with more complex glyphs) are on the right. Tiles with the same glyph and shade should stay in order. If all the adventurers have the same glyph, place the last one drawn at the bottom of the stack and draw a new one. Keep doing this until you get a different glyph. Then re-order the adventurers.
Orders Phase
Now look at the Central Board. In the middle there are 8 places you can send your minions to. Each place has 3 spaces, which represent slightly different ways of accomplishing the task you order.
Selecting Orders
You begin the round with 6 Orders Cards in your hand. (Two inaccessible orders are face up on your Dungeon Board.) All players decide simultaneously. Choose 3 orders and place them face down on the appropriate spaces of your Dungeon Board. The order you want carried out first should be on the left.
Revealing Orders
- When everyone has placed all three orders, everyone turns their first card (the one on the left) face up. Beginning with the starting player, each player finds the place on the Central Board corresponding to the revealed order and places one of his or her Minion Figures on the first empty space (the one with the lowest number). You play in turn, clockwise around the table. If someone playing ahead of you has chosen the same place as you, your minion will have to go on the second space.
- Then everyone reveals their second order. Again, play clockwise around the table, placing your second minion on the first unoccupied space corresponding to your chosen action.
- Finally, everyone reveals their third card and places their third minion, according to the same rules.
It is possible that when it is your turn to place a minion all three spaces will be occupied. In this case, you place the minion on the Orders Card instead. This indicates that he is unable to carry out the order.
Executing Orders
The actions are always performed in the same order. You start with the Get Food action in the upper left corner and move from left to right along the top row. Then you do the actions in the second row, again from left to right.
At each place, the minions execute their orders beginning with the one on the shortest space. (Usually they act in the order in which they arrived – I, II, III – but when buying rooms or hiring monsters, they go in the opposite order, as explained below.) When it is your minion’s turn, you perform the indicated action and return your Minion Figure to your Dungeon Board. Alternatively, you can decide not to perform that action and move your Minion Figure to your Orders Card to indicate that the order was not carried out.
- Each space illustrates what you gain from that action. If there is no arrow, you get it for free. Usually, however, the action will have a cost which is indicated by the symbol to the left of the arrow. If you pay that cost, you get the thing the arrow points to.
- If the cost is gold or food , you pay it by taking the indicated number of Food or Gold Tokens from your Dungeon Board and returning them to the bank. If you do not want to pay or cannot pay, then you cannot use the action. In this case, move your Minion Figure to the Orders Card to indicate that the order was not carried out.
- You must pay the full cost or nothing at all. You cannot pay part of the cost to get part of the reward. You cannot pay double the cost to use the action twice.
- If a player does not use an action, the space remains unused. The other Minion Figures do not move up. They stay where they are.
- Sometimes the cost of an action is paid for with your reputation . This means that you move your Evil Counter one space up the Evilometer toward the evil face (unless you are already at the top). Two evil faces mean that you move up two spaces.
Description of Actions
Get Food
- Space I: Buy food with gold.
- Space II: Get food by gaining evil (threatening the villagers).
- Space III: Get food and gold by gaining 2 evil (ruining the village).
Improve Reputation
- For each smiley face , you move your Evil Counter down the Evilometer one space (unless you are already at the bottom).
- If you also get a chance to spy , you can look at any one of the four Combat Cards. (Usually, it is best to look at the top card, unless you spied it earlier in the round.) Be sure not to change the order of the cards.
Dig Tunnels
This action allows you to dig up to the indicated number of tunnels (2, 3, or 4). Each tunnel will require one imp. You do not have to dig all of them. You can dig fewer tunnels and use fewer imps.
- If your minion is on the third space, you must use one imp as a foreimp, even if you only dig one tunnel. Place an Imp Figure on the dungeon entrance to indicate that he is supervising. (If you choose to dig no tunnels, you do not use a foreimp.)
- If you choose to dig no tunnels, then move your Minion Figure to the Dig Tunnels Orders Card to indicate that the order was not carried out.
- Placement rules: Draw one Tunnel Tile from the bank and place it (dark side up) adjacent to a previously placed Tunnel or Room Tile. Put an Imp Figure in the upper right corner of the new tile to indicate that the imp is working on the tunnel.
- For safety reasons, the Ministry of Dungeons will not let your tunnels make a 2×2 square. This means that any 2×2 block of your Construction Site must have at least one square empty.
Mine Gold
Mining gold is analogous to digging tunnels. Your minion will get you a permit for 2, 3, or 4 imps. If you get the last permit, you need to put a foreimp at the dungeon entrance to supervise. As with digging tunnels, you can choose to use fewer than the maximum number of imps.
- Imps only mine gold in unconquered tunnels (Tunnel Tiles that are dark-side-up). Imps cannot mine gold in rooms.
- To mine gold, place an Imp Figure in the middle of the tile and draw 1 Gold from the bank.
- Two imps cannot mine the same Tunnel Tile, but an imp can mine gold in a tunnel that was dug this round. Such a tile will have one imp in the upper right corner (the one that dug it) and one imp in the center (the one mining gold).
- Imps that were used during digging cannot be re-used during mining. Each imp only does one job per round.
Recruit Imps
To recruit imps, pay the indicated cost in Food (and possibly Gold) and take the indicated number of Imp Figures from the bank. New imps will not be available for digging or mining this round because those actions have already been dealt with, but they can still help out during the Production Phase, which comes later.
Buy Traps
To buy traps, pay the indicated amount of Gold (nothing if your minion is on space II) and draw the indicated number of Trap Cards (1, 1, or 2). You keep your Trap Cards face down on your Dungeon Board, but you can look at them at any time.
Hire Monster (or Ghost)
Unlike the preceding actions, those who come later perform their actions earlier. Begin with the minion on space III (the shortest space) and proceed to II and then I.
- To hire a monster (or ghost) you choose one of the available Monster (or Ghost) Tiles and pay the cost indicated in the corner of the tile. Place your new monster (or ghost) face up in the Monster Lair of your Dungeon Board.
- Each player can hire one monster (or one ghost). The one whose minion is on space III must pay an extra food, but he or she gets to choose from all 3 available monsters (and ghosts). Those who go later must choose among the monsters (and ghosts) that are left.
- If you can’t pay the cost on the Monster (or Ghost) Tile (or if you can’t pay the extra cost on space III) you cannot use the action.
- When you hire a troll, take a Troll Token from the bank and put it in your Imp Den. If you lose the troll later, return the Troll Token to the bank.
Build Room
As with hiring monsters, players buy rooms in reverse order, beginning with the minion on space III. Each player may buy only 1 room, and only 2 rooms are available. The player on space I does not have to pay anything, but if the players on spaces III and II buy rooms (for 1 Gold) then nothing will be left. (In this case the player moves his Minion Figure from space I to the Build Room Orders Card to indicate that the order was not carried out.)
When you get a room, you replace one of your unconquered Tunnel Tiles with the Room Tile. The room must be placed according to the following limitations:
- Proper zone: A First Year room must be placed in the proper zone of the dungeon. Some rooms must be near the surface, some must be deep, some must be in the center, and some must be on the periphery. The zone is illustrated on the Room Tile. The light squares are the ones where the room is allowed to be built.
- No adjacency: Two rooms cannot be adjacent. (But it is acceptable for two rooms to share a corner or to be connected by a Tunnel Tile.)
If you have no unconquered Tunnel Tiles on squares that meet the requirements, you cannot buy that room. A tunnel can be turned into a room even if it was newly dug or mined earlier in the round. New tunnels can be attached to rooms as though the room were just another tunnel.
After Executing Orders
The Orders Phase ends when all actions in all 8 places have been dealt with. Minions who carried out orders are returned to their Dungeon Boards. The others remain on the cards of the orders that they did not carry out.
The Orders Phase with 3 Players
- Before choosing orders, choose orders for the non-player color. Pick up the 3 inaccessible orders and put them back in the deck. Shuffle the 5 cards and choose 3 at random to put on the non-player Dungeon Board, face up.
- Take the 3 non-player Minion Figures and place them on space II of the actions indicated by the new orders. Move the new Orders Cards to the spaces for inaccessible orders.
- Then everyone chooses and reveals orders as usual. The spaces occupied by the non-player minions are off limits, so the first player there gets space I and the second player gets space III. If all 3 players choose an order picked by the non-player color, one of them will be shut out.
- When it comes time for a non-player minion action, simply return the Minion Figure to the non-player Dungeon Board.
The Orders Phase with 2 Players
- Each non-player Dungeon Board should have 3 inaccessible Orders Cards. For the non-player color that you are in charge of, shuffle the 5 remaining Orders Cards and reveal 2 at random.
- Place 2 Minion Figures of that color on space I of the actions chosen. (If both non-player colors choose the same card, one goes on I and the other on II.)
- Each player is left with a hand of 3 non-player Orders Cards. When choosing your own orders, also choose a third order for your non-player color face down next to the 2 already chosen.
- Reveal the final non-player orders and place minions on space I (or II/III if doubled up).
- After orders are revealed, pick up the 3 non-player inaccessible orders, put them in the deck with the 2 unused ones, leaving the 3 used ones to become the new inaccessible orders.
Production and Orders Retrieval Phase
In this phase you can use your production rooms (even one that you built this round). You also get to take back 3 Orders Cards. All players can do this simultaneously.
Production
- Rooms that produce something indicate how many imps are required and what the imps will produce. If you have that many imps left in your Imp Den, you can move them to the room and take the indicated product from the bank. (Imps that mined gold or dug tunnels or supervised this round are not available for production.)
- A Troll Token can take the place of an Imp Figure during production. However, trolls only help out in rooms. They cannot be used for digging tunnels or mining gold.
- You can use multiple production rooms if you have them. However, in the First Year, it is only possible to use each room once per round.
Orders Retrieval
- Take back the two inaccessible Orders Cards.
- Take back the Orders Card that you chose for the first position and move the other two up to the spaces for inaccessible orders, as indicated by the arrows on your Dungeon Board.
- Exception: If you have an order that was not carried out (as indicated by a Minion Figure on the Orders Card) you can take that card back instead of the one in the first position. In any case, you may only take back 1 of the 3 cards you chose for this round. The other 2 become inaccessible.
Event Phase
No events occur in the first round (winter) but the other three rounds have an Event Phase. Events are revealed at the beginning of the round before they occur, so players have 2 rounds to prepare for them. After the event occurs, remove the Event Tile from the Progress Board. The event applies to all players in clockwise order starting from the starting player.
Each Year has the same 3 Event Tiles:
- Pay Day: On Pay Day, each player must pay the wages of his or her monsters (and ghosts). This cost is given in the corner of the Monster (or Ghost) Tile. If you are unable or unwilling to pay the cost of keeping a monster (or ghost), the monster (or ghost) leaves your dungeon. Discard the Monster (or Ghost) Tile to the Distant Lands Board. When a monster (or ghost) leaves you this way, you gain 1 Evil. Move your Evil Counter one space up the Evilometer.
- Taxes: When taxes are due, each player must pay a tax based on the size of his or her dungeon. For every 2 dungeon tiles (tunnels and rooms) you pay 1 Gold. (Round up: 3 tunnels would cost 2 Gold.) Conquered and unconquered tiles both count. For each Gold that you choose not to pay, take a Damage Counter and place it in the Dead Letter Office. At the end of the game, each of these Damage Counters will cost you 3 points. You choose how much to pay.
- Special Events: This Event Tile has no effect in your first game. Special Event Cards are only used in the full game.
Adventurers Phase
Like Event Tiles, the Adventurer Tiles for spring, summer, and fall are revealed at the beginning of the previous round. In this phase, the adventurers are assigned to the players’ dungeons.
- Each player will get one adventurer. Assign adventurers in order, beginning with the one on the left (with the simplest glyph). This one goes to the nicest dungeon lord, the one lowest on the Evilometer. Break ties according to play order: Among tied players, the starting player is nicest, the one on the starting player’s left is next, and so on.
- The next adventurer goes to the second nicest dungeon lord, and so on. The one on the far right (the most powerful) will go to the player highest on the Evilometer.
When you get your first Adventurer Tile (in spring) put it on the small space closest to your dungeon’s entrance. Your second Adventurer Tile goes on the next space, and your third goes on the last remaining space, so that adventurers enter the dungeon in the order in which they come to you.
Warrior Exception: When you get a new warrior, he pushes his way to the front. Push all the others back one space. (A new warrior will even push back a warrior from a previous round).
Assigning Adventurers to 2 Players
In a two-player game, there are 3 Adventurer Tiles and 3 Evil Counters on the Evilometer. Before assigning adventurers, move the non-player Evil Counter one space toward Evil. Assign the adventurers as though it were a 3-player game. (In case of ties, the non-player is nicer than the players.) The adventurer assigned to the non-player should be discarded to the Distant Lands Board.
End of the Round
At the end of each of the first three rounds, the Starting Player Token moves one player to the left. At the end of the last round (fall) the token does not move. Instead, Combat begins.
In any case, at this moment you move all your Imp Figures back to your Imp Den. They will be ready to work for you next round.
Paladin
Each Year has only one paladin. In the First Year, you use the weaker paladin, the one with the darker background and the silver glyph.
If your Evil Counter lands on or rises above the paladin space on the Evilometer, the paladin sets out to attack your dungeon. Take the Paladin Tile from the Central Board and put it in the large space near the entrance to the dungeon. The paladin is a special adventurer that is always at the front of the party. Any new warrior will push ahead of everyone but the paladin.
If you cross the line, you attract the paladin immediately. Once the paladin sets out, there is no way to return him to his tent. However, the paladin will move to another player’s dungeon if these two conditions are met:
- That player’s Evil Counter is at or above the paladin space.
- That player’s Evil Counter is higher than the Evil Counter of the player who currently has the paladin. (It must be higher. Being on the same space is not evil enough.)
If 2 players have simultaneously become the most evil, the paladin will go to the one who plays later in clockwise play order from the starting player.
Combat Phase
Combat lasts 4 rounds. Any adventurers that are not eliminated after the fourth round leave your dungeon and head off to Distant Lands.
- Each round has its own Combat Card. This tells you which spell the wizards are casting (if there are any wizards) and how much damage the first adventurer will take from fatigue. You have to make your plans before the Combat Card is revealed.
- Each time the adventurers conquer a tile, you move your Evil Counter down one space on the Evilometer.
- When the number of Damage Counters on an Adventurer Tile equals or exceeds its hit points, the tile is moved immediately to Prison.
Setup
Flip over the Progress Board so that the Combat Side is up. Take the 4 Combat Cards from the Central Board and place them face down on the indicated spaces on the Progress Board (1 to 4). Put the Progress Marker on the first space.
Planning Phase
All players make choices simultaneously (or in clockwise order starting from starting player if desired):
- Choosing a Dungeon Tile: Use a Minion Figure to indicate which dungeon tile the adventurers will be attacking. You must choose among the unconquered tiles nearest the entrance. Distance is measured as though you were walking through the dungeon.
- Choosing Defense: Decide which traps and monsters (and ghosts) you will use in the battle. Traps are played face down. Monsters (and ghosts) are played face up.
- In Tunnels: You can use only 1 trap and 1 monster. You can use as many ghosts as you want.
- In Rooms: You can use only 1 trap, and it will cost you 1 Gold to do so. Put the Gold Token on the Trap Card. You can use up to 2 monsters and as many ghosts as you want.
Revealing Combat Card Phase
Once all players have chosen their traps and monsters (and ghosts), reveal the Combat Card. Players who used spies to look at the card have an advantage: the other players have to plan without knowing what the card is. The Combat Card does not take effect at this time. It is simply revealed.
Battle Phase
Battle is the last phase of the round. Players will fight their battles in order, beginning with the starting player. Place your second Minion Figure on the illustration of the first step, and move him along after each step is dealt with:
- Trap Step: Reveal your Trap Card. Pay any cost indicated on the card (and 1 Gold if fought in a room). Damage is reduced by 1 for each symbol on the paladin and thief tiles in the party, protecting adventurers in front first. Trap special effects cannot be prevented. Discard the Trap Card after use.
- Fast Spells Step: Occurs only if the Combat Card has the fast spell icon AND the party has enough magic points (wizard and paladin symbols ≥ the requirement shown for the round: 1 in round 1, 2 in round 2, etc.). If the spell says “withdraw” a monster, return it to Monster Lair face up.
- Monsters (and Ghosts) Step: Monsters and ghosts attack in the order you choose. After attacking (or attempting to attack), the monster/ghost is knocked out for the rest of the Year (place it face down in the Monster Lair).
- Standard Attack: First adventurer takes damage.
- Attack Anyone: You choose target adventurer.
- Attack Everyone: Each adventurer takes damage.
- Monster may not attack priests.
- Ghost may not attack the first adventurer.
- Monster returns face up (not knocked out).
- Party does not conquer and takes no fatigue.
- Skip Healing Step this round.
- Not a monster (ghost).
- Take a Troll Token.
- Slow Spells Step: Occurs only if the Combat Card has the slow spell icon AND the party has enough magic points. Magic points are checked at the time the spell takes effect.
- Healing Step: Occurs only if the party has at least one priest or paladin () AND at least one monster/ghost attacked this round. Remove 1 Damage Counter per healing symbol from front to back. Dead adventurers cannot be healed.
- Conquering Step: The party accumulates fatigue damage shown on the Combat Card (dealt to the first adventurer 1 point at a time; excess spills over to next in line). If at least one adventurer survives, the tile is conquered: flip it over (light side up) and lose 1 Evil. If all adventurers are eliminated, combat ends and the tile is saved.
End of Combat
There are three ways Combat in your dungeon can end:
- All adventurers are eliminated. You skip any remaining steps/rounds and wait for others to finish.
- Four rounds have been fought. Any remaining adventurers go to Distant Lands.
- No unconquered tiles are left. Each time you are supposed to pick a tile, you must release one imprisoned adventurer instead (to Distant Lands).
After all players are done with Combat, turn your monsters (and ghosts) face up again.
Moving Paladin
Because players change positions on the Evilometer during Combat (e.g. from conquered tiles), the paladin may move immediately to another player’s dungeon if they become more evil. The paladin keeps all accumulated Damage Counters. If the paladin moves to a dungeon where combat had already ended, combat resumes next round (unless it is round 4).
Notes on Selected Traps
- Poisoned Dart: Deal 1 damage to chosen adventurer. At round end (after Conquering), he takes 2 unpreventable damage even if the initial damage was prevented by a thief.
- Anti-Magic Dart: Deal 1 damage to chosen adventurer. If wizard targeted, party casts no spells this round. If priest targeted, skip Healing Step. If paladin targeted, no special effect.
Combat Training & Scenarios
After Building, three adventurers come to your dungeon to face your monsters in Combat. Although it is out of order, we will go over Combat first, so you know what things to look for during Building.
Monster (or Ghost) Tile
- Cost: The monster’s (or ghost’s) wages, which must be paid when hiring and again on Pay Day. (This is not relevant to Combat Training.)
- Abilities: What the monster (or ghost) can do in Combat.
- The back of the Monster (or Ghost) Tile indicates whether it can be hired in the First Year (silver) or the Second Year (gold). In Combat Training, we will just look at the First Year Monsters (and Ghosts).
Adventurer Tile
- The glyph: Two adventurers with the same glyph are equally powerful. Adventurers with more complex glyphs are more powerful. The power level is also indicated by the background shade – lighter adventurers are more powerful.
- Hit points: The amount of damage the adventurer can take before being eliminated.
- Special abilities: These indicate the adventurer’s profession:
- Warriors go in front.
- Thieves disarm traps.
- Priests heal.
- Wizards cast spells.
- The back of the Adventurer Tile indicates whether it appears in the First Year (silver) or the Second Year (gold). In Combat Training, we will just look at the First Year adventurers.
Trap Card
- Name of the trap
- Illustration
- Description: Effect of the trap, including any special costs. Some traps have a different strength or cost in the Second Year. We will just ignore these Second Year values in Combat Training.
- All Trap Cards have the same back. There is only one deck for both Years.
Training Dungeons
We will use Ministry-approved training dungeons for Combat Training. They look almost like real dungeons and you can find one on the back of each player’s Dungeon Board. Even if you have fewer than 4 players, you should use all 4 training dungeons – each gives a different training scenario. On each training dungeon, set up the monsters (or ghosts), traps, and adventurers depicted.
- Scenario number: Go through the training scenarios in order. The lower numbered ones are simpler.
- Entrance with pre-drawn adventurers: A party is made up of three adventurers who march in a specific order. They work together to last as long as they can in your dungeon. Warriors go first and protect the rest. Thieves keep those in front from getting harmed by traps. If the party is attacked, the priests heal them up after battle. Priority is given to protecting the first adventurer. If the first adventurer is eliminated, the next in line becomes the first adventurer. In the four training scenarios, you will use every silver-backed Adventurer Tile except for the wizards.
- Small dungeon with three tunnels: Put 3 Tunnel Tiles on the indicated squares, dark side up. The adventurers will try to conquer these tiles (and flip them over so that the light side is up). Your success can be measured by how few they conquer.
- Prison: This starts empty, but you hope to fill it with eliminated adventurers.
- Damage Counters: Damage Counters are used to keep track of damage done to adventurers. Keep some within reach. When an adventurer takes damage, put that many Damage Counters on the Adventurer Tile. If the number of Damage Counters matches or exceeds the adventurer’s hit points (red number) the adventurer is eliminated and the tile should be moved to the Prison.
- Battleground: This depicts the steps of Battle, which will be explained below. This also has places for you to put the monsters (and ghosts) and traps you use during battle.
- Treasury / Pantry: There usually isn’t much in a training dungeon, but some of the training scenarios require a Food Token or a Gold Token .
- Your combat options: Find the Trap Cards and Monster (or Ghost) Tiles with the corresponding illustrations and put them here, face up.
- Minion Figures: Minions are essential to the proper function of any dungeon.
Combat Tutorial & Steps
Combat takes place over several rounds. Each round, the adventurers try to conquer one tile of your dungeon. You try to use your monsters (and ghosts) and traps to do enough damage to eliminate them.
Combat Round
The Battleground illustrates the steps of Battle. Take a Minion Figure and put it on the first space: Planning. After completing each step, advance the figure to the next one.
Planning
- First you decide where the battle will be fought. In the beginning, this is simple: the adventurers always attack the tile closest to the entrance. Put the Adventuring Party Marker on that Tunnel Tile to mark where the battle is being fought.
- Next you decide which traps and monsters (or ghosts) to use. In a tunnel, you can only use 1 trap and 1 monster. Put the Trap Card and the Monster (or Ghost) Tile on the indicated spaces of the Battleground.
You can also choose to use a trap with no monster (or ghost), a monster (or ghost) with no trap, or nothing at all.
Traps
In this step, your trap goes off. The card explains what the trap does. Usually it deals some damage. Discard the Trap Card after using.
Example 1: Put 1 Damage Counter on each warrior and 2 on the priest in the rear.
Example 2: Put 3 Damage Counters on the first warrior. This eliminates him. Move him to the Prison and put the Damage Counters back in the bank.
Thieves have the ability to reduce the damage from your traps. For each symbol, they reduce the damage by 1. Damage to the adventurers in front is reduced first.
Example 3: The Rolling Stone does 3 damage, but the thief reduces it by 2. Put 1 Damage Counter on the warrior.
Example 4: The Wall of Fire does 1 damage to the warrior and 1 to the priest, but the thief can prevent both of these. That is the limit of her ability, so she gets 2 Damage Counters.
The thief’s damage-reduction ability can be used again each round until she is eliminated. If there are multiple thieves in the party, their abilities are cumulative. The ability only works on damage, however. If the trap has other effects, the thief cannot prevent them.
Example 5: All 3 points of damage are prevented by the thieves. No one gets any Damage Counters.
Example 6: Both points of damage are prevented, but the special effect (skip Conquering) still applies.
Monsters (and Ghosts)
Monsters (and ghosts) attack after traps go off. If you have more than one, you can decide the order in which they attack. Some monsters have two ways to attack divided by a horizontal line. You get to decide between them.
There are three types of attack:
- Standard Attack: The monster attacks the first adventurer and deals the indicated amount of damage. All the damage is applied to the first adventurer even if damage exceeds hit points.
Example: If you use the witch’s standard attack for 4, she does 4 damage to the first in line. The warrior already has 2 Damage Counters, so 4 is more than enough to eliminate him. The excess damage does not go to the next in line.
- Attack Anyone: This is like a standard attack except you get to choose the target.
Example: If you use the vampire to attack anyone for 3, you can choose to eliminate the first adventurer or the last or to give the one in the middle 3 Damage Counters.
- Attack Everyone: The monster does the indicated amount of damage to each adventurer.
Example: If you use the slime to attack everyone for 1, each adventurer will get 1 Damage Counter. This is enough to eliminate the warrior.
After attacking, the monster (or ghost) is automatically knocked out. Return the Monster (or Ghost) Tile back to its lair face down. It will not be usable in later rounds. However, you don’t lose it forever. It turns face up again after the last round of Combat.
Healing
Now the priests step in. If any adventurer was attacked, the priests will heal the party. But if no monster (or ghost) damaged the party this round, the priests do not heal, even if the adventurers have damage from traps or from previous rounds.
Each priest removes 1 Damage Counter from the party for each symbol on his Adventurer Tile. At this time, it does not matter whether the damage was from monsters (or ghosts) or traps. They simply heal all they can, beginning with the adventurer in front. A priest will heal himself, if all those in front of him have no damage.
Adventurers that were eliminated remain eliminated. The priests cannot repair the damage that eliminated them.
Example 1: The troll attacks and does 3 damage to the warrior. The priest heals one damage during Healing, so the warrior is left with 2 Damage Counters.
Example 2: The vampire attacks the thief and eliminates her. During Healing, nothing happens because neither of the remaining adventurers have damage.
Example 3: The party is already wounded when the goblin attacks. It does 2 damage to the first priest. During Healing, the priests heal 4 damage. This removes both Damage Counters from the first priest, the Damage Counter from the thief, and one of the Damage Counters from the last priest. In this case, it would have been better not to have sent the goblin.
Fatigue and Conquering
Now the adventurers try to conquer the indicated tile.
Before the party can conquer the tile, they accumulate fatigue. This is indicated by the two Damage Counters illustrated for this step.
The Damage Counters both go to the adventurer in front (because he’s under the most stress). Unlike all the other damage in the game, fatigue damage is dealt 1 point at a time. So if the first adventurer is eliminated by fatigue, the next adventurer in line will get what is left.
- If all adventurers have been eliminated after accumulating fatigue (or earlier) then Combat is over and the adventurers do not conquer that tile.
- However, if even one adventurer is left after assigning fatigue, the tile is conquered. Flip it over so that it is light side up. The next battle will be fought over the next tile.
Later Rounds
After Conquering, the round is over. The next round begins and has the same rules. Do not forget that used traps are discarded and used monsters are turned face down, so they will not be able to aid you in later rounds. Combat continues until all adventurers are eliminated or until all dungeon tiles are conquered.
Combat in Rooms
So far, we have only covered combat in tunnels. But some dungeon tiles can be rooms. There are 2 differences:
- You can send up to 2 monsters into battle (along with any number of ghosts). When it is time for them to attack, you choose the order in which they do so.
- You can use 1 trap, just as you can in a tunnel, but in a room you must pay 1 Gold.
Everything else works the same as it does in tunnels. If a Room Tile is conquered, flip it over so the back side is up.
Training Scenarios
At this moment, we can look at the scenarios in the prepared training dungeons.
Monsters Used
These are the monsters (and ghost) used in the training scenarios:
Troll: The troll has a standard attack of 3. If you pay 1 Food, it can attack for 4 instead.
Goblin: The goblin has a standard attack of 2. If it eliminates the first adventurer it gets to attack the next one for 1.
Witch: The witch has either a standard attack of 4 or two attacks of 1 on anyone. These two attacks can be on the same adventurer or on two different adventurers.
Ghost: The ghost can attack anyone for 2 except for the first adventurer. The ghost is not a monster, so limits on the number of monsters do not apply to it. In a tunnel you can send one monster and as many ghosts as you want.
Vampire: The vampire can attack anyone who is not a priest. He can either attack for 3, or make an eat-and-run attack for 2. In the second case, he is not knocked out. He returns to the Monster Lair face up, ready to be used in a later round.
Slime: The slime can either attack everyone for 1 or it can slurp around their ankles and hold them in place. This latter effect is not an attack, so it does not trigger Healing. It has the special effect that the adventurers do not conquer the tile (and do not accumulate fatigue) that round. Whether you use the slime’s attack or its effect, it is knocked out afterwards.
Solutions
Each scenario has a solution in which the adventurers only conquer one tile. If your friends don’t find the optimal solution, it doesn’t really matter. The goal is just to get them to understand the mechanics of Combat.
First Scenario
The simplest solution is to use the Rolling Stone and the troll in round 1, paying the troll 1 Food to use his bigger attack. This eliminates both warriors. The priest has no one to heal, and he takes 2 damage during Conquering. The trap is discarded, and the troll is turned face down, which leaves us with the goblin. It can easily eliminate the priest next round. Or we can leave the priest alone. Without an attack, he will not heal and then he will be eliminated by fatigue before he can conquer the next tile.
An even more efficient solution is to use the troll’s free attack, after the trap eliminates the first warrior. This will not be enough to eliminate the second warrior, and the priest will heal one point of damage, but the warrior will then be eliminated by fatigue. To eliminate the priest in the next round, attack with the goblin for 2. Even though the priest heals one, he is still eliminated by fatigue before he can conquer the second tile. The result is the same except that we have saved one Food Token for later.
Second Scenario
It looks like the trap can take out the first adventurer, but the thieves will reduce the damage down to 1.
Instead, let’s save the trap for next round and just send the witch and the ghost. The witch can eliminate the warrior, but we’ll send the ghost into battle first. We want the ghost to attack the thief in the middle and it won’t be able to do that if the thief is the first in line.
Then the warrior is eliminated by the witch, and the wounded thief falls from fatigue. We are left with just the last thief for round 2. Now we prepare the Poisoned Meal. Even though she knows she shouldn’t, the thief takes a little bite (1 damage). She is eliminated by fatigue before she can conquer the second tile.
Third Scenario
These adventurers are tougher. Has our vampire bit off more than it can chew? It can’t attack the priest, so we’ll save the Pendulum for him. But for that to be effective, we need to get rid of the thief.
In round 1 we send the vampire and the Cursed Ring. The ring only damages the thief. The vampire could eliminate the thief now, but then it would be knocked out. Instead we have the vampire attack for 2 and return face up. The priest heals 1, so the thief ends the round with 2 Damage Counters. The ring prevents Conquering and the adventurers take no damage from fatigue.
The second round is fought in the same place. We just send the vampire to finish off the thief. The vampire returns face up. The priest has no one to heal. During Conquering , the warrior takes 2 damage from fatigue.
In round 3, we finally send the Pendulum with the vampire. The pendulum does 3 damage to the priest. We’ll use the vampire’s bigger attack on the warrior. This eliminates the warrior. It also knocks out the vampire, but that doesn’t matter, as we shall see. The priest heals 1 damage. Even though his damage was from the trap, he gets to heal because the vampire damaged the warrior. The priest is eliminated by fatigue before he can conquer the second tile.
Fourth Scenario
Let’s be patient. We’ll hold back the slime and just send out the Wall of Fire. The weak thief can only reduce damage to the first priest. The thief takes 1 damage, and the priest in the rear takes 2. The priests heal no one because nothing attacked. The party conquers the first tile after the first priest accumulates 2 damage from fatigue.
In the second round, we send the Anti-Magic Dart and the Slime. Because of the thief, the dart does not wound the priest that we target, but its special effect (skip Healing) still works. The slime attacks and does 1 damage to everyone. This eliminates the first priest. The thief and the priest are each 1 point away. The priest cannot heal because of the dart. During Conquering, the first point of fatigue eliminates the thief and the second point eliminates the priest before they can conquer the second tile.
Training Scenario in a Room
Set up the first training scenario again. What if it were being fought in a room? Take a Room Tile and put it face up on the square by the entrance. You can probably figure out that if you get to use one trap and two monsters, you can win in the first round, but it will cost you 1 Food (for the troll’s bigger attack) and 1 Gold (for baiting a trap).
Second Year
After Combat, the Second Year begins. Players continue with the same dungeons. Conquered rooms and tunnels cannot be repaired in any way. Your inaccessible Orders Cards for winter will be the two that you put there at the end of fall in the First Year.
- Return the 4 used Combat Cards to the box. Take the 4 gold-backed Combat Cards from Distant Lands and put them on the Central Board.
- Discard the First Year paladin; the Second Year uses only the stronger gold paladin.
- Draw new Adventurer, Monster, and Room Tiles from gold-backed stacks.
- In a two-player game, move the non-player Evil Counter 2 spaces down toward the happy face.
- Choosing a New Starting Player:
- In a 4-player game: moves 3 places to the left (opposite the First Year starter).
- In a 3-player game: moves 1 place to the left (spring starter of First Year).
- In a 2-player game: kept by the player who started fall in First Year.
- Check Evilometer for the Paladin threshold.
Rooms and Monsters in the Second Year
- Second Year rooms do not produce, but First Year production rooms can now produce twice per round (e.g., 6 imps for 2 Food).
- Second Year rooms have no zone restrictions and provide combat abilities or endgame points.
- Buying Traps in the Second Year: Draw one extra Trap Card (2 cards on spaces I and II, 3 on space III). After looking at all cards, discard any one trap face down.
- Combat is identical to the First Year.
Scoring & Winning
The Scoring Track is on the Combat side of the Progress Board. Place your third Minion Figure on space 0 and score line by line according to the Overview Card:
- +2 points for each unconquered room in your dungeon.
- +1 point for each monster in your Monster Lair (face up; no points for ghosts).
- +2 points for each adventurer in your Prison.
- +5 points for each paladin in your Prison.
- –2 points for each conquered tile (room or tunnel).
- –3 points for each red mark in your Dead Letter Office.
- Bonus points for point-scoring rooms (except Hall of Fame, scored with titles).
Titles
Titles are given to players who have the most in selected categories. If one player has the most, the title is exclusive and worth 3 points (2 in 2-player). If shared, each tied player gets 2 points (1 in 2-player).
- The Lord of Dark Deeds: Highest on Evilometer (tied players share).
- The Lord of Halls: Most rooms (conquered and unconquered).
- The Tunnellord: Most tunnels (conquered and unconquered).
- The Monsterlord: Most monsters (ghosts do not count).
- The Lord of Imps: Most Imp Figures (trolls do not count).
- The Lord of Riches: Most total Gold Tokens + Food Tokens + unplayed Trap Cards.
- The Battlelord: Fewest conquered tiles (tunnels and rooms).
Winning the Game
The player with the most points wins and becomes the Underlord. Ties are shared. All players who finish with a score above zero pass the test and receive their dungeon lord licenses!
Full Game Rules
When playing the full rules, incorporate these changes:
Choosing Initial Inaccessible Orders
After the starting player is chosen, but before tiles are revealed, shuffle your 8 Orders Cards, draw 3 at random, and choose 2 to be your inaccessible orders. Reveal them simultaneously.
Special Events
Shuffle the blue Special Event Cards. Draw 2 at random face down on the Distant Lands Board (one on top of the Second Year Combat deck, one underneath). When the Special Event tile appears on the Progress Board, reveal the card and follow its instructions.
Recruiting as First Order
If you play the Recruit Monster (or Ghost) card as your first order, it costs 1 Gold. You must pay this as soon as the card is revealed. If you have no gold, your minion is placed directly on the card and the action space remains open.
Paying a Cost vs. Gaining Evil
You pay for costs by moving up the Evilometer. If you are already at the top, you cannot pay the cost. There are three situations where moving up is a cost:
- Getting food on action spaces II and III.
- Hiring certain monsters (and ghosts).
- Paying wages to monsters (and ghosts) on Pay Day or in response to Suggestion.
In all other situations (spells, events, releasing unpaid monsters), you are “gaining Evil”. If you gain Evil while already at the top, you simply remain at the top.
Appendix & Quick Reference
Full Rules Summary
A quick summary of the game round and combat flow without commentary:
- Setup: Randomly set 2 Special Events. Choose 2 of 3 random Orders as initial inaccessible orders.
- Building:
- New Round Phase: Reveal 3 Monsters, 2 Rooms, and (except round 4) next round’s Adventurers and Event.
- Orders Phase: Set 3 orders face down. Reveal sequentially. Place minions (Hire Monster as 1st order costs 1 Gold). Execute in board order.
- Production & Retrieval: Rooms produce with imps/trolls. Retrieve inaccessible orders plus first played (or failed) order.
- Event Phase: Pay Day, Taxes, or Special Event.
- Adventurers Phase: Distribute adventurers from lowest evil to highest evil. Warriors push to the front.
- End of Round: Return imps; pass Starting Player Token.
- Combat: 4 rounds. Reveal Combat Card. In planning, choose tile nearest entrance and assign traps/monsters. Battle steps: 1. Traps, 2. Fast Spells, 3. Monsters/Ghosts, 4. Slow Spells, 5. Healing, 6. Conquering (fatigue damage, flip tile if survived).
- Second Year: Stronger paladin, gold decks, First Year rooms produce twice. Draw extra trap when buying.
- Scoring: Points for rooms (+2), monsters (+1), prisoners (+2), paladin (+5), conquered tiles (–2), unpaid taxes (–3), and titles (+3 exclusive / +2 shared).
Monsters (and Ghost)
- Goblin: Standard attack 2. If it eliminates the lead adventurer, attacks next in line for 1.
- Slime: Attack everyone for 1, OR prevent conquering and fatigue this round (not an attack; does not trigger healing).
- Ghost: Not a monster (does not count toward monster limits or scoring). Standard attack 2 against anyone except the lead adventurer.
- Troll: Standard attack 3 (attack 4 for 1 Food). Provides a Troll Token that works as an imp in production rooms.
- Witch: Standard attack 4, OR two separate attacks of 1 on anyone.
- Vampire: Attack anyone (except priests) for 3, OR eat-and-run attack for 2 and return to lair face up.
- Golem: Costs 1 Gold and 1 Trap Card to hire and on Pay Day. Standard attack 4; returns to lair face up.
- Dragon: Attacks everyone for 2. Party skips Healing Step this round.
- Demon: Attacks anyone for 7. Party skips conquering and fatigue. Requires feeding a monster when hired and on Pay Day.
Production Rooms (First Year)
- Chicken Coop, Mushroom Bed: Produce Food.
- Souvenir Shop, Mint: Produce Gold.
- Workshop: Produces a Trap Card.
- Tool Shed: Digs 1 tunnel with its 2 working imps without needing a permit.
- Printing Press: Improves reputation (move down Evilometer).
- Magic Room: Produces a new Imp Figure immediately.
Combat Rooms (Second Year)
- Training Room: Trolls and goblins get +1 damage to each attack.
- Dark Room: Vampires and witches get +1 damage to each attack.
- Labyrinth: Allows 2 traps without paying gold; only 1 monster allowed.
- Anti-Magic Room: Party cannot cast spells (skip Fast and Slow Spells steps).
Point-Scoring Rooms (Second Year)
- Cafeteria: +1 point per depicted monster (troll, goblin, slime, witch).
- Chapel: +2 points per vampire and ghost.
- Pandemonium: +2 points per golem, dragon, demon.
- Hall of Fame: +2 bonus points per exclusive title earned (+1 in 2/3 player).
Expansions for
Dungeon Lords
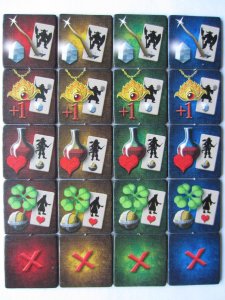
Dungeon Lords: Minions Bearing Gifts
2011
Give adventurers a boost with two distinct expansion variants.
90
minutes
Medium Heavy
View expansion
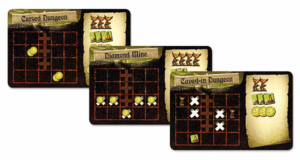
Dungeon Lords: Dungeon-Setup Tiles
2014
Begin with a new dungeon setup, from hidden caves to a diamond mine.
Medium Heavy
View expansion
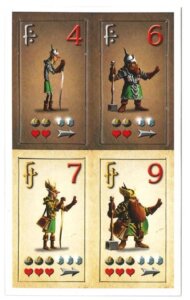
Dungeon Lords: The New Paladins
2012
Two new paladin pairs bring a trickier challenge to your dungeon.
90
minutes
Medium Heavy
View expansion
Dungeon Lords: Festival Season
2012
Build deeper, face tougher heroes, and survive a perilous festival season.
120
minutes
Medium Heavy
View expansion
