Frosthaven
2022
Lead a band of mercenaries through a 100-scenario campaign of harsh weather, invasions, crafting, mysteries, and village expansion.
180
minutes
1 - 4
player(s)
14+
Heavy


About this board game
Frosthaven is a campaign adventure for 1–4 players, with sessions lasting around 180 minutes, set in a remote outpost far north of White Oak. Players guide a group of mercenaries as they struggle to save the settlement from harsh weather, invasions, and dangerous threats hidden in the frozen wastes.
The outpost faces attacks from the mountain-dwelling Algox, the larger, yeti-like cousins of the Inox, while Lurkers arrive from the northern sea. Rumors also speak of machines wandering the icy wilderness. As the campaign unfolds, the mercenaries may uncover ways to make peace with these new races and work together against even more sinister forces.
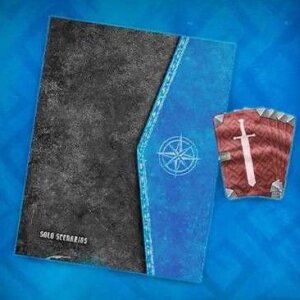
This standalone adventure includes a 100-scenario campaign, 16 new characters, three new races, more than 20 new enemies, and over 100 new items. It uses the well-known combat mechanisms of Gloomhaven while adding new ways to shape the story and settlement.
- Solve mysteries and experience a seasonal event system.
- Control how the ramshackle village expands, with each new building offering new ways to progress.
- Gather valuable resources and craft items instead of simply buying them.
- Use characters and items from Gloomhaven, and bring Frosthaven content into Gloomhaven.
Frosthaven’s remote location gives imported Gloomhaven products a distinct role: they can be brought in, but are not standard items at the outpost. With survival, exploration, crafting, and settlement development woven into its campaign, Frosthaven offers a broad adventure in an unforgiving cold frontier.
Thematics
Mechanics
Designer
Useful links
 View board game on
Board Game Geek
Board Game Rules for
Frosthaven
Overview & Goal
Your goal is to keep the outpost of Frosthaven safe from all threats. Your party of mercenaries will do this by venturing out into the wilderness in various scenarios. Once a scenario is completed, new scenarios become available, which progresses the campaign narrative. Between scenarios, your party will return to Frosthaven to resolve events, acquire new items and abilities, and interact with buildings.
The heart of the game lies in its characters, which you will create from the six starting character classes, though more will become available as the campaign progresses. The game can be played with two to four players, and each player will use a separate character. Each character class, indicated by a different icon, has a unique set of ability cards that determine how they play.
Starting Character Classes
- Banner Spear (Low Complexity): Natural leader and protector with powerful attacks that require proper positioning.
- Drifter (Low Complexity): Jack-of-all-trades with great stamina to fill any role you need.
- Boneshaper (Medium Complexity): Summoner of the undead who sacrifices their health to create and heal allies.
- Deathwalker (Medium Complexity): Manipulator of dead spirits who uses death as fuel for their abilities.
- Blinkblade (High Complexity): Powerful melee fighter who is able to quickly zip in and out of combat.
- Geminate (High Complexity): Insect swarm with two separate forms that allow for switching between melee and ranged attacks.

Creating a Character
Once you have decided which character class you would like to play, find the small tuck box and large tuck box for that class and open them up.
Inside the small tuck box, you will find a plastic miniature (the Geminate has two small tuck boxes because they have two separate forms).
Inside the large tuck box, you will find:
- A. Character Sheets: Where you track all persistent information from scenario to scenario. Write a name in the Name field, mark Level 1, and write ’30’ in the Gold field (initial characters start with 30 gold). Only one character of each class can exist at a given time.
- B. Character Mat: Displays your character’s illustration, hand size, traits, and maximum hit points at each level, with thematic lore on the back.
- C. Character Standee: An alternative to the plastic miniature.
- D. Summon Standees: Used if your character can summon allies into a scenario.
- E. Character Tokens: Used to track specific class abilities.
- F. Initiative Order Token: Marks your turn order within a round.

- G. Ability Cards: Represent dynamic actions you perform during a scenario. The card level is shown in the upper left corner. For your first game, use only Level 1 cards (equal to your hand size). Level X cards are more situational and may substitute Level 1 cards one-for-one.
- H. Advanced Attack Modifier Cards and Perk Reminder Cards: Marked with your class icon, used as your character earns perks and power.
Additional Starting Components
- A. Standard Attack Modifier Deck: Six 20-card decks (1, 2, 3, 4 for characters, A for allies, M for monsters). Each contains six +0, five -1, five +1, one -2, one +2, one Null (Ø), and one 2x.
- B. Personal Quest: Draw two cards from the personal quest deck, keep one, and shuffle the other back. Gives your character’s retirement goal.
- C. Character Dial: Tracks hit points (red) and experience (blue).
- D. Items: Spend starting 30 gold on available purchasable supply (items 120–128; plus items 10, 25, 72, 105, 109, 116 if owning Gloomhaven). Unspent gold is lost.

Suggested Starting Purchases
- Banner Spear: Winged Shoes (124), Heater Shield (128)
- Drifter: Amulet of Life (120), Winged Shoes (124)
- Boneshaper: Warden’s Robes (122)
- Deathwalker: Boots of Speed (125)
- Blinkblade: Leather Armor (123), Poison Dagger (127)
- Geminate: Amulet of Life (120), Leather Armor (123)
Learning the Rules
Rules are split into scenario rules and between-scenario outpost rules. For the first scenario, skip Road Events and set Scenario Level to 1. Rulebook blue text highlights rules exclusive to Frosthaven.
Universal Rule: The party decides ambiguity.
Scenario Phase Overview
Scenarios are self-contained tactical missions. The scenario book contains 138 branching scenarios. Each Scenario Phase consists of three distinct steps:
- Beginning a Scenario: Prepare characters, monster decks/standees, map layout, and loot deck.
- Playing a Scenario: Rounds of card selection, initiative ordering, character and monster turns, and end of round.
- Ending a Scenario: Resolve rewards/consequences of winning or losing.
Whenever the section book icon appears, read the indicated section immediately (format: page.section).
Beginning a Scenario (Setup Steps)
- Select an unlocked scenario that meets requirements; open scenario entry and keep section book nearby.
- Resolve a road event if necessary (not before scenario 0 or 1).
- Set up all map tiles as shown in the scenario map layout.
- Retrieve materials for monsters shown in the scenario key (ability deck, stat card in stat sleeve, standees, initiative token). Shuffle ability decks.
- Retrieve overlay tiles shown in scenario key.
- Set up the first room as depicted on the main map.
- Shuffle attack modifier decks (characters, monster M, ally A) and set aside curse/bless cards.
- Read scenario goals, introduction, and special rules.
- Deal three battle goals to each character; secretly choose one and discard the other two.
- Place token tray nearby.
- Build the loot deck from the scenario entry’s loot table.
- Equip items and apply any start-of-scenario or negative modifier effects from items.
- Select ability cards equal to hand size to start in hand.
- Set hit point dial (red) to maximum at current level; set experience dial (blue) to zero.
- Apply any road event and scenario effects.

Scenario Entries Layout
Scenario entries in the scenario book provide:
- A. Scenario Name & Number
- B. Grid Coordinates (or ‘FR’ for Frosthaven)
- C. Requirements
- D. Complexity (1–3)
- E. Geographical Feature
- F. Designers & Writers (side scenarios)
- G. Goal (read specified section book link at end of round when achieved)
- H. Introduction
- I. Special Rules
- J. Scenario Effects
- K. Section Links: Read immediately when triggered, even if interrupting an ability.
- L. Map Tile Configuration
- M. Loot Deck Composition
- N. Scenario Key: Monsters and overlay tiles needed for the entire scenario.

First Room Map Layout
- Starting Hexes: Marked with player icons where characters place figures at start. Max one figure per hex.
- Overlay Tiles: Placed on top of map tiles.
- Loot Tokens: Placed on designated hexes.
- Monster Placements: Indicated by 3-tiered bars (top: 2 characters, middle: 3, bottom: 4). Black = none, White = normal, Yellow = elite. Randomize standee numbers.
- Notable Hexes: Denoted by letters/numbers. Place scenario aid token if green; do not place if gray.

Road Events
Resolved at the start of scenarios, except:
- Scenario 0 and 1
- Replaying a lost scenario without returning to Frosthaven
- Moving directly to a linked scenario
- Scenarios taking place within Frosthaven itself
- Casual mode
Draw from the active Summer or Winter road event deck matching the current calendar season. Read front text, collectively choose an option, then read and resolve the corresponding back outcome. If the return icon is shown, place at the bottom of the deck; otherwise remove from the game.

Map Tiles and Overlay Tiles
Map tiles consist of traversable hexes bounded by wall lines. Wall lines cannot be crossed; a grouping of hexes surrounded by walls is a room. A hex is adjacent to a wall if it shares a border with a wall line.
- Featureless Hex: A hex with no overlay tiles (corridors and pressure plates do not count as overlay tiles for this purpose).
- Unoccupied Hex: A hex with no figure.
- Empty Hex: A hex that is both featureless and unoccupied. (Tokens are not overlay tiles.)
Overlay Tile Types
- Doors: Separate rooms. Closed doors block LOS and act as walls to enemies, but characters can open them by entering. Flipping to open reveals the adjacent room. Figures cannot be forced into closed doors.
- Corridors: Connect map tiles to make a single room; treated as empty hexes.
- Pressure Plates: Triggers defined by scenario rules; jump/flying still trigger them; treated as empty hexes.
- Traps: Sprung when a figure enters (except jump/fly unless landing there). Deals 2 + Scenario Level damage plus any listed conditions, then is removed.
- Hazardous Terrain: Deals 1 + round_up(Scenario Level / 3) damage upon entering (not when starting turn or exiting). Not removed when triggered.
- Difficult Terrain: Costs 2 movement points per hex (ignored by jump/fly).
- Icy Terrain: When entering, forces the figure to slide 1 additional hex in the same direction without spending movement. Ignored by jump, fly, and teleport.
- Obstacles: Block movement (except fly/jump landing outside). Do not block line-of-sight.
- Objectives: Scenario-specific figures. Immune to conditions and forced movement; have 99 initiative for monster focus; occupy hexes.
- Walls: Block all movement and line-of-sight.
- Treasures: Looted by characters. Goal treasures resolve scenario rules. Numbered treasures give one-time rewards found in the Treasure Index (p. 78) and cannot be looted again in replays.
Loot Deck & Scenario Level
Construct the loot deck from individual card decks as specified in the scenario entry:
- Money: 20 cards (1–3 coins each, converted to gold at end of scenario).
- Material Resources: 8 cards each of Lumber, Metal, Hide.
- Herb Resources: 2 cards each of Arrowvine, Axenut, Corpsecap, Flamefruit, Rockroot, Snowthistle.
- Random Item: 1 card (draw from random item deck immediately; once per scenario entry).
Scenario Level Calculation
Recommended Scenario Level = (Average Character Level / 2), rounded up.
Difficulty can be adjusted from 0 to 7.
| Scenario Level | 0 | 1 | 2 | 3 | 4 | 5 | 6 | 7 |
|---|---|---|---|---|---|---|---|---|
| Monster Level | 0 | 1 | 2 | 3 | 4 | 5 | 6 | 7 |
| Gold Conversion | 2 | 2 | 3 | 3 | 4 | 4 | 5 | 6 |
| Trap Damage | 2 | 3 | 4 | 5 | 6 | 7 | 8 | 9 |
| Hazardous Terrain | 1 | 2 | 2 | 2 | 3 | 3 | 3 | 4 |
| Bonus Experience | 4 | 6 | 8 | 10 | 12 | 14 | 16 | 18 |
Battle Goals
Each character secretly receives three battle goal cards at scenario start, keeps one, and discards two. If the scenario is completed and the goal achieved, gain the checkmarks indicated. Every three checkmarks grant a perk mark (max 18 checkmarks / 6 extra perks). If the scenario is lost, no checkmarks are awarded.

Round Structure
Each round consists of the following steps:
- Card Selection: Each player secretly selects two ability cards from hand, designating one as initiative, OR declares a long rest on initiative 99 (requires at least 2 discard cards). Specific numbers and card titles cannot be communicated.
- Ordering of Initiative: Reveal player cards and one monster ability card per active monster set. Order all figures from lowest initiative to highest (earliest to latest). Character summons act immediately before their summoner. Ties between characters broken by second card initiative; ties between character and monster go to character.
- Character and Monster Turns: Each figure takes their turn in initiative order.
- End of Round: Trigger end-of-round effects, reshuffle decks if shuffle icon drawn, discard round bonuses, allow short rests, and wane infused elements.

Character Ability Cards & Actions
An action is one half of an ability card. Characters perform one top action and one bottom action per turn (in either order). Monsters perform the abilities on their drawn card from top to bottom. Abilities within an action are separated by dividing lines and performed in order. Character abilities can be skipped unless marked with a mandatory trigger (!).

Resting
- Short Rest: At end of round, lose 1 random discarded card and return the rest to hand. May suffer 1 damage once to re-draw lost card.
- Long Rest: Chosen during card selection (initiative 99). Choose 1 discarded card to lose, return rest to hand, Heal 2 self, and refresh all spent items.
Items
- Usage Icons: Spent (turned sideways; recovered on long rest), Lost (flipped face-down; cannot be used again this scenario unless recovered), Flip (flipped to opposite side). Passive items have no icon.
- Item Carrying Limits: 1 Head, 1 Body, 1 Feet, up to 2 One-Hand OR 1 Two-Hand, and Small items up to round_up(Level / 2).
Damage Negation & Exhaustion
Character Damage & Negation
When suffering damage, a character may avoid all damage from that single source by losing 1 card from hand or 2 cards from discard.
Exhaustion
A character is exhausted if they drop to 0 HP OR cannot play two cards/long rest at the start of a round. Remove figure, lose all cards. If all characters exhaust, the scenario is lost.
Targeted Abilities & Concepts
- Line-of-Sight: Required for all targets. A line must be drawn from any point of the acting hex to any point of the target hex without intersecting a wall line. Only walls and closed doors block LOS.
- Target X: Can target up to X different figures within range. Targeted abilities: Attack, conditions, heal, forced movement, commanding figures, manipulating tiles.
- Allies, Enemies, and Self: Characters are allies to characters, monsters are allies to monsters. Figures are not their own allies. Negative abilities affect enemies; positive abilities affect allies/self.
- Range: Distance in hexes, counted around walls. Melee attacks have range 1 (adjacent). Non-attack abilities without range have infinite range.
- Area of Effect (AOE): Gray hex is user (melee); blue hex requires an ally present; red hexes are attack targets. Can be rotated or mirrored.
- Added Effects: Conditions, push/pull, or infuse attached to an ability. May be skipped unless mandatory, but must be decided before drawing attack modifiers.
Elements
Elements (Fire, Ice, Air, Earth, Light, Dark): Infused at the end of turn if any part of the action is used. Consumed during turn from strong/waning state to boost abilities. Elements wane one step (Strong -> Waning -> Inert) at round end.

Specific Abilities Reference
- Move X: Spend up to X movement points (1 per hex). Can move through allies, not enemies/obstacles/walls. Must end in unoccupied hex.
- Jump: Move modifier ignoring enemies, obstacles, traps, and terrain along the path, but landing hex must be valid and triggers effects. Cannot jump walls.
- Flying: Active bonus ignoring figures, obstacles, traps, and all terrain continuously.
- Teleport X: Transport directly to any valid hex within X range without pathing. Does not count as movement. Can open closed doors by teleporting onto them.
- Attack X: Deal base X damage to target. Ranged attacks on adjacent targets gain disadvantage.
- Pierce X: Reduces target’s shield value by X for that attack.
- Heal X: Positive targeted ability recovering X hit points. Automatically removes Wound, Brittle, Bane, and Poison (if poisoned, the condition is removed but no HP is recovered).
- Active Bonuses: Placed in active area. Expire at round end (round bonus) or when specified conditions/use slots are exhausted (persistent bonus).
- Shield X: Reduces incoming attack damage by X.
- Retaliate X: Deals X unmitigated damage back to attacker within range after attack resolves.
- Summon: Places ally standee in an adjacent empty hex. Acts automatically before summoner each round (Move+0, Attack+0) using summoner’s modifier deck. Summons die if HP reaches 0 or summoner exhausts.
- Forced Movement: Push X forces target X hexes away. Pull X forces target X hexes closer. Characters choose direction; monsters maximize push/pull distance.
- Loot X: Character loots all loot tokens and treasure tiles within range X.
- Commanding Figures: Grant (allies perform an ability) or Control (force enemies to perform an ability).
- Manipulating Tiles: Create, destroy, relocate, move, replace, or spring overlay tiles/traps. Cannot isolate areas from being reached.

Attack Resolution & Modifiers
Attack Modification Order
- Apply attacker’s bonuses/penalties (+/- attack values).
- Draw attack modifier card from attacker’s deck.
- Apply target’s Shield bonus.
- Apply Ward (half damage rounded down) and Brittle (double damage). If target has both, they cancel each other out and are removed.
- Target suffers remaining damage (or negates via card loss).
Advantage & Disadvantage
- Advantage: Draw two modifier cards, use the better one (player chooses if ambiguous). If first card is rolling, keep drawing until a non-rolling card is drawn, then draw one additional non-rolling card and combine all rolling with the better card.
- Disadvantage: Draw two modifier cards, use the worse one. Rolling modifiers are ignored if drawn.
Positive Conditions
- Regenerate: Heal 1, self at start of turn (even if stunned). Removed upon suffering damage.
- Ward: Halves next damage suffered (rounded down), then removed.
- Invisible: Cannot be focused or targeted by enemies. Removed at end of next turn.
- Strengthen: Advantage on all attacks. Removed at end of next turn.
- Bless: Shuffle a 2x card into modifier deck (removed after being drawn).

Negative Conditions
- Wound: Suffer 1 damage at start of turn. Removed by heal.
- Brittle: Next damage suffered is doubled, then removed. Removed by heal.
- Bane: Suffer 10 damage at end of next turn, then removed. Removed by heal.
- Poison: Attacks against target gain +1 Attack. Removed by heal (negates healing effect).
- Immobilize: Cannot perform move abilities. Removed at end of next turn.
- Disarm: Cannot perform attack abilities. Removed at end of next turn.
- Impair: (Characters only) Cannot use or trigger items. Removed at end of next turn.
- Stun: Cannot perform any abilities or items. Removed at end of next turn.
- Muddle: Disadvantage on all attacks. Removed at end of next turn.
- Curse: Shuffle a Null card into modifier deck (removed after being drawn).

Activation Order
Monsters act by monster set. Elites act first in ascending standee order, then normal monsters in ascending standee order.

Determining Monster Focus
A monster focuses on the single enemy it can attack using the fewest movement points. Tiebreakers:
- Path triggering fewest negative hexes (traps/hazards).
- Shortest path (fewest movement points).
- Closest enemy by physical range.
- Earliest in initiative order.
If a monster cannot find a path to attack an enemy under infinite movement, it has no focus and does not move or attack.

Monster Movement & Attacks
- Only moves if Move is on the ability card (adds to base stat).
- Only moves enough to maximize its attacks with the fewest disadvantaged attacks.
- Ranged monsters back away 1 hex if adjacent to their focus to avoid disadvantage.
- Only attacks if Attack is on the ability card.
- Summoned monsters do not drop loot and do not act in the round summoned.
- When a monster dies, drop a loot token in its hex (except scenario allies).
If Completed
- Looted Resources: Gain resources from loot cards.
- Battle Goals: Tally checkmarks on character sheet.
- Masteries: Gain 1 perk mark per mastery achieved (max once per character).
- Conclusion: Read scenario conclusion in section book.
- Rewards: Gain listed rewards (once per campaign). Unlocked scenarios have stickers placed on the map.
- Inspiration: Gain (4 – number of characters) inspiration.
- Update Map: Check off scenario.
- Return to Frosthaven for Outpost Phase (unless linked/force-linked).
If Lost
Choose one option:
- Return to Frosthaven: Keep loot resources, XP, gold, treasure. Conduct Outpost Phase.
- Replay Scenario Immediately: Keep XP, gold, treasure, but lose resources from loot cards. Skip Outpost Phase; no road event.
Campaign Overview
Between scenarios, players manage the town of Frosthaven. The Outpost Phase occurs in five sequential steps:
- Passage of Time: Mark next week on the calendar. Read any section book numbers in the marked box. Every 10 weeks, the season changes (Summer <-> Winter).
- Outpost Event: Draw an event from the current season’s outpost event deck. If an Attack Event occurs, resolve defense checks for targeted buildings using the Town Guard deck.
- Building Operations: In sequential building number order, resolve effects for all operational or wrecked buildings.
- Downtime: Characters perform actions in any order:
- Level Up: Advance level if XP threshold met (or via prosperity). Gain new card, increase HP, gain 1 perk mark.
- Retire a Character: If personal quest completed, unlock specified building envelope, gain 2 prosperity, record in retirement table. Can spend 15 inspiration to complete a second quest.
- Create a Character: Select class, start with (10 x Prosperity + 20) gold, bonus perks based on player’s retired characters, draw 2 personal quests (keep 1).
- Craft Items: Spend personal materials / collective herbs at Craftsman.
- Brew Potions: Spend 2 herbs at Alchemist and reveal window on alchemy chart.
- Sell Items: Sell for half purchase cost or 2 gold per crafting material.
- Construction: Build or upgrade 1 building (pay resources from Frosthaven supply). May spend 2 morale to build/upgrade a second building. Can rebuild any number of wrecked buildings.


Game Variants
- Casual Mode: Play any unlocked scenario ignoring campaign progression, road events, time passage, and rewards.
- Crossover Classes: Import classes between Frosthaven and Gloomhaven.
- Temporary Enhancements: Enhancement stickers placed on sleeves and removed at retirement at a 20% discount.
- Reduced Randomness: Treat Null/Curse as -2, and 2x/Bless as +2.
- Solo Mode: Increase difficulty: Scenario Level = ((Average Level + 1) / 2) rounded up.
- Open Information: Allow full discussion of cards and initiative during card selection, using solo mode difficulty calculation.
- Permanent Death: Characters die permanently when reaching 0 HP.
- Character Respeccing: Pay (10 x Level) gold to re-select card choices.
- Random Dungeons: 3-room generated dungeons using random room and setup cards.
Appendix: Enhancement Costs
(Unlocked when building 44 is built)
| Enhancement | Base Cost | Enhancement | Base Cost |
|---|---|---|---|
| Move +1 | 30g | Summon HP +1 | 40g |
| Attack +1 | 50g | Summon Move +1 | 60g |
| Range +1 | 30g | Summon Attack +1 | 100g |
| Target +1 | 75g | Summon Range +1 | 50g |
| Shield +1 | 80g | Regenerate | 40g |
| Retaliate +1 | 60g | Ward | 75g |
| Pierce +1 | 30g | Strengthen | 100g |
| Heal +1 | 30g | Bless | 75g |
| Push +1 | 30g | Wound | 75g |
| Pull +1 | 20g | Poison | 50g |
| Teleport +1 | 50g | Immobilize | 150g |
| Jump | 60g | Muddle | 40g |
| Element | 100g | Curse | 150g |
| Wild Element | 150g | Area-of-Effect Hex | 200g / hexes |
Cost Modifiers (apply in order):
- Double cost if ability targets multiple figures/tiles.
- Halve cost if lost icon without persistent icon.
- Triple cost if ability provides persistent bonus.
- +25g for each level above level 1.
- +75g for each previous enhancement on the action.
Quick Reference Summary
Targeted Abilities
- Attack (p. 25)
- Conditions (p. 28)
- Heal (p. 29)
- Forced Movement (p. 32)
- Commanding Figures (p. 33)
- Manipulating Tiles (p. 33)
Attack Modification Order
- Apply all attack bonuses and penalties.
- Draw and apply attack modifier card.
- Apply target’s shield bonus.
- Apply effects of Ward and Brittle.
End of Round Checklist
- Trigger end-of-round effects.
- Shuffle decks if shuffle icon revealed.
- Remove round bonuses from active areas.
- Perform short rests if desired.
- Move infused elements one step left (waning / inert).
Introduction & Character Creation
Overview & Goal
Your goal is to keep the outpost of Frosthaven safe from all threats. Your party of mercenaries will do this by venturing out into the wilderness in various scenarios. Once a scenario is completed, new scenarios become available, which progresses the campaign narrative. Between scenarios, your party will return to Frosthaven to resolve events, acquire new items and abilities, and interact with buildings.
The heart of the game lies in its characters, which you will create from the six starting character classes, though more will become available as the campaign progresses. The game can be played with two to four players, and each player will use a separate character. Each character class, indicated by a different icon, has a unique set of ability cards that determine how they play.
Starting Character Classes
- Banner Spear (Low Complexity): Natural leader and protector with powerful attacks that require proper positioning.
- Drifter (Low Complexity): Jack-of-all-trades with great stamina to fill any role you need.
- Boneshaper (Medium Complexity): Summoner of the undead who sacrifices their health to create and heal allies.
- Deathwalker (Medium Complexity): Manipulator of dead spirits who uses death as fuel for their abilities.
- Blinkblade (High Complexity): Powerful melee fighter who is able to quickly zip in and out of combat.
- Geminate (High Complexity): Insect swarm with two separate forms that allow for switching between melee and ranged attacks.
Creating a Character
Once you have decided which character class you would like to play, find the small tuck box and large tuck box for that class and open them up.
Inside the small tuck box, you will find a plastic miniature (the Geminate has two small tuck boxes because they have two separate forms).
Inside the large tuck box, you will find:
- A. Character Sheets: Where you track all persistent information from scenario to scenario. Write a name in the Name field, mark Level 1, and write ’30’ in the Gold field (initial characters start with 30 gold). Only one character of each class can exist at a given time.
- B. Character Mat: Displays your character’s illustration, hand size, traits, and maximum hit points at each level, with thematic lore on the back.
- C. Character Standee: An alternative to the plastic miniature.
- D. Summon Standees: Used if your character can summon allies into a scenario.
- E. Character Tokens: Used to track specific class abilities.
- F. Initiative Order Token: Marks your turn order within a round.
- G. Ability Cards: Represent dynamic actions you perform during a scenario. The card level is shown in the upper left corner. For your first game, use only Level 1 cards (equal to your hand size). Level X cards are more situational and may substitute Level 1 cards one-for-one.
- H. Advanced Attack Modifier Cards and Perk Reminder Cards: Marked with your class icon, used as your character earns perks and power.
Additional Starting Components
- A. Standard Attack Modifier Deck: Six 20-card decks (1, 2, 3, 4 for characters, A for allies, M for monsters). Each contains six +0, five -1, five +1, one -2, one +2, one Null (Ø), and one 2x.
- B. Personal Quest: Draw two cards from the personal quest deck, keep one, and shuffle the other back. Gives your character’s retirement goal.
- C. Character Dial: Tracks hit points (red) and experience (blue).
- D. Items: Spend starting 30 gold on available purchasable supply (items 120–128; plus items 10, 25, 72, 105, 109, 116 if owning Gloomhaven). Unspent gold is lost.
Suggested Starting Purchases
- Banner Spear: Winged Shoes (124), Heater Shield (128)
- Drifter: Amulet of Life (120), Winged Shoes (124)
- Boneshaper: Warden’s Robes (122)
- Deathwalker: Boots of Speed (125)
- Blinkblade: Leather Armor (123), Poison Dagger (127)
- Geminate: Amulet of Life (120), Leather Armor (123)
Learning the Rules
Rules are split into scenario rules and between-scenario outpost rules. For the first scenario, skip Road Events and set Scenario Level to 1. Rulebook blue text highlights rules exclusive to Frosthaven.
Universal Rule: The party decides ambiguity.
Scenario Setup & Environment
Scenario Phase Overview
Scenarios are self-contained tactical missions. The scenario book contains 138 branching scenarios. Each Scenario Phase consists of three distinct steps:
- Beginning a Scenario: Prepare characters, monster decks/standees, map layout, and loot deck.
- Playing a Scenario: Rounds of card selection, initiative ordering, character and monster turns, and end of round.
- Ending a Scenario: Resolve rewards/consequences of winning or losing.
Whenever the section book icon appears, read the indicated section immediately (format: page.section).
Beginning a Scenario (Setup Steps)
- Select an unlocked scenario that meets requirements; open scenario entry and keep section book nearby.
- Resolve a road event if necessary (not before scenario 0 or 1).
- Set up all map tiles as shown in the scenario map layout.
- Retrieve materials for monsters shown in the scenario key (ability deck, stat card in stat sleeve, standees, initiative token). Shuffle ability decks.
- Retrieve overlay tiles shown in scenario key.
- Set up the first room as depicted on the main map.
- Shuffle attack modifier decks (characters, monster M, ally A) and set aside curse/bless cards.
- Read scenario goals, introduction, and special rules.
- Deal three battle goals to each character; secretly choose one and discard the other two.
- Place token tray nearby.
- Build the loot deck from the scenario entry’s loot table.
- Equip items and apply any start-of-scenario or negative modifier effects from items.
- Select ability cards equal to hand size to start in hand.
- Set hit point dial (red) to maximum at current level; set experience dial (blue) to zero.
- Apply any road event and scenario effects.
Scenario Entries Layout
Scenario entries in the scenario book provide:
- A. Scenario Name & Number
- B. Grid Coordinates (or ‘FR’ for Frosthaven)
- C. Requirements
- D. Complexity (1–3)
- E. Geographical Feature
- F. Designers & Writers (side scenarios)
- G. Goal (read specified section book link at end of round when achieved)
- H. Introduction
- I. Special Rules
- J. Scenario Effects
- K. Section Links: Read immediately when triggered, even if interrupting an ability.
- L. Map Tile Configuration
- M. Loot Deck Composition
- N. Scenario Key: Monsters and overlay tiles needed for the entire scenario.
First Room Map Layout
- Starting Hexes: Marked with player icons where characters place figures at start. Max one figure per hex.
- Overlay Tiles: Placed on top of map tiles.
- Loot Tokens: Placed on designated hexes.
- Monster Placements: Indicated by 3-tiered bars (top: 2 characters, middle: 3, bottom: 4). Black = none, White = normal, Yellow = elite. Randomize standee numbers.
- Notable Hexes: Denoted by letters/numbers. Place scenario aid token if green; do not place if gray.
Road Events
Resolved at the start of scenarios, except:
- Scenario 0 and 1
- Replaying a lost scenario without returning to Frosthaven
- Moving directly to a linked scenario
- Scenarios taking place within Frosthaven itself
- Casual mode
Draw from the active Summer or Winter road event deck matching the current calendar season. Read front text, collectively choose an option, then read and resolve the corresponding back outcome. If the return icon is shown, place at the bottom of the deck; otherwise remove from the game.
Map Tiles and Overlay Tiles
Map tiles consist of traversable hexes bounded by wall lines. Wall lines cannot be crossed; a grouping of hexes surrounded by walls is a room. A hex is adjacent to a wall if it shares a border with a wall line.
- Featureless Hex: A hex with no overlay tiles (corridors and pressure plates do not count as overlay tiles for this purpose).
- Unoccupied Hex: A hex with no figure.
- Empty Hex: A hex that is both featureless and unoccupied. (Tokens are not overlay tiles.)
Overlay Tile Types
- Doors: Separate rooms. Closed doors block LOS and act as walls to enemies, but characters can open them by entering. Flipping to open reveals the adjacent room. Figures cannot be forced into closed doors.
- Corridors: Connect map tiles to make a single room; treated as empty hexes.
- Pressure Plates: Triggers defined by scenario rules; jump/flying still trigger them; treated as empty hexes.
- Traps: Sprung when a figure enters (except jump/fly unless landing there). Deals 2 + Scenario Level damage plus any listed conditions, then is removed.
- Hazardous Terrain: Deals 1 + round_up(Scenario Level / 3) damage upon entering (not when starting turn or exiting). Not removed when triggered.
- Difficult Terrain: Costs 2 movement points per hex (ignored by jump/fly).
- Icy Terrain: When entering, forces the figure to slide 1 additional hex in the same direction without spending movement. Ignored by jump, fly, and teleport.
- Obstacles: Block movement (except fly/jump landing outside). Do not block line-of-sight.
- Objectives: Scenario-specific figures. Immune to conditions and forced movement; have 99 initiative for monster focus; occupy hexes.
- Walls: Block all movement and line-of-sight.
- Treasures: Looted by characters. Goal treasures resolve scenario rules. Numbered treasures give one-time rewards found in the Treasure Index (p. 78) and cannot be looted again in replays.
Loot Deck & Scenario Level
Construct the loot deck from individual card decks as specified in the scenario entry:
- Money: 20 cards (1–3 coins each, converted to gold at end of scenario).
- Material Resources: 8 cards each of Lumber, Metal, Hide.
- Herb Resources: 2 cards each of Arrowvine, Axenut, Corpsecap, Flamefruit, Rockroot, Snowthistle.
- Random Item: 1 card (draw from random item deck immediately; once per scenario entry).
Scenario Level Calculation
Recommended Scenario Level = (Average Character Level / 2), rounded up.
Difficulty can be adjusted from 0 to 7.
| Scenario Level | 0 | 1 | 2 | 3 | 4 | 5 | 6 | 7 |
|---|---|---|---|---|---|---|---|---|
| Monster Level | 0 | 1 | 2 | 3 | 4 | 5 | 6 | 7 |
| Gold Conversion | 2 | 2 | 3 | 3 | 4 | 4 | 5 | 6 |
| Trap Damage | 2 | 3 | 4 | 5 | 6 | 7 | 8 | 9 |
| Hazardous Terrain | 1 | 2 | 2 | 2 | 3 | 3 | 3 | 4 |
| Bonus Experience | 4 | 6 | 8 | 10 | 12 | 14 | 16 | 18 |
Battle Goals
Each character secretly receives three battle goal cards at scenario start, keeps one, and discards two. If the scenario is completed and the goal achieved, gain the checkmarks indicated. Every three checkmarks grant a perk mark (max 18 checkmarks / 6 extra perks). If the scenario is lost, no checkmarks are awarded.
How to Play: Round Structure & Character Rules
Round Structure
Each round consists of the following steps:
- Card Selection: Each player secretly selects two ability cards from hand, designating one as initiative, OR declares a long rest on initiative 99 (requires at least 2 discard cards). Specific numbers and card titles cannot be communicated.
- Ordering of Initiative: Reveal player cards and one monster ability card per active monster set. Order all figures from lowest initiative to highest (earliest to latest). Character summons act immediately before their summoner. Ties between characters broken by second card initiative; ties between character and monster go to character.
- Character and Monster Turns: Each figure takes their turn in initiative order.
- End of Round: Trigger end-of-round effects, reshuffle decks if shuffle icon drawn, discard round bonuses, allow short rests, and wane infused elements.
Character Ability Cards & Actions
An action is one half of an ability card. Characters perform one top action and one bottom action per turn (in either order). Monsters perform the abilities on their drawn card from top to bottom. Abilities within an action are separated by dividing lines and performed in order. Character abilities can be skipped unless marked with a mandatory trigger (!).
Resting
- Short Rest: At end of round, lose 1 random discarded card and return the rest to hand. May suffer 1 damage once to re-draw lost card.
- Long Rest: Chosen during card selection (initiative 99). Choose 1 discarded card to lose, return rest to hand, Heal 2 self, and refresh all spent items.
Items
- Usage Icons: Spent (turned sideways; recovered on long rest), Lost (flipped face-down; cannot be used again this scenario unless recovered), Flip (flipped to opposite side). Passive items have no icon.
- Item Carrying Limits: 1 Head, 1 Body, 1 Feet, up to 2 One-Hand OR 1 Two-Hand, and Small items up to round_up(Level / 2).
Damage Negation & Exhaustion
Character Damage & Negation
When suffering damage, a character may avoid all damage from that single source by losing 1 card from hand or 2 cards from discard.
Exhaustion
A character is exhausted if they drop to 0 HP OR cannot play two cards/long rest at the start of a round. Remove figure, lose all cards. If all characters exhaust, the scenario is lost.
Abilities, Elements & Combat Resolution
Targeted Abilities & Concepts
- Line-of-Sight: Required for all targets. A line must be drawn from any point of the acting hex to any point of the target hex without intersecting a wall line. Only walls and closed doors block LOS.
- Target X: Can target up to X different figures within range. Targeted abilities: Attack, conditions, heal, forced movement, commanding figures, manipulating tiles.
- Allies, Enemies, and Self: Characters are allies to characters, monsters are allies to monsters. Figures are not their own allies. Negative abilities affect enemies; positive abilities affect allies/self.
- Range: Distance in hexes, counted around walls. Melee attacks have range 1 (adjacent). Non-attack abilities without range have infinite range.
- Area of Effect (AOE): Gray hex is user (melee); blue hex requires an ally present; red hexes are attack targets. Can be rotated or mirrored.
- Added Effects: Conditions, push/pull, or infuse attached to an ability. May be skipped unless mandatory, but must be decided before drawing attack modifiers.
Elements
Elements (Fire, Ice, Air, Earth, Light, Dark): Infused at the end of turn if any part of the action is used. Consumed during turn from strong/waning state to boost abilities. Elements wane one step (Strong -> Waning -> Inert) at round end.
Specific Abilities Reference
- Move X: Spend up to X movement points (1 per hex). Can move through allies, not enemies/obstacles/walls. Must end in unoccupied hex.
- Jump: Move modifier ignoring enemies, obstacles, traps, and terrain along the path, but landing hex must be valid and triggers effects. Cannot jump walls.
- Flying: Active bonus ignoring figures, obstacles, traps, and all terrain continuously.
- Teleport X: Transport directly to any valid hex within X range without pathing. Does not count as movement. Can open closed doors by teleporting onto them.
- Attack X: Deal base X damage to target. Ranged attacks on adjacent targets gain disadvantage.
- Pierce X: Reduces target’s shield value by X for that attack.
- Heal X: Positive targeted ability recovering X hit points. Automatically removes Wound, Brittle, Bane, and Poison (if poisoned, the condition is removed but no HP is recovered).
- Active Bonuses: Placed in active area. Expire at round end (round bonus) or when specified conditions/use slots are exhausted (persistent bonus).
- Shield X: Reduces incoming attack damage by X.
- Retaliate X: Deals X unmitigated damage back to attacker within range after attack resolves.
- Summon: Places ally standee in an adjacent empty hex. Acts automatically before summoner each round (Move+0, Attack+0) using summoner’s modifier deck. Summons die if HP reaches 0 or summoner exhausts.
- Forced Movement: Push X forces target X hexes away. Pull X forces target X hexes closer. Characters choose direction; monsters maximize push/pull distance.
- Loot X: Character loots all loot tokens and treasure tiles within range X.
- Commanding Figures: Grant (allies perform an ability) or Control (force enemies to perform an ability).
- Manipulating Tiles: Create, destroy, relocate, move, replace, or spring overlay tiles/traps. Cannot isolate areas from being reached.
Attack Resolution & Modifiers
Attack Modification Order
- Apply attacker’s bonuses/penalties (+/- attack values).
- Draw attack modifier card from attacker’s deck.
- Apply target’s Shield bonus.
- Apply Ward (half damage rounded down) and Brittle (double damage). If target has both, they cancel each other out and are removed.
- Target suffers remaining damage (or negates via card loss).
Advantage & Disadvantage
- Advantage: Draw two modifier cards, use the better one (player chooses if ambiguous). If first card is rolling, keep drawing until a non-rolling card is drawn, then draw one additional non-rolling card and combine all rolling with the better card.
- Disadvantage: Draw two modifier cards, use the worse one. Rolling modifiers are ignored if drawn.
Conditions Reference
Positive Conditions
- Regenerate: Heal 1, self at start of turn (even if stunned). Removed upon suffering damage.
- Ward: Halves next damage suffered (rounded down), then removed.
- Invisible: Cannot be focused or targeted by enemies. Removed at end of next turn.
- Strengthen: Advantage on all attacks. Removed at end of next turn.
- Bless: Shuffle a 2x card into modifier deck (removed after being drawn).
Negative Conditions
- Wound: Suffer 1 damage at start of turn. Removed by heal.
- Brittle: Next damage suffered is doubled, then removed. Removed by heal.
- Bane: Suffer 10 damage at end of next turn, then removed. Removed by heal.
- Poison: Attacks against target gain +1 Attack. Removed by heal (negates healing effect).
- Immobilize: Cannot perform move abilities. Removed at end of next turn.
- Disarm: Cannot perform attack abilities. Removed at end of next turn.
- Impair: (Characters only) Cannot use or trigger items. Removed at end of next turn.
- Stun: Cannot perform any abilities or items. Removed at end of next turn.
- Muddle: Disadvantage on all attacks. Removed at end of next turn.
- Curse: Shuffle a Null card into modifier deck (removed after being drawn).
Monster Turns & AI
Activation Order
Monsters act by monster set. Elites act first in ascending standee order, then normal monsters in ascending standee order.
Determining Monster Focus
A monster focuses on the single enemy it can attack using the fewest movement points. Tiebreakers:
- Path triggering fewest negative hexes (traps/hazards).
- Shortest path (fewest movement points).
- Closest enemy by physical range.
- Earliest in initiative order.
If a monster cannot find a path to attack an enemy under infinite movement, it has no focus and does not move or attack.
Monster Movement & Attacks
- Only moves if Move is on the ability card (adds to base stat).
- Only moves enough to maximize its attacks with the fewest disadvantaged attacks.
- Ranged monsters back away 1 hex if adjacent to their focus to avoid disadvantage.
- Only attacks if Attack is on the ability card.
- Summoned monsters do not drop loot and do not act in the round summoned.
- When a monster dies, drop a loot token in its hex (except scenario allies).
Ending a Scenario
If Completed
- Looted Resources: Gain resources from loot cards.
- Battle Goals: Tally checkmarks on character sheet.
- Masteries: Gain 1 perk mark per mastery achieved (max once per character).
- Conclusion: Read scenario conclusion in section book.
- Rewards: Gain listed rewards (once per campaign). Unlocked scenarios have stickers placed on the map.
- Inspiration: Gain (4 – number of characters) inspiration.
- Update Map: Check off scenario.
- Return to Frosthaven for Outpost Phase (unless linked/force-linked).
If Lost
Choose one option:
- Return to Frosthaven: Keep loot resources, XP, gold, treasure. Conduct Outpost Phase.
- Replay Scenario Immediately: Keep XP, gold, treasure, but lose resources from loot cards. Skip Outpost Phase; no road event.
Campaign Overview & Outpost Phase
Campaign Overview
Between scenarios, players manage the town of Frosthaven. The Outpost Phase occurs in five sequential steps:
- Passage of Time: Mark next week on the calendar. Read any section book numbers in the marked box. Every 10 weeks, the season changes (Summer <-> Winter).
- Outpost Event: Draw an event from the current season’s outpost event deck. If an Attack Event occurs, resolve defense checks for targeted buildings using the Town Guard deck.
- Building Operations: In sequential building number order, resolve effects for all operational or wrecked buildings.
- Downtime: Characters perform actions in any order:
- Level Up: Advance level if XP threshold met (or via prosperity). Gain new card, increase HP, gain 1 perk mark.
- Retire a Character: If personal quest completed, unlock specified building envelope, gain 2 prosperity, record in retirement table. Can spend 15 inspiration to complete a second quest.
- Create a Character: Select class, start with (10 x Prosperity + 20) gold, bonus perks based on player’s retired characters, draw 2 personal quests (keep 1).
- Craft Items: Spend personal materials / collective herbs at Craftsman.
- Brew Potions: Spend 2 herbs at Alchemist and reveal window on alchemy chart.
- Sell Items: Sell for half purchase cost or 2 gold per crafting material.
- Construction: Build or upgrade 1 building (pay resources from Frosthaven supply). May spend 2 morale to build/upgrade a second building. Can rebuild any number of wrecked buildings.
Variants, Enhancement Costs & Quick Reference
Game Variants
- Casual Mode: Play any unlocked scenario ignoring campaign progression, road events, time passage, and rewards.
- Crossover Classes: Import classes between Frosthaven and Gloomhaven.
- Temporary Enhancements: Enhancement stickers placed on sleeves and removed at retirement at a 20% discount.
- Reduced Randomness: Treat Null/Curse as -2, and 2x/Bless as +2.
- Solo Mode: Increase difficulty: Scenario Level = ((Average Level + 1) / 2) rounded up.
- Open Information: Allow full discussion of cards and initiative during card selection, using solo mode difficulty calculation.
- Permanent Death: Characters die permanently when reaching 0 HP.
- Character Respeccing: Pay (10 x Level) gold to re-select card choices.
- Random Dungeons: 3-room generated dungeons using random room and setup cards.
Appendix: Enhancement Costs
(Unlocked when building 44 is built)
| Enhancement | Base Cost | Enhancement | Base Cost |
|---|---|---|---|
| Move +1 | 30g | Summon HP +1 | 40g |
| Attack +1 | 50g | Summon Move +1 | 60g |
| Range +1 | 30g | Summon Attack +1 | 100g |
| Target +1 | 75g | Summon Range +1 | 50g |
| Shield +1 | 80g | Regenerate | 40g |
| Retaliate +1 | 60g | Ward | 75g |
| Pierce +1 | 30g | Strengthen | 100g |
| Heal +1 | 30g | Bless | 75g |
| Push +1 | 30g | Wound | 75g |
| Pull +1 | 20g | Poison | 50g |
| Teleport +1 | 50g | Immobilize | 150g |
| Jump | 60g | Muddle | 40g |
| Element | 100g | Curse | 150g |
| Wild Element | 150g | Area-of-Effect Hex | 200g / hexes |
Cost Modifiers (apply in order):
- Double cost if ability targets multiple figures/tiles.
- Halve cost if lost icon without persistent icon.
- Triple cost if ability provides persistent bonus.
- +25g for each level above level 1.
- +75g for each previous enhancement on the action.
Quick Reference Summary
Targeted Abilities
- Attack (p. 25)
- Conditions (p. 28)
- Heal (p. 29)
- Forced Movement (p. 32)
- Commanding Figures (p. 33)
- Manipulating Tiles (p. 33)
Attack Modification Order
- Apply all attack bonuses and penalties.
- Draw and apply attack modifier card.
- Apply target’s shield bonus.
- Apply effects of Ward and Brittle.
End of Round Checklist
- Trigger end-of-round effects.
- Shuffle decks if shuffle icon revealed.
- Remove round bonuses from active areas.
- Perform short rests if desired.
- Move infused elements one step left (waning / inert).