
Nemesis
2018
A 1–5-player semi-cooperative sci-fi horror game of survival, secret objectives, evolving aliens, and desperate escape.
180
minutes
1 - 5
player(s)
12+
Medium Heavy


About this board game
Nemesis is a 1–5-player semi-cooperative sci-fi survival horror game with an approximately 180-minute play time. You and your crewmates must survive aboard a ship infested with hostile organisms while pursuing personal objectives and trying to return to Earth alive.
Each player controls a crew member with a unique set of skills, a personal deck of cards, and individual starting equipment. The scientist excels at computers and research but struggles in combat, while the soldier is better prepared to face danger directly. Every role brings different strengths and challenges to the desperate fight for survival.
To win, you must complete one of two objectives dealt to you at the start of the game and escape the ship in one piece. Cooperation may be essential, but fellow players have their own agendas, creating uncertainty at every turn. A crewmate may become a crucial ally—or take the last escape pod when it matters most.
- Hostile Intruders: Alien organisms react to the noise you make and grow stronger as time passes.
- Dangerous surroundings: The ship’s poor physical condition adds further obstacles to your plans.
- Climactic decisions: Combat, research, movement, and survival can all lead to unexpected consequences.
The longer the game continues, the more formidable the Intruders become, turning every delay into a serious threat. You may race to find a solution in a makeshift lab, fire blindly down a corridor, or attempt to outlast the growing alien advance.
Nemesis is designed around dramatic reversals and tense moments, where even carefully made plans can collapse and characters may meet terrible fates. Its blend of individual objectives, evolving enemies, and uncertain alliances creates a survival story shaped by both strategy and cruel fate.

Board Game Rules for
Nemesis
Game Overview
Nemesis is a semi-cooperative game where you and your crewmates must survive on a ship infested with hostile organisms.
To win the game, you will have to complete one of the two objectives dealt to you at the start of the game and get back to Earth in one piece. You will find many obstacles on your way: swarms of Intruders (the name given to the alien organisms by the ship AI), the poor physical condition of the ship, the other players that will have their own agendas and, sometimes, just cruel fate.
Nemesis is designed to be full of climatic moments which, hopefully, you will find rewarding even when your best plans are ruined and your character meets a terrible fate.
Nemesis – Game Introduction
Welcome aboard! This introductory story is designed to familiarize you with the flow of a standard game and to give you an overview of the essential Nemesis rules. All game terms, items, characters and board locations are written in bold to make them more distinguishable. We hope that this story will make reading these rules easier and more enjoyable. We hope that, after some games of Nemesis, you will have your own stories to tell!
It started like countless times before – waking up in a cold fog within the Hibernatorium, at the very center of the ship. As usual, we were suffering from temporary amnesia due to FTL travel and hibernation. We knew our names and we had some basic memories, but we didn’t remember clearly where we were or what we were supposed to do. The layout of the ship felt unfamiliar. We knew that somewhere at the stern, there were three Engines and somewhere in the bow section, there was a Bridge. We were also conditioned to remember the location of the two Escape Pods, just in case something went REALLY wrong. The rest was blurry. But this time, amnesia was not our only problem – one of our comrades was lying in his pod with a gaping hole in his chest. Emergency lights were flashing all over the place.
As the Captain, I knew we had to avoid panic, follow the procedures, inspect the ship, and check if the engines were operational, as we needed at least 2 of them to continue our trip. We also had to check the coordinates to make sure the ship was still heading to Earth. We had all watched enough horror movies to know we needed some weapons. Luckily, our lockers were right there, with some basic gear and Items we needed to perform our assigned jobs (although not all of them were functional). Between my 6-shooter and other personal items, I also found something else – a letter containing special orders from my employer. Some time ago, our ship’s Mechanic had dug up some dirt on the corporation and claimed he would testify once he got back to Earth. The company made it clear they didn’t want him to come back. At any cost.
I knew many of my crew members had their own secret agendas and their own Corporate Objectives. I couldn’t trust them. We split into two groups – the Pilot and I were to check the bridge, while the Mechanic and the Scientist went to the aft section, where the Engine Rooms were located.
I moved forward, navigating the Corridor carefully. When I entered the next room, I heard a very strange Noise coming from the bow of the ship. Then, the Door slammed right behind me. System malfunction! So much for staying together…
I looked around – I was in a section containing the crew’s Cabins. I decided to search this place for any useful items, finding a Fire Extinguisher and a Med Kit. I immediately felt a bit safer. There was nothing more here, so I decided to move forward. This is when things went from bad to worse. First, I stepped into some green Slime that covered my legs and wouldn’t come off. Then, I heard that noise again.
Suddenly, a monstrous Larva jumped right at me from the dark. By the look of its claws and mandibles, I was quite certain that this thing would do something horrible to me if I didn’t act fast. So, I kept on shooting at the thing until it stopped twitching, spending most of my Ammo in the process.
At this point, I knew something crazy was going on. I had to decide if I wanted to fulfill the task the company had given me or if I should follow my Personal Objective. I realized that it wasn’t the best moment to bring down a crewmate – the future of mankind could be at hand! Instead of killing the Mechanic, I decided I should send a Signal using our Communications Room to warn Earth of the situation. Then, I would examine one of the creatures in the Lab, trying to get as much information as possible, before leaving this doomed ship.
I was taking a short Rest to settle my nerves when I heard those creepy noises again. Nothing came at me this time, though. Moving to the next room, I entered the Generator, where I reunited with our Pilot. It was the only place where we could activate the ship’s Self-Destruct sequence. Considering what I had just seen, it didn’t sound like a bad idea… Unfortunately, the room was Damaged, and we would need to fix it first. We decided the Mechanic was best suited for this task.
I had a conversation with the pilot, who confirmed what I had been fearing all along – there was more than a single Larva. On her way here, she ran into an Adult specimen that managed to hit her. Fortunately, it was just a Light Wound, but I secretly feared that she might have been Infected. And, since this Intruder was now lurking behind us, we could not go back to the Hibernatorium.
We spent the next few minutes moving cautiously from one room to another, trying to salvage what we could – I managed to Craft a makeshift Flamethrower, using some Chemicals and Tools. Every step of the way, we heard more and more noises converging in our direction.
Several of the rooms we checked had been damaged, and one was on Fire. Things weren’t looking good. I knew the ship could only take so much stress before it would explode. With that in mind, we spent some time fixing the Hatch Control System to unlock our two Escape Pods – we were one step closer from escaping this death trap.
At this point, we spread out. The Pilot went to the Bridge, and I went to send my Signal. I entered my login into the comms console and began my transmission when an explosion threw me against the opposite wall. Even stunned by the blast, I understood that someone had just tried to kill me. I did not have to wait long for the culprit – a few seconds later, the Mechanic stormed into the room, a burning Molotov Cocktail in his greasy hand.
He couldn’t shoot me or harm me directly – thanks to anti-aggression implants all space crews had in their brains to prevent violence or mutiny. However, indirect weapons were one of the ways to cheat the implant. There was just one thing he didn’t know. As a Captain, I could use the same implant to force him to follow a single order. I ordered the Mechanic to scout one of the connected rooms. Soon I heard the sound I had been hoping for. One of the Intruders came out of the Technical Corridors and jumped at the poor fool. Just to be sure neither of them would come out of it alive, I threw a Grenade in the corridor.
I inspected my Wounds – my leg was badly hurt. I Dressed it, and was able to move again, but I also knew this was a temporary measure, intending to Heal the damage at the first opportunity.
Despite the pain, I managed to reach the Bridge, Destroying a Locked Door along the way. There, I found the Pilot and told her about the Mechanic’s attack. She was in too much of a hurry to care. She had just set the jump coordinates for Earth. We didn’t know if enough engines were working, but she was willing to take the risk. This left us little time to get back to the Hibernatorium. There were only a few minutes left before the Jump, and everyone outside of a stasis pod at that moment would be atomized by the extreme acceleration.
I told her to lead the way, hoping I’d get the chance to swing by the Lab and complete my own objective. But something didn’t feel right… Maybe it was the way she acted or talked? I could not tell, but as the Captain, I had learned not to ignore my hunch.
Fortunately, I had a Log Key that could give me full access to one crew member’s account – I chose to check the Pilot’s correspondence. What I found was shocking. She intended to take the ship to some secret base on Mars, where an organization I’d never heard of before was planning to use the Intruders for some unknown dark purpose.
What followed was pure hell. Wounded, surrounded by hostile life forms and without allies, I had to use every trick in my book to stay alive. When an Adult Intruder stood in my way, I used up all the fuel in my flamethrower trying to take him down, but it wasn’t enough. He managed to sink his slobbering mandibles in my shoulder. I took out the revolver and the last bullet I was saving for myself, I blew his head off.
I was about to lose consciousness from the Bleeding, when our Scientist stumbled upon me. He was coming from the Lab, where he had analyzed one of the Intruder Carcasses, and discovered a Weakness of their species. Turns out we shared a common objective!
He helped me up, and we decided to make a run for it together. Unfortunately, he didn’t make it very far. I had to leave him behind when he was caught by an enormous Breeder. It was a hard call, but someone had to warn Earth after all!
Finally, I reached the Evacuation Hatch – but the way was blocked. There she was, waiting for me. A terrifying beast, the biggest of her kind. The Queen. I had only one thing left: a small fire extinguisher I had been carrying all along. In desperation, I fired it upon her.
To my utter amazement, it worked! She retreated, giving me just enough time to enter the Escape Pod and launch it in a hurry.
I was OUT. I SURVIVED.
Or at least I thought I had… I can feel something moving inside me. I don’t know how much time I have left. I am leaving this message in case someone finds this forsaken pod.
Destroy my body. Do not examine these creatures. Do not try to harness them in any way.
If you want humanity to survive – leave them and never come back.
A Word from the Author
Five years. Five years have passed since the winter of 2013, when I built my first Nemesis prototype. The game you are holding in your hands barely looks like its original version. In the years that followed, the project evolved and changed on a regular basis – sometimes going back to its roots, only to drastically alter them some time later. The one thing that remained constant was the core concept: recreating the experience of the claustrophobic, paranoid horror Sci-fi classics as closely as possible.
Even though only my name appears on the box, the full list of people who contributed to this game at the various stages of its production would likely take several pages – the team of my old publishing company, the people at Rebel Publishing that took over the project, and finally, the team at Awaken Realms that finished the development of the game and handled its crowdfunding.
Regardless of his position at Awaken Realms, I would also like to personally thank Marcin Świerkot, not only as a publisher or for his skills at handling impressive Kickstarter campaigns. For me, it is obvious that Nemesis owes Marcin a great part of its incredible success, and I also wanted to thank him from his constant feedback and for convincing me to adopt several new concepts (which, believe me, wasn’t easy).
Nemesis also had a humongous group of testers. At the start, I only played it with a few close friends, but, with each iteration of the project, the team grew until it reached truly epic proportions – especially after the game had been ported to the Tabletop Simulator (thanks to the efforts of Ken Cunningham, Steven Becker, David Werner, Stefano Trivellato, Adam Grinder and Luca Cornaggia). I didn’t have the chance to meet every one of our many testers in person, but I wanted them to know that it was their feedback that helped me through the stages of this project, and allowed me to keep my enthusiasm intact throughout these five long years of development.
I also owe some special thanks to Michał Oracz, whom I met during the Nemesis project. The depth of his involvement in all aspects of this game is simply amazing, and I can only say how lucky I was to meet a person with such skills and experience.
To wrap things up, I’d like to thank Iga, who is probably the only person to remember the true beginning of this project, as she was the one who inspired me to create it five years ago, on a cold winter’s evening.
My final thanks go to everyone who supported this game on Kickstarter, trusting both me and Awaken Realms. I hope Nemesis will repay you with many thrills and unforgettable hours spent over the board. And I hope that – at least every now and then – your journey will end with a safe trip back to Earth…
Credits
- Game Design: Adam Kwapiński
- Development: Michał Oracz, Marcin Świerkot, Paweł Samborski, Michał Siekierski, Rebel team
- Tests: Paweł Samborski, Michał Siekierski, Łukasz Krawiec, Franciszek Ostojski, Krzysztof Belczyk, Paweł Czochra
- Rulebook: Michał Oracz, Paweł Samborski, Krzysztof Piskorski, Marcin Świerkot, Hervé Daubet
- Illustrations: Piotr Foksowicz, Ewa Labak, Patryk Jędraszek, Andrzej Półtoranos
- Graphic Design: Adrian Radziun, Andrzej Półtoranos, Michał Oracz
- 3D Models: Jędrzej Chomicki, Jakub Ziółkowski, Piotr Gacek, Mateusz Modzelewski
- Art Direction: Marcin Świerkot
- English Translation: Krzysztof Piskorski, Paweł Samborski
- Proofreading: Hervé Daubet, Dan Morley
Board and Character Components
- 1 Two-sided Board
- 6 Character boards
- 11 Room tiles “1”
- 9 Room tiles “2”
- 6 Character miniatures (Captain, Pilot, Scientist, Scout, Soldier, Mechanic)
- 6 Larvae miniatures
- 3 Creepers miniatures
- 8 Adult Intruders miniatures (4 different sculpts)
- 2 Breeders miniatures
- 1 Queen miniature
- 6 Colored plastic rings
- 5 Plastic card holders (Inventories)
- 2 d6 Attack dice and 2 d10 Noise dice
- 1 Intruder bag
- 1 Scanner
- 1 Intruder board

Cards
- 60 Action cards (10 per Character)
- 18 Objective cards (9 Personal and 9 Corporate)
- 27 Contamination cards (Note: Although they share a common back with the Action cards, they should form a separate deck.)
- 20 Intruder Attack cards
- 16 Serious Wound cards
- 20 Event cards
- 5 Help cards
- 8 Intruder Weakness cards
- 8 Coordinates cards
- 30 Green (medical) Item cards
- 30 Yellow (technical) Item cards
- 30 Red (military) Item cards
- 12 Blue (Crafted) Item cards
- 6 Character Starting Item cards (Weapon)
- 12 Character Quest Item cards
- 6 Character Draft cards
Markers and Tokens
- 2 Room sheets
- 1 First Player token
- 18 Status markers
- 30 Noise markers
- 12 Doors
- 4 Escape Pods
- 20 Exploration tokens
- 1 Blue Character Corpse token
- 5 Red Character Corpse tokens
- 8 Intruder Egg tokens
- 27 Intruder tokens (8 Larvae, 12 Adult Intruders, 3 Creeper, 2 Breeder, 1 Queen, 1 Blank)
- 8 Intruder Carcass tokens
- 50 Ammo/Injury markers
- 8 Fire markers
- 8 Malfunction markers
- 6 Engine tokens (3 Working, 3 Damaged)
- 2 Five Injury tokens
- 1 Airlock Procedure token
Advanced Mode Components
- 7 Solo/Coop Objective cards (Not used in the basic game)
- 10 Intruder Action cards (Not used in the basic game)
Other Components
- 1 Cardboard box holder (Not used in the game)
- 10 Promo cards (Not used in the game)

Board Setup (Steps 1-13)
- Place the board on the table. Use the basic side of the board as shown in the picture.
Note: The basic side of the board is marked by a red arrow icon in its upper left corner. - Shuffle all Room tiles “2” without looking at their fronts and randomly place (face down) one Room tile “2” on each of the Room slots marked with a “2” on the board. Put all remaining Room tiles “2” back in the box.
Note: You will not use all available Room tiles “2” each game, as there are more tiles than slots on the board. Players never know exactly which Rooms are on the ship. When putting any components back in the box, avoid looking at their contents. - Place Room tiles “1”: Use the same method to place all Room tiles “1” on the Room slots marked with a “1”.
- Exploration tokens: Take the Exploration tokens, shuffle them (without looking at their fronts) and place one token at random (face down) on each Room tile. Put all remaining Exploration tokens back in the box.
- Coordinates cards: Take the Coordinates cards and place one randomly (face down) on its space next to the Cockpit. Put all remaining Coordinates cards back in the box.
- Destination marker: Place 1 Status marker on the “B” space on the Destination Track. This is the Destination marker.
- Escape Pods: Take the corresponding number of randomly chosen Escape Pod tokens:
- 1-2 players: 2 Escape Pods.
- 3-4 players: 3 Escape Pods.
- 5 players: 4 Escape Pods.
Place the lowest-numbered Escape Pod in Section “A”, then place the next (in numerical order) Escape Pod in Section “B”. Place the other Escape Pods, alternating between “A” and “B”. Escape Pod tokens should be placed with their “Locked” side face up. Put all remaining Escape Pods back in the box.
- Engines: Take both Engine tokens marked with the number “1” (1 Damaged and 1 Working) and shuffle them face down. Place them on the corresponding Engine “1” slot on the board, one atop the other, and face down. The top Engine token indicates the true status of the Engine. Repeat this step for Engine tokens “2” and “3”.
Important: Make sure that the players do not see the fronts of the tokens, so that they will not know if the Engines are working or not. - Intruder board: Take the Intruder board, put it next to the board and place in the corresponding slots:
- 5 Egg tokens
- 3 random Weakness cards (placed face down, so players do not know what Weaknesses they can discover). Put all remaining Weakness cards back in the box.
- Intruder bag: Take the Intruder bag and put the following Intruder tokens inside:
- 1 Blank
- 4 Larvae
- 1 Creeper
- 1 Queen
- 3 Adults
- Add 1 additional Adult Intruder token for each player taking part in the game.
The rest of the Intruder tokens are placed next to the board – they will be used during play. Place the Intruder Carcass tokens next to the board as well – they will mark killed Intruders.
- Decks: Shuffle and place the following decks face down next to the board: 3 Items (each with its own color), Event, Intruder Attack, Contamination, and Serious Wound decks.
- Place the Craft Item deck next to the 3 Item decks.
- Place the Scanner next to the Contamination deck.
- Put all Intruder Player Action cards and Solo/Coop Objective cards back in the box (only used in advanced modes).
- Other markers, tokens, and dice: Place next to the board:
- Fire markers
- Malfunction markers
- Noise markers
- Ammo / Injury markers
- Status markers (used as Light Wounds / Slime / Signal / Self-Destruct / Time / Destination markers)
- Door tokens
- Red Character Corpse tokens
- 2 Combat dice
- 2 Noise dice
- First Player token
- Time marker: Place 1 Status marker on the green space of the Time Track. This is the Time marker.
Intruder Symbols
- Larva
- Creeper
- Adult
- Breeder
- Queen


Crew Setup (Steps 14-20)
- Help Cards: Take as many Help Cards as there are players and deal one to each player at random. These cards determine the order of choosing Characters (Step 17). If there are 3 players, take cards 1-3; if 4 players, cards 1-4, etc.
The number shown on the Help Card and Inventory is the Player Number – it is important for choosing Characters and for some Objectives. Put remaining Help cards back in the box. - Inventory Card Holder: Each player gets 1 plastic Inventory Card holder with the same number as their Help card to keep their non-Heavy Item cards hidden during the game.
- Objective Decks: Remove from both Objective Decks (Corporate and Personal) all cards showing a number of players higher than the number of players taking part in the game.
Shuffle these two decks individually and deal each player 1 card from the Corporate Objectives deck and 1 card from the Personal Objectives deck. Each player must keep the contents of their Objective cards hidden from other players! Put all remaining Objective cards back in the box.
Note: When any Character encounters an Intruder for the first time, you will choose one of the two Objectives to pursue.
Hint: Receiving Objectives before Character draft allows you to pick a Character best suited to fulfill your goals. - Character Draft: Shuffle all Character draft cards. Players choose Characters in order: Player 1 takes 2 random Character draft cards, reveals them, chooses 1, and shuffles the other back into the draft deck. Then Player 2 chooses the same way, then Player 3, etc. A player may only control the Character whose card they have chosen. Put all remaining draft cards back in the box.
- Character Components: Each player takes:
- A) The Character board of the chosen Character.
- B) The miniature of their Character, placing it in a colored plastic ring and into the Hibernatorium.
- C) The Action cards deck of their Character, shuffled and placed face down on the left side of their Character board.
- D) The Starting Item card (Weapon), placed in one of the two Hand slots on the Character board, loaded with Ammo markers equal to its Ammo capacity.
- E) The 2 Quest Items of their Character, placed horizontal side up next to the Character board (not active until mini-quests are completed).
- F) Leave an empty spot for the Action discard pile on the right.
Put all remaining Character boards back in the box.
- First Player Token: Player 1 gets the First Player token.
- Character Corpse Token: Place the blue Character Corpse token in the Hibernatorium. It represents the body of a poor sod lying in a pool of blood (treated as a Character Corpse Object).

Board Description
- 1 – Hibernatorium (Special Room)
- 2 – Cockpit (Special Room)
- 3 – Coordinates card space
- 4 – Destination Track
- 5 – Engine 01, Engine 02, Engine 03 (Special Rooms)
Important: During Movement, Special Rooms are treated as already explored Rooms. - 6 – Escape Pod spaces
- 7 – Explored Rooms
- 8 – Unexplored Rooms
- 9 – Technical Corridors Entrances
- 10 – Technical Corridors space
- 11 – Time Track
- 12 – Self-Destruct Track
- 13 – Item Counters
- 14 – Corridors
- 15 – Corridor Numbers
- 16 – Room Number
Discard Piles
Leave an empty space for a discard pile next to each of the following decks: Items, Event, Intruder Attack, and Serious Wounds.
Note: There is a special spot for the Action discard pile marked on each Character board. Contamination cards go to the player’s Action discard pile until removed. All cards are discarded face up. All markers are discarded to the appropriate pile.

The game is played over a series of consecutive turns, each split into two consecutive Phases: I: Player Phase and II: Event Phase.
I: Player Phase
- Draw Action Cards: All players draw cards from their Action deck until they have a hand size of 5 cards. If your Action deck is empty when required to draw, shuffle your discard pile to form a new Action deck, then draw.
- First Player Token: The player with the First Player token passes it to the player on their left.
Note: In the first turn of the game, do not pass the First Player token. - Player Rounds: Starting with the first player and proceeding clockwise, each player performs a round of 2 Actions.
- When each player has performed their 2 Actions (or passed), the next series of rounds takes place until all players have passed.
- If a player cannot perform Actions or chooses not to, they must pass.
- If a player performs only 1 Action instead of two, they must pass.
- A player who has passed cannot perform ANY Actions later during that Phase.
- When passing, a player may discard any number of cards from their hand to their discard pile, and flips their Help card to the “Pass” side.
- Note: Ending a round in a Room with a Fire marker inflicts 1 Light Wound.
II: Event Phase
- Time Track: Move the Time marker by 1 space to the right. If the Self-Destruct Sequence is active, also move its marker by 1 space to the right on its track.
- Intruder Attack: Each Intruder in Combat with a Character attacks them.
- Fire Damage: Each Intruder in the same Room as a Fire marker suffers 1 Injury.
- Resolve Event Card: Draw and resolve 1 Event card:
- Intruder Movement: All Intruders matching the symbol on the card (and NOT in a Room with Characters) move through the Corridor showing the indicated number. If moved into a Technical Corridor, remove the miniature and return its token to the bag.
- Event Effect: Resolve the effect described on the card, then discard it to the Event discard pile.
- Intruder Bag Development: Draw 1 Intruder token from the bag and resolve its effect:
- Larva: Remove token from bag; add 1 Adult token to the bag.
- Creeper: Remove token from bag; add 1 Breeder token to the bag.
- Adult: All players roll for Noise in order (except those in Combat). Return Adult token to bag.
- Breeder: All players roll for Noise in order (except those in Combat). Return Breeder token to bag.
- Queen: If Characters are in the Nest Room, place the Queen miniature there and resolve an Encounter. If no Characters are in the Nest (or it is undiscovered), add 1 Egg token to the Intruder board. Return Queen token to bag.
- Blank: Add 1 Adult Intruder token to the bag (if available). Return Blank token to bag.
- End of the Turn: Once bag development and all resulting Encounters/Surprise Attacks are fully resolved, start a new turn with the Player Phase.

Action System
Actions come from 4 sources: Basic Actions, Action cards, Item cards, and Room tiles. Each displays an Action Cost, paid by discarding that number of Action cards from hand. Contamination cards cannot be used to pay costs.
Timing Restrictions
- In Combat Only: May only be performed if an Intruder is in the room.
- Out of Combat Only: May only be performed if NO Intruder is in the room.
- No icon: May be performed both in and out of Combat.

Basic Actions
Every Character can perform these actions, provided conditions are met:
- Movement (Cost 1): Move your miniature to a neighboring connected Room.
- Careful Movement (Cost 2 – Out of Combat Only): Move to a neighboring Room. Instead of rolling for Noise, place a Noise marker in a chosen connected Corridor. Cannot be used if all connected Corridors already have Noise markers, or if in Combat.
- Shoot (Cost 1 – In Combat Only): Discard 1 Ammo from a Weapon in hand and roll the Combat die against an Intruder in the room.
- Melee Attack (Cost 1 – In Combat Only): Attack an Intruder in the room bare-handed. Draw 1 Contamination card to your discard pile, then roll the Combat die.
- Pick up Heavy Object (Cost 1): Pick up 1 Heavy Object (Character Corpse, Intruder Carcass, or Intruder Egg) present in your room.
- Trade (Cost 1): Initiate trade of Items/Objects with Characters in the same Room. Both must agree. Ammo cannot be traded.
- Craft Item (Cost 1): Discard 2 Item cards showing matching blue Craft icons to gain the corresponding Crafted Item card.
Actions from Cards and Rooms
- Action Cards: Discard the played card plus additional Action cards equal to its Cost. If split by [OR], choose one effect.
- Item Cards: Specific actions described on the cards. Pay card cost as indicated.
- Room Tiles: Specific Room Actions described on the Room Sheet. Usually Cost 2 Action cards. Disabled by Malfunctions.

Rooms and Corridors
Miniatures are placed only in Rooms (including Special Rooms: Hibernatorium, Engines, Cockpit). Corridors connect Rooms; neither Characters nor Intruders can stop in Corridors. Moving through a Corridor triggers its effects AFTER entering the Room.
Movement Action Steps
When entering a Room:
- If unexplored (face down): Turn the Room tile face up and reveal its Exploration token. Set the Room’s Item Counter to the number on the token. Apply the token’s special effect, then discard the token.
- Noise check: If the entered Room is empty (no Characters and no Intruders), perform a Noise Roll. If another Character or Intruder is present, do not roll for Noise.
Exploration Token Effects
- Silence: No Noise roll. (If slimed, treat as Danger).
- Danger: No Noise roll. If an Intruder is in an adjacent room and not in Combat, it moves into this room. If none, place Noise markers in all empty connected Corridors.
- Slime: Place a Slime marker on your Character board.
- Fire: Place a Fire marker in this Room.
- Malfunction: Place a Malfunction marker in this Room.
- Doors: Place a Closed Door token in the Corridor you just entered through.

Noise Roll
When entering an empty room, roll the Noise die and apply the result:
- Result 1, 2, 3, or 4: Place a Noise marker in the Corridor matching that number connected to your room. If that Corridor already has a Noise marker, resolve an Encounter instead.
- Danger: If an Intruder is in an adjacent room (not in Combat), move it into your room. If none, place a Noise marker in every connected Corridor without one.
- Silence: Nothing happens. (If Character has a Slime marker, resolve Danger instead).

Additional Notes on Movement
If an Adult Intruder must be placed but all 8 models are already on the board, all Adult Intruders not in Combat retreat into the Intruder bag, and an Adult model is placed in the Encounter room.
Technical Corridors
Technical Corridors are accessible only to Intruders (unless special cards allow access). Noise markers rolled for Technical Entrances are placed on the Technical Corridors space on the board. If an Intruder moves into a Technical Corridor Entrance, it disappears into the ducts: discard its injuries, return its token to the bag, and remove its miniature.

Board Markers
Noise Markers
Mark Corridors. A Corridor can never hold more than 1 Noise marker. A second marker triggers an Encounter.
Slime Marker
Treats all Silence results as Danger. Max 1 per Character. Removed by Clothes item or Shower Room Action.
Fire Marker
- Inflicts 1 Light Wound to any Character ending their round in the room.
- Deals 1 Injury to each Intruder in the room during the Event Phase.
- Max 1 Fire marker per room. If a 9th Fire marker must be placed and the pool is empty, the ship explodes and everyone loses.
Malfunction Marker
- Disables Room Actions and Computers in that room (Search is still allowed).
- Max 1 per room. If a 9th Malfunction marker is needed and none remain in the pool, the ship loses integrity and destroys everyone.
Door Tokens
- Closed (standing): Blocks movement. Intruders attempting to move through destroy the door instead.
- Destroyed (lying down): Allows movement. Cannot be closed again (except via Plasma Torch).
- Open: Token removed.
Encounter
An Encounter occurs when an Intruder appears in a Room with a Character (usually via Noise roll). Steps:
- Discard all Noise markers from all Corridors connected to this Room.
- Draw 1 Intruder token from the bag.
- Place the corresponding miniature in the Room.
- Surprise Attack Check: Compare the number on the token with the number of cards in the player’s hand. If hand size is lower, a Surprise Attack occurs (draw and resolve an Intruder Attack card).
Blank Token: Place a Noise marker in each connected Corridor. If bag is empty, add 1 Adult token to the bag.
Combat
A Character and Intruder in the same room are in Combat. Intruders attack during the Event Phase.
Shoot Action (Cost 1)
- Choose Weapon and target Intruder. Discard 1 Ammo.
- Roll Combat die:
- Miss: No effect.
- 1 Hit (Creeper/Larva): 1 Injury to Larva or Creeper; miss otherwise.
- 1 Hit (Adult/Creeper/Larva): 1 Injury to Adult, Creeper, or Larva; miss otherwise.
- 1 Hit: 1 Injury to any target.
- 2 Hits: 2 Injuries to any target.
- Check Intruder Injury Effect.
Melee Attack Action (Cost 1)
- Draw 1 Contamination card to your discard pile.
- Roll Combat die: On a hit, deal 1 Injury (2 Hits count as 1 Hit). On a miss, suffer 1 Serious Wound.

Character Escape
To leave a Room with an Intruder, perform a Movement Action. Before moving, each Intruder in the room performs an Intruder Attack against you. If you survive, complete movement.
Intruder Injuries and Death
When an Intruder takes Injury markers, check its endurance:
- Larva & Egg: 1 Injury kills them. Remove model.
- Creeper or Adult: Draw 1 Intruder Attack card. Compare its blood icon value to total Injuries on the Intruder. If blood value is equal to or less than total Injuries, it is slain (replace with Intruder Carcass token). If higher, it survives.
- Breeder or Queen: Draw 2 Intruder Attack cards and sum their blood icon values. Compare to total Injuries.
- Intruder Retreat: If any drawn card shows a Retreat arrow, the Intruder flees: draw an Event card and move it through the indicated Corridor number.
Intruder Attack
When an Intruder attacks a Character:
- Target is the Character with the fewest Action cards in hand (or active player in case of Escape / Surprise Attack).
- Draw 1 Intruder Attack card. If it displays the attacking Intruder’s symbol, resolve the effect. If not, the attack misses.

Infest (Larva Attack)
A Larva does not draw an Attack card: remove the Larva miniature from the board and place it on the target’s Character board. The player gains 1 Contamination card.
Contamination Cards
Drawn cards go to your Action discard pile. They cannot be used to pay Action costs. Use the Scanner (red foil) over the coded text to reveal if the card is INFECTED. If infected, place a Larva on your Character board. If already carrying a Larva, the Character dies instantly and spawns a Creeper.
Character Wounds and Death
Wounds
- Light Wounds: Tracked on Character board (1st marker = 1 Light Wound; 2nd marker = 2 Light Wounds; 3rd marker becomes a Serious Wound).
- Serious Wounds: Draw 1 Serious Wound card and apply its persistent penalty. If a Character has 3 Serious Wounds and suffers any additional Wound, they die immediately.
- Death: Replace miniature with a Character Corpse token. Drop all carried Heavy Objects.
Dressing and Healing Wounds
- Dress Serious Wound: Flip card face down; ignore its penalty, but it still counts toward the 3-wound limit.
- Heal: Discard a Dressed Serious Wound or remove Light Wounds.
Hands and Inventory
- Inventory: Holds normal Items face down in the card holder. Unlimited capacity. Colors are visible to others, specific items remain secret.
- Hand Slots (Heavy Items & Objects): Maximum 2 slots. Heavy Items (Weapons) and Heavy Objects (Corpses, Carcasses, Eggs) must occupy Hand slots and are always public.
- Drop: Characters may drop any Item or Object at any time for free. Dropped Objects stay in the Room; dropped Items are discarded.

Crafting
Combine two Items with matching blue component icons to gain a Crafted Item from the Craft deck:
- Antidote: Chemicals + Medical Supplies
- Taser: Energy Cell + Tools
- Flamethrower: Chemicals + Tools
- Molotov Cocktail: Chemicals + Alcohol

Quest Items
Each Character starts with 2 inactive Quest Items. Complete the specified mini-quest condition on the card to flip it face up and unlock its powerful ability.
Attacking Other Players
Anti-aggression implants prevent direct attacks against crew members. Players may only harm each other indirectly (e.g. fire, self-destruct, locking doors, throwing grenades at Intruders in the same room).
Basic Rooms “1”
- Armory: Recharge 2 Ammo on 1 Energy Weapon.
- Comms Room: Place a Status marker on your Character board’s Signal space.
- Emergency Room: Dress all Serious Wounds, OR Heal 1 Dressed Serious Wound, OR Heal all Light Wounds.
- Evacuation Section A & B: If an Escape Pod is unlocked and has space, roll for Noise. If no Intruder appears, enter the pod.
- Fire Control System: Choose 1 Room. Discard a Fire marker there and force all Intruders in that Room to flee in random directions.
- Generator: Initiate or abort Self-Destruct. Cannot be started if anyone is hibernating. Once critical (yellow spaces), it cannot be stopped.
- Laboratory: Analyze 1 Object present in the room (Corpse, Carcass, Egg) to discover the matching Intruder Weakness card.
- Nest: Take 1 Egg token from the Intruder board (triggers Noise roll). Eggs in the room can also be attacked and destroyed.
- Storage: Draw 2 Item cards of the chosen color (Red, Yellow, Green), keep 1, place the other at the bottom of the deck.
- Surgery: Scan all Contamination cards and remove Infected ones. Remove any Larva on your board. Suffer 1 Light Wound and automatically pass.
Additional Rooms “2” (5 used per game)
- Airlock Control: Initiate lock procedure in a yellow room without destroyed doors. If doors remain closed until end of Player Phase, everything in that room dies.
- Cabins: If starting turn here without Intruders, draw 1 additional Action card (hand size 6).
- Canteen: Heal 1 Light Wound. Option to Scan hand Contamination cards and remove non-infected ones.
- Command Center: Choose 1 Room: open or close any doors in connected Corridors.
- Engine Control Room: Check the status of all 3 Engines.
- Hatch Control System: Lock or unlock 1 Escape Pod.
- Monitoring Room: Secretly check 1 unexplored Room tile and its Exploration token.
- Room Covered with Slime: Gain a Slime marker upon entering. Cannot Search here.
- Shower Room: Discard Slime marker. Option to Scan hand Contamination cards.
Special Rooms
- Cockpit: Check Coordinates card OR change the Destination marker on the track.
- Engines 1, 2, 3: Check the top Engine token OR Repair/Break the Engine. (At least 2 working engines are needed for a safe jump).
- Hibernatorium: Enter hibernation once the Time Track reaches a blue space (perform Noise roll).
Escape Pods
Pods hold up to 2 Characters. Once inside, choose to launch immediately (leaving the game safely) or wait for other crew members. Entering an Escape Pod requires an Unlocked pod and a successful Noise roll.

Intruder Weakness Cards
Three face-down cards are placed on the Intruder board during setup. Characters discover them by analyzing Objects in the Laboratory:
- Character Corpse
- Intruder Egg
- Intruder Carcass
Revealed Weaknesses provide permanent advantages to all players against Intruders.

Players Goals
Nemesis is a semi-cooperative game with multiple potential winners. Each player has their own Objective. To be considered a winner, a player must meet 2 conditions:
- Fulfill their Objective, detailed on their chosen Objective card.
- Survive, by either:
- Hibernating in the Hibernatorium with the ship functioning and jumping to Earth (or specified destination), OR
- Evacuating the ship using one of the Escape Pods.
Critical Gameplay Moments
First Encounter
When the first Intruder miniature (of any type, not Eggs) appears on the board:
- Each player immediately chooses 1 of their 2 Objective cards to keep.
- The unchosen card is removed from the game face down.
- The encounter is resolved, and the game continues.
First Dead Character
When the first Character dies, the ship’s AI starts emergency procedures: All Escape Pods are automatically unlocked (flip to Unlocked side). The dead player may optionally take control of the Intruders.
Self-Destruct and Hibernation
- Hibernation Chambers Open: When the Time Track reaches any blue space, hibernation chambers unlock. Characters cannot enter before this.
- Self-Destruct is Critical: When the Self-Destruct Track reaches any yellow space, all Escape Pods automatically unlock, and the sequence can no longer be aborted.
Objectives Advice
- Player X’s Character Cannot Survive: Target player must be dead by end of game (cannot hibernate or escape). Direct player vs player attacks are prohibited, but indirect traps (fire, intruders, sabotage) are allowed.
- Your Character is the Only Survivor: No other Characters may survive.
- Sending the Signal: Perform the Room Action in the Comms Room.
- The Ship Must Reach Earth/Mars: Set coordinates in the Cockpit and ensure at least 2 of 3 Engines are working.
- Discover a Weakness: Bring an Object (Corpse, Carcass, Egg) to the Laboratory and perform the Room Action.
- Destroy the Nest: Destroy all Eggs in the Nest room.
End of the Game
The game ends immediately when one of the following conditions is met:
- Time runs out: The Time marker reaches the final red space of the Time Track. The ship jumps into hyperspace; all Characters not in hibernation die from g-force. Intruders are unharmed.
- Ship destruction: The Self-Destruct marker reaches the skull space, OR a 9th Fire marker is needed, OR a 9th Malfunction marker is needed. The ship explodes/loses hull integrity; all Characters and Intruders die.
- No active Characters left: The last alive, non-hibernating Character dies, hibernates, or launches in an Escape Pod. If Self-Destruct was active, resolve its final space; otherwise move the Time marker to the final space and resolve hyperspace jump.
Victory Check
If at least 1 Character survived, perform the following checks in order:
- Engines Check: Reveal the top Engine tokens of all 3 Engines. If 2 or 3 are Damaged, the ship explodes: all hibernating Characters and Intruders die.
- Coordinates Check: Reveal the Coordinates card and check the Destination marker. If not headed to Earth, all Characters asleep in the Hibernatorium die (unless their objective was Quarantine to Mars). The ship is not destroyed.
- Contamination Check: Each alive Character (hibernating or escaped) checks Contamination:
- Scan all Contamination cards in your deck, discard pile, and hand.
- If at least 1 card is “INFECTED” (or if you have a Larva on your board), shuffle all cards (Action and Contamination) and draw the top 4 cards. If any Contamination card appears, the Character dies. Otherwise, they survive.
- Objective Check: Each surviving Character reveals their chosen Objective card to confirm if all requirements were successfully met.
Ending the Game Before Other Players
Characters who launch in an Escape Pod, hibernate, or die can no longer take actions and spectate. The first player whose Character dies may optionally play as the Intruder.
Solo Mode
Play alone using the Solo/Coop Objectives deck (draw 2, choose 1 at First Encounter). Item counts in rooms are halved (rounded up). To win, fulfill objective and survive.
Fully Cooperative Mode
Draw 1 Solo/Coop Objective per player. ALL objectives must be completed, and at least 1 Character must survive. Characters can carry dead comrades’ bodies to the Emergency Room to revive them with the AutoDoc device.
Playing as an Intruder
Optional mode where the first player eliminated takes control of the Intruders:
- Draws from an Intruder Player Action deck (hand size 4).
- Plays 1 action per round: Move Intruders, select attack cards for Intruder attacks, or trigger special event effects.
- Goal: Prevent all human players from winning.
Alternative Side of the Board
Features a more challenging layout with separate Red and Blue Technical Corridors and paired corridors between certain rooms.
Turn Sequence
- Player Phase:
- Draw up to 5 Action cards.
- Pass First Player token clockwise.
- Player rounds: Take 2 Actions, or 1 Action and pass, or pass. Repeat until all pass.
- Event Phase:
- Advance Time marker (and Self-Destruct if active).
- Intruder Attacks in combat rooms.
- Intruders suffer Fire damage.
- Resolve 1 Event card (Intruder Movement + Event Effect).
- Intruder bag development.
Combat Summary
- Shooting (Cost 1): Discard 1 Ammo, roll Combat die. On hit, assign Injury and check Intruder endurance.
- Melee Attack (Cost 1): Draw 1 Contamination card, roll Combat die. On miss, suffer 1 Serious Wound.
- Escape (Cost 1): Suffer attack from each Intruder in the room; if you survive, move to adjacent room.
Introduction & Overview
Game Overview
Nemesis is a semi-cooperative game where you and your crewmates must survive on a ship infested with hostile organisms.
To win the game, you will have to complete one of the two objectives dealt to you at the start of the game and get back to Earth in one piece. You will find many obstacles on your way: swarms of Intruders (the name given to the alien organisms by the ship AI), the poor physical condition of the ship, the other players that will have their own agendas and, sometimes, just cruel fate.
Nemesis is designed to be full of climatic moments which, hopefully, you will find rewarding even when your best plans are ruined and your character meets a terrible fate.
Nemesis – Game Introduction
Welcome aboard! This introductory story is designed to familiarize you with the flow of a standard game and to give you an overview of the essential Nemesis rules. All game terms, items, characters and board locations are written in bold to make them more distinguishable. We hope that this story will make reading these rules easier and more enjoyable. We hope that, after some games of Nemesis, you will have your own stories to tell!
It started like countless times before – waking up in a cold fog within the Hibernatorium, at the very center of the ship. As usual, we were suffering from temporary amnesia due to FTL travel and hibernation. We knew our names and we had some basic memories, but we didn’t remember clearly where we were or what we were supposed to do. The layout of the ship felt unfamiliar. We knew that somewhere at the stern, there were three Engines and somewhere in the bow section, there was a Bridge. We were also conditioned to remember the location of the two Escape Pods, just in case something went REALLY wrong. The rest was blurry. But this time, amnesia was not our only problem – one of our comrades was lying in his pod with a gaping hole in his chest. Emergency lights were flashing all over the place.
As the Captain, I knew we had to avoid panic, follow the procedures, inspect the ship, and check if the engines were operational, as we needed at least 2 of them to continue our trip. We also had to check the coordinates to make sure the ship was still heading to Earth. We had all watched enough horror movies to know we needed some weapons. Luckily, our lockers were right there, with some basic gear and Items we needed to perform our assigned jobs (although not all of them were functional). Between my 6-shooter and other personal items, I also found something else – a letter containing special orders from my employer. Some time ago, our ship’s Mechanic had dug up some dirt on the corporation and claimed he would testify once he got back to Earth. The company made it clear they didn’t want him to come back. At any cost.
I knew many of my crew members had their own secret agendas and their own Corporate Objectives. I couldn’t trust them. We split into two groups – the Pilot and I were to check the bridge, while the Mechanic and the Scientist went to the aft section, where the Engine Rooms were located.
I moved forward, navigating the Corridor carefully. When I entered the next room, I heard a very strange Noise coming from the bow of the ship. Then, the Door slammed right behind me. System malfunction! So much for staying together…
I looked around – I was in a section containing the crew’s Cabins. I decided to search this place for any useful items, finding a Fire Extinguisher and a Med Kit. I immediately felt a bit safer. There was nothing more here, so I decided to move forward. This is when things went from bad to worse. First, I stepped into some green Slime that covered my legs and wouldn’t come off. Then, I heard that noise again.
Suddenly, a monstrous Larva jumped right at me from the dark. By the look of its claws and mandibles, I was quite certain that this thing would do something horrible to me if I didn’t act fast. So, I kept on shooting at the thing until it stopped twitching, spending most of my Ammo in the process.
At this point, I knew something crazy was going on. I had to decide if I wanted to fulfill the task the company had given me or if I should follow my Personal Objective. I realized that it wasn’t the best moment to bring down a crewmate – the future of mankind could be at hand! Instead of killing the Mechanic, I decided I should send a Signal using our Communications Room to warn Earth of the situation. Then, I would examine one of the creatures in the Lab, trying to get as much information as possible, before leaving this doomed ship.
I was taking a short Rest to settle my nerves when I heard those creepy noises again. Nothing came at me this time, though. Moving to the next room, I entered the Generator, where I reunited with our Pilot. It was the only place where we could activate the ship’s Self-Destruct sequence. Considering what I had just seen, it didn’t sound like a bad idea… Unfortunately, the room was Damaged, and we would need to fix it first. We decided the Mechanic was best suited for this task.
I had a conversation with the pilot, who confirmed what I had been fearing all along – there was more than a single Larva. On her way here, she ran into an Adult specimen that managed to hit her. Fortunately, it was just a Light Wound, but I secretly feared that she might have been Infected. And, since this Intruder was now lurking behind us, we could not go back to the Hibernatorium.
We spent the next few minutes moving cautiously from one room to another, trying to salvage what we could – I managed to Craft a makeshift Flamethrower, using some Chemicals and Tools. Every step of the way, we heard more and more noises converging in our direction.
Several of the rooms we checked had been damaged, and one was on Fire. Things weren’t looking good. I knew the ship could only take so much stress before it would explode. With that in mind, we spent some time fixing the Hatch Control System to unlock our two Escape Pods – we were one step closer from escaping this death trap.
At this point, we spread out. The Pilot went to the Bridge, and I went to send my Signal. I entered my login into the comms console and began my transmission when an explosion threw me against the opposite wall. Even stunned by the blast, I understood that someone had just tried to kill me. I did not have to wait long for the culprit – a few seconds later, the Mechanic stormed into the room, a burning Molotov Cocktail in his greasy hand.
He couldn’t shoot me or harm me directly – thanks to anti-aggression implants all space crews had in their brains to prevent violence or mutiny. However, indirect weapons were one of the ways to cheat the implant. There was just one thing he didn’t know. As a Captain, I could use the same implant to force him to follow a single order. I ordered the Mechanic to scout one of the connected rooms. Soon I heard the sound I had been hoping for. One of the Intruders came out of the Technical Corridors and jumped at the poor fool. Just to be sure neither of them would come out of it alive, I threw a Grenade in the corridor.
I inspected my Wounds – my leg was badly hurt. I Dressed it, and was able to move again, but I also knew this was a temporary measure, intending to Heal the damage at the first opportunity.
Despite the pain, I managed to reach the Bridge, Destroying a Locked Door along the way. There, I found the Pilot and told her about the Mechanic’s attack. She was in too much of a hurry to care. She had just set the jump coordinates for Earth. We didn’t know if enough engines were working, but she was willing to take the risk. This left us little time to get back to the Hibernatorium. There were only a few minutes left before the Jump, and everyone outside of a stasis pod at that moment would be atomized by the extreme acceleration.
I told her to lead the way, hoping I’d get the chance to swing by the Lab and complete my own objective. But something didn’t feel right… Maybe it was the way she acted or talked? I could not tell, but as the Captain, I had learned not to ignore my hunch.
Fortunately, I had a Log Key that could give me full access to one crew member’s account – I chose to check the Pilot’s correspondence. What I found was shocking. She intended to take the ship to some secret base on Mars, where an organization I’d never heard of before was planning to use the Intruders for some unknown dark purpose.
What followed was pure hell. Wounded, surrounded by hostile life forms and without allies, I had to use every trick in my book to stay alive. When an Adult Intruder stood in my way, I used up all the fuel in my flamethrower trying to take him down, but it wasn’t enough. He managed to sink his slobbering mandibles in my shoulder. I took out the revolver and the last bullet I was saving for myself, I blew his head off.
I was about to lose consciousness from the Bleeding, when our Scientist stumbled upon me. He was coming from the Lab, where he had analyzed one of the Intruder Carcasses, and discovered a Weakness of their species. Turns out we shared a common objective!
He helped me up, and we decided to make a run for it together. Unfortunately, he didn’t make it very far. I had to leave him behind when he was caught by an enormous Breeder. It was a hard call, but someone had to warn Earth after all!
Finally, I reached the Evacuation Hatch – but the way was blocked. There she was, waiting for me. A terrifying beast, the biggest of her kind. The Queen. I had only one thing left: a small fire extinguisher I had been carrying all along. In desperation, I fired it upon her.
To my utter amazement, it worked! She retreated, giving me just enough time to enter the Escape Pod and launch it in a hurry.
I was OUT. I SURVIVED.
Or at least I thought I had… I can feel something moving inside me. I don’t know how much time I have left. I am leaving this message in case someone finds this forsaken pod.
Destroy my body. Do not examine these creatures. Do not try to harness them in any way.
If you want humanity to survive – leave them and never come back.
A Word from the Author
Five years. Five years have passed since the winter of 2013, when I built my first Nemesis prototype. The game you are holding in your hands barely looks like its original version. In the years that followed, the project evolved and changed on a regular basis – sometimes going back to its roots, only to drastically alter them some time later. The one thing that remained constant was the core concept: recreating the experience of the claustrophobic, paranoid horror Sci-fi classics as closely as possible.
Even though only my name appears on the box, the full list of people who contributed to this game at the various stages of its production would likely take several pages – the team of my old publishing company, the people at Rebel Publishing that took over the project, and finally, the team at Awaken Realms that finished the development of the game and handled its crowdfunding.
Regardless of his position at Awaken Realms, I would also like to personally thank Marcin Świerkot, not only as a publisher or for his skills at handling impressive Kickstarter campaigns. For me, it is obvious that Nemesis owes Marcin a great part of its incredible success, and I also wanted to thank him from his constant feedback and for convincing me to adopt several new concepts (which, believe me, wasn’t easy).
Nemesis also had a humongous group of testers. At the start, I only played it with a few close friends, but, with each iteration of the project, the team grew until it reached truly epic proportions – especially after the game had been ported to the Tabletop Simulator (thanks to the efforts of Ken Cunningham, Steven Becker, David Werner, Stefano Trivellato, Adam Grinder and Luca Cornaggia). I didn’t have the chance to meet every one of our many testers in person, but I wanted them to know that it was their feedback that helped me through the stages of this project, and allowed me to keep my enthusiasm intact throughout these five long years of development.
I also owe some special thanks to Michał Oracz, whom I met during the Nemesis project. The depth of his involvement in all aspects of this game is simply amazing, and I can only say how lucky I was to meet a person with such skills and experience.
To wrap things up, I’d like to thank Iga, who is probably the only person to remember the true beginning of this project, as she was the one who inspired me to create it five years ago, on a cold winter’s evening.
My final thanks go to everyone who supported this game on Kickstarter, trusting both me and Awaken Realms. I hope Nemesis will repay you with many thrills and unforgettable hours spent over the board. And I hope that – at least every now and then – your journey will end with a safe trip back to Earth…
Credits
- Game Design: Adam Kwapiński
- Development: Michał Oracz, Marcin Świerkot, Paweł Samborski, Michał Siekierski, Rebel team
- Tests: Paweł Samborski, Michał Siekierski, Łukasz Krawiec, Franciszek Ostojski, Krzysztof Belczyk, Paweł Czochra
- Rulebook: Michał Oracz, Paweł Samborski, Krzysztof Piskorski, Marcin Świerkot, Hervé Daubet
- Illustrations: Piotr Foksowicz, Ewa Labak, Patryk Jędraszek, Andrzej Półtoranos
- Graphic Design: Adrian Radziun, Andrzej Półtoranos, Michał Oracz
- 3D Models: Jędrzej Chomicki, Jakub Ziółkowski, Piotr Gacek, Mateusz Modzelewski
- Art Direction: Marcin Świerkot
- English Translation: Krzysztof Piskorski, Paweł Samborski
- Proofreading: Hervé Daubet, Dan Morley
Components
Board and Character Components
- 1 Two-sided Board
- 6 Character boards
- 11 Room tiles “1”
- 9 Room tiles “2”
- 6 Character miniatures (Captain, Pilot, Scientist, Scout, Soldier, Mechanic)
- 6 Larvae miniatures
- 3 Creepers miniatures
- 8 Adult Intruders miniatures (4 different sculpts)
- 2 Breeders miniatures
- 1 Queen miniature
- 6 Colored plastic rings
- 5 Plastic card holders (Inventories)
- 2 d6 Attack dice and 2 d10 Noise dice
- 1 Intruder bag
- 1 Scanner
- 1 Intruder board
Cards
- 60 Action cards (10 per Character)
- 18 Objective cards (9 Personal and 9 Corporate)
- 27 Contamination cards (Note: Although they share a common back with the Action cards, they should form a separate deck.)
- 20 Intruder Attack cards
- 16 Serious Wound cards
- 20 Event cards
- 5 Help cards
- 8 Intruder Weakness cards
- 8 Coordinates cards
- 30 Green (medical) Item cards
- 30 Yellow (technical) Item cards
- 30 Red (military) Item cards
- 12 Blue (Crafted) Item cards
- 6 Character Starting Item cards (Weapon)
- 12 Character Quest Item cards
- 6 Character Draft cards
Markers and Tokens
- 2 Room sheets
- 1 First Player token
- 18 Status markers
- 30 Noise markers
- 12 Doors
- 4 Escape Pods
- 20 Exploration tokens
- 1 Blue Character Corpse token
- 5 Red Character Corpse tokens
- 8 Intruder Egg tokens
- 27 Intruder tokens (8 Larvae, 12 Adult Intruders, 3 Creeper, 2 Breeder, 1 Queen, 1 Blank)
- 8 Intruder Carcass tokens
- 50 Ammo/Injury markers
- 8 Fire markers
- 8 Malfunction markers
- 6 Engine tokens (3 Working, 3 Damaged)
- 2 Five Injury tokens
- 1 Airlock Procedure token
Advanced Mode Components
- 7 Solo/Coop Objective cards (Not used in the basic game)
- 10 Intruder Action cards (Not used in the basic game)
Other Components
- 1 Cardboard box holder (Not used in the game)
- 10 Promo cards (Not used in the game)
Setup
Board Setup (Steps 1-13)
- Place the board on the table. Use the basic side of the board as shown in the picture.
Note: The basic side of the board is marked by a red arrow icon in its upper left corner. - Shuffle all Room tiles “2” without looking at their fronts and randomly place (face down) one Room tile “2” on each of the Room slots marked with a “2” on the board. Put all remaining Room tiles “2” back in the box.
Note: You will not use all available Room tiles “2” each game, as there are more tiles than slots on the board. Players never know exactly which Rooms are on the ship. When putting any components back in the box, avoid looking at their contents. - Place Room tiles “1”: Use the same method to place all Room tiles “1” on the Room slots marked with a “1”.
- Exploration tokens: Take the Exploration tokens, shuffle them (without looking at their fronts) and place one token at random (face down) on each Room tile. Put all remaining Exploration tokens back in the box.
- Coordinates cards: Take the Coordinates cards and place one randomly (face down) on its space next to the Cockpit. Put all remaining Coordinates cards back in the box.
- Destination marker: Place 1 Status marker on the “B” space on the Destination Track. This is the Destination marker.
- Escape Pods: Take the corresponding number of randomly chosen Escape Pod tokens:
- 1-2 players: 2 Escape Pods.
- 3-4 players: 3 Escape Pods.
- 5 players: 4 Escape Pods.
Place the lowest-numbered Escape Pod in Section “A”, then place the next (in numerical order) Escape Pod in Section “B”. Place the other Escape Pods, alternating between “A” and “B”. Escape Pod tokens should be placed with their “Locked” side face up. Put all remaining Escape Pods back in the box.
- Engines: Take both Engine tokens marked with the number “1” (1 Damaged and 1 Working) and shuffle them face down. Place them on the corresponding Engine “1” slot on the board, one atop the other, and face down. The top Engine token indicates the true status of the Engine. Repeat this step for Engine tokens “2” and “3”.
Important: Make sure that the players do not see the fronts of the tokens, so that they will not know if the Engines are working or not. - Intruder board: Take the Intruder board, put it next to the board and place in the corresponding slots:
- 5 Egg tokens
- 3 random Weakness cards (placed face down, so players do not know what Weaknesses they can discover). Put all remaining Weakness cards back in the box.
- Intruder bag: Take the Intruder bag and put the following Intruder tokens inside:
- 1 Blank
- 4 Larvae
- 1 Creeper
- 1 Queen
- 3 Adults
- Add 1 additional Adult Intruder token for each player taking part in the game.
The rest of the Intruder tokens are placed next to the board – they will be used during play. Place the Intruder Carcass tokens next to the board as well – they will mark killed Intruders.
- Decks: Shuffle and place the following decks face down next to the board: 3 Items (each with its own color), Event, Intruder Attack, Contamination, and Serious Wound decks.
- Place the Craft Item deck next to the 3 Item decks.
- Place the Scanner next to the Contamination deck.
- Put all Intruder Player Action cards and Solo/Coop Objective cards back in the box (only used in advanced modes).
- Other markers, tokens, and dice: Place next to the board:
- Fire markers
- Malfunction markers
- Noise markers
- Ammo / Injury markers
- Status markers (used as Light Wounds / Slime / Signal / Self-Destruct / Time / Destination markers)
- Door tokens
- Red Character Corpse tokens
- 2 Combat dice
- 2 Noise dice
- First Player token
- Time marker: Place 1 Status marker on the green space of the Time Track. This is the Time marker.
Intruder Symbols
- Larva
- Creeper
- Adult
- Breeder
- Queen
Crew Setup (Steps 14-20)
- Help Cards: Take as many Help Cards as there are players and deal one to each player at random. These cards determine the order of choosing Characters (Step 17). If there are 3 players, take cards 1-3; if 4 players, cards 1-4, etc.
The number shown on the Help Card and Inventory is the Player Number – it is important for choosing Characters and for some Objectives. Put remaining Help cards back in the box. - Inventory Card Holder: Each player gets 1 plastic Inventory Card holder with the same number as their Help card to keep their non-Heavy Item cards hidden during the game.
- Objective Decks: Remove from both Objective Decks (Corporate and Personal) all cards showing a number of players higher than the number of players taking part in the game.
Shuffle these two decks individually and deal each player 1 card from the Corporate Objectives deck and 1 card from the Personal Objectives deck. Each player must keep the contents of their Objective cards hidden from other players! Put all remaining Objective cards back in the box.
Note: When any Character encounters an Intruder for the first time, you will choose one of the two Objectives to pursue.
Hint: Receiving Objectives before Character draft allows you to pick a Character best suited to fulfill your goals. - Character Draft: Shuffle all Character draft cards. Players choose Characters in order: Player 1 takes 2 random Character draft cards, reveals them, chooses 1, and shuffles the other back into the draft deck. Then Player 2 chooses the same way, then Player 3, etc. A player may only control the Character whose card they have chosen. Put all remaining draft cards back in the box.
- Character Components: Each player takes:
- A) The Character board of the chosen Character.
- B) The miniature of their Character, placing it in a colored plastic ring and into the Hibernatorium.
- C) The Action cards deck of their Character, shuffled and placed face down on the left side of their Character board.
- D) The Starting Item card (Weapon), placed in one of the two Hand slots on the Character board, loaded with Ammo markers equal to its Ammo capacity.
- E) The 2 Quest Items of their Character, placed horizontal side up next to the Character board (not active until mini-quests are completed).
- F) Leave an empty spot for the Action discard pile on the right.
Put all remaining Character boards back in the box.
- First Player Token: Player 1 gets the First Player token.
- Character Corpse Token: Place the blue Character Corpse token in the Hibernatorium. It represents the body of a poor sod lying in a pool of blood (treated as a Character Corpse Object).
Board Description
- 1 – Hibernatorium (Special Room)
- 2 – Cockpit (Special Room)
- 3 – Coordinates card space
- 4 – Destination Track
- 5 – Engine 01, Engine 02, Engine 03 (Special Rooms)
Important: During Movement, Special Rooms are treated as already explored Rooms. - 6 – Escape Pod spaces
- 7 – Explored Rooms
- 8 – Unexplored Rooms
- 9 – Technical Corridors Entrances
- 10 – Technical Corridors space
- 11 – Time Track
- 12 – Self-Destruct Track
- 13 – Item Counters
- 14 – Corridors
- 15 – Corridor Numbers
- 16 – Room Number
Discard Piles
Leave an empty space for a discard pile next to each of the following decks: Items, Event, Intruder Attack, and Serious Wounds.
Note: There is a special spot for the Action discard pile marked on each Character board. Contamination cards go to the player’s Action discard pile until removed. All cards are discarded face up. All markers are discarded to the appropriate pile.
Flow of the Game
The game is played over a series of consecutive turns, each split into two consecutive Phases: I: Player Phase and II: Event Phase.
I: Player Phase
- Draw Action Cards: All players draw cards from their Action deck until they have a hand size of 5 cards. If your Action deck is empty when required to draw, shuffle your discard pile to form a new Action deck, then draw.
- First Player Token: The player with the First Player token passes it to the player on their left.
Note: In the first turn of the game, do not pass the First Player token. - Player Rounds: Starting with the first player and proceeding clockwise, each player performs a round of 2 Actions.
- When each player has performed their 2 Actions (or passed), the next series of rounds takes place until all players have passed.
- If a player cannot perform Actions or chooses not to, they must pass.
- If a player performs only 1 Action instead of two, they must pass.
- A player who has passed cannot perform ANY Actions later during that Phase.
- When passing, a player may discard any number of cards from their hand to their discard pile, and flips their Help card to the “Pass” side.
- Note: Ending a round in a Room with a Fire marker inflicts 1 Light Wound.
II: Event Phase
- Time Track: Move the Time marker by 1 space to the right. If the Self-Destruct Sequence is active, also move its marker by 1 space to the right on its track.
- Intruder Attack: Each Intruder in Combat with a Character attacks them.
- Fire Damage: Each Intruder in the same Room as a Fire marker suffers 1 Injury.
- Resolve Event Card: Draw and resolve 1 Event card:
- Intruder Movement: All Intruders matching the symbol on the card (and NOT in a Room with Characters) move through the Corridor showing the indicated number. If moved into a Technical Corridor, remove the miniature and return its token to the bag.
- Event Effect: Resolve the effect described on the card, then discard it to the Event discard pile.
- Intruder Bag Development: Draw 1 Intruder token from the bag and resolve its effect:
- Larva: Remove token from bag; add 1 Adult token to the bag.
- Creeper: Remove token from bag; add 1 Breeder token to the bag.
- Adult: All players roll for Noise in order (except those in Combat). Return Adult token to bag.
- Breeder: All players roll for Noise in order (except those in Combat). Return Breeder token to bag.
- Queen: If Characters are in the Nest Room, place the Queen miniature there and resolve an Encounter. If no Characters are in the Nest (or it is undiscovered), add 1 Egg token to the Intruder board. Return Queen token to bag.
- Blank: Add 1 Adult Intruder token to the bag (if available). Return Blank token to bag.
- End of the Turn: Once bag development and all resulting Encounters/Surprise Attacks are fully resolved, start a new turn with the Player Phase.
Character Actions
Action System
Actions come from 4 sources: Basic Actions, Action cards, Item cards, and Room tiles. Each displays an Action Cost, paid by discarding that number of Action cards from hand. Contamination cards cannot be used to pay costs.
Timing Restrictions
- In Combat Only: May only be performed if an Intruder is in the room.
- Out of Combat Only: May only be performed if NO Intruder is in the room.
- No icon: May be performed both in and out of Combat.
Basic Actions
Every Character can perform these actions, provided conditions are met:
- Movement (Cost 1): Move your miniature to a neighboring connected Room.
- Careful Movement (Cost 2 – Out of Combat Only): Move to a neighboring Room. Instead of rolling for Noise, place a Noise marker in a chosen connected Corridor. Cannot be used if all connected Corridors already have Noise markers, or if in Combat.
- Shoot (Cost 1 – In Combat Only): Discard 1 Ammo from a Weapon in hand and roll the Combat die against an Intruder in the room.
- Melee Attack (Cost 1 – In Combat Only): Attack an Intruder in the room bare-handed. Draw 1 Contamination card to your discard pile, then roll the Combat die.
- Pick up Heavy Object (Cost 1): Pick up 1 Heavy Object (Character Corpse, Intruder Carcass, or Intruder Egg) present in your room.
- Trade (Cost 1): Initiate trade of Items/Objects with Characters in the same Room. Both must agree. Ammo cannot be traded.
- Craft Item (Cost 1): Discard 2 Item cards showing matching blue Craft icons to gain the corresponding Crafted Item card.
Actions from Cards and Rooms
- Action Cards: Discard the played card plus additional Action cards equal to its Cost. If split by [OR], choose one effect.
- Item Cards: Specific actions described on the cards. Pay card cost as indicated.
- Room Tiles: Specific Room Actions described on the Room Sheet. Usually Cost 2 Action cards. Disabled by Malfunctions.
Movement, Noise & Ship Environment
Rooms and Corridors
Miniatures are placed only in Rooms (including Special Rooms: Hibernatorium, Engines, Cockpit). Corridors connect Rooms; neither Characters nor Intruders can stop in Corridors. Moving through a Corridor triggers its effects AFTER entering the Room.
Movement Action Steps
When entering a Room:
- If unexplored (face down): Turn the Room tile face up and reveal its Exploration token. Set the Room’s Item Counter to the number on the token. Apply the token’s special effect, then discard the token.
- Noise check: If the entered Room is empty (no Characters and no Intruders), perform a Noise Roll. If another Character or Intruder is present, do not roll for Noise.
Exploration Token Effects
- Silence: No Noise roll. (If slimed, treat as Danger).
- Danger: No Noise roll. If an Intruder is in an adjacent room and not in Combat, it moves into this room. If none, place Noise markers in all empty connected Corridors.
- Slime: Place a Slime marker on your Character board.
- Fire: Place a Fire marker in this Room.
- Malfunction: Place a Malfunction marker in this Room.
- Doors: Place a Closed Door token in the Corridor you just entered through.
Noise Roll
When entering an empty room, roll the Noise die and apply the result:
- Result 1, 2, 3, or 4: Place a Noise marker in the Corridor matching that number connected to your room. If that Corridor already has a Noise marker, resolve an Encounter instead.
- Danger: If an Intruder is in an adjacent room (not in Combat), move it into your room. If none, place a Noise marker in every connected Corridor without one.
- Silence: Nothing happens. (If Character has a Slime marker, resolve Danger instead).
Additional Notes on Movement
If an Adult Intruder must be placed but all 8 models are already on the board, all Adult Intruders not in Combat retreat into the Intruder bag, and an Adult model is placed in the Encounter room.
Technical Corridors
Technical Corridors are accessible only to Intruders (unless special cards allow access). Noise markers rolled for Technical Entrances are placed on the Technical Corridors space on the board. If an Intruder moves into a Technical Corridor Entrance, it disappears into the ducts: discard its injuries, return its token to the bag, and remove its miniature.
Board Markers
Noise Markers
Mark Corridors. A Corridor can never hold more than 1 Noise marker. A second marker triggers an Encounter.
Slime Marker
Treats all Silence results as Danger. Max 1 per Character. Removed by Clothes item or Shower Room Action.
Fire Marker
- Inflicts 1 Light Wound to any Character ending their round in the room.
- Deals 1 Injury to each Intruder in the room during the Event Phase.
- Max 1 Fire marker per room. If a 9th Fire marker must be placed and the pool is empty, the ship explodes and everyone loses.
Malfunction Marker
- Disables Room Actions and Computers in that room (Search is still allowed).
- Max 1 per room. If a 9th Malfunction marker is needed and none remain in the pool, the ship loses integrity and destroys everyone.
Door Tokens
- Closed (standing): Blocks movement. Intruders attempting to move through destroy the door instead.
- Destroyed (lying down): Allows movement. Cannot be closed again (except via Plasma Torch).
- Open: Token removed.
Encounters & Combat
Encounter
An Encounter occurs when an Intruder appears in a Room with a Character (usually via Noise roll). Steps:
- Discard all Noise markers from all Corridors connected to this Room.
- Draw 1 Intruder token from the bag.
- Place the corresponding miniature in the Room.
- Surprise Attack Check: Compare the number on the token with the number of cards in the player’s hand. If hand size is lower, a Surprise Attack occurs (draw and resolve an Intruder Attack card).
Blank Token: Place a Noise marker in each connected Corridor. If bag is empty, add 1 Adult token to the bag.
Combat
A Character and Intruder in the same room are in Combat. Intruders attack during the Event Phase.
Shoot Action (Cost 1)
- Choose Weapon and target Intruder. Discard 1 Ammo.
- Roll Combat die:
- Miss: No effect.
- 1 Hit (Creeper/Larva): 1 Injury to Larva or Creeper; miss otherwise.
- 1 Hit (Adult/Creeper/Larva): 1 Injury to Adult, Creeper, or Larva; miss otherwise.
- 1 Hit: 1 Injury to any target.
- 2 Hits: 2 Injuries to any target.
- Check Intruder Injury Effect.
Melee Attack Action (Cost 1)
- Draw 1 Contamination card to your discard pile.
- Roll Combat die: On a hit, deal 1 Injury (2 Hits count as 1 Hit). On a miss, suffer 1 Serious Wound.
Character Escape
To leave a Room with an Intruder, perform a Movement Action. Before moving, each Intruder in the room performs an Intruder Attack against you. If you survive, complete movement.
Intruder Injuries and Death
When an Intruder takes Injury markers, check its endurance:
- Larva & Egg: 1 Injury kills them. Remove model.
- Creeper or Adult: Draw 1 Intruder Attack card. Compare its blood icon value to total Injuries on the Intruder. If blood value is equal to or less than total Injuries, it is slain (replace with Intruder Carcass token). If higher, it survives.
- Breeder or Queen: Draw 2 Intruder Attack cards and sum their blood icon values. Compare to total Injuries.
- Intruder Retreat: If any drawn card shows a Retreat arrow, the Intruder flees: draw an Event card and move it through the indicated Corridor number.
Intruder Attack
When an Intruder attacks a Character:
- Target is the Character with the fewest Action cards in hand (or active player in case of Escape / Surprise Attack).
- Draw 1 Intruder Attack card. If it displays the attacking Intruder’s symbol, resolve the effect. If not, the attack misses.
Infest (Larva Attack)
A Larva does not draw an Attack card: remove the Larva miniature from the board and place it on the target’s Character board. The player gains 1 Contamination card.
Contamination Cards
Drawn cards go to your Action discard pile. They cannot be used to pay Action costs. Use the Scanner (red foil) over the coded text to reveal if the card is INFECTED. If infected, place a Larva on your Character board. If already carrying a Larva, the Character dies instantly and spawns a Creeper.
Character Health & Items
Character Wounds and Death
Wounds
- Light Wounds: Tracked on Character board (1st marker = 1 Light Wound; 2nd marker = 2 Light Wounds; 3rd marker becomes a Serious Wound).
- Serious Wounds: Draw 1 Serious Wound card and apply its persistent penalty. If a Character has 3 Serious Wounds and suffers any additional Wound, they die immediately.
- Death: Replace miniature with a Character Corpse token. Drop all carried Heavy Objects.
Dressing and Healing Wounds
- Dress Serious Wound: Flip card face down; ignore its penalty, but it still counts toward the 3-wound limit.
- Heal: Discard a Dressed Serious Wound or remove Light Wounds.
Hands and Inventory
- Inventory: Holds normal Items face down in the card holder. Unlimited capacity. Colors are visible to others, specific items remain secret.
- Hand Slots (Heavy Items & Objects): Maximum 2 slots. Heavy Items (Weapons) and Heavy Objects (Corpses, Carcasses, Eggs) must occupy Hand slots and are always public.
- Drop: Characters may drop any Item or Object at any time for free. Dropped Objects stay in the Room; dropped Items are discarded.
Crafting
Combine two Items with matching blue component icons to gain a Crafted Item from the Craft deck:
- Antidote: Chemicals + Medical Supplies
- Taser: Energy Cell + Tools
- Flamethrower: Chemicals + Tools
- Molotov Cocktail: Chemicals + Alcohol
Quest Items
Each Character starts with 2 inactive Quest Items. Complete the specified mini-quest condition on the card to flip it face up and unlock its powerful ability.
Attacking Other Players
Anti-aggression implants prevent direct attacks against crew members. Players may only harm each other indirectly (e.g. fire, self-destruct, locking doors, throwing grenades at Intruders in the same room).
Room Sheet & Ship Locations
Basic Rooms “1”
- Armory: Recharge 2 Ammo on 1 Energy Weapon.
- Comms Room: Place a Status marker on your Character board’s Signal space.
- Emergency Room: Dress all Serious Wounds, OR Heal 1 Dressed Serious Wound, OR Heal all Light Wounds.
- Evacuation Section A & B: If an Escape Pod is unlocked and has space, roll for Noise. If no Intruder appears, enter the pod.
- Fire Control System: Choose 1 Room. Discard a Fire marker there and force all Intruders in that Room to flee in random directions.
- Generator: Initiate or abort Self-Destruct. Cannot be started if anyone is hibernating. Once critical (yellow spaces), it cannot be stopped.
- Laboratory: Analyze 1 Object present in the room (Corpse, Carcass, Egg) to discover the matching Intruder Weakness card.
- Nest: Take 1 Egg token from the Intruder board (triggers Noise roll). Eggs in the room can also be attacked and destroyed.
- Storage: Draw 2 Item cards of the chosen color (Red, Yellow, Green), keep 1, place the other at the bottom of the deck.
- Surgery: Scan all Contamination cards and remove Infected ones. Remove any Larva on your board. Suffer 1 Light Wound and automatically pass.
Additional Rooms “2” (5 used per game)
- Airlock Control: Initiate lock procedure in a yellow room without destroyed doors. If doors remain closed until end of Player Phase, everything in that room dies.
- Cabins: If starting turn here without Intruders, draw 1 additional Action card (hand size 6).
- Canteen: Heal 1 Light Wound. Option to Scan hand Contamination cards and remove non-infected ones.
- Command Center: Choose 1 Room: open or close any doors in connected Corridors.
- Engine Control Room: Check the status of all 3 Engines.
- Hatch Control System: Lock or unlock 1 Escape Pod.
- Monitoring Room: Secretly check 1 unexplored Room tile and its Exploration token.
- Room Covered with Slime: Gain a Slime marker upon entering. Cannot Search here.
- Shower Room: Discard Slime marker. Option to Scan hand Contamination cards.
Special Rooms
- Cockpit: Check Coordinates card OR change the Destination marker on the track.
- Engines 1, 2, 3: Check the top Engine token OR Repair/Break the Engine. (At least 2 working engines are needed for a safe jump).
- Hibernatorium: Enter hibernation once the Time Track reaches a blue space (perform Noise roll).
Escape Pods
Pods hold up to 2 Characters. Once inside, choose to launch immediately (leaving the game safely) or wait for other crew members. Entering an Escape Pod requires an Unlocked pod and a successful Noise roll.
Intruder Weakness Cards
Three face-down cards are placed on the Intruder board during setup. Characters discover them by analyzing Objects in the Laboratory:
- Character Corpse
- Intruder Egg
- Intruder Carcass
Revealed Weaknesses provide permanent advantages to all players against Intruders.
Objectives & End of the Game
Players Goals
Nemesis is a semi-cooperative game with multiple potential winners. Each player has their own Objective. To be considered a winner, a player must meet 2 conditions:
- Fulfill their Objective, detailed on their chosen Objective card.
- Survive, by either:
- Hibernating in the Hibernatorium with the ship functioning and jumping to Earth (or specified destination), OR
- Evacuating the ship using one of the Escape Pods.
Critical Gameplay Moments
First Encounter
When the first Intruder miniature (of any type, not Eggs) appears on the board:
- Each player immediately chooses 1 of their 2 Objective cards to keep.
- The unchosen card is removed from the game face down.
- The encounter is resolved, and the game continues.
First Dead Character
When the first Character dies, the ship’s AI starts emergency procedures: All Escape Pods are automatically unlocked (flip to Unlocked side). The dead player may optionally take control of the Intruders.
Self-Destruct and Hibernation
- Hibernation Chambers Open: When the Time Track reaches any blue space, hibernation chambers unlock. Characters cannot enter before this.
- Self-Destruct is Critical: When the Self-Destruct Track reaches any yellow space, all Escape Pods automatically unlock, and the sequence can no longer be aborted.
Objectives Advice
- Player X’s Character Cannot Survive: Target player must be dead by end of game (cannot hibernate or escape). Direct player vs player attacks are prohibited, but indirect traps (fire, intruders, sabotage) are allowed.
- Your Character is the Only Survivor: No other Characters may survive.
- Sending the Signal: Perform the Room Action in the Comms Room.
- The Ship Must Reach Earth/Mars: Set coordinates in the Cockpit and ensure at least 2 of 3 Engines are working.
- Discover a Weakness: Bring an Object (Corpse, Carcass, Egg) to the Laboratory and perform the Room Action.
- Destroy the Nest: Destroy all Eggs in the Nest room.
End of the Game
The game ends immediately when one of the following conditions is met:
- Time runs out: The Time marker reaches the final red space of the Time Track. The ship jumps into hyperspace; all Characters not in hibernation die from g-force. Intruders are unharmed.
- Ship destruction: The Self-Destruct marker reaches the skull space, OR a 9th Fire marker is needed, OR a 9th Malfunction marker is needed. The ship explodes/loses hull integrity; all Characters and Intruders die.
- No active Characters left: The last alive, non-hibernating Character dies, hibernates, or launches in an Escape Pod. If Self-Destruct was active, resolve its final space; otherwise move the Time marker to the final space and resolve hyperspace jump.
Victory Check
If at least 1 Character survived, perform the following checks in order:
- Engines Check: Reveal the top Engine tokens of all 3 Engines. If 2 or 3 are Damaged, the ship explodes: all hibernating Characters and Intruders die.
- Coordinates Check: Reveal the Coordinates card and check the Destination marker. If not headed to Earth, all Characters asleep in the Hibernatorium die (unless their objective was Quarantine to Mars). The ship is not destroyed.
- Contamination Check: Each alive Character (hibernating or escaped) checks Contamination:
- Scan all Contamination cards in your deck, discard pile, and hand.
- If at least 1 card is “INFECTED” (or if you have a Larva on your board), shuffle all cards (Action and Contamination) and draw the top 4 cards. If any Contamination card appears, the Character dies. Otherwise, they survive.
- Objective Check: Each surviving Character reveals their chosen Objective card to confirm if all requirements were successfully met.
Ending the Game Before Other Players
Characters who launch in an Escape Pod, hibernate, or die can no longer take actions and spectate. The first player whose Character dies may optionally play as the Intruder.
Game Modes & Variants
Solo Mode
Play alone using the Solo/Coop Objectives deck (draw 2, choose 1 at First Encounter). Item counts in rooms are halved (rounded up). To win, fulfill objective and survive.
Fully Cooperative Mode
Draw 1 Solo/Coop Objective per player. ALL objectives must be completed, and at least 1 Character must survive. Characters can carry dead comrades’ bodies to the Emergency Room to revive them with the AutoDoc device.
Playing as an Intruder
Optional mode where the first player eliminated takes control of the Intruders:
- Draws from an Intruder Player Action deck (hand size 4).
- Plays 1 action per round: Move Intruders, select attack cards for Intruder attacks, or trigger special event effects.
- Goal: Prevent all human players from winning.
Alternative Side of the Board
Features a more challenging layout with separate Red and Blue Technical Corridors and paired corridors between certain rooms.
Rules Summary
Turn Sequence
- Player Phase:
- Draw up to 5 Action cards.
- Pass First Player token clockwise.
- Player rounds: Take 2 Actions, or 1 Action and pass, or pass. Repeat until all pass.
- Event Phase:
- Advance Time marker (and Self-Destruct if active).
- Intruder Attacks in combat rooms.
- Intruders suffer Fire damage.
- Resolve 1 Event card (Intruder Movement + Event Effect).
- Intruder bag development.
Combat Summary
- Shooting (Cost 1): Discard 1 Ammo, roll Combat die. On hit, assign Injury and check Intruder endurance.
- Melee Attack (Cost 1): Draw 1 Contamination card, roll Combat die. On miss, suffer 1 Serious Wound.
- Escape (Cost 1): Suffer attack from each Intruder in the room; if you survive, move to adjacent room.
Rules explaination videos
Expansions for
Nemesis
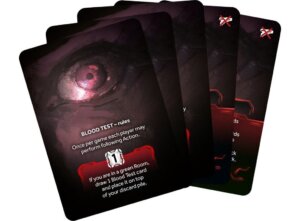
Nemesis: Blood Tests Deck
2019
Add a new way to check Contamination cards in Nemesis.
180
minutes
Medium Heavy
View expansion
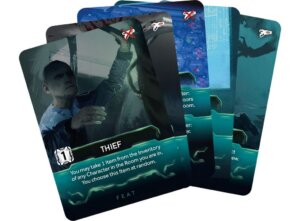
Nemesis: Feat Promo Cards
2020
Five promo Feat cards that add powerful options to your action deck
180
minutes
Medium Heavy
View expansion
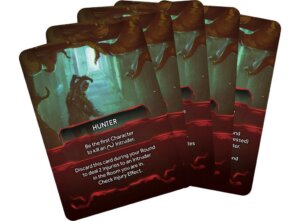
Nemesis: Achievement Cards
2019
Promo cards that unlock special actions when their requirements are met.
180
minutes
Medium Heavy
View expansion

Nemesis: Untold Stories #2
2019
Expand your Nemesis experience with comic-book scenarios and extra gameplay.
180
minutes
Medium Heavy
View expansion

Nemesis: Aftermath & Void Seeders & Medic
2019
Face whispering aliens, spreading insanity, and terrifying choices aboard the ship.
180
minutes
Medium Heavy
View expansion
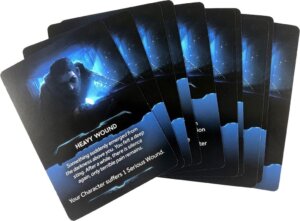
Nemesis: Crawl Deck
2019
Add a risky new route through Technical Corridors with a 10-card deck.
180
minutes
Medium Heavy
View expansion
Nemesis: Untold Stories #1
2019
Explore new cooperative scenarios through an 80+ page graphic novel.
180
minutes
Medium Heavy
View expansion

Nemesis: Aftermath & Void Seeders
2019
Whispers spread through the ship as insanity turns crew against itself.
180
minutes
Medium Heavy
View expansion
