
Cthulhu: Death May Die – Fear of the Unknown
2024
Take on six new Episodes and two Elder Boxes in a cooperative mythos game with upgraded rules, new monsters, and new insanities for 1–5 players.
90
minutes
1 - 5
player(s)
14+
Medium

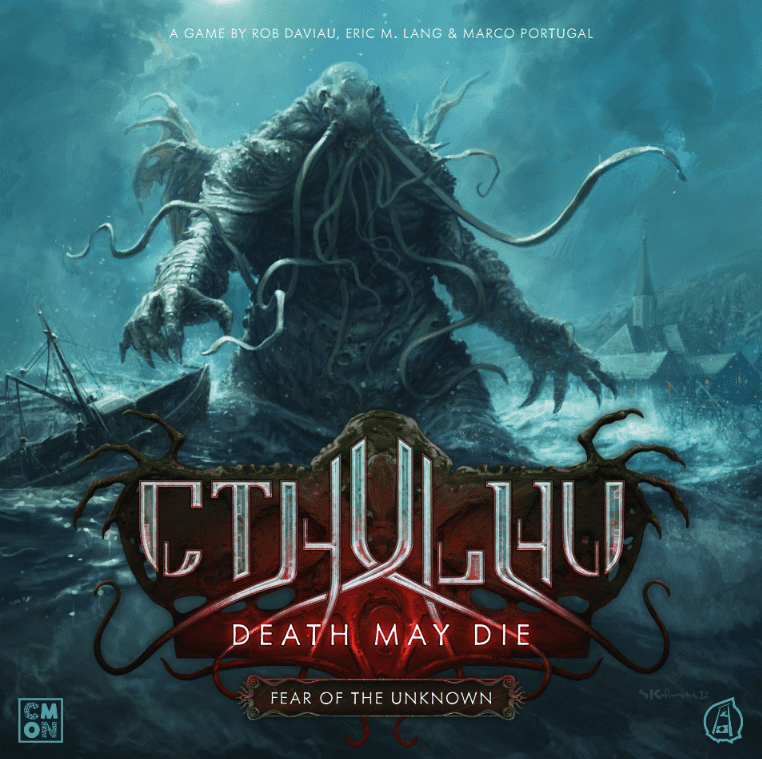
About this board game
Cthulhu: Death May Die – Fear of the Unknown is a cooperative board game for 1–5 players, with sessions lasting about 90 minutes. Released in 2024, this standalone box introduces a new Season of the series and upgraded rules.
Designed by Rob Daviau and Marco Portugal, Fear of the Unknown brings a new twist to the mythos universe created by H.P. Lovecraft. Players face the challenges presented by new content designed to expand the game’s cooperative experience.
The box includes 6 new Episode Boxes and 2 new Elder Boxes. These additions bring new insanities and monsters, along with new modular rules for changing the way each game unfolds.
- Standalone box for the Fear of the Unknown Season
- Cooperative play for 1–5 players
- Approximately 90 minutes of play time
- Six new Episodes and two new Elder Boxes
- New insanities, monsters, and modular rules
Whether played alone or with a group, Cthulhu: Death May Die – Fear of the Unknown offers a focused cooperative board game experience built around confronting challenges in a Lovecraftian mythos setting. Its new Episodes, Elder Boxes, and upgraded rules provide a fresh way to explore the series.
/pic7182955.jpg)
Board Game Rules for
Cthulhu: Death May Die – Fear of the Unknown
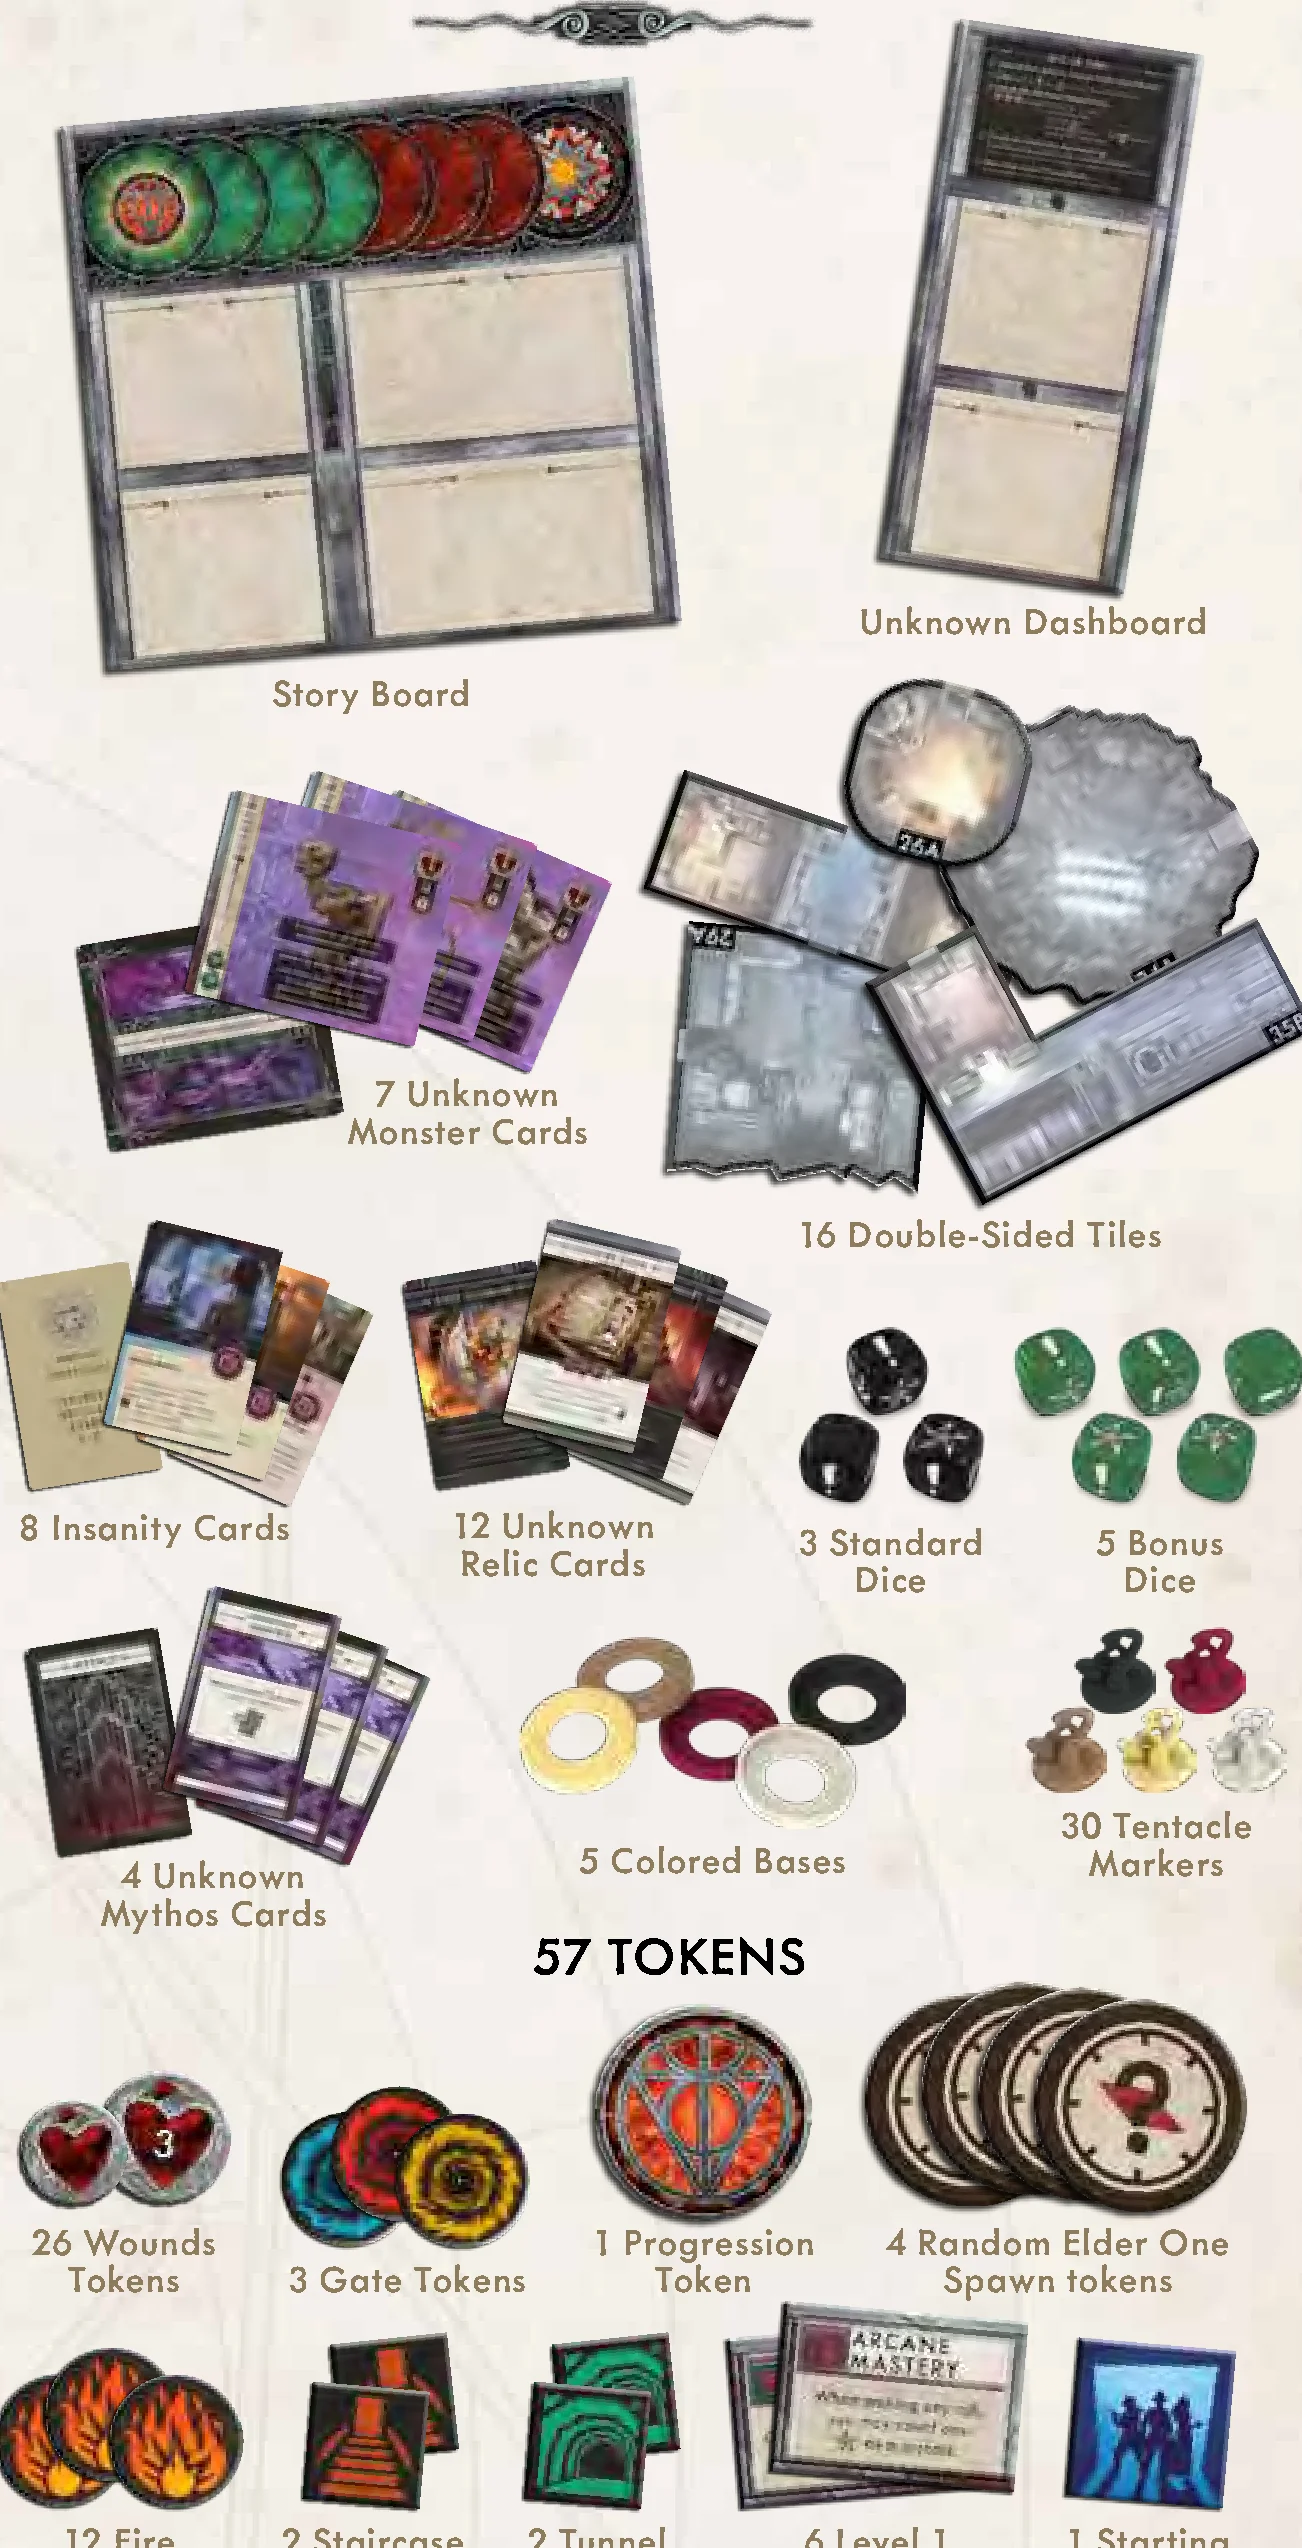
Components
- Story Board
- Unknown Dashboard
- 16 Double-Sided Tiles
- 7 Unknown Monster Cards
- 4 Unknown Mythos Cards
- 8 Insanity Cards
- 12 Unknown Relic Cards
- 3 Standard Dice
- 5 Bonus Dice
- 5 Colored Bases
- 30 Tentacle Markers
- 57 Tokens:
- 26 Wounds Tokens
- 12 Fire Tokens
- 3 Gate Tokens
- 2 Staircase Tokens
- 2 Tunnel Tokens
- 1 Progression Token
- 4 Random Elder One Spawn tokens
- 6 Level 1 Skill Tokens
- 1 Starting Space Token
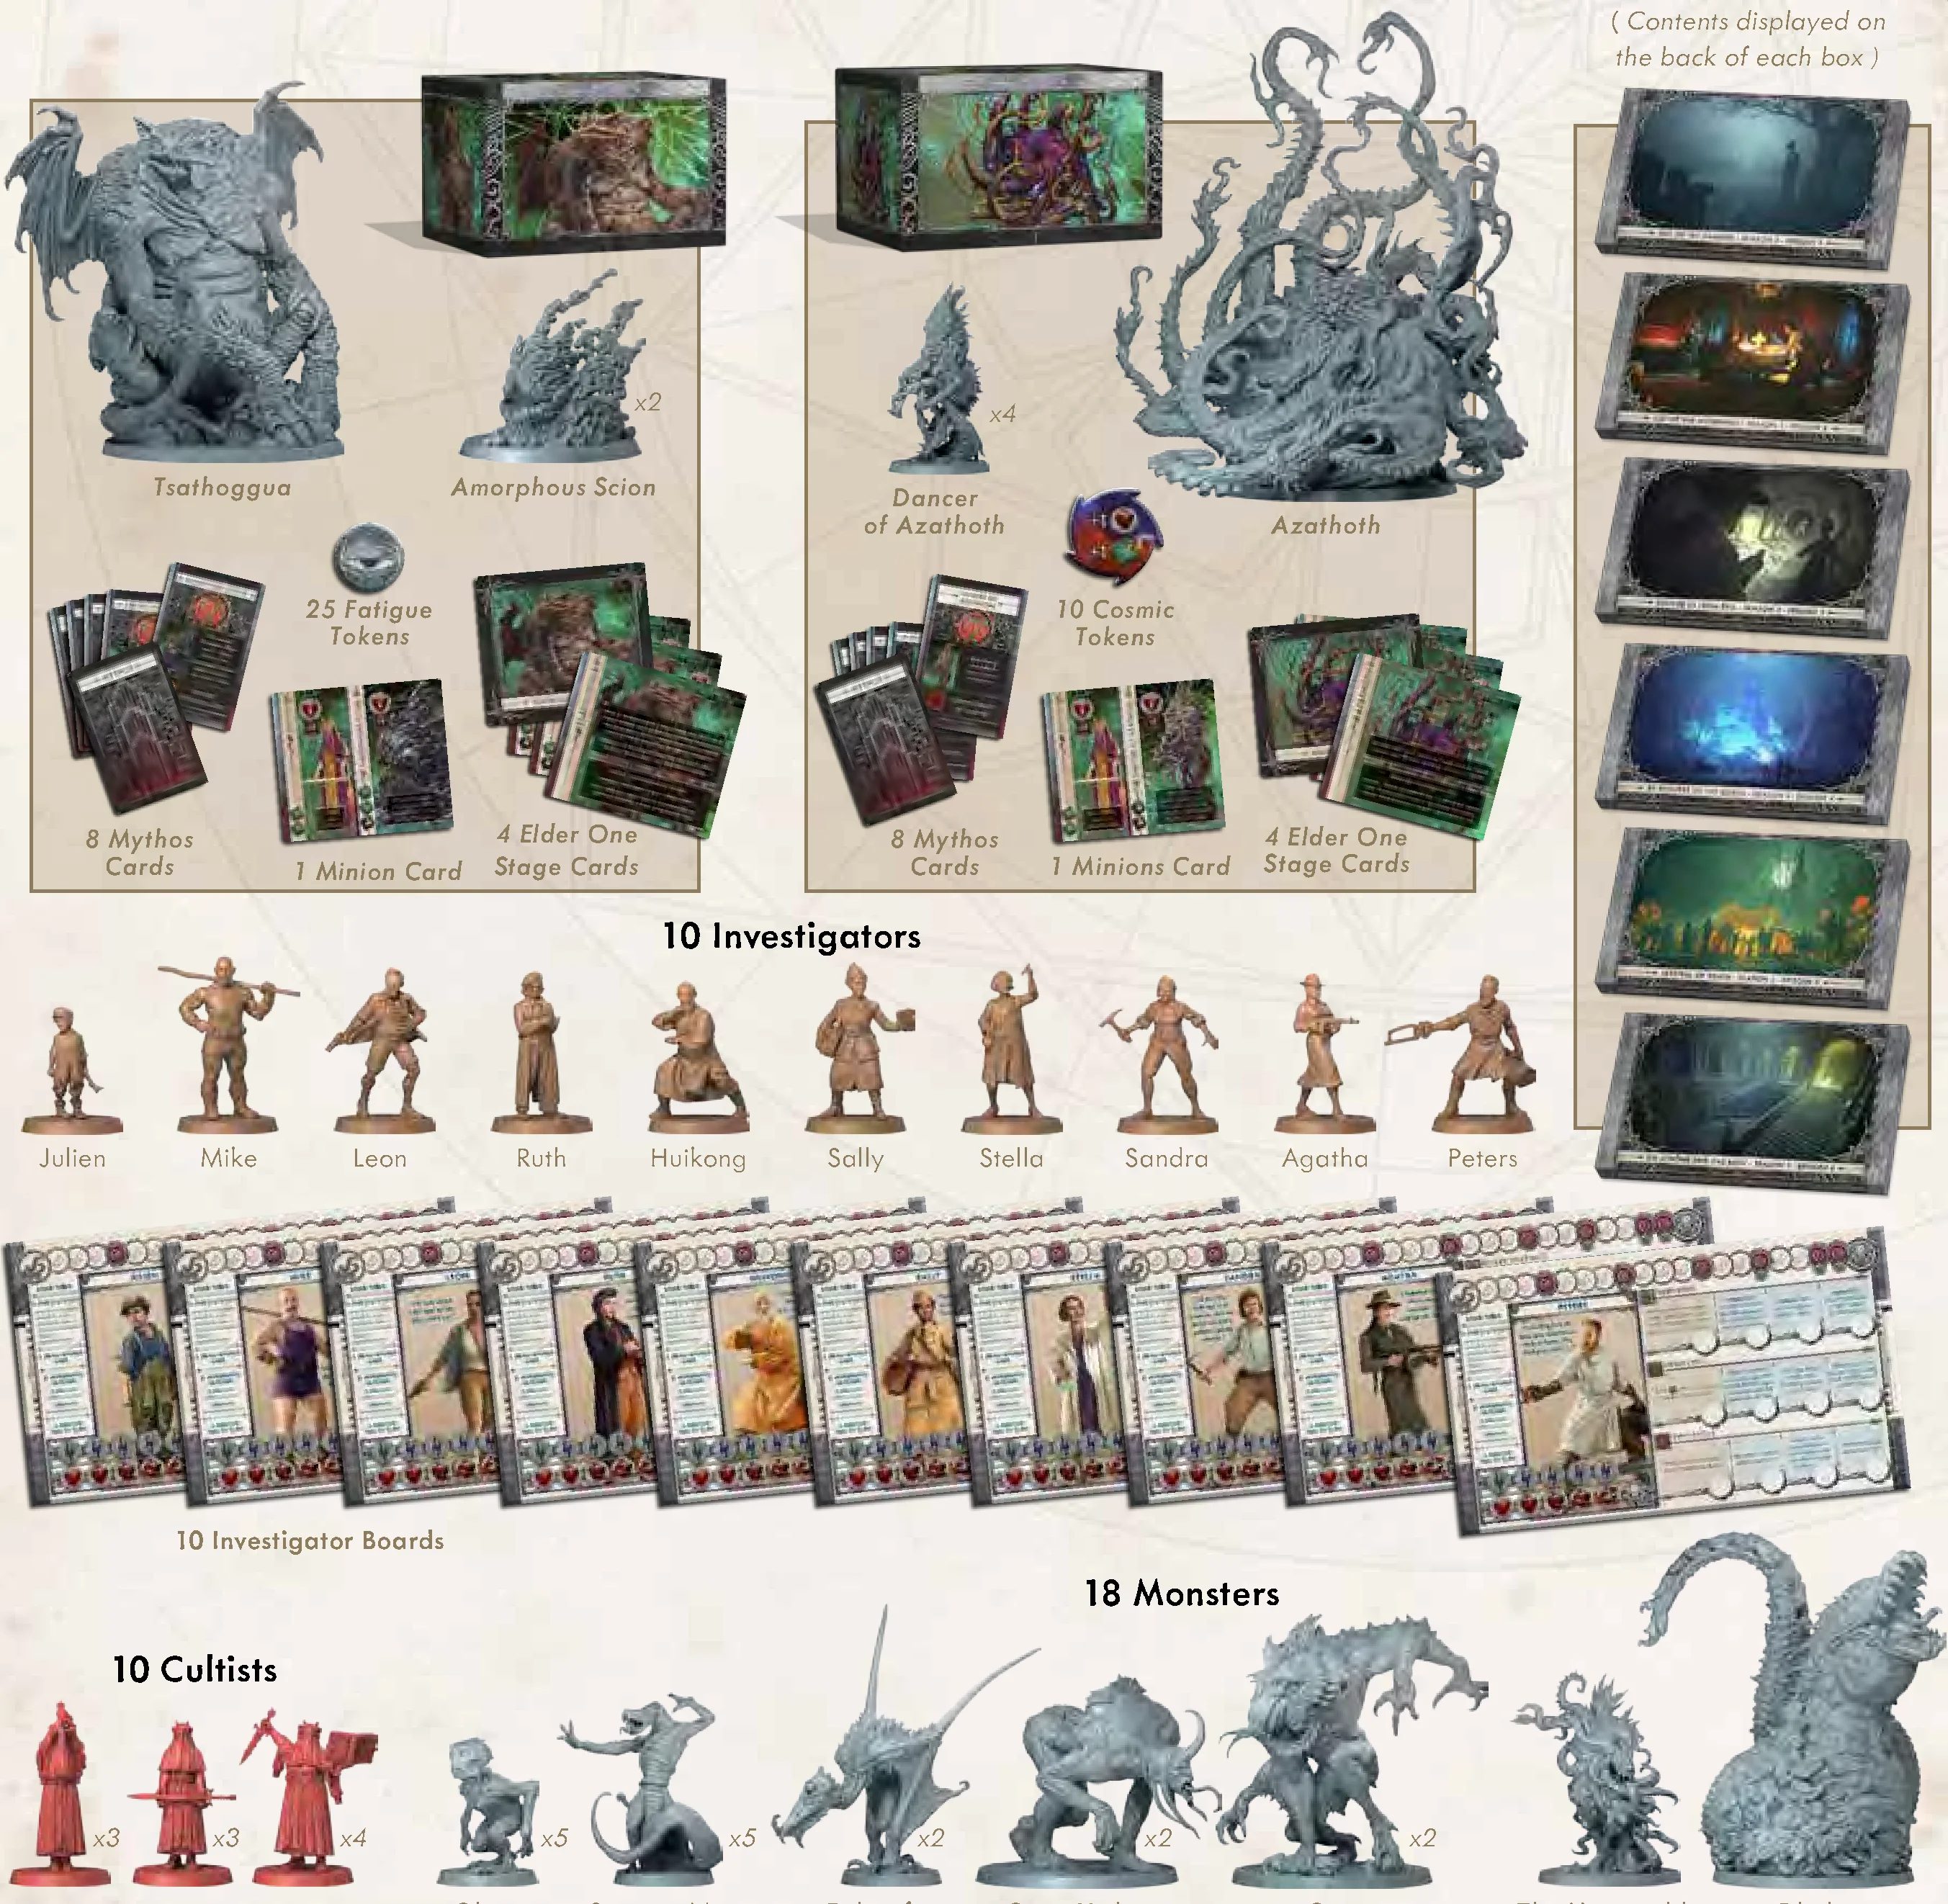
Additional Components
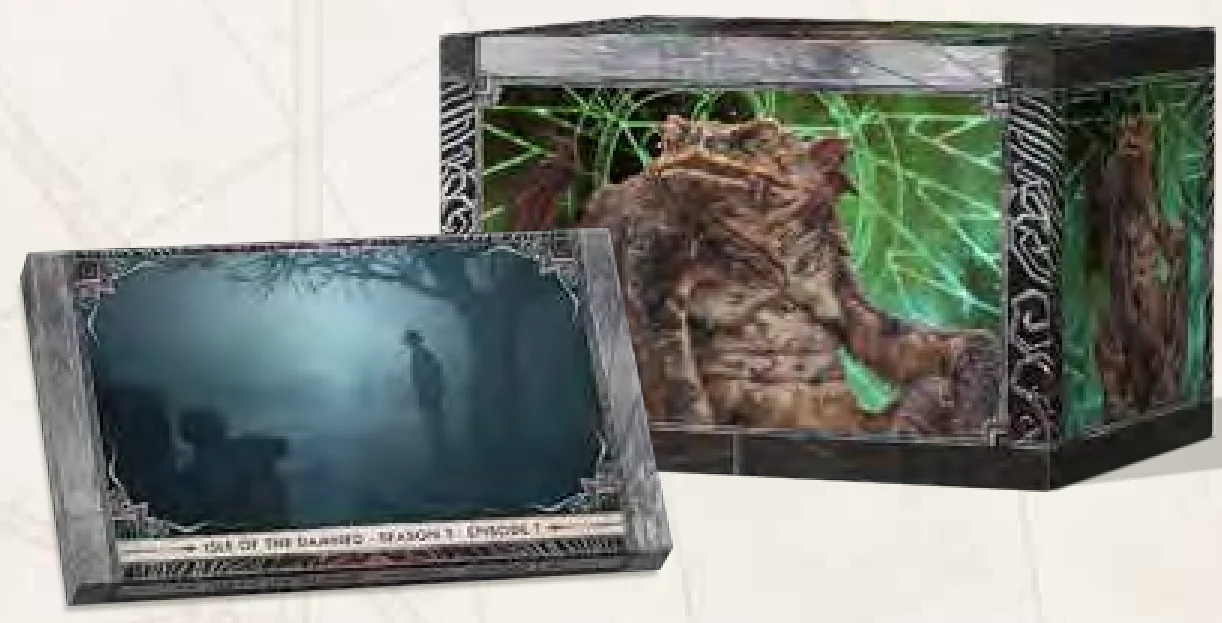
- 6 Episode Boxes (contents displayed on the back of each box)
- Elder One Box – Tsathoggua:
- Tsathoggua figure
- 2 Amorphous Scion figures
- 8 Mythos Cards
- 1 Minion Card
- 4 Elder One Stage Cards
- 25 Fatigue Tokens
- Elder One Box – Azathoth:
- Azathoth figure
- 4 Dancer of Azathoth figures
- 8 Mythos Cards
- 1 Minions Card
- 4 Elder One Stage Cards
- 10 Cosmic Tokens
- 10 Investigators & 10 Investigator Boards: Julien, Mike, Leon, Ruth, Huikong, Sally, Stella, Sandra, Agatha, Peters
- 10 Cultists (3 pose A, 3 pose B, 4 pose C)
- 18 Monsters:
- 5 Ghasts
- 5 Serpent Men
- 2 Fishers from Outside
- 2 Gyaa-Yothn
- 2 Gugs
- 1 The Unnamable
- 1 Dhole
Overview
Cultists. Doing idiotic rituals again.
Going to summon an Elder God,
destroy the world. The usual.
But we’ve got something different planned.
Mess it up real good.So when that Elder One
lands in our world, it’s mortal.
Just a bit. Just for a little while.And then we’re going to kill it.
It won’t be easy. We’ll have to work together.
We’ll likely lose our sanity. But that’s OK.
We’re fueled by madness.
At the start of each game, players choose an Episode box and an Elder One box and combine their components. The Episode will provide the map layout, the ritual they are trying to disrupt (and how to disrupt it), as well as the abilities of the monsters in the game. The Elder One will provide the big boss they will fight, with its own challenges, along with its special minions. Do not combine elements from other boxes.
1 to 5 players control investigators, cooperating to win or lose the game together. In each game, the goal remains the same: disrupt the ritual, then kill the Elder One.
Episodes and Elder Ones
Episodes
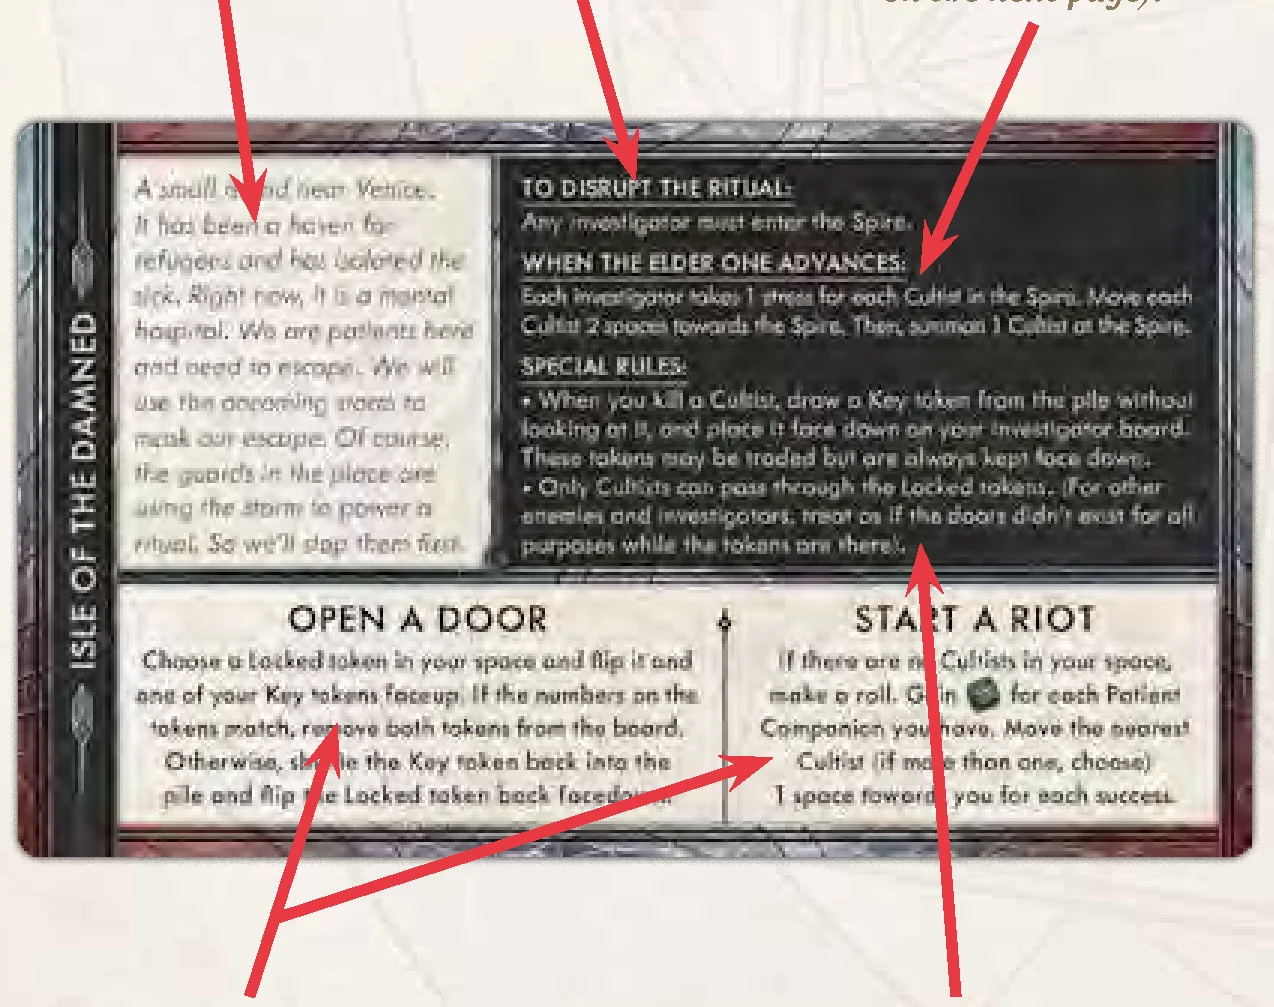
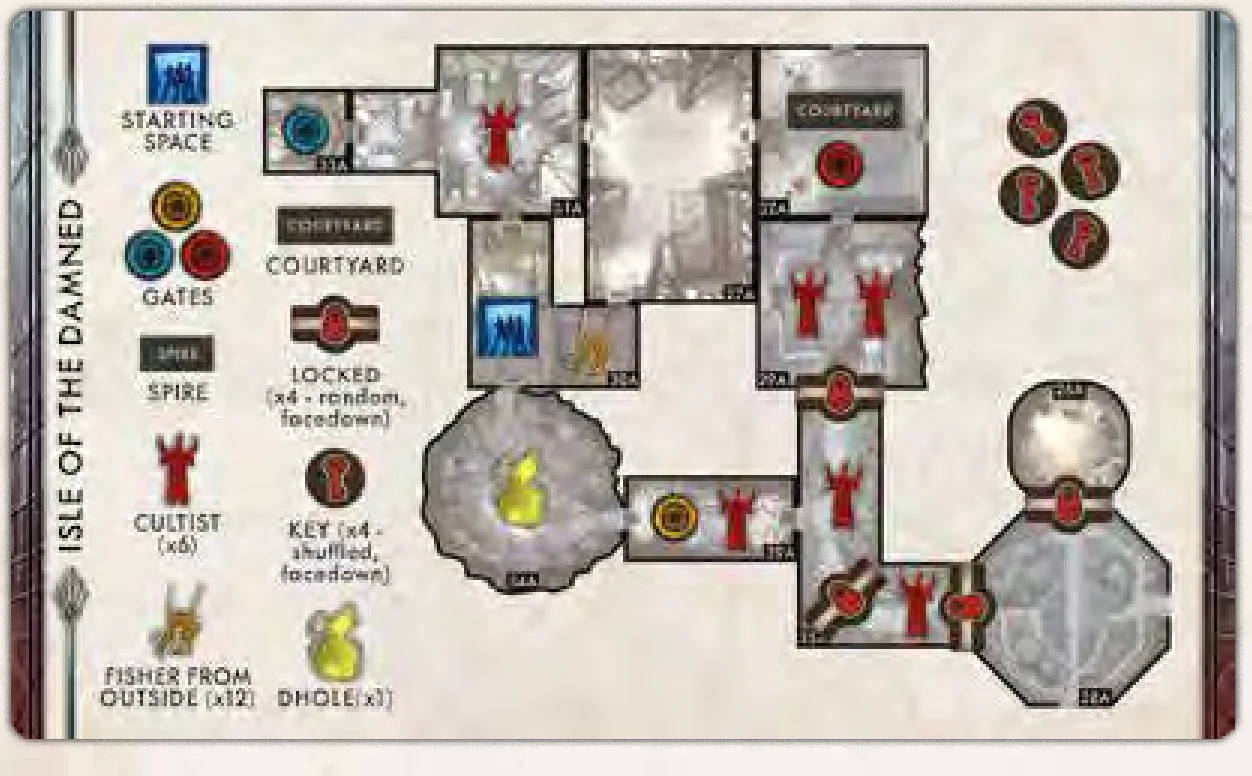
Each episode has its own Episode cards, Mythos cards, and Discovery cards, as well as special tokens.
NOTE: Some Episode cards feature special rules.
The back of each Episode card shows how to set up the episode.
Elder Ones
Each Elder One comes with its own flavor of Cultists and monsters, its own Mythos cards to mess with Investigators, and Elder One cards in different stages that will unfold as the game goes on. Investigators cannot attack the Elder One until the ritual is disrupted, even if it’s been summoned to the board!
Story Board & Summoning Track
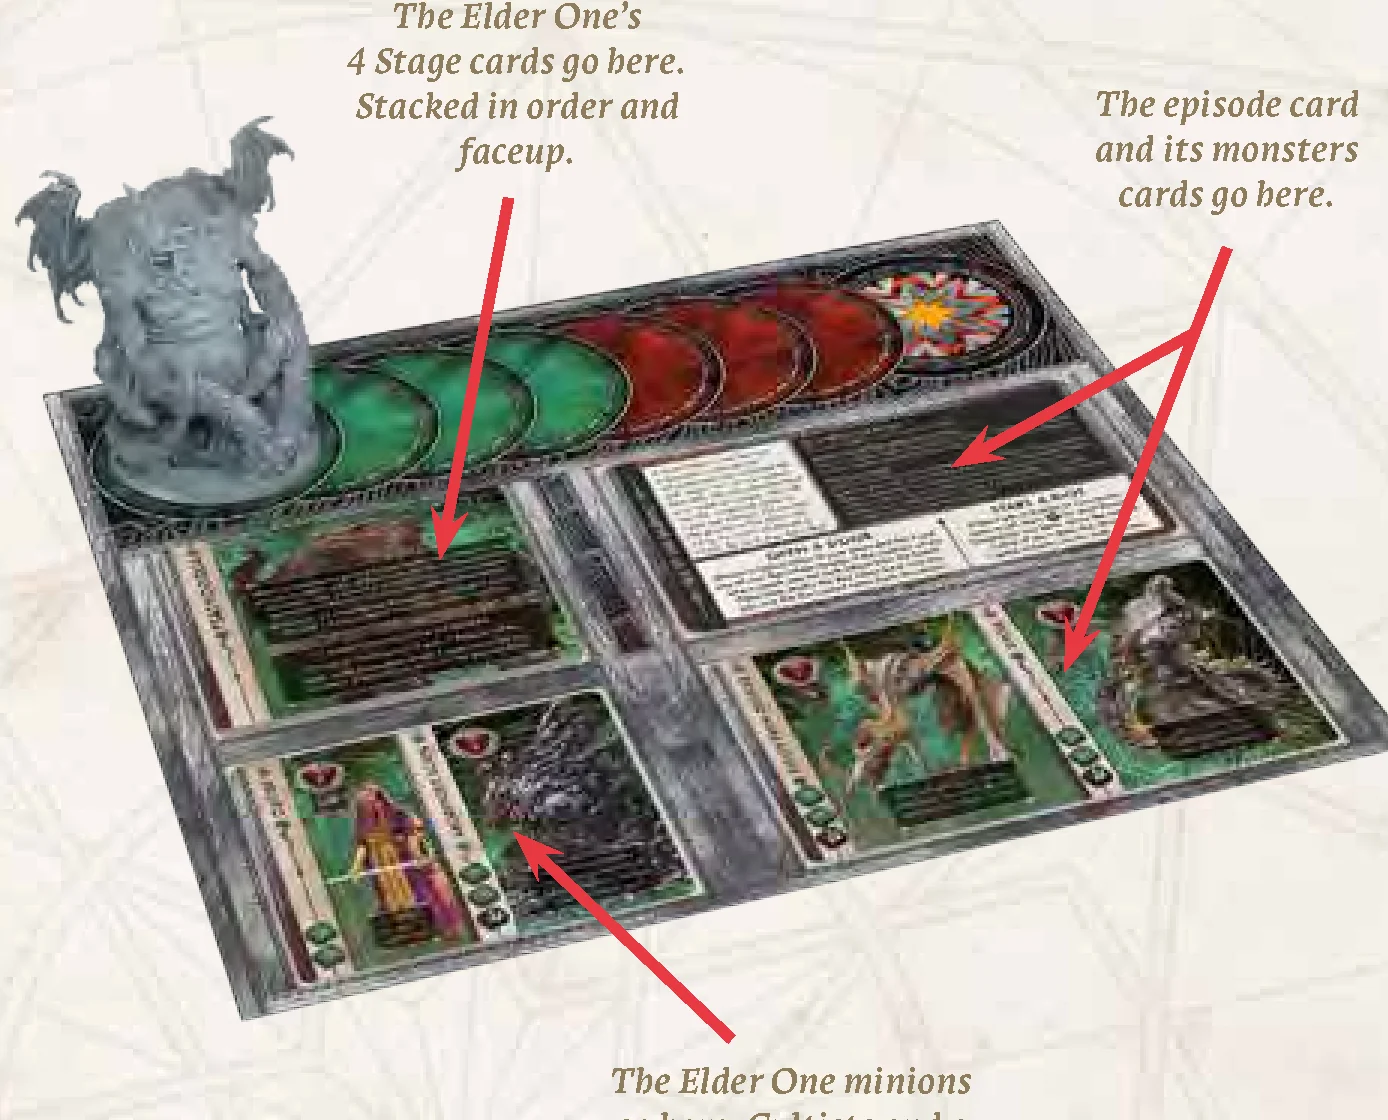
The Story board, used in every game, is the hub of information.
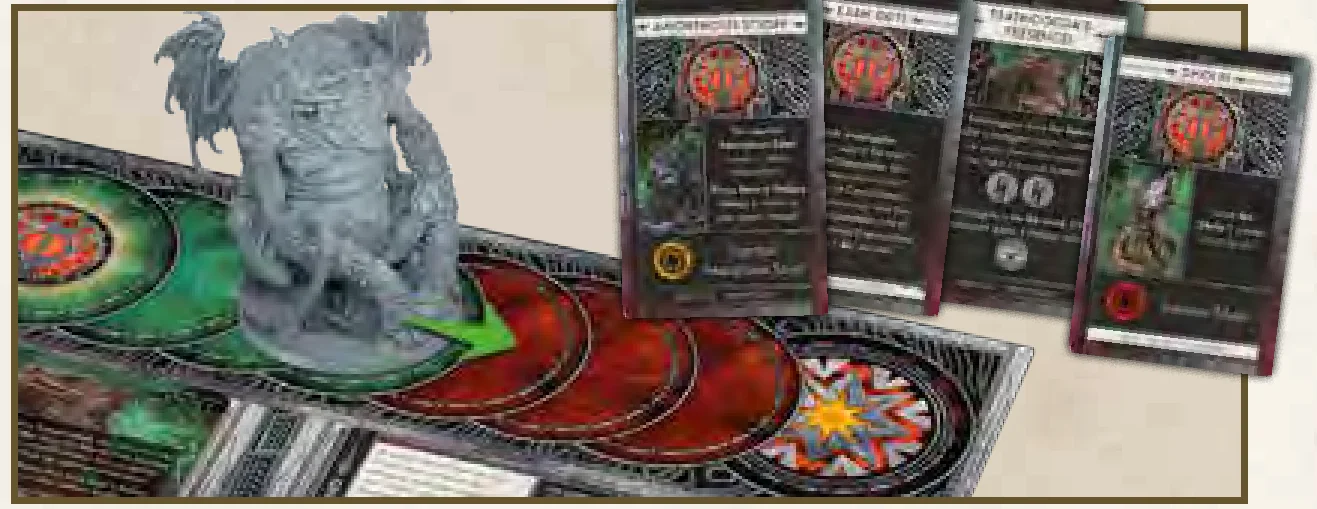
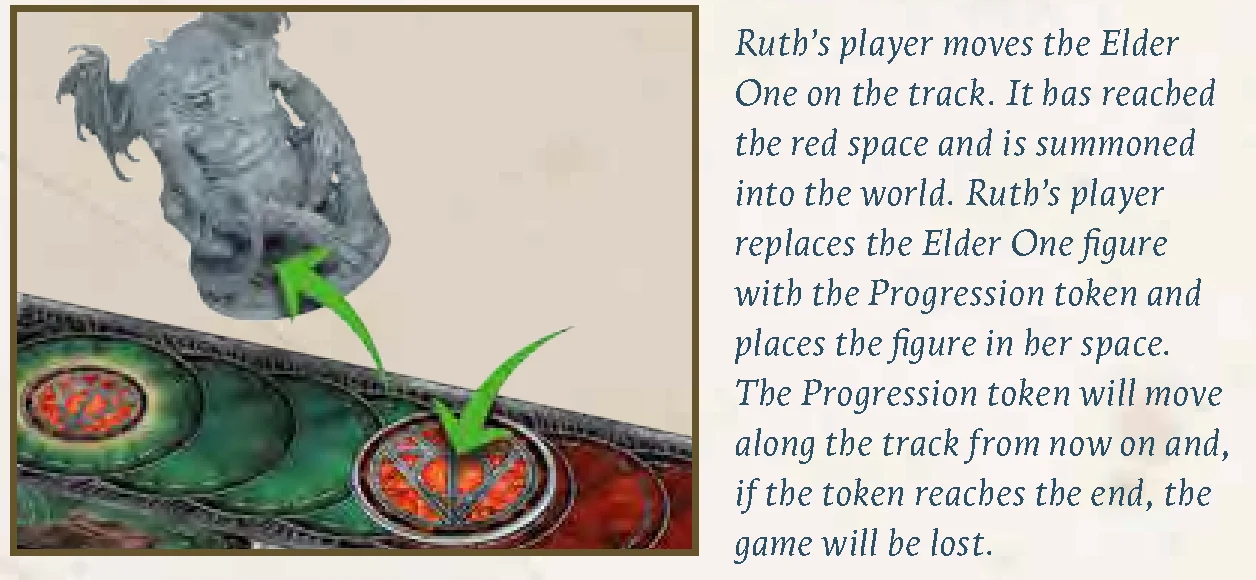
The Summoning track shows the progression of the Elder One as it manifests into our world. The Elder One figure starts on the left part of the track and progresses to the right. When it enters a red space, it will be summoned (it will be summoned earlier if the ritual is disrupted). After the Elder One is summoned to our world, the Progression token is placed on the track and moved instead of the figure. If the Progression token reaches the end of the track, the Elder One dominates the world and the investigators lose!
Cards Overview
Discovery Cards
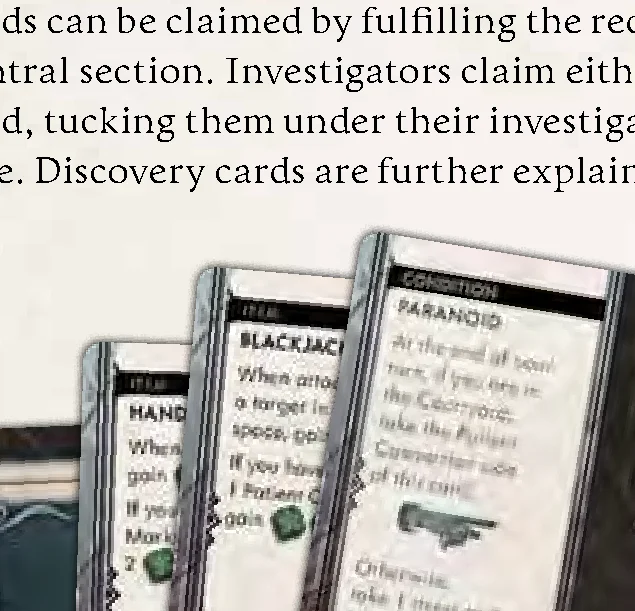
Each episode has 15 Discovery cards. These include Items, Companions, and Conditions that can help or hinder the players. Most Discovery cards can be claimed by fulfilling the requirements listed in the card’s central section. Investigators claim either the left or right side of the card, tucking them under their investigator board on the appropriate side.
If it’s not specified when the player may use an effect on a Discovery card, it may be used anytime during their turn. However, it cannot be used while resolving another card, effect, or during a roll.
Mythos Cards
Mythos cards drive the horrors of each game. Players will grow to hate them. Half the Mythos cards in a game come from the Episode box and the other half comes from the Elder One box.
Each turn, after taking their actions, the active player will draw a Mythos card. Some will move and/or summon enemies. Others will drive investigators mad. There are also ones that aren’t as kind.
Most Mythos cards have an Elder One Summoning symbol 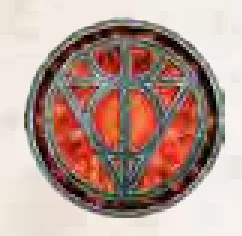 on them. When there are 3 Summoning symbols in the Mythos discard pile, the Elder One advances along the Summoning track.
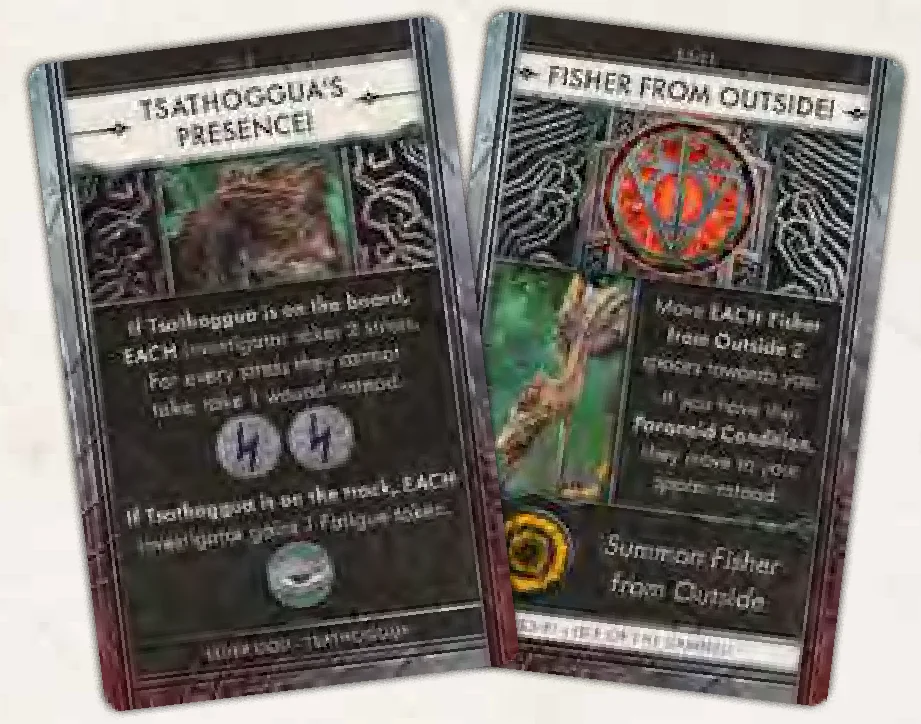
Enemies
The term “enemies” refers to Cultists, monsters, and the Elder One (once it’s summoned to the board). Any enemy that’s not a Cultist or the Elder One is a “monster”.
- Anything that refers to Cultists affects Cultists only.
- Anything that refers to monsters affects monsters only.
- Anything that refers to the Elder One affects the Elder One only.
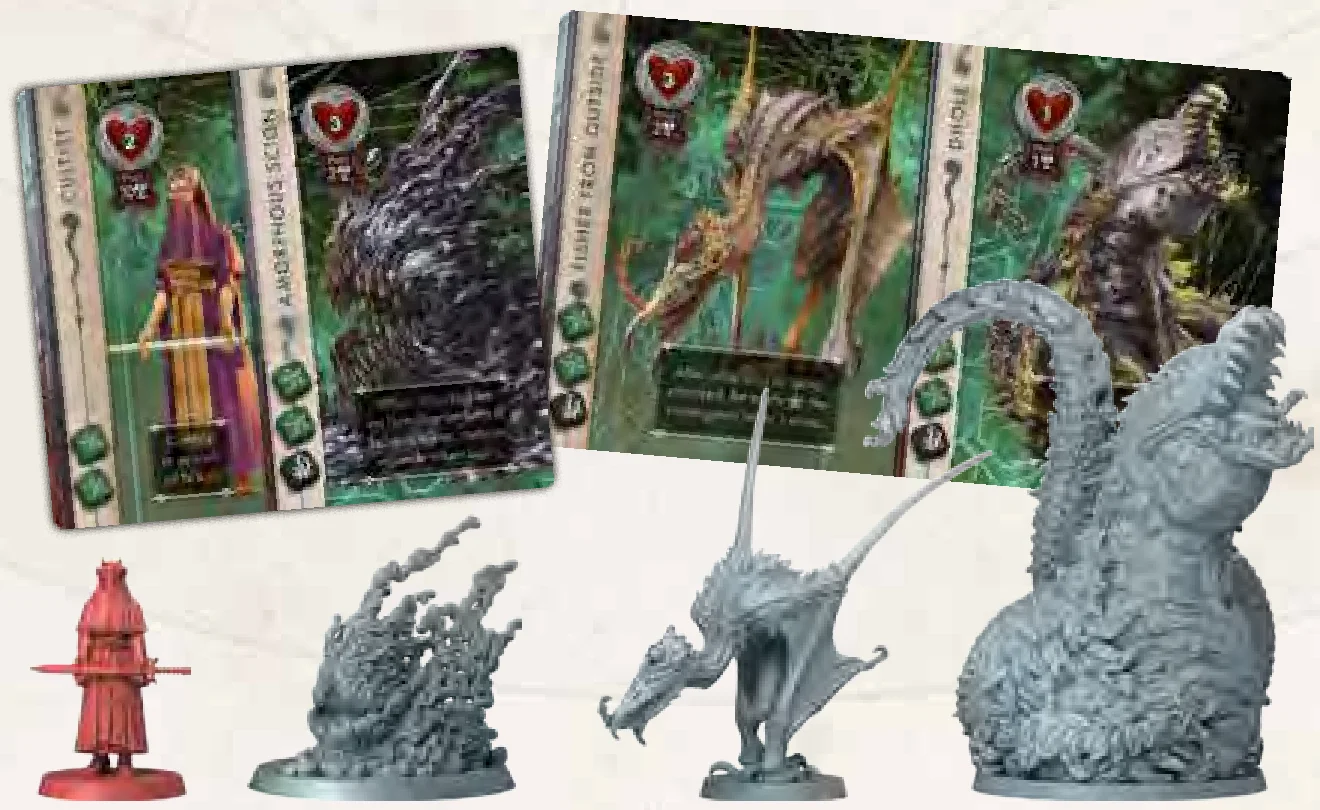
Enemy cards show their health, the dice they use when attacking, and a special ability that may come into effect in different circumstances. The cards also show the total number of figures that should be available in the pool. If an Episode uses specific monsters, all its miniatures that are not present in the setup are kept in a pool, ready to spawn.
Tiles and Spaces
Each tile is double-sided and labeled with a code to help with setup.
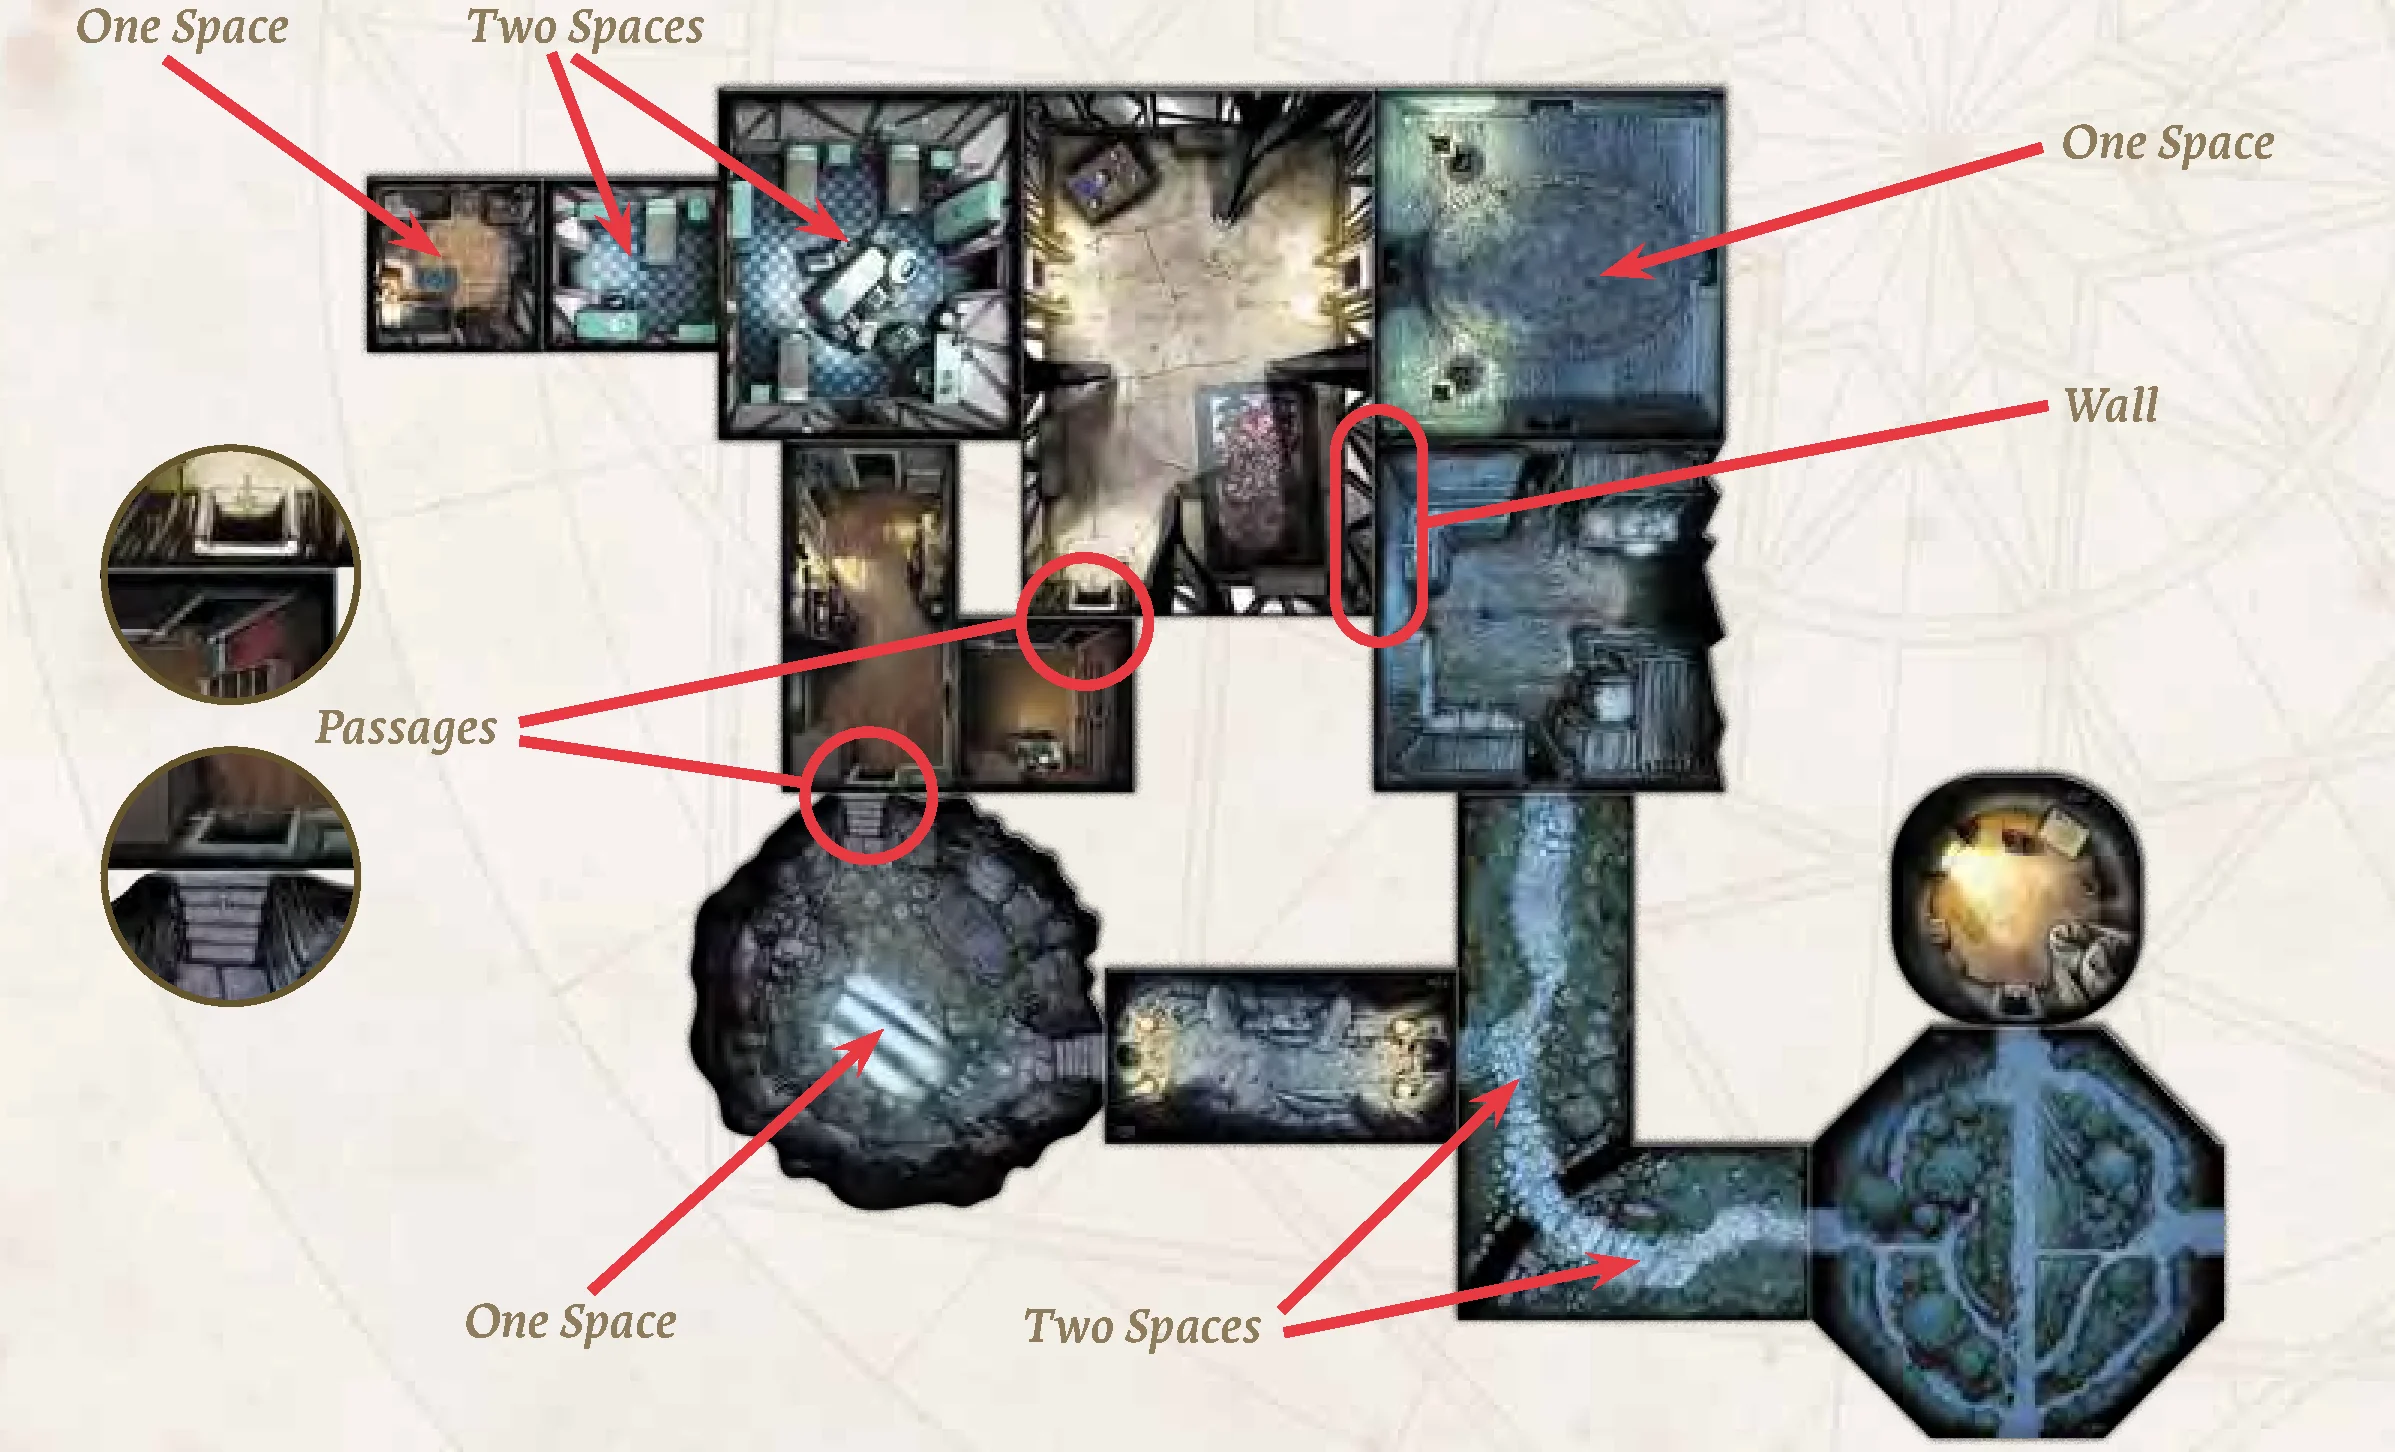
Spaces are defined by walls and passages:
- Some tiles contain 1 space while others contain 2 or 3.
- On the board, investigators may only move through passages that have connecting arrows on both spaces. If there is only a passage on one side (or a passage leading off the board) and nothing on the other side, investigators cannot go through it.
- There is no limit to the number of figures that may occupy each space.
- A space is adjacent to another if they are one space away from each other. In other words, if it is possible for an investigator to move between 2 spaces, they are considered adjacent.
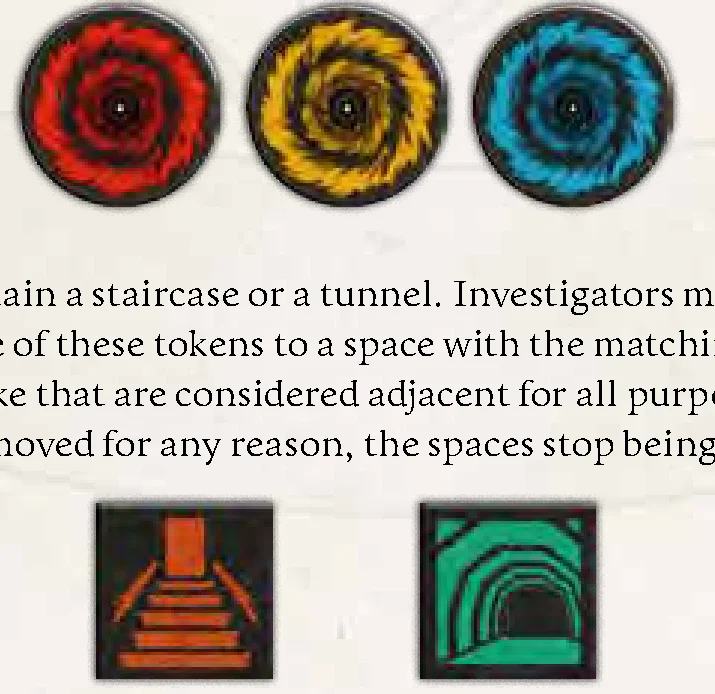
- Each map has 3 Gates – Red, Yellow, and Blue, where enemies are summoned.
- Some maps contain a staircase or a tunnel. Investigators may move from a space with one of these tokens to a space with the matching token. Spaces linked like that are considered adjacent for all purposes. If one of the tokens is removed for any reason, the spaces stop being adjacent.
Safe Spaces
A space is Safe when there are no enemies in it.
General Rules
Component Limitation
With the exception of dice and Wound tokens (and consequently, Fire on investigators), all components are limited. If there are not enough tokens (or other components), use as many as possible for the effect, but do not add substitutes for the missing components. Also, if a component is discarded/removed, it returns to the pool of available components, unless stated otherwise.
When mixing components from different Cthulhu: Death May Die Core Boxes, players should increase the Fire token pool. For example, since Cthulhu: Death May Die Core Box comes with 8 Fire tokens and Cthulhu: Death May Die – Fear of the Unknown Core Box with 12, if players have both boxes, they increase the pool to 20 Fire tokens.
Note that this is not true for other components. For example, the total number of Cultists in an Episode is always limited to 10, as stated in the Elder One Minions Card.
Resolving Ties and Ambiguities
If there are multiple ways to resolve an effect, the active player always chooses how to resolve it. For example, if an effect moves the nearest enemy and there are multiple enemies at the same distance, the active player chooses 1 of them to move. Also, if multiple effects trigger at the same time, the active player chooses the order in which they are resolved.
For several effects, players must determine the nearest or furthest element (space, figure, or token) from their investigator or another element on the board. When determining the nearest or furthest element, always use the shortest path to the space where the element is. Distance to the same space is always 0. So, if an element is in the investigator’s space, it is the nearest element. If there are multiple elements of the specified type at the same distance, the active player selects 1 of them.
Checking Distance
For several effects players must determine the nearest or furthest element (space, figure or token) from their investigator or another element on the board. When determining the nearest or furthest element, always use the shortest path to the space where the element is. Distance to the same space is always 0. So, if an element is in the investigator’s space, it is the nearest element. If there are multiple elements of the specified type at the same distance, the active player selects 1 of them.
Effects that block passages, like locked tokens, should be considered when checking the shortest path, the path cannot pass through blocked passages. The only exception is if the effect would move a figure that can ignore the restrictions. For example, on Season 3 – Episode 1: Isle of the Damned, the Cultists can pass through locked tokens. If an effect moves the nearest Cultist towards you, even though other figures cannot move through the locked tokens, you ignore those tokens when checking which Cultist is the nearest, since they can pass through them. However, effects that affect which spaces are adjacent to each other on specific circumstances, like the Silver Key Relic, are ignored when checking the shortest path.
Investigators
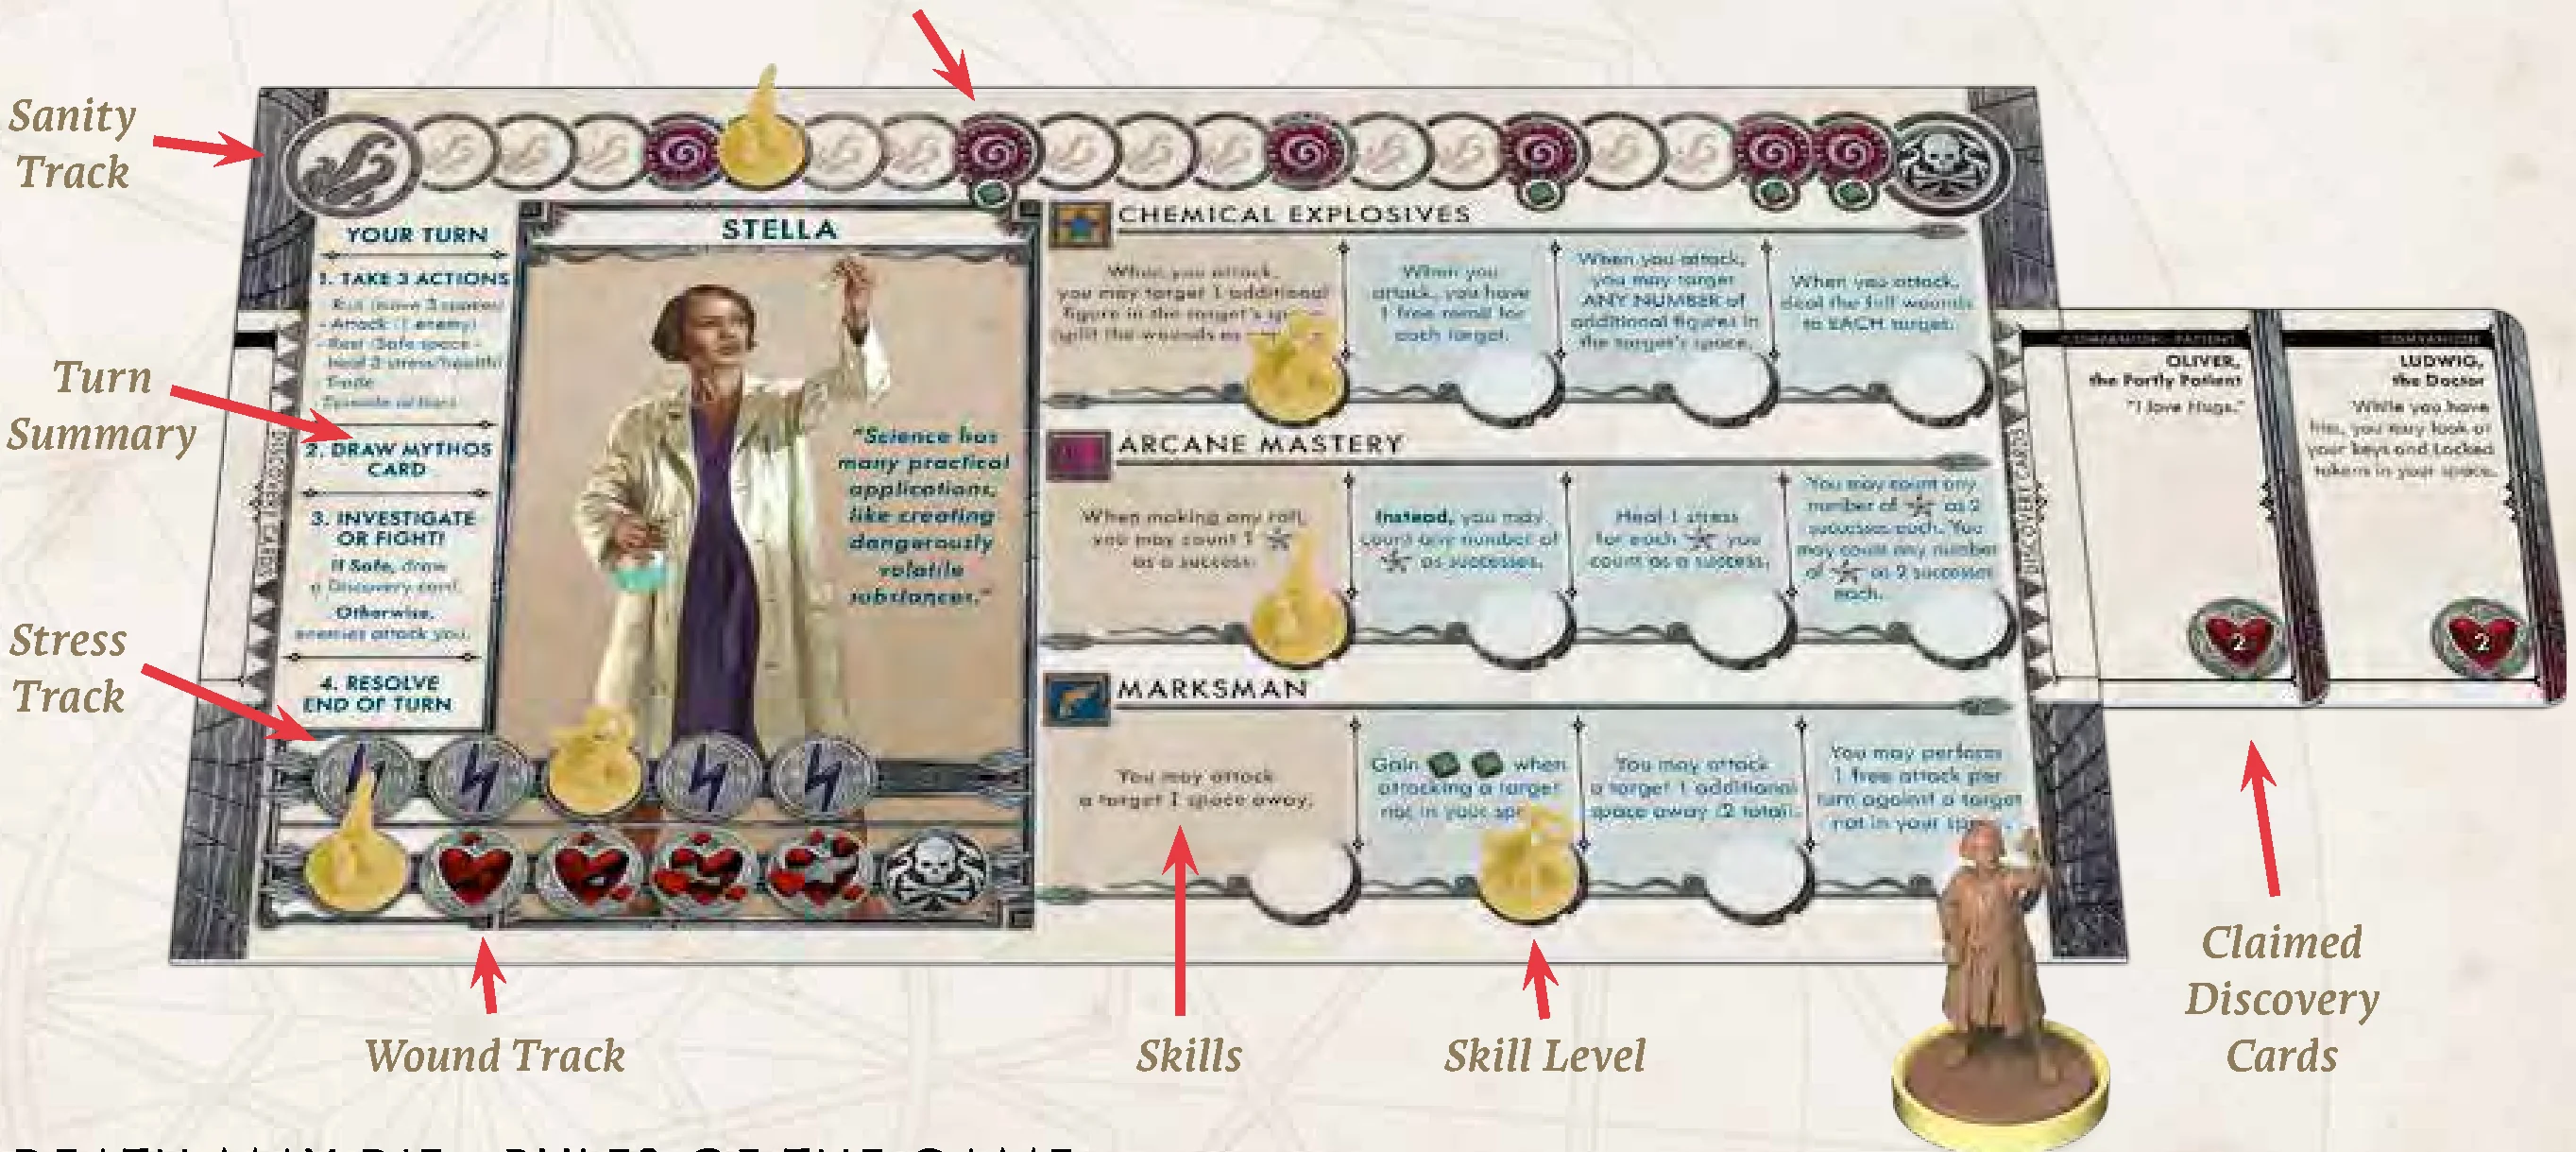
Each investigator has a board with a wound track, a stress track, a sanity track, and 3 skills. All are tracked with plastic tentacle markers in the investigator’s color. There are also slots on the right and on the left of the board to insert claimed Discovery cards. There is no limit to the number of cards that can be slotted to an investigator.
Stress
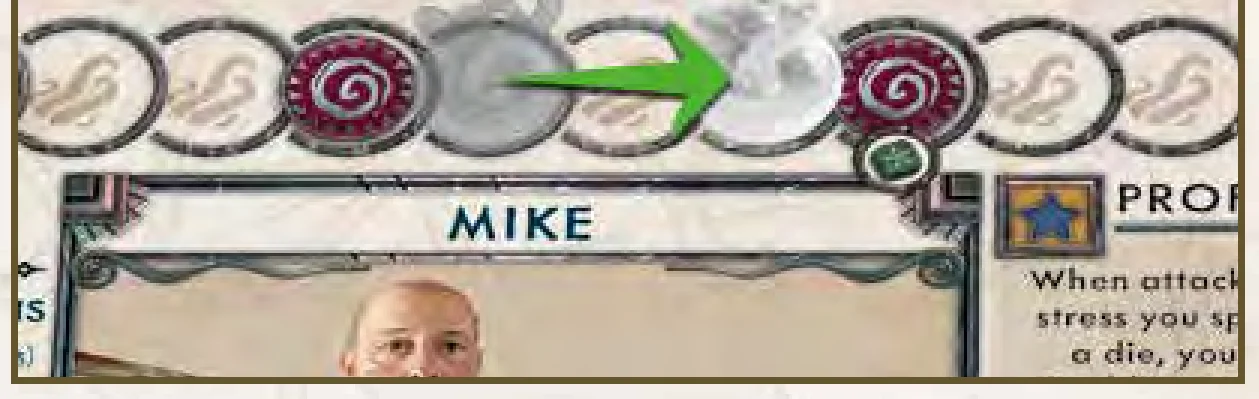
Stress is used to try and push situations in the investigator’s favor. Players may always increase investigator’s stress to reroll 1 die they just rolled. Many Discovery cards also have investigators take stress in order to claim them. Generally, the only consequence of being at maximum stress is that the investigator can’t take more stress (though some effects may deal wounds instead). Investigators can take a maximum of 4 stress without healing.
Wounds
If the marker ever reaches the skull at the end of the wound track, the investigator is dead.
Skills
The investigator’s 3 skills allow them to bend the rules in their favor. The top one is their signature skill, unique to each investigator, while the other 2 skills come from a common pool (so other investigators may have the same ones). All skills start at the first level, but investigators will increase them when they level up. Some skills replace a lower-level skill as they level up, while others add to them, as described on the skill.
Sanity & Madness
Whenever an investigator loses sanity, the marker on their sanity track advances to the right. If it reaches the skull at the end, the investigator is consumed by madness and eliminated.
The track has Insanity Threshold ( ) spaces that will activate the investigator’s insanity and level up a skill. Some of them also give investigators permanent bonus dice. When an investigator loses more sanity (from dice rolls, Discovery, or Mythos cards) than required to hit the next , the marker stops at the and all excess sanity loss is ignored.
Gaining Bonus Dice
4 of the spaces display a green Bonus die  under them. Once each of these is reached, the investigator adds +1 Bonus die to any rolls they make for the rest of the game, except for rolls against themselves.
Activating Insanities
Each investigator gets an insanity card at the start of play. Every time their marker on the sanity track reaches a , that insanity activates. Perform the symptoms on the card. If multiple investigators reach a at the same time, they activate clockwise from the current player.
Leveling up Skills
When the marker reaches a , after activating their insanity, the investigator levels up 1 of their skills. Choose 1 skill and move its marker 1 space to the right.
Game Setup
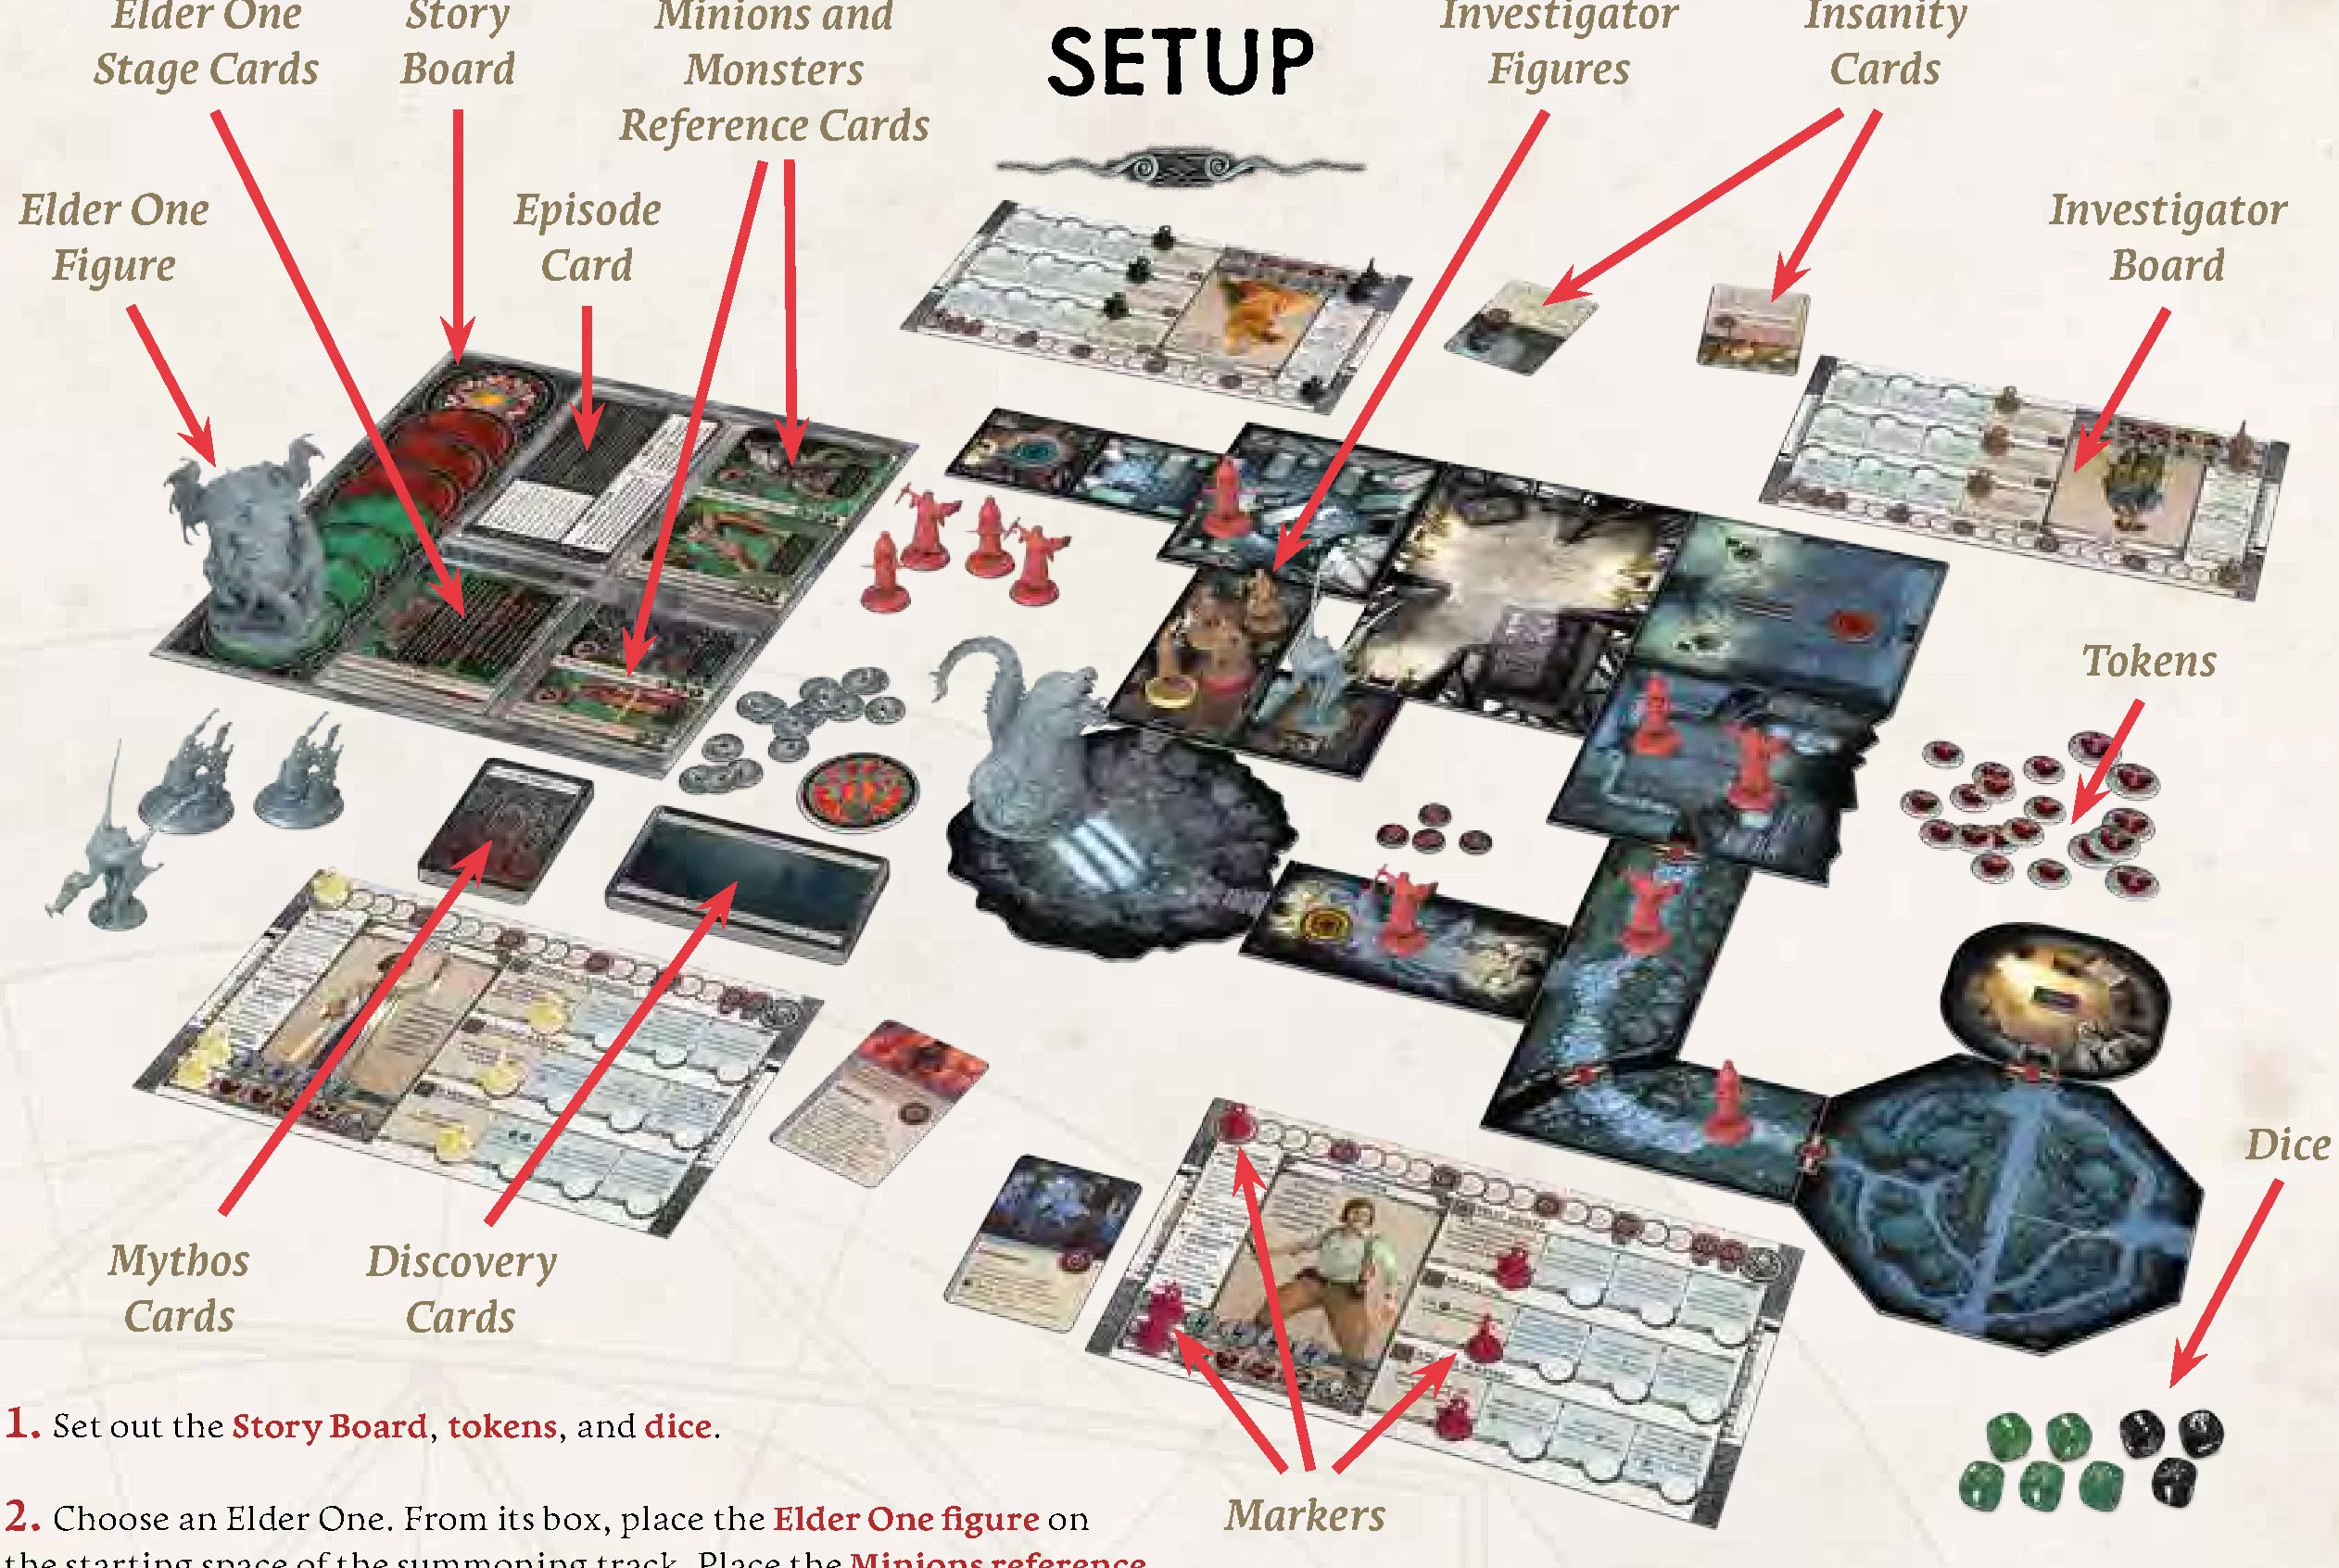
- Set out the Story Board, tokens, and dice.
- Choose an Elder One. From its box, place the Elder One figure on the starting space of the summoning track. Place the Minions reference card on the Story Board. Set out the 8 Mythos cards and any tokens. Place the Elder One Stage cards in order, faceup, on the Story Board. Stage 1 goes on top.
- Choose an episode. From its box, take out its 8 Mythos cards, 15 Discovery cards, Episode card, and tokens. Place the Monsters reference cards on the Story board.
- Take out ALL the figures for the enemies shown on the reference cards (other monsters won’t be used).
- Set up the map board according to the instructions on the back of the episode card, including arranging the map tiles and setting enemy figures and tokens in the indicated spaces. Then, turn over the episode card and place it on the Story board. Any Cultist and monster figures that are not placed on the map stay on a pool next to the Story Board, ready to spawn.
- Shuffle the 16 Mythos cards together and place them facedown.
- Shuffle the episode Discovery deck and place it facedown.
- Have each player select an investigator board and its figure. Attach a color base on the figure to help the player remember which figure is theirs. Place the figures on the starting space for the episode.
In a SINGLE-PLAYER game, choose 2 investigators. The player will control both, alternating turns with them. - Place the 6 tentacle markers of the player’s color on their investigator board: 3 on the first level of the investigator’s skills and the other 3 in the leftmost space of the wound, stress, and sanity tracks.
- Shuffle the insanity cards and deal 1 to each player, putting away the rest. Players place their card, faceup, near their investigator boards.
- Randomly determine a starting player. That player takes the Mythos deck and will take the first turn.
Dice and Checks
Throughout the game, players roll dice to determine the outcome of certain actions or effects. The most common times to roll dice are when players are told to make a roll and when an enemy attacks.
Make a Roll
Some actions and Discovery cards tell players to “make a roll”. When players make a roll, they always roll 3 standard black dice (and may also be allowed to add bonus green dice).
Enemy Attack
Enemies roll a specific number and type of dice for their attacks as indicated on their reference card.
Rolls Against Yourself
Some effects and abilities specify “rolls against yourself”. Rolls against a player are rolls where each success is detrimental to the player. Enemy attacks and rolling for Fire are examples of “rolls against yourself”.
Die Results
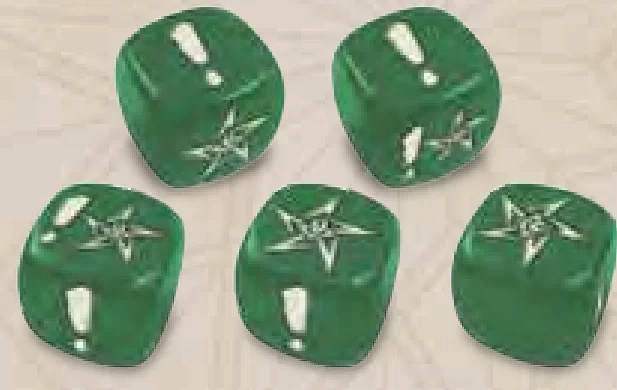
Each die has 4 different possible results:
 Success: This means that the investigator (or the enemy) succeeded at their attempt (or partially succeeded). If the investigator was attacking, it means they hit. If an enemy is attacking, it means they hit. In some cases, players need to reach a target amount of successes in a single roll.
 Elder Sign: These mean nothing unless an investigator has a skill or card that uses them.
 Tentacle: Madness! For each tentacle, the investigator loses 1 sanity, moving their tracker 1 space to the right.
IMPORTANT: Tentacles on EVERY roll cost investigators sanity, whether they’re attacking, being attacked, or just “making a roll”. Blank: No effect most of the time.
Bonus Dice
Certain skills and cards may give investigators bonus green dice, as noted on their description. Some checks may also give them bonus dice if they have a related ability. Finally, reaching certain Insanity Thresholds will add permanent bonus dice to all of that investigator’s rolls, except against themself.
- NOTE: The bonus dice do not contain a tentacle icon.
- NOTE: There is no limit to the number of regular dice and bonus dice that may be added to a roll (if players run out of dice, note the results and roll the same dice again).
- NOTE: When rolling dice, players cannot choose to roll less dice than they are allowed to roll (unless the effect is optional).
Rerolls
After rolling dice, players may take 1 stress to reroll 1 die, ignoring its original result. Players may do this as often as they like on any roll they make, until the investigator’s stress is at the maximum. When enemies attack, players roll for them and may also take stress to reroll their dice.
Modifying Rolls
Some effects or abilities may be applied to rolls. Unless stated otherwise, those abilities are applied to ALL rolls an investigator makes, including against themselves. Note, though, that some of them are optional.
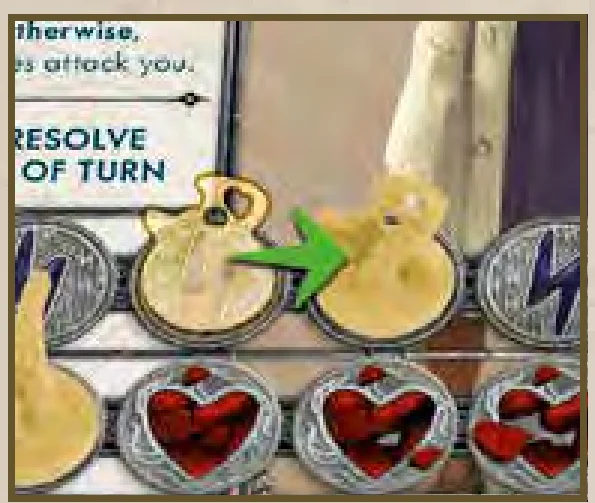
Applying Results
Once a player is done using any rerolls, tally the number of each result obtained (note that some die faces contain 2 results). Make sure to apply any symbol changes from abilities (such as counting as successes).
NOTE: If an effect counts an icon as another icon (e.g. Arcane Mastery), that icon stops counting as the original icon, unless stated otherwise in the effect. That means that an icon cannot be changed by 2 different abilities, unless one of those abilities says the icon keeps counting as the original icon.
Then, apply the results of the dice roll in this order:
- Use Any Successes:
- If an investigator is attacking, these successes are wounds applied to their target.
- If an enemy is attacking, successes are also wounds applied to their target (usually an investigator).
- If players are told to “make a roll” by an action or effect, they must follow the instructions on the corresponding action or effect. Sometimes, they must match or exceed the number of successes indicated on the card to be successful. In other cases, for each success rolled, players get to do something.
- Resolve Effects:
- Resolve any effects that may be tied to the result of the roll (Examples: “If wounded…”, “If it survives an attack…”, “When the enemy dies…”).
- Apply Any Tentacles:
- Lose 1 sanity for each tentacle rolled (move the marker 1 space to the right on their sanity track).
- If the investigator reaches a space on their sanity track, stop moving the marker (even if they didn’t lose the full amount of sanity), activate their insanity, and level up a skill.
Turn Overview
- Take 3 Actions
- Draw Mythos Card
- Investigate or Fight!
- Resolve End of Turn
1. Take 3 Actions
On a player’s turn, they may take 3 actions. They may take the same action more than once. There are 4 actions that are available in every episode and 2 that are unique to each episode. Also, some effects may give players access to free and special actions.
Some actions can only be done while in a Safe space. A Safe space is a space without enemies.
Free Actions
Some abilities and effects can be used as a free action. They can only be used during this Phase of the turn before or after other actions.
Special Actions
Some abilities and effects can be used as a special action. They can only be used during this Phase of the turn and players must spend 1 of their actions to use it.
Run
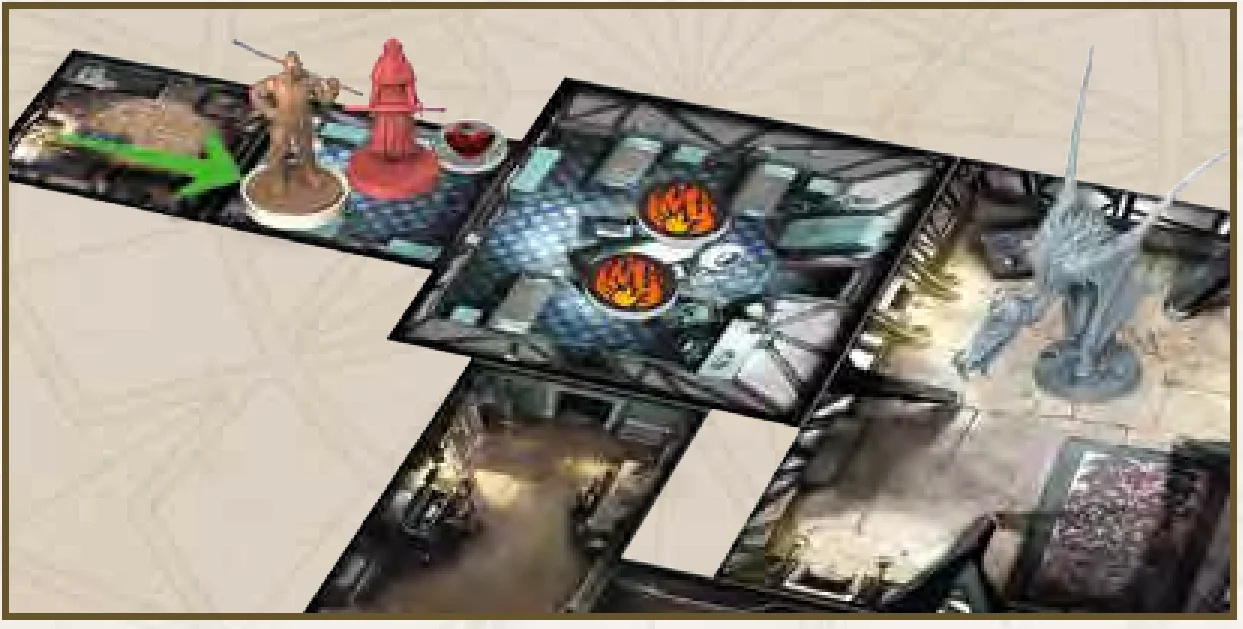
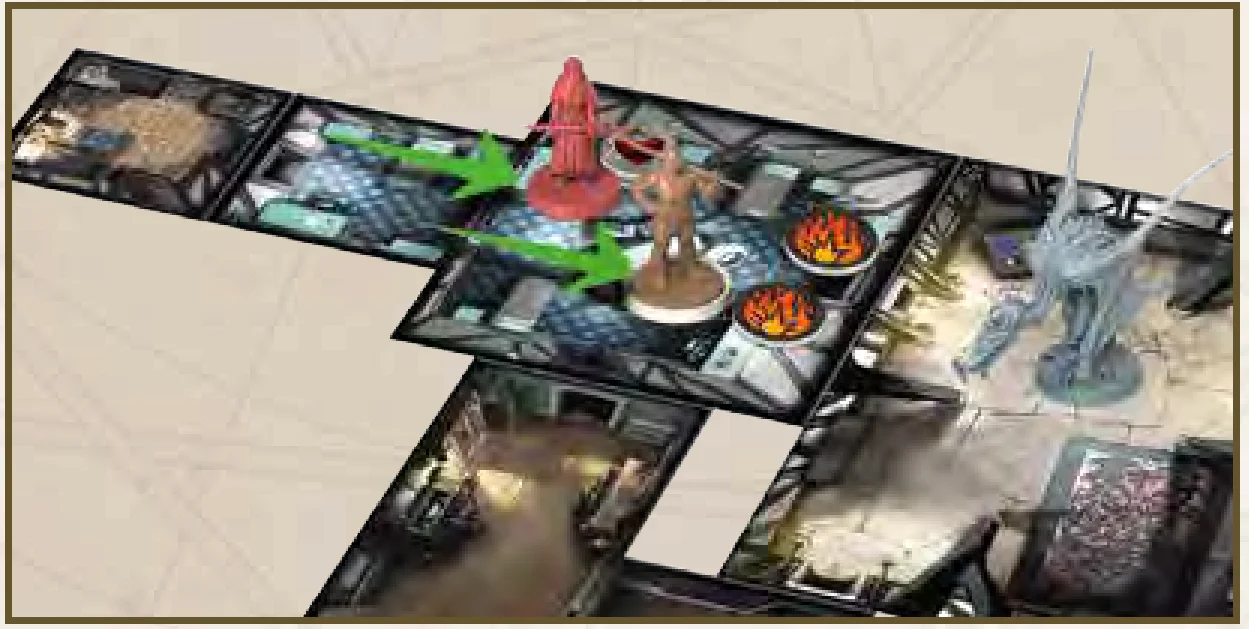
Move up to 3 spaces. Investigators can only move between spaces if there is a passage on both tiles (as indicated by arrows on both sides). They may also pass between 2 spaces that both have a staircase or tunnel token.
- When investigators leave a space with enemies, ALL enemies in that space follow them to their new space (even if there were other investigators in their space).
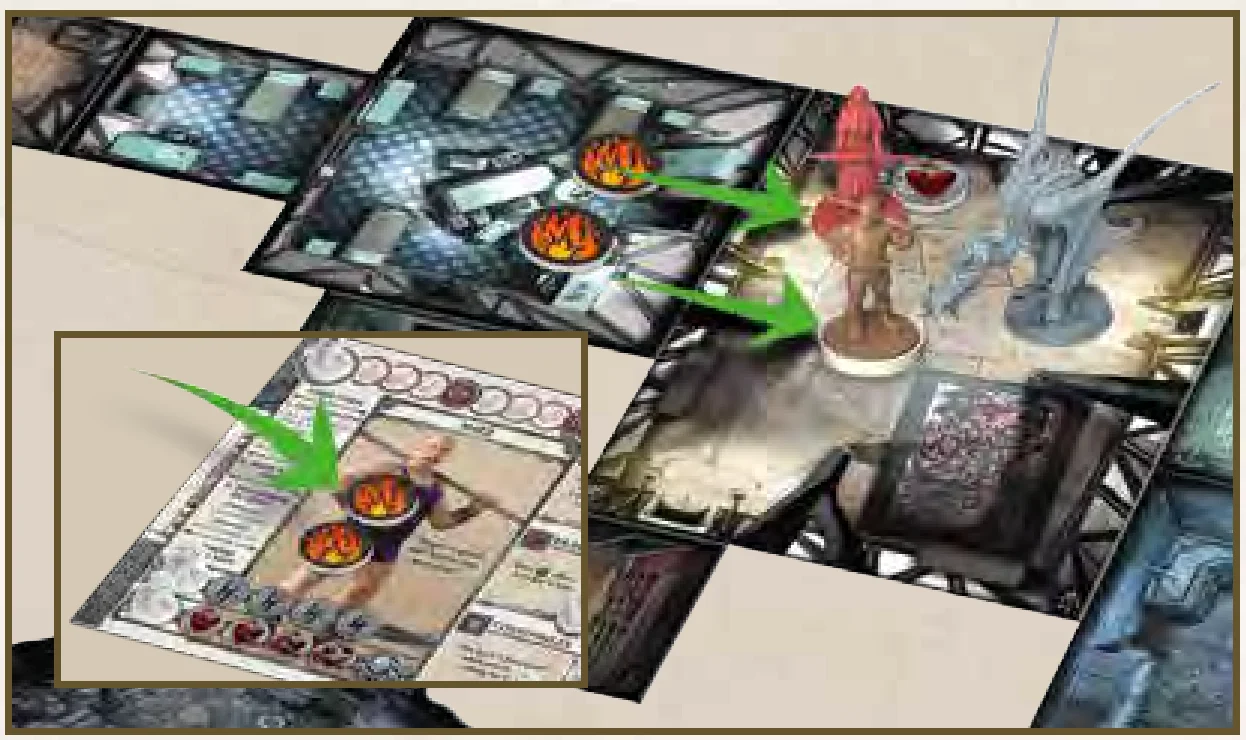
- When investigators leave a space with Fire tokens, place 1 Fire token from the reserve onto their investigator board for each token on the space, leaving those tokens untouched.
NOTE: Unless stated otherwise, when an investigator moves outside of a Run action, they catch fire and enemies follow as well, even if it’s not their turn. The only exception are the effects that “place” an investigator in another space, in which case the investigator is placed directly in that space, they do not catch fire, and enemies do not follow.
Attack
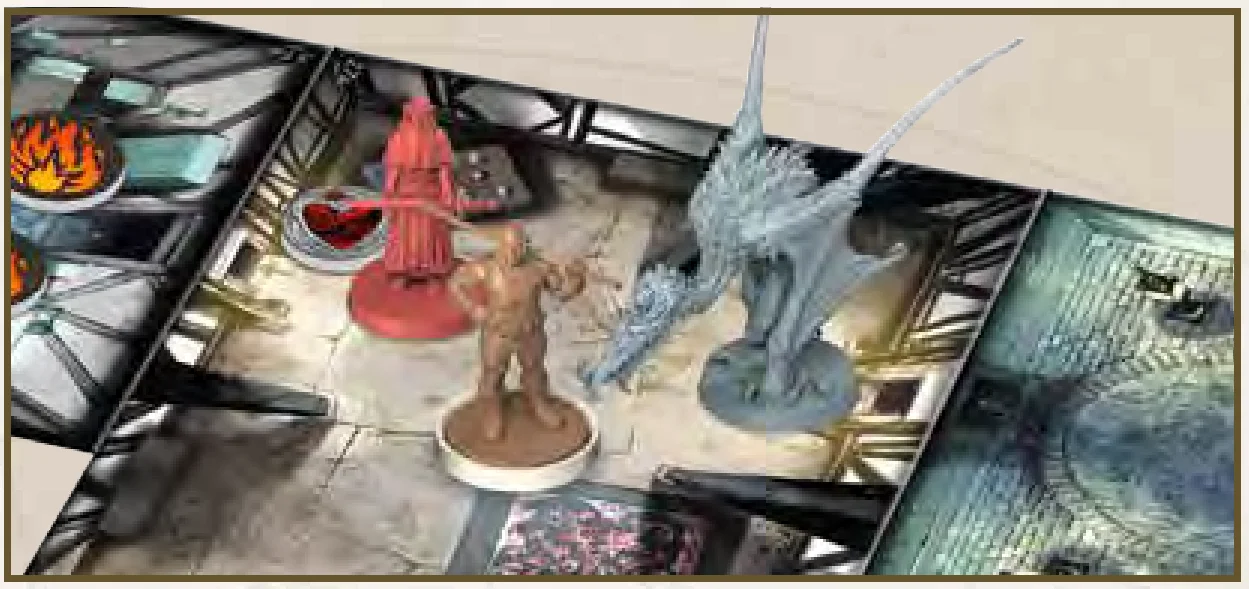
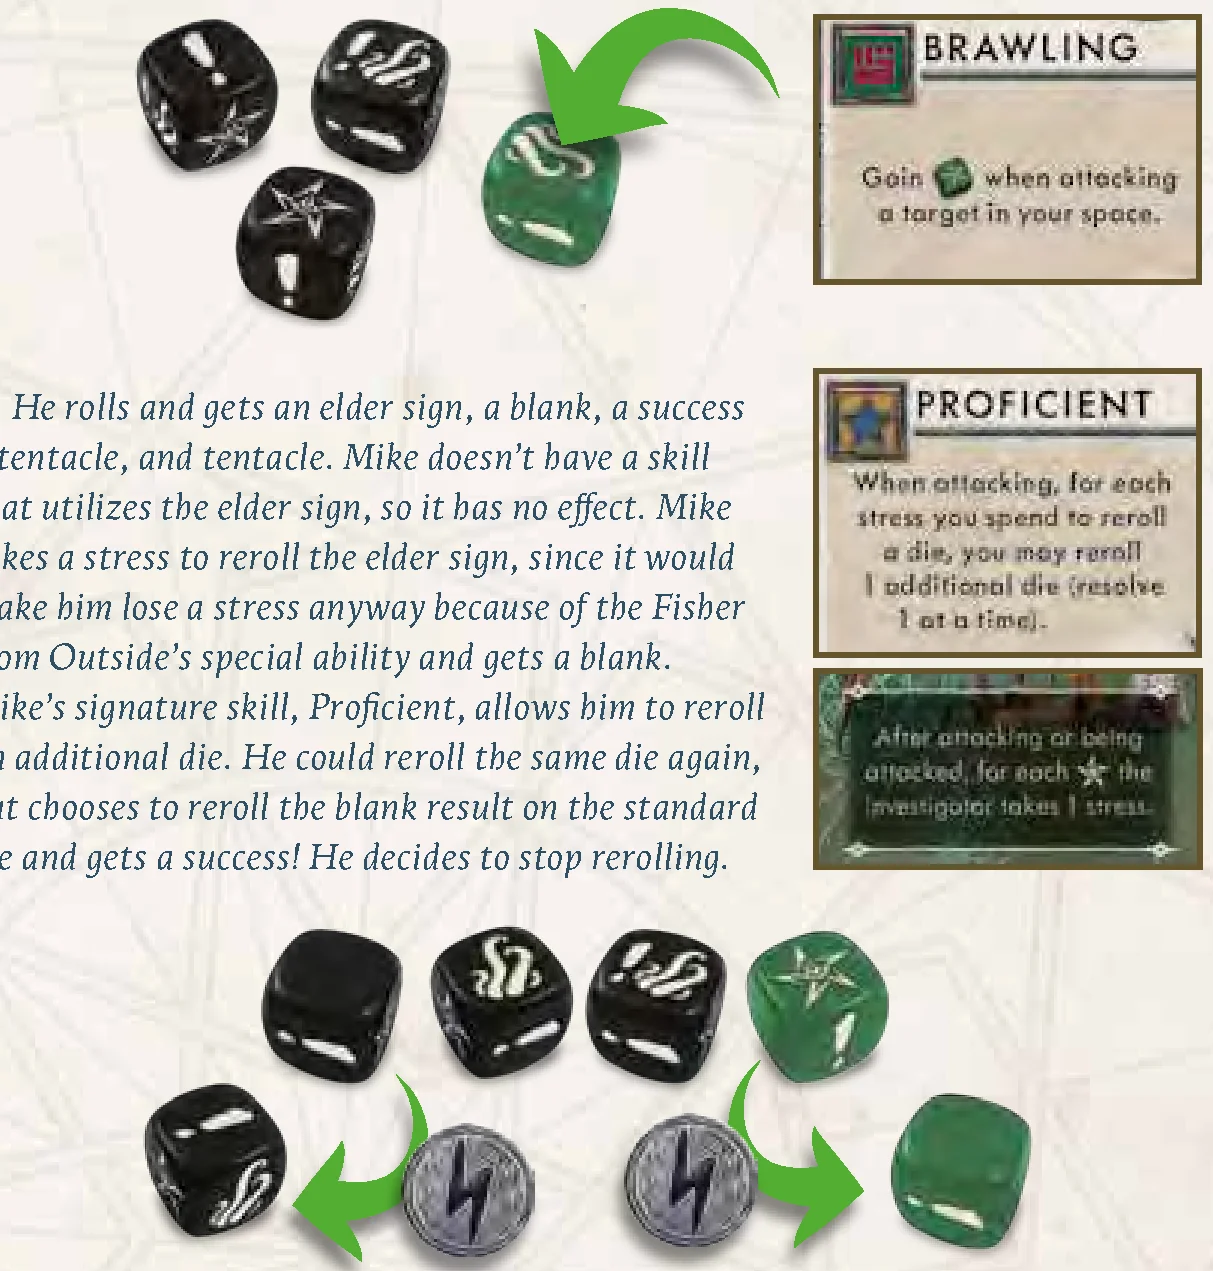
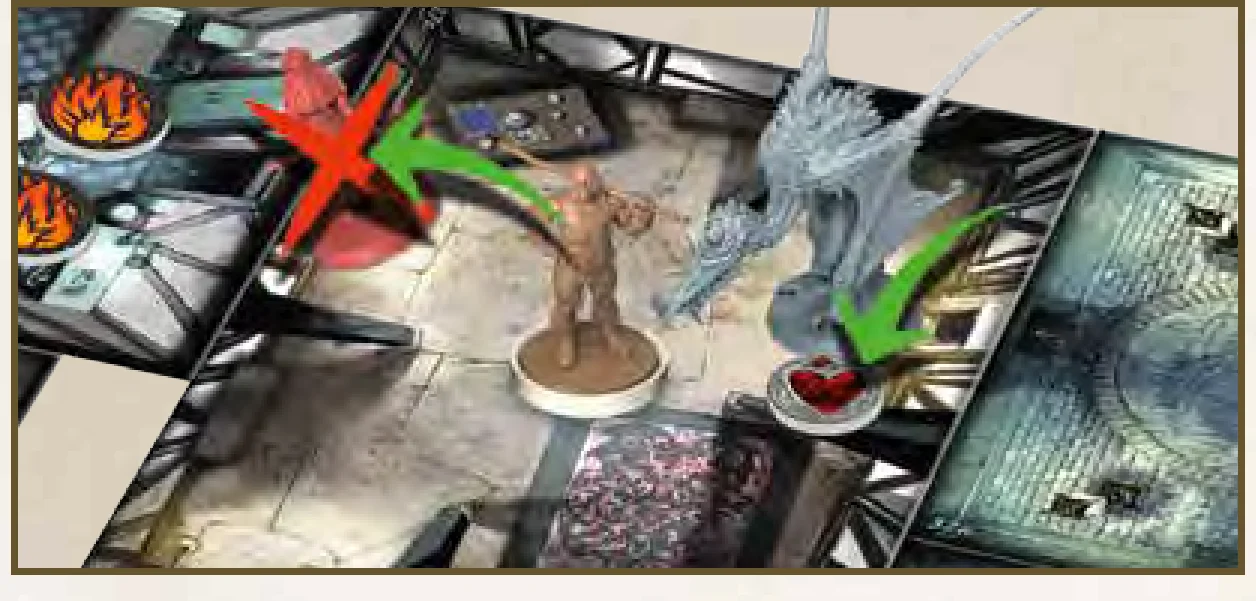
Target a single enemy in the investigator’s space and make a roll. Each success rolled causes 1 wound to the target. Place wound tokens next to the base of the figure attacked. If this number equals (or exceeds) their health, they die. Remove their figure from the board.
Keep in mind that if the Elder One is on the board, it can only be attacked once the ritual is disrupted.
NOTE: If the investigator doesn’t have the Brawling skill, he must deal all wounds to a single enemy (chosen before rolling dice), even if excess wounds would go ignored with no effect.
Rest (only on a Safe space)
If an investigator is in a Safe space (there are no enemies with them) they may heal their stress and/or health up to 3 spaces (in any combination). This is 3 spaces total, not 3 spaces for each track. Investigators may perform the Rest action more than once per turn.
IMPORTANT: SANITY CANNOT BE HEALED BY RESTING!
Trade
The active investigator and all investigators in their space may trade any number of Items or Companions with each other (either giving or receiving). While some Discovery cards have Items or Companions on both the left and right side of the card, a traded card must remain on the same side as it was originally. Investigators may not trade Conditions.
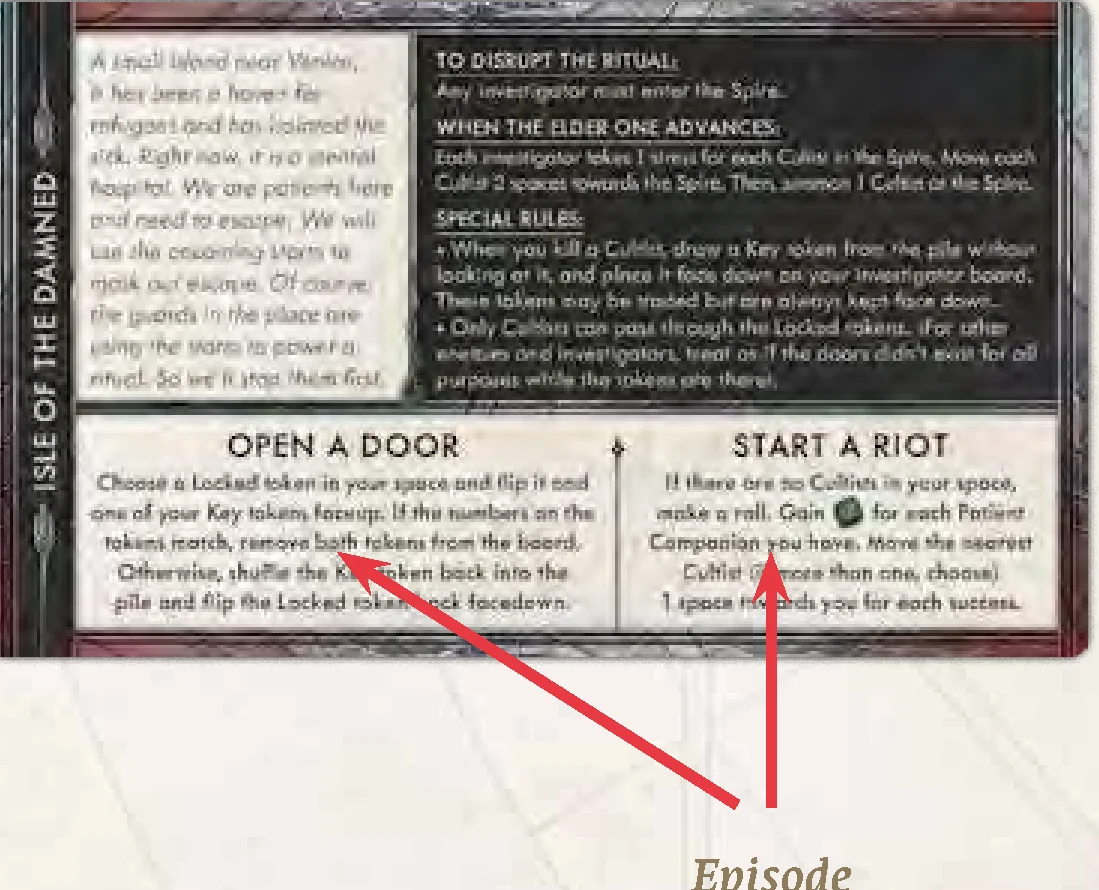
Episode Actions
Each episode has 2 unique actions as shown on the episode card. These work just like the standard actions and will help investigators disrupt the ritual or help them survive.
2. Draw Mythos Card
Draw the top Mythos card from the deck and resolve it. Then, place it on a faceup discard pile.
Mythos cards may have several different steps to them, divided into 3 types. Players must do these steps in order, from top to bottom, before discarding the card. If players can’t do a step on the card, skip it and move on to the next.
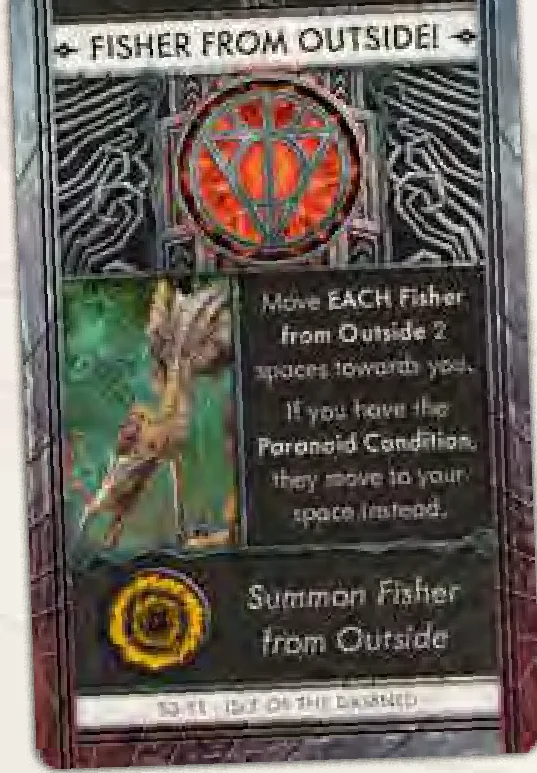
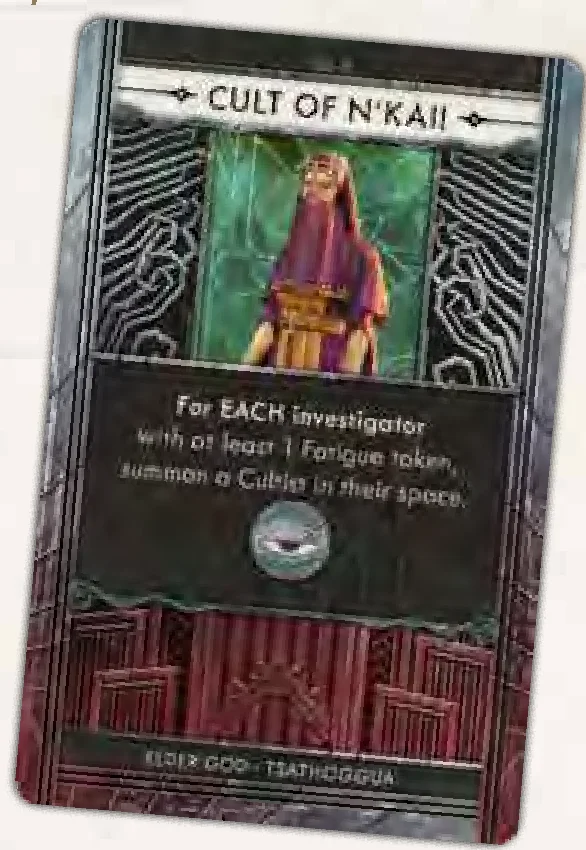
- Elder One Summoning: The Elder One Summoning symbol has no effect when the card is drawn, but may cause the Elder One to advance on its track at the end of the turn. If the card has this symbol, make sure it remains visible when it is discarded.
- Special Effects: Mythos cards have all sorts of different special effects to make life hell. Unless otherwise stated, these effects only affect the player whose turn it is, ignoring all other investigators. Any choice that needs to be made is up to the active player, such as choosing which closest figure to move.
When an effect moves an enemy towards a space, it should be moved by the shortest path to that space. Count how many spaces the enemy would move in all possible paths and choose the shortest one. In case of a tie, the active player chooses. The enemy must always be moved as much as allowed towards its target but stops when it reaches its target. - Summon Enemies: Finally, the bottom of some cards will indicate a Gate color and the specific enemy that must be summoned there. If players have the corresponding figure available in reserve, place it in the indicated space. Otherwise, ignore this step. If there are multiple Gates and enemies indicated, perform the summonings in order. Skip any remaining Gates if there are no more enemy figures available to summon.
NOTE: If an effect summons multiple enemies at the same time without specifying an order (e.g: Summon 1 Cultist at each Gate), the active player chooses the order in which to summon the enemies.
3. Investigate or Fight!
This phase varies depending on whether there are enemies in an investigator’s space or not.
If the investigator is in a Safe space, INVESTIGATE the space:
Draw the top card of the Discovery deck and read the text in the center box aloud.
- Some cards have a statement of something the investigator must do if they have a Condition or a certain Companion.
- Most offer choices of what the player can do.
- Some cards result in CLAIMING a Companion, Item, or Condition. Claiming means to slide the card under the investigator board, becoming part of the investigator’s inventory (or, when it’s a Condition, changing their mental state). If the investigator cannot or, in case it’s optional, does not want to claim either side of the card, discard the card.
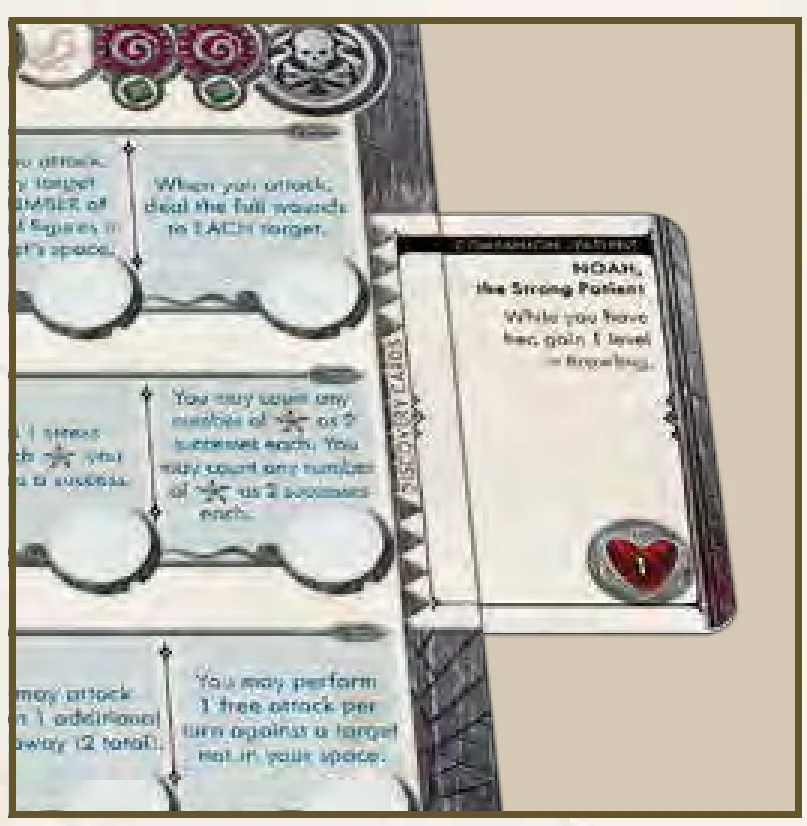
- COMPANIONS: Any wounds investigators take may instead be applied to Companions they currently have. This still counts as the investigator taking wounds for card effects. Companions can never be healed. If their wounds equal the number on their card, the Companion is discarded and any benefit they give is immediately lost. Companions may also give investigators a level in a skill. If the investigator doesn’t have that skill, they gain level 1 in that skill while they have this Companion with them (take the corresponding token). If they already have the skill, move the skill level marker 1 level forward. If they lose the Companion, move the marker back 1 level.
- Some Discovery cards have effects that allow players to take the other side of the card. This means that players remove it from the side it currently is on the dashboard and slide it under the other side. If it’s a Companion, any wounds on it are discarded.
- NOTE: If the Discovery deck has no cards, it is not possible to investigate anymore.
- NOTE: Investigators must always investigate if they are safe, even if they wouldn’t want to.
If you are not in a Safe space, the enemies FIGHT you:
Do not draw a Discovery card. Instead, each enemy in their space attacks them in the order the player chooses (they ignore other investigators) until all enemies in the space that could attack you have done so.
IMPORTANT: If an effect makes an investigator enter a space with an enemy, or an enemy enters an investigator’s space during this phase, that enemy attacks even if it was not in the space at the beginning of this phase. Also, if an enemy that was in an investigator’s space leaves the space, it doesn’t attack anymore. If an effect makes the space safe during this phase, enemies stop attacking (but the investigator cannot investigate, since the space wasn’t safe at the start of the phase).
Defending Against Enemies
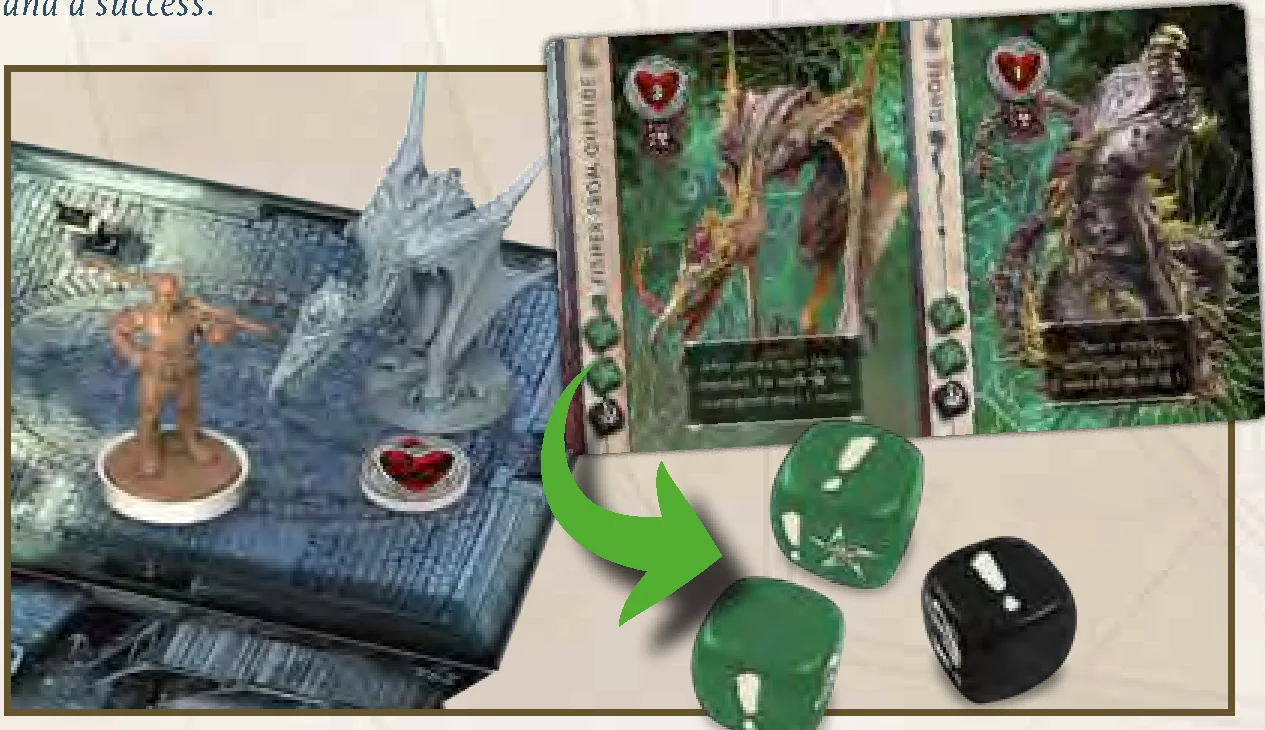
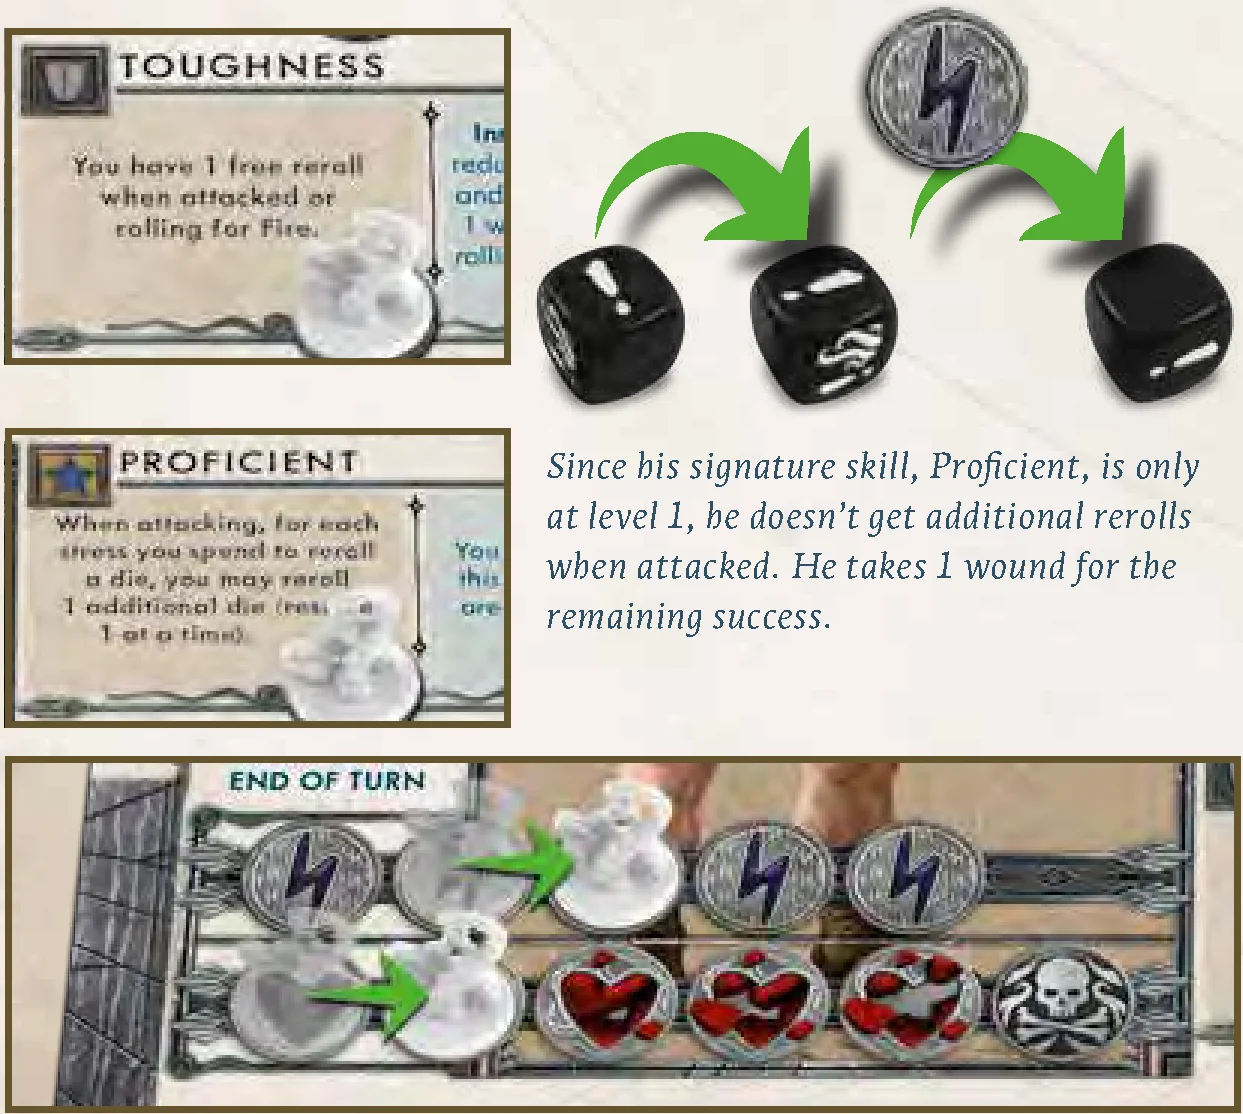
When an enemy attacks, roll the number and type of dice as shown on their reference card. Each success gives the investigator 1 wound. Each tentacle costs the investigator 1 sanity. Elder signs only have an effect if either the investigator or the enemy have an ability that affect them. Investigators may use stress to reroll these dice and may use any of their skills to help avoid or minimize the attack.
4. Resolve End of Turn
- End of Turn Effects: Any effects that happen at the end of the turn, except for Elder One effects, happen now, in any order the active player chooses.
- Fire!: Investigators may be on fire. This will have happened if they left a space that contains Fire tokens. It may be that a monster set them on Fire.
At the end of a player’s turn, they roll 1 standard die for every Fire token on their investigator board, as a single roll. You may use stress to reroll dice. Take 1 wound for each success and lose 1 sanity for each tentacle. Then, they discard all Fire tokens on their investigator board.
NOTE: Enemies don’t catch Fire when leaving a space with Fire tokens.
RUNNING OUT OF FIRE: The number of Fire tokens on the board is limited to the number of Fire tokens available. If players need to add a Fire token to the board but there are none left, ignore the effect. However, Fire tokens on investigators are not limited. If a player needs to add a Fire token to their investigator board but there are none left, use a wound token instead. If there are Fire tokens available on Investigator boards, replace them with wound tokens to make the Fire tokens available to place on the board.

- Check the Mythos Discard Pile: If there are 3 or more cards in the discard pile that have the Elder One Summoning symbol, the Elder One advances towards ultimate power!
Advance the Elder One along the Summoning track. If the Elder One is already on the board, move the Progression token along the track instead. The revealed Elder One Stage cards and the Episode card will tell players what to do when the Elder One advances. Resolve the Elder One effects first. It doesn’t matter whether it’s the Elder One figure or the Progression token advancing on the Summoning track. The effects are resolved in the same way.
After the Elder One advances, all of the discarded Mythos cards are shuffled back into the deck. - Check the Elder One Summoning: The Elder One is summoned if:
- The Elder One entered the first red space on the track
- OR The ritual was disrupted this turn
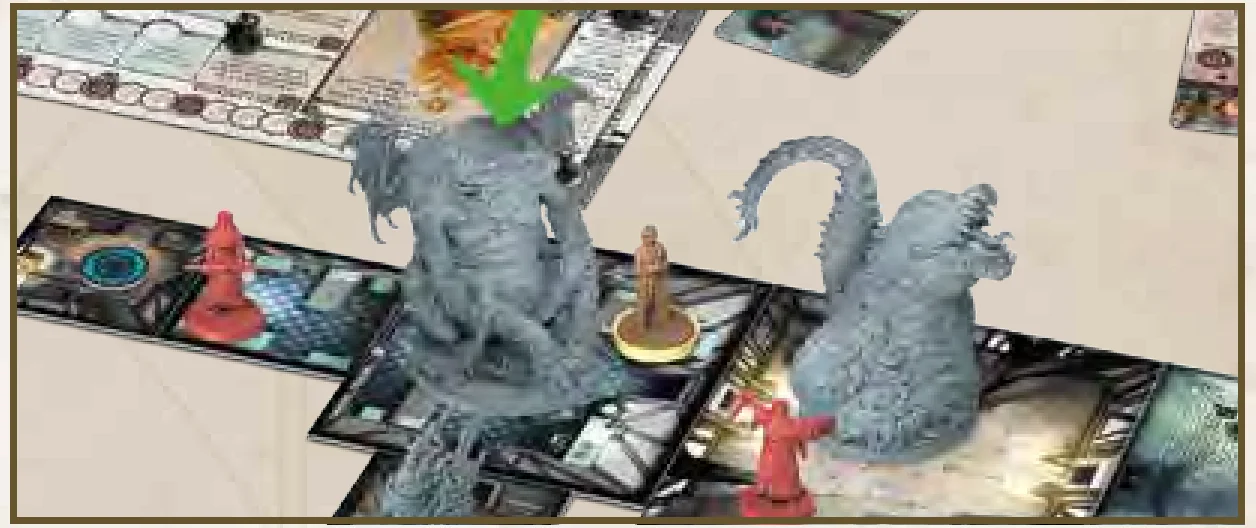
When the Elder One is summoned to the world, move the Stage 1 card to the side, revealing the Stage 2 card underneath. Resolve its reveal effects, which will specify where the Elder One must be summoned. The Stage 1 effects remain in play until the end of the game.
Place the Progression token on the Summoning track on the space previously occupied by the Elder One figure. Use this Progression token to mark the Elder One’s progress until the end of the game. - Elder One End of Turn Effects: As the Elder One progresses through its stages, there may be End of Turn effects visible on its Stage cards. Resolve all effects on each Stage card in the order of the Stages: First 1, then 2, then 3, and then Final. Any effect that refers to “you” is referring solely to the investigator whose turn it is.
The turn is now over and the player to the left takes their turn. Continue taking turns like this until the investigators either win or lose.
Disrupting the Ritual
Each episode describes the tasks the investigators must accomplish in order to disrupt the Cultists’ ritual and make the Elder One mortal, even if only for a short time. The Elder One cannot be attacked or damaged until the ritual is disrupted (though it can attack investigators if it’s on the board)!
If the investigators disrupt the ritual, the Elder One is summoned at the end of the turn.
Fighting the Elder One
Once the Elder One is summoned to the board, it acts like any enemy, attacking investigators that end their turn in its space. The number and type of dice the Elder One rolls is the total of all dice displayed on all its revealed Stage cards.
Until the ritual is disrupted, the Elder One cannot be attacked or damaged, even if it’s already been summoned to the board by reaching the red space on the summoning track! After the ritual is disrupted, the Elder One can be attacked and damaged like any other enemy. The Elder One has multiple Stages, with individual health totals, which must be defeated one at a time until it’s ultimately destroyed.
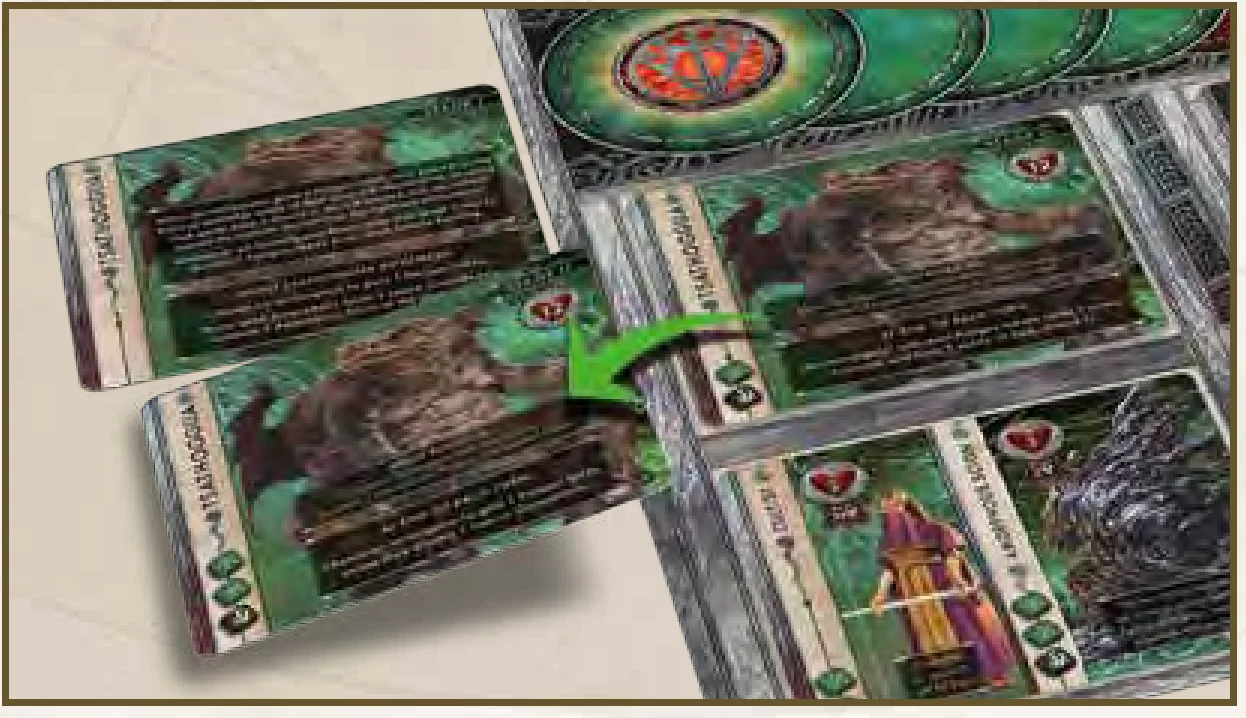
Starting with Stage 2, each card displays:
- A one-time effect that takes place when that card is revealed.
- An ongoing effect that remains in play until the end of the game.
- Health showing how many wounds that Stage can take.
- The number and type of dice that Stage adds to the Elder One’s attacks.
When a Stage has wounds equal to or greater than its health, that Stage is defeated. Move that Stage card to the side to reveal the next and resolve its When Revealed effect. Any excess wounds do NOT carry over to the next Stage. Remember that all of the previous Stages’ effects and dice remain in play until the end of the game!
Death of an Investigator
When an investigator is killed or consumed by madness, the game is immediately lost if the Elder One is still on the Summoning track. If, however, the Elder One has already been summoned to the board, the other investigators may continue playing and trying to win the game.
First, discard all Discovery cards, tokens and other components the now-deceased investigator had. The episode may specify something to do with any special tokens the investigator had been holding.
If the investigator died during their turn, skip all the following turn phases except for the Check the Mythos Discard Pile phase. If there are 3 Elder One Summoning symbols, the Elder One advances and its effects are applied (if it is needed to determine the position of the dead investigator, use the space where they died). From now on, that player’s turn is skipped entirely.
Ending the Game
Players win the game when they kill the Elder One by defeating its Final Stage. If multiple end-game triggers happen at the same time, winning conditions have precedence.
EXAMPLE: The Elder One and the last investigator die at the same time. The players saved the world and win the game.
Players lose the game when 1 of the following happens:
- An investigator is killed or consumed by madness before the Elder One is summoned to the board (Stage 1 card).
- All investigators are killed or consumed by madness after the Elder One is summoned (Stage 2 onward).
- The Progression token reaches the last (8th) space of the Summoning track.
Common Skills
The common skills are:
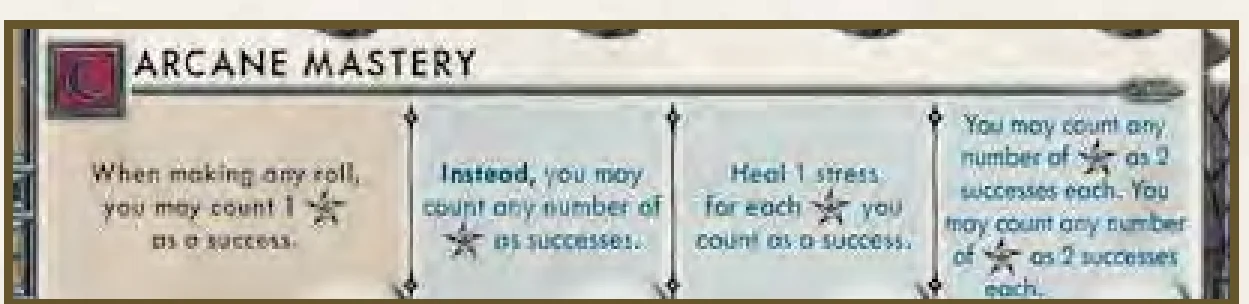
Arcane Mastery
Arcane Mastery can be used for any roll, including rolls against themself, if the player wants.
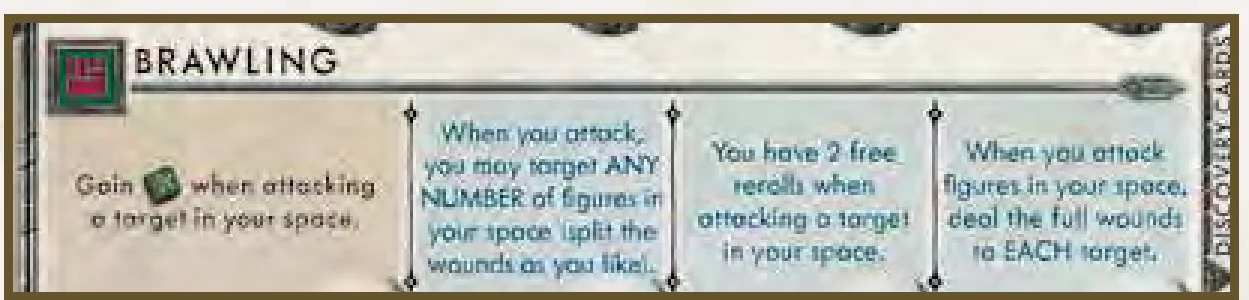
Brawling
With Brawling Level 2 or higher, players must choose the targets of their attack before rolling dice. If the investigator attacks multiple targets, each of them triggers effects that say, “When attacked” or, “When attacked, but not destroyed”. The active player chooses the order in which they are resolved.
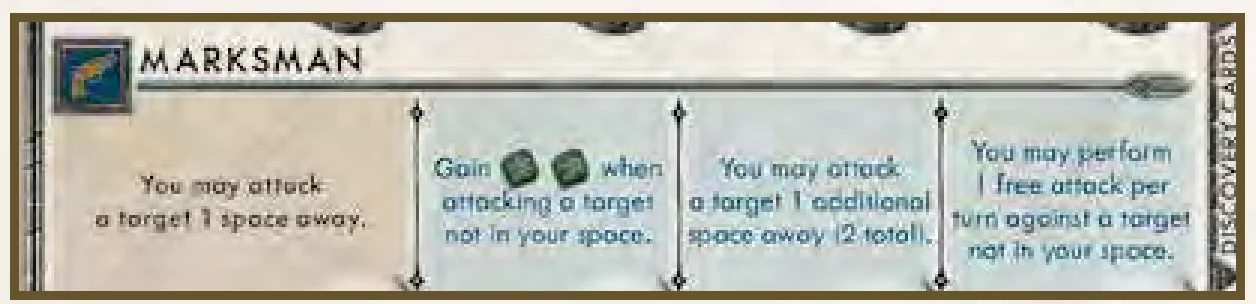
Marksman
A target 1 space away is a target that is in a space that can be accessed with 1 movement. Similarly, a target 2 spaces away is in a space that can be accessed with 2 movement. A space that is inaccessible for any reason cannot be targeted.
With Marksman Level 4, the investigator gains a free attack action during their turn that can only be used against a target not in their space.
Stealth
Stealth specifies that the investigator may only Sneak during a Run action. If any other effect makes them move, enemies follow as usual, unless stated otherwise.
To Sneak means that when leaving a space, the investigator may ignore 1 of the enemies there that would follow them (player’s choice). It stays on the space they were leaving.
Stealth Level 2 allows the investigator to Sneak up to 3 times per Run. Since investigators can choose to use it at any point of the Run action, they can, for example, make 3 enemies follow them through 2 spaces, and with their last move, leave them behind. They can also choose to leave each enemy in a different space by sneaking each of them when leaving a different space. Investigators may also sneak past the same enemy more than once if they return to the original space and leave it again. Notice, though, that Sneaking the same enemy twice would spend 2 of the Sneaks.
With Stealth Level 4, the investigator keeps Level 3’s ability to deal 1 wound to each enemy they Sneak past.
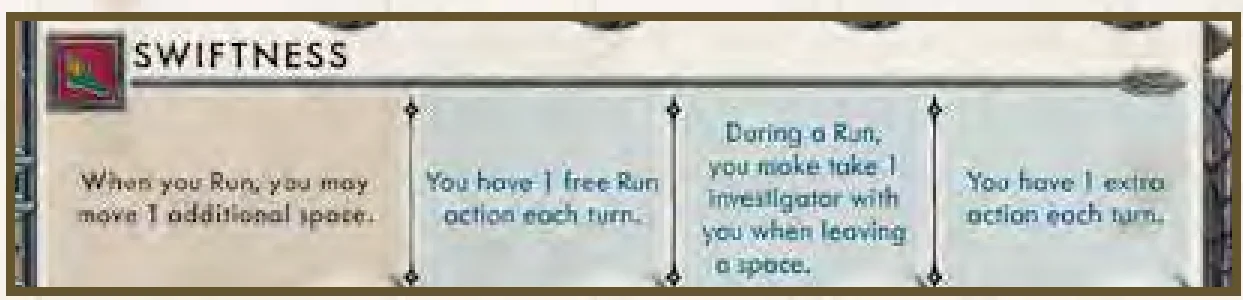
Swiftness
With Swiftness Level 3 or higher, the decision of taking an investigator or not is made independently for each space the Investigator leaves during a Run.
Example: Leon starts his Run action in the same space as Julien. When making his first move, he takes Julien with him. For the second move, he decides to leave Julien in that space and takes no one with him when entering a space where Mike and Ruth are. For his third move, he decides to take Mike with him. Then, he decides to stop.
Toughness
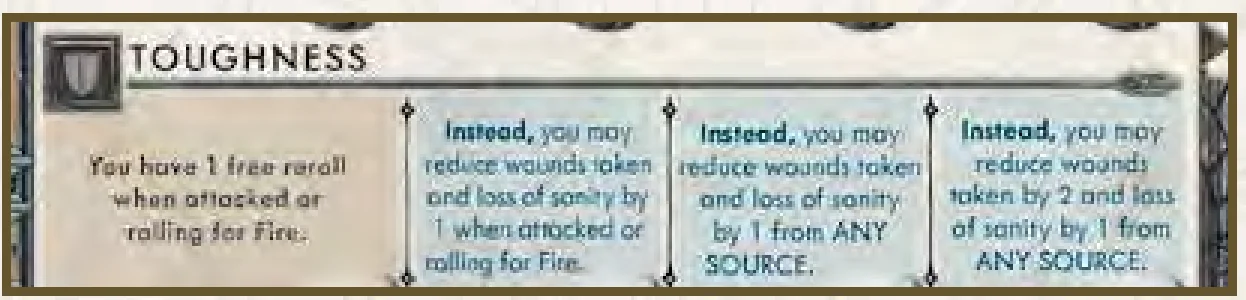
With Toughness Level 2 or 3, the investigator may prevent either 1 wound, 1 sanity, or both 1 wound and 1 sanity from the same source.

Unknown Rules
If players want to try a more challenging game, they can add this special set of rules to any game of Cthulhu: Death May Die. These rules allow players to add different Monsters to any episode and introduce unique relics that the investigators can access. Please note that these rules increase the difficulty of the overall game and are not recommended for players’ first time playing the game.
Additional Concepts
Unknown Dashboard
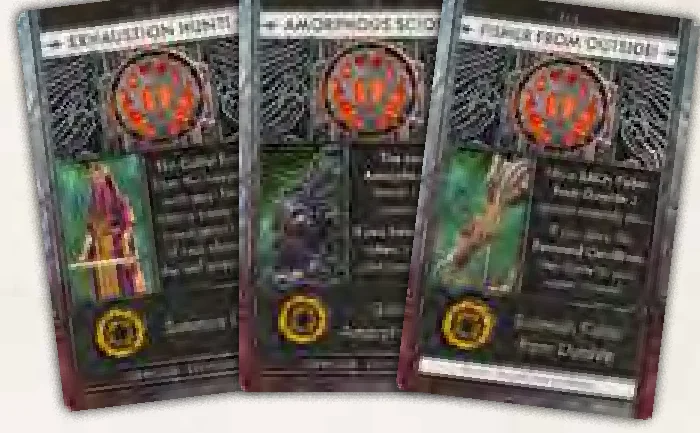
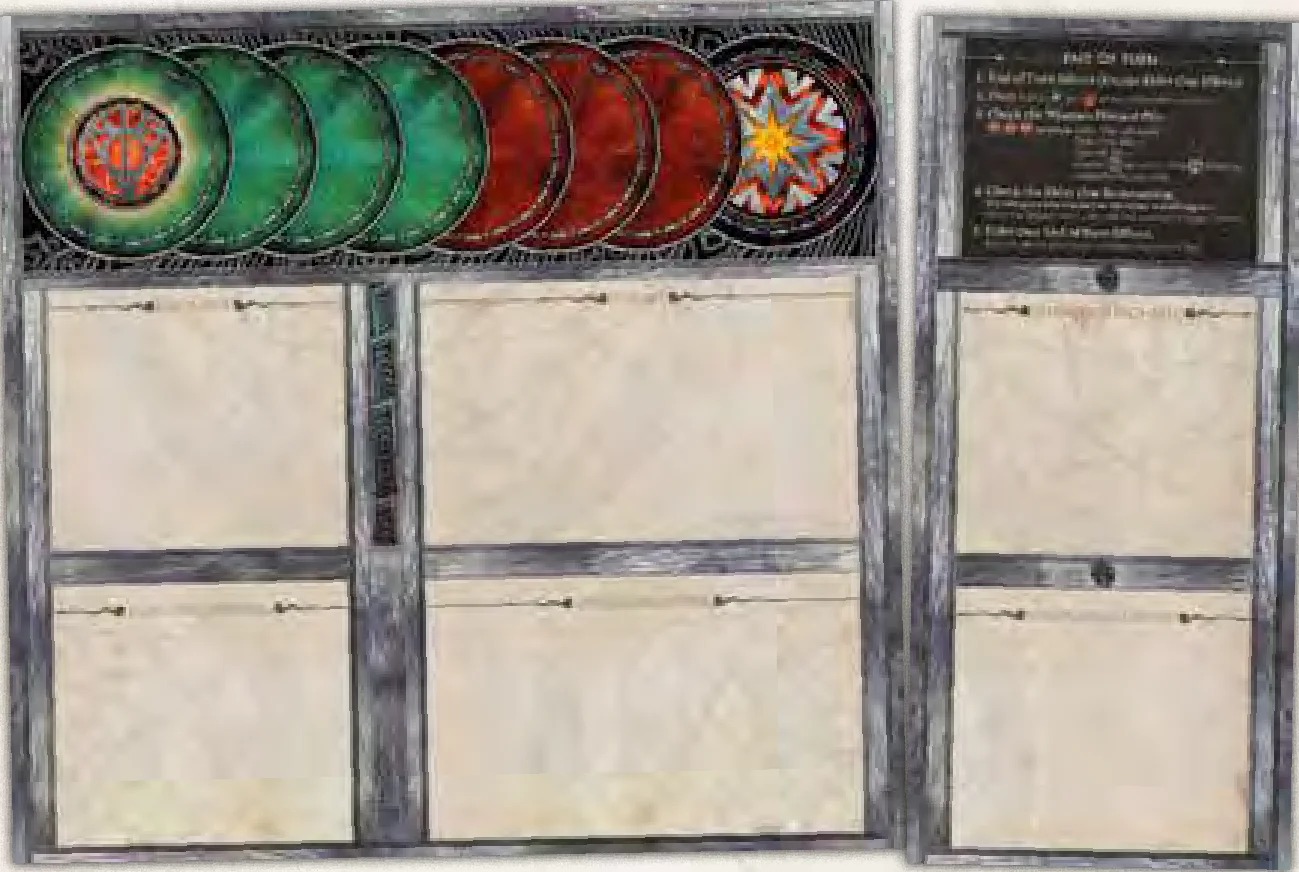
When playing with the Unknown Rules, place the Unknown Dashboard next to the Story Board. The Dashboard contains a summary of the End of Turn phase, including the extra steps added by the Unknown Rules. It also contains 2 slots for Unknown Monster cards with different icons on each slot. Those icons are used to reference the different Monsters.
Unknown Monsters
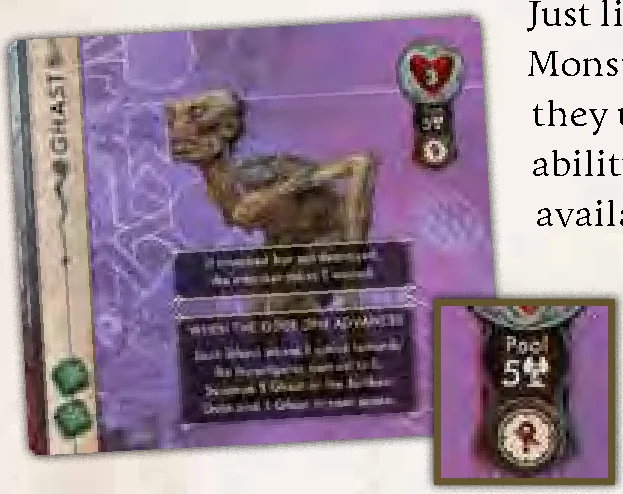
Just like other enemy cards, Unknown Monster cards show their health, the dice they use when attacking, their special ability, and the total number of figures available in the pool.
They also show Setup summon information and a special effect that happens when the Elder One advances.
Unknown Mythos Cards
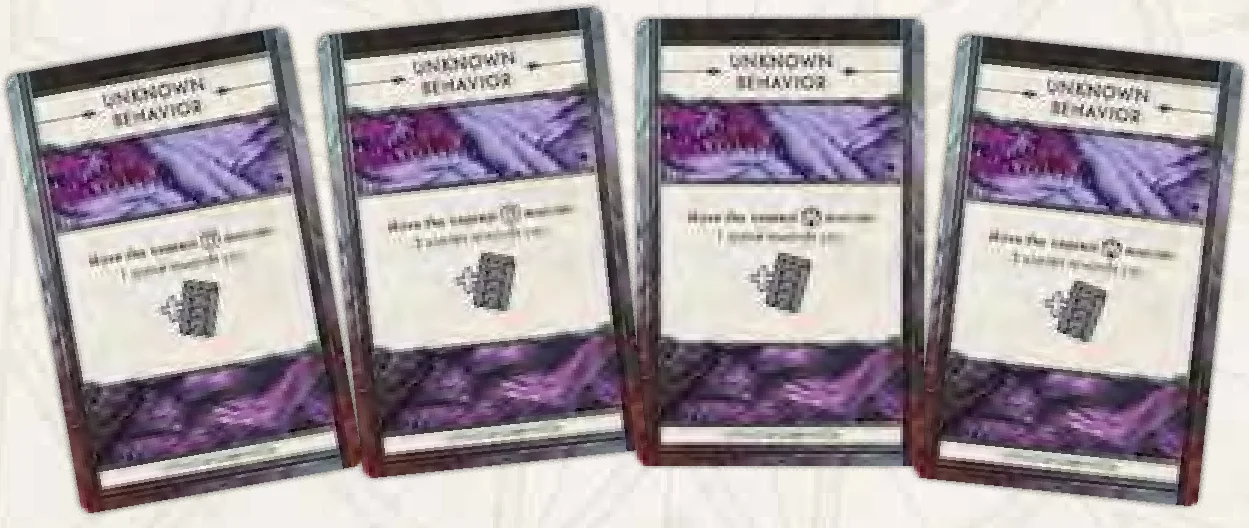
When playing with the Unknown rules, shuffle the 4 Unknown Mythos cards into the Mythos deck. These cards move the Unknown Monsters and do not count as the Mythos drawn for the turn. Players must draw another card after the Unknown Mythos card is resolved.
When players draw a card with the draw-again icon  , after resolving it, discard it and they must draw and resolve another Mythos card. Keep drawing and resolving until a card without this icon is resolved.
NOTE: If players resolve a card with this icon without drawing it (e.g. Recurring Trauma insanity from Cthulhu: Death May Die Core Box), players resolve its effect but do not draw and resolve another card.
Unknown Relics
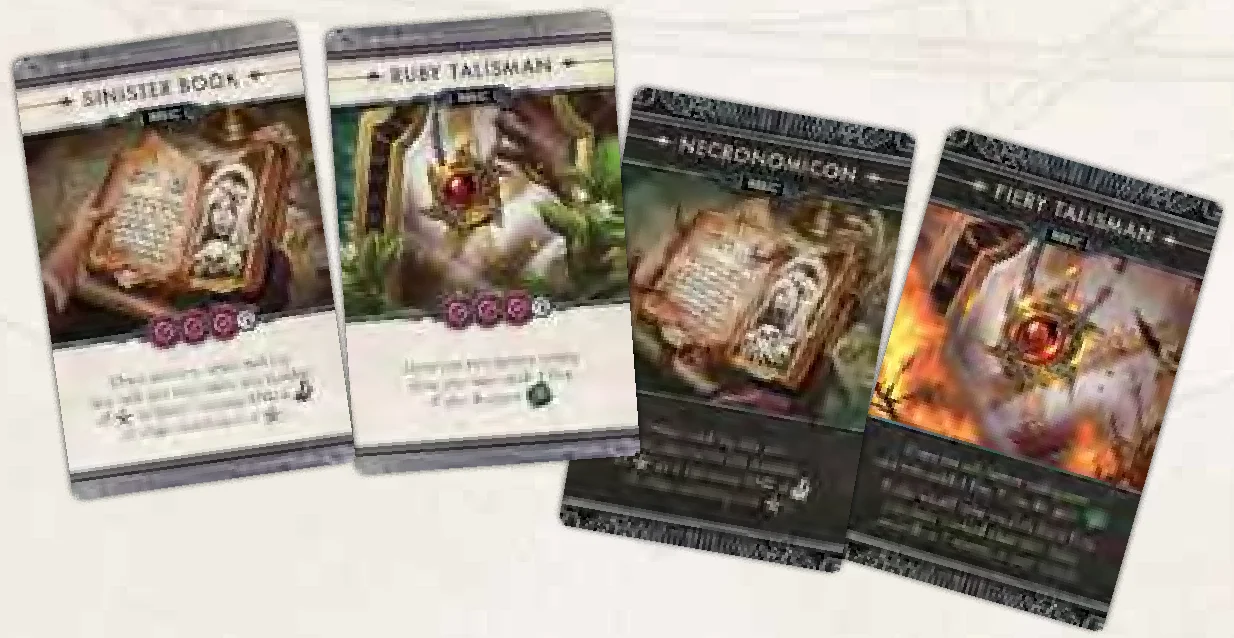
In addition to the monsters, the Unknown Relics are also added to the game. Each investigator starts with 1 Relic that has a unique ability. As soon as an investigator reaches their third , the Relic is flipped to the other side, revealing an upgraded effect. This represents the loss of sanity, making the investigator believe that the Relic is more than a simple artifact.
IMPORTANT: Relics are not considered Items or Discovery cards and cannot be discarded or traded.
Additional Setup
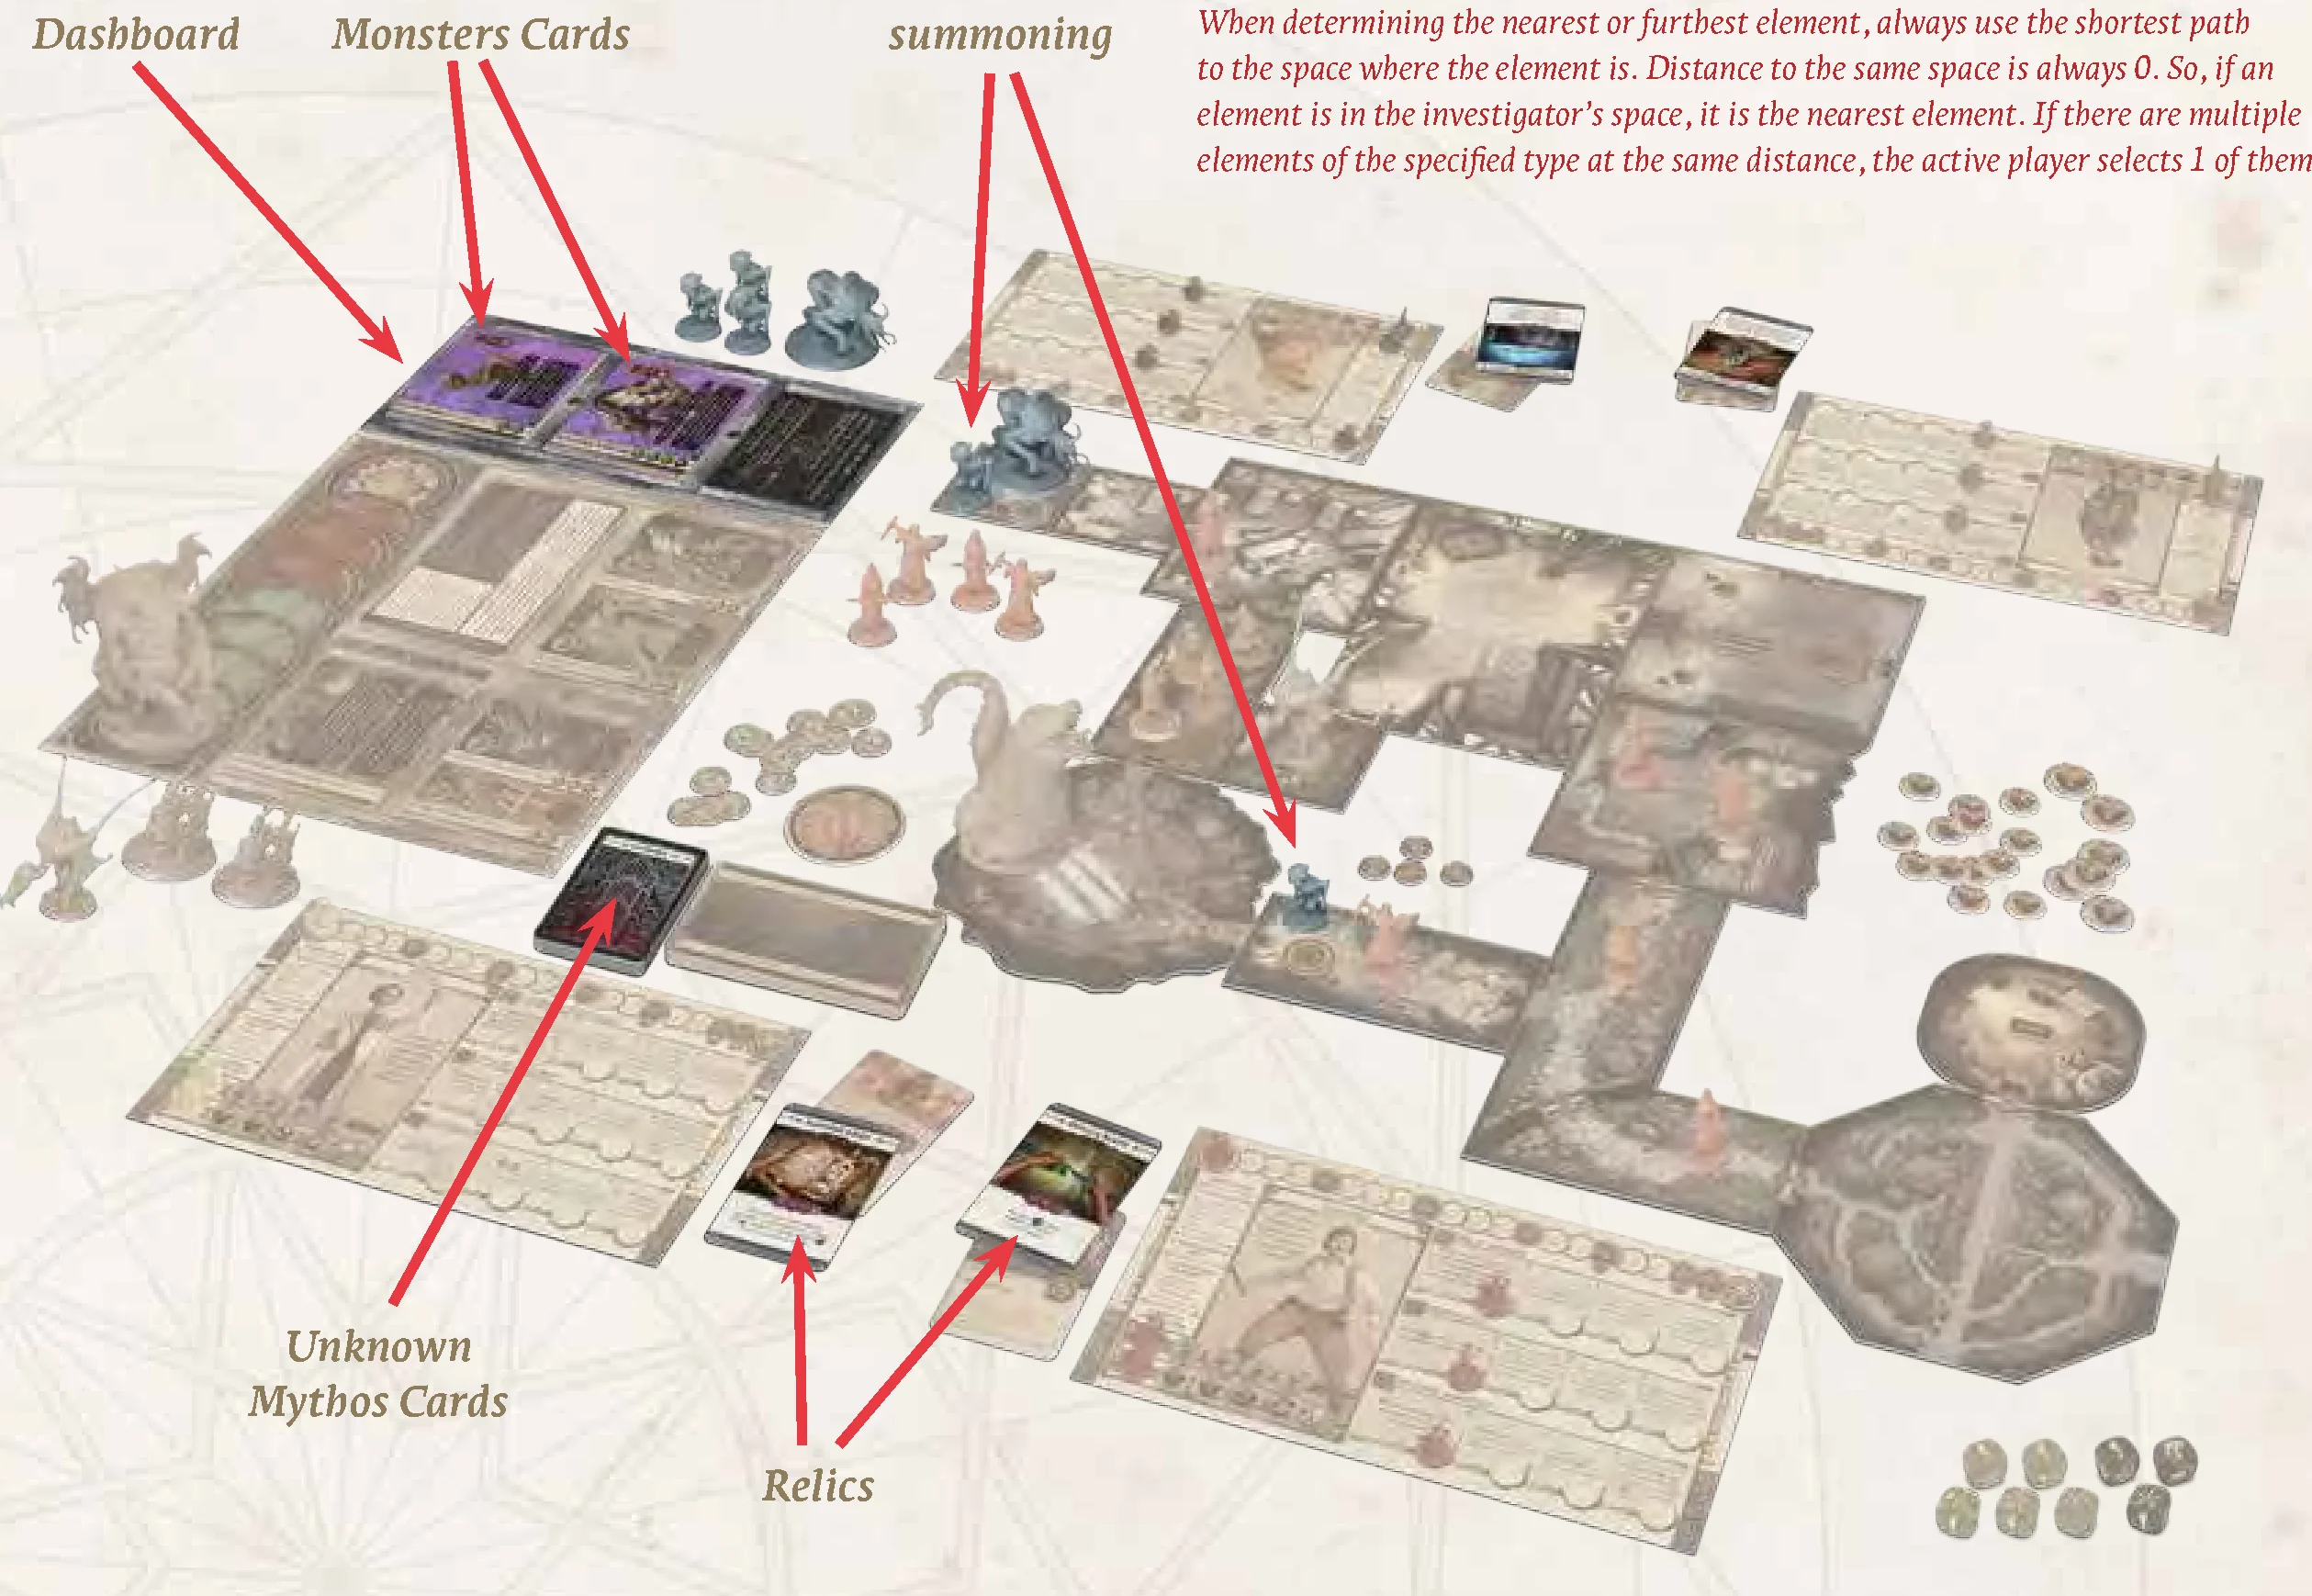
- Place the Unknown Dashboard to the right of the Story Board.
- Randomly choose 2 Unknown Monsters that are different from the Monsters already present in the Episode. Place both cards randomly on the Unknown Dashboard slots and take out ALL their corresponding figures.
- Summon 1 figure from each Unknown Monster on a different random Gate: Take the 4 Random Location tokens and remove the one with the Starting Space from the pool, leaving only the ones with a Gate. Randomly select 1 of the tokens and set 1 figure from the Monster on the corresponding Gate. Remove that token from the pool. Then, randomly select 1 of the 2 tokens left and set 1 figure from the Monster on the corresponding Gate.
- Shuffle the 4 Unknown Mythos cards into the Mythos deck.
- Randomly select a number of Relics equal to the number of investigators. Starting with the starting player and going clockwise, each player chooses 1 Relic and places it next to their investigator board with the initial side face up.
Additional Rules
- Unknown Monsters are treated as regular monsters during the game. Any effect that affects monsters also affect them.
- The Relics provide abilities very similar to skills. When an investigator reaches the third , immediately flip the Relic to the transformed side.
- When the Elder One advances, after resolving the Elder One and Episode effects, resolve the Unknown Monsters effects in order. First, the left slot effect and then the right slot effect.
NOTE: For several effects, players must determine the nearest or furthest element (space, figure, or token) from their investigator or another element on the board. When determining the nearest or furthest element, always use the shortest path to the space where the element is. Distance to the same space is always 0. So, if an element is in the investigator’s space, it is the nearest element. If there are multiple elements of the specified type at the same distance, the active player selects 1 of them.
Adjusting the Difficulty
If players want to adjust the difficulty of the game, they can implement some of the following changes.
Breaking the Unknown Rules
Although the Unknown Relics and Monsters were designed to be played together, players may choose to use them independently if they want an easier or harder game.
- Unknown Relics: If players want an easier game of Cthulhu: Death May Die, they may add the Unknown Relics without the Unknown Monsters. If they choose to do so, only add the Relics to the game (step 16 of the setup) and ignore the other components (Dashboard, Mythos cards, and Monsters).
- Unknown Monsters: On the other hand, if players want a harder game, they may add the Unknown Monsters without the Unknown Relics. In this case, ignore the Relics and skip step 16 of the setup.
Random Elder One Spawn
After playing against the same Elder One multiple times, it is possible to memorize the spaces in which the Stage III and the Final Stage are summoned. This can be used strategically to have an advantage in the fight. To avoid this, players can use the Random Location tokens to randomize where the last 2 stages are summoned.
- When the Stage 3 of the Elder One is revealed, instead of summoning it in the specified space, randomly select 1 of the 4 Random Location tokens and summon it in that space. Remove that token from the pool.
- When the Final Stage of the Elder One is revealed, instead of summoning it in the specified space, randomly select 1 of the 3 remaining Random Location tokens and summon it in that space.

Season 3 Episodes
Season 3 – Episode 1:
This small isle near Venice has been a haven for refugees and the sick since ancient times. But now it is our prison. They sent us here for ‘madness’. But the guards themselves are cultists, ready to use the oncoming storm for a ritual. We must stop them, then use the storm’s cover to escape.

Season 3 – Episode 2:
Kilkenny was the site of one of the first witch trials in western history, and one of the few to find actual witches. Now though, cultists are using ancient energies to power their rituals. As a side effect, the spirits of the old witches have risen, and two of them, Petronilla de Meath and Alice Kyteler, are battling through their ancient feud anew. Only proving Petronilla’s innocence will finally lay her spirit to rest, taking Alice along with her.
Season 3 – Episode 3:
Beneath the streets of Paris lie vast catacombs hearkening back to even before the city was founded. It is here that a band of cultists have erected a large bone altar, the perfect beacon to catch the eye of their patron Elder God. And for some reason, the appointed hour is 2pm on a Wednesday. The cultists must be eradicated, the altar dismantled, and the bones laid back to rest.
Season 3 – Episode 4:
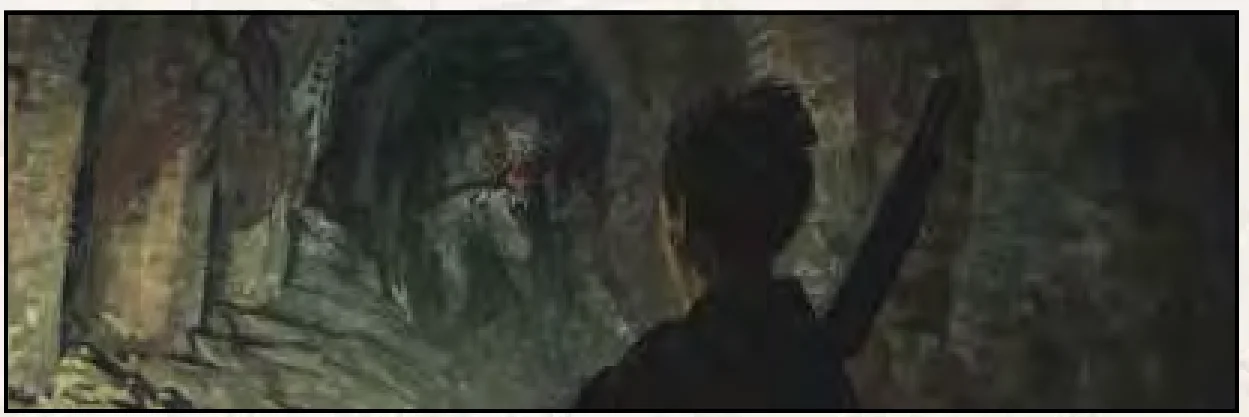
The semi-mythical home of Vlad the Impaler is everything you might expect from a Gothic castle. Soaring columns, blood red trappings, and gargoyles everywhere. Queen Marie of Romania has made its restoration her life’s work. Unfortunately, cultists have also made it their work, and the place is perfectly primed for a ritual of ungodly power.
Season 3 – Episode 5:
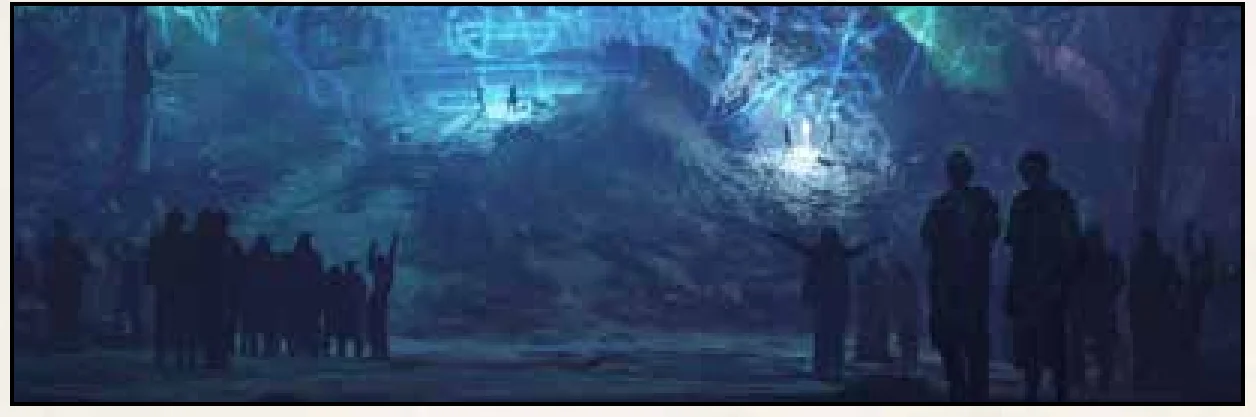
What seems a simple town festival put on by a traveling circus is actually a cultist ritual in disguise! The ‘games and puzzles’ offered by these carnie-cultists are intended to fuel their vast summoning ritual. Expect many ‘accidental deaths’ along the way. It’s up to us to poison the well, as it were, by playing these games ourselves and disrupting the summoning!
Season 3 – Episode 6:
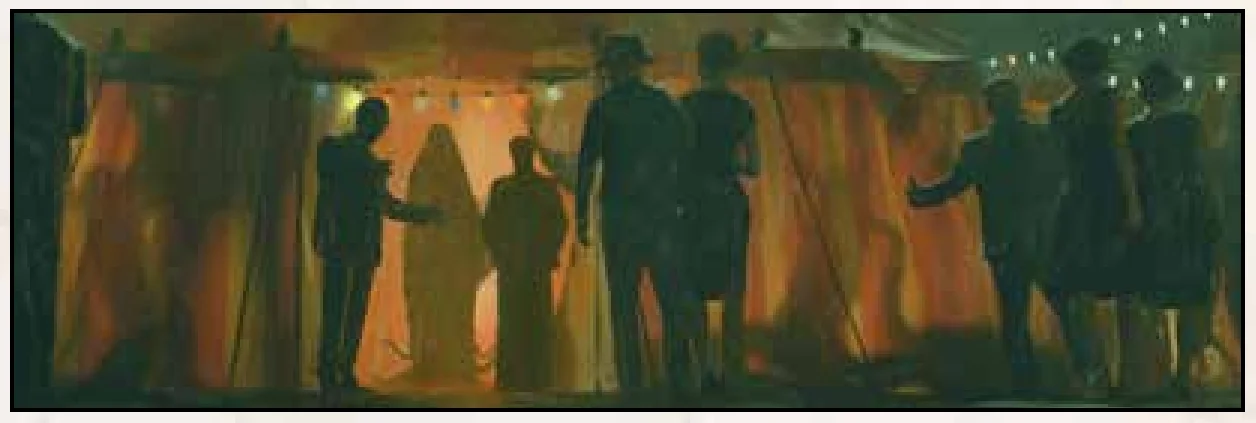
A beautiful Bavarian Castle. Haunted, of course. A jealous husband. An unfaithful wife. Murder. Death. Strange noises from the caverns below. A woman in white stalks the halls on silent steps. It’s a mystery wrapped within an enigma. Your allies will be vital to your success. Or key to your failure.

Rules Summary
Turn Sequence
- Investigator Takes 3 Actions:
- Run: Move up to 3 spaces – Enemies follow. Add 1 Fire token
 to the investigator board per Fire token in the space they leave.
 - Attack: Make a roll against 1 enemy in investigator’s space.
- Rest: Safe space only: Heal 3 stress/wounds.
- Trade: With all investigators in same space.
- Episode actions: Described on the episode card.
- Run: Move up to 3 spaces – Enemies follow. Add 1 Fire token
- Draw Mythos Card:
- Keep Elder One Summoning symbols visible
- Resolve special effects
- Summon enemies at Gates (if available)
- Investigate or Fight!:
- If in a Safe space, draw a Discovery card.
- If there are enemies in investigator’s space, they all attack you (roll dice shown on their card).
- Resolve End of Turn:
- End of Turn Effects
- Fire!: Roll 1 standard die
 per Fire token on investigator, then discard them.
 - Check the Mythos Discard Pile: If there are 3 , the Elder One advances. Apply Elder One and Episode card effects. Then, reshuffle Mythos deck.
- Check Elder One Summoning: If a red space is reached or the ritual is disrupted, move the Stage 1 card to the side and resolve the Stage 2 Reveal effects, summoning the Elder One.
- Elder One End of Turn Effects: Resolve all revealed Stages in order.
Dice and Checks
- “Make a roll”: Roll 3 standard black dice + any applicable bonus green dice .
- Rerolls: On ANY roll, the active investigator may take 1 stress to reroll 1 die (as many times as they want and can).
- Success: Deals 1 wound when attacking.
- Elder Sign: Requires an ability to have any effect.
- Tentacle: Lose 1 sanity.
Sanity
When marker reaches :
- Ignore any remaining sanity loss.
- Activate your insanity.
- Level up 1 of your skills.
- If there’s a symbol, investigator now adds +1 to all their rolls.
Fighting the Elder One
- Once summoned, if the Elder One attacks, roll the dice on all revealed Stages together.
- The Elder One can only be attacked after the ritual is disrupted.
- Once the current Elder One Stage loses all its health, move that card to the side and resolve the Reveal effect of the next Stage.
Ending the Game
- Investigators all win if: They defeat the Final Stage of the Elder One.
- Investigators all lose if:
- An investigator is eliminated before the Elder One is summoned.
- All investigators are eliminated.
- The Progression token reaches the final Summoning track space.
Credits
- Game Design: Marco Portugal and Rob Daviau
- Original Design: Rob Daviau and Eric M. Lang
- Development: Leo Almeida (Lead), Jordy Adan, and Patrick Fernandes
- Production: Guilherme Goulart (Lead), Marcela Fabreti (Lead), Thiago Aranha, Vincent Fontaine, Rebecca Ho, Isadora Leite, Thiago Meyer, Shafiq Rizwan, Kenneth Tan, and Gregory Varghese
- Art: Helder Almeida, Nicolas Fructus, Stefan Kopinski, Karl Kopinski, Prosper Tipaldi, Iwo Widulinski, Richard Wright, Daniel Zrom
- Cover Art: Stefan Kopinski
- Additional Episode Design: Brian Neff and Umberto Pignatelli
- Lore Consultant: Francesco Nepitello
- Art Director: Mathieu Harlaut
- Graphic Design: Marc Brouillon, Louise Combal, Fabio de Castro, Júlia Ferrari, and Max Duarte
- Miniatures Renders: Edgar Ramos
- Miniatures Directing: Mike McVey
- Sculpting: Studio McVey
- Proofreading: Jason Koepp
- Publisher: David Preti
Components
Components
- Story Board
- Unknown Dashboard
- 16 Double-Sided Tiles
- 7 Unknown Monster Cards
- 4 Unknown Mythos Cards
- 8 Insanity Cards
- 12 Unknown Relic Cards
- 3 Standard Dice
- 5 Bonus Dice
- 5 Colored Bases
- 30 Tentacle Markers
- 57 Tokens:
- 26 Wounds Tokens
- 12 Fire Tokens
- 3 Gate Tokens
- 2 Staircase Tokens
- 2 Tunnel Tokens
- 1 Progression Token
- 4 Random Elder One Spawn tokens
- 6 Level 1 Skill Tokens
- 1 Starting Space Token
Additional Components
- 6 Episode Boxes (contents displayed on the back of each box)
- Elder One Box – Tsathoggua:
- Tsathoggua figure
- 2 Amorphous Scion figures
- 8 Mythos Cards
- 1 Minion Card
- 4 Elder One Stage Cards
- 25 Fatigue Tokens
- Elder One Box – Azathoth:
- Azathoth figure
- 4 Dancer of Azathoth figures
- 8 Mythos Cards
- 1 Minions Card
- 4 Elder One Stage Cards
- 10 Cosmic Tokens
- 10 Investigators & 10 Investigator Boards: Julien, Mike, Leon, Ruth, Huikong, Sally, Stella, Sandra, Agatha, Peters
- 10 Cultists (3 pose A, 3 pose B, 4 pose C)
- 18 Monsters:
- 5 Ghasts
- 5 Serpent Men
- 2 Fishers from Outside
- 2 Gyaa-Yothn
- 2 Gugs
- 1 The Unnamable
- 1 Dhole
Overview & Core Concepts
Overview
Cultists. Doing idiotic rituals again.
Going to summon an Elder God,
destroy the world. The usual.
But we’ve got something different planned.
Mess it up real good.So when that Elder One
lands in our world, it’s mortal.
Just a bit. Just for a little while.And then we’re going to kill it.
It won’t be easy. We’ll have to work together.
We’ll likely lose our sanity. But that’s OK.
We’re fueled by madness.
At the start of each game, players choose an Episode box and an Elder One box and combine their components. The Episode will provide the map layout, the ritual they are trying to disrupt (and how to disrupt it), as well as the abilities of the monsters in the game. The Elder One will provide the big boss they will fight, with its own challenges, along with its special minions. Do not combine elements from other boxes.
1 to 5 players control investigators, cooperating to win or lose the game together. In each game, the goal remains the same: disrupt the ritual, then kill the Elder One.
Episodes and Elder Ones
Episodes
Each episode has its own Episode cards, Mythos cards, and Discovery cards, as well as special tokens.
NOTE: Some Episode cards feature special rules.
The back of each Episode card shows how to set up the episode.
Elder Ones
Each Elder One comes with its own flavor of Cultists and monsters, its own Mythos cards to mess with Investigators, and Elder One cards in different stages that will unfold as the game goes on. Investigators cannot attack the Elder One until the ritual is disrupted, even if it’s been summoned to the board!
Story Board & Summoning Track
The Story board, used in every game, is the hub of information.
The Summoning track shows the progression of the Elder One as it manifests into our world. The Elder One figure starts on the left part of the track and progresses to the right. When it enters a red space, it will be summoned (it will be summoned earlier if the ritual is disrupted). After the Elder One is summoned to our world, the Progression token is placed on the track and moved instead of the figure. If the Progression token reaches the end of the track, the Elder One dominates the world and the investigators lose!
Cards Overview
Discovery Cards
Each episode has 15 Discovery cards. These include Items, Companions, and Conditions that can help or hinder the players. Most Discovery cards can be claimed by fulfilling the requirements listed in the card’s central section. Investigators claim either the left or right side of the card, tucking them under their investigator board on the appropriate side.
If it’s not specified when the player may use an effect on a Discovery card, it may be used anytime during their turn. However, it cannot be used while resolving another card, effect, or during a roll.
Mythos Cards
Mythos cards drive the horrors of each game. Players will grow to hate them. Half the Mythos cards in a game come from the Episode box and the other half comes from the Elder One box.
Each turn, after taking their actions, the active player will draw a Mythos card. Some will move and/or summon enemies. Others will drive investigators mad. There are also ones that aren’t as kind.
Most Mythos cards have an Elder One Summoning symbol on them. When there are 3 Summoning symbols in the Mythos discard pile, the Elder One advances along the Summoning track.
Enemies
The term “enemies” refers to Cultists, monsters, and the Elder One (once it’s summoned to the board). Any enemy that’s not a Cultist or the Elder One is a “monster”.
- Anything that refers to Cultists affects Cultists only.
- Anything that refers to monsters affects monsters only.
- Anything that refers to the Elder One affects the Elder One only.
Enemy cards show their health, the dice they use when attacking, and a special ability that may come into effect in different circumstances. The cards also show the total number of figures that should be available in the pool. If an Episode uses specific monsters, all its miniatures that are not present in the setup are kept in a pool, ready to spawn.
Tiles and Spaces
Each tile is double-sided and labeled with a code to help with setup.
Spaces are defined by walls and passages:
- Some tiles contain 1 space while others contain 2 or 3.
- On the board, investigators may only move through passages that have connecting arrows on both spaces. If there is only a passage on one side (or a passage leading off the board) and nothing on the other side, investigators cannot go through it.
- There is no limit to the number of figures that may occupy each space.
- A space is adjacent to another if they are one space away from each other. In other words, if it is possible for an investigator to move between 2 spaces, they are considered adjacent.
- Each map has 3 Gates – Red, Yellow, and Blue, where enemies are summoned.
- Some maps contain a staircase or a tunnel. Investigators may move from a space with one of these tokens to a space with the matching token. Spaces linked like that are considered adjacent for all purposes. If one of the tokens is removed for any reason, the spaces stop being adjacent.
Safe Spaces
A space is Safe when there are no enemies in it.
General Rules
Component Limitation
With the exception of dice and Wound tokens (and consequently, Fire on investigators), all components are limited. If there are not enough tokens (or other components), use as many as possible for the effect, but do not add substitutes for the missing components. Also, if a component is discarded/removed, it returns to the pool of available components, unless stated otherwise.
When mixing components from different Cthulhu: Death May Die Core Boxes, players should increase the Fire token pool. For example, since Cthulhu: Death May Die Core Box comes with 8 Fire tokens and Cthulhu: Death May Die – Fear of the Unknown Core Box with 12, if players have both boxes, they increase the pool to 20 Fire tokens.
Note that this is not true for other components. For example, the total number of Cultists in an Episode is always limited to 10, as stated in the Elder One Minions Card.
Resolving Ties and Ambiguities
If there are multiple ways to resolve an effect, the active player always chooses how to resolve it. For example, if an effect moves the nearest enemy and there are multiple enemies at the same distance, the active player chooses 1 of them to move. Also, if multiple effects trigger at the same time, the active player chooses the order in which they are resolved.
For several effects, players must determine the nearest or furthest element (space, figure, or token) from their investigator or another element on the board. When determining the nearest or furthest element, always use the shortest path to the space where the element is. Distance to the same space is always 0. So, if an element is in the investigator’s space, it is the nearest element. If there are multiple elements of the specified type at the same distance, the active player selects 1 of them.
Checking Distance
For several effects players must determine the nearest or furthest element (space, figure or token) from their investigator or another element on the board. When determining the nearest or furthest element, always use the shortest path to the space where the element is. Distance to the same space is always 0. So, if an element is in the investigator’s space, it is the nearest element. If there are multiple elements of the specified type at the same distance, the active player selects 1 of them.
Effects that block passages, like locked tokens, should be considered when checking the shortest path, the path cannot pass through blocked passages. The only exception is if the effect would move a figure that can ignore the restrictions. For example, on Season 3 – Episode 1: Isle of the Damned, the Cultists can pass through locked tokens. If an effect moves the nearest Cultist towards you, even though other figures cannot move through the locked tokens, you ignore those tokens when checking which Cultist is the nearest, since they can pass through them. However, effects that affect which spaces are adjacent to each other on specific circumstances, like the Silver Key Relic, are ignored when checking the shortest path.
Investigators & Sanity
Investigators
Each investigator has a board with a wound track, a stress track, a sanity track, and 3 skills. All are tracked with plastic tentacle markers in the investigator’s color. There are also slots on the right and on the left of the board to insert claimed Discovery cards. There is no limit to the number of cards that can be slotted to an investigator.
Stress
Stress is used to try and push situations in the investigator’s favor. Players may always increase investigator’s stress to reroll 1 die they just rolled. Many Discovery cards also have investigators take stress in order to claim them. Generally, the only consequence of being at maximum stress is that the investigator can’t take more stress (though some effects may deal wounds instead). Investigators can take a maximum of 4 stress without healing.
Wounds
If the marker ever reaches the skull at the end of the wound track, the investigator is dead.
Skills
The investigator’s 3 skills allow them to bend the rules in their favor. The top one is their signature skill, unique to each investigator, while the other 2 skills come from a common pool (so other investigators may have the same ones). All skills start at the first level, but investigators will increase them when they level up. Some skills replace a lower-level skill as they level up, while others add to them, as described on the skill.
Sanity & Madness
Whenever an investigator loses sanity, the marker on their sanity track advances to the right. If it reaches the skull at the end, the investigator is consumed by madness and eliminated.
The track has Insanity Threshold () spaces that will activate the investigator’s insanity and level up a skill. Some of them also give investigators permanent bonus dice. When an investigator loses more sanity (from dice rolls, Discovery, or Mythos cards) than required to hit the next , the marker stops at the and all excess sanity loss is ignored.
Gaining Bonus Dice
4 of the spaces display a green Bonus die under them. Once each of these is reached, the investigator adds +1 Bonus die to any rolls they make for the rest of the game, except for rolls against themselves.
Activating Insanities
Each investigator gets an insanity card at the start of play. Every time their marker on the sanity track reaches a , that insanity activates. Perform the symptoms on the card. If multiple investigators reach a at the same time, they activate clockwise from the current player.
Leveling up Skills
When the marker reaches a , after activating their insanity, the investigator levels up 1 of their skills. Choose 1 skill and move its marker 1 space to the right.
Setup
Game Setup
- Set out the Story Board, tokens, and dice.
- Choose an Elder One. From its box, place the Elder One figure on the starting space of the summoning track. Place the Minions reference card on the Story Board. Set out the 8 Mythos cards and any tokens. Place the Elder One Stage cards in order, faceup, on the Story Board. Stage 1 goes on top.
- Choose an episode. From its box, take out its 8 Mythos cards, 15 Discovery cards, Episode card, and tokens. Place the Monsters reference cards on the Story board.
- Take out ALL the figures for the enemies shown on the reference cards (other monsters won’t be used).
- Set up the map board according to the instructions on the back of the episode card, including arranging the map tiles and setting enemy figures and tokens in the indicated spaces. Then, turn over the episode card and place it on the Story board. Any Cultist and monster figures that are not placed on the map stay on a pool next to the Story Board, ready to spawn.
- Shuffle the 16 Mythos cards together and place them facedown.
- Shuffle the episode Discovery deck and place it facedown.
- Have each player select an investigator board and its figure. Attach a color base on the figure to help the player remember which figure is theirs. Place the figures on the starting space for the episode.
In a SINGLE-PLAYER game, choose 2 investigators. The player will control both, alternating turns with them. - Place the 6 tentacle markers of the player’s color on their investigator board: 3 on the first level of the investigator’s skills and the other 3 in the leftmost space of the wound, stress, and sanity tracks.
- Shuffle the insanity cards and deal 1 to each player, putting away the rest. Players place their card, faceup, near their investigator boards.
- Randomly determine a starting player. That player takes the Mythos deck and will take the first turn.
Dice and Checks
Dice and Checks
Throughout the game, players roll dice to determine the outcome of certain actions or effects. The most common times to roll dice are when players are told to make a roll and when an enemy attacks.
Make a Roll
Some actions and Discovery cards tell players to “make a roll”. When players make a roll, they always roll 3 standard black dice (and may also be allowed to add bonus green dice).
Enemy Attack
Enemies roll a specific number and type of dice for their attacks as indicated on their reference card.
Rolls Against Yourself
Some effects and abilities specify “rolls against yourself”. Rolls against a player are rolls where each success is detrimental to the player. Enemy attacks and rolling for Fire are examples of “rolls against yourself”.
Die Results
Each die has 4 different possible results:
- Success: This means that the investigator (or the enemy) succeeded at their attempt (or partially succeeded). If the investigator was attacking, it means they hit. If an enemy is attacking, it means they hit. In some cases, players need to reach a target amount of successes in a single roll.
- Elder Sign: These mean nothing unless an investigator has a skill or card that uses them.
- Tentacle: Madness! For each tentacle, the investigator loses 1 sanity, moving their tracker 1 space to the right.
IMPORTANT: Tentacles on EVERY roll cost investigators sanity, whether they’re attacking, being attacked, or just “making a roll”. - Blank: No effect most of the time.
Bonus Dice
Certain skills and cards may give investigators bonus green dice, as noted on their description. Some checks may also give them bonus dice if they have a related ability. Finally, reaching certain Insanity Thresholds will add permanent bonus dice to all of that investigator’s rolls, except against themself.
- NOTE: The bonus dice do not contain a tentacle icon.
- NOTE: There is no limit to the number of regular dice and bonus dice that may be added to a roll (if players run out of dice, note the results and roll the same dice again).
- NOTE: When rolling dice, players cannot choose to roll less dice than they are allowed to roll (unless the effect is optional).
Rerolls
After rolling dice, players may take 1 stress to reroll 1 die, ignoring its original result. Players may do this as often as they like on any roll they make, until the investigator’s stress is at the maximum. When enemies attack, players roll for them and may also take stress to reroll their dice.
Modifying Rolls
Some effects or abilities may be applied to rolls. Unless stated otherwise, those abilities are applied to ALL rolls an investigator makes, including against themselves. Note, though, that some of them are optional.
Applying Results
Once a player is done using any rerolls, tally the number of each result obtained (note that some die faces contain 2 results). Make sure to apply any symbol changes from abilities (such as counting as successes).
NOTE: If an effect counts an icon as another icon (e.g. Arcane Mastery), that icon stops counting as the original icon, unless stated otherwise in the effect. That means that an icon cannot be changed by 2 different abilities, unless one of those abilities says the icon keeps counting as the original icon.
Then, apply the results of the dice roll in this order:
- Use Any Successes:
- If an investigator is attacking, these successes are wounds applied to their target.
- If an enemy is attacking, successes are also wounds applied to their target (usually an investigator).
- If players are told to “make a roll” by an action or effect, they must follow the instructions on the corresponding action or effect. Sometimes, they must match or exceed the number of successes indicated on the card to be successful. In other cases, for each success rolled, players get to do something.
- Resolve Effects:
- Resolve any effects that may be tied to the result of the roll (Examples: “If wounded…”, “If it survives an attack…”, “When the enemy dies…”).
- Apply Any Tentacles:
- Lose 1 sanity for each tentacle rolled (move the marker 1 space to the right on their sanity track).
- If the investigator reaches a space on their sanity track, stop moving the marker (even if they didn’t lose the full amount of sanity), activate their insanity, and level up a skill.
Turn Sequence
Turn Overview
- Take 3 Actions
- Draw Mythos Card
- Investigate or Fight!
- Resolve End of Turn
1. Take 3 Actions
On a player’s turn, they may take 3 actions. They may take the same action more than once. There are 4 actions that are available in every episode and 2 that are unique to each episode. Also, some effects may give players access to free and special actions.
Some actions can only be done while in a Safe space. A Safe space is a space without enemies.
Free Actions
Some abilities and effects can be used as a free action. They can only be used during this Phase of the turn before or after other actions.
Special Actions
Some abilities and effects can be used as a special action. They can only be used during this Phase of the turn and players must spend 1 of their actions to use it.
Run
Move up to 3 spaces. Investigators can only move between spaces if there is a passage on both tiles (as indicated by arrows on both sides). They may also pass between 2 spaces that both have a staircase or tunnel token.
- When investigators leave a space with enemies, ALL enemies in that space follow them to their new space (even if there were other investigators in their space).
- When investigators leave a space with Fire tokens, place 1 Fire token from the reserve onto their investigator board for each token on the space, leaving those tokens untouched.
NOTE: Unless stated otherwise, when an investigator moves outside of a Run action, they catch fire and enemies follow as well, even if it’s not their turn. The only exception are the effects that “place” an investigator in another space, in which case the investigator is placed directly in that space, they do not catch fire, and enemies do not follow.
Attack
Target a single enemy in the investigator’s space and make a roll. Each success rolled causes 1 wound to the target. Place wound tokens next to the base of the figure attacked. If this number equals (or exceeds) their health, they die. Remove their figure from the board.
Keep in mind that if the Elder One is on the board, it can only be attacked once the ritual is disrupted.
NOTE: If the investigator doesn’t have the Brawling skill, he must deal all wounds to a single enemy (chosen before rolling dice), even if excess wounds would go ignored with no effect.
Rest (only on a Safe space)
If an investigator is in a Safe space (there are no enemies with them) they may heal their stress and/or health up to 3 spaces (in any combination). This is 3 spaces total, not 3 spaces for each track. Investigators may perform the Rest action more than once per turn.
IMPORTANT: SANITY CANNOT BE HEALED BY RESTING!
Trade
The active investigator and all investigators in their space may trade any number of Items or Companions with each other (either giving or receiving). While some Discovery cards have Items or Companions on both the left and right side of the card, a traded card must remain on the same side as it was originally. Investigators may not trade Conditions.
Episode Actions
Each episode has 2 unique actions as shown on the episode card. These work just like the standard actions and will help investigators disrupt the ritual or help them survive.
2. Draw Mythos Card
Draw the top Mythos card from the deck and resolve it. Then, place it on a faceup discard pile.
Mythos cards may have several different steps to them, divided into 3 types. Players must do these steps in order, from top to bottom, before discarding the card. If players can’t do a step on the card, skip it and move on to the next.
- Elder One Summoning: The Elder One Summoning symbol has no effect when the card is drawn, but may cause the Elder One to advance on its track at the end of the turn. If the card has this symbol, make sure it remains visible when it is discarded.
- Special Effects: Mythos cards have all sorts of different special effects to make life hell. Unless otherwise stated, these effects only affect the player whose turn it is, ignoring all other investigators. Any choice that needs to be made is up to the active player, such as choosing which closest figure to move.
When an effect moves an enemy towards a space, it should be moved by the shortest path to that space. Count how many spaces the enemy would move in all possible paths and choose the shortest one. In case of a tie, the active player chooses. The enemy must always be moved as much as allowed towards its target but stops when it reaches its target. - Summon Enemies: Finally, the bottom of some cards will indicate a Gate color and the specific enemy that must be summoned there. If players have the corresponding figure available in reserve, place it in the indicated space. Otherwise, ignore this step. If there are multiple Gates and enemies indicated, perform the summonings in order. Skip any remaining Gates if there are no more enemy figures available to summon.
NOTE: If an effect summons multiple enemies at the same time without specifying an order (e.g: Summon 1 Cultist at each Gate), the active player chooses the order in which to summon the enemies.
3. Investigate or Fight!
This phase varies depending on whether there are enemies in an investigator’s space or not.
If the investigator is in a Safe space, INVESTIGATE the space:
Draw the top card of the Discovery deck and read the text in the center box aloud.
- Some cards have a statement of something the investigator must do if they have a Condition or a certain Companion.
- Most offer choices of what the player can do.
- Some cards result in CLAIMING a Companion, Item, or Condition. Claiming means to slide the card under the investigator board, becoming part of the investigator’s inventory (or, when it’s a Condition, changing their mental state). If the investigator cannot or, in case it’s optional, does not want to claim either side of the card, discard the card.
- COMPANIONS: Any wounds investigators take may instead be applied to Companions they currently have. This still counts as the investigator taking wounds for card effects. Companions can never be healed. If their wounds equal the number on their card, the Companion is discarded and any benefit they give is immediately lost. Companions may also give investigators a level in a skill. If the investigator doesn’t have that skill, they gain level 1 in that skill while they have this Companion with them (take the corresponding token). If they already have the skill, move the skill level marker 1 level forward. If they lose the Companion, move the marker back 1 level.
- Some Discovery cards have effects that allow players to take the other side of the card. This means that players remove it from the side it currently is on the dashboard and slide it under the other side. If it’s a Companion, any wounds on it are discarded.
- NOTE: If the Discovery deck has no cards, it is not possible to investigate anymore.
- NOTE: Investigators must always investigate if they are safe, even if they wouldn’t want to.
If you are not in a Safe space, the enemies FIGHT you:
Do not draw a Discovery card. Instead, each enemy in their space attacks them in the order the player chooses (they ignore other investigators) until all enemies in the space that could attack you have done so.
IMPORTANT: If an effect makes an investigator enter a space with an enemy, or an enemy enters an investigator’s space during this phase, that enemy attacks even if it was not in the space at the beginning of this phase. Also, if an enemy that was in an investigator’s space leaves the space, it doesn’t attack anymore. If an effect makes the space safe during this phase, enemies stop attacking (but the investigator cannot investigate, since the space wasn’t safe at the start of the phase).
Defending Against Enemies
When an enemy attacks, roll the number and type of dice as shown on their reference card. Each success gives the investigator 1 wound. Each tentacle costs the investigator 1 sanity. Elder signs only have an effect if either the investigator or the enemy have an ability that affect them. Investigators may use stress to reroll these dice and may use any of their skills to help avoid or minimize the attack.
4. Resolve End of Turn
- End of Turn Effects: Any effects that happen at the end of the turn, except for Elder One effects, happen now, in any order the active player chooses.
- Fire!: Investigators may be on fire. This will have happened if they left a space that contains Fire tokens. It may be that a monster set them on Fire.
At the end of a player’s turn, they roll 1 standard die for every Fire token on their investigator board, as a single roll. You may use stress to reroll dice. Take 1 wound for each success and lose 1 sanity for each tentacle. Then, they discard all Fire tokens on their investigator board.
NOTE: Enemies don’t catch Fire when leaving a space with Fire tokens.
RUNNING OUT OF FIRE: The number of Fire tokens on the board is limited to the number of Fire tokens available. If players need to add a Fire token to the board but there are none left, ignore the effect. However, Fire tokens on investigators are not limited. If a player needs to add a Fire token to their investigator board but there are none left, use a wound token instead. If there are Fire tokens available on Investigator boards, replace them with wound tokens to make the Fire tokens available to place on the board.
- Check the Mythos Discard Pile: If there are 3 or more cards in the discard pile that have the Elder One Summoning symbol, the Elder One advances towards ultimate power!
Advance the Elder One along the Summoning track. If the Elder One is already on the board, move the Progression token along the track instead. The revealed Elder One Stage cards and the Episode card will tell players what to do when the Elder One advances. Resolve the Elder One effects first. It doesn’t matter whether it’s the Elder One figure or the Progression token advancing on the Summoning track. The effects are resolved in the same way.
After the Elder One advances, all of the discarded Mythos cards are shuffled back into the deck. - Check the Elder One Summoning: The Elder One is summoned if:
- The Elder One entered the first red space on the track
- OR The ritual was disrupted this turn
When the Elder One is summoned to the world, move the Stage 1 card to the side, revealing the Stage 2 card underneath. Resolve its reveal effects, which will specify where the Elder One must be summoned. The Stage 1 effects remain in play until the end of the game.
Place the Progression token on the Summoning track on the space previously occupied by the Elder One figure. Use this Progression token to mark the Elder One’s progress until the end of the game. - Elder One End of Turn Effects: As the Elder One progresses through its stages, there may be End of Turn effects visible on its Stage cards. Resolve all effects on each Stage card in the order of the Stages: First 1, then 2, then 3, and then Final. Any effect that refers to “you” is referring solely to the investigator whose turn it is.
The turn is now over and the player to the left takes their turn. Continue taking turns like this until the investigators either win or lose.
Disrupting the Ritual & The Elder One
Disrupting the Ritual
Each episode describes the tasks the investigators must accomplish in order to disrupt the Cultists’ ritual and make the Elder One mortal, even if only for a short time. The Elder One cannot be attacked or damaged until the ritual is disrupted (though it can attack investigators if it’s on the board)!
If the investigators disrupt the ritual, the Elder One is summoned at the end of the turn.
Fighting the Elder One
Once the Elder One is summoned to the board, it acts like any enemy, attacking investigators that end their turn in its space. The number and type of dice the Elder One rolls is the total of all dice displayed on all its revealed Stage cards.
Until the ritual is disrupted, the Elder One cannot be attacked or damaged, even if it’s already been summoned to the board by reaching the red space on the summoning track! After the ritual is disrupted, the Elder One can be attacked and damaged like any other enemy. The Elder One has multiple Stages, with individual health totals, which must be defeated one at a time until it’s ultimately destroyed.
Starting with Stage 2, each card displays:
- A one-time effect that takes place when that card is revealed.
- An ongoing effect that remains in play until the end of the game.
- Health showing how many wounds that Stage can take.
- The number and type of dice that Stage adds to the Elder One’s attacks.
When a Stage has wounds equal to or greater than its health, that Stage is defeated. Move that Stage card to the side to reveal the next and resolve its When Revealed effect. Any excess wounds do NOT carry over to the next Stage. Remember that all of the previous Stages’ effects and dice remain in play until the end of the game!
Investigator Death & End of Game
Death of an Investigator
When an investigator is killed or consumed by madness, the game is immediately lost if the Elder One is still on the Summoning track. If, however, the Elder One has already been summoned to the board, the other investigators may continue playing and trying to win the game.
First, discard all Discovery cards, tokens and other components the now-deceased investigator had. The episode may specify something to do with any special tokens the investigator had been holding.
If the investigator died during their turn, skip all the following turn phases except for the Check the Mythos Discard Pile phase. If there are 3 Elder One Summoning symbols, the Elder One advances and its effects are applied (if it is needed to determine the position of the dead investigator, use the space where they died). From now on, that player’s turn is skipped entirely.
Ending the Game
Players win the game when they kill the Elder One by defeating its Final Stage. If multiple end-game triggers happen at the same time, winning conditions have precedence.
EXAMPLE: The Elder One and the last investigator die at the same time. The players saved the world and win the game.
Players lose the game when 1 of the following happens:
- An investigator is killed or consumed by madness before the Elder One is summoned to the board (Stage 1 card).
- All investigators are killed or consumed by madness after the Elder One is summoned (Stage 2 onward).
- The Progression token reaches the last (8th) space of the Summoning track.
Skill Codex
Common Skills
The common skills are:
Arcane Mastery
Arcane Mastery can be used for any roll, including rolls against themself, if the player wants.
Brawling
With Brawling Level 2 or higher, players must choose the targets of their attack before rolling dice. If the investigator attacks multiple targets, each of them triggers effects that say, “When attacked” or, “When attacked, but not destroyed”. The active player chooses the order in which they are resolved.
Marksman
A target 1 space away is a target that is in a space that can be accessed with 1 movement. Similarly, a target 2 spaces away is in a space that can be accessed with 2 movement. A space that is inaccessible for any reason cannot be targeted.
With Marksman Level 4, the investigator gains a free attack action during their turn that can only be used against a target not in their space.
Stealth
Stealth specifies that the investigator may only Sneak during a Run action. If any other effect makes them move, enemies follow as usual, unless stated otherwise.
To Sneak means that when leaving a space, the investigator may ignore 1 of the enemies there that would follow them (player’s choice). It stays on the space they were leaving.
Stealth Level 2 allows the investigator to Sneak up to 3 times per Run. Since investigators can choose to use it at any point of the Run action, they can, for example, make 3 enemies follow them through 2 spaces, and with their last move, leave them behind. They can also choose to leave each enemy in a different space by sneaking each of them when leaving a different space. Investigators may also sneak past the same enemy more than once if they return to the original space and leave it again. Notice, though, that Sneaking the same enemy twice would spend 2 of the Sneaks.
With Stealth Level 4, the investigator keeps Level 3’s ability to deal 1 wound to each enemy they Sneak past.
Swiftness
With Swiftness Level 3 or higher, the decision of taking an investigator or not is made independently for each space the Investigator leaves during a Run.
Example: Leon starts his Run action in the same space as Julien. When making his first move, he takes Julien with him. For the second move, he decides to leave Julien in that space and takes no one with him when entering a space where Mike and Ruth are. For his third move, he decides to take Mike with him. Then, he decides to stop.
Toughness
With Toughness Level 2 or 3, the investigator may prevent either 1 wound, 1 sanity, or both 1 wound and 1 sanity from the same source.
Variants & Unknown Rules
Unknown Rules
If players want to try a more challenging game, they can add this special set of rules to any game of Cthulhu: Death May Die. These rules allow players to add different Monsters to any episode and introduce unique relics that the investigators can access. Please note that these rules increase the difficulty of the overall game and are not recommended for players’ first time playing the game.
Additional Concepts
Unknown Dashboard
When playing with the Unknown Rules, place the Unknown Dashboard next to the Story Board. The Dashboard contains a summary of the End of Turn phase, including the extra steps added by the Unknown Rules. It also contains 2 slots for Unknown Monster cards with different icons on each slot. Those icons are used to reference the different Monsters.
Unknown Monsters
Just like other enemy cards, Unknown Monster cards show their health, the dice they use when attacking, their special ability, and the total number of figures available in the pool.
They also show Setup summon information and a special effect that happens when the Elder One advances.
Unknown Mythos Cards
When playing with the Unknown rules, shuffle the 4 Unknown Mythos cards into the Mythos deck. These cards move the Unknown Monsters and do not count as the Mythos drawn for the turn. Players must draw another card after the Unknown Mythos card is resolved.
When players draw a card with the draw-again icon , after resolving it, discard it and they must draw and resolve another Mythos card. Keep drawing and resolving until a card without this icon is resolved.
NOTE: If players resolve a card with this icon without drawing it (e.g. Recurring Trauma insanity from Cthulhu: Death May Die Core Box), players resolve its effect but do not draw and resolve another card.
Unknown Relics
In addition to the monsters, the Unknown Relics are also added to the game. Each investigator starts with 1 Relic that has a unique ability. As soon as an investigator reaches their third , the Relic is flipped to the other side, revealing an upgraded effect. This represents the loss of sanity, making the investigator believe that the Relic is more than a simple artifact.
IMPORTANT: Relics are not considered Items or Discovery cards and cannot be discarded or traded.
Additional Setup
- Place the Unknown Dashboard to the right of the Story Board.
- Randomly choose 2 Unknown Monsters that are different from the Monsters already present in the Episode. Place both cards randomly on the Unknown Dashboard slots and take out ALL their corresponding figures.
- Summon 1 figure from each Unknown Monster on a different random Gate: Take the 4 Random Location tokens and remove the one with the Starting Space from the pool, leaving only the ones with a Gate. Randomly select 1 of the tokens and set 1 figure from the Monster on the corresponding Gate. Remove that token from the pool. Then, randomly select 1 of the 2 tokens left and set 1 figure from the Monster on the corresponding Gate.
- Shuffle the 4 Unknown Mythos cards into the Mythos deck.
- Randomly select a number of Relics equal to the number of investigators. Starting with the starting player and going clockwise, each player chooses 1 Relic and places it next to their investigator board with the initial side face up.
Additional Rules
- Unknown Monsters are treated as regular monsters during the game. Any effect that affects monsters also affect them.
- The Relics provide abilities very similar to skills. When an investigator reaches the third , immediately flip the Relic to the transformed side.
- When the Elder One advances, after resolving the Elder One and Episode effects, resolve the Unknown Monsters effects in order. First, the left slot effect and then the right slot effect.
NOTE: For several effects, players must determine the nearest or furthest element (space, figure, or token) from their investigator or another element on the board. When determining the nearest or furthest element, always use the shortest path to the space where the element is. Distance to the same space is always 0. So, if an element is in the investigator’s space, it is the nearest element. If there are multiple elements of the specified type at the same distance, the active player selects 1 of them.
Adjusting the Difficulty
If players want to adjust the difficulty of the game, they can implement some of the following changes.
Breaking the Unknown Rules
Although the Unknown Relics and Monsters were designed to be played together, players may choose to use them independently if they want an easier or harder game.
- Unknown Relics: If players want an easier game of Cthulhu: Death May Die, they may add the Unknown Relics without the Unknown Monsters. If they choose to do so, only add the Relics to the game (step 16 of the setup) and ignore the other components (Dashboard, Mythos cards, and Monsters).
- Unknown Monsters: On the other hand, if players want a harder game, they may add the Unknown Monsters without the Unknown Relics. In this case, ignore the Relics and skip step 16 of the setup.
Random Elder One Spawn
After playing against the same Elder One multiple times, it is possible to memorize the spaces in which the Stage III and the Final Stage are summoned. This can be used strategically to have an advantage in the fight. To avoid this, players can use the Random Location tokens to randomize where the last 2 stages are summoned.
- When the Stage 3 of the Elder One is revealed, instead of summoning it in the specified space, randomly select 1 of the 4 Random Location tokens and summon it in that space. Remove that token from the pool.
- When the Final Stage of the Elder One is revealed, instead of summoning it in the specified space, randomly select 1 of the 3 remaining Random Location tokens and summon it in that space.
Episodes Lore
Season 3 Episodes
Season 3 – Episode 1:
This small isle near Venice has been a haven for refugees and the sick since ancient times. But now it is our prison. They sent us here for ‘madness’. But the guards themselves are cultists, ready to use the oncoming storm for a ritual. We must stop them, then use the storm’s cover to escape.
Season 3 – Episode 2:
Kilkenny was the site of one of the first witch trials in western history, and one of the few to find actual witches. Now though, cultists are using ancient energies to power their rituals. As a side effect, the spirits of the old witches have risen, and two of them, Petronilla de Meath and Alice Kyteler, are battling through their ancient feud anew. Only proving Petronilla’s innocence will finally lay her spirit to rest, taking Alice along with her.
Season 3 – Episode 3:
Beneath the streets of Paris lie vast catacombs hearkening back to even before the city was founded. It is here that a band of cultists have erected a large bone altar, the perfect beacon to catch the eye of their patron Elder God. And for some reason, the appointed hour is 2pm on a Wednesday. The cultists must be eradicated, the altar dismantled, and the bones laid back to rest.
Season 3 – Episode 4:
The semi-mythical home of Vlad the Impaler is everything you might expect from a Gothic castle. Soaring columns, blood red trappings, and gargoyles everywhere. Queen Marie of Romania has made its restoration her life’s work. Unfortunately, cultists have also made it their work, and the place is perfectly primed for a ritual of ungodly power.
Season 3 – Episode 5:
What seems a simple town festival put on by a traveling circus is actually a cultist ritual in disguise! The ‘games and puzzles’ offered by these carnie-cultists are intended to fuel their vast summoning ritual. Expect many ‘accidental deaths’ along the way. It’s up to us to poison the well, as it were, by playing these games ourselves and disrupting the summoning!
Season 3 – Episode 6:
A beautiful Bavarian Castle. Haunted, of course. A jealous husband. An unfaithful wife. Murder. Death. Strange noises from the caverns below. A woman in white stalks the halls on silent steps. It’s a mystery wrapped within an enigma. Your allies will be vital to your success. Or key to your failure.
Rules Summary & Credits
Rules Summary
Turn Sequence
- Investigator Takes 3 Actions:
- Run: Move up to 3 spaces – Enemies follow. Add 1 Fire token to the investigator board per Fire token in the space they leave.
- Attack: Make a roll against 1 enemy in investigator’s space.
- Rest: Safe space only: Heal 3 stress/wounds.
- Trade: With all investigators in same space.
- Episode actions: Described on the episode card.
- Run: Move up to 3 spaces – Enemies follow. Add 1 Fire token
- Draw Mythos Card:
- Keep Elder One Summoning symbols visible
- Resolve special effects
- Summon enemies at Gates (if available)
- Investigate or Fight!:
- If in a Safe space, draw a Discovery card.
- If there are enemies in investigator’s space, they all attack you (roll dice shown on their card).
- Resolve End of Turn:
- End of Turn Effects
- Fire!: Roll 1 standard die per Fire token on investigator, then discard them.
- Check the Mythos Discard Pile: If there are 3 , the Elder One advances. Apply Elder One and Episode card effects. Then, reshuffle Mythos deck.
- Check Elder One Summoning: If a red space is reached or the ritual is disrupted, move the Stage 1 card to the side and resolve the Stage 2 Reveal effects, summoning the Elder One.
- Elder One End of Turn Effects: Resolve all revealed Stages in order.
Dice and Checks
- “Make a roll”: Roll 3 standard black dice + any applicable bonus green dice .
- Rerolls: On ANY roll, the active investigator may take 1 stress to reroll 1 die (as many times as they want and can).
- Success: Deals 1 wound when attacking.
- Elder Sign: Requires an ability to have any effect.
- Tentacle: Lose 1 sanity.
Sanity
When marker reaches :
- Ignore any remaining sanity loss.
- Activate your insanity.
- Level up 1 of your skills.
- If there’s a symbol, investigator now adds +1 to all their rolls.
Fighting the Elder One
- Once summoned, if the Elder One attacks, roll the dice on all revealed Stages together.
- The Elder One can only be attacked after the ritual is disrupted.
- Once the current Elder One Stage loses all its health, move that card to the side and resolve the Reveal effect of the next Stage.
Ending the Game
- Investigators all win if: They defeat the Final Stage of the Elder One.
- Investigators all lose if:
- An investigator is eliminated before the Elder One is summoned.
- All investigators are eliminated.
- The Progression token reaches the final Summoning track space.
Credits
- Game Design: Marco Portugal and Rob Daviau
- Original Design: Rob Daviau and Eric M. Lang
- Development: Leo Almeida (Lead), Jordy Adan, and Patrick Fernandes
- Production: Guilherme Goulart (Lead), Marcela Fabreti (Lead), Thiago Aranha, Vincent Fontaine, Rebecca Ho, Isadora Leite, Thiago Meyer, Shafiq Rizwan, Kenneth Tan, and Gregory Varghese
- Art: Helder Almeida, Nicolas Fructus, Stefan Kopinski, Karl Kopinski, Prosper Tipaldi, Iwo Widulinski, Richard Wright, Daniel Zrom
- Cover Art: Stefan Kopinski
- Additional Episode Design: Brian Neff and Umberto Pignatelli
- Lore Consultant: Francesco Nepitello
- Art Director: Mathieu Harlaut
- Graphic Design: Marc Brouillon, Louise Combal, Fabio de Castro, Júlia Ferrari, and Max Duarte
- Miniatures Renders: Edgar Ramos
- Miniatures Directing: Mike McVey
- Sculpting: Studio McVey
- Proofreading: Jason Koepp
- Publisher: David Preti
Expansions for
Cthulhu: Death May Die – Fear of the Unknown
Cthulhu: Death May Die – Bonus Relic Cards
2023
Two Kickstarter-exclusive relic cards for collectors and campaign backers.
90
minutes
View expansion
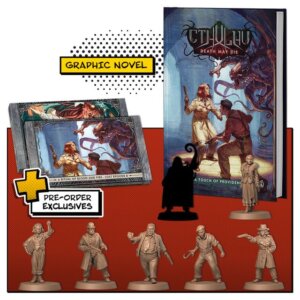
Cthulhu: Death May Die – CMON Comics: Vol. 2 Promos
2023
A Providence-themed comic with exclusive investigators, episodes, and more.
120
minutes
Medium Heavy

View expansion
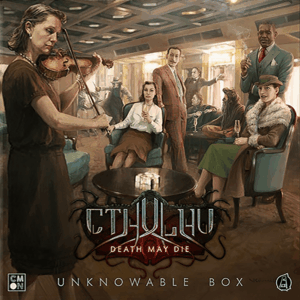
Cthulhu: Death May Die – Unknowable Box
2024
A complete collection of Kickstarter-exclusive stretch goals and lost episodes.
90
minutes
Medium Heavy
View expansion
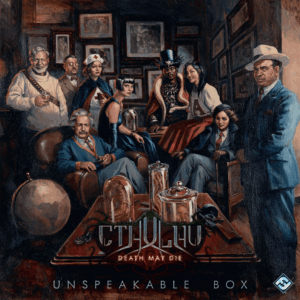
Cthulhu: Death May Die – Unspeakable Box
2019
A collection of Kickstarter stretch goals, investigators, Elder Ones, and lost episodes.
Medium Heavy
View expansion
