
Agricola
2007
Develop a farm, grow your household, and compete for the most Victory Points through careful action planning and card-driven strategies.
150
minutes
1 - 5
player(s)
12+
Medium Heavy


About this board game
Agricola is a turn-based farming game for 1–5 players, with play time of about 150 minutes, in which each player develops a farm from a humble wooden shack and a small household.
At the beginning, your family has only two actions per turn: one for you and one for your spouse. You can plow fields, collect materials, build fences, and pursue other possibilities as new action cards are revealed throughout the game. Every available action can be taken by only one player each round, making timing and careful planning essential.
Your farm and family will grow, but expansion brings new demands. You may want to have children to increase the work your household can accomplish, yet you must first enlarge your house—and then find enough food for everyone. Each decision helps shape your strategy while competing players claim valuable actions.
- Farm development: Plow fields, gather materials, build fences, and improve your property.
- Household growth: Expand your home and consider having children for additional workers.
- Exclusive actions: Choose carefully because each action is available to only one player per round.
- Variable card play: Use Occupations and Minor Improvements to support different strategies.
Agricola supports multiple levels of complexity. The beginner-friendly Family Variant does not use Occupations or Minor Improvements, while advanced play adds card decks with Basic, Interactive, and Complex levels. Each player begins with seven Occupation cards and seven Minor Improvement cards, selected from large collections and used when they fit the developing plan.
With countless possible strategies and competition for every action, Agricola rewards adaptable decision-making. The player who earns the most Victory Points from Improvements made on their farm wins.

Board Game Rules for
Agricola
Agricola
The 17th Century: Not an easy time for farming
(Agricola is the Latin word for “farmer”)
An agricultural development game for 1-5 players by Uwe Rosenberg
Playing time: Half an hour per player, shorter as a Family game. Age: From 12 years
Central Europe, around 1670 AD. The Plague which has raged since 1348 has finally been overcome. The civilized world is revitalized. People are upgrading and renovating their huts. Fields must be plowed, tilled and harvested. The famine of the previous years has encouraged people to eat more meat (a habit that we continue to this day).
Components
Game boards:
- 5 farmyards for the players (with farmyard spaces as well as 1 example on the reverse side)
- 3 game boards for the game actions (including one with an alternative reverse side for the Family game, as well as two examples)
- 1 board for Major Improvements (with a summary of scoring on the reverse side)

360 Cards:
- 169 yellow “Occupation” cards (66 cards for 1-5 players; 41 cards for 3-5 players; 62 cards for 4-5 players)
- 139 orange “Minor Improvement” cards (including 7 upgrades from Major or Minor Improvements)
- 10 red “Major Improvement” cards
- 14 blue Round cards with possible actions for rounds 1 to 14
- 16 green Action cards with possible actions that depend on the number of players
- 5 grey Begging cards
- 5 Summary cards
- 2 Deck cards (1 Deck I, 1 Deck K)

Wooden playing pieces:
- 5 Family member discs, 4 Stables and 15 Fences in each of the five player colors (blue, green, red, natural wood and purple)
- 33 round, dark brown Wood counters
- 27 round, light brown Clay counters
- 15 round, white Reed counters
- 18 round, grey Stone counters
- 27 round, yellow Grain counters
- 18 round, orange Vegetable counters
- 21 Sheep tokens (white cubes)
- 18 Wild boar tokens (black cubes)
- 15 Cattle tokens (brown cubes)
- 1 Starting player token

And also:
- 33 brown/grey Field/Stone house tiles
- 24 brown/red Wood/Clay hut tiles
- 36 yellow Food markers labeled “1”
- 9 Multiplication markers (can apply to animals, goods or Food)
- 3 Claim markers (with “Guest” on the reverse)
- 1 Scoring pad

Component Limits & Multiplication Markers
The only game components that have been deliberately limited in number are the 5 Family member discs, the 4 stables and the 15 fences for each player. If the other game components run out, a substitute should be improvised. To help, there are also multiplication markers, which multiply by 3 or 4 on the front and by 5 on the back. To show which resource the marker applies to, one of the appropriate goods is placed on top of the marker. Some markers are pre-printed with Food and Grain.

Preparing to Play
- Place the three game boards as shown in the illustration to the right.
- Each player chooses a color and takes the playing pieces in that color, as well as one farmyard. These are placed in front of the player (facing whichever direction the player chooses).
- On each of the two building spaces on this farmyard, players first place a Wooden hut room tile and then (in each of these rooms) one of their Family members.
- The remaining playing pieces (additional Family members, fences and stables) remain in the bag for now or are placed to one side.
- Sort the remaining house and hut tiles and the rest of the game components and place them beside the playing area.

Reverse sides:
- The first game board has a different reverse side which is used for the simplified Family game.
- The other two game boards should be turned facedown during the rules explanation. They have illustrative examples.
- The reverse sides of two of the farmyards can be used as supply areas for game components, if the farmyards are not in use in the game.
For your first game(s) of Agricola, we strongly recommend that you use the “Family game” rules. The game is the same as the full game, except that it is played without Occupation and Minor Improvement cards and with slightly different Action spaces. Starting with the Family game is a great way to get acquainted with the game before you try the full Agricola experience.
In the Family game variant, the yellow Occupation cards and the orange Minor Improvement cards are not used. In addition, some of the Action spaces are different in the Family game. Apart from that, all the rules of the full game apply.
Card Setup
Sort the cards according to the color of the reverse side.
Depending on the number of players, different green Action cards (B) are used. There are also blue Round cards (A), yellow Occupation cards (C), orange “Minor Improvement” cards (D), red “Major Improvement” cards (E), grey Begging cards (F) and Summary cards (G).
- Sort the blue Round cards according to the Stage of the game. Shuffle each small pile and place the piles on top of each other with the cards for Stage 6 at the bottom, Stage 5 on top of that, etc – finishing with the four cards for Stage 1 on the top. The Round cards make new actions available during the game.
- Green Action cards: If you are playing with 3, 4 or 5 players, take the corresponding set of green Action cards and place them face up on the spaces to the left of the first game board. The order in which the cards are laid out is irrelevant. In a 3-player game, there are 4 cards, in 4- and 5-player games there are 6 cards. In solo and 2-player games, no green Action cards are used.
- Yellow Occupation cards: The purple symbol on the left side of the yellow Occupation cards shows how many players the card is used for:
 means for 1-5 players,
 for 3-5 players,
 for 4-5 players. Cards that are not in use are removed from the game; the full deck of Occupation cards is only available in a 4- or 5-player game. Shuffle the cards. Each player is dealt a hand of 7 Occupation cards and may look through them. The remaining Occupation cards are put to one side.

The “Occupation” and “Minor Improvement” cards are divided into 3 decks – a Basic deck (E), an Interactive deck (I) and a Complex deck (K). To vary the cards that are used in a game, players can play with cards from only one deck, can take a share of their cards from each deck, or can shuffle the decks together. The deck that a card belongs to is indicated by the symbol on the right hand side of the card.
- Orange Minor Improvement cards: Shuffle the orange Minor Improvement cards. Each player is dealt a hand of 7 Minor Improvement cards and may look through them. The remaining Minor Improvement cards are put to one side.
- Red Major Improvement cards: Place the 10 red Major Improvement cards face up on the Major Improvements board. As soon as 9 Major Improvements have been bought, the board is turned over to show the scoring overview and the remaining Major Improvement is placed on the space on the reverse of the board.
- Begging cards: Place the grey Begging cards face-up beside the playing area.
- Summary cards: Each player takes a Summary card and places it in their playing area. One side of the card gives an overview of the game phases; the other explains the scoring at the end of the game. There are no scoring rounds during the game.

Starting Player
Players choose a starting player who receives the Starting player marker and 2 Food. The other players each receive 3 Food. The Starting player marker is not automatically passed on to the next player at the end of a round: it passes to the player who chooses the “Starting player” action.

Object of the Game
Players start the game with a farming couple living in a simple two-roomed hut. During the course of the game, these families have abundant possibilities to improve their quality of life by building up their home, improving their fields and breeding their animals.
In each of the game’s 14 rounds, each of a player’s Family members may take exactly one action. They can generate building resources such as Wood and Clay, add more people to their family, and ensure that they are fed. In each round, each action can only be taken by one Person – players will miss out if another player chooses the action first. A new action becomes available in each round – see Overview of game phases. You must plan to grow your family at the right time – but not too soon, because even the next generation must be fed. Growing your family is important, though, because it allows you to take more actions as they become available.
At the end of the game, the winner is the player who has established the best farmyard – see Scoring overview. Victory points are awarded for:
- the number of fields, pastures and fenced stables
- Grain, Vegetables, Sheep, Wild boar and Cattle
- extension and renovation of the family’s home
- the number of Family members
- played Occupation and Improvement cards
Players lose one point for each unused farmyard space. There are examples of play, with explanations, on the reverse sides of three of the boards.

Note: The terms “Person” and “Family member” are used in the rules and on the game cards to mean the round Family member discs; “Player” means the humans who are taking part in a game of Agricola.
The term “Other players” means all other players – so not the player taking the action.
Play of the Game
The game consists of six stages, which are divided into 14 rounds. Each round follows the same pattern and consists of four phases. There is a Harvest at the end of each stage (after rounds 4, 7, 9, 11, 13 and 14). This is shown on the game boards as Harvest.
Phase 1: Start the round – draw a new Round card
- Turn over the top Round card and place it on the appropriate space on the board. The action on this card is available to all players, and can be used not only in this round but in all subsequent rounds.
- All actions which occur at the beginning of a particular round or at the beginning of every round occur now.
- The text on some cards instructs players to place items on the Round card spaces. If there are tiles, Food and/or other playing pieces on the space for the current round, these are distributed to the appropriate players (who earned them by playing an Occupation or Improvement).

Phase 2: Replenish – place new goods and animals
Place new goods and Food on any Action spaces on the board that require them (on the printed spaces as well as on Action and Round cards). These spaces are shown by an arrow . If goods or Food are already on a space, the new goods/Food are added to them.
- 3 Wood means that 3 Wood tokens are placed on that space each round, 1 Cattle means that 1 Cattle token is placed on the space each round, etc.
- The Fishing and Traveling Players Action spaces receive 1 Food each round.
- These goods and Food are taken from the general supply and can build up over several rounds – there is no upper limit.

Phase 3: Work phase
In clockwise order, starting with the Starting player, players take turns taking a single Family member from their farmyard, placing it on an unoccupied Action space and taking that action. Play continues until all Family members have been placed.
- A player may only ever place one Family member at a time.
- Each Action space can only be used by one Person in one round.
- A Family member may never occupy an Action space without performing its action.
- Some Action spaces offer players several choices of action or require a player to take one action before (optionally) taking a second action.
- Whenever a player takes building resources, Grain, Vegetables or Food, the tokens are placed in a player’s personal supply in view of the other players.
- Animals may not be placed in the supply; they must be placed directly into the farmyard.

Animals that cannot be placed into the farmyard must be returned to the general supply or immediately transformed into Food using an Improvement with the  symbol. A player who plays a card from their hand or buys a Major Improvement must read the text on the card aloud so that all the other players are aware of its effects. Players are not allowed to hide their personal supply from other players or to completely cover cards that they have played.
Phase 4: Return home
Players remove their Family members from the game boards and return them to their home.
The Actions Overview
Four main types of action can be taken to improve a player’s farmyard:
- Players can extend and renovate their Wooden huts.
- An extended home enables the family to grow.
- Fields can be Plowed and Sown.
- Pastures can be fenced to hold animals.
Action A – Extend Wooden hut or renovate it into a Clay hut or Stone house
At the start of the game, each player has a Wooden hut with two rooms. Players can extend their huts by Building rooms using the Build room(s) action. New rooms must be orthogonally (i.e. not diagonally) adjacent to the existing rooms.
- There is no upper limit on the number of rooms that a player may build.
- New rooms are always made from the same material as the rest of the home. Wooden huts can only be extended with Wooden rooms; Clay huts only with Clay rooms; and Stone houses only with Stone rooms.
- Extending a Wooden hut costs 5 Wood and 2 Reed (for the roof), a Clay hut 5 Clay and 2 Reed, and a Stone house 5 Stone and 2 Reed.

During the game, the Wooden hut can be Renovated to a Clay hut and, later, a Stone house. The first Renovation Action space becomes available during Stage 2 (rounds 5 to 7).
- To renovate your Wooden hut to a Clay hut, you require 1 Clay token for each room in your Wooden hut, plus 1 Reed (for the roof). Turn the Wooden hut tiles over to show the Clay hut rooms.
- For the second renovation – from Clay hut to Stone house – you require 1 Stone token for each room in your Clay hut, plus 1 Reed (for the roof). Replace the Clay hut tiles with Stone house tiles.
- Players can only ever renovate a complete hut. Rooms may never be renovated one at a time.
- The Renovation action only allows a single renovation. A double renovation from Wooden hut to Stone house in one turn is not allowed.
Stables
A player who chooses the Build Room(s) action space on the left-hand board may choose to instead, or in addition, build up to 4 stables for 2 Wood each. Stables provide shelter for animals.
Additional actions after a Renovation
The Renovation card for Stage 2 allows players to purchase a Major (or Minor) Improvement after performing the renovation – players may not, however, ignore the Renovation action and only play an Improvement. A second Renovation card comes into play in the last round of the game. This allows players to Fence pastures after performing a renovation.

Action B – Family Growth
In Stage 2 (Rounds 5-7), the after Family growth, also 1 Minor Improvement action becomes available. Players must have room for offspring in their home before they can use this action – that is, they must have more rooms in their home than they have Family members. After taking Family growth, the player may choose to purchase a Minor Improvement.
The Family growth even without room in your home action card becomes available in Stage 5 (Round 12 or 13). With this action, a player may grow his or her family regardless of the number of rooms in their home.
- A player who chooses a Family growth action adds their newborn offspring to the Action space.
- In the Return home phase, the new Family member is taken home and placed in its room. If it doesn’t have its own room, it shares a room with another Family member.
- A Player who takes the Family growth action will therefore have one additional (adult) Family member to use from the following round onwards. The new Family member is not available for use in the round when it is produced – it must first grow up.
- Families are limited to a maximum of 5 members. A player who already has 5 Family members in play may not choose the Family growth action.

Action C – Plowing Fields, Grain and Vegetables
- A player who chooses the Plow 1 field action takes a field tile and places it on an empty space in his or her farmyard. If the player already has fields, the new field must be placed orthogonally adjacent to an existing field. Players may use at most 1 Plow Improvement each time they select the Plow 1 field action.
- A player who chooses Take 1 Grain takes one Grain marker and places it in his or her personal supply – the similar Take 1 Vegetable action becomes available in Stage 3 (Round 8 or 9).
- The Sow action allows a player to plant 1 or more empty fields: the player takes 1 Grain from his or her personal supply and places it on an empty (fallow) field, then adds 2 Grain from the general supply to the field.
- Instead of Grain, a player may also Sow Vegetables by taking 1 Vegetable from his or her personal supply and placing it on the empty field. 1 Vegetable from the general supply is added to the field.
- A newly planted Grain field holds 3 counters, a Vegetable field 2 counters.
- Grain and Vegetables are harvested during the Harvest. Grain and Vegetables that are in a player’s personal supply may be converted to 1 Food at any time – or to more than 1 Food with an appropriate Improvement.
- If a field is emptied, it can be replanted using the Sow action – a Harvested field does not need to be re-Plowed. In Stage 5 (Round 12 or 13), a new action allows players to Plow a field and immediately Sow one or more empty fields.

Baking bread as an additional action when plowing
A player who chooses the Sow and/or Bake bread Action space may choose what to do with any or all Grain counters in his or her personal supply. Grain may be sown in empty fields, be Baked into a loaf of bread and converted to Food or be left in the supply. Baking bread requires an appropriate Improvement with the  symbol.
- A Fireplace allows one Grain to be converted to 2 Food.
- A Cooking Hearth converts it to 3 Food.
- A Stone Oven allows up to 2 Grain to be converted to 4 Food each.
- A Clay Oven allows at most 1 Grain to be converted to 5 Food.

Action D – Raising Animals
Each player may raise exactly one animal as a pet in his or her home, regardless of the home’s size and type. The pet does not take a room away from a Family member.
To hold more animals, players must Fence pastures:
- Each pasture may only hold animals of one type – Sheep, Wild boar or Cattle.
- Up to 2 animals may live on each square of the pasture: Pastures that occupy 1 farmyard square can hold 2 animals; 2 squares can hold 4 animals; 3 squares can hold 6 animals etc.
- During the course of the game, players may rearrange their animals at any time, as long as these rules are followed. A player may release some or all of their animals at any time, at will (for example, to make room for other animals in a farmyard space).
- Animals breed at the very end of the Harvest.

The Fences action allows a player to immediately Fence pastures at a cost of 1 Wood for each fence.
- Fences border the pastures and are laid between the farmyard spaces; one fence may border more than one pasture.
- Like rooms and fields, all of a player’s pastures must be orthogonally adjacent.
- Fences may only be built if they will create a fully enclosed pasture, with fences on all sides. The edge of the farmyard board, stables, fields and rooms do not count as fences.
- Each player may build at most 15 fences.
- Fields and rooms may not be completely surrounded with a fence.
- Fences may not be demolished once they have been built.
- If a player has already built pastures, any new pastures must border the existing ones. You may subdivide an existing pasture by adding a fence or fences.
- Enclosed farmyard spaces are considered to be “used”.
Building stables
- Placing a stable in a pasture doubles the capacity of the entire pasture.
- Stables can be built at a cost of 2 Wood using the Build room(s) and/or Build stable(s) Action space.
- They may be placed on any space in the farmyard that does not already contain a room or a field, and may not be removed.
- Stables need not be fenced in: each unfenced stable may hold exactly 1 animal.
- Only 1 stable may be built in any farmyard space.
- A player may fence the stable in later, in order to create a new pasture with doubled capacity.

Harvest Overview
Players feed their Family members during the Harvest, which occurs at the end of each stage of the game – that is, after rounds 4, 7, 9, 11, 13 and 14. The Harvest consists of three phases, which occur one after another.
Harvest Phase 1: The Field phase
Players remove 1 Grain or Vegetable token from each Sown field in their farmyard and place them in their personal supply. Players may also receive additional Food from Occupation or Improvement cards that they have played.
Harvest Phase 2: Feeding the family
At the end of this phase, each player must feed his or her family by paying 2 Food per Family member. Offspring that were born during the current round (“Newborn offspring”, typically from a Family growth action) only consume 1 Food for this round, but will require 2 Food in future Harvests.
- Each unprocessed Grain or Vegetable may be converted to 1 Food at any time.
- Fireplaces and Cooking Hearths, as well as other specific Occupations and Improvements, allow players to convert Vegetables at any time, at a better exchange rate.
- Improvements with the symbol can be used to convert animals to Food at any time.
- Improvements with the symbol can be used to Bake bread, but only when the player takes a Bake bread action during a round.
- Unprocessed animals have no Food value.
Begging
A player who cannot or does not wish to produce the required Food must take a Begging card for each missing Food – players may not give up members of their family to avoid the need to Feed them. At the end of the game, players lose 3 points for each Begging card.
Harvest Phase 3: Breeding
Lastly, any player with at least 2 animals of the same type receives exactly one additional (baby) animal of that type – but only if the lamb, the shoat (piglet) or the calf can be accommodated in the farmyard (or on an appropriate Improvement card, for example the “Animal Yard”, “Wildlife Reserve” or “Forest Pasture”).
- Baby animals and parent animals may not be converted into Food immediately after the birth (for example, if you only have room for two animals of that type); they simply run away if they cannot be accommodated.
- The animals breed regardless of where the parent animals are placed – the parents may be in separate areas.

Occupation and Improvement Cards
At the start of the game, each player receives 7 Occupation cards and 7 Minor Improvement cards. A player who plays a card from their hand or buys a Major Improvement must read the text on the card aloud so that all the other players are aware of its effects.
Occupation Cards
- A player can use the 1 Occupation Action space(s) to play one of these cards face-up on the table.
- On the 1 Occupation Action space that is printed on the left-hand game board, a player’s first Occupation is free, and each additional Occupation costs 1 Food. In the 3–5 player game, a second Occupation space has varying costs depending on the number of players.
- The text on the Occupation cards applies to the player as soon as the card is played. Cards that are in a player’s hand have no effect on the game.
- Several cards, including the Countryman, Acrobat and Net Fisherman, are printed with a Claim symbol – if a player with one of these Occupations meets the stated condition, a Claim token is placed on the appropriate Action space with the arrow pointing towards the player with the claim.


Improvement Cards
In addition to the Minor Improvements, there are also ten Major Improvement cards. In each game, different Minor Improvements will come into play, but the same Major Improvements are available in each game and may be used by any player.
- The 1 Major or Minor Improvement Action space allows a player to purchase either a Major or Minor Improvement – as does the Renovation space.
- Minor Improvements may also be purchased – in conjunction with other actions – on the Starting player and Family growth action spaces. Players may not choose the action After Family growth, also 1 Minor Improvement and only purchase an Improvement: This card only allows an Improvement after Family growth.
- The upper-right corner of an Improvement card shows its cost: goods that a player must pay in order to play the card. Grain and Vegetables that are paid must be taken from a player’s supply and may not be taken directly from a field. Some Improvement cards have a slash, showing that the player may choose between two options to pay for the Improvement.
- Some Minor Improvements require the player to have a prerequisite – these are shown in the top left corner. In order to play these cards, the player must have the required goods, tiles or cards on the table in front of him or her. The condition is fulfilled if the player has more than the required number of fields or cards.
- Many Minor and all Major Improvements are worth Victory Points at the end of the game. These are shown by the symbol at the left beside the picture. The Bonus Points symbol on some cards (bottom center) indicates that they also give variable Bonus points – these are described in the text on the card.
- Some Minor Improvements (Traveling cards) are placed in the hand of the next player to the left after they are played and acted on. These are indicated by the brown arrows to either side of the illustration and the text on the card explains how they are used.
- Some Minor Improvements are Upgrade cards. Playing these cards not only costs goods but also requires the player to return an existing played or acquired Improvement. Upgraded Major Improvements are returned to the Major Improvements board and may be bought again by any player (including the same one as before). Upgraded Minor Improvements are removed from the game.

Major Improvements Summary
There are 10 Major Improvement cards. These have their own board, on which the cards are laid out. Each Major Improvement card has its own place on the board. Once all but one of the Major Improvements have been sold, the board is flipped to the reverse side, which has an overview of scoring. There is a space for the tenth Major Improvement card on this side of the board; it may still be bought.
- Fireplaces and Cooking Hearths: A player may own several Fireplaces and Cooking Hearths. The two Fireplaces only differ in their price (2 Clay and 3 Clay). Similarly, the two Cooking Hearths are identical except for their cost (4 Clay / 5 Clay). A player who chooses the Major Improvement action may upgrade a Fireplace to a Cooking Hearth by taking a Cooking Hearth and returning the Fireplace to the Major Improvements board, where it is available for purchase again. Fireplaces and Cooking Hearths are worth 1 VP each. They make Vegetables worth more than 1 Food, and can turn animals into Food. They also allow the player to use the Bake bread Action space to make Grain more valuable. The Cooking Hearth produces 1 more Food from Baking bread and from cooking Vegetables, Wild Boar and Cattle than the Fireplace.
- Clay Oven and Stone Oven: These allow players to Bake bread more efficiently and are worth 2 and 3 VP respectively. Players may Bake bread as a one-time action immediately after they have bought an Oven. The Ovens cost 3 Clay and 1 Stone / 1 Clay and 3 Stone.
- Joinery, Pottery and Basketmaker’s Workshop: Offer an additional scoring opportunity for Wood, Clay and Reed. In each Harvest, up to 1 of the corresponding Building resource may be converted into 2 or 3 Food (depending on the card). At the end of the game, players with these cards earn up to 3 Bonus points for having several of the same resource. These workshops each cost 2 Stone plus 2 Wood, Clay or Reed. At the end of the game, each workshop is worth 2VP.
- The Well: Provides 1 food for each of up to 5 Rounds. More importantly, the Well is worth 4 VP at the end of the game. The Well costs 3 Stone and 1 Wood.
End of the Game
The game ends after the Harvest at the end of the 14th round (Stage 6), after which the players’ scores are calculated. There is a scoring overview on the back of the board for Major Improvements and on the back of the Summary card, and the scoring is detailed on page 8.
Tally each player’s Victory Points on the scoring sheet. The player with the most points is the winner. If there is a tie, the tied players share the victory (or can play another game of Agricola to break the tie).
Scoring
The game is scored at the end of Round 14. The Summary cards have scoring tables, as does the reverse side of the Major Improvements board. The following categories are scored one after another:

- Fields: All field tiles that are on the player’s farmyard are scored, regardless of whether they are currently fallow or are sown. A player with 0 or 1 fields loses 1 point. Each field after the first scores 1 point, up to a maximum of 4 points for 5 or more fields. Players score -1/1/2/3/4 points for 0-1/2/3/4/5+ fields.
- Pastures: Points are awarded for fenced areas (“Pastures”), not for the number of farmyard spaces that are fenced in (“Pasture spaces”). The size of the individual pastures is irrelevant. A player with no pastures loses 1 point. Each pasture scores 1 point, up to a maximum of 4 points for 4 or more pastures. Players score -1/1/2/3/4 points for 0/1/2/3/4+ pastures.
- Grain and Vegetables: All of a player’s Grain and Vegetables are scored – whether it is in the fields or in the player’s supply. A player with no Grain loses 1 point. After that, players score 1/2/3/4 points for 1/4/6/8+ Grain. A player with no Vegetables loses 1 point. After that, players score 1 point per Vegetable up to a maximum of 4 points (score -1/1/2/3/4 for 0/1/2/3/4+ Vegetables).
- Animals: A player loses a point for having no animals of a particular type. Players score:
- -1/1/2/3/4 points for 0/1/4/6/8+ Sheep
- -1/1/2/3/4 points for 0/1/3/5/7+ Wild boar
- -1/1/2/3/4 points for 0/1/2/4/6+ Cattle
- Unused farmyard spaces: No additional points are awarded for using farmyard spaces, but players lose 1 point for each unused farmyard space. Farmyard spaces are counted as “used”, if they are fenced in or if they have a room tile, field tile or unfenced stable on them. In other words, “unused” farmyard spaces are empty and unfenced.
- Fenced Stables: Each fenced stable earns the player 1 point. No points are given for unfenced stables. Players do not lose points for having no stables. An unfenced stable has the advantage that the player avoids losing a point for having unused farmyard spaces.
- Huts and Houses: Players earn 1 point for each room in a Clay hut (so a player with 4 Clay rooms earns 4 points), and 2 points for each room in a Stone house (so a player with 4 rooms earns 8 points). Rooms in a Wooden hut do not earn any Victory Points.
- Family Members: Players earn 3 points for each Family member, up to a maximum of 15 points (as the number of Family members cannot be greater than 5).
- Points for cards: A point value is shown in a yellow circle on the left of the Minor and Major Improvement cards. Players lose 3 points for each Begging Card that they hold at the end of the game.
- Bonus points: The text on various Improvement and Occupation cards describes how Bonus points are awarded. Cards which earn Bonus points have a Bonus point symbol at the bottom.

Action Spaces Overview
Some actions are printed directly on the game boards (1.1) and others are on cards. Each round during the game, a new Round card (1.2) is drawn. Depending on the number of players, up to 6 additional Action cards may be laid out at the start of the game (1.3).
A player may never use an Action space without taking one of the actions shown on the space.
1.1. Actions that are printed on spaces on the game board
The actions that are printed on the game board are the same each time the game is played. They vary slightly in the Solo game and in the Family Game variant.
- Action spaces with an arrow: Players whose Family members use this space take all the resources, animals or Food that are on the space. Food is found on the Fishing and Traveling Players spaces and, in the Family Game variant, in the Storehouse. Apart from these, the Action spaces are named after the goods that are placed on the spaces.
- Build Room(s) and/or Stable(s): During the course of the game, each player may build any number of rooms and at most 4 stables. Pieces must be placed immediately whenever something is built. Each stable costs 2 Wood and can be placed on a fenced or empty unfenced farmyard space. A fenced stable doubles the holding capacity of a pasture. Each farmyard space can hold 1 stable. Each space within a pasture may have its own stable: the pasture’s capacity is then multiplied by 4, 8, etc. An unfenced stable can hold at most 1 animal and may be fenced later. A new room must be orthogonally adjacent to existing rooms.
- Starting player and/or Minor Improvement: The player takes or retains the Starting player token. He may play one Minor Improvement from his hand.
- Take 1 Grain: The player takes 1 Grain from the general supply and places it in her own supply. She may not Sow the Grain immediately, even if she has fallow fields. To Sow it, she must choose one of the Sow action spaces.
- Plow 1 Field: The player places 1 field tile on an unfenced, empty farmyard space of her choice. If she already has fields, the new field must be orthogonally adjacent to the existing fields. Players may not un-Plow plowed fields (that is, a player may never remove a field tile) for any reason.
- 1 Occupation: The player plays 1 Occupation card from his hand by placing it face-up on the table and reading it aloud. The first Occupation card a player plays in a game is free; each additional Occupation card costs 1 Food.
- Day Laborer: The player takes 2 Food from the general supply in the standard game, or 1 Food and 1 Building resource in the Family Game.

1.2. Action Spaces on the Round cards
The game is divided into 14 rounds over 6 stages – the first stage lasts for 4 rounds, the second for 3, the third to fifth for 2 each and the sixth for 1 round. In each round, a new Action space is added into the game; this can be used in the round in which it is turned up and in each subsequent round. Each of the 6 stages ends with a Harvest.
- Sow and/or bake bread (Stage 1): When Sowing, a player need not Sow all her empty fields, some may be left empty. Bake bread means that the player takes Grain from her supply and uses a Baking Improvement with the symbol to turn it into food.
- 1 Major or Minor Improvement (Stage 1): The player may place either a Major or a Minor Improvement. Major Improvements are shown on the red cards and may be placed by any player. Minor Improvements are held in a player’s hand.
- 1 Sheep (Stage 1): Place 1 Sheep on this space in the Replenish phase of each round. A player who selects this action takes all the Sheep from the Action space and must either put them into his farmyard or use an Improvement to turn them into Food. Sheep that cannot be pastured or turned into Food are returned to the general supply.
- Fences (Stage 1): Fences cost 1 Wood per fence. A fence that has been built may not be demolished. Huts do not create a natural border for a pasture – a pasture must be surrounded by fences even along the side(s) of a hut, the edges of the game board and beside fields and stables. A pasture may be divided into several pastures by adding fences.
- 1 Stone (Stage 2): This Action space is a normal resource space. In Stage 4 (Rounds 10 & 11), a second Stone space enters the game.
- After Renovation, also 1 Major or Minor Improvement (Stage 2): A player may only use this space to purchase a Major or Minor Improvement after Renovating. A player may not undertake both renovations, from a Wood to a Clay hut and to a Stone house, in one action.
- After Family Growth, also 1 Minor Improvement (Stage 2): A player may only use this Family growth space if he has more empty rooms than Family members. A player may not ignore the Family growth action and only purchase the Minor Improvement. A Guest – acquired through a Minor Improvement card – does not count as a Family member.
- Take 1 Vegetable (Stage 3): The player takes 1 Vegetable from the general supply and places it in her own supply. She may not immediately Sow the Vegetable.
- 1 Wild Boar (Stage 3): This Action space is the same as the 1 Sheep Round card, but instead of a sheep it adds a Wild boar to the game.
- 1 Stone (Stage 4): This is a normal building resource space.
- 1 Cattle (Stage 4): This action space is the same as the 1 Sheep Round card, but instead of a Sheep it adds a Cattle to the game.
- Plow and/or Sow 1 field (Stage 5): The player who takes this action may Plow one field and after that may also Sow: he may plant Grain or Vegetables from his personal supply into any empty field on his farmyard. A player need not Sow all his fields; some may be left empty.
- Family Growth even without a room (Stage 5): Unlike the other Family Growth card, this is not dependent on the number of rooms. By using this action three times, a player could possibly have 5 Family members in only 2 rooms. Note: If a player who uses this card later extends her home, she may not use the other Family Growth card again until she has more rooms than Family members: the new rooms must first be used for Family members that did not previously have their own room.
- After Renovation, also Fences (Stage 6): Round 14 is the only round of the game in which there are 2 Renovation actions (so that more than one player can build a Stone house). A player must Renovate to be allowed to Fence pastures. Players may never perform both renovations (to a Clay hut and to a Stone house) with one action.
1.3. Special Action spaces that vary according to the number of players
In a 3-5 player game, additional Action spaces ensure that there are enough actions available for all the players:
- 1 Occupation (3 players): A player who chooses this action may play 1 Occupation card from his hand. This Occupation costs 2 Food.
- Take 1 Reed, 1 Stone and 1 Food (4 players): The player takes 1 Reed, 1 Stone and 1 Food from the general supply and places them in his personal supply.
- 1 Occupation (4 players): A player who chooses this action may play 1 Occupation card from his hand. If this is the player’s first or second Occupation card, it costs 1 food, a subsequent Occupation card costs 2 food.
- Take 1 Reed, also 1 Stone and 1 Wood (5 players): 1 Reed is placed on this action space each round. In addition, when a player takes this Action, he also takes 1 Stone and 1 Wood from the general supply (Stone and Wood do not build up on this space over several rounds).
In a 5-player game, there are three action spaces on which a player must choose one of two or more options. The restriction of only one Family member on any action space still applies:
- Take animals (5 players): A player who chooses this Action space has three choices: Take 1 Sheep and 1 Food; Take 1 Wild Boar; or pay 1 Food for 1 Cattle. The animal is taken from the general supply and is immediately placed in the player’s farmyard or turned into Food using an appropriate Occupation or an Improvement with the symbol.
- Either 1 Occupation or, from Round 5, Family Growth (5 players): The player may play an Occupation card from her hand. If this is the player’s first or second Occupation card, it costs 1 Food, a subsequent Occupation card costs 2 Food. From the start of Round 5, a player may choose to take Family Growth instead of an Occupation.
- Build 1 Room or Traveling Players (5 players): A player choosing this Action space may either build a room or use the Traveling Players. Unlike the other Building space, this action can only be used to build a single room. Each round, 1 Food is placed on the Traveling Players space. If a player chooses the Building action, the Food remains on the Action space.

Terminology: Counters and Tokens
Counters and tokens are described in different ways:
- Building resources: Stone, Reed, Clay, Wood
- Resources: Building resources, Grain, Vegetables
- Animals: Sheep, Wild boar, Cattle
- Goods: All Resources, Animals
Specific Minor Improvement Clarifications
The 169 “Occupation” cards and the 139 “Minor Improvement” cards are divided into three decks:
- E: Basic deck
- I: Interactive deck
- K: Complex deck
The following abbreviations are used in the card descriptions:
- B: Cards that offer Bonus points
- U: Upgrade cards
- T: Traveling cards (pass to the player on the left after play)
- AS: One Minor Improvement, the Tavern, is available to all players as an Action space
- FS: Cards that function as a Farmyard space
- Acreage (K, FS): Players who receive 4 Grain on fields when Sowing (through Occupations like the Fieldsman and Smallholder) can also receive 4 Grain on the Acreage.
- Alms (I, T): The current round is not a “completed” round.
- Animal Feed (I): When acquiring this card, it is irrelevant whether the fields are planted with Grain or Vegetables. A player may return animals to the supply in order to make room for the new arrivals.
- Bakehouse (K, 5, U): The Baker’s Kitchen may not be upgraded to a Bakehouse.
- Baker’s Kitchen (I, 4, U): see Bakehouse.
- Bean Field (E, 1, FS): May be combined with the Potato Dibber, Fieldsman and Smallholder.
- Boar Breeding (K, T): The Wild boar may immediately be converted into Food, using an Improvement with the symbol or an appropriate Occupation.
- Bread Paddle (K): May be used with the Puppeteer and the Educator.
- Bookshelf (K, 1): When used with the Writing Desk to play two Occupation cards, the additional 3 Food are distributed twice (once for each card). The Patron gives an additional 2 Food.
- Brushwood Roof (K, 1): The player may mix Wood and Reed when building a new room. Instead of 2 Reed, he may use 1 Wood and 1 Reed.
- Cattle Market (E, T): The cattle may immediately be converted into Food, using an Improvement with the symbol or an appropriate Occupation.
- Chicken Coop (I, 1): May either be built with 2 Wood & 1 Reed or with 2 Clay & 1 Reed.
- Clay Roof (E, 1): Players may mix Clay and Reed when building. Instead of 2 Reed, a player may use 1 Clay & 1 Reed.
- Clay Supports (E): A Clay Support is a support used in preparing a Clay wall. A player is allowed to build 1 room for 5 Clay & 2 Reed and an additional room for 2 Clay, 1 Wood & 1 Reed in the same turn. The Clay Supports may not be combined with the Axe, Carpenter or the Clay Plasterer.
- Clogs (E): This card is worth 2 points even if the player receives Bonus points for the Half-timbered House or the Mansion. May be combined with the Chief’s Daughter.
- Copse (I, 1, FS): Players who receive 4 Grain on fields when Sowing can also grow 4 Wood once or twice in the Copse. Harvest the Wood during the Harvest.
- Corn Storehouse (I, 1): This is built with either 2 Wood & 1 Reed or 2 Clay & 1 Reed. Use the Corn Storehouse during the Harvest at the same time as the Watermill and the Harvest Helper.
- Crooked Plow (K, 1): A player may choose to only Plow 2 fields instead of 3 at once. Place 1 field tile on the card to show that the Plow may be used 1 more time. Each time a player selects the Plow 1 Field action, s/he may only use 1 plow.
- Field (E, T): The Harrow and Plows may not be used with the Field.
- Fish Trap (I): The Fish Trap does not earn additional food for the Reed Exchange, Helpful Neighbors, Reed Buyer and Reed Collector cards.
- Flagon (I): If the Well is rebuilt after the Village Well upgrade, the Food is distributed again. If both the Village Well and the Well have been played when the Flagon is played, the Food is distributed twice.
- Forest Pasture (K, 1, FS): The Wild boar on this card are included when scoring Wild boar.
- Granary (K, 1): A player may not build the Granary with 2 Wood & 1 Clay or with 1 Wood & 2 Clay. The Granary may not be combined with the Grain Cart, Corn Scoop, Pieceworker, Sycophant, Seed Seller, Greengrocer, Market Crier or Field Watchman.
- Greenhouse (K, 1): If the player does not wish to pay the 1 Food to buy the Vegetables, the Vegetable token is returned to the general supply.
- Guest (I, T): To show the Guest, take a Claim marker and turn it over to show the word Guest. The Guest counts as an additional Family member. A player who already has 5 Family members can use the Guest to play one round with 6. A Guest is not counted in checking whether there is enough room in the home.
- Gypsy’s Crock (E, 1): A player who converts 4 goods at once receives 2 additional Food, for 6 Goods, 3 additional Food, etc.
- Half-timbered House (E, B): If a player does not Renovate to a Stone house or if the player has also played the Mansion, there is no advantage.
- Harrow (I): Other players that use the Harrow may only Plow 2 fields at once if they place one Family member on one of the Plow 1 field Action spaces. The Harrow cannot be combined with any of the Plows. The owner of the Harrow may not deny other players the right to use it.
- Holiday House (I, 8): This costs either 3 Wood & 2 Reed or 3 Clay & 2 Reed. The player may not add a Clay Roof, Brushwood Roof or Straw-thatched Roof when building this. The owner of this card does not participate in the Work Phase (Phase 3) in round 14 – but s/he can still profit from the “Start the Round” phase (Phase 1).
- House Goat (K, 1): The goat was the first domesticated animal in the history of the human race. Place 1 Food for each remaining Harvest on this card, to ensure that the Food is not forgotten. A player cannot choose to let the Goat run free in order to make room for a different animal in his or her house.
- Lasso (I): Once the owner of this card has had a turn during the “Work” phase (Phase 3) and has placed 2 Family members, she can place her third Family member as soon as she has her second turn. Players cannot place more than two people at a time with the Lasso. A player with 4 or 5 Family members may use the Lasso twice in the same round.
- Lettuce Patch (E, 1, FS): To receive the 4 Food for Harvested Vegetables, the player must convert the Vegetables to Food immediately after Harvesting. See also: Turnip Field.
- Liquid Manure (K): Fields that have already been planted when the card is played will only benefit from the Liquid Manure when they are emptied and replanted. Liquid Manure may be combined with a Corn Storehouse, Potato Dibber, Planter Box, Bean Field, Turnip Field, Lettuce Patch, Fieldsman and Smallholder.
- Manure (I): The owner of the Manure has a Field phase (Harvest phase 1) after each round. Outside a regular Harvest time, the Milking Shed, Spindle, Butter Churn, Milking Stool and Loom do not earn any additional Food.
- Market Stall (E, T): The Market Stall may not be combined with the Pieceworker but may be combined with the Market Woman. A player with no Grain in the Supply may not use the Market Stall, even in combination with the Market Woman.
- Milking Shed (I, 2): Pets and live Animals on Improvement cards are also counted with the animals in the farmyard. At Harvest time, the Milking Shed is processed before the Spindle, Butter Churn, Milking Stool and Loom.
- Millstone (E): With the Baker, the player receives at most 2 additional Food in each Harvest.
- Mini Pasture (E, T): The new pasture must border an existing pasture. The Mini Pasture may be combined with the Hedge Keeper, Farmer, Stablehand and Animal Breeder.
- Moldboard Plow (I, 1): Place 2 field tiles on this card to show that the Plow may be used 2 times.
- Potato Dibber (E): May be combined with Beanfield, Turnip Field and Lettuce Patch.
- Punner (I): Unless another player Plows more than one field on his/her action, the player with the Punner may not take a field with it.
- Reed Exchange (I, T): A player may not exchange 1 Wood or 1 Clay for only 1 Reed, or exchange 1 Wood and 1 Clay for 2 Reed.
- Reed Hut (K, 1): The person in the Reed Hut is not counted when calculating whether Family Growth is allowed. They do not count as part of the family.
- Riding Plow (E, 2): A player may choose to only Plow 2 fields at once instead of 3. Place 2 field tiles on the card to show that the plow may be used 2 more times. Each time a player selects the Plow 1 Field action, s/he may only use 1 Plow.
- Sawhorse (K): A player that can already put those fences up at no cost cannot save the free fences for another turn.
- Shepherd’s Crook (I): If, for example, a pasture of size 5 or 6 is divided into a pasture of size 4, this does not count as “newly fenced” and it does not receive the 2 Sheep.
- Shepherd’s Pipe (E): May not be combined with the Stablemaster.
- Sleeping Corner (K, 1): This can be used with either of the Family Growth actions.
- Spinney (I, 1): When the owner of the Spinney demands the 1 Wood from another player, the other player is entitled to change her mind & select a different action instead – it is easy to overlook the Spinney.
- Stone Exchange (K, T): A player may not exchange 1 Wood or 1 Clay for only 1 Stone, or exchange 1 Wood and 1 Clay for 2 Stone.
- Swing Plow (K, 1): A player may choose to only Plow 2 fields instead of 3 at once. Place 2 field tiles on the card to show how many times the Plow may be used. Each time a player selects the Plow 1 Field action, she may only use 1 plow.
- Turnip field (K, 1, FS): May be combined with the Potato Dibber, Fieldsman and Smallholder.
- Turnwrest Plow (E, 1): A player may choose to only Plow 2 fields at once instead of 3. Place 1 field tile on the card to show that the Plow may be used 1 more time. Each time a player selects the Plow 1 field action, she may only use 1 plow.
- Weekly Market (I, T): The Weekly Market may be combined with the Market Woman but not with the Pieceworker.
- Wood Cart (I): The Wood Cart may not be used with the 1 Reed, also 1 Stone and 1 Wood action space in the 5-player game.
- Wooden Crane (I, 1): The Wooden Crane may not be used on the Take 1 Reed, 1 Stone and 1 Food space from the 4-player game or the Reed, also 1 Stone and 1 Wood from the 5-player game.
- Village Well (I, 5, U): The Well gives 1 Food per round for 5 rounds. These Food remain on the board even when the 3 additional Food from the Village Well are distributed, and are distributed again if the Well is purchased a second time.
Specific Occupation Clarifications
This section clarifies questions about some of the occupation cards. The number range shows the number of players that the card may be used with (1-5, 3-5 or 4-5).
- Acrobat (K, 4-5): If the Acrobat uses the Traveling Players Action space, he should place Claim markers on any unused Take 1 Grain, Plow 1 field and Plow 1 field and/or Sow Action spaces as a reminder that these may be claimed later.
- Adoptive Parents (K, 1-5): A player must pay 2 Food instead of 1 for an adoptive child, even if it was adopted immediately before the Harvest.
- Animal Dealer (I, 3-5): In the 5-player game, there is an Action space which gives Players 1 animal of their choice. The Animal Dealer cannot take an additional animal. See also: Animal handler.
- Animal Handler (K, 4-5): By paying 1 Food, a player may immediately convert the animal into Food. The 1 Food may not be taken from the proceeds.
- Animal Tamer (K, 1-5): No effect after acquisition of a House Goat.
- Basin Maker (K, 4-5, B): Slaughtered Wild boar may either be placed on the Tanner or used for the Basin Maker, not both.
- Berry Picker (E, 3-5): This card is activated by the Action space 1 Reed, in addition 1 Stone and 1 Wood that is used in a 5-player game and also by the Building Materials Minor Improvement card.
- Businessman (I, 3-5): In conjunction with the Traveling Salesman, up to 3 Minor Improvements may be played one after another using the Starting Player Action space. In conjunction with the Merchant, first 1 Minor Improvement and 1 Minor or Major Improvement and then additionally, for 1 Food, either 2 Minor Improvements or 1 Major and 1 Minor Improvements may be played using the Starting Player Action space.
- Carpenter (E, 1-5): May not be combined with the Axe or with the Clay Plasterer.
- Charcoal Burner (E, 3-5): The player can place 1 Food and 1 Wood on the unbuilt Major Improvements with the symbol, to remind her to take the tokens.
- Chief (E, 1-5, B): The third point per room is scored as Bonus points. The Chief may be combined with the Half-timbered House as well as with the Mansion.
- Clay Worker (K, 1-5): In a 5-player game, there is an Action space on which the player always receives 1 Wood in addition to any other resources. The Clay worker also receives 1 additional Clay on this space.
- Conservator (E, 1-5): May not be combined with the Stone Breaker. The Renovation is paid as usual, with 1 Stone per room plus 1 Reed.
- Countryman (K, 4-5): If the player chooses either the Take 1 Grain or Take 1 Vegetable action, he places Claim markers on the empty Sowing spaces to show that he has a claim. There are 2 Sowing Action spaces. The second Round card with this action appears during Stage V.
- Cowherd (I, 3-5): In the 5-player game, there is an Action space which gives players 1 animal of their choice. The Cowherd cannot take an additional Cattle token on this space.
- Farm Steward (I, 1-5): Allows at most 1 Family Growth without space in the Hut.
- Farmer (E, 4-5): The player only receives 1 new animal, even if several Pastures are created with the same action.
- Fence Builder (I, 1-5): From now on, the player has only 14 fences for building. Building fences always follows all other actions on the Action space.
- Fence Deliveryman (I, 1-5): Fences may not be removed from the Round space to build them in the usual way. A player who only wishes to build 1-3 fences still pays 2 Food. A player who chooses not to build any fences or not to build as many as were possible returns the leftover fences to her own supply of unbuilt fences. A player may not leave a pasture open.
- Fence Overseer (K, 1-5): May be combined with Farmer, Animal Breeder, Stablehand and Groom. Used with the Stablehand, it is possible to build fences, receiving 1 free stable that could then be fenced for free. The player does not then receive a second stable, as only 1 free stable is awarded in each action. Combined with the Groom: First the player puts up 1 stable, then he surrounds it with fences.
- Fieldsman (I, 1-5): May be combined with the Forester, Copse, Lettuce Patch, Beanfield, Turnip Field and Acreage.
- Field Guard (E, 4-5): see Head of the Family.
- Field Watchman (I, 1-5): Plows and the Harrow cannot be used with the Field Watchman.
- Field Worker (I, 3-5): The Field Worker is also activated when a Player uses the Corn Storehouse.
- Foreman (K, 4-5): Wood Distributor, Foreman and Taster can affect one another. A player who decides to use the Occupation cannot take back the decision. A player who does not wish to use the Occupation has until the start of the Work phase (Phase 3) to reconsider.
- Forester (K, 1-5, FS): A player who may grow 4 Grain on a field, (eg. through an Occupation) also grows 4 Wood on the Copse (1-3 times); a player who could grow 5 Grain grows 5 Wood. A player with the Fieldsman receives a total of 5 piled Wood for a new Wood planting, for 2 new Wood plantings she receives 4 Wood each.
- Gardener (I, 1-5): All the player’s Vegetable patches remain untouched until the end of the game. This also applies to the Beanfield, Turnip Field and Lettuce Patch.
- Groom (I, 4-5): Wood that the player receives at the same time through a Private Forest, Wood Collector or Wood Deliveryman may immediately be used to build 1 stable.
- Harvest Helper (I, 3-5): A player may not take the additional Grain from one of his own fields. The Corn Storehouse has precedence over the Harvest Helper. The Harvest Helper may take the Grain from the Acreage Minor Improvement.
- Head of the Family (E, 4-5): A player may not use the same Action space in the same round with 2 of her own Family Members.
- Hedge Cutter (E, 1-5): May be combined with the Fence Overseer, Fence Builder and Fence Deliveryman as well as with the Farmer, Stablehand, Wood Carver and Sawhorse.
- Hut Builder (E, 4-5): When the card is played, place a hut tile on the Action space for round 11.
- Layabout (I, 1-5): The player does not participate in any part of the next Harvest, including harvesting fields, breeding animals and feeding his or her family.
- Lover (K, 3-5): If a player builds a room after the Lover has had Offspring, the Offspring occupies the new room. It is better to first build the room, then take a normal Family Growth action and only then use the Lover.
- Market Woman (K, 1-5): The Market Woman may be combined with the Greenhouse, Market Stall and Weekly Market. She may not be combined with Occupations. If the player who has played the Market Woman also has the Market Stall or Weekly Market, he must first give up Grain in order to get it back.
- Mason (E, 1-5): The player may place a room tile on the Occupation card to show that he has not yet taken the Extension action.
- Merchant (E, 1-5): A player using the 1 Major or Minor Improvement Action space can play either 2 Major or 2 Minor Improvements or 1 Major and 1 Minor Improvement. In conjunction with the Traveling Salesman it is possible to acquire up to 4 Minor Improvements, or to acquire 2 Major Improvements using the 1 Minor Improvement and paying 1 Food. In conjunction with the Businessman, first 1 Minor Improvement and 1 Minor or Major Improvement and then additionally, for 1 Food, either 2 Minor Improvements or 1 Major and 1 Minor Improvements may be played using the Starting Player Action space.
- Net Fisherman (I, 1-5): When the Player places 1 Family member on an Action space with Reed, he stakes his claim to fish by placing a Claim marker.
- Parvenu (I, 4-5): The player receives the Stone immediately after Renovating, so can use them immediately for the accompanying Improvement.
- Pieceworker (K, 1-5): The Pieceworker can only buy goods in the “Work” phase (Phase 3) – not at the start of a round (Phase 1). The Pieceworker only affects goods that are earned directly through an Action space, not through Improvements and Occupations.
- Plow Driver (E, 1-5): May not be combined with any of the 5 Plows or the Harrow.
- Plow Maker (E, 1-5): Unlike the Plow Driver, the Plow Maker may be combined with a Plow or the Harrow.
- Plowman (K, 1-5): If the player chooses not to take a field, the field is returned to the general Supply.
- Puppeteer (I, 4-5): The Puppeteer may only play Occupation cards if she has Food – even if the card would provide Food immediately.
- Reed Buyer (I, 4-5): If the Player takes Reed, he does not receive additional Food from the general supply. The Other player may not refuse the Reed purchase. The Reed Buyer cannot interfere if Reed is taken for the second time in a Round.
- Resource Seller (K, 1-5): Resources may be bought at the start of the round (Phase 1) as well as in the Work phase (phase 3). It is possible to buy more than 1 resource from the Resource Seller by using Occupation cards like the Wood Distributor, Storekeeper or Clay Worker.
- Schnaps Distiller (K, 1-5): The Player does not require a Fireplace, Cooking Hearth or Oven to convert the Vegetables.
- Scholar (K, 1-5): The Bookshelf, Perpetual Student and Patron can be used with the Scholar. Each round, the Scholar allows a player to play up to 1 additional card.
- Sheep Farmer (K, 3-5): There is an additional animal space in the 5-player game. The Sheep Farmer can affect this space. The Sheep Farmer may not be combined with the Shepherd Boy, Animal Handler, Sheep Whisperer or Master Shepherd.
- Shepherd Boy (K, 4-5): The player does not receive a free Sheep for the current round. The free Sheep may be immediately transformed into Food with an appropriate Improvement.
- Smallholder (K, 1-5): May be combined with the Drinking Trough and the Shepherd’s Pipe. Copse, Acreage, Beanfield, Turnip Field and Lettuce Patch do not count towards the indicated maximum of 2 fields. Neither those nor the Forester may be combined with the Smallholder.
- Stable Hand (E, 1-5): Stable Hand and Fence Overseer can be combined. It would be possible to build fences, receiving 1 free stable that could then be fenced for free. The player does not then receive a second stable.
- Stablemaster (E, 1-5): The Stablemaster and the Shepherd’s Pipe may not be used together.
- Stone Breaker (K, 4-5): May not be combined with the Conservator.
- Stone Buyer (I, 4-5): If the Player takes Stone, she does not receive additional Food from the general Supply. The Other player may not refuse the Stone purchase. The Stone Buyer cannot interfere if Stone is taken for the second time or third time in a Round.
- Stone Cutter (E, 3-5): If e.g. the Lumber card is played, the player need not give up any Stone.
- Sycophant (I, 4-5): Note that there are enough cards in the I deck for the other players to avoid the Take 1 Grain Action space.
- Tanner (K, 3-5, B): Slaughtered Wild Boar may either be placed on the Tanner or used for the Basin Maker, not both.
- Taster (I, 4-5): If e.g. the right-hand neighbor of the Taster is the Starting player, the Taster pays him 1 Food and places her first person. The Starting player then places the second, the third person is then played by the player who played the Taster (due to the normal flow of the game). See also: Foreman.
- Traveling Salesman (K, 1-5): In conjunction with the Merchant, it is possible to acquire up to 4 Minor Improvements using the 1 Major or Minor Improvement space for 1 Food, or to acquire 2 Major Improvements using the 1 Minor Improvement for 1 Food. In conjunction with the Businessman, up to 3 Minor Improvements may be played using the Starting Player Action.
- Tutor (E, 1-5, B): The player may note the Bonus points immediately on his scoring pad, or may also simply lay out his Occupations in the order that he plays them.
- Veterinarian (K, 4-5): If the player draws 2 different animals, both are returned to the container. If the animals are the same, the player may immediately convert the animal s/he receives into Food. If you are playing with Wooden animals, take Stone, Reed and Wood tokens for drawing and take one animal of the appropriate color.
- Water Carrier (I, 1-5): Food is not distributed a second time when the Well is upgraded to the Village Well. It is distributed again if the Well is built for a second time.
- Well Builder (I, 1-5): After the upgrade to the Village Well, the Well may be built a second time. The benefits of the Well builder also apply the second time.
- Wet Nurse (K, 1-5): Players are allowed to build several rooms at once with the Build Room(s) action. For 2 Food, the Wet Nurse allows an immediate Family Growth of 2 people, for 3 Food 3 people. The new Family members are placed on top of the Family member that was placed on the Build Room(s) Action space. The newborns are available to take actions in the following round.
- Wood Buyer (I, 3-5): The card also applies to the 1 Reed, in addition 1 Stone and 1 Wood Action space that is used in a 5-player game.
- Wood Carver (K, 1-5): May only be used once in each Round. The player can place her Wood supply on the Wood Carver card, to ensure that she does not forget the benefits.
- Wood Distributor (K, 1-5): Occupations like Boar Catcher and Mushroom Collector may mean that there is Wood on the Wood space that cannot be distributed evenly – in this case, 1 or 2 Wood are left on the Action space. The Wood Distributor, Foreman and Taster can affect one another. A player who chooses to use the Wood Distributor cannot take back the decision. A player who chooses not to use the Wood Distributor has until the start of the Work phase (Phase 3) to reconsider.
- Woodcutter (E, 1-5): see Wood Buyer.
Harvest Card Timing Sequence
The Harvest consists of three phases. The Improvement and Occupation cards can divide the Harvest into up to 11 parts:
Harvest Phase 1: Field Phase
- Start: Milking Shed.
- During the phase: Forester, Milking Hand, Copse, Butter Churn, Spindle, Loom, Milking Stool, Beanfield, Turnip Patch, Lettuce Patch, Acreage.
- At the end of the phase: Water Mill, Corn Storehouse.
- Between Phases 1 and 2: Harvest Helper.
Harvest Phase 2: Feeding the Family
- Start: Baker.
- During the phase: Cook, Schnaps Distiller, Schnaps Distillery, Master Brewer, Brewery, Hand Mill, Plane, Spit Roast, House Goat.
- At the end of the phase: Slaughterman, Slaughterhouse.
- Between Phases 2 and 3: n/a
Harvest Phase 3: Breeding
- Start: n/a
- During the phase: Shepherd, Forest Pasture, Nature Reserve, Animal Yard.
- At the end of the phase: n/a
Agricola as a Family Game (for 1-5 people from 10 years)
In the simplified version of Agricola, the Occupation and Minor Improvement cards are not used – players do not have a hand of cards.
- The first game board is turned face-down, showing the “Agricola Family Game” side, and in a 3–5 player game only the “Family Game” Action cards are used.
- The Major or Minor Improvement action is restricted to Major Improvements.
- Otherwise, the rules are the same as for the full game.
Card Distribution Variants
- 3:1 Exchange: At any time, a player may discard any 3 cards from his hand and draw the face-down card at the top of either the Minor Improvements or the Occupations deck. This card is placed in the player’s hand.
- 10-3: Each player draws 10 Occupation and 10 Minor Improvement cards and discards 3 of each.
- Mulligan: At the start of the game (and only at the start), a player may discard all 7 Occupations and/or Minor Improvements and draw 6 new cards of that type. (If the player is still unhappy, he can keep trying this, always drawing 1 card fewer than he discards).
- Draft: Before the game starts, each player receives a hand of 7 Occupation cards as usual, then chooses one and passes the rest to her left-hand neighbor. Each player chooses one of the 6 new cards and passes on the remaining 5. This continues until each player has 7 cards. Repeat this process with the Minor Improvement cards. This variant allows players to create better combinations of cards than with a purely random distribution. We recommend that each player should have played Agricola at least 4-5 times before trying this variant.
Solo Version (for 1 person, from 12 years)
To play a Solo game, start with 0 Food. The left-hand spaces on the left game board remain empty, as in the 2-player game. Otherwise, play the game by the same rules as the multi-player game, taking your turns one after another. After you play a Minor Improvement that should be passed to the player on the left, it is removed from the game.
Exceptions:
- Adult Family members must be fed 3 Food each at Harvest time (Newborn offspring are still fed only 1).
- The “3 Wood” Action space only supplies 2 Wood in any round.
To play a series of Solo games:
- After the first game, choose one of your played Occupations. This is now a permanent Occupation and is placed face-up before the start of all subsequent games without requiring any Action to be used. You can use the abilities of the Occupation card from the start of the game, just as though you had already played it.
- Each subsequent game, you choose another played Occupation to be added to your permanent Occupations. Reduce the number of cards in your Occupations hand by the number of permanent Occupations that you have, so that you have a total of seven Occupation cards at the start of each Solo game. Once an Occupation has been made permanent, it must be placed face-up at the start of each subsequent game in the series.
- Because you have more permanent Occupations after each game, the goal score that you must reach goes up in each game: In the first game, your goal is 50 points, then 55, 59, 62, 64, 65, 66 and 67 points. After the eighth game, the Solo game series is over. (You can of course play on with all permanent Occupation cards, in which case the goal score increases by 1 point per game.)
- At the start of each game in the series, you receive 1 food for every 2 points by which you exceeded the goal score for the previous game (rounded down). Any cards from the previous game that were not moved to the permanent Occupations are shuffled into the deck.
Many Solo players enjoy choosing their own cards – even determining the order of the Round cards. You can also try the following three “contests”: restrict your Occupation and Improvement cards to only one of Deck E, I or K.
Credits
Agricola is a complex development game that was designed between December 2005 and February 2006.
- Game design: Uwe Rosenberg
- Graphic design and Illustration: Klemens Franz / atelier198
- Editing: Hanno Girke und Uwe Rosenberg
Thanks to the 138 Playtesters of the first edition as well as to the gaming public for the many comments and compliments after publication, which helped us to improve the game even further.
Special thanks to the Game Doctor Dale Yu for reviewing the Solo game rules.
The English translation was done by Melissa Rogerson, who thanks Hanno Girke and William Attia for support and many late-night discussions, her family for their patience, and John Kennard, Shawn Low, Dale Yu, Zev Shlasinger and the Agricola translators group for their suggestions and proofing.
© 2007 Lookout Games
www.lookout-games.de
English language publisher:
Z-Man Games, Inc. © 2008
www.zmangames.com
Introduction & Components
Agricola
The 17th Century: Not an easy time for farming
(Agricola is the Latin word for “farmer”)
An agricultural development game for 1-5 players by Uwe Rosenberg
Playing time: Half an hour per player, shorter as a Family game. Age: From 12 years
Central Europe, around 1670 AD. The Plague which has raged since 1348 has finally been overcome. The civilized world is revitalized. People are upgrading and renovating their huts. Fields must be plowed, tilled and harvested. The famine of the previous years has encouraged people to eat more meat (a habit that we continue to this day).
Components
Game boards:
- 5 farmyards for the players (with farmyard spaces as well as 1 example on the reverse side)
- 3 game boards for the game actions (including one with an alternative reverse side for the Family game, as well as two examples)
- 1 board for Major Improvements (with a summary of scoring on the reverse side)
360 Cards:
- 169 yellow “Occupation” cards (66 cards for 1-5 players; 41 cards for 3-5 players; 62 cards for 4-5 players)
- 139 orange “Minor Improvement” cards (including 7 upgrades from Major or Minor Improvements)
- 10 red “Major Improvement” cards
- 14 blue Round cards with possible actions for rounds 1 to 14
- 16 green Action cards with possible actions that depend on the number of players
- 5 grey Begging cards
- 5 Summary cards
- 2 Deck cards (1 Deck I, 1 Deck K)
Wooden playing pieces:
- 5 Family member discs, 4 Stables and 15 Fences in each of the five player colors (blue, green, red, natural wood and purple)
- 33 round, dark brown Wood counters
- 27 round, light brown Clay counters
- 15 round, white Reed counters
- 18 round, grey Stone counters
- 27 round, yellow Grain counters
- 18 round, orange Vegetable counters
- 21 Sheep tokens (white cubes)
- 18 Wild boar tokens (black cubes)
- 15 Cattle tokens (brown cubes)
- 1 Starting player token
And also:
- 33 brown/grey Field/Stone house tiles
- 24 brown/red Wood/Clay hut tiles
- 36 yellow Food markers labeled “1”
- 9 Multiplication markers (can apply to animals, goods or Food)
- 3 Claim markers (with “Guest” on the reverse)
- 1 Scoring pad
Component Limits & Multiplication Markers
The only game components that have been deliberately limited in number are the 5 Family member discs, the 4 stables and the 15 fences for each player. If the other game components run out, a substitute should be improvised. To help, there are also multiplication markers, which multiply by 3 or 4 on the front and by 5 on the back. To show which resource the marker applies to, one of the appropriate goods is placed on top of the marker. Some markers are pre-printed with Food and Grain.
Setup
Preparing to Play
- Place the three game boards as shown in the illustration to the right.
- Each player chooses a color and takes the playing pieces in that color, as well as one farmyard. These are placed in front of the player (facing whichever direction the player chooses).
- On each of the two building spaces on this farmyard, players first place a Wooden hut room tile and then (in each of these rooms) one of their Family members.
- The remaining playing pieces (additional Family members, fences and stables) remain in the bag for now or are placed to one side.
- Sort the remaining house and hut tiles and the rest of the game components and place them beside the playing area.
Reverse sides:
- The first game board has a different reverse side which is used for the simplified Family game.
- The other two game boards should be turned facedown during the rules explanation. They have illustrative examples.
- The reverse sides of two of the farmyards can be used as supply areas for game components, if the farmyards are not in use in the game.
For your first game(s) of Agricola, we strongly recommend that you use the “Family game” rules. The game is the same as the full game, except that it is played without Occupation and Minor Improvement cards and with slightly different Action spaces. Starting with the Family game is a great way to get acquainted with the game before you try the full Agricola experience.
In the Family game variant, the yellow Occupation cards and the orange Minor Improvement cards are not used. In addition, some of the Action spaces are different in the Family game. Apart from that, all the rules of the full game apply.
Card Setup
Sort the cards according to the color of the reverse side.
Depending on the number of players, different green Action cards (B) are used. There are also blue Round cards (A), yellow Occupation cards (C), orange “Minor Improvement” cards (D), red “Major Improvement” cards (E), grey Begging cards (F) and Summary cards (G).
- Sort the blue Round cards according to the Stage of the game. Shuffle each small pile and place the piles on top of each other with the cards for Stage 6 at the bottom, Stage 5 on top of that, etc – finishing with the four cards for Stage 1 on the top. The Round cards make new actions available during the game.
- Green Action cards: If you are playing with 3, 4 or 5 players, take the corresponding set of green Action cards and place them face up on the spaces to the left of the first game board. The order in which the cards are laid out is irrelevant. In a 3-player game, there are 4 cards, in 4- and 5-player games there are 6 cards. In solo and 2-player games, no green Action cards are used.
- Yellow Occupation cards: The purple symbol on the left side of the yellow Occupation cards shows how many players the card is used for: means for 1-5 players, for 3-5 players, for 4-5 players. Cards that are not in use are removed from the game; the full deck of Occupation cards is only available in a 4- or 5-player game. Shuffle the cards. Each player is dealt a hand of 7 Occupation cards and may look through them. The remaining Occupation cards are put to one side.
The “Occupation” and “Minor Improvement” cards are divided into 3 decks – a Basic deck (E), an Interactive deck (I) and a Complex deck (K). To vary the cards that are used in a game, players can play with cards from only one deck, can take a share of their cards from each deck, or can shuffle the decks together. The deck that a card belongs to is indicated by the symbol on the right hand side of the card.
- Orange Minor Improvement cards: Shuffle the orange Minor Improvement cards. Each player is dealt a hand of 7 Minor Improvement cards and may look through them. The remaining Minor Improvement cards are put to one side.
- Red Major Improvement cards: Place the 10 red Major Improvement cards face up on the Major Improvements board. As soon as 9 Major Improvements have been bought, the board is turned over to show the scoring overview and the remaining Major Improvement is placed on the space on the reverse of the board.
- Begging cards: Place the grey Begging cards face-up beside the playing area.
- Summary cards: Each player takes a Summary card and places it in their playing area. One side of the card gives an overview of the game phases; the other explains the scoring at the end of the game. There are no scoring rounds during the game.
Starting Player
Players choose a starting player who receives the Starting player marker and 2 Food. The other players each receive 3 Food. The Starting player marker is not automatically passed on to the next player at the end of a round: it passes to the player who chooses the “Starting player” action.
Object of the Game & Turn Structure
Object of the Game
Players start the game with a farming couple living in a simple two-roomed hut. During the course of the game, these families have abundant possibilities to improve their quality of life by building up their home, improving their fields and breeding their animals.
In each of the game’s 14 rounds, each of a player’s Family members may take exactly one action. They can generate building resources such as Wood and Clay, add more people to their family, and ensure that they are fed. In each round, each action can only be taken by one Person – players will miss out if another player chooses the action first. A new action becomes available in each round – see Overview of game phases. You must plan to grow your family at the right time – but not too soon, because even the next generation must be fed. Growing your family is important, though, because it allows you to take more actions as they become available.
At the end of the game, the winner is the player who has established the best farmyard – see Scoring overview. Victory points are awarded for:
- the number of fields, pastures and fenced stables
- Grain, Vegetables, Sheep, Wild boar and Cattle
- extension and renovation of the family’s home
- the number of Family members
- played Occupation and Improvement cards
Players lose one point for each unused farmyard space. There are examples of play, with explanations, on the reverse sides of three of the boards.
Note: The terms “Person” and “Family member” are used in the rules and on the game cards to mean the round Family member discs; “Player” means the humans who are taking part in a game of Agricola.
The term “Other players” means all other players – so not the player taking the action.
Play of the Game
The game consists of six stages, which are divided into 14 rounds. Each round follows the same pattern and consists of four phases. There is a Harvest at the end of each stage (after rounds 4, 7, 9, 11, 13 and 14). This is shown on the game boards as Harvest.
Phase 1: Start the round – draw a new Round card
- Turn over the top Round card and place it on the appropriate space on the board. The action on this card is available to all players, and can be used not only in this round but in all subsequent rounds.
- All actions which occur at the beginning of a particular round or at the beginning of every round occur now.
- The text on some cards instructs players to place items on the Round card spaces. If there are tiles, Food and/or other playing pieces on the space for the current round, these are distributed to the appropriate players (who earned them by playing an Occupation or Improvement).
Phase 2: Replenish – place new goods and animals
Place new goods and Food on any Action spaces on the board that require them (on the printed spaces as well as on Action and Round cards). These spaces are shown by an arrow . If goods or Food are already on a space, the new goods/Food are added to them.
- 3 Wood means that 3 Wood tokens are placed on that space each round, 1 Cattle means that 1 Cattle token is placed on the space each round, etc.
- The Fishing and Traveling Players Action spaces receive 1 Food each round.
- These goods and Food are taken from the general supply and can build up over several rounds – there is no upper limit.
Phase 3: Work phase
In clockwise order, starting with the Starting player, players take turns taking a single Family member from their farmyard, placing it on an unoccupied Action space and taking that action. Play continues until all Family members have been placed.
- A player may only ever place one Family member at a time.
- Each Action space can only be used by one Person in one round.
- A Family member may never occupy an Action space without performing its action.
- Some Action spaces offer players several choices of action or require a player to take one action before (optionally) taking a second action.
- Whenever a player takes building resources, Grain, Vegetables or Food, the tokens are placed in a player’s personal supply in view of the other players.
- Animals may not be placed in the supply; they must be placed directly into the farmyard.
Animals that cannot be placed into the farmyard must be returned to the general supply or immediately transformed into Food using an Improvement with the symbol. A player who plays a card from their hand or buys a Major Improvement must read the text on the card aloud so that all the other players are aware of its effects. Players are not allowed to hide their personal supply from other players or to completely cover cards that they have played.
Phase 4: Return home
Players remove their Family members from the game boards and return them to their home.
The Actions in Detail
The Actions Overview
Four main types of action can be taken to improve a player’s farmyard:
- Players can extend and renovate their Wooden huts.
- An extended home enables the family to grow.
- Fields can be Plowed and Sown.
- Pastures can be fenced to hold animals.
Action A – Extend Wooden hut or renovate it into a Clay hut or Stone house
At the start of the game, each player has a Wooden hut with two rooms. Players can extend their huts by Building rooms using the Build room(s) action. New rooms must be orthogonally (i.e. not diagonally) adjacent to the existing rooms.
- There is no upper limit on the number of rooms that a player may build.
- New rooms are always made from the same material as the rest of the home. Wooden huts can only be extended with Wooden rooms; Clay huts only with Clay rooms; and Stone houses only with Stone rooms.
- Extending a Wooden hut costs 5 Wood and 2 Reed (for the roof), a Clay hut 5 Clay and 2 Reed, and a Stone house 5 Stone and 2 Reed.
During the game, the Wooden hut can be Renovated to a Clay hut and, later, a Stone house. The first Renovation Action space becomes available during Stage 2 (rounds 5 to 7).
- To renovate your Wooden hut to a Clay hut, you require 1 Clay token for each room in your Wooden hut, plus 1 Reed (for the roof). Turn the Wooden hut tiles over to show the Clay hut rooms.
- For the second renovation – from Clay hut to Stone house – you require 1 Stone token for each room in your Clay hut, plus 1 Reed (for the roof). Replace the Clay hut tiles with Stone house tiles.
- Players can only ever renovate a complete hut. Rooms may never be renovated one at a time.
- The Renovation action only allows a single renovation. A double renovation from Wooden hut to Stone house in one turn is not allowed.
Stables
A player who chooses the Build Room(s) action space on the left-hand board may choose to instead, or in addition, build up to 4 stables for 2 Wood each. Stables provide shelter for animals.
Additional actions after a Renovation
The Renovation card for Stage 2 allows players to purchase a Major (or Minor) Improvement after performing the renovation – players may not, however, ignore the Renovation action and only play an Improvement. A second Renovation card comes into play in the last round of the game. This allows players to Fence pastures after performing a renovation.
Action B – Family Growth
In Stage 2 (Rounds 5-7), the after Family growth, also 1 Minor Improvement action becomes available. Players must have room for offspring in their home before they can use this action – that is, they must have more rooms in their home than they have Family members. After taking Family growth, the player may choose to purchase a Minor Improvement.
The Family growth even without room in your home action card becomes available in Stage 5 (Round 12 or 13). With this action, a player may grow his or her family regardless of the number of rooms in their home.
- A player who chooses a Family growth action adds their newborn offspring to the Action space.
- In the Return home phase, the new Family member is taken home and placed in its room. If it doesn’t have its own room, it shares a room with another Family member.
- A Player who takes the Family growth action will therefore have one additional (adult) Family member to use from the following round onwards. The new Family member is not available for use in the round when it is produced – it must first grow up.
- Families are limited to a maximum of 5 members. A player who already has 5 Family members in play may not choose the Family growth action.
Action C – Plowing Fields, Grain and Vegetables
- A player who chooses the Plow 1 field action takes a field tile and places it on an empty space in his or her farmyard. If the player already has fields, the new field must be placed orthogonally adjacent to an existing field. Players may use at most 1 Plow Improvement each time they select the Plow 1 field action.
- A player who chooses Take 1 Grain takes one Grain marker and places it in his or her personal supply – the similar Take 1 Vegetable action becomes available in Stage 3 (Round 8 or 9).
- The Sow action allows a player to plant 1 or more empty fields: the player takes 1 Grain from his or her personal supply and places it on an empty (fallow) field, then adds 2 Grain from the general supply to the field.
- Instead of Grain, a player may also Sow Vegetables by taking 1 Vegetable from his or her personal supply and placing it on the empty field. 1 Vegetable from the general supply is added to the field.
- A newly planted Grain field holds 3 counters, a Vegetable field 2 counters.
- Grain and Vegetables are harvested during the Harvest. Grain and Vegetables that are in a player’s personal supply may be converted to 1 Food at any time – or to more than 1 Food with an appropriate Improvement.
- If a field is emptied, it can be replanted using the Sow action – a Harvested field does not need to be re-Plowed. In Stage 5 (Round 12 or 13), a new action allows players to Plow a field and immediately Sow one or more empty fields.
Baking bread as an additional action when plowing
A player who chooses the Sow and/or Bake bread Action space may choose what to do with any or all Grain counters in his or her personal supply. Grain may be sown in empty fields, be Baked into a loaf of bread and converted to Food or be left in the supply. Baking bread requires an appropriate Improvement with the symbol.
- A Fireplace allows one Grain to be converted to 2 Food.
- A Cooking Hearth converts it to 3 Food.
- A Stone Oven allows up to 2 Grain to be converted to 4 Food each.
- A Clay Oven allows at most 1 Grain to be converted to 5 Food.
Action D – Raising Animals
Each player may raise exactly one animal as a pet in his or her home, regardless of the home’s size and type. The pet does not take a room away from a Family member.
To hold more animals, players must Fence pastures:
- Each pasture may only hold animals of one type – Sheep, Wild boar or Cattle.
- Up to 2 animals may live on each square of the pasture: Pastures that occupy 1 farmyard square can hold 2 animals; 2 squares can hold 4 animals; 3 squares can hold 6 animals etc.
- During the course of the game, players may rearrange their animals at any time, as long as these rules are followed. A player may release some or all of their animals at any time, at will (for example, to make room for other animals in a farmyard space).
- Animals breed at the very end of the Harvest.
The Fences action allows a player to immediately Fence pastures at a cost of 1 Wood for each fence.
- Fences border the pastures and are laid between the farmyard spaces; one fence may border more than one pasture.
- Like rooms and fields, all of a player’s pastures must be orthogonally adjacent.
- Fences may only be built if they will create a fully enclosed pasture, with fences on all sides. The edge of the farmyard board, stables, fields and rooms do not count as fences.
- Each player may build at most 15 fences.
- Fields and rooms may not be completely surrounded with a fence.
- Fences may not be demolished once they have been built.
- If a player has already built pastures, any new pastures must border the existing ones. You may subdivide an existing pasture by adding a fence or fences.
- Enclosed farmyard spaces are considered to be “used”.
Building stables
- Placing a stable in a pasture doubles the capacity of the entire pasture.
- Stables can be built at a cost of 2 Wood using the Build room(s) and/or Build stable(s) Action space.
- They may be placed on any space in the farmyard that does not already contain a room or a field, and may not be removed.
- Stables need not be fenced in: each unfenced stable may hold exactly 1 animal.
- Only 1 stable may be built in any farmyard space.
- A player may fence the stable in later, in order to create a new pasture with doubled capacity.
Harvest Time
Harvest Overview
Players feed their Family members during the Harvest, which occurs at the end of each stage of the game – that is, after rounds 4, 7, 9, 11, 13 and 14. The Harvest consists of three phases, which occur one after another.
Harvest Phase 1: The Field phase
Players remove 1 Grain or Vegetable token from each Sown field in their farmyard and place them in their personal supply. Players may also receive additional Food from Occupation or Improvement cards that they have played.
Harvest Phase 2: Feeding the family
At the end of this phase, each player must feed his or her family by paying 2 Food per Family member. Offspring that were born during the current round (“Newborn offspring”, typically from a Family growth action) only consume 1 Food for this round, but will require 2 Food in future Harvests.
- Each unprocessed Grain or Vegetable may be converted to 1 Food at any time.
- Fireplaces and Cooking Hearths, as well as other specific Occupations and Improvements, allow players to convert Vegetables at any time, at a better exchange rate.
- Improvements with the symbol can be used to convert animals to Food at any time.
- Improvements with the symbol can be used to Bake bread, but only when the player takes a Bake bread action during a round.
- Unprocessed animals have no Food value.
Begging
A player who cannot or does not wish to produce the required Food must take a Begging card for each missing Food – players may not give up members of their family to avoid the need to Feed them. At the end of the game, players lose 3 points for each Begging card.
Harvest Phase 3: Breeding
Lastly, any player with at least 2 animals of the same type receives exactly one additional (baby) animal of that type – but only if the lamb, the shoat (piglet) or the calf can be accommodated in the farmyard (or on an appropriate Improvement card, for example the “Animal Yard”, “Wildlife Reserve” or “Forest Pasture”).
- Baby animals and parent animals may not be converted into Food immediately after the birth (for example, if you only have room for two animals of that type); they simply run away if they cannot be accommodated.
- The animals breed regardless of where the parent animals are placed – the parents may be in separate areas.
Occupations & Improvements
Occupation and Improvement Cards
At the start of the game, each player receives 7 Occupation cards and 7 Minor Improvement cards. A player who plays a card from their hand or buys a Major Improvement must read the text on the card aloud so that all the other players are aware of its effects.
Occupation Cards
- A player can use the 1 Occupation Action space(s) to play one of these cards face-up on the table.
- On the 1 Occupation Action space that is printed on the left-hand game board, a player’s first Occupation is free, and each additional Occupation costs 1 Food. In the 3–5 player game, a second Occupation space has varying costs depending on the number of players.
- The text on the Occupation cards applies to the player as soon as the card is played. Cards that are in a player’s hand have no effect on the game.
- Several cards, including the Countryman, Acrobat and Net Fisherman, are printed with a Claim symbol – if a player with one of these Occupations meets the stated condition, a Claim token is placed on the appropriate Action space with the arrow pointing towards the player with the claim.
Improvement Cards
In addition to the Minor Improvements, there are also ten Major Improvement cards. In each game, different Minor Improvements will come into play, but the same Major Improvements are available in each game and may be used by any player.
- The 1 Major or Minor Improvement Action space allows a player to purchase either a Major or Minor Improvement – as does the Renovation space.
- Minor Improvements may also be purchased – in conjunction with other actions – on the Starting player and Family growth action spaces. Players may not choose the action After Family growth, also 1 Minor Improvement and only purchase an Improvement: This card only allows an Improvement after Family growth.
- The upper-right corner of an Improvement card shows its cost: goods that a player must pay in order to play the card. Grain and Vegetables that are paid must be taken from a player’s supply and may not be taken directly from a field. Some Improvement cards have a slash, showing that the player may choose between two options to pay for the Improvement.
- Some Minor Improvements require the player to have a prerequisite – these are shown in the top left corner. In order to play these cards, the player must have the required goods, tiles or cards on the table in front of him or her. The condition is fulfilled if the player has more than the required number of fields or cards.
- Many Minor and all Major Improvements are worth Victory Points at the end of the game. These are shown by the symbol at the left beside the picture. The Bonus Points symbol on some cards (bottom center) indicates that they also give variable Bonus points – these are described in the text on the card.
- Some Minor Improvements (Traveling cards) are placed in the hand of the next player to the left after they are played and acted on. These are indicated by the brown arrows to either side of the illustration and the text on the card explains how they are used.
- Some Minor Improvements are Upgrade cards. Playing these cards not only costs goods but also requires the player to return an existing played or acquired Improvement. Upgraded Major Improvements are returned to the Major Improvements board and may be bought again by any player (including the same one as before). Upgraded Minor Improvements are removed from the game.
Major Improvements Summary
There are 10 Major Improvement cards. These have their own board, on which the cards are laid out. Each Major Improvement card has its own place on the board. Once all but one of the Major Improvements have been sold, the board is flipped to the reverse side, which has an overview of scoring. There is a space for the tenth Major Improvement card on this side of the board; it may still be bought.
- Fireplaces and Cooking Hearths: A player may own several Fireplaces and Cooking Hearths. The two Fireplaces only differ in their price (2 Clay and 3 Clay). Similarly, the two Cooking Hearths are identical except for their cost (4 Clay / 5 Clay). A player who chooses the Major Improvement action may upgrade a Fireplace to a Cooking Hearth by taking a Cooking Hearth and returning the Fireplace to the Major Improvements board, where it is available for purchase again. Fireplaces and Cooking Hearths are worth 1 VP each. They make Vegetables worth more than 1 Food, and can turn animals into Food. They also allow the player to use the Bake bread Action space to make Grain more valuable. The Cooking Hearth produces 1 more Food from Baking bread and from cooking Vegetables, Wild Boar and Cattle than the Fireplace.
- Clay Oven and Stone Oven: These allow players to Bake bread more efficiently and are worth 2 and 3 VP respectively. Players may Bake bread as a one-time action immediately after they have bought an Oven. The Ovens cost 3 Clay and 1 Stone / 1 Clay and 3 Stone.
- Joinery, Pottery and Basketmaker’s Workshop: Offer an additional scoring opportunity for Wood, Clay and Reed. In each Harvest, up to 1 of the corresponding Building resource may be converted into 2 or 3 Food (depending on the card). At the end of the game, players with these cards earn up to 3 Bonus points for having several of the same resource. These workshops each cost 2 Stone plus 2 Wood, Clay or Reed. At the end of the game, each workshop is worth 2VP.
- The Well: Provides 1 food for each of up to 5 Rounds. More importantly, the Well is worth 4 VP at the end of the game. The Well costs 3 Stone and 1 Wood.
End of the Game & Scoring
End of the Game
The game ends after the Harvest at the end of the 14th round (Stage 6), after which the players’ scores are calculated. There is a scoring overview on the back of the board for Major Improvements and on the back of the Summary card, and the scoring is detailed on page 8.
Tally each player’s Victory Points on the scoring sheet. The player with the most points is the winner. If there is a tie, the tied players share the victory (or can play another game of Agricola to break the tie).
Scoring
The game is scored at the end of Round 14. The Summary cards have scoring tables, as does the reverse side of the Major Improvements board. The following categories are scored one after another:
- Fields: All field tiles that are on the player’s farmyard are scored, regardless of whether they are currently fallow or are sown. A player with 0 or 1 fields loses 1 point. Each field after the first scores 1 point, up to a maximum of 4 points for 5 or more fields. Players score -1/1/2/3/4 points for 0-1/2/3/4/5+ fields.
- Pastures: Points are awarded for fenced areas (“Pastures”), not for the number of farmyard spaces that are fenced in (“Pasture spaces”). The size of the individual pastures is irrelevant. A player with no pastures loses 1 point. Each pasture scores 1 point, up to a maximum of 4 points for 4 or more pastures. Players score -1/1/2/3/4 points for 0/1/2/3/4+ pastures.
- Grain and Vegetables: All of a player’s Grain and Vegetables are scored – whether it is in the fields or in the player’s supply. A player with no Grain loses 1 point. After that, players score 1/2/3/4 points for 1/4/6/8+ Grain. A player with no Vegetables loses 1 point. After that, players score 1 point per Vegetable up to a maximum of 4 points (score -1/1/2/3/4 for 0/1/2/3/4+ Vegetables).
- Animals: A player loses a point for having no animals of a particular type. Players score:
- -1/1/2/3/4 points for 0/1/4/6/8+ Sheep
- -1/1/2/3/4 points for 0/1/3/5/7+ Wild boar
- -1/1/2/3/4 points for 0/1/2/4/6+ Cattle
- Unused farmyard spaces: No additional points are awarded for using farmyard spaces, but players lose 1 point for each unused farmyard space. Farmyard spaces are counted as “used”, if they are fenced in or if they have a room tile, field tile or unfenced stable on them. In other words, “unused” farmyard spaces are empty and unfenced.
- Fenced Stables: Each fenced stable earns the player 1 point. No points are given for unfenced stables. Players do not lose points for having no stables. An unfenced stable has the advantage that the player avoids losing a point for having unused farmyard spaces.
- Huts and Houses: Players earn 1 point for each room in a Clay hut (so a player with 4 Clay rooms earns 4 points), and 2 points for each room in a Stone house (so a player with 4 rooms earns 8 points). Rooms in a Wooden hut do not earn any Victory Points.
- Family Members: Players earn 3 points for each Family member, up to a maximum of 15 points (as the number of Family members cannot be greater than 5).
- Points for cards: A point value is shown in a yellow circle on the left of the Minor and Major Improvement cards. Players lose 3 points for each Begging Card that they hold at the end of the game.
- Bonus points: The text on various Improvement and Occupation cards describes how Bonus points are awarded. Cards which earn Bonus points have a Bonus point symbol at the bottom.
Action Spaces Reference
Action Spaces Overview
Some actions are printed directly on the game boards (1.1) and others are on cards. Each round during the game, a new Round card (1.2) is drawn. Depending on the number of players, up to 6 additional Action cards may be laid out at the start of the game (1.3).
A player may never use an Action space without taking one of the actions shown on the space.
1.1. Actions that are printed on spaces on the game board
The actions that are printed on the game board are the same each time the game is played. They vary slightly in the Solo game and in the Family Game variant.
- Action spaces with an arrow: Players whose Family members use this space take all the resources, animals or Food that are on the space. Food is found on the Fishing and Traveling Players spaces and, in the Family Game variant, in the Storehouse. Apart from these, the Action spaces are named after the goods that are placed on the spaces.
- Build Room(s) and/or Stable(s): During the course of the game, each player may build any number of rooms and at most 4 stables. Pieces must be placed immediately whenever something is built. Each stable costs 2 Wood and can be placed on a fenced or empty unfenced farmyard space. A fenced stable doubles the holding capacity of a pasture. Each farmyard space can hold 1 stable. Each space within a pasture may have its own stable: the pasture’s capacity is then multiplied by 4, 8, etc. An unfenced stable can hold at most 1 animal and may be fenced later. A new room must be orthogonally adjacent to existing rooms.
- Starting player and/or Minor Improvement: The player takes or retains the Starting player token. He may play one Minor Improvement from his hand.
- Take 1 Grain: The player takes 1 Grain from the general supply and places it in her own supply. She may not Sow the Grain immediately, even if she has fallow fields. To Sow it, she must choose one of the Sow action spaces.
- Plow 1 Field: The player places 1 field tile on an unfenced, empty farmyard space of her choice. If she already has fields, the new field must be orthogonally adjacent to the existing fields. Players may not un-Plow plowed fields (that is, a player may never remove a field tile) for any reason.
- 1 Occupation: The player plays 1 Occupation card from his hand by placing it face-up on the table and reading it aloud. The first Occupation card a player plays in a game is free; each additional Occupation card costs 1 Food.
- Day Laborer: The player takes 2 Food from the general supply in the standard game, or 1 Food and 1 Building resource in the Family Game.
1.2. Action Spaces on the Round cards
The game is divided into 14 rounds over 6 stages – the first stage lasts for 4 rounds, the second for 3, the third to fifth for 2 each and the sixth for 1 round. In each round, a new Action space is added into the game; this can be used in the round in which it is turned up and in each subsequent round. Each of the 6 stages ends with a Harvest.
- Sow and/or bake bread (Stage 1): When Sowing, a player need not Sow all her empty fields, some may be left empty. Bake bread means that the player takes Grain from her supply and uses a Baking Improvement with the symbol to turn it into food.
- 1 Major or Minor Improvement (Stage 1): The player may place either a Major or a Minor Improvement. Major Improvements are shown on the red cards and may be placed by any player. Minor Improvements are held in a player’s hand.
- 1 Sheep (Stage 1): Place 1 Sheep on this space in the Replenish phase of each round. A player who selects this action takes all the Sheep from the Action space and must either put them into his farmyard or use an Improvement to turn them into Food. Sheep that cannot be pastured or turned into Food are returned to the general supply.
- Fences (Stage 1): Fences cost 1 Wood per fence. A fence that has been built may not be demolished. Huts do not create a natural border for a pasture – a pasture must be surrounded by fences even along the side(s) of a hut, the edges of the game board and beside fields and stables. A pasture may be divided into several pastures by adding fences.
- 1 Stone (Stage 2): This Action space is a normal resource space. In Stage 4 (Rounds 10 & 11), a second Stone space enters the game.
- After Renovation, also 1 Major or Minor Improvement (Stage 2): A player may only use this space to purchase a Major or Minor Improvement after Renovating. A player may not undertake both renovations, from a Wood to a Clay hut and to a Stone house, in one action.
- After Family Growth, also 1 Minor Improvement (Stage 2): A player may only use this Family growth space if he has more empty rooms than Family members. A player may not ignore the Family growth action and only purchase the Minor Improvement. A Guest – acquired through a Minor Improvement card – does not count as a Family member.
- Take 1 Vegetable (Stage 3): The player takes 1 Vegetable from the general supply and places it in her own supply. She may not immediately Sow the Vegetable.
- 1 Wild Boar (Stage 3): This Action space is the same as the 1 Sheep Round card, but instead of a sheep it adds a Wild boar to the game.
- 1 Stone (Stage 4): This is a normal building resource space.
- 1 Cattle (Stage 4): This action space is the same as the 1 Sheep Round card, but instead of a Sheep it adds a Cattle to the game.
- Plow and/or Sow 1 field (Stage 5): The player who takes this action may Plow one field and after that may also Sow: he may plant Grain or Vegetables from his personal supply into any empty field on his farmyard. A player need not Sow all his fields; some may be left empty.
- Family Growth even without a room (Stage 5): Unlike the other Family Growth card, this is not dependent on the number of rooms. By using this action three times, a player could possibly have 5 Family members in only 2 rooms. Note: If a player who uses this card later extends her home, she may not use the other Family Growth card again until she has more rooms than Family members: the new rooms must first be used for Family members that did not previously have their own room.
- After Renovation, also Fences (Stage 6): Round 14 is the only round of the game in which there are 2 Renovation actions (so that more than one player can build a Stone house). A player must Renovate to be allowed to Fence pastures. Players may never perform both renovations (to a Clay hut and to a Stone house) with one action.
1.3. Special Action spaces that vary according to the number of players
In a 3-5 player game, additional Action spaces ensure that there are enough actions available for all the players:
- 1 Occupation (3 players): A player who chooses this action may play 1 Occupation card from his hand. This Occupation costs 2 Food.
- Take 1 Reed, 1 Stone and 1 Food (4 players): The player takes 1 Reed, 1 Stone and 1 Food from the general supply and places them in his personal supply.
- 1 Occupation (4 players): A player who chooses this action may play 1 Occupation card from his hand. If this is the player’s first or second Occupation card, it costs 1 food, a subsequent Occupation card costs 2 food.
- Take 1 Reed, also 1 Stone and 1 Wood (5 players): 1 Reed is placed on this action space each round. In addition, when a player takes this Action, he also takes 1 Stone and 1 Wood from the general supply (Stone and Wood do not build up on this space over several rounds).
In a 5-player game, there are three action spaces on which a player must choose one of two or more options. The restriction of only one Family member on any action space still applies:
- Take animals (5 players): A player who chooses this Action space has three choices: Take 1 Sheep and 1 Food; Take 1 Wild Boar; or pay 1 Food for 1 Cattle. The animal is taken from the general supply and is immediately placed in the player’s farmyard or turned into Food using an appropriate Occupation or an Improvement with the symbol.
- Either 1 Occupation or, from Round 5, Family Growth (5 players): The player may play an Occupation card from her hand. If this is the player’s first or second Occupation card, it costs 1 Food, a subsequent Occupation card costs 2 Food. From the start of Round 5, a player may choose to take Family Growth instead of an Occupation.
- Build 1 Room or Traveling Players (5 players): A player choosing this Action space may either build a room or use the Traveling Players. Unlike the other Building space, this action can only be used to build a single room. Each round, 1 Food is placed on the Traveling Players space. If a player chooses the Building action, the Food remains on the Action space.
Card Clarifications & Harvest Timing
Terminology: Counters and Tokens
Counters and tokens are described in different ways:
- Building resources: Stone, Reed, Clay, Wood
- Resources: Building resources, Grain, Vegetables
- Animals: Sheep, Wild boar, Cattle
- Goods: All Resources, Animals
Specific Minor Improvement Clarifications
The 169 “Occupation” cards and the 139 “Minor Improvement” cards are divided into three decks:
- E: Basic deck
- I: Interactive deck
- K: Complex deck
The following abbreviations are used in the card descriptions:
- B: Cards that offer Bonus points
- U: Upgrade cards
- T: Traveling cards (pass to the player on the left after play)
- AS: One Minor Improvement, the Tavern, is available to all players as an Action space
- FS: Cards that function as a Farmyard space
- Acreage (K, FS): Players who receive 4 Grain on fields when Sowing (through Occupations like the Fieldsman and Smallholder) can also receive 4 Grain on the Acreage.
- Alms (I, T): The current round is not a “completed” round.
- Animal Feed (I): When acquiring this card, it is irrelevant whether the fields are planted with Grain or Vegetables. A player may return animals to the supply in order to make room for the new arrivals.
- Bakehouse (K, 5, U): The Baker’s Kitchen may not be upgraded to a Bakehouse.
- Baker’s Kitchen (I, 4, U): see Bakehouse.
- Bean Field (E, 1, FS): May be combined with the Potato Dibber, Fieldsman and Smallholder.
- Boar Breeding (K, T): The Wild boar may immediately be converted into Food, using an Improvement with the symbol or an appropriate Occupation.
- Bread Paddle (K): May be used with the Puppeteer and the Educator.
- Bookshelf (K, 1): When used with the Writing Desk to play two Occupation cards, the additional 3 Food are distributed twice (once for each card). The Patron gives an additional 2 Food.
- Brushwood Roof (K, 1): The player may mix Wood and Reed when building a new room. Instead of 2 Reed, he may use 1 Wood and 1 Reed.
- Cattle Market (E, T): The cattle may immediately be converted into Food, using an Improvement with the symbol or an appropriate Occupation.
- Chicken Coop (I, 1): May either be built with 2 Wood & 1 Reed or with 2 Clay & 1 Reed.
- Clay Roof (E, 1): Players may mix Clay and Reed when building. Instead of 2 Reed, a player may use 1 Clay & 1 Reed.
- Clay Supports (E): A Clay Support is a support used in preparing a Clay wall. A player is allowed to build 1 room for 5 Clay & 2 Reed and an additional room for 2 Clay, 1 Wood & 1 Reed in the same turn. The Clay Supports may not be combined with the Axe, Carpenter or the Clay Plasterer.
- Clogs (E): This card is worth 2 points even if the player receives Bonus points for the Half-timbered House or the Mansion. May be combined with the Chief’s Daughter.
- Copse (I, 1, FS): Players who receive 4 Grain on fields when Sowing can also grow 4 Wood once or twice in the Copse. Harvest the Wood during the Harvest.
- Corn Storehouse (I, 1): This is built with either 2 Wood & 1 Reed or 2 Clay & 1 Reed. Use the Corn Storehouse during the Harvest at the same time as the Watermill and the Harvest Helper.
- Crooked Plow (K, 1): A player may choose to only Plow 2 fields instead of 3 at once. Place 1 field tile on the card to show that the Plow may be used 1 more time. Each time a player selects the Plow 1 Field action, s/he may only use 1 plow.
- Field (E, T): The Harrow and Plows may not be used with the Field.
- Fish Trap (I): The Fish Trap does not earn additional food for the Reed Exchange, Helpful Neighbors, Reed Buyer and Reed Collector cards.
- Flagon (I): If the Well is rebuilt after the Village Well upgrade, the Food is distributed again. If both the Village Well and the Well have been played when the Flagon is played, the Food is distributed twice.
- Forest Pasture (K, 1, FS): The Wild boar on this card are included when scoring Wild boar.
- Granary (K, 1): A player may not build the Granary with 2 Wood & 1 Clay or with 1 Wood & 2 Clay. The Granary may not be combined with the Grain Cart, Corn Scoop, Pieceworker, Sycophant, Seed Seller, Greengrocer, Market Crier or Field Watchman.
- Greenhouse (K, 1): If the player does not wish to pay the 1 Food to buy the Vegetables, the Vegetable token is returned to the general supply.
- Guest (I, T): To show the Guest, take a Claim marker and turn it over to show the word Guest. The Guest counts as an additional Family member. A player who already has 5 Family members can use the Guest to play one round with 6. A Guest is not counted in checking whether there is enough room in the home.
- Gypsy’s Crock (E, 1): A player who converts 4 goods at once receives 2 additional Food, for 6 Goods, 3 additional Food, etc.
- Half-timbered House (E, B): If a player does not Renovate to a Stone house or if the player has also played the Mansion, there is no advantage.
- Harrow (I): Other players that use the Harrow may only Plow 2 fields at once if they place one Family member on one of the Plow 1 field Action spaces. The Harrow cannot be combined with any of the Plows. The owner of the Harrow may not deny other players the right to use it.
- Holiday House (I, 8): This costs either 3 Wood & 2 Reed or 3 Clay & 2 Reed. The player may not add a Clay Roof, Brushwood Roof or Straw-thatched Roof when building this. The owner of this card does not participate in the Work Phase (Phase 3) in round 14 – but s/he can still profit from the “Start the Round” phase (Phase 1).
- House Goat (K, 1): The goat was the first domesticated animal in the history of the human race. Place 1 Food for each remaining Harvest on this card, to ensure that the Food is not forgotten. A player cannot choose to let the Goat run free in order to make room for a different animal in his or her house.
- Lasso (I): Once the owner of this card has had a turn during the “Work” phase (Phase 3) and has placed 2 Family members, she can place her third Family member as soon as she has her second turn. Players cannot place more than two people at a time with the Lasso. A player with 4 or 5 Family members may use the Lasso twice in the same round.
- Lettuce Patch (E, 1, FS): To receive the 4 Food for Harvested Vegetables, the player must convert the Vegetables to Food immediately after Harvesting. See also: Turnip Field.
- Liquid Manure (K): Fields that have already been planted when the card is played will only benefit from the Liquid Manure when they are emptied and replanted. Liquid Manure may be combined with a Corn Storehouse, Potato Dibber, Planter Box, Bean Field, Turnip Field, Lettuce Patch, Fieldsman and Smallholder.
- Manure (I): The owner of the Manure has a Field phase (Harvest phase 1) after each round. Outside a regular Harvest time, the Milking Shed, Spindle, Butter Churn, Milking Stool and Loom do not earn any additional Food.
- Market Stall (E, T): The Market Stall may not be combined with the Pieceworker but may be combined with the Market Woman. A player with no Grain in the Supply may not use the Market Stall, even in combination with the Market Woman.
- Milking Shed (I, 2): Pets and live Animals on Improvement cards are also counted with the animals in the farmyard. At Harvest time, the Milking Shed is processed before the Spindle, Butter Churn, Milking Stool and Loom.
- Millstone (E): With the Baker, the player receives at most 2 additional Food in each Harvest.
- Mini Pasture (E, T): The new pasture must border an existing pasture. The Mini Pasture may be combined with the Hedge Keeper, Farmer, Stablehand and Animal Breeder.
- Moldboard Plow (I, 1): Place 2 field tiles on this card to show that the Plow may be used 2 times.
- Potato Dibber (E): May be combined with Beanfield, Turnip Field and Lettuce Patch.
- Punner (I): Unless another player Plows more than one field on his/her action, the player with the Punner may not take a field with it.
- Reed Exchange (I, T): A player may not exchange 1 Wood or 1 Clay for only 1 Reed, or exchange 1 Wood and 1 Clay for 2 Reed.
- Reed Hut (K, 1): The person in the Reed Hut is not counted when calculating whether Family Growth is allowed. They do not count as part of the family.
- Riding Plow (E, 2): A player may choose to only Plow 2 fields at once instead of 3. Place 2 field tiles on the card to show that the plow may be used 2 more times. Each time a player selects the Plow 1 Field action, s/he may only use 1 Plow.
- Sawhorse (K): A player that can already put those fences up at no cost cannot save the free fences for another turn.
- Shepherd’s Crook (I): If, for example, a pasture of size 5 or 6 is divided into a pasture of size 4, this does not count as “newly fenced” and it does not receive the 2 Sheep.
- Shepherd’s Pipe (E): May not be combined with the Stablemaster.
- Sleeping Corner (K, 1): This can be used with either of the Family Growth actions.
- Spinney (I, 1): When the owner of the Spinney demands the 1 Wood from another player, the other player is entitled to change her mind & select a different action instead – it is easy to overlook the Spinney.
- Stone Exchange (K, T): A player may not exchange 1 Wood or 1 Clay for only 1 Stone, or exchange 1 Wood and 1 Clay for 2 Stone.
- Swing Plow (K, 1): A player may choose to only Plow 2 fields instead of 3 at once. Place 2 field tiles on the card to show how many times the Plow may be used. Each time a player selects the Plow 1 Field action, she may only use 1 plow.
- Turnip field (K, 1, FS): May be combined with the Potato Dibber, Fieldsman and Smallholder.
- Turnwrest Plow (E, 1): A player may choose to only Plow 2 fields at once instead of 3. Place 1 field tile on the card to show that the Plow may be used 1 more time. Each time a player selects the Plow 1 field action, she may only use 1 plow.
- Weekly Market (I, T): The Weekly Market may be combined with the Market Woman but not with the Pieceworker.
- Wood Cart (I): The Wood Cart may not be used with the 1 Reed, also 1 Stone and 1 Wood action space in the 5-player game.
- Wooden Crane (I, 1): The Wooden Crane may not be used on the Take 1 Reed, 1 Stone and 1 Food space from the 4-player game or the Reed, also 1 Stone and 1 Wood from the 5-player game.
- Village Well (I, 5, U): The Well gives 1 Food per round for 5 rounds. These Food remain on the board even when the 3 additional Food from the Village Well are distributed, and are distributed again if the Well is purchased a second time.
Specific Occupation Clarifications
This section clarifies questions about some of the occupation cards. The number range shows the number of players that the card may be used with (1-5, 3-5 or 4-5).
- Acrobat (K, 4-5): If the Acrobat uses the Traveling Players Action space, he should place Claim markers on any unused Take 1 Grain, Plow 1 field and Plow 1 field and/or Sow Action spaces as a reminder that these may be claimed later.
- Adoptive Parents (K, 1-5): A player must pay 2 Food instead of 1 for an adoptive child, even if it was adopted immediately before the Harvest.
- Animal Dealer (I, 3-5): In the 5-player game, there is an Action space which gives Players 1 animal of their choice. The Animal Dealer cannot take an additional animal. See also: Animal handler.
- Animal Handler (K, 4-5): By paying 1 Food, a player may immediately convert the animal into Food. The 1 Food may not be taken from the proceeds.
- Animal Tamer (K, 1-5): No effect after acquisition of a House Goat.
- Basin Maker (K, 4-5, B): Slaughtered Wild boar may either be placed on the Tanner or used for the Basin Maker, not both.
- Berry Picker (E, 3-5): This card is activated by the Action space 1 Reed, in addition 1 Stone and 1 Wood that is used in a 5-player game and also by the Building Materials Minor Improvement card.
- Businessman (I, 3-5): In conjunction with the Traveling Salesman, up to 3 Minor Improvements may be played one after another using the Starting Player Action space. In conjunction with the Merchant, first 1 Minor Improvement and 1 Minor or Major Improvement and then additionally, for 1 Food, either 2 Minor Improvements or 1 Major and 1 Minor Improvements may be played using the Starting Player Action space.
- Carpenter (E, 1-5): May not be combined with the Axe or with the Clay Plasterer.
- Charcoal Burner (E, 3-5): The player can place 1 Food and 1 Wood on the unbuilt Major Improvements with the symbol, to remind her to take the tokens.
- Chief (E, 1-5, B): The third point per room is scored as Bonus points. The Chief may be combined with the Half-timbered House as well as with the Mansion.
- Clay Worker (K, 1-5): In a 5-player game, there is an Action space on which the player always receives 1 Wood in addition to any other resources. The Clay worker also receives 1 additional Clay on this space.
- Conservator (E, 1-5): May not be combined with the Stone Breaker. The Renovation is paid as usual, with 1 Stone per room plus 1 Reed.
- Countryman (K, 4-5): If the player chooses either the Take 1 Grain or Take 1 Vegetable action, he places Claim markers on the empty Sowing spaces to show that he has a claim. There are 2 Sowing Action spaces. The second Round card with this action appears during Stage V.
- Cowherd (I, 3-5): In the 5-player game, there is an Action space which gives players 1 animal of their choice. The Cowherd cannot take an additional Cattle token on this space.
- Farm Steward (I, 1-5): Allows at most 1 Family Growth without space in the Hut.
- Farmer (E, 4-5): The player only receives 1 new animal, even if several Pastures are created with the same action.
- Fence Builder (I, 1-5): From now on, the player has only 14 fences for building. Building fences always follows all other actions on the Action space.
- Fence Deliveryman (I, 1-5): Fences may not be removed from the Round space to build them in the usual way. A player who only wishes to build 1-3 fences still pays 2 Food. A player who chooses not to build any fences or not to build as many as were possible returns the leftover fences to her own supply of unbuilt fences. A player may not leave a pasture open.
- Fence Overseer (K, 1-5): May be combined with Farmer, Animal Breeder, Stablehand and Groom. Used with the Stablehand, it is possible to build fences, receiving 1 free stable that could then be fenced for free. The player does not then receive a second stable, as only 1 free stable is awarded in each action. Combined with the Groom: First the player puts up 1 stable, then he surrounds it with fences.
- Fieldsman (I, 1-5): May be combined with the Forester, Copse, Lettuce Patch, Beanfield, Turnip Field and Acreage.
- Field Guard (E, 4-5): see Head of the Family.
- Field Watchman (I, 1-5): Plows and the Harrow cannot be used with the Field Watchman.
- Field Worker (I, 3-5): The Field Worker is also activated when a Player uses the Corn Storehouse.
- Foreman (K, 4-5): Wood Distributor, Foreman and Taster can affect one another. A player who decides to use the Occupation cannot take back the decision. A player who does not wish to use the Occupation has until the start of the Work phase (Phase 3) to reconsider.
- Forester (K, 1-5, FS): A player who may grow 4 Grain on a field, (eg. through an Occupation) also grows 4 Wood on the Copse (1-3 times); a player who could grow 5 Grain grows 5 Wood. A player with the Fieldsman receives a total of 5 piled Wood for a new Wood planting, for 2 new Wood plantings she receives 4 Wood each.
- Gardener (I, 1-5): All the player’s Vegetable patches remain untouched until the end of the game. This also applies to the Beanfield, Turnip Field and Lettuce Patch.
- Groom (I, 4-5): Wood that the player receives at the same time through a Private Forest, Wood Collector or Wood Deliveryman may immediately be used to build 1 stable.
- Harvest Helper (I, 3-5): A player may not take the additional Grain from one of his own fields. The Corn Storehouse has precedence over the Harvest Helper. The Harvest Helper may take the Grain from the Acreage Minor Improvement.
- Head of the Family (E, 4-5): A player may not use the same Action space in the same round with 2 of her own Family Members.
- Hedge Cutter (E, 1-5): May be combined with the Fence Overseer, Fence Builder and Fence Deliveryman as well as with the Farmer, Stablehand, Wood Carver and Sawhorse.
- Hut Builder (E, 4-5): When the card is played, place a hut tile on the Action space for round 11.
- Layabout (I, 1-5): The player does not participate in any part of the next Harvest, including harvesting fields, breeding animals and feeding his or her family.
- Lover (K, 3-5): If a player builds a room after the Lover has had Offspring, the Offspring occupies the new room. It is better to first build the room, then take a normal Family Growth action and only then use the Lover.
- Market Woman (K, 1-5): The Market Woman may be combined with the Greenhouse, Market Stall and Weekly Market. She may not be combined with Occupations. If the player who has played the Market Woman also has the Market Stall or Weekly Market, he must first give up Grain in order to get it back.
- Mason (E, 1-5): The player may place a room tile on the Occupation card to show that he has not yet taken the Extension action.
- Merchant (E, 1-5): A player using the 1 Major or Minor Improvement Action space can play either 2 Major or 2 Minor Improvements or 1 Major and 1 Minor Improvement. In conjunction with the Traveling Salesman it is possible to acquire up to 4 Minor Improvements, or to acquire 2 Major Improvements using the 1 Minor Improvement and paying 1 Food. In conjunction with the Businessman, first 1 Minor Improvement and 1 Minor or Major Improvement and then additionally, for 1 Food, either 2 Minor Improvements or 1 Major and 1 Minor Improvements may be played using the Starting Player Action space.
- Net Fisherman (I, 1-5): When the Player places 1 Family member on an Action space with Reed, he stakes his claim to fish by placing a Claim marker.
- Parvenu (I, 4-5): The player receives the Stone immediately after Renovating, so can use them immediately for the accompanying Improvement.
- Pieceworker (K, 1-5): The Pieceworker can only buy goods in the “Work” phase (Phase 3) – not at the start of a round (Phase 1). The Pieceworker only affects goods that are earned directly through an Action space, not through Improvements and Occupations.
- Plow Driver (E, 1-5): May not be combined with any of the 5 Plows or the Harrow.
- Plow Maker (E, 1-5): Unlike the Plow Driver, the Plow Maker may be combined with a Plow or the Harrow.
- Plowman (K, 1-5): If the player chooses not to take a field, the field is returned to the general Supply.
- Puppeteer (I, 4-5): The Puppeteer may only play Occupation cards if she has Food – even if the card would provide Food immediately.
- Reed Buyer (I, 4-5): If the Player takes Reed, he does not receive additional Food from the general supply. The Other player may not refuse the Reed purchase. The Reed Buyer cannot interfere if Reed is taken for the second time in a Round.
- Resource Seller (K, 1-5): Resources may be bought at the start of the round (Phase 1) as well as in the Work phase (phase 3). It is possible to buy more than 1 resource from the Resource Seller by using Occupation cards like the Wood Distributor, Storekeeper or Clay Worker.
- Schnaps Distiller (K, 1-5): The Player does not require a Fireplace, Cooking Hearth or Oven to convert the Vegetables.
- Scholar (K, 1-5): The Bookshelf, Perpetual Student and Patron can be used with the Scholar. Each round, the Scholar allows a player to play up to 1 additional card.
- Sheep Farmer (K, 3-5): There is an additional animal space in the 5-player game. The Sheep Farmer can affect this space. The Sheep Farmer may not be combined with the Shepherd Boy, Animal Handler, Sheep Whisperer or Master Shepherd.
- Shepherd Boy (K, 4-5): The player does not receive a free Sheep for the current round. The free Sheep may be immediately transformed into Food with an appropriate Improvement.
- Smallholder (K, 1-5): May be combined with the Drinking Trough and the Shepherd’s Pipe. Copse, Acreage, Beanfield, Turnip Field and Lettuce Patch do not count towards the indicated maximum of 2 fields. Neither those nor the Forester may be combined with the Smallholder.
- Stable Hand (E, 1-5): Stable Hand and Fence Overseer can be combined. It would be possible to build fences, receiving 1 free stable that could then be fenced for free. The player does not then receive a second stable.
- Stablemaster (E, 1-5): The Stablemaster and the Shepherd’s Pipe may not be used together.
- Stone Breaker (K, 4-5): May not be combined with the Conservator.
- Stone Buyer (I, 4-5): If the Player takes Stone, she does not receive additional Food from the general Supply. The Other player may not refuse the Stone purchase. The Stone Buyer cannot interfere if Stone is taken for the second time or third time in a Round.
- Stone Cutter (E, 3-5): If e.g. the Lumber card is played, the player need not give up any Stone.
- Sycophant (I, 4-5): Note that there are enough cards in the I deck for the other players to avoid the Take 1 Grain Action space.
- Tanner (K, 3-5, B): Slaughtered Wild Boar may either be placed on the Tanner or used for the Basin Maker, not both.
- Taster (I, 4-5): If e.g. the right-hand neighbor of the Taster is the Starting player, the Taster pays him 1 Food and places her first person. The Starting player then places the second, the third person is then played by the player who played the Taster (due to the normal flow of the game). See also: Foreman.
- Traveling Salesman (K, 1-5): In conjunction with the Merchant, it is possible to acquire up to 4 Minor Improvements using the 1 Major or Minor Improvement space for 1 Food, or to acquire 2 Major Improvements using the 1 Minor Improvement for 1 Food. In conjunction with the Businessman, up to 3 Minor Improvements may be played using the Starting Player Action.
- Tutor (E, 1-5, B): The player may note the Bonus points immediately on his scoring pad, or may also simply lay out his Occupations in the order that he plays them.
- Veterinarian (K, 4-5): If the player draws 2 different animals, both are returned to the container. If the animals are the same, the player may immediately convert the animal s/he receives into Food. If you are playing with Wooden animals, take Stone, Reed and Wood tokens for drawing and take one animal of the appropriate color.
- Water Carrier (I, 1-5): Food is not distributed a second time when the Well is upgraded to the Village Well. It is distributed again if the Well is built for a second time.
- Well Builder (I, 1-5): After the upgrade to the Village Well, the Well may be built a second time. The benefits of the Well builder also apply the second time.
- Wet Nurse (K, 1-5): Players are allowed to build several rooms at once with the Build Room(s) action. For 2 Food, the Wet Nurse allows an immediate Family Growth of 2 people, for 3 Food 3 people. The new Family members are placed on top of the Family member that was placed on the Build Room(s) Action space. The newborns are available to take actions in the following round.
- Wood Buyer (I, 3-5): The card also applies to the 1 Reed, in addition 1 Stone and 1 Wood Action space that is used in a 5-player game.
- Wood Carver (K, 1-5): May only be used once in each Round. The player can place her Wood supply on the Wood Carver card, to ensure that she does not forget the benefits.
- Wood Distributor (K, 1-5): Occupations like Boar Catcher and Mushroom Collector may mean that there is Wood on the Wood space that cannot be distributed evenly – in this case, 1 or 2 Wood are left on the Action space. The Wood Distributor, Foreman and Taster can affect one another. A player who chooses to use the Wood Distributor cannot take back the decision. A player who chooses not to use the Wood Distributor has until the start of the Work phase (Phase 3) to reconsider.
- Woodcutter (E, 1-5): see Wood Buyer.
Harvest Card Timing Sequence
The Harvest consists of three phases. The Improvement and Occupation cards can divide the Harvest into up to 11 parts:
Harvest Phase 1: Field Phase
- Start: Milking Shed.
- During the phase: Forester, Milking Hand, Copse, Butter Churn, Spindle, Loom, Milking Stool, Beanfield, Turnip Patch, Lettuce Patch, Acreage.
- At the end of the phase: Water Mill, Corn Storehouse.
- Between Phases 1 and 2: Harvest Helper.
Harvest Phase 2: Feeding the Family
- Start: Baker.
- During the phase: Cook, Schnaps Distiller, Schnaps Distillery, Master Brewer, Brewery, Hand Mill, Plane, Spit Roast, House Goat.
- At the end of the phase: Slaughterman, Slaughterhouse.
- Between Phases 2 and 3: n/a
Harvest Phase 3: Breeding
- Start: n/a
- During the phase: Shepherd, Forest Pasture, Nature Reserve, Animal Yard.
- At the end of the phase: n/a
Variants, Solo Rules & Credits
Agricola as a Family Game (for 1-5 people from 10 years)
In the simplified version of Agricola, the Occupation and Minor Improvement cards are not used – players do not have a hand of cards.
- The first game board is turned face-down, showing the “Agricola Family Game” side, and in a 3–5 player game only the “Family Game” Action cards are used.
- The Major or Minor Improvement action is restricted to Major Improvements.
- Otherwise, the rules are the same as for the full game.
Card Distribution Variants
- 3:1 Exchange: At any time, a player may discard any 3 cards from his hand and draw the face-down card at the top of either the Minor Improvements or the Occupations deck. This card is placed in the player’s hand.
- 10-3: Each player draws 10 Occupation and 10 Minor Improvement cards and discards 3 of each.
- Mulligan: At the start of the game (and only at the start), a player may discard all 7 Occupations and/or Minor Improvements and draw 6 new cards of that type. (If the player is still unhappy, he can keep trying this, always drawing 1 card fewer than he discards).
- Draft: Before the game starts, each player receives a hand of 7 Occupation cards as usual, then chooses one and passes the rest to her left-hand neighbor. Each player chooses one of the 6 new cards and passes on the remaining 5. This continues until each player has 7 cards. Repeat this process with the Minor Improvement cards. This variant allows players to create better combinations of cards than with a purely random distribution. We recommend that each player should have played Agricola at least 4-5 times before trying this variant.
Solo Version (for 1 person, from 12 years)
To play a Solo game, start with 0 Food. The left-hand spaces on the left game board remain empty, as in the 2-player game. Otherwise, play the game by the same rules as the multi-player game, taking your turns one after another. After you play a Minor Improvement that should be passed to the player on the left, it is removed from the game.
Exceptions:
- Adult Family members must be fed 3 Food each at Harvest time (Newborn offspring are still fed only 1).
- The “3 Wood” Action space only supplies 2 Wood in any round.
To play a series of Solo games:
- After the first game, choose one of your played Occupations. This is now a permanent Occupation and is placed face-up before the start of all subsequent games without requiring any Action to be used. You can use the abilities of the Occupation card from the start of the game, just as though you had already played it.
- Each subsequent game, you choose another played Occupation to be added to your permanent Occupations. Reduce the number of cards in your Occupations hand by the number of permanent Occupations that you have, so that you have a total of seven Occupation cards at the start of each Solo game. Once an Occupation has been made permanent, it must be placed face-up at the start of each subsequent game in the series.
- Because you have more permanent Occupations after each game, the goal score that you must reach goes up in each game: In the first game, your goal is 50 points, then 55, 59, 62, 64, 65, 66 and 67 points. After the eighth game, the Solo game series is over. (You can of course play on with all permanent Occupation cards, in which case the goal score increases by 1 point per game.)
- At the start of each game in the series, you receive 1 food for every 2 points by which you exceeded the goal score for the previous game (rounded down). Any cards from the previous game that were not moved to the permanent Occupations are shuffled into the deck.
Many Solo players enjoy choosing their own cards – even determining the order of the Round cards. You can also try the following three “contests”: restrict your Occupation and Improvement cards to only one of Deck E, I or K.
Credits
Agricola is a complex development game that was designed between December 2005 and February 2006.
- Game design: Uwe Rosenberg
- Graphic design and Illustration: Klemens Franz / atelier198
- Editing: Hanno Girke und Uwe Rosenberg
Thanks to the 138 Playtesters of the first edition as well as to the gaming public for the many comments and compliments after publication, which helped us to improve the game even further.
Special thanks to the Game Doctor Dale Yu for reviewing the Solo game rules.
The English translation was done by Melissa Rogerson, who thanks Hanno Girke and William Attia for support and many late-night discussions, her family for their patience, and John Kennard, Shawn Low, Dale Yu, Zev Shlasinger and the Agricola translators group for their suggestions and proofing.
© 2007 Lookout Games
www.lookout-games.de
English language publisher:
Z-Man Games, Inc. © 2008
www.zmangames.com
Rules explaination videos
Expansions for
Agricola

Agricola: Glonnacker
2015
A commemorative Agricola field with a distinctive grain-and-vegetable harvest.
150
minutes
View expansion
Agricola: Bielefeld Deck
2013
A Bielefeld-themed Agricola expansion with 24 new cards.
Medium Heavy
View expansion
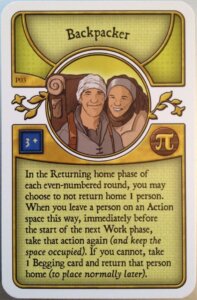
Agricola: Pi-Deck
2012
Add 24 unconventional cards to Agricola with the Pi-Deck.
120
minutes
Medium Heavy
View expansion
Agricola: X-Deck
2008
Bring unexpected alien encounters to the stone-quarrying stage of Agricola.
120
minutes
Medium

View expansion
Agricola: The Legen*dairy Forest-Deck
2010
A woodland tale of fairy tales, surprises, and extra wood-fueled effects.
120
minutes
Medium
View expansion
Agricola: CZ-Deck
2009
A Czech-inspired 24-card expansion illustrated in Josef Lada's style
120
minutes
Medium Heavy
View expansion
Agricola: Belgium Deck
2012
Bring Belgium’s Flanders and Wallonia to the classic farming game.
180
minutes
Medium Heavy
View expansion
Agricola: France Deck
2014
Explore French history and culture through 120 themed Agricola cards.
90
minutes
Medium Heavy
View expansion

Agricola: NL-Deck
2011
Explore the Netherlands through 120 thematic Agricola cards.
150
minutes
Medium Heavy
View expansion
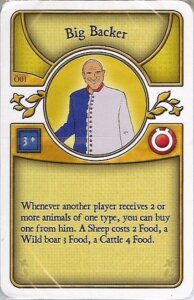
Agricola: Ö-Deck
2008
Add 24 Austria-themed cards to Agricola
120
minutes
Medium Heavy
View expansion
Agricola: Z-Deck
2008
A 24-card promotional expansion with Occupations and Minor Improvements
120
minutes
Medium Heavy
View expansion
Agricola: World Championship Deck – 2011
2011
A 115-card Agricola set with five mini-decks and flexible drafting options
180
minutes
Medium Heavy
View expansion
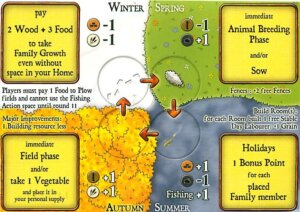
Agricola: Through the Seasons
2008
A seasonal Agricola mini expansion with new actions and resource tweaks
120
minutes
Medium Heavy
View expansion
Agricola: The Goodies Expansion
2010
Add quirky decks, themed boards, stickers, and distinctive wooden meeples to Agricola.
120
minutes
Medium Heavy
View expansion
Agricola: Gamers’ Deck
2010
A community-tested card expansion with 119 new cards for Agricola.
150
minutes
Medium Heavy
View expansion
Agricola: Farmers of the Moor
2009
Expand your farm with horses, fuel, forests, peat, and new improvements.
200
minutes
Medium Heavy
View expansion
