
Caper: Europe
2022
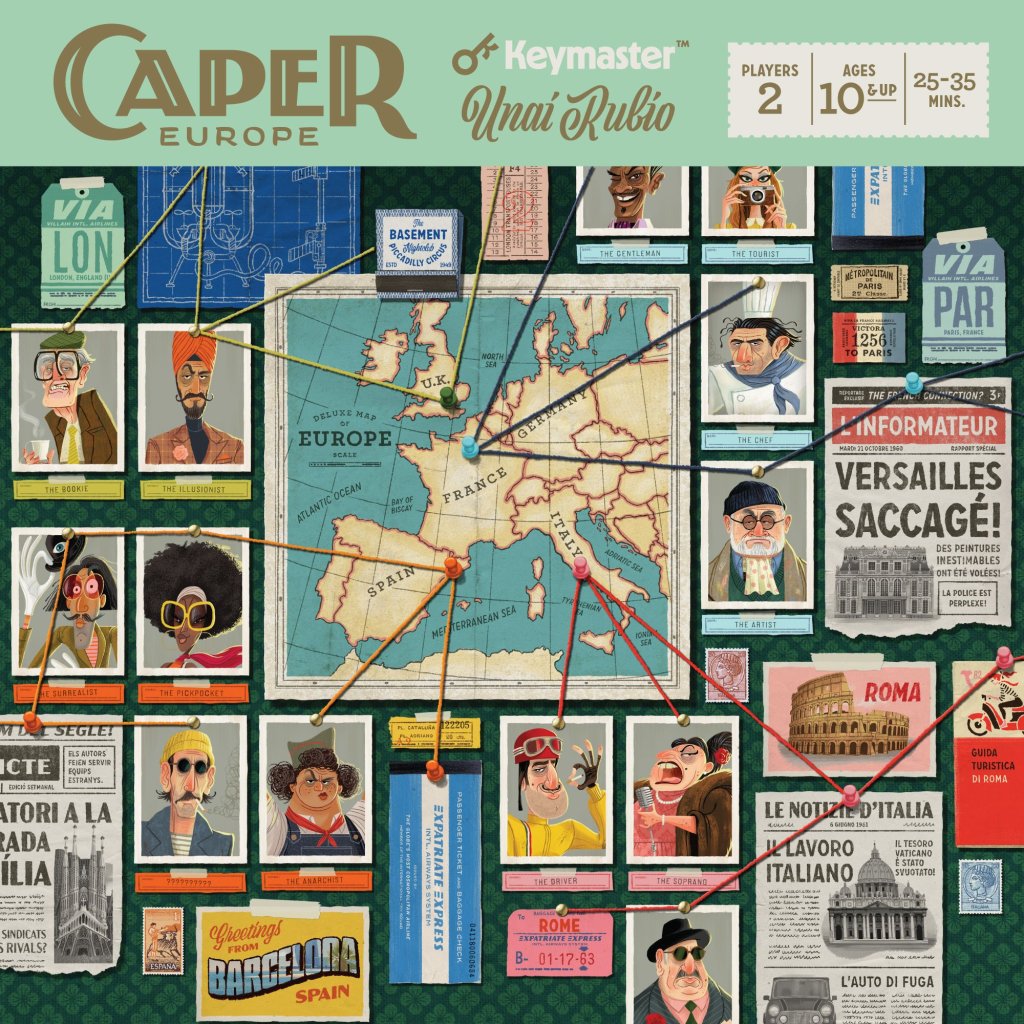
Recruit a crew, equip your thieves, and compete for famous European locations and priceless goods in a tense two-player drafting game.
35
minutes
2 - 2
player(s)
10+
Medium

About this board game
Caper: Europe is a two-player drafting game that plays in about 35 minutes, challenging rival masterminds to execute the perfect theft across famous European locations.
Recruit a crew of thieves, send them to locations across Europe, and provide them with the gear they need. Over six rounds, you will take turns drafting and playing cards, building a plan while watching for opportunities to disrupt your opponent.
Each thief brings special card powers to the operation, and adding gear can enhance those abilities. Deploy your crew carefully to compete for control of locations, but remember that dominating a location is only part of the job. Priceless stolen goods are also waiting for the mastermind clever enough to claim them first.
- Draft and play thief and gear cards over six rounds.
- Use special powers to outmaneuver your opponent’s plans.
- Compete for control of famous European locations.
- Collect stolen goods and equip thieves with their preferred gear.
Efficient resource use is essential, but a successful operation takes more than simply collecting cards or winning locations. You must decide when to commit your thieves, how to enhance them, and where to focus your limited opportunities before time runs out.
At the end of the sixth round, points come from winning locations, collecting stolen goods, and equipping thieves with preferred gear. In Caper: Europe, the mastermind with the most points wins the night.
Thematic
Designer
Illustrator



Board Game Rules for
Caper: Europe
Introduction
Becoming the greatest Mastermind to wander Europe is no small feat. You’ll need to pull off daring capers in lucrative locations across the continent. But watch out! Your rival Mastermind is looking to do the same and could thwart your best-laid plans. Outwit them with the right crew and latest gear to pull off the perfect heist.
Overview & Objective
Caper is a two-player game that takes place over 6 rounds across 3 Locations. During a round, each Mastermind will play Thief cards at Locations or Gear cards on top of Thieves. After playing a card, each Mastermind exchanges their entire hand of cards—giving the other player access to the cards they just had! Points will be scored at the end of the game. The Mastermind with the most wins!
Ways You’ll Score Points
- LOCATIONS: Move the Caper Tracker closer to your side of the board to win a Location’s Points and Bonuses at the end of the game.
- CARDS: Even if you don’t win a Location, your Thief and Gear cards may award you standalone Points or Points through sets.
- STOLEN GOODS: Acquire unique Stolen Goods from Locations to form sets and score luxurious loot at the end of the game.
Components
- 1 Score Pad
- 1 Game Board
- 2 Player Aids
- 1 Round Tracker
- 3 Caper Trackers
- 10 Coins
- 12 Stolen Goods:
- 4 Diamonds
- 4 Paintings
- 4 Antiques
- Locations Deck • 28 Cards:
- 8 Core Location Cards
- 20 City-Based Location Cards (5 per City)
- Thief Deck • 27 Cards:
- 15 Core Thief Cards
- 12 City-Based Thief Cards (3 per City)
- Gear Deck • 54 Cards:
- 30 Core Gear Cards
- 24 City-Based Gear Cards (6 per City)

Game Setup
- Set the Table: Sit across the table from the other Mastermind. Place the board between you with the long side facing each player. Place the 10 Coins next to one end of the board to form the supply.
- Set up the Decks: Locate and separate the core Thief, Gear, and Location cards into their own decks. Choose one of the Cities to play and locate all of its City cards. Then, separate and shuffle that City’s Thief, Gear, and Location cards into their respective core decks. Leave all unused City cards in the box. They will not be used for the game.
For your first game, we recommend playing in lovely Paris. Read about the nitty-gritty City details on pgs. 17-18.
- Set up the Cards on the Board: Place the shuffled Thief and Gear decks face down onto their matching icon slots on the board. From the Locations deck, reveal one Location card into each of the three Location spots on the board. Return all unused Location cards to the box.
- Set up the Stolen Goods: Randomly place four Stolen Goods into their slots at each of the three Locations with their icons face up. You can do this by placing the Stolen Goods face down on the table, shuffling them around, and then revealing them into each Location Stolen Good slot.
- Set up the Rest of the Board: Place a Caper Tracker in the middle position of each Caper Track at the 3 Location areas. Place the Round Tracker on the Intro slot of the Round Track. You’re ready to play!

Quickstart Guide
- Choose a City and shuffle its cards into each appropriate Core deck.
- Place 3 Locations onto the board along with the Thief and Gear decks.
- Randomly place the Stolen Goods out onto the board.
- Place the Coins, Round Tracker, and Caper Trackers into their areas.
- Begin the Round by drawing cards indicated by Round Tracker.
- Each turn, the Starting Mastermind plays a card, then the other Mastermind plays a card, then both players exchange hands.
- Continue this until each Mastermind is left with only one card.
- Instead of exchanging it, the last card is discarded face-up and the Round Tracker moves to the next space down.
- After the final Gear Round, score the game to see who wins!
Want help with icons? Checkout pg. 9-10 to learn the ins-and-outs, or if you want help on a specific icon combo, go to CaperIcons.com

Round Structure
Begin each round by looking at the Round Tracker. The icon next to the Round Tracker shows:
- From which deck you deal cards,
- How many cards each player gets, and
- Which Mastermind goes first that round.
The first round begins with the Round Tracker next to this icon. The icon is adjacent to the Thief deck and shows 4 pips, so each Mastermind will start with 4 cards in their hand from the Thief deck.
Each round has a different number of turns, based on the number of cards Masterminds have. Each turn:
- The Starting Mastermind plays a card from their hand, and then the other Mastermind plays a card from their hand.
- Then, both players exchange their hand of cards.
- This continues until both players only have one card left in their hand.
- Instead of exchanging their final card, both players discard it face-up to their Hideout area. This ends the round.
- Move the Round Tracker one space down, deal cards based on the Round Tracker, and start a new round.
Rounds alternate between playing Thieves at Locations and Gear onto Thieves. After the final Gear round (Fin), the game ends and is scored.
Drafting
WHAT’S ON DRAFT: The process of playing a card then exchanging hands is called drafting. Be on the lookout for what you need, but also what you’re passing to your opponent. If you aren’t hiring a Thief, then they’re headed right over to the other Mastermind to see if they can work for them!


Thief Rounds
Thieves are the backbone of a good heist. Three Thief rounds occur during the game. During a Thief round, Masterminds place Thieves on their side of the board next to Locations. Each Thief comes with skills represented by the icons under their name. Thieves can help move the Caper Tracker so you may win a Location, earn you Points through card combos, or give you the pick of a Location’s Stolen Goods. Also, many Thieves will immediately get you Coins that you may use in later Gear rounds.
On a Thief Turn:
- Place a Thief at an available Location slot on your side.
- Gain the number of Coins listed on the Thief.
- Resolve any icons that are triggered.
Each Location has slots for up to 3 Thieves per side, shown by the  mark. Once those three Location slots are filled on your side, you can no longer play Thieves there. However, your opponent may still play Thieves to that Location if there are available slots on their side of the board. It does not matter which of the three slots you play the Thief on.
Thief Card Color
Cream: All Thief cards are a Cream color and pair with icon sets showing this color.
IT PAYS TO SAVE: Some Thieves have powerful abilities, but bring in little to no Coins. Make sure to plan well for the upcoming Gear round where often you’ll need Coins to pay for more powerful Gear. With each subsequent Thief round, you will start with fewer Thieves.

Gear Rounds
Three Gear rounds also occur during the game, so pairing the right Gear with the right Crew is critical for success. During these rounds, Masterminds play Gear onto their Thief cards. Each Thief can hold a maximum of 3 Gear cards. Some Gear have a Coin cost that must be paid in order to be played. To pay for a Gear card, simply return the appropriate number of Coins to the supply.
On a Gear Turn, You May:
- Select a Gear card to play, paying its cost.
- Place the Gear card on a Thief, up to 3 Gear per Thief.
- Resolve any Icons that are triggered on the card.
- Check if any Thief or Location effects are also triggered.
OR
- Discard a Gear card from your hand and gain a Coin.
Gear should be placed onto a Thief or onto the latest played Gear card on a Thief, so that all icons and colors of the previous cards played are visible. (Max of 3 Gear per Thief)
RAIN CHECK: You might discard a Gear card if you cannot afford to play it, need money for a card coming back to you, or want to prevent your opponent using a card that works well with their crew.

Gear Turn Examples
- Your Opponent plays Simple Disguise on The Banker. They move the
 1 space toward their side for the on the Simple Disguise and then 1 more space once for the
 Set Effect on The Colonel.
- On your turn, you respond by paying 2 Coins to play a Blazeblaster on The Artist. Note: now that the Artist has 3 Gear Cards on top, you cannot play any more Gear cards on them.
- You choose to burn your opponent’s Plasma Cutter, forcing them to discard that card to their Hideout and revert its effect (returning 4 Coins to the supply).
- Your Opponent only has 3 Coins, so they return as many as they have. Only the card’s immediate effect is reverted when burned. Other effects previously gained such as the
 on The Banker are not reverted.
THE BEST DEFENSE: Playing the Blazeblaster on the briefcase doubles as protection. If your opponent were to play a Blazeblaster, they could not destroy the briefcase as it wouldn’t be the topmost card.

Assembling a Crew
Each Thief and Gear card you play at a Location becomes a part of your Crew. All cards in your Crew work together at that Location. Therefore, Gear cards do not have to be played on a specific Thief to trigger that Thief’s icons. As long as the card is played at the Location, it applies to each icon there.
Gear Card Colors
Gear cards also have a Color. These Colors can trigger other icons on cards at that Location. In each game, there are 4 core Gear Colors and 1 City-Specific Color. Combo card Colors with matching icons to maximize your crew’s effectiveness:
 Purple: Focused on moving the Caper Tracker to win a Location.
 Green: Focused on taking Stolen Goods from Locations.
 Yellow: Focused on gaining Coins to pay for fancy Gear.
- Red: Focused on discarding your Opponent’s played cards.
- City Color: Each City’s Gear has a unique focus. Only one of these colors will be in each game.
- Any Gear Color: This also includes any City-Specific Gear.
WHAT’S TO COME: If you want to win a Location, sometimes leaving yourself enough slots for Gear is key in the later rounds. This can help defend against late game movement of the Caper Tracker.
Locations and How to Win Them
Location cards depict the scene of the heist. Each of the 3 Locations includes 4 Stolen Goods, a Location Card, a Caper Track, and slots for 3 Thieves on both sides.
A Location will reward Points to the Mastermind who has moved its closer to their side at the end of the game. The further a Mastermind moves the to their side, the more Bonus Points they can earn. If the game ends with the Caper Tracker in the middle, neither Mastermind wins the Location.
Locations have a base amount of Points often paired with a Set Effect that awards additional Points for how well the Mastermind accomplishes it. For example, the Location above awards a Mastermind 5 base Points plus a Point for each of their Thief cards (Cream color) at this Location.
Some Locations also have an ongoing Location Effect identified by a darker background. These Effects provide bonuses to a Mastermind whenever they meet its condition.
Note: If you should move the and there is not a space closer to you, then you do not move it and that immediate effect is lost.
DON’T GET AHEAD OF YOURSELF: While getting ahead at a Location early can discourage your opponent from playing at that site, it can also draw their full attention to the other Locations.

Coins in Caper – Limited Supply
There are only 10 Coins in the game. If you should gain Coins and there are none in the supply, gain them from your opponent while you have less. You should take the indicated amount one Coin at a time from them, until you have a number equal or greater than their amount.
For example, let’s say you had 4 coins and your opponent has 6. You play a Thief that allows you to gain 2 Coins. If none are in the supply, you would take 1 Coin from your opponent, but not the 2nd because you are now at an equal amount.
Icon Effects
Icons and how they interact with other cards is the core of learning Caper: Europe. There are only 5 core game icons. We’ll learn what they do and how they interact on these next two pages. For City-specific icons effects, see pages 17-18.
For each icon present on a card, resolve its effect. For example, the Incognito Tuxedo immediately moves the twice at its location. The Smoke Screen immediately moves the once, but its Point scores at the end of the game.
Effects That Resolve Immediately
 Move the Caper Tracker: Move the Caper Tracker at this Location 1 space toward you.
 Gain a Coin: Gain a Coin from the supply.
- Burn a card: Discard one of the topmost Gear cards on the Opponent’s side of this Location and revert its Icon.
- Steal a Stolen Good: Take the matching Stolen Good from this Location and place it in your Hideout. The
 allows you to take any Stolen Good from this Location.
Point Effects Resolve at Game End
 Gain Point(s): Gain one Point for each star or number of stars inside.
PERFECT BALANCE: An expert Mastermind knows how to balance the effects they need to come out on top. Knowing when to move the Caper Tracker or when to take a Stolen Good can make or break the plan.
Set Effects
Some icons are paired together to signify that you resolve its effect if certain conditions are met. Most often these effects resolve if you play a specific card color at that Location. These icons are ongoing Set Effects and can resolve multiple times.
Set Effects can be read from top to bottom like this:
- Top (Card Set): For each card or set of cards
- Bottom (Effects): Resolve this effect
For example, this icon reads “For each Green card in your Crew, move the one space toward you.” So when you play the Conductor to a Crew that already has 2 Green cards, you’d immediately move the 2 spaces toward you. This effect is ongoing so on future turns, when you play a Green card with this Crew you would also move the one space toward you.
Set Effects with Points will resolve at the end of the game. For example, this icon reads “For each Green card + Any Color Gear card in your Crew, score 2 Points.” In this example to your left, The Bon Vivant is currently scoring 2 Points at the end of the game since there is one set of a Green + Any Color (Green in this case) in the Crew.
Some Set Effects do not include Card Colors, but Stolen Goods instead. This means you will score Points for each Stolen Good of that type in your Hideout at the end of the game. For example, the reward at this Locations reads, “Score 2 Points per Painting in your Hideout.” So if you ended the game with 3 Paintings and won the Louvre, this effect would score you 6 Points.
WOMBO COMBOS: Playing cards with overlapping colors in their set effects can help maximize your Crew’s potential, but that also gives information to your opponent as to what you want to draft. Always have a backup plan in case you are unable to pull off your big combo!

Burning Cards
When you play a card with , choose one of your opponent’s topmost Gear cards on a Thief at this Location and have them discard it. If there are any immediate icon effects on the discarded card, revert them. Do not revert effects previously gained from other Set Effects. If the burned card shows:
- Move the a number of spaces back toward you equal to the number of on the burned card.
 Your opponent returns the amount of Coins pictured to the supply. If they cannot return the full amount, then they must discard as many Coins as they have.
 Your opponent returns the depicted Stolen Good from their Hideout to a Stolen Good slot at this Location. If you destroy a , then they may choose which type of Stolen Good to return. If they do not have the depicted Icon, then they do not have to return a Stolen Good.
Destroying a Burn card with a has no effect and destroying has no immediate effect as Points are scored at game end.
Burn Protection
You can protect a card by playing another Gear card over it, or by playing a card with burn protection—meaning your cards of this type are protected in this Crew from being burned.
THIRD TIME’S THE CHARM: There are 3 Blazeblasters in the core game, but you can protect your valuable Gear from getting burned by playing other Gear cards on top of them.

Scoring the Game
After each Mastermind discards their final card from the 6th round, it is time to score the game. Pull out the Score Pad and assign each Mastermind a column. There are 4 steps to scoring a game of Caper: Europe. In each step, both players will count up their Points from icons and Set Effects on the relevant cards before moving onto the next step.
- Locations: Identify which Mastermind won each Location. Then each Mastermind adds up the Points and any Caper Bonus from the Locations they won. Unless otherwise noted, Location bonuses only apply to the Crew on the winning Mastermind’s side of the board.
- Thieves: Each Mastermind scores their Thief cards in each Crew.
- Gear: Each Mastermind scores their Gear cards in each Crew.
- Stolen Goods: Each Mastermind sorts their Stolen Goods into sets with unique icons — meaning a set cannot contain 2 of the same Stolen Good.
Stolen Goods Scoring Values
- Single Stolen Good: = 2 Points
- Set of 2 Different: = 5 Points
- Set of All 3: = 9 Points
Any single Stolen Good that can’t be paired with another type is worth 2 Points. A set containing 2 different Stolen Goods is worth 5 Points. A set containing all 3 Stolen Goods is worth 9 Points. Different sets can be scored, but a Stolen Good tile cannot be used in more than 1 Set.
Tiebreaker
Total up each Mastermind’s Points! Whoever has the most Points is the winner! If the Masterminds are tied, compare Coins. If there is still a tie, compare the number of Stolen Goods. If there is still a tie, agree to test your skills another time.

Scoring Example
For purpose of this example, we will only score the Points awarded to the pictured Mastermind who we will call Tess.
- Locations: Tess wins the Louvre and Moulin Rouge because the is closer to Tess’s side of the board at those Locations. Neither Mastermind wins the Yacht as the is in the middle of the Caper Track. The Louvre awards Tess 3
 + 2 Points per Stolen Painting (which Tess has 2 of in their Hideout) for a total of 7 Points. Moulin Rouge awards Tess 5 + 1 Point per Thief card (which Tess has 3 at that Location) for a total of 8 Points. Tess also scores 2 Bonus Points for the position of the at the Moulin Rouge Location. Tess scores 17 Points total from Locations.
- Thieves: Tess then looks at each of their Thieves in a Crew. At the Yacht, the Actress awards (2 Points per set of Yellow + any Gear card). Tess can make 1 set with the Yellow Plasma Cutter + Light Blue card scoring 2 Points. Since each card can only be used in 1 set per Set Effect, Tess is unable to make another set at the Location. At the Louvre, The Bon Vivant awards Tess, so with the 3 Green cards and 1 Red card in that Crew, Tess makes 2 sets scoring 4 Points. At Moulin Rouge, Tess made 1 set toward the Gentleman’s icon scoring 4 Points, and 3 sets for the Dame’s scoring 6 more Points. Tess scores 16 Points total from Thieves.
- Gear: Tess then looks at their Gear cards at each Location. At the Yacht, Tess has 1 Yellow Gear card with a 1 Point icon. At the Louvre, the False Bottom Briefcase awards (for each Green card score 1 Point). Tess has 3 Green cards in that Crew, scoring 3 Points. At Moulin Rouge, there are 2 Plans Cachés, each awarding 1 Point per Light Blue card. There are 2 Light Blue cards in that crew, so each Plans Cachés scores them 2 Points to make 4 Points. Tess scores 8 Points total from Gear.
- Stolen Goods: Tess now sorts their Stolen Goods, making 1 complete set of all 3 unique Stolen Goods for 9 Points and 1 set of 2 unique Stolen Goods for 5 Points. Tess scores 14 Points total from Stolen Goods.
Tess’s final score is 55 Points. This is VERY high! What was Danny thinking letting Tess draft all those combos? Games average around 30-40 Points depending on the City.
Honor among thieves: Keep your discards visible so that each Mastermind can see what’s been played or discarded.

The Cities of Caper: Europe
Each of the four cities sets the stage for a unique heist experience when you sit down at the table. Here you will find a short description of each city and any unique icons not found in the core set.
Paris
Paris is home to some of the oldest, most valuable Diamonds, Antiques, and Paintings in the world! Locations reward extra Points for Stolen Goods and the Gear is all about Points combos.
 For each Stolen Good in your Hideout at the end of the game, score 1 Point.
Barcelona
Barcelona is a place of beauty and organization! In this city, the “eye”-con is introduced, granting a bonus at the end of the game if a topmost Gear’s color in your Crew matches the eye’s color.
- If you have an Orange card as a topmost card in this Crew at the end of the game, then score 3 Points.
 For each card of this color in your Crew and your Opponent’s here, score 1 Point.
In this example, the topmost cards are Purple and Orange, so all eye-cons with Purple or Orange would resolve their effects when scoring (the Anarchist and Mesmerizer). The Surrealist would not activate their ability as there is not a topmost Green card here.


Rome
Rome is a place of emperors and old families, so watch your back! There’s more movement in the Caper Trackers and this City allows you to increase your Points for winning Locations, making each spot a heated battleground.
 For each card of this type discarded to your Hideout, gain 1 Caper.
 For each card of this type discarded to your Hideout, score 1 Point.
- If you win this Location, score 2 Points.
 For each card of this type in your Opponent’s Crew here, score 1 Point.
London
London is a center for economic development and commerce! Coins will be moving around more and some will be disappearing. Laundered Coins will be removed from the supply and go into your Hideout. They cannot be used to purchase Gear and cannot be affected by your opponent. As the Coin supply dwindles, remember the Coin supply rules on pg. 11. If you are to gain Coins and there are none in the supply, take from your opponent while you have less.
 Place a Coin from the supply into your Hideout.
 For each Coin in your Hideout, score 1 Point.
 For each Coin in your Hideout, move the Caper Tracker one space toward you.
 For each card of this type in your Crew, gain 1 Coin.
 For each card of this type in your Crew and your Opponent’s here, score 1 Point.
Reverting this Effect: If you a Gear card with this icon, your opponent returns 1 Coin from their Hideout back into the Supply.
Overview & Components
Introduction
Becoming the greatest Mastermind to wander Europe is no small feat. You’ll need to pull off daring capers in lucrative locations across the continent. But watch out! Your rival Mastermind is looking to do the same and could thwart your best-laid plans. Outwit them with the right crew and latest gear to pull off the perfect heist.
Overview & Objective
Caper is a two-player game that takes place over 6 rounds across 3 Locations. During a round, each Mastermind will play Thief cards at Locations or Gear cards on top of Thieves. After playing a card, each Mastermind exchanges their entire hand of cards—giving the other player access to the cards they just had! Points will be scored at the end of the game. The Mastermind with the most wins!
Ways You’ll Score Points
- LOCATIONS: Move the Caper Tracker closer to your side of the board to win a Location’s Points and Bonuses at the end of the game.
- CARDS: Even if you don’t win a Location, your Thief and Gear cards may award you standalone Points or Points through sets.
- STOLEN GOODS: Acquire unique Stolen Goods from Locations to form sets and score luxurious loot at the end of the game.
Components
- 1 Score Pad
- 1 Game Board
- 2 Player Aids
- 1 Round Tracker
- 3 Caper Trackers
- 10 Coins
- 12 Stolen Goods:
- 4 Diamonds
- 4 Paintings
- 4 Antiques
- Locations Deck • 28 Cards:
- 8 Core Location Cards
- 20 City-Based Location Cards (5 per City)
- Thief Deck • 27 Cards:
- 15 Core Thief Cards
- 12 City-Based Thief Cards (3 per City)
- Gear Deck • 54 Cards:
- 30 Core Gear Cards
- 24 City-Based Gear Cards (6 per City)
Setup
Game Setup
- Set the Table: Sit across the table from the other Mastermind. Place the board between you with the long side facing each player. Place the 10 Coins next to one end of the board to form the supply.
- Set up the Decks: Locate and separate the core Thief, Gear, and Location cards into their own decks. Choose one of the Cities to play and locate all of its City cards. Then, separate and shuffle that City’s Thief, Gear, and Location cards into their respective core decks. Leave all unused City cards in the box. They will not be used for the game.
For your first game, we recommend playing in lovely Paris. Read about the nitty-gritty City details on pgs. 17-18.
- Set up the Cards on the Board: Place the shuffled Thief and Gear decks face down onto their matching icon slots on the board. From the Locations deck, reveal one Location card into each of the three Location spots on the board. Return all unused Location cards to the box.
- Set up the Stolen Goods: Randomly place four Stolen Goods into their slots at each of the three Locations with their icons face up. You can do this by placing the Stolen Goods face down on the table, shuffling them around, and then revealing them into each Location Stolen Good slot.
- Set up the Rest of the Board: Place a Caper Tracker in the middle position of each Caper Track at the 3 Location areas. Place the Round Tracker on the Intro slot of the Round Track. You’re ready to play!
Quickstart Guide
- Choose a City and shuffle its cards into each appropriate Core deck.
- Place 3 Locations onto the board along with the Thief and Gear decks.
- Randomly place the Stolen Goods out onto the board.
- Place the Coins, Round Tracker, and Caper Trackers into their areas.
- Begin the Round by drawing cards indicated by Round Tracker.
- Each turn, the Starting Mastermind plays a card, then the other Mastermind plays a card, then both players exchange hands.
- Continue this until each Mastermind is left with only one card.
- Instead of exchanging it, the last card is discarded face-up and the Round Tracker moves to the next space down.
- After the final Gear Round, score the game to see who wins!
Want help with icons? Checkout pg. 9-10 to learn the ins-and-outs, or if you want help on a specific icon combo, go to CaperIcons.com
Round Structure & Drafting
Round Structure
Begin each round by looking at the Round Tracker. The icon next to the Round Tracker shows:
- From which deck you deal cards,
- How many cards each player gets, and
- Which Mastermind goes first that round.
The first round begins with the Round Tracker next to this icon. The icon is adjacent to the Thief deck and shows 4 pips, so each Mastermind will start with 4 cards in their hand from the Thief deck.
Each round has a different number of turns, based on the number of cards Masterminds have. Each turn:
- The Starting Mastermind plays a card from their hand, and then the other Mastermind plays a card from their hand.
- Then, both players exchange their hand of cards.
- This continues until both players only have one card left in their hand.
- Instead of exchanging their final card, both players discard it face-up to their Hideout area. This ends the round.
- Move the Round Tracker one space down, deal cards based on the Round Tracker, and start a new round.
Rounds alternate between playing Thieves at Locations and Gear onto Thieves. After the final Gear round (Fin), the game ends and is scored.
Drafting
WHAT’S ON DRAFT: The process of playing a card then exchanging hands is called drafting. Be on the lookout for what you need, but also what you’re passing to your opponent. If you aren’t hiring a Thief, then they’re headed right over to the other Mastermind to see if they can work for them!
Playing Cards: Thieves & Gear
Thief Rounds
Thieves are the backbone of a good heist. Three Thief rounds occur during the game. During a Thief round, Masterminds place Thieves on their side of the board next to Locations. Each Thief comes with skills represented by the icons under their name. Thieves can help move the Caper Tracker so you may win a Location, earn you Points through card combos, or give you the pick of a Location’s Stolen Goods. Also, many Thieves will immediately get you Coins that you may use in later Gear rounds.
On a Thief Turn:
- Place a Thief at an available Location slot on your side.
- Gain the number of Coins listed on the Thief.
- Resolve any icons that are triggered.
Each Location has slots for up to 3 Thieves per side, shown by the mark. Once those three Location slots are filled on your side, you can no longer play Thieves there. However, your opponent may still play Thieves to that Location if there are available slots on their side of the board. It does not matter which of the three slots you play the Thief on.
Thief Card Color
Cream: All Thief cards are a Cream color and pair with icon sets showing this color.
IT PAYS TO SAVE: Some Thieves have powerful abilities, but bring in little to no Coins. Make sure to plan well for the upcoming Gear round where often you’ll need Coins to pay for more powerful Gear. With each subsequent Thief round, you will start with fewer Thieves.
Gear Rounds
Three Gear rounds also occur during the game, so pairing the right Gear with the right Crew is critical for success. During these rounds, Masterminds play Gear onto their Thief cards. Each Thief can hold a maximum of 3 Gear cards. Some Gear have a Coin cost that must be paid in order to be played. To pay for a Gear card, simply return the appropriate number of Coins to the supply.
On a Gear Turn, You May:
- Select a Gear card to play, paying its cost.
- Place the Gear card on a Thief, up to 3 Gear per Thief.
- Resolve any Icons that are triggered on the card.
- Check if any Thief or Location effects are also triggered.
OR
- Discard a Gear card from your hand and gain a Coin.
Gear should be placed onto a Thief or onto the latest played Gear card on a Thief, so that all icons and colors of the previous cards played are visible. (Max of 3 Gear per Thief)
RAIN CHECK: You might discard a Gear card if you cannot afford to play it, need money for a card coming back to you, or want to prevent your opponent using a card that works well with their crew.
Gear Turn Examples
- Your Opponent plays Simple Disguise on The Banker. They move the 1 space toward their side for the on the Simple Disguise and then 1 more space once for the Set Effect on The Colonel.
- On your turn, you respond by paying 2 Coins to play a Blazeblaster on The Artist. Note: now that the Artist has 3 Gear Cards on top, you cannot play any more Gear cards on them.
- You choose to burn your opponent’s Plasma Cutter, forcing them to discard that card to their Hideout and revert its effect (returning 4 Coins to the supply).
- Your Opponent only has 3 Coins, so they return as many as they have. Only the card’s immediate effect is reverted when burned. Other effects previously gained such as the on The Banker are not reverted.
THE BEST DEFENSE: Playing the Blazeblaster on the briefcase doubles as protection. If your opponent were to play a Blazeblaster, they could not destroy the briefcase as it wouldn’t be the topmost card.
Crews, Colors & Locations
Assembling a Crew
Each Thief and Gear card you play at a Location becomes a part of your Crew. All cards in your Crew work together at that Location. Therefore, Gear cards do not have to be played on a specific Thief to trigger that Thief’s icons. As long as the card is played at the Location, it applies to each icon there.
Gear Card Colors
Gear cards also have a Color. These Colors can trigger other icons on cards at that Location. In each game, there are 4 core Gear Colors and 1 City-Specific Color. Combo card Colors with matching icons to maximize your crew’s effectiveness:
- Purple: Focused on moving the Caper Tracker to win a Location.
- Green: Focused on taking Stolen Goods from Locations.
- Yellow: Focused on gaining Coins to pay for fancy Gear.
- Red: Focused on discarding your Opponent’s played cards.
- City Color: Each City’s Gear has a unique focus. Only one of these colors will be in each game.
- Any Gear Color: This also includes any City-Specific Gear.
WHAT’S TO COME: If you want to win a Location, sometimes leaving yourself enough slots for Gear is key in the later rounds. This can help defend against late game movement of the Caper Tracker.
Locations and How to Win Them
Location cards depict the scene of the heist. Each of the 3 Locations includes 4 Stolen Goods, a Location Card, a Caper Track, and slots for 3 Thieves on both sides.
A Location will reward Points to the Mastermind who has moved its closer to their side at the end of the game. The further a Mastermind moves the to their side, the more Bonus Points they can earn. If the game ends with the Caper Tracker in the middle, neither Mastermind wins the Location.
Locations have a base amount of Points often paired with a Set Effect that awards additional Points for how well the Mastermind accomplishes it. For example, the Location above awards a Mastermind 5 base Points plus a Point for each of their Thief cards (Cream color) at this Location.
Some Locations also have an ongoing Location Effect identified by a darker background. These Effects provide bonuses to a Mastermind whenever they meet its condition.
Note: If you should move the and there is not a space closer to you, then you do not move it and that immediate effect is lost.
DON’T GET AHEAD OF YOURSELF: While getting ahead at a Location early can discourage your opponent from playing at that site, it can also draw their full attention to the other Locations.
Coins in Caper – Limited Supply
There are only 10 Coins in the game. If you should gain Coins and there are none in the supply, gain them from your opponent while you have less. You should take the indicated amount one Coin at a time from them, until you have a number equal or greater than their amount.
For example, let’s say you had 4 coins and your opponent has 6. You play a Thief that allows you to gain 2 Coins. If none are in the supply, you would take 1 Coin from your opponent, but not the 2nd because you are now at an equal amount.
Card Effects & Burning
Icon Effects
Icons and how they interact with other cards is the core of learning Caper: Europe. There are only 5 core game icons. We’ll learn what they do and how they interact on these next two pages. For City-specific icons effects, see pages 17-18.
For each icon present on a card, resolve its effect. For example, the Incognito Tuxedo immediately moves the twice at its location. The Smoke Screen immediately moves the once, but its Point scores at the end of the game.
Effects That Resolve Immediately
- Move the Caper Tracker: Move the Caper Tracker at this Location 1 space toward you.
- Gain a Coin: Gain a Coin from the supply.
- Burn a card: Discard one of the topmost Gear cards on the Opponent’s side of this Location and revert its Icon.
- Steal a Stolen Good: Take the matching Stolen Good from this Location and place it in your Hideout. The allows you to take any Stolen Good from this Location.
Point Effects Resolve at Game End
- Gain Point(s): Gain one Point for each star or number of stars inside.
PERFECT BALANCE: An expert Mastermind knows how to balance the effects they need to come out on top. Knowing when to move the Caper Tracker or when to take a Stolen Good can make or break the plan.
Set Effects
Some icons are paired together to signify that you resolve its effect if certain conditions are met. Most often these effects resolve if you play a specific card color at that Location. These icons are ongoing Set Effects and can resolve multiple times.
Set Effects can be read from top to bottom like this:
- Top (Card Set): For each card or set of cards
- Bottom (Effects): Resolve this effect
For example, this icon reads “For each Green card in your Crew, move the one space toward you.” So when you play the Conductor to a Crew that already has 2 Green cards, you’d immediately move the 2 spaces toward you. This effect is ongoing so on future turns, when you play a Green card with this Crew you would also move the one space toward you.
Set Effects with Points will resolve at the end of the game. For example, this icon reads “For each Green card + Any Color Gear card in your Crew, score 2 Points.” In this example to your left, The Bon Vivant is currently scoring 2 Points at the end of the game since there is one set of a Green + Any Color (Green in this case) in the Crew.
Some Set Effects do not include Card Colors, but Stolen Goods instead. This means you will score Points for each Stolen Good of that type in your Hideout at the end of the game. For example, the reward at this Locations reads, “Score 2 Points per Painting in your Hideout.” So if you ended the game with 3 Paintings and won the Louvre, this effect would score you 6 Points.
WOMBO COMBOS: Playing cards with overlapping colors in their set effects can help maximize your Crew’s potential, but that also gives information to your opponent as to what you want to draft. Always have a backup plan in case you are unable to pull off your big combo!
Burning Cards
When you play a card with , choose one of your opponent’s topmost Gear cards on a Thief at this Location and have them discard it. If there are any immediate icon effects on the discarded card, revert them. Do not revert effects previously gained from other Set Effects. If the burned card shows:
- Move the a number of spaces back toward you equal to the number of on the burned card.
- Your opponent returns the amount of Coins pictured to the supply. If they cannot return the full amount, then they must discard as many Coins as they have.
- Your opponent returns the depicted Stolen Good from their Hideout to a Stolen Good slot at this Location. If you destroy a , then they may choose which type of Stolen Good to return. If they do not have the depicted Icon, then they do not have to return a Stolen Good.
Destroying a Burn card with a has no effect and destroying has no immediate effect as Points are scored at game end.
Burn Protection
You can protect a card by playing another Gear card over it, or by playing a card with burn protection—meaning your cards of this type are protected in this Crew from being burned.
THIRD TIME’S THE CHARM: There are 3 Blazeblasters in the core game, but you can protect your valuable Gear from getting burned by playing other Gear cards on top of them.
End of Game & Scoring
Scoring the Game
After each Mastermind discards their final card from the 6th round, it is time to score the game. Pull out the Score Pad and assign each Mastermind a column. There are 4 steps to scoring a game of Caper: Europe. In each step, both players will count up their Points from icons and Set Effects on the relevant cards before moving onto the next step.
- Locations: Identify which Mastermind won each Location. Then each Mastermind adds up the Points and any Caper Bonus from the Locations they won. Unless otherwise noted, Location bonuses only apply to the Crew on the winning Mastermind’s side of the board.
- Thieves: Each Mastermind scores their Thief cards in each Crew.
- Gear: Each Mastermind scores their Gear cards in each Crew.
- Stolen Goods: Each Mastermind sorts their Stolen Goods into sets with unique icons — meaning a set cannot contain 2 of the same Stolen Good.
Stolen Goods Scoring Values
- Single Stolen Good: = 2 Points
- Set of 2 Different: = 5 Points
- Set of All 3: = 9 Points
Any single Stolen Good that can’t be paired with another type is worth 2 Points. A set containing 2 different Stolen Goods is worth 5 Points. A set containing all 3 Stolen Goods is worth 9 Points. Different sets can be scored, but a Stolen Good tile cannot be used in more than 1 Set.
Tiebreaker
Total up each Mastermind’s Points! Whoever has the most Points is the winner! If the Masterminds are tied, compare Coins. If there is still a tie, compare the number of Stolen Goods. If there is still a tie, agree to test your skills another time.
Scoring Example
For purpose of this example, we will only score the Points awarded to the pictured Mastermind who we will call Tess.
- Locations: Tess wins the Louvre and Moulin Rouge because the is closer to Tess’s side of the board at those Locations. Neither Mastermind wins the Yacht as the is in the middle of the Caper Track. The Louvre awards Tess 3 + 2 Points per Stolen Painting (which Tess has 2 of in their Hideout) for a total of 7 Points. Moulin Rouge awards Tess 5 + 1 Point per Thief card (which Tess has 3 at that Location) for a total of 8 Points. Tess also scores 2 Bonus Points for the position of the at the Moulin Rouge Location. Tess scores 17 Points total from Locations.
- Thieves: Tess then looks at each of their Thieves in a Crew. At the Yacht, the Actress awards (2 Points per set of Yellow + any Gear card). Tess can make 1 set with the Yellow Plasma Cutter + Light Blue card scoring 2 Points. Since each card can only be used in 1 set per Set Effect, Tess is unable to make another set at the Location. At the Louvre, The Bon Vivant awards Tess, so with the 3 Green cards and 1 Red card in that Crew, Tess makes 2 sets scoring 4 Points. At Moulin Rouge, Tess made 1 set toward the Gentleman’s icon scoring 4 Points, and 3 sets for the Dame’s scoring 6 more Points. Tess scores 16 Points total from Thieves.
- Gear: Tess then looks at their Gear cards at each Location. At the Yacht, Tess has 1 Yellow Gear card with a 1 Point icon. At the Louvre, the False Bottom Briefcase awards (for each Green card score 1 Point). Tess has 3 Green cards in that Crew, scoring 3 Points. At Moulin Rouge, there are 2 Plans Cachés, each awarding 1 Point per Light Blue card. There are 2 Light Blue cards in that crew, so each Plans Cachés scores them 2 Points to make 4 Points. Tess scores 8 Points total from Gear.
- Stolen Goods: Tess now sorts their Stolen Goods, making 1 complete set of all 3 unique Stolen Goods for 9 Points and 1 set of 2 unique Stolen Goods for 5 Points. Tess scores 14 Points total from Stolen Goods.
Tess’s final score is 55 Points. This is VERY high! What was Danny thinking letting Tess draft all those combos? Games average around 30-40 Points depending on the City.
Honor among thieves: Keep your discards visible so that each Mastermind can see what’s been played or discarded.
City Modules & Reference
The Cities of Caper: Europe
Each of the four cities sets the stage for a unique heist experience when you sit down at the table. Here you will find a short description of each city and any unique icons not found in the core set.
Paris
Paris is home to some of the oldest, most valuable Diamonds, Antiques, and Paintings in the world! Locations reward extra Points for Stolen Goods and the Gear is all about Points combos.
- For each Stolen Good in your Hideout at the end of the game, score 1 Point.
Barcelona
Barcelona is a place of beauty and organization! In this city, the “eye”-con is introduced, granting a bonus at the end of the game if a topmost Gear’s color in your Crew matches the eye’s color.
- If you have an Orange card as a topmost card in this Crew at the end of the game, then score 3 Points.
- For each card of this color in your Crew and your Opponent’s here, score 1 Point.
In this example, the topmost cards are Purple and Orange, so all eye-cons with Purple or Orange would resolve their effects when scoring (the Anarchist and Mesmerizer). The Surrealist would not activate their ability as there is not a topmost Green card here.
Rome
Rome is a place of emperors and old families, so watch your back! There’s more movement in the Caper Trackers and this City allows you to increase your Points for winning Locations, making each spot a heated battleground.
- For each card of this type discarded to your Hideout, gain 1 Caper.
- For each card of this type discarded to your Hideout, score 1 Point.
- If you win this Location, score 2 Points.
- For each card of this type in your Opponent’s Crew here, score 1 Point.
London
London is a center for economic development and commerce! Coins will be moving around more and some will be disappearing. Laundered Coins will be removed from the supply and go into your Hideout. They cannot be used to purchase Gear and cannot be affected by your opponent. As the Coin supply dwindles, remember the Coin supply rules on pg. 11. If you are to gain Coins and there are none in the supply, take from your opponent while you have less.
- Place a Coin from the supply into your Hideout.
- For each Coin in your Hideout, score 1 Point.
- For each Coin in your Hideout, move the Caper Tracker one space toward you.
- For each card of this type in your Crew, gain 1 Coin.
- For each card of this type in your Crew and your Opponent’s here, score 1 Point.
Reverting this Effect: If you a Gear card with this icon, your opponent returns 1 Coin from their Hideout back into the Supply.
