Merchants of the Dark Road
2022
Build your caravan, hire heroes, explore dungeons, and deliver goods through the dark season while balancing wealth and fame.
120
minutes
1 - 4
player(s)
12+
Medium Heavy

About this board game
Merchants of the Dark Road is a strategy board game for 1–4 players, with games lasting about 120 minutes. Set during a dangerous season of darkness, it places you among the select merchants willing to travel treacherous roads between cities.
Use a rondel action system to explore the capital city, where you will prepare for your journeys and manage the opportunities available to your caravan. Collect and produce items, then sell them to local heroes and hire those heroes to travel with you.
Your route to success can include several different pursuits:
- Manipulate the market price of items.
- Visit back alley sellers.
- Delve into a nearby dungeon for magical items.
- Gather lanterns to ease your passage along the dark roads.
- Deliver goods and heroes to distant villages.
Every decision can help you earn more coin or build your notoriety. Magical items offer the potential for additional wealth, while brave deliveries along the dark roads can increase your fame. Building an effective caravan means weighing immediate opportunities against the demands of dangerous travel.
In Merchants of the Dark Road, money and reputation are closely linked. After a number of game rounds, your final score reflects the lower of your coin and fame values, encouraging you to develop both rather than focus on only one. A full purse is valuable, but your achievements must also inspire songs if you want to become a truly celebrated merchant.
/pic7182955.jpg)
Board Game Rules for
Merchants of the Dark Road
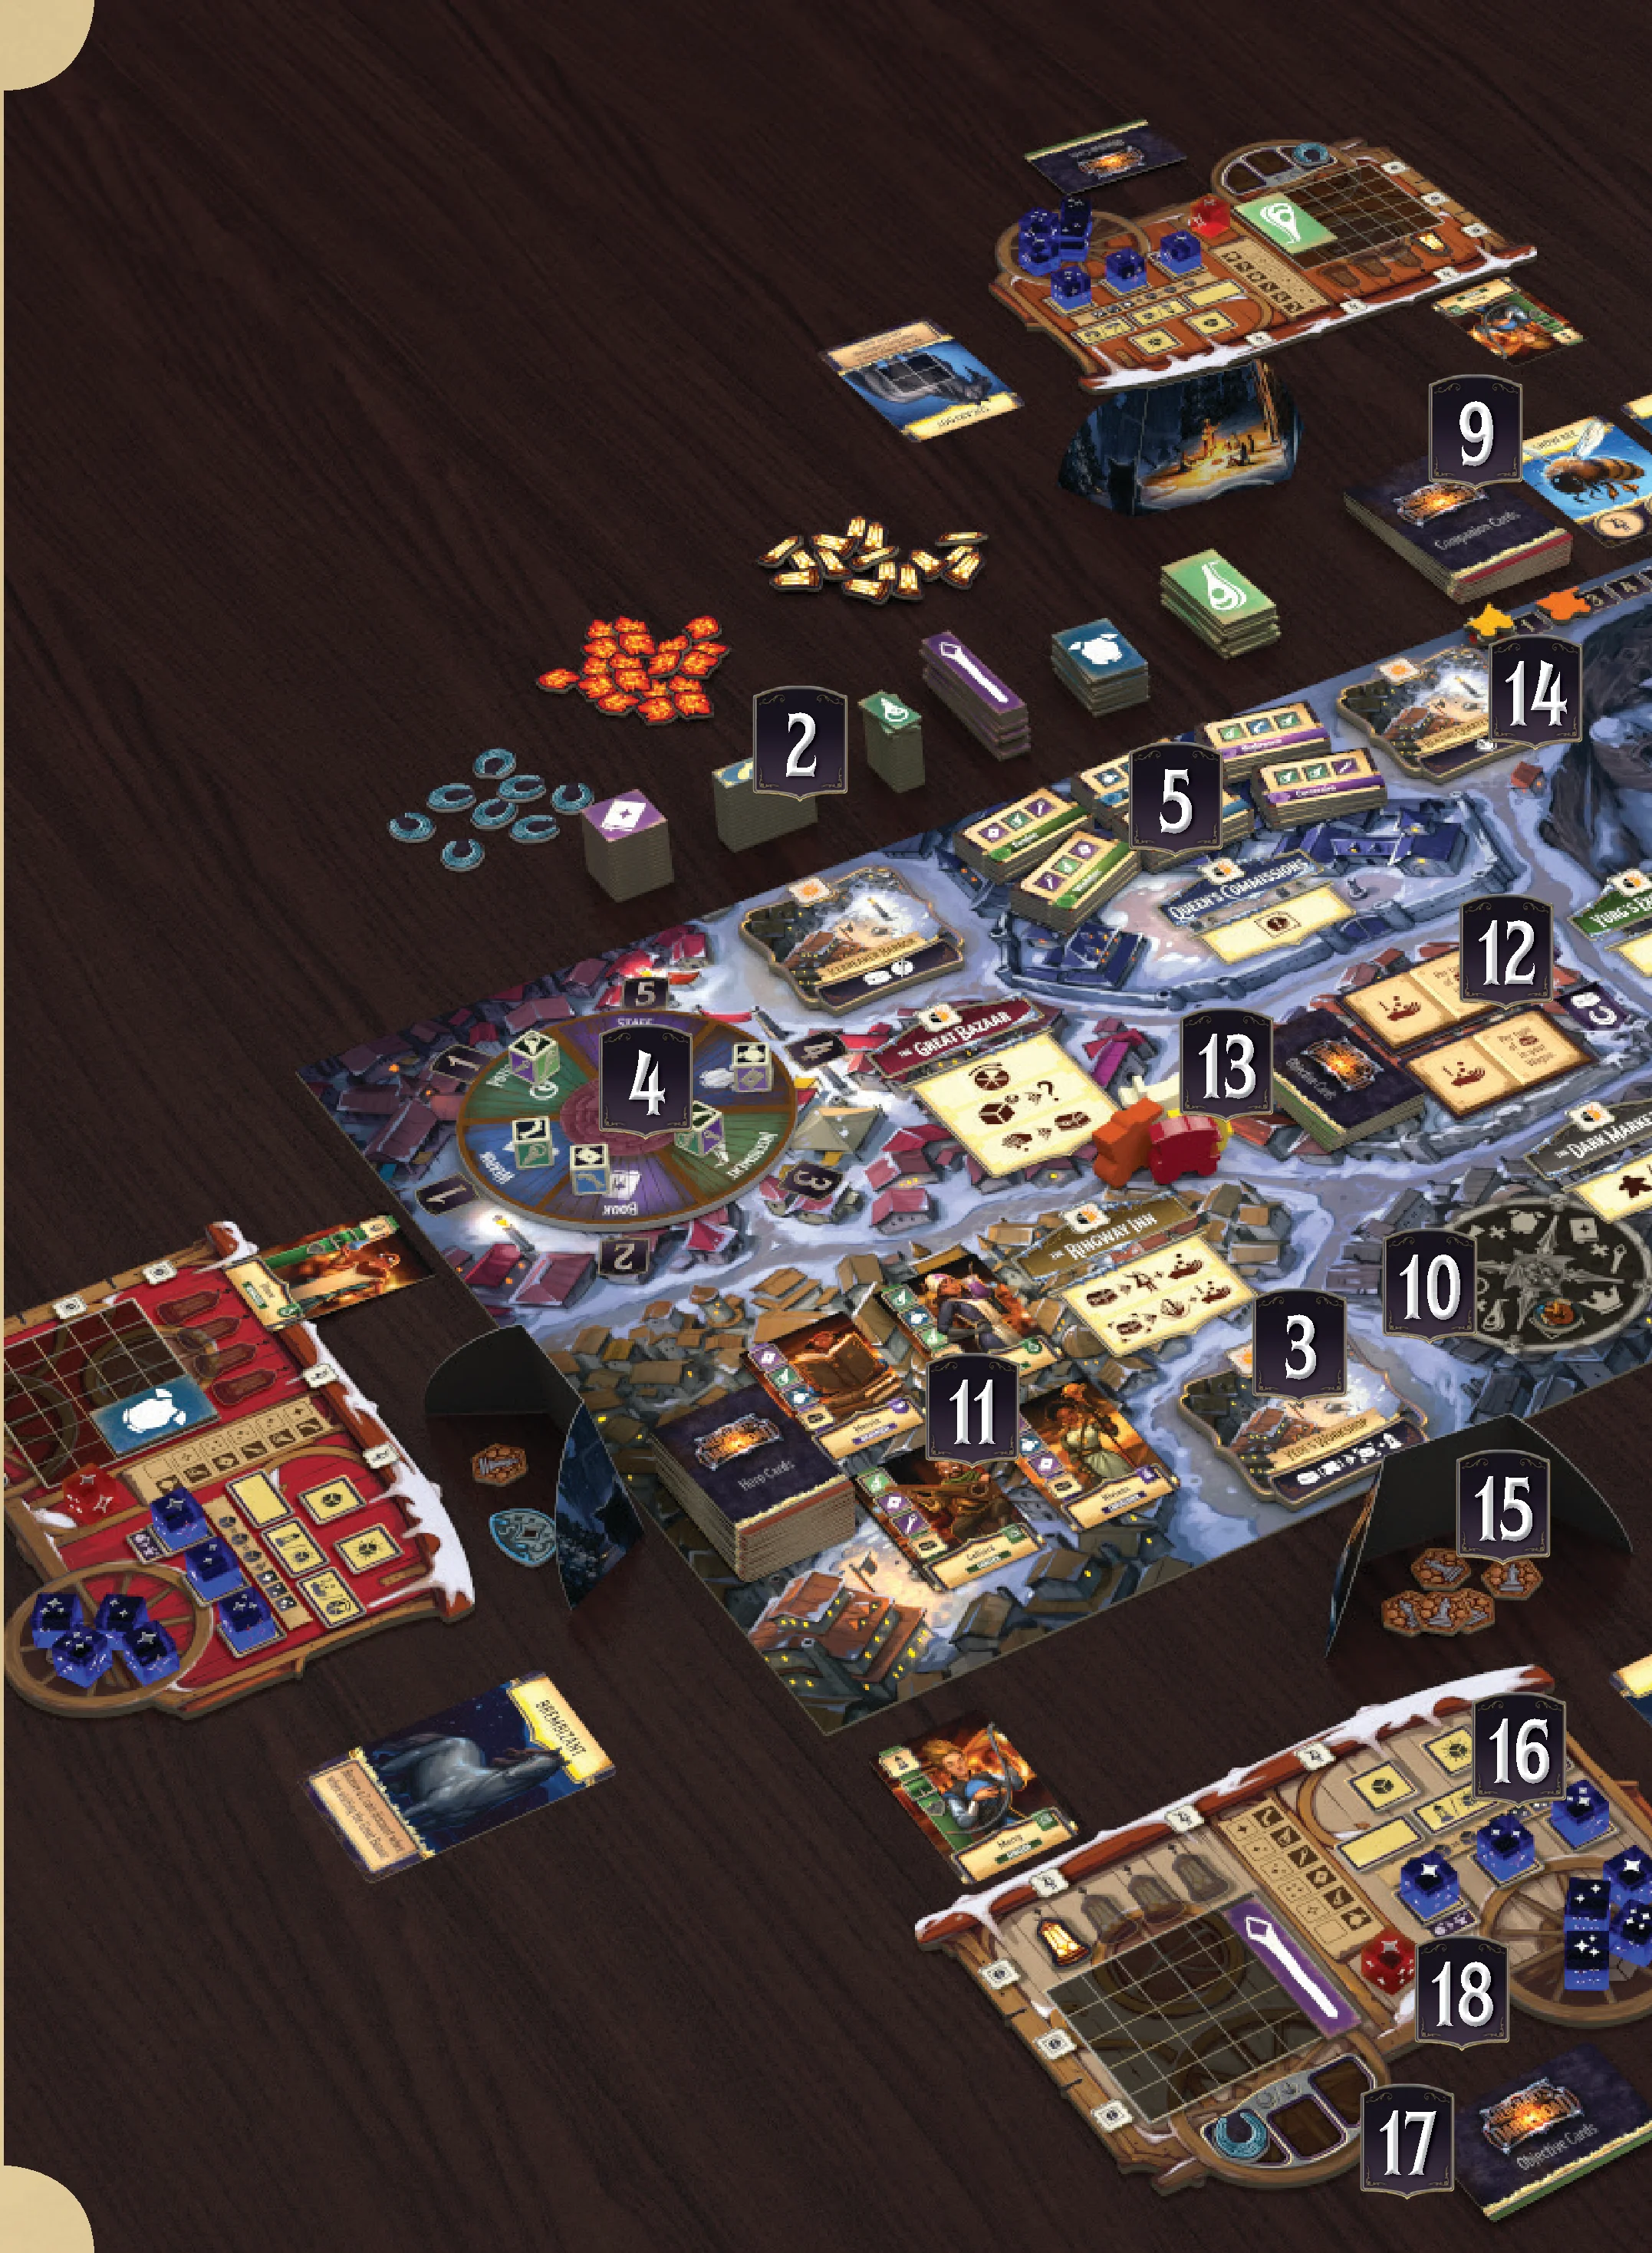
Central Board Setup
- Central Board: Place the central board in the middle of the table. Place the night dice, travel dice, coins, crystals, lanterns and goods within reach of all players.
- Goods: Goods are two-sided, basic and upgraded. Stack the goods by type with the basic side face-up.
- Buildings: Randomly place 4 of the 5 building tiles on the matching spaces on the central board. For the first game, we recommend choosing the Mine, Filigree, Workshop and Oracle. In later games, players may choose any combination of buildings.
- Bazaar: Roll 1 market die and rotate the wheel so the good matching the die is aligned with the 5 section. Place one market die in each of the 1-4 value sections, so that the face-up side of the die matches the section of the wheel. In this way, all but the 5 value good will contain a matching die.
- Commissions: Separate the commissions in piles for each of the 6 outlying cities. Shuffle each stack and place it in the corresponding section of the board.
- Ruins: Place the ruins marker in the wild upgraded good section on the ruins tablet.
- Travel: Shuffle the regular dark road and shortcut decks separately and place them face-down next to the travel section of the central board.
- Place a 5 value coin from the supply atop the coin section of the leader bonus track. Last, stack the wagon upgrade tiles on the last section of the leader bonus track.
- Companions: Shuffle the companion deck and place it face-down near the travel section of the central board. Draw the top 3 cards and place them face-up in a row. Place 1 travel die atop the companion card furthest from the companion deck.
- Dark Market: Place the dark market marker on the section with the crown/commission space.
- Heroes: Shuffle the hero deck and place it face down in the Inn. Draw the top four cards and place them face-up in the Inn.
- Crowns: Shuffle the crown deck (objective cards) and place it face down in the courtyard. Draw and place 2 cards face-up in the courtyard.
Player Setup
Each player follows the steps below:
Take a player board and select a color; take the matching wagon meeple, prestige marker, player shield, and horseshoe token.
- Place the wagon on the road space between the bazaar and inn on the central board.
- Place the prestige marker near the prestige track on the central board.
- Take 5 coins from the supply and place them behind your player shield.
- Take 7 night dice and 1 illuminated night die from the supply. Place a night die with a single, solid star in the first locked slot on your player board. Next, place a night die with a value of 2 stars in the second. Last, place a night die with a value of 3 stars in the third. Roll the rest of your dice, and place the four night dice into your main reserve. Place the illuminated die in your special reserve section.
- Draw one crown card (objective card) from the top of the deck and keep it face-down in your play area.
- Take one horseshoe and place it in the horseshoe/crystal storage section of your player board.
Starting Goods
- The first player takes 1 good worth 5 coins on the market wheel and places it in their wagon.
- The second player takes 1 good worth 4 coins and receives 1 coin from the supply.
- The third player takes 1 good worth 3 coins and receives 2 coins from the supply.
- The fourth player takes 1 good worth 2 coins and receives 3 coins from the supply.
Starting Hero and Horse
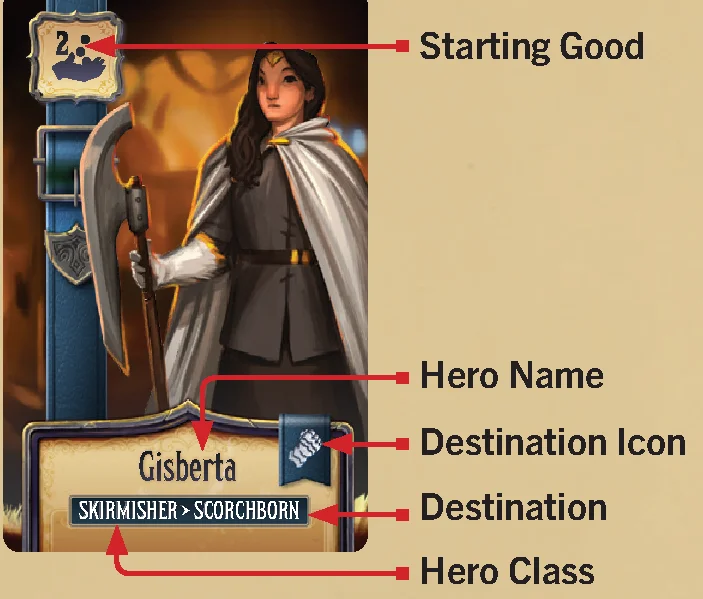
Shuffle the starting hero cards and deal one to each player who places it face-up in one of the hero slots in their wagon. Each player receives their starting hero’s bonus from the supply.
Shuffle the horse cards and deal one to each player who places it face-up to the right of their player board.
Please note that Hero Name and Class are for flavor and do not impact gameplay.
Storage Rules
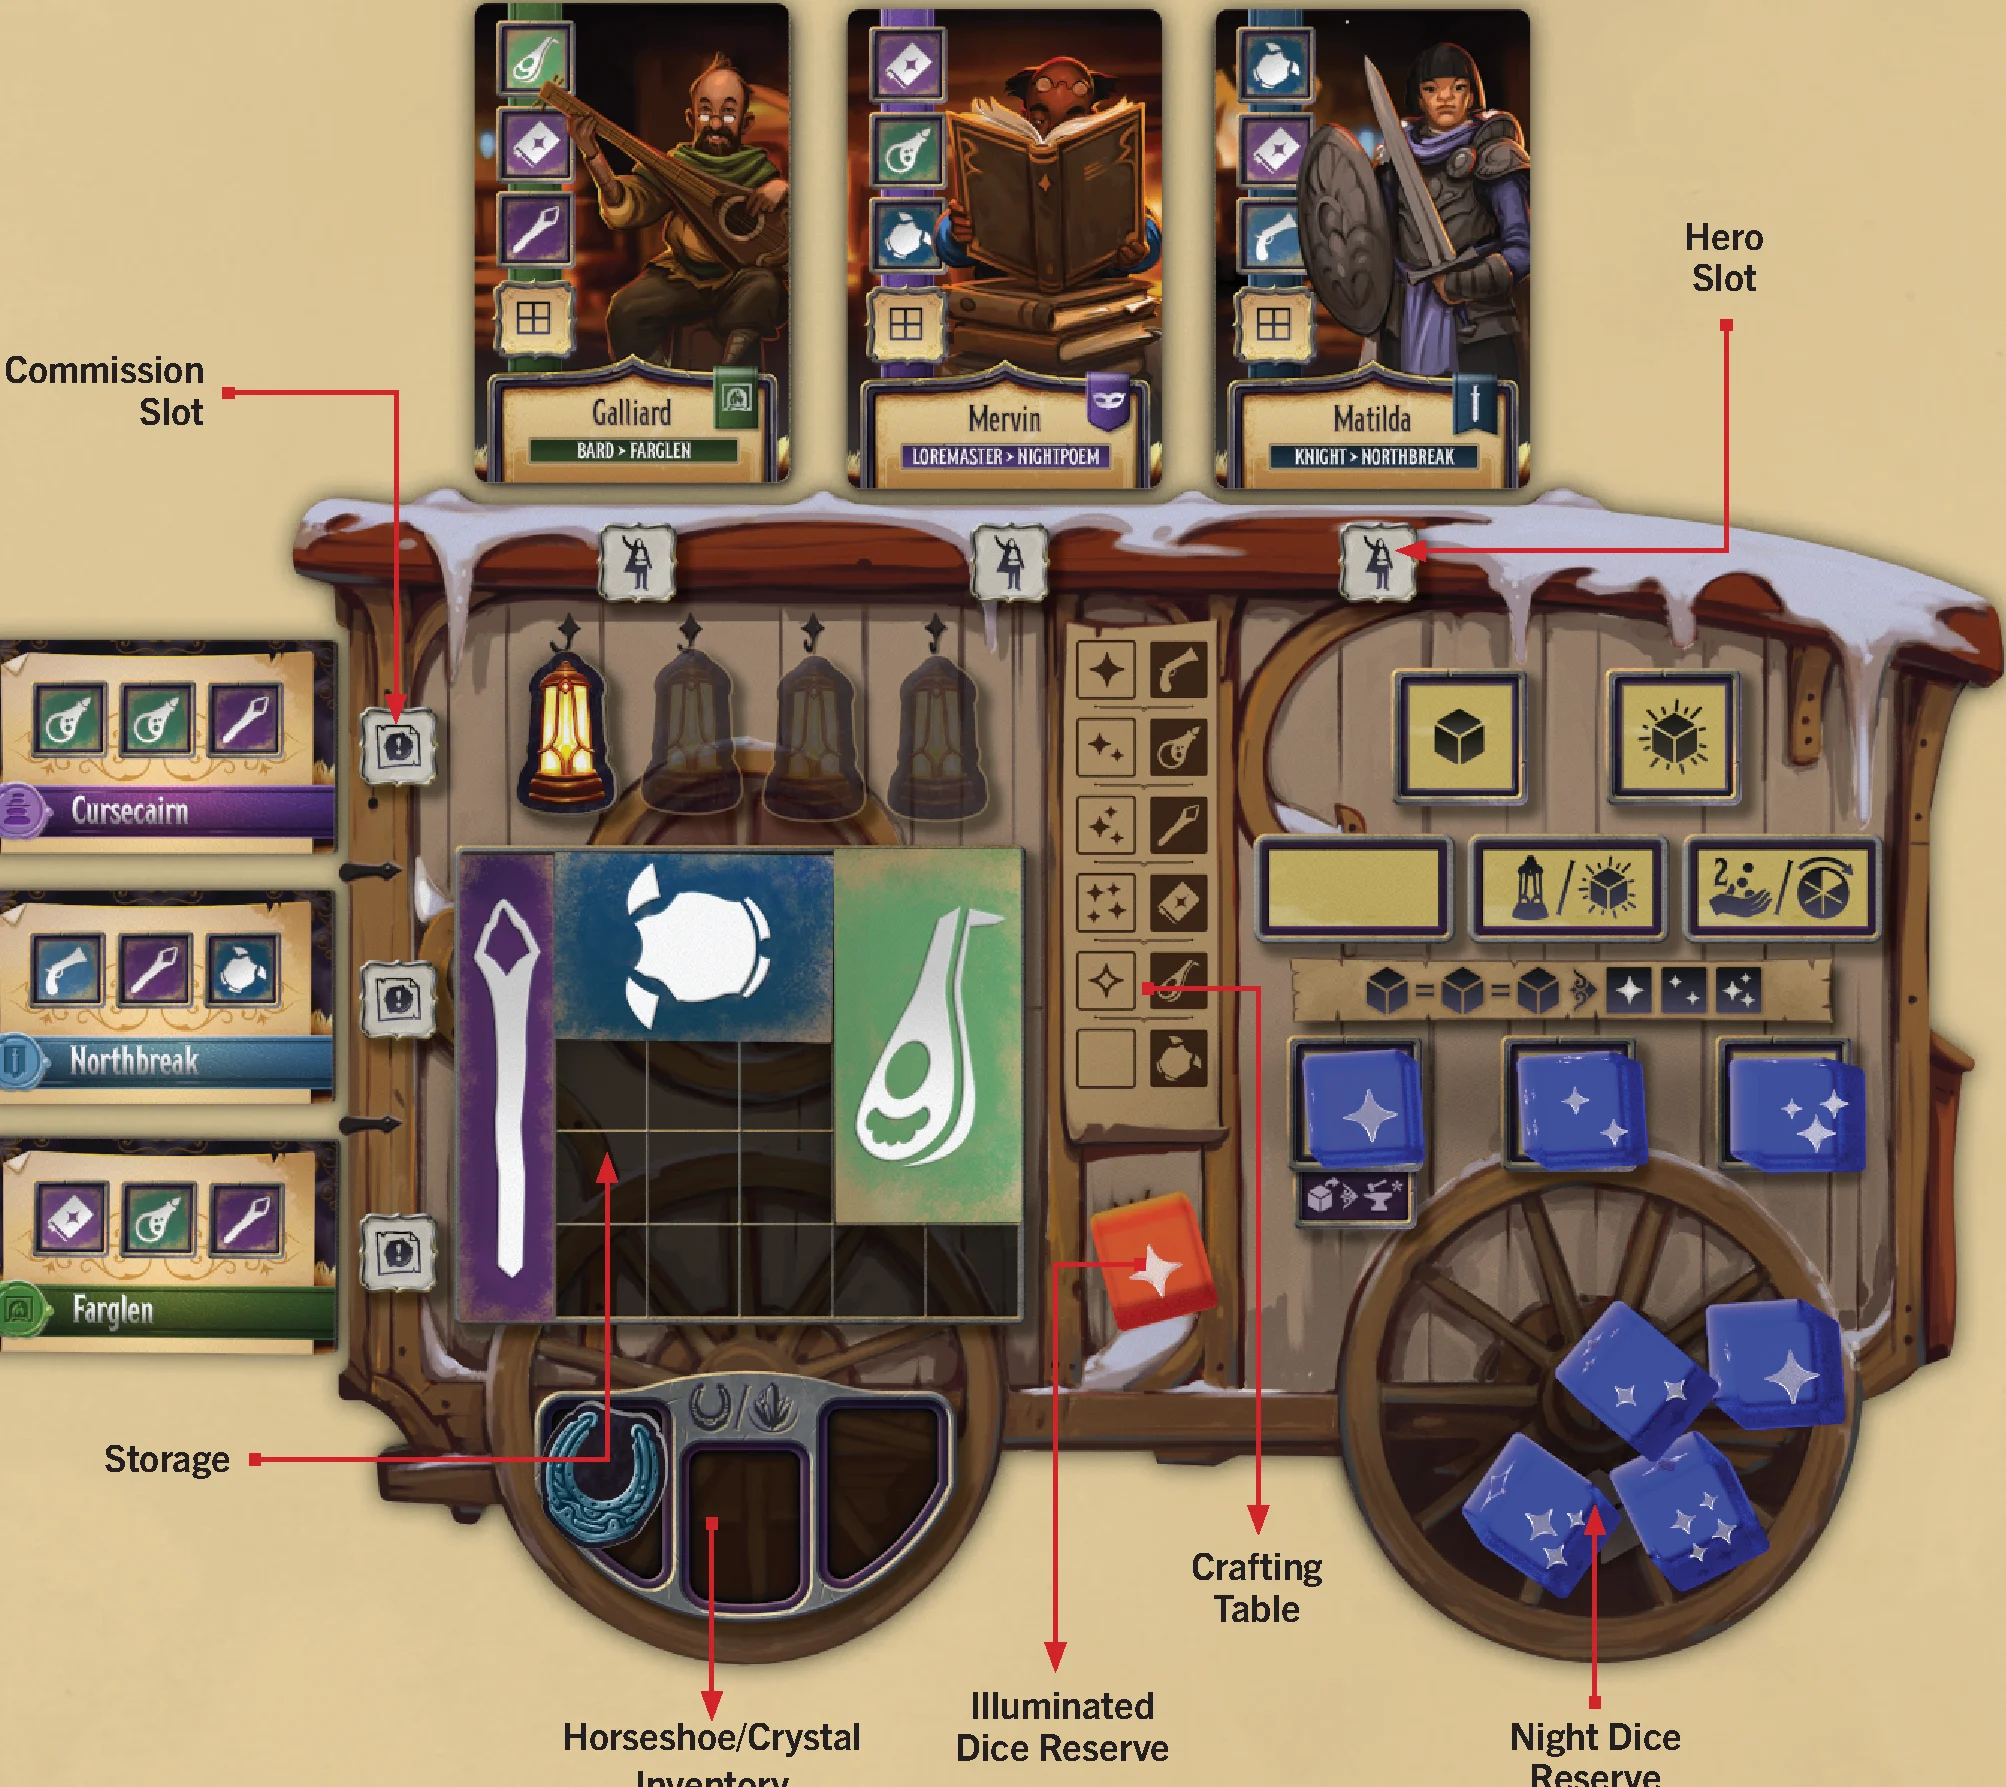
The wagon section of your player board is where you keep track of your heroes, commissions, lanterns and goods.
- Commissions: When a commission is acquired, place it on an unoccupied commission slot on the left of your player board. If you acquire a commission and all three of your slots are full, you may discard a commission to the bottom of the matching location deck.
- Heroes: When a hero is acquired, place it on an unoccupied hero slot on your player board. If you acquire a hero and all three of your slots are full, you may discard a hero to the bottom of the hero deck.
- Lanterns: When a Lantern is acquired, place it on 1 of the 4 Lantern slots.
- Goods: When a good is acquired, it must be placed in your storage or atop a hero with a storage icon. You can rearrange your storage at any time to make newly acquired goods fit. Any goods that do not fit in your storage must be discarded back to the supply. Goods in your storage may be placed in any orientation.
- Horseshoes & Crystals: When either a horseshoe or crystal is acquired, place it on 1 of the 3 inventory slots for these items. If you acquire a horseshoe or crystal and all three of your slots are full, you may discard an item back to the general supply to make room.
Round Overview
A round proceeds in clockwise order. Each player will take a full turn, going through each of the turn steps, before passing their turn to the next player. Rounds continue until the end of the game is triggered.
A player’s turn consist of 4 steps that must be taken in order:
- Plan: In this step, a player chooses 1 night die in their main reserve to bump a locked night die into the action pool.
- Move: The player moves their wagon around the central board a number of spaces equal to the value of one die in their action pool.
- Act: After moving, the player will take actions on the central board using dice from their action pool.
- Rest: This is the cleanup step, where a player refreshes the central board, checks if their main reserve is empty, and passes play to the next player.
Step 1: Plan
During the plan step you must choose one night die in your main reserve to bump one of the three locked night dice above the main reserve. The locked die you bump goes into your action pool and the die from your main reserve is now locked in its place. Be sure not to change the values on the dice when moving them around your player board.
If at the beginning of your turn, your three locked night dice are all the same die face, you MAY reset them to the 1-2-3 star patterns that all players started wth at setup.
There are 3 locked action slots, each with its own special actions. After bumping, immediately perform the slots special action.
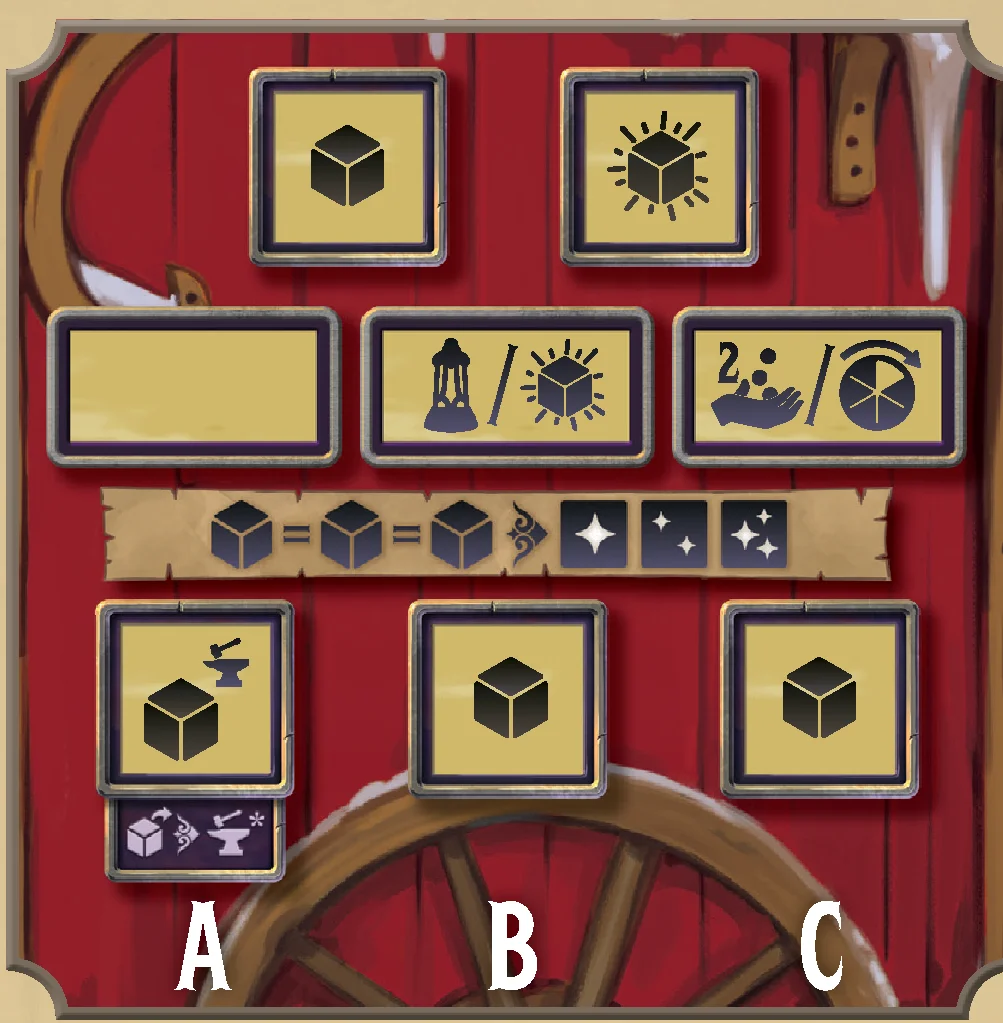
- Slot 1 (A): Use the crafting chart, take 1 Basic good from the supply matching the locked night die’s value and place it in your wagon. Note: the new die, which comes into slot 1, is used for crafting and NOT the die that moves into the action pool.
- Slot 2 (B): Take 1 lantern from the supply and place it on your player board OR move 1 illuminated night die from your special reserve to your action pool. Note: This is the only way to move a 2nd/illluminated die into your action pool.
- Slot 3 (C): Take 2 coins from the supply or turn the market wheel one space clockwise.
During the last 3 rounds of the game, your main reserve will be empty and you must play the last three locked night dice. On your turn, choose one locked night die and move it to your action pool and perform the slot’s special action, leaving the action slot empty for the remainder of the game. Note that for its last use, you will receive any good of your choice from the crafted good slot (A). The purple banner below this slot serves as a reminder of this effect.
Step 2: Move
During the Move step, you must choose one die in your action pool and move your wagon the exact number of spaces equal to the die’s value. Wagons always move clockwise around the capital city. Moving from one space to the next is considered one movement. The blank face on the night die signifies a movement of zero—players remain at their same location.
If they have two dice, players still only move once on their turn. Two dice may add to your choice of movement, however, as either die may be used for movement.
You may spend a horseshoe to add or subtract one movement. You can only play one horseshoe per turn.
Step 3: Act
During the Act step, you will interact with districts that are adjacent to your wagon. There are 5 Districts; Great Bazaar, Queen’s Commissions, Yurg’s Excursions (Travel/Ruins), Dark Market and Ringway Inn. Your wagon will always be adjacent to 2 districts. Each district has an action space where you will place a die and perform an action.
On most turns, you will have only one night die in your pool. On those turns, take the die from your action pool and place it on an action space in one of the two adjacent districts.
When placing an night die in a district you immediately perform the district’s action.
If you ALSO have an illuminated die in your action pool, you will get more actions on your turn. When placing an illuminated night die in a district, you activate both the district and the building at the end of the road containing your wagon meeple.
Thus, if you only have a night die, you will do the action of one of the district adjacent to you wagon. If you have BOTH a night die and an illluminated die, you will do the actions of BOTH districts adjacent to your wagon AND use the building in the road between those districts. You may perform your 2 disctrict actions and 1 building action in any order you want.
As long as you have dice in your action pool, you must choose and perform district actions. Once your action pool is out of dice, you will move to step 4.
Note: The value of the dice placed in a district or building has no impact.
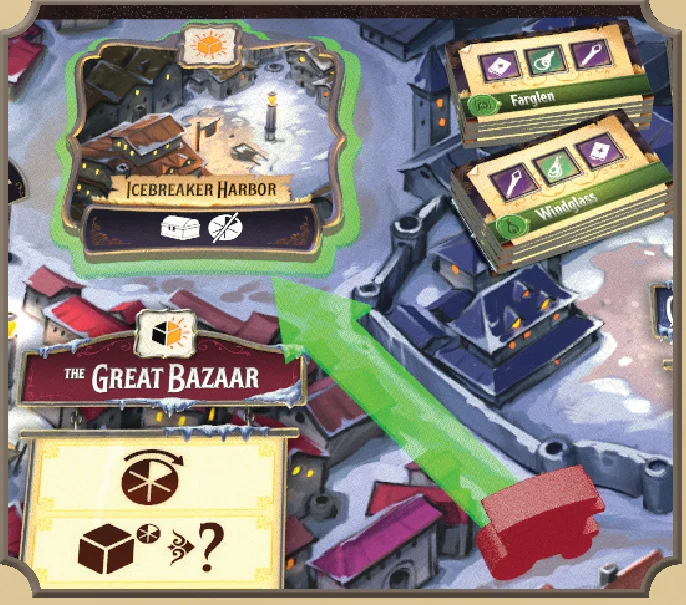
Each building is connected to the wagon area by a road. Note that there is no building between the Great Bazaar and the Ringway Inn.
Step 4: Rest
Return your night die from the central board to your personal discard pile near your player board. If you played an illuminated night die this turn, return it to the general supply. All action spaces on the central board should be unoccupied.
Then check for the following:
- Market dice: any dice that were removed from the market wheel during your turn must be rerolled and placed back onto the market wheel. No more than two dice may be in any individual section of the market wheel. If you roll a market die and get a result that already has 2 dice on it, simply re-roll until you get a result that can be added to the wheel.
- Crown Cards: If a card(s) was taken, draw a replacement card(s) is drawn from the top of the deck for a total of 2 face up cards.
- Companions: If a companion card(s) was taken, all remaining cards move to the right if their right space is empty, and a replacement card is drawn from the top of the deck for a total of 3 face up companions. Make sure the companion card furthest from the deck has a travel die on top of it.
If your main reserve still has night dice, then your turn ends and play passes to the next player. If your main reserve is empty and has no dice, then return one night die from your personal discard to the general supply. Roll all remaining dice in your personal discard and place them into your main reserve. Your turn ends and play passes to the next player.
If you return an night die to the general supply and you have no remaining dice in your personal discard, your reserve will remain empty for the remainder of the game. From this point on, during the plan step, you must choose one of the locked night dice to play for the turn.
Great Bazaar
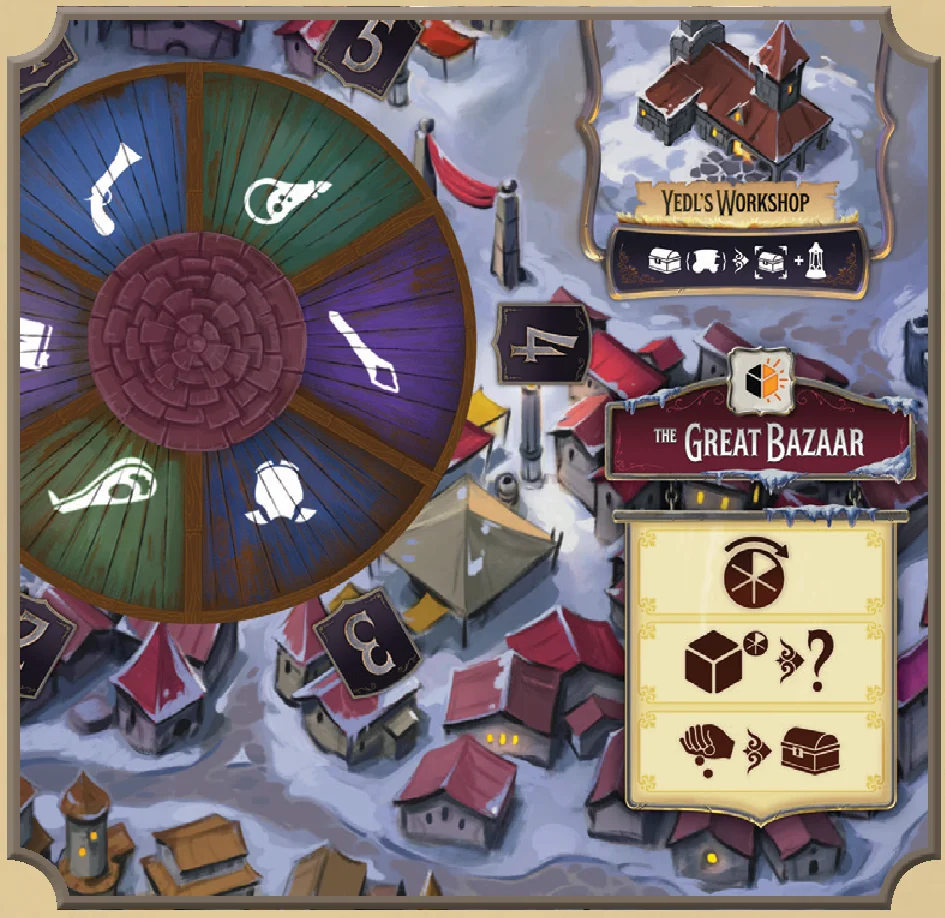
This is where you purchase basic goods with coins. The five market dice represent the type and quantity of goods available at the bazaar’s market. The cost of all of the dice showing the same type of good is noted on the outside section of the market wheel.
After placing a night die in the market, you may perform these actions in any order:
- Rotate the market wheel one space clockwise.
- Flip one market die to any good you want and place it back on its matching section. Note: no more than two dice may be in any individual section of the market wheel.
Then, choose which market dice you want to purchase and remove them from the wheel. Add up the cost of each type of good purchased and pay the amount in coins to the supply. For each market die removed, take a matching basic good(s) from the supply.
Example: Storm removes two dice showing potions for three coins and one die showing books for one coin, she pays four coins to the supply and takes two potions and a book from the supply and places them in her storage.
Queen’s Commissions
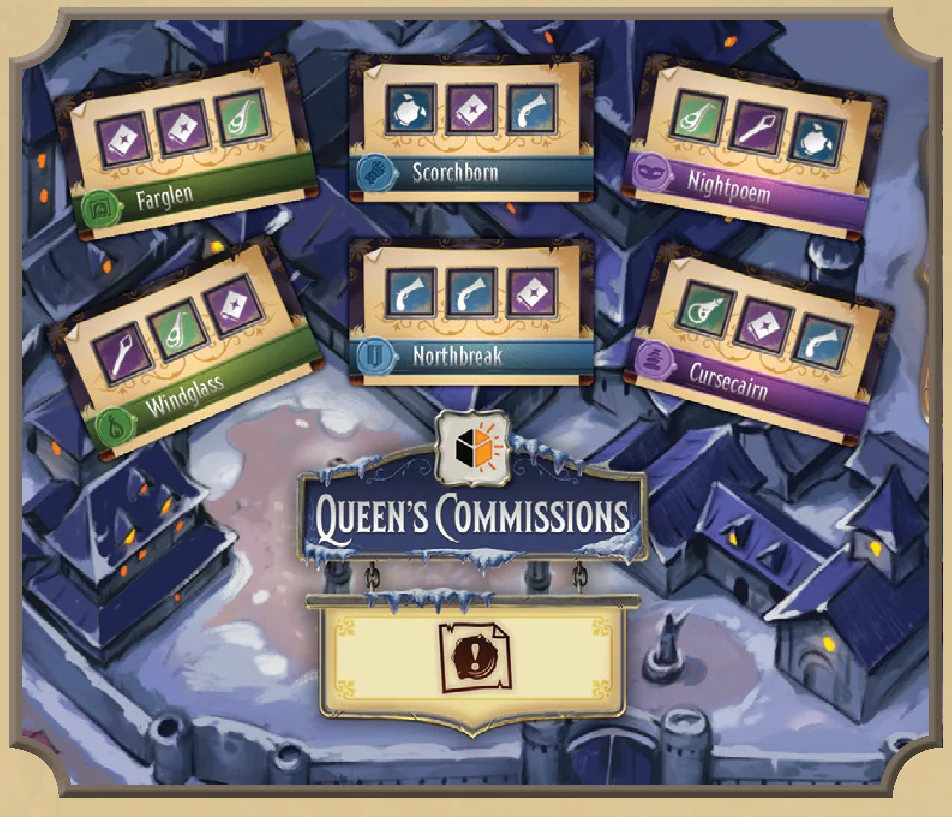
Commissions are needed to deliver goods to cities during the travel action. You can only have three active commissions at any one time. After placing a die in the commission district, take the top commission from any location deck.
Dark Market
The dark market is where you can buy goods, commissions and crown cards (objectives). After placing a die in the dark market, pay one coin to move the marker one space clockwise. You may continue to pay one coin to move the marker up to 4, in which case the marker has returned to its starting position. When you are done, you will receive the rewards from the section containing the marker.
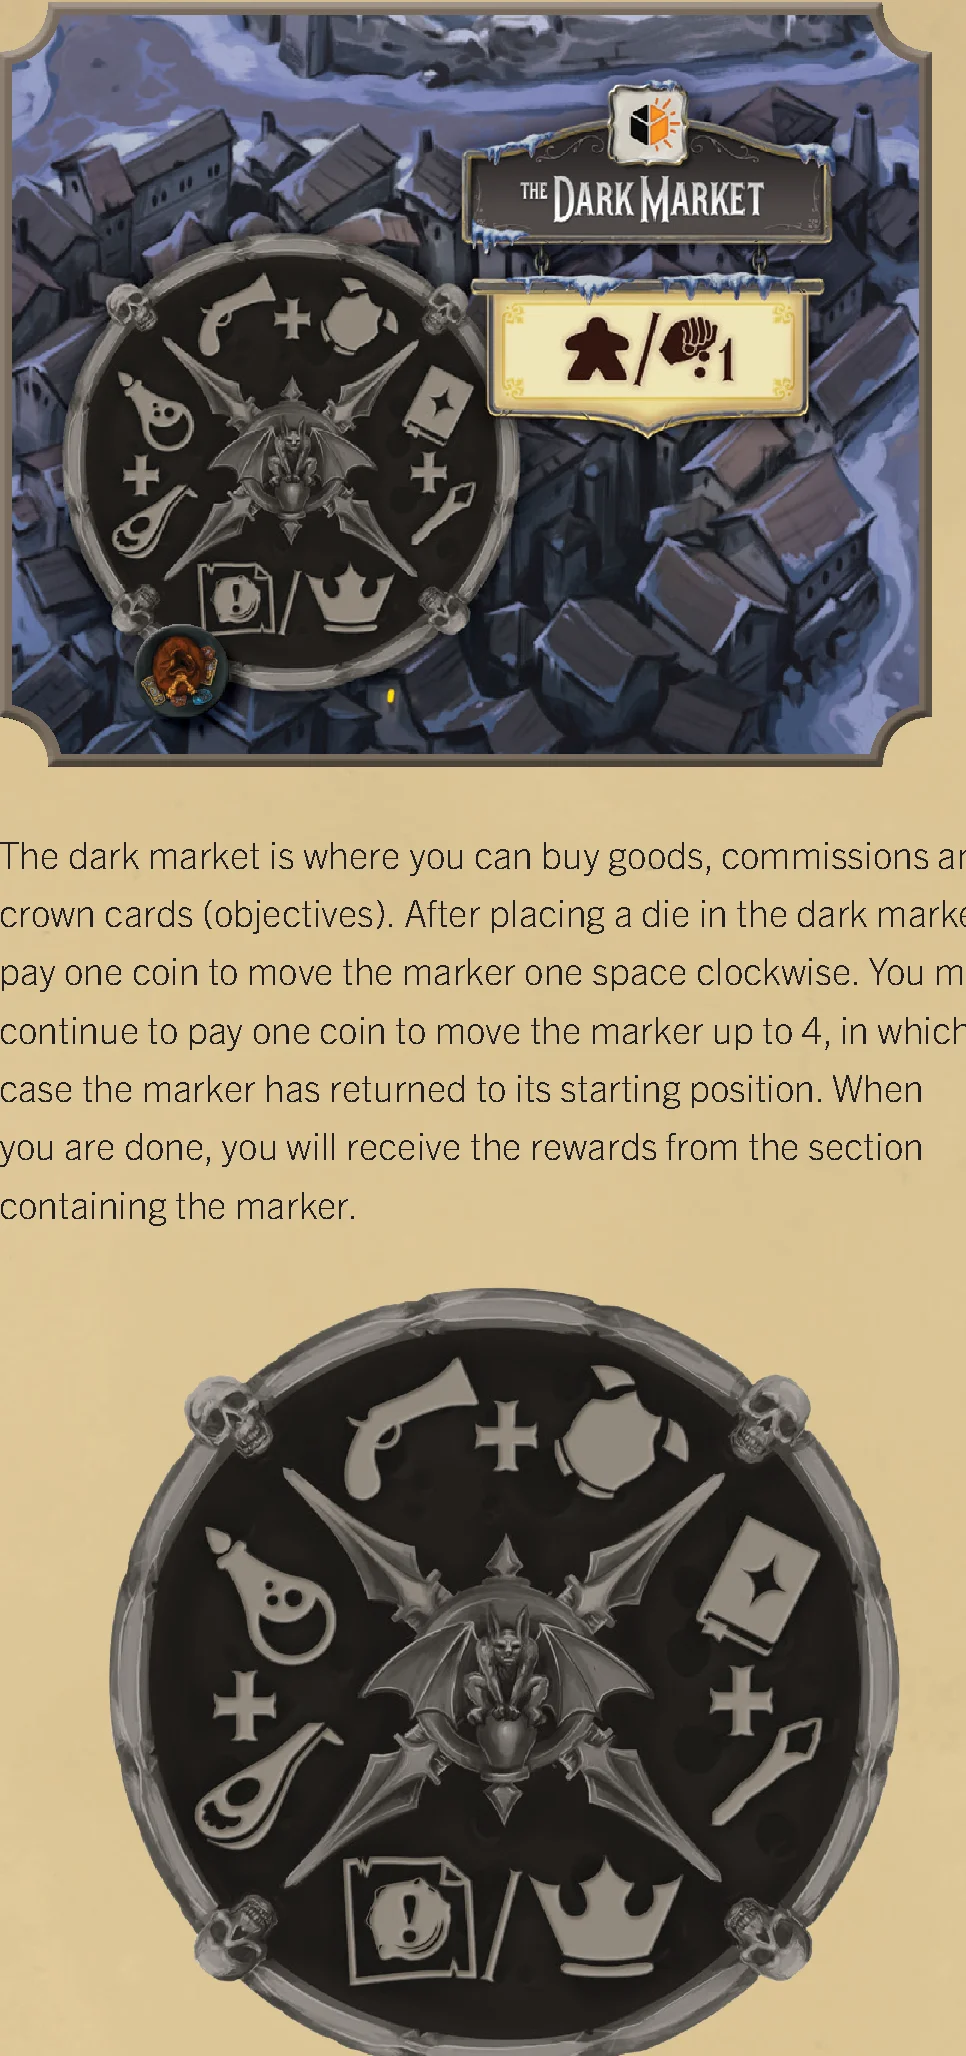
Three sections of the dark market provide two basic goods. Take both goods from the supply. If the marker stops on thee fourth section, take the top commission from any location deck OR one crown card (and bonus reward) from the courtyard.
Ringway Inn
The inn is where you sell goods to heroes for coins. After placing a die in the inn, choose one face up hero to sell goods. Gain coins from the supply for each good sold, based on the market wheel prices. In addition, gain 1 crystal and 1 extra coin from the supply for each upgraded good sold.
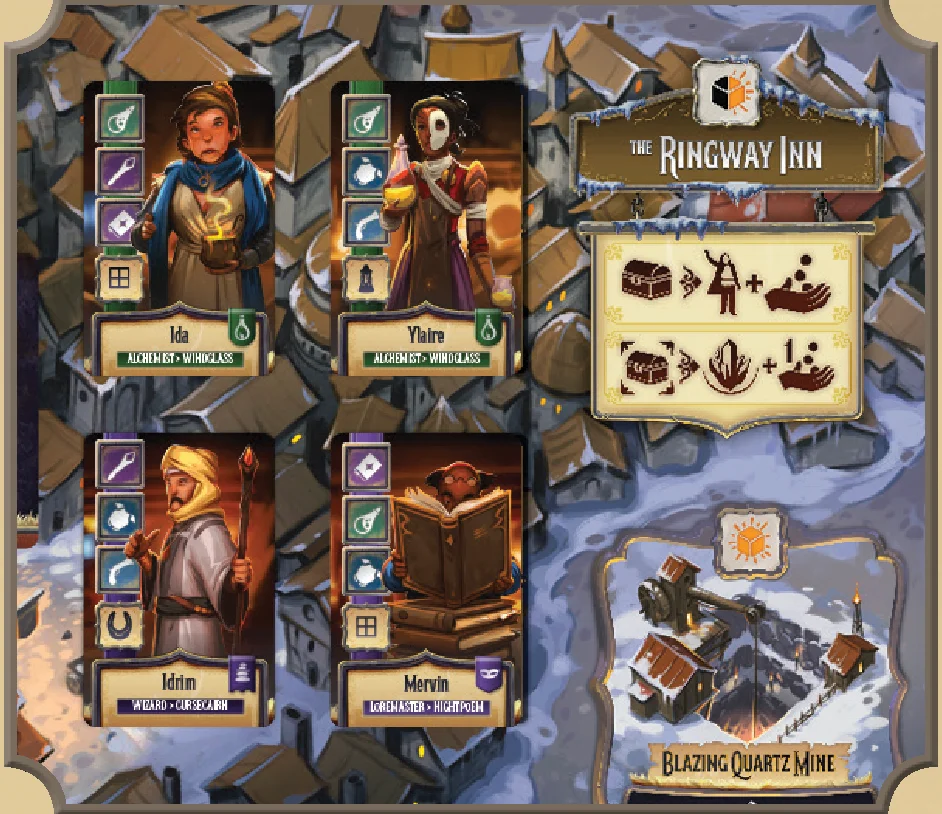
Each hero has icons showing the goods they wish to buy. You can only sell one good per icon listed on a hero. You must sell at least one good. Return each good sold to the supply. After selling, place the hero card onto one of the hero slots on your player board.
- If the hero has a lantern icon, take one lantern from the supply.
- If the hero has a grid icon, they can store one good from your wagon.
- If the hero has a horseshoe icon, take one horsshoe from the supply.
Note: Market dice do not affect the selling action in any way.
Yurg’s Excursions (Ruins and Travel)
This district has both the ruins and the travel actions. After placing a die, you must choose to perform the ruins action or the travel action.
Yurg’s excursions is where you can find upgraded goods in the ruins or travel to the outlying cities to fulfill commissions for prestige and other rewards.
When you place your die here, you choose either to visit the Ruins of Yin or to Travel to an Outlying City. Under no circumstance can you take a ruins action and a travel action on the same turn.
Ruins
You may move the ruins marker up to one space plus the number of heroes on your player board. When you are done moving the marker, take the rewards shown on the same section. Three sections provide an option of two upgraded goods, choose one and take it from the supply. If the ruins marker is in the fourth section, take any upgraded from the supply.
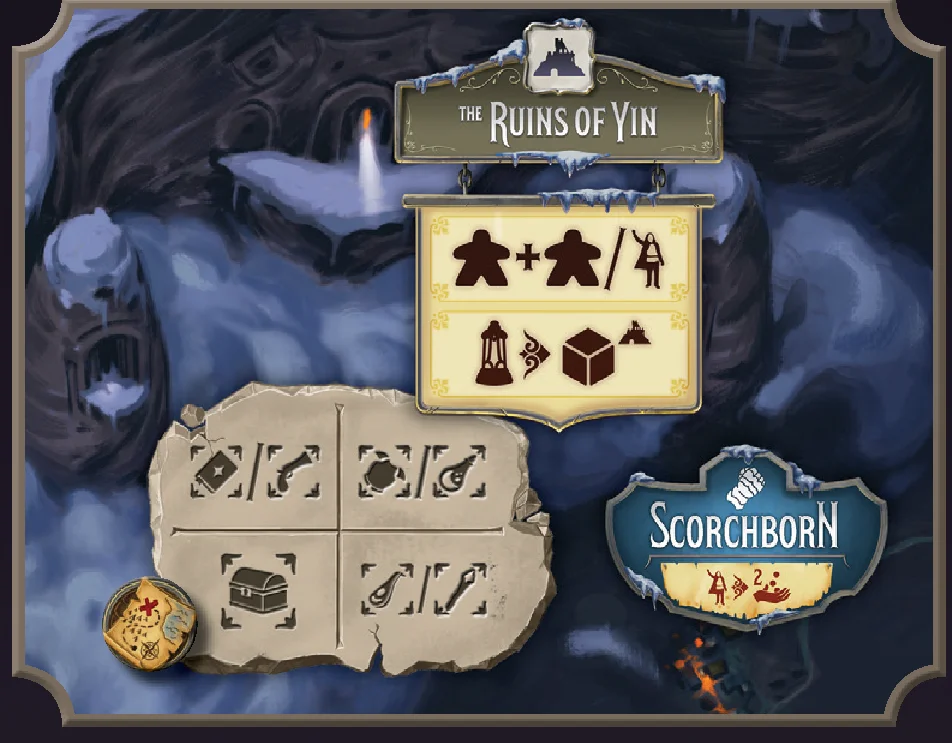
After taking the reward, you may return one lantern to the supply to roll the ruin die and take the rewards. Die rewards listed below:
 Move the marker one space clockwise and take the reward shown in the section.
 Reroll the ruin die and if you roll this reward again, take one illuminated die from the general supply, roll it, and place it in your special reserve. If you roll another reward, take that reward instead.
 Take a basic good from the supply worth one coin based on market prices.
 Take a crystal from the supply.
 Take two coins from the supply.
 Take one face up hero or the hero from the top of the deck and place it on your player board. Note: You do not sell to this hero.
Travel
When you choose the travel action, you become the leader of a caravan that travels to one city in a region. As the leader, you must travel to the chosen city, while other players may follow you to any city in the same region. The leader must choose a companion and decide which road to take, the regular dark road or take a shortcut. After any encounters along the road, players can turn in commissions and heroes to their chosen city. Then, the leader receives a leader bonus and the travel action is over.
After placing a die, follow the steps below in order:
- Choose a companion card: Choose any one of the three face-up companion cards available (or the top card from the deck) and place it face-up on the right side of your player board. If you chose the companion card with the travel die on top of it, place the travel die in the travel section of the central board.
- Declare destination: Declare which city you have chosen to travel to.
- Choose road: Declare either “I will take the dark road” or “Trust me, I know a shortcut.” The leader must return three lanterns to the supply in order to take a shortcut.
- Invite players: Ask each player in turn order if they would like to join the caravan. Players should respond with a “yes” or “no”. The caravan travels to a pair of cities in a region. The leader must travel to the chosen city, each other player may deliver to any city in the same region. Add one travel die for every player in the caravan (including the leader) to the travel section of the central board.
- Travel encounter: Draw and reveal the top card from the road chosen in step 3. Roll all of the travel dice in the travel section of the central board. Each player in the caravan must take one travel die. Who chooses the first die is determined by the road travelled:
- Dark Road: Starting with the leader and continuing clockwise, each player in the caravan must take one travel die.
- A Shortcut: Starting with the first player to the left of the leader and continuing clockwise, each player in the caravan must take one travel die. The leader always chooses a travel die last on the shortcut.
When a player takes a travel die, compare the die’s value with the road card and receive your reward or penalty. Rewards have a black border and penalties have a red border. See the appendix for more details on rewards and penalty icons.
Rerolling travel dice: Before choosing a travel die, a player may return one lantern to the supply and reroll all remaining travel dice. You must spend one lantern each time you repeat this action.
After all players have taken a travel die and received their rewards or penalties, return all travel dice (including any remaining travel dice on the central board) to the supply.
- Delivering: The caravan has arrived in the chosen region. The leader may only deliver to the city chosen during step 2. Each other player in the caravan may choose to deliver to one of the two cities in the region. Players are not required to deliver to a city and can pass on the opportunity. All players simultaneously deliver commissions and/or heroes.
Delivering Commissions:
There are two parts that make up the structure of a commission:
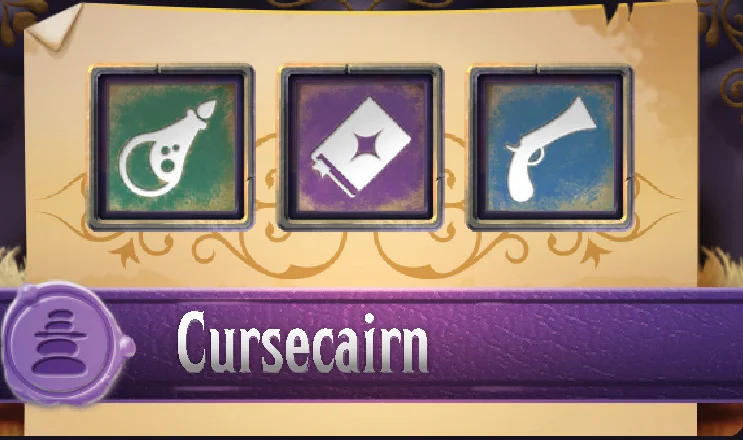
- On the bottom, the required city to fulfill the commission.
- On the top, three icons showing the required goods. You can only deliver one good per icon. All icons can be delivered with either basic or upgraded goods. To fulfill a commission, you must deliver at least one of the necessary goods, returning them to the general supply. You may fulfill multiple commissions.
You earn prestige based on the number of goods delivered to each commissions. If you deliver 1/2/3 goods on a commission, receive 1/3/6 prestige.
Any upgraded goods you turn in for a commission earn you an additional 1 prestige per upgraded good. (Note: Unlike at the Inn, players do NOT receive a crystal for their upgraded goods.) After tallying your total prestige, move your prestige marker on the prestige track. Place fulfilled commissions face down in your score pile.
Delivering Heroes:
Heroes can only be delivered to the city listed on the card. Receive a reward for each hero delivered to the matching city. The reward is listed in each region:
- Region A (Scorchborn/Northbreak): Gain two coins.
- Region B (Cursecairn/Nightpoem): Gain one coin and one prestige.
- Region C (Farglen/Windglass): Gain two prestige.
Place completed Heroes face down in your score pile.
Leader Bonus:
After all players have finished delivering, the leader receives a “leader bonus”. Depending on the road chosen during step 3, the leader receives one or two leader bonuses. One bonus for the dark road and two for the shortcut. If you receive two bonuses, you may take the same bonus twice, with the exception that you can only have one wagon upgrade. The bonuses are listed below:
- Take one illuminated night die and roll it, then place it in your special reserve.
- Take one of the two face-up crown cards (or the top card from the deck) in the courtyard. Take the card and the bonus reward on the banner to the right of each face-up card. Two prestige or any basic good.
- Take three coins. The first player to take this bonus receives the five coin piece placed at setup.
- Take one wagon upgrade. You may choose from any of the remaining upgrades available. You may only have 1 upgrade per game.
After taking your leader bonus, move to your rest step and end your turn.
Buildings
When using an illuminated night die in a district, you may perform a building action before or after the district action. You only have access to a building if there’s a road between your wagon and the building. There is no building between the inn and bazaar. Building actions are listed in the appendix.
Crowns
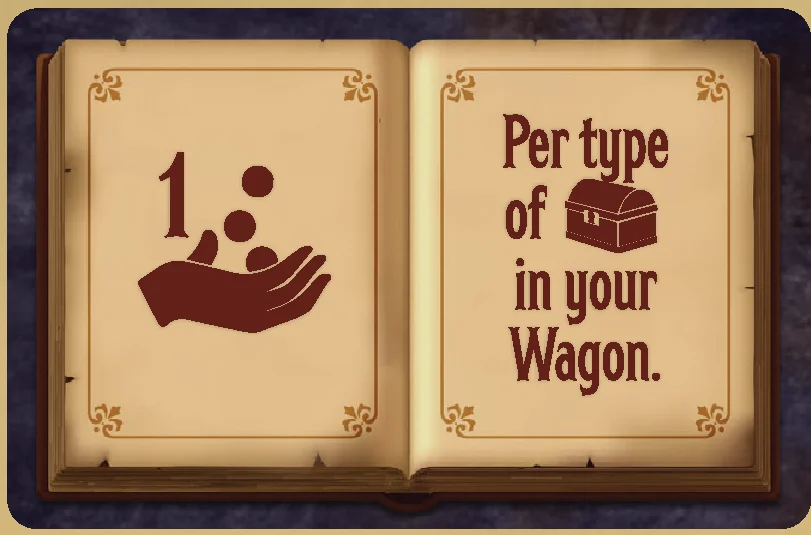
Crowns are personal objectives for end game scoring. When taking an action that gives you a crown, take one of the two faceup cards (or the top card from the deck) in the courtyard. Take the card and the bonus reward on the banner to the right of each face-up crown (two prestige or any basic good + 1 horseshoe).
Companions
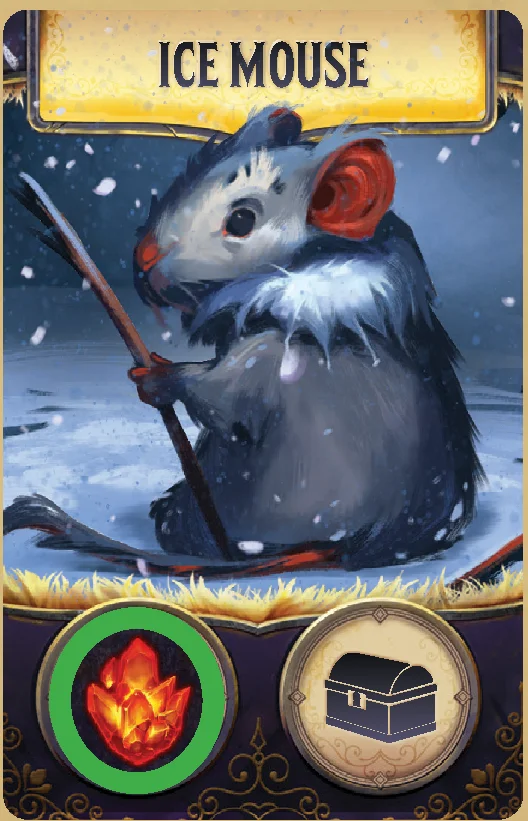
Companions have powerful one time actions that can be triggered by “gifting” them crystals. You can only gift crystals to companions in your play area. Crystals may be gifted anytime during your turn. To gift a crystal, place the token on top of a companion’s action space that does not already have a token. The companion actions are listed in the appendix.
Game End Trigger & Final Travel
The end of the game is triggered when all players have played their last locked night die. Then, each player may travel to any one city of their choosing and deliver commissions and heroes to the chosen city, skipping roads, travel dice or following.
Scoring
Crowns
Before calculating final scores, each players should take any coins or prestige gained from completed crown cards. Some crown cards provide VP victory points which should be set aside and added to your final score.
Coins and Prestige Balance
To calculate your final score, count your coins and prestige. The lower value is your base score.
Victory Points
Next, add up victory points, which are added to your base score. Unused illuminated dice are worth 1 victory point each. Also add any victory points earned on crown cards.
Final Score
The total is your final score. The winner is the player with the highest final score.
Breaking Ties
In the case of a tie, the tied player with the higher value of coins or prestige is the winner (the lower value). If players are still tied, the player that gifted the most medallions is the winner. If players are still tied, the player that delivered the most contracts is the winner, then the player that delivered the most heroes. If players are still tied after 4 tiebreakers, choose to either share the victory or play again to determine a winner.
Overview
In the solo game, you will play against the Trader. To win the game, your final score must exceed the Trader’s score. Unless noted below, play the solo game exactly as you would the 2-player game.
Setup Changes
Travel: Randomly choose 1 wagon upgrade and place it on the last section of the leader bonus track. Place the remaining wagon upgrades back into the box.
Player & Trader Setup
Setup your player board as per the normal rules.
The Trader Setup: Choose a color for the Trader, take the matching wagon meeple, prestige marker, and player shield. The Trader does not take a player board but will need space to play cards and store resources.
- Place the wagon on the road space between the bazaar and inn on the central board.
- Place the prestige marker and the goods marker near the prestige track on the central board.
- Take a 5 coin piece and place it behind the Trader’s player shield.
- Draw one crown card (objective card) from the top of the deck and place it face-down in the Trader’s play area.
- Place one illuminated die in the Traders play area.
- Shuffle the 10 Trader cards and place them face down to form the Trader deck.
The Trader does not take tiles when it gains goods. The Trader uses the goods marker to track goods on the prestige track. Each time the Trader gains or loses goods, move the tracker accordingly.
Choose a player to start the game and reward starting goods and coins to both you and the Trader.
Give the Trader a starting hero and the starting hero bonus. The Trader does not receive a horse.
The Trader’s Turn
Draw the top card of the Trader’s deck and execute the planning action and one district action. Place the card in the discard pile. The Trader’s turn ends.
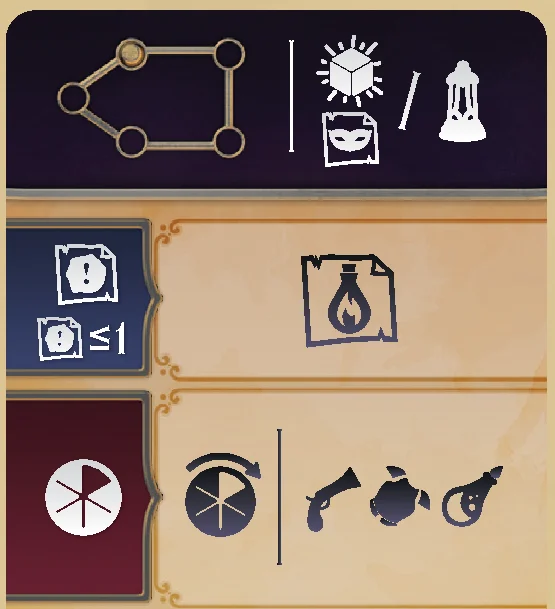
First, you must perform the planning actions in the dark section at the top of the card. Then, starting with the first district action and moving downward on the card, you must check and see if the Trader meets the requirements. District actions that are highlighted in red have requirements that the trader must meet in order to perform the action. If the Trader meets the requirements then perform the district action from left to right. If the Trader does not meet the requirements, then check the next district action and so on until the Trader performs and completes one district action. Once the Trader has completed a district action the Trader’s turn is over.
Executing District Actions for the Trader
Below is a list of district actions and how to execute them:
- Planning Section: Move the Trader’s wagon to the noted space on the game board. Then, gain the special action reward on the right side of the planning section. Some cards have an illuminated die option. If the Trader has an illuminated die, it must return one to the supply and give the noted rewards. If the Trader does not have an illuminated die then give the trader the second reward option. The Trader only receives one reward if there is an option.
- Bazaar: Some bazaar actions require the Trader to have less than or equal to a number of goods. If true, rotate the market wheel one space. Then, remove all market dice from the wheel matching the three good icons. For each die removed, move the Traders good marker one space. The Trader never pays coins for goods. In the rare case no dice are removed, the trader gains 1 good. Reroll market dice and return them.
- Commissions: Some commission actions require the Trader to have less than or equal to one commission. If true, the Trader takes one commission. The Trader takes a commission to the city it has the most heroes and or commissions to delivery to. If there is a tie or the Trader doesn’t have any other heroes or commissions, take the commission from the location noted.
- Travel: The travel action requires the Trader to have greater than or equal to one commission (or 2 heroes to the same location). If true, follow the steps below:
- Discard the companion card from the space noted on the card. The Trader does not collect companion cards. If the Trader discarded the companion card with the travel die on top of it, place the travel die in the travel section of the central board.
- Use the following list to determine where the Trader travels. If tied, move to the next: 1. Most heroes and commissions 2. Most commissions 3. Players choice.
- The Trader always takes the shortcut if it has 3 lanterns in it’s play area. Return the lanterns to the general supply. If the Trader has less than 3 lanterns, it chooses the regular dark road road.
- You must decide weather to follow or pass.
- Draw the road card and roll all of the dice in the travel section of the central board per normal rules.
- When its the Traders turn to choose a die, it always selects the highest value die possible. It receives rewards or penalties for the chosen die. The Trader does not spend lanterns to reroll dice.
- The caravan arrives and the Trader delivers all heroes and commissions to the chosen city. Move the Traders goods marker back one space for each good required on a commission. The type of goods do not matter and if the Traders good marker reaches zero it cannot deliver any more goods. The Trader earns prestige for goods delivered on commissions the same way the player does: 1/3/6. Each hero and commission the Trader delivers can be set outside the play area as they are no longer needed. For example: The Trader has 5 goods and 2 commissions to Farglen. The Trader reduces the goods marker to zero and delivers one commission for 6 prestige (three goods) and another for 3 prestige (two goods).
- If the Trader traveled the secure road, it receives the first leader bonus listed on the card. The Trader receives both for taking the shortcut. Place gained illuminated dice and crown cards in the Traders play area. If the Trader gains a crown, take the crown card and reward noted on the card. If the Trader takes the gain 3 coins bonus, it will take the 5 coin if available.
- Ruins: Some ruins actions require the Trader to have less than or equal to a number of goods. If true, move the ruins marker equal to the number of spaces noted on the card. The Trader gains 1 good and 1 Crystal. Next, if the Trader has at least one lantern, return a latern to the general supply and roll the ruins die and give the trader any rewards rolled.
- Lower: Some lower actions require the Trader to have less than or equal to a number of goods. If true, move the dark market marker equal to the number of spaces noted on the card. The Trader gains 2 goods. If the marker lands on the commission/crown space, the Trader chooses the noted action.
- Inn: Some Inn actions require the Trader to have greater than or equal to a number of goods. If true, the Trader sells to one hero. If available, the Trader always sells to a hero that matches other commissions or heroes in its play area. If there is a tie or the Trader doesn’t have any other heroes or commissions, it sells to the noted hero space on the card. To determine which goods the Trader sells to the hero, use the small diagram on the Trader card. For each good sold, reduce the Traders good marker and the Trader takes coins from the supply based on market prices. Place the hero in the Traders play area. If the hero has a lantern icon, the Trader takes one lantern from the supply.
General Solo Rules
- When you take the travel action, the Trader always follows if: It has heroes or commissions to deliver to the same region or it has atleast 1 lantern in it’s play area.
- The Trader always selects the travel die with the highest value.
- The Trader has no limit on the number of heroes, commissions, illuminated dice, or lanterns in its play area.
- When the Trader deck runs out, shuffle the discards to form a new Trader deck.
- Coins earned by the Trader are placed in it’s purse and you may not count them.
- When the Trader recieves a hero or commission reward from a die or travel card, follow the same rules for selecting heroes and commissions on Trader cards. If there is ever a situation where the rule doesn’t apply, the player chooses.
- When the Trader receives an upgraded good, move the good marker one space and the Trader takes 1 crystal from the general supply.
Final Travel (Solo)
The Trader delivers to the city with most heroes and or commissions. If a tie, it always delivers commissions before heroes. If still tied, the player chooses.
Trader Scoring & Tiebreakers
Count the Traders coins and prestige and the lower value is it’s base score.
Next, add 1 VP for each item below:
- Unspent good (4 goods is 4vp)
- Illuminated die
- Crystal
- Crown card
The winner is the player with the highest final score.
Breaking Ties
In the case of a tie, the tied player with the higher value of coins or prestige is the winner.
Icon Glossary
 Anytime you gain prestige, immediately move your marker.
 Gain a horseshoe.
 Lose any 1 good (your choice).
 Gain 1 Hero from the Inn. Note: You do not sell to this hero.
 Pay coins to the supply.
 Gain a crown.
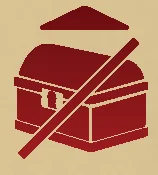 Lose 1 of your most valuable goods based on market prices.
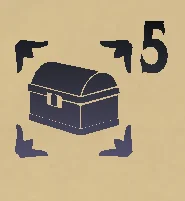 Gain an Upgraded good worth 5 coins at the Market.
 Gain coins from the supply.
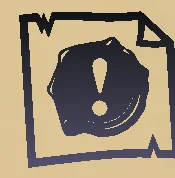 Gain any commission.
 Roll the Oracle die and gain reward.
 Gain a Commission from Northbreak.
 Any basic good.
 Gain a crystal.
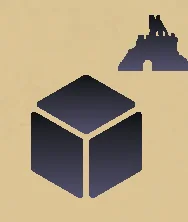 Roll the ruins die and gain reward.
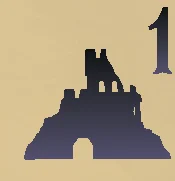 Move the ruins marker 1 spot and receive the reward for that location.
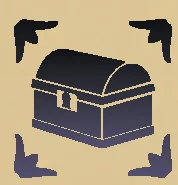 Any upgraded good.
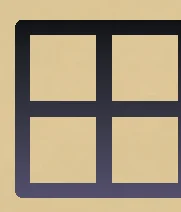 This hero can carry any one good. Place the good on the hero card.
 Travel die.
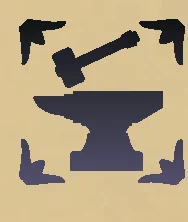 Receive the crafting bonus from your player board for whatever die is currently locked there (treat that locked value as wild if the slot is empty. In this case, the crafted item is also an upgraded good).
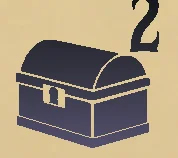 Basic good worth 2 coins at Market.
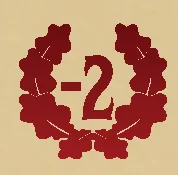 Lose Prestige.
 Illuminated die.
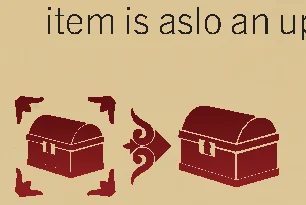 Flip an upgraded good to it’s basic side. If you have no upgraded good, return a basic good to the supply instead.
 Rotate the market wheel 1 space clockwise.
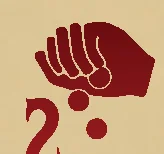 Lose Coins.
 Upgraded staff.
 1 good that is currently in your wagon storage.
 Gain one lantern from supply.
 Lose 1 Hero from a hero slot. (Return to bottom of hero deck).
 Return one lantern to the supply.
 A good not currently available in the bazaar (i.e. there is no market die in the wedge).
Starting Horses
- Sugarfoot: During the move step you may move 3 spaces regardless of the dice value in your action pool. Small saddle bag to hold goods.
- Lovebug: Gain one lantern from the supply when you activate the travel action.
- Whisper: When choosing a travel die, you may add +1 pip when you’re the leader or following.
- Brembizant: Receive a two coin discount when purchasing goods at the market. Cost cannot go lower than zero.
Building Actions
- Blazing Quartz Mine: Take one crystal from the supply.
- Icebreaker Harbor: Gain one good from the supply that is not available to buy on the market wheel.
- Frosted Filigree: Gain a basic good worth one coin and one lantern and one prestige.
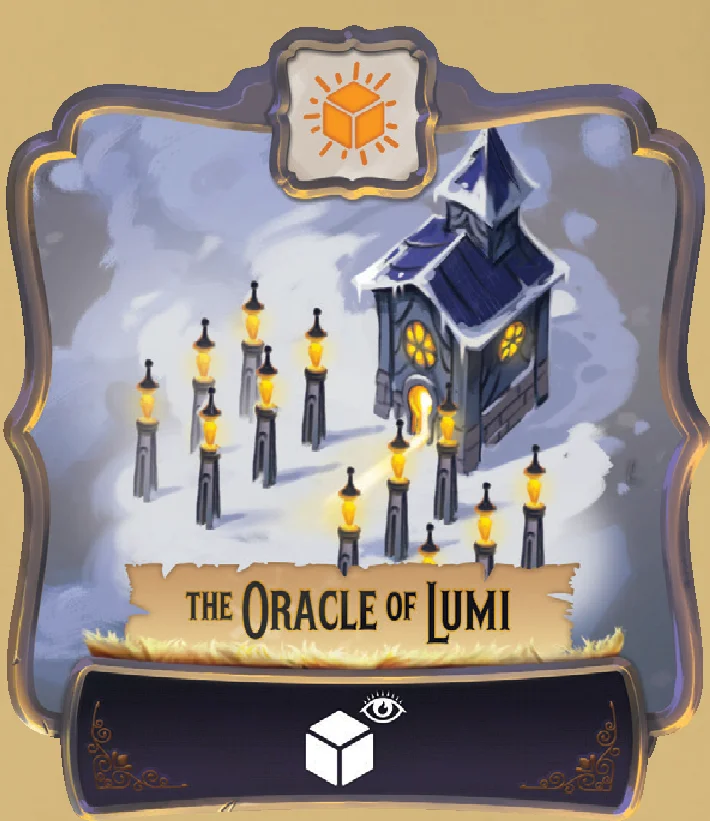
- Oracle of Lumi: Roll the oracle die and gain the reward.
- Yedl’s Workshop: Flip over one basic good in your wagon to the upgraded side and gain one lantern.
Companions
- Raven: Gain one illuminated action die from the supply. Roll the oracle die.
- Threy Cat: Copy the travel die you took this turn and receive the reward again. Add +1 or 2 to a travel die.
- Ice Mouse: Gain any commission. Gain any basic good from the supply.
- Cave Dragon: Deliver one hero to its matching city and gain the reward. Gain one good from the supply that is not available to buy on the market wheel.
- Scorpion: Gain 1 hero. Craft an upgraded good using the action die locked in the crafting slot.
- Phoenix: Gain two lanterns from the supply. Move the ruins marker one space in the ruins and gain the reward. (You cannot pay a lantern to roll the ruin die)
Travel Rewards and Penalties
Penalties have red borders and require players to lose resources. Unless noted below, return all penalties back to the general supply. When selecting a penalty, you do not need to have the resource shown. If you do not have enough of the required resource, you must pay all that you have. You cannot go below zero coins or zero prestige.
Setup
Central Board Setup
- Central Board: Place the central board in the middle of the table. Place the night dice, travel dice, coins, crystals, lanterns and goods within reach of all players.
- Goods: Goods are two-sided, basic and upgraded. Stack the goods by type with the basic side face-up.
- Buildings: Randomly place 4 of the 5 building tiles on the matching spaces on the central board. For the first game, we recommend choosing the Mine, Filigree, Workshop and Oracle. In later games, players may choose any combination of buildings.
- Bazaar: Roll 1 market die and rotate the wheel so the good matching the die is aligned with the 5 section. Place one market die in each of the 1-4 value sections, so that the face-up side of the die matches the section of the wheel. In this way, all but the 5 value good will contain a matching die.
- Commissions: Separate the commissions in piles for each of the 6 outlying cities. Shuffle each stack and place it in the corresponding section of the board.
- Ruins: Place the ruins marker in the wild upgraded good section on the ruins tablet.
- Travel: Shuffle the regular dark road and shortcut decks separately and place them face-down next to the travel section of the central board.
- Place a 5 value coin from the supply atop the coin section of the leader bonus track. Last, stack the wagon upgrade tiles on the last section of the leader bonus track.
- Companions: Shuffle the companion deck and place it face-down near the travel section of the central board. Draw the top 3 cards and place them face-up in a row. Place 1 travel die atop the companion card furthest from the companion deck.
- Dark Market: Place the dark market marker on the section with the crown/commission space.
- Heroes: Shuffle the hero deck and place it face down in the Inn. Draw the top four cards and place them face-up in the Inn.
- Crowns: Shuffle the crown deck (objective cards) and place it face down in the courtyard. Draw and place 2 cards face-up in the courtyard.
Player Setup
Each player follows the steps below:
Take a player board and select a color; take the matching wagon meeple, prestige marker, player shield, and horseshoe token.
- Place the wagon on the road space between the bazaar and inn on the central board.
- Place the prestige marker near the prestige track on the central board.
- Take 5 coins from the supply and place them behind your player shield.
- Take 7 night dice and 1 illuminated night die from the supply. Place a night die with a single, solid star in the first locked slot on your player board. Next, place a night die with a value of 2 stars in the second. Last, place a night die with a value of 3 stars in the third. Roll the rest of your dice, and place the four night dice into your main reserve. Place the illuminated die in your special reserve section.
- Draw one crown card (objective card) from the top of the deck and keep it face-down in your play area.
- Take one horseshoe and place it in the horseshoe/crystal storage section of your player board.
Starting Goods
- The first player takes 1 good worth 5 coins on the market wheel and places it in their wagon.
- The second player takes 1 good worth 4 coins and receives 1 coin from the supply.
- The third player takes 1 good worth 3 coins and receives 2 coins from the supply.
- The fourth player takes 1 good worth 2 coins and receives 3 coins from the supply.
Starting Hero and Horse
Shuffle the starting hero cards and deal one to each player who places it face-up in one of the hero slots in their wagon. Each player receives their starting hero’s bonus from the supply.
Shuffle the horse cards and deal one to each player who places it face-up to the right of their player board.
Please note that Hero Name and Class are for flavor and do not impact gameplay.
Player Board and Storage
Storage Rules
The wagon section of your player board is where you keep track of your heroes, commissions, lanterns and goods.
- Commissions: When a commission is acquired, place it on an unoccupied commission slot on the left of your player board. If you acquire a commission and all three of your slots are full, you may discard a commission to the bottom of the matching location deck.
- Heroes: When a hero is acquired, place it on an unoccupied hero slot on your player board. If you acquire a hero and all three of your slots are full, you may discard a hero to the bottom of the hero deck.
- Lanterns: When a Lantern is acquired, place it on 1 of the 4 Lantern slots.
- Goods: When a good is acquired, it must be placed in your storage or atop a hero with a storage icon. You can rearrange your storage at any time to make newly acquired goods fit. Any goods that do not fit in your storage must be discarded back to the supply. Goods in your storage may be placed in any orientation.
- Horseshoes & Crystals: When either a horseshoe or crystal is acquired, place it on 1 of the 3 inventory slots for these items. If you acquire a horseshoe or crystal and all three of your slots are full, you may discard an item back to the general supply to make room.
Turn Structure
Round Overview
A round proceeds in clockwise order. Each player will take a full turn, going through each of the turn steps, before passing their turn to the next player. Rounds continue until the end of the game is triggered.
A player’s turn consist of 4 steps that must be taken in order:
- Plan: In this step, a player chooses 1 night die in their main reserve to bump a locked night die into the action pool.
- Move: The player moves their wagon around the central board a number of spaces equal to the value of one die in their action pool.
- Act: After moving, the player will take actions on the central board using dice from their action pool.
- Rest: This is the cleanup step, where a player refreshes the central board, checks if their main reserve is empty, and passes play to the next player.
Step 1: Plan
During the plan step you must choose one night die in your main reserve to bump one of the three locked night dice above the main reserve. The locked die you bump goes into your action pool and the die from your main reserve is now locked in its place. Be sure not to change the values on the dice when moving them around your player board.
If at the beginning of your turn, your three locked night dice are all the same die face, you MAY reset them to the 1-2-3 star patterns that all players started wth at setup.
There are 3 locked action slots, each with its own special actions. After bumping, immediately perform the slots special action.
- Slot 1 (A): Use the crafting chart, take 1 Basic good from the supply matching the locked night die’s value and place it in your wagon. Note: the new die, which comes into slot 1, is used for crafting and NOT the die that moves into the action pool.
- Slot 2 (B): Take 1 lantern from the supply and place it on your player board OR move 1 illuminated night die from your special reserve to your action pool. Note: This is the only way to move a 2nd/illluminated die into your action pool.
- Slot 3 (C): Take 2 coins from the supply or turn the market wheel one space clockwise.
During the last 3 rounds of the game, your main reserve will be empty and you must play the last three locked night dice. On your turn, choose one locked night die and move it to your action pool and perform the slot’s special action, leaving the action slot empty for the remainder of the game. Note that for its last use, you will receive any good of your choice from the crafted good slot (A). The purple banner below this slot serves as a reminder of this effect.
Step 2: Move
During the Move step, you must choose one die in your action pool and move your wagon the exact number of spaces equal to the die’s value. Wagons always move clockwise around the capital city. Moving from one space to the next is considered one movement. The blank face on the night die signifies a movement of zero—players remain at their same location.
If they have two dice, players still only move once on their turn. Two dice may add to your choice of movement, however, as either die may be used for movement.
You may spend a horseshoe to add or subtract one movement. You can only play one horseshoe per turn.
Step 3: Act
During the Act step, you will interact with districts that are adjacent to your wagon. There are 5 Districts; Great Bazaar, Queen’s Commissions, Yurg’s Excursions (Travel/Ruins), Dark Market and Ringway Inn. Your wagon will always be adjacent to 2 districts. Each district has an action space where you will place a die and perform an action.
On most turns, you will have only one night die in your pool. On those turns, take the die from your action pool and place it on an action space in one of the two adjacent districts.
When placing an night die in a district you immediately perform the district’s action.
If you ALSO have an illuminated die in your action pool, you will get more actions on your turn. When placing an illuminated night die in a district, you activate both the district and the building at the end of the road containing your wagon meeple.
Thus, if you only have a night die, you will do the action of one of the district adjacent to you wagon. If you have BOTH a night die and an illluminated die, you will do the actions of BOTH districts adjacent to your wagon AND use the building in the road between those districts. You may perform your 2 disctrict actions and 1 building action in any order you want.
As long as you have dice in your action pool, you must choose and perform district actions. Once your action pool is out of dice, you will move to step 4.
Note: The value of the dice placed in a district or building has no impact.
Each building is connected to the wagon area by a road. Note that there is no building between the Great Bazaar and the Ringway Inn.
Step 4: Rest
Return your night die from the central board to your personal discard pile near your player board. If you played an illuminated night die this turn, return it to the general supply. All action spaces on the central board should be unoccupied.
Then check for the following:
- Market dice: any dice that were removed from the market wheel during your turn must be rerolled and placed back onto the market wheel. No more than two dice may be in any individual section of the market wheel. If you roll a market die and get a result that already has 2 dice on it, simply re-roll until you get a result that can be added to the wheel.
- Crown Cards: If a card(s) was taken, draw a replacement card(s) is drawn from the top of the deck for a total of 2 face up cards.
- Companions: If a companion card(s) was taken, all remaining cards move to the right if their right space is empty, and a replacement card is drawn from the top of the deck for a total of 3 face up companions. Make sure the companion card furthest from the deck has a travel die on top of it.
If your main reserve still has night dice, then your turn ends and play passes to the next player. If your main reserve is empty and has no dice, then return one night die from your personal discard to the general supply. Roll all remaining dice in your personal discard and place them into your main reserve. Your turn ends and play passes to the next player.
If you return an night die to the general supply and you have no remaining dice in your personal discard, your reserve will remain empty for the remainder of the game. From this point on, during the plan step, you must choose one of the locked night dice to play for the turn.
Districts and Actions
Great Bazaar
This is where you purchase basic goods with coins. The five market dice represent the type and quantity of goods available at the bazaar’s market. The cost of all of the dice showing the same type of good is noted on the outside section of the market wheel.
After placing a night die in the market, you may perform these actions in any order:
- Rotate the market wheel one space clockwise.
- Flip one market die to any good you want and place it back on its matching section. Note: no more than two dice may be in any individual section of the market wheel.
Then, choose which market dice you want to purchase and remove them from the wheel. Add up the cost of each type of good purchased and pay the amount in coins to the supply. For each market die removed, take a matching basic good(s) from the supply.
Example: Storm removes two dice showing potions for three coins and one die showing books for one coin, she pays four coins to the supply and takes two potions and a book from the supply and places them in her storage.
Queen’s Commissions
Commissions are needed to deliver goods to cities during the travel action. You can only have three active commissions at any one time. After placing a die in the commission district, take the top commission from any location deck.
Dark Market
The dark market is where you can buy goods, commissions and crown cards (objectives). After placing a die in the dark market, pay one coin to move the marker one space clockwise. You may continue to pay one coin to move the marker up to 4, in which case the marker has returned to its starting position. When you are done, you will receive the rewards from the section containing the marker.
Three sections of the dark market provide two basic goods. Take both goods from the supply. If the marker stops on thee fourth section, take the top commission from any location deck OR one crown card (and bonus reward) from the courtyard.
Ringway Inn
The inn is where you sell goods to heroes for coins. After placing a die in the inn, choose one face up hero to sell goods. Gain coins from the supply for each good sold, based on the market wheel prices. In addition, gain 1 crystal and 1 extra coin from the supply for each upgraded good sold.
Each hero has icons showing the goods they wish to buy. You can only sell one good per icon listed on a hero. You must sell at least one good. Return each good sold to the supply. After selling, place the hero card onto one of the hero slots on your player board.
- If the hero has a lantern icon, take one lantern from the supply.
- If the hero has a grid icon, they can store one good from your wagon.
- If the hero has a horseshoe icon, take one horsshoe from the supply.
Note: Market dice do not affect the selling action in any way.
Yurg’s Excursions (Ruins and Travel)
This district has both the ruins and the travel actions. After placing a die, you must choose to perform the ruins action or the travel action.
Yurg’s excursions is where you can find upgraded goods in the ruins or travel to the outlying cities to fulfill commissions for prestige and other rewards.
When you place your die here, you choose either to visit the Ruins of Yin or to Travel to an Outlying City. Under no circumstance can you take a ruins action and a travel action on the same turn.
Ruins
You may move the ruins marker up to one space plus the number of heroes on your player board. When you are done moving the marker, take the rewards shown on the same section. Three sections provide an option of two upgraded goods, choose one and take it from the supply. If the ruins marker is in the fourth section, take any upgraded from the supply.
After taking the reward, you may return one lantern to the supply to roll the ruin die and take the rewards. Die rewards listed below:
- Move the marker one space clockwise and take the reward shown in the section.
- Reroll the ruin die and if you roll this reward again, take one illuminated die from the general supply, roll it, and place it in your special reserve. If you roll another reward, take that reward instead.
- Take a basic good from the supply worth one coin based on market prices.
- Take a crystal from the supply.
- Take two coins from the supply.
- Take one face up hero or the hero from the top of the deck and place it on your player board. Note: You do not sell to this hero.
Travel
When you choose the travel action, you become the leader of a caravan that travels to one city in a region. As the leader, you must travel to the chosen city, while other players may follow you to any city in the same region. The leader must choose a companion and decide which road to take, the regular dark road or take a shortcut. After any encounters along the road, players can turn in commissions and heroes to their chosen city. Then, the leader receives a leader bonus and the travel action is over.
After placing a die, follow the steps below in order:
- Choose a companion card: Choose any one of the three face-up companion cards available (or the top card from the deck) and place it face-up on the right side of your player board. If you chose the companion card with the travel die on top of it, place the travel die in the travel section of the central board.
- Declare destination: Declare which city you have chosen to travel to.
- Choose road: Declare either “I will take the dark road” or “Trust me, I know a shortcut.” The leader must return three lanterns to the supply in order to take a shortcut.
- Invite players: Ask each player in turn order if they would like to join the caravan. Players should respond with a “yes” or “no”. The caravan travels to a pair of cities in a region. The leader must travel to the chosen city, each other player may deliver to any city in the same region. Add one travel die for every player in the caravan (including the leader) to the travel section of the central board.
- Travel encounter: Draw and reveal the top card from the road chosen in step 3. Roll all of the travel dice in the travel section of the central board. Each player in the caravan must take one travel die. Who chooses the first die is determined by the road travelled:
- Dark Road: Starting with the leader and continuing clockwise, each player in the caravan must take one travel die.
- A Shortcut: Starting with the first player to the left of the leader and continuing clockwise, each player in the caravan must take one travel die. The leader always chooses a travel die last on the shortcut.
When a player takes a travel die, compare the die’s value with the road card and receive your reward or penalty. Rewards have a black border and penalties have a red border. See the appendix for more details on rewards and penalty icons.
Rerolling travel dice: Before choosing a travel die, a player may return one lantern to the supply and reroll all remaining travel dice. You must spend one lantern each time you repeat this action.
After all players have taken a travel die and received their rewards or penalties, return all travel dice (including any remaining travel dice on the central board) to the supply.
- Delivering: The caravan has arrived in the chosen region. The leader may only deliver to the city chosen during step 2. Each other player in the caravan may choose to deliver to one of the two cities in the region. Players are not required to deliver to a city and can pass on the opportunity. All players simultaneously deliver commissions and/or heroes.
Delivering Commissions:
There are two parts that make up the structure of a commission:
- On the bottom, the required city to fulfill the commission.
- On the top, three icons showing the required goods. You can only deliver one good per icon. All icons can be delivered with either basic or upgraded goods. To fulfill a commission, you must deliver at least one of the necessary goods, returning them to the general supply. You may fulfill multiple commissions.
You earn prestige based on the number of goods delivered to each commissions. If you deliver 1/2/3 goods on a commission, receive 1/3/6 prestige.
Any upgraded goods you turn in for a commission earn you an additional 1 prestige per upgraded good. (Note: Unlike at the Inn, players do NOT receive a crystal for their upgraded goods.) After tallying your total prestige, move your prestige marker on the prestige track. Place fulfilled commissions face down in your score pile.
Delivering Heroes:
Heroes can only be delivered to the city listed on the card. Receive a reward for each hero delivered to the matching city. The reward is listed in each region:
- Region A (Scorchborn/Northbreak): Gain two coins.
- Region B (Cursecairn/Nightpoem): Gain one coin and one prestige.
- Region C (Farglen/Windglass): Gain two prestige.
Place completed Heroes face down in your score pile.
Leader Bonus:
After all players have finished delivering, the leader receives a “leader bonus”. Depending on the road chosen during step 3, the leader receives one or two leader bonuses. One bonus for the dark road and two for the shortcut. If you receive two bonuses, you may take the same bonus twice, with the exception that you can only have one wagon upgrade. The bonuses are listed below:
- Take one illuminated night die and roll it, then place it in your special reserve.
- Take one of the two face-up crown cards (or the top card from the deck) in the courtyard. Take the card and the bonus reward on the banner to the right of each face-up card. Two prestige or any basic good.
- Take three coins. The first player to take this bonus receives the five coin piece placed at setup.
- Take one wagon upgrade. You may choose from any of the remaining upgrades available. You may only have 1 upgrade per game.
After taking your leader bonus, move to your rest step and end your turn.
Buildings, Crowns and Companions
Buildings
When using an illuminated night die in a district, you may perform a building action before or after the district action. You only have access to a building if there’s a road between your wagon and the building. There is no building between the inn and bazaar. Building actions are listed in the appendix.
Crowns
Crowns are personal objectives for end game scoring. When taking an action that gives you a crown, take one of the two faceup cards (or the top card from the deck) in the courtyard. Take the card and the bonus reward on the banner to the right of each face-up crown (two prestige or any basic good + 1 horseshoe).
Companions
Companions have powerful one time actions that can be triggered by “gifting” them crystals. You can only gift crystals to companions in your play area. Crystals may be gifted anytime during your turn. To gift a crystal, place the token on top of a companion’s action space that does not already have a token. The companion actions are listed in the appendix.
End of Game and Scoring
Game End Trigger & Final Travel
The end of the game is triggered when all players have played their last locked night die. Then, each player may travel to any one city of their choosing and deliver commissions and heroes to the chosen city, skipping roads, travel dice or following.
Scoring
Crowns
Before calculating final scores, each players should take any coins or prestige gained from completed crown cards. Some crown cards provide VP victory points which should be set aside and added to your final score.
Coins and Prestige Balance
To calculate your final score, count your coins and prestige. The lower value is your base score.
Victory Points
Next, add up victory points, which are added to your base score. Unused illuminated dice are worth 1 victory point each. Also add any victory points earned on crown cards.
Final Score
The total is your final score. The winner is the player with the highest final score.
Breaking Ties
In the case of a tie, the tied player with the higher value of coins or prestige is the winner (the lower value). If players are still tied, the player that gifted the most medallions is the winner. If players are still tied, the player that delivered the most contracts is the winner, then the player that delivered the most heroes. If players are still tied after 4 tiebreakers, choose to either share the victory or play again to determine a winner.
Solo Play
Overview
In the solo game, you will play against the Trader. To win the game, your final score must exceed the Trader’s score. Unless noted below, play the solo game exactly as you would the 2-player game.
Setup Changes
Travel: Randomly choose 1 wagon upgrade and place it on the last section of the leader bonus track. Place the remaining wagon upgrades back into the box.
Player & Trader Setup
Setup your player board as per the normal rules.
The Trader Setup: Choose a color for the Trader, take the matching wagon meeple, prestige marker, and player shield. The Trader does not take a player board but will need space to play cards and store resources.
- Place the wagon on the road space between the bazaar and inn on the central board.
- Place the prestige marker and the goods marker near the prestige track on the central board.
- Take a 5 coin piece and place it behind the Trader’s player shield.
- Draw one crown card (objective card) from the top of the deck and place it face-down in the Trader’s play area.
- Place one illuminated die in the Traders play area.
- Shuffle the 10 Trader cards and place them face down to form the Trader deck.
The Trader does not take tiles when it gains goods. The Trader uses the goods marker to track goods on the prestige track. Each time the Trader gains or loses goods, move the tracker accordingly.
Choose a player to start the game and reward starting goods and coins to both you and the Trader.
Give the Trader a starting hero and the starting hero bonus. The Trader does not receive a horse.
The Trader’s Turn
Draw the top card of the Trader’s deck and execute the planning action and one district action. Place the card in the discard pile. The Trader’s turn ends.
First, you must perform the planning actions in the dark section at the top of the card. Then, starting with the first district action and moving downward on the card, you must check and see if the Trader meets the requirements. District actions that are highlighted in red have requirements that the trader must meet in order to perform the action. If the Trader meets the requirements then perform the district action from left to right. If the Trader does not meet the requirements, then check the next district action and so on until the Trader performs and completes one district action. Once the Trader has completed a district action the Trader’s turn is over.
Executing District Actions for the Trader
Below is a list of district actions and how to execute them:
- Planning Section: Move the Trader’s wagon to the noted space on the game board. Then, gain the special action reward on the right side of the planning section. Some cards have an illuminated die option. If the Trader has an illuminated die, it must return one to the supply and give the noted rewards. If the Trader does not have an illuminated die then give the trader the second reward option. The Trader only receives one reward if there is an option.
- Bazaar: Some bazaar actions require the Trader to have less than or equal to a number of goods. If true, rotate the market wheel one space. Then, remove all market dice from the wheel matching the three good icons. For each die removed, move the Traders good marker one space. The Trader never pays coins for goods. In the rare case no dice are removed, the trader gains 1 good. Reroll market dice and return them.
- Commissions: Some commission actions require the Trader to have less than or equal to one commission. If true, the Trader takes one commission. The Trader takes a commission to the city it has the most heroes and or commissions to delivery to. If there is a tie or the Trader doesn’t have any other heroes or commissions, take the commission from the location noted.
- Travel: The travel action requires the Trader to have greater than or equal to one commission (or 2 heroes to the same location). If true, follow the steps below:
- Discard the companion card from the space noted on the card. The Trader does not collect companion cards. If the Trader discarded the companion card with the travel die on top of it, place the travel die in the travel section of the central board.
- Use the following list to determine where the Trader travels. If tied, move to the next: 1. Most heroes and commissions 2. Most commissions 3. Players choice.
- The Trader always takes the shortcut if it has 3 lanterns in it’s play area. Return the lanterns to the general supply. If the Trader has less than 3 lanterns, it chooses the regular dark road road.
- You must decide weather to follow or pass.
- Draw the road card and roll all of the dice in the travel section of the central board per normal rules.
- When its the Traders turn to choose a die, it always selects the highest value die possible. It receives rewards or penalties for the chosen die. The Trader does not spend lanterns to reroll dice.
- The caravan arrives and the Trader delivers all heroes and commissions to the chosen city. Move the Traders goods marker back one space for each good required on a commission. The type of goods do not matter and if the Traders good marker reaches zero it cannot deliver any more goods. The Trader earns prestige for goods delivered on commissions the same way the player does: 1/3/6. Each hero and commission the Trader delivers can be set outside the play area as they are no longer needed. For example: The Trader has 5 goods and 2 commissions to Farglen. The Trader reduces the goods marker to zero and delivers one commission for 6 prestige (three goods) and another for 3 prestige (two goods).
- If the Trader traveled the secure road, it receives the first leader bonus listed on the card. The Trader receives both for taking the shortcut. Place gained illuminated dice and crown cards in the Traders play area. If the Trader gains a crown, take the crown card and reward noted on the card. If the Trader takes the gain 3 coins bonus, it will take the 5 coin if available.
- Ruins: Some ruins actions require the Trader to have less than or equal to a number of goods. If true, move the ruins marker equal to the number of spaces noted on the card. The Trader gains 1 good and 1 Crystal. Next, if the Trader has at least one lantern, return a latern to the general supply and roll the ruins die and give the trader any rewards rolled.
- Lower: Some lower actions require the Trader to have less than or equal to a number of goods. If true, move the dark market marker equal to the number of spaces noted on the card. The Trader gains 2 goods. If the marker lands on the commission/crown space, the Trader chooses the noted action.
- Inn: Some Inn actions require the Trader to have greater than or equal to a number of goods. If true, the Trader sells to one hero. If available, the Trader always sells to a hero that matches other commissions or heroes in its play area. If there is a tie or the Trader doesn’t have any other heroes or commissions, it sells to the noted hero space on the card. To determine which goods the Trader sells to the hero, use the small diagram on the Trader card. For each good sold, reduce the Traders good marker and the Trader takes coins from the supply based on market prices. Place the hero in the Traders play area. If the hero has a lantern icon, the Trader takes one lantern from the supply.
General Solo Rules
- When you take the travel action, the Trader always follows if: It has heroes or commissions to deliver to the same region or it has atleast 1 lantern in it’s play area.
- The Trader always selects the travel die with the highest value.
- The Trader has no limit on the number of heroes, commissions, illuminated dice, or lanterns in its play area.
- When the Trader deck runs out, shuffle the discards to form a new Trader deck.
- Coins earned by the Trader are placed in it’s purse and you may not count them.
- When the Trader recieves a hero or commission reward from a die or travel card, follow the same rules for selecting heroes and commissions on Trader cards. If there is ever a situation where the rule doesn’t apply, the player chooses.
- When the Trader receives an upgraded good, move the good marker one space and the Trader takes 1 crystal from the general supply.
Final Travel (Solo)
The Trader delivers to the city with most heroes and or commissions. If a tie, it always delivers commissions before heroes. If still tied, the player chooses.
Trader Scoring & Tiebreakers
Count the Traders coins and prestige and the lower value is it’s base score.
Next, add 1 VP for each item below:
- Unspent good (4 goods is 4vp)
- Illuminated die
- Crystal
- Crown card
The winner is the player with the highest final score.
Breaking Ties
In the case of a tie, the tied player with the higher value of coins or prestige is the winner.
Appendix
Icon Glossary
- Anytime you gain prestige, immediately move your marker.
- Gain a horseshoe.
- Lose any 1 good (your choice).
- Gain 1 Hero from the Inn. Note: You do not sell to this hero.
- Pay coins to the supply.
- Gain a crown.
- Lose 1 of your most valuable goods based on market prices.
- Gain an Upgraded good worth 5 coins at the Market.
- Gain coins from the supply.
- Gain any commission.
- Roll the Oracle die and gain reward.
- Gain a Commission from Northbreak.
- Any basic good.
- Gain a crystal.
- Roll the ruins die and gain reward.
- Move the ruins marker 1 spot and receive the reward for that location.
- Any upgraded good.
- This hero can carry any one good. Place the good on the hero card.
- Travel die.
- Receive the crafting bonus from your player board for whatever die is currently locked there (treat that locked value as wild if the slot is empty. In this case, the crafted item is also an upgraded good).
- Basic good worth 2 coins at Market.
- Lose Prestige.
- Illuminated die.
- Flip an upgraded good to it’s basic side. If you have no upgraded good, return a basic good to the supply instead.
- Rotate the market wheel 1 space clockwise.
- Lose Coins.
- Upgraded staff.
- 1 good that is currently in your wagon storage.
- Gain one lantern from supply.
- Lose 1 Hero from a hero slot. (Return to bottom of hero deck).
- Return one lantern to the supply.
- A good not currently available in the bazaar (i.e. there is no market die in the wedge).
Starting Horses
- Sugarfoot: During the move step you may move 3 spaces regardless of the dice value in your action pool. Small saddle bag to hold goods.
- Lovebug: Gain one lantern from the supply when you activate the travel action.
- Whisper: When choosing a travel die, you may add +1 pip when you’re the leader or following.
- Brembizant: Receive a two coin discount when purchasing goods at the market. Cost cannot go lower than zero.
Building Actions
- Blazing Quartz Mine: Take one crystal from the supply.
- Icebreaker Harbor: Gain one good from the supply that is not available to buy on the market wheel.
- Frosted Filigree: Gain a basic good worth one coin and one lantern and one prestige.
- Oracle of Lumi: Roll the oracle die and gain the reward.
- Yedl’s Workshop: Flip over one basic good in your wagon to the upgraded side and gain one lantern.
Companions
- Raven: Gain one illuminated action die from the supply. Roll the oracle die.
- Threy Cat: Copy the travel die you took this turn and receive the reward again. Add +1 or 2 to a travel die.
- Ice Mouse: Gain any commission. Gain any basic good from the supply.
- Cave Dragon: Deliver one hero to its matching city and gain the reward. Gain one good from the supply that is not available to buy on the market wheel.
- Scorpion: Gain 1 hero. Craft an upgraded good using the action die locked in the crafting slot.
- Phoenix: Gain two lanterns from the supply. Move the ruins marker one space in the ruins and gain the reward. (You cannot pay a lantern to roll the ruin die)
Travel Rewards and Penalties
Penalties have red borders and require players to lose resources. Unless noted below, return all penalties back to the general supply. When selecting a penalty, you do not need to have the resource shown. If you do not have enough of the required resource, you must pay all that you have. You cannot go below zero coins or zero prestige.