
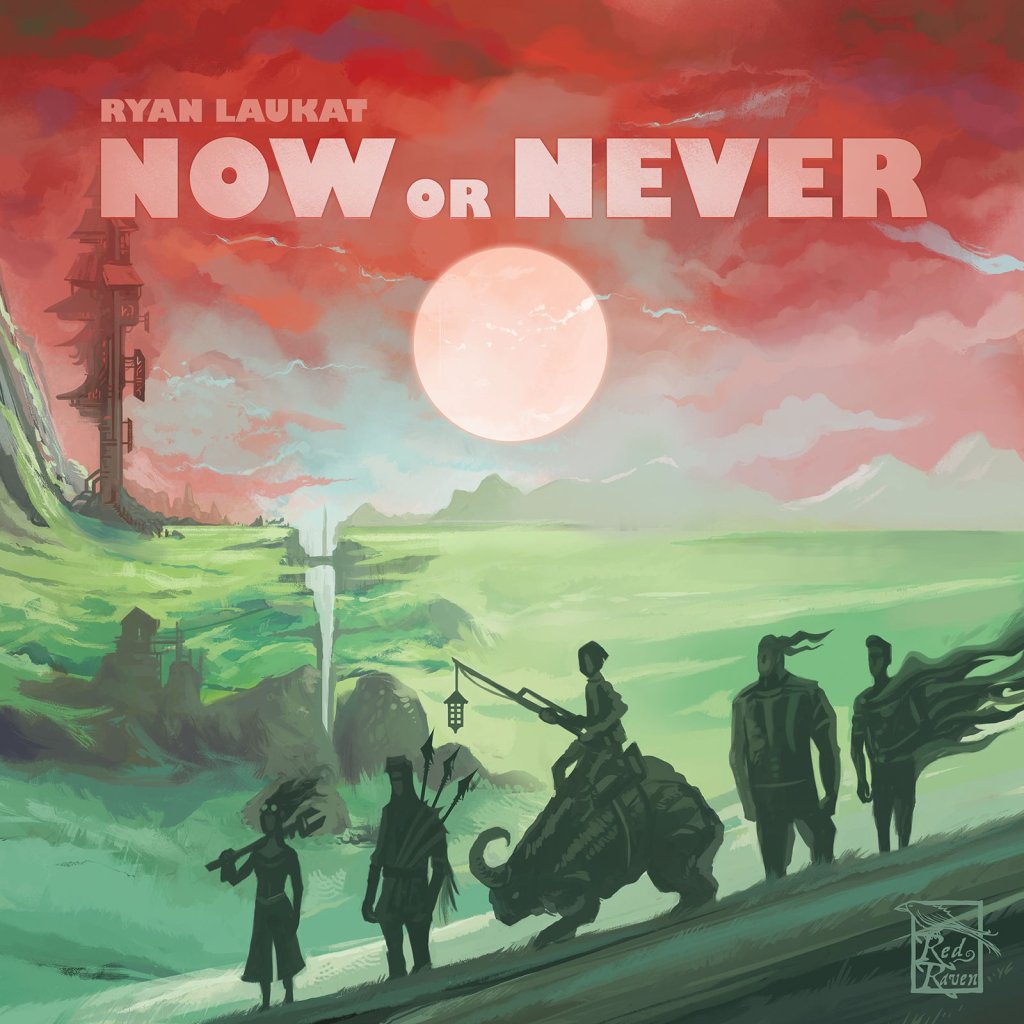
Now or Never
2022
Return to a ruined ancestral village, rebuild it, rescue traveling villagers, and explore a strange fantasy world in a rich strategy adventure.
180
minutes
1 - 4
player(s)
14+
Medium Heavy

About this board game
Now or Never is a competitive strategy board game for 1–4 players, with sessions lasting about 180 minutes. Guide the exiled people of The Monument back to their ruined cliffside village and rebuild their ancient home before another faction claims it.
Twenty years after a crystal meteorite unleashed bizarre creatures across the land, the monsters are weakening. They are slower, less resistant to attack, and some are petrifying into dust—but many still remain. As you restore the village, you must also protect traveling villagers by confronting these dangerous creatures.
Choose one of four asymmetrical characters, each offering a distinct way to approach the struggle for The Monument. Carefully decide what to build and where to place it, creating a village that supports your plans and delivers the greatest rewards over the long term.
- Rebuild the ancestral village and plan its development.
- Hire other players’ specialists to perform special actions.
- Fight creatures to rescue villagers on their journey home.
- Explore a fantasy landscape filled with strange places, technology, and peoples.
Now or Never includes both standard and story modes. In story mode, exploration leads to a storybook where your choices reveal more about the characters and the world. Each character has their own stories, tied to the locations they explore and varied in plot, perspective, and motive.
As the third game in the Arzium storybook series following Above and Below and Near and Far, Now or Never combines village rebuilding, exploration, character-driven storytelling, and monster combat into a race to reclaim a lost home.

Board Game Rules for
Now or Never
1-4 Players, 90-180 Minutes, Ages 14+
Game Design, Illustrations, and Graphic Design: Ryan Laukat
Far to the south of the Last Ruin lies a cliffside village called the Monument. For generations, it protected an ancient shrine until the day a crystal meteorite descended. The meteor’s denizens slowly crept out into the world—bizarre monstrosities from nightmare, attacking all in their path. As they spread across the land, there was no intelligent malice nor grand invasion strategy; the creatures acted like a fungus—expanding into new territory sporadically.
After many fruitless attempts to expel the monsters, the people of the Monument fled as their village crumbled, exiled to distant lands, resigned to a nomadic existence.
Twenty years later, there are rumors that the bizarre monsters are growing weak. They’re slower, some undergoing a gradual petrification until they crumble to dust. Is it something in the air? Are they dying of old age? Do they suffer from a strange disease? No one is certain, but as the news spreads, various factions set their eyes on the vacant, ruined village of the Monument. The original villagers, now refugees, are desperate to return and rebuild. But they must do it quickly, before someone else claims their home. This is their chance. It’s now or never.
In Now or Never, you and up to three friends compete to best rebuild your ancestral village and guide the rest of the villagers on their journey home. Although the creatures of the meteorite have lost much of their strength, many of them remain, and you must fight them off to protect traveling villagers. Now or Never is the third game in the Arzium storybook series that includes Above and Below and Near and Far.
Now or Never is a competitive strategy game that allows you to:
- Choose one of four asymmetrical characters to play.
- Rebuild the village so that returning villagers have a place to live. You must carefully choose what and where to build to maintain an advantage, earning the biggest rewards for long-term planning.
- Interact with other players by hiring their specialists to perform special actions.
- Combat dangerous creatures to rescue villagers.
- Explore a fantasy landscape filled with bizarre places, technology, and people.
Now or Never includes two modes of play: standard and story. When playing in story mode, you read from a storybook when you explore, making choices and learning more about the characters and the world. Each character has their own set of stories, unique to the locations they explore and diverse in plot, perspective, and motive. You must choose what direction your own story will take.
Journey to the Monument and help rebuild your ancient home!

Components List


Base Components
- 1 Game Board (double-sided)
- 4 Town Boards (double-sided)
- 1 Season Board (double-sided)
- 4 Hero Boards
- 4 Book Markers
- 4 Shell Markers
- 4 Tool Markers
- 4 Bottled Demon Markers
- 4 Crystal Markers
- 4 Heart Markers
- 1 Season Marker
- 20 Mana Tokens
- 15 Hero Action Tokens
- 4 4-sided dice
- Coins (42 ones, 12 fives, 12 tens)
- 15 Experience Tokens
- 34 Enemies (4 each of enemies 1-8; 2 of enemy 9)
- Building Tiles (4 identical sets of 20)
- 1 First Player Token
Not Pictured: Rulebook, Story Books (6), Solo Cards (9), Player Aid Cards (8), Plastic Standees (8 — use these for the hero cutouts, there are 4 extra).

- 4 Hero Cutouts
- Hero Abilities (4 sets of 6)
- 12 Blue Banner Gear
- 9 Red Banner Gear
- 3 Random Location Tiles
- 18 Search Tokens
- 9 Order Tokens
- 8 Starting Specialists (sunset icon on back)
- 14 Specialists
- 60 Villagers
- Quest Cards: 43 Basic, 13 Artifact, 17 Advanced
Story Mode & Underground Map Components
The components below are used only in story mode or when playing with the underground map. Place them in a separate bag and only use them when the game instructions tell you to retrieve them.

- 1 Story Mode Specialist
- 1 Giant Boar
- 3 Rifts
- 11 Glogo Villagers
- 1 Lab Monster Villager
- Underground Enemies (4 each of enemies 2, 5, and 7)
- 2 Gigaslug Enemies
- Drill Tank Enemies (4 each of enemies 3 and 4)
- 1 Mystic Healer
- 2 Story Mode Items
- Tempest: Ship and Token
- 1 Guild Tank
- Hero Mission Tokens / Reputation Markers (2 per hero)
These instructions tell you how to set up the standard game. If you want to play story mode (pg 22) OR standard mode with the underground map (pg 27), follow the additional setup instructions listed in those sections. Solo play rules are on pg 24-25.
Board Setup
- Place the game board in the center of the table. Shuffle the 3 random location tiles and place them on the board, one on each of the spaces with the small scroll symbol in the top left corner. Shuffle the order tokens and place them in a face-down stack on the top left space on the map (Tower of Miners). For all board setup, be sure not to cover up any mountain symbols on the board.
- Place enemy tokens on the 9 spaces on the board with enemy symbols. Match the enemy level at the top of the enemy token with the number on the board. Place 1 enemy token per player for each level. For level 9, place 2 enemy tokens if playing with 3-4 players, and only 1 token if playing with 1-2 players. Return the unused enemy tokens to the box.
Example: If playing with 2 players, you need 2 enemy tokens per level, but only 1 level 9 token. - Shuffle the search tokens and place one face down on each space with a letter in the bottom left corner: A-N. (The faces have variable rewards. The backs are identical.) Return the unused search tokens to the box.
- Place the season board next to the game board. Place the side with the reputation track (flame symbols) face down. (The reputation track is for story mode.) Shuffle the villager tokens in a pile, face down. Draw 6 and place them face up in the 6 slots on the season board.
- Shuffle the red gear tokens and the blue gear tokens in their own piles, face down. Place the piles on the season board, then draw 3 red gear tokens and 3 blue gear tokens and place them face up in the slots below.
- Place the season marker on space 1 of the season track.
- Organize the quest cards into 3 piles according to their backs: basic, artifact, and advanced. Shuffle each pile and place them face down near the board.
- Separate the starting specialist tiles (indicated by the sunset icon on the backs of the starting specialists). Give 1 random starting builder (building icon) and 1 random starting healer (heart icon) to each player. Place the remaining unused starting specialists in the game box. Shuffle the remaining specialists (no sunset icon) and place the pile, face down, to the side of the game board. Draw the top 4 tiles and place them face up in a row nearby.

Player Area Setup
- Each player chooses a hero board and sets up their individual play area by following these instructions:
- Place your 2 starting specialists face up on 2 available slots at the top of your hero board.
- Place a heart marker on the space farthest to the right on your heart track, indicating full health.
- Place 1 mana token on each mana symbol to the right of your heart track.
- Take 3 hero action tokens and place them on the faded arrow symbols on your hero board.
- Take your 6 matching hero ability tokens (3 red, 3 blue) and place them below your hero board.
- Take 17 coins from the supply.
- Place 1 die near your player board.
- Take a town board and place it to the side of your hero board (with the above ground side face up).
- There are 4 identical sets of building tiles in the game (differentiated by the color on the back). Take 1 set of tiles, shuffle them face down, and place them face up in a 5×4 grid to the side of your town board. Once placed in this grid, the tiles cannot be rearranged unless you take specific actions in the game.
- Draw 6 basic quest cards, 1 artifact quest card, and 1 advanced quest card. Choose 4 cards to keep, and discard the others in their own discard piles to the side of each draw pile.
- Place your hero cutout in a standee, and place it on the Monument space on the game board.
- Take the following markers and place them on the 0 space on the resource track at the bottom of your town board: book, shell, tool, bottled demon, and crystal.
- Place the coins and experience tokens to the side of the board. This is called the “supply.” These components are not limited. If you ever run out, use a suitable replacement. All other game components are limited by amount.
- First Player: The player who most recently won a game takes the first player token. Play moves in a clockwise direction. The 2nd and 3rd players start with 1 extra coin, and the 4th player starts with 2 extra coins. Return any other unused components to the box.

Before you learn the game rules (starting on page 8), it is helpful to understand a few symbols on the town and hero boards.
Town Board Basics

Town Board Features
- Building Grid: Each town has 4 rows, each with 4 building spaces. Gain victory points listed on the left if you have 4 buildings in that row at the end of the game.
- Starting Building Row: Marked by a star icon. Your first building must be placed in this row.
- Building Costs / Bonuses on Spaces:
- Building on a space with a resource icon (such as a shell) grants 1 of that resource immediately.
- Building on a space with a
 cost icon costs 2 extra coins.
- When you build on the tool space, gain 1 tool.
- Housing Area: The rightmost column is the housing area. Each space in the area corresponds to its row for housing. When you gain villagers, you can place them in the space if you have enough housing in the same row. The victory point symbol in each box is rewarded at the end of the game if you have at least 1 of each type of villager in the row. Villagers are NOT placed on building tiles.
- Resource Track: At the bottom of your town board is the resource track. Use the 5 resource markers to keep track of how many of each resource you own (shells, tools, bottled demons, crystals, and books). Whenever you gain, produce, lose, or sell a resource, move the marker up or down. If you ever have more than 9 of a good, place a coin token on top of the marker and start again on 0 on the track (the coin represents +10 of that good). Each of these resources except books are also known as “goods” and can be sold at any time for coins (described on page 15).
Hero Board Basics

Hero Board Features
- Specialist Slots: Place your specialists in the 4 slots at the top. You can only have 4 at once. If you ever gain a specialist but all slots are filled, you must discard an old specialist to make room for the new one.
- Hero Action Tokens: You have 3 hero action tokens. When in their initial position on the left, they are available. When you take a hero action, move a token so that it covers the arrow with the number to the right. Once all 3 arrows have been covered, you cannot take another hero action until the next season.
- Red Ability/Gear Slots: You have 4 red ability/gear slots available. When you gain a red ability or gear, place it in one of these slots, covering the previous ability. If you have no room, discard a previously placed token to make room.
- Blue Ability/Gear Slots: You have 3 blue ability/gear slots available. When you gain a blue ability or gear, place it in one of these slots. If you have no room, discard a previously placed token to make room.
- Basic Ability: Each hero has a basic ability listed on their board.
- Heart Track: Keep track of your hearts on this track. When you reach 0 hearts, you cannot take any more hero actions until you have at least 1 heart. You may never have more hearts than the maximum number on your heart track.
- Mana Slots: These slots hold your mana tokens. When you spend mana, remove the token from your board until the next season. You can never have more mana than slots unless a card/gear/ability specifically states that you can.
There are two ways to play Now or Never:
- Standard Mode: Compete to rebuild the Monument, defeat enemies, and find lost villagers. The remaining pages in this rulebook (except for the “Story Mode” section) teach how to play standard mode. Game duration: 45 minutes per player.
- Story Mode: Play through a story campaign consisting of six game sessions, called chapters. Players read from a storybook instead of uncovering search tokens. Each chapter also has some modified setup rules, listed at the start of each chapter. This mode takes slightly longer to play. For story mode rules, see page 22.
Game Structure
Now or Never is played in rounds, called seasons. Each season, starting with the first player, players take turns in clockwise order performing one action each until all players pass. When all players have passed, players simultaneously perform the production phase. After this, a new season begins and play continues.
After six seasons, the game ends. Players perform the final production phase and score victory points. The player with the most points wins.
Basic Turn
On your turn, choose one of two actions:
- Specialist Action:
- Pay a specialist to perform that specialist’s action, or
- Recruit a new specialist and perform that specialist’s action, or
- Rest a specialist.
- or Hero Action:
- First, you must move.
- Then you may play a quest card (optional).
- Then choose one of the following:
- Visit a Location, or
- Fight an Enemy, or
- Search.

Specialist Action Options
SPECIALIST ACTION: Pay a specialist to perform that specialist’s action. You may choose one of the following three options:
- Pay your own specialist: You may pay any face-up specialist on your own hero board. Pay the large (upper) coin amount to the supply. Then perform the specialist’s action.
- Pay another player’s specialist: You may pay any face-up specialist on another player’s hero board. You pay the large (upper) coin amount to the supply. The other player collects the small (lower) coin amount (called the “tax”) from the supply. Then you perform the specialist’s action.
- Recruit a new specialist: Recruit from the row to the side of the board. Pay DOUBLE the large (upper) coin amount to the supply. (Always pay double the upper coin amount when recruiting. Do not pay or collect the tax when recruiting.) Take the specialist and place them in one of the 4 slots at the top of your hero board. If there is no slot available, discard one of your specialists to make room (put the old specialist in the game box). You may replace either a used (face-down) specialist, or an unused (face-up) specialist. Then immediately perform the new specialist’s action. Draw a new specialist from the pile and place it in the row so that there are 4 available specialists at all times.
As soon as you pay any specialist (yours or another player’s) and perform their action, flip the token face down. That specialist cannot be used again until the next season.
You may pay a specialist and perform no action, or only part of the specialist’s action. You still flip the token face down in this case.

Specialist Actions Detail
A) BUILD
You may place 1 building tile on your town board. Choose 1 tile from your unbuilt building grid and place it on the town board, according to the following rules:
- If this is your first building in the game, you must choose a building from the outer border of your grid. On future building actions, you may only choose buildings adjacent to empty spaces in the grid. (The outside border of the grid doesn’t count.)
- You must place your first building in one of the 4 building spaces on the starting building row of your town board (the row with the star). After this, you must place new buildings adjacent to any previously placed building in the town.
- Pay the coin cost of the building to the supply. (The coin cost is listed in the bottom right corner of each building tile.) Buildings only cost coins, not resources or books.
- If you place a building on a town space with a resource (such as a shell), gain 1 of that resource immediately.
- If you place a building on a space with a coin/build cost icon, you must pay the indicated coin cost to build there.
- If the building you place has a book and arrow icon on the tile, you immediately gain 1 book (only when you build it). This is not a cost.
- Some buildings give a bonus when built (see the building ability descriptions on page 19).


Additional Build Bonuses on Specialists: If the build icon has a “+hearts” icon next to it, gain the indicated number of hearts after you build. If there is an experience icon next to it, gain 1 experience after you build. If there is a resource icon next to it, gain 1 of that resource.
B) HEAL
Move your heart marker on your hero’s heart track to the furthest space to the right, indicating full health. If there is a “+mana” icon, restore the indicated number of mana (without exceeding your maximum mana slots). If there is a resource icon next to it, gain 1 of that resource.
C) GAIN EXPERIENCE
Gain 2 experience tokens and any listed bonuses (such as a resource).
D) BUY GEAR
You may immediately purchase 1 gear token from the season board. Pay the coin cost shown on the gear token, place the new gear on a matching red or blue slot on your hero board, and draw from the appropriate pile to refill the empty slot on the season board. If you do not have a matching open slot on your hero board for the gear token, you must make room by putting an old token in the game box. When placing red gear, you cover up a basic ability on your hero board.
E) REST
Instead of paying a specialist, you may simply flip the specialist face down and gain either 2 hearts or 1 coin (as shown on the bottom right of each specialist). You may only rest your own specialists, not those of other players.

You may only perform a hero action if you have at least 1 heart and you have an unused hero action token on your hero board. When you take a hero action, follow these 3 steps in order:
- Move
- Play a Quest Card (optional)
- Take an Action on the Board (Choose one: Visit a Location, Fight an Enemy, or Search)
1. Move
Slide one of your available hero action tokens so that it covers the hero action slot to the right. Move your hero on the game board according to the following rules:
- You must move to a new space. (You cannot stay put and take an action on the same space.)
- You may move a number of spaces up to the number in the blue arrow that you cover with a hero action token, plus any bonuses from gear, buildings, etc.
- To move farther, lose 1 heart per extra space. (You can move as many extra spaces as you want, as long as you have enough hearts to pay for it.)
- You may stop moving at any time.
- You may not move diagonally.
- When you enter a space with a mountain icon, you lose 1 heart.
- If you enter a space with an enemy and choose not to fight it, you lose 1 heart. You may continue moving if you choose not to fight.

2. Play a Quest Card (Optional)
When you decide to stop moving, you may play 1 quest card (explained on page 18). To play a quest card, you must have stopped on its matching location.
3. Take an Action on the Board
A) Visit a Location
Locations are indicated by a name on a scroll with an action beneath the scroll. When you visit a location, you may perform the action. Generally, you must pay something and/or lose hearts to gain something else. Each location action can only be performed once per turn. (Refer to page 20 for a detailed description of each location action.)
B) Fight an Enemy
If you stop on a location with an enemy, you may combat the enemy by following these steps:
- Roll Combat: Roll a die. Check the result on your red combat abilities. Each hero starts with 4 basic combat abilities, one for each number on a 4-sided die. Deal any damage listed on the ability you rolled. The enemy attacks you simultaneously, and you lose hearts equal to the enemy’s attack damage (minus any defense that you have, either from blue abilities/gear or from the red combat ability you rolled). Only the red ability matching your die roll applies to that round of combat.
- Determine Outcome:
- If you’ve dealt cumulative damage equal to the enemy’s health, the enemy is defeated. Gain the rewards (white symbols & resources) on the enemy token and discard the token (leaving the rest of the stack below).
- If you haven’t defeated the enemy yet, you must either start a new combat round (roll to attack again, tracking running total damage) or retreat.
- Running Out of Hearts: If you run out of hearts at any time during the attack, even if you simultaneously have dealt enough damage to defeat the enemy, you lose the combat and your turn ends immediately.
- Retreating: You may keep attacking until the enemy is defeated, you run out of hearts, or you retreat. To retreat, leave your hero on the same space; your turn ends immediately.
- Retreat / Defeat Penalty and Consolation: If you retreat or run out of hearts during combat, the enemy token remains and returns to full health. You do not receive the listed rewards, but you do gain 1 experience token.
Rescuing Villagers: If you defeat an enemy, you rescue villagers trapped by the enemy! Choose villagers from any available face-up tokens on the season board. If there are no villagers left, draw 6 new villagers from the supply and refill the empty slots on the season board. Only refill the row of villagers if there are no more villagers left in the row.

Red and Blue Abilities / Gear in Combat
- RED ABILITIES/GEAR: Some red abilities and gear deal extra damage or defense if you pay mana, and some require mana to gain any effects. A red combat ability can only be used when you roll its assigned number, and only once per attack round.
- BLUE ABILITIES/GEAR:增Unless otherwise stated, a blue ability that costs mana can be activated at any time on your turn, and you may activate it multiple times (by paying the mana cost each time). Defensive blue gear (without mana cost) reduces damage taken during each enemy attack round in combat, but does not apply outside of combat. Defense from gear stacks together.

C) Search
When on a space with an unclaimed search token, you may roll a die and lose hearts equal to the result. If you reach 0 hearts, your turn ends and you do not gain the search token.
After rolling, take the search token and gain the reward listed on the opposite side. After this, keep the token face down near your town board. It provides 1 coin during each production phase for the rest of the game, including the final production phase. (Some search tokens instruct you to discard them; do not keep these as income. See page 26.)
Passing and Running Out of Hearts
PASS
If you cannot or do not wish to take any more actions this season, you pass. Once you pass, you cannot take any more actions until the next season. Play continues until all players pass. Then the production phase begins.
RUNNING OUT OF HEARTS
If you ever reach 0 hearts during a hero action, your turn immediately ends. You cannot take another hero action until you have at least 1 heart.
- If this happens when visiting a location, you do not gain any rewards of the action.
- If this happens during combat, combat ends and the enemy returns to full health.
- If this happens when picking up a search token, you must leave the search token on the board.
Anytime Actions
You may take the following actions at any time, even after you have passed or when it is not your turn. You can even perform these actions during the production phase.
- Sell goods for coins: The season board lists combinations of goods and how many coins you gain for selling them. Reduce each good you sell on your resource track. (e.g., 1 shell = 1 coin; 3 shells together = 5 coins; 1 shell, 1 tool, 1 bottled demon, and 1 crystal = 12 coins).
- Place one of your villagers in housing: Place a villager in the housing area on the right side of your town board. You must choose one of the four rows, and you must have enough buildings in that row to hold the villager. Each building allows you to place 1 villager in that row’s housing space, and each building with a bed icon allows 1 additional villager. Once a villager is placed in housing, they cannot be moved to a different row or swapped out. Villagers not yet housed may be kept below your town board.
- Complete one of your order tokens: Pay the specified goods to gain the listed coin reward, then place the token face down near your town board. Each order can only be completed once. Gain 2 victory points per completed order at end of game. Orders cannot be completed in the final production phase!
- Refill villagers early: Pay 2 experience to refill all empty villager slots on the season board early. You can do this at any time, even in the middle of gaining 2 or more villagers.
- Purchase one of your hero abilities: Pay the specified experience cost and place it on your hero board (in a matching red or blue slot). You must own a level 1 ability to purchase a level 2 in the same color, and a level 2 before purchasing a level 3. Once you own a level 1 ability, you can purchase any number of level 2 abilities in that color.

Production Phase
When all players have passed, follow these steps in order (if it is the final round, see “End of the Game”):
- Collect Produced Goods: Add totals to your resource track. Each of your villagers in housing produces a specified good (unhoused villagers do not produce). Some buildings also produce goods or bonuses (shown in the gray box at bottom left). Also, collect 1 coin per search token you own.
- Refresh Mana: Return all spent mana to the empty mana slots on your hero board.
- Refresh Hero Action Tokens: Return all 3 hero action tokens to their starting spaces (to the left of the arrows).
- Refresh Specialists: Flip all of your specialists face up.
- Advance Season Marker: Move the season marker 1 space forward on the track.
- Begin Next Season: The player with the first player token takes the first turn.
Important Reminders
- Players DO NOT refresh their hearts during production.
- Only villagers in housing produce goods.
- Specialists DO NOT produce goods in the production phase.
- After 6 rounds are completed, play the final production phase and proceed to final scoring.

During the sixth and final production phase, follow these steps:
- Discard Resources & Unfinished Quests: Discard all of your coins and set all resource markers to 0 (except books). Discard uncompleted quest cards and incomplete order tokens.
- Final Production & Sell Goods: Produce goods and coins from search tokens as normal. Then sell all of your goods at the market to gain as many coins as possible.
- Count Final Victory Points:
- Each coin is worth 1 victory point.
- Full Building Rows: Gain victory points for having 4 buildings in the 2nd, 3rd, and 4th row from the top: 6, 8, and 8 VP, respectively.
- Full Housing Diversity: Gain victory points for each housing row containing villagers that produce at least 1 of each of the 4 goods (shell, tool, bottled demon, crystal): 5, 5, 6, and 7 VP, respectively.
- Building bonuses (see page 19).
- Completed quest cards victory points.
- Completed order tokens (2 VP each; no new orders can be completed during the final production phase).
Winning the Game
The player with the most victory points wins! In case of a tie, the player with the most remaining experience and books wins. If still tied, the player with the most remaining hearts wins.

Quest Cards
After moving your hero, you may play 1 quest card from your hand that matches the location of the space where you stopped. You play the card before visiting the location, entering combat, or picking up a search token.
- Playing Requirements: Follow the card instructions. Pay the cost (resource, coins, experience) shown in the top right corner (or described in gray text if an asterisk is shown). You must be at the location specified in white text on the red background banner.
- Tucking: After playing, tuck the card beneath the bottom of your town board so that only the bottom half is visible (showing the VP icon and ONGOING or AT GAME END effects).
- Artifact Quest Cards: Usually cost 2 books and grant an ability usable with mana. For once-per-season abilities, place spent mana on the card until season end.
- Advanced Quest Cards: Usually cost 2 books and provide substantial end-game VP, often requiring specific conditions.
- Drawing Quests: When instructed to draw quest cards, you may draw from any of the three piles (basic, artifact, advanced). There is no hand limit. Reshuffle discards if a deck runs out.

Building Abilities
- Market Hall: Gain 4 victory points at game end per building in town that is adjacent to this building that produces any 1 of the 4 goods (not hearts or coins).
- Town Hall: Gain 2 victory points at game end per bed icon in a building in town that is adjacent to this building.
- Production Buildings: Produce at the end of each season the good/hearts specified in the light gray box at bottom left.
- Crystal Lab: Gain 3 victory points at game end per crystal produced in the final production phase (from buildings and villagers, before selling).
- Bottled Demons Lab: Gain 3 victory points at game end per bottled demon produced in the final production phase (from buildings and villagers, before selling).
- Workshop: Gain 2 victory points at game end per tool produced in the final production phase (from buildings and villagers, before selling).
- Construction HQ: Pay 1 fewer coin each time you build another building.
- Garden House: Collect 2 coins during production except during the final production phase.
- Library: Gain 3 victory points at game end per building in town adjacent to this building that has a book icon (do not count the Library itself).
- School: Gives you 1 book immediately when built; no other abilities.
- Snail Ranch: Each time you take a hero action, you have +1 movement.
- Inn: Has 2 extra beds (houses up to 3 villagers). At any time, you may move a villager in housing on this row to any other row with available housing.

Location Descriptions
Note: If you cannot pay the specified cost, you cannot gain the rewards. Each location action can only be completed once per turn.
Standard Locations
- Tower of Miners: Draw 2 order tokens and keep 1 (place the other at the bottom of the pile). Place it face up near your town board. Complete it at any later time (except final production phase).
- Hermit’s Hut: Swap the location of two buildings in your unbuilt building grid. Gain 1 shell and 4 hearts.
- Crystal Meteorite: Roll a die and lose that many hearts. Gain 1 crystal and 1 experience.
- Nomad Camp: Lose 1 heart, pay 1 book, and gain 1 villager from the season board (refill 6 if empty).
- Ublo Tower: Lose 1 heart to gain 1 tool.
- The Monument: Gain 4 hearts and 1 coin. Take the first player token.
- Scholars’ Tower: Pay 3 coins to gain 1 book.
- Undergarden: Pay 2 experience, draw 2 quest cards (keep 1), and gain 6 coins.
- Forest of Faces: Lose 5 hearts to gain 5 coins.
- Snail Caves: Lose 2 hearts to gain 1 experience and 2 coins.
- Flying Casino: Pay 1 coin. Draw 3 quest cards (keep 2). Gain 5 hearts.
- City of Spirits: Lose 2 hearts. Gain 1 bottled demon and 1 coin.
- Istreka: Buy 1 gear token from season board by paying its coin cost (refill slot). Also draw 2 quest cards (keep 1).
- Wailing Cavern: Lose 8 hearts and pay 1 mana to gain 1 villager from the season board.
Underground Location Changes
- Tower of Miners: Buy 1 gear token from the season board (pay coin cost, refill slot). Gain 1 shell.
- Hermit’s Hut: Gain 1 experience. Draw 3 quest cards (keep 1).
- The Monument: Gain 4 hearts and take the first player token. Swap two buildings in your unbuilt grid.
- Undergarden: Pay 1 experience to gain 2 hearts and 4 coins.
- Forest of Faces: Pay 1 coin, 1 mana, and lose 5 hearts to gain 1 villager from the season board.
- Flying Casino: Lose 5 hearts to gain 5 coins.
- Snail Caves: Pay 2 experience. Draw 2 quest cards (keep 1). Gain 6 coins.
- Istreka: Gain 1 heart. Draw 2 order tokens and keep 1.
- Wailing Caverns: Lose 8 hearts. Draw 3 quest cards (keep 2). Gain 1 shell.
Gear, Artifact, and Hero Abilities
Gear Descriptions
Note: You can purchase multiple copies of the same gear.
- Arzian Helm: Any time you roll a 4 during combat, gain 1 heart (choose when during the combat round to gain it).
- Azure Gloves: If both Azure Gloves and Azure Coat are equipped, gain +1 max mana (replenishes at end of each season).
- Shield Crystal: When equipped, gain +1 max mana (replenishes at end of each season).
- Vampire Knife: Gain 1 mana immediately (if you have an empty mana slot), usable on the same attack roll.
Hero Ability Descriptions
- Basic Abilities (on hero boards):
- Marklun (Haste): Pay 1 mana to move 2 extra spaces during a hero action (can be used multiple times).
- Halia (Strange Luck): Pay 1 mana to reroll a die (can be used multiple times).
- Namal (Armored): Pay 1 mana to ignore all enemies for 1 turn (move through without taking damage).
- Zeik (Farsight): Once per season, pay 1 mana to draw a quest card from any deck.
- Purchasable Hero Abilities:
- Toughness (Zeik): Take 1 fewer damage each time you search or make a choice in a story encounter.
- Self-Repair (Namal): Spend 1 tool to gain 7 hearts (outside combat only, once per season).
- Leadership (Halia): Pay 1 fewer coin whenever recruiting a new specialist from the row.
- Research (Marklun): Pay 3 mana to gain 1 book.
- Siphon Power (Marklun): Pay 1 bottled demon to gain 4 mana.
- Gravity Orb (Marklun): Spend 1 mana to roll a die and add the result to combat damage.
Artifact Abilities
- Demon Trap: Pay 1 mana at any time (except final production) to gain 1 bottled demon (once per season).
- Warp Stone: When taking a hero action, pay 1 mana to move +4 spaces.
- Metal Hound: Pay 3 mana on your turn to pick up any unclaimed search token on the game board (once per season).
- Life Candle: Pay 1 mana at any time (except in combat) to gain 6 hearts (once per season).
- Magic Chest: Pay 1 mana at any time (except final production) to gain 4 coins (once per season).
- Lightning Fungus: Pay 1 mana to take 1 hero action with a movement of 3 (takes 1 turn, once per season).
Search Tokens Reference
Keep each of these search tokens face down near your town board after gaining the reward. Each provides 1 coin during each production phase (including final production), unless specified otherwise.

Token Rewards Breakdown
- Abandoned Camp (4 coins): Gain 4 coins and draw 1 quest card.
- Abandoned Camp (5 coins): Gain 5 coins.
- Hidden Cave: Gain 1 crystal and 1 experience.
- High-tech Ruins (Demon + Shell): Gain 1 bottled demon and 1 shell.
- High-tech Ruins (Demon + Card): Gain 1 bottled demon and draw 1 quest card.
- Lost Knowledge: Gain 1 book.
- Crashed Vehicle: Gain 2 tools.
- Old Teacher: Gain 2 experience.
- Ruined Shelter: Immediately gain 1 gear token from the season board at -6 coins off normal cost.
- Lost Villager: Gain 1 villager. Discard this search token! (Does not grant income).
In story mode, you play through a campaign consisting of 6 game sessions, called chapters (chapters 1 through 6). It is recommended to play at least one standard game before trying story mode.
Setup Changes
- Retrieve the booklet for the current chapter and follow any special setup rules.
- Use the side of the season board with the reputation track at the bottom. Start reputation at 0.
Rule Changes & Reading Stories
Each hero has their own stories in the storybook for each chapter. When you search, do not look at token rewards; instead, check the board space’s letter (e.g., Zeik A, Halia D) or location name, and have the player to your left read the corresponding passage.
- Reading: The reader reads the narrative text and the choices (title, skill level, or combat), but NOT the reaction text or rewards. (Solo players may read rewards).
- Resolving Choices: Select a choice. Roll a die and choose how many hearts to lose (each lost heart adds +1 to your roll). If your total meets or exceeds the required skill, you succeed and gain the rewards. If your total is 2 or more above the required skill, gain the listed BONUS (+2) reward.
- Combat in Stories: Fought just like standard enemy combat.
- Failure: If you do not meet the requirement or reach 0 hearts, you fail; your turn ends, and the search token remains on the board.
- Claiming Tokens: After completing the story, place the search token face down near your town board for +1 coin income in production.
Reputation & Mission Tokens
- Reputation Track: Gain/loss of reputation must be recorded immediately. At game end, positive reputation awards bonus VP (as marked on or to the left of the space), while negative reputation deducts VP. The player(s) with the most reputation gain an extra 3 VP.
- Mission Tokens: When directed by a story, place your hero’s mission token at the specified location. Only you may perform search actions there to continue the quest line. When completed, take a random search token from the box as income.
Campaign Sheet Scoring
Record VP and reputation after each chapter. After 6 chapters, sum all points. The player with the highest cumulative reputation earns +25 bonus VP. Highest overall score wins the campaign.
Catch-up mechanism: In subsequent chapters, the lowest-scoring player from the previous chapter starts with +4 coins and +1 reputation. The highest-scoring player chooses any space on the board to start.

In solo mode, you play against an automated bot. The bot performs actions but does not score VP. You win if you achieve 100 or more victory points, then try to beat your personal high score.
Setup Changes
- Shuffle the 9 solo cards into a face-down deck.
- Give the bot an unused hero board with 2 starting specialists. The bot does not use hearts, mana, a town board, buildings, resources, experience, coins, ability tokens, quest cards, or a standee.
Rules of Play
- Basic Bot Rules: The bot never scores VP or collects goods/coins/books/experience. Villagers and search tokens it gains are simply placed on its hero board. It never reads stories. Bot combat always succeeds automatically. Used specialists are simply flipped face down.
- Turn Sequence: You always take the first turn of each season. After each of your turns, draw and resolve the top solo card for the bot. You then take your next turn.
- Season End: When you pass, the season ends immediately; the bot takes no further actions.
- Production: The bot produces nothing. Reshuffle all 9 solo cards and refresh the bot’s specialists face up.
- Bot’s Specialists: You may pay to use the bot’s specialist. The bot does not collect tax.
- Bot Villager Priority: Crystal > Bottled Demon > Tool > Shell.

Solo Card Actions
- SEARCH: Bot claims the search token nearest to you (you break ties).
- RECRUIT SPECIALIST: Bot recruits the leftmost specialist from the display. You choose which specialist to discard if slots are full. Refill row.
- ATTACK (first time): If the bot hasn’t attacked this season, it defeats the lowest available enemy, claiming villagers equal to the reward. (Ignore and redraw if it already attacked).
- EXHAUST SPECIALIST: The bot exhausts the leftmost specialist on its board or your board (as specified on card; pays you tax if it uses yours).
- ROLL A DIE: Bot claims an order token or quest cards depending on die roll.
Underground Board in Standard Mode

Use the opposite sides of the game board and town boards. Replace standard enemies of levels 2, 5, and 7 with their underground counterparts (distinguished by cave art on backs). Use underground location actions on page 20.
Reroll Variant
For more luck mitigation: at any time, a player may spend a good (shell, tool, bottled demon, or crystal) to reroll one of their die rolls. Multiple goods may be spent to reroll multiple times.
Quick Reference: Icons and Reminders
Season Turn Structure
Take one action at a time clockwise until all players pass:
- Specialist Action: Pay specialist, Recruit specialist, or Rest.
- Hero Action: Move → Play quest card (optional) → Location / Combat / Search.
- Pass: Done for the season.
Production Phase Sequence
- Collect produced goods and 1 coin per search token (only housed villagers produce).
- Refresh spent mana.
- Refresh hero action tokens (slide left).
- Flip specialists face up.
- Advance season track marker 1 space forward.
- Begin next season (or final scoring after season 6).
Anytime Actions
- Sell goods for coins according to market chart.
- Place gained villagers into available housing.
- Complete an order token.
- Pay 2 experience to refill villager display early.
- Spend experience to purchase hero abilities.
Credits
- Game Design, Illustrations, Graphic Design & Rule Book: Ryan Laukat
- Editing & Development: Ryan Laukat, Malorie Laukat
- Writing: Ryan Laukat, Malorie Laukat, Brenna Asplund
- Proofreading: Malorie Laukat, Brenna Asplund, Diana Parkin
- Copyright 2021 Red Raven Games
Introduction & Components
1-4 Players, 90-180 Minutes, Ages 14+
Game Design, Illustrations, and Graphic Design: Ryan Laukat
Far to the south of the Last Ruin lies a cliffside village called the Monument. For generations, it protected an ancient shrine until the day a crystal meteorite descended. The meteor’s denizens slowly crept out into the world—bizarre monstrosities from nightmare, attacking all in their path. As they spread across the land, there was no intelligent malice nor grand invasion strategy; the creatures acted like a fungus—expanding into new territory sporadically.
After many fruitless attempts to expel the monsters, the people of the Monument fled as their village crumbled, exiled to distant lands, resigned to a nomadic existence.
Twenty years later, there are rumors that the bizarre monsters are growing weak. They’re slower, some undergoing a gradual petrification until they crumble to dust. Is it something in the air? Are they dying of old age? Do they suffer from a strange disease? No one is certain, but as the news spreads, various factions set their eyes on the vacant, ruined village of the Monument. The original villagers, now refugees, are desperate to return and rebuild. But they must do it quickly, before someone else claims their home. This is their chance. It’s now or never.
In Now or Never, you and up to three friends compete to best rebuild your ancestral village and guide the rest of the villagers on their journey home. Although the creatures of the meteorite have lost much of their strength, many of them remain, and you must fight them off to protect traveling villagers. Now or Never is the third game in the Arzium storybook series that includes Above and Below and Near and Far.
Now or Never is a competitive strategy game that allows you to:
- Choose one of four asymmetrical characters to play.
- Rebuild the village so that returning villagers have a place to live. You must carefully choose what and where to build to maintain an advantage, earning the biggest rewards for long-term planning.
- Interact with other players by hiring their specialists to perform special actions.
- Combat dangerous creatures to rescue villagers.
- Explore a fantasy landscape filled with bizarre places, technology, and people.
Now or Never includes two modes of play: standard and story. When playing in story mode, you read from a storybook when you explore, making choices and learning more about the characters and the world. Each character has their own set of stories, unique to the locations they explore and diverse in plot, perspective, and motive. You must choose what direction your own story will take.
Journey to the Monument and help rebuild your ancient home!
Components List
Base Components
- 1 Game Board (double-sided)
- 4 Town Boards (double-sided)
- 1 Season Board (double-sided)
- 4 Hero Boards
- 4 Book Markers
- 4 Shell Markers
- 4 Tool Markers
- 4 Bottled Demon Markers
- 4 Crystal Markers
- 4 Heart Markers
- 1 Season Marker
- 20 Mana Tokens
- 15 Hero Action Tokens
- 4 4-sided dice
- Coins (42 ones, 12 fives, 12 tens)
- 15 Experience Tokens
- 34 Enemies (4 each of enemies 1-8; 2 of enemy 9)
- Building Tiles (4 identical sets of 20)
- 1 First Player Token
Not Pictured: Rulebook, Story Books (6), Solo Cards (9), Player Aid Cards (8), Plastic Standees (8 — use these for the hero cutouts, there are 4 extra).
- 4 Hero Cutouts
- Hero Abilities (4 sets of 6)
- 12 Blue Banner Gear
- 9 Red Banner Gear
- 3 Random Location Tiles
- 18 Search Tokens
- 9 Order Tokens
- 8 Starting Specialists (sunset icon on back)
- 14 Specialists
- 60 Villagers
- Quest Cards: 43 Basic, 13 Artifact, 17 Advanced
Story Mode & Underground Map Components
The components below are used only in story mode or when playing with the underground map. Place them in a separate bag and only use them when the game instructions tell you to retrieve them.
- 1 Story Mode Specialist
- 1 Giant Boar
- 3 Rifts
- 11 Glogo Villagers
- 1 Lab Monster Villager
- Underground Enemies (4 each of enemies 2, 5, and 7)
- 2 Gigaslug Enemies
- Drill Tank Enemies (4 each of enemies 3 and 4)
- 1 Mystic Healer
- 2 Story Mode Items
- Tempest: Ship and Token
- 1 Guild Tank
- Hero Mission Tokens / Reputation Markers (2 per hero)
Setup
These instructions tell you how to set up the standard game. If you want to play story mode (pg 22) OR standard mode with the underground map (pg 27), follow the additional setup instructions listed in those sections. Solo play rules are on pg 24-25.
Board Setup
- Place the game board in the center of the table. Shuffle the 3 random location tiles and place them on the board, one on each of the spaces with the small scroll symbol in the top left corner. Shuffle the order tokens and place them in a face-down stack on the top left space on the map (Tower of Miners). For all board setup, be sure not to cover up any mountain symbols on the board.
- Place enemy tokens on the 9 spaces on the board with enemy symbols. Match the enemy level at the top of the enemy token with the number on the board. Place 1 enemy token per player for each level. For level 9, place 2 enemy tokens if playing with 3-4 players, and only 1 token if playing with 1-2 players. Return the unused enemy tokens to the box.
Example: If playing with 2 players, you need 2 enemy tokens per level, but only 1 level 9 token. - Shuffle the search tokens and place one face down on each space with a letter in the bottom left corner: A-N. (The faces have variable rewards. The backs are identical.) Return the unused search tokens to the box.
- Place the season board next to the game board. Place the side with the reputation track (flame symbols) face down. (The reputation track is for story mode.) Shuffle the villager tokens in a pile, face down. Draw 6 and place them face up in the 6 slots on the season board.
- Shuffle the red gear tokens and the blue gear tokens in their own piles, face down. Place the piles on the season board, then draw 3 red gear tokens and 3 blue gear tokens and place them face up in the slots below.
- Place the season marker on space 1 of the season track.
- Organize the quest cards into 3 piles according to their backs: basic, artifact, and advanced. Shuffle each pile and place them face down near the board.
- Separate the starting specialist tiles (indicated by the sunset icon on the backs of the starting specialists). Give 1 random starting builder (building icon) and 1 random starting healer (heart icon) to each player. Place the remaining unused starting specialists in the game box. Shuffle the remaining specialists (no sunset icon) and place the pile, face down, to the side of the game board. Draw the top 4 tiles and place them face up in a row nearby.
Player Area Setup
- Each player chooses a hero board and sets up their individual play area by following these instructions:
- Place your 2 starting specialists face up on 2 available slots at the top of your hero board.
- Place a heart marker on the space farthest to the right on your heart track, indicating full health.
- Place 1 mana token on each mana symbol to the right of your heart track.
- Take 3 hero action tokens and place them on the faded arrow symbols on your hero board.
- Take your 6 matching hero ability tokens (3 red, 3 blue) and place them below your hero board.
- Take 17 coins from the supply.
- Place 1 die near your player board.
- Take a town board and place it to the side of your hero board (with the above ground side face up).
- There are 4 identical sets of building tiles in the game (differentiated by the color on the back). Take 1 set of tiles, shuffle them face down, and place them face up in a 5×4 grid to the side of your town board. Once placed in this grid, the tiles cannot be rearranged unless you take specific actions in the game.
- Draw 6 basic quest cards, 1 artifact quest card, and 1 advanced quest card. Choose 4 cards to keep, and discard the others in their own discard piles to the side of each draw pile.
- Place your hero cutout in a standee, and place it on the Monument space on the game board.
- Take the following markers and place them on the 0 space on the resource track at the bottom of your town board: book, shell, tool, bottled demon, and crystal.
- Place the coins and experience tokens to the side of the board. This is called the “supply.” These components are not limited. If you ever run out, use a suitable replacement. All other game components are limited by amount.
- First Player: The player who most recently won a game takes the first player token. Play moves in a clockwise direction. The 2nd and 3rd players start with 1 extra coin, and the 4th player starts with 2 extra coins. Return any other unused components to the box.
Player Boards & Board Basics
Before you learn the game rules (starting on page 8), it is helpful to understand a few symbols on the town and hero boards.
Town Board Basics
Town Board Features
- Building Grid: Each town has 4 rows, each with 4 building spaces. Gain victory points listed on the left if you have 4 buildings in that row at the end of the game.
- Starting Building Row: Marked by a star icon. Your first building must be placed in this row.
- Building Costs / Bonuses on Spaces:
- Building on a space with a resource icon (such as a shell) grants 1 of that resource immediately.
- Building on a space with a cost icon costs 2 extra coins.
- When you build on the tool space, gain 1 tool.
- Housing Area: The rightmost column is the housing area. Each space in the area corresponds to its row for housing. When you gain villagers, you can place them in the space if you have enough housing in the same row. The victory point symbol in each box is rewarded at the end of the game if you have at least 1 of each type of villager in the row. Villagers are NOT placed on building tiles.
- Resource Track: At the bottom of your town board is the resource track. Use the 5 resource markers to keep track of how many of each resource you own (shells, tools, bottled demons, crystals, and books). Whenever you gain, produce, lose, or sell a resource, move the marker up or down. If you ever have more than 9 of a good, place a coin token on top of the marker and start again on 0 on the track (the coin represents +10 of that good). Each of these resources except books are also known as “goods” and can be sold at any time for coins (described on page 15).
Hero Board Basics
Hero Board Features
- Specialist Slots: Place your specialists in the 4 slots at the top. You can only have 4 at once. If you ever gain a specialist but all slots are filled, you must discard an old specialist to make room for the new one.
- Hero Action Tokens: You have 3 hero action tokens. When in their initial position on the left, they are available. When you take a hero action, move a token so that it covers the arrow with the number to the right. Once all 3 arrows have been covered, you cannot take another hero action until the next season.
- Red Ability/Gear Slots: You have 4 red ability/gear slots available. When you gain a red ability or gear, place it in one of these slots, covering the previous ability. If you have no room, discard a previously placed token to make room.
- Blue Ability/Gear Slots: You have 3 blue ability/gear slots available. When you gain a blue ability or gear, place it in one of these slots. If you have no room, discard a previously placed token to make room.
- Basic Ability: Each hero has a basic ability listed on their board.
- Heart Track: Keep track of your hearts on this track. When you reach 0 hearts, you cannot take any more hero actions until you have at least 1 heart. You may never have more hearts than the maximum number on your heart track.
- Mana Slots: These slots hold your mana tokens. When you spend mana, remove the token from your board until the next season. You can never have more mana than slots unless a card/gear/ability specifically states that you can.
How to Play: Overview & Specialist Actions
There are two ways to play Now or Never:
- Standard Mode: Compete to rebuild the Monument, defeat enemies, and find lost villagers. The remaining pages in this rulebook (except for the “Story Mode” section) teach how to play standard mode. Game duration: 45 minutes per player.
- Story Mode: Play through a story campaign consisting of six game sessions, called chapters. Players read from a storybook instead of uncovering search tokens. Each chapter also has some modified setup rules, listed at the start of each chapter. This mode takes slightly longer to play. For story mode rules, see page 22.
Game Structure
Now or Never is played in rounds, called seasons. Each season, starting with the first player, players take turns in clockwise order performing one action each until all players pass. When all players have passed, players simultaneously perform the production phase. After this, a new season begins and play continues.
After six seasons, the game ends. Players perform the final production phase and score victory points. The player with the most points wins.
Basic Turn
On your turn, choose one of two actions:
- Specialist Action:
- Pay a specialist to perform that specialist’s action, or
- Recruit a new specialist and perform that specialist’s action, or
- Rest a specialist.
- or Hero Action:
- First, you must move.
- Then you may play a quest card (optional).
- Then choose one of the following:
- Visit a Location, or
- Fight an Enemy, or
- Search.
Specialist Action Options
SPECIALIST ACTION: Pay a specialist to perform that specialist’s action. You may choose one of the following three options:
- Pay your own specialist: You may pay any face-up specialist on your own hero board. Pay the large (upper) coin amount to the supply. Then perform the specialist’s action.
- Pay another player’s specialist: You may pay any face-up specialist on another player’s hero board. You pay the large (upper) coin amount to the supply. The other player collects the small (lower) coin amount (called the “tax”) from the supply. Then you perform the specialist’s action.
- Recruit a new specialist: Recruit from the row to the side of the board. Pay DOUBLE the large (upper) coin amount to the supply. (Always pay double the upper coin amount when recruiting. Do not pay or collect the tax when recruiting.) Take the specialist and place them in one of the 4 slots at the top of your hero board. If there is no slot available, discard one of your specialists to make room (put the old specialist in the game box). You may replace either a used (face-down) specialist, or an unused (face-up) specialist. Then immediately perform the new specialist’s action. Draw a new specialist from the pile and place it in the row so that there are 4 available specialists at all times.
As soon as you pay any specialist (yours or another player’s) and perform their action, flip the token face down. That specialist cannot be used again until the next season.
You may pay a specialist and perform no action, or only part of the specialist’s action. You still flip the token face down in this case.
Specialist Actions Detail
A) BUILD
You may place 1 building tile on your town board. Choose 1 tile from your unbuilt building grid and place it on the town board, according to the following rules:
- If this is your first building in the game, you must choose a building from the outer border of your grid. On future building actions, you may only choose buildings adjacent to empty spaces in the grid. (The outside border of the grid doesn’t count.)
- You must place your first building in one of the 4 building spaces on the starting building row of your town board (the row with the star). After this, you must place new buildings adjacent to any previously placed building in the town.
- Pay the coin cost of the building to the supply. (The coin cost is listed in the bottom right corner of each building tile.) Buildings only cost coins, not resources or books.
- If you place a building on a town space with a resource (such as a shell), gain 1 of that resource immediately.
- If you place a building on a space with a coin/build cost icon, you must pay the indicated coin cost to build there.
- If the building you place has a book and arrow icon on the tile, you immediately gain 1 book (only when you build it). This is not a cost.
- Some buildings give a bonus when built (see the building ability descriptions on page 19).
Additional Build Bonuses on Specialists: If the build icon has a “+hearts” icon next to it, gain the indicated number of hearts after you build. If there is an experience icon next to it, gain 1 experience after you build. If there is a resource icon next to it, gain 1 of that resource.
B) HEAL
Move your heart marker on your hero’s heart track to the furthest space to the right, indicating full health. If there is a “+mana” icon, restore the indicated number of mana (without exceeding your maximum mana slots). If there is a resource icon next to it, gain 1 of that resource.
C) GAIN EXPERIENCE
Gain 2 experience tokens and any listed bonuses (such as a resource).
D) BUY GEAR
You may immediately purchase 1 gear token from the season board. Pay the coin cost shown on the gear token, place the new gear on a matching red or blue slot on your hero board, and draw from the appropriate pile to refill the empty slot on the season board. If you do not have a matching open slot on your hero board for the gear token, you must make room by putting an old token in the game box. When placing red gear, you cover up a basic ability on your hero board.
E) REST
Instead of paying a specialist, you may simply flip the specialist face down and gain either 2 hearts or 1 coin (as shown on the bottom right of each specialist). You may only rest your own specialists, not those of other players.
How to Play: Hero Actions & Combat
You may only perform a hero action if you have at least 1 heart and you have an unused hero action token on your hero board. When you take a hero action, follow these 3 steps in order:
- Move
- Play a Quest Card (optional)
- Take an Action on the Board (Choose one: Visit a Location, Fight an Enemy, or Search)
1. Move
Slide one of your available hero action tokens so that it covers the hero action slot to the right. Move your hero on the game board according to the following rules:
- You must move to a new space. (You cannot stay put and take an action on the same space.)
- You may move a number of spaces up to the number in the blue arrow that you cover with a hero action token, plus any bonuses from gear, buildings, etc.
- To move farther, lose 1 heart per extra space. (You can move as many extra spaces as you want, as long as you have enough hearts to pay for it.)
- You may stop moving at any time.
- You may not move diagonally.
- When you enter a space with a mountain icon, you lose 1 heart.
- If you enter a space with an enemy and choose not to fight it, you lose 1 heart. You may continue moving if you choose not to fight.
2. Play a Quest Card (Optional)
When you decide to stop moving, you may play 1 quest card (explained on page 18). To play a quest card, you must have stopped on its matching location.
3. Take an Action on the Board
A) Visit a Location
Locations are indicated by a name on a scroll with an action beneath the scroll. When you visit a location, you may perform the action. Generally, you must pay something and/or lose hearts to gain something else. Each location action can only be performed once per turn. (Refer to page 20 for a detailed description of each location action.)
B) Fight an Enemy
If you stop on a location with an enemy, you may combat the enemy by following these steps:
- Roll Combat: Roll a die. Check the result on your red combat abilities. Each hero starts with 4 basic combat abilities, one for each number on a 4-sided die. Deal any damage listed on the ability you rolled. The enemy attacks you simultaneously, and you lose hearts equal to the enemy’s attack damage (minus any defense that you have, either from blue abilities/gear or from the red combat ability you rolled). Only the red ability matching your die roll applies to that round of combat.
- Determine Outcome:
- If you’ve dealt cumulative damage equal to the enemy’s health, the enemy is defeated. Gain the rewards (white symbols & resources) on the enemy token and discard the token (leaving the rest of the stack below).
- If you haven’t defeated the enemy yet, you must either start a new combat round (roll to attack again, tracking running total damage) or retreat.
- Running Out of Hearts: If you run out of hearts at any time during the attack, even if you simultaneously have dealt enough damage to defeat the enemy, you lose the combat and your turn ends immediately.
- Retreating: You may keep attacking until the enemy is defeated, you run out of hearts, or you retreat. To retreat, leave your hero on the same space; your turn ends immediately.
- Retreat / Defeat Penalty and Consolation: If you retreat or run out of hearts during combat, the enemy token remains and returns to full health. You do not receive the listed rewards, but you do gain 1 experience token.
Rescuing Villagers: If you defeat an enemy, you rescue villagers trapped by the enemy! Choose villagers from any available face-up tokens on the season board. If there are no villagers left, draw 6 new villagers from the supply and refill the empty slots on the season board. Only refill the row of villagers if there are no more villagers left in the row.
Red and Blue Abilities / Gear in Combat
- RED ABILITIES/GEAR: Some red abilities and gear deal extra damage or defense if you pay mana, and some require mana to gain any effects. A red combat ability can only be used when you roll its assigned number, and only once per attack round.
- BLUE ABILITIES/GEAR:增Unless otherwise stated, a blue ability that costs mana can be activated at any time on your turn, and you may activate it multiple times (by paying the mana cost each time). Defensive blue gear (without mana cost) reduces damage taken during each enemy attack round in combat, but does not apply outside of combat. Defense from gear stacks together.
C) Search
When on a space with an unclaimed search token, you may roll a die and lose hearts equal to the result. If you reach 0 hearts, your turn ends and you do not gain the search token.
After rolling, take the search token and gain the reward listed on the opposite side. After this, keep the token face down near your town board. It provides 1 coin during each production phase for the rest of the game, including the final production phase. (Some search tokens instruct you to discard them; do not keep these as income. See page 26.)
Passing and Running Out of Hearts
PASS
If you cannot or do not wish to take any more actions this season, you pass. Once you pass, you cannot take any more actions until the next season. Play continues until all players pass. Then the production phase begins.
RUNNING OUT OF HEARTS
If you ever reach 0 hearts during a hero action, your turn immediately ends. You cannot take another hero action until you have at least 1 heart.
- If this happens when visiting a location, you do not gain any rewards of the action.
- If this happens during combat, combat ends and the enemy returns to full health.
- If this happens when picking up a search token, you must leave the search token on the board.
Anytime Actions & Production Phase
Anytime Actions
You may take the following actions at any time, even after you have passed or when it is not your turn. You can even perform these actions during the production phase.
- Sell goods for coins: The season board lists combinations of goods and how many coins you gain for selling them. Reduce each good you sell on your resource track. (e.g., 1 shell = 1 coin; 3 shells together = 5 coins; 1 shell, 1 tool, 1 bottled demon, and 1 crystal = 12 coins).
- Place one of your villagers in housing: Place a villager in the housing area on the right side of your town board. You must choose one of the four rows, and you must have enough buildings in that row to hold the villager. Each building allows you to place 1 villager in that row’s housing space, and each building with a bed icon allows 1 additional villager. Once a villager is placed in housing, they cannot be moved to a different row or swapped out. Villagers not yet housed may be kept below your town board.
- Complete one of your order tokens: Pay the specified goods to gain the listed coin reward, then place the token face down near your town board. Each order can only be completed once. Gain 2 victory points per completed order at end of game. Orders cannot be completed in the final production phase!
- Refill villagers early: Pay 2 experience to refill all empty villager slots on the season board early. You can do this at any time, even in the middle of gaining 2 or more villagers.
- Purchase one of your hero abilities: Pay the specified experience cost and place it on your hero board (in a matching red or blue slot). You must own a level 1 ability to purchase a level 2 in the same color, and a level 2 before purchasing a level 3. Once you own a level 1 ability, you can purchase any number of level 2 abilities in that color.
Production Phase
When all players have passed, follow these steps in order (if it is the final round, see “End of the Game”):
- Collect Produced Goods: Add totals to your resource track. Each of your villagers in housing produces a specified good (unhoused villagers do not produce). Some buildings also produce goods or bonuses (shown in the gray box at bottom left). Also, collect 1 coin per search token you own.
- Refresh Mana: Return all spent mana to the empty mana slots on your hero board.
- Refresh Hero Action Tokens: Return all 3 hero action tokens to their starting spaces (to the left of the arrows).
- Refresh Specialists: Flip all of your specialists face up.
- Advance Season Marker: Move the season marker 1 space forward on the track.
- Begin Next Season: The player with the first player token takes the first turn.
Important Reminders
- Players DO NOT refresh their hearts during production.
- Only villagers in housing produce goods.
- Specialists DO NOT produce goods in the production phase.
- After 6 rounds are completed, play the final production phase and proceed to final scoring.
End of Game & Scoring
During the sixth and final production phase, follow these steps:
- Discard Resources & Unfinished Quests: Discard all of your coins and set all resource markers to 0 (except books). Discard uncompleted quest cards and incomplete order tokens.
- Final Production & Sell Goods: Produce goods and coins from search tokens as normal. Then sell all of your goods at the market to gain as many coins as possible.
- Count Final Victory Points:
- Each coin is worth 1 victory point.
- Full Building Rows: Gain victory points for having 4 buildings in the 2nd, 3rd, and 4th row from the top: 6, 8, and 8 VP, respectively.
- Full Housing Diversity: Gain victory points for each housing row containing villagers that produce at least 1 of each of the 4 goods (shell, tool, bottled demon, crystal): 5, 5, 6, and 7 VP, respectively.
- Building bonuses (see page 19).
- Completed quest cards victory points.
- Completed order tokens (2 VP each; no new orders can be completed during the final production phase).
Winning the Game
The player with the most victory points wins! In case of a tie, the player with the most remaining experience and books wins. If still tied, the player with the most remaining hearts wins.
Reference: Quests & Buildings
Quest Cards
After moving your hero, you may play 1 quest card from your hand that matches the location of the space where you stopped. You play the card before visiting the location, entering combat, or picking up a search token.
- Playing Requirements: Follow the card instructions. Pay the cost (resource, coins, experience) shown in the top right corner (or described in gray text if an asterisk is shown). You must be at the location specified in white text on the red background banner.
- Tucking: After playing, tuck the card beneath the bottom of your town board so that only the bottom half is visible (showing the VP icon and ONGOING or AT GAME END effects).
- Artifact Quest Cards: Usually cost 2 books and grant an ability usable with mana. For once-per-season abilities, place spent mana on the card until season end.
- Advanced Quest Cards: Usually cost 2 books and provide substantial end-game VP, often requiring specific conditions.
- Drawing Quests: When instructed to draw quest cards, you may draw from any of the three piles (basic, artifact, advanced). There is no hand limit. Reshuffle discards if a deck runs out.
Building Abilities
- Market Hall: Gain 4 victory points at game end per building in town that is adjacent to this building that produces any 1 of the 4 goods (not hearts or coins).
- Town Hall: Gain 2 victory points at game end per bed icon in a building in town that is adjacent to this building.
- Production Buildings: Produce at the end of each season the good/hearts specified in the light gray box at bottom left.
- Crystal Lab: Gain 3 victory points at game end per crystal produced in the final production phase (from buildings and villagers, before selling).
- Bottled Demons Lab: Gain 3 victory points at game end per bottled demon produced in the final production phase (from buildings and villagers, before selling).
- Workshop: Gain 2 victory points at game end per tool produced in the final production phase (from buildings and villagers, before selling).
- Construction HQ: Pay 1 fewer coin each time you build another building.
- Garden House: Collect 2 coins during production except during the final production phase.
- Library: Gain 3 victory points at game end per building in town adjacent to this building that has a book icon (do not count the Library itself).
- School: Gives you 1 book immediately when built; no other abilities.
- Snail Ranch: Each time you take a hero action, you have +1 movement.
- Inn: Has 2 extra beds (houses up to 3 villagers). At any time, you may move a villager in housing on this row to any other row with available housing.
Reference: Locations, Gear, Abilities & Search Tokens
Location Descriptions
Note: If you cannot pay the specified cost, you cannot gain the rewards. Each location action can only be completed once per turn.
Standard Locations
- Tower of Miners: Draw 2 order tokens and keep 1 (place the other at the bottom of the pile). Place it face up near your town board. Complete it at any later time (except final production phase).
- Hermit’s Hut: Swap the location of two buildings in your unbuilt building grid. Gain 1 shell and 4 hearts.
- Crystal Meteorite: Roll a die and lose that many hearts. Gain 1 crystal and 1 experience.
- Nomad Camp: Lose 1 heart, pay 1 book, and gain 1 villager from the season board (refill 6 if empty).
- Ublo Tower: Lose 1 heart to gain 1 tool.
- The Monument: Gain 4 hearts and 1 coin. Take the first player token.
- Scholars’ Tower: Pay 3 coins to gain 1 book.
- Undergarden: Pay 2 experience, draw 2 quest cards (keep 1), and gain 6 coins.
- Forest of Faces: Lose 5 hearts to gain 5 coins.
- Snail Caves: Lose 2 hearts to gain 1 experience and 2 coins.
- Flying Casino: Pay 1 coin. Draw 3 quest cards (keep 2). Gain 5 hearts.
- City of Spirits: Lose 2 hearts. Gain 1 bottled demon and 1 coin.
- Istreka: Buy 1 gear token from season board by paying its coin cost (refill slot). Also draw 2 quest cards (keep 1).
- Wailing Cavern: Lose 8 hearts and pay 1 mana to gain 1 villager from the season board.
Underground Location Changes
- Tower of Miners: Buy 1 gear token from the season board (pay coin cost, refill slot). Gain 1 shell.
- Hermit’s Hut: Gain 1 experience. Draw 3 quest cards (keep 1).
- The Monument: Gain 4 hearts and take the first player token. Swap two buildings in your unbuilt grid.
- Undergarden: Pay 1 experience to gain 2 hearts and 4 coins.
- Forest of Faces: Pay 1 coin, 1 mana, and lose 5 hearts to gain 1 villager from the season board.
- Flying Casino: Lose 5 hearts to gain 5 coins.
- Snail Caves: Pay 2 experience. Draw 2 quest cards (keep 1). Gain 6 coins.
- Istreka: Gain 1 heart. Draw 2 order tokens and keep 1.
- Wailing Caverns: Lose 8 hearts. Draw 3 quest cards (keep 2). Gain 1 shell.
Gear, Artifact, and Hero Abilities
Gear Descriptions
Note: You can purchase multiple copies of the same gear.
- Arzian Helm: Any time you roll a 4 during combat, gain 1 heart (choose when during the combat round to gain it).
- Azure Gloves: If both Azure Gloves and Azure Coat are equipped, gain +1 max mana (replenishes at end of each season).
- Shield Crystal: When equipped, gain +1 max mana (replenishes at end of each season).
- Vampire Knife: Gain 1 mana immediately (if you have an empty mana slot), usable on the same attack roll.
Hero Ability Descriptions
- Basic Abilities (on hero boards):
- Marklun (Haste): Pay 1 mana to move 2 extra spaces during a hero action (can be used multiple times).
- Halia (Strange Luck): Pay 1 mana to reroll a die (can be used multiple times).
- Namal (Armored): Pay 1 mana to ignore all enemies for 1 turn (move through without taking damage).
- Zeik (Farsight): Once per season, pay 1 mana to draw a quest card from any deck.
- Purchasable Hero Abilities:
- Toughness (Zeik): Take 1 fewer damage each time you search or make a choice in a story encounter.
- Self-Repair (Namal): Spend 1 tool to gain 7 hearts (outside combat only, once per season).
- Leadership (Halia): Pay 1 fewer coin whenever recruiting a new specialist from the row.
- Research (Marklun): Pay 3 mana to gain 1 book.
- Siphon Power (Marklun): Pay 1 bottled demon to gain 4 mana.
- Gravity Orb (Marklun): Spend 1 mana to roll a die and add the result to combat damage.
Artifact Abilities
- Demon Trap: Pay 1 mana at any time (except final production) to gain 1 bottled demon (once per season).
- Warp Stone: When taking a hero action, pay 1 mana to move +4 spaces.
- Metal Hound: Pay 3 mana on your turn to pick up any unclaimed search token on the game board (once per season).
- Life Candle: Pay 1 mana at any time (except in combat) to gain 6 hearts (once per season).
- Magic Chest: Pay 1 mana at any time (except final production) to gain 4 coins (once per season).
- Lightning Fungus: Pay 1 mana to take 1 hero action with a movement of 3 (takes 1 turn, once per season).
Search Tokens Reference
Keep each of these search tokens face down near your town board after gaining the reward. Each provides 1 coin during each production phase (including final production), unless specified otherwise.
Token Rewards Breakdown
- Abandoned Camp (4 coins): Gain 4 coins and draw 1 quest card.
- Abandoned Camp (5 coins): Gain 5 coins.
- Hidden Cave: Gain 1 crystal and 1 experience.
- High-tech Ruins (Demon + Shell): Gain 1 bottled demon and 1 shell.
- High-tech Ruins (Demon + Card): Gain 1 bottled demon and draw 1 quest card.
- Lost Knowledge: Gain 1 book.
- Crashed Vehicle: Gain 2 tools.
- Old Teacher: Gain 2 experience.
- Ruined Shelter: Immediately gain 1 gear token from the season board at -6 coins off normal cost.
- Lost Villager: Gain 1 villager. Discard this search token! (Does not grant income).
Story Mode
In story mode, you play through a campaign consisting of 6 game sessions, called chapters (chapters 1 through 6). It is recommended to play at least one standard game before trying story mode.
Setup Changes
- Retrieve the booklet for the current chapter and follow any special setup rules.
- Use the side of the season board with the reputation track at the bottom. Start reputation at 0.
Rule Changes & Reading Stories
Each hero has their own stories in the storybook for each chapter. When you search, do not look at token rewards; instead, check the board space’s letter (e.g., Zeik A, Halia D) or location name, and have the player to your left read the corresponding passage.
- Reading: The reader reads the narrative text and the choices (title, skill level, or combat), but NOT the reaction text or rewards. (Solo players may read rewards).
- Resolving Choices: Select a choice. Roll a die and choose how many hearts to lose (each lost heart adds +1 to your roll). If your total meets or exceeds the required skill, you succeed and gain the rewards. If your total is 2 or more above the required skill, gain the listed BONUS (+2) reward.
- Combat in Stories: Fought just like standard enemy combat.
- Failure: If you do not meet the requirement or reach 0 hearts, you fail; your turn ends, and the search token remains on the board.
- Claiming Tokens: After completing the story, place the search token face down near your town board for +1 coin income in production.
Reputation & Mission Tokens
- Reputation Track: Gain/loss of reputation must be recorded immediately. At game end, positive reputation awards bonus VP (as marked on or to the left of the space), while negative reputation deducts VP. The player(s) with the most reputation gain an extra 3 VP.
- Mission Tokens: When directed by a story, place your hero’s mission token at the specified location. Only you may perform search actions there to continue the quest line. When completed, take a random search token from the box as income.
Campaign Sheet Scoring
Record VP and reputation after each chapter. After 6 chapters, sum all points. The player with the highest cumulative reputation earns +25 bonus VP. Highest overall score wins the campaign.
Catch-up mechanism: In subsequent chapters, the lowest-scoring player from the previous chapter starts with +4 coins and +1 reputation. The highest-scoring player chooses any space on the board to start.
Solo Play Rules
In solo mode, you play against an automated bot. The bot performs actions but does not score VP. You win if you achieve 100 or more victory points, then try to beat your personal high score.
Setup Changes
- Shuffle the 9 solo cards into a face-down deck.
- Give the bot an unused hero board with 2 starting specialists. The bot does not use hearts, mana, a town board, buildings, resources, experience, coins, ability tokens, quest cards, or a standee.
Rules of Play
- Basic Bot Rules: The bot never scores VP or collects goods/coins/books/experience. Villagers and search tokens it gains are simply placed on its hero board. It never reads stories. Bot combat always succeeds automatically. Used specialists are simply flipped face down.
- Turn Sequence: You always take the first turn of each season. After each of your turns, draw and resolve the top solo card for the bot. You then take your next turn.
- Season End: When you pass, the season ends immediately; the bot takes no further actions.
- Production: The bot produces nothing. Reshuffle all 9 solo cards and refresh the bot’s specialists face up.
- Bot’s Specialists: You may pay to use the bot’s specialist. The bot does not collect tax.
- Bot Villager Priority: Crystal > Bottled Demon > Tool > Shell.
Solo Card Actions
- SEARCH: Bot claims the search token nearest to you (you break ties).
- RECRUIT SPECIALIST: Bot recruits the leftmost specialist from the display. You choose which specialist to discard if slots are full. Refill row.
- ATTACK (first time): If the bot hasn’t attacked this season, it defeats the lowest available enemy, claiming villagers equal to the reward. (Ignore and redraw if it already attacked).
- EXHAUST SPECIALIST: The bot exhausts the leftmost specialist on its board or your board (as specified on card; pays you tax if it uses yours).
- ROLL A DIE: Bot claims an order token or quest cards depending on die roll.
Underground Board, Variants & Quick Reference
Underground Board in Standard Mode
Use the opposite sides of the game board and town boards. Replace standard enemies of levels 2, 5, and 7 with their underground counterparts (distinguished by cave art on backs). Use underground location actions on page 20.
Reroll Variant
For more luck mitigation: at any time, a player may spend a good (shell, tool, bottled demon, or crystal) to reroll one of their die rolls. Multiple goods may be spent to reroll multiple times.
Quick Reference: Icons and Reminders
Season Turn Structure
Take one action at a time clockwise until all players pass:
- Specialist Action: Pay specialist, Recruit specialist, or Rest.
- Hero Action: Move → Play quest card (optional) → Location / Combat / Search.
- Pass: Done for the season.
Production Phase Sequence
- Collect produced goods and 1 coin per search token (only housed villagers produce).
- Refresh spent mana.
- Refresh hero action tokens (slide left).
- Flip specialists face up.
- Advance season track marker 1 space forward.
- Begin next season (or final scoring after season 6).
Anytime Actions
- Sell goods for coins according to market chart.
- Place gained villagers into available housing.
- Complete an order token.
- Pay 2 experience to refill villager display early.
- Spend experience to purchase hero abilities.
Credits
- Game Design, Illustrations, Graphic Design & Rule Book: Ryan Laukat
- Editing & Development: Ryan Laukat, Malorie Laukat
- Writing: Ryan Laukat, Malorie Laukat, Brenna Asplund
- Proofreading: Malorie Laukat, Brenna Asplund, Diana Parkin
- Copyright 2021 Red Raven Games
