
Obscurio
2019
Work together through a library of illusions, following image clues while a hidden traitor tries to lead the team astray.
40
minutes
2 - 8
player(s)
10+
Medium Light

About this board game
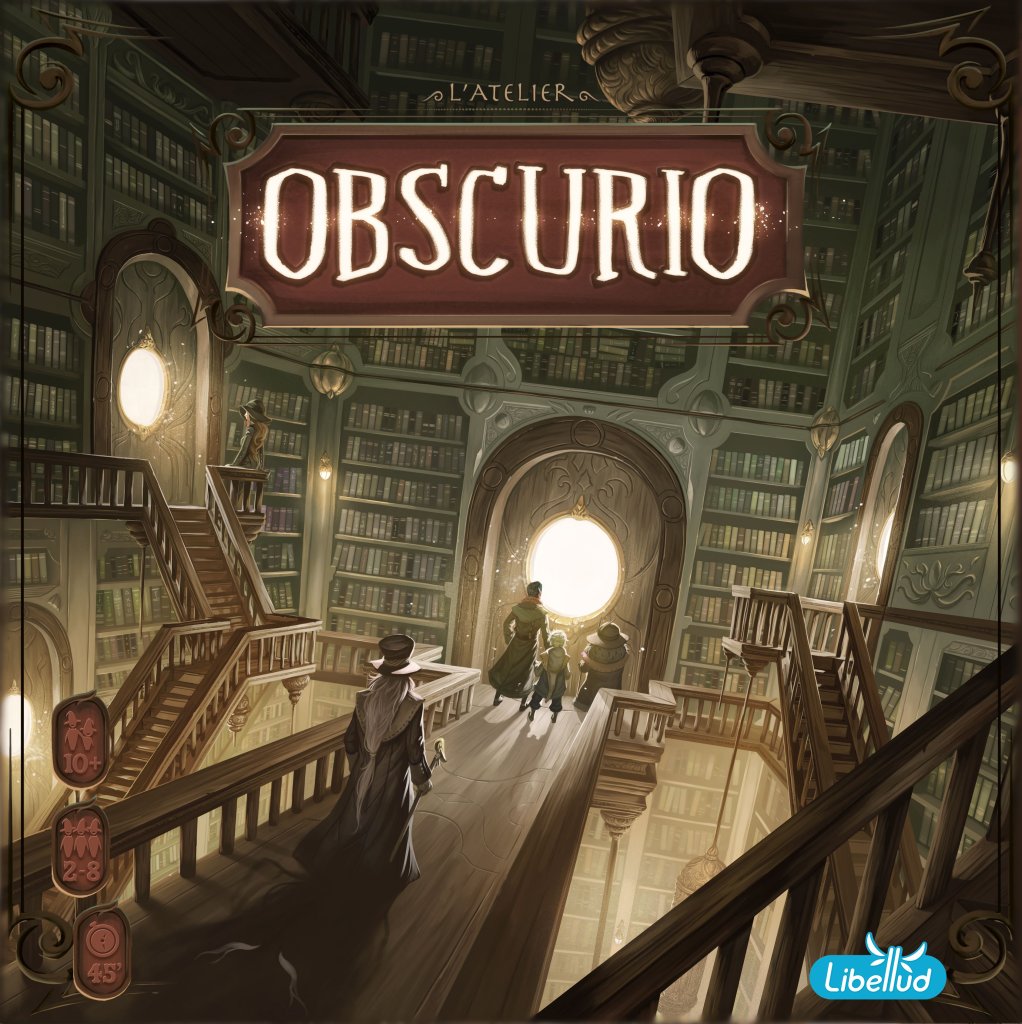
Obscurio is a family board game for 2–8 players that combines image-based communication with secret roles in a tense escape from the Sorcerer’s library. A game takes about 40 minutes, as the team searches for the exit while trying to avoid dangerous illusions.
One player takes the role of the Grimoire, guiding the others through images by pointing to particular details. The rest of the team must interpret those visual clues, discuss the possible paths, and choose the right cards as quickly as possible. Choosing incorrectly can send the group toward the wrong route.
There is more to the challenge than interpreting pictures. A traitor is hidden among the team and wants to lead the other players astray, making every suggestion a source of doubt. The group must communicate efficiently while considering whether an idea genuinely follows the Grimoire’s clues or serves the traitor’s plans.
- Image-based clues focused on details within illustrations
- A secret-role challenge featuring a traitor among the players
- Illusions and traps that make communication harder
- A cooperative race to find the library’s exit
Rich visual content keeps attention on the images, while the constant uncertainty created by the traitor gives every decision added weight. Players need to share ideas, compare interpretations, and remain alert as they make their way through the library.
With its blend of visual deduction, teamwork, and hidden-role tension, Obscurio offers a fresh take on image-based communication games. Work together, avoid the illusions, and escape before the Sorcerer’s library overwhelms the group.
/pic7182955.jpg)
Board Game Rules for
Obscurio
You knew that there had to be a reason why this Library had been abandoned. People had disappeared… others had gone mad… but it was said that the Library was full of magical items and powerful artifacts, and that was enough to convince you and your fellow Wizards.
Now, you’re running between endless rows of bookshelves, with a precious Grimoire under your arm, and a terrible Sorcerer hell-bent on recovering his treasure on your heels. The Library itself answers to its dark master and does all that it can to prevent you from escaping this maze: endless hallways, concealed doors, moving stairways…
Fortunately, the Grimoire is here to guide you to the exit. Its pages display phantasmagoric visions, and interpreting them correctly with the help of your friends is the key to victory.
But are they really your friends? Can you trust them all? Your instinct tells you that one of you group fell under the Sorcerer’s spell, and secretly plots against you. Be careful, or you could end up wandering in this endless maze forever…
Game Overview
Obscurio is a cooperative, asymmetric game, where each player has a secret role. Players try to interpret pictures to escape the Library. Depending on their role, they will each play differently.
Roles
 The Grimoire
The Grimoire is the only role that is public at the start of the game. They play the game differently, as they know the way out. The Grimoire also knows who the Traitor is. Their role is to guide their team. However, the Grimoire cannot speak (it’s a book, after all) and must only communicate with pictures and visual clues.
Victory: The Grimoire wins with the Wizards if the loyal Wizards manage to escape the Library. They know who the Traitor is but must not give any information about it!
 The loyal Wizards
The loyal Wizards keep their role hidden for most of the game. They try to decipher the clues given by the Grimoire to choose the doors that will allow them to exit the Library.
Victory: The loyal Wizards win if they manage to escape the Library.
 The Traitor
The Traitor is hidden among the Wizards at the beginning of the game. They must try to mislead the other Wizards as long as possible, without being exposed. The Traitor plays against the Grimoire and the Wizards, and wins if they lose.
Victory: The Traitor wins alone if the Wizards lose of all their Cohesion points.
Note: Unless stated otherwise, when the word Wizards is used in this rulebook, it refers to all players (including the Traitor) except the Grimoire.
Note: Use the following rules for games with 4 players or more. If you play with 2 or 3 players, see the 2- and 3-player variants on p11.
Contents
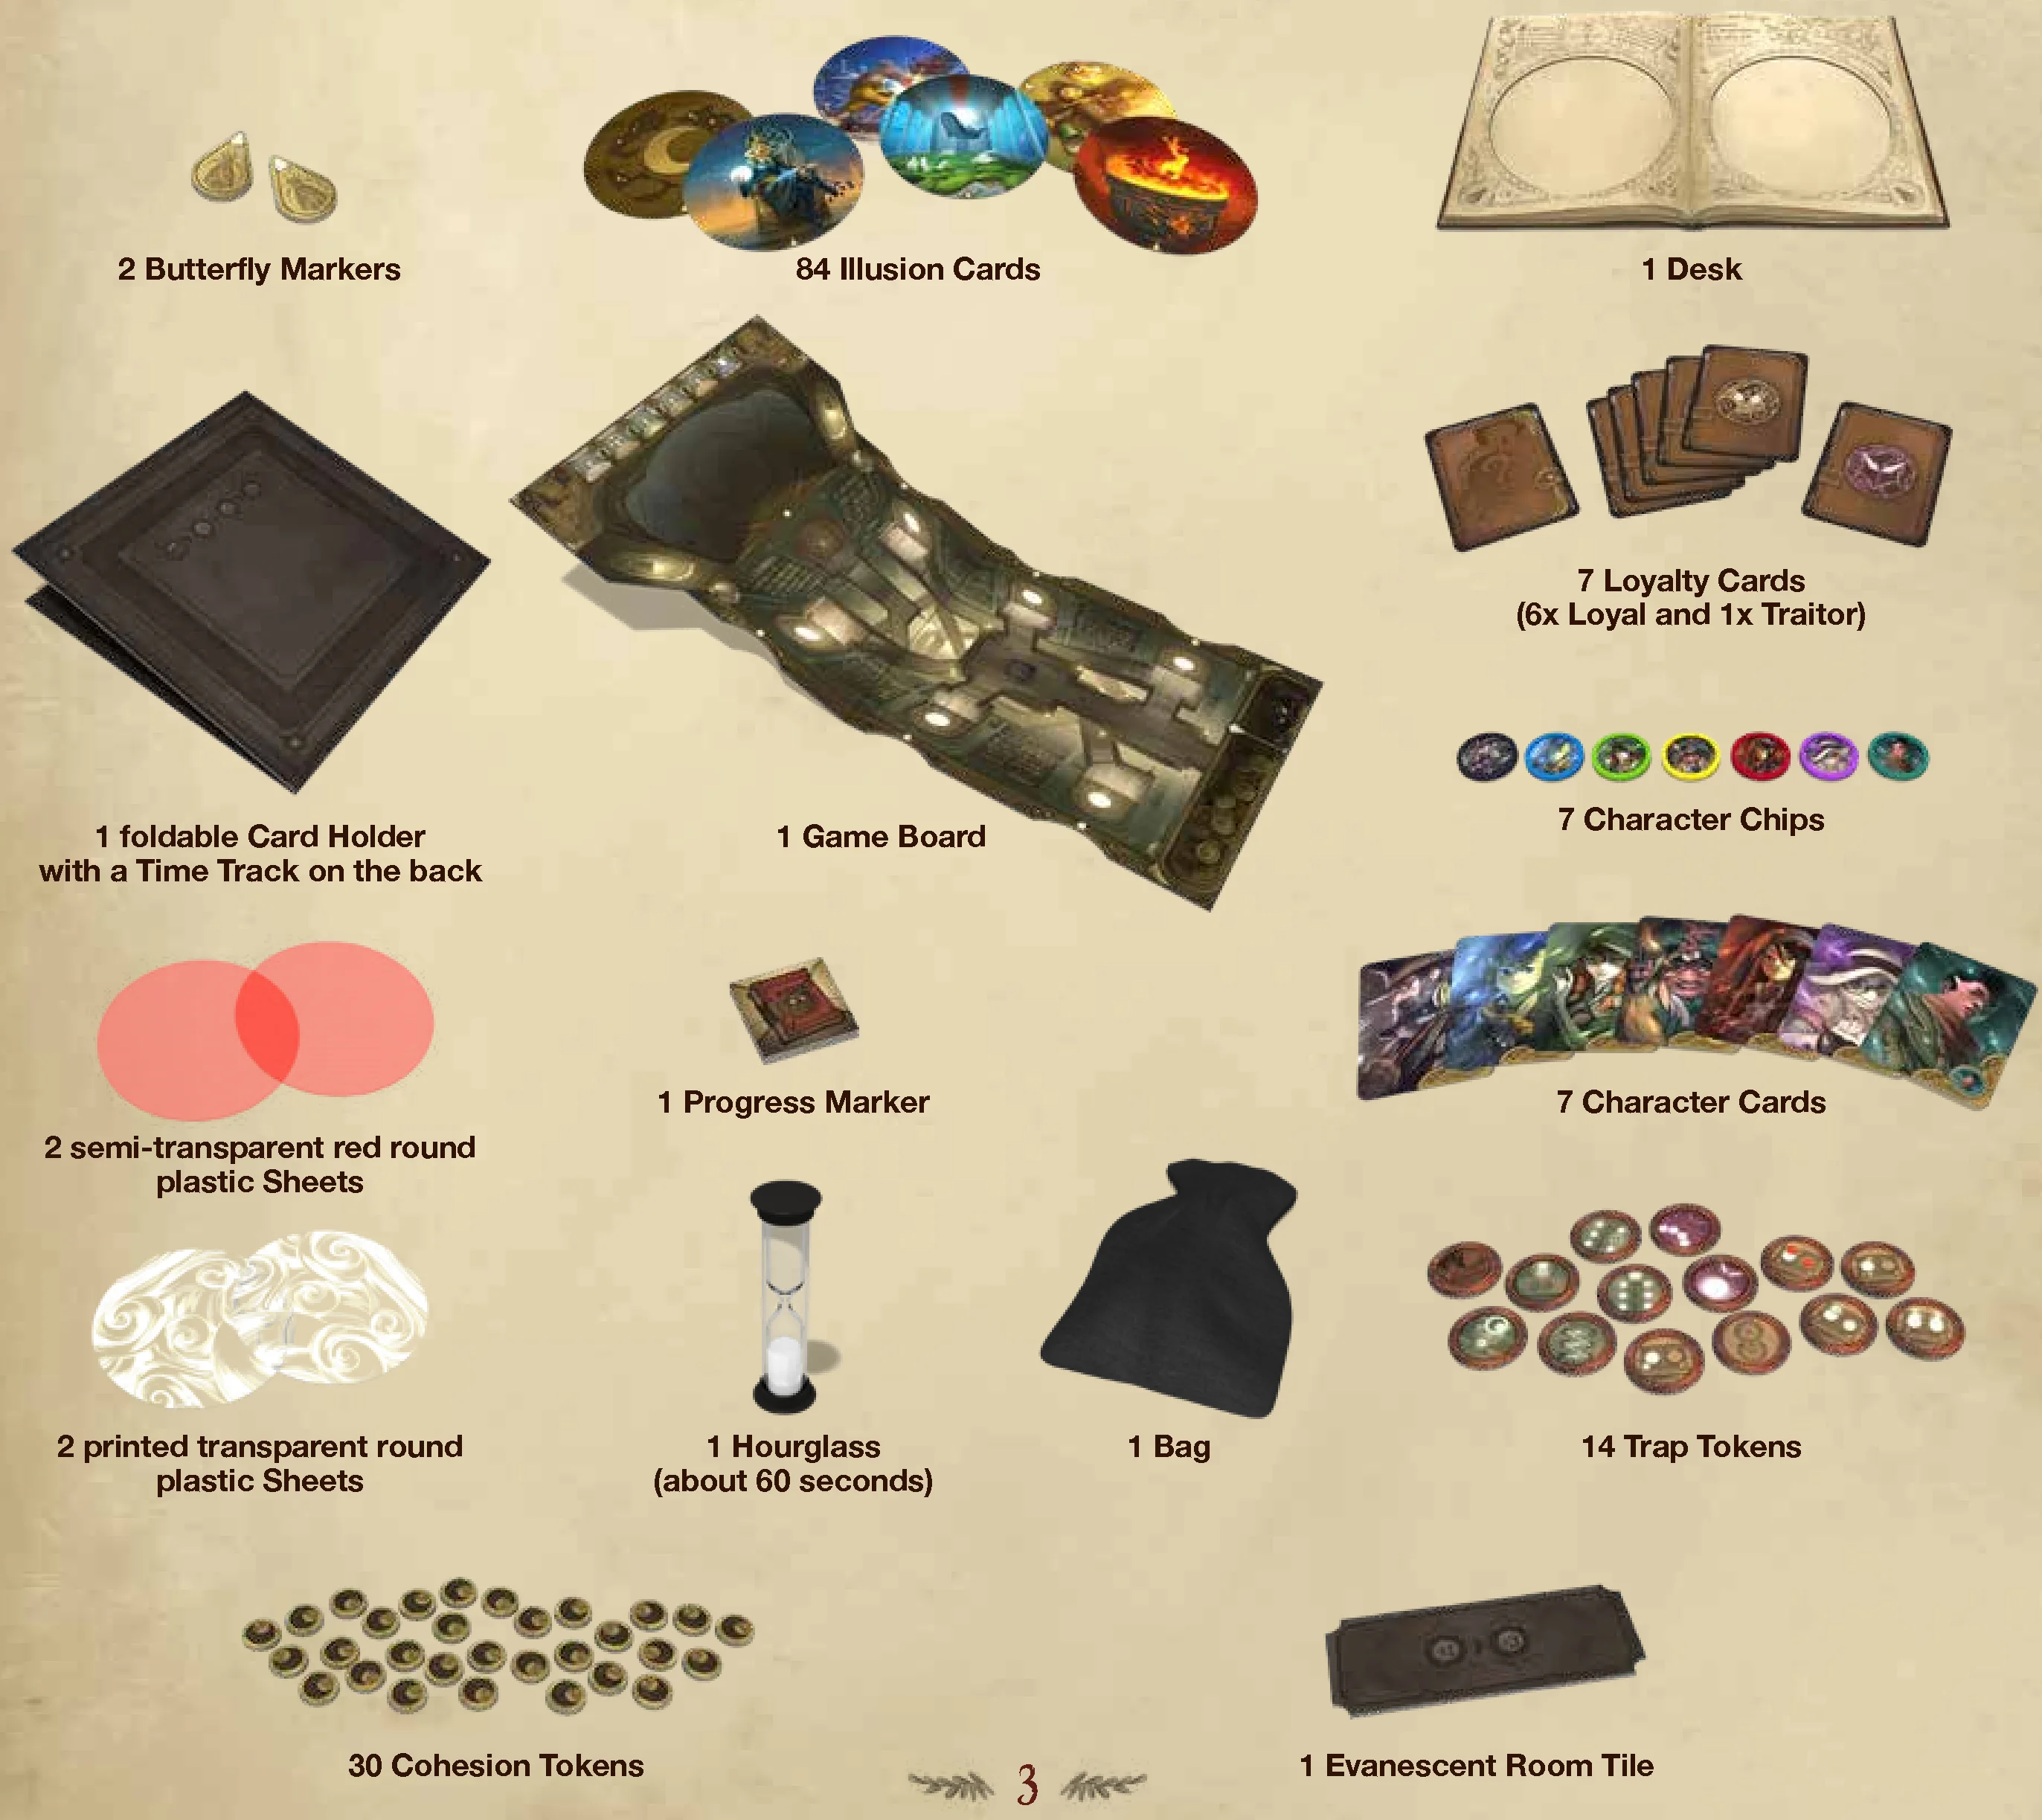
- 2 Butterfly Markers
- 84 Illusion Cards
- 1 Desk
- 1 foldable Card Holder with a Time Track on the back
- 1 Game Board
- 7 Loyalty Cards (6x Loyal and 1x Traitor)
- 7 Character Chips
- 7 Character Cards
- 2 semi-transparent red round plastic Sheets
- 2 printed transparent round plastic Sheets
- 1 Progress Marker
- 1 Hourglass (about 60 seconds)
- 1 Bag
- 14 Trap Tokens
- 30 Cohesion Tokens
- 1 Evanescent Room Tile
Setup
Difficulty Settings
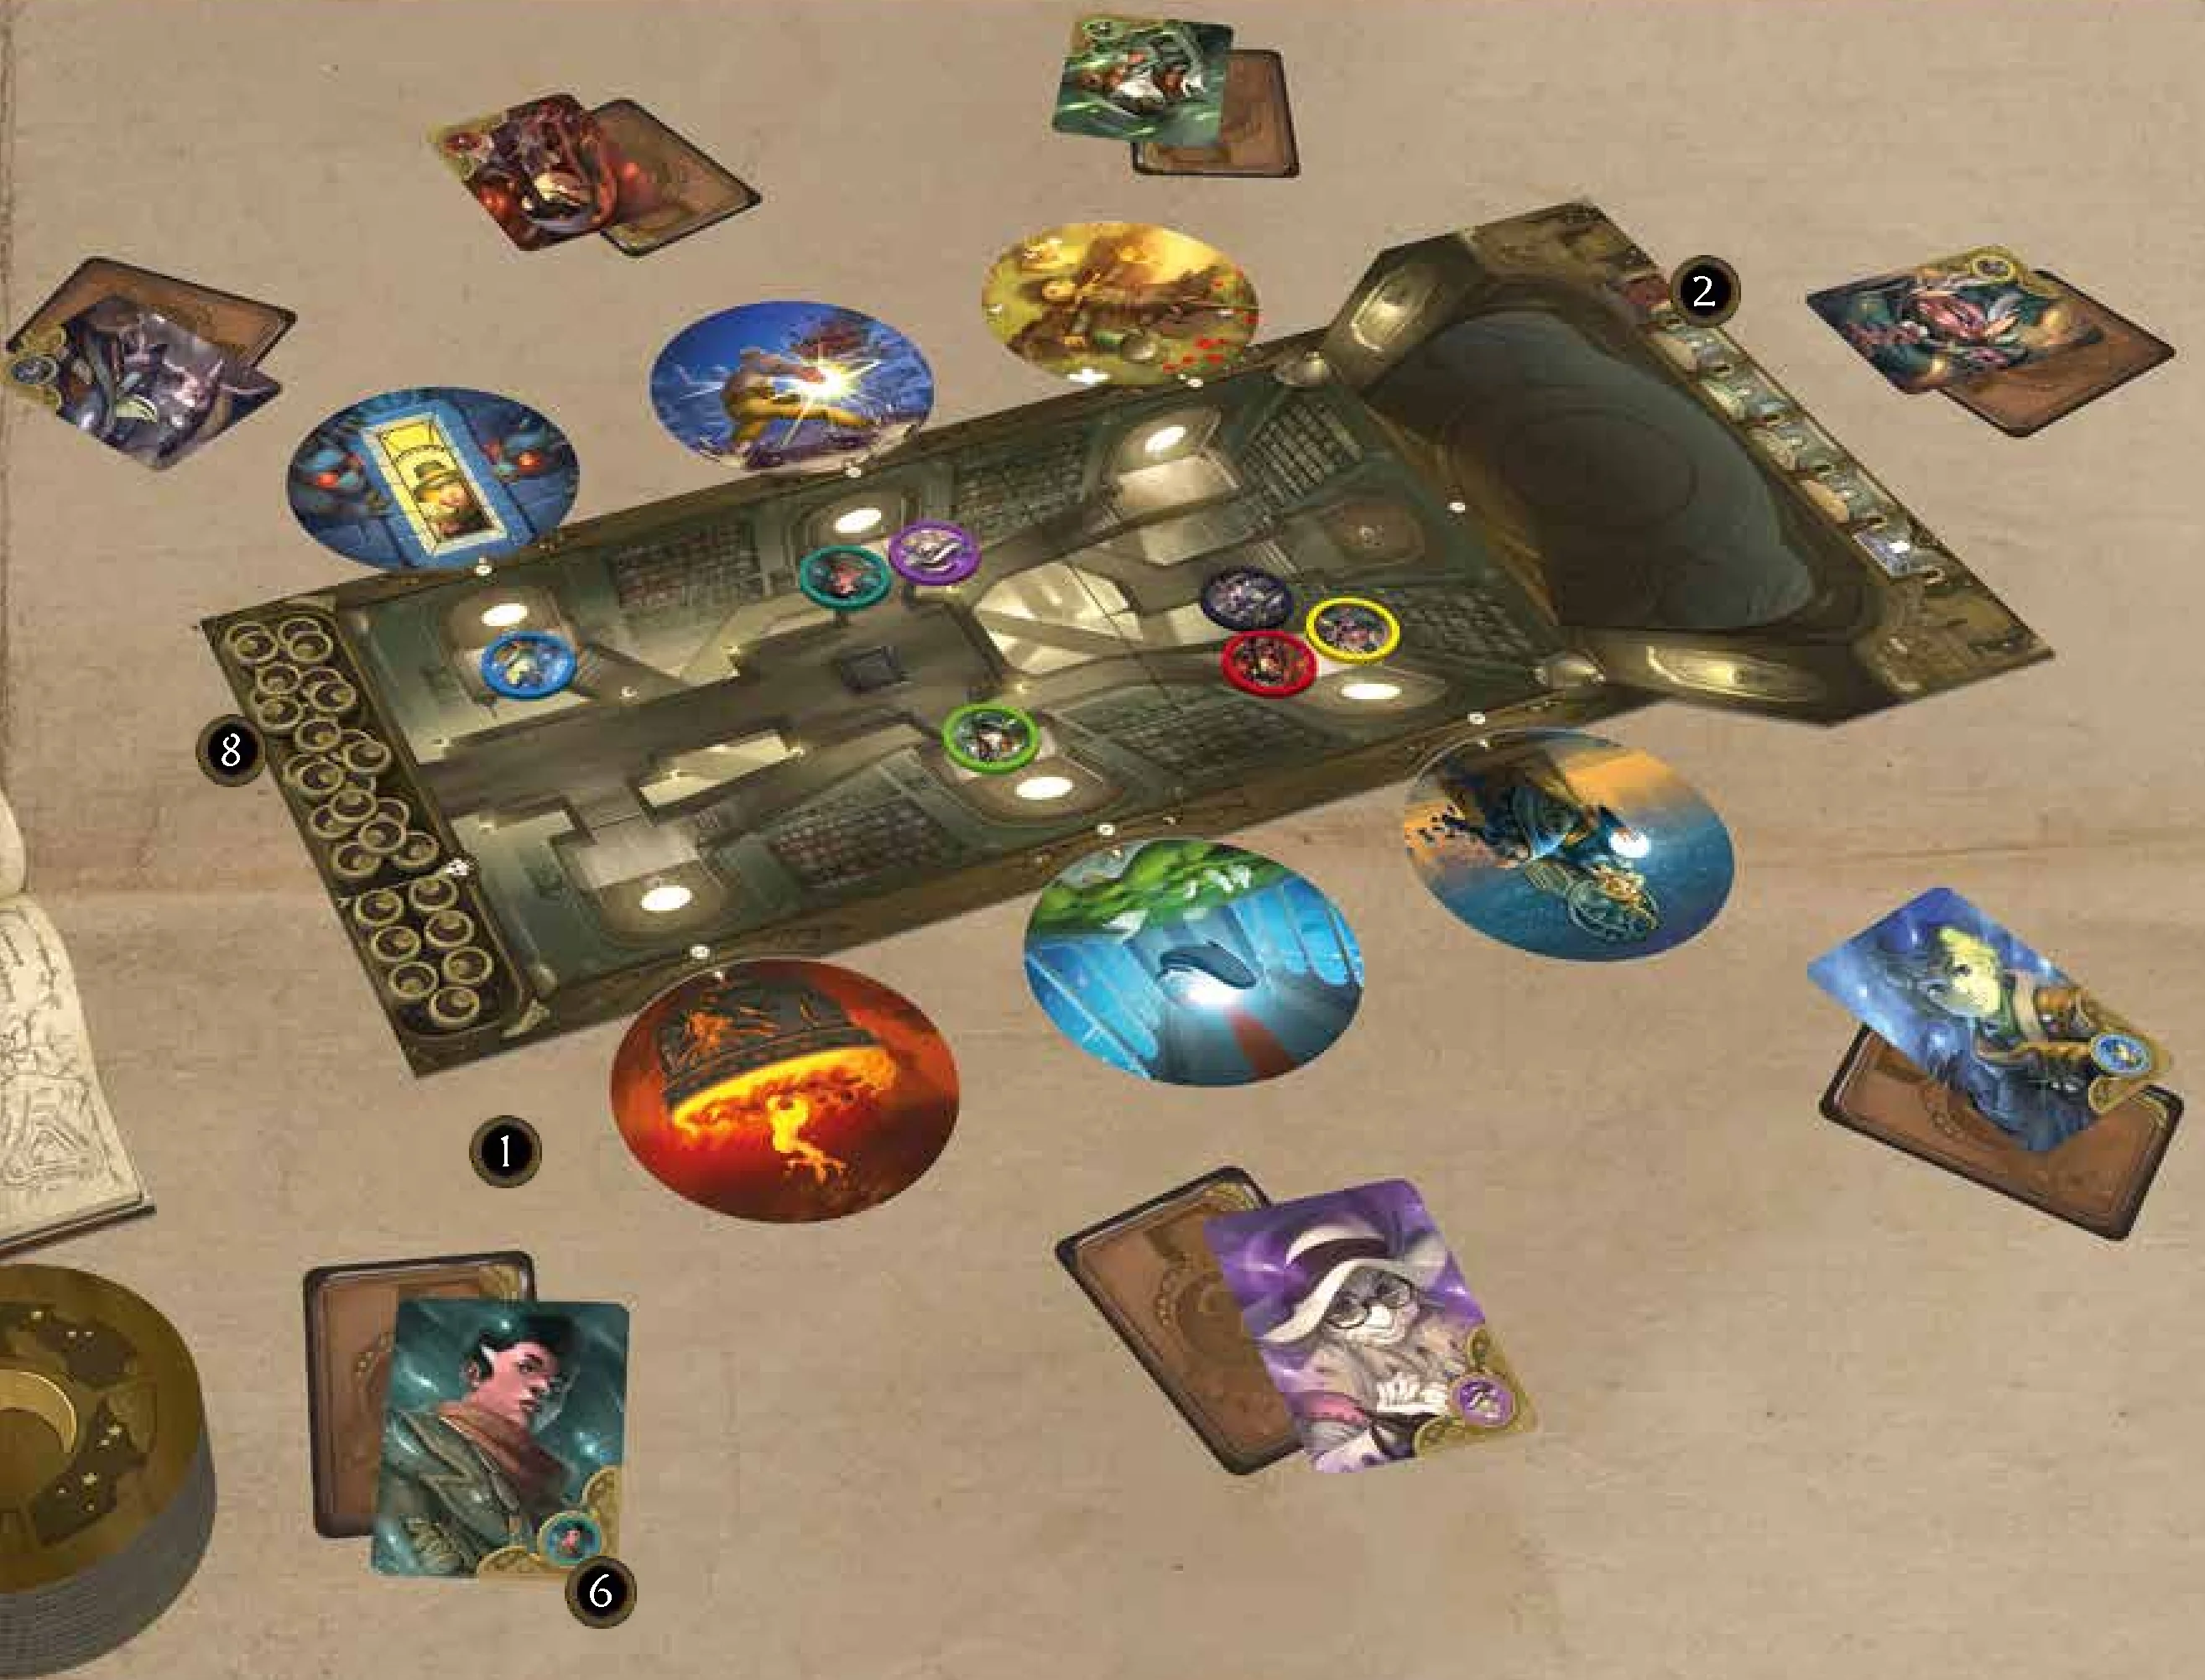
- Place the board on the table (1). Place the Progress marker on the first spot of the Progress track, in the upper part of the board (2).
- Choose which player plays as the Grimoire. That player receives the Desk, the 2 Butterfly markers, the card holder and the hourglass (3). Shuffle the Illusion cards and place their deck face down next to the Grimoire (4). The Grimoire draws 8 Illusion cards and places them face up in their card holder (the other players must not see them). Then, close the card holder (5).
- All other players choose their Character card and take the matching chip. Each player keeps their card in front of them and places their chip at the center of the board (6). These players are the Wizards.
- Take the Traitor card. Add Loyal cards until you have as many Loyalty cards as there are Wizards (for instance, with 4 Wizards, take 1 Traitor cards and 3 Loyal cards). Shuffle the cards and deal 1 card to each Wizard. Each Wizard secretly looks at their Loyalty card and keeps it hidden from any other player. One of them will be the Traitor.
- Place the Trap tokens in the bag (7).
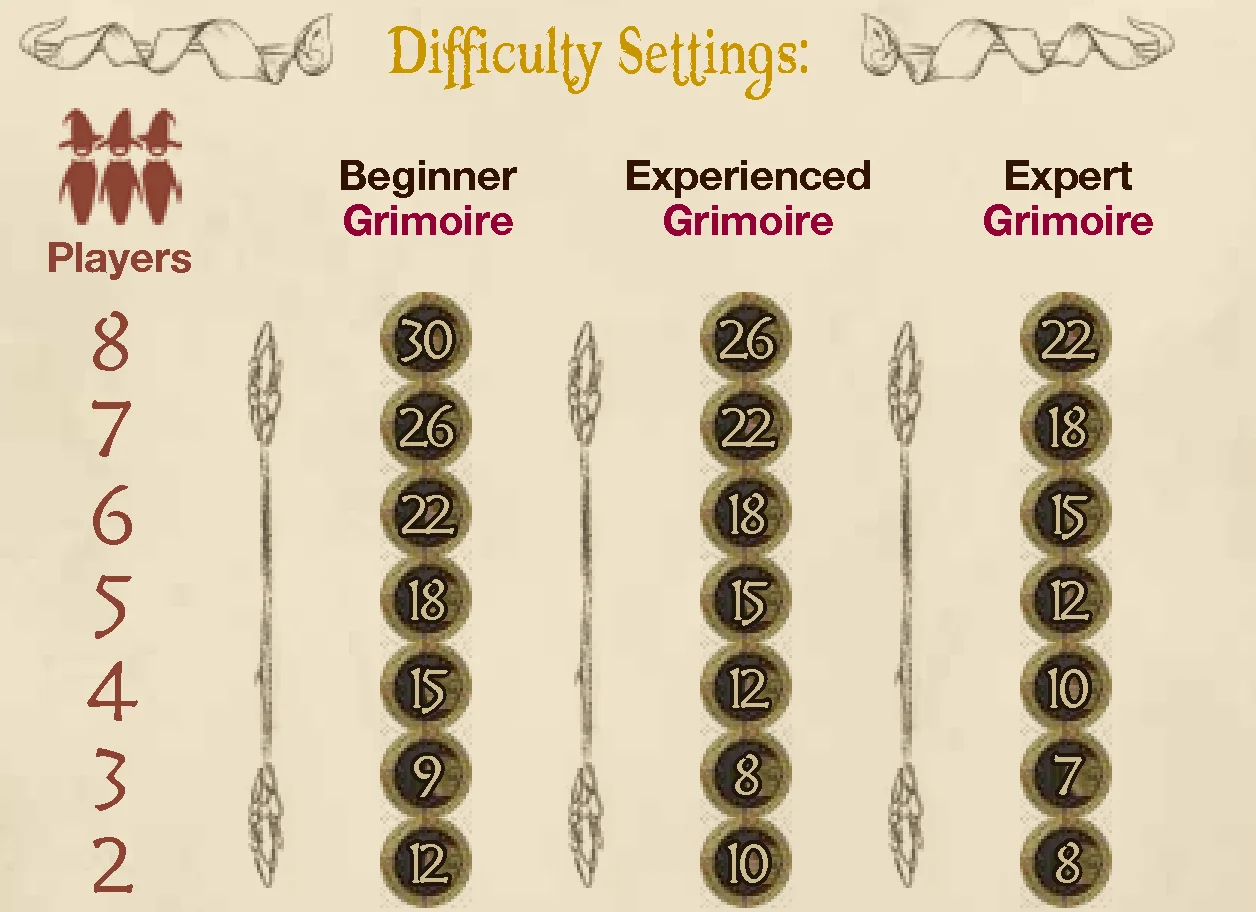
- Choose a game difficulty. Use the Beginner Grimoire level for your first game. Take the number of Cohesion tokens indicated in the table for your number of players (including the Grimoire) and the difficulty level that you chose. First, place the required number of Cohesion tokens on the dark area of the gauge (with the monster), then place all the remaining tokens on the other part of the gauge (8).
- Tokens in the dark area:
- 4 or 5 players: 5
- 6 to 8 players: 7
- Tokens in the dark area:
All other game elements remain in the box for the moment.
You are now ready to play Obscurio!
Important Note: the Grimoire is not allowed to speak with the Wizards. That player cannot gesture, mimic, nor make any sound or comment to try to give hints. To communicate with the Wizards, the Grimoire can only use the Butterfly markers.
A game of Obscurio plays in several turns. Each turn is divided into 5 steps. On each turn, the Wizards must resolve a riddle (interpret the clues given by the Grimoire) to find the door that will lead them to the next Room. To exit the Library, they must successfully cross 6 Rooms.
Step 1: Turn Setup
Each Room features many obstacles designed to prevent the Wizards from escaping the Library. During the turn setup, you must draw one or several Trap tokens from the bag and place them in front of the Grimoire.
- You always draw at least 1 Trap token at this step, even on the first turn.
- Depending on the time that the Wizards took to complete the previous turn, there may be additional Trap tokens. Any Trap token that you draw must be resolved during the current turn.
See p12 to check the effects of the Trap tokens.
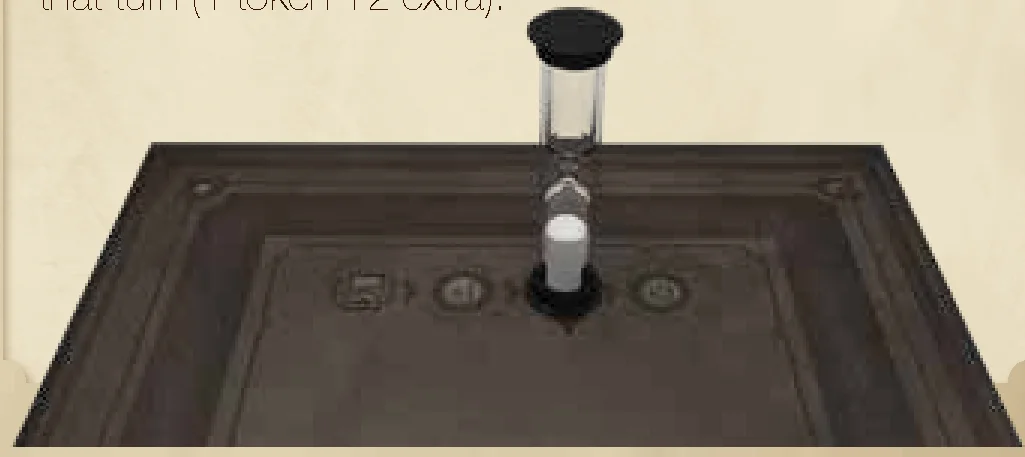
Example: During the previous turn, the Wizards finished their actions after the timer reached the ‘+2’ space. As a result, they must draw 3 Trap tokens on that turn (1 token +2 extra).
Step 2: Prepare the Riddle
The Grimoire takes the first Illusion card from the deck and looks at that card (make sure that no other player can see it). That card is the Exit card: the Wizards must identify it (among many others) to move to the next Room. The Grimoire keeps the card face down. As long as Step 2 is not over, the Grimoire may look at the Exit card.
Then, the Grimoire draws 2 other Illusion cards and place them face up on the Desk. These are the Pages of the Grimoire. Using the Butterfly markers, the Grimoire points to 1 or 2 elements on these Pages. These elements must be related to the Exit card, as the Wizards will use them as clues to identify that Exit card. The Grimoire may use one of their two Butterfly markers, or both of them. They can be placed on each Page, or both on the same Page. The Butterfly must be placed inside the circle of the card they point at.
The Grimoire may also place one Butterfly marker at the bottom of a Page. This means that the Page as a whole is a clue, and related to the Exit card, because of its subject, its theme, its colors, etc.
Once the Grimoire has placed their Butterfly marker(s), they place the Exit card face down next to them and pass the Desk to the Wizards. The Wizards may now freely talk about the Butterfly markers and try to interpret their placement.
Note: Once placed, a Butterfly marker may no longer be moved by anyone (neither by the Grimoire, nor by any other player). Furthermore, the Grimoire may not use both Butterfly markers to point to the same element.
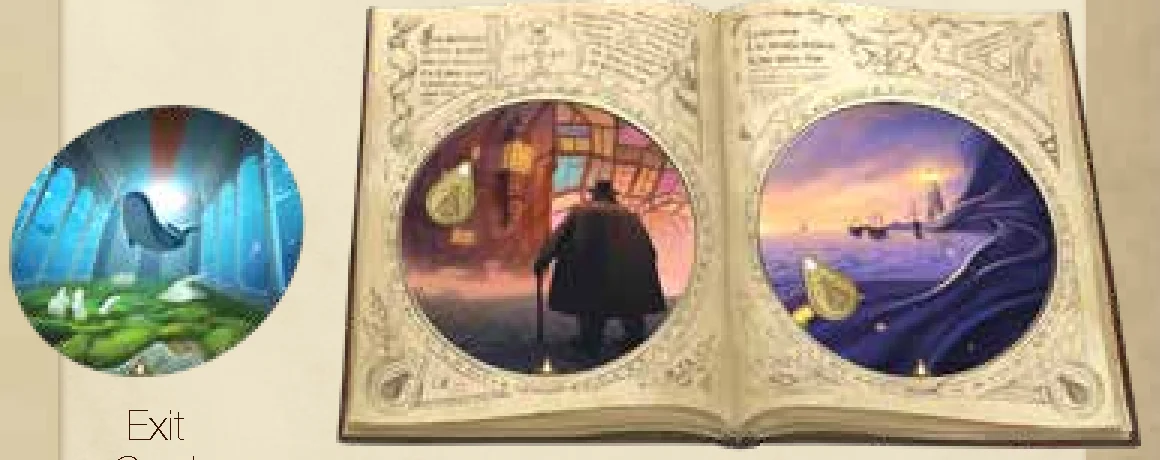
Example: In this example, the Grimoire decides to point at the sea on the right Page, because it is related to the water on the Exit card. Then, the Grimoire places their second Butterfly marker pointing to the round window, as there is one on the Exit card.
Step 3: Traitor Cards
Note: The Grimoire ensures that this step plays smoothly, but they cannot comment on the Traitor’s choices, as they must not disclose the Traitor’s identity. Don’t talk to the Traitor, and make sure that they remain anonymous!
This step plays in 3 phases:
- Phase 1: On the Grimoire’s command, the Wizards close their eyes.
Note: it is critical that all Wizards close their eyes. Not doing it would be cheating, as the Traitor would be easily exposed. - Phase 2: The Grimoire asks the Traitor to open their eyes and opens the card holder, showing it to the Traitor. There are 8 cards numbered #1 to #8 in the card holder. The objective of the Traitor is to confuse the Wizards by choosing cards that look like potential Exit cards, according to the Butterfly markers placed on the Pages of the Grimoire.
- The Traitor may choose a first card: they simply indicate the number of the card with their fingers. The Grimoire then places that card face down on top of the Exit card and immediately draws a new card from the deck to replace the chosen card.
- The Traitor may then choose a second card. Proceed as you did for the first card, making sure to draw a new card to replace it once selected.
- Then, the Grimoire closes the card holder.
Note: Choosing cards is not mandatory. The Traitor may decide not to choose cards, in which case they simply nod to the Grimoire to let them know that they can close the card holder at once.
- Phase 3: Once the Grimoire has closed the card holder, the Traitor closes their eyes. On the Grimoire’s command, everyone opens their eyes.
Important Note: During this step, it is critical that the Grimoire and the Traitor do not disclose any information about the Traitor’s identity. The Grimoire should not call the Traitor by their name, nor should they turn to them when speaking. The Traitor should move with care; making any sound would draw the other players’ attention to them.
Step 4: Choosing the Door
The Grimoire now takes the Exit card, plus any cards chosen by the Traitor during the previous step, and adds as many cards as needed from the deck to have a total of 6 Illusion cards (Trap tokens may alter this total). Then, the Grimoire shuffles the cards and give them to the Wizards.
The Wizards place them face up on the appropriate spots of the board, numbered #1 to #6. These spots are called ”Doors”.
During this step, the Wizards must find the Exit card, hidden among the other Illusion cards. They must discuss the clues given by the Grimoire (the Butterfly markers) and try to understand how the elements indicated by the Butterflies are related to the Exit card.
As soon as the first card is placed on the board, the Grimoire turns the hourglass and places it on the first space of the Time Track (on the back of the card holder). If the hourglass runs out before the end of that step, the Grimoire must turn it again and place it on the second space, and so on. The sooner that the Wizards agree on a card, the fewer Traps they will suffer on the next turn.
When a Wizard thinks they have found the proper Exit card (i.e. a card that would match the clues that they received), they place their Character chip in front of the matching door. Wizards can change their mind and move their chip as long as the step is not over.
The Wizards may cooperate and each may choose a different door to increase the group’s chances to find the right door. However, doing so is risky, as the group will lose one Cohesion token for each Wizard that chose the wrong door.
Ending the Step
This step can end in two ways:
- All Wizards have chosen a door, and they don’t want to change their mind. They tell the Grimoire that the step is over. The hourglass stays on its current space.
- The hourglass runs out while on the last space of the Time Track. The Grimoire announces “Stop!” and Wizards can no longer place their chips. For any Wizard that did not place or move their chip, the group will lose Cohesion points, as if these Wizards had chosen the wrong door.
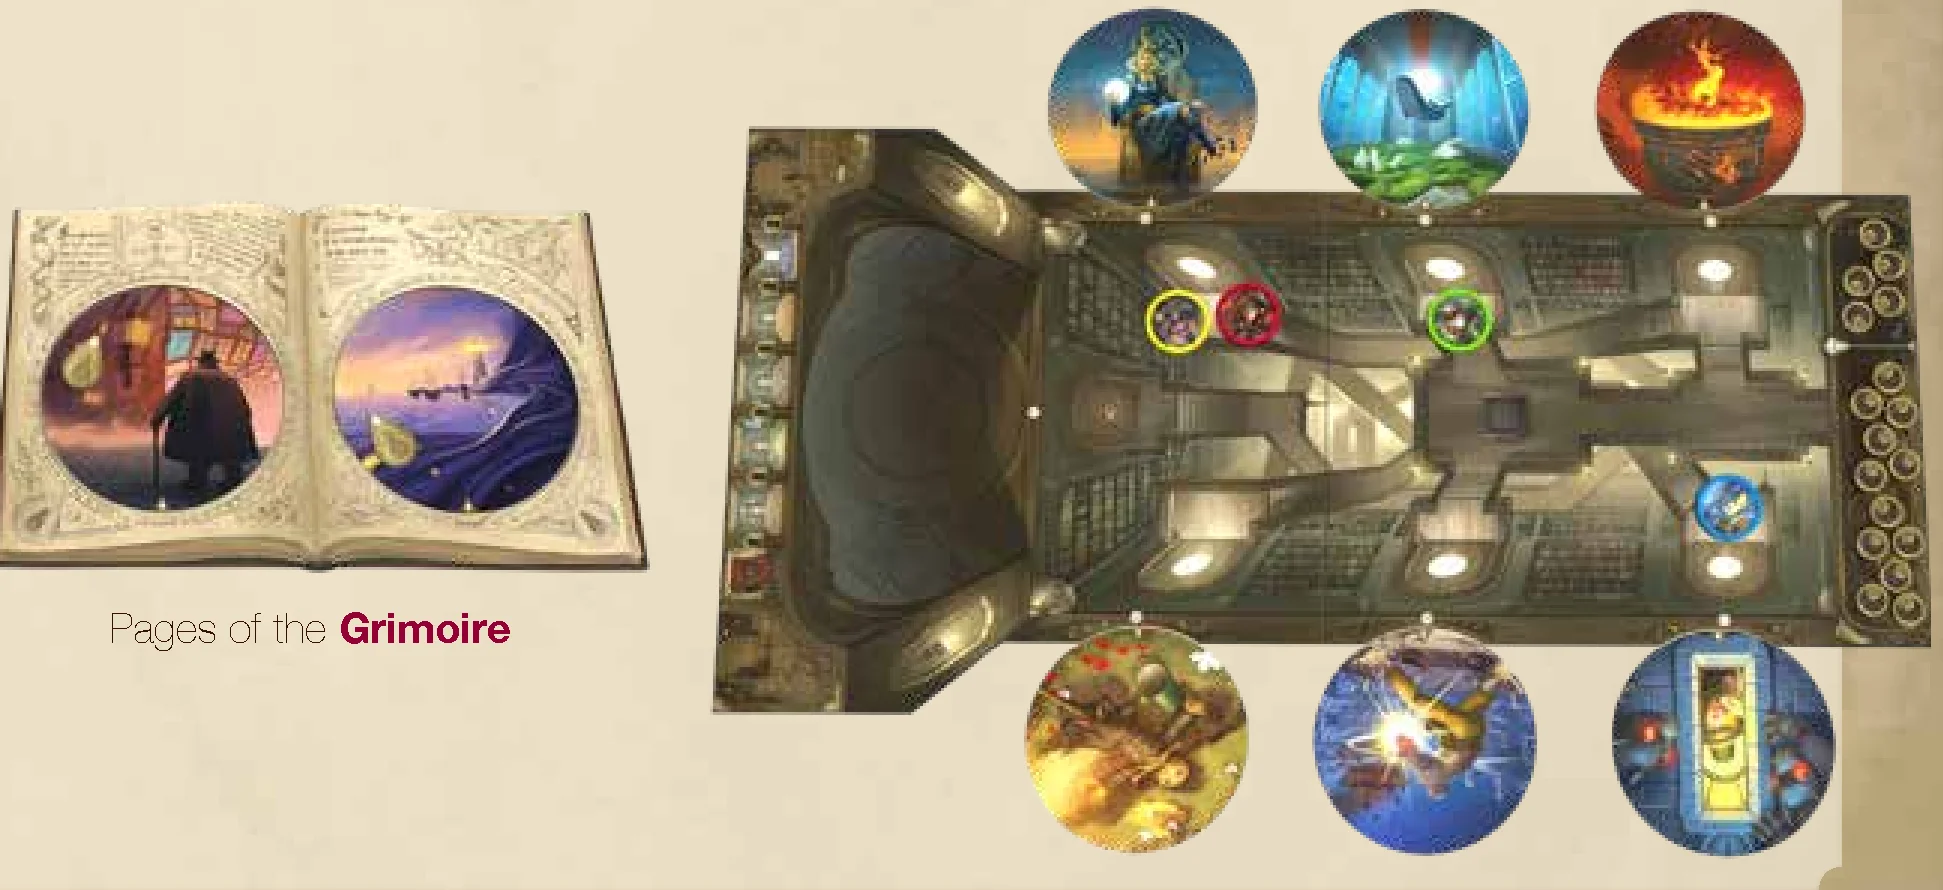
Example: In this example, Blue thinks that the clues given by the Grimoire are a reference to the window and the dark blue displayed on card #1. As a result, they place their Character chip in front of that door. Green chooses to place their chip in front of door #4 because of the round window and the water that appear on it. Also, they want to make sure that someone chooses this door. Red and Yellow are both convinced that the correct door is door #6 because of the moon and the stars.
Resolving Step 4
When this step ends, the Grimoire reveals the correct Exit card among the doors. Then, proceed as follows to resolve that step:
Correct Door
If there is at least one Character chip in front of the Exit card, then the group moves one Room forward! Move the Progress Marker one space forward. If the Progress Marker reaches the last space of the Progress track, the Watcher Trap is now active (as indicated on the game board) for the rest of the game. You can read the effects of this trap on page 12.
If the Progress Marker was on the last space, and if the Wizards still have at least 1 Cohesion token, the game ends immediately. The Wizards and the Grimoire win!
Wrong Door
Each Wizard whose Character chip is not placed, or is placed in front of a wrong door (any door other than the Exit card) takes a Cohesion token (first from the leftmost area of the gauge, then from the dark area if the other area is empty) and places it on their Character card. Keeping the tokens on the Character cards allows the players to keep track of the number of times that a given Wizard chose a wrong door. If the last Cohesion token is taken from the board, the Wizards are lost in the Library. The Traitor wins the game! If no-one found the Exit card, then the group does not progress. The Progress marker does not move on the track.
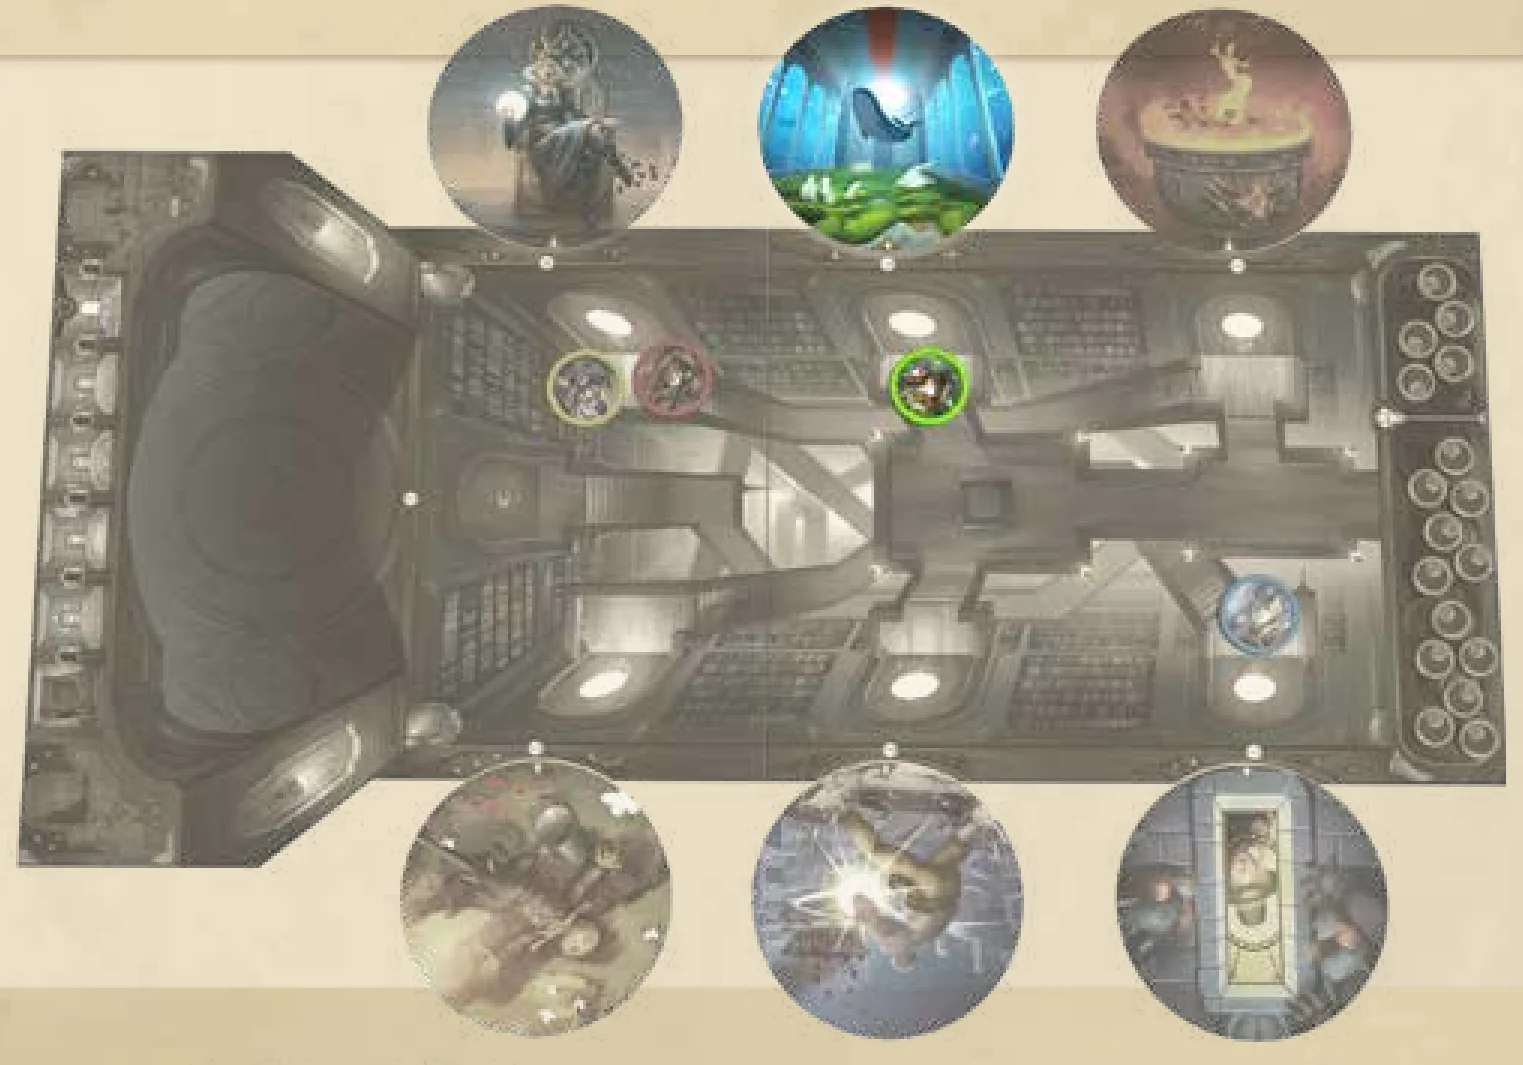
Example: In this example, the Exit card is Door #3. At least one Character chip is in front of that door. As a result, the Progress Marker moves one space forward. Then, each player that was in front of a wrong door takes one Cohesion token from the matching area and places that token on their Character card. Blue, Red and Yellow take one token each. The team lost 3 Cohesion tokens – but at least they moved to the next Room.
Step 5: End of the Turn
All used Illusion cards are discarded face up next to the board. All Trap tokens are placed back in the bag. All Wizards place their chip at the center of the board. Then, proceed to the next turn, starting with Step 1: Turn Setup.
As soon as they take the last Cohesion token from the first area of the gauge in Step 4, the Wizards start looking for the Traitor in their ranks: the Accusation Phase begins. The Grimoire does not take part in this phase. The Accusation Phase plays as follows:
- Turn the hourglass. The Wizards have 1 minute to discuss and try to find who is the Traitor among them.
- When the hourglass runs out, on the count of three, the Wizards simultaneously point their fingers at any player of their choice, if they think that player is the Traitor.
- Count the votes against each player. The player with the most votes is accused (if there is a tie, all tied players are accused). Any accused player reveals their Loyalty card. For each Loyal player falsely accused, lose 2 Cohesion tokens (place them back in the box).
- If the Traitor was not accused, and if there are still Cohesion tokens remaining, start this phase over (Turn the hourglass, etc.).
- If the Traitor was accused and exposed, and if there are still Cohesion tokens, proceed to the next turn. The Traitor removes their chip from the board. From now on and until the end of the game, the Traitor will only take part in Phase 3 (Traitor cards). They may no longer participate in the discussions between Wizards.
Note: Loyal players still take part in all phases of the game turn, even if they were falsely accused.
The game may end in two ways:
- The game instructs you to move the Progress marker while that marker already is on the last space of the track (the track features 6 spaces) and the Wizards still have at least 1 Cohesion token: the Wizards managed to escape the Library!
The Wizards and the Grimoire win the game. The Traitor loses! - The last Cohesion token is taken from the dark area of the gauge: the Wizards are lost in the Library and the group scatters.
The Traitor wins the game alone!
Each Trap applies on a given step. Traps make it more difficult for Wizards to escape the Library.
Brown Traps affect Step 2
-
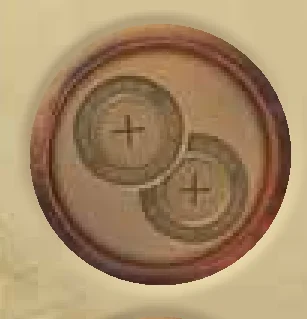 +2: Immediately draw 2 extra Trap tokens from the bag.
 -
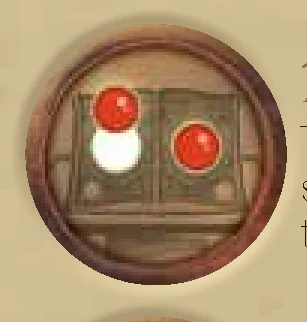 Dusk Hallway (red filter): The Grimoire must place the red sheets on the Pages before placing their Butterfly markers.
 -
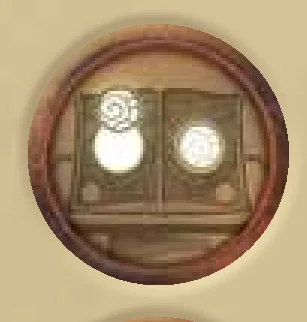 Magical Mist: The Grimoire must place the printed sheets on the Pages before placing their Butterfly markers. They cannot point to anything on the printed sheets.
 -
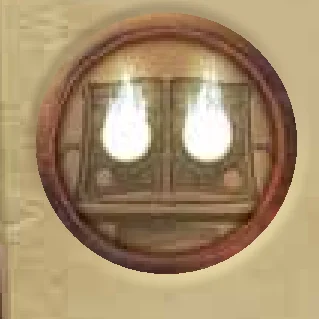 Dark Night: The Grimoire must discard the Pages and remove the Butterfly markers at the beginning of Step 3.
 -
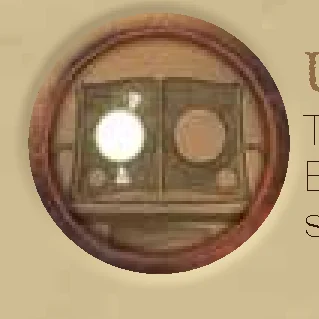 United Butterflies: The Grimoire must place both Butterfly markers on or below the same Page.
 -
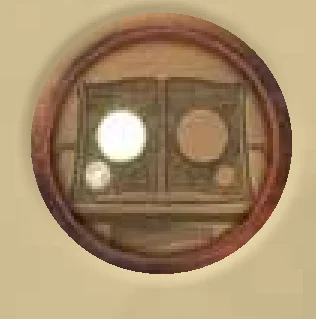 Bottom Butterfly: The Grimoire must place at least one Butterfly marker at the bottom of a Page. The other Butterfly marker may be placed freely.
Purple Traps affect Step 3
-
 Dark Magic: The Traitor may choose up to 4 cards from the card holder instead of 2.
 -
 Espionage: The Grimoire must show the Exit card to the Traitor before the Traitor picks their cards.
Green Traps affect Step 4
-
 Concealed Door: The card placed on Door #4 is not revealed. The Wizards may choose it as any other door, but the card won’t be revealed until the end of that step.
 -
 Evanescent Room: Place the Evanescent Room on the Time Track. It replaces the Time Track completely until the end of the turn.
 -
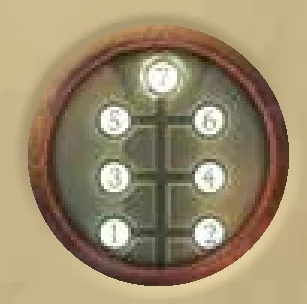 Great Room: The Grimoire adds an extra card from the deck (use Door
  ).
). -
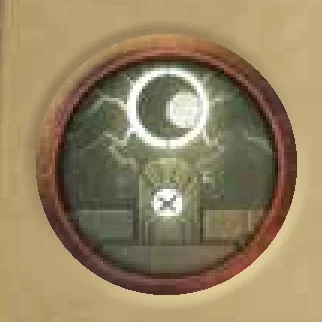 Dangerous Room: When resolving Step 4, count the number of wrong doors that have been chosen by the Wizards, and remove as many Cohesion tokens from the board (place them back in the box).
 -
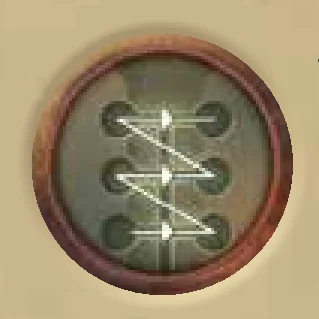 Locked Doors: Instead of revealing all Illusion cards simultaneously, the Wizards reveal them one by one. As soon as a door is revealed, each Wizard that did not place their chip must decide whether or not they will choose this door. If they don’t, they cannot place their chips on that door later in the turn. Once all Wizards have placed their chips, resolve Step 4.
Note: if you reveal this token while the Watcher is active, after a card is revealed, count to three. Each player that chooses this door after that places their chip on it.
Special Traps
-
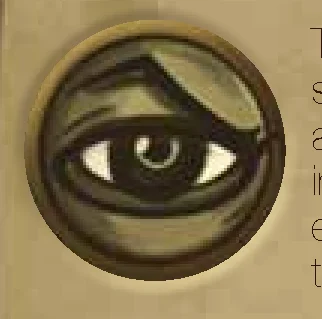 The Watcher: The Watcher Trap is not a token. It applies on each turn if the Progress Marker is on the last space of its track. When this Trap applies, Wizards cannot communicate with each other, in any way. Moreover, instead of placing their chip in front of a door, they simply take their chip in hand once each of them has individually decided which door they are going to try. Once everyone has their chip in hand, all Wizards count to three, then they simultaneously place their chips in front of the door of their choice.
 -
 No effect: This token has no effect.
2 and 3 players
There is no Traitor in 2- or 3-player games. Ignore any rules or steps related to the Traitor. Also:
- Don’t use Loyalty cards;
- Ignore Step 3 on every turn;
- Remove any purple Trap token from the game;
- Ignore the Accusation Phase;
- Do not put Illusion cards in the card holder (you still need it for the Time Track).
2 players
In a 2-player game, there is one Grimoire and one Wizard player. The Wizard starts with two Character chips: their own chip, plus another one who will be their companion. Place the 2 chips at the center of the board. On Step 4 (Choosing a Door), they must use the two chips. Both chips may be placed in front of the same door, or in front of two different doors. At the end of this step, if their own chip has chosen the wrong door, they take 2 Cohesion tokens from the board. If the companion’s chip has chosen the wrong door, they only take 1 Cohesion token from the board.
Credits
- Designer: L’Atelier
- Publishing Director: Régis Bonnessée
- Project Lead: Arthur Décamp
- Development Manager: Alexandre Garcia
- Development: Lucas Forlacroix, Valentin Gaudicheau, Nicolas Sato
- Art Director: Jérémy Couturier
- Artwork: Xavier Collette, M81 and Libellud
- Layout: Thomas Dutertre
- Design Team: Clément Dautremay, Mélanie André
- Rules: Arthur Décamp & L’Atelier
- Translation: Antoine Prono
- Proofreading: George Ankers
- Marketing: Mathieu Aubert
- Communication: Maximilien Da Cunha, Paul Neveur
- Production Manager: Alexandra Soporan
- Administration: Amélie Roullet, Pascale Belot
- Playtests: Rosie Hewis, Julie Vignaud, Catalina Balan, Adrien Baudet, Anthony Carles, Alexis Chapeau, Louise Cornu, Pascal Dubech, Laura Espitia, Floriana Luciani, Javier Mayorga, Charles Triboulot, André Vanouche, Emmanuel Biré, Valentin Briolet, Mathieu Carlouet, Brice Chardin, Laura Cousseau, Benoît Dabadie, Mathieu Fenot, Paul Ferret, Aline Fischer, William Forestier, Simon Genet, Kévin Goulette, Hélène Grisoni, Florent Guibert, Corentin Guillaumot, Robin Larnicol, José Lhuillier, Louisa Mamalis, Susan Mckinlay, Namiko Maki, Olivier Noc, Alexandra Pedinotti, Tristan Pietropaoli, Raphaël Robert-Bouchard, Aurélie Simondet, Stico, Andrés Vargas
- © Libellud 2019
Introduction & Roles
You knew that there had to be a reason why this Library had been abandoned. People had disappeared… others had gone mad… but it was said that the Library was full of magical items and powerful artifacts, and that was enough to convince you and your fellow Wizards.
Now, you’re running between endless rows of bookshelves, with a precious Grimoire under your arm, and a terrible Sorcerer hell-bent on recovering his treasure on your heels. The Library itself answers to its dark master and does all that it can to prevent you from escaping this maze: endless hallways, concealed doors, moving stairways…
Fortunately, the Grimoire is here to guide you to the exit. Its pages display phantasmagoric visions, and interpreting them correctly with the help of your friends is the key to victory.
But are they really your friends? Can you trust them all? Your instinct tells you that one of you group fell under the Sorcerer’s spell, and secretly plots against you. Be careful, or you could end up wandering in this endless maze forever…
Game Overview
Obscurio is a cooperative, asymmetric game, where each player has a secret role. Players try to interpret pictures to escape the Library. Depending on their role, they will each play differently.
Roles
The Grimoire
The Grimoire is the only role that is public at the start of the game. They play the game differently, as they know the way out. The Grimoire also knows who the Traitor is. Their role is to guide their team. However, the Grimoire cannot speak (it’s a book, after all) and must only communicate with pictures and visual clues.
Victory: The Grimoire wins with the Wizards if the loyal Wizards manage to escape the Library. They know who the Traitor is but must not give any information about it!
The loyal Wizards
The loyal Wizards keep their role hidden for most of the game. They try to decipher the clues given by the Grimoire to choose the doors that will allow them to exit the Library.
Victory: The loyal Wizards win if they manage to escape the Library.
The Traitor
The Traitor is hidden among the Wizards at the beginning of the game. They must try to mislead the other Wizards as long as possible, without being exposed. The Traitor plays against the Grimoire and the Wizards, and wins if they lose.
Victory: The Traitor wins alone if the Wizards lose of all their Cohesion points.
Note: Unless stated otherwise, when the word Wizards is used in this rulebook, it refers to all players (including the Traitor) except the Grimoire.
Note: Use the following rules for games with 4 players or more. If you play with 2 or 3 players, see the 2- and 3-player variants on p11.
Game Components & Setup
Contents
- 2 Butterfly Markers
- 84 Illusion Cards
- 1 Desk
- 1 foldable Card Holder with a Time Track on the back
- 1 Game Board
- 7 Loyalty Cards (6x Loyal and 1x Traitor)
- 7 Character Chips
- 7 Character Cards
- 2 semi-transparent red round plastic Sheets
- 2 printed transparent round plastic Sheets
- 1 Progress Marker
- 1 Hourglass (about 60 seconds)
- 1 Bag
- 14 Trap Tokens
- 30 Cohesion Tokens
- 1 Evanescent Room Tile
Setup
Difficulty Settings
- Place the board on the table (1). Place the Progress marker on the first spot of the Progress track, in the upper part of the board (2).
- Choose which player plays as the Grimoire. That player receives the Desk, the 2 Butterfly markers, the card holder and the hourglass (3). Shuffle the Illusion cards and place their deck face down next to the Grimoire (4). The Grimoire draws 8 Illusion cards and places them face up in their card holder (the other players must not see them). Then, close the card holder (5).
- All other players choose their Character card and take the matching chip. Each player keeps their card in front of them and places their chip at the center of the board (6). These players are the Wizards.
- Take the Traitor card. Add Loyal cards until you have as many Loyalty cards as there are Wizards (for instance, with 4 Wizards, take 1 Traitor cards and 3 Loyal cards). Shuffle the cards and deal 1 card to each Wizard. Each Wizard secretly looks at their Loyalty card and keeps it hidden from any other player. One of them will be the Traitor.
- Place the Trap tokens in the bag (7).
- Choose a game difficulty. Use the Beginner Grimoire level for your first game. Take the number of Cohesion tokens indicated in the table for your number of players (including the Grimoire) and the difficulty level that you chose. First, place the required number of Cohesion tokens on the dark area of the gauge (with the monster), then place all the remaining tokens on the other part of the gauge (8).
- Tokens in the dark area:
- 4 or 5 players: 5
- 6 to 8 players: 7
- Tokens in the dark area:
All other game elements remain in the box for the moment.
You are now ready to play Obscurio!
Gameplay & Turn Structure
Important Note: the Grimoire is not allowed to speak with the Wizards. That player cannot gesture, mimic, nor make any sound or comment to try to give hints. To communicate with the Wizards, the Grimoire can only use the Butterfly markers.
A game of Obscurio plays in several turns. Each turn is divided into 5 steps. On each turn, the Wizards must resolve a riddle (interpret the clues given by the Grimoire) to find the door that will lead them to the next Room. To exit the Library, they must successfully cross 6 Rooms.
Step 1: Turn Setup
Each Room features many obstacles designed to prevent the Wizards from escaping the Library. During the turn setup, you must draw one or several Trap tokens from the bag and place them in front of the Grimoire.
- You always draw at least 1 Trap token at this step, even on the first turn.
- Depending on the time that the Wizards took to complete the previous turn, there may be additional Trap tokens. Any Trap token that you draw must be resolved during the current turn.
See p12 to check the effects of the Trap tokens.
Example: During the previous turn, the Wizards finished their actions after the timer reached the ‘+2’ space. As a result, they must draw 3 Trap tokens on that turn (1 token +2 extra).
Step 2: Prepare the Riddle
The Grimoire takes the first Illusion card from the deck and looks at that card (make sure that no other player can see it). That card is the Exit card: the Wizards must identify it (among many others) to move to the next Room. The Grimoire keeps the card face down. As long as Step 2 is not over, the Grimoire may look at the Exit card.
Then, the Grimoire draws 2 other Illusion cards and place them face up on the Desk. These are the Pages of the Grimoire. Using the Butterfly markers, the Grimoire points to 1 or 2 elements on these Pages. These elements must be related to the Exit card, as the Wizards will use them as clues to identify that Exit card. The Grimoire may use one of their two Butterfly markers, or both of them. They can be placed on each Page, or both on the same Page. The Butterfly must be placed inside the circle of the card they point at.
The Grimoire may also place one Butterfly marker at the bottom of a Page. This means that the Page as a whole is a clue, and related to the Exit card, because of its subject, its theme, its colors, etc.
Once the Grimoire has placed their Butterfly marker(s), they place the Exit card face down next to them and pass the Desk to the Wizards. The Wizards may now freely talk about the Butterfly markers and try to interpret their placement.
Note: Once placed, a Butterfly marker may no longer be moved by anyone (neither by the Grimoire, nor by any other player). Furthermore, the Grimoire may not use both Butterfly markers to point to the same element.
Example: In this example, the Grimoire decides to point at the sea on the right Page, because it is related to the water on the Exit card. Then, the Grimoire places their second Butterfly marker pointing to the round window, as there is one on the Exit card.
Step 3: Traitor Cards
Note: The Grimoire ensures that this step plays smoothly, but they cannot comment on the Traitor’s choices, as they must not disclose the Traitor’s identity. Don’t talk to the Traitor, and make sure that they remain anonymous!
This step plays in 3 phases:
- Phase 1: On the Grimoire’s command, the Wizards close their eyes.
Note: it is critical that all Wizards close their eyes. Not doing it would be cheating, as the Traitor would be easily exposed. - Phase 2: The Grimoire asks the Traitor to open their eyes and opens the card holder, showing it to the Traitor. There are 8 cards numbered #1 to #8 in the card holder. The objective of the Traitor is to confuse the Wizards by choosing cards that look like potential Exit cards, according to the Butterfly markers placed on the Pages of the Grimoire.
- The Traitor may choose a first card: they simply indicate the number of the card with their fingers. The Grimoire then places that card face down on top of the Exit card and immediately draws a new card from the deck to replace the chosen card.
- The Traitor may then choose a second card. Proceed as you did for the first card, making sure to draw a new card to replace it once selected.
- Then, the Grimoire closes the card holder.
Note: Choosing cards is not mandatory. The Traitor may decide not to choose cards, in which case they simply nod to the Grimoire to let them know that they can close the card holder at once.
- Phase 3: Once the Grimoire has closed the card holder, the Traitor closes their eyes. On the Grimoire’s command, everyone opens their eyes.
Important Note: During this step, it is critical that the Grimoire and the Traitor do not disclose any information about the Traitor’s identity. The Grimoire should not call the Traitor by their name, nor should they turn to them when speaking. The Traitor should move with care; making any sound would draw the other players’ attention to them.
Step 4: Choosing the Door
The Grimoire now takes the Exit card, plus any cards chosen by the Traitor during the previous step, and adds as many cards as needed from the deck to have a total of 6 Illusion cards (Trap tokens may alter this total). Then, the Grimoire shuffles the cards and give them to the Wizards.
The Wizards place them face up on the appropriate spots of the board, numbered #1 to #6. These spots are called ”Doors”.
During this step, the Wizards must find the Exit card, hidden among the other Illusion cards. They must discuss the clues given by the Grimoire (the Butterfly markers) and try to understand how the elements indicated by the Butterflies are related to the Exit card.
As soon as the first card is placed on the board, the Grimoire turns the hourglass and places it on the first space of the Time Track (on the back of the card holder). If the hourglass runs out before the end of that step, the Grimoire must turn it again and place it on the second space, and so on. The sooner that the Wizards agree on a card, the fewer Traps they will suffer on the next turn.
When a Wizard thinks they have found the proper Exit card (i.e. a card that would match the clues that they received), they place their Character chip in front of the matching door. Wizards can change their mind and move their chip as long as the step is not over.
The Wizards may cooperate and each may choose a different door to increase the group’s chances to find the right door. However, doing so is risky, as the group will lose one Cohesion token for each Wizard that chose the wrong door.
Ending the Step
This step can end in two ways:
- All Wizards have chosen a door, and they don’t want to change their mind. They tell the Grimoire that the step is over. The hourglass stays on its current space.
- The hourglass runs out while on the last space of the Time Track. The Grimoire announces “Stop!” and Wizards can no longer place their chips. For any Wizard that did not place or move their chip, the group will lose Cohesion points, as if these Wizards had chosen the wrong door.
Example: In this example, Blue thinks that the clues given by the Grimoire are a reference to the window and the dark blue displayed on card #1. As a result, they place their Character chip in front of that door. Green chooses to place their chip in front of door #4 because of the round window and the water that appear on it. Also, they want to make sure that someone chooses this door. Red and Yellow are both convinced that the correct door is door #6 because of the moon and the stars.
Resolving Step 4
When this step ends, the Grimoire reveals the correct Exit card among the doors. Then, proceed as follows to resolve that step:
Correct Door
If there is at least one Character chip in front of the Exit card, then the group moves one Room forward! Move the Progress Marker one space forward. If the Progress Marker reaches the last space of the Progress track, the Watcher Trap is now active (as indicated on the game board) for the rest of the game. You can read the effects of this trap on page 12.
If the Progress Marker was on the last space, and if the Wizards still have at least 1 Cohesion token, the game ends immediately. The Wizards and the Grimoire win!
Wrong Door
Each Wizard whose Character chip is not placed, or is placed in front of a wrong door (any door other than the Exit card) takes a Cohesion token (first from the leftmost area of the gauge, then from the dark area if the other area is empty) and places it on their Character card. Keeping the tokens on the Character cards allows the players to keep track of the number of times that a given Wizard chose a wrong door. If the last Cohesion token is taken from the board, the Wizards are lost in the Library. The Traitor wins the game! If no-one found the Exit card, then the group does not progress. The Progress marker does not move on the track.
Example: In this example, the Exit card is Door #3. At least one Character chip is in front of that door. As a result, the Progress Marker moves one space forward. Then, each player that was in front of a wrong door takes one Cohesion token from the matching area and places that token on their Character card. Blue, Red and Yellow take one token each. The team lost 3 Cohesion tokens – but at least they moved to the next Room.
Step 5: End of the Turn
All used Illusion cards are discarded face up next to the board. All Trap tokens are placed back in the bag. All Wizards place their chip at the center of the board. Then, proceed to the next turn, starting with Step 1: Turn Setup.
Accusation Phase
As soon as they take the last Cohesion token from the first area of the gauge in Step 4, the Wizards start looking for the Traitor in their ranks: the Accusation Phase begins. The Grimoire does not take part in this phase. The Accusation Phase plays as follows:
- Turn the hourglass. The Wizards have 1 minute to discuss and try to find who is the Traitor among them.
- When the hourglass runs out, on the count of three, the Wizards simultaneously point their fingers at any player of their choice, if they think that player is the Traitor.
- Count the votes against each player. The player with the most votes is accused (if there is a tie, all tied players are accused). Any accused player reveals their Loyalty card. For each Loyal player falsely accused, lose 2 Cohesion tokens (place them back in the box).
- If the Traitor was not accused, and if there are still Cohesion tokens remaining, start this phase over (Turn the hourglass, etc.).
- If the Traitor was accused and exposed, and if there are still Cohesion tokens, proceed to the next turn. The Traitor removes their chip from the board. From now on and until the end of the game, the Traitor will only take part in Phase 3 (Traitor cards). They may no longer participate in the discussions between Wizards.
Note: Loyal players still take part in all phases of the game turn, even if they were falsely accused.
End of the Game
The game may end in two ways:
- The game instructs you to move the Progress marker while that marker already is on the last space of the track (the track features 6 spaces) and the Wizards still have at least 1 Cohesion token: the Wizards managed to escape the Library!
The Wizards and the Grimoire win the game. The Traitor loses! - The last Cohesion token is taken from the dark area of the gauge: the Wizards are lost in the Library and the group scatters.
The Traitor wins the game alone!
Trap Tokens Reference
Each Trap applies on a given step. Traps make it more difficult for Wizards to escape the Library.
Brown Traps affect Step 2
-
+2: Immediately draw 2 extra Trap tokens from the bag.
-
Dusk Hallway (red filter): The Grimoire must place the red sheets on the Pages before placing their Butterfly markers.
-
Magical Mist: The Grimoire must place the printed sheets on the Pages before placing their Butterfly markers. They cannot point to anything on the printed sheets.
-
Dark Night: The Grimoire must discard the Pages and remove the Butterfly markers at the beginning of Step 3.
-
United Butterflies: The Grimoire must place both Butterfly markers on or below the same Page.
-
Bottom Butterfly: The Grimoire must place at least one Butterfly marker at the bottom of a Page. The other Butterfly marker may be placed freely.
Purple Traps affect Step 3
-
Dark Magic: The Traitor may choose up to 4 cards from the card holder instead of 2.
-
Espionage: The Grimoire must show the Exit card to the Traitor before the Traitor picks their cards.
Green Traps affect Step 4
-
Concealed Door: The card placed on Door #4 is not revealed. The Wizards may choose it as any other door, but the card won’t be revealed until the end of that step.
-
Evanescent Room: Place the Evanescent Room on the Time Track. It replaces the Time Track completely until the end of the turn.
-
Great Room: The Grimoire adds an extra card from the deck (use Door ).
-
Dangerous Room: When resolving Step 4, count the number of wrong doors that have been chosen by the Wizards, and remove as many Cohesion tokens from the board (place them back in the box).
-
Locked Doors: Instead of revealing all Illusion cards simultaneously, the Wizards reveal them one by one. As soon as a door is revealed, each Wizard that did not place their chip must decide whether or not they will choose this door. If they don’t, they cannot place their chips on that door later in the turn. Once all Wizards have placed their chips, resolve Step 4.
Note: if you reveal this token while the Watcher is active, after a card is revealed, count to three. Each player that chooses this door after that places their chip on it.
Special Traps
-
The Watcher: The Watcher Trap is not a token. It applies on each turn if the Progress Marker is on the last space of its track. When this Trap applies, Wizards cannot communicate with each other, in any way. Moreover, instead of placing their chip in front of a door, they simply take their chip in hand once each of them has individually decided which door they are going to try. Once everyone has their chip in hand, all Wizards count to three, then they simultaneously place their chips in front of the door of their choice.
-
No effect: This token has no effect.
Variants (2 and 3 Players)
2 and 3 players
There is no Traitor in 2- or 3-player games. Ignore any rules or steps related to the Traitor. Also:
- Don’t use Loyalty cards;
- Ignore Step 3 on every turn;
- Remove any purple Trap token from the game;
- Ignore the Accusation Phase;
- Do not put Illusion cards in the card holder (you still need it for the Time Track).
2 players
In a 2-player game, there is one Grimoire and one Wizard player. The Wizard starts with two Character chips: their own chip, plus another one who will be their companion. Place the 2 chips at the center of the board. On Step 4 (Choosing a Door), they must use the two chips. Both chips may be placed in front of the same door, or in front of two different doors. At the end of this step, if their own chip has chosen the wrong door, they take 2 Cohesion tokens from the board. If the companion’s chip has chosen the wrong door, they only take 1 Cohesion token from the board.
Credits
Credits
- Designer: L’Atelier
- Publishing Director: Régis Bonnessée
- Project Lead: Arthur Décamp
- Development Manager: Alexandre Garcia
- Development: Lucas Forlacroix, Valentin Gaudicheau, Nicolas Sato
- Art Director: Jérémy Couturier
- Artwork: Xavier Collette, M81 and Libellud
- Layout: Thomas Dutertre
- Design Team: Clément Dautremay, Mélanie André
- Rules: Arthur Décamp & L’Atelier
- Translation: Antoine Prono
- Proofreading: George Ankers
- Marketing: Mathieu Aubert
- Communication: Maximilien Da Cunha, Paul Neveur
- Production Manager: Alexandra Soporan
- Administration: Amélie Roullet, Pascale Belot
- Playtests: Rosie Hewis, Julie Vignaud, Catalina Balan, Adrien Baudet, Anthony Carles, Alexis Chapeau, Louise Cornu, Pascal Dubech, Laura Espitia, Floriana Luciani, Javier Mayorga, Charles Triboulot, André Vanouche, Emmanuel Biré, Valentin Briolet, Mathieu Carlouet, Brice Chardin, Laura Cousseau, Benoît Dabadie, Mathieu Fenot, Paul Ferret, Aline Fischer, William Forestier, Simon Genet, Kévin Goulette, Hélène Grisoni, Florent Guibert, Corentin Guillaumot, Robin Larnicol, José Lhuillier, Louisa Mamalis, Susan Mckinlay, Namiko Maki, Olivier Noc, Alexandra Pedinotti, Tristan Pietropaoli, Raphaël Robert-Bouchard, Aurélie Simondet, Stico, Andrés Vargas
- © Libellud 2019
