
Reykholt
2018
Grow unexpected crops, use the right people, and deliver the right vegetables before Reykholt’s brief tourist season ends.
60
minutes
1 - 4
player(s)
12+
Medium

About this board game
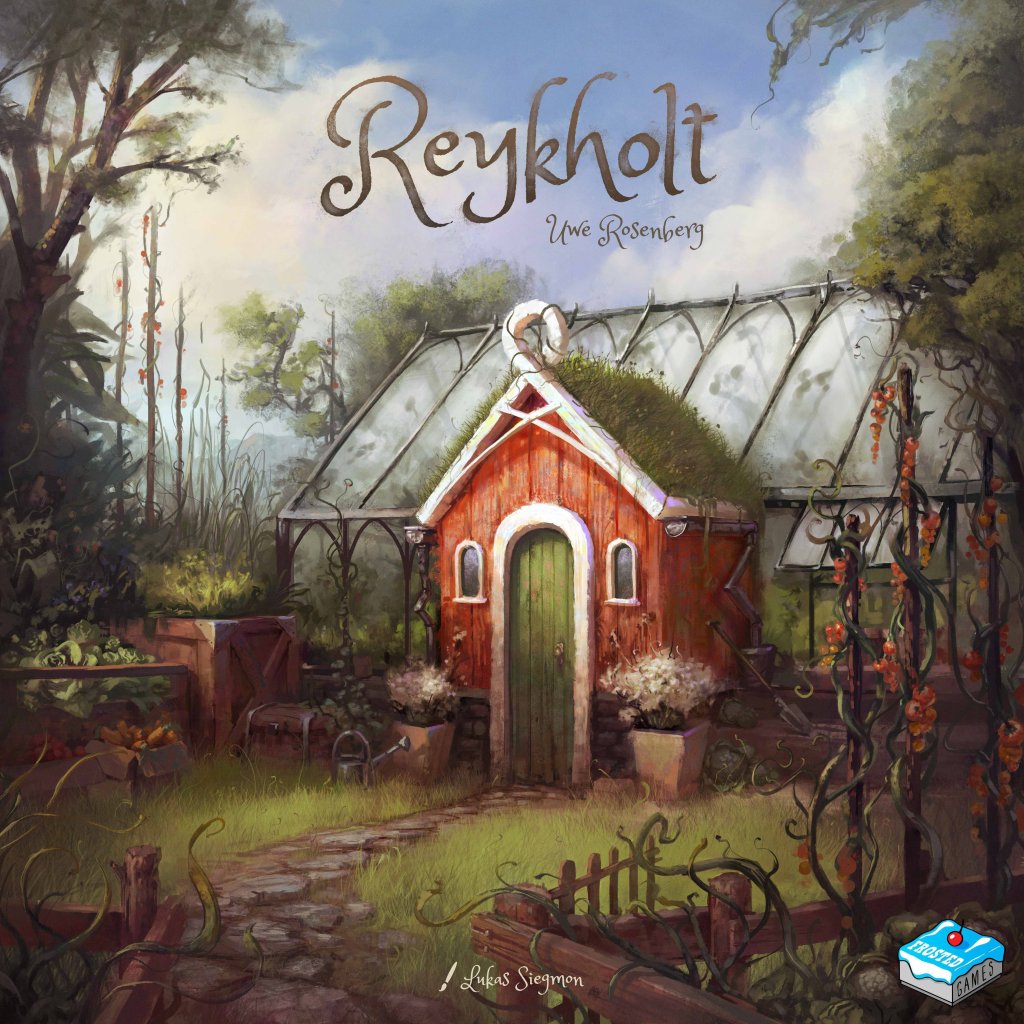
Reykholt is a board game for 1–4 players, with an approximate play time of 60 minutes, in which farmers race to profit from Iceland’s unusual geothermal agriculture.
Growing tomatoes, lettuce, and carrots in Iceland may sound absurd, but geothermal energy makes it possible. These unexpected fruits and vegetables have become an attraction for tourists, creating a valuable opportunity for farmers in Reykholt.
The tourist season is short, and every year brings more visitors. To succeed, you must make the most of the people available to you and have the right vegetables at the right time. Timing is central to the race, as rival farmers are pursuing the same opportunity.
Reykholt turns this unusual setting into a contest of agricultural ambition. The goal is not simply to grow crops, but to turn them into a fortune before the season passes. Each decision contributes to your attempt to gain the advantage over the other farmers.
With its distinctive Icelandic premise and focus on crops, workers, timing, and tourism, Reykholt offers a focused race for players who enjoy competing over a limited opportunity. The game was released in 2018 and supports both solo play and games with up to four players.

Board Game Rules for
Reykholt
Vegetables & Tourism in Iceland
A game for 1–4 players by Uwe Rosenberg
In Iceland, you can climb volcanoes, marvel at the aurora borealis, count sheep, and eat delicious tomatoes. Thanks to geothermal energy, Iceland is a vegetable paradise! Players take on the roles of vegetable farmers to build a livelihood in beautiful Iceland. But, with all the tourism around the natural wonders, competition to have the best vegetables is fierce!

Component List
- 1 Game Board (double-sided: front side for 3 and 4 players, back side for 1 and 2 players)
- 1 Covering Tile for 3-player games
- 4 Managers (1 in each player color)
- 12 Worker Discs (3 in each player color)
- 1 Sheet of Stickers for the worker discs
- 5 Goods Boxes
- 1 Start Player Card
- 4 Player Cards (1 in each player color)
- 23 Greenhouse Cards
- 8 Game Round Tiles
- 40 Goods Tiles
- 160 Wooden Goods:
- 40 tomatoes (red)
- 36 lettuce (green)
- 32 mushrooms (brown)
- 28 cauliflowers (white)
- 24 carrots (orange)
- 36 Service Cards (in 5 sets: A–E)
- 34 Story Mode Cards
Note: These setup instructions are for 2–4 players. Changes for the solo game or Story Mode are detailed on pages 11–12.
- To set up the game area, place the game board in the middle of the table. Use the side that matches your player count.
- In a 2-player game, place the covering tile face down above the game board.
- In a 3-player game, place the covering tile on the top row of the game board.
- In a 4-player game, the covering tile is not used at all.
- From the deck of greenhouse cards, remove all cards that exceed your player count (e.g., in a 2-player game, remove all cards marked with
 and
 ) and return them to the game box. Sort the remaining greenhouse cards into separate piles by the number of parcels on their back. Place these piles in a row next to the game board, face up. For the pile of random greenhouse cards (i.e., with the
 symbol on their back), set aside the card with
 symbol for now. Shuffle this pile and set it next to the other piles, face up. Then place the set-aside card on top of this pile, face down. This pile is known as the “random greenhouses.”

- Choose a set of service cards to use in this game. Shuffle all cards of this chosen set, then select 5 of them at random, placing them in an open display next to the game board. Return all other sets, along with the unused cards of the chosen set, back to the game box.
Hint: We recommend using cards from set A for your first game. Set E is only an option in the 2-player game.

- Stack the game round tiles in ascending order (i.e., 1 on top, 7 on bottom). Place this stack on the marked space, either on the game board or on the covering tile. (Game round tile 8 is only needed for Story Mode.)
- Place all of the wooden goods in their goods boxes, and set these boxes nearby. This is known as the supply. Place the goods tiles nearby as well.
- Stack 1 mushroom, 1 lettuce, and 1 tomato — from bottom to top, in that order. Place this stack at one end of the open display of service cards.
- Each player chooses a color and takes the following pieces in their chosen color:
- 3 workers
- 1 manager
- 1 player card
Unused player pieces are then returned to the box.
- The player who most recently purchased tomatoes is named the start player and takes the start player card. Then, beginning with the start player and continuing in clockwise order, each player places their manager on the start table of the tourism track.
First Game Preparations
Important! Before you start your first game…
Affix the stickers onto the worker discs — blue on blue discs, yellow on yellow discs, and so on. Assemble the goods boxes.

Note: The following rules are for 2–4 players. Changes for the solo game or Story Mode are detailed on pages 11–12.
The game is played over the course of 7 rounds. Each round is broken up into 4 phases, known as “times,” executed in order:
- During Work Time, your workers perform actions.
- During Harvest Time, you harvest goods from your greenhouses.
- During Tourism Time, your manager advances on the tourism track.
- During Homecoming Time, you retrieve all of your workers from the game board.
The game board displays the action spaces, as well as the tourism track, made up of tables showing dishes. (Details of the action spaces can be found on page 9.)
Glossary of Key Terms
- Supply – The general supply of goods is unlimited. If the goods of a given type run out, use the goods tiles as a stand-in. (Each goods tile = 3 goods.)
- Stock – Your personal stock is all of the goods that you have taken or harvested. You can only pay costs with goods from your stock.
- Seed – Each greenhouse is made up of several parcels. To seed, take 1 good from your stock and place it in a parcel of an empty greenhouse that you have. The entire greenhouse must be empty, not just a single parcel. Each greenhouse indicates which vegetables are allowed to be seeded there. Once you have seeded in a greenhouse, fill all its remaining empty parcels with goods of the same type, taken from the supply.
In general, each action space specifically tells you how many times you can seed. But read carefully, because there is a special phrase in the game: “Seed at least X times.” With such an action, there is no limit to how many times you can seed, as long as you have enough goods and empty greenhouses. But you must seed the minimum number of times, otherwise you cannot choose that action.
Example: “Seed at least 2 times.” You may seed 3, 4, or even more times, if you have enough goods and empty greenhouses. But you must do it at least 2 times if you want to choose this action.
1 – Work Time
Each round of the game starts with Work Time. Beginning with the start player and proceeding in clockwise order, each player places 1 of their 3 workers on a free action space. This continues until every player has placed all 3 of their workers.
When you place your worker on an action space, you immediately perform that action.
Placement Rules:
- A free action space is any action space that has no workers on it at all.
- You may only place your worker on an action space if you can perform at least 1 of the actions of that space. Some action spaces have more than 1 action. You may choose such an action space even if you can only perform 1 of those actions. However, you must perform all actions of an action space, if possible. You cannot voluntarily skip an action.
Example: You choose the following action space: “Take 1 tomato -AND- seed 1 time.” You may use this action space even if you cannot seed, as long as you want to take the tomato. However, if you can seed, then you must do so, in addition to taking the tomato. - The action spaces are divided into columns. The 4 columns are (from left to right): Property actions, Field actions, Market actions, and Town Hall actions.
- In the Property and Town Hall columns, some action spaces are marked with a flag
 . In a given round, each player can only use 1 flag action space in each column, at maximum.
Key Action Definitions:
- Harvest – To harvest, take 1 good from 1 of your greenhouses and move it to your stock. If an action allows you to harvest multiple times, you must take the goods from different greenhouses. You may only harvest 1 good from a greenhouse per action, unless the action specifically says otherwise. However, you may always harvest fewer times than allowed.
- Take a Service Card – To take a service card, choose 1 of the cards from the open display and place it in front of you. If you take 1 of the last 3 service cards remaining in the display, you also take the topmost good from the nearby stack (tomato, lettuce, or mushroom), placing it in your stock.

- Immediately Advance – To immediately advance, move your manager 1 table further along the tourism track, but without spending the goods that would normally be required.
2 – Harvest Time
During Harvest Time, each player harvests 1 time from each of their filled greenhouses. If you have a greenhouse with different goods (possible due to service card effects), you decide which to harvest.
3 – Tourism Time
During Tourism Time, each player takes a turn — but not in clockwise order. Start with the player furthest ahead on the tourism track, then proceed in order of position on the tourism track, from front to back. Each player completes their entire turn before the next player takes their turn.
During your turn, you may advance your manager by as many tables as you want and can afford. (Don’t forget the bonus!)
To advance your manager to a table, discard goods from your stock back to the supply, as shown on the signpost of that table.

Example: To advance your manager to this next table, you must discard 1 tomato from your stock.
In rare cases, it is possible to finish the entire tourism track. If you do, place your manager back at the start table and keep going, but treat each table like it shows +6 goods of that type.
If you advance to a table where other managers are already present, always place your manager ahead of all the other managers present, at the front of the table.

Example: There are already 2 other managers at this table. You slide them backward and place your own manager at the very front.
Using the Bonus
The “bonus” is a special function of Tourism Time. Once per round, while advancing your manager, you are required to use the bonus. To use the bonus, instead of discarding the goods required to advance, you take those goods from the supply. You can use this bonus before or after advancing normally, and you can even acquire goods via the bonus and then discard them to advance further in the same round.

Example: Your manager is at the table with 1 mushroom. You have 1 cauliflower and 2 tomatoes in your stock. First, you discard 1 cauliflower to advance to the next table. Then, for the next table, you use the bonus to take 1 carrot from the supply, as you advance. Finally, you discard 2 tomatoes to advance to yet another table.
| In your stock, you do have the goods required to advance… | In your stock, you do NOT have the goods required to advance… | |
|---|---|---|
| You have NOT yet used the bonus this round… | You may discard the goods from your stock to advance by 1 table -OR- use the bonus to advance by 1 table. You cannot stay at your table. | You must use the bonus to advance by 1 table. |
| You have already used the bonus this round… | You may discard the goods from your stock to advance by 1 table -OR- stay at your current table. | You stay at your current table. |
4 – Homecoming Time
During Homecoming Time, each player retrieves their workers from the game board. The topmost round tile is discarded, then the start player passes the start player card to the player seated on their left.
The game ends when the final game round tile has been discarded during Homecoming Time.
The player who advanced their manager the furthest on the tourism track is the winner!
In the case of a tie, the tied player who is at the front of the furthest table reached (i.e., the player who arrived at the table last) is the winner.
Action Spaces: General Clarifications
- All actions are performed immediately after choosing them.
- The arrow icon (
 ) on action spaces means that you have to discard the thing in front of the arrow in order to get or do the thing after the arrow.
- The word “OR” on action spaces denotes exclusivity. You have to do this -OR- that, but not both. If actions are described in any other way, there is no order in which you must perform them; you can choose the order.
- If you have to discard a greenhouse, it is returned to its pile, from where it can again be taken. If any goods still remain on a greenhouse when it is discarded, they are discarded to the supply.
- On the game board, the action spaces are sorted into columns and rows. The 4 columns are (from left to right): Property actions, Field actions, Market actions, and Town Hall actions. This terminology is important for certain service cards. Some service cards also refer to the rows.
Service Cards: General Clarifications
- Service cards provide you with immediate or ongoing effects. Their effects are active as soon as you take the card. When a card’s effect actually triggers is denoted in its text.
- Service cards with the words “immediately and once only” are highlighted in red, and you may only take them from the display if you can use their effect at that moment. After you have used the effect, such cards have no benefit.
- Cards that can be used “at any time” can be used at any point during the game, even when it is not your turn.
- Some cards are triggered during a certain time, others when you use a certain action. Only the actions triggered by action spaces count as “via an action,” but even another service card can trigger when a certain time is mentioned.
- When multiple card effects appear to occur simultaneously, resolve them in turn order.
- When a service card refers to a good of the “rarest type” in a greenhouse, it means the type depicted in a golden box on that greenhouse. The general order of rarity, from common to rare, is: tomato > lettuce > mushroom > cauliflower > carrot.
- In a 3- or 4-player game, service cards can be shared. When you share a service card, choose a service card that is in front of the player to your left or to your right. Slide that service card between the two of you — from now on, you can use it also (and no one else can join in sharing that card). If you choose to share an “immediately and once only” card, you use its effect immediately and once only, after which it has no further benefit.

Service Cards: Specific Clarifications
Service cards from Story Mode are highlighted in yellow.
| Card | Name | Effect | Clarification |
|---|---|---|---|
| A8 | Village Elder | If your manager shares a table with another manager at the end of Tourism Time, count the number of dishes at your current table. You may discard that many goods, in any combination, to advance by 1 table. | Example: On your table are 3 dishes, which means you may discard any 3 goods to advance by 1 table. You decide to discard 2 tomatoes and 1 lettuce to advance your manager by 1 table. |
| B5 | Carrot Seed | Immediately and once only, fill 1 empty parcel in each of your greenhouses with 1 carrot from the supply. | You place 1 carrot in each greenhouse, even those that normally would not be allowed to have carrots seeded. |
| B11 | Trainer | Immediately and once only, fill 1 empty parcel in each of your greenhouses with 1 good from the supply that can be seeded there but currently is not. | Example: In this greenhouse, mushrooms can be seeded, but currently the greenhouse only contains lettuce. So you may place 1 mushroom on an empty parcel. |
| B12 | Market Woman | Immediately and once only, fill 1 empty parcel in each of your greenhouses with 1 cauliflower from the supply. | You place 1 cauliflower in each greenhouse, even those that normally would not be allowed to have cauliflower seeded. |
| C12 | Farm Girl | At the start of Homecoming Time, you may seed at least 1 time. Do this as if your greenhouses each had 3 parcels. | This means that you can only have 3 goods on each greenhouse, but you may seed as on a greenhouse with 3 parcels (i.e., any type of goods may be seeded). |
| D11 | Greenhouse Estate Agent | This card has 4 parcels, divided into 2 separate sections, in which you can seed goods of any type. | Effectively, this card acts like 2 separate greenhouses that each have 2 parcels. For all other purposes, this card is not considered to be a greenhouse, however. |
| E1 | Full Restaurant | At the start of Harvest Time each round, if all action spaces in any row are unoccupied, you may take 1 lettuce and 1 carrot. | If there are multiple unoccupied rows, you still only take 1 lettuce and 1 carrot from the supply. |
| E2 | Lease of Land | Immediately and once only, give 1 of your greenhouses to your opponent, then immediately advance by 1 table. | If there are still goods in the greenhouse when you give it to your opponent, they stay in the greenhouse — in other words, you give those, too! |
Note: The solo game follows the rules for a 2-player game, but with the following changes.
Setup
- Place 1/2/2/1 greenhouses of sizes 3/4/5/6, respectively. The pile of random greenhouses is unchanged.
- Choose 2 colors and take the workers of both of those colors. Take 1 manager (of either color) to use.
- On each of the flag action spaces in the Property column, place an unused worker. These 2 action spaces are blocked for the entire game. The workers that are blocking these spaces cannot be removed whatsoever.
- From your chosen set of service cards, place only 3 cards (instead of 5 cards) in the open display, returning the rest to the game box. You still take the topmost good from the stack each time you take a service card from the display.
- Only use game round tiles 1–5.
Work Time
- At the start of Work Time each round, take a greenhouse from the pile of random greenhouses. In addition, take 1 tomato from the supply. This does not use up an action.
- From round to round, you will alternate using the workers of different colors during Work Time. This means that you will use workers of the first color three times (in rounds 1, 3, and 5) and workers of the second color twice (in rounds 2 and 4).
- When you are placing workers of the active color, workers of the inactive color block the action spaces that they occupy.
Homecoming Time
- During Homecoming Time in the first round, do not retrieve any workers. They stay on their action spaces and will block them for the next round.
- During Homecoming Time in each subsequent round, you always retrieve the workers from the previous round (i.e., of the inactive color). The workers placed in the current round stay put!
- After round 5 is complete, the game ends.
Goal of the Game
In the solo game, your goal is to reach the tomato table with 5 dishes. You can try to beat your high score by advancing even further. You can measure your success by counting how many goods you had of those required by the next table.
To measure this in points:
- For each extra table reached (after the tomato table with 5 dishes), you score 10 points.
- For each good you had of those required by the next table, you score 1 point (up to a maximum of 9 points).
Example: You have reached the mushroom table with 5 dishes, and still have 2 cauliflower in your stock. Your final score in this game would be 22 points.
Variant: Once during the game, you may place a worker on a blocked action space. (The challenge of this variant is in the timing — when will you do this?)
Backstory
Welcome to Iceland! You decided to leave your old life behind — to “drop out,” as they say. Say goodbye to big-city noise pollution, a hectic life, and the “always on” mentality. Life as a vegetable farmer in Reykholt sounds perfectly idyllic and relaxing — at least, until you meet Enya Göransdottir. Enya is responsible for the tourism of this quaint town, and she is your contact person in Reykholt. She is nice enough to give you some important advice right off the bat:
“Every vegetable we grow here is valuable. But the tourists are just mesmerized by our Icelandic tomatoes. That’s why you will even see them used as cocktail dressing (and everywhere else). But I have to admit that our last harvest didn’t go quite as planned. We could really use some help. Care to join us?”
Introduction
Story Mode is a completely new way to play Reykholt. You play as fresh arrivals in faraway Iceland, trying to make a living! You can play Story Mode with any player count.
For Story Mode, we put a special pack of cards in your game box! It contains:
- 5 scenario cards
- 13 event cards
- 16 service cards
The new service cards can also be used in the main game, without Story Mode. Just add them to your game and the appropriate sets, if desired.
Story Mode follows the rules of the base game, but with the following changes.
Setup
There are only two changes to the setup when you are playing in Story Mode:
- Before you prepare the game round tiles (step 4), choose a scenario card. We recommend playing the scenarios in numerical order, but it is your choice. The number of game round tiles to use is listed on the chosen scenario card.
- As the very last step of setup (step 9), shuffle the 13 event cards into a face-down deck. Place this event deck next to the game board.
Work Time
At the start of Work Time each round, the start player reveals the topmost event card, and the effect of that event is applied, for all players. Afterward, that event card is discarded.
End of Game and Winner
The chosen scenario card will indicate how many rounds to play, and any additional requirements for victory.
Game Designer: Uwe Rosenberg
Developers: Matthias Nagy and Benjamin Schönheiter
Illustrator: Lukas Siegmon
Graphic Designer: atelier198
Editors: Dustin Schwartz and William Sobel
Production Artist: Dan Wagner
© 2018 Renegade Game Studios, under license from Frosted Games, Germany. All rights reserved.
Introduction & Components
Vegetables & Tourism in Iceland
A game for 1–4 players by Uwe Rosenberg
In Iceland, you can climb volcanoes, marvel at the aurora borealis, count sheep, and eat delicious tomatoes. Thanks to geothermal energy, Iceland is a vegetable paradise! Players take on the roles of vegetable farmers to build a livelihood in beautiful Iceland. But, with all the tourism around the natural wonders, competition to have the best vegetables is fierce!
Component List
- 1 Game Board (double-sided: front side for 3 and 4 players, back side for 1 and 2 players)
- 1 Covering Tile for 3-player games
- 4 Managers (1 in each player color)
- 12 Worker Discs (3 in each player color)
- 1 Sheet of Stickers for the worker discs
- 5 Goods Boxes
- 1 Start Player Card
- 4 Player Cards (1 in each player color)
- 23 Greenhouse Cards
- 8 Game Round Tiles
- 40 Goods Tiles
- 160 Wooden Goods:
- 40 tomatoes (red)
- 36 lettuce (green)
- 32 mushrooms (brown)
- 28 cauliflowers (white)
- 24 carrots (orange)
- 36 Service Cards (in 5 sets: A–E)
- 34 Story Mode Cards
Setup
Note: These setup instructions are for 2–4 players. Changes for the solo game or Story Mode are detailed on pages 11–12.
- To set up the game area, place the game board in the middle of the table. Use the side that matches your player count.
- In a 2-player game, place the covering tile face down above the game board.
- In a 3-player game, place the covering tile on the top row of the game board.
- In a 4-player game, the covering tile is not used at all.
- From the deck of greenhouse cards, remove all cards that exceed your player count (e.g., in a 2-player game, remove all cards marked with and ) and return them to the game box. Sort the remaining greenhouse cards into separate piles by the number of parcels on their back. Place these piles in a row next to the game board, face up. For the pile of random greenhouse cards (i.e., with the symbol on their back), set aside the card with symbol for now. Shuffle this pile and set it next to the other piles, face up. Then place the set-aside card on top of this pile, face down. This pile is known as the “random greenhouses.”
- Choose a set of service cards to use in this game. Shuffle all cards of this chosen set, then select 5 of them at random, placing them in an open display next to the game board. Return all other sets, along with the unused cards of the chosen set, back to the game box.
Hint: We recommend using cards from set A for your first game. Set E is only an option in the 2-player game.
- Stack the game round tiles in ascending order (i.e., 1 on top, 7 on bottom). Place this stack on the marked space, either on the game board or on the covering tile. (Game round tile 8 is only needed for Story Mode.)
- Place all of the wooden goods in their goods boxes, and set these boxes nearby. This is known as the supply. Place the goods tiles nearby as well.
- Stack 1 mushroom, 1 lettuce, and 1 tomato — from bottom to top, in that order. Place this stack at one end of the open display of service cards.
- Each player chooses a color and takes the following pieces in their chosen color:
- 3 workers
- 1 manager
- 1 player card
Unused player pieces are then returned to the box.
- The player who most recently purchased tomatoes is named the start player and takes the start player card. Then, beginning with the start player and continuing in clockwise order, each player places their manager on the start table of the tourism track.
First Game Preparations
Important! Before you start your first game…
Affix the stickers onto the worker discs — blue on blue discs, yellow on yellow discs, and so on. Assemble the goods boxes.
Game Overview & Key Concepts
Note: The following rules are for 2–4 players. Changes for the solo game or Story Mode are detailed on pages 11–12.
The game is played over the course of 7 rounds. Each round is broken up into 4 phases, known as “times,” executed in order:
- During Work Time, your workers perform actions.
- During Harvest Time, you harvest goods from your greenhouses.
- During Tourism Time, your manager advances on the tourism track.
- During Homecoming Time, you retrieve all of your workers from the game board.
The game board displays the action spaces, as well as the tourism track, made up of tables showing dishes. (Details of the action spaces can be found on page 9.)
Glossary of Key Terms
- Supply – The general supply of goods is unlimited. If the goods of a given type run out, use the goods tiles as a stand-in. (Each goods tile = 3 goods.)
- Stock – Your personal stock is all of the goods that you have taken or harvested. You can only pay costs with goods from your stock.
- Seed – Each greenhouse is made up of several parcels. To seed, take 1 good from your stock and place it in a parcel of an empty greenhouse that you have. The entire greenhouse must be empty, not just a single parcel. Each greenhouse indicates which vegetables are allowed to be seeded there. Once you have seeded in a greenhouse, fill all its remaining empty parcels with goods of the same type, taken from the supply.
In general, each action space specifically tells you how many times you can seed. But read carefully, because there is a special phrase in the game: “Seed at least X times.” With such an action, there is no limit to how many times you can seed, as long as you have enough goods and empty greenhouses. But you must seed the minimum number of times, otherwise you cannot choose that action.
Example: “Seed at least 2 times.” You may seed 3, 4, or even more times, if you have enough goods and empty greenhouses. But you must do it at least 2 times if you want to choose this action.
Phases of a Round
1 – Work Time
Each round of the game starts with Work Time. Beginning with the start player and proceeding in clockwise order, each player places 1 of their 3 workers on a free action space. This continues until every player has placed all 3 of their workers.
When you place your worker on an action space, you immediately perform that action.
Placement Rules:
- A free action space is any action space that has no workers on it at all.
- You may only place your worker on an action space if you can perform at least 1 of the actions of that space. Some action spaces have more than 1 action. You may choose such an action space even if you can only perform 1 of those actions. However, you must perform all actions of an action space, if possible. You cannot voluntarily skip an action.
Example: You choose the following action space: “Take 1 tomato -AND- seed 1 time.” You may use this action space even if you cannot seed, as long as you want to take the tomato. However, if you can seed, then you must do so, in addition to taking the tomato. - The action spaces are divided into columns. The 4 columns are (from left to right): Property actions, Field actions, Market actions, and Town Hall actions.
- In the Property and Town Hall columns, some action spaces are marked with a flag . In a given round, each player can only use 1 flag action space in each column, at maximum.
Key Action Definitions:
- Harvest – To harvest, take 1 good from 1 of your greenhouses and move it to your stock. If an action allows you to harvest multiple times, you must take the goods from different greenhouses. You may only harvest 1 good from a greenhouse per action, unless the action specifically says otherwise. However, you may always harvest fewer times than allowed.
- Take a Service Card – To take a service card, choose 1 of the cards from the open display and place it in front of you. If you take 1 of the last 3 service cards remaining in the display, you also take the topmost good from the nearby stack (tomato, lettuce, or mushroom), placing it in your stock.
- Immediately Advance – To immediately advance, move your manager 1 table further along the tourism track, but without spending the goods that would normally be required.
2 – Harvest Time
During Harvest Time, each player harvests 1 time from each of their filled greenhouses. If you have a greenhouse with different goods (possible due to service card effects), you decide which to harvest.
3 – Tourism Time
During Tourism Time, each player takes a turn — but not in clockwise order. Start with the player furthest ahead on the tourism track, then proceed in order of position on the tourism track, from front to back. Each player completes their entire turn before the next player takes their turn.
During your turn, you may advance your manager by as many tables as you want and can afford. (Don’t forget the bonus!)
To advance your manager to a table, discard goods from your stock back to the supply, as shown on the signpost of that table.
Example: To advance your manager to this next table, you must discard 1 tomato from your stock.
In rare cases, it is possible to finish the entire tourism track. If you do, place your manager back at the start table and keep going, but treat each table like it shows +6 goods of that type.
If you advance to a table where other managers are already present, always place your manager ahead of all the other managers present, at the front of the table.
Example: There are already 2 other managers at this table. You slide them backward and place your own manager at the very front.
Using the Bonus
The “bonus” is a special function of Tourism Time. Once per round, while advancing your manager, you are required to use the bonus. To use the bonus, instead of discarding the goods required to advance, you take those goods from the supply. You can use this bonus before or after advancing normally, and you can even acquire goods via the bonus and then discard them to advance further in the same round.
Example: Your manager is at the table with 1 mushroom. You have 1 cauliflower and 2 tomatoes in your stock. First, you discard 1 cauliflower to advance to the next table. Then, for the next table, you use the bonus to take 1 carrot from the supply, as you advance. Finally, you discard 2 tomatoes to advance to yet another table.
| In your stock, you do have the goods required to advance… | In your stock, you do NOT have the goods required to advance… | |
|---|---|---|
| You have NOT yet used the bonus this round… | You may discard the goods from your stock to advance by 1 table -OR- use the bonus to advance by 1 table. You cannot stay at your table. | You must use the bonus to advance by 1 table. |
| You have already used the bonus this round… | You may discard the goods from your stock to advance by 1 table -OR- stay at your current table. | You stay at your current table. |
4 – Homecoming Time
During Homecoming Time, each player retrieves their workers from the game board. The topmost round tile is discarded, then the start player passes the start player card to the player seated on their left.
End of Game and Winner
The game ends when the final game round tile has been discarded during Homecoming Time.
The player who advanced their manager the furthest on the tourism track is the winner!
In the case of a tie, the tied player who is at the front of the furthest table reached (i.e., the player who arrived at the table last) is the winner.
Action Spaces & Service Cards Clarifications
Action Spaces: General Clarifications
- All actions are performed immediately after choosing them.
- The arrow icon () on action spaces means that you have to discard the thing in front of the arrow in order to get or do the thing after the arrow.
- The word “OR” on action spaces denotes exclusivity. You have to do this -OR- that, but not both. If actions are described in any other way, there is no order in which you must perform them; you can choose the order.
- If you have to discard a greenhouse, it is returned to its pile, from where it can again be taken. If any goods still remain on a greenhouse when it is discarded, they are discarded to the supply.
- On the game board, the action spaces are sorted into columns and rows. The 4 columns are (from left to right): Property actions, Field actions, Market actions, and Town Hall actions. This terminology is important for certain service cards. Some service cards also refer to the rows.
Service Cards: General Clarifications
- Service cards provide you with immediate or ongoing effects. Their effects are active as soon as you take the card. When a card’s effect actually triggers is denoted in its text.
- Service cards with the words “immediately and once only” are highlighted in red, and you may only take them from the display if you can use their effect at that moment. After you have used the effect, such cards have no benefit.
- Cards that can be used “at any time” can be used at any point during the game, even when it is not your turn.
- Some cards are triggered during a certain time, others when you use a certain action. Only the actions triggered by action spaces count as “via an action,” but even another service card can trigger when a certain time is mentioned.
- When multiple card effects appear to occur simultaneously, resolve them in turn order.
- When a service card refers to a good of the “rarest type” in a greenhouse, it means the type depicted in a golden box on that greenhouse. The general order of rarity, from common to rare, is: tomato > lettuce > mushroom > cauliflower > carrot.
- In a 3- or 4-player game, service cards can be shared. When you share a service card, choose a service card that is in front of the player to your left or to your right. Slide that service card between the two of you — from now on, you can use it also (and no one else can join in sharing that card). If you choose to share an “immediately and once only” card, you use its effect immediately and once only, after which it has no further benefit.
Service Cards: Specific Clarifications
Service cards from Story Mode are highlighted in yellow.
| Card | Name | Effect | Clarification |
|---|---|---|---|
| A8 | Village Elder | If your manager shares a table with another manager at the end of Tourism Time, count the number of dishes at your current table. You may discard that many goods, in any combination, to advance by 1 table. | Example: On your table are 3 dishes, which means you may discard any 3 goods to advance by 1 table. You decide to discard 2 tomatoes and 1 lettuce to advance your manager by 1 table. |
| B5 | Carrot Seed | Immediately and once only, fill 1 empty parcel in each of your greenhouses with 1 carrot from the supply. | You place 1 carrot in each greenhouse, even those that normally would not be allowed to have carrots seeded. |
| B11 | Trainer | Immediately and once only, fill 1 empty parcel in each of your greenhouses with 1 good from the supply that can be seeded there but currently is not. | Example: In this greenhouse, mushrooms can be seeded, but currently the greenhouse only contains lettuce. So you may place 1 mushroom on an empty parcel. |
| B12 | Market Woman | Immediately and once only, fill 1 empty parcel in each of your greenhouses with 1 cauliflower from the supply. | You place 1 cauliflower in each greenhouse, even those that normally would not be allowed to have cauliflower seeded. |
| C12 | Farm Girl | At the start of Homecoming Time, you may seed at least 1 time. Do this as if your greenhouses each had 3 parcels. | This means that you can only have 3 goods on each greenhouse, but you may seed as on a greenhouse with 3 parcels (i.e., any type of goods may be seeded). |
| D11 | Greenhouse Estate Agent | This card has 4 parcels, divided into 2 separate sections, in which you can seed goods of any type. | Effectively, this card acts like 2 separate greenhouses that each have 2 parcels. For all other purposes, this card is not considered to be a greenhouse, however. |
| E1 | Full Restaurant | At the start of Harvest Time each round, if all action spaces in any row are unoccupied, you may take 1 lettuce and 1 carrot. | If there are multiple unoccupied rows, you still only take 1 lettuce and 1 carrot from the supply. |
| E2 | Lease of Land | Immediately and once only, give 1 of your greenhouses to your opponent, then immediately advance by 1 table. | If there are still goods in the greenhouse when you give it to your opponent, they stay in the greenhouse — in other words, you give those, too! |
Solo Game
Note: The solo game follows the rules for a 2-player game, but with the following changes.
Setup
- Place 1/2/2/1 greenhouses of sizes 3/4/5/6, respectively. The pile of random greenhouses is unchanged.
- Choose 2 colors and take the workers of both of those colors. Take 1 manager (of either color) to use.
- On each of the flag action spaces in the Property column, place an unused worker. These 2 action spaces are blocked for the entire game. The workers that are blocking these spaces cannot be removed whatsoever.
- From your chosen set of service cards, place only 3 cards (instead of 5 cards) in the open display, returning the rest to the game box. You still take the topmost good from the stack each time you take a service card from the display.
- Only use game round tiles 1–5.
Work Time
- At the start of Work Time each round, take a greenhouse from the pile of random greenhouses. In addition, take 1 tomato from the supply. This does not use up an action.
- From round to round, you will alternate using the workers of different colors during Work Time. This means that you will use workers of the first color three times (in rounds 1, 3, and 5) and workers of the second color twice (in rounds 2 and 4).
- When you are placing workers of the active color, workers of the inactive color block the action spaces that they occupy.
Homecoming Time
- During Homecoming Time in the first round, do not retrieve any workers. They stay on their action spaces and will block them for the next round.
- During Homecoming Time in each subsequent round, you always retrieve the workers from the previous round (i.e., of the inactive color). The workers placed in the current round stay put!
- After round 5 is complete, the game ends.
Goal of the Game
In the solo game, your goal is to reach the tomato table with 5 dishes. You can try to beat your high score by advancing even further. You can measure your success by counting how many goods you had of those required by the next table.
To measure this in points:
- For each extra table reached (after the tomato table with 5 dishes), you score 10 points.
- For each good you had of those required by the next table, you score 1 point (up to a maximum of 9 points).
Example: You have reached the mushroom table with 5 dishes, and still have 2 cauliflower in your stock. Your final score in this game would be 22 points.
Variant: Once during the game, you may place a worker on a blocked action space. (The challenge of this variant is in the timing — when will you do this?)
Story Mode
Backstory
Welcome to Iceland! You decided to leave your old life behind — to “drop out,” as they say. Say goodbye to big-city noise pollution, a hectic life, and the “always on” mentality. Life as a vegetable farmer in Reykholt sounds perfectly idyllic and relaxing — at least, until you meet Enya Göransdottir. Enya is responsible for the tourism of this quaint town, and she is your contact person in Reykholt. She is nice enough to give you some important advice right off the bat:
“Every vegetable we grow here is valuable. But the tourists are just mesmerized by our Icelandic tomatoes. That’s why you will even see them used as cocktail dressing (and everywhere else). But I have to admit that our last harvest didn’t go quite as planned. We could really use some help. Care to join us?”
Introduction
Story Mode is a completely new way to play Reykholt. You play as fresh arrivals in faraway Iceland, trying to make a living! You can play Story Mode with any player count.
For Story Mode, we put a special pack of cards in your game box! It contains:
- 5 scenario cards
- 13 event cards
- 16 service cards
The new service cards can also be used in the main game, without Story Mode. Just add them to your game and the appropriate sets, if desired.
Story Mode follows the rules of the base game, but with the following changes.
Setup
There are only two changes to the setup when you are playing in Story Mode:
- Before you prepare the game round tiles (step 4), choose a scenario card. We recommend playing the scenarios in numerical order, but it is your choice. The number of game round tiles to use is listed on the chosen scenario card.
- As the very last step of setup (step 9), shuffle the 13 event cards into a face-down deck. Place this event deck next to the game board.
Work Time
At the start of Work Time each round, the start player reveals the topmost event card, and the effect of that event is applied, for all players. Afterward, that event card is discarded.
End of Game and Winner
The chosen scenario card will indicate how many rounds to play, and any additional requirements for victory.
Credits
Game Designer: Uwe Rosenberg
Developers: Matthias Nagy and Benjamin Schönheiter
Illustrator: Lukas Siegmon
Graphic Designer: atelier198
Editors: Dustin Schwartz and William Sobel
Production Artist: Dan Wagner
© 2018 Renegade Game Studios, under license from Frosted Games, Germany. All rights reserved.


