
Spartacus: A Game of Blood and Treachery
2012
Manage a gladiatorial school, forge alliances, win arena fights, and outmaneuver rivals in a tense game of strategy and treachery.
180
minutes
3 - 4
player(s)
17+
Medium


About this board game
Spartacus: A Game of Blood and Treachery is a strategy, negotiation, and combat board game for 3–4 players, with an approximate play time of 180 minutes. Released in 2012, it is set in the ancient Roman city of Capua and is based on the hit TV series.
Each player takes charge of a gladiatorial school managed by a lanista. Your goal is to increase your influence and surpass rival schools by buying and training gladiators, acquiring slaves, and seeking the favor of influential Romans.
The game unfolds through variable phases, each offering a different way to advance your position:
- Intrigue: Plot against rivals, forge alliances, and maneuver for advantage.
- Market: Bid in open auctions for gladiators, slaves, and equipment, or try to sway influential Romans.
- Arena: Send gladiators into bloody combat for the crowd, with victories boosting your fame and influence.
Success in Spartacus requires more than building the strongest collection of gladiators or gathering the most resources. You must also master diplomacy, making and breaking alliances as circumstances change. Trust is always limited, and every negotiation can reshape the balance of power.
With its blend of strategy, negotiation, and robust combat, Spartacus: A Game of Blood and Treachery creates an immersive contest of political maneuvering, gladiatorial spectacle, and backstabbing treachery. Fans of the series and players who enjoy tense social strategy will find a ruthless journey where every decision matters and only the most cunning can hope to triumph.

Board Game Rules for
Spartacus: A Game of Blood and Treachery
Overview
In the game, each player takes on the role of Dominus, the head of a house in Capua, a city in the era of Ancient Rome. Each house is competing for influence. Fight for dominance through a combination of political schemes and glorious battles on the sands of the arena.
As Dominus, you have a variety of resources at your disposal:
- Guards protect you from schemes launched by rivals.
- Slaves run your household and earn gold for you.
- You also control a Ludus, a gladiator training school. Gladiators compete to bring glory to themselves and influence to their Dominus.
Each turn begins with Upkeep and is then divided into three Phases:
- Intrigue Phase: Houses play their Schemes, hoping to raise their fortunes while undermining their rivals.
- Market Phase: Players buy, sell and trade Assets (Gladiators, Slaves and Guards). Players also bid against each other to acquire new Assets at Auction.
- Arena Phase: The bloody games are held. Two Houses’ Gladiators are pitted against each other in a brutal fight for Favor and Influence.
The goal of the game is to become the most influential house in Capua, securing your family’s power for years to come.
Spirit of the Game
During the game, players will bribe, poison, betray, steal, blackmail, and undermine each other. Gold will change hands again and again to buy support, stay someone’s hand or influence their decisions. Will you be the honorable player whose word is their bond or the treacherous schemer whose alliances change with the wind?
BUT – don’t be an ass about it. Everyone plays games to have a good time. Ultimately, you’re playing to have fun with your friends – keep that in mind as you’re plotting to destroy their House.
Box Contents
- Rulebook
- Market Deck (62 cards)
- Intrigue Deck (104 cards)
- House Cards (4)
- Tokens (148)
- Dice (26)
- Gladiator Figures (4)
- Game Board

Game Components
House Cards
House Cards serve as the center of your play area and track your Influence during the game. House Cards also detail your House’s Starting Assets: Gladiators, Slaves, Guards and Gold. Each House has different Special Rules and Starting Assets.

Dice
There are three colors of dice in the game: red, black and blue. Each color is used for a different attribute:
- Red for Attack
- Black for Defense
- Blue for Speed
In combat, the number of dice you have determines the health of your Combatant.

Game Board
The Game Board serves as the Grand Arena where the Gladiators ply their bloody art. Wagers are placed on the board corners.

Gladiator Figures
These figures represent your chosen combatant in the arena. Each player will use the same figure throughout the game.

Game Tokens
Various tokens are used throughout the game to mark status, influence, wagers, and hosting:

The Card Decks
Market Deck
The Market Deck contains Assets that can be acquired by each Dominus to advance their standing in Roman society. Assets include Gladiators, Slaves and Equipment.

Gladiator Cards
Gladiators are exceptional slaves, trained to fight in the Arena to bring Influence and glory to your House. Maintaining a large stable of Gladiators is one way to gain Influence.

Slave Cards
Slaves are servants of the Dominus; earning coin and performing other services. Slaves increase the wealth of their House.

Equipment Cards
Equipment Cards represent arming and training all of a House’s Gladiators in the use of specialized equipment (rather than a single sword or helmet). There are three types of Equipment: Weapons, Armor and Special. Only one card of each type may be used in each Arena Match.

Intrigue Deck
The Intrigue Deck includes all manner of plots and machinations each Dominus will launch against their rivals. The Intrigue Deck includes Schemes, Reactions and Guards.

Scheme Cards
Schemes detail a variety of underhanded maneuvers. You may also Cash In Schemes for Gold. All Schemes have a minimum required Influence.

Reaction Cards
Reactions are powerful counter maneuvers played in response to other events in the game. Some Reactions are Foils which are used to stop Schemes played by other Houses.

Guard Cards
Guards are a special type of Reaction that may only be used to stop Schemes targeting you. Guards have a chance to fail. If you fail you may use additional Guards. Guards may be held in your hand or deployed on the table as an Asset.

Game Set Up
Each House has its strengths and weaknesses. Some Houses rely on their stable of Gladiators to lead them to victory. Other Houses depend on a strong defense. Utilizing your strengths is a key to victory.

House Selection
- Each Dominus rolls a dice. The Dominus with the highest dice takes their choice of House Card and Gladiator figure and receives the Host token.
- Going clockwise, the remaining players each choose a House Card and Gladiator figure.
- Each player also receives their matching House tokens.
In the Intrigue Phase, play begins with the Dominus with the Host Token.
Starting Assets
Each Dominus receives the Starting Assets described on their House Card.
- Gladiators & Slaves: Separate the white bordered “Starting Gladiators” and “Starting Slaves” from the Market Deck. There are 8 of each. Shuffle the Starting Gladiators and deal each Dominus their starting number of Gladiators. Do the same with the Starting Slaves. Any remaining Starting Gladiators and Slaves are returned to the Market Deck.
- Guards: Give each Dominus their starting number of Guards, taken from the Intrigue Deck. Starting Guards must be placed face up on the table (rather than in your hand).
- Gold: Give each Dominus their starting Gold. The remaining Gold is the Bank. You may have one player act as the banker or all the players can share the responsibility.
Note: Gold may change hands between players at any time! There are no restrictions on when Gold may change hands.
Choose a Game Type
- Quick: Players start with 7 Influence. Quick games usually take under two hours. Quick games are recommended for the first few times you play.
- Standard: Players start with 4 Influence. Standard games usually take between two and three hours.
- Advanced: Players start with 1 Influence. Advanced games often run over three hours as each Dominus rises from obscurity to supremacy.
Card Decks
Shuffle the Market Deck and Intrigue Deck thoroughly. Place the decks face down on the table. Discarded cards will be placed face up next to their deck.
Ready to Play!
You’re now set up and ready to play! Let the deals and machinations begin!
Goal of the Game
The goal of the game is to raise your House to an impressive 12 Influence. For detailed victory conditions, see the “WINNING THE GAME” rules.
Upkeep Phase Overview
Upkeep is when all the maintenance and preparation for game’s three main phases occurs. Each game turn begins with Upkeep.
Upkeep Summary
- Refresh Cards
- Heal Injuries
- Balance the Ledgers
Note: During each stage of Upkeep, all players may perform their actions simultaneously.
1. Refresh Cards
At the beginning of Upkeep, all players flip any uninjured “Exhausted” (face down) Asset Cards face up. Refreshed (face up) cards are considered “Ready”. For details on Exhausted cards, see the special rules on page 17. After Refresh Cards, move on to Heal Injuries.
2. Heal Injuries
For each Exhausted Gladiator or Slave with an Injury token, roll a dice to make a Healing Roll:
- On a roll of 4, 5 or 6: Remove the Injury token and Refresh the card.
- On a roll of 2 or 3: The Gladiator or Slave remains Injured this turn. You may attempt to Heal their Injury again next round.
- On a roll of a 1: The Gladiator or Slave has died from their Injury and is placed face up in the Market discard pile.
Note: Certain cards, such as a Medicus, allow you to re-roll a failed Healing Roll.
After Healing Injuries, move on to Balance the Ledgers.
3. Balance the Ledgers
Training, feeding and equipping elite Gladiators is expensive. Slave ownership helps offset that cost:
- You receive 1 Gold for each Ready Slave you possess.
- You must pay 1 Gold for each Ready Gladiator.
- If a player is unwilling or unable to pay for their Gladiators, they must discard a Gladiator for every unpaid Gold, setting the Gladiator free.
Example: Balance the Ledgers
- Pete has 3 Gladiators and 2 Slaves so he pays the Bank 1 Gold.
- Sally has 2 Gladiators, one of which is Ready, one of which is Injured. In addition, she has 4 Slaves so she receives 3 Gold from the Bank.
- John has 1 Gladiator and 1 Slave; he doesn’t pay or receive any Gold from the bank.
- Liz has 3 Gladiators, no Slaves and only 2 Gold. She must pay the Bank 2 Gold and choose one of her Gladiators to discard.
Sample Upkeep Walkthrough
- Pete starts Upkeep with one ready (face up) Gladiator, two Injured Gladiators and two Exhausted Slaves. Pete flips over the two Exhausted Slaves. They are now available to use again this turn.
- Pete makes a Healing Rolls for his 2 Injured Gladiators. He indicates which Gladiator he’s trying to Heal first and rolls a “3”: that Gladiator remains Injured and the card stays face down. He indicates the second Gladiator and rolls a “5”: success! He removes the second Gladiator’s Injury token and flips the card face up.
- Pete now has 2 Ready Gladiators and 2 Ready Slaves. The cost of his Gladiators equals the income from his Slaves, so Pete doesn’t owe the bank any gold this Upkeep.
- He’s done – once all the Players have finished their Upkeep, play moves on to the Intrigue Phase.

Intrigue Phase Overview
During this Phase you’ll play cards from your hand to affect the fortunes and Influence of your House – or bring shame and ruin to your rivals. Launch Schemes, defend your House and reap your profits!
Phase Summary
- Draw Cards
- Play Schemes / Cash In Cards
Draw Cards
At the start of the Intrigue Phase, all Players draw 3 new Intrigue Cards into their hand (this may increase your hand above your Hand Size). If, during the course of the game, the Intrigue Deck runs out of cards, shuffle and reuse the discard pile.

Hand Size
Your Hand Size is listed underneath your current Influence. You may not end your Intrigue turn with more cards in your hand than your listed Hand Size. You may have more cards than this during your Intrigue turn, but you must bring your hand down to your Hand Size before ending your turn.

Tip: You’ll often have to play a card that you’d rather keep to stay within your Hand Size. Decide carefully; some cards are much more valuable later in the game!
Turn Order
After all the players have drawn 3 cards, play begins with the Dominus holding the Host Marker. After that Dominus has finished their Intrigue Turn, play proceeds clockwise around the table.

Note: During the Intrigue Phase, players are free to discuss the cards they wish to play, barter for favors and pay Gold to each other to secure assistance. Asset Cards may NOT change hands during this Phase.
Your Intrigue Turn
During your Intrigue turn, you may perform the following available actions in any order:
- Cash In cards for Gold
- Use Special Abilities
- Play Schemes
Cash In Cards
Intrigue Cards can be cashed in for the Gold Value listed at the bottom of the card. To Cash In an Intrigue Card, place the card face up in the Intrigue discard pile and take the amount of Gold listed at the bottom of the card from the Bank.
House Special Rules
Each House has Special Rules that may only be used in the Intrigue Phase. Each House’s Special Rules are detailed on their House Card.
Card Special Abilities
Many Slaves and some Gladiators have “Intrigue” Special Abilities. Many of these require you to Exhaust the card. These must be used during your Intrigue turn, if possible. Any exceptions will be noted on the cards.

Playing Schemes
Each Scheme has an Influence level required to play the card. If your current Influence is equal to or greater than the Influence required, you may play the Scheme. When playing a Scheme, declare which Dominus is the Target Dominus, which may be yourself.
Example: Playing Schemes
Sally has “Inside Information” in her hand, a Scheme that requires 6 Influence to play and lets the Target Dominus draw 2 extra cards. Sally currently has 7 Influence, so she is able to play the card. She places the card on the table and declares that she is the Target Dominus. The Scheme is successful: Sally draws 2 cards from the Intrigue Deck and places “Inside Information” face up in the Intrigue discard pile.
Seeking Support
If you do not have enough Influence to play a Scheme by yourself, you may ask other players for support. If they agree to Support your Scheme, you may play the Scheme as if your Influence was equal to the total of all the supporting Houses’ Influence. Once a Dominus has agreed to support a Scheme, that Support may not be withdrawn: the granting of Support is final.
A scheme may be supported by any number of Houses. Their Support does not change your actual Influence or affect anything other than your ability to play that one Scheme – do not move anyone’s Influence markers.
Tip: You are not required to show your opponents your Scheme before asking for their support. You are not required to tell the truth about your Scheme either…
Example: Seeking Support
John has 6 Influence and has a Scheme in his hand that requires 9 Influence. Asking the other players for Support, he convinces Liz (who has 4 Influence) to support his Scheme for a few Gold. For the purposes of playing that Scheme (and only that Scheme), John now has 10 Influence, enough to play the Scheme. Neither John nor Liz’s Influence changes.
Successful Schemes
If you have enough Influence to play a Scheme and the Scheme is not Foiled (see Foiling a Scheme), then the Scheme is successful. The effects of the card take place immediately and any costs of the card are paid. The successful Scheme is then placed face up in the Intrigue discard pile.
Example: Successful Scheme
Pete has 4 Influence and holds the card “Black Market Profits” which requires 7 Influence and has the effect “Gain 5 Gold”. Pete asks Liz, who has 3 Influence, for her support playing the scheme. “Sure”, she says, “For 2 Gold”. Pete agrees, and plays the Scheme. No one foils the Scheme with a Reaction so the Scheme is successful and he gains 5 gold. Whether or not he keeps his end of the bargain is up to him…
Note: Intrigue Cards may never change hands between players. Gold may change hands at any time. You’re free to solicit deals and payoffs from other players in exchange for their Support – or restraint!
Reactions
Reactions are powerful counter maneuvers played in response to other events. Unlike Schemes, Reactions are not always played during your turn.
Each Reaction will indicate when it may be played. Reactions are not limited to the Intrigue Phase.
Reactions also have a required Influence level to play. However, you may not receive Support when playing a Reaction. Reactions represent quick responses and there’s simply no time to muster support from another House. After playing a Reaction, place it in the Intrigue Deck discard pile.
Example: Playing a Reaction
During Upkeep, Sally has 2 Gold, all of which she has to spend to “Balance the Ledgers”, leaving her with zero Gold. John is able to play the “Destitute!” Reaction Card, “-1 influence to Target Player with no Gold”. Sally loses 1 Influence and John places his card in the discard pile.
Foiling a Scheme
Some Reaction Cards state “Foil a Scheme”. These may be played immediately following another Dominus attempting to play a Scheme in their Intrigue phase.
You may Foil any Scheme; not just those targeting yourself. You may only Foil Schemes – you may not Foil a Reaction (unless a card states otherwise).
Example: Foiling a Scheme
With 10 Influence, John plays the Scheme “A Visitor From Rome”, which would result in him gaining 1 Influence. Liz decides to play “Whispered Rumors”, Foiling John’s Scheme. John’s Scheme failed so he places the card in the Intrigue discard pile along with Liz’s Reaction.
Guard Cards
Guard Cards are a special type of Reaction that may only be used to Foil Schemes targeting the controlling Dominus’ House. However, a Guard’s Foil attempt is not guaranteed.
To make a Guard attempt, discard a Guard and roll a dice:
- On a result of 4, 5 or 6: The Scheme targeting your House is Foiled.
- On a result of 1, 2, 3: That Guard attempt has failed.
You may make as many Guard Attempts as you have Guards. After a failed Guard attempt, you may alternately Foil the Scheme with a Reaction from your hand.
Note: Even if your Guard attempt fails, the Guard is still discarded!
Guards may be kept in your hand or deployed to the table as an Asset. Guards can be moved from your hand to the table at any time. Once on the table, they may not be moved back into your hand. Guards deployed to the table become Assets of your House and may be sold or traded during the Open Market Phase.
Tip: Guards may be used to Foil a Scheme targeting you regardless of whether the Guard is in your hand or on the table. Keeping Guards in your hand allows you to keep your defenses hidden from your opponents (but uses limited hand space).
Example: Guard Attempts
Pete has one Guard on the table, plus a couple more in his hand. Thinking he looks like an easy target, Sally plays “Incite Rebellion” on Pete. If successful, the Scheme requires him to discard a Gladiator. Not wanting to lose a Gladiator, Pete discards his Guard on the table to try to stop the scheme. He rolls a dice and gets a “2”. Failure! Pete then discards a second Guard, from his hand, and rolls again. He rolls a “5”: success! Sally’s scheme is Foiled; her “Incite Rebellion” card is placed in the discard pile atop Pete’s 2 Guards.
Tip: Even if a Dominus has a lot of Guards, it still may be worth targeting them with Schemes. If they discard a Guard to Foil the Scheme, you’ve at least weakened their defenses!
Foiled Schemes
When a Scheme is Foiled, none of that Scheme’s effects take place – including any costs associated with the scheme. Place the Foiled Scheme face up in the Intrigue discard pile.
Example: Foiled Scheme Costs
Liz attempts to play “Grand Feast”. It has the effect “Pay every Player 2 Gold, Target Dominus gains +1 Influence”. John Foils the Scheme. “Grand Feast” is placed in the discard pile and Liz does not pay any Gold.
Ending Your Turn
After playing Schemes and Cashing In cards, you may not hold more cards than the Hand Size under your current Influence on your House Card. When you’ve finished your Intrigue turn, play moves to the player on your left.
After all players have finished their Intrigue turn, play moves on to the Market Phase.
Market Phase Overview
During the Market Phase players have the opportunity to buy and sell Asset Cards to each other and acquire new Gladiators, Slaves and Equipment during the Auction.
Phase Summary
- Open Market
- Auction
- Bid for Hosting
1. Open Market
During Open Market players have the opportunity to buy, sell and trade Asset Cards with other players and sell Assets to the Bank. There is no turn order during Open Market. Players are free to make deals at will.
Note: The Open Market stage is the ONLY TIME Gladiators, Slaves, Equipment and Guards may change hands with other players!
Asset Cards’ Gold Values have no bearing when bartering with other players. All manner of deals are permitted concerning Asset Cards and Gold. Remember, Intrigue Cards may NEVER be traded or sold between players. Intrigue Cards may NOT be discarded for Gold in Open Market.
Selling to the Bank
During Open Market, Asset Cards may also be sold to the Bank. To sell an Asset Card to the Bank, discard the Asset and receive the card’s Gold Value from the Bank.
Tip: The true value of a card is often higher than its Gold Value. Other players may pay more for a card than the Bank.
Ending Open Market
When you’ve completed your business and have no more trades to conduct, pick up and conceal your Gold. Picking up your Gold signals that your Open Market business is over. Once all players have picked up their Gold, Open Market ends and the Auction begins. This is the only time when Gold may be concealed.
Tip: Remember to keep your Gold concealed until after you’ve bid for Hosting Honors! Revealing your wealth early gives your rivals an advantage.
Example: Open Market
In Open Market, Sally decides she has one more Gladiator than she wants so asks the other players if anyone is interested in buying or trading for it. Pete offers Sally 3 Gold for it, but Sally decides that she’d rather sell it back to the bank for 2 Gold than give it to Pete for 3. Pete only has 1 Guard remaining, so he asks the other players if anyone will sell him a Guard for 3 Gold. Being broke, John quickly agrees and passes Pete a Guard. Business concluded, all the players pick up their Gold and the Auction begins.
2. Auction
To begin the Auction, place a number of cards from the Market Deck, equal to the number of players, face down in a row. Reveal the first card, this is the first Asset to be auctioned. All players will bid using concealed bids. The winning bidder adds the card to their House and the next card to be auctioned is revealed.

Concealed Bidding
- To bid on an Asset, place your Gold in your hand, keeping the exact amount of your bid hidden from the other players.
- Once your bid is in hand, extend your fist above the table, still keeping your bid hidden.
- Once all players have their fists over the table, everyone opens their hands to reveal their bid.
- The highest bidder wins the auction, puts their Gold in the Bank and claims the Asset for their House. All the other bidders keep their Gold.
Resolving Tied Bids
If two or more players are tied for the highest bid, they each place the Gold from their first bid on the table. Then another round of concealed bidding commences – with only the tied players participating. Their second bids are added to their initial bids. Bidding continues until one player has the highest total bid.
Failed Auctions
If all bidders bid zero Gold, in the first or subsequent rounds of bidding, the auction is a Failed Auction: no one claims the prize and the card is discarded. Any bids on the table from previous rounds of bidding are returned to the players’ hands.
Example: Auction Bidding
Agron is up for bid in the Auction. Everyone extends their closed hands containing their bids over the table. Pete bids 0, Sally bids 2, John bids 3 and Liz bids 3 – John and Liz are tied for highest bidder and Sally and Pete are out of the Auction. John and Liz place their initial bids on the table in front of them. In the second round of bidding John and Liz both then add 1 Gold to their bids on the table. In the third round, they both bid zero. They both put a total of 4 Gold on the table for Agron, but because they both bid nothing in the third round of bidding the auction is a Failed Auction and neither player receives the card. Agron is discarded and they both return their bids to their hands.
3. Bid for Hosting
After all the Asset Cards have been auctioned off, players bid for the Hosting Honors in the following Arena Phase.
Tip: Hosting the games is critical to success. Hosting not only raises your Influence, it also gives you control over who fights in the Games – potentially earning you even more Influence and Gold!
As with the Auction, players bid via Concealed Bidding and pay the winning bid to the bank. The player with the winning bid receives the Host marker and will be the Host of the following Games.
Note: Bidding for Hosting is when (and only when) the Host marker changes hands. The winning bidder will host the Games this turn and go first in the next Intrigue phase.
All normal bidding rules apply, with one exception. In the event of a Failed Auction, all the participating bidders roll a dice. The Dominus with the highest result wins the Hosting Honors.
Example: Hosting Bid
When bidding for Hosting Honors, Pete bids 8, John bids 6, Sally bids 5 and Liz bids 8. Pete and Liz are tied for the highest bid; John and Sally are no longer participating. Pete and Liz’s bids are tied, so they then place their 8 Gold on the table and a second round of bidding commences. However, they’re both out of Gold and cannot bid again. They both place empty fists over the table, bidding nothing. At this point, it would normally be a Failed Auction. But someone has to Host, so Liz and Pete both roll a dice. Liz wins the dice roll, claims the Host Marker and will Host in the following Arena Phase.
Ending Market Phase
Once a Dominus has won the right to Host, players return their remaining Gold to the Treasury on their House Cards and the Arena Phase begins.
Arena Phase Overview
In the Arena Phase, Gladiators fight to bring glory to themselves and Influence to their Dominus. Hosting the Games brings Influence to the Host as they display their wealth and power.
Phase Summary
- Honor to the Host
- Hosting the Event
- Tribute
- Place Wagers
- Combat!
- Victory and Defeat
1. Honor to the Host
The Dominus who won the Host marker in the previous Market Phase is the Host this turn and receives 1 Influence for presiding over the Games.
2. Hosting the Event
It is the Host’s duty to fill 2 openings in the Games with worthy Combatants. The players should be offered an Invitation one at a time. The Host may Invite themselves.
Note: Throughout the rules, “Combatant” is used to refer to a Gladiator or Slave selected to fight in the Arena. The same rules apply to both Gladiators and Slaves.
Invitations
- When the first Dominus accepts an Invitation, they choose a Gladiator or Slave from their House and place their Gladiator Figure on the Game Board, on the hex marked “I”. The Dominus then places their Combatant’s card on the edge of the Arena, along with any Equipment Cards the Combatant is using (up to one of each type: Weapon, Armor and Special Equipment). Once these card selections are made they are committed and may not be altered.
- The Host then offers an Invitation to a second Dominus as above. That Dominus then commits their Combatant and Equipment and places their Gladiator Figure on the hex marked “II”.
Note: Gold may change hands at any time, but Asset Cards may not change hands during the Arena Phase.
Declining an Invitation (Booooo! Hissss!)
If a Dominus is unable or unwilling to accept an Invitation, they lose 1 Influence. The Host then Invites another Dominus. If, after all other players have been invited, there is still an opening in the Games, the Host must invite themselves.
In the unlikely event that only 1 Dominus accepts an Invitation, no match is fought, the Arena Phase ends and the next game round begins.
Tip: Hosting players are permitted to solicit bribes, deals and promises from the other players to secure an Invitation (or avoid one!). This allows the Host to parlay their temporary position of authority into financial and political gain.

Example: Arena Invitations
John holds the Host Marker and is deciding who to offer an Invitation. He knows he’s going to invite himself second, since he has Theokeles, a powerful Gladiator. Trying to insure his victory in the Arena, he invites Liz – whose only Gladiator is a weak Thracian Warrior. Liz doesn’t want to get pummelled and lose her only Gladiator, so she declines his Invitation. Liz then loses 1 Influence. John asks if anyone will pay for an Invitation. Pete offers John 3 Gold. John agrees and invites Pete. Pete commits his Combatant’s card to the edge of the Game Board along with Trident (Weapon), Helmet (Armor) and Javelin (Special) cards. John then invites himself and commits Theokeles to the Games.
3. Tribute
Tribute is paid to the owners of favored Combatants. Invited players receive:
- 2 Gold per Favor Token on their Combatant.
- 6 Gold for a Champion Token on their Combatant.
Tribute is paid after both Invited players have committed their Combatants, before Wagers are placed. See “Victory and Defeat” for details about receiving Favor and Champion tokens.

4. Place Wagers
After the Combatants are committed, all players may place Wagers on the Games’ outcome. Wagers are indicated by placing 1 to 3 Gold coins on the desired board corner and capping the stack with a House token. Players may place no more than 3 Gold on any given Wager.
Note: Betting happens simultaneously, with all players placing their Wagers at the same time. If this causes disputes or takes an excessively long time, you may optionally start with the Host, and take turns betting individually.

The Wagers
- VICTORY (Pays 1 to 1): A Wager placed on Victory is a bet that the selected Combatant will win the match. If the selected Combatant wins, the Bank pays 1 Gold for every Gold bet. Players participating in the Games are not permitted to bet against their Combatant as this would invoke the wrath of the gods!
- INJURY (Pays 2 to 1): A Wager placed on Injury is a bet that an Injury will end the match. If either Combatant is Injured, the Bank pays 2 Gold for every Gold bet.
- DECAPITATION (Pays 2 to 1): A Wager placed on Decapitation is a bet that a Decapitation will end the match. If either Combatant is Decapitated, the bank pays 2 Gold for every Gold bet.
Note: When you win a Wager, you retrieve the Gold you bet from the board in addition to receiving your winnings from the Bank. Lost Wagers are paid to the Bank.
Example: Placing Bets
Sally wants to bet 3 Gold on Decapitation and 3 Gold on Theokeles to win. She places a stack of 3 Gold topped with one of her house tokens on both the “Decapitation” corner and the “Victory II” corner.
5. Combat!
Once all players have finished placing wagers, Combat begins (see the dedicated Combat section for detailed rules).
6. Victory and Defeat
After the combat has been decided:
- The victorious Dominus gains 1 Influence.
- The victorious Combatant receives a Favor token, to be kept on the Combatant’s card.
Crowning a Champion
Champions are beloved by the crowd and bring glory to their House. However, losing a Champion can devastate a House’s fortunes.
- When a Combatant receives its third Favor token, the Combatant becomes a Champion. Return all the Combatant’s Favor tokens and replace them with a Champion token. The Champion token remains with the Combatant for the remainder of the game (or the Combatant’s life).
- When a Dominus acquires a Champion through victories in the Arena or from another player, that Dominus gains 1 Influence.
- If a Dominus loses a Champion for any reason that Dominus loses 1 Influence.
Settling Wagers
After the winning Combatant receives their Favor token, players settle their Wagers with the Bank. Losing Wagers are placed in the Bank. Winning Wagers are returned to their owners, along with their appropriate winnings.
Example: Settling Wagers
Sally bet 3 Gold on Theokeles to win and 3 Gold on Decapitation. John loses the match when Theokeles is Decapitated! Sally loses the 3 Gold she bet on Theokeles to win and receives 6 Gold from the Bank because the match ended in a Decapitation (plus she takes back the 3 Gold that she bet on Decapitation). In the end, Sally comes out three Gold ahead.
The Power of Life & Death
The Host must choose whether the defeated Combatant lives or dies with the traditional “Thumbs Up or Thumbs Down” gesture.
- THUMBS UP: Combatants receiving a “Thumbs Up” are returned to their House along with all Equipment Cards.
- THUMBS DOWN: Combatants receiving a “Thumbs Down” are executed: place the defeated Combatant in the Market discard pile. All Equipment Cards are returned to their owner.
Some Combatants have the Favor of the crowd through past victories in the Arena. Choosing “Thumbs Down” for a Combatant with Favor tokens results in the Host losing 1 Influence per Favor Token. Choosing “Thumbs Down” on a Champion is not permitted. The wrath of the crowd would be too great!
Tip: As with the brokering of Invitations, the Host may solicit bribes and other favors from players wishing to influence their thumb.
The Game Continues…
After the host decides the fate of the defeated Combatant, the next game turn begins.

Combat Overview
The sands of the Arena are where fortunes are made, reputations are built and the crowd’s appetite is sated.
Tip: Before playing your first game, it may be useful to play a few practice fights to make sure you understand the flow of combat.
Attributes
Every Gladiator and Slave in the game has three Attributes listed down the left-hand side of the card. These numbers determine how many dice are in each Combatant’s Attribute Dice Pools. As a Combatant fights and takes damage, the number of available dice decreases.
- ATTACK (ATK): The red dice are rolled for attacking. The more you have, the more likely you are to Wound your opponent.
- DEFENSE (DEF): The black dice are used for defending. The more you have, the more likely you are to Block your opponent’s attacks.
- SPEED (SPD): The blue dice are used to determine who goes first in Combat. The number of Speed dice in your Dice Pool determines how many hexes you can move.

Dice as Health
The total number of dice available in all three Attribute Pools represents the total health of a Combatant. As dice are lost from each Attribute Pool as a result of taking Wounds, the Combatant’s ability decreases. This attrition of ability mimics the reduction of power over the course of a long and grueling fight.

Combat Basics
Each round of Combat begins with the Combatants making an Initiative Roll. The winner of the Initiative Roll then chooses to go first or second. The first Combatant then moves and attacks, followed by the second Combatant moving and attacking. This makes up a single Combat Round.
Combat Initiative
To determine Initiative, each player rolls their Combatant’s available Speed dice and totals the result. The Player with the higher total wins Initiative and may choose to go first or second this combat round. In case of a tie, roll again.
Example: Combat Initiative
John’s Gladiator has 3 Speed dice, Sally’s has 4. They both roll their Speed dice and compare totals. John’s dice total 8; Sally’s dice total 11. Sally chooses to Move and Attack second this round. John must Move and Attack first this round.
Combat Round
During their Combat Round, each player Moves and Attacks in the order they choose (Move then Attack, Attack then Move). In some cases, a player will choose to Move into contact with their opponent and then Attack. At other times it might be more advantageous to Attack first then Move to avoid your opponent’s Attack.
Moving
A Combatant may Move a number of hexes equal to or less than the number of Speed dice currently in their Attribute Pool.
Tip: If you’re a lot slower than your opponent, you’ll find yourself constantly outmaneuvered!

Attacking
Combatants may Attack opponents in adjacent hexes. Attacks are resolved through Opposed Dice Rolling:
- The attacking player rolls their Combatant’s current Attack Dice Pool and the defending Combatant rolls their current Defense Dice Pool simultaneously.
- Each player lines up their dice, highest to lowest, creating a Dice String.
- The combatants compare Dice Strings: highest to highest, lowest to lowest.
- A Wound is successfully caused if the Attack Dice rolled is greater than the Defense Dice for that position in the Dice String. Ties go to the Defender.


Unopposed Attack Dice
In the event that the attacker is rolling more Attack Dice than the defender has Defense Dice, any unopposed Attack Dice roll of 3 or greater causes a Wound. Unopposed rolls of 1 or 2 are considered failed attacks and no Wounds are dealt.

Unopposed Defense Dice
If more Defense Dice are rolled than Attack Dice, the lower unopposed Defense Dice are ignored; only the higher Defense Dice are used.
Taking Wounds
Any Wounds taken are resolved immediately. The wounded Combatant must surrender a number of dice equal to the number of Wounds taken. When surrendering dice, you may surrender dice from any Dice Pool: Attack, Defense or Speed. Dice lost to Wounds are no longer part of the available Dice Pool for your Combatant.
Example: Taking Wounds
Pete has a 3 ATK, 3 DEF, 3 SPD Gladiator that takes two Wounds. Pete must surrender two dice. Hoping to respond with a devastating attack, Pete surrenders one of his DEF and one SPD. This leaves him more vulnerable and slower, but still able to attack back at full strength.
Combat Dice Examples


The Rule of One
No Dice Pool may be reduced below 1 dice until all Dice Pools have only 1 dice left. Reducing 1 or more Dice Pools to zero ends the match in defeat.
Example: Rule of One
For example, Sally has a Gladiator that has been reduced to 2 ATK, 2 DEF and 1 SPD. The Gladiator takes 2 Wounds. Sally may not surrender her last SPD (due to the “Rule of One”, above). She surrenders 1 ATK and 1 DEF, leaving her Gladiator with only 1 dice of each color. If Sally’s Gladiator takes another Wound, he’ll be defeated.
Defeat
When any of a Combatant’s Attribute’s Dice Pools are reduced to zero, the Combatant is defeated. There are 3 levels of Defeat:
- YIELD: If any single Attribute Dice Pool is reduced to zero your Combatant has been defeated. Your Combatant is at the mercy of the Host, but no other ill effects are suffered.
- INJURY: If a match ends with 2 Attribute Dice Pools at zero dice your Combatant has sustained an Injury. Exhaust the card and mark it with an Injury token. The Combatant will remain exhausted until the Injury is Healed. If the Host is merciful enough to let the Combatant live, you may attempt to Heal the Injury in the following Upkeep.
- DECAPITATION: If all 3 of a Combatant’s Attribute Dice Pools are reduced to zero, the Combatant has been Decapitated. The Combatant’s card is placed in the discard pile and any Equipment Cards are returned to the controlling Dominus.
Special Abilities
Some Gladiators and Slaves have Special Abilities on their cards. These Special Abilities may contradict some of the standard rules. In all cases, rules on the cards take precedence over the rulebook.
Exhausting a Card
Many cards’ Special Abilities will state “Exhaust to…”. This will often be preceded by when the Special Ability may be used. When instructed by a card to Exhaust, flip the card face down and then apply the rule. Face-up cards are considered “Ready”.
Example: Exhausting a Card
Liz owns Pietros whose Special Ability is “SKILLED: (Intrigue) Exhaust to gain 1 Gold”. In the Intrigue Phase, Liz exhausts Pietros, flips him face down and takes a Gold from the Bank.
Exhausted Cards
Exhausted cards may not be used in any way – they are effectively out of the game until they are refreshed in the following Upkeep. Exhausted cards:
- Don’t count towards Schemes
- Are not counted during Balancing the Ledgers
- May not fight in the Arena
- May not be bought, sold or traded
- Are not eligible to be discarded for any reason
Example: Exhausted Cards
Sally has three Slaves in her House, two of which are Exhausted. She plays the Scheme “Illicit Services”, which pays 2 Gold per Ready Slave. Sally has 1 Ready Slave so receives 2 Gold: her 2 Exhausted Slaves do not count towards the Scheme. Pete then plays “Incite Rebellion” on Sally, forcing her to discard a Slave. She must discard her remaining Ready Slave, as her Exhausted cards are not eligible. John then plays the Reaction “Empty Brothel” on her! Even though Sally still has 2 Slaves, she counts as having none, since they are both Exhausted. She loses 1 Influence.
Re-Rolling Dice
Some Equipment and Special Rules allow you to re-roll a dice. When you have the ability to re-roll a dice, it is your choice which dice to re-roll. Only the final result counts.
Tip: Just because you have the ability to re-roll a dice, doesn’t mean you have to use it. It may sometimes be in your best interest to hold back!
Unless explicitly stated otherwise, re-rolls only apply to your own dice rolls. You can’t use a Helmet, which allows you to re-roll a DEF, to make your opponent re-roll one of their DEF! In the event both players have re-rolls, the re-rolls should be simultaneous.
Example: Dice Re-Roll
Sally has a Sword card which grants her 1 ATK re-roll. In Combat, her Attack Dice String is: 6-4-3. Her opponent rolls 6-4-2. Without the re-roll, she would do 1 Wound. She decides to re-roll her “3”. The re-rolled dice comes up “5”, making her Dice String 6-5-4, resulting in 2 Wounds!
Doubles & Triples
Many Gladiators have Special Abilities that are triggered when the Gladiator rolls doubles or triples. Re-rolling a dice can result in doubles or triples.
Note: Each dice can only count towards one set of doubles or triples. Rolling three “5”s could count as either a double or a triple, but not multiple doubles.
Examples: Doubles & Triples
- Agron is fighting in the Arena. His Special Ability states “DEF triples cause one auto-wound to attacker”. When rolling his 4 DEF dice, he rolls 4,3,3,2. With his Helmet, Agron then re-rolls the “2” and gets a “3” instead. His Defense String is now 4,3,3,3: Woo Hoo! Triples! Regardless of his attacker’s ATK roll, Agron deals a wound to his attacker.
- Spartacus’s Special Ability is “ATK doubles add 1 auto-wound”. He attacks and rolls 2-2-1-1: normally a terrible Attack. However, his Special Ability will deal 2 Wounds to the Defender, regardless of their DEF String.
Equipment Rules
The Market Deck contains a variety of different Weapons, Armor and Special Equipment Cards. Every piece of Equipment gives your Combatant an advantage in the Arena. Some types of Equipment may be used every Combat Round, other types may only be used once per Combat.
Equipment Cards represent money and training invested by the Houses to prepare their Gladiators for the Arena rather than representing a single sword or helmet.
Equipping Your Gladiator
After selecting a Gladiator or Slave to fight in the Arena, you may equip your Combatant with up to 1 of each type of Equipment: 1 Weapon Card, 1 Armor Card and 1 Special Card.
Equipment Effects
- Attack Re-rolls: Some Equipment allows you to re-roll one Attack Dice. This may be done every time you Attack.
- Defense Re-rolls: Some Equipment allows you to re-roll one Defense Dice. This may be done every time you roll your Defense dice.
- Attack Range: Some Equipment allows you to Attack from a greater distance. Normal Attacks must be made from adjacent hexes. For example, a Trident is an “Attack Range: 2” Weapon so may be used to Attack opponents within 2 hexes.
- Speed Attacks: Some Attacks (such as those made with a Javelin) use your Gladiator’s Speed Dice instead of their Attack Dice. The Attack is resolved per the normal rules: simply roll your current Speed Dice instead of your Attack Dice. This Speed Attack is made instead of your normal Attack, not in addition to it.
- Ignore Wound: Some Equipment allows you to ignore a Wound. After the Attack and Defense Dice Strings have been compared, but before surrendering any dice, you may ignore one of the wounds.
- Extra Wound: Some Equipment allows you to deal an extra Wound. After the Attack and Defense Dice Strings have been compared, but before surrendering any dice, you may add a Wound to the number of Wounds dealt.
- Net: The Net is a specialized piece of Equipment that allows your Combatant to seize Initiative at a crucial moment. Before rolling Speed Dice to determine Combat Initiative, you may Exhaust your Combatant’s Net to automatically win the Initiative roll. There is no Initiative roll in the Combat Round in which a Net is used.
Winning the Game
The goal of the game is to reach 12 Influence. If, at the end of a Phase, (Intrigue, Market or Arena) only 1 Dominus has 12 Influence, that Dominus wins the game. To win, you need to end a Phase with 12 Influence and be the only Dominus to do so!
Note: Hitting 12 Influence during a Phase doesn’t mean you’ve won yet! There may still be time for the other players to knock your Influence down or get to 12 Influence themselves.
Tournaments
If, at the end of a Phase, 2 or more players have 12 Influence, the Game’s winner must be decided in the Arena! Players who ended the phase with 12 Influence are immediately entered into a Tournament to determine the winner:
- Two Player Tournament: The 2 players with 12 influence each select and equip a Combatant and an Arena battle is fought per normal Combat rules. The winner of the match wins the game!
- Three Player Tournament: The 3 players with 12 influence each add up the Gold Values of all their Gladiators and Equipment. If the Gold Values are tied, roll off. The 2 players with lower totals fight a match in the Arena. The victor of that match then fights a match with the remaining player. The victor of the second match is the winner!
- Four Player Final Battle: In the exceedingly rare instance that all 4 players end a phase with 12 Influence, all 4 players total the Gold Values of all their Gladiators and Equipment. If the Gold Values are tied, roll off. The players with the lowest two totals fight in the Arena. Then, the players with the highest two scores fight a match in the Arena. Finally, the victors of the first two matches fight to determine the final winner!
Turn Summary
-
Upkeep
- Refresh Cards: Flip uninjured, Exhausted cards face up.
- Heal Injuries: Make Healing Rolls for Injured Assets.
- Balance the Ledgers: Pay 1 Gold per Ready Gladiator, Earn 1 Gold per Ready Slave.
-
Intrigue
- Draw Cards: All players draw 3 cards.
- Intrigue Turns: Starting with the Host, players take turns playing Schemes, Cash In cards, use House Special Rules and Asset Special Abilities.
-
Market
- Open Market: Players are free to buy, sell and trade Assets with each other and the Bank.
- Auction: Deal cards from the Market Deck face down. Reveal the cards and bid.
- Bid for Hosting: The winning bidder hosts the following Arena Games.
-
Arena
- Honor to the Host: The Host gains 1 Influence.
- Hosting the Event: The Host invites 2 players to the Games.
- Tribute: Players are paid for any Favor or Champion tokens their Combatants possess.
- Place Wagers: All players may wager on the outcome of the Games.
- Combat! Opposed dice combat in the arena.
- Victory and Defeat: The victorious Combatant receives a Favor token, wagers are settled and the Host exercises the Power of Life & Death.
Credits
- Game Design: Sean Sweigart, Aaron Dill
- Original Concept / Design: John Kovaleski
- 3D Modeling: Charles Woods
- Producers: Peter Simunovich, John-Paul Brisigotti
- Graphic Design: Gale Force Nine Studio
- Special Thanks: To all the staff at the USA, UK and NZ Battlefront offices
- Playtesting: Kelly Arthur, Janet Brooks, Jason Buyaki, Jordan Carasa, Alessio Cavatore, Cheryl Delaney, Jason Delaney, Rebecca Dill, Andrew Duncan, Steve Eyles, Nick “Red Dog” Eyre, Kit Goldsbury, David Griffin, Mark Honeycutt, Sally Honeycutt, Sam Knowles, Christopher Kovaleski, Daniel Linder, Christine Matthews, Ray O’Connor, Tim Oswalt, Peter Przekop, Damian Reid, Robert Sadler, Brian Sayman, Adam Simunovich, Andrew Smith, Gav Thorpe, Gavin van Rossum, Tony Vodanovich, Lizzie Willick
Introduction & Components
Overview
In the game, each player takes on the role of Dominus, the head of a house in Capua, a city in the era of Ancient Rome. Each house is competing for influence. Fight for dominance through a combination of political schemes and glorious battles on the sands of the arena.
As Dominus, you have a variety of resources at your disposal:
- Guards protect you from schemes launched by rivals.
- Slaves run your household and earn gold for you.
- You also control a Ludus, a gladiator training school. Gladiators compete to bring glory to themselves and influence to their Dominus.
Each turn begins with Upkeep and is then divided into three Phases:
- Intrigue Phase: Houses play their Schemes, hoping to raise their fortunes while undermining their rivals.
- Market Phase: Players buy, sell and trade Assets (Gladiators, Slaves and Guards). Players also bid against each other to acquire new Assets at Auction.
- Arena Phase: The bloody games are held. Two Houses’ Gladiators are pitted against each other in a brutal fight for Favor and Influence.
The goal of the game is to become the most influential house in Capua, securing your family’s power for years to come.
Spirit of the Game
During the game, players will bribe, poison, betray, steal, blackmail, and undermine each other. Gold will change hands again and again to buy support, stay someone’s hand or influence their decisions. Will you be the honorable player whose word is their bond or the treacherous schemer whose alliances change with the wind?
BUT – don’t be an ass about it. Everyone plays games to have a good time. Ultimately, you’re playing to have fun with your friends – keep that in mind as you’re plotting to destroy their House.
Box Contents
- Rulebook
- Market Deck (62 cards)
- Intrigue Deck (104 cards)
- House Cards (4)
- Tokens (148)
- Dice (26)
- Gladiator Figures (4)
- Game Board
Game Components
House Cards
House Cards serve as the center of your play area and track your Influence during the game. House Cards also detail your House’s Starting Assets: Gladiators, Slaves, Guards and Gold. Each House has different Special Rules and Starting Assets.
Dice
There are three colors of dice in the game: red, black and blue. Each color is used for a different attribute:
- Red for Attack
- Black for Defense
- Blue for Speed
In combat, the number of dice you have determines the health of your Combatant.
Game Board
The Game Board serves as the Grand Arena where the Gladiators ply their bloody art. Wagers are placed on the board corners.
Gladiator Figures
These figures represent your chosen combatant in the arena. Each player will use the same figure throughout the game.
Game Tokens
Various tokens are used throughout the game to mark status, influence, wagers, and hosting:
The Card Decks
Market Deck
The Market Deck contains Assets that can be acquired by each Dominus to advance their standing in Roman society. Assets include Gladiators, Slaves and Equipment.
Gladiator Cards
Gladiators are exceptional slaves, trained to fight in the Arena to bring Influence and glory to your House. Maintaining a large stable of Gladiators is one way to gain Influence.
Slave Cards
Slaves are servants of the Dominus; earning coin and performing other services. Slaves increase the wealth of their House.
Equipment Cards
Equipment Cards represent arming and training all of a House’s Gladiators in the use of specialized equipment (rather than a single sword or helmet). There are three types of Equipment: Weapons, Armor and Special. Only one card of each type may be used in each Arena Match.
Intrigue Deck
The Intrigue Deck includes all manner of plots and machinations each Dominus will launch against their rivals. The Intrigue Deck includes Schemes, Reactions and Guards.
Scheme Cards
Schemes detail a variety of underhanded maneuvers. You may also Cash In Schemes for Gold. All Schemes have a minimum required Influence.
Reaction Cards
Reactions are powerful counter maneuvers played in response to other events in the game. Some Reactions are Foils which are used to stop Schemes played by other Houses.
Guard Cards
Guards are a special type of Reaction that may only be used to stop Schemes targeting you. Guards have a chance to fail. If you fail you may use additional Guards. Guards may be held in your hand or deployed on the table as an Asset.
Setup
Game Set Up
Each House has its strengths and weaknesses. Some Houses rely on their stable of Gladiators to lead them to victory. Other Houses depend on a strong defense. Utilizing your strengths is a key to victory.
House Selection
- Each Dominus rolls a dice. The Dominus with the highest dice takes their choice of House Card and Gladiator figure and receives the Host token.
- Going clockwise, the remaining players each choose a House Card and Gladiator figure.
- Each player also receives their matching House tokens.
In the Intrigue Phase, play begins with the Dominus with the Host Token.
Starting Assets
Each Dominus receives the Starting Assets described on their House Card.
- Gladiators & Slaves: Separate the white bordered “Starting Gladiators” and “Starting Slaves” from the Market Deck. There are 8 of each. Shuffle the Starting Gladiators and deal each Dominus their starting number of Gladiators. Do the same with the Starting Slaves. Any remaining Starting Gladiators and Slaves are returned to the Market Deck.
- Guards: Give each Dominus their starting number of Guards, taken from the Intrigue Deck. Starting Guards must be placed face up on the table (rather than in your hand).
- Gold: Give each Dominus their starting Gold. The remaining Gold is the Bank. You may have one player act as the banker or all the players can share the responsibility.
Note: Gold may change hands between players at any time! There are no restrictions on when Gold may change hands.
Choose a Game Type
- Quick: Players start with 7 Influence. Quick games usually take under two hours. Quick games are recommended for the first few times you play.
- Standard: Players start with 4 Influence. Standard games usually take between two and three hours.
- Advanced: Players start with 1 Influence. Advanced games often run over three hours as each Dominus rises from obscurity to supremacy.
Card Decks
Shuffle the Market Deck and Intrigue Deck thoroughly. Place the decks face down on the table. Discarded cards will be placed face up next to their deck.
Ready to Play!
You’re now set up and ready to play! Let the deals and machinations begin!
Goal of the Game
The goal of the game is to raise your House to an impressive 12 Influence. For detailed victory conditions, see the “WINNING THE GAME” rules.
Phase 1: Upkeep
Upkeep Phase Overview
Upkeep is when all the maintenance and preparation for game’s three main phases occurs. Each game turn begins with Upkeep.
Upkeep Summary
- Refresh Cards
- Heal Injuries
- Balance the Ledgers
Note: During each stage of Upkeep, all players may perform their actions simultaneously.
1. Refresh Cards
At the beginning of Upkeep, all players flip any uninjured “Exhausted” (face down) Asset Cards face up. Refreshed (face up) cards are considered “Ready”. For details on Exhausted cards, see the special rules on page 17. After Refresh Cards, move on to Heal Injuries.
2. Heal Injuries
For each Exhausted Gladiator or Slave with an Injury token, roll a dice to make a Healing Roll:
- On a roll of 4, 5 or 6: Remove the Injury token and Refresh the card.
- On a roll of 2 or 3: The Gladiator or Slave remains Injured this turn. You may attempt to Heal their Injury again next round.
- On a roll of a 1: The Gladiator or Slave has died from their Injury and is placed face up in the Market discard pile.
Note: Certain cards, such as a Medicus, allow you to re-roll a failed Healing Roll.
After Healing Injuries, move on to Balance the Ledgers.
3. Balance the Ledgers
Training, feeding and equipping elite Gladiators is expensive. Slave ownership helps offset that cost:
- You receive 1 Gold for each Ready Slave you possess.
- You must pay 1 Gold for each Ready Gladiator.
- If a player is unwilling or unable to pay for their Gladiators, they must discard a Gladiator for every unpaid Gold, setting the Gladiator free.
Example: Balance the Ledgers
- Pete has 3 Gladiators and 2 Slaves so he pays the Bank 1 Gold.
- Sally has 2 Gladiators, one of which is Ready, one of which is Injured. In addition, she has 4 Slaves so she receives 3 Gold from the Bank.
- John has 1 Gladiator and 1 Slave; he doesn’t pay or receive any Gold from the bank.
- Liz has 3 Gladiators, no Slaves and only 2 Gold. She must pay the Bank 2 Gold and choose one of her Gladiators to discard.
Sample Upkeep Walkthrough
- Pete starts Upkeep with one ready (face up) Gladiator, two Injured Gladiators and two Exhausted Slaves. Pete flips over the two Exhausted Slaves. They are now available to use again this turn.
- Pete makes a Healing Rolls for his 2 Injured Gladiators. He indicates which Gladiator he’s trying to Heal first and rolls a “3”: that Gladiator remains Injured and the card stays face down. He indicates the second Gladiator and rolls a “5”: success! He removes the second Gladiator’s Injury token and flips the card face up.
- Pete now has 2 Ready Gladiators and 2 Ready Slaves. The cost of his Gladiators equals the income from his Slaves, so Pete doesn’t owe the bank any gold this Upkeep.
- He’s done – once all the Players have finished their Upkeep, play moves on to the Intrigue Phase.
Phase 2: Intrigue
Intrigue Phase Overview
During this Phase you’ll play cards from your hand to affect the fortunes and Influence of your House – or bring shame and ruin to your rivals. Launch Schemes, defend your House and reap your profits!
Phase Summary
- Draw Cards
- Play Schemes / Cash In Cards
Draw Cards
At the start of the Intrigue Phase, all Players draw 3 new Intrigue Cards into their hand (this may increase your hand above your Hand Size). If, during the course of the game, the Intrigue Deck runs out of cards, shuffle and reuse the discard pile.
Hand Size
Your Hand Size is listed underneath your current Influence. You may not end your Intrigue turn with more cards in your hand than your listed Hand Size. You may have more cards than this during your Intrigue turn, but you must bring your hand down to your Hand Size before ending your turn.
Tip: You’ll often have to play a card that you’d rather keep to stay within your Hand Size. Decide carefully; some cards are much more valuable later in the game!
Turn Order
After all the players have drawn 3 cards, play begins with the Dominus holding the Host Marker. After that Dominus has finished their Intrigue Turn, play proceeds clockwise around the table.
Note: During the Intrigue Phase, players are free to discuss the cards they wish to play, barter for favors and pay Gold to each other to secure assistance. Asset Cards may NOT change hands during this Phase.
Your Intrigue Turn
During your Intrigue turn, you may perform the following available actions in any order:
- Cash In cards for Gold
- Use Special Abilities
- Play Schemes
Cash In Cards
Intrigue Cards can be cashed in for the Gold Value listed at the bottom of the card. To Cash In an Intrigue Card, place the card face up in the Intrigue discard pile and take the amount of Gold listed at the bottom of the card from the Bank.
House Special Rules
Each House has Special Rules that may only be used in the Intrigue Phase. Each House’s Special Rules are detailed on their House Card.
Card Special Abilities
Many Slaves and some Gladiators have “Intrigue” Special Abilities. Many of these require you to Exhaust the card. These must be used during your Intrigue turn, if possible. Any exceptions will be noted on the cards.
Playing Schemes
Each Scheme has an Influence level required to play the card. If your current Influence is equal to or greater than the Influence required, you may play the Scheme. When playing a Scheme, declare which Dominus is the Target Dominus, which may be yourself.
Example: Playing Schemes
Sally has “Inside Information” in her hand, a Scheme that requires 6 Influence to play and lets the Target Dominus draw 2 extra cards. Sally currently has 7 Influence, so she is able to play the card. She places the card on the table and declares that she is the Target Dominus. The Scheme is successful: Sally draws 2 cards from the Intrigue Deck and places “Inside Information” face up in the Intrigue discard pile.
Seeking Support
If you do not have enough Influence to play a Scheme by yourself, you may ask other players for support. If they agree to Support your Scheme, you may play the Scheme as if your Influence was equal to the total of all the supporting Houses’ Influence. Once a Dominus has agreed to support a Scheme, that Support may not be withdrawn: the granting of Support is final.
A scheme may be supported by any number of Houses. Their Support does not change your actual Influence or affect anything other than your ability to play that one Scheme – do not move anyone’s Influence markers.
Tip: You are not required to show your opponents your Scheme before asking for their support. You are not required to tell the truth about your Scheme either…
Example: Seeking Support
John has 6 Influence and has a Scheme in his hand that requires 9 Influence. Asking the other players for Support, he convinces Liz (who has 4 Influence) to support his Scheme for a few Gold. For the purposes of playing that Scheme (and only that Scheme), John now has 10 Influence, enough to play the Scheme. Neither John nor Liz’s Influence changes.
Successful Schemes
If you have enough Influence to play a Scheme and the Scheme is not Foiled (see Foiling a Scheme), then the Scheme is successful. The effects of the card take place immediately and any costs of the card are paid. The successful Scheme is then placed face up in the Intrigue discard pile.
Example: Successful Scheme
Pete has 4 Influence and holds the card “Black Market Profits” which requires 7 Influence and has the effect “Gain 5 Gold”. Pete asks Liz, who has 3 Influence, for her support playing the scheme. “Sure”, she says, “For 2 Gold”. Pete agrees, and plays the Scheme. No one foils the Scheme with a Reaction so the Scheme is successful and he gains 5 gold. Whether or not he keeps his end of the bargain is up to him…
Note: Intrigue Cards may never change hands between players. Gold may change hands at any time. You’re free to solicit deals and payoffs from other players in exchange for their Support – or restraint!
Reactions
Reactions are powerful counter maneuvers played in response to other events. Unlike Schemes, Reactions are not always played during your turn.
Each Reaction will indicate when it may be played. Reactions are not limited to the Intrigue Phase.
Reactions also have a required Influence level to play. However, you may not receive Support when playing a Reaction. Reactions represent quick responses and there’s simply no time to muster support from another House. After playing a Reaction, place it in the Intrigue Deck discard pile.
Example: Playing a Reaction
During Upkeep, Sally has 2 Gold, all of which she has to spend to “Balance the Ledgers”, leaving her with zero Gold. John is able to play the “Destitute!” Reaction Card, “-1 influence to Target Player with no Gold”. Sally loses 1 Influence and John places his card in the discard pile.
Foiling a Scheme
Some Reaction Cards state “Foil a Scheme”. These may be played immediately following another Dominus attempting to play a Scheme in their Intrigue phase.
You may Foil any Scheme; not just those targeting yourself. You may only Foil Schemes – you may not Foil a Reaction (unless a card states otherwise).
Example: Foiling a Scheme
With 10 Influence, John plays the Scheme “A Visitor From Rome”, which would result in him gaining 1 Influence. Liz decides to play “Whispered Rumors”, Foiling John’s Scheme. John’s Scheme failed so he places the card in the Intrigue discard pile along with Liz’s Reaction.
Guard Cards
Guard Cards are a special type of Reaction that may only be used to Foil Schemes targeting the controlling Dominus’ House. However, a Guard’s Foil attempt is not guaranteed.
To make a Guard attempt, discard a Guard and roll a dice:
- On a result of 4, 5 or 6: The Scheme targeting your House is Foiled.
- On a result of 1, 2, 3: That Guard attempt has failed.
You may make as many Guard Attempts as you have Guards. After a failed Guard attempt, you may alternately Foil the Scheme with a Reaction from your hand.
Note: Even if your Guard attempt fails, the Guard is still discarded!
Guards may be kept in your hand or deployed to the table as an Asset. Guards can be moved from your hand to the table at any time. Once on the table, they may not be moved back into your hand. Guards deployed to the table become Assets of your House and may be sold or traded during the Open Market Phase.
Tip: Guards may be used to Foil a Scheme targeting you regardless of whether the Guard is in your hand or on the table. Keeping Guards in your hand allows you to keep your defenses hidden from your opponents (but uses limited hand space).
Example: Guard Attempts
Pete has one Guard on the table, plus a couple more in his hand. Thinking he looks like an easy target, Sally plays “Incite Rebellion” on Pete. If successful, the Scheme requires him to discard a Gladiator. Not wanting to lose a Gladiator, Pete discards his Guard on the table to try to stop the scheme. He rolls a dice and gets a “2”. Failure! Pete then discards a second Guard, from his hand, and rolls again. He rolls a “5”: success! Sally’s scheme is Foiled; her “Incite Rebellion” card is placed in the discard pile atop Pete’s 2 Guards.
Tip: Even if a Dominus has a lot of Guards, it still may be worth targeting them with Schemes. If they discard a Guard to Foil the Scheme, you’ve at least weakened their defenses!
Foiled Schemes
When a Scheme is Foiled, none of that Scheme’s effects take place – including any costs associated with the scheme. Place the Foiled Scheme face up in the Intrigue discard pile.
Example: Foiled Scheme Costs
Liz attempts to play “Grand Feast”. It has the effect “Pay every Player 2 Gold, Target Dominus gains +1 Influence”. John Foils the Scheme. “Grand Feast” is placed in the discard pile and Liz does not pay any Gold.
Ending Your Turn
After playing Schemes and Cashing In cards, you may not hold more cards than the Hand Size under your current Influence on your House Card. When you’ve finished your Intrigue turn, play moves to the player on your left.
After all players have finished their Intrigue turn, play moves on to the Market Phase.
Phase 3: Market
Market Phase Overview
During the Market Phase players have the opportunity to buy and sell Asset Cards to each other and acquire new Gladiators, Slaves and Equipment during the Auction.
Phase Summary
- Open Market
- Auction
- Bid for Hosting
1. Open Market
During Open Market players have the opportunity to buy, sell and trade Asset Cards with other players and sell Assets to the Bank. There is no turn order during Open Market. Players are free to make deals at will.
Note: The Open Market stage is the ONLY TIME Gladiators, Slaves, Equipment and Guards may change hands with other players!
Asset Cards’ Gold Values have no bearing when bartering with other players. All manner of deals are permitted concerning Asset Cards and Gold. Remember, Intrigue Cards may NEVER be traded or sold between players. Intrigue Cards may NOT be discarded for Gold in Open Market.
Selling to the Bank
During Open Market, Asset Cards may also be sold to the Bank. To sell an Asset Card to the Bank, discard the Asset and receive the card’s Gold Value from the Bank.
Tip: The true value of a card is often higher than its Gold Value. Other players may pay more for a card than the Bank.
Ending Open Market
When you’ve completed your business and have no more trades to conduct, pick up and conceal your Gold. Picking up your Gold signals that your Open Market business is over. Once all players have picked up their Gold, Open Market ends and the Auction begins. This is the only time when Gold may be concealed.
Tip: Remember to keep your Gold concealed until after you’ve bid for Hosting Honors! Revealing your wealth early gives your rivals an advantage.
Example: Open Market
In Open Market, Sally decides she has one more Gladiator than she wants so asks the other players if anyone is interested in buying or trading for it. Pete offers Sally 3 Gold for it, but Sally decides that she’d rather sell it back to the bank for 2 Gold than give it to Pete for 3. Pete only has 1 Guard remaining, so he asks the other players if anyone will sell him a Guard for 3 Gold. Being broke, John quickly agrees and passes Pete a Guard. Business concluded, all the players pick up their Gold and the Auction begins.
2. Auction
To begin the Auction, place a number of cards from the Market Deck, equal to the number of players, face down in a row. Reveal the first card, this is the first Asset to be auctioned. All players will bid using concealed bids. The winning bidder adds the card to their House and the next card to be auctioned is revealed.
Concealed Bidding
- To bid on an Asset, place your Gold in your hand, keeping the exact amount of your bid hidden from the other players.
- Once your bid is in hand, extend your fist above the table, still keeping your bid hidden.
- Once all players have their fists over the table, everyone opens their hands to reveal their bid.
- The highest bidder wins the auction, puts their Gold in the Bank and claims the Asset for their House. All the other bidders keep their Gold.
Resolving Tied Bids
If two or more players are tied for the highest bid, they each place the Gold from their first bid on the table. Then another round of concealed bidding commences – with only the tied players participating. Their second bids are added to their initial bids. Bidding continues until one player has the highest total bid.
Failed Auctions
If all bidders bid zero Gold, in the first or subsequent rounds of bidding, the auction is a Failed Auction: no one claims the prize and the card is discarded. Any bids on the table from previous rounds of bidding are returned to the players’ hands.
Example: Auction Bidding
Agron is up for bid in the Auction. Everyone extends their closed hands containing their bids over the table. Pete bids 0, Sally bids 2, John bids 3 and Liz bids 3 – John and Liz are tied for highest bidder and Sally and Pete are out of the Auction. John and Liz place their initial bids on the table in front of them. In the second round of bidding John and Liz both then add 1 Gold to their bids on the table. In the third round, they both bid zero. They both put a total of 4 Gold on the table for Agron, but because they both bid nothing in the third round of bidding the auction is a Failed Auction and neither player receives the card. Agron is discarded and they both return their bids to their hands.
3. Bid for Hosting
After all the Asset Cards have been auctioned off, players bid for the Hosting Honors in the following Arena Phase.
Tip: Hosting the games is critical to success. Hosting not only raises your Influence, it also gives you control over who fights in the Games – potentially earning you even more Influence and Gold!
As with the Auction, players bid via Concealed Bidding and pay the winning bid to the bank. The player with the winning bid receives the Host marker and will be the Host of the following Games.
Note: Bidding for Hosting is when (and only when) the Host marker changes hands. The winning bidder will host the Games this turn and go first in the next Intrigue phase.
All normal bidding rules apply, with one exception. In the event of a Failed Auction, all the participating bidders roll a dice. The Dominus with the highest result wins the Hosting Honors.
Example: Hosting Bid
When bidding for Hosting Honors, Pete bids 8, John bids 6, Sally bids 5 and Liz bids 8. Pete and Liz are tied for the highest bid; John and Sally are no longer participating. Pete and Liz’s bids are tied, so they then place their 8 Gold on the table and a second round of bidding commences. However, they’re both out of Gold and cannot bid again. They both place empty fists over the table, bidding nothing. At this point, it would normally be a Failed Auction. But someone has to Host, so Liz and Pete both roll a dice. Liz wins the dice roll, claims the Host Marker and will Host in the following Arena Phase.
Ending Market Phase
Once a Dominus has won the right to Host, players return their remaining Gold to the Treasury on their House Cards and the Arena Phase begins.
Phase 4: Arena
Arena Phase Overview
In the Arena Phase, Gladiators fight to bring glory to themselves and Influence to their Dominus. Hosting the Games brings Influence to the Host as they display their wealth and power.
Phase Summary
- Honor to the Host
- Hosting the Event
- Tribute
- Place Wagers
- Combat!
- Victory and Defeat
1. Honor to the Host
The Dominus who won the Host marker in the previous Market Phase is the Host this turn and receives 1 Influence for presiding over the Games.
2. Hosting the Event
It is the Host’s duty to fill 2 openings in the Games with worthy Combatants. The players should be offered an Invitation one at a time. The Host may Invite themselves.
Note: Throughout the rules, “Combatant” is used to refer to a Gladiator or Slave selected to fight in the Arena. The same rules apply to both Gladiators and Slaves.
Invitations
- When the first Dominus accepts an Invitation, they choose a Gladiator or Slave from their House and place their Gladiator Figure on the Game Board, on the hex marked “I”. The Dominus then places their Combatant’s card on the edge of the Arena, along with any Equipment Cards the Combatant is using (up to one of each type: Weapon, Armor and Special Equipment). Once these card selections are made they are committed and may not be altered.
- The Host then offers an Invitation to a second Dominus as above. That Dominus then commits their Combatant and Equipment and places their Gladiator Figure on the hex marked “II”.
Note: Gold may change hands at any time, but Asset Cards may not change hands during the Arena Phase.
Declining an Invitation (Booooo! Hissss!)
If a Dominus is unable or unwilling to accept an Invitation, they lose 1 Influence. The Host then Invites another Dominus. If, after all other players have been invited, there is still an opening in the Games, the Host must invite themselves.
In the unlikely event that only 1 Dominus accepts an Invitation, no match is fought, the Arena Phase ends and the next game round begins.
Tip: Hosting players are permitted to solicit bribes, deals and promises from the other players to secure an Invitation (or avoid one!). This allows the Host to parlay their temporary position of authority into financial and political gain.
Example: Arena Invitations
John holds the Host Marker and is deciding who to offer an Invitation. He knows he’s going to invite himself second, since he has Theokeles, a powerful Gladiator. Trying to insure his victory in the Arena, he invites Liz – whose only Gladiator is a weak Thracian Warrior. Liz doesn’t want to get pummelled and lose her only Gladiator, so she declines his Invitation. Liz then loses 1 Influence. John asks if anyone will pay for an Invitation. Pete offers John 3 Gold. John agrees and invites Pete. Pete commits his Combatant’s card to the edge of the Game Board along with Trident (Weapon), Helmet (Armor) and Javelin (Special) cards. John then invites himself and commits Theokeles to the Games.
3. Tribute
Tribute is paid to the owners of favored Combatants. Invited players receive:
- 2 Gold per Favor Token on their Combatant.
- 6 Gold for a Champion Token on their Combatant.
Tribute is paid after both Invited players have committed their Combatants, before Wagers are placed. See “Victory and Defeat” for details about receiving Favor and Champion tokens.
4. Place Wagers
After the Combatants are committed, all players may place Wagers on the Games’ outcome. Wagers are indicated by placing 1 to 3 Gold coins on the desired board corner and capping the stack with a House token. Players may place no more than 3 Gold on any given Wager.
Note: Betting happens simultaneously, with all players placing their Wagers at the same time. If this causes disputes or takes an excessively long time, you may optionally start with the Host, and take turns betting individually.
The Wagers
- VICTORY (Pays 1 to 1): A Wager placed on Victory is a bet that the selected Combatant will win the match. If the selected Combatant wins, the Bank pays 1 Gold for every Gold bet. Players participating in the Games are not permitted to bet against their Combatant as this would invoke the wrath of the gods!
- INJURY (Pays 2 to 1): A Wager placed on Injury is a bet that an Injury will end the match. If either Combatant is Injured, the Bank pays 2 Gold for every Gold bet.
- DECAPITATION (Pays 2 to 1): A Wager placed on Decapitation is a bet that a Decapitation will end the match. If either Combatant is Decapitated, the bank pays 2 Gold for every Gold bet.
Note: When you win a Wager, you retrieve the Gold you bet from the board in addition to receiving your winnings from the Bank. Lost Wagers are paid to the Bank.
Example: Placing Bets
Sally wants to bet 3 Gold on Decapitation and 3 Gold on Theokeles to win. She places a stack of 3 Gold topped with one of her house tokens on both the “Decapitation” corner and the “Victory II” corner.
5. Combat!
Once all players have finished placing wagers, Combat begins (see the dedicated Combat section for detailed rules).
6. Victory and Defeat
After the combat has been decided:
- The victorious Dominus gains 1 Influence.
- The victorious Combatant receives a Favor token, to be kept on the Combatant’s card.
Crowning a Champion
Champions are beloved by the crowd and bring glory to their House. However, losing a Champion can devastate a House’s fortunes.
- When a Combatant receives its third Favor token, the Combatant becomes a Champion. Return all the Combatant’s Favor tokens and replace them with a Champion token. The Champion token remains with the Combatant for the remainder of the game (or the Combatant’s life).
- When a Dominus acquires a Champion through victories in the Arena or from another player, that Dominus gains 1 Influence.
- If a Dominus loses a Champion for any reason that Dominus loses 1 Influence.
Settling Wagers
After the winning Combatant receives their Favor token, players settle their Wagers with the Bank. Losing Wagers are placed in the Bank. Winning Wagers are returned to their owners, along with their appropriate winnings.
Example: Settling Wagers
Sally bet 3 Gold on Theokeles to win and 3 Gold on Decapitation. John loses the match when Theokeles is Decapitated! Sally loses the 3 Gold she bet on Theokeles to win and receives 6 Gold from the Bank because the match ended in a Decapitation (plus she takes back the 3 Gold that she bet on Decapitation). In the end, Sally comes out three Gold ahead.
The Power of Life & Death
The Host must choose whether the defeated Combatant lives or dies with the traditional “Thumbs Up or Thumbs Down” gesture.
- THUMBS UP: Combatants receiving a “Thumbs Up” are returned to their House along with all Equipment Cards.
- THUMBS DOWN: Combatants receiving a “Thumbs Down” are executed: place the defeated Combatant in the Market discard pile. All Equipment Cards are returned to their owner.
Some Combatants have the Favor of the crowd through past victories in the Arena. Choosing “Thumbs Down” for a Combatant with Favor tokens results in the Host losing 1 Influence per Favor Token. Choosing “Thumbs Down” on a Champion is not permitted. The wrath of the crowd would be too great!
Tip: As with the brokering of Invitations, the Host may solicit bribes and other favors from players wishing to influence their thumb.
The Game Continues…
After the host decides the fate of the defeated Combatant, the next game turn begins.
Arena Combat Rules
Combat Overview
The sands of the Arena are where fortunes are made, reputations are built and the crowd’s appetite is sated.
Tip: Before playing your first game, it may be useful to play a few practice fights to make sure you understand the flow of combat.
Attributes
Every Gladiator and Slave in the game has three Attributes listed down the left-hand side of the card. These numbers determine how many dice are in each Combatant’s Attribute Dice Pools. As a Combatant fights and takes damage, the number of available dice decreases.
- ATTACK (ATK): The red dice are rolled for attacking. The more you have, the more likely you are to Wound your opponent.
- DEFENSE (DEF): The black dice are used for defending. The more you have, the more likely you are to Block your opponent’s attacks.
- SPEED (SPD): The blue dice are used to determine who goes first in Combat. The number of Speed dice in your Dice Pool determines how many hexes you can move.
Dice as Health
The total number of dice available in all three Attribute Pools represents the total health of a Combatant. As dice are lost from each Attribute Pool as a result of taking Wounds, the Combatant’s ability decreases. This attrition of ability mimics the reduction of power over the course of a long and grueling fight.
Combat Basics
Each round of Combat begins with the Combatants making an Initiative Roll. The winner of the Initiative Roll then chooses to go first or second. The first Combatant then moves and attacks, followed by the second Combatant moving and attacking. This makes up a single Combat Round.
Combat Initiative
To determine Initiative, each player rolls their Combatant’s available Speed dice and totals the result. The Player with the higher total wins Initiative and may choose to go first or second this combat round. In case of a tie, roll again.
Example: Combat Initiative
John’s Gladiator has 3 Speed dice, Sally’s has 4. They both roll their Speed dice and compare totals. John’s dice total 8; Sally’s dice total 11. Sally chooses to Move and Attack second this round. John must Move and Attack first this round.
Combat Round
During their Combat Round, each player Moves and Attacks in the order they choose (Move then Attack, Attack then Move). In some cases, a player will choose to Move into contact with their opponent and then Attack. At other times it might be more advantageous to Attack first then Move to avoid your opponent’s Attack.
Moving
A Combatant may Move a number of hexes equal to or less than the number of Speed dice currently in their Attribute Pool.
Tip: If you’re a lot slower than your opponent, you’ll find yourself constantly outmaneuvered!
Attacking
Combatants may Attack opponents in adjacent hexes. Attacks are resolved through Opposed Dice Rolling:
- The attacking player rolls their Combatant’s current Attack Dice Pool and the defending Combatant rolls their current Defense Dice Pool simultaneously.
- Each player lines up their dice, highest to lowest, creating a Dice String.
- The combatants compare Dice Strings: highest to highest, lowest to lowest.
- A Wound is successfully caused if the Attack Dice rolled is greater than the Defense Dice for that position in the Dice String. Ties go to the Defender.
Unopposed Attack Dice
In the event that the attacker is rolling more Attack Dice than the defender has Defense Dice, any unopposed Attack Dice roll of 3 or greater causes a Wound. Unopposed rolls of 1 or 2 are considered failed attacks and no Wounds are dealt.
Unopposed Defense Dice
If more Defense Dice are rolled than Attack Dice, the lower unopposed Defense Dice are ignored; only the higher Defense Dice are used.
Taking Wounds
Any Wounds taken are resolved immediately. The wounded Combatant must surrender a number of dice equal to the number of Wounds taken. When surrendering dice, you may surrender dice from any Dice Pool: Attack, Defense or Speed. Dice lost to Wounds are no longer part of the available Dice Pool for your Combatant.
Example: Taking Wounds
Pete has a 3 ATK, 3 DEF, 3 SPD Gladiator that takes two Wounds. Pete must surrender two dice. Hoping to respond with a devastating attack, Pete surrenders one of his DEF and one SPD. This leaves him more vulnerable and slower, but still able to attack back at full strength.
Combat Dice Examples
The Rule of One
No Dice Pool may be reduced below 1 dice until all Dice Pools have only 1 dice left. Reducing 1 or more Dice Pools to zero ends the match in defeat.
Example: Rule of One
For example, Sally has a Gladiator that has been reduced to 2 ATK, 2 DEF and 1 SPD. The Gladiator takes 2 Wounds. Sally may not surrender her last SPD (due to the “Rule of One”, above). She surrenders 1 ATK and 1 DEF, leaving her Gladiator with only 1 dice of each color. If Sally’s Gladiator takes another Wound, he’ll be defeated.
Defeat
When any of a Combatant’s Attribute’s Dice Pools are reduced to zero, the Combatant is defeated. There are 3 levels of Defeat:
- YIELD: If any single Attribute Dice Pool is reduced to zero your Combatant has been defeated. Your Combatant is at the mercy of the Host, but no other ill effects are suffered.
- INJURY: If a match ends with 2 Attribute Dice Pools at zero dice your Combatant has sustained an Injury. Exhaust the card and mark it with an Injury token. The Combatant will remain exhausted until the Injury is Healed. If the Host is merciful enough to let the Combatant live, you may attempt to Heal the Injury in the following Upkeep.
- DECAPITATION: If all 3 of a Combatant’s Attribute Dice Pools are reduced to zero, the Combatant has been Decapitated. The Combatant’s card is placed in the discard pile and any Equipment Cards are returned to the controlling Dominus.
Special Rules & Equipment
Special Abilities
Some Gladiators and Slaves have Special Abilities on their cards. These Special Abilities may contradict some of the standard rules. In all cases, rules on the cards take precedence over the rulebook.
Exhausting a Card
Many cards’ Special Abilities will state “Exhaust to…”. This will often be preceded by when the Special Ability may be used. When instructed by a card to Exhaust, flip the card face down and then apply the rule. Face-up cards are considered “Ready”.
Example: Exhausting a Card
Liz owns Pietros whose Special Ability is “SKILLED: (Intrigue) Exhaust to gain 1 Gold”. In the Intrigue Phase, Liz exhausts Pietros, flips him face down and takes a Gold from the Bank.
Exhausted Cards
Exhausted cards may not be used in any way – they are effectively out of the game until they are refreshed in the following Upkeep. Exhausted cards:
- Don’t count towards Schemes
- Are not counted during Balancing the Ledgers
- May not fight in the Arena
- May not be bought, sold or traded
- Are not eligible to be discarded for any reason
Example: Exhausted Cards
Sally has three Slaves in her House, two of which are Exhausted. She plays the Scheme “Illicit Services”, which pays 2 Gold per Ready Slave. Sally has 1 Ready Slave so receives 2 Gold: her 2 Exhausted Slaves do not count towards the Scheme. Pete then plays “Incite Rebellion” on Sally, forcing her to discard a Slave. She must discard her remaining Ready Slave, as her Exhausted cards are not eligible. John then plays the Reaction “Empty Brothel” on her! Even though Sally still has 2 Slaves, she counts as having none, since they are both Exhausted. She loses 1 Influence.
Re-Rolling Dice
Some Equipment and Special Rules allow you to re-roll a dice. When you have the ability to re-roll a dice, it is your choice which dice to re-roll. Only the final result counts.
Tip: Just because you have the ability to re-roll a dice, doesn’t mean you have to use it. It may sometimes be in your best interest to hold back!
Unless explicitly stated otherwise, re-rolls only apply to your own dice rolls. You can’t use a Helmet, which allows you to re-roll a DEF, to make your opponent re-roll one of their DEF! In the event both players have re-rolls, the re-rolls should be simultaneous.
Example: Dice Re-Roll
Sally has a Sword card which grants her 1 ATK re-roll. In Combat, her Attack Dice String is: 6-4-3. Her opponent rolls 6-4-2. Without the re-roll, she would do 1 Wound. She decides to re-roll her “3”. The re-rolled dice comes up “5”, making her Dice String 6-5-4, resulting in 2 Wounds!
Doubles & Triples
Many Gladiators have Special Abilities that are triggered when the Gladiator rolls doubles or triples. Re-rolling a dice can result in doubles or triples.
Note: Each dice can only count towards one set of doubles or triples. Rolling three “5”s could count as either a double or a triple, but not multiple doubles.
Examples: Doubles & Triples
- Agron is fighting in the Arena. His Special Ability states “DEF triples cause one auto-wound to attacker”. When rolling his 4 DEF dice, he rolls 4,3,3,2. With his Helmet, Agron then re-rolls the “2” and gets a “3” instead. His Defense String is now 4,3,3,3: Woo Hoo! Triples! Regardless of his attacker’s ATK roll, Agron deals a wound to his attacker.
- Spartacus’s Special Ability is “ATK doubles add 1 auto-wound”. He attacks and rolls 2-2-1-1: normally a terrible Attack. However, his Special Ability will deal 2 Wounds to the Defender, regardless of their DEF String.
Equipment Rules
The Market Deck contains a variety of different Weapons, Armor and Special Equipment Cards. Every piece of Equipment gives your Combatant an advantage in the Arena. Some types of Equipment may be used every Combat Round, other types may only be used once per Combat.
Equipment Cards represent money and training invested by the Houses to prepare their Gladiators for the Arena rather than representing a single sword or helmet.
Equipping Your Gladiator
After selecting a Gladiator or Slave to fight in the Arena, you may equip your Combatant with up to 1 of each type of Equipment: 1 Weapon Card, 1 Armor Card and 1 Special Card.
Equipment Effects
- Attack Re-rolls: Some Equipment allows you to re-roll one Attack Dice. This may be done every time you Attack.
- Defense Re-rolls: Some Equipment allows you to re-roll one Defense Dice. This may be done every time you roll your Defense dice.
- Attack Range: Some Equipment allows you to Attack from a greater distance. Normal Attacks must be made from adjacent hexes. For example, a Trident is an “Attack Range: 2” Weapon so may be used to Attack opponents within 2 hexes.
- Speed Attacks: Some Attacks (such as those made with a Javelin) use your Gladiator’s Speed Dice instead of their Attack Dice. The Attack is resolved per the normal rules: simply roll your current Speed Dice instead of your Attack Dice. This Speed Attack is made instead of your normal Attack, not in addition to it.
- Ignore Wound: Some Equipment allows you to ignore a Wound. After the Attack and Defense Dice Strings have been compared, but before surrendering any dice, you may ignore one of the wounds.
- Extra Wound: Some Equipment allows you to deal an extra Wound. After the Attack and Defense Dice Strings have been compared, but before surrendering any dice, you may add a Wound to the number of Wounds dealt.
- Net: The Net is a specialized piece of Equipment that allows your Combatant to seize Initiative at a crucial moment. Before rolling Speed Dice to determine Combat Initiative, you may Exhaust your Combatant’s Net to automatically win the Initiative roll. There is no Initiative roll in the Combat Round in which a Net is used.
Winning the Game
Winning the Game
The goal of the game is to reach 12 Influence. If, at the end of a Phase, (Intrigue, Market or Arena) only 1 Dominus has 12 Influence, that Dominus wins the game. To win, you need to end a Phase with 12 Influence and be the only Dominus to do so!
Note: Hitting 12 Influence during a Phase doesn’t mean you’ve won yet! There may still be time for the other players to knock your Influence down or get to 12 Influence themselves.
Tournaments
If, at the end of a Phase, 2 or more players have 12 Influence, the Game’s winner must be decided in the Arena! Players who ended the phase with 12 Influence are immediately entered into a Tournament to determine the winner:
- Two Player Tournament: The 2 players with 12 influence each select and equip a Combatant and an Arena battle is fought per normal Combat rules. The winner of the match wins the game!
- Three Player Tournament: The 3 players with 12 influence each add up the Gold Values of all their Gladiators and Equipment. If the Gold Values are tied, roll off. The 2 players with lower totals fight a match in the Arena. The victor of that match then fights a match with the remaining player. The victor of the second match is the winner!
- Four Player Final Battle: In the exceedingly rare instance that all 4 players end a phase with 12 Influence, all 4 players total the Gold Values of all their Gladiators and Equipment. If the Gold Values are tied, roll off. The players with the lowest two totals fight in the Arena. Then, the players with the highest two scores fight a match in the Arena. Finally, the victors of the first two matches fight to determine the final winner!
Turn Summary & Credits
Turn Summary
-
Upkeep
- Refresh Cards: Flip uninjured, Exhausted cards face up.
- Heal Injuries: Make Healing Rolls for Injured Assets.
- Balance the Ledgers: Pay 1 Gold per Ready Gladiator, Earn 1 Gold per Ready Slave.
-
Intrigue
- Draw Cards: All players draw 3 cards.
- Intrigue Turns: Starting with the Host, players take turns playing Schemes, Cash In cards, use House Special Rules and Asset Special Abilities.
-
Market
- Open Market: Players are free to buy, sell and trade Assets with each other and the Bank.
- Auction: Deal cards from the Market Deck face down. Reveal the cards and bid.
- Bid for Hosting: The winning bidder hosts the following Arena Games.
-
Arena
- Honor to the Host: The Host gains 1 Influence.
- Hosting the Event: The Host invites 2 players to the Games.
- Tribute: Players are paid for any Favor or Champion tokens their Combatants possess.
- Place Wagers: All players may wager on the outcome of the Games.
- Combat! Opposed dice combat in the arena.
- Victory and Defeat: The victorious Combatant receives a Favor token, wagers are settled and the Host exercises the Power of Life & Death.
Credits
- Game Design: Sean Sweigart, Aaron Dill
- Original Concept / Design: John Kovaleski
- 3D Modeling: Charles Woods
- Producers: Peter Simunovich, John-Paul Brisigotti
- Graphic Design: Gale Force Nine Studio
- Special Thanks: To all the staff at the USA, UK and NZ Battlefront offices
- Playtesting: Kelly Arthur, Janet Brooks, Jason Buyaki, Jordan Carasa, Alessio Cavatore, Cheryl Delaney, Jason Delaney, Rebecca Dill, Andrew Duncan, Steve Eyles, Nick “Red Dog” Eyre, Kit Goldsbury, David Griffin, Mark Honeycutt, Sally Honeycutt, Sam Knowles, Christopher Kovaleski, Daniel Linder, Christine Matthews, Ray O’Connor, Tim Oswalt, Peter Przekop, Damian Reid, Robert Sadler, Brian Sayman, Adam Simunovich, Andrew Smith, Gav Thorpe, Gavin van Rossum, Tony Vodanovich, Lizzie Willick
Expansions for
Spartacus: A Game of Blood and Treachery

Spartacus: A Game of Blood & Treachery – House Calavius
2014
Add the House Calavius card to your Spartacus games.
View expansion
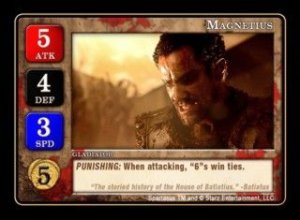
Spartacus: Magnetius Promo Card
2012
Add a legendary Capua gladiator whose attacks treat sixes as tie-breakers.
150
minutes
Light

View expansion
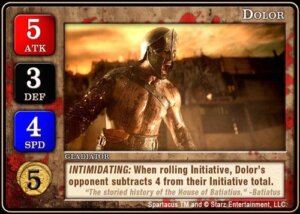
Spartacus: Dolor Promo Card
2012
Add legendary combatant Dolor and weaken an opponent’s initiative by 4.
150
minutes
Medium
View expansion
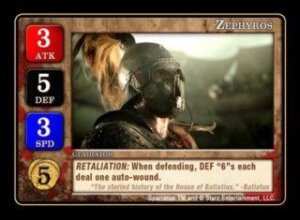
Spartacus: Zephyros Promo Card
2012
Add legendary gladiator Zephyros and his powerful defensive ability to your ludus.
150
minutes
Light
View expansion
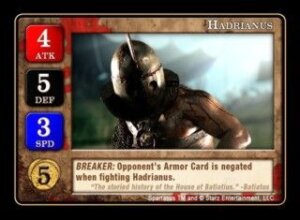
Spartacus: Hadrianus Promo Card
2012
Add a legendary Capua gladiator who can overcome an opponent’s armor.
150
minutes
Light
View expansion
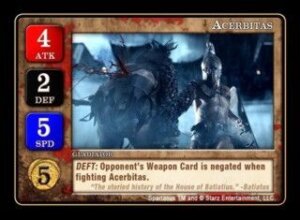
Spartacus: Acerbitas Promo Card
2012
Add legendary gladiator Acerbitas and negate an opponent’s Weapon Card.
150
minutes
Medium
View expansion
Spartacus: Champions of House Batiatus Card Set
2014
Add five former promo Gladiators to the Spartacus board game.
150
minutes
Medium Light

View expansion
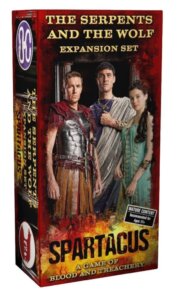
Spartacus: The Serpents and the Wolf Expansion Set
2013
Add new Houses, deadly Gladiators, and team-based arena combat.
180
minutes
Medium
View expansion
