Tiletum
2022
Travel from Flanders to Venice, fulfill trade contracts, support cathedrals, and balance dice values to become the Renaissance's most famous merchant.
100
minutes
1 - 4
player(s)
14+
Medium Heavy


About this board game
Tiletum is a dice management game for 1–4 players, with a playing time of about 100 minutes. Set during the Golden Age of the Renaissance, it casts you as a rich merchant traveling across Europe from Flanders to Venice.
Visit different cities to acquire trade contracts for wool and iron, while collecting their coats of arms. You will need to gather the right resources to fulfill contracts, build monumental cathedrals, win the favor of noble families, and participate in important fairs where your main business takes place.
- Travel throughout Renaissance Europe and visit various cities.
- Collect wool, iron, and city coats of arms.
- Fulfill trade contracts and invest in monumental cathedrals.
- Welcome notable people into your houses and gain their services.
- Seek prestige and become the most famous merchant of the Renaissance.
At the heart of Tiletum is a distinctive dice system with a dual function. Each round, a certain number of dice are rolled. On your turn, choose a die to gain a number of its corresponding resources equal to the die’s value, then perform the associated action.
The value you choose creates an important trade-off: higher die values provide more resources, while lower values grant more powerful actions. Decide when to prioritize immediate supplies and when to accept fewer resources in exchange for greater action strength. Across its journeys, contracts, construction, fairs, and relationships, Tiletum challenges you to build enough prestige to stand above your fellow merchants.
/pic7182955.jpg)
Board Game Rules for
Tiletum
Introduction
In Tiletum, you and your fellow players take on the roles of rich merchants traveling throughout Europe, from the city of Tiletum (modern-day Tielt, Belgium) to Venice, during the days of early Renaissance.
You will travel to various cities to acquire trade contracts for wool and iron and establish trade houses. You must collect the required resources to fulfill contracts, invest in the construction of monumental cathedrals, gain the favor of noble families, and participate in important fairs, where your main business occurs. You will also use the services of notable people who will be welcomed into your houses. You will thus gain prestige that will make you the most famous merchant of the early Renaissance.
Tiletum is a dice management game, where dice have a dual function: gaining resources and performing actions. A certain number of dice are rolled each round. On your turn, choose a die gaining resources equal to the value and color of the die and perform the associated action. The power of the action is inversely proportional to the value of the die; meaning the fewer resources you gain, the more powerful your actions will be, and vice versa.
Living Rules Pledge
We pledge to support every game well after its initial release. Despite rigorous play testing and multiple rounds of both internal and external proof reading and editing, occasionally the need for rules corrections or minor game play adjustments are discovered only several months or years after the game was manufactured. We promise to produce timely rules updates as necessary, along with expanded FAQ clarifications if needed, available for download from our website in digital PDF format.
Missing or damaged components: Although we take a lot of care to make sure that your game is complete, manufacturing mistakes can still leave you with a missing or damaged component. If that happens, please contact us to receive replacements swiftly, and with our sincere apologies.
Customer support: https://boardanddice.com/customer-support/
Game Components
Before your first game of Tiletum, carefully punch out all cardboard components, tiles, and tokens. Solo components are listed in a separate Solo Mode booklet.
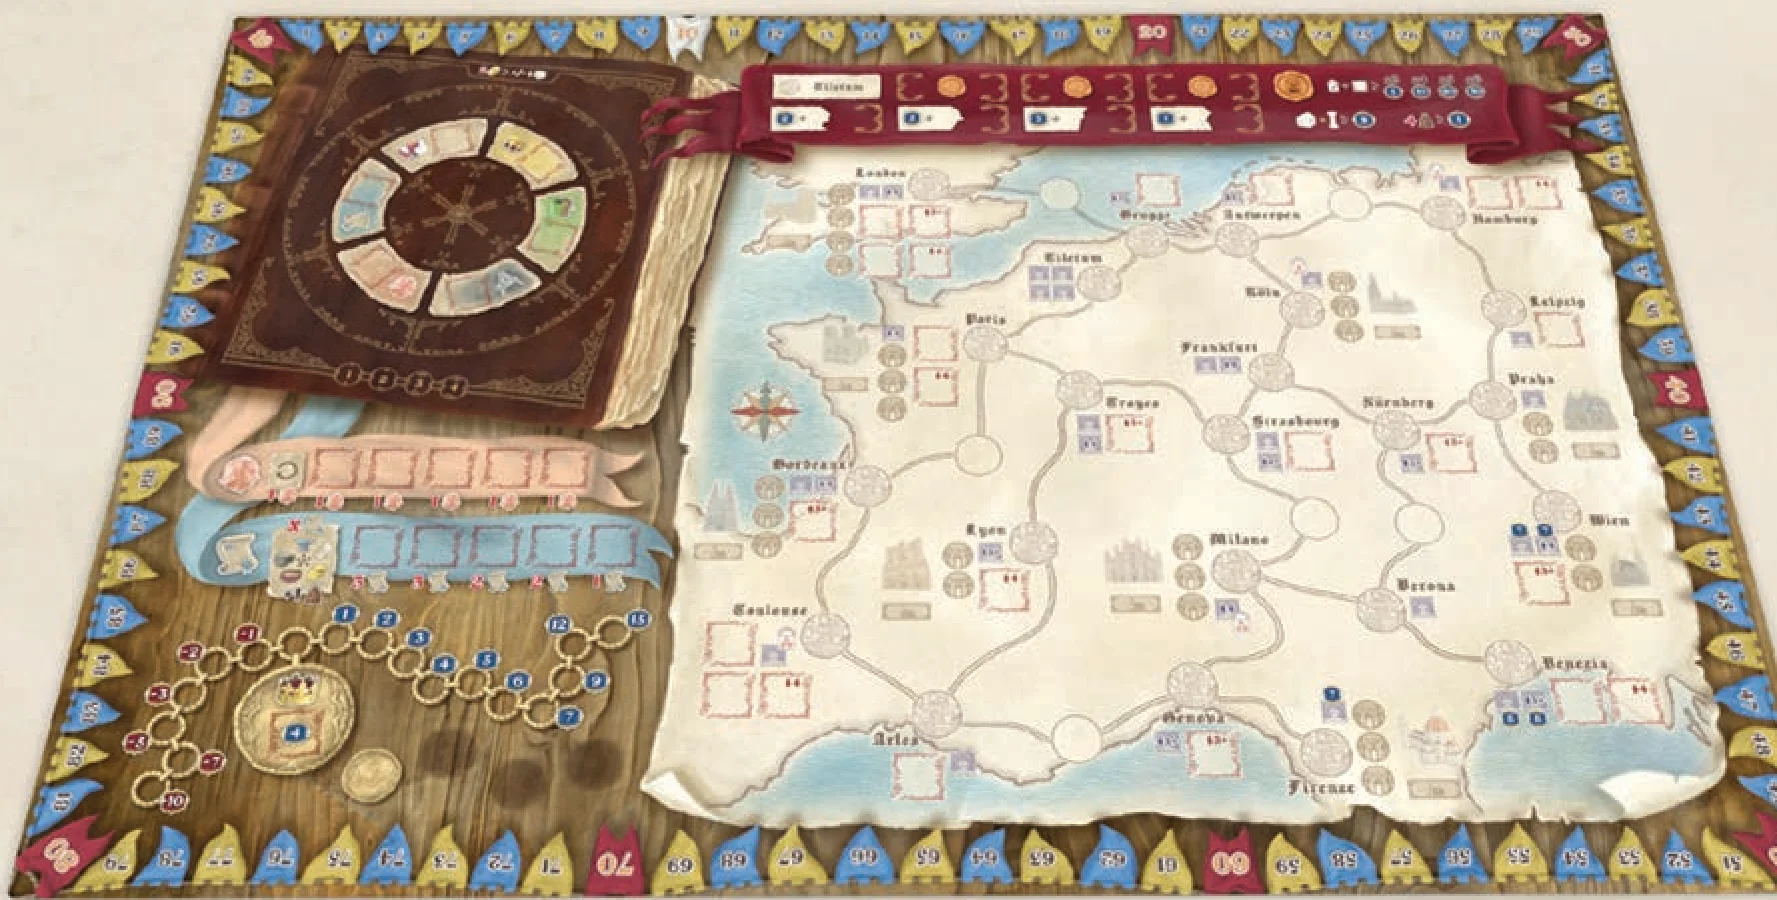
- 1 Game board
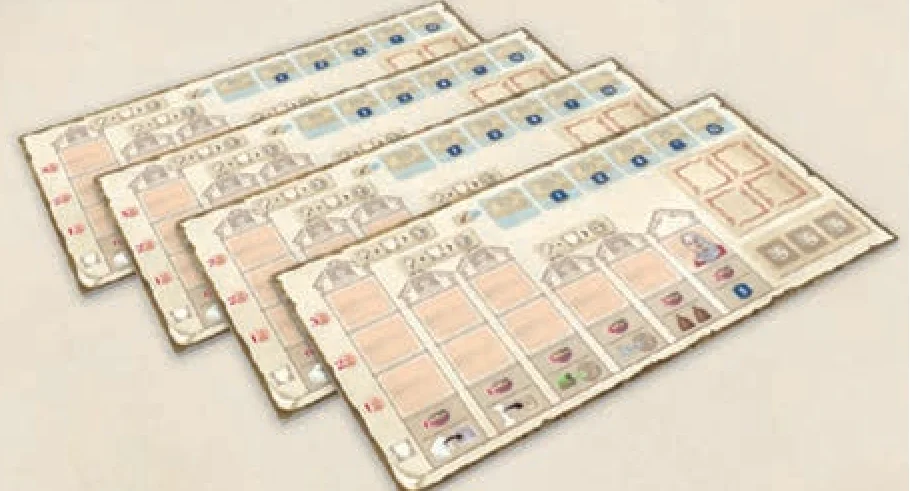

- 4 Player boards
- 20 Resource dice (4 in each of 5 colors)


- 1 Compass Rose marker
- 1 Dice bag
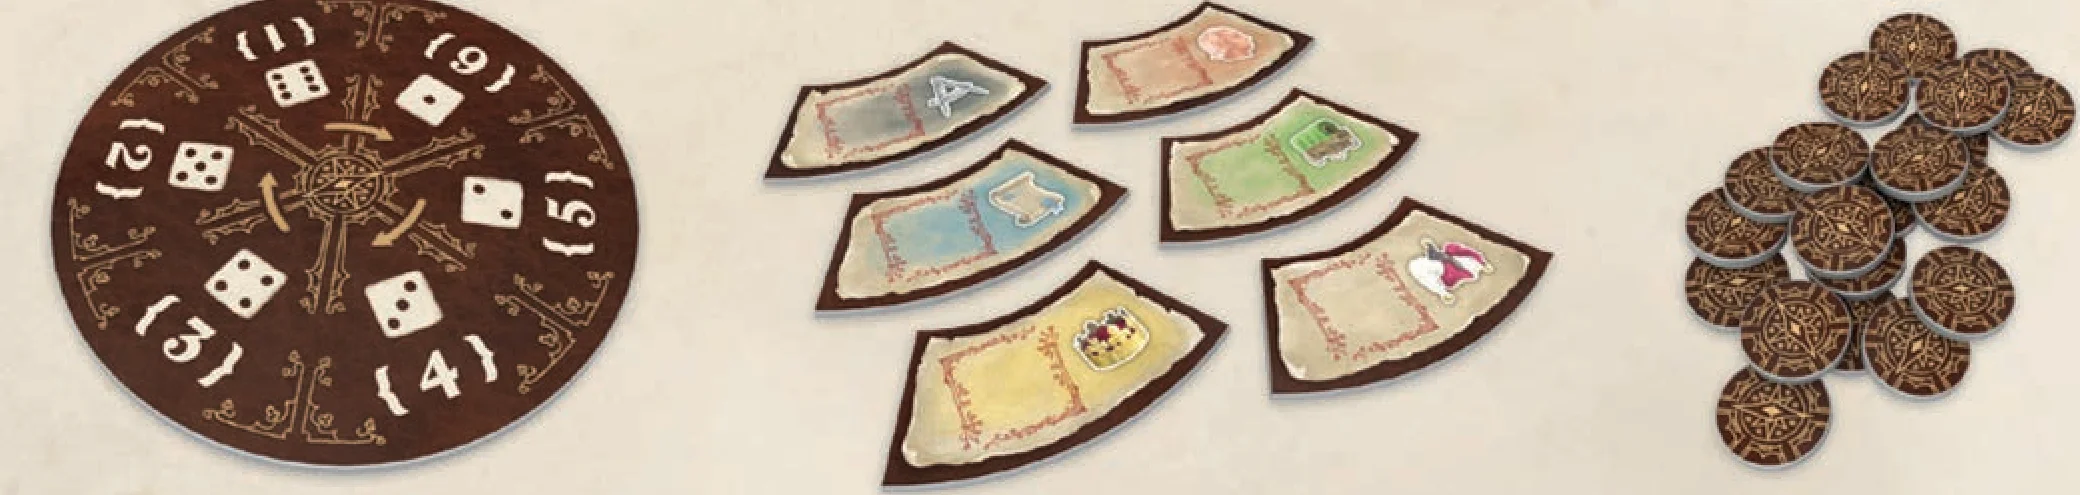
- 1 Action Wheel
- 6 Action tiles
- 20 Action Point counters
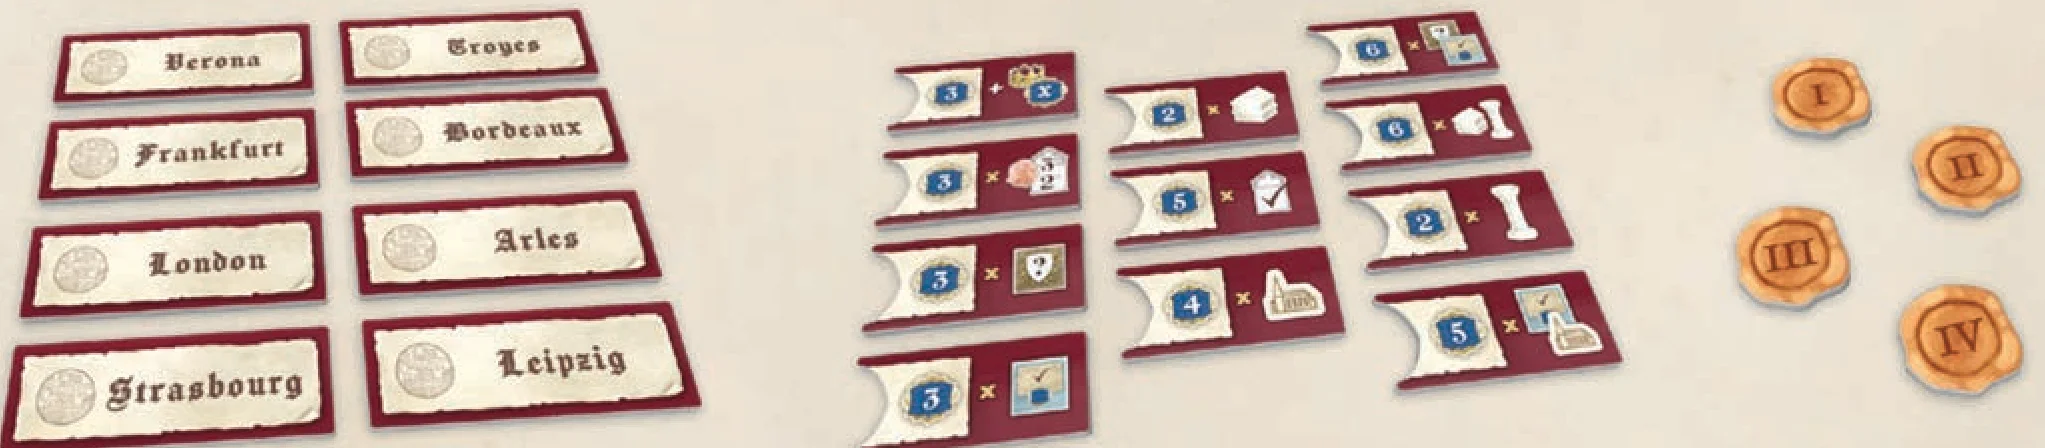
- 8 Town tiles
- 11 Fair tiles
- 4 Fair Order tiles
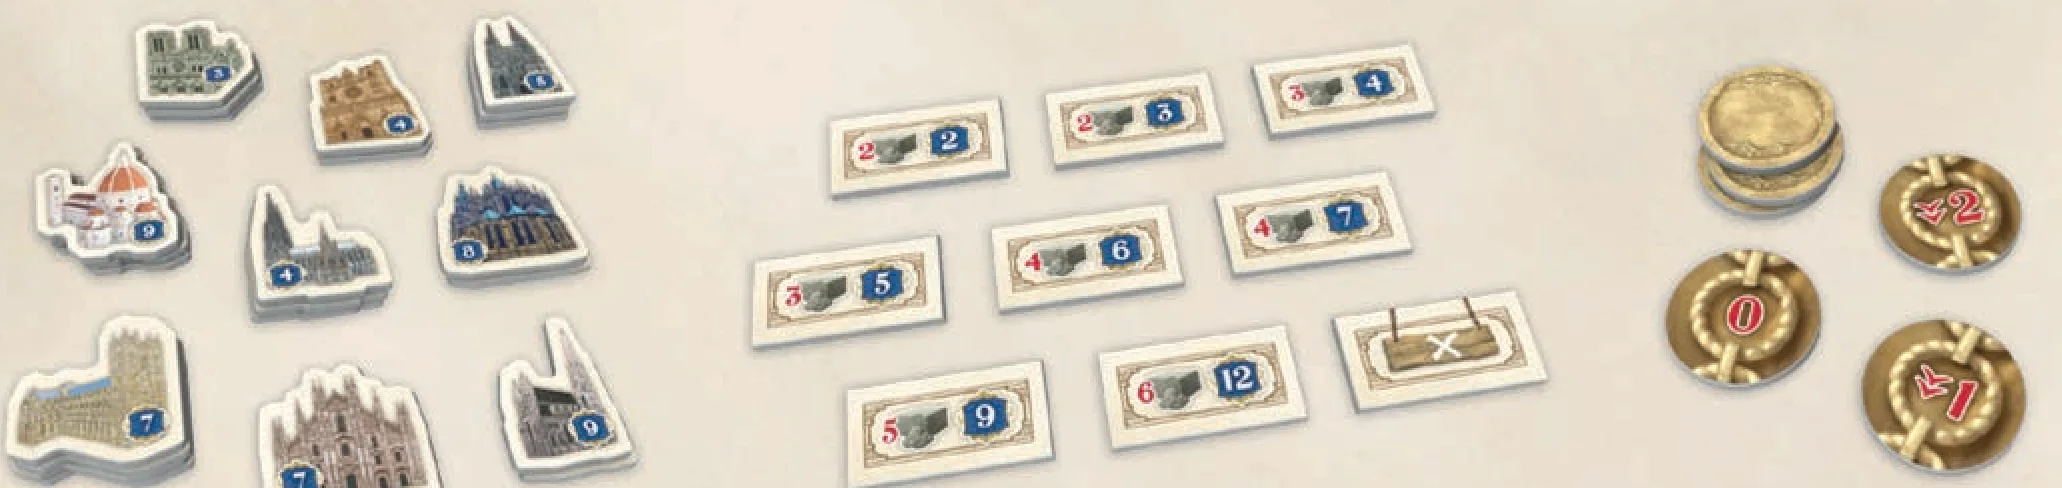
- 25 Cathedral tiles
- 9 Construction Cost tiles
- 6 Corruption tokens
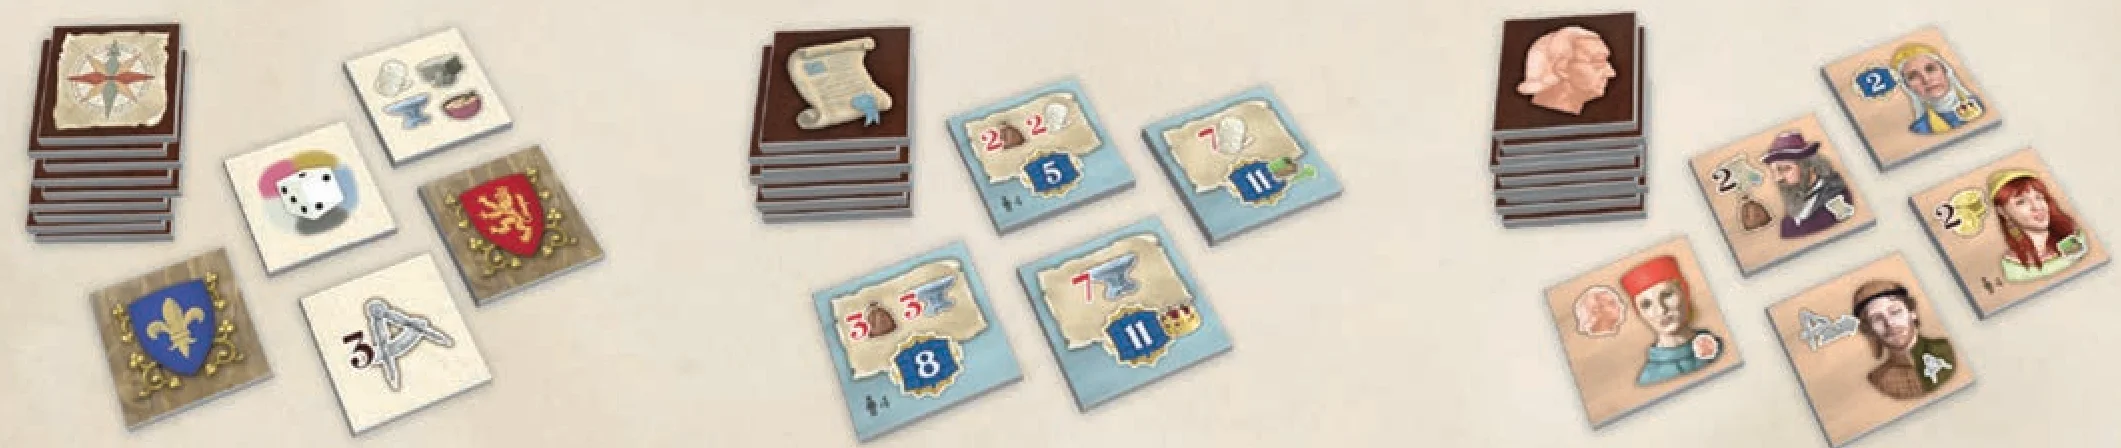
- 54 Bonus tiles
- 26 Contract tiles
- 45 Character tiles
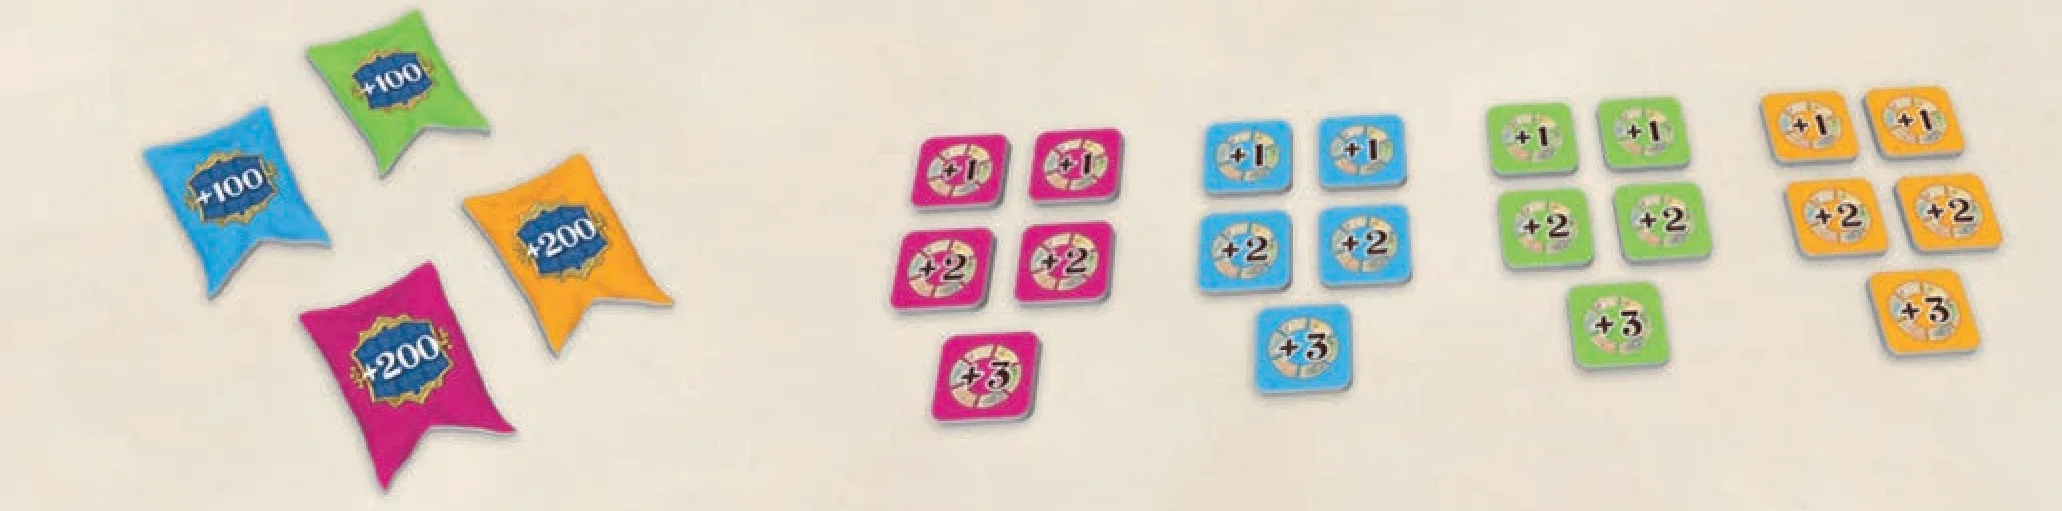
- 1 “+100/+200” Victory Point marker per player
- 5 Bonus Action Points markers per player
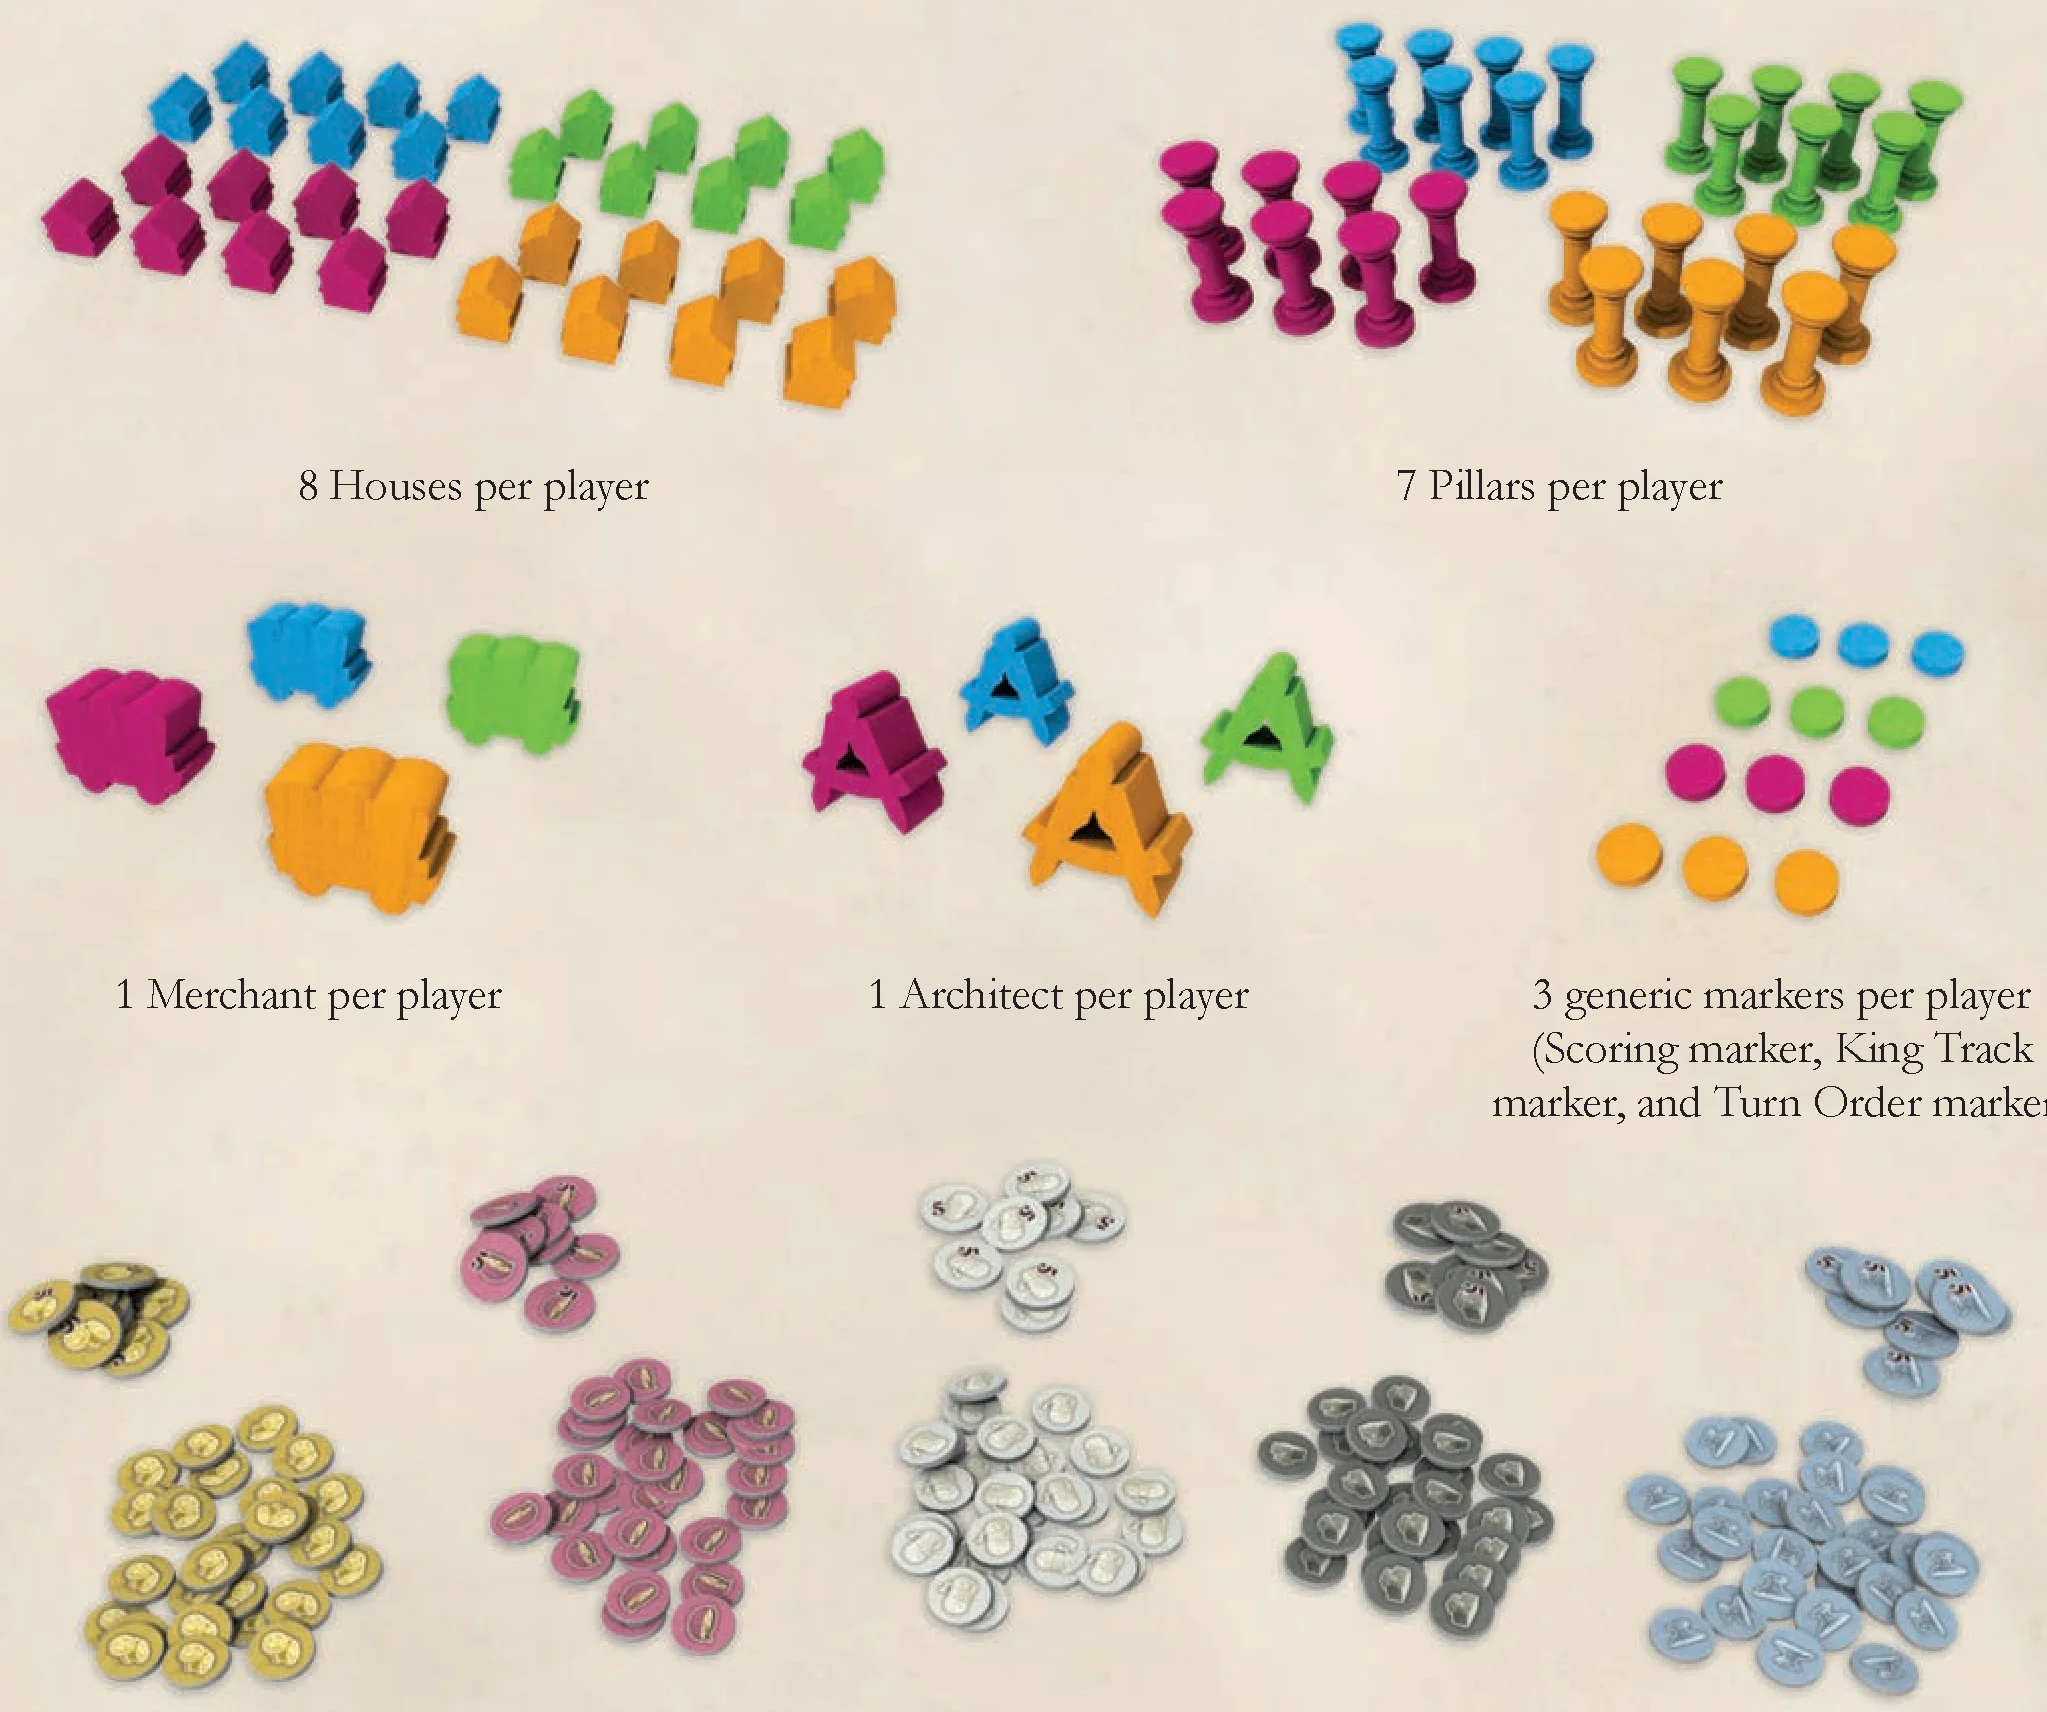
- 8 Houses per player
- 7 Pillars per player
- 1 Merchant per player
- 1 Architect per player
- 3 generic markers per player (Scoring marker, King Track marker, and Turn Order marker)
- Resource tokens in denominations of 1 and 5: Gold, Food, Wool, Stone, and Iron
The Resources are meant to be unlimited. In the unlikely situation that a Resource runs out, use any substitute (like beads or buttons).
Game Setup
There are many ways in which players can gain or lose Victory Points during the game. These points are tracked on the Score track surrounding the game board.
Within this rulebook, Victory Points may be shortened to just “VP” in writing.
 Gain 1 Victory Point.
  Lose 1 Victory Point.
For additional variety, especially once the players are more familiar with the game, you may shuffle the six Action tiles and place one at random on each space around the Action Wheel. For your first game, however, these tiles will not be used and can be returned to the box.
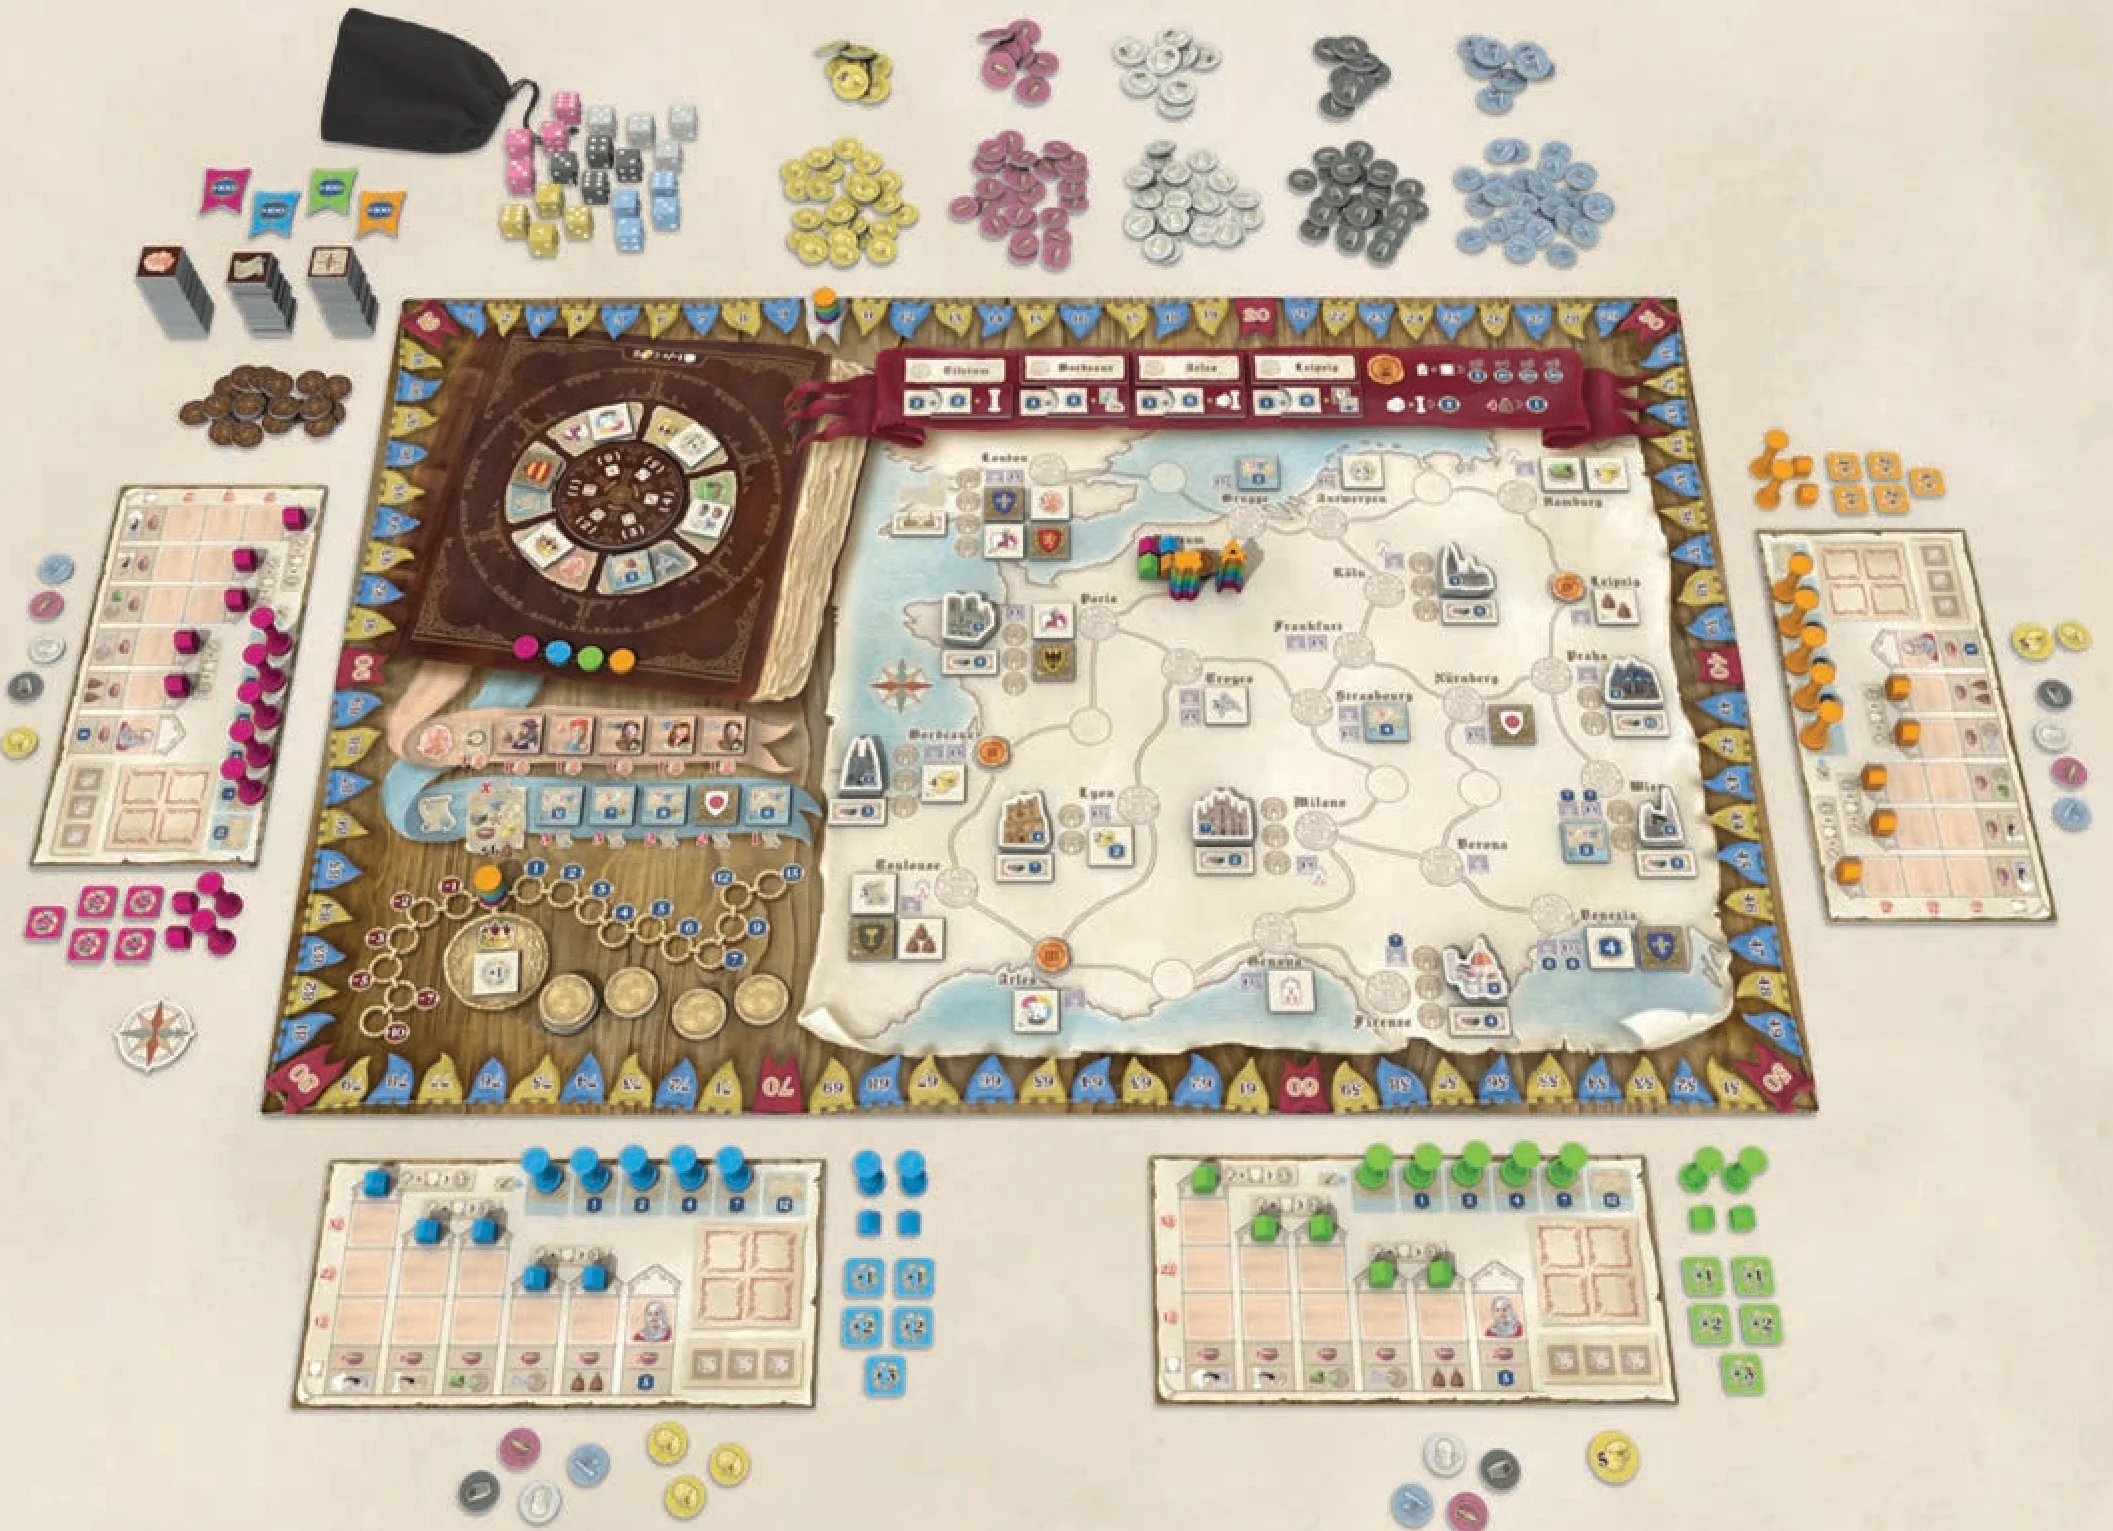
- Place the game board in the middle of the table. The right-hand part of the board consists of a map of Europe and will be referred to in the rules simply as “the map”.
- Set out the Resource tokens (Gold, Food, Wool, Stone, and Iron) and Action Point counters within reach of all players, forming a general supply.
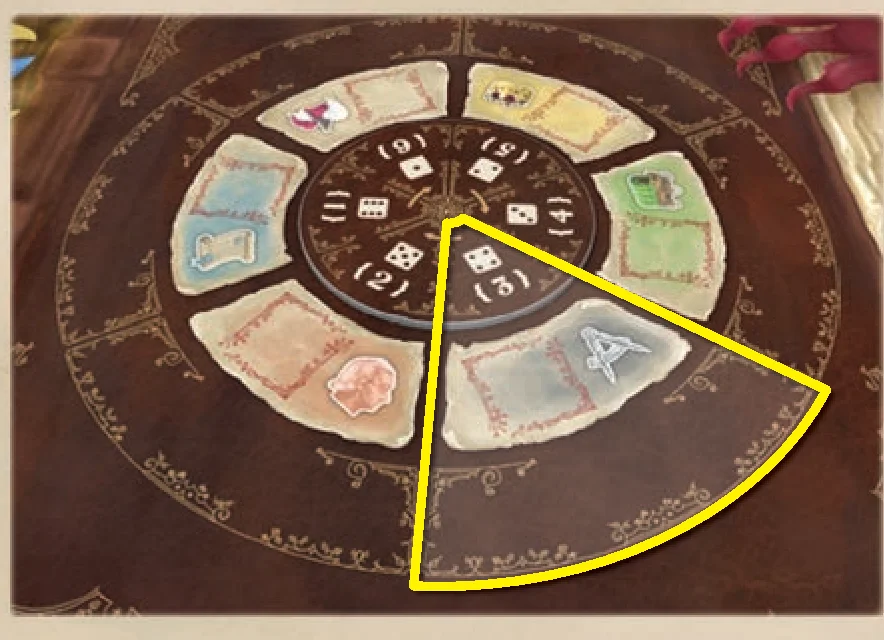
- Place the Action Wheel on its dedicated space in the top-left corner of the game board. The Action Wheel can be rotated in any direction, as long as each numbered segment aligns with a single Action.
- Separate tiles by player count: Separate all Bonus tiles, Contract tiles, and Character tiles by type, according to the number of players.
- If playing with 3 players, remove all tiles marked with a “4”.
- If playing with 2 players, remove tiles marked with “3+” or “4”.
- Shuffle Bonus tiles: Shuffle the Bonus tiles and place them in a face-down pile next to the game board. Randomly place Bonus tiles face up in the following areas:
- 6 Bonus Tiles onto the Action tiles,
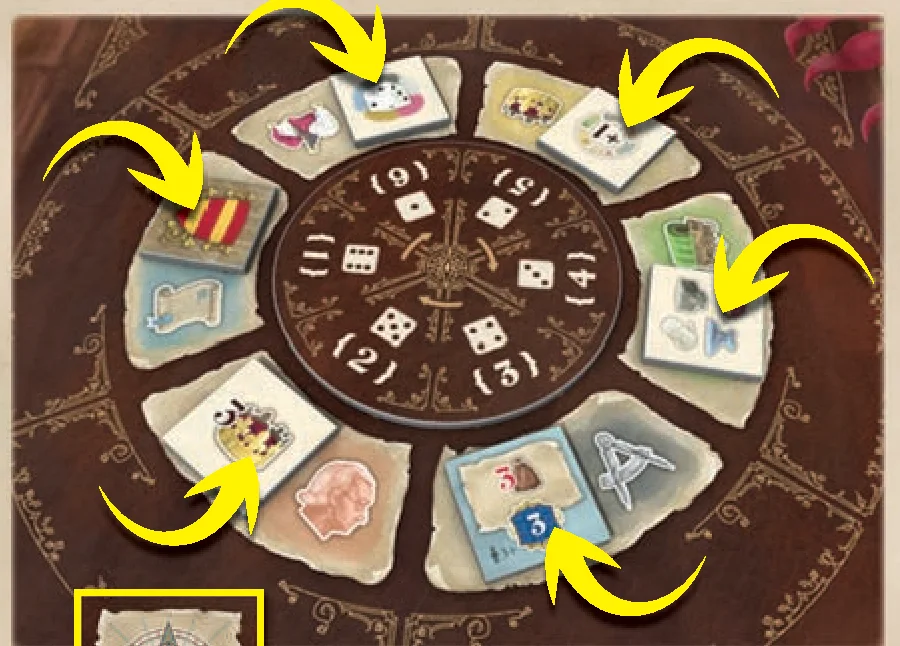
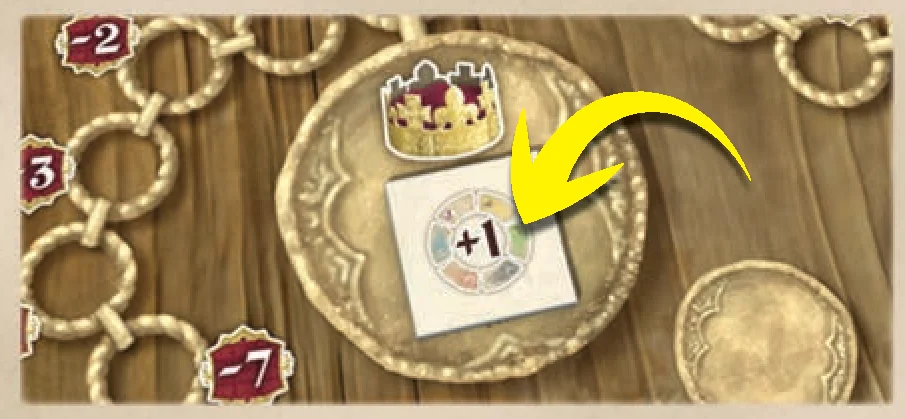
- 1 Bonus tile in the space next to the King Track,
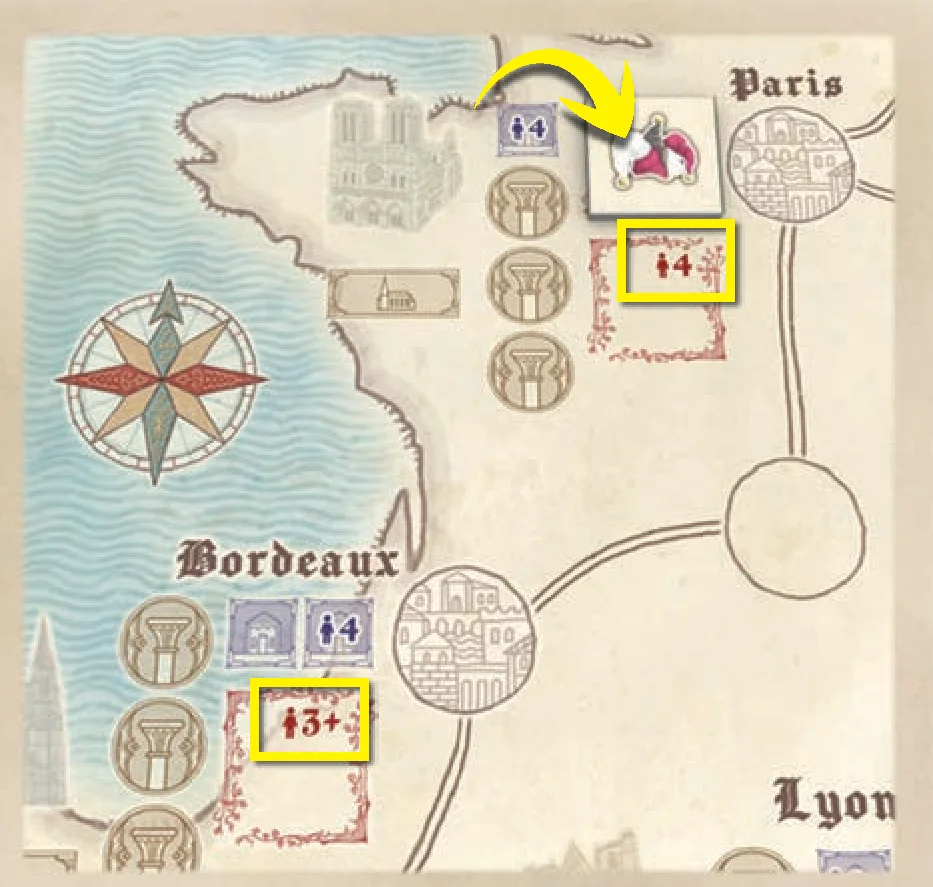
- The required number of Bonus tiles on the map. If playing with 3 players, do not place Bonus tiles on any spaces marked with a “4”. If playing with 2 players, do not place Bonus tiles on any spaces marked with a “3+” or “4”.
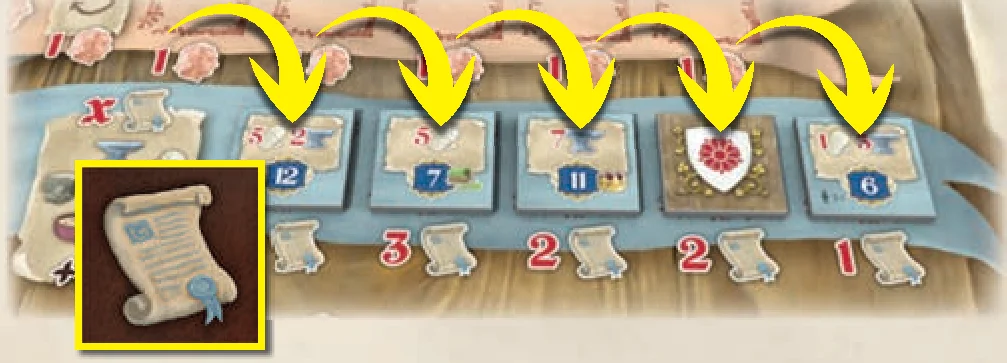
- Contract offer: Shuffle the Contract tiles and place them in a face-down pile next to the game board. Draw 5 Contract tiles and place them face up on their dedicated spaces on the game board. These face-up Contract tiles will be referred to as “the (Contract) offer”.
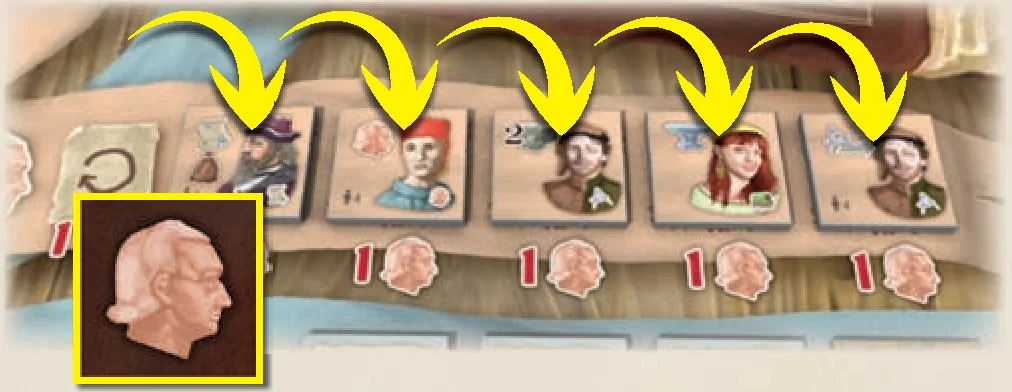
- Character offer: Shuffle the Character tiles and place them in a face-down pile next to the game board. Draw 5 Character tiles, and place them face up on their dedicated spaces on the game board. These face-up Character tiles will be referred to as “the (Character) offer”.
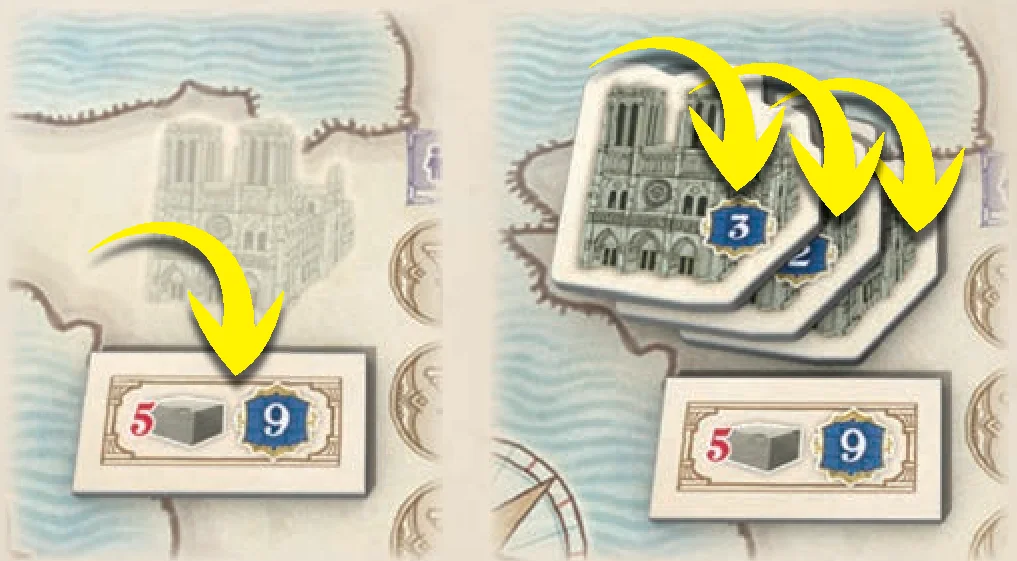
- Cathedrals setup: Shuffle the Construction Cost tiles, and place one at random under each Cathedral spot. Group the Cathedral tiles by type, and within each group, sort the Cathedral tiles from the lowest Victory Points value on the bottom to the highest at the top. Place each group of Cathedral tiles on its dedicated space on the game board.
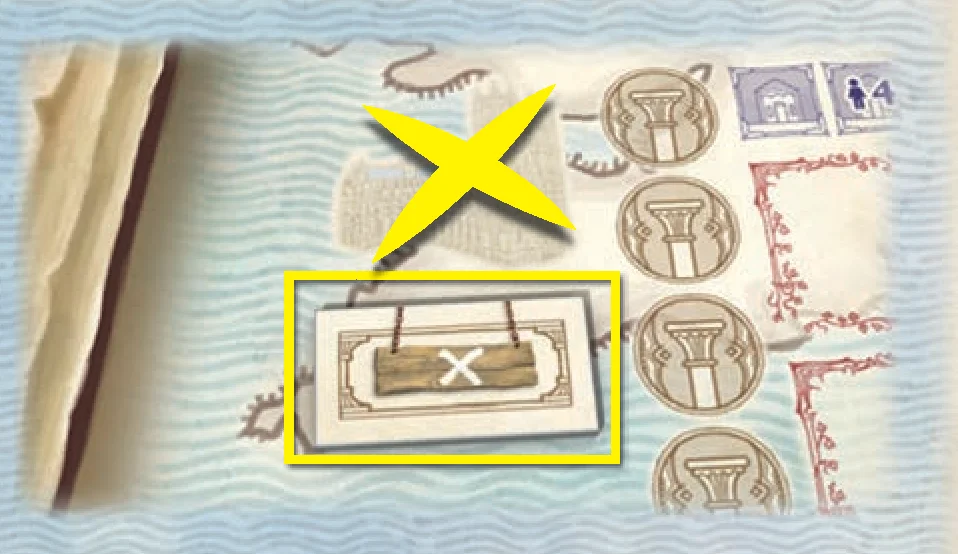
The Cathedral in the Town containing this “Unavailable Cathedral” tile will not be built during this game. Return the corresponding Cathedral tiles to the game box.
- Town and Fair tiles: Shuffle and randomly place 3 Town tiles and 4 Fair tiles, filling the corresponding spaces on the game board next to the printed “Tiletum” Town tile. Return unused Town tiles and Fair tiles to the game box.
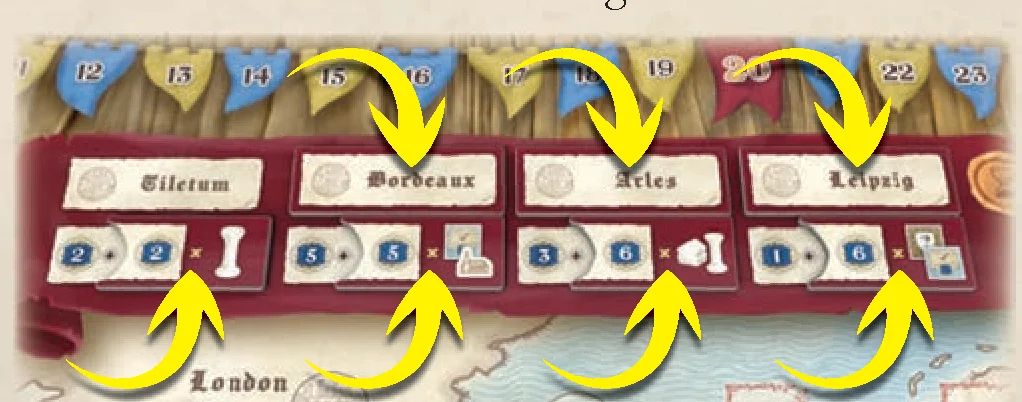
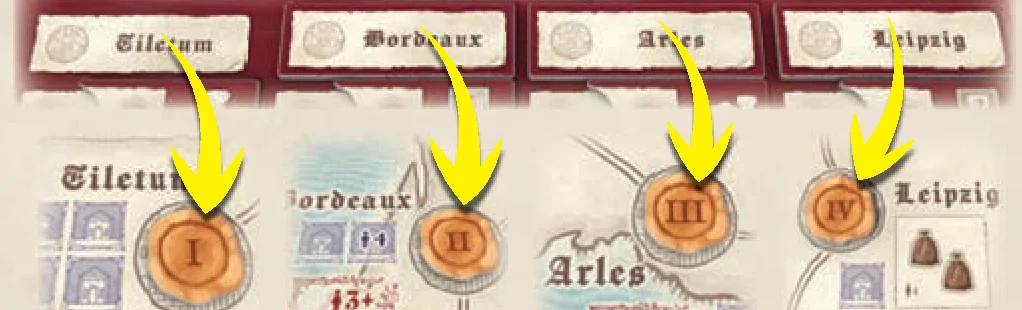
- Fair Order tiles: Place Fair Order tiles in the cities where the Fairs will take place.
- Corruption tokens: Shuffle the Corruption tokens, and put them face down in a stack next to the Turn track. Take 3 at random, and place each one, still face down, on its dedicated space on the Turn track. They will be revealed one per turn.
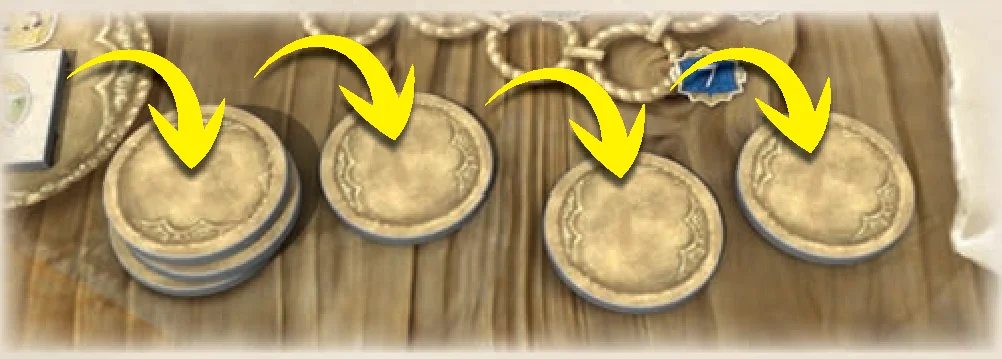
- Determine first player: Determine the first player, and give them the Compass Rose marker. The next player in clockwise order around the table becomes the second player, and so on.
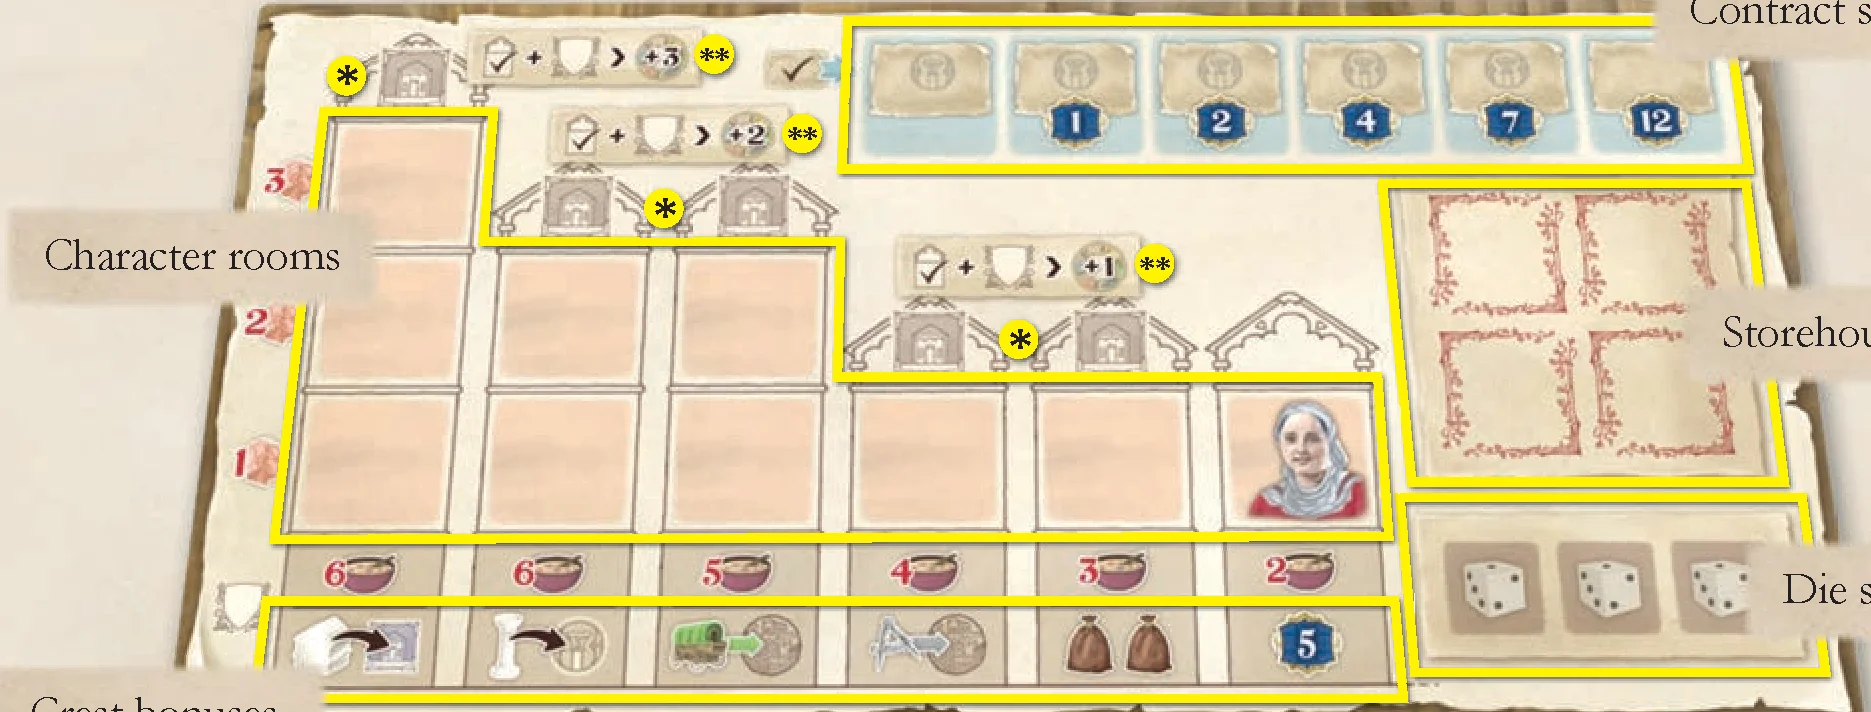
- Player components: Each player chooses a color and takes in that color:
- 1 Player board,
- 3 markers, placing them:
- on the Scoring track on the value “10” spot;
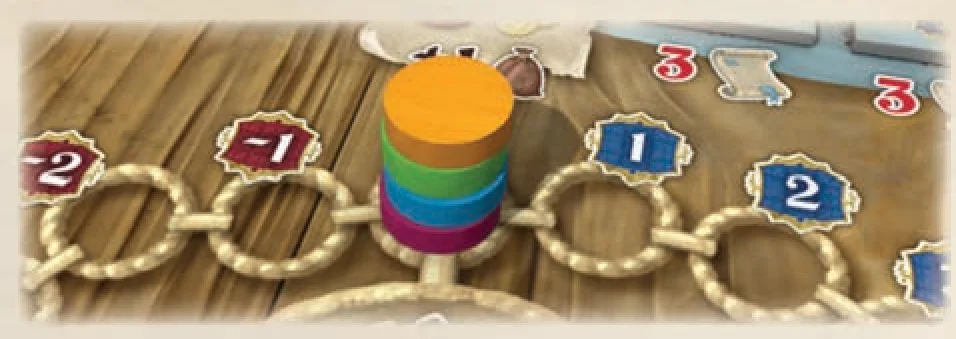
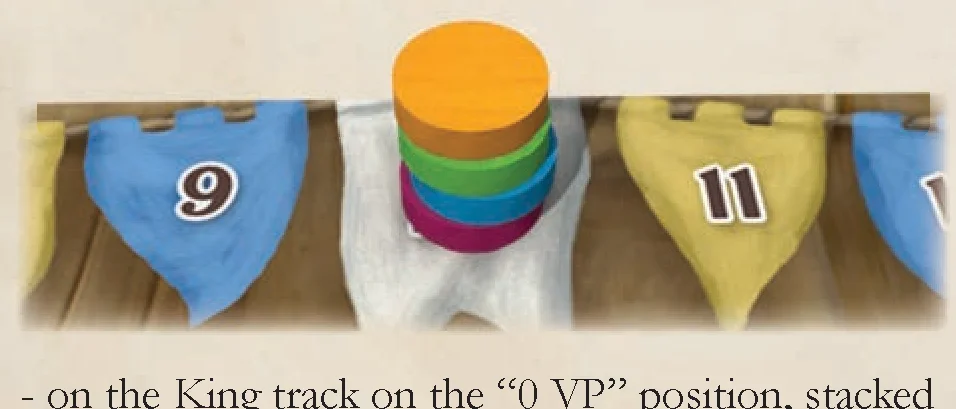
- on the King track on the “0 VP” position, stacked with the first player’s marker at the bottom of the stack and the last player’s marker at the top;
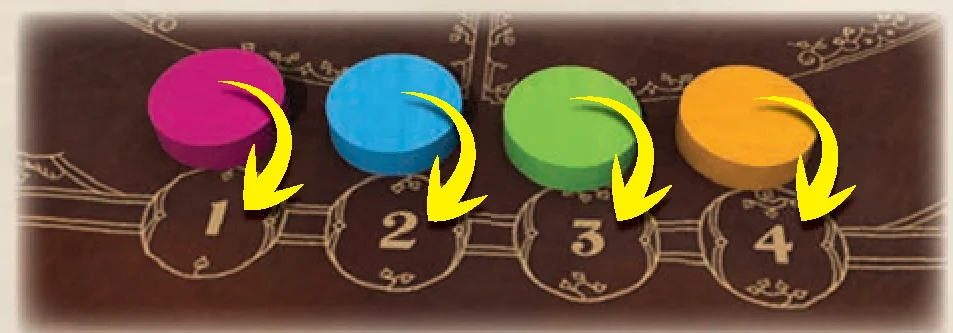
- on the Turn Order track, to reflect the turn order determined in the previous point;
- 1 Merchant and 1 Architect, placing them both next to the Tiletum town space on the map,
- 8 Houses, placing 5 of them on the roof spaces on their Player board, 1 in Tiletum, and 2 next to their Player board as part of their supply,
- 7 Pillars, placing 5 of them on the first 5 Contract spaces on their Player board from left to right and 2 next to their Player board as part of their supply,
- 5 Bonus Action Point markers, placing them next to their player board.
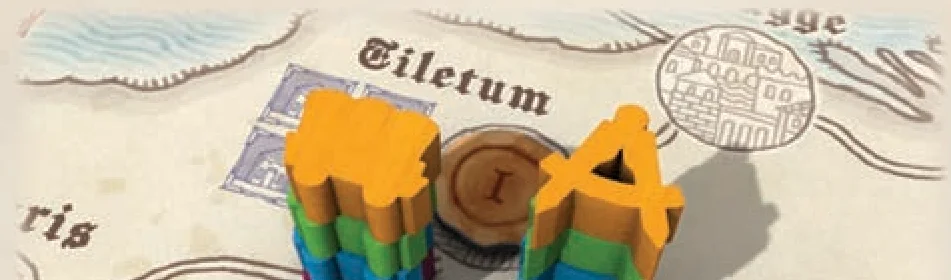
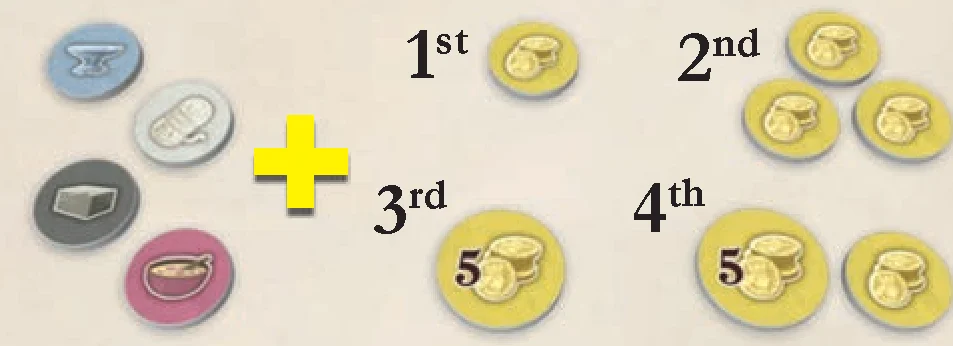
- Starting resources: Each player takes 1 Iron, 1 Wool, 1 Stone, and 1 Food. The first player takes 1 Gold, the second player takes 3 Gold, the third player (in games with at least 3 players) takes 5 Gold, and the fourth player (in games with 4 players) takes 6 Gold.
- Dice in bag: Put 1 die of each color per player in the bag:
- In 4-player games, there will be 20 dice in the bag (4 per color).
- In 3-player games, there will be 15 dice (3 per color) in the bag.
- In 2-player games, there will be 10 dice in the bag.
Return any unused dice to the game box as they will not be needed this game.
Game Flow
The aim of the game is to score the most Victory Points. Mark your Victory Points on the Scoring track. Your marker on the Scoring track may never go below “0.” If you have more than 100 Victory Points, take a “+100 VP” marker. If you have more than 200 Victory Points, flip that marker to the “+200 VP” side.
The game is played over four rounds. Each round is divided into the following five phases that must be carried out in this order:
- Preparation phase
- Action phase
- King phase
- Fair phase
- Cleanup phase
1. Preparation Phase
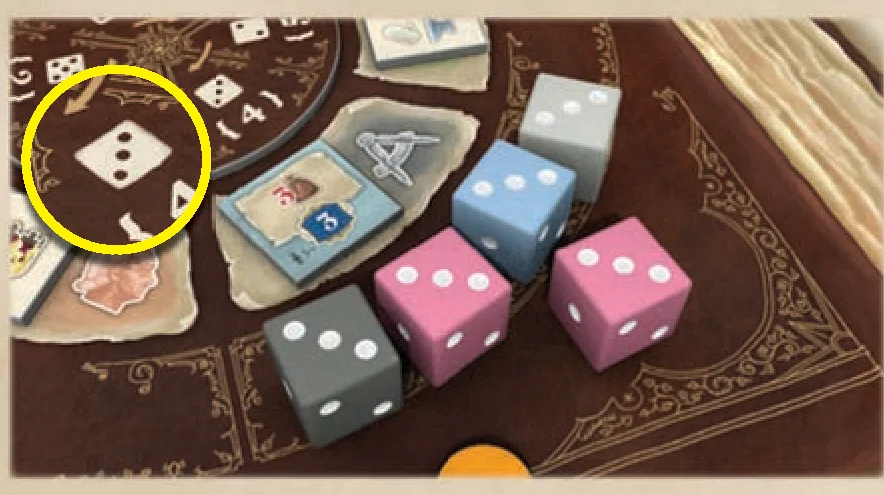
Take from the bag 8/11/14 dice for games with 2/3/4 players; roll all the dice, and place them around the Action Wheel according to their value. All dice of the same value, regardless of their color, are placed in the designated section on the Action Wheel.
2. Action Phase
Step 1: Reveal Corruption
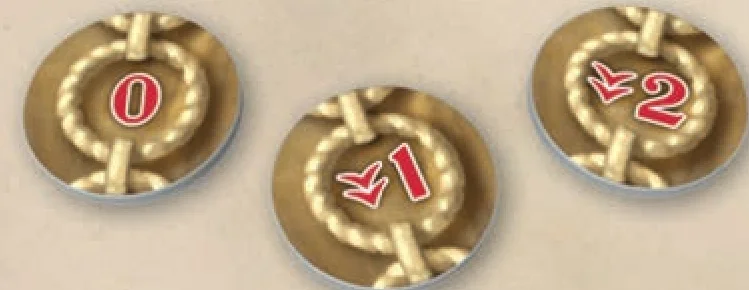
The first player reveals the rightmost face-down Corruption token and moves the markers of all players on the King track according to the number on the token.
Corruption tokens have values of 0, 1, or 2; therefore, when resolved, all player markers move left or stay put:
- If the “0” value token is revealed, all player markers remain in their current positions.
- If a “1” or “2” value token is revealed, all player markers move left 1 or 2 spaces (respectively). A marker may not be moved beyond the leftmost (lowest) position of the King track. In this case, simply ignore any extra movement.
When moving markers, always start with the ones that are on the leftmost (lowest) spaces. When moving multiple markers occupying the same space on the King track, make sure not to change their order in the stack.
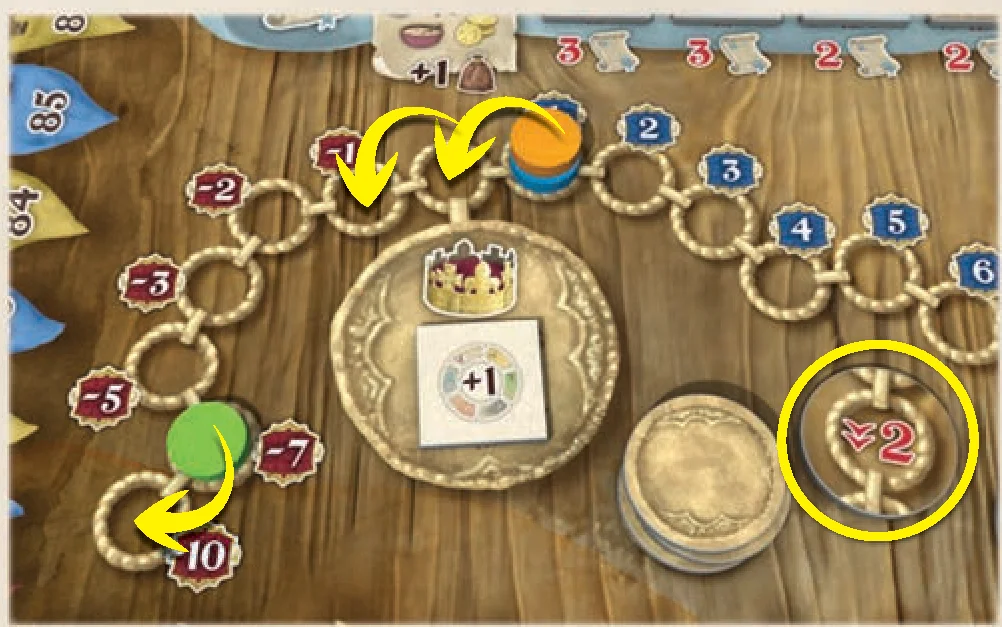
Example: During Step 1 of the Action Phase, a “2 Corruption” token is revealed. The orange and blue markers move (without changing their order in the stack) to the “-1 VP” position. The green marker moves to the “-10 VP” position and stops, as it may not move any further.
Step 2: Player Turns
Proceeding according to the order dictated by the Turn Order track, each player takes one turn. On your turn, perform the following steps, in order:
- Take 1 die from the Action Wheel,
- Take the Resources provided by the die, then
- Perform the associated type of Action.
Taking a Die
Choose one of the available dice from the game board.
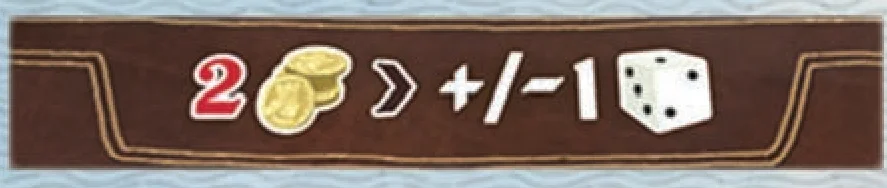
Immediately before taking a die, you may spend 2 Gold to add or subtract 1 to the value of your chosen die (this can be done multiple times). The value of the die is permanently changed, affecting number of Resources provided and the type of Action associated with the die. A value of 6 can be changed into a value of 1 (and vice versa) by spending 2 Gold.
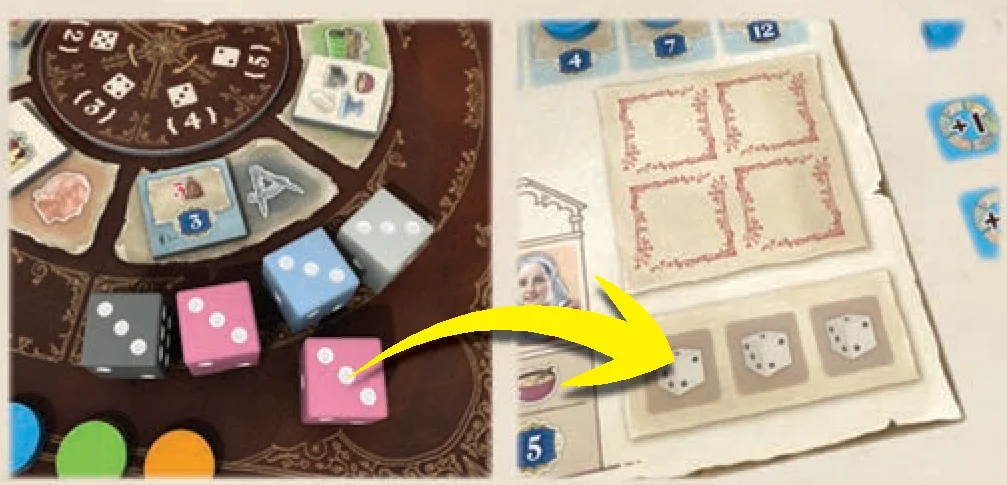
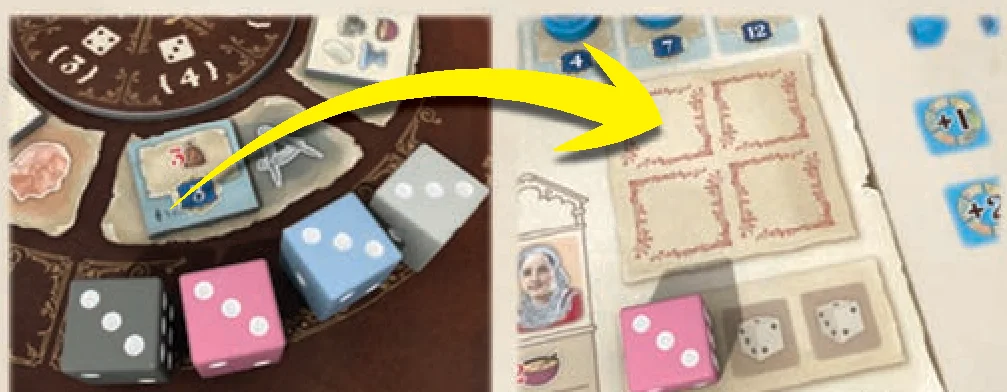
Place the selected die on the leftmost empty die space on your Player board. If the associated Action still has a Bonus tile, you may take it and place it in your Storehouse (on your Player board). Taking a Bonus tile is not mandatory: you may choose not to take it, even if you have enough space in your Storehouse. Once taken, a Bonus tile cannot be discarded.
Storehouse Rules
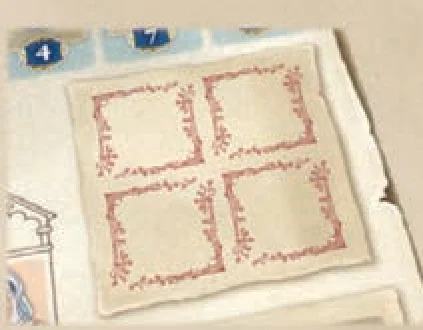
Several different types of tiles first go into your Storehouse when taken from the game board. Regardless of the type of tile taken (Bonus, Character, or Contract tile), all of the following rules apply:
- You must have at least one empty space in the Storehouse on your Player board.
- Once taken, the tile cannot be discarded.
Bonus tiles can be gained from various locations around the board during different parts of your turn. Taking a Bonus tile is always optional. Some Bonus tiles may show Contracts or Crests. Such Bonus tiles may be interchangeably referred to as Contract tiles or Crest tiles in these rules.
Taking Resources
Take a number of Resources from the supply matching the color and number of your chosen die:
- Blue dice produce Iron.
- Pink dice produce Food.
- Yellow dice produce Gold.
- Light gray dice produce Wool.
- Dark gray dice produce Stone.
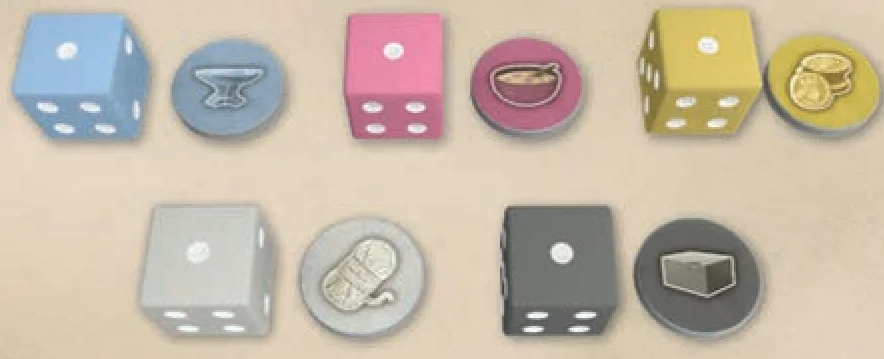
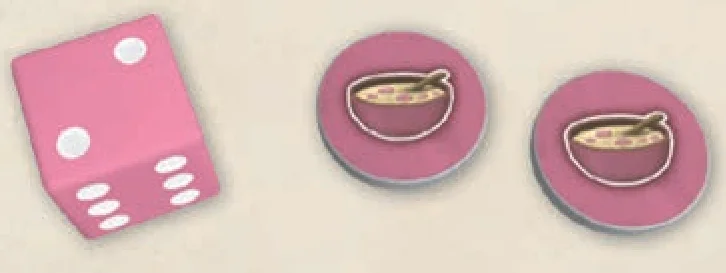
Example: After taking the pink die of value 2, the player receives 2 Food.
Perform Action
Finally, perform the Action associated with the space you took the die from. All the different Actions are described in detail below.
After each player has taken a turn, go back to Step 1 of the Action phase and repeat the process two more times. Once all players have taken three turns (during which they choose a die, gain Resources, and perform the associated Action), the Action phase ends and the game proceeds to the King phase.
3. King Phase
Step 1: King Track Scoring
The player whose marker is highest on the King track takes (or discards) the Bonus tile next to the track. If there is no Bonus tile available (during the last round), that player scores 4 Victory Points. If multiple players are tied for the highest position on the King track, the tie is broken in favor of the player with the bottommost marker.
Then, all players score points as indicated by their position on the King track:
- You lose points if your marker is in the lower (red) part of the track.
- You gain points if it is in the higher (blue) part.
- If your marker is in the starting space of the track (no color), you neither lose nor gain any Victory Points.
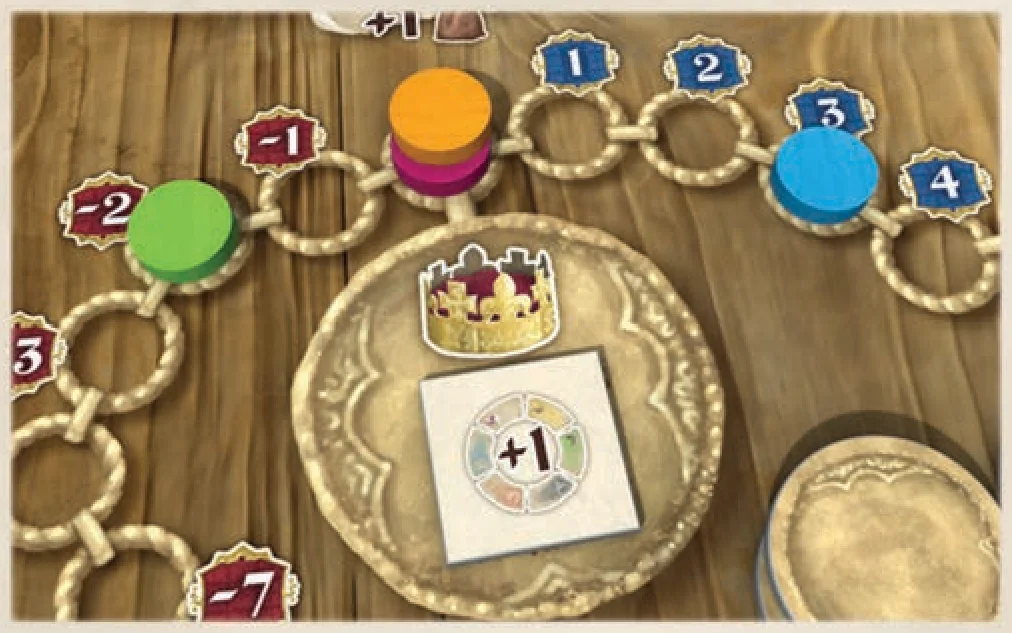
Example: Blue receives 3 Victory Points. Neither Orange nor Purple receive any Victory Points (but also do not lose any Victory Points), and Green loses 2 Victory Points. The Bonus tile from the space next to the King track is awarded to the Blue player.
Step 2: Adjust Turn Order
Adjust the markers on the Turn Order track: the player who is highest on the King track becomes the first player, the second-highest becomes the second player, and so on. If multiple players share the same spot on the King track, the tie is broken in favor of the player with the bottommost marker (as they were there first).
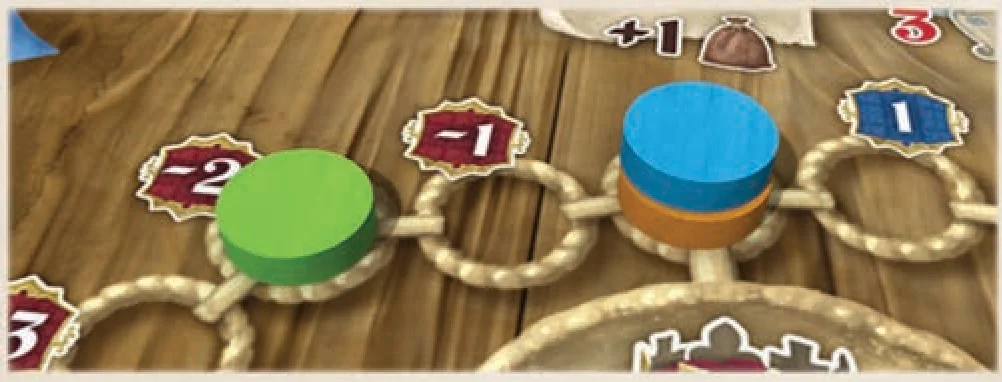
Example: When the new Turn Order is established, Orange will be first, Blue second, and Green third.
Resetting Markers on King Track
Any player markers in the lower (red) part of the King track are moved up to 0, preserving their respective order. (Stack the markers from left to right so that the previously lowest placed marker will be at the top of the stack on the “0 VP” space.) Markers in the higher (blue) part should not be moved, but rather left where they are.
4. Fair Phase
During this phase, players will have a chance to score Victory Points for their achievements.
Fair towns
A total of four Fairs will be held during the game, as indicated by the Town tiles placed during setup. The Fair Order tokens which were placed during setup act as a reminder of the order in which the Fairs will take place, one at the end of each game round. The first fair always takes place in Tiletum (its Town tile is printed on the board). The Fair tile below the Town tile describes the scoring criteria for the round and the number of Victory Points that can be gained during the Fair scoring.
Fair scoring
To participate in the Fair scoring, you must either:
- have a House in that Town, or
- have your Merchant present in that Town at the time of the Fair phase.
House spots on the map are limited. In most Towns, only one or two players can have a House. In preparation for a Fair, you can either place your House in that Town, or you can plan the path of your Merchant in such a way that it ends up in the Fair Town at the end of your Action phase.
The Fair scoring reward is a combination of information preprinted on the game board and information provided by the Fair tile. Look at the Fair tile for the current round. To its left is a Victory Point value. Add this number to the value printed on the Fair tile itself. This sum represents the total number of Victory Points (board+tile) you will receive, multiplied by the number of times you meet condition depicted on the Fair tile itself.
After scoring, flip the Fair tile face down.
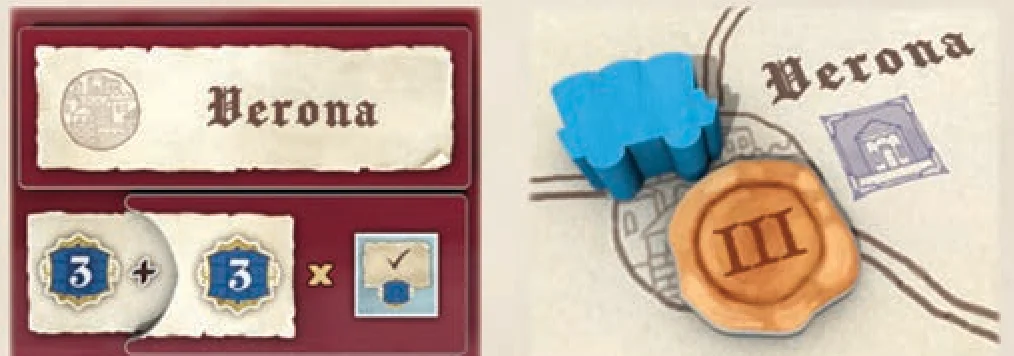
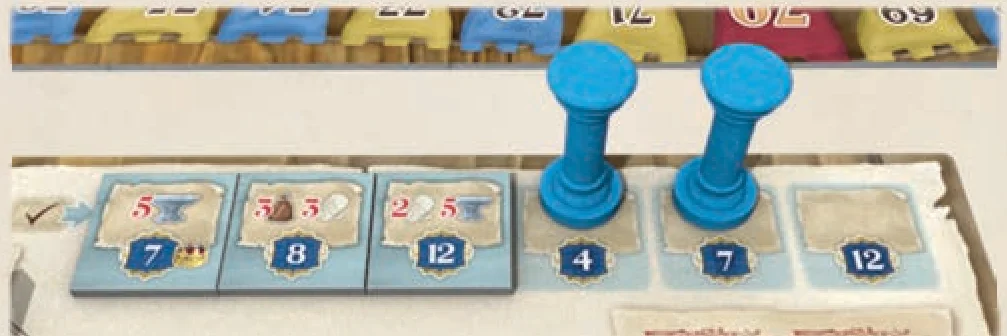
Example: During the 3rd round of the game, the Fair takes place in Verona. The amount of Victory Points awarded is 6 (3 preprinted on the board plus 3 on the Fair tile) for each fulfilled Contract. The Blue player will participate in the Fair scoring since their Merchant is present in Verona. With 3 fulfilled Contracts on their Player board, Blue receives a total of 18 Victory Points.
5. Cleanup Phase
Skip this phase in the final (4th) round.
Do the following, in order:
- For each Action around the Action Wheel, replenish any Bonus tiles that were claimed. (Leave unclaimed tiles in place.) Replenish the Bonus tile on the King track. (Bonus tiles on the map are never replenished.)
- Shuffle all Corruption tokens, randomly select 3, and place them face down on their dedicated spaces on the game board.
- Return all dice to the bag.
- Rotate the Action Wheel one step clockwise.
- Start a new game round, beginning with the Preparation phase.
At the conclusion of the Fair phase of the 4th round, the game has come to an end. Proceed to End of the Game and Final Scoring.
Action Points Overview
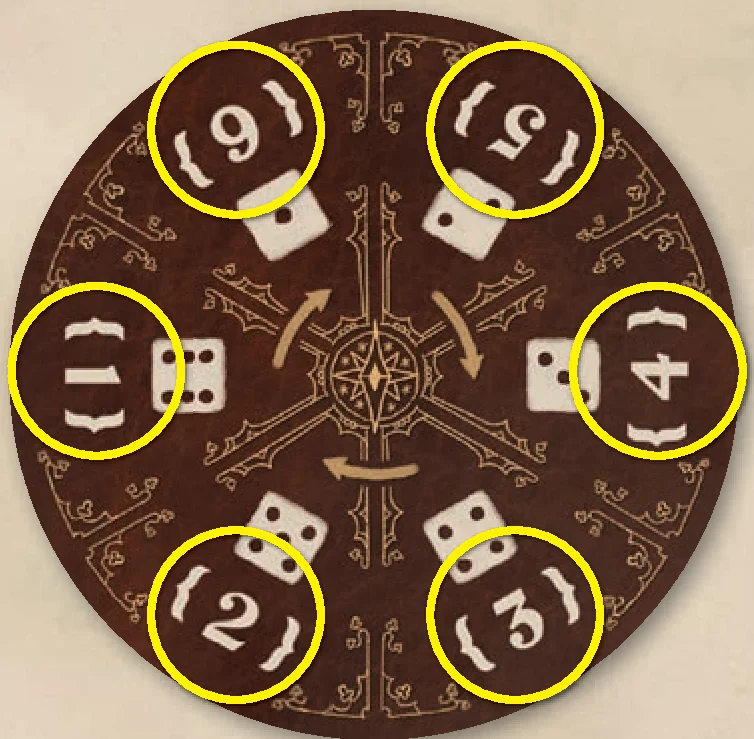
When performing an Action, you receive a number of Action Points depending on the value of the die used to take it. The number of Action Points received is printed on the Action Wheel next to the depiction of the die.
Action Point values are printed on the Action Wheel. This value is always equal to 7 minus the value of the corresponding die. Therefore, the more Action Points you get, the fewer Resources you receive, so there is always a balance between the strength of an Action and the amount of Resources you gain.
Action Point counters are provided to aid in keeping track of how many Action Points you received versus how many you have already spent or have remaining. When choosing a die, simply take a number of Action Point counters equal to the number of Action Points you receive for the turn.
Most Actions provide multiple options which may be chosen any number of times, in any order, spending the corresponding Action Points each time. For the sake of brevity, the words “Action Points” may be shortened to “AP” below.
Architect Action
When performing the Architect Action, the following options are available:
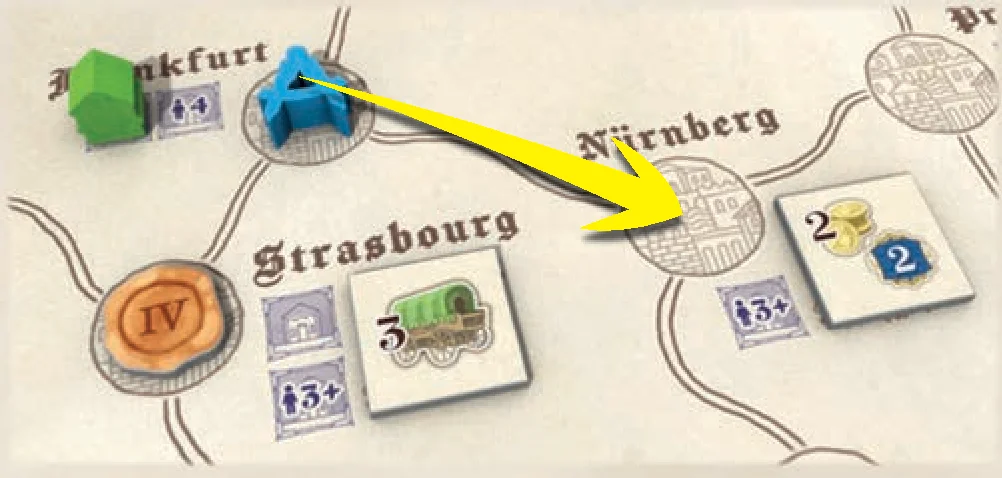
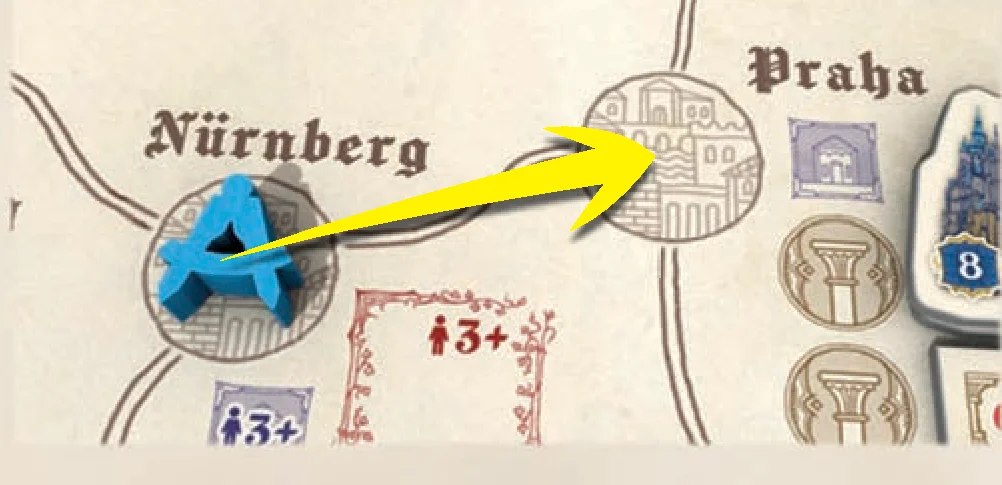
- 1 AP: Move your Architect on the map, from one spot to an adjacent one.
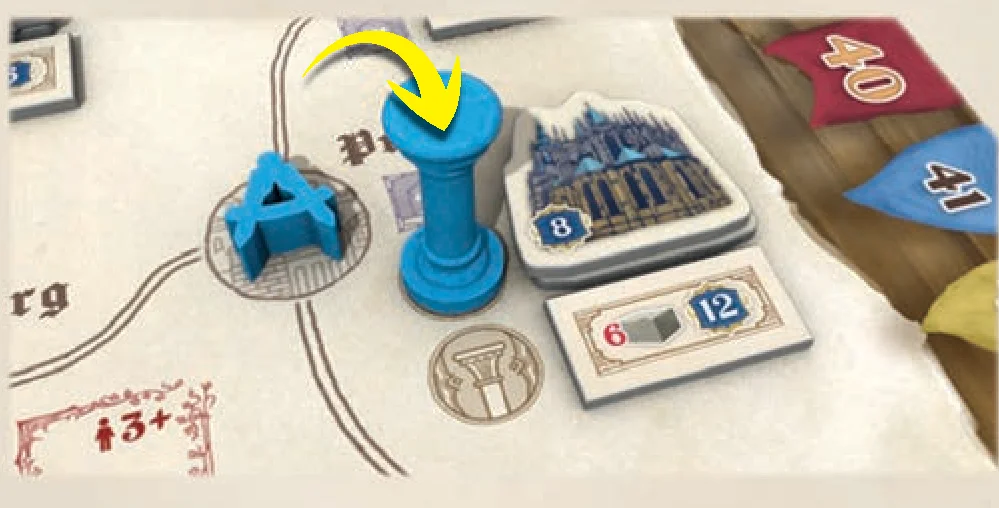
- 1 AP: Add a Pillar from your personal supply to a Cathedral. Your Architect must be located in a Town with at least one empty Pillar space and you may not already have a Pillar at that Cathedral.
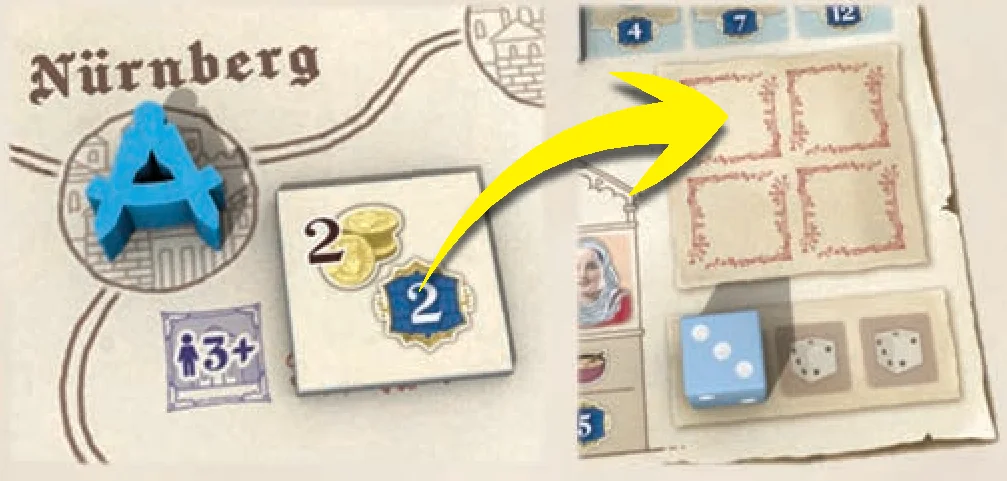
- 1 AP: Take one Bonus tile from the Town where your Architect is located, if one is available, and place it in your Storehouse.
Merchant Action
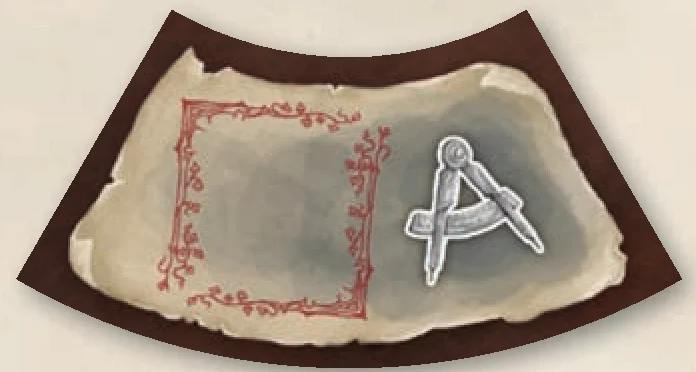
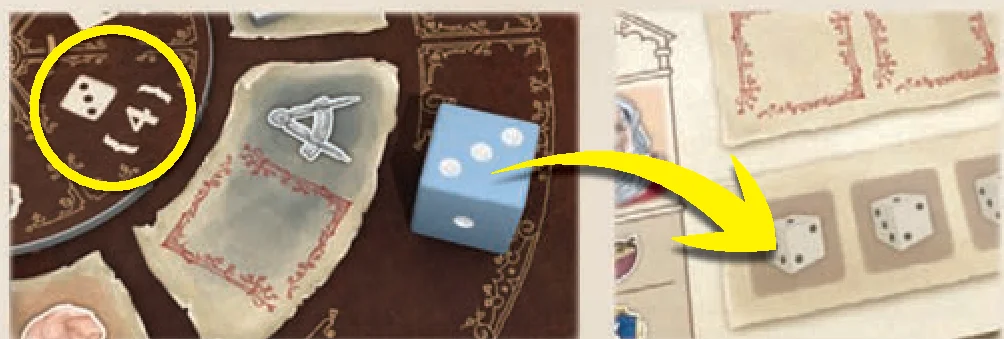
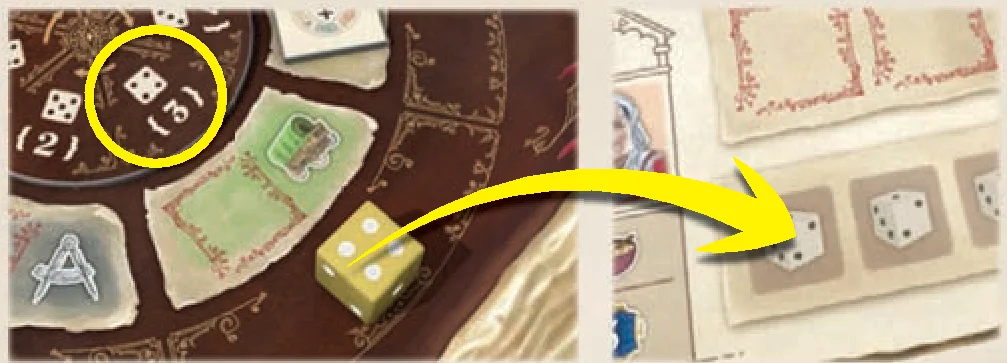
When performing the Merchant Action, the following options are available:
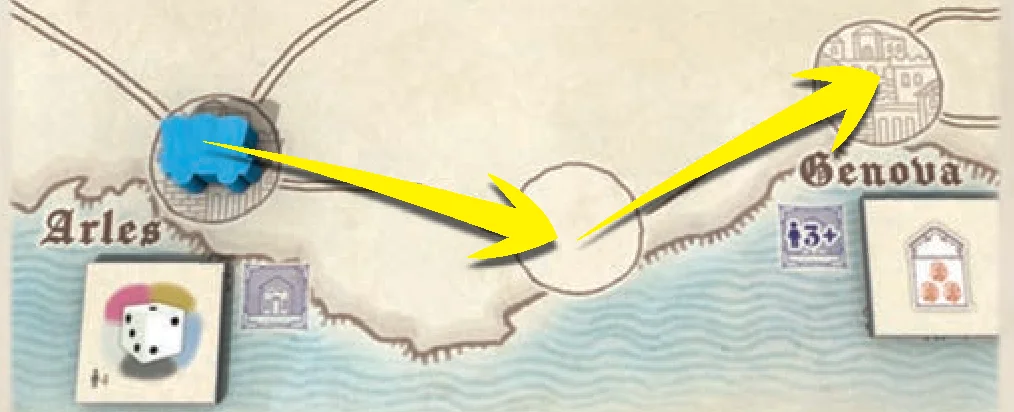
- 1 AP: Move your Merchant on the map, from one spot to an adjacent one.
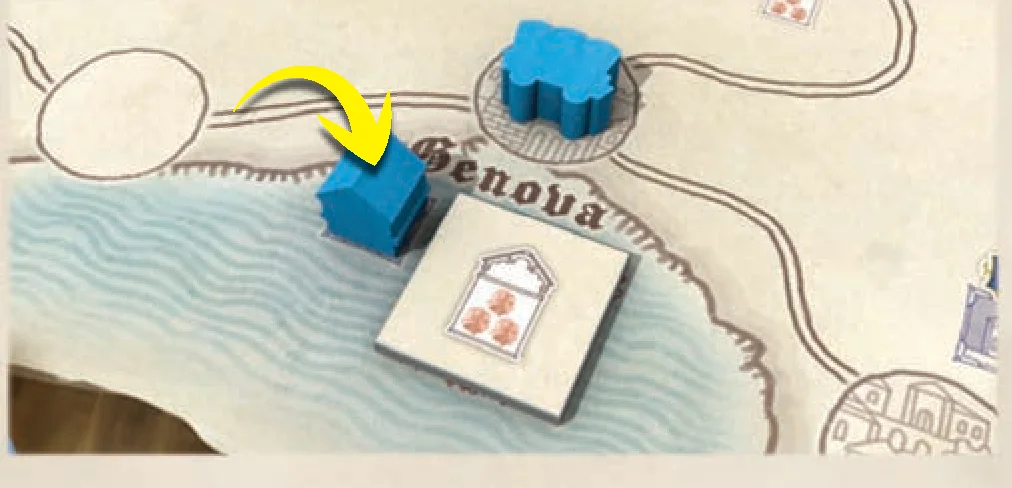
- 1 AP: Add a House from your personal supply to a Town. Your Merchant must be located in a Town with at least one empty House space and you may not already have a House in that Town. If the House space contains a Building Bonus, receive it now. (See the Appendix for more details.)
- 1 AP: Take one Bonus tile from the Town where your Merchant is located, if one is available, and place it in your Storehouse.
Character Action
When performing the Character Action, the following options are available:
- 1 AP: Take a Character tile from the Character offer and place it in your Storehouse, then replenish the offer immediately.
- 1 AP: Discard all Character tiles from the Character offer, then replenish the offer immediately. Discarded Character tiles are mixed, face down, back into the pile of Character tiles.
- 1/2/3 AP: Move a Character tile from your Storehouse to a Room on floor 1/2/3 on your Player board. The cost in Action Points is equal to the floor of the Room.
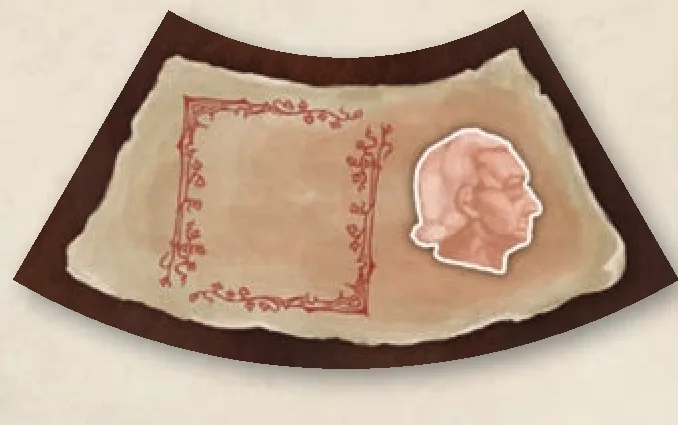
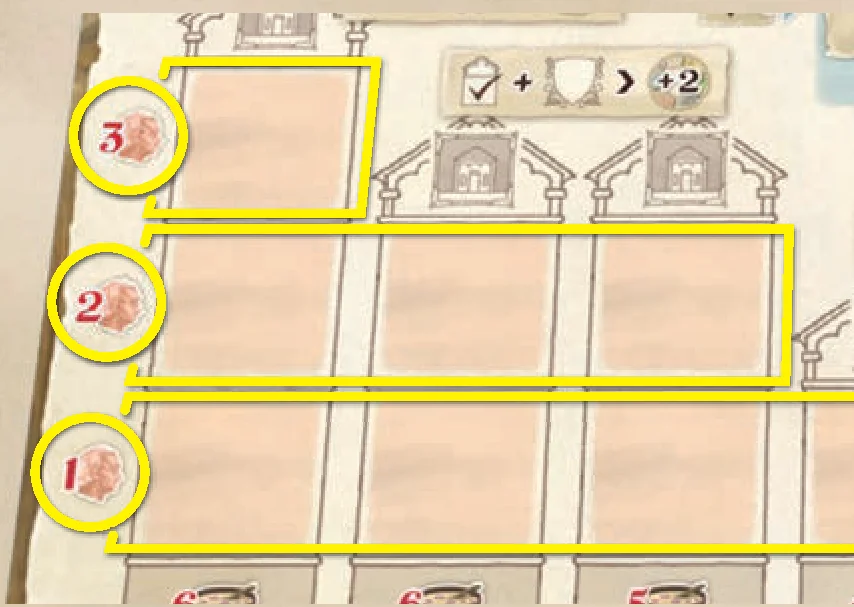
On your Player board, there are six Buildings, each with one, two, or three Rooms. The rightmost Building is already occupied. The following rules govern the placement of Character tiles in the Rooms:
- You cannot have two different Buildings with the same Character (same illustration). In other words, as soon as a Character is placed in a Building, matching Character tiles must be placed in the same Building.
- As soon as a Character tile is placed in a Room, you immediately earn the Character bonus (printed in the top left corner of the tile).
- As soon as a Building has all its Rooms filled with Character tiles, take the House from the roof space of that Building and add it to your personal supply. That House is now available for you to use when performing Merchant Actions.
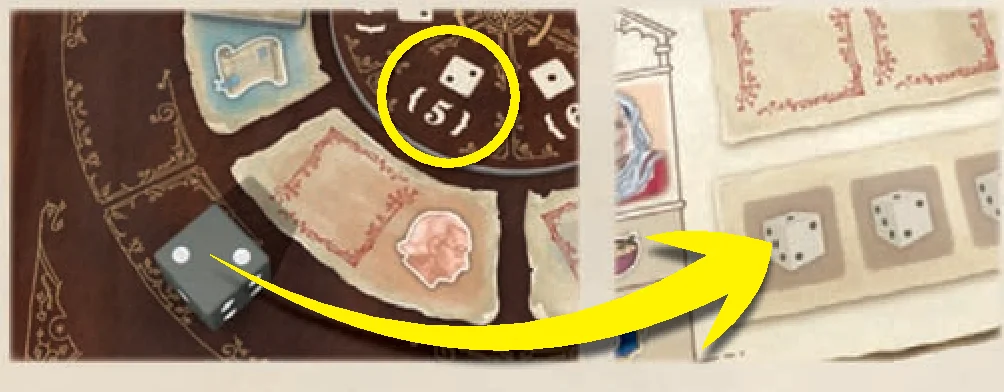
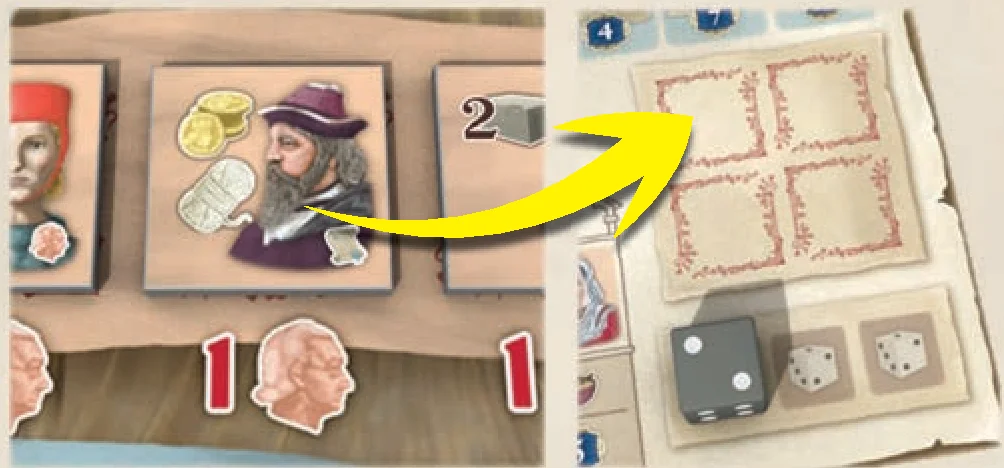
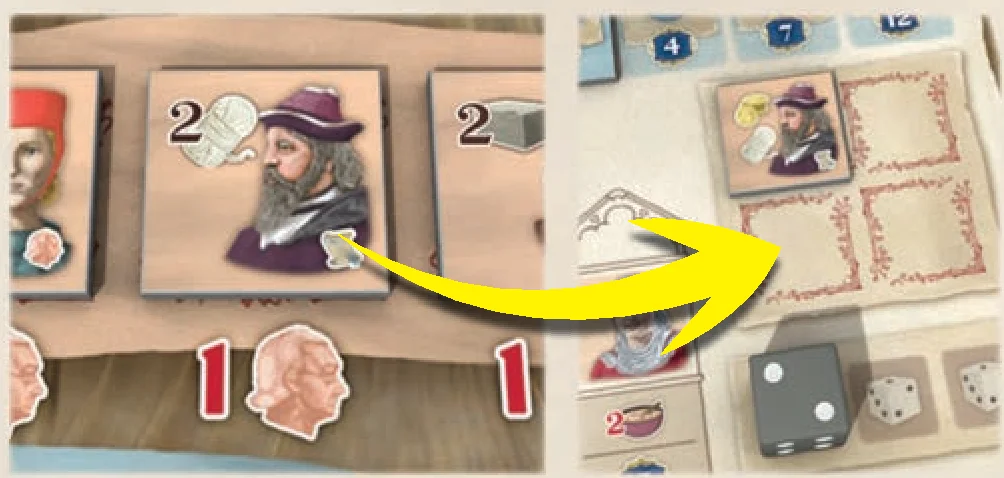
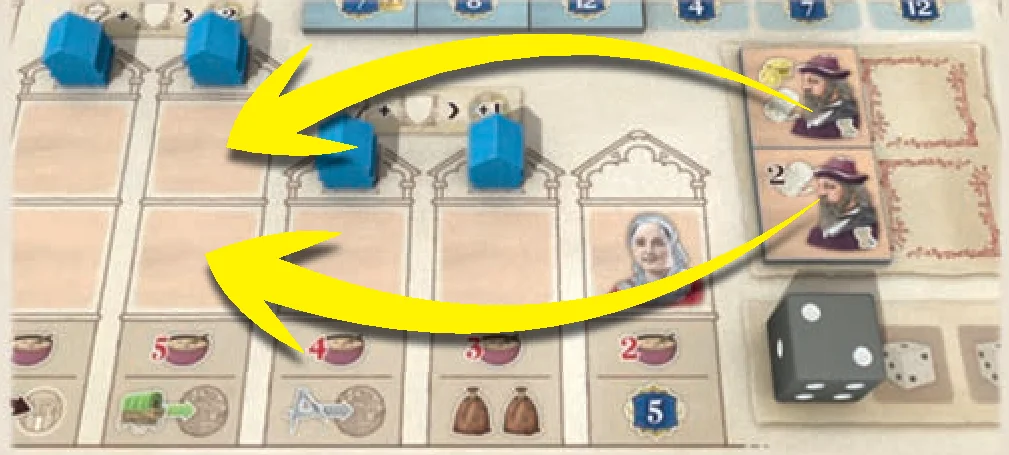
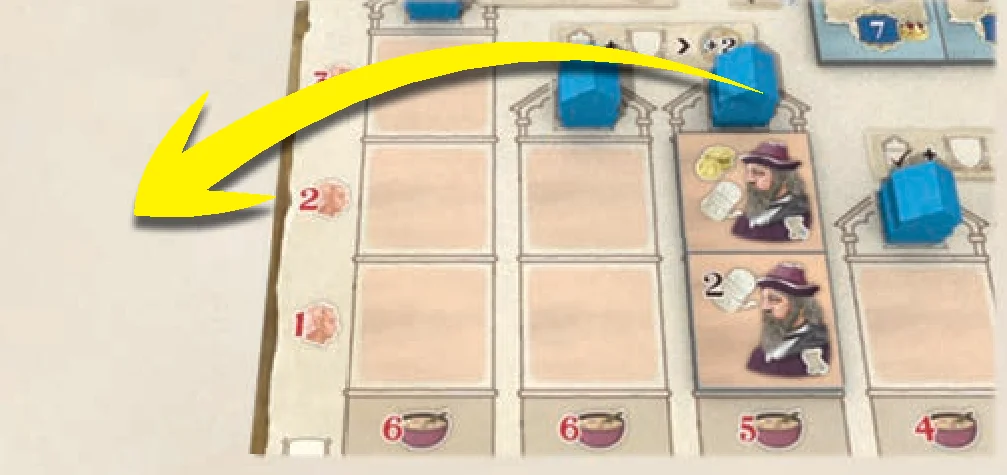
Example: Then, Blue spends 2 Action Points to place one of their Characters into a Room on floor 2 and 1 more Action Point to place another Character on floor 1 of the same Building. This is allowed, since both Characters are the same. Blue receives the printed benefits on the placed tiles: 1 Gold and 1 Wool for the first Character and 2 Wool for the second Character. Since all floors of this Building are now occupied, Blue immediately moves the Building’s House to their supply at the side of their Player board.
Contract Action
When performing the Contract Action, the following options are available:
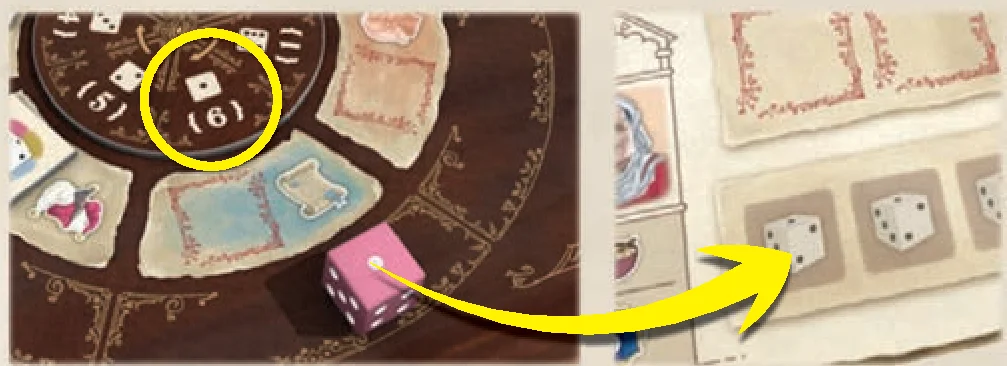
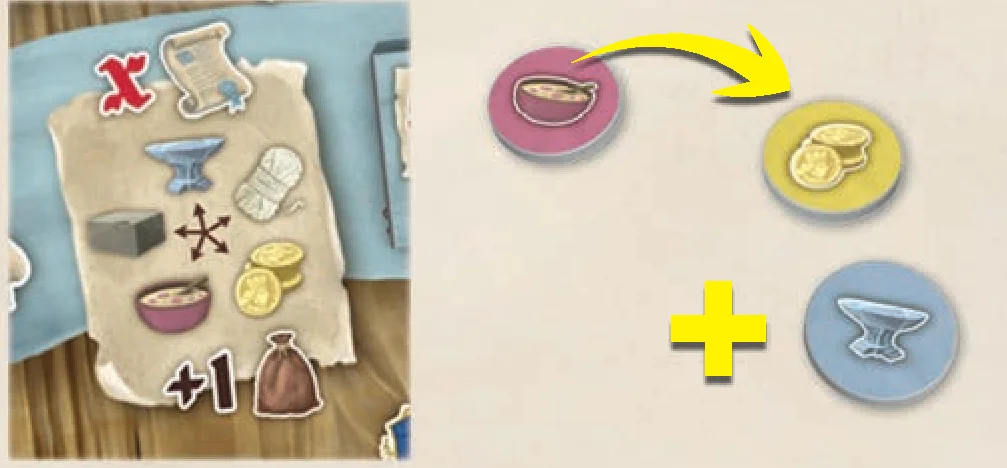
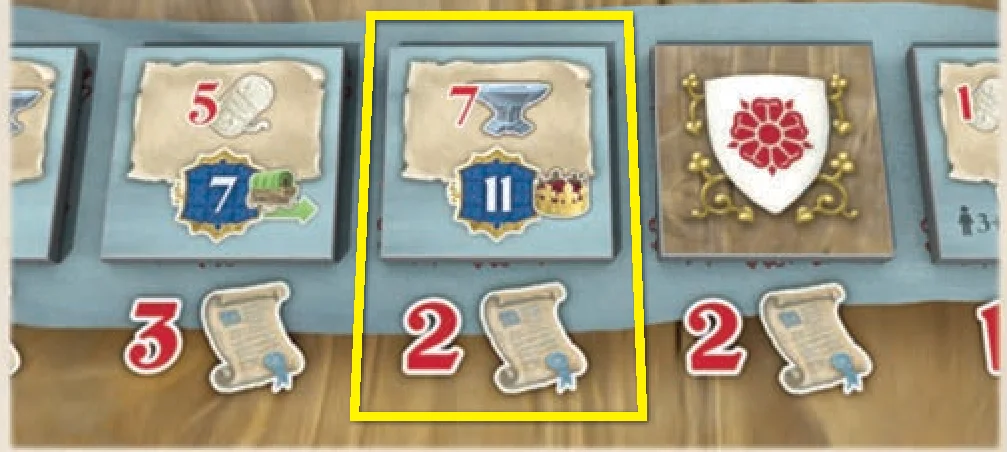
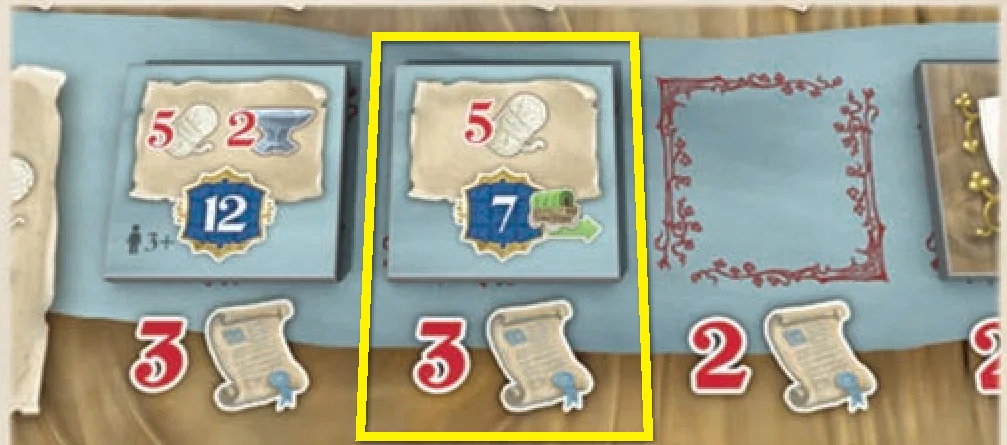
- ? AP: Take a Contract tile from the offer, spending the number of Action Points indicated below its space in the offer, and place it in your Storehouse. (Do not replenish the offer.)
- 1 AP: Exchange one of your Resources for a different Resource. The first time you do this during your turn, receive one bonus Resource of your choice.
At the end of your turn, shift all Contract tiles in the offer to the right until all empty positions are filled, then replenish the offer.
King Action
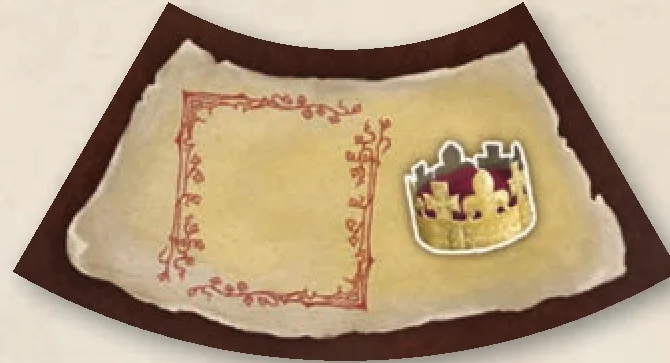
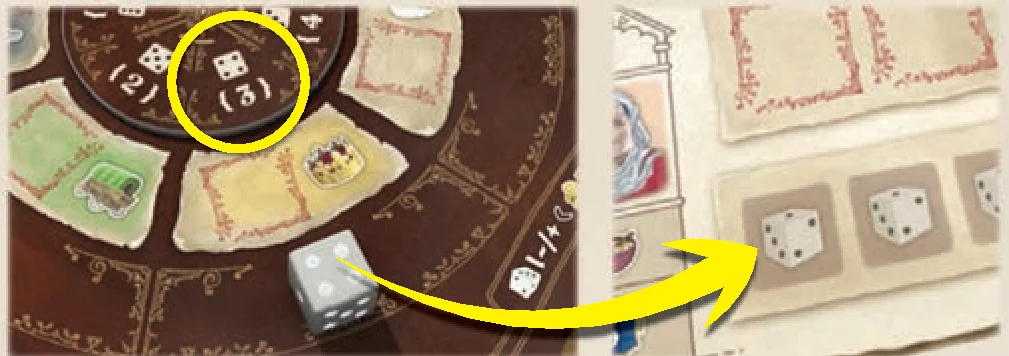
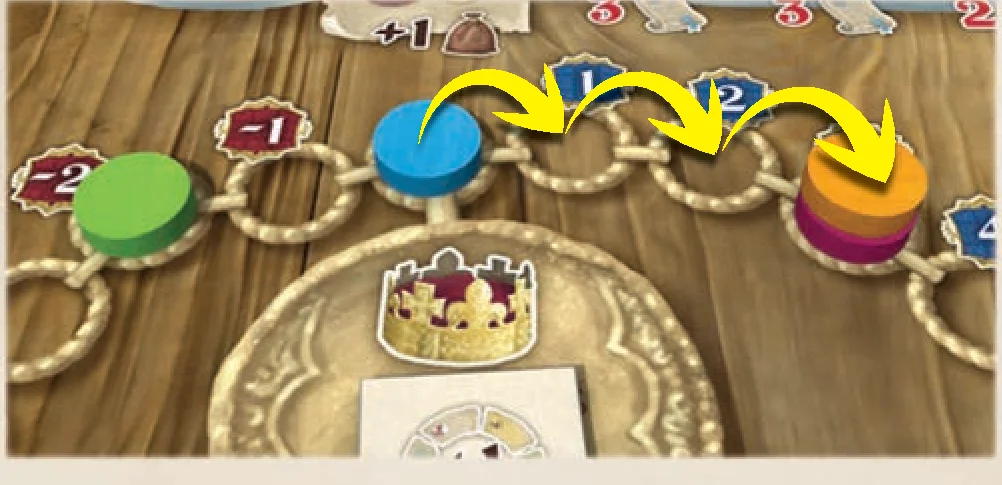
When performing the King Action, for each Action Point you have, advance your marker one step on the King track. If you end up on a step already occupied by other player markers, place yours on top. Your marker on this track can never go above the “+15 VP” position.
Joker Action
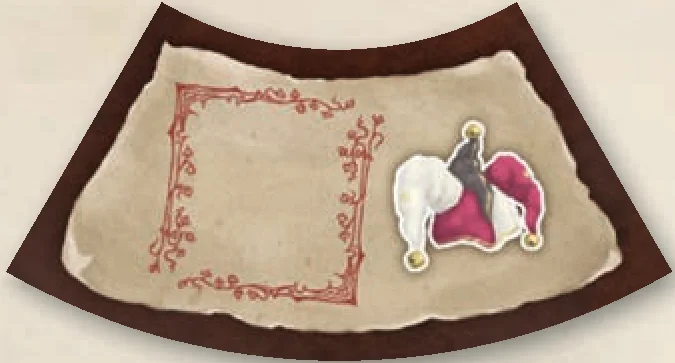
Choose one of the other five Actions. Spend all your Action Points on the options available for that Action.
All Action Points must be used to perform the same Action. You cannot split them between multiple Actions.
Tasks
At any time during your turn (before, after, or between spending Action Points), you can pause to complete tasks. Unlike Actions, most Tasks will require you to spend Resources.
These are all possible Tasks:
- Spend 2 Gold to gain one other Resource (Stone, Wool, Metal, or Food).
- Fulfill a Contract in your Storehouse by spending the Resources depicted on the tile. Move the Contract tile from your Storehouse to the leftmost open Contract space on your Player board. Take the Pillar from that space (if any) and add it to your personal supply. That Pillar is now available for you to use when performing Architect Actions. Score any Victory Points indicated on the Contract tile itself as well as on the space you cover. Receive any additional benefits depicted on the Contract tile.
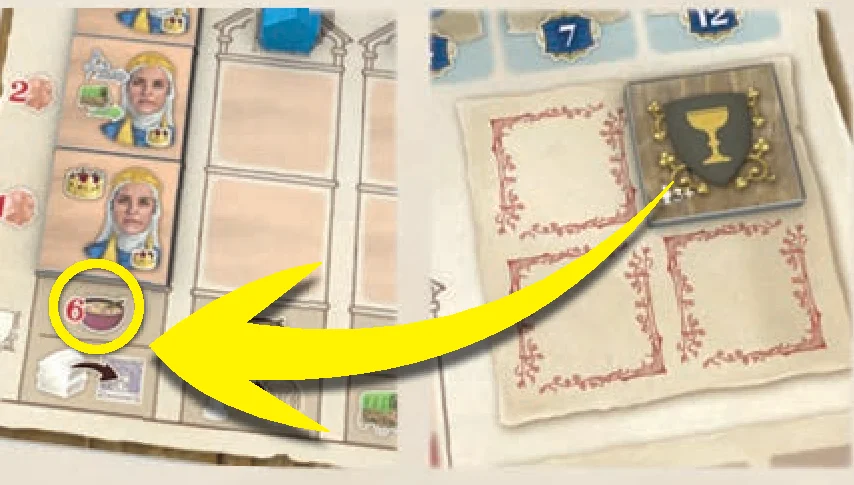
- Spend Food to move a Crest tile from your Storehouse to a dedicated empty space below a Building on your Player board. Each Crest space has a different Food cost. Each such space also has a bonus that is awarded immediately after covering it with a Crest.
- Contribute to the building of any Cathedral where you already have a Pillar. Spend the required amount of Stone, as depicted on the Construction Cost tile for that Cathedral, and take the topmost Cathedral tile. Score the number of Victory Points depicted on both the Construction Cost tile and the Cathedral tile. (You may only contribute to the building of a specific Cathedral once.)
- Use the Helper Ability from a Bonus tile in your Storehouse. After resolving the Helper Ability, the tile is removed from the game.
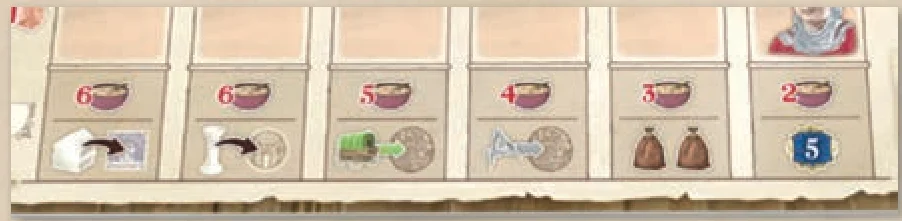
Bonuses for Placing a Crest
Bonuses for placing a Crest are (from left to right):
- Place a House from your supply onto any Town on the map. There must be an available House space in the chosen Town, and you cannot place the House in a Town that already has one of your Houses.
- Place a Pillar from your supply onto any Cathedral on the map. There must be an available Pillar space at the chosen Cathedral, and you cannot place the Pillar at a Cathedral that already has one of your Pillars.
- Move your Merchant to any space on the map.
- Move your Architect to any space on the map.
- Gain any 2 Resources.
- Gain 5 Victory Points.
Types of Tiles
Whenever you gain a tile of any kind from the game board (map, tracks, etc), it first goes into your Storehouse. If your Storehouse is full, you cannot take a tile. Therefore, before being in the situation to gain a tile while your Storehouse is full, consider performing Actions or tasks which would allow you to remove some tiles from your Storehouse.
Crests
Crests are light brown. There are six different types of Crests (representing major noble families). Crest tiles are placed in their dedicated spaces below the Buildings on your Player board (after passing through your Storehouse). Crests are found on Contract tiles as well as Bonus tiles. You may never have multiple Crests of the same type anywhere on your Player board.
Contracts
Contract tiles are blue. Resources depicted on them represent the requirement of the Contract, while the Victory Points reward and other benefits are depicted at the bottom of the tile. Most Contract tiles are available via the Contract offer, but others can be found among the Bonus tiles.
When you take a Contract tile, keep it in your Storehouse until you have enough of its required Resources and decide to fulfill it. If there are no more open Contract spaces on your Player board to accommodate new Contracts, you may not take anymore Contracts.
Helpers
Helpers are light beige and can only be found among the Bonus tiles. While in your Storehouse, a Helper can be used for its ability at any time during your turn and is afterwards removed from the game. They may provide Resources, Victory Points, extra Action Points, etc.
Player Boards: Completed Buildings
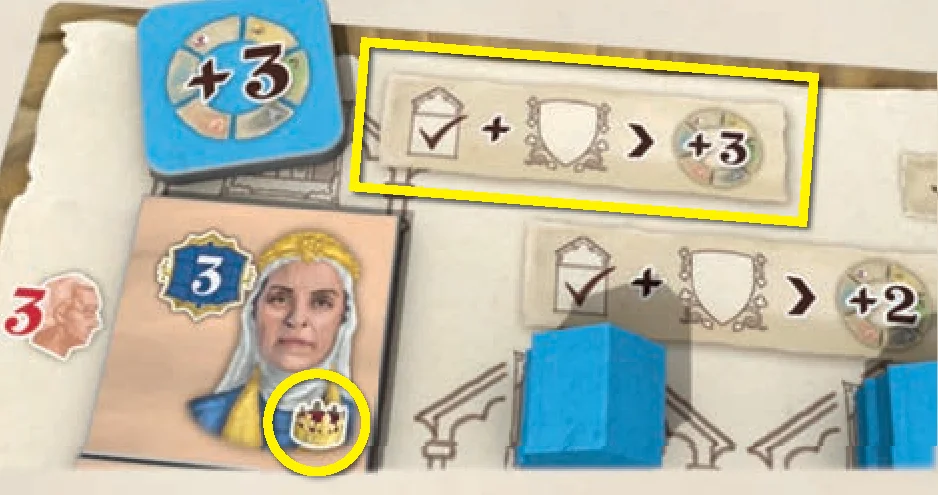
As soon as a Building has all its Rooms filled with Character tiles and it has a Crest tile placed in its dedicated space (thereby becoming a Completed Building), the Action associated with that Character type immediately becomes stronger for you (including the current Action, if applicable).
The Action associated with the Character type is indicated in the bottom-right corner of a Character tile.
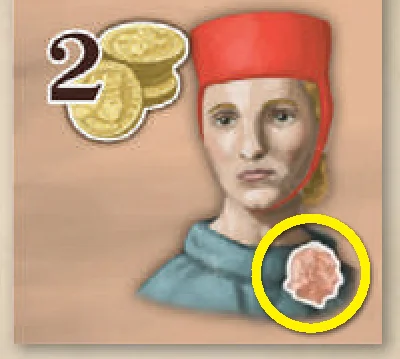
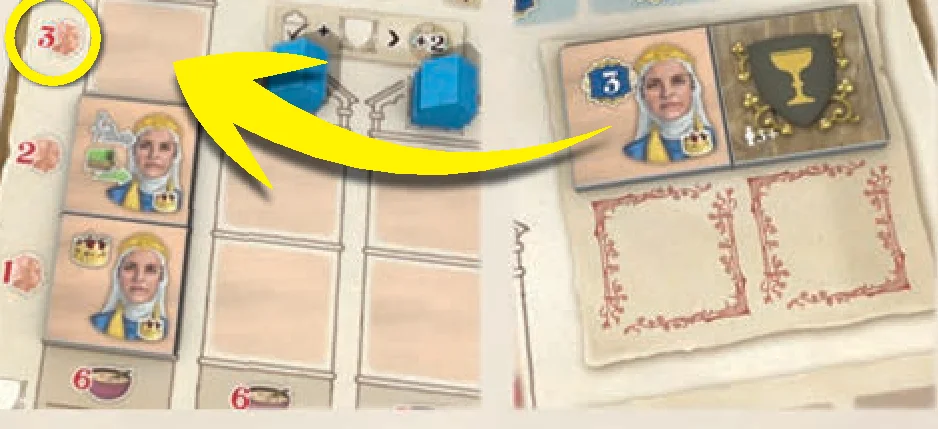
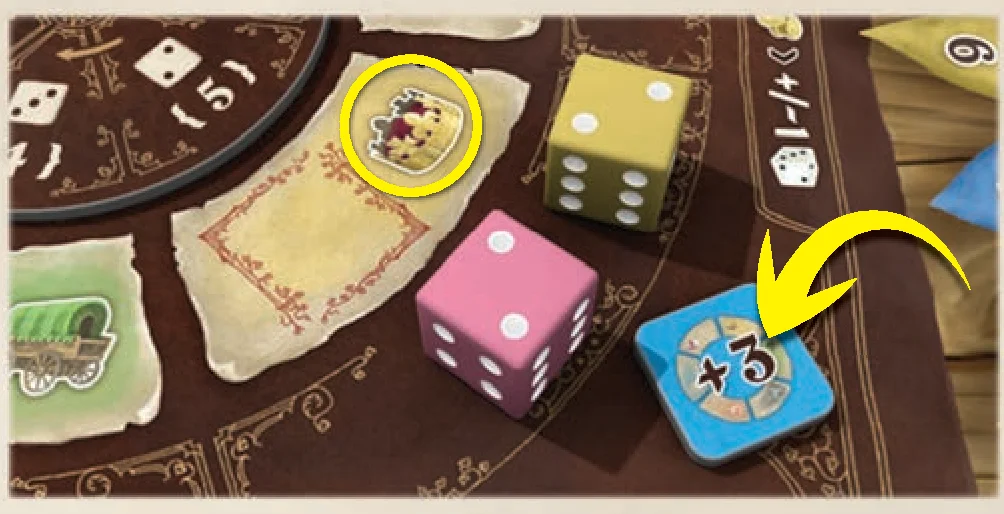
As soon as you complete a Building, take the indicated Bonus Action Points marker, and place it onto the matching Action on the outside of the Action Wheel. From this point onward, you have a bonus of 1/2/3 Action Points (for a Building with 1/2/3 Rooms) every time you select that Action.
This bonus also applies when you perform the matching Action using the Joker Action. This bonus only applies to Action Points received when choosing a die and not to any Actions provided by a Helper or other game effect.
Completing the rightmost Building on your Player board does not provide any Action bonuses.
Final Scoring
At the conclusion of the 4th game round, perform Final Scoring as follows:
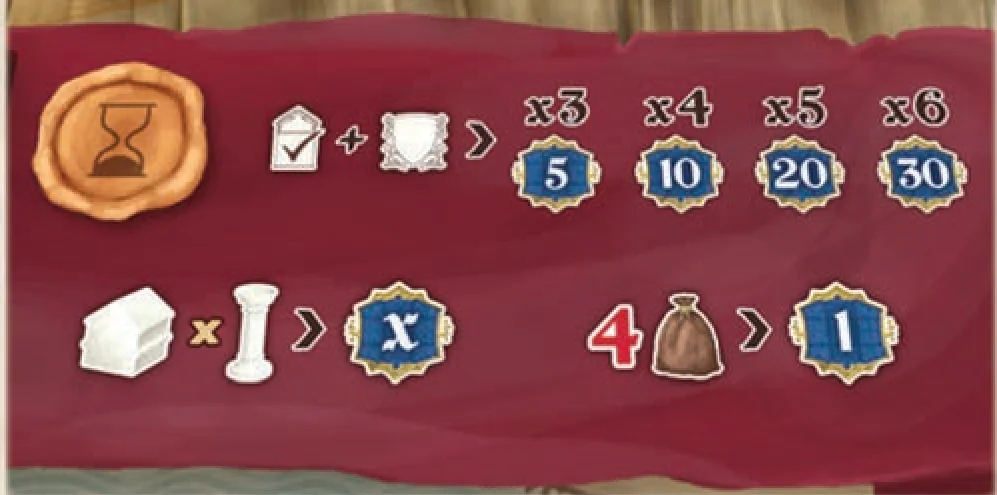
- Houses and Pillars: Multiply the number of Houses you have on the map by the number of Pillars you have on the map and gain that many Victory Points.
- Completed Buildings: Count the number of Completed Buildings you have, meaning those containing both a Crest and all (1, 2, or 3) Rooms filled with Characters:
- 1 Completed Building: 0 VP
- 2 Completed Buildings: 0 VP
- 3 Completed Buildings: 5 VP
- 4 Completed Buildings: 10 VP
- 5 Completed Buildings: 20 VP
- 6 Completed Buildings: 30 VP
- Remaining Resources: For every 4 Resources left in your personal supply, gain 1 Victory Point.
The player with the most points is the winner. In case of a tie, the tied player that is first in Turn Order wins.
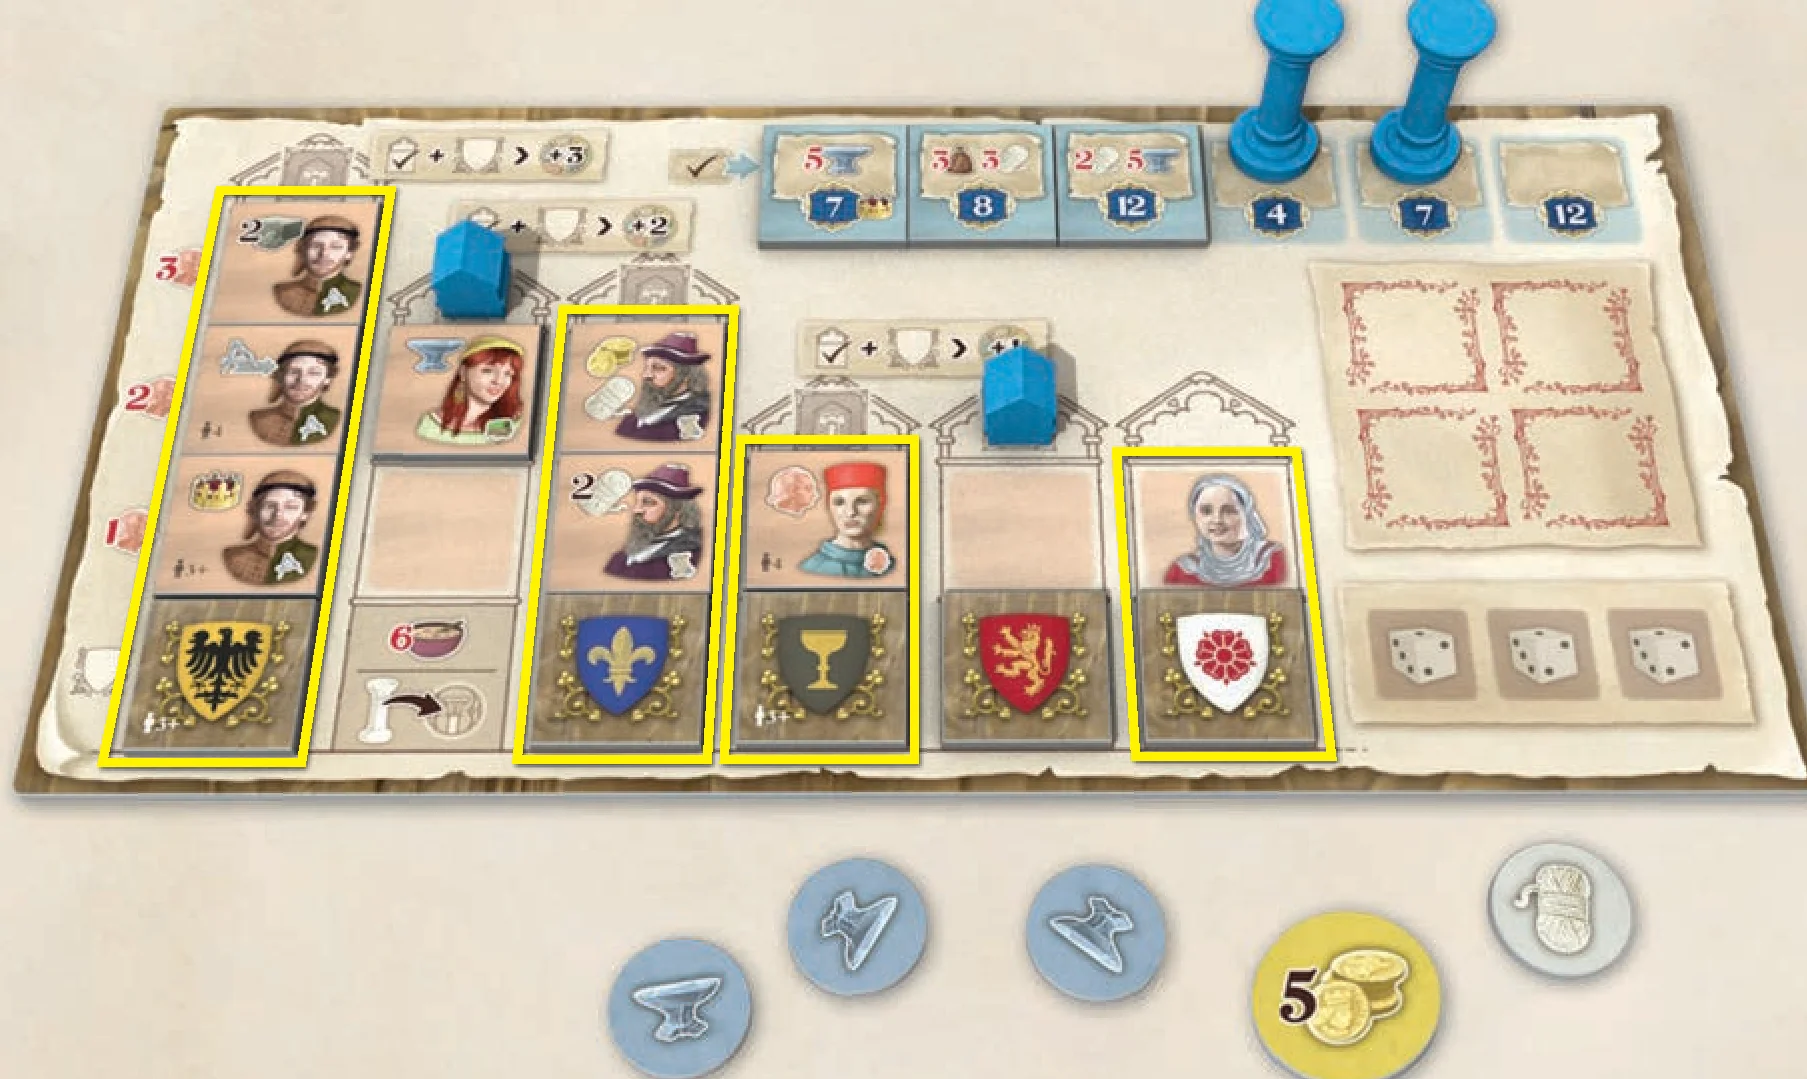
Example: Blue is counting their final score:
- There are 5 blue Pillars and 5 blue Houses on the game board, so Blue scores 25 Victory Points.
- Blue has 4 Completed Buildings, which scores them 10 Victory Points.
- Blue also has 3 Iron, 5 Gold, and 1 Wool, which scores them another 2 Victory Points.
The total number of Victory Points gained at game end (to be added to any Victory Points scored during the game) is 25 + 10 + 2 = 37 Victory Points.
Helper Abilities
| Icon / Tile | Description |
|---|---|
 |
Take an Action of your choice with 1 Action Point. |
  |
Take a Merchant Action with 2/3 Action Points. |
  |
Take a Character Action with 2/3 Action Points. |
  |
Take a Contract Action with 2/3 Action Points. |
  |
Take an Architect Action with 2/3 Action Points. |
  |
Take a King Action with 2/3 Action Points. |
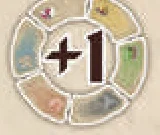 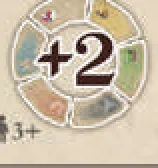 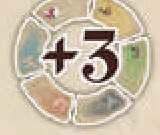 |
Add 1/2/3 Action Points to your current Action. These can only be applied to the Action associated with your chosen die and not to any Actions provided by another Helper or other game effects. |
 |
Use when choosing a die. Choose one type of Resource. Take Resources of that type instead of the type that matches the color of your chosen die. |
  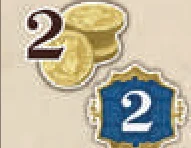 |
Gain the depicted number of Gold and/or Victory Points. |
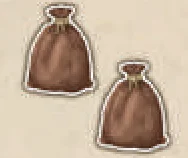 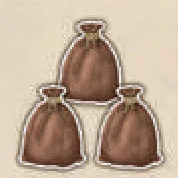 |
Gain any 2/3 Resources. (Each resource may be different.) |
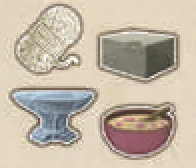 |
Gain 1 Iron, 1 Wool, 1 Stone, and 1 Food. |
 |
Select a Building on your Player board. You gain the bonuses from all Characters in that Building. |
Character Tiles Reference
Icons in the right bottom corner of Character tiles are a reminder of which Action (Contract, Character, Architect, Merchant, or King) you will have bonus Action Points for after you fully complete the Building containing this type of Character.
| Tile | Description |
|---|---|
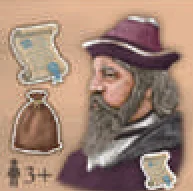 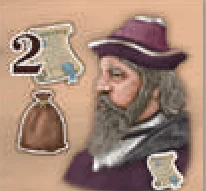 |
Take a Contract Action with 1/2 Action Points. Gain 1 Resource of your choice. |
|
Take a Contract Action with 3 Action Points. |
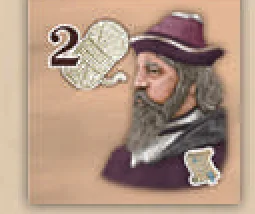 |
Gain 2 Wool. |
 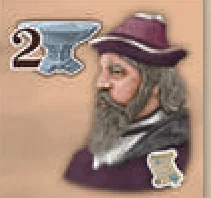 |
Gain 1/2 Iron. |
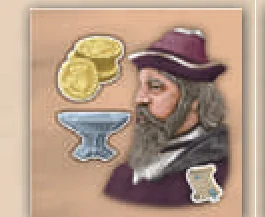  |
Gain 1 Gold and 1 Iron / 1 Gold and 1 Wool. |
  |
Take a Character Action with 1/2 Action Points. |
 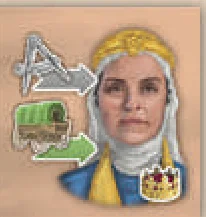 |
You may move your Architect from one space to an adjacent space. You may move your Merchant from one space to an adjacent space. |
  |
Gain 1/2 Food. |
  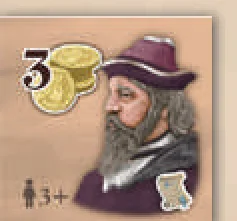 |
Gain 2/3 Gold. |
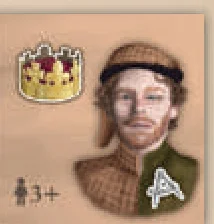 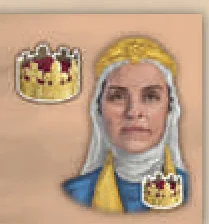 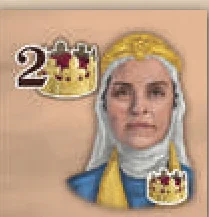 |
Take a King Action with 1/2 Action Points. |
 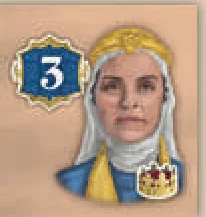 |
Gain 2/3 Victory Points. |
  |
You may move your Merchant from one space to an adjacent space once/twice. |
 |
You may move your Merchant from one space to an adjacent space. If your Merchant is in a Town where you do not have a House and there is an empty House space available, you may place a House where your Merchant is. You may perform those Actions in any order and decide to use just part of this bonus. |
 |
Place 1 House where your Merchant is. You can only benefit from this Character tile if your Merchant is in a Town where you do not already have a House and there is an empty House space available. |
  |
You may move your Architect from one space to an adjacent space once/twice. |
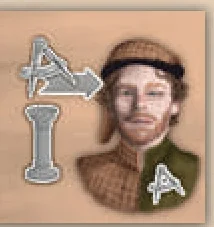 |
You may move your Architect from one space to an adjacent space. If your Architect is in a Town where you do not already have a Pillar and there is an empty Pillar space available, you may place a Pillar where your Architect is. You may perform those Actions in any order and decide to use just a part of this bonus. |
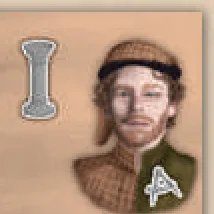 |
Place 1 Pillar where your Architect is. You can only benefit from this Character tile if your Architect is in a Town where you do not already have a Pillar and there is an empty Pillar space available. |
 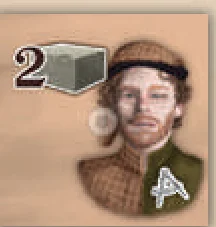 |
Gain 1/2 Stone. |
Crests Reference
There are 6 different Crests (representing influential noble families) and they can be found on both Bonus and Contract tiles. Reminder: You may only have one of each Crest anywhere on your Player board. You may never take a Crest you already possess.
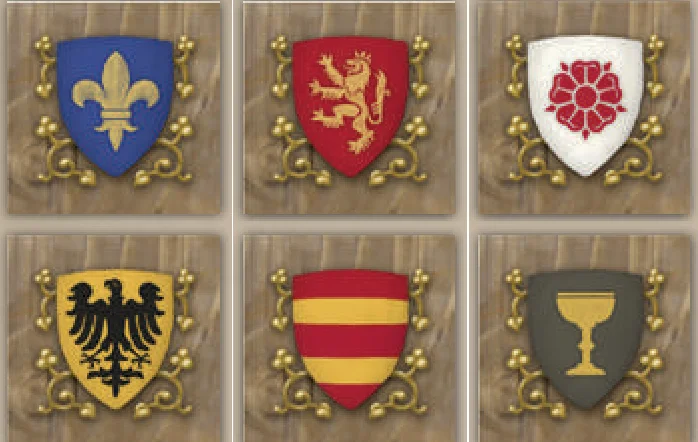
Contracts Reference
| Contract Requirements | Reward / Effect |
|---|---|
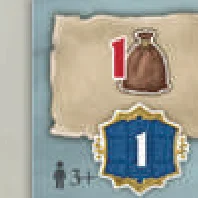 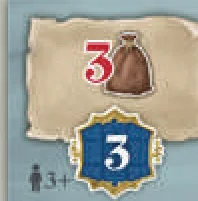 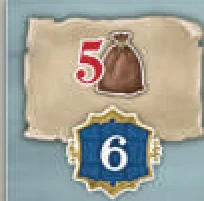 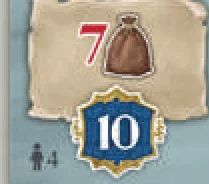 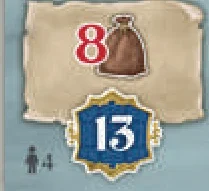 |
Pay 1/3/5/7/8 identical Resources to gain 1/3/6/10/13 Victory Points. |
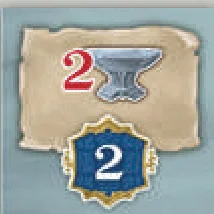 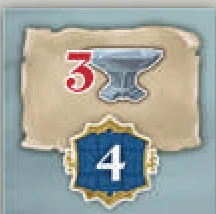 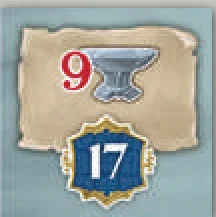 |
Pay 2/3/9 Iron to gain 2/4/17 Victory Points. |
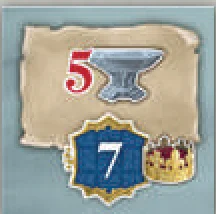 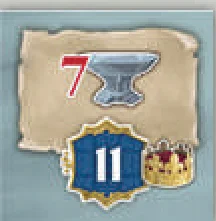 |
Pay 5/7 Iron to gain 7/11 Victory Points and advance one space on the King track. |
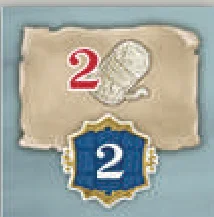 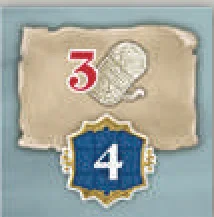 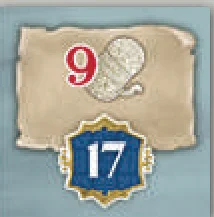 |
Pay 2/3/9 Wool to gain 2/4/17 Victory Points. |
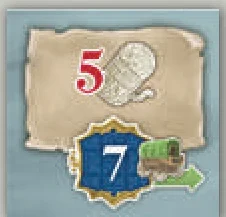 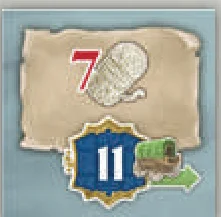 |
Pay 5/7 Wool to gain 7/11 Victory Points and move your Merchant from one Town to an adjacent Town. |
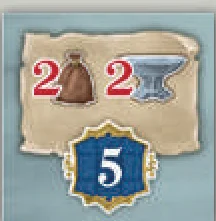 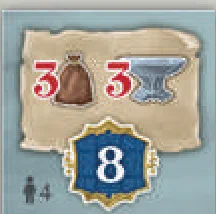 |
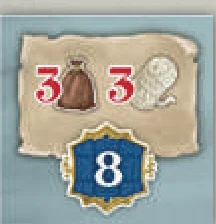
Pay 2/3 identical Resources of your choice and 2/3 Iron to gain 5/8 Victory Points. |
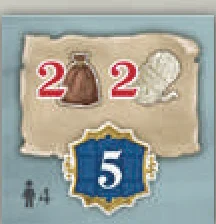  |
Pay 2/3 identical Resources of your choice and 2/3 Wool to gain 5/8 Victory Points. |
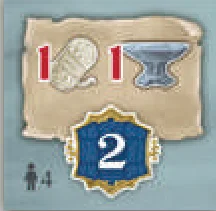 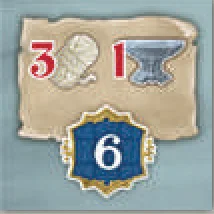 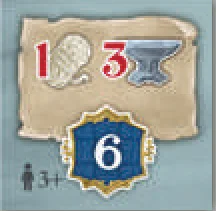 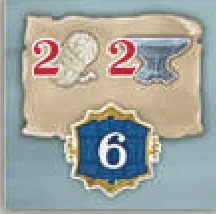 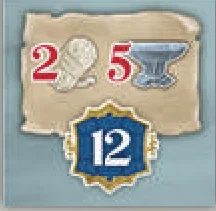 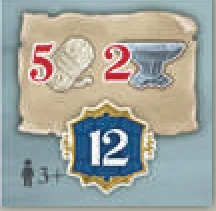 |
Pay the indicated combination of Iron and Wool to gain 2/6/12 Victory Points. |
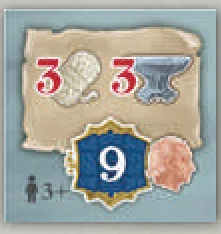 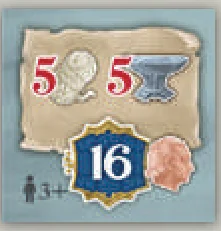 |
Pay 3/5 Wool and 3/5 Iron to gain 9/16 Victory Points and take a Character Action with 1 Action Point. |
Fair Tiles Reference
| Tile | Scoring Criteria |
|---|---|
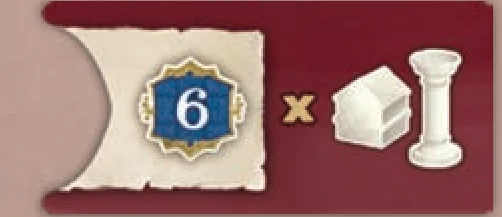 |
Score Victory Points for each set of 1 House and 1 Pillar you have on the map. |
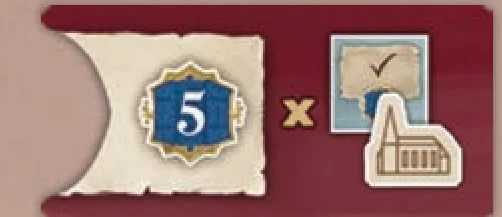 |
Score Victory Points for each set of 1 fulfilled Contract on your Player board and 1 Cathedral tile in your possession. |
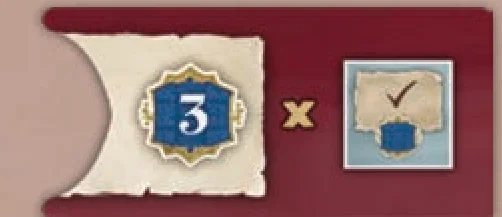 |
Score Victory Points for each fulfilled Contract on your Player board. |
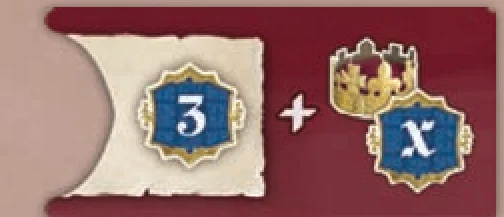 |
This is a special tile that needs to be scored before resetting the King track! Score the total Victory Points from this tile and those printed on the board, and then score Victory Points according to your position on the King track. (This is not a multiplier.) It is possible to lose Victory Points when this tile is evaluated. |
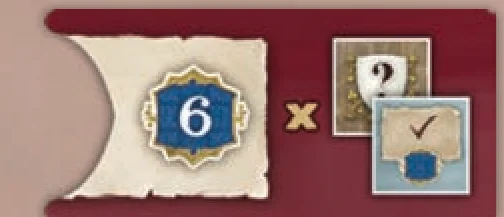 |
Score Victory Points for each set of 1 fulfilled Contract and 1 Crest on your Player board. |
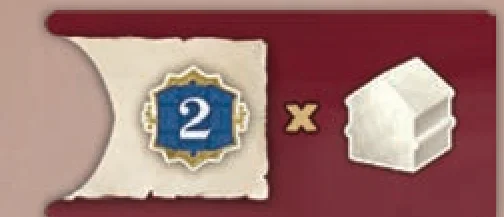 |
Score Victory Points for each House you have on the map. |
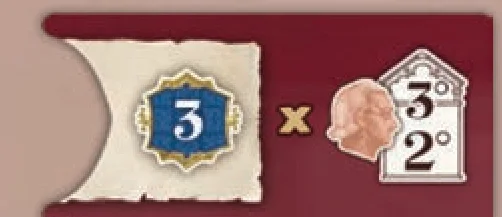 |
Score Victory Points for each Character on floors 2 and 3 of your Buildings (regardless of whether the Building is complete or not). |
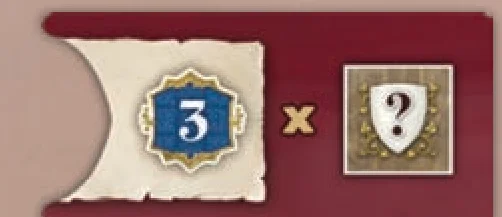 |
Score Victory Points for each Crest tile on your Player board. |
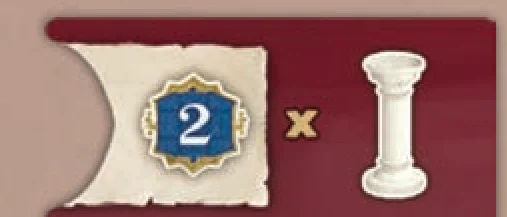 |
Score Victory Points for each Pillar you have on the map. |
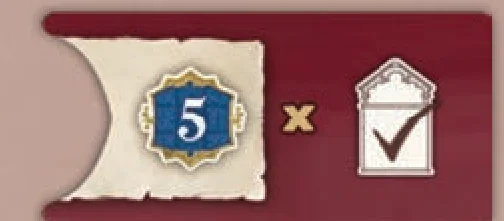 |
Score Victory Points for each Building on your Player board that is completely filled with Character tiles (regardless of whether it is Completed or not). |
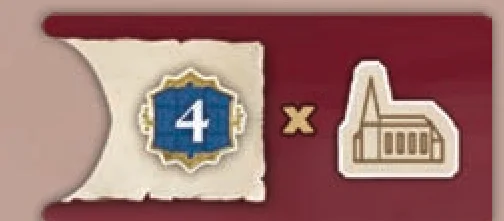 |
Score Victory Points for each Cathedral tile in your possession. |
Game Board Spaces
| Space Icon | Description |
|---|---|
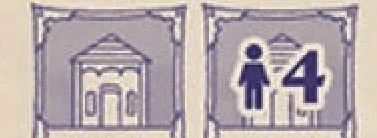 |
Towns include a number of spaces for player Houses. Some spaces are only available in games with “3+” or “4” players. |
 |
Road spaces. Your Merchants and Architects must count these spaces when moving, but cannot place Houses or Pillars here. |
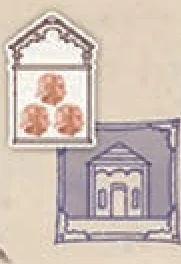 |
After building a House on a space with this symbol, immediately select one of your Buildings (regardless of whether it is Completed or not) that includes at least one Character, and receive each Character bonus once. You may receive the bonuses in any order and may choose to ignore the bonuses provided by some or all of the Characters in the Building. |
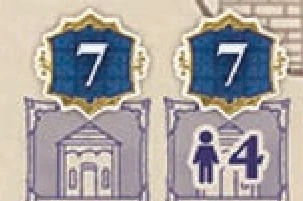 |
After building a House on a space with this symbol, immediately gain the depicted number of Victory Points. |
 |
Pillar space. You cannot place a Pillar at the Cathedral in the Town containing this tile  , since that Cathedral will not be built during this game. , since that Cathedral will not be built during this game. |
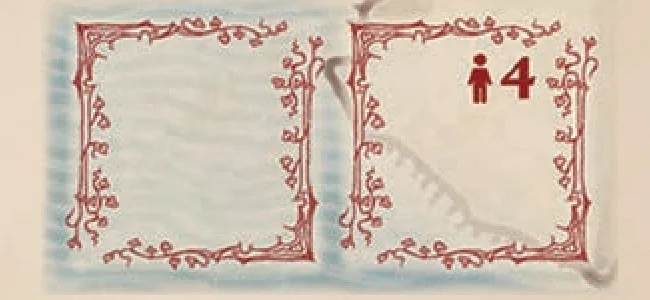 |
Bonus tile spaces. Any space with a number is only used in games with a player count equal to or higher than the number. (In other words, do not place Bonus tiles there with lower player counts.) |
Crest Placement Bonuses Reference
| Slot | Cost and Effect |
|---|---|
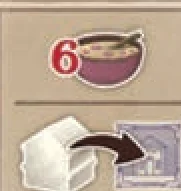 |
Pay 6 Food. Place a House from your supply onto any Town on the map. There must be an available House space in the chosen Town, and you cannot place the House in a Town that already has one of your Houses. |
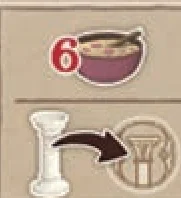 |
Pay 6 Food. Place a Pillar from your supply onto any Cathedral on the map. There must be an available Pillar space at the chosen Cathedral, and you cannot place the Pillar at a Cathedral that already has one of your Pillars. |
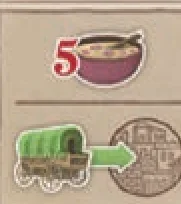 |
Pay 5 Food. Move your Merchant to any space on the map. |
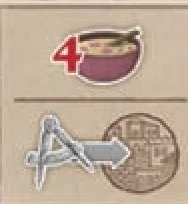 |
Pay 4 Food. Move your Architect to any space on the map. |
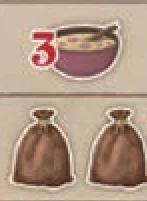 |
Pay 3 Food. Gain any 2 Resources. |
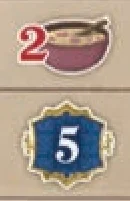 |
Pay 2 Food. Gain 5 Victory Points. |
Credits
Game Design: Daniele Tascini and Simone Luciani
Game Development: Andrei Novac, Błażej Kubacki, Małgorzata Mitura, and Dávid Turczi
Solo Mode Design: Dávid Turczi with Jeremy Avery
Cover art: Giorgio De Michele
Graphic Design: Zbigniew Umgelter
Illustrations: Zbigniew Umgelter
Rulebook: Błażej Kubacki
Rulebook Editing: Emanuela and Robert Pratt, Rainer Åhlfors
Rulebook DTP: Zbigniew Umgelter
Solo Testing Lead: Chuck Case
Additional Solo Testing: Paweł Gajda, Charlie Field, Jace Ravensburg, Kacper Frydrykiewicz
Board&Dice would like to thank the following for their invaluable play testing, advice, and feedback:
Shannon Pepitone, Dan Varrette, Thomas Covert, Anson Garry, Anne Lexington, Maciej Matejko, Franciszek Prusiecki, Wojtek Chuchla, Adam Kwapiński, Julia Gauza, Grzegorz Wojtył, Paweł “Wppxis” Gajda, Kuba Kisała, Klaudyna Mikołajczyk, Adam Kamiński, Marta Szpaderska, Iwona Jaworowska, Michał Cieślikowski, Wiktoria Matyja, Dave Haenze, Damian Głuszczyk, Mateusz Puchalski, Daniel Sobolewski, Łukasz Stadnik, Aleksandra Wiatr, Krzysztof Jurzysta, Miłosz Murawski, Sebastian Borowczyk, Daniel “Gun3R” Sobolewski, Maria Jóźwik, Marek Mańko, Daniel Dubel, Paweł Jabłczyński, Artur Szemczek, Patrycja “Puff” Szudarska, Piotr Rybak, Kinga Agnik, Adam Kamiński, Dominik “Vykk” Pańczyk, Mateusz Sekulski, Grzegorz Góra, Michał Mazurek, Artur Szemiczek, Dariusz Misiulajtis, Miłosz Murawski, Patryk Olbert.
BOARD&DICE
CEO: Andrei Novac
Operations Manager: Aleksandra Menio
Head of Marketing: Filip Głowacz
Head of Sales: Ireneusz Huszcza
Art Direction: Kuba Polkowski
Head of Development: Błażej Kubacki
© 2022 Board&Dice. All rights reserved.
For more information about Tiletum please visit: www.boardanddice.com
Introduction & Components
Introduction
In Tiletum, you and your fellow players take on the roles of rich merchants traveling throughout Europe, from the city of Tiletum (modern-day Tielt, Belgium) to Venice, during the days of early Renaissance.
You will travel to various cities to acquire trade contracts for wool and iron and establish trade houses. You must collect the required resources to fulfill contracts, invest in the construction of monumental cathedrals, gain the favor of noble families, and participate in important fairs, where your main business occurs. You will also use the services of notable people who will be welcomed into your houses. You will thus gain prestige that will make you the most famous merchant of the early Renaissance.
Tiletum is a dice management game, where dice have a dual function: gaining resources and performing actions. A certain number of dice are rolled each round. On your turn, choose a die gaining resources equal to the value and color of the die and perform the associated action. The power of the action is inversely proportional to the value of the die; meaning the fewer resources you gain, the more powerful your actions will be, and vice versa.
Living Rules Pledge
We pledge to support every game well after its initial release. Despite rigorous play testing and multiple rounds of both internal and external proof reading and editing, occasionally the need for rules corrections or minor game play adjustments are discovered only several months or years after the game was manufactured. We promise to produce timely rules updates as necessary, along with expanded FAQ clarifications if needed, available for download from our website in digital PDF format.
Missing or damaged components: Although we take a lot of care to make sure that your game is complete, manufacturing mistakes can still leave you with a missing or damaged component. If that happens, please contact us to receive replacements swiftly, and with our sincere apologies.
Customer support: https://boardanddice.com/customer-support/
Game Components
Before your first game of Tiletum, carefully punch out all cardboard components, tiles, and tokens. Solo components are listed in a separate Solo Mode booklet.
- 1 Game board
- 4 Player boards
- 20 Resource dice (4 in each of 5 colors)
- 1 Compass Rose marker
- 1 Dice bag
- 1 Action Wheel
- 6 Action tiles
- 20 Action Point counters
- 8 Town tiles
- 11 Fair tiles
- 4 Fair Order tiles
- 25 Cathedral tiles
- 9 Construction Cost tiles
- 6 Corruption tokens
- 54 Bonus tiles
- 26 Contract tiles
- 45 Character tiles
- 1 “+100/+200” Victory Point marker per player
- 5 Bonus Action Points markers per player
- 8 Houses per player
- 7 Pillars per player
- 1 Merchant per player
- 1 Architect per player
- 3 generic markers per player (Scoring marker, King Track marker, and Turn Order marker)
- Resource tokens in denominations of 1 and 5: Gold, Food, Wool, Stone, and Iron
The Resources are meant to be unlimited. In the unlikely situation that a Resource runs out, use any substitute (like beads or buttons).
Setup
Game Setup
There are many ways in which players can gain or lose Victory Points during the game. These points are tracked on the Score track surrounding the game board.
Within this rulebook, Victory Points may be shortened to just “VP” in writing.
Gain 1 Victory Point. Lose 1 Victory Point.
For additional variety, especially once the players are more familiar with the game, you may shuffle the six Action tiles and place one at random on each space around the Action Wheel. For your first game, however, these tiles will not be used and can be returned to the box.
- Place the game board in the middle of the table. The right-hand part of the board consists of a map of Europe and will be referred to in the rules simply as “the map”.
- Set out the Resource tokens (Gold, Food, Wool, Stone, and Iron) and Action Point counters within reach of all players, forming a general supply.
- Place the Action Wheel on its dedicated space in the top-left corner of the game board. The Action Wheel can be rotated in any direction, as long as each numbered segment aligns with a single Action.
- Separate tiles by player count: Separate all Bonus tiles, Contract tiles, and Character tiles by type, according to the number of players.
- If playing with 3 players, remove all tiles marked with a “4”.
- If playing with 2 players, remove tiles marked with “3+” or “4”.
- Shuffle Bonus tiles: Shuffle the Bonus tiles and place them in a face-down pile next to the game board. Randomly place Bonus tiles face up in the following areas:
- 6 Bonus Tiles onto the Action tiles,
- 1 Bonus tile in the space next to the King Track,
- The required number of Bonus tiles on the map. If playing with 3 players, do not place Bonus tiles on any spaces marked with a “4”. If playing with 2 players, do not place Bonus tiles on any spaces marked with a “3+” or “4”.
- Contract offer: Shuffle the Contract tiles and place them in a face-down pile next to the game board. Draw 5 Contract tiles and place them face up on their dedicated spaces on the game board. These face-up Contract tiles will be referred to as “the (Contract) offer”.
- Character offer: Shuffle the Character tiles and place them in a face-down pile next to the game board. Draw 5 Character tiles, and place them face up on their dedicated spaces on the game board. These face-up Character tiles will be referred to as “the (Character) offer”.
- Cathedrals setup: Shuffle the Construction Cost tiles, and place one at random under each Cathedral spot. Group the Cathedral tiles by type, and within each group, sort the Cathedral tiles from the lowest Victory Points value on the bottom to the highest at the top. Place each group of Cathedral tiles on its dedicated space on the game board.
The Cathedral in the Town containing this “Unavailable Cathedral” tile will not be built during this game. Return the corresponding Cathedral tiles to the game box.
- Town and Fair tiles: Shuffle and randomly place 3 Town tiles and 4 Fair tiles, filling the corresponding spaces on the game board next to the printed “Tiletum” Town tile. Return unused Town tiles and Fair tiles to the game box.
- Fair Order tiles: Place Fair Order tiles in the cities where the Fairs will take place.
- Corruption tokens: Shuffle the Corruption tokens, and put them face down in a stack next to the Turn track. Take 3 at random, and place each one, still face down, on its dedicated space on the Turn track. They will be revealed one per turn.
- Determine first player: Determine the first player, and give them the Compass Rose marker. The next player in clockwise order around the table becomes the second player, and so on.
- Player components: Each player chooses a color and takes in that color:
- 1 Player board,
- 3 markers, placing them:
- on the Scoring track on the value “10” spot;
- on the King track on the “0 VP” position, stacked with the first player’s marker at the bottom of the stack and the last player’s marker at the top;
- on the Turn Order track, to reflect the turn order determined in the previous point;
- 1 Merchant and 1 Architect, placing them both next to the Tiletum town space on the map,
- 8 Houses, placing 5 of them on the roof spaces on their Player board, 1 in Tiletum, and 2 next to their Player board as part of their supply,
- 7 Pillars, placing 5 of them on the first 5 Contract spaces on their Player board from left to right and 2 next to their Player board as part of their supply,
- 5 Bonus Action Point markers, placing them next to their player board.
- Starting resources: Each player takes 1 Iron, 1 Wool, 1 Stone, and 1 Food. The first player takes 1 Gold, the second player takes 3 Gold, the third player (in games with at least 3 players) takes 5 Gold, and the fourth player (in games with 4 players) takes 6 Gold.
- Dice in bag: Put 1 die of each color per player in the bag:
- In 4-player games, there will be 20 dice in the bag (4 per color).
- In 3-player games, there will be 15 dice (3 per color) in the bag.
- In 2-player games, there will be 10 dice in the bag.
Return any unused dice to the game box as they will not be needed this game.
Playing the Game: Round Structure
Game Flow
The aim of the game is to score the most Victory Points. Mark your Victory Points on the Scoring track. Your marker on the Scoring track may never go below “0.” If you have more than 100 Victory Points, take a “+100 VP” marker. If you have more than 200 Victory Points, flip that marker to the “+200 VP” side.
The game is played over four rounds. Each round is divided into the following five phases that must be carried out in this order:
- Preparation phase
- Action phase
- King phase
- Fair phase
- Cleanup phase
1. Preparation Phase
Take from the bag 8/11/14 dice for games with 2/3/4 players; roll all the dice, and place them around the Action Wheel according to their value. All dice of the same value, regardless of their color, are placed in the designated section on the Action Wheel.
2. Action Phase
Step 1: Reveal Corruption
The first player reveals the rightmost face-down Corruption token and moves the markers of all players on the King track according to the number on the token.
Corruption tokens have values of 0, 1, or 2; therefore, when resolved, all player markers move left or stay put:
- If the “0” value token is revealed, all player markers remain in their current positions.
- If a “1” or “2” value token is revealed, all player markers move left 1 or 2 spaces (respectively). A marker may not be moved beyond the leftmost (lowest) position of the King track. In this case, simply ignore any extra movement.
When moving markers, always start with the ones that are on the leftmost (lowest) spaces. When moving multiple markers occupying the same space on the King track, make sure not to change their order in the stack.
Example: During Step 1 of the Action Phase, a “2 Corruption” token is revealed. The orange and blue markers move (without changing their order in the stack) to the “-1 VP” position. The green marker moves to the “-10 VP” position and stops, as it may not move any further.
Step 2: Player Turns
Proceeding according to the order dictated by the Turn Order track, each player takes one turn. On your turn, perform the following steps, in order:
- Take 1 die from the Action Wheel,
- Take the Resources provided by the die, then
- Perform the associated type of Action.
Taking a Die
Choose one of the available dice from the game board.
Immediately before taking a die, you may spend 2 Gold to add or subtract 1 to the value of your chosen die (this can be done multiple times). The value of the die is permanently changed, affecting number of Resources provided and the type of Action associated with the die. A value of 6 can be changed into a value of 1 (and vice versa) by spending 2 Gold.
Place the selected die on the leftmost empty die space on your Player board. If the associated Action still has a Bonus tile, you may take it and place it in your Storehouse (on your Player board). Taking a Bonus tile is not mandatory: you may choose not to take it, even if you have enough space in your Storehouse. Once taken, a Bonus tile cannot be discarded.
Storehouse Rules
Several different types of tiles first go into your Storehouse when taken from the game board. Regardless of the type of tile taken (Bonus, Character, or Contract tile), all of the following rules apply:
- You must have at least one empty space in the Storehouse on your Player board.
- Once taken, the tile cannot be discarded.
Bonus tiles can be gained from various locations around the board during different parts of your turn. Taking a Bonus tile is always optional. Some Bonus tiles may show Contracts or Crests. Such Bonus tiles may be interchangeably referred to as Contract tiles or Crest tiles in these rules.
Taking Resources
Take a number of Resources from the supply matching the color and number of your chosen die:
- Blue dice produce Iron.
- Pink dice produce Food.
- Yellow dice produce Gold.
- Light gray dice produce Wool.
- Dark gray dice produce Stone.
Example: After taking the pink die of value 2, the player receives 2 Food.
Perform Action
Finally, perform the Action associated with the space you took the die from. All the different Actions are described in detail below.
After each player has taken a turn, go back to Step 1 of the Action phase and repeat the process two more times. Once all players have taken three turns (during which they choose a die, gain Resources, and perform the associated Action), the Action phase ends and the game proceeds to the King phase.
3. King Phase
Step 1: King Track Scoring
The player whose marker is highest on the King track takes (or discards) the Bonus tile next to the track. If there is no Bonus tile available (during the last round), that player scores 4 Victory Points. If multiple players are tied for the highest position on the King track, the tie is broken in favor of the player with the bottommost marker.
Then, all players score points as indicated by their position on the King track:
- You lose points if your marker is in the lower (red) part of the track.
- You gain points if it is in the higher (blue) part.
- If your marker is in the starting space of the track (no color), you neither lose nor gain any Victory Points.
Example: Blue receives 3 Victory Points. Neither Orange nor Purple receive any Victory Points (but also do not lose any Victory Points), and Green loses 2 Victory Points. The Bonus tile from the space next to the King track is awarded to the Blue player.
Step 2: Adjust Turn Order
Adjust the markers on the Turn Order track: the player who is highest on the King track becomes the first player, the second-highest becomes the second player, and so on. If multiple players share the same spot on the King track, the tie is broken in favor of the player with the bottommost marker (as they were there first).
Example: When the new Turn Order is established, Orange will be first, Blue second, and Green third.
Resetting Markers on King Track
Any player markers in the lower (red) part of the King track are moved up to 0, preserving their respective order. (Stack the markers from left to right so that the previously lowest placed marker will be at the top of the stack on the “0 VP” space.) Markers in the higher (blue) part should not be moved, but rather left where they are.
4. Fair Phase
During this phase, players will have a chance to score Victory Points for their achievements.
Fair towns
A total of four Fairs will be held during the game, as indicated by the Town tiles placed during setup. The Fair Order tokens which were placed during setup act as a reminder of the order in which the Fairs will take place, one at the end of each game round. The first fair always takes place in Tiletum (its Town tile is printed on the board). The Fair tile below the Town tile describes the scoring criteria for the round and the number of Victory Points that can be gained during the Fair scoring.
Fair scoring
To participate in the Fair scoring, you must either:
- have a House in that Town, or
- have your Merchant present in that Town at the time of the Fair phase.
House spots on the map are limited. In most Towns, only one or two players can have a House. In preparation for a Fair, you can either place your House in that Town, or you can plan the path of your Merchant in such a way that it ends up in the Fair Town at the end of your Action phase.
The Fair scoring reward is a combination of information preprinted on the game board and information provided by the Fair tile. Look at the Fair tile for the current round. To its left is a Victory Point value. Add this number to the value printed on the Fair tile itself. This sum represents the total number of Victory Points (board+tile) you will receive, multiplied by the number of times you meet condition depicted on the Fair tile itself.
After scoring, flip the Fair tile face down.
Example: During the 3rd round of the game, the Fair takes place in Verona. The amount of Victory Points awarded is 6 (3 preprinted on the board plus 3 on the Fair tile) for each fulfilled Contract. The Blue player will participate in the Fair scoring since their Merchant is present in Verona. With 3 fulfilled Contracts on their Player board, Blue receives a total of 18 Victory Points.
5. Cleanup Phase
Skip this phase in the final (4th) round.
Do the following, in order:
- For each Action around the Action Wheel, replenish any Bonus tiles that were claimed. (Leave unclaimed tiles in place.) Replenish the Bonus tile on the King track. (Bonus tiles on the map are never replenished.)
- Shuffle all Corruption tokens, randomly select 3, and place them face down on their dedicated spaces on the game board.
- Return all dice to the bag.
- Rotate the Action Wheel one step clockwise.
- Start a new game round, beginning with the Preparation phase.
At the conclusion of the Fair phase of the 4th round, the game has come to an end. Proceed to End of the Game and Final Scoring.
Actions in Detail
Action Points Overview
When performing an Action, you receive a number of Action Points depending on the value of the die used to take it. The number of Action Points received is printed on the Action Wheel next to the depiction of the die.
Action Point values are printed on the Action Wheel. This value is always equal to 7 minus the value of the corresponding die. Therefore, the more Action Points you get, the fewer Resources you receive, so there is always a balance between the strength of an Action and the amount of Resources you gain.
Action Point counters are provided to aid in keeping track of how many Action Points you received versus how many you have already spent or have remaining. When choosing a die, simply take a number of Action Point counters equal to the number of Action Points you receive for the turn.
Most Actions provide multiple options which may be chosen any number of times, in any order, spending the corresponding Action Points each time. For the sake of brevity, the words “Action Points” may be shortened to “AP” below.
Architect Action
When performing the Architect Action, the following options are available:
- 1 AP: Move your Architect on the map, from one spot to an adjacent one.
- 1 AP: Add a Pillar from your personal supply to a Cathedral. Your Architect must be located in a Town with at least one empty Pillar space and you may not already have a Pillar at that Cathedral.
- 1 AP: Take one Bonus tile from the Town where your Architect is located, if one is available, and place it in your Storehouse.
Merchant Action
When performing the Merchant Action, the following options are available:
- 1 AP: Move your Merchant on the map, from one spot to an adjacent one.
- 1 AP: Add a House from your personal supply to a Town. Your Merchant must be located in a Town with at least one empty House space and you may not already have a House in that Town. If the House space contains a Building Bonus, receive it now. (See the Appendix for more details.)
- 1 AP: Take one Bonus tile from the Town where your Merchant is located, if one is available, and place it in your Storehouse.
Character Action
When performing the Character Action, the following options are available:
- 1 AP: Take a Character tile from the Character offer and place it in your Storehouse, then replenish the offer immediately.
- 1 AP: Discard all Character tiles from the Character offer, then replenish the offer immediately. Discarded Character tiles are mixed, face down, back into the pile of Character tiles.
- 1/2/3 AP: Move a Character tile from your Storehouse to a Room on floor 1/2/3 on your Player board. The cost in Action Points is equal to the floor of the Room.
On your Player board, there are six Buildings, each with one, two, or three Rooms. The rightmost Building is already occupied. The following rules govern the placement of Character tiles in the Rooms:
- You cannot have two different Buildings with the same Character (same illustration). In other words, as soon as a Character is placed in a Building, matching Character tiles must be placed in the same Building.
- As soon as a Character tile is placed in a Room, you immediately earn the Character bonus (printed in the top left corner of the tile).
- As soon as a Building has all its Rooms filled with Character tiles, take the House from the roof space of that Building and add it to your personal supply. That House is now available for you to use when performing Merchant Actions.
Example: Then, Blue spends 2 Action Points to place one of their Characters into a Room on floor 2 and 1 more Action Point to place another Character on floor 1 of the same Building. This is allowed, since both Characters are the same. Blue receives the printed benefits on the placed tiles: 1 Gold and 1 Wool for the first Character and 2 Wool for the second Character. Since all floors of this Building are now occupied, Blue immediately moves the Building’s House to their supply at the side of their Player board.
Contract Action
When performing the Contract Action, the following options are available:
- ? AP: Take a Contract tile from the offer, spending the number of Action Points indicated below its space in the offer, and place it in your Storehouse. (Do not replenish the offer.)
- 1 AP: Exchange one of your Resources for a different Resource. The first time you do this during your turn, receive one bonus Resource of your choice.
At the end of your turn, shift all Contract tiles in the offer to the right until all empty positions are filled, then replenish the offer.
King Action
When performing the King Action, for each Action Point you have, advance your marker one step on the King track. If you end up on a step already occupied by other player markers, place yours on top. Your marker on this track can never go above the “+15 VP” position.
Joker Action
Choose one of the other five Actions. Spend all your Action Points on the options available for that Action.
All Action Points must be used to perform the same Action. You cannot split them between multiple Actions.
Tasks, Tiles & Completed Buildings
Tasks
At any time during your turn (before, after, or between spending Action Points), you can pause to complete tasks. Unlike Actions, most Tasks will require you to spend Resources.
These are all possible Tasks:
- Spend 2 Gold to gain one other Resource (Stone, Wool, Metal, or Food).
- Fulfill a Contract in your Storehouse by spending the Resources depicted on the tile. Move the Contract tile from your Storehouse to the leftmost open Contract space on your Player board. Take the Pillar from that space (if any) and add it to your personal supply. That Pillar is now available for you to use when performing Architect Actions. Score any Victory Points indicated on the Contract tile itself as well as on the space you cover. Receive any additional benefits depicted on the Contract tile.
- Spend Food to move a Crest tile from your Storehouse to a dedicated empty space below a Building on your Player board. Each Crest space has a different Food cost. Each such space also has a bonus that is awarded immediately after covering it with a Crest.
- Contribute to the building of any Cathedral where you already have a Pillar. Spend the required amount of Stone, as depicted on the Construction Cost tile for that Cathedral, and take the topmost Cathedral tile. Score the number of Victory Points depicted on both the Construction Cost tile and the Cathedral tile. (You may only contribute to the building of a specific Cathedral once.)
- Use the Helper Ability from a Bonus tile in your Storehouse. After resolving the Helper Ability, the tile is removed from the game.
Bonuses for Placing a Crest
Bonuses for placing a Crest are (from left to right):
- Place a House from your supply onto any Town on the map. There must be an available House space in the chosen Town, and you cannot place the House in a Town that already has one of your Houses.
- Place a Pillar from your supply onto any Cathedral on the map. There must be an available Pillar space at the chosen Cathedral, and you cannot place the Pillar at a Cathedral that already has one of your Pillars.
- Move your Merchant to any space on the map.
- Move your Architect to any space on the map.
- Gain any 2 Resources.
- Gain 5 Victory Points.
Types of Tiles
Whenever you gain a tile of any kind from the game board (map, tracks, etc), it first goes into your Storehouse. If your Storehouse is full, you cannot take a tile. Therefore, before being in the situation to gain a tile while your Storehouse is full, consider performing Actions or tasks which would allow you to remove some tiles from your Storehouse.
Crests
Crests are light brown. There are six different types of Crests (representing major noble families). Crest tiles are placed in their dedicated spaces below the Buildings on your Player board (after passing through your Storehouse). Crests are found on Contract tiles as well as Bonus tiles. You may never have multiple Crests of the same type anywhere on your Player board.
Contracts
Contract tiles are blue. Resources depicted on them represent the requirement of the Contract, while the Victory Points reward and other benefits are depicted at the bottom of the tile. Most Contract tiles are available via the Contract offer, but others can be found among the Bonus tiles.
When you take a Contract tile, keep it in your Storehouse until you have enough of its required Resources and decide to fulfill it. If there are no more open Contract spaces on your Player board to accommodate new Contracts, you may not take anymore Contracts.
Helpers
Helpers are light beige and can only be found among the Bonus tiles. While in your Storehouse, a Helper can be used for its ability at any time during your turn and is afterwards removed from the game. They may provide Resources, Victory Points, extra Action Points, etc.
Player Boards: Completed Buildings
As soon as a Building has all its Rooms filled with Character tiles and it has a Crest tile placed in its dedicated space (thereby becoming a Completed Building), the Action associated with that Character type immediately becomes stronger for you (including the current Action, if applicable).
The Action associated with the Character type is indicated in the bottom-right corner of a Character tile.
As soon as you complete a Building, take the indicated Bonus Action Points marker, and place it onto the matching Action on the outside of the Action Wheel. From this point onward, you have a bonus of 1/2/3 Action Points (for a Building with 1/2/3 Rooms) every time you select that Action.
This bonus also applies when you perform the matching Action using the Joker Action. This bonus only applies to Action Points received when choosing a die and not to any Actions provided by a Helper or other game effect.
Completing the rightmost Building on your Player board does not provide any Action bonuses.
End of the Game and Final Scoring
Final Scoring
At the conclusion of the 4th game round, perform Final Scoring as follows:
- Houses and Pillars: Multiply the number of Houses you have on the map by the number of Pillars you have on the map and gain that many Victory Points.
- Completed Buildings: Count the number of Completed Buildings you have, meaning those containing both a Crest and all (1, 2, or 3) Rooms filled with Characters:
- 1 Completed Building: 0 VP
- 2 Completed Buildings: 0 VP
- 3 Completed Buildings: 5 VP
- 4 Completed Buildings: 10 VP
- 5 Completed Buildings: 20 VP
- 6 Completed Buildings: 30 VP
- Remaining Resources: For every 4 Resources left in your personal supply, gain 1 Victory Point.
The player with the most points is the winner. In case of a tie, the tied player that is first in Turn Order wins.
Example: Blue is counting their final score:
- There are 5 blue Pillars and 5 blue Houses on the game board, so Blue scores 25 Victory Points.
- Blue has 4 Completed Buildings, which scores them 10 Victory Points.
- Blue also has 3 Iron, 5 Gold, and 1 Wool, which scores them another 2 Victory Points.
The total number of Victory Points gained at game end (to be added to any Victory Points scored during the game) is 25 + 10 + 2 = 37 Victory Points.
Appendix: Tiles and Board Spaces
Helper Abilities
| Icon / Tile | Description |
|---|---|
|
Take an Action of your choice with 1 Action Point. |
| |
Take a Merchant Action with 2/3 Action Points. |
| |
Take a Character Action with 2/3 Action Points. |
| |
Take a Contract Action with 2/3 Action Points. |
| |
Take an Architect Action with 2/3 Action Points. |
| |
Take a King Action with 2/3 Action Points. |
| |
Add 1/2/3 Action Points to your current Action. These can only be applied to the Action associated with your chosen die and not to any Actions provided by another Helper or other game effects. |
|
Use when choosing a die. Choose one type of Resource. Take Resources of that type instead of the type that matches the color of your chosen die. |
| |
Gain the depicted number of Gold and/or Victory Points. |
| |
Gain any 2/3 Resources. (Each resource may be different.) |
|
Gain 1 Iron, 1 Wool, 1 Stone, and 1 Food. |
|
Select a Building on your Player board. You gain the bonuses from all Characters in that Building. |
Character Tiles Reference
Icons in the right bottom corner of Character tiles are a reminder of which Action (Contract, Character, Architect, Merchant, or King) you will have bonus Action Points for after you fully complete the Building containing this type of Character.
| Tile | Description |
|---|---|
| |
Take a Contract Action with 1/2 Action Points. Gain 1 Resource of your choice. |
|
Take a Contract Action with 3 Action Points. |
|
Gain 2 Wool. |
| |
Gain 1/2 Iron. |
| |
Gain 1 Gold and 1 Iron / 1 Gold and 1 Wool. |
| |
Take a Character Action with 1/2 Action Points. |
| |
You may move your Architect from one space to an adjacent space. You may move your Merchant from one space to an adjacent space. |
| |
Gain 1/2 Food. |
| |
Gain 2/3 Gold. |
| |
Take a King Action with 1/2 Action Points. |
| |
Gain 2/3 Victory Points. |
| |
You may move your Merchant from one space to an adjacent space once/twice. |
|
You may move your Merchant from one space to an adjacent space. If your Merchant is in a Town where you do not have a House and there is an empty House space available, you may place a House where your Merchant is. You may perform those Actions in any order and decide to use just part of this bonus. |
|
Place 1 House where your Merchant is. You can only benefit from this Character tile if your Merchant is in a Town where you do not already have a House and there is an empty House space available. |
| |
You may move your Architect from one space to an adjacent space once/twice. |
|
You may move your Architect from one space to an adjacent space. If your Architect is in a Town where you do not already have a Pillar and there is an empty Pillar space available, you may place a Pillar where your Architect is. You may perform those Actions in any order and decide to use just a part of this bonus. |
|
Place 1 Pillar where your Architect is. You can only benefit from this Character tile if your Architect is in a Town where you do not already have a Pillar and there is an empty Pillar space available. |
| |
Gain 1/2 Stone. |
Crests Reference
There are 6 different Crests (representing influential noble families) and they can be found on both Bonus and Contract tiles. Reminder: You may only have one of each Crest anywhere on your Player board. You may never take a Crest you already possess.
Contracts Reference
| Contract Requirements | Reward / Effect |
|---|---|
| |
Pay 1/3/5/7/8 identical Resources to gain 1/3/6/10/13 Victory Points. |
| |
Pay 2/3/9 Iron to gain 2/4/17 Victory Points. |
| |
Pay 5/7 Iron to gain 7/11 Victory Points and advance one space on the King track. |
| |
Pay 2/3/9 Wool to gain 2/4/17 Victory Points. |
| |
Pay 5/7 Wool to gain 7/11 Victory Points and move your Merchant from one Town to an adjacent Town. |
| |
Pay 2/3 identical Resources of your choice and 2/3 Iron to gain 5/8 Victory Points. |
| |
Pay 2/3 identical Resources of your choice and 2/3 Wool to gain 5/8 Victory Points. |
| |
Pay the indicated combination of Iron and Wool to gain 2/6/12 Victory Points. |
| |
Pay 3/5 Wool and 3/5 Iron to gain 9/16 Victory Points and take a Character Action with 1 Action Point. |
Fair Tiles Reference
| Tile | Scoring Criteria |
|---|---|
|
Score Victory Points for each set of 1 House and 1 Pillar you have on the map. |
|
Score Victory Points for each set of 1 fulfilled Contract on your Player board and 1 Cathedral tile in your possession. |
|
Score Victory Points for each fulfilled Contract on your Player board. |
|
This is a special tile that needs to be scored before resetting the King track! Score the total Victory Points from this tile and those printed on the board, and then score Victory Points according to your position on the King track. (This is not a multiplier.) It is possible to lose Victory Points when this tile is evaluated. |
|
Score Victory Points for each set of 1 fulfilled Contract and 1 Crest on your Player board. |
|
Score Victory Points for each House you have on the map. |
|
Score Victory Points for each Character on floors 2 and 3 of your Buildings (regardless of whether the Building is complete or not). |
|
Score Victory Points for each Crest tile on your Player board. |
|
Score Victory Points for each Pillar you have on the map. |
|
Score Victory Points for each Building on your Player board that is completely filled with Character tiles (regardless of whether it is Completed or not). |
|
Score Victory Points for each Cathedral tile in your possession. |
Game Board Spaces
| Space Icon | Description |
|---|---|
|
Towns include a number of spaces for player Houses. Some spaces are only available in games with “3+” or “4” players. |
|
Road spaces. Your Merchants and Architects must count these spaces when moving, but cannot place Houses or Pillars here. |
|
After building a House on a space with this symbol, immediately select one of your Buildings (regardless of whether it is Completed or not) that includes at least one Character, and receive each Character bonus once. You may receive the bonuses in any order and may choose to ignore the bonuses provided by some or all of the Characters in the Building. |
|
After building a House on a space with this symbol, immediately gain the depicted number of Victory Points. |
|
Pillar space. You cannot place a Pillar at the Cathedral in the Town containing this tile , since that Cathedral will not be built during this game. |
|
Bonus tile spaces. Any space with a number is only used in games with a player count equal to or higher than the number. (In other words, do not place Bonus tiles there with lower player counts.) |
Crest Placement Bonuses Reference
| Slot | Cost and Effect |
|---|---|
|
Pay 6 Food. Place a House from your supply onto any Town on the map. There must be an available House space in the chosen Town, and you cannot place the House in a Town that already has one of your Houses. |
|
Pay 6 Food. Place a Pillar from your supply onto any Cathedral on the map. There must be an available Pillar space at the chosen Cathedral, and you cannot place the Pillar at a Cathedral that already has one of your Pillars. |
|
Pay 5 Food. Move your Merchant to any space on the map. |
|
Pay 4 Food. Move your Architect to any space on the map. |
|
Pay 3 Food. Gain any 2 Resources. |
|
Pay 2 Food. Gain 5 Victory Points. |
Credits
Credits
Game Design: Daniele Tascini and Simone Luciani
Game Development: Andrei Novac, Błażej Kubacki, Małgorzata Mitura, and Dávid Turczi
Solo Mode Design: Dávid Turczi with Jeremy Avery
Cover art: Giorgio De Michele
Graphic Design: Zbigniew Umgelter
Illustrations: Zbigniew Umgelter
Rulebook: Błażej Kubacki
Rulebook Editing: Emanuela and Robert Pratt, Rainer Åhlfors
Rulebook DTP: Zbigniew Umgelter
Solo Testing Lead: Chuck Case
Additional Solo Testing: Paweł Gajda, Charlie Field, Jace Ravensburg, Kacper Frydrykiewicz
Board&Dice would like to thank the following for their invaluable play testing, advice, and feedback:
Shannon Pepitone, Dan Varrette, Thomas Covert, Anson Garry, Anne Lexington, Maciej Matejko, Franciszek Prusiecki, Wojtek Chuchla, Adam Kwapiński, Julia Gauza, Grzegorz Wojtył, Paweł “Wppxis” Gajda, Kuba Kisała, Klaudyna Mikołajczyk, Adam Kamiński, Marta Szpaderska, Iwona Jaworowska, Michał Cieślikowski, Wiktoria Matyja, Dave Haenze, Damian Głuszczyk, Mateusz Puchalski, Daniel Sobolewski, Łukasz Stadnik, Aleksandra Wiatr, Krzysztof Jurzysta, Miłosz Murawski, Sebastian Borowczyk, Daniel “Gun3R” Sobolewski, Maria Jóźwik, Marek Mańko, Daniel Dubel, Paweł Jabłczyński, Artur Szemczek, Patrycja “Puff” Szudarska, Piotr Rybak, Kinga Agnik, Adam Kamiński, Dominik “Vykk” Pańczyk, Mateusz Sekulski, Grzegorz Góra, Michał Mazurek, Artur Szemiczek, Dariusz Misiulajtis, Miłosz Murawski, Patryk Olbert.
BOARD&DICE
CEO: Andrei Novac
Operations Manager: Aleksandra Menio
Head of Marketing: Filip Głowacz
Head of Sales: Ireneusz Huszcza
Art Direction: Kuba Polkowski
Head of Development: Błażej Kubacki
© 2022 Board&Dice. All rights reserved.
For more information about Tiletum please visit: www.boardanddice.com