
Ahoy
2022
Explore a changing ocean, battle for control, and pursue Fame as sharks, mollusks, or smugglers in a fast-playing asymmetric adventure.
75
minutes
2 - 4
player(s)
14+
Medium

About this board game
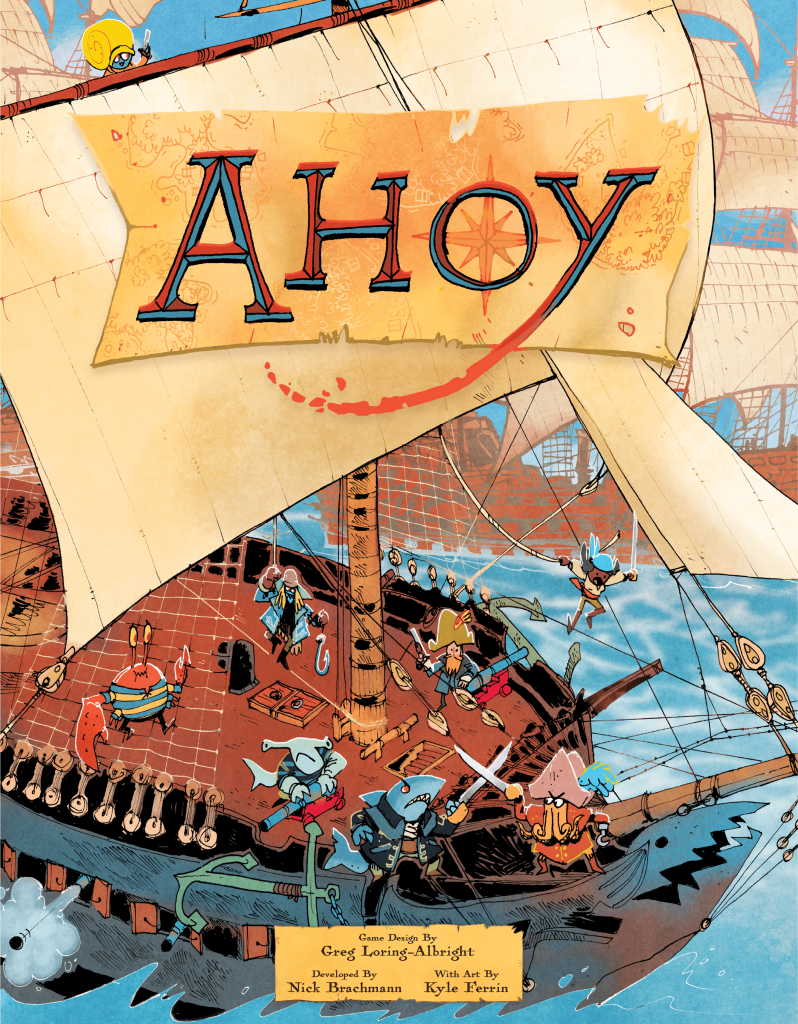
Ahoy is a lightly asymmetrical board game for 2–4 players that takes about 75 minutes, casting players as swashbucklers and soldiers competing for Fame on the high seas.
Each faction brings a distinct role to the colorful setting. One player commands the Bluefin Squadron, a company of sharks and their toothy friends who patrol the waters and maintain order with shot and sword. Another leads the Mollusk Union, an alliance of undersea creatures and their comrades-in-arms fighting to reclaim their ancestral home.
- Bluefin Squadron: patrol the seas and keep order.
- Mollusk Union: fight to reclaim their ancestral home.
- Smugglers: in games with more players, maverick captains run blockades and deliver luxuries and essentials to those with the most need—or the most coin.
Exploration helps make every game feel distinct. As you play, you create a unique map filled with treasure troves, dangerous wreckage, and powerful sea currents, using deluxe double-layer region tiles.
Developed by the same team behind Root and Oath, Ahoy combines deep, interactive gameplay with a fast-playing, easy-to-learn design. Its changing map, competing interests, and colorful factions create a lively contest across the open ocean.
Mechanics
Designer
Illustrator


Board Game Rules for
Ahoy
Overview
2–4 Players | Ages 14+ | 45–75 Minutes
In Ahoy, you play as one of four swashbuckling factions seeking Fame on the high seas:
- The Bluefin Squadron has roamed these waters for decades, enforcing order with shot and sword. Each round, they gain Fame by controlling regions—basically by having the most pieces on them.
- The Mollusk Union, driven long ago into the deep, now rises from the sea to reclaim their ancestral home. Just like the Bluefin Squadron, they gain Fame each round by controlling regions.
- The two Smugglers run blockades to bring luxuries and essentials to those with the most need—or the most coin. They gain Fame by delivering Cargo cards, though this also increases the wealth of regions, making them worth more Fame for the Squadron and Union to control.
The game ends at the end of a round if any player has at least 30 Fame. The winner is the player with the most Fame!
If you’re familiar with board game genres, the Bluefin Squadron and Mollusk Union are playing an area control game, and the Smugglers are playing a pick up and deliver game.

Components
- 4 Pocket Guides
- 12 Region Tiles
- 4 Player Boards (one per faction, with overview and setup on back)
Figures
- 4 Flagship Figures (one per faction)
- 10 Patrol Figures
- 3 Stronghold Figures
- 1 Cutter Figure
- 1 Gunship Figure
Dice
- 17 Action Dice (5 for Bluefin Squadron, 4 for each other player) — Action dice are referred to simply as “dice” in the rules.
- 11 Wealth Dice
- 2 Battle Dice
Cards
- 30 Market Cards
- 12 Plan Cards
- 1 First Player Card (end-of-round aid on back)
- 2 Bluefin Squadron Aid Cards (1 Patrol, 1 Stronghold)
- 2 Smuggler Aid Cards (one per Smuggler)
Tokens & Markers
- 25 Damage Tokens
- 20 Gold Tokens
- 20 Comrade Tokens (to make the Comrade tokens, put the 20 included stickers on the 20 yellow wood discs)
- 1 Fame Track (setup aid on back)
- 4 Fame Markers (one per faction)
- 4 Pledge Markers (two per Smuggler)
- 4 Reward Markers (two per Smuggler)

Game Setup
- Collect Shared Pieces. Collect the 20 gold tokens, 25 damage tokens, 11 wealth dice, and 2 battle dice nearby.
- Choose Factions. Each player chooses a faction to play. The factions you can play depend on the number of players:
- Two Players: Play with the Bluefin Squadron and Mollusk Union.
- Three Players: Play with the Bluefin Squadron, a Smuggler, and the Mollusk Union.
- Four Players: Play with all four factions.
- Seat Players. Players must sit in this clockwise order: Bluefin Squadron, Smuggler (3 and 4 players), Mollusk Union, Smuggler (4 players only). Each player places the player board for their faction in front of themself.
The two Smugglers are identical. If the Smugglers disagree about who sits in the second and fourth seats, determine it randomly. - Prepare Region Stack. Shuffle the 12 region tiles, return one facedown to the box, and place the remaining 11 region tiles in a facedown stack nearby.
- Set Up Map. Draw and deal 2 region tiles randomly and face up to the table. Place them so only 1 space of each region touches the other region, and so their 2 Islands are opposite and as far away from each other as possible.
Each region tile is a 2×2 grid of 4 spaces, one of which is an Island. - Place Wealth Dice. Place a wealth die with a value of “1” on the center of each face-up region tile.
- Prepare Market. If you’re playing with 2 or 3 players, return 1 random market card of each suit, shown in their top-left corner, from the deck of 30 market cards to the box.
It’s okay to see which cards get removed. Just shuffle the market deck, flip over cards until you find one of each suit, return them to the box, then reshuffle the market deck. - Deal Market. Shuffle the market cards into a deck, and deal 3 market cards to a face-up Market row.
- Mark Fame Track. Place the Fame track nearby and place the Fame marker for each player on the “0” Fame space.
After this, set up the factions as described both on page 6 and on the backs of the player boards. Return the pieces of all unchosen factions to the box.


Faction Setup
It’s fine if all the factions set up at the same time, but you can follow this strict order if the Smugglers really care about seeing how the other factions set up.
- Roll Action Dice. The Bluefin Squadron takes and rolls the 5 action dice of their color. Each other player takes and rolls the 4 action dice of their color.
- Take Gold. Each player takes 1 gold token.
- Set Up Bluefin Squadron:
- Take your 10 Patrol figures and 3 Stronghold figures.
- Take your Patrol aid card, Stronghold aid card, and the first player card. (You may place the figures on their aid cards if you want.)
- Place both your Flagship figure and 1 Patrol figure on the Island on either region tile. (Each region has 1 Island.)
- Set Up First Smuggler (in games with 3 or 4 players):
- Place your Flagship figure on any space on the map except an Island.
- Take your Smuggler aid card and your 2 pledge markers with their Squadron and Union icons facedown. (You may look at them.)
- Place your black and white reward markers on the middle space of the Rewards grid on your player board. (You can stack them.)
- Set Up Mollusk Union:
- Take your Cutter figure, Gunship figure, and 20 Comrade tokens.
- Place your Flagship figure and 2 Comrade tokens on the empty Island.
- Shuffle your 12 plan cards into a plan deck and draw 2 plan cards into your hand, keeping them secret from the other players.
- Place 6 Comrade tokens on the Ready Comrades section of your player board.
- Set Up Second Smuggler (in games with 4 players): Set up the second Smuggler in the same way as the first Smuggler.
Time to set sail! Begin play, starting with the Bluefin Squadron.

Round & Turn Structure
Ahoy is played over a series of rounds until someone wins at the end of a round. In a round, players take one turn at a time, starting with the first player.
On the first round, the Bluefin Squadron takes the first turn.
On your turn, you can take various actions. Most of the time, you take an action by placing an action die onto a die slot on your player board. A few actions don’t require placing an action die, such as recruiting Crew and handling Cargo.
To start out the game, each player rolled their faction’s set of action dice during setup. Going forward, everyone will reroll all of their action dice at the end of each round.

In total, you must place 2 action dice on your turn, no more and no less. On their final turn of the round, though, the Bluefin Squadron places only 1 action die. In the rare situation that you cannot place a die, set it aside—you cannot place it this round.
The Bluefin Squadron will take a total of three turns to place their 5 action dice, and each other player will take a total of two turns to place their 4 action dice.
Take actions one at a time. You must complete your action before taking another one.

When you decide that you’re done acting, your turn ends. The next player in clockwise order who has any action dice left to place begins their turn. If everyone has already placed all their action dice, the round ends.
From now on, the action dice are just called “dice” since they are used very often.
Taking Action
On your turn, you must take two actions that require placing a die. To do so, place a die on the action’s die slot. Most of them are on your player board, but you may gain more from Crew.
You can also take any number of actions that do not require a die, such as recruiting Crew.
The die slot must be empty. It cannot be filled with a die or damage token. Once you place a die, it stays placed until the end of the round.
Some die slots only accept dice of certain values. A slot with no icon accepts any die. A slot with a die value only accepts that exact value. A slot that says “even” only accepts an even number: 2, 4, or 6.
You may spend gold to modify your die. When placing a die, you may spend any number of gold tokens to increase or decrease the die’s value by one per gold you spend.
Common Actions
Every faction has these actions on their player board, with some differences that you’ll learn about later:
- Sail: Move your Flagship 1 or 2 spaces. Each move goes to an adjacent space, not diagonal.
- Tailwind: You may move your Flagship directly to any space on the map with a printed die in the corner whose value matches the die you placed on the Tailwind die slot. This space does not have to be adjacent, and you ignore everything between the starting and ending space.
Tailwind basically lets you teleport around the map. - Cannons: Your figures have LOADED CANNONS from now until the end of the round. Whenever you move one of your figures into a space with enemy figures, you must battle them if either of you has loaded Cannons.
- Repair: Remove up to 2 damage tokens from any of your die slots.

Recruiting Crew
As an action, while your Flagship is at an Island, you may recruit any number of cards from the Market into your Crew, as long as the Crew’s suit matches the Island.
To recruit Crew, you must pay the cost shown under its suit. It either requires you to place a die on the card or spend 1 or 2 gold back to the supply. You can have any number of Crew.
When you recruit Crew, tuck the bottom of the card under your player board to cover its Cargo, then draw a market card to refill the Market unless the Market deck is empty.
Some Crew give a new action, which may require placing a die. Other Crew give a passive power that you can use at the time it says.
Remember, you only get to place 2 dice in total on your turn, including dice you place to recruit or use Crew! Recruiting Crew with a gold cost doesn’t require placing a die.

Moving
Many actions let you MOVE your Flagship—for example, every faction can Sail, which lets you move your Flagship 1 or 2 spaces. A few actions let you move other figures.
You may only move to an adjacent space: one space up, down, left, or right from your space, not diagonal. If you’re on the map edge, you can move off the map.
You cannot move across Sandbars: lines of tan sand separating two spaces.
Remember, your Tailwind action lets you MOVE DIRECTLY to distant, non-adjacent spaces, ignoring Sandbars and everything else between.
Each time you move a space, do this in order:
- If you move off the map, you EXPLORE, letting you draw and place a new region tile.
- If the space has enemy figures, you BATTLE them if either of you has loaded Cannons.
- If the space has Wreckage or Strong Current TERRAIN, resolve it.
After moving a space, if you choose not to move another space or cannot move another space, you ANCHOR. If the space has Harbor or Treasure terrain, resolve it.
Battling and exploring make you lose any remaining spaces of movement in your action. You can only start a new action once you have anchored.


Exploring
Whenever you move one of your figures off the map, you EXPLORE a new region…
- Draw Region. Draw a region tile from the tile stack.
- Place Region. Place the region tile so that one space is where you are moving to. Pick up your figure and put it back down on that space.
- Place Wealth Die. Place a wealth die showing “1” on the center of the region.
There must be enough room. You cannot move off the map to explore if there isn’t enough room to place the region without overlapping another, or if the tile stack is empty.
You can rotate the region, but you cannot place its Island adjacent to any other Island. (They can be diagonal.)
After exploring, you cannot move your figure any more spaces with your current action. (If you’re on Strong Current terrain, it still moves you before you anchor.)


Terrain
Each space of a region can have TERRAIN:
 Strong Current: When any of your figures moves here, you must move it to the adjacent space in the direction shown for free. (Don’t spend movement. Move before anchoring. This can make you explore or battle.)
 Harbor: When your Flagship anchors here, you may repair 2 damage, or you may take any die that you have already placed and place it on your Cannons die slot. (The Squadron may only place a “5” or “6” die.)
 Fog: Battles cannot happen here.
 Tailwind: You can move here directly, ignoring everything between, by placing a matching die on your Tailwind action. (Some Fog and other spaces have Tailwinds.)
 Sandbar: You cannot move across this edge. (Your Tailwind action and some Crew let you ignore Sandbars.)
 Wreckage: When any figure moves here, it must take 1 damage.
 Treasure: When your Flagship anchors here, you may gain 1 gold for each gold icon shown in the corner of the space. (All Wreckage and some other spaces have Treasure.)
 Island: As an action, while your Flagship is here, you may recruit Crew from the Market. (Each faction can also do unique actions here. For example, the Smugglers can smuggle and deliver Cargo here.)
Just like with battling, when a figure is PLACED on Strong Current, Harbor, Wreckage, or Treasure terrain, don’t trigger it, because the figure didn’t MOVE or ANCHOR there.

Battling
Whenever you move one of your figures, check if you have loaded Cannons. (Usually this means you have a die on Cannons, but some figures always have loaded Cannons.)
If you do, your figure must BATTLE every enemy figure in its space. If you do not, you must battle every enemy figure there that has loaded Cannons. (Do not battle if no one there, including you, has loaded Cannons.)
You must battle these enemy figures one by one, in any order:
- Choose a Defender. Choose one eligible enemy figure there. You are the attacker. They are the defender.
- Attacker Fires Cannons. You may turn your die on Cannons to lower its value by any amount (not below 1). This adds to your battle die roll in step 4.
- Defender Fires Cannons. The defender may lower their Cannons value, as in step 2.
- Roll Battle Dice. Each player rolls 1 battle die and adds the amount that they reduced their own die on Cannons. The player with the higher total is the winner. On a tie, the attacker wins.
- Resolve Victory. The winner may resolve one Battle Victory option, listed on their player board.
After battling, you cannot move your figure any more spaces with your current action.
Some things in this game can PLACE figures in spaces with enemy figures. This does not trigger battle, since the figure didn’t MOVE into the space.


Damage
Whenever your Flagship is damaged, a damage token is placed onto an empty die slot of your player board or Crew.
- Wreckage terrain and some Crew make your Flagship TAKE DAMAGE. In this case, you choose which die slot of your own to damage.
- Victory in battle and some Crew let you DEAL DAMAGE. In this case, you choose which die slot of your enemy to damage.
- Whenever you REPAIR DAMAGE, remove a damage token from any damaged die slot on your player board or Crew, returning it to the supply.
Die slot damage restrictions:
- A die slot cannot be damaged if it already has a damage token or die on it.
- A die slot cannot be damaged if it has a dashed box around it, such as the Repair slot.
- If no slots can be damaged, ignore the damage.
When a Squadron Patrol or Stronghold is damaged, it is removed rather than a damage token being placed. When the Union’s Cutter or Gunship is damaged, the damage token goes on the ship’s card rather than the Union’s player board.

Faction Features
Patrols
- Placing: Whenever you take the Sail or Tailwind action, you may place 1 Patrol from your supply into your Flagship’s space when you anchor. (Do not trigger battle or terrain.)
- Damaging: Whenever a Patrol is damaged (even from moving into Wreckage), return the Patrol to your supply instead of placing a damage token.
Patrols battle just like your Flagship does. You or an enemy must move in, and one of you must have loaded Cannons. You can still lower your Cannons die to add to your roll.
Strongholds
- Placing: At the end of your turn, any number of times, you may remove 2 Patrols from an Island to place a Stronghold there. (You may have multiple Strongholds on an Island.)
- Battling: They always have loaded Cannons. Strongholds start battle as if you had a die on your Cannons slot, even if you do not. In this battle, add +2 to your roll. (You can still lower your Cannons die.)
- Damaging: Whenever a Stronghold is damaged, return the Stronghold to your supply instead of placing a damage token.
- Island Dominance: You may recruit Crew of matching suit from any Islands with a Stronghold, as if your Flagship were there. Also, while an enemy’s Flagship is at an Island with a Stronghold, they cannot recruit Crew or smuggle or deliver Cargo. (The Mollusk Union can still place Comrades. Smugglers cannot recruit Crew even if they gain a Reward.)
Fifth Die
You have 5 dice. On your first and second turns, you place 2 dice. On your third turn, you place 1 die. If you’re last in turn order, take your third turn right after your second turn.


Bluefin Squadron Actions
Standard Actions
- Sail: Place any die. Move your Flagship 1 or 2 spaces. When your Flagship anchors, you may place a Patrol in your Flagship’s space.
This is the standard Sail, but it lets you place a Patrol when anchoring. - Tailwind: Place any die. You may move your Flagship as described in Common Actions. When your Flagship anchors, you may place a Patrol in your Flagship’s space.
This is the standard Tailwind, but it lets you place a Patrol when anchoring. - Cannons: Place a “5” or “6” die. You now have loaded Cannons as described in Battling.
This is the standard Cannons, but it can hold up to 2 dice at a time. In battle, you may only reduce 1 die on Cannons to add to your roll. - Repair: Place a “2” die. Remove up to 2 damage from any of your die slots.
Unique Actions
- Bombard: Place a “4” die. Remove all Comrades from the Island in your Flagship’s region, returning them to the Union’s supply. (Comrades are Mollusk Union pieces.)
- Order: Place a “3” die. Move up to 4 different Patrols, each 1 space. (They can explore and battle, which won’t end the movement of Patrols that haven’t moved yet.)
- Deploy: Place any die. Place 1 Patrol in your Flagship’s space or an adjacent space. (You cannot place it diagonally. Ignore battle and all terrain, including Sandbars.)
Battle Victory
When you win a battle, you may choose one of the following options:
- Deal 1 damage and steal 1 gold from the defeated player.
- Deal 2 damage.
- Mollusk Union Ship: Deal 1 damage and remove 1 Comrade from the Island in the region of battle.

Faction Features
Comrades
- Gaining: Your Sail and Rally actions let you take Comrade tokens from your supply and place them onto the Ready Comrades section of your player board. You can have any number.
- Placing: Your Sail, Inspire, and Assemble actions let you take Ready Comrades and place them on Islands. Comrades on Islands (but not Ready Comrades) each add +1 control.
- Removing: Removed Comrades are returned to your supply, not your Ready Comrades.
- Battling: Comrades are tokens, so they cannot battle or be battled.
Plans
- Drawing: You start the game with 2 plan cards in your hand. After cleaning up at the end of each round, you draw 2 plan cards into your hand unless your plan deck is empty. You can hold any number of plans in your hand.
- Playing: You may play plan cards at the time they list at the top—as an action or at the start of any battle. When you play it, resolve it and discard it face up into a discard pile. If you play your Cutter or Gunship plan, place it near you instead.
- Discussing: You may talk (and lie!) about plans in your hand, but you cannot show them to other players.
Cutter and Gunship
- Placing: If you play the Cutter or Gunship plan, remove 2 Comrades from any 1 Island to place the ship’s figure there. (Do not battle.)
- Die Slots: The Cutter and Gunship plans have die slots that let the ship either Sail or Tailwind, ignoring Wreckage. The Cutter’s Sail lets it move 1 to 3 spaces, not 1 or 2.
- Damaging: When the Cutter or Gunship is damaged, the damage is placed on an empty die slot of the ship’s plan. This damage cannot be repaired. When all of its die slots are all damaged, discard its plan and remove its figure.
Remember, full die slots cannot be damaged! If the Cutter or Gunship is in a risky spot, place a die on it to stop it from being destroyed this turn. They’re fragile but hard to hit!


Cutter and Gunship Combat & Powers
- Gunship Battling: It always has loaded Cannons. The Gunship starts battles as if you had a die on your Cannons slot, even if you do not. In this battle, add +3 to your roll. (You can still lower your die on Cannons to add more.)
- Cutter Battling: It cannot load Cannons. The Cutter cannot use your die on Cannons to start battles, and you cannot lower your die on Cannons in battle to add to its roll. (It only battles enemies who have loaded Cannons, including Strongholds.)
- The Mighty Claw: In addition to adding +1 control, the Cutter doubles the control of all Comrades on the Island in its region—each Comrade adds +2 control instead of +1. (Seeing the claw, a symbol of the union, inspires your Comrades to take back what’s theirs!)

Mollusk Union Actions
Standard Actions
- Sail: Place any die. Move your Flagship 1 or 2 spaces. If you anchor at an Island, you may either place 2 Comrades on the Island or gain 2 Ready Comrades.
This is the standard Sail, but it lets you place or gain Comrades when anchoring. You can have any number on the Island and in your Ready Comrades. - Tailwind: Place any die. You may move your Flagship as described in Common Actions.
Tailwind doesn’t let you gain or place Comrades because no Islands have a Tailwind. - Cannons: Place any die. You now have loaded Cannons as described in Battling.
- Repair: Place an even die. Remove up to 2 damage from any of your die slots.
Unique Actions
- Inspire: Place a “6” die. Place 1 Comrade each on up to 4 different Islands. (If there are fewer than 4 Islands, you may only place as many Comrades as there are Islands.)
- Assemble: Place a “1” die. Place 4 Comrades on the Island in your Flagship’s region.
- Rally: Place a “6” die. If your Flagship is at an Island, gain 4 Ready Comrades.
Battle Victory
When you win a battle, you may choose one of the following options:
- Deal 1 damage and place 1 Comrade on the Island in the region of battle. (This comes from Ready Comrades, regardless of which of your ships is battling!)
- Deal 1 damage and steal 1 gold from the defeated player.
Cargo & Delivery
As a Smuggler, you have two unique actions that do not require placing dice: While your Flagship is at an Island, you may SMUGGLE and DELIVER any number of cards.
To smuggle Cargo: Take a card from the Market whose suit matches your Island’s suit. (Unlike recruiting, smuggling has no cost.) Tuck it into the Cargo slot on your player board so it only shows the Cargo at the bottom, then draw a market card to refill the Market unless the market deck is empty.
You may have up to 2 Cargo. If you ever have more than 2 Cargo, you must return Cargo to the box until you have 2 Cargo. (Cast it into the sea!)
To deliver Cargo: Your Flagship must be at an Island whose suit matches the Cargo’s Deliver suit, shown at the bottom of the card. When you deliver, do these steps:
- Gain 2 Fame. Gain 2 Fame.
- Increase Wealth. Increase the wealth die on your Flagship’s region by one.
- Gain Reward. On your player board, move your white reward marker on the Rewards grid to an adjacent space, except the one with the black reward marker. You may gain the reward in the space with the white reward marker. Then, move the black reward marker to the space that the white reward marker moved out of.
- Pledge Cargo. Place the delivered Cargo card facedown under either your Squadron or Union pledge marker, keeping the pledge marker facedown.


Pledged Cargo
At the end of the game, you reveal your Squadron and Union pledge markers and the delivered Cargo under them. For each Cargo, you gain 1 Fame for each region that the pledged faction controls whose Island matches the Cargo’s top-left suit.

Smuggler Actions
Standard Actions
- Sail: Place any die. Move your Flagship 1 or 2 spaces.
- Tailwind: Place any die. You may move your Flagship as described in Common Actions.
- Cannons: Place any die. You now have loaded Cannons as described in Battling.
- Repair: Place an even die. Remove up to 2 damage from any of your die slots.
Unique Actions
- Full Sail: Place any die. Move your Flagship a number of spaces up to the value of the die you placed, but at least 1 space. (So placing a “6” die lets you move up to 6 spaces!)
- Negotiate: Place an even die. While your Flagship is at an Island, you may recruit any card from the Market into your Crew, ignoring its cost and suit requirement. You may recruit one more Crew, as described, if you choose to remove one Comrade from the Island.
You cannot recruit more than twice in total, you cannot recruit again if the Island has no Comrades, and you cannot remove the Comrade if the Market is empty.
Battle Victory
When you win a battle, you may choose one of the following options:
- Deal 1 damage and move 1 or 2 spaces immediately, ignoring all other battles in your space.
- Deal 1 damage and gain a reward, exactly as in step 3 of delivering Cargo.
Ending the Round
When the round ends, score Fame from controlled regions and then clean up.
Score Regions
Check every region for control. Only the Bluefin Squadron or Mollusk Union can control a region, based on which faction has the higher control, calculated as follows:
Bluefin Squadron:
- +1 control per Patrol
- +2 control per Stronghold
- +2 control for their Flagship
Mollusk Union:
- +1 control per Comrade on the region’s Island
- +1 control per Union ship
The controller gains Fame equal to the region’s wealth die. Every region has a wealth die on the center of its tile. They start at “1” but increase as the game progresses.
On a tie for control of a region, no one scores Fame for it.
The Smugglers’ Flagships don’t affect control in any way.

Clean Up
Do these steps in the following order:
- End Game? If any player has at least 30 Fame, end the game. Smugglers score pledged Cargo, then the player with the most Fame wins! On a tie, the tied player with the most gold wins.
- Adjust for Two? With 2 players, the first player must increase one region’s wealth die by 1, then may return all cards in the Market to the box. (Refill it.)
With 3 or 4 players, a region’s wealth will increase whenever a Smuggler delivers Cargo. - Reroll Dice. Each player rolls all of their action dice and places them nearby.
- Pass First Player. Give the first player card to the next clockwise player.
When you’re done cleaning up, begin the next round, starting with the new first player.
The Fine Print
- Piece Limits: All pieces are limited by the contents of the box except for damage tokens. If you are prompted to place a piece from a supply, but its supply is empty, do not place the piece.
- Rules Hierarchy: Crew and plan cards supersede the core rules. Rules that say CANNOT are absolute and cannot be superseded unless a rule explicitly supersedes it with the IGNORE keyword.
- Sidebars & Clarifications: Sidebars, text written in italics and parentheses (like this), and text on the player boards are clarifications and reminders, which are superseded by the core rules they reference.
- Die Values: A die cannot increase over 6, decrease below 1, or wrap from 1 to 6 or reverse. Dice values are public.
- Simultaneous Timing: If two things happen at the same time, the player taking their turn chooses the order.
- Effectless Actions: You can do things with no outcome, such as spending 2 gold to decrease and increase a die.
- Conceding with Two Players: With 2 players, the winner might be clear before the game ends. Conceding is totally okay!
Appendix A: Crew
- Aeronauts (Action): While your Flagship is at an Island, you may spend 1 gold to move your Flagship directly to the other Island of that suit. (Ignore everything between. Not a Tailwind action.)
- Barrelman: When your Flagship moves into Fog, you may treat it as a Strong Current going in any direction.
- Battering Beakhead: When you damage an enemy figure (unless it would be removed), you may move it 1 space. It cannot move off map (and ignores Strong Currents that make it do so). It ignores battle, Harbors, and Treasure.
- Buccaneer: When you win any battle, you may return Buccaneer to the box to return 2 Crew of theirs that you choose to the box.
- Convincing Comrade (Action): Place any die. Take up to 2 Comrades from any 1 Island and place them on another Island. (There are 2 Convincing Comrades.)
- Convincing Official (Action): Place any die. Move up to 2 Patrols, each 1 or 2 spaces. They ignore battle. (There are 2 Convincing Officials.)
- Cutpurse: When you win any battle (not just with your Flagship), gain 2 gold.
- Diver: When your Flagship anchors at Wreckage, gain 1 more gold from its Treasure.
- Documentarian: At the end of your turn, gain 1 gold if your Flagship is in the same region as an enemy Flagship. (Don’t gain more gold with more enemy Flagships.)
- Elder: At the end of your turn, gain 1 gold if you have no damaged die slots (even Crew).
- Emissary: If you would battle as the attacker, you may give the defender 1 gold to ignore the battle.
- Fighters: In any battle (not just with your Flagship), you add +1 to your roll.
- Ghastly Gust (Action): Return Ghastly Gust to the box to move your Flagship directly to any space. (Ignore everything between. Not a Tailwind action.)
- Grogmaster: Once per battle, after you roll, you may take 1 damage to reroll your battle die. If you’re rolling 2 battle dice, reroll them both. (You must be able to place the damage.)
- Gunner: When you win a battle with your Flagship, deal an extra damage.
- Gunner’s Mate: When you place a die on Cannons (even with a Harbor), your Flagship may battle against any space in its region as if it moved there.
- Merchant: When your Flagship anchors at a Harbor (not Island), gain 1 gold.
- Middleman: When you spend gold to change a die value, change it by up to 2 per gold spent.
- Mystic (Action): Once per turn, take 1 damage to deal 1 damage to any figure in your Flagship’s region. (You must be able to place the damage.)
- Naive Noble (Action): Return Naive Noble to the box to take 1 Crew or Cargo from a Flagship in your Flagship’s region, making it Crew or Cargo. (You may swap it from Cargo to Crew, or from Crew to Cargo.)
- Pilot: When your Flagship moves into Wreckage, you may ignore its damage.
- Powder Monkey: When you repair any amount of damage, you may deal 1 damage to any figure in your Flagship’s region.
- Sailor (Action): Place any die. Move your Flagship 1 to 3 spaces. (Not a Sail action.)
- Sea Dog: When your Flagship moves into a Strong Current, you may ignore its effect or move in a different direction.
- Sea Witch: When your Flagship moves off the map (even if you cannot explore), you may move it directly to the space on the nearest opposite edge for free. (See example below.)

- Shipwright (Action): Place any die. Remove all damage from your die slots.
- Trawler (Action): Place any die. Move your Flagship 1 or 2 spaces. You may gain Treasure gold even if you don’t anchor at it. (Not a Sail action.)
- Whispering Wind (Action): Once per turn, spend 2 gold to move your Flagship directly to any space with Tailwind terrain. (Ignore everything between. Not a Tailwind action.)
Appendix B: Plans
For the Cutter and Gunship, see pages 18–19.
- Close Call: Play at the start of a battle with you, even outside your turn, then discard. Ignore the battle. (If it’s your turn, you can keep moving if you have movement left.)
- Dynamic Entry (2x): Increase your die on Cannons by 2 (not above 6). Then, you may move your Flagship directly to any space with Tailwind terrain.
- Enlist: Play as an action, then discard. Choose any 1 Island with any Comrades. Recruit any number of Crew of its suit, ignoring cost. Refill the Market only when done.
- Evacuation: Play as an action, then discard. Remove all Comrades from 1 Island, and place them on any other Island or Islands. (You may distribute them any way you want.)
- Secret Weapon: Play at the start of a battle with you, even outside your turn, then discard. Instead of rolling 1 battle die, you roll 2 battle dice and add them up. (Your enemy still rolls 1 battle die.) If you win, deal an extra damage.
- Sneak Attack (2x): Play as an action, then discard. Remove up to 2 Patrols from any 1 region whose Island has any Comrades. (Return the Patrols to the Squadron’s supply.)
- Weapon Cache (2x): Play at the start of a battle with you, even outside your turn, then discard. Increase your roll by the number of your Ready Comrades. (You may play both Weapons Cache plans and the Secret Weapon plan.)
Credits
- Game Design: Greg Loring-Albright
- Development Lead: Nick Brachmann
- Illustration: Kyle Ferrin
- Rules and Usability: Joshua Yearsley
- Graphic Design: Nick Brachmann and Pati Hyun
- Copy-Editing: Amanda Valentine and Carina Bissett
- 3D Render: Cory DeVore
- Development: Marshall Britt, Ted Caya, Pati Hyun, Patrick Leder, Brooke Nelson, Cole Wehrle, Joshua Yearsley
Overview & Components
Overview
2–4 Players | Ages 14+ | 45–75 Minutes
In Ahoy, you play as one of four swashbuckling factions seeking Fame on the high seas:
- The Bluefin Squadron has roamed these waters for decades, enforcing order with shot and sword. Each round, they gain Fame by controlling regions—basically by having the most pieces on them.
- The Mollusk Union, driven long ago into the deep, now rises from the sea to reclaim their ancestral home. Just like the Bluefin Squadron, they gain Fame each round by controlling regions.
- The two Smugglers run blockades to bring luxuries and essentials to those with the most need—or the most coin. They gain Fame by delivering Cargo cards, though this also increases the wealth of regions, making them worth more Fame for the Squadron and Union to control.
The game ends at the end of a round if any player has at least 30 Fame. The winner is the player with the most Fame!
If you’re familiar with board game genres, the Bluefin Squadron and Mollusk Union are playing an area control game, and the Smugglers are playing a pick up and deliver game.
Components
- 4 Pocket Guides
- 12 Region Tiles
- 4 Player Boards (one per faction, with overview and setup on back)
Figures
- 4 Flagship Figures (one per faction)
- 10 Patrol Figures
- 3 Stronghold Figures
- 1 Cutter Figure
- 1 Gunship Figure
Dice
- 17 Action Dice (5 for Bluefin Squadron, 4 for each other player) — Action dice are referred to simply as “dice” in the rules.
- 11 Wealth Dice
- 2 Battle Dice
Cards
- 30 Market Cards
- 12 Plan Cards
- 1 First Player Card (end-of-round aid on back)
- 2 Bluefin Squadron Aid Cards (1 Patrol, 1 Stronghold)
- 2 Smuggler Aid Cards (one per Smuggler)
Tokens & Markers
- 25 Damage Tokens
- 20 Gold Tokens
- 20 Comrade Tokens (to make the Comrade tokens, put the 20 included stickers on the 20 yellow wood discs)
- 1 Fame Track (setup aid on back)
- 4 Fame Markers (one per faction)
- 4 Pledge Markers (two per Smuggler)
- 4 Reward Markers (two per Smuggler)
Setup
Game Setup
- Collect Shared Pieces. Collect the 20 gold tokens, 25 damage tokens, 11 wealth dice, and 2 battle dice nearby.
- Choose Factions. Each player chooses a faction to play. The factions you can play depend on the number of players:
- Two Players: Play with the Bluefin Squadron and Mollusk Union.
- Three Players: Play with the Bluefin Squadron, a Smuggler, and the Mollusk Union.
- Four Players: Play with all four factions.
- Seat Players. Players must sit in this clockwise order: Bluefin Squadron, Smuggler (3 and 4 players), Mollusk Union, Smuggler (4 players only). Each player places the player board for their faction in front of themself.
The two Smugglers are identical. If the Smugglers disagree about who sits in the second and fourth seats, determine it randomly. - Prepare Region Stack. Shuffle the 12 region tiles, return one facedown to the box, and place the remaining 11 region tiles in a facedown stack nearby.
- Set Up Map. Draw and deal 2 region tiles randomly and face up to the table. Place them so only 1 space of each region touches the other region, and so their 2 Islands are opposite and as far away from each other as possible.
Each region tile is a 2×2 grid of 4 spaces, one of which is an Island. - Place Wealth Dice. Place a wealth die with a value of “1” on the center of each face-up region tile.
- Prepare Market. If you’re playing with 2 or 3 players, return 1 random market card of each suit, shown in their top-left corner, from the deck of 30 market cards to the box.
It’s okay to see which cards get removed. Just shuffle the market deck, flip over cards until you find one of each suit, return them to the box, then reshuffle the market deck. - Deal Market. Shuffle the market cards into a deck, and deal 3 market cards to a face-up Market row.
- Mark Fame Track. Place the Fame track nearby and place the Fame marker for each player on the “0” Fame space.
After this, set up the factions as described both on page 6 and on the backs of the player boards. Return the pieces of all unchosen factions to the box.
Faction Setup
It’s fine if all the factions set up at the same time, but you can follow this strict order if the Smugglers really care about seeing how the other factions set up.
- Roll Action Dice. The Bluefin Squadron takes and rolls the 5 action dice of their color. Each other player takes and rolls the 4 action dice of their color.
- Take Gold. Each player takes 1 gold token.
- Set Up Bluefin Squadron:
- Take your 10 Patrol figures and 3 Stronghold figures.
- Take your Patrol aid card, Stronghold aid card, and the first player card. (You may place the figures on their aid cards if you want.)
- Place both your Flagship figure and 1 Patrol figure on the Island on either region tile. (Each region has 1 Island.)
- Set Up First Smuggler (in games with 3 or 4 players):
- Place your Flagship figure on any space on the map except an Island.
- Take your Smuggler aid card and your 2 pledge markers with their Squadron and Union icons facedown. (You may look at them.)
- Place your black and white reward markers on the middle space of the Rewards grid on your player board. (You can stack them.)
- Set Up Mollusk Union:
- Take your Cutter figure, Gunship figure, and 20 Comrade tokens.
- Place your Flagship figure and 2 Comrade tokens on the empty Island.
- Shuffle your 12 plan cards into a plan deck and draw 2 plan cards into your hand, keeping them secret from the other players.
- Place 6 Comrade tokens on the Ready Comrades section of your player board.
- Set Up Second Smuggler (in games with 4 players): Set up the second Smuggler in the same way as the first Smuggler.
Time to set sail! Begin play, starting with the Bluefin Squadron.
How to Play & Turn Structure
Round & Turn Structure
Ahoy is played over a series of rounds until someone wins at the end of a round. In a round, players take one turn at a time, starting with the first player.
On the first round, the Bluefin Squadron takes the first turn.
On your turn, you can take various actions. Most of the time, you take an action by placing an action die onto a die slot on your player board. A few actions don’t require placing an action die, such as recruiting Crew and handling Cargo.
To start out the game, each player rolled their faction’s set of action dice during setup. Going forward, everyone will reroll all of their action dice at the end of each round.
In total, you must place 2 action dice on your turn, no more and no less. On their final turn of the round, though, the Bluefin Squadron places only 1 action die. In the rare situation that you cannot place a die, set it aside—you cannot place it this round.
The Bluefin Squadron will take a total of three turns to place their 5 action dice, and each other player will take a total of two turns to place their 4 action dice.
Take actions one at a time. You must complete your action before taking another one.
When you decide that you’re done acting, your turn ends. The next player in clockwise order who has any action dice left to place begins their turn. If everyone has already placed all their action dice, the round ends.
From now on, the action dice are just called “dice” since they are used very often.
Core Rules & Actions
Taking Action
On your turn, you must take two actions that require placing a die. To do so, place a die on the action’s die slot. Most of them are on your player board, but you may gain more from Crew.
You can also take any number of actions that do not require a die, such as recruiting Crew.
The die slot must be empty. It cannot be filled with a die or damage token. Once you place a die, it stays placed until the end of the round.
Some die slots only accept dice of certain values. A slot with no icon accepts any die. A slot with a die value only accepts that exact value. A slot that says “even” only accepts an even number: 2, 4, or 6.
You may spend gold to modify your die. When placing a die, you may spend any number of gold tokens to increase or decrease the die’s value by one per gold you spend.
Common Actions
Every faction has these actions on their player board, with some differences that you’ll learn about later:
- Sail: Move your Flagship 1 or 2 spaces. Each move goes to an adjacent space, not diagonal.
- Tailwind: You may move your Flagship directly to any space on the map with a printed die in the corner whose value matches the die you placed on the Tailwind die slot. This space does not have to be adjacent, and you ignore everything between the starting and ending space.
Tailwind basically lets you teleport around the map. - Cannons: Your figures have LOADED CANNONS from now until the end of the round. Whenever you move one of your figures into a space with enemy figures, you must battle them if either of you has loaded Cannons.
- Repair: Remove up to 2 damage tokens from any of your die slots.
Recruiting Crew
As an action, while your Flagship is at an Island, you may recruit any number of cards from the Market into your Crew, as long as the Crew’s suit matches the Island.
To recruit Crew, you must pay the cost shown under its suit. It either requires you to place a die on the card or spend 1 or 2 gold back to the supply. You can have any number of Crew.
When you recruit Crew, tuck the bottom of the card under your player board to cover its Cargo, then draw a market card to refill the Market unless the Market deck is empty.
Some Crew give a new action, which may require placing a die. Other Crew give a passive power that you can use at the time it says.
Remember, you only get to place 2 dice in total on your turn, including dice you place to recruit or use Crew! Recruiting Crew with a gold cost doesn’t require placing a die.
Map & Navigation
Moving
Many actions let you MOVE your Flagship—for example, every faction can Sail, which lets you move your Flagship 1 or 2 spaces. A few actions let you move other figures.
You may only move to an adjacent space: one space up, down, left, or right from your space, not diagonal. If you’re on the map edge, you can move off the map.
You cannot move across Sandbars: lines of tan sand separating two spaces.
Remember, your Tailwind action lets you MOVE DIRECTLY to distant, non-adjacent spaces, ignoring Sandbars and everything else between.
Each time you move a space, do this in order:
- If you move off the map, you EXPLORE, letting you draw and place a new region tile.
- If the space has enemy figures, you BATTLE them if either of you has loaded Cannons.
- If the space has Wreckage or Strong Current TERRAIN, resolve it.
After moving a space, if you choose not to move another space or cannot move another space, you ANCHOR. If the space has Harbor or Treasure terrain, resolve it.
Battling and exploring make you lose any remaining spaces of movement in your action. You can only start a new action once you have anchored.
Exploring
Whenever you move one of your figures off the map, you EXPLORE a new region…
- Draw Region. Draw a region tile from the tile stack.
- Place Region. Place the region tile so that one space is where you are moving to. Pick up your figure and put it back down on that space.
- Place Wealth Die. Place a wealth die showing “1” on the center of the region.
There must be enough room. You cannot move off the map to explore if there isn’t enough room to place the region without overlapping another, or if the tile stack is empty.
You can rotate the region, but you cannot place its Island adjacent to any other Island. (They can be diagonal.)
After exploring, you cannot move your figure any more spaces with your current action. (If you’re on Strong Current terrain, it still moves you before you anchor.)
Terrain
Each space of a region can have TERRAIN:
- Strong Current: When any of your figures moves here, you must move it to the adjacent space in the direction shown for free. (Don’t spend movement. Move before anchoring. This can make you explore or battle.)
- Harbor: When your Flagship anchors here, you may repair 2 damage, or you may take any die that you have already placed and place it on your Cannons die slot. (The Squadron may only place a “5” or “6” die.)
- Fog: Battles cannot happen here.
- Tailwind: You can move here directly, ignoring everything between, by placing a matching die on your Tailwind action. (Some Fog and other spaces have Tailwinds.)
- Sandbar: You cannot move across this edge. (Your Tailwind action and some Crew let you ignore Sandbars.)
- Wreckage: When any figure moves here, it must take 1 damage.
- Treasure: When your Flagship anchors here, you may gain 1 gold for each gold icon shown in the corner of the space. (All Wreckage and some other spaces have Treasure.)
- Island: As an action, while your Flagship is here, you may recruit Crew from the Market. (Each faction can also do unique actions here. For example, the Smugglers can smuggle and deliver Cargo here.)
Just like with battling, when a figure is PLACED on Strong Current, Harbor, Wreckage, or Treasure terrain, don’t trigger it, because the figure didn’t MOVE or ANCHOR there.
Combat & Damage
Battling
Whenever you move one of your figures, check if you have loaded Cannons. (Usually this means you have a die on Cannons, but some figures always have loaded Cannons.)
If you do, your figure must BATTLE every enemy figure in its space. If you do not, you must battle every enemy figure there that has loaded Cannons. (Do not battle if no one there, including you, has loaded Cannons.)
You must battle these enemy figures one by one, in any order:
- Choose a Defender. Choose one eligible enemy figure there. You are the attacker. They are the defender.
- Attacker Fires Cannons. You may turn your die on Cannons to lower its value by any amount (not below 1). This adds to your battle die roll in step 4.
- Defender Fires Cannons. The defender may lower their Cannons value, as in step 2.
- Roll Battle Dice. Each player rolls 1 battle die and adds the amount that they reduced their own die on Cannons. The player with the higher total is the winner. On a tie, the attacker wins.
- Resolve Victory. The winner may resolve one Battle Victory option, listed on their player board.
After battling, you cannot move your figure any more spaces with your current action.
Some things in this game can PLACE figures in spaces with enemy figures. This does not trigger battle, since the figure didn’t MOVE into the space.
Damage
Whenever your Flagship is damaged, a damage token is placed onto an empty die slot of your player board or Crew.
- Wreckage terrain and some Crew make your Flagship TAKE DAMAGE. In this case, you choose which die slot of your own to damage.
- Victory in battle and some Crew let you DEAL DAMAGE. In this case, you choose which die slot of your enemy to damage.
- Whenever you REPAIR DAMAGE, remove a damage token from any damaged die slot on your player board or Crew, returning it to the supply.
Die slot damage restrictions:
- A die slot cannot be damaged if it already has a damage token or die on it.
- A die slot cannot be damaged if it has a dashed box around it, such as the Repair slot.
- If no slots can be damaged, ignore the damage.
When a Squadron Patrol or Stronghold is damaged, it is removed rather than a damage token being placed. When the Union’s Cutter or Gunship is damaged, the damage token goes on the ship’s card rather than the Union’s player board.
Faction: The Bluefin Squadron
Faction Features
Patrols
- Placing: Whenever you take the Sail or Tailwind action, you may place 1 Patrol from your supply into your Flagship’s space when you anchor. (Do not trigger battle or terrain.)
- Damaging: Whenever a Patrol is damaged (even from moving into Wreckage), return the Patrol to your supply instead of placing a damage token.
Patrols battle just like your Flagship does. You or an enemy must move in, and one of you must have loaded Cannons. You can still lower your Cannons die to add to your roll.
Strongholds
- Placing: At the end of your turn, any number of times, you may remove 2 Patrols from an Island to place a Stronghold there. (You may have multiple Strongholds on an Island.)
- Battling: They always have loaded Cannons. Strongholds start battle as if you had a die on your Cannons slot, even if you do not. In this battle, add +2 to your roll. (You can still lower your Cannons die.)
- Damaging: Whenever a Stronghold is damaged, return the Stronghold to your supply instead of placing a damage token.
- Island Dominance: You may recruit Crew of matching suit from any Islands with a Stronghold, as if your Flagship were there. Also, while an enemy’s Flagship is at an Island with a Stronghold, they cannot recruit Crew or smuggle or deliver Cargo. (The Mollusk Union can still place Comrades. Smugglers cannot recruit Crew even if they gain a Reward.)
Fifth Die
You have 5 dice. On your first and second turns, you place 2 dice. On your third turn, you place 1 die. If you’re last in turn order, take your third turn right after your second turn.
Bluefin Squadron Actions
Standard Actions
- Sail: Place any die. Move your Flagship 1 or 2 spaces. When your Flagship anchors, you may place a Patrol in your Flagship’s space.
This is the standard Sail, but it lets you place a Patrol when anchoring. - Tailwind: Place any die. You may move your Flagship as described in Common Actions. When your Flagship anchors, you may place a Patrol in your Flagship’s space.
This is the standard Tailwind, but it lets you place a Patrol when anchoring. - Cannons: Place a “5” or “6” die. You now have loaded Cannons as described in Battling.
This is the standard Cannons, but it can hold up to 2 dice at a time. In battle, you may only reduce 1 die on Cannons to add to your roll. - Repair: Place a “2” die. Remove up to 2 damage from any of your die slots.
Unique Actions
- Bombard: Place a “4” die. Remove all Comrades from the Island in your Flagship’s region, returning them to the Union’s supply. (Comrades are Mollusk Union pieces.)
- Order: Place a “3” die. Move up to 4 different Patrols, each 1 space. (They can explore and battle, which won’t end the movement of Patrols that haven’t moved yet.)
- Deploy: Place any die. Place 1 Patrol in your Flagship’s space or an adjacent space. (You cannot place it diagonally. Ignore battle and all terrain, including Sandbars.)
Battle Victory
When you win a battle, you may choose one of the following options:
- Deal 1 damage and steal 1 gold from the defeated player.
- Deal 2 damage.
- Mollusk Union Ship: Deal 1 damage and remove 1 Comrade from the Island in the region of battle.
Faction: The Mollusk Union
Faction Features
Comrades
- Gaining: Your Sail and Rally actions let you take Comrade tokens from your supply and place them onto the Ready Comrades section of your player board. You can have any number.
- Placing: Your Sail, Inspire, and Assemble actions let you take Ready Comrades and place them on Islands. Comrades on Islands (but not Ready Comrades) each add +1 control.
- Removing: Removed Comrades are returned to your supply, not your Ready Comrades.
- Battling: Comrades are tokens, so they cannot battle or be battled.
Plans
- Drawing: You start the game with 2 plan cards in your hand. After cleaning up at the end of each round, you draw 2 plan cards into your hand unless your plan deck is empty. You can hold any number of plans in your hand.
- Playing: You may play plan cards at the time they list at the top—as an action or at the start of any battle. When you play it, resolve it and discard it face up into a discard pile. If you play your Cutter or Gunship plan, place it near you instead.
- Discussing: You may talk (and lie!) about plans in your hand, but you cannot show them to other players.
Cutter and Gunship
- Placing: If you play the Cutter or Gunship plan, remove 2 Comrades from any 1 Island to place the ship’s figure there. (Do not battle.)
- Die Slots: The Cutter and Gunship plans have die slots that let the ship either Sail or Tailwind, ignoring Wreckage. The Cutter’s Sail lets it move 1 to 3 spaces, not 1 or 2.
- Damaging: When the Cutter or Gunship is damaged, the damage is placed on an empty die slot of the ship’s plan. This damage cannot be repaired. When all of its die slots are all damaged, discard its plan and remove its figure.
Remember, full die slots cannot be damaged! If the Cutter or Gunship is in a risky spot, place a die on it to stop it from being destroyed this turn. They’re fragile but hard to hit!
Cutter and Gunship Combat & Powers
- Gunship Battling: It always has loaded Cannons. The Gunship starts battles as if you had a die on your Cannons slot, even if you do not. In this battle, add +3 to your roll. (You can still lower your die on Cannons to add more.)
- Cutter Battling: It cannot load Cannons. The Cutter cannot use your die on Cannons to start battles, and you cannot lower your die on Cannons in battle to add to its roll. (It only battles enemies who have loaded Cannons, including Strongholds.)
- The Mighty Claw: In addition to adding +1 control, the Cutter doubles the control of all Comrades on the Island in its region—each Comrade adds +2 control instead of +1. (Seeing the claw, a symbol of the union, inspires your Comrades to take back what’s theirs!)
Mollusk Union Actions
Standard Actions
- Sail: Place any die. Move your Flagship 1 or 2 spaces. If you anchor at an Island, you may either place 2 Comrades on the Island or gain 2 Ready Comrades.
This is the standard Sail, but it lets you place or gain Comrades when anchoring. You can have any number on the Island and in your Ready Comrades. - Tailwind: Place any die. You may move your Flagship as described in Common Actions.
Tailwind doesn’t let you gain or place Comrades because no Islands have a Tailwind. - Cannons: Place any die. You now have loaded Cannons as described in Battling.
- Repair: Place an even die. Remove up to 2 damage from any of your die slots.
Unique Actions
- Inspire: Place a “6” die. Place 1 Comrade each on up to 4 different Islands. (If there are fewer than 4 Islands, you may only place as many Comrades as there are Islands.)
- Assemble: Place a “1” die. Place 4 Comrades on the Island in your Flagship’s region.
- Rally: Place a “6” die. If your Flagship is at an Island, gain 4 Ready Comrades.
Battle Victory
When you win a battle, you may choose one of the following options:
- Deal 1 damage and place 1 Comrade on the Island in the region of battle. (This comes from Ready Comrades, regardless of which of your ships is battling!)
- Deal 1 damage and steal 1 gold from the defeated player.
Faction: The Smugglers
Cargo & Delivery
As a Smuggler, you have two unique actions that do not require placing dice: While your Flagship is at an Island, you may SMUGGLE and DELIVER any number of cards.
To smuggle Cargo: Take a card from the Market whose suit matches your Island’s suit. (Unlike recruiting, smuggling has no cost.) Tuck it into the Cargo slot on your player board so it only shows the Cargo at the bottom, then draw a market card to refill the Market unless the market deck is empty.
You may have up to 2 Cargo. If you ever have more than 2 Cargo, you must return Cargo to the box until you have 2 Cargo. (Cast it into the sea!)
To deliver Cargo: Your Flagship must be at an Island whose suit matches the Cargo’s Deliver suit, shown at the bottom of the card. When you deliver, do these steps:
- Gain 2 Fame. Gain 2 Fame.
- Increase Wealth. Increase the wealth die on your Flagship’s region by one.
- Gain Reward. On your player board, move your white reward marker on the Rewards grid to an adjacent space, except the one with the black reward marker. You may gain the reward in the space with the white reward marker. Then, move the black reward marker to the space that the white reward marker moved out of.
- Pledge Cargo. Place the delivered Cargo card facedown under either your Squadron or Union pledge marker, keeping the pledge marker facedown.
Pledged Cargo
At the end of the game, you reveal your Squadron and Union pledge markers and the delivered Cargo under them. For each Cargo, you gain 1 Fame for each region that the pledged faction controls whose Island matches the Cargo’s top-left suit.
Smuggler Actions
Standard Actions
- Sail: Place any die. Move your Flagship 1 or 2 spaces.
- Tailwind: Place any die. You may move your Flagship as described in Common Actions.
- Cannons: Place any die. You now have loaded Cannons as described in Battling.
- Repair: Place an even die. Remove up to 2 damage from any of your die slots.
Unique Actions
- Full Sail: Place any die. Move your Flagship a number of spaces up to the value of the die you placed, but at least 1 space. (So placing a “6” die lets you move up to 6 spaces!)
- Negotiate: Place an even die. While your Flagship is at an Island, you may recruit any card from the Market into your Crew, ignoring its cost and suit requirement. You may recruit one more Crew, as described, if you choose to remove one Comrade from the Island.
You cannot recruit more than twice in total, you cannot recruit again if the Island has no Comrades, and you cannot remove the Comrade if the Market is empty.
Battle Victory
When you win a battle, you may choose one of the following options:
- Deal 1 damage and move 1 or 2 spaces immediately, ignoring all other battles in your space.
- Deal 1 damage and gain a reward, exactly as in step 3 of delivering Cargo.
Scoring, Round End & Game End
Ending the Round
When the round ends, score Fame from controlled regions and then clean up.
Score Regions
Check every region for control. Only the Bluefin Squadron or Mollusk Union can control a region, based on which faction has the higher control, calculated as follows:
Bluefin Squadron:
- +1 control per Patrol
- +2 control per Stronghold
- +2 control for their Flagship
Mollusk Union:
- +1 control per Comrade on the region’s Island
- +1 control per Union ship
The controller gains Fame equal to the region’s wealth die. Every region has a wealth die on the center of its tile. They start at “1” but increase as the game progresses.
On a tie for control of a region, no one scores Fame for it.
The Smugglers’ Flagships don’t affect control in any way.
Clean Up
Do these steps in the following order:
- End Game? If any player has at least 30 Fame, end the game. Smugglers score pledged Cargo, then the player with the most Fame wins! On a tie, the tied player with the most gold wins.
- Adjust for Two? With 2 players, the first player must increase one region’s wealth die by 1, then may return all cards in the Market to the box. (Refill it.)
With 3 or 4 players, a region’s wealth will increase whenever a Smuggler delivers Cargo. - Reroll Dice. Each player rolls all of their action dice and places them nearby.
- Pass First Player. Give the first player card to the next clockwise player.
When you’re done cleaning up, begin the next round, starting with the new first player.
Rules Details & Fine Print
The Fine Print
- Piece Limits: All pieces are limited by the contents of the box except for damage tokens. If you are prompted to place a piece from a supply, but its supply is empty, do not place the piece.
- Rules Hierarchy: Crew and plan cards supersede the core rules. Rules that say CANNOT are absolute and cannot be superseded unless a rule explicitly supersedes it with the IGNORE keyword.
- Sidebars & Clarifications: Sidebars, text written in italics and parentheses (like this), and text on the player boards are clarifications and reminders, which are superseded by the core rules they reference.
- Die Values: A die cannot increase over 6, decrease below 1, or wrap from 1 to 6 or reverse. Dice values are public.
- Simultaneous Timing: If two things happen at the same time, the player taking their turn chooses the order.
- Effectless Actions: You can do things with no outcome, such as spending 2 gold to decrease and increase a die.
- Conceding with Two Players: With 2 players, the winner might be clear before the game ends. Conceding is totally okay!
Appendices & Credits
Appendix A: Crew
- Aeronauts (Action): While your Flagship is at an Island, you may spend 1 gold to move your Flagship directly to the other Island of that suit. (Ignore everything between. Not a Tailwind action.)
- Barrelman: When your Flagship moves into Fog, you may treat it as a Strong Current going in any direction.
- Battering Beakhead: When you damage an enemy figure (unless it would be removed), you may move it 1 space. It cannot move off map (and ignores Strong Currents that make it do so). It ignores battle, Harbors, and Treasure.
- Buccaneer: When you win any battle, you may return Buccaneer to the box to return 2 Crew of theirs that you choose to the box.
- Convincing Comrade (Action): Place any die. Take up to 2 Comrades from any 1 Island and place them on another Island. (There are 2 Convincing Comrades.)
- Convincing Official (Action): Place any die. Move up to 2 Patrols, each 1 or 2 spaces. They ignore battle. (There are 2 Convincing Officials.)
- Cutpurse: When you win any battle (not just with your Flagship), gain 2 gold.
- Diver: When your Flagship anchors at Wreckage, gain 1 more gold from its Treasure.
- Documentarian: At the end of your turn, gain 1 gold if your Flagship is in the same region as an enemy Flagship. (Don’t gain more gold with more enemy Flagships.)
- Elder: At the end of your turn, gain 1 gold if you have no damaged die slots (even Crew).
- Emissary: If you would battle as the attacker, you may give the defender 1 gold to ignore the battle.
- Fighters: In any battle (not just with your Flagship), you add +1 to your roll.
- Ghastly Gust (Action): Return Ghastly Gust to the box to move your Flagship directly to any space. (Ignore everything between. Not a Tailwind action.)
- Grogmaster: Once per battle, after you roll, you may take 1 damage to reroll your battle die. If you’re rolling 2 battle dice, reroll them both. (You must be able to place the damage.)
- Gunner: When you win a battle with your Flagship, deal an extra damage.
- Gunner’s Mate: When you place a die on Cannons (even with a Harbor), your Flagship may battle against any space in its region as if it moved there.
- Merchant: When your Flagship anchors at a Harbor (not Island), gain 1 gold.
- Middleman: When you spend gold to change a die value, change it by up to 2 per gold spent.
- Mystic (Action): Once per turn, take 1 damage to deal 1 damage to any figure in your Flagship’s region. (You must be able to place the damage.)
- Naive Noble (Action): Return Naive Noble to the box to take 1 Crew or Cargo from a Flagship in your Flagship’s region, making it Crew or Cargo. (You may swap it from Cargo to Crew, or from Crew to Cargo.)
- Pilot: When your Flagship moves into Wreckage, you may ignore its damage.
- Powder Monkey: When you repair any amount of damage, you may deal 1 damage to any figure in your Flagship’s region.
- Sailor (Action): Place any die. Move your Flagship 1 to 3 spaces. (Not a Sail action.)
- Sea Dog: When your Flagship moves into a Strong Current, you may ignore its effect or move in a different direction.
- Sea Witch: When your Flagship moves off the map (even if you cannot explore), you may move it directly to the space on the nearest opposite edge for free. (See example below.)
- Shipwright (Action): Place any die. Remove all damage from your die slots.
- Trawler (Action): Place any die. Move your Flagship 1 or 2 spaces. You may gain Treasure gold even if you don’t anchor at it. (Not a Sail action.)
- Whispering Wind (Action): Once per turn, spend 2 gold to move your Flagship directly to any space with Tailwind terrain. (Ignore everything between. Not a Tailwind action.)
Appendix B: Plans
For the Cutter and Gunship, see pages 18–19.
- Close Call: Play at the start of a battle with you, even outside your turn, then discard. Ignore the battle. (If it’s your turn, you can keep moving if you have movement left.)
- Dynamic Entry (2x): Increase your die on Cannons by 2 (not above 6). Then, you may move your Flagship directly to any space with Tailwind terrain.
- Enlist: Play as an action, then discard. Choose any 1 Island with any Comrades. Recruit any number of Crew of its suit, ignoring cost. Refill the Market only when done.
- Evacuation: Play as an action, then discard. Remove all Comrades from 1 Island, and place them on any other Island or Islands. (You may distribute them any way you want.)
- Secret Weapon: Play at the start of a battle with you, even outside your turn, then discard. Instead of rolling 1 battle die, you roll 2 battle dice and add them up. (Your enemy still rolls 1 battle die.) If you win, deal an extra damage.
- Sneak Attack (2x): Play as an action, then discard. Remove up to 2 Patrols from any 1 region whose Island has any Comrades. (Return the Patrols to the Squadron’s supply.)
- Weapon Cache (2x): Play at the start of a battle with you, even outside your turn, then discard. Increase your roll by the number of your Ready Comrades. (You may play both Weapons Cache plans and the Secret Weapon plan.)
Credits
- Game Design: Greg Loring-Albright
- Development Lead: Nick Brachmann
- Illustration: Kyle Ferrin
- Rules and Usability: Joshua Yearsley
- Graphic Design: Nick Brachmann and Pati Hyun
- Copy-Editing: Amanda Valentine and Carina Bissett
- 3D Render: Cory DeVore
- Development: Marshall Britt, Ted Caya, Pati Hyun, Patrick Leder, Brooke Nelson, Cole Wehrle, Joshua Yearsley
Expansions for
Ahoy
Ahoy: Treasure Pack
2025
A 13-card trove of surprising choices for every Ahoy game
75
minutes
View expansion
Ahoy: Rivals & Renegades
2025
Add orcas and turtles to Ahoy’s battle for control of the seas.
75
minutes
Medium Heavy

View expansion
Ahoy: Fang & Fortune
2025
Unleash a growing beast or start a pirate party in Ahoy's wild expansion.
75
minutes
Medium Heavy
View expansion
