
Arkham Horror (Third Edition)
2018
Work together as investigators to stop occult rituals, defeat monsters, and prevent the Ancient Ones from claiming Arkham.
180
minutes
1 - 6
player(s)
14+
Medium Heavy


About this board game
Arkham Horror (Third Edition) is a cooperative board game for 1–6 players, with sessions lasting about 180 minutes. Set in 1926, it casts players as investigators fighting to rid the world of eldritch beings known as the Ancient Ones.
Arkham may be celebrating the Roaring Twenties, but a dark shadow is growing beneath its smoke-filled speakeasies and glittering nightlife. Alien entities lurk beyond space and time, pressing against the thresholds between worlds while occult rituals threaten to unleash horrors into reality.
Working together, players must investigate the city and gather the clues needed to understand the danger. They will also need to confront terrifying monsters, stop occult rituals, and find useful tools and allies if they hope to stand against the forces gathering beyond the veil.
- Cooperative play: All investigators work together against the game’s eldritch threats.
- Investigative objectives: Gather clues and uncover what is happening in Arkham.
- Supernatural conflict: Defeat alien creatures and oppose the Ancient Ones.
- 1920s setting: Explore a city caught between celebration and cosmic horror.
Based on the works of H. P. Lovecraft, Arkham Horror (Third Edition) combines investigation, dangerous encounters, and a desperate struggle to protect the world. Every investigator is part of a small group standing between Arkham and a ruined dominion beyond space and time.

Board Game Rules for
Arkham Horror (Third Edition)
The year is 1926, and it is the height of the Roaring Twenties. Flappers dance till dawn in smoke-filled speakeasies, drinking alcohol supplied by rum runners and the mob. It’s a celebration to end all celebrations in the aftermath of the War to End All Wars.
Yet a dark shadow grows in the city of Arkham. Alien entities known as Ancient Ones lurk in the emptiness beyond space and time, writhing at the thresholds between worlds. Occult rituals must be stopped and alien creatures destroyed before the Ancient Ones make our world their ruined dominion.
Only a handful of investigators stand against the Arkham Horror. Will they prevail?
Arkham Horror is a board game of pulp action and horror for one to six players, playable in two to three hours. The game is set in the fictional town of Arkham, Massachusetts, made famous by H.P. Lovecraft in his writings about the Cthulhu mythos.
Game Overview
Terrible creatures from beyond time and space threaten the city of Arkham. The players must join forces to beat back the approaching doom. If left unchecked, these ancient evils will rise up and destroy not only Arkham, but the entire world.
Arkham Horror is a cooperative game. All players are on the same team and win or lose the game together. Each player controls an intrepid investigator—one of the unlikely few who have become aware of the growing threat to our world. The investigators explore the city, encountering places, people, and creatures both mundane and supernatural. Through these adventures, the investigators hope to gain the clues and resources needed to confront and ultimately thwart the Ancient Ones.
Learning How to Play
This Learn to Play booklet is designed to teach new players how to play Arkham Horror. To make your first game easier, this booklet omits some of the more complex rules and game interactions. The Rules Reference contains the complete rules of the game and addresses all exceptions that are not addressed here. Questions that arise during play are best answered by the Rules Reference.
Sidebars: Sidebars like this one appear throughout this booklet to provide context for rules, visual diagrams, strategy tips, or additional narrative.

- 1 Rules Reference
- 12 Map Tiles (5 Neighborhoods, 7 Streets)
- 4 Scenario Sheets
- 12 Investigator Sheets (with matching token and plastic stand)
- 6 Reference Cards
- 32 Headline Cards
- 40 Archive Cards
- 36 Anomaly Cards
- 96 Event Cards
- 72 Encounter Cards
- 12 Ally Cards
- 28 Item Cards
- 10 Spell Cards
- 26 Special Cards
- 37 Starting Cards
- 12 Condition Cards
- 62 Monster Cards
- 48 Clue/Doom Tokens
- 42 Damage Tokens (36 “1 damage”, 6 “3 damage”)
- 42 Horror Tokens (36 “1 horror”, 6 “3 horror”)
- 40 Money Tokens (31 “1 dollar”, 6 “5 dollar”)
- 24 Remnant Tokens
- 30 Focus Tokens (6 for each skill)
- 5 Anomaly Tokens
- 18 Mythos Tokens
- 10 Marker Tokens
- 6 Activation Tokens
- 6 Dice
- 1 Event Deck Holder
Note: Event and encounter cards have the same backs. Don’t sort until setup.
To set up the game, follow these steps in order:
- Choose Scenario: As a group, choose one of the available scenario sheets. For your first game, we recommend “Approach of Azathoth.” Place that sheet in the play area. Return all other scenario sheets to the game box.
- Prepare Board and Encounters: Arrange the neighborhood and street tiles as shown on the back of the scenario sheet. Each street tile has an icon indicating its type. Use tiles with the indicated icons.
Shuffle the encounter cards separately to create the encounter decks. Use only the street cards and the neighborhood cards that correspond to the neighborhoods used in the current scenario—for “Approach of Azathoth,” use Downtown, Easttown, Merchant District, Northside, and Rivertown. There are exactly eight cards in each of these decks. Be careful not to accidentally include any event cards (see step three). Return all other neighborhood cards to the game box.


- Prepare Event Deck: Each scenario has a unique deck of event cards that correspond to the five neighborhoods in that scenario. Event cards are kept in a single deck despite not sharing the same card back.
There is an identifying label along the bottom-left of each event card that indicates which scenario that card belongs to. Take the 24 event cards for the “Approach of Azathoth” scenario, shuffle them, and place them facedown in the event deck holder. Return the event cards for the other scenarios to the game box.

Event cards: Event cards have card backs that are identical to neighborhood cards. They can be differentiated from neighborhood cards by the clue (
) icon in the top-left corner and the scenario name along the bottom of the card.
Event Deck Holder: The event deck holder keeps the event deck at an angle to allow you to more easily draw cards from both the top and bottom of the deck.
- Create Monster Deck: Gather the monster cards indicated in the “Monster Deck” section on the back of the scenario sheet. Return all other monster cards to the game box.
Place the starting monsters as indicated on the back of the scenario sheet—for “Approach of Azathoth” place one robed figure on Independence Square and a second robed figure on the Black Cave.
Then, shuffle the remaining cards to form the monster deck. Place it ready side up near the board.

Different Card Backs: The cards in the event and monster decks have different card backs, so you can easily tell what card is on top of the deck. After you shuffle a set of event or monster cards, cut the deck so the top card is randomized.
Place the monsters in the indicated spaces ready side up (the side with the larger art showing).
- Create Mythos Cup: The mythos cup is an opaque container (such as a dice bag, a bowl, or the lid of the game box) from which mythos tokens will be drawn at random. You will need to provide your own mythos cup.
Gather the mythos tokens in the quantities indicated on the back of the scenario sheet and put them into the mythos cup. Return the other mythos tokens to the game box.

- Create Headline Deck: Shuffle the headline cards and deal 13 of them into a facedown deck. These 13 cards are the headline deck. Return the other headline cards to the game box.
- Prepare Assets and Display: Separately shuffle the item cards, ally cards, and spell cards to form three decks and place them in the play area. Keep the special cards and condition cards sorted and place them off to the side.
Take the top five cards of the item deck and place them in a faceup row next to the item deck. This row of cards is called the DISPLAY. The items in the display can be gained or bought by having encounters during the game. Certain locations—such as the general store—allow you to buy items from the display by spending money.

Special cards can be items, allies, spells, or talents, but all share the same card back. Conditions are double-sided. You will be instructed to find specific special or condition cards by name, so keep each deck organized alphabetically.
- Prepare Token Pools: Separate all tokens by type and keep them nearby for easy access along with the dice.

- Prepare the Archive: The archive is a collection of cards that are used by scenarios to create an evolving narrative during the game. Archive cards have an assortment of different fronts and backs, but all share a large card number in the top-left corner of the card. Keep all archive cards in a single stack in numerical order until you are instructed to use them.

Each archive card has a number in the top-left corner of the front of the card. Because archive cards can have many different appearances, these card numbers are the best way to identify archive cards. The side of the card with the number in the top-left corner is the front.
- Choose Investigator(s): Each player chooses one of the investigator sheets. There are many investigators, and each one has unique abilities and skills.
Each player takes their respective investigator token (inserted into a plastic stand), one activation token, and one reference card. As a group, choose one player to be the LEADER. That player takes the leader activation token (the one with the flashlight on it) as their activation token. Players are hereafter referred to as “investigators.”- Starting Possessions: Each investigator gains the cards and money tokens indicated in the “Starting Possessions” section on the back of their sheet. Investigator starting cards are easily identified by that investigator’s portrait on the back of the card. Some investigators must choose between two or more of their possessions. You may review your options before making a decision. Return the unchosen cards and all unused investigator starting cards to the game box.
- Starting Space: Place all of the investigator tokens in the starting space indicated on the scenario sheet. The starting space for the “Approach of Azathoth” scenario is the Train Station in Northside.

Investigator Roles: Each investigator has one or two roles described on the back of their sheet. These roles offer advice about the strengths and effective strategies for that investigator and have no mechanical effect. We recommend choosing at least one mystic and one guardian for your first game, but feel free to experiment and have fun with different combinations!
- Final Preparations: With everything in place, all that remains is to set up the clues and doom that await the investigators in the coming story.
- Spawn Starting Clues: Draw the top three cards of the event deck one at a time. For each card, place one clue token in the central area of its corresponding neighborhood tile. Then, add that card to its corresponding neighborhood deck by taking the top two cards of that deck, shuffling all three cards together, and placing them on top of that deck.
- Place Starting Doom: Place one doom token on each space indicated on the back of the scenario sheet. (For “Approach of Azathoth,” these are Arkham Advertiser, Independence Square, Velma’s Diner, the Unvisited Isle, and the Black Cave.)
- Spread Doom Once: Draw the bottom card of the event deck and discard it faceup next to the deck. Place one doom token in each space that has a doom icon next to its name on the card.
- Final Scenario Setup: Resolve any effects in the “Finalize Setup” section on the back of the scenario sheet. (For “Approach of Azathoth,” take cards #2 and #3 from the archive and place them faceup next to the scenario sheet; this area is known as the CODEX. Create the anomaly deck by shuffling the “Temporal Fissure” anomaly cards together and placing them in the play area. Return all other anomaly cards to the game box.) Cards in the codex provide scenario-specific rules and narrative. The codex is explained in detail later. For now, read those cards aloud in order, starting with the front of card #2 (the side with the number on it).

Before you learn more about the phases of the game, it is important that you understand some core concepts that are commonly referenced throughout the game.
Skill Tests
A skill test (or “test”) represents a physical, mental, or social challenge you are facing. Cards instruct you to resolve tests, either by directly instructing you to or by simply showing a skill icon in parentheses.
To resolve a test, roll a number of dice equal to the value shown next to the skill on your investigator sheet. This value can be modified up or down by various game effects, or by a test modifier next to the test declaration (such as “–1”). Even if the modifier reduces your skill value to zero, you roll a minimum of one die.
Each five or six you roll is a SUCCESS. If you roll at least one success, you PASS the test. If you roll zero successes, you FAIL the test. The total number of successes you rolled is called your TEST RESULT, which may be referenced by effects on the card.
After passing or failing a test, follow the card’s instructions for the matching result. If a matching result is not listed, the card has no further effect.
Modifying Tests
Some components allow you to REROLL dice, manipulate dice, or directly add successes to your test result. For example, you can spend a clue token or focus token to reroll one die. These occur after your initial roll but before your final result is determined.
Example Test: Dexter Drake is instructed to test lore (
). He has a lore of four, so he rolls four dice and gets the following results: [1, 2, 2, 5]. He has rolled a single success (the five). One success is enough to pass the test, but he was hoping for more. Dexter’s magical gift ability allows him to reroll one or all of his dice. He doesn’t want to reroll the five, so he decides to reroll only one of the dice. After the reroll, Dexter has rolled both a five and a six, a total of two successes. He has passed this test.

Damage and Horror
Both your physical and mental endurance will be challenged on the streets of Arkham. When you suffer damage or horror, place that many damage or horror tokens on your investigator sheet, respectively.
Your investigator sheet shows your health and sanity values. If you have damage greater than or equal to your health or horror greater than or equal to your sanity, you are DEFEATED.
When you recover health or sanity, you remove that many damage or horror tokens from your sheet, respectively.

Being Defeated
When you are defeated, remove your investigator token from the board and discard all of your cards and tokens.
Not only do you lose your investigator and equipment, the city of Arkham suffers as well. When you are defeated, you must place one doom on the scenario sheet.
You will need to select a new investigator to control. Return your defeated investigator sheet and token to the box and choose a new investigator that has not been played yet during this game.
As in setup, gather your new investigator sheet, investigator token, and unique starting possessions.
After the mythos phase is over, place your investigator token at the starting space (the Train Station for “Approach of Azathoth”). You are ready to continue the investigation.
While Defeated: Between your old investigator being defeated and your new one being placed, you do not have encounters and are unaffected by headline cards; you still draw two mythos tokens during the mythos phase as normal.
Arkham Horror is played over a number of rounds; each round consists of four phases:
- Action Phase: During the action phase, investigators take turns performing up to two actions each (such as moving or attacking monsters).
- Monster Phase: During the monster phase, monsters activate, attack investigators they are engaged with, or ready if they were previously exhausted.
- Encounter Phase: During the encounter phase, investigators take turns resolving an encounter. Each encounter tells a short narrative about what the investigator experiences in their location.
- Mythos Phase: During the mythos phase, each investigator draws two tokens that can cause clues, monsters, and doom to spread across Arkham.
After the mythos phase, the game continues to a new round starting again with the action phase.
Tracking Your Turns: During the action phase and encounter phase, investigators can take their turns in any order. After you perform your two actions, flip your token to its inactive side. After you resolve your encounter, flip your token back to the active side.

Winning the Game
At the start of the game, it is not obvious how you win. You should begin by investigating every lead and studying the clues to unravel the scenario’s mystery and discover a way to fight back against the encroaching doom.
The cards in the codex provide you with objectives that help you progress the scenario. The first objective in “Approach of Azathoth” on card #3 is to have three clues on the scenario sheet. After you complete your first objective, a card is added to the codex that provides you with a new objective. Continuing to complete these objectives eventually leads you to victory.
The Codex: The codex is the collection of cards placed in the play area next to the scenario sheet. These cards add scenario-specific goals and rules to the game. Rules on these cards are in effect until the card is removed from the codex. Many cards show a number of clues you need to research or a number of doom you want to prevent from being placed. These show a clue or doom token next to the text to help you quickly spot them.

Researching Clues
The “Approach of Azathoth” scenario begins with three clues that are spread throughout neighborhoods on the board. By moving to any spaces in those neighborhoods and having ENCOUNTERS (which you will learn about later), you are able to gather those clues. However, it may take a few encounters to find them.
After gathering the clues, use the RESEARCH action (which you will also learn about later) to research your findings. This is how you place the clues you gathered onto the scenario sheet to make progress toward your first goal.
Warding Doom
The cards in the codex also have conditions under which the eldritch forces working against you can hinder your progress. In “Approach to Azathoth,” card #3 is flipped over if there are ever three or more doom on the scenario sheet. You can remove doom from the board to prevent this by using the WARD action (which is described later).
You must not become too obsessed with your investigation because if doom is left unchecked, it can spread across Arkham and quickly overwhelm the entire city, causing you to lose the game. Balancing your approach of researching clues to achieve your goals while also warding off doom is your key to saving Arkham from ultimate peril!
During the action phase, investigators move around the city, gathering resources and fighting off the encroaching evils. Each investigator takes one turn. These turns can be taken in an order of their choice.
During your turn, you perform up to two of the following actions. You can perform each action no more than once per round.
Move Action
Move your investigator token up to two spaces. You may spend money to move farther. For each dollar you spend, you move one additional space, up to a maximum of two additional spaces.
If you move into a space with a ready monster, that monster ENGAGES you. Remove the monster card from the board and place it near your investigator sheet. (When a monster is engaged with you, it is most helpful to keep its exhausted side up—the side shown on the opposite-page sidebar).

Map Spaces: Each neighborhood tile features three spaces (locations) that are separated by white lines. The central area of a neighborhood tile is not a space; you cannot move into it. Each street tile is a single space.
Investigators move to adjacent spaces. Daniela can move up to two spaces using a move action. For her first movement, she moves from Velma’s Diner to the adjacent street space.
Gather Resources Action
When you perform a gather resources action, you gain one dollar.

Focus Action
Choose one skill and gain a focus token that corresponds to that skill. That skill value is increased by one for as long as you have the focus token.
Focus tokens can be spent while resolving a test to reroll dice. For each focus token you spend, reroll one die, even if the skill being tested does not match the focus token.
You can have, at maximum, one of any given focus token. You have a FOCUS LIMIT on your investigator sheet that indicates how many focus tokens you can have at once.

Ward Action
When you perform a ward action, you resolve a lore () test. For each success you roll, you may remove one doom from your space. If you remove two or more doom with a single ward action, you also gain one remnant.

Remnants: Remnants represent the remains of arcane rituals or supernatural creatures. You can use remnants to more safely cast spells or exchange remnants for money during certain encounters at either the Arkham Advertiser or the river docks.
Attack Action
Choose a monster in your space—even one engaged with you or another investigator in your space—and ENGAGE it by placing it near your investigator sheet (if it is not there already). You resolve a strength ( ) test modified by the monster’s attack modifier.
For each success you roll, deal one damage to the monster. Mark this damage by placing that many damage tokens on the monster card. These tokens stay with the monster when it moves. If the monster has damage greater than or equal to its health, you have defeated it. When a monster is defeated, place it on the top of the monster deck; if the monster has a remnant ( ) icon, gain one remnant.

Monster Cards:
- Health: How much damage is required to defeat the monster.
- Attack Modifier: This modifier affects the test during an attack action.
- Evade Modifier: This modifier affects the test during an evade action.
- Remnant: You gain one remnant for defeating a monster that has this icon.
Evade Action
When you are engaged with a monster, the actions you can perform are limited. To disengage monsters, you can perform an evade action by resolving an observation ( ) test modified by the monster’s evade modifier. If you are engaged with multiple monsters, you apply only the modifier that results in you rolling the fewest dice.
For each success you roll, you DISENGAGE and EXHAUST one monster by placing it in your space on the board with its exhausted side up. If you roll enough successes to evade all of the monsters you were engaged with, you may perform one additional action.
While Engaged: While you are engaged with a monster, you can perform only the focus, attack, and evade actions. You cannot resolve an encounter.
Research Action
Most scenarios require you to get a certain number of clues onto the scenario sheet. The research action is the main way of doing this.
When you perform this action, resolve an observation () test. For each success you roll, you may place one of your clues on the scenario sheet.
Trade Action
When you perform a trade action, you and all other investigators in your space may exchange any number of allies, items, spells, money, clues, and/or remnants with one another. Health, sanity, talents, and conditions cannot normally be traded.
Component Actions
In addition to the above actions, some components allow you to perform unique actions that are described on those components. Each component action is preceded by the word “action” in bold.
Delayed
During the game, you might become DELAYED. When you are delayed, tip your investigator token on its side. At the start of your turn during the next action phase, you stand up your token, but you can perform only a single action that turn.

The maligned forces of the mythos lurk in every corner of Arkham, threatening the investigators and furthering their own ends. During the monster phase, monsters move, attack, and advance their own twisted agendas.
Monster States
A monster can either be READY, EXHAUSTED, or ENGAGED based on where it is physically located and what side of the card is showing.
- Ready: Monsters that are ready are actively seeking out investigators and are prepared to move or attack. A monster that is in a space on the board with its ready side showing is ready.
If a ready monster is in the same space as an investigator (for any reason), the monster engages that investigator. Monsters that are exhausted or already engaged do not engage investigators in their spaces. - Exhausted: Monsters that are exhausted are distracted or otherwise encumbered, usually due to being evaded by an investigator. A monster that is in a space with its exhausted side up is exhausted.
An exhausted monster cannot move, attack, or engage investigators. - Engaged: Monsters that are engaged have found an investigator and are about to attack. A monster that is placed next to an investigator’s sheet is engaged with that investigator. Engaged monsters should be kept with their exhausted side showing so you can more easily see what you are up against.
Most monsters can be engaged with only a single investigator at a time. There is no limit to the number of monsters an investigator can be engaged with.

Steps of the Monster Phase
The monster phase is resolved in three steps:
- Ready monsters activate: Each ready monster activates according to its activation text:
- Hunter: Monsters with hunter move toward and engage specific investigators, such as the investigator with the “lowest ” or “most clues.”
- Patrol: Monsters with patrol move toward locations instead of investigators, such as the space with the “most doom” or the “unstable space.”
- Lurker: Monsters with lurker do not move. Instead, they cause some other negative effect to occur, such as placing doom on the board.
When a monster moves, it moves a number of spaces up to its speed, unless the text specifies that it “moves directly,” in which case it is placed in the specified space, regardless of how far away it is. Remember that when a monster enters an investigator’s space, it stops moving and engages that investigator.
The unstable space is a beacon for paranormal activity. The space marked with a doom (
 ) icon on the top event card in the discard pile is the unstable space.
- Hunter: Monsters with hunter move toward and engage specific investigators, such as the investigator with the “lowest
- Engaged monsters attack: Each monster that is engaged with an investigator deals damage and horror to the investigator it is engaged with equal to the number of damage and horror icons at the bottom of the monster’s card.
- Exhausted monsters ready: Each exhausted monster readies; flip the card ready side up. The monster did not move or attack this round, but it is ready to do so next round. Since this monster is now ready, it engages an investigator if there is one in its space.

During the encounter phase, each investigator resolves a short narrative about what they are doing at their current location. These encounters can have a wide variety of effects based on the investigator’s choices and test results. Investigators take turns resolving encounters in an order of their choice.
During your turn, you draw and resolve an encounter card unless you are engaged with a monster. While engaged, you do not get to have an encounter.
If you are in a neighborhood space, draw a card from the matching neighborhood encounter deck and resolve the encounter text matching the name of the space you are in. If you are in a street space, draw a card from the street deck and resolve the encounter matching the type of street you are in.

Encounter Benefits
Neighborhood spaces have icons that indicate what encounters in that space are likely to involve.
The icons to the left of the arrow indicate the skills that are likely to be tested or the type of payment you might be asked to make. The icons to the right of the arrow indicate the expected benefits of the encounter. A reference for these icons is provided on the back of the rules reference.

The icons above “General Store” indicate that you are likely to be asked to spend money, and that you will receive common items for doing so.
Finishing the Encounter
After you finish resolving the effects of an encounter, discard that card to the bottom of the deck it was drawn from unless that card is an event card.
After resolving an encounter on an event card:
- If you gained a clue from your neighborhood, discard that card faceup to the event card discard pile.
- If you did not gain a clue, add it back to the neighborhood by taking the top two cards of the corresponding neighborhood deck, shuffling them together with the event card, and placing them all back on top of that deck.
Clue tokens are necessary to advancing most scenarios. Each clue token on a neighborhood indicates that there is an event card in the top three cards of that neighborhood’s deck that will give you a shot at gaining that clue.
In addition to advancing the investigation, during a test, a clue can be discarded to reroll one die.
Reading Encounters: If you are playing with multiple players, have someone else read your encounter aloud to you. The reader should not reveal the results of a test or a choice until the test has been resolved or the choice has been made. This increases the suspense of every decision!
Gaining Cards by Name: If an effect instructs you to gain a card by name in ALL CAPS, find that card by name in the special cards or conditions decks.
Conditions are double-sided. The blessed and cursed conditions are on opposite sides of the same card. The dark pact condition has hidden information on the back. When you gain it, draw a random copy without looking at the back.

During the mythos phase, each investigator takes a turn drawing tokens from the mythos cup, starting with the leader and proceeding around the table clockwise. On your turn, draw two tokens from the mythos cup, one at a time, and resolve their effects. After you have drawn your tokens, do not return them to the cup.
- Spread Doom (): Spread doom once by discarding the bottom card of the event deck faceup and placing one doom token in the location on that card marked with a doom () icon.
The more doom that builds up on the board, the worse off Arkham will be. Cards in the codex will indicate what terrible things happen as doom accrues. - Spawn Monster (
 ): Spawn one monster by drawing the bottom card of the monster deck and placing it on the board as instructed by its spawn text. If the spawn text refers to a monster’s PREY, that is the investigator that it moves toward when activating.
- Read Headline (
 ): Draw and read the top card of the headline deck. The card effects only you unless it specifies otherwise. Then, discard that card to a faceup discard pile. If you are instructed to draw a headline card while the deck is empty, you must place one doom on the scenario sheet instead.
- Spawn Clue (): Spawn one clue by taking the top card of the event deck and placing one clue token in the area in the center of the corresponding neighborhood. Then, take that card and the top two cards of the corresponding neighborhood deck, shuffle those cards together, and place them on top of the neighborhood deck.
- Gate Burst (
 ): Resolve a gate burst by taking the top card of the event deck and placing one doom token in each space of the corresponding neighborhood. Then, shuffle that card and the entire event discard pile together, and place them on the bottom of the event deck.
- Reckoning (
 ): Resolve the reckoning effects—all effects preceded by the reckoning () icon—of all components in play. Usually this will just be the reckoning effect of the scenario sheet, but some headlines or other cards might also have reckoning effects.
- Blank: When you draw this token, nothing happens. You have been afforded a most brief respite from the ever-growing dangers of the mythos.
Replenishing the Mythos Cup
When you need to draw tokens but the mythos cup is empty, return all mythos tokens being used this game to the cup; then draw from the newly replenished cup.
Adding Mythos Tokens
Some rare game effects instruct you to add tokens to the mythos cup. These tokens should be taken from the game box and added to the mythos cup.
Another Round! After the mythos phase is done, the game continues with a new round, starting with the action phase. This continues until you have won or lost the game.

There are a few more things you need to know to save Arkham. The next several sections describe anomalies and the items, allies, and spells you get along the way.
Gaining Assets
As you have encounters across Arkham, you will gain allies, spells, and items to help you to combat the evils of the mythos. When you gain one of these cards, draw one card from the corresponding deck.
If you are instructed to gain a card with a specific trait (like a “common item” or a “curio item”), reveal cards from the top of the deck until you reveal a card with the indicated trait. Gain that card and shuffle the other revealed cards back into the deck.
The Display
When you gain an item, instead of drawing it from the item deck, you can instead choose an item from the display that has the specified traits (if any). After you take an item from the display, draw a new item to replace it.
If you are instructed to BUY items from the display, you must spend an amount of money equal to the item’s value to take the item.
Hands
While resolving a test, you can use any number of cards with up to two hand icons total. For example, you could use a two-handed shotgun or a one-handed revolver while attacking, but not both at the same time.
There is no limit to the number of items you can carry.
Casting Spells
Unlike items and allies, using spells comes with a cost. When using the game effect on a spell, you must first suffer horror equal to the number of horror icons on the spell card. You may spend remnants instead of suffering horror on a one-for-one basis.
Assigning Damage and Horror
Some cards (mainly allies) have health and sanity values just like investigators. When you suffer damage or horror, you may instead assign it to one of your cards with a health or sanity value by placing the tokens on the card. You cannot assign damage to a card that does not have a health value, nor can you assign horror to one without a sanity value. When an ally or other asset has damage equal to its health or horror greater than or equal to its sanity, you must discard that card.
Sometimes you suffer direct damage or direct horror. Direct damage and direct horror cannot be assigned to allies or items. You must suffer it yourself.
Discarding Cards:
- When you discard a condition, special card, or starting card, return that card to its deck.
- When you discard an ally card, item card, or spell card, place that card on the bottom of its respective deck.

Anomalies are strange and terrifying occurrences such as gateways to other dimensions. These are a result of doom spreading out of control, and are the first big sign that you are in trouble!
Anomalies are not used in every scenario, but are used in “Approach of Azathoth.” A card summarizing these rules (card #2) is added to the codex if they are in effect.
Placing Anomaly Tokens
When any one space has three doom, place an anomaly token in the central area of that neighborhood tile. Likewise, if a neighborhood has a total of five doom, place an anomaly in that neighborhood. Do not place multiple anomaly tokens in the same neighborhood.

Anomalies and Doom
If doom would be placed in any space of a neighborhood tile that has an anomaly, it is placed on the scenario sheet instead, regardless of the number of doom still in the neighborhood.
Removing Anomalies
Both the ward action and anomaly encounters allow you to remove doom from your space. When you have removed all doom from a neighborhood, the anomaly in that neighborhood stabilizes and you remove the anomaly token.
Anomaly Encounters
During your turn of the encounter phase, if you are in a neighborhood with an anomaly, you must have an anomaly encounter instead of a normal neighborhood encounter. You draw the top card of the anomaly deck and resolve the section that corresponds to the amount of doom in your space.

- Third Edition Game Design: Nikki Valens
- Original Game Design: Richard Launius and Kevin Wilson
- Additional Development: Daniel Lovat Clark with Dane Beltrami, Pat Harrigan, and Tim Uren
- Editing: Adam Baker
- Proofreading: Molly Glover with Matt Click
- Board Game Manager: Andrew Fischer
- Arkham Horror Story Review: Kara Centell-Dunk and Matt Newman
- Story Manager: Katrina Ostrander
- Graphic Design: WiL Springer and Evan Simonet
- Graphic Design Manager: Christopher Hosch
- Cover Art: Anders Finer
- Map Tile Art: Jokubas Uoginas
- Art Direction: Jeff Lee Johnson
- Managing Art Director: Melissa Shetler
- Quality Assurance Coordinator: Zach Tewalthomas
- Production Management: Jason Beaudoin and Megan Duehn
- Visual Creative Director: Brian Schomburg
- Senior Project Manager: John Franz-Wichlacz
- Senior Manager of Product Development: Chris Gerber
- Executive Game Designer: Corey Konieczka
- Publisher: Andrew Navaro
Introduction & Overview
The year is 1926, and it is the height of the Roaring Twenties. Flappers dance till dawn in smoke-filled speakeasies, drinking alcohol supplied by rum runners and the mob. It’s a celebration to end all celebrations in the aftermath of the War to End All Wars.
Yet a dark shadow grows in the city of Arkham. Alien entities known as Ancient Ones lurk in the emptiness beyond space and time, writhing at the thresholds between worlds. Occult rituals must be stopped and alien creatures destroyed before the Ancient Ones make our world their ruined dominion.
Only a handful of investigators stand against the Arkham Horror. Will they prevail?
Arkham Horror is a board game of pulp action and horror for one to six players, playable in two to three hours. The game is set in the fictional town of Arkham, Massachusetts, made famous by H.P. Lovecraft in his writings about the Cthulhu mythos.
Game Overview
Terrible creatures from beyond time and space threaten the city of Arkham. The players must join forces to beat back the approaching doom. If left unchecked, these ancient evils will rise up and destroy not only Arkham, but the entire world.
Arkham Horror is a cooperative game. All players are on the same team and win or lose the game together. Each player controls an intrepid investigator—one of the unlikely few who have become aware of the growing threat to our world. The investigators explore the city, encountering places, people, and creatures both mundane and supernatural. Through these adventures, the investigators hope to gain the clues and resources needed to confront and ultimately thwart the Ancient Ones.
Learning How to Play
This Learn to Play booklet is designed to teach new players how to play Arkham Horror. To make your first game easier, this booklet omits some of the more complex rules and game interactions. The Rules Reference contains the complete rules of the game and addresses all exceptions that are not addressed here. Questions that arise during play are best answered by the Rules Reference.
Sidebars: Sidebars like this one appear throughout this booklet to provide context for rules, visual diagrams, strategy tips, or additional narrative.
Components
- 1 Rules Reference
- 12 Map Tiles (5 Neighborhoods, 7 Streets)
- 4 Scenario Sheets
- 12 Investigator Sheets (with matching token and plastic stand)
- 6 Reference Cards
- 32 Headline Cards
- 40 Archive Cards
- 36 Anomaly Cards
- 96 Event Cards
- 72 Encounter Cards
- 12 Ally Cards
- 28 Item Cards
- 10 Spell Cards
- 26 Special Cards
- 37 Starting Cards
- 12 Condition Cards
- 62 Monster Cards
- 48 Clue/Doom Tokens
- 42 Damage Tokens (36 “1 damage”, 6 “3 damage”)
- 42 Horror Tokens (36 “1 horror”, 6 “3 horror”)
- 40 Money Tokens (31 “1 dollar”, 6 “5 dollar”)
- 24 Remnant Tokens
- 30 Focus Tokens (6 for each skill)
- 5 Anomaly Tokens
- 18 Mythos Tokens
- 10 Marker Tokens
- 6 Activation Tokens
- 6 Dice
- 1 Event Deck Holder
Note: Event and encounter cards have the same backs. Don’t sort until setup.
Setup
To set up the game, follow these steps in order:
- Choose Scenario: As a group, choose one of the available scenario sheets. For your first game, we recommend “Approach of Azathoth.” Place that sheet in the play area. Return all other scenario sheets to the game box.
- Prepare Board and Encounters: Arrange the neighborhood and street tiles as shown on the back of the scenario sheet. Each street tile has an icon indicating its type. Use tiles with the indicated icons.
Shuffle the encounter cards separately to create the encounter decks. Use only the street cards and the neighborhood cards that correspond to the neighborhoods used in the current scenario—for “Approach of Azathoth,” use Downtown, Easttown, Merchant District, Northside, and Rivertown. There are exactly eight cards in each of these decks. Be careful not to accidentally include any event cards (see step three). Return all other neighborhood cards to the game box.
- Prepare Event Deck: Each scenario has a unique deck of event cards that correspond to the five neighborhoods in that scenario. Event cards are kept in a single deck despite not sharing the same card back.
There is an identifying label along the bottom-left of each event card that indicates which scenario that card belongs to. Take the 24 event cards for the “Approach of Azathoth” scenario, shuffle them, and place them facedown in the event deck holder. Return the event cards for the other scenarios to the game box.
Event cards: Event cards have card backs that are identical to neighborhood cards. They can be differentiated from neighborhood cards by the clue (
Event Deck Holder: The event deck holder keeps the event deck at an angle to allow you to more easily draw cards from both the top and bottom of the deck.
- Create Monster Deck: Gather the monster cards indicated in the “Monster Deck” section on the back of the scenario sheet. Return all other monster cards to the game box.
Place the starting monsters as indicated on the back of the scenario sheet—for “Approach of Azathoth” place one robed figure on Independence Square and a second robed figure on the Black Cave.
Then, shuffle the remaining cards to form the monster deck. Place it ready side up near the board.
Different Card Backs: The cards in the event and monster decks have different card backs, so you can easily tell what card is on top of the deck. After you shuffle a set of event or monster cards, cut the deck so the top card is randomized.
Place the monsters in the indicated spaces ready side up (the side with the larger art showing).
- Create Mythos Cup: The mythos cup is an opaque container (such as a dice bag, a bowl, or the lid of the game box) from which mythos tokens will be drawn at random. You will need to provide your own mythos cup.
Gather the mythos tokens in the quantities indicated on the back of the scenario sheet and put them into the mythos cup. Return the other mythos tokens to the game box.
- Create Headline Deck: Shuffle the headline cards and deal 13 of them into a facedown deck. These 13 cards are the headline deck. Return the other headline cards to the game box.
- Prepare Assets and Display: Separately shuffle the item cards, ally cards, and spell cards to form three decks and place them in the play area. Keep the special cards and condition cards sorted and place them off to the side.
Take the top five cards of the item deck and place them in a faceup row next to the item deck. This row of cards is called the DISPLAY. The items in the display can be gained or bought by having encounters during the game. Certain locations—such as the general store—allow you to buy items from the display by spending money.
Special cards can be items, allies, spells, or talents, but all share the same card back. Conditions are double-sided. You will be instructed to find specific special or condition cards by name, so keep each deck organized alphabetically.
- Prepare Token Pools: Separate all tokens by type and keep them nearby for easy access along with the dice.
- Prepare the Archive: The archive is a collection of cards that are used by scenarios to create an evolving narrative during the game. Archive cards have an assortment of different fronts and backs, but all share a large card number in the top-left corner of the card. Keep all archive cards in a single stack in numerical order until you are instructed to use them.
Each archive card has a number in the top-left corner of the front of the card. Because archive cards can have many different appearances, these card numbers are the best way to identify archive cards. The side of the card with the number in the top-left corner is the front.
- Choose Investigator(s): Each player chooses one of the investigator sheets. There are many investigators, and each one has unique abilities and skills.
Each player takes their respective investigator token (inserted into a plastic stand), one activation token, and one reference card. As a group, choose one player to be the LEADER. That player takes the leader activation token (the one with the flashlight on it) as their activation token. Players are hereafter referred to as “investigators.”- Starting Possessions: Each investigator gains the cards and money tokens indicated in the “Starting Possessions” section on the back of their sheet. Investigator starting cards are easily identified by that investigator’s portrait on the back of the card. Some investigators must choose between two or more of their possessions. You may review your options before making a decision. Return the unchosen cards and all unused investigator starting cards to the game box.
- Starting Space: Place all of the investigator tokens in the starting space indicated on the scenario sheet. The starting space for the “Approach of Azathoth” scenario is the Train Station in Northside.
Investigator Roles: Each investigator has one or two roles described on the back of their sheet. These roles offer advice about the strengths and effective strategies for that investigator and have no mechanical effect. We recommend choosing at least one mystic and one guardian for your first game, but feel free to experiment and have fun with different combinations!
- Final Preparations: With everything in place, all that remains is to set up the clues and doom that await the investigators in the coming story.
- Spawn Starting Clues: Draw the top three cards of the event deck one at a time. For each card, place one clue token in the central area of its corresponding neighborhood tile. Then, add that card to its corresponding neighborhood deck by taking the top two cards of that deck, shuffling all three cards together, and placing them on top of that deck.
- Place Starting Doom: Place one doom token on each space indicated on the back of the scenario sheet. (For “Approach of Azathoth,” these are Arkham Advertiser, Independence Square, Velma’s Diner, the Unvisited Isle, and the Black Cave.)
- Spread Doom Once: Draw the bottom card of the event deck and discard it faceup next to the deck. Place one doom token in each space that has a doom icon next to its name on the card.
- Final Scenario Setup: Resolve any effects in the “Finalize Setup” section on the back of the scenario sheet. (For “Approach of Azathoth,” take cards #2 and #3 from the archive and place them faceup next to the scenario sheet; this area is known as the CODEX. Create the anomaly deck by shuffling the “Temporal Fissure” anomaly cards together and placing them in the play area. Return all other anomaly cards to the game box.) Cards in the codex provide scenario-specific rules and narrative. The codex is explained in detail later. For now, read those cards aloud in order, starting with the front of card #2 (the side with the number on it).
Core Concepts & Investigator Health
Before you learn more about the phases of the game, it is important that you understand some core concepts that are commonly referenced throughout the game.
Skill Tests
A skill test (or “test”) represents a physical, mental, or social challenge you are facing. Cards instruct you to resolve tests, either by directly instructing you to or by simply showing a skill icon in parentheses.
To resolve a test, roll a number of dice equal to the value shown next to the skill on your investigator sheet. This value can be modified up or down by various game effects, or by a test modifier next to the test declaration (such as “–1”). Even if the modifier reduces your skill value to zero, you roll a minimum of one die.
Each five or six you roll is a SUCCESS. If you roll at least one success, you PASS the test. If you roll zero successes, you FAIL the test. The total number of successes you rolled is called your TEST RESULT, which may be referenced by effects on the card.
After passing or failing a test, follow the card’s instructions for the matching result. If a matching result is not listed, the card has no further effect.
Modifying Tests
Some components allow you to REROLL dice, manipulate dice, or directly add successes to your test result. For example, you can spend a clue token or focus token to reroll one die. These occur after your initial roll but before your final result is determined.
Example Test: Dexter Drake is instructed to test lore (
Damage and Horror
Both your physical and mental endurance will be challenged on the streets of Arkham. When you suffer damage or horror, place that many damage or horror tokens on your investigator sheet, respectively.
Your investigator sheet shows your health and sanity values. If you have damage greater than or equal to your health or horror greater than or equal to your sanity, you are DEFEATED.
When you recover health or sanity, you remove that many damage or horror tokens from your sheet, respectively.
Being Defeated
When you are defeated, remove your investigator token from the board and discard all of your cards and tokens.
Not only do you lose your investigator and equipment, the city of Arkham suffers as well. When you are defeated, you must place one doom on the scenario sheet.
You will need to select a new investigator to control. Return your defeated investigator sheet and token to the box and choose a new investigator that has not been played yet during this game.
As in setup, gather your new investigator sheet, investigator token, and unique starting possessions.
After the mythos phase is over, place your investigator token at the starting space (the Train Station for “Approach of Azathoth”). You are ready to continue the investigation.
While Defeated: Between your old investigator being defeated and your new one being placed, you do not have encounters and are unaffected by headline cards; you still draw two mythos tokens during the mythos phase as normal.
Structure of the Game & Objectives
Arkham Horror is played over a number of rounds; each round consists of four phases:
- Action Phase: During the action phase, investigators take turns performing up to two actions each (such as moving or attacking monsters).
- Monster Phase: During the monster phase, monsters activate, attack investigators they are engaged with, or ready if they were previously exhausted.
- Encounter Phase: During the encounter phase, investigators take turns resolving an encounter. Each encounter tells a short narrative about what the investigator experiences in their location.
- Mythos Phase: During the mythos phase, each investigator draws two tokens that can cause clues, monsters, and doom to spread across Arkham.
After the mythos phase, the game continues to a new round starting again with the action phase.
Tracking Your Turns: During the action phase and encounter phase, investigators can take their turns in any order. After you perform your two actions, flip your token to its inactive side. After you resolve your encounter, flip your token back to the active side.
Winning the Game
At the start of the game, it is not obvious how you win. You should begin by investigating every lead and studying the clues to unravel the scenario’s mystery and discover a way to fight back against the encroaching doom.
The cards in the codex provide you with objectives that help you progress the scenario. The first objective in “Approach of Azathoth” on card #3 is to have three clues on the scenario sheet. After you complete your first objective, a card is added to the codex that provides you with a new objective. Continuing to complete these objectives eventually leads you to victory.
The Codex: The codex is the collection of cards placed in the play area next to the scenario sheet. These cards add scenario-specific goals and rules to the game. Rules on these cards are in effect until the card is removed from the codex. Many cards show a number of clues you need to research or a number of doom you want to prevent from being placed. These show a clue or doom token next to the text to help you quickly spot them.
Researching Clues
The “Approach of Azathoth” scenario begins with three clues that are spread throughout neighborhoods on the board. By moving to any spaces in those neighborhoods and having ENCOUNTERS (which you will learn about later), you are able to gather those clues. However, it may take a few encounters to find them.
After gathering the clues, use the RESEARCH action (which you will also learn about later) to research your findings. This is how you place the clues you gathered onto the scenario sheet to make progress toward your first goal.
Warding Doom
The cards in the codex also have conditions under which the eldritch forces working against you can hinder your progress. In “Approach to Azathoth,” card #3 is flipped over if there are ever three or more doom on the scenario sheet. You can remove doom from the board to prevent this by using the WARD action (which is described later).
You must not become too obsessed with your investigation because if doom is left unchecked, it can spread across Arkham and quickly overwhelm the entire city, causing you to lose the game. Balancing your approach of researching clues to achieve your goals while also warding off doom is your key to saving Arkham from ultimate peril!
Action Phase
During the action phase, investigators move around the city, gathering resources and fighting off the encroaching evils. Each investigator takes one turn. These turns can be taken in an order of their choice.
During your turn, you perform up to two of the following actions. You can perform each action no more than once per round.
Move Action
Move your investigator token up to two spaces. You may spend money to move farther. For each dollar you spend, you move one additional space, up to a maximum of two additional spaces.
If you move into a space with a ready monster, that monster ENGAGES you. Remove the monster card from the board and place it near your investigator sheet. (When a monster is engaged with you, it is most helpful to keep its exhausted side up—the side shown on the opposite-page sidebar).
Map Spaces: Each neighborhood tile features three spaces (locations) that are separated by white lines. The central area of a neighborhood tile is not a space; you cannot move into it. Each street tile is a single space.
Investigators move to adjacent spaces. Daniela can move up to two spaces using a move action. For her first movement, she moves from Velma’s Diner to the adjacent street space.
Gather Resources Action
When you perform a gather resources action, you gain one dollar.
Focus Action
Choose one skill and gain a focus token that corresponds to that skill. That skill value is increased by one for as long as you have the focus token.
Focus tokens can be spent while resolving a test to reroll dice. For each focus token you spend, reroll one die, even if the skill being tested does not match the focus token.
You can have, at maximum, one of any given focus token. You have a FOCUS LIMIT on your investigator sheet that indicates how many focus tokens you can have at once.
Ward Action
When you perform a ward action, you resolve a lore () test. For each success you roll, you may remove one doom from your space. If you remove two or more doom with a single ward action, you also gain one remnant.
Remnants: Remnants represent the remains of arcane rituals or supernatural creatures. You can use remnants to more safely cast spells or exchange remnants for money during certain encounters at either the Arkham Advertiser or the river docks.
Attack Action
Choose a monster in your space—even one engaged with you or another investigator in your space—and ENGAGE it by placing it near your investigator sheet (if it is not there already). You resolve a strength () test modified by the monster’s attack modifier.
For each success you roll, deal one damage to the monster. Mark this damage by placing that many damage tokens on the monster card. These tokens stay with the monster when it moves. If the monster has damage greater than or equal to its health, you have defeated it. When a monster is defeated, place it on the top of the monster deck; if the monster has a remnant () icon, gain one remnant.
Monster Cards:
- Health: How much damage is required to defeat the monster.
- Attack Modifier: This modifier affects the test during an attack action.
- Evade Modifier: This modifier affects the test during an evade action.
- Remnant: You gain one remnant for defeating a monster that has this icon.
Evade Action
When you are engaged with a monster, the actions you can perform are limited. To disengage monsters, you can perform an evade action by resolving an observation () test modified by the monster’s evade modifier. If you are engaged with multiple monsters, you apply only the modifier that results in you rolling the fewest dice.
For each success you roll, you DISENGAGE and EXHAUST one monster by placing it in your space on the board with its exhausted side up. If you roll enough successes to evade all of the monsters you were engaged with, you may perform one additional action.
While Engaged: While you are engaged with a monster, you can perform only the focus, attack, and evade actions. You cannot resolve an encounter.
Research Action
Most scenarios require you to get a certain number of clues onto the scenario sheet. The research action is the main way of doing this.
When you perform this action, resolve an observation () test. For each success you roll, you may place one of your clues on the scenario sheet.
Trade Action
When you perform a trade action, you and all other investigators in your space may exchange any number of allies, items, spells, money, clues, and/or remnants with one another. Health, sanity, talents, and conditions cannot normally be traded.
Component Actions
In addition to the above actions, some components allow you to perform unique actions that are described on those components. Each component action is preceded by the word “action” in bold.
Delayed
During the game, you might become DELAYED. When you are delayed, tip your investigator token on its side. At the start of your turn during the next action phase, you stand up your token, but you can perform only a single action that turn.
Monster Phase
The maligned forces of the mythos lurk in every corner of Arkham, threatening the investigators and furthering their own ends. During the monster phase, monsters move, attack, and advance their own twisted agendas.
Monster States
A monster can either be READY, EXHAUSTED, or ENGAGED based on where it is physically located and what side of the card is showing.
- Ready: Monsters that are ready are actively seeking out investigators and are prepared to move or attack. A monster that is in a space on the board with its ready side showing is ready.
If a ready monster is in the same space as an investigator (for any reason), the monster engages that investigator. Monsters that are exhausted or already engaged do not engage investigators in their spaces. - Exhausted: Monsters that are exhausted are distracted or otherwise encumbered, usually due to being evaded by an investigator. A monster that is in a space with its exhausted side up is exhausted.
An exhausted monster cannot move, attack, or engage investigators. - Engaged: Monsters that are engaged have found an investigator and are about to attack. A monster that is placed next to an investigator’s sheet is engaged with that investigator. Engaged monsters should be kept with their exhausted side showing so you can more easily see what you are up against.
Most monsters can be engaged with only a single investigator at a time. There is no limit to the number of monsters an investigator can be engaged with.
Steps of the Monster Phase
The monster phase is resolved in three steps:
- Ready monsters activate: Each ready monster activates according to its activation text:
- Hunter: Monsters with hunter move toward and engage specific investigators, such as the investigator with the “lowest ” or “most clues.”
- Patrol: Monsters with patrol move toward locations instead of investigators, such as the space with the “most doom” or the “unstable space.”
- Lurker: Monsters with lurker do not move. Instead, they cause some other negative effect to occur, such as placing doom on the board.
When a monster moves, it moves a number of spaces up to its speed, unless the text specifies that it “moves directly,” in which case it is placed in the specified space, regardless of how far away it is. Remember that when a monster enters an investigator’s space, it stops moving and engages that investigator.
The unstable space is a beacon for paranormal activity. The space marked with a doom (
) icon on the top event card in the discard pile is the unstable space. - Hunter: Monsters with hunter move toward and engage specific investigators, such as the investigator with the “lowest
- Engaged monsters attack: Each monster that is engaged with an investigator deals damage and horror to the investigator it is engaged with equal to the number of damage and horror icons at the bottom of the monster’s card.
- Exhausted monsters ready: Each exhausted monster readies; flip the card ready side up. The monster did not move or attack this round, but it is ready to do so next round. Since this monster is now ready, it engages an investigator if there is one in its space.
Encounter Phase
During the encounter phase, each investigator resolves a short narrative about what they are doing at their current location. These encounters can have a wide variety of effects based on the investigator’s choices and test results. Investigators take turns resolving encounters in an order of their choice.
During your turn, you draw and resolve an encounter card unless you are engaged with a monster. While engaged, you do not get to have an encounter.
If you are in a neighborhood space, draw a card from the matching neighborhood encounter deck and resolve the encounter text matching the name of the space you are in. If you are in a street space, draw a card from the street deck and resolve the encounter matching the type of street you are in.
Encounter Benefits
Neighborhood spaces have icons that indicate what encounters in that space are likely to involve.
The icons to the left of the arrow indicate the skills that are likely to be tested or the type of payment you might be asked to make. The icons to the right of the arrow indicate the expected benefits of the encounter. A reference for these icons is provided on the back of the rules reference.
The icons above “General Store” indicate that you are likely to be asked to spend money, and that you will receive common items for doing so.
Finishing the Encounter
After you finish resolving the effects of an encounter, discard that card to the bottom of the deck it was drawn from unless that card is an event card.
After resolving an encounter on an event card:
- If you gained a clue from your neighborhood, discard that card faceup to the event card discard pile.
- If you did not gain a clue, add it back to the neighborhood by taking the top two cards of the corresponding neighborhood deck, shuffling them together with the event card, and placing them all back on top of that deck.
Clue tokens are necessary to advancing most scenarios. Each clue token on a neighborhood indicates that there is an event card in the top three cards of that neighborhood’s deck that will give you a shot at gaining that clue.
In addition to advancing the investigation, during a test, a clue can be discarded to reroll one die.
Reading Encounters: If you are playing with multiple players, have someone else read your encounter aloud to you. The reader should not reveal the results of a test or a choice until the test has been resolved or the choice has been made. This increases the suspense of every decision!
Gaining Cards by Name: If an effect instructs you to gain a card by name in ALL CAPS, find that card by name in the special cards or conditions decks.
Conditions are double-sided. The blessed and cursed conditions are on opposite sides of the same card. The dark pact condition has hidden information on the back. When you gain it, draw a random copy without looking at the back.
Mythos Phase
During the mythos phase, each investigator takes a turn drawing tokens from the mythos cup, starting with the leader and proceeding around the table clockwise. On your turn, draw two tokens from the mythos cup, one at a time, and resolve their effects. After you have drawn your tokens, do not return them to the cup.
- Spread Doom (): Spread doom once by discarding the bottom card of the event deck faceup and placing one doom token in the location on that card marked with a doom () icon.
The more doom that builds up on the board, the worse off Arkham will be. Cards in the codex will indicate what terrible things happen as doom accrues. - Spawn Monster (): Spawn one monster by drawing the bottom card of the monster deck and placing it on the board as instructed by its spawn text. If the spawn text refers to a monster’s PREY, that is the investigator that it moves toward when activating.
- Read Headline (): Draw and read the top card of the headline deck. The card effects only you unless it specifies otherwise. Then, discard that card to a faceup discard pile. If you are instructed to draw a headline card while the deck is empty, you must place one doom on the scenario sheet instead.
- Spawn Clue (): Spawn one clue by taking the top card of the event deck and placing one clue token in the area in the center of the corresponding neighborhood. Then, take that card and the top two cards of the corresponding neighborhood deck, shuffle those cards together, and place them on top of the neighborhood deck.
- Gate Burst (): Resolve a gate burst by taking the top card of the event deck and placing one doom token in each space of the corresponding neighborhood. Then, shuffle that card and the entire event discard pile together, and place them on the bottom of the event deck.
- Reckoning (): Resolve the reckoning effects—all effects preceded by the reckoning () icon—of all components in play. Usually this will just be the reckoning effect of the scenario sheet, but some headlines or other cards might also have reckoning effects.
- Blank: When you draw this token, nothing happens. You have been afforded a most brief respite from the ever-growing dangers of the mythos.
Replenishing the Mythos Cup
When you need to draw tokens but the mythos cup is empty, return all mythos tokens being used this game to the cup; then draw from the newly replenished cup.
Adding Mythos Tokens
Some rare game effects instruct you to add tokens to the mythos cup. These tokens should be taken from the game box and added to the mythos cup.
Another Round! After the mythos phase is done, the game continues with a new round, starting with the action phase. This continues until you have won or lost the game.
Items, Allies, and Spells
There are a few more things you need to know to save Arkham. The next several sections describe anomalies and the items, allies, and spells you get along the way.
Gaining Assets
As you have encounters across Arkham, you will gain allies, spells, and items to help you to combat the evils of the mythos. When you gain one of these cards, draw one card from the corresponding deck.
If you are instructed to gain a card with a specific trait (like a “common item” or a “curio item”), reveal cards from the top of the deck until you reveal a card with the indicated trait. Gain that card and shuffle the other revealed cards back into the deck.
The Display
When you gain an item, instead of drawing it from the item deck, you can instead choose an item from the display that has the specified traits (if any). After you take an item from the display, draw a new item to replace it.
If you are instructed to BUY items from the display, you must spend an amount of money equal to the item’s value to take the item.
Hands
While resolving a test, you can use any number of cards with up to two hand icons total. For example, you could use a two-handed shotgun or a one-handed revolver while attacking, but not both at the same time.
There is no limit to the number of items you can carry.
Casting Spells
Unlike items and allies, using spells comes with a cost. When using the game effect on a spell, you must first suffer horror equal to the number of horror icons on the spell card. You may spend remnants instead of suffering horror on a one-for-one basis.
Assigning Damage and Horror
Some cards (mainly allies) have health and sanity values just like investigators. When you suffer damage or horror, you may instead assign it to one of your cards with a health or sanity value by placing the tokens on the card. You cannot assign damage to a card that does not have a health value, nor can you assign horror to one without a sanity value. When an ally or other asset has damage equal to its health or horror greater than or equal to its sanity, you must discard that card.
Sometimes you suffer direct damage or direct horror. Direct damage and direct horror cannot be assigned to allies or items. You must suffer it yourself.
Discarding Cards:
- When you discard a condition, special card, or starting card, return that card to its deck.
- When you discard an ally card, item card, or spell card, place that card on the bottom of its respective deck.
Anomalies
Anomalies are strange and terrifying occurrences such as gateways to other dimensions. These are a result of doom spreading out of control, and are the first big sign that you are in trouble!
Anomalies are not used in every scenario, but are used in “Approach of Azathoth.” A card summarizing these rules (card #2) is added to the codex if they are in effect.
Placing Anomaly Tokens
When any one space has three doom, place an anomaly token in the central area of that neighborhood tile. Likewise, if a neighborhood has a total of five doom, place an anomaly in that neighborhood. Do not place multiple anomaly tokens in the same neighborhood.
Anomalies and Doom
If doom would be placed in any space of a neighborhood tile that has an anomaly, it is placed on the scenario sheet instead, regardless of the number of doom still in the neighborhood.
Removing Anomalies
Both the ward action and anomaly encounters allow you to remove doom from your space. When you have removed all doom from a neighborhood, the anomaly in that neighborhood stabilizes and you remove the anomaly token.
Anomaly Encounters
During your turn of the encounter phase, if you are in a neighborhood with an anomaly, you must have an anomaly encounter instead of a normal neighborhood encounter. You draw the top card of the anomaly deck and resolve the section that corresponds to the amount of doom in your space.
Credits
- Third Edition Game Design: Nikki Valens
- Original Game Design: Richard Launius and Kevin Wilson
- Additional Development: Daniel Lovat Clark with Dane Beltrami, Pat Harrigan, and Tim Uren
- Editing: Adam Baker
- Proofreading: Molly Glover with Matt Click
- Board Game Manager: Andrew Fischer
- Arkham Horror Story Review: Kara Centell-Dunk and Matt Newman
- Story Manager: Katrina Ostrander
- Graphic Design: WiL Springer and Evan Simonet
- Graphic Design Manager: Christopher Hosch
- Cover Art: Anders Finer
- Map Tile Art: Jokubas Uoginas
- Art Direction: Jeff Lee Johnson
- Managing Art Director: Melissa Shetler
- Quality Assurance Coordinator: Zach Tewalthomas
- Production Management: Jason Beaudoin and Megan Duehn
- Visual Creative Director: Brian Schomburg
- Senior Project Manager: John Franz-Wichlacz
- Senior Manager of Product Development: Chris Gerber
- Executive Game Designer: Corey Konieczka
- Publisher: Andrew Navaro
Expansions for
Arkham Horror (Third Edition)
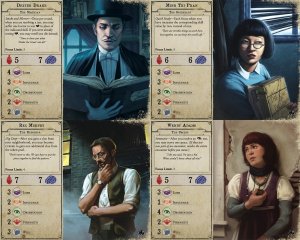
Arkham Horror (Third Edition): Recursive Echoes
2020
Reimagine four familiar investigators with new abilities and starting assets.
180
minutes
View expansion
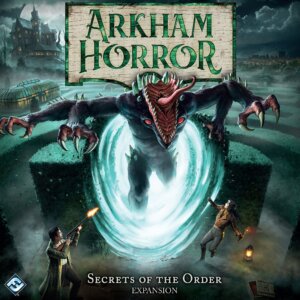
Arkham Horror (Third Edition): Secrets of the Order
2021
Explore French Hill and the terrifying Underworld in three new scenarios.
180
minutes
Medium Heavy
View expansion
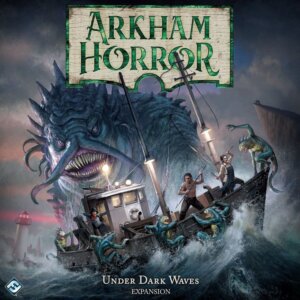
Arkham Horror (Third Edition): Under Dark Waves
2020
Take investigations into the fog-shrouded towns of Kingsport and Innsmouth.
180
minutes
Medium Heavy
View expansion
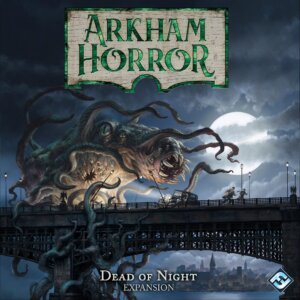
Arkham Horror (Third Edition): Dead of Night
2019
Uncover cults, crime, and cosmic horrors after dark in Arkham.
180
minutes
Medium Heavy
View expansion
