
Clank!: Catacombs
2022
Lay dungeon tiles, use portals, free prisoners, and seek riches before the skeletal dragon catches you.
90
minutes
2 - 4
player(s)
13+
Medium

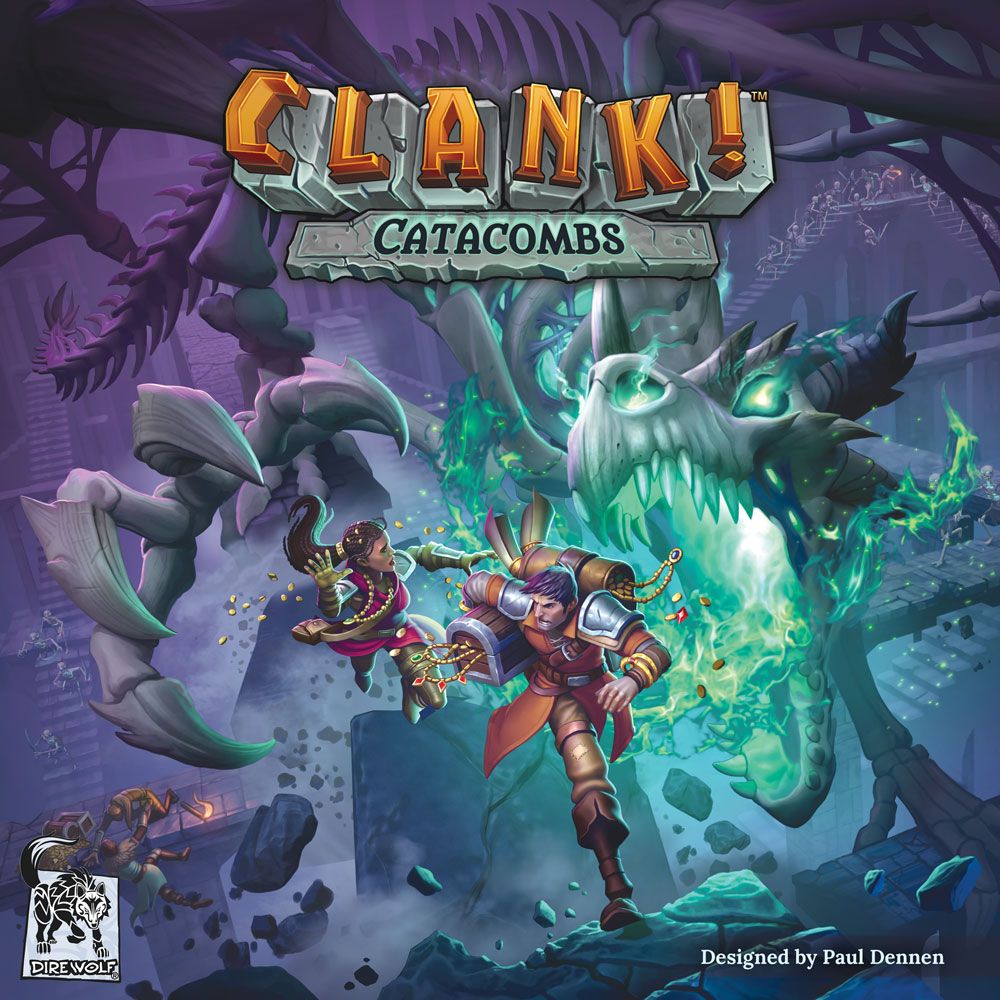
About this board game
Clank!: Catacombs is a standalone deck-building adventure for 2–4 players, with games lasting about 90 minutes. Set in the mysterious catacombs of the skeletal dragon Umbrok Vessna, it challenges you to explore dangerous depths, find your fortune, and escape alive.
Every trip into the catacombs is different because the dungeon is created as you play. Lay tiles to build the underground world, revealing new paths and changing the shape of your adventure from one game to the next.
The catacombs are filled with opportunities and threats, including:
- Portals that transport you around the dungeon depths
- Wayshrines offering vast riches to intrepid explorers
- Prisoners who are counting on you to free them
- Ghosts that may haunt you to death once disturbed
Build and use your deck as you press deeper into the dungeon, balancing the promise of treasure against the danger of staying too long. Your journey can use only the all-new dungeon deck, or you can include cards from previous Clank! expansions.
With its tile-laid dungeon, shifting routes, portals, prisoners, and haunting ghosts, Clank!: Catacombs offers a fresh standalone way to explore the world of Clank!. Venture below, claim what riches you can, and make your escape before the dragon catches you.
/pic7182955.jpg)
Board Game Rules for
Clank!: Catacombs
Leave the board behind with CLANK! Catacombs, a stand-alone deck-building adventure!
The catacombs of the skeletal dragon Umbrok Vessna are mysterious and dangerous. Portals transport you all around the dungeon depths. Wayshrines offer vast riches to intrepid explorers. Prisoners are counting on you to free them. Ghosts, once disturbed, may haunt you to death.
Each trip into the catacombs is unique, as you lay tiles to create the dungeon. You can play using only the all-new Dungeon Deck, or include cards from previous CLANK! expansions.
Find your fortune (and escape the dragon!) in CLANK! Catacombs.
Components


- 1 Clank! Board
- 1 Double-Sided Starting Tile
- 28 Square Tiles (22 in the Depths, 6 in safety)
- 1 Dragon Marker
- 1 Dragon Bag
- 24 Dragon Cubes
- 120 Clank! Cubes (30 of each player color)
- 4 Player Pawns
- 5 Ghost Cubes
- Reserve Cards: 15 Mercenary, 15 Explore, 12 Secret Tome, 1 Goblin
- Four 10-card Starting Decks (Each containing: 6 Burgle, 2 Stumble, 1 Sidestep, 1 Scramble)
- 1 Dungeon Deck (100 cards)
- Token Reference Guide / Rules Supplement

- 1 Market Board
- 7 Artifacts
- 11 Major Secrets
- 20 Minor Secrets
- 2 Backpacks
- 2 Blood Amulets
- 3 Burglar’s Kits
- 3 Crowns
- 20 Prisoners
- 3 Monkey Idols
- 4 Mastery Tokens
- Gold (valued 1, 5, and 10)
- 24 Lockpicks
Enhance your experience with the Dire Wolf Game Room companion app for your PC, smartphone, or tablet. It includes fun variants for many games in the CLANK! family.
Entering the Catacombs
CLANK! Catacombs builds upon the gameplay of CLANK! A Deck-Building Adventure, but it is a complete stand-alone experience. Accordingly, these rules explain everything you’ll need to know to play the game.
CLANK! Catacombs is a deck-building game. Each player starts with their own small deck containing the same cards, but they’ll acquire different cards during their turns. Because cards can do many different things, each player’s deck (and strategy) will become more and more different as the game unfolds. Developing your deck (and strategy) is a key to success.
CLANK! Difference: If you have played the original CLANK!, look for the dragon star symbol throughout these rules. It highlights key differences from that game.
During the game, you have two goals:
- Retrieve an Artifact token and escape the dragon by returning to the place you started, the Crypt above the dungeon.
- Accumulate enough points with your Artifact and other loot to beat out your opponents and earn the title of Greatest Thief in the Realm!

A. Board and Dragon Marker:
- Place the Clank! board to one side of your playing space.
- Place the Dragon marker on the Rage Track of the Clank! board, on the space that shows the numbers of players in the game.
B. Tiles Stack:
- Separate the 28 square tiles by their backs, forming two piles.
- Shuffle the 22 Depths tiles. Place them in a face-down stack in a Bank next to the Clank! board.
- Shuffle the six remaining square tiles. Select two at random and return them to the game box without looking at them; you will not use them in this game. Place the remaining four tiles on top of your shuffled stack of Depths tiles.
C. Bank Items: Add these to the Bank:
- The Gold (valued 1, 5, and 10) and Lockpicks. These are not meant to be limited; if you run out and need more, make any convenient substitution.
- The five white Ghost cubes.
- The Dragon bag, with the 24 black dragon cubes inside.
- Stack the seven Artifacts face up in order of value, with the 5-point Artifact on top and the 20-point Artifact on the bottom.
- Separate the major secrets, minor secrets, and prisoners. Shuffle each of these kinds of tokens face down.
- Place the Market Board in the Bank, then stack these tokens on it: two Backpacks, two Blood Amulets, three Burglar’s Kits, and three Crowns (in order of value, with the 10-point Crown on top and the 8-point Crown on the bottom).
D. Starting Tile and Tokens:
- Place the starting tile in the center of your playing space, with either side face up. Leave room around it for new tiles to be added during the game.
- Place the three Monkey Idols on the Monkey Shrine room.
- Stack the Mastery tokens near the Crypt: one for each player (returning any extra tokens to the box).

E. Reserve and Dungeon Deck:
- Prepare these cards to one side of your playing space, away from the starting tile and Clank! board.
- Create the Reserve, containing the Goblin card and three stacks: one for Mercenary, one for Explore, and one for Secret Tome.
- Shuffle the Dungeon Deck. From it, deal six cards face up to form the Dungeon Row.
- Replace any cards that have the Dragon Attack symbol along the right edge, dealing new ones until you have six cards in the Dungeon Row that don’t show the symbol. Shuffle any replaced cards back into the Dungeon Deck.
- Finally, place the Dungeon Deck next to the Dungeon Row. Leave room next to it to form a Dungeon discard pile during the game.
F. Player Colors:
- Each player chooses a color.
- They take the 30 Clank! cubes of that color, placing them in a personal supply in front of them.
- They place the pawn of that color on the Crypt of the starting tile (outside the dungeon).
G. Personal Supply: Each player adds the following to their personal supply:
- Three Lockpicks (taken from the Bank).
- A 10-card deck containing:
- 6 Burgles
- 2 Stumbles
- 1 Sidestep
- 1 Scramble
- Each player shuffles their deck, then draws five cards from it.
H. Starting the Game:
- The sneakiest player goes first (or you may choose randomly). Play proceeds clockwise from there.
- The first player places 3 Clank! cubes in the Clank! area of the Clank! board. The second player places 2 Clank! The third and fourth players (if there are any) place 1 Clank! and 0 Clank!, respectively.
CLANK! Difference: In Setup, the fixed game board of CLANK! A Deck-Building Adventure is replaced with tiles and a Clank! board, as described in sections A, B, and D. Look for differences in token setup in section C (especially for Artifacts and secrets). Make sure each player begins with three Lockpick tokens as noted in section G.
You start each of your turns with five cards in your hand. The one requirement of your turn is that you must play all your cards before ending it, but you may play them in any order you choose. Cards you play go to a “play area” in front of you, where they remain until the end of your turn for easy reference.
Most cards produce the resources you need to take actions. There are a variety of actions you can take during your turn, described in the Actions section on the next two pages. You may take each action as many times as you like, so long as you have the resources required to do so. You can wait to take actions until after you’ve played all your cards, or take actions between your card plays if you prefer.
Resources
Most cards produce one or more of the following resources:
 SKILL: used for the Acquire a Card and Use a Device actions.
 SWORDS: used for the Fight a Monster action (and sometimes as part of the Movement action).
 BOOTS: used for the Movement action.
Skill, Swords, and Boots pool as you generate them, so you may play multiple cards to gather the resources for one action. You may also split the resources made by one card to take multiple actions. Any Skill, Swords, or Boots you don’t use during your turn are wasted, so try to make them count!
Cards also often generate gold, Clank!, and card draws:
 GOLD: Whenever you gain Gold, take it from the Bank and put it in your personal supply. Each Gold is worth 1 point when the game ends, but you can also use it during the game, such as for the Buy From the Market action.
- CLANK!: Whenever you make Clank! (for example: “+1 Clank!”), add that many cubes from your personal supply to the Clank! area on the Clank! board. (If your supply is empty, you skip this.) It’s also possible to remove Clank! For each negative Clank! you get, remove one of your Clank! cubes from the Clank! area. If you don’t have enough there, you can still remove Clank! later if you add any later on in the turn. Any leftover negative Clank! is lost when your turn ends.
- CARD DRAWS: Whenever you get to draw one or more cards, draw from your own deck, not the Dungeon Deck. Whenever you need to draw a card and have none remaining in your deck, shuffle your discard pile (without adding any cards currently in your play area) to form a new deck.
Order and Resolution
Some cards have effects that depend on tokens you have, other cards in your play area, or things you have done during your turn. You get a card’s effects regardless of the order in which you play your cards.
- Rebel General says “If you have another companion in your play area, draw a card.” You draw the card whether you play the other companion before or after the Rebel General.
- Lie in Wait says “If you’re in a Crystal Cave, -2 Clank!” If you enter a Crystal Cave after playing Lie in Wait, you still get the -2 Clank!
- Lute says (in part) “For each Clank! you make this turn, 1 Gold.” You get the gold for each Clank! you make before or after playing Lute, and even if you get negative Clank! before or after you make Clank!
Once you’ve played all of your cards and taken all the actions you wish, declare the end of your turn.
Acquire a Card
You can use Skill to acquire cards with blue banners from the Dungeon Row.
The Skill Cost of a card is found in its lower right corner. Once you pay the cost, place the card in your discard pile. It does nothing now, but you’ll have the chance to draw and play it later once you reshuffle your discard pile to form a new deck. Do not immediately replace a card taken from the Dungeon Row with a new one from the Dungeon Deck.
You may also acquire cards with yellow banners from the Reserve. These cards are the same in every game. The supply is limited, and can be depleted if players acquire enough cards from the Reserve.

Use a Device
Skill is also how you use Devices—cards with purple banners—in the Dungeon Row. You pay the cost in the lower right corner of the card. However, you perform the USE text listed on the card immediately. Then the card is placed in the Dungeon discard pile (not your own discard pile). Do not immediately replace it with a card from the Dungeon Deck.

Fight a Monster
Monsters are the cards with red banners in the Dungeon Row. Instead of acquiring them with Skill, you fight them using Swords.
The Swords required to defeat a monster are found in its lower right corner.
When you fight a monster in the Dungeon Row, you gain the reward listed in its DEFEAT text. Then the card is placed in the Dungeon discard pile (not your own discard pile). Do not immediately replace it with a card from the Dungeon Deck.
You may also fight the Goblin in the Reserve. It is not discarded when defeated; each player may fight it multiple times each turn, earning its reward each time.

Movement
Boots are how you traverse the tunnels of the dungeon, moving from room to room. (Many rooms have special properties, described in the Tile Features section on pages 10 and 11.)
All tunnels require at least one Boot. Some tunnels have additional requirements and rules:
- Discovering a New Tile: When a tunnel leads to the edge of a tile and there is no adjacent tile, you discover what lies beyond. (This is described in the Discovering a New Tile section on page 9.)
- Footprints: A tunnel with Footprint icons (
 ) requires two Boots to traverse instead of one.
 - Monsters: A tunnel with Monster icons (
 ) deals one damage to you for each icon when you move through it. For each Sword you spend, you prevent damage from one icon. You don’t have to use Swords to move through a Monster icon.
 - Locked Tunnels: You cannot use a tunnel with a lock icon (
 ) unless you spend a Lockpick: take a Lockpick from your personal supply and place it on the tunnel to cover the icon. The tunnel is now permanently “unlocked”; you and your opponents may move through it for the rest of the game. In the rare case where two Lock icons exist in the same tunnel (on two different tiles), you must spend a Lockpick on each one.
 - One-Way Tunnels: A one-way tunnel is shaped like an arrow, and can only be used in the direction of that arrow. You can’t normally move through it in the opposite direction.
CLANK! Difference: Lockpicks are used to move through lock icons. (There is no Master Key available in the Market.)
Buy From the Market
If you’re in a Market room, you may buy a token from the Market Board in the Bank.
All items on the Market Board are available in each Market room, each for a cost of 7 Gold (which you spend by returning the Gold to the Bank). Place each item you buy in your personal supply. As with all actions, you may take the Buy action more than once in a turn. You may also buy more than one of the same kind of item (on the same or different turns).
Items available at the Market are described in the “Token Reference Guide” rules supplement.

Take an Artifact
If you’re in a room with an Artifact token, you may pick it up and place it in your personal supply. You do not have to pick up an Artifact when you first enter the room.
You can’t take an Artifact token if you already have one. Once you’ve picked one up, you’re stuck with it. Choose carefully! You might want to pass up one Artifact to go after a more valuable one elsewhere.
When you take an Artifact token, move the Dragon Marker up one space along the Rage Track. Once you have an Artifact, you will probably want to make your way back to the Crypt on the starting tile.

Pick a Chest, Library, or Prison
Many rooms in the dungeon have an attached Chest, Library, or Prison. While you’re in such a room, you may spend a Lockpick to access the locked feature: take a Lockpick from your personal supply and cover the feature on the tile. It can’t be picked again during this game.
- Chests: When you pick a Chest, immediately take a major secret at random from the Bank and reveal it. The effects of the major secrets are described in the “Token Reference Guide” rules supplement. You cannot spend a Lockpick on a Chest if there are no major secrets remaining in the Bank.
- Libraries: When you pick a Library, immediately acquire a Secret Tome from the reserve and place it in your discard pile (without spending any Skill). You cannot spend a Lockpick on a Library if there are no Secret Tomes remaining in the Reserve.
- Prisons: When you pick a Prison, immediately free two Prisoners. Take two random Prisoner tokens from the Bank and put them face up in your personal supply. The different Prisoners are described in the “Token Reference Guide” rules supplement. You keep them for scoring at the end of the game. You cannot spend a Lockpick on a Prison if there are no Prisoners remaining in the Bank (though you can spend one to free the last Prisoner, if only one remains).
CLANK! Difference: Take an Artifact is an action you can take at any point in your turn—you don’t have to take an Artifact when you first enter a room (as in some previous versions of CLANK!). The Pick a Chest, Library, or Prison action is new.
Discovering a New Tile
Each game of CLANK! Catacombs begins on a single tile, but the dungeon will expand onto other tiles as players move around. When a tunnel leads to the edge of the dungeon (with no adjacent tile), moving along the tunnel lets you discover what lies beyond. Take the next tile from the top of the face down stack in the Bank, reveal it, then place it next to the tile you’re leaving.
- Each new tile must always be added to an empty space; tiles are never stacked on top of each other. You may rotate the new tile in any orientation before placing it.
- A tile must always share an entire edge with at least one other tile (except when playing next to the long edges of the starting tile; then the new tile lines up with either the top or bottom half).
- Placing a new tile completes the tunnel you used to leave the previous tile. This may add icons to the tunnel you’re traveling. You interact with those icons as you continue your move and arrive on the new tile.
- If you don’t have enough Boots for Footprint icons (or Lockpicks for Lock icons), you must place the tile in a different orientation. However, you can interrupt your movement long enough to get help. (Sometimes, Acquiring a Card, Using a Device, or Fighting a Monster might give you what you need to complete your Movement onto a new tile.)
- If the entire stack of tiles is emptied during the game, it becomes impossible to discover any new ones. Players can no longer move off the edge of a tile into undiscovered terrain.
- The first four tiles discovered during a game have a different color. The rest of the tiles are in the “Depths” of the dungeon, which will be explained more in the Game End and Scoring section on page 14.

Tile Features
Artifact
When you first place a new tile that has an Artifact room, take the top Artifact from the stack in the Bank and place it in that room. That Artifact has been “found,” and can now be taken by a player in that room (using the Take an Artifact action).
Some Artifact rooms show one or two “plus” icons. When you find one, instead of placing the top Artifact from the stack, you place the Artifact one or two down from the top.
Example: You discover the tile with the double-plus Artifact room. Currently, the top Artifact of the stack is worth 10 points. The next two below that are the 12-point and 15-point Artifact. You place the 15-point Artifact in the room.
There are more Artifact rooms on tiles than there are Artifacts in the Bank. Once the Artifact stack is empty, you find nothing if you discover an Artifact room. If you discover an Artifact room with more “plus” icons than there are Artifacts below the top of the stack, place the highest-valued Artifact that remains.
Crypt
This is the room you start each game. Returning there with an Artifact is the goal of the game. (See the Game End and Scoring section on page 14.) You cannot return empty handed; you must take an Artifact from the somewhere in the dungeon.
Crystal Cave
When you enter a Crystal Cave, you become exhausted while wandering its maze-like passages. You cannot spend any more Boots for the rest of the turn. You can still move via Teleport (described in the Card Effects section on the next page). However, even if you do, you remain exhausted and can’t spend Boots this turn.
Haunted Tiles
Four of the 22 Depths tiles are haunted by ghosts! When you add a haunted tile to the dungeon, immediately take one Ghost cube from the Bank and place it in the Clank! area. (It will be added to the Dragon Bag during the next attack. See the Ending Your Turn and Dragon Attacks section on page 12 for details.)
Locked Features
While you’re in a room with locked feature, you may take the Pick a Chest, Library, or Prison action described on page 8.
Market
While you’re in a Market room, you may take the Buy From the Market action described on page 8.
Portal
Some tiles include a tunnel that ends in a portal rather than a room. If you move along such a tunnel, you don’t stop on the portal. Instead, you enter it and then exit from any other portal on any tile in the dungeon.
Tunnels connected to portals still use normal rules of movement (such as Monster and Lock icons, and one-way tunnels). However, an entire portal movement—from one room, through both portals, and into another room—requires only one Boot. Cards that let you “teleport” can be used to move through portals, as though the two rooms on either side of the portals are adjacent.
After using the portal, you may continue to move normally if you have additional Boots (or cards that allow you to teleport).
Rewards
Some rooms on tiles give you something when you enter them. You don’t have to end your turn there, but you only get these things once each turn; you must re-enter the room on a later turn to receive the thing again. (You may enter more than one room of the same type during a single turn, receiving something from each one.)
The things you can receive from a room include:
 Minor Secret: Take one minor secret at random from the Bank and reveal it. The effects are described in the “Token Reference Guide” rules supplement. (If the Bank runs out of minor secrets, there is no reward for entering the room.)
 Monkey Idol: Take one monkey idol from the room and put it in your personal supply. (It is worth 5 points at the end of the game. It is not an Artifact.)
- Gold: Take the amount shown from the Bank.
 Healing: Heal 1 damage. (See the Health and Damage section on page 12 for details.)
Wayshrine
While you’re in a Wayshrine, you may mark it during your turn as a special action: take one of the cubes from your personal supply and place it on an empty space around the Wayshrine. If you do, you take 1 Gold from the Bank for every Wayshrine you’ve marked during the game. (So your first Wayshrine is worth 1 Gold, your second is worth 2 Gold, your third is worth 3 Gold, and so on.)
You cannot mark the same Wayshrine more than once. You also cannot mark a Wayshrine if you have no cubes remaining in your personal supply. (However, the cubes you place on Wayshrines will never have to be used as Clank!)
CLANK! Difference: Crystal Caves and Markets work like they did in CLANK! A Deck-Building Adventure. The Crypt is how you escape the dungeon. Rewards in rooms (including minor secrets, which are taken from the Bank) can be claimed only once each turn. Other Tile Features are new, so you should read the other entries in this section.
Ending Your Turn and Dragon Attacks
Once you’ve played all of your cards and taken all the actions you wish for your turn, simply declare the end of your turn. You then do the following, in order:
- Clear Your Play Area and Draw a New Hand: Put all of the cards from your play area into your discard pile. Keep this discard pile face up, to easily distinguish it from your deck. Draw five new cards from your deck in preparation for your next turn.
- Refill the Dungeon Row: If there are fewer than six cards in the Dungeon Row, refill the empty spaces with new cards from the Dungeon Deck. (The Dungeon Row should have no empty spaces at the start of the next player’s turn.) In the rare case that there aren’t enough cards in the Dungeon Deck to fill the Row, the game ends immediately—all remaining players are knocked out.
- Check for a Dragon Attack: If any of the new cards just added to the Dungeon Row has a Dragon Attack symbol, the dragon attacks! It attacks only once, no matter how many Dragon Attack symbols were revealed. Only new Dragon attack symbols cause an attack. Cards that remain in the Dungeon Row for multiple turns do not repeatedly trigger attacks.
To execute a Dragon Attack, take all of the cubes in the Clank! area and put them in the Dragon Bag. Shake up the bag and draw a number of cubes equal to the number shown in the Dragon Marker’s current space of the Rage Track. Each black cube drawn is set aside in the Bank, but each colored cube represents damage dealt to that player. (Undrawn cubes remain in the bag—they might still be drawn later.) The more Clank! you make, the more likely the dragon is to attack you. Managing your noise level is key to survival!
The dragon’s rage level increases throughout the game. Every time an Artifact is picked up (but also, whenever certain minor secrets or prisoners are found), advance the Dragon Marker one space along the Rage Track. This may cause more cubes to be drawn in the next attack. The more cubes being drawn, the deadlier the game becomes. Tread carefully!
In the rare case that the Dragon Bag is empty after an attack, the game ends immediately—all remaining players are knocked out.
Ghosts: Whenever a white Ghost cube is pulled from the bag during an attack, every player takes one damage. Once the attack is over, return any Ghost cubes that were pulled to the Clank! area. (Ghosts will go into the bag again during the next attack.) If a Ghost cube is pulled from the Dragon Bag and you have no cubes in your personal supply to mark the damage, use a black cube that has been set aside in the Bank instead.
Health and Damage
Each player’s health is tracked on a Health Meter on the Clank! Board. When you take damage during the game, place your cubes on the Health Meter of your color, starting on the leftmost space.
- If the damage came from a Dragon Attack, use the cubes that were pulled from the Dragon Bag.
- If the damage came by some other means, take the cubes from your personal supply. You can’t voluntarily take damage this way (for example, moving along a Monster path without a Sword) if you have no cubes in your supply, or if doing so would completely fill your Health Meter!
- Some effects can heal damage you’ve taken. When you heal, take back a cube of your color from your Health Meter and put it in your personal supply. You can use it again later for more Clank!
If your Health Meter is ever completely filled, you are knocked out.
CLANK! Difference: Ghosts are a new kind of cube. The game ends immediately if the Dragon Bag is empty after an attack.
Example Turn


The green player takes her turn by playing the following cards:
- She carries out the text on her cards as she plays them, adding 1 Clank! to the Clank! area for her Stumble, then removing it when she plays Sneak Attack. (She has another -1 Clank! left over from Sneak Attack, which she could use later in the turn if she were to make more Clank!)
- She has a total of two Boots. She uses one of them to move along a tunnel with a monster icon, using one of her Swords to prevent being damaged by it. But she enters a Crystal Cave. She can’t spend any more Boots to move this turn, so she ignores her second Boot.
- Because she is now in a Crystal Cave, she can defeat a Crystal Kobold in the Dungeon Row. She uses her remaining two Swords to do so, gaining 2 Skill (from the Crystal Kobold’s DEFEAT text). She then places the monster in the Dungeon discard pile.
- She now has a total of 5 skill (3 from the cards she played, and 2 more from the monster she defeated). She uses her 5 Skill to acquire an Expert Guide from the Dungeon Row, placing the card in her own discard pile. (She has just acquired the card; she won’t get Skill or Boots from it until she reshuffles her discard pile, draws the card, and plays it.)
- Having played all cards in her hand and used all the resources she can, the green player announces the end of her turn. She puts all the cards she played in her discard pile, then draws five new cards for her next turn.
Next, it’s time to refill the Dungeon Row. There are only four cards there after the green player’s turn, so two cards are now revealed from the top of the Dungeon Deck to fill the empty spaces. One has a Dragon Attack symbol, triggering an attack this turn.

All the cubes in the Clank! area are placed in the Dragon Bag. The Dragon Marker is currently on the fifth space of the Rage Track, so four cubes are drawn from the bag.
One cube is black; it is set aside, affecting no one. The second is green, so the green player takes 1 damage. The last two cubes are both yellow, so the yellow player takes 2 damage.
A game ends when all players have either escaped or have been knocked out.
- Escaping: You voluntarily end your dragon heist when you escape. This happens when you arrive at the Crypt with an Artifact. Finish taking the rest of your turn, then before refilling the Dungeon Row, remove your pawn from the board. Also take one of the Mastery tokens near the Crypt; it is worth an additional 20 points!
- Knocked Out: Your heist ends involuntarily when you’re knocked out. This happens when your Health Meter is full (as detailed in the Health and Damage section on page 12). Lay your pawn on its side. If you don’t have an Artifact, or if your pawn is in the Depths, well… that’s bad for you. Instead of counting your score as described below, you score 0 points.
Depths
The first four tiles discovered during a game are safe, but the 22 darker tiles are in the Depths. The top half of the starting tile is also in the Depths.
Turns After Escaping or Being Knocked Out
Once a player has escaped or has been knocked out, they stop taking regular game turns. From then on, they add no more Clank! to the Clank! area. Cards that affect all players don’t affect them. They take no damage from cubes drawn from the Dragon Bag. They neither draw nor play cards, and they take no regular game actions.
Instead, each time a turn comes for an escaped or knocked out player, they take all the cubes in the Clank! area and put them in the Dragon Bag. Ignoring the Dragon Marker’s current space on the Rage Track and any additional Danger in the Dungeon Row, they draw exactly four cubes (or, in a 2-player game, six cubes). Damage is taken just like in a Dragon Attack.
Scoring
Once all players have escaped or have been knocked out, each player (who retrieved an Artifact and wasn’t knocked out in the Depths) counts their score by adding up the following:
 Artifact: The value of their Artifact. (You can’t score any points without one!)
 Tokens: Points from any other tokens they acquired (including their Mastery token, if they escaped).
- Gold: Points equal to the amount of Gold they accumulated.
 Cards: Points awarded by cards in their deck, including their hand and discard pile. (The top right corner of each card shows the amount it’s worth.)
The player with the most points is the winner and is declared the Greatest Thief in the Realm! In the case of a tie, the tied player with the most valuable Artifact is the winner.
CLANK! Difference: The Depths are the 22 darker tiles, plus the top half of the starting tile. There is no Countdown Track; read above to see how to handle players who escape or are knocked out.
Card Effects
- Acquire: A card’s Acquire text is carried out one time, the moment you acquire it from the Dungeon Row (not when you play it later from your hand).
- Arrive: A card’s Arrive text is carried out immediately when the card is revealed in the Dungeon Row (before any Dragon Attack that may also have been triggered by refilling the Row). If any cards with Arrive text are in the Dungeon Row at the start of a game, carry out that text before the first player takes their turn.
- Danger: For each Danger card in the Dungeon Row, you pull an additional cube from the Dragon Bag during each Dragon Attack.
- Discard: Some cards allow you to discard a card. You can only discard cards in your hand that you haven’t played yet. The card does not have its normal effect, which means discarding can be a useful way to get around cards that generate Clank! If you’re asked to discard a card to get something, you must actually discard a card to get it. Charlatan says “You may discard a card to draw two cards.” If you don’t have a card in your hand to discard, you don’t get to draw two cards.
- Each Player: Most of the time, when “each player” is required to do a thing, the order will not matter. In the rare case that it does (for example: when rotating a tile), begin with the player taking (or ending) their turn and proceed clockwise. (Ignore players who have escaped or who have been knocked out; see the Game End and Scoring section on page 14 for more details.)
- Teleport: Teleportation is a special form of movement that takes you directly from one room to another. No Boots are required for this move (though you remain exhausted if you entered a Crystal Cave this turn). Often, teleporting takes you to an “adjacent room”: one connected by a tunnel to your current room. You ignore any icons along that tunnel, and can even teleport against the arrow of a one-way tunnel. You can teleport off the edge of a tile to discover a new tile beyond.
- Trash: Some cards and tokens can cause you to trash a card. This removes the card from the game entirely, which is a great thing to do to the relatively weak cards that make up your starting deck. When you trash a card, place it in the game box.
Token Reference Guide
Prisoners
 Adventurer: Immediately advance the Dragon marker one space along the Rage Track. Also worth 3 points at the end of the game.
 Barbarian: Immediately gain 2 Swords to use on this turn. Also worth 2 points at the end of the game.
 Cleric: Immediately heal 1 damage. Also worth 2 points at the end of the game.
 Discount Coupon: You may use this token one time while buying an item from the market to pay 5 less Gold. It is not a Prisoner for any purpose (such as Riot, Brave Hero, or the Warrior). (Keep until you use it, then return it to the box.)
 Golden Monkey Bot: This counts as a Monkey Idol for all purposes, though it is worth 3 points at the end of the game (instead of 5).
 Haunted Prisoner: Immediately take a Ghost cube from the Bank and place it in the Clank! area. Also worth 3 points at the end of the game.
 Mayor: Worth 5 points at the end of the game, if you have a mastery token.
 Monk: Worth 1 point at the end of the game for each Wayshrine you’ve marked.
 Peasant: Worth 2 points at the end of the game.
 Primatologist: Worth 5 points at the end of the game, if you have at least one Monkey Idol (which can be the Golden Monkey Bot).
 Prince/Princess: Worth 5 points at the end of the game, if you have a Crown.
 Sorceress: Worth 5 points at the end of the game, if you have at least two Secret Tomes.
 Warrior: Worth 1 point at the end of the game for each Prisoner you have freed (including the Warrior himself).
Major Secrets
 Catacombs Map: Keep this token—for the rest of the game, you may move through one-way tunnels in the opposite direction of the arrow. (Also worth 5 points at the end of the game.)
 Chalice: Keep this token—it is worth 7 points at the end of the game. It is not an Artifact.
 Greater Skill Boost: Immediately gain 5 Skill, then return the token to the box.
 Greater Treasure: This token counts as 5 Gold. You may keep it until the end of the game or spend it normally.
 Potion of Greater Healing: Use during your turn to heal 2 damage. (Keep until you use it, then return it to the box.)
Market Items
 Backpack: Allows you to carry an additional Artifact. (Also worth 5 points at the end of the game.)
 Blood Amulet: You must have at least 5 damage to buy this item. When you buy it, immediately heal 2 damage. (Also worth 7 points at the end of the game.)
 Burglar’s Kit: When you buy this, immediately take two Lockpicks from the Bank. (Also worth 2 points at the end of the game.)
 Crown: Worth the number of points shown. (Each player takes the most valuable Crown available when they buy one.)
Minor Secrets
 Dragon Egg: Keep this token—it is worth 3 points at the end of the game. Advance the Dragon marker one space along the Rage Track.
 Lockpick: Immediately return this secret to the box and take a Lockpick from the Bank.
 Magic Spring: At the end of this turn, trash a card from your discard pile or play area. Return the card and this token to the box.
 Potion of Healing: Use during your turn to heal 1 damage. (Keep until you use it, then return it to the box.)
 Potion of Swiftness: Use during your turn to gain 1 Boot. (Keep until you use it, then return it to the box.)
 Potion of Strength: Use during your turn to gain 2 Swords. (Keep until you use it, then return it to the box.)
 Puzzle Box: Keep this token until you enter a Wayshrine. There, return the token to the box and take a major secret from the Bank.
 Treasure: This token counts as 2 Gold. You may keep it until the end of the game or spend it normally.
Monkey Idol
 Monkey Idol: When you enter the Monkey Shrine room, immediately take one Monkey Idol and put it in your personal supply. It is worth 5 points at the end of the game. A Monkey Idol is not an artifact.
CLANK! Difference: Some market items and secrets differ from CLANK! A Deck-Building Adventure. Prisoners are a new token type, listed on the other side of this sheet.
Party in the Catacombs!
The CLANK! Adventuring Party expansion allows 5 or 6 players to play CLANK! A Deck-Building Adventure. The rules below allow you to mix Adventuring Party with CLANK! Catacombs.
Setup
- To set up a game for 5 or 6 players, take four of the five Artifact tokens from Adventuring Party: the ones worth 10, 15, 20, and 25 points. (Do not use the 30-point Artifact.) Include these Artifacts in the Bank, still stacking all Artifacts in order of increasing value (with the Adventuring Party version on top of any Catacombs Artifact of the same value).
- Do not add the extra Master Key Market item from Adventuring Party (as there are no Master Keys in CLANK! Catacombs). You may use the other Market items (including the Invisibility Cloaks).
- Use all other components from Adventuring Party (the minor secrets, mastery tokens, extra Gold, and additional cards). Place the side board near the Clank! board, using it to track the Dragon’s rage and the health of the fifth and sixth player.
- You may play the Adventuring Party characters (or not, as you choose).


Artifacts
When playing with 5 or 6 players, if you discover a tile with an Artifact room that has one or two “plus icons,” you will not place an Artifact from lower in the Artifact stack. Instead, you place multiple Artifacts from the stack in that single room.
Example: You discover the tile with the double-plus Artifact room. Currently, the top Artifact of the stack is worth 12 points. You place that 12-point Artifact and the next two Artifacts—both worth 15 points—in that room.
A player taking an Artifact from a room with more than one takes the most valuable Artifact available. Remember the Adventuring Party rule that a backpack does not allow you to pick up a second Artifact from the same room!
Uncommon Cases
- Each Wayshrine has space for only four cubes, to be filled by the first four players to reach it. If a fifth or sixth player enters the same Wayshrine, they cannot mark it with a cube.
- When the Ape Lord Phantasm is defeated, a player who has the Golden Monkey Bot prisoner cannot “return” it to the monkey shrine room, as it was never previously there.
Credits
- Game Design: Paul Dennen
- Additional Game Design: Evan Lorentz, Tim McKnight
- Executive Producer: Scott Martins
- Art and Graphic Design: Clay Brooks, Anika Burrell, Nate Storm, Dan Taylor
- Card Illustration: Derek Herring, Rastislav Le, Raul Ramos
- Production: Evan Lorentz
- Game Development: Andy Clautice, Justin Cohen, Julia Duga, Darrell Hardy, Dylan Nelkin, Kevin Spak, Jay Treat, Yuri Tolpin, Caleb Vance
- Special thanks to: All of the awesome Dire Wolf Digital team members, and their friends and families, who helped to playtest CLANK!

Published by: Dire Wolf Digital.
© 2022 Dire Wolf Digital, LLC. All Rights Reserved.
Dire Wolf and the Dire Wolf logo are registered trademarks of Dire Wolf Digital, LLC.
Introduction & Components
Leave the board behind with CLANK! Catacombs, a stand-alone deck-building adventure!
The catacombs of the skeletal dragon Umbrok Vessna are mysterious and dangerous. Portals transport you all around the dungeon depths. Wayshrines offer vast riches to intrepid explorers. Prisoners are counting on you to free them. Ghosts, once disturbed, may haunt you to death.
Each trip into the catacombs is unique, as you lay tiles to create the dungeon. You can play using only the all-new Dungeon Deck, or include cards from previous CLANK! expansions.
Find your fortune (and escape the dragon!) in CLANK! Catacombs.
Components
- 1 Clank! Board
- 1 Double-Sided Starting Tile
- 28 Square Tiles (22 in the Depths, 6 in safety)
- 1 Dragon Marker
- 1 Dragon Bag
- 24 Dragon Cubes
- 120 Clank! Cubes (30 of each player color)
- 4 Player Pawns
- 5 Ghost Cubes
- Reserve Cards: 15 Mercenary, 15 Explore, 12 Secret Tome, 1 Goblin
- Four 10-card Starting Decks (Each containing: 6 Burgle, 2 Stumble, 1 Sidestep, 1 Scramble)
- 1 Dungeon Deck (100 cards)
- Token Reference Guide / Rules Supplement
- 1 Market Board
- 7 Artifacts
- 11 Major Secrets
- 20 Minor Secrets
- 2 Backpacks
- 2 Blood Amulets
- 3 Burglar’s Kits
- 3 Crowns
- 20 Prisoners
- 3 Monkey Idols
- 4 Mastery Tokens
- Gold (valued 1, 5, and 10)
- 24 Lockpicks
Enhance your experience with the Dire Wolf Game Room companion app for your PC, smartphone, or tablet. It includes fun variants for many games in the CLANK! family.
Entering the Catacombs
CLANK! Catacombs builds upon the gameplay of CLANK! A Deck-Building Adventure, but it is a complete stand-alone experience. Accordingly, these rules explain everything you’ll need to know to play the game.
CLANK! Catacombs is a deck-building game. Each player starts with their own small deck containing the same cards, but they’ll acquire different cards during their turns. Because cards can do many different things, each player’s deck (and strategy) will become more and more different as the game unfolds. Developing your deck (and strategy) is a key to success.
CLANK! Difference: If you have played the original CLANK!, look for the dragon star symbol throughout these rules. It highlights key differences from that game.
During the game, you have two goals:
- Retrieve an Artifact token and escape the dragon by returning to the place you started, the Crypt above the dungeon.
- Accumulate enough points with your Artifact and other loot to beat out your opponents and earn the title of Greatest Thief in the Realm!
Setup
A. Board and Dragon Marker:
- Place the Clank! board to one side of your playing space.
- Place the Dragon marker on the Rage Track of the Clank! board, on the space that shows the numbers of players in the game.
B. Tiles Stack:
- Separate the 28 square tiles by their backs, forming two piles.
- Shuffle the 22 Depths tiles. Place them in a face-down stack in a Bank next to the Clank! board.
- Shuffle the six remaining square tiles. Select two at random and return them to the game box without looking at them; you will not use them in this game. Place the remaining four tiles on top of your shuffled stack of Depths tiles.
C. Bank Items: Add these to the Bank:
- The Gold (valued 1, 5, and 10) and Lockpicks. These are not meant to be limited; if you run out and need more, make any convenient substitution.
- The five white Ghost cubes.
- The Dragon bag, with the 24 black dragon cubes inside.
- Stack the seven Artifacts face up in order of value, with the 5-point Artifact on top and the 20-point Artifact on the bottom.
- Separate the major secrets, minor secrets, and prisoners. Shuffle each of these kinds of tokens face down.
- Place the Market Board in the Bank, then stack these tokens on it: two Backpacks, two Blood Amulets, three Burglar’s Kits, and three Crowns (in order of value, with the 10-point Crown on top and the 8-point Crown on the bottom).
D. Starting Tile and Tokens:
- Place the starting tile in the center of your playing space, with either side face up. Leave room around it for new tiles to be added during the game.
- Place the three Monkey Idols on the Monkey Shrine room.
- Stack the Mastery tokens near the Crypt: one for each player (returning any extra tokens to the box).
E. Reserve and Dungeon Deck:
- Prepare these cards to one side of your playing space, away from the starting tile and Clank! board.
- Create the Reserve, containing the Goblin card and three stacks: one for Mercenary, one for Explore, and one for Secret Tome.
- Shuffle the Dungeon Deck. From it, deal six cards face up to form the Dungeon Row.
- Replace any cards that have the Dragon Attack symbol along the right edge, dealing new ones until you have six cards in the Dungeon Row that don’t show the symbol. Shuffle any replaced cards back into the Dungeon Deck.
- Finally, place the Dungeon Deck next to the Dungeon Row. Leave room next to it to form a Dungeon discard pile during the game.
F. Player Colors:
- Each player chooses a color.
- They take the 30 Clank! cubes of that color, placing them in a personal supply in front of them.
- They place the pawn of that color on the Crypt of the starting tile (outside the dungeon).
G. Personal Supply: Each player adds the following to their personal supply:
- Three Lockpicks (taken from the Bank).
- A 10-card deck containing:
- 6 Burgles
- 2 Stumbles
- 1 Sidestep
- 1 Scramble
- Each player shuffles their deck, then draws five cards from it.
H. Starting the Game:
- The sneakiest player goes first (or you may choose randomly). Play proceeds clockwise from there.
- The first player places 3 Clank! cubes in the Clank! area of the Clank! board. The second player places 2 Clank! The third and fourth players (if there are any) place 1 Clank! and 0 Clank!, respectively.
CLANK! Difference: In Setup, the fixed game board of CLANK! A Deck-Building Adventure is replaced with tiles and a Clank! board, as described in sections A, B, and D. Look for differences in token setup in section C (especially for Artifacts and secrets). Make sure each player begins with three Lockpick tokens as noted in section G.
Turn Structure & Resources
You start each of your turns with five cards in your hand. The one requirement of your turn is that you must play all your cards before ending it, but you may play them in any order you choose. Cards you play go to a “play area” in front of you, where they remain until the end of your turn for easy reference.
Most cards produce the resources you need to take actions. There are a variety of actions you can take during your turn, described in the Actions section on the next two pages. You may take each action as many times as you like, so long as you have the resources required to do so. You can wait to take actions until after you’ve played all your cards, or take actions between your card plays if you prefer.
Resources
Most cards produce one or more of the following resources:
- SKILL: used for the Acquire a Card and Use a Device actions.
- SWORDS: used for the Fight a Monster action (and sometimes as part of the Movement action).
- BOOTS: used for the Movement action.
Skill, Swords, and Boots pool as you generate them, so you may play multiple cards to gather the resources for one action. You may also split the resources made by one card to take multiple actions. Any Skill, Swords, or Boots you don’t use during your turn are wasted, so try to make them count!
Cards also often generate gold, Clank!, and card draws:
- GOLD: Whenever you gain Gold, take it from the Bank and put it in your personal supply. Each Gold is worth 1 point when the game ends, but you can also use it during the game, such as for the Buy From the Market action.
- CLANK!: Whenever you make Clank! (for example: “+1 Clank!”), add that many cubes from your personal supply to the Clank! area on the Clank! board. (If your supply is empty, you skip this.) It’s also possible to remove Clank! For each negative Clank! you get, remove one of your Clank! cubes from the Clank! area. If you don’t have enough there, you can still remove Clank! later if you add any later on in the turn. Any leftover negative Clank! is lost when your turn ends.
- CARD DRAWS: Whenever you get to draw one or more cards, draw from your own deck, not the Dungeon Deck. Whenever you need to draw a card and have none remaining in your deck, shuffle your discard pile (without adding any cards currently in your play area) to form a new deck.
Order and Resolution
Some cards have effects that depend on tokens you have, other cards in your play area, or things you have done during your turn. You get a card’s effects regardless of the order in which you play your cards.
- Rebel General says “If you have another companion in your play area, draw a card.” You draw the card whether you play the other companion before or after the Rebel General.
- Lie in Wait says “If you’re in a Crystal Cave, -2 Clank!” If you enter a Crystal Cave after playing Lie in Wait, you still get the -2 Clank!
- Lute says (in part) “For each Clank! you make this turn, 1 Gold.” You get the gold for each Clank! you make before or after playing Lute, and even if you get negative Clank! before or after you make Clank!
Once you’ve played all of your cards and taken all the actions you wish, declare the end of your turn.
Player Actions
Acquire a Card
You can use Skill to acquire cards with blue banners from the Dungeon Row.
The Skill Cost of a card is found in its lower right corner. Once you pay the cost, place the card in your discard pile. It does nothing now, but you’ll have the chance to draw and play it later once you reshuffle your discard pile to form a new deck. Do not immediately replace a card taken from the Dungeon Row with a new one from the Dungeon Deck.
You may also acquire cards with yellow banners from the Reserve. These cards are the same in every game. The supply is limited, and can be depleted if players acquire enough cards from the Reserve.
Use a Device
Skill is also how you use Devices—cards with purple banners—in the Dungeon Row. You pay the cost in the lower right corner of the card. However, you perform the USE text listed on the card immediately. Then the card is placed in the Dungeon discard pile (not your own discard pile). Do not immediately replace it with a card from the Dungeon Deck.
Fight a Monster
Monsters are the cards with red banners in the Dungeon Row. Instead of acquiring them with Skill, you fight them using Swords.
The Swords required to defeat a monster are found in its lower right corner.
When you fight a monster in the Dungeon Row, you gain the reward listed in its DEFEAT text. Then the card is placed in the Dungeon discard pile (not your own discard pile). Do not immediately replace it with a card from the Dungeon Deck.
You may also fight the Goblin in the Reserve. It is not discarded when defeated; each player may fight it multiple times each turn, earning its reward each time.
Movement
Boots are how you traverse the tunnels of the dungeon, moving from room to room. (Many rooms have special properties, described in the Tile Features section on pages 10 and 11.)
All tunnels require at least one Boot. Some tunnels have additional requirements and rules:
- Discovering a New Tile: When a tunnel leads to the edge of a tile and there is no adjacent tile, you discover what lies beyond. (This is described in the Discovering a New Tile section on page 9.)
- Footprints: A tunnel with Footprint icons () requires two Boots to traverse instead of one.
- Monsters: A tunnel with Monster icons () deals one damage to you for each icon when you move through it. For each Sword you spend, you prevent damage from one icon. You don’t have to use Swords to move through a Monster icon.
- Locked Tunnels: You cannot use a tunnel with a lock icon () unless you spend a Lockpick: take a Lockpick from your personal supply and place it on the tunnel to cover the icon. The tunnel is now permanently “unlocked”; you and your opponents may move through it for the rest of the game. In the rare case where two Lock icons exist in the same tunnel (on two different tiles), you must spend a Lockpick on each one.
- One-Way Tunnels: A one-way tunnel is shaped like an arrow, and can only be used in the direction of that arrow. You can’t normally move through it in the opposite direction.
CLANK! Difference: Lockpicks are used to move through lock icons. (There is no Master Key available in the Market.)
Buy From the Market
If you’re in a Market room, you may buy a token from the Market Board in the Bank.
All items on the Market Board are available in each Market room, each for a cost of 7 Gold (which you spend by returning the Gold to the Bank). Place each item you buy in your personal supply. As with all actions, you may take the Buy action more than once in a turn. You may also buy more than one of the same kind of item (on the same or different turns).
Items available at the Market are described in the “Token Reference Guide” rules supplement.
Take an Artifact
If you’re in a room with an Artifact token, you may pick it up and place it in your personal supply. You do not have to pick up an Artifact when you first enter the room.
You can’t take an Artifact token if you already have one. Once you’ve picked one up, you’re stuck with it. Choose carefully! You might want to pass up one Artifact to go after a more valuable one elsewhere.
When you take an Artifact token, move the Dragon Marker up one space along the Rage Track. Once you have an Artifact, you will probably want to make your way back to the Crypt on the starting tile.
Pick a Chest, Library, or Prison
Many rooms in the dungeon have an attached Chest, Library, or Prison. While you’re in such a room, you may spend a Lockpick to access the locked feature: take a Lockpick from your personal supply and cover the feature on the tile. It can’t be picked again during this game.
- Chests: When you pick a Chest, immediately take a major secret at random from the Bank and reveal it. The effects of the major secrets are described in the “Token Reference Guide” rules supplement. You cannot spend a Lockpick on a Chest if there are no major secrets remaining in the Bank.
- Libraries: When you pick a Library, immediately acquire a Secret Tome from the reserve and place it in your discard pile (without spending any Skill). You cannot spend a Lockpick on a Library if there are no Secret Tomes remaining in the Reserve.
- Prisons: When you pick a Prison, immediately free two Prisoners. Take two random Prisoner tokens from the Bank and put them face up in your personal supply. The different Prisoners are described in the “Token Reference Guide” rules supplement. You keep them for scoring at the end of the game. You cannot spend a Lockpick on a Prison if there are no Prisoners remaining in the Bank (though you can spend one to free the last Prisoner, if only one remains).
CLANK! Difference: Take an Artifact is an action you can take at any point in your turn—you don’t have to take an Artifact when you first enter a room (as in some previous versions of CLANK!). The Pick a Chest, Library, or Prison action is new.
Dungeon Exploration & Tile Features
Discovering a New Tile
Each game of CLANK! Catacombs begins on a single tile, but the dungeon will expand onto other tiles as players move around. When a tunnel leads to the edge of the dungeon (with no adjacent tile), moving along the tunnel lets you discover what lies beyond. Take the next tile from the top of the face down stack in the Bank, reveal it, then place it next to the tile you’re leaving.
- Each new tile must always be added to an empty space; tiles are never stacked on top of each other. You may rotate the new tile in any orientation before placing it.
- A tile must always share an entire edge with at least one other tile (except when playing next to the long edges of the starting tile; then the new tile lines up with either the top or bottom half).
- Placing a new tile completes the tunnel you used to leave the previous tile. This may add icons to the tunnel you’re traveling. You interact with those icons as you continue your move and arrive on the new tile.
- If you don’t have enough Boots for Footprint icons (or Lockpicks for Lock icons), you must place the tile in a different orientation. However, you can interrupt your movement long enough to get help. (Sometimes, Acquiring a Card, Using a Device, or Fighting a Monster might give you what you need to complete your Movement onto a new tile.)
- If the entire stack of tiles is emptied during the game, it becomes impossible to discover any new ones. Players can no longer move off the edge of a tile into undiscovered terrain.
- The first four tiles discovered during a game have a different color. The rest of the tiles are in the “Depths” of the dungeon, which will be explained more in the Game End and Scoring section on page 14.
Tile Features
Artifact
When you first place a new tile that has an Artifact room, take the top Artifact from the stack in the Bank and place it in that room. That Artifact has been “found,” and can now be taken by a player in that room (using the Take an Artifact action).
Some Artifact rooms show one or two “plus” icons. When you find one, instead of placing the top Artifact from the stack, you place the Artifact one or two down from the top.
Example: You discover the tile with the double-plus Artifact room. Currently, the top Artifact of the stack is worth 10 points. The next two below that are the 12-point and 15-point Artifact. You place the 15-point Artifact in the room.
There are more Artifact rooms on tiles than there are Artifacts in the Bank. Once the Artifact stack is empty, you find nothing if you discover an Artifact room. If you discover an Artifact room with more “plus” icons than there are Artifacts below the top of the stack, place the highest-valued Artifact that remains.
Crypt
This is the room you start each game. Returning there with an Artifact is the goal of the game. (See the Game End and Scoring section on page 14.) You cannot return empty handed; you must take an Artifact from the somewhere in the dungeon.
Crystal Cave
When you enter a Crystal Cave, you become exhausted while wandering its maze-like passages. You cannot spend any more Boots for the rest of the turn. You can still move via Teleport (described in the Card Effects section on the next page). However, even if you do, you remain exhausted and can’t spend Boots this turn.
Haunted Tiles
Four of the 22 Depths tiles are haunted by ghosts! When you add a haunted tile to the dungeon, immediately take one Ghost cube from the Bank and place it in the Clank! area. (It will be added to the Dragon Bag during the next attack. See the Ending Your Turn and Dragon Attacks section on page 12 for details.)
Locked Features
While you’re in a room with locked feature, you may take the Pick a Chest, Library, or Prison action described on page 8.
Market
While you’re in a Market room, you may take the Buy From the Market action described on page 8.
Portal
Some tiles include a tunnel that ends in a portal rather than a room. If you move along such a tunnel, you don’t stop on the portal. Instead, you enter it and then exit from any other portal on any tile in the dungeon.
Tunnels connected to portals still use normal rules of movement (such as Monster and Lock icons, and one-way tunnels). However, an entire portal movement—from one room, through both portals, and into another room—requires only one Boot. Cards that let you “teleport” can be used to move through portals, as though the two rooms on either side of the portals are adjacent.
After using the portal, you may continue to move normally if you have additional Boots (or cards that allow you to teleport).
Rewards
Some rooms on tiles give you something when you enter them. You don’t have to end your turn there, but you only get these things once each turn; you must re-enter the room on a later turn to receive the thing again. (You may enter more than one room of the same type during a single turn, receiving something from each one.)
The things you can receive from a room include:
- Minor Secret: Take one minor secret at random from the Bank and reveal it. The effects are described in the “Token Reference Guide” rules supplement. (If the Bank runs out of minor secrets, there is no reward for entering the room.)
- Monkey Idol: Take one monkey idol from the room and put it in your personal supply. (It is worth 5 points at the end of the game. It is not an Artifact.)
- Gold: Take the amount shown from the Bank.
- Healing: Heal 1 damage. (See the Health and Damage section on page 12 for details.)
Wayshrine
While you’re in a Wayshrine, you may mark it during your turn as a special action: take one of the cubes from your personal supply and place it on an empty space around the Wayshrine. If you do, you take 1 Gold from the Bank for every Wayshrine you’ve marked during the game. (So your first Wayshrine is worth 1 Gold, your second is worth 2 Gold, your third is worth 3 Gold, and so on.)
You cannot mark the same Wayshrine more than once. You also cannot mark a Wayshrine if you have no cubes remaining in your personal supply. (However, the cubes you place on Wayshrines will never have to be used as Clank!)
CLANK! Difference: Crystal Caves and Markets work like they did in CLANK! A Deck-Building Adventure. The Crypt is how you escape the dungeon. Rewards in rooms (including minor secrets, which are taken from the Bank) can be claimed only once each turn. Other Tile Features are new, so you should read the other entries in this section.
Turn End, Dragon Attacks & Health
Ending Your Turn and Dragon Attacks
Once you’ve played all of your cards and taken all the actions you wish for your turn, simply declare the end of your turn. You then do the following, in order:
- Clear Your Play Area and Draw a New Hand: Put all of the cards from your play area into your discard pile. Keep this discard pile face up, to easily distinguish it from your deck. Draw five new cards from your deck in preparation for your next turn.
- Refill the Dungeon Row: If there are fewer than six cards in the Dungeon Row, refill the empty spaces with new cards from the Dungeon Deck. (The Dungeon Row should have no empty spaces at the start of the next player’s turn.) In the rare case that there aren’t enough cards in the Dungeon Deck to fill the Row, the game ends immediately—all remaining players are knocked out.
- Check for a Dragon Attack: If any of the new cards just added to the Dungeon Row has a Dragon Attack symbol, the dragon attacks! It attacks only once, no matter how many Dragon Attack symbols were revealed. Only new Dragon attack symbols cause an attack. Cards that remain in the Dungeon Row for multiple turns do not repeatedly trigger attacks.
To execute a Dragon Attack, take all of the cubes in the Clank! area and put them in the Dragon Bag. Shake up the bag and draw a number of cubes equal to the number shown in the Dragon Marker’s current space of the Rage Track. Each black cube drawn is set aside in the Bank, but each colored cube represents damage dealt to that player. (Undrawn cubes remain in the bag—they might still be drawn later.) The more Clank! you make, the more likely the dragon is to attack you. Managing your noise level is key to survival!
The dragon’s rage level increases throughout the game. Every time an Artifact is picked up (but also, whenever certain minor secrets or prisoners are found), advance the Dragon Marker one space along the Rage Track. This may cause more cubes to be drawn in the next attack. The more cubes being drawn, the deadlier the game becomes. Tread carefully!
In the rare case that the Dragon Bag is empty after an attack, the game ends immediately—all remaining players are knocked out.
Ghosts: Whenever a white Ghost cube is pulled from the bag during an attack, every player takes one damage. Once the attack is over, return any Ghost cubes that were pulled to the Clank! area. (Ghosts will go into the bag again during the next attack.) If a Ghost cube is pulled from the Dragon Bag and you have no cubes in your personal supply to mark the damage, use a black cube that has been set aside in the Bank instead.
Health and Damage
Each player’s health is tracked on a Health Meter on the Clank! Board. When you take damage during the game, place your cubes on the Health Meter of your color, starting on the leftmost space.
- If the damage came from a Dragon Attack, use the cubes that were pulled from the Dragon Bag.
- If the damage came by some other means, take the cubes from your personal supply. You can’t voluntarily take damage this way (for example, moving along a Monster path without a Sword) if you have no cubes in your supply, or if doing so would completely fill your Health Meter!
- Some effects can heal damage you’ve taken. When you heal, take back a cube of your color from your Health Meter and put it in your personal supply. You can use it again later for more Clank!
If your Health Meter is ever completely filled, you are knocked out.
CLANK! Difference: Ghosts are a new kind of cube. The game ends immediately if the Dragon Bag is empty after an attack.
Example Turn
The green player takes her turn by playing the following cards:
- She carries out the text on her cards as she plays them, adding 1 Clank! to the Clank! area for her Stumble, then removing it when she plays Sneak Attack. (She has another -1 Clank! left over from Sneak Attack, which she could use later in the turn if she were to make more Clank!)
- She has a total of two Boots. She uses one of them to move along a tunnel with a monster icon, using one of her Swords to prevent being damaged by it. But she enters a Crystal Cave. She can’t spend any more Boots to move this turn, so she ignores her second Boot.
- Because she is now in a Crystal Cave, she can defeat a Crystal Kobold in the Dungeon Row. She uses her remaining two Swords to do so, gaining 2 Skill (from the Crystal Kobold’s DEFEAT text). She then places the monster in the Dungeon discard pile.
- She now has a total of 5 skill (3 from the cards she played, and 2 more from the monster she defeated). She uses her 5 Skill to acquire an Expert Guide from the Dungeon Row, placing the card in her own discard pile. (She has just acquired the card; she won’t get Skill or Boots from it until she reshuffles her discard pile, draws the card, and plays it.)
- Having played all cards in her hand and used all the resources she can, the green player announces the end of her turn. She puts all the cards she played in her discard pile, then draws five new cards for her next turn.
Next, it’s time to refill the Dungeon Row. There are only four cards there after the green player’s turn, so two cards are now revealed from the top of the Dungeon Deck to fill the empty spaces. One has a Dragon Attack symbol, triggering an attack this turn.
All the cubes in the Clank! area are placed in the Dragon Bag. The Dragon Marker is currently on the fifth space of the Rage Track, so four cubes are drawn from the bag.
One cube is black; it is set aside, affecting no one. The second is green, so the green player takes 1 damage. The last two cubes are both yellow, so the yellow player takes 2 damage.
Game End & Scoring
A game ends when all players have either escaped or have been knocked out.
- Escaping: You voluntarily end your dragon heist when you escape. This happens when you arrive at the Crypt with an Artifact. Finish taking the rest of your turn, then before refilling the Dungeon Row, remove your pawn from the board. Also take one of the Mastery tokens near the Crypt; it is worth an additional 20 points!
- Knocked Out: Your heist ends involuntarily when you’re knocked out. This happens when your Health Meter is full (as detailed in the Health and Damage section on page 12). Lay your pawn on its side. If you don’t have an Artifact, or if your pawn is in the Depths, well… that’s bad for you. Instead of counting your score as described below, you score 0 points.
Depths
The first four tiles discovered during a game are safe, but the 22 darker tiles are in the Depths. The top half of the starting tile is also in the Depths.
Turns After Escaping or Being Knocked Out
Once a player has escaped or has been knocked out, they stop taking regular game turns. From then on, they add no more Clank! to the Clank! area. Cards that affect all players don’t affect them. They take no damage from cubes drawn from the Dragon Bag. They neither draw nor play cards, and they take no regular game actions.
Instead, each time a turn comes for an escaped or knocked out player, they take all the cubes in the Clank! area and put them in the Dragon Bag. Ignoring the Dragon Marker’s current space on the Rage Track and any additional Danger in the Dungeon Row, they draw exactly four cubes (or, in a 2-player game, six cubes). Damage is taken just like in a Dragon Attack.
Scoring
Once all players have escaped or have been knocked out, each player (who retrieved an Artifact and wasn’t knocked out in the Depths) counts their score by adding up the following:
- Artifact: The value of their Artifact. (You can’t score any points without one!)
- Tokens: Points from any other tokens they acquired (including their Mastery token, if they escaped).
- Gold: Points equal to the amount of Gold they accumulated.
- Cards: Points awarded by cards in their deck, including their hand and discard pile. (The top right corner of each card shows the amount it’s worth.)
The player with the most points is the winner and is declared the Greatest Thief in the Realm! In the case of a tie, the tied player with the most valuable Artifact is the winner.
CLANK! Difference: The Depths are the 22 darker tiles, plus the top half of the starting tile. There is no Countdown Track; read above to see how to handle players who escape or are knocked out.
Card & Token Reference Guide
Card Effects
- Acquire: A card’s Acquire text is carried out one time, the moment you acquire it from the Dungeon Row (not when you play it later from your hand).
- Arrive: A card’s Arrive text is carried out immediately when the card is revealed in the Dungeon Row (before any Dragon Attack that may also have been triggered by refilling the Row). If any cards with Arrive text are in the Dungeon Row at the start of a game, carry out that text before the first player takes their turn.
- Danger: For each Danger card in the Dungeon Row, you pull an additional cube from the Dragon Bag during each Dragon Attack.
- Discard: Some cards allow you to discard a card. You can only discard cards in your hand that you haven’t played yet. The card does not have its normal effect, which means discarding can be a useful way to get around cards that generate Clank! If you’re asked to discard a card to get something, you must actually discard a card to get it. Charlatan says “You may discard a card to draw two cards.” If you don’t have a card in your hand to discard, you don’t get to draw two cards.
- Each Player: Most of the time, when “each player” is required to do a thing, the order will not matter. In the rare case that it does (for example: when rotating a tile), begin with the player taking (or ending) their turn and proceed clockwise. (Ignore players who have escaped or who have been knocked out; see the Game End and Scoring section on page 14 for more details.)
- Teleport: Teleportation is a special form of movement that takes you directly from one room to another. No Boots are required for this move (though you remain exhausted if you entered a Crystal Cave this turn). Often, teleporting takes you to an “adjacent room”: one connected by a tunnel to your current room. You ignore any icons along that tunnel, and can even teleport against the arrow of a one-way tunnel. You can teleport off the edge of a tile to discover a new tile beyond.
- Trash: Some cards and tokens can cause you to trash a card. This removes the card from the game entirely, which is a great thing to do to the relatively weak cards that make up your starting deck. When you trash a card, place it in the game box.
Token Reference Guide
Prisoners
- Adventurer: Immediately advance the Dragon marker one space along the Rage Track. Also worth 3 points at the end of the game.
- Barbarian: Immediately gain 2 Swords to use on this turn. Also worth 2 points at the end of the game.
- Cleric: Immediately heal 1 damage. Also worth 2 points at the end of the game.
- Discount Coupon: You may use this token one time while buying an item from the market to pay 5 less Gold. It is not a Prisoner for any purpose (such as Riot, Brave Hero, or the Warrior). (Keep until you use it, then return it to the box.)
- Golden Monkey Bot: This counts as a Monkey Idol for all purposes, though it is worth 3 points at the end of the game (instead of 5).
- Haunted Prisoner: Immediately take a Ghost cube from the Bank and place it in the Clank! area. Also worth 3 points at the end of the game.
- Mayor: Worth 5 points at the end of the game, if you have a mastery token.
- Monk: Worth 1 point at the end of the game for each Wayshrine you’ve marked.
- Peasant: Worth 2 points at the end of the game.
- Primatologist: Worth 5 points at the end of the game, if you have at least one Monkey Idol (which can be the Golden Monkey Bot).
- Prince/Princess: Worth 5 points at the end of the game, if you have a Crown.
- Sorceress: Worth 5 points at the end of the game, if you have at least two Secret Tomes.
- Warrior: Worth 1 point at the end of the game for each Prisoner you have freed (including the Warrior himself).
Major Secrets
- Catacombs Map: Keep this token—for the rest of the game, you may move through one-way tunnels in the opposite direction of the arrow. (Also worth 5 points at the end of the game.)
- Chalice: Keep this token—it is worth 7 points at the end of the game. It is not an Artifact.
- Greater Skill Boost: Immediately gain 5 Skill, then return the token to the box.
- Greater Treasure: This token counts as 5 Gold. You may keep it until the end of the game or spend it normally.
- Potion of Greater Healing: Use during your turn to heal 2 damage. (Keep until you use it, then return it to the box.)
Market Items
- Backpack: Allows you to carry an additional Artifact. (Also worth 5 points at the end of the game.)
- Blood Amulet: You must have at least 5 damage to buy this item. When you buy it, immediately heal 2 damage. (Also worth 7 points at the end of the game.)
- Burglar’s Kit: When you buy this, immediately take two Lockpicks from the Bank. (Also worth 2 points at the end of the game.)
- Crown: Worth the number of points shown. (Each player takes the most valuable Crown available when they buy one.)
Minor Secrets
- Dragon Egg: Keep this token—it is worth 3 points at the end of the game. Advance the Dragon marker one space along the Rage Track.
- Lockpick: Immediately return this secret to the box and take a Lockpick from the Bank.
- Magic Spring: At the end of this turn, trash a card from your discard pile or play area. Return the card and this token to the box.
- Potion of Healing: Use during your turn to heal 1 damage. (Keep until you use it, then return it to the box.)
- Potion of Swiftness: Use during your turn to gain 1 Boot. (Keep until you use it, then return it to the box.)
- Potion of Strength: Use during your turn to gain 2 Swords. (Keep until you use it, then return it to the box.)
- Puzzle Box: Keep this token until you enter a Wayshrine. There, return the token to the box and take a major secret from the Bank.
- Treasure: This token counts as 2 Gold. You may keep it until the end of the game or spend it normally.
Monkey Idol
- Monkey Idol: When you enter the Monkey Shrine room, immediately take one Monkey Idol and put it in your personal supply. It is worth 5 points at the end of the game. A Monkey Idol is not an artifact.
CLANK! Difference: Some market items and secrets differ from CLANK! A Deck-Building Adventure. Prisoners are a new token type, listed on the other side of this sheet.
Variants & Credits
Party in the Catacombs!
The CLANK! Adventuring Party expansion allows 5 or 6 players to play CLANK! A Deck-Building Adventure. The rules below allow you to mix Adventuring Party with CLANK! Catacombs.
Setup
- To set up a game for 5 or 6 players, take four of the five Artifact tokens from Adventuring Party: the ones worth 10, 15, 20, and 25 points. (Do not use the 30-point Artifact.) Include these Artifacts in the Bank, still stacking all Artifacts in order of increasing value (with the Adventuring Party version on top of any Catacombs Artifact of the same value).
- Do not add the extra Master Key Market item from Adventuring Party (as there are no Master Keys in CLANK! Catacombs). You may use the other Market items (including the Invisibility Cloaks).
- Use all other components from Adventuring Party (the minor secrets, mastery tokens, extra Gold, and additional cards). Place the side board near the Clank! board, using it to track the Dragon’s rage and the health of the fifth and sixth player.
- You may play the Adventuring Party characters (or not, as you choose).
Artifacts
When playing with 5 or 6 players, if you discover a tile with an Artifact room that has one or two “plus icons,” you will not place an Artifact from lower in the Artifact stack. Instead, you place multiple Artifacts from the stack in that single room.
Example: You discover the tile with the double-plus Artifact room. Currently, the top Artifact of the stack is worth 12 points. You place that 12-point Artifact and the next two Artifacts—both worth 15 points—in that room.
A player taking an Artifact from a room with more than one takes the most valuable Artifact available. Remember the Adventuring Party rule that a backpack does not allow you to pick up a second Artifact from the same room!
Uncommon Cases
- Each Wayshrine has space for only four cubes, to be filled by the first four players to reach it. If a fifth or sixth player enters the same Wayshrine, they cannot mark it with a cube.
- When the Ape Lord Phantasm is defeated, a player who has the Golden Monkey Bot prisoner cannot “return” it to the monkey shrine room, as it was never previously there.
Credits
- Game Design: Paul Dennen
- Additional Game Design: Evan Lorentz, Tim McKnight
- Executive Producer: Scott Martins
- Art and Graphic Design: Clay Brooks, Anika Burrell, Nate Storm, Dan Taylor
- Card Illustration: Derek Herring, Rastislav Le, Raul Ramos
- Production: Evan Lorentz
- Game Development: Andy Clautice, Justin Cohen, Julia Duga, Darrell Hardy, Dylan Nelkin, Kevin Spak, Jay Treat, Yuri Tolpin, Caleb Vance
- Special thanks to: All of the awesome Dire Wolf Digital team members, and their friends and families, who helped to playtest CLANK!
Published by: Dire Wolf Digital.
© 2022 Dire Wolf Digital, LLC. All Rights Reserved.
Dire Wolf and the Dire Wolf logo are registered trademarks of Dire Wolf Digital, LLC.
Expansions for
Clank!: Catacombs
Clank! Adventuring Party: Lightning Reflexes Promo Card
2020
A reactive promo card rewarding a deck filled with React cards.
120
minutes
Medium
View expansion
Clank!: Catacombs – Dusty Map Promo Card
2022
Place a new tile anywhere—then choose its orientation as usual.
90
minutes
Medium
View expansion
Clank!: Door to Before Promo Card
2020
A cost-3 Device that lets you revisit a room from this turn.
60
minutes
Medium
View expansion
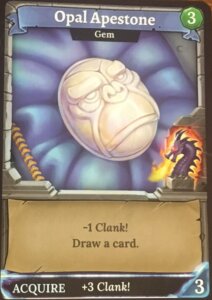
Clank!: Opal Apestone Promo Card
2019
A 2019 Gencon promo gem with card draw, points, and a dragon attack.
60
minutes
Medium
View expansion
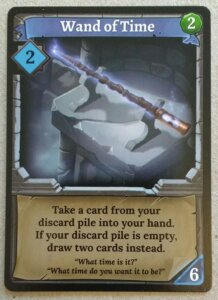
Clank!: Wand of Time Promo Card
2018
A time-themed promo card with a powerful discard-pile action
60
minutes
Medium
View expansion
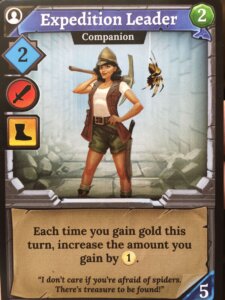
Clank!: Expedition Leader Promo Card
2018
Boost every gold gain this turn with this powerful Companion promo card.
60
minutes
Medium
View expansion
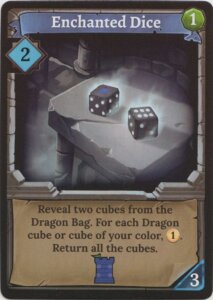
Clank!: Enchanted Dice Promo Card
2017
Reveal two cubes, earn gold, and score a point with this 2017 promo card.
60
minutes
Medium
View expansion
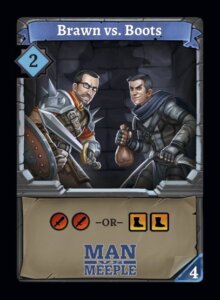
Clank!: Brawn vs. Boots Promo Card
2017
A 2017 promo card offering 2 Fight or 2 Boots for a Skill Cost of 4.
60
minutes
Medium
View expansion
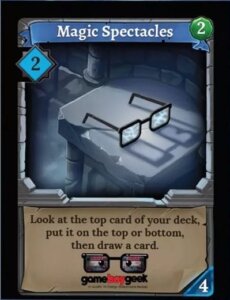
Clank!: Magic Spectacles Promo Card
2017
A focused deck-control effect: inspect your top card, then draw.
60
minutes
Medium
View expansion
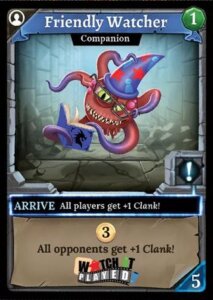
Clank!: Friendly Watcher Promo Card
2017
A 5-Skill promo card that rewards its player while raising Clank! for everyone else.
60
minutes
Medium
View expansion
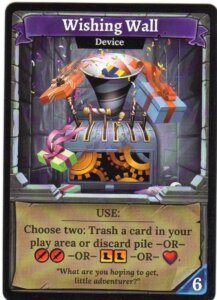
Clank!: Wishing Wall Promo Card
2017
A cost-6 device offering two powerful choices in one turn.
60
minutes
Medium
View expansion
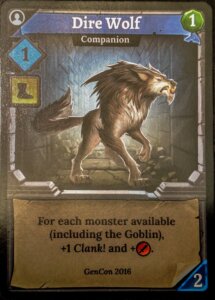
Clank!: Dire Wolf Promo Card
2016
A GenCon 2016 promo card with a scaling Clank and Fight effect.
90
minutes
Medium
View expansion

Clank!: Snack Table Promo Card
2017
A heart-giving snack stop with a coin-powered benefit for others.
60
minutes
Medium
View expansion
Clank! Legacy: Acquisitions Incorporated – The “C” Team Pack
2019
Bring four illustrious characters to your next Clank! adventure.
60
minutes
Medium Light

View expansion
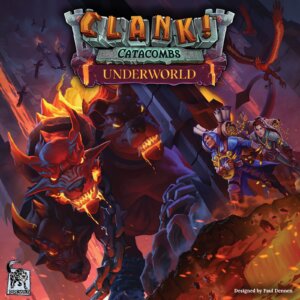
Clank!: Catacombs – Underworld
2025
Descend into a mysterious realm where greater treasures—and greater risks—await.
90
minutes
Medium
View expansion
Clank! Legacy: Acquisitions Incorporated – Upper Management Pack
2019
Bring professional thieves and talent-driven decks to your next Clank! game.
60
minutes
Light

View expansion
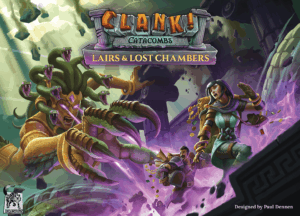
Clank!: Catacombs – Lairs and Lost Chambers
2024
Explore strange lairs and lost Chambers, then grow your legend.
90
minutes
Medium
View expansion

Clank!: Adventuring Party
2020
Recruit unique thieves and brave the dungeon with up to six players.
120
minutes
Medium
View expansion
