
Dune: Imperium – Uprising
2023
Build your influence through deck-building, worker placement, spies, contracts, Fremen wisdom, and mighty sandworms.
120
minutes
1 - 6
player(s)
13+
Medium Heavy

About this board game
Dune: Imperium – Uprising is a standalone strategy game for 1–6 players, with sessions lasting about 120 minutes. It combines deck-building and worker placement in a struggle where military might and political intrigue must be balanced in the pursuit of victory.
Uprising expands the Dune: Imperium system with new tools for shaping your plans. Deploy spies to support your schemes, secure vital contracts to expand your resources, or learn the ways of the Fremen and ride mighty sandworms into battle.
- Deck-building and worker placement: Combine both systems as you develop your plans.
- New strategic tools: Use spies, vital contracts, and Fremen knowledge to pursue your goals.
- Six-player team mode: Pit two teams against each other in the biggest struggle yet.
As a standalone spinoff, Dune: Imperium – Uprising offers its own take on the established blend of mechanisms while remaining connected to the wider game system. The Rise of Ix and Immortality expansions work with Uprising, and almost all cards from the base game can be used with it.
Elements of Uprising can also be used with Dune: Imperium, creating additional ways to combine the two games. Whether you focus on intrigue, resources, Fremen ways, or military power, the choices are yours. The Imperium awaits.
/pic7182955.jpg)
Board Game Rules for
Dune: Imperium – Uprising
Arrakis. Dune. Desert Planet. Home to the most precious resource in the universe—the spice melange. After betraying and destroying House Atreides, the Emperor Shaddam Corrino IV has given House Harkonnen control over the planet Arrakis once more.
But a mysterious warrior named Muad’Dib has risen to power among the Fremen, threatening the schemes of the Emperor and his allies. Other factions have taken notice, as the conflict on Arrakis has reached a breaking point. What was once a blood feud between rival Great Houses has become something greater. From lowly smugglers to Bene Gesserit sisters to the Emperor himself, many have critical roles to play in determining the future of the Imperium. As always, one thing remains true:
Whoever controls the spice controls the universe…
Across the Imperium
This page contains no game rules; you can skip ahead if you’d like. But if you don’t know much about the world of Dune, or want to learn how the game board connects to the story, see below.
DUNE: IMPERIUM — UPRISING is a deck-building worker placement game that finds inspiration in elements and characters from the Dune legacy, both the films from Legendary Pictures and the seminal literary series from Frank Herbert, Brian Herbert, and Kevin J. Anderson.
Note: The game comes with multiple leaders from some of the Great Houses. For the most authentic story experience, more than one leader from the same House shouldn’t be used in the same game. But the game is also designed to allow nonstandard leader combinations and “What If?” scenarios.
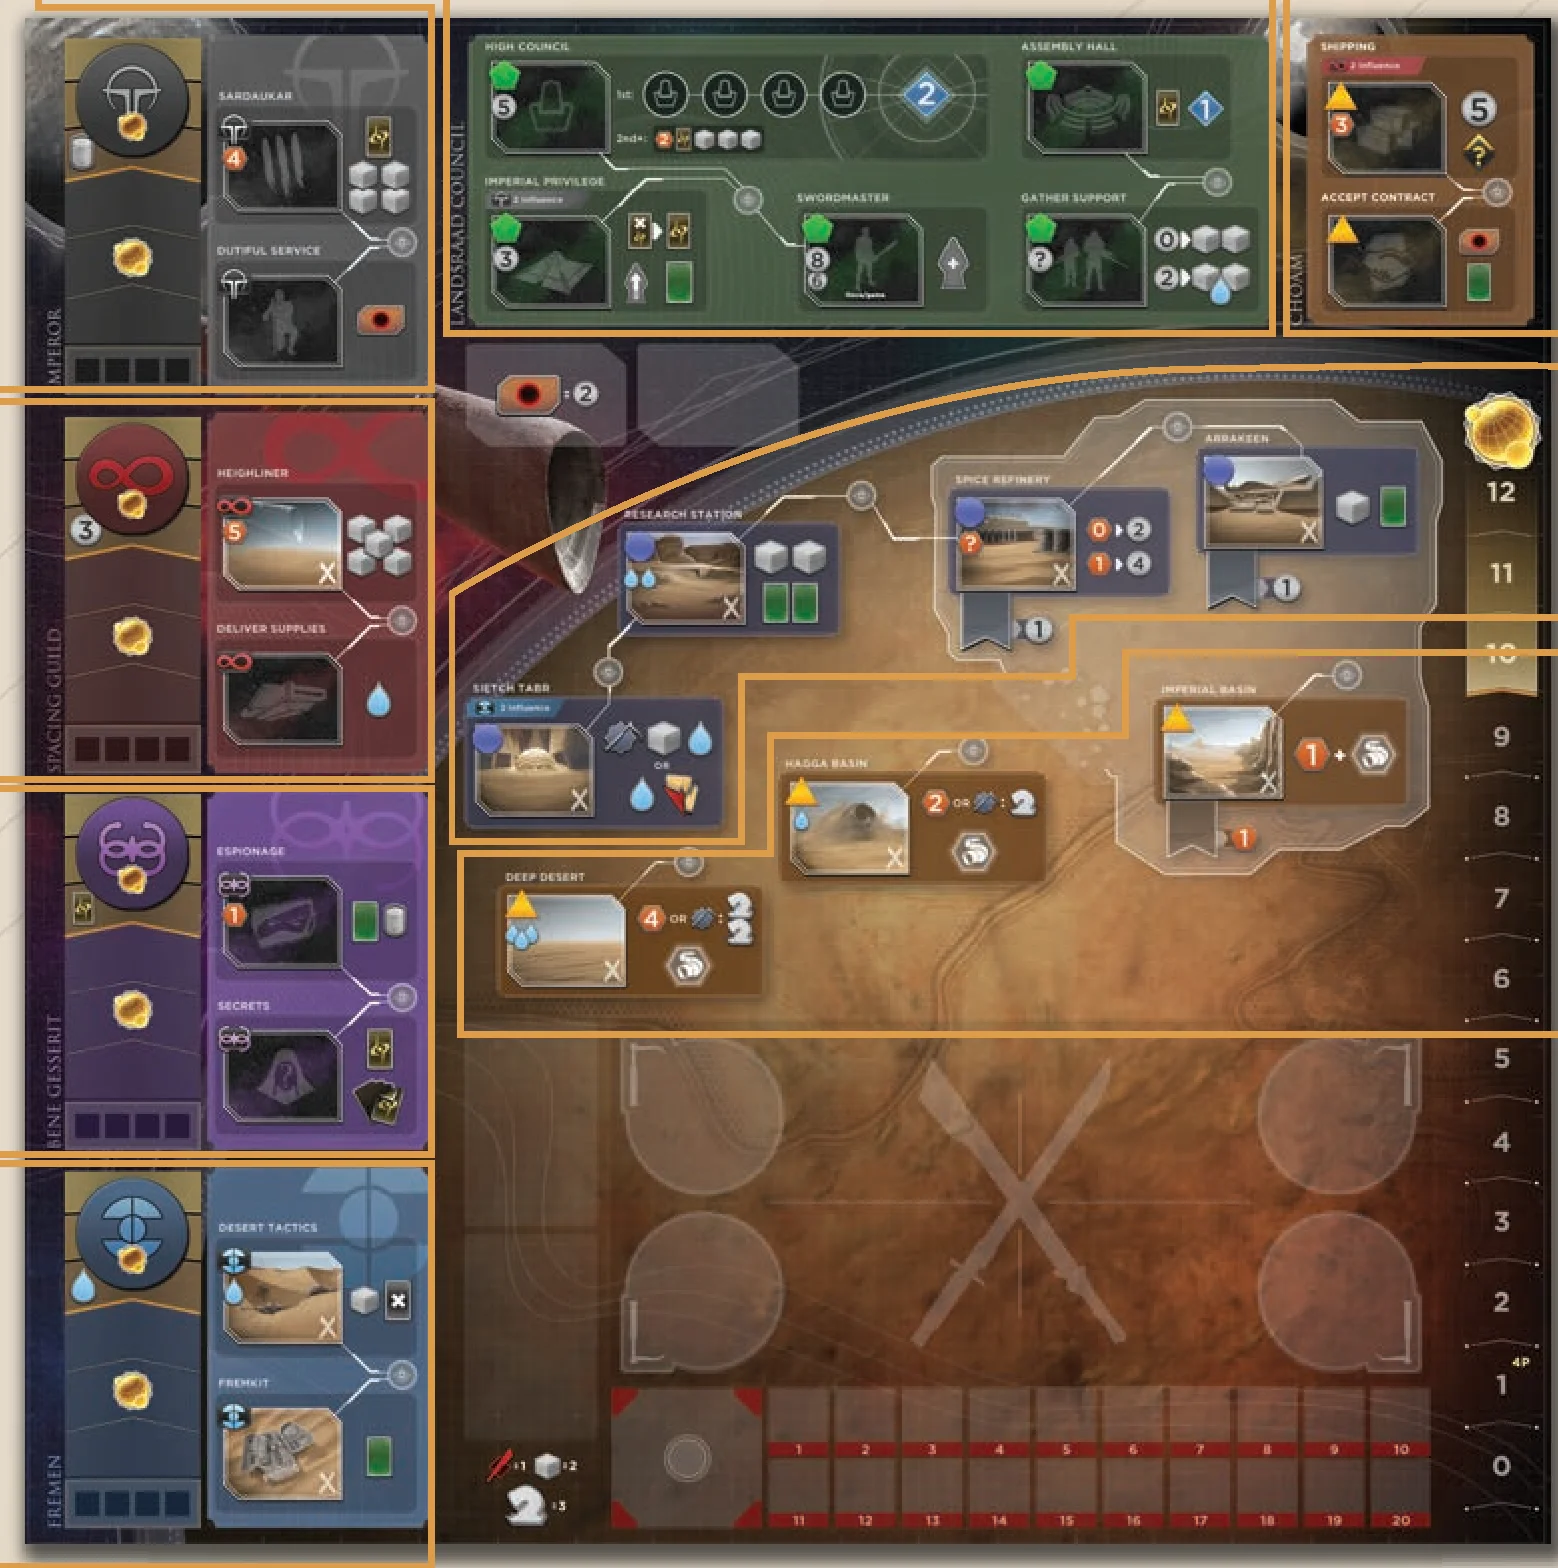
- The Emperor / Shaddam IV: Shaddam IV of House Corrino is the ruthless Emperor of the Known Universe. Through inroads with him, your wealth will increase and you may be granted assistance from his elite military—the Sardaukar.
- The Landsraad: The Emperor presides over the Landsraad, the governing body that represents the Great Houses of the Imperium. It’s no coincidence that Solari goes a long way here at making connections, earning favors, or gaining a permanent strategic advantage.
- CHOAM: The Combine Honnete Ober Advancer Mercantiles (or simply CHOAM) is a massive commercial organization that spans the Imperium. Filling their trade contracts yields Solari, the main currency of the Imperium, while selling them your spice brings even greater payoffs and strengthens important political pacts.
- The Spacing Guild: The Spacing Guild has a monopoly on foldspace travel. Their massive heighliners can deliver critical supplies and large numbers of troops, if you can afford to pay the high price they ask in spice.
- The Bene Gesserit: The intrigues and machinations of the Bene Gesserit sisterhood and their generations-long planning are everywhere in the Imperium, seen and unseen.
- The Fremen: The harsh landscape of Dune has molded the Fremen into fierce warriors. You may seek to befriend them to amass desert power and the incredible ability to ride sandworms into battle.
- The Populated Areas: The populated areas of Dune are important sites from which to stage any military campaigns, as you can muster troops at most of these locations. And some of the locations (along with Imperial Basin) are protected from the sandworms by a mighty shield wall of solid rock.
- The Deserts: The deserts of Dune are where you’ll harvest the most precious substance in the Imperium: the spice melange. They are also home to colossal sandworms. Spice harvesters must flee when they approach, but those who master the ways of the Fremen and their maker hooks might have other plans…
General Components
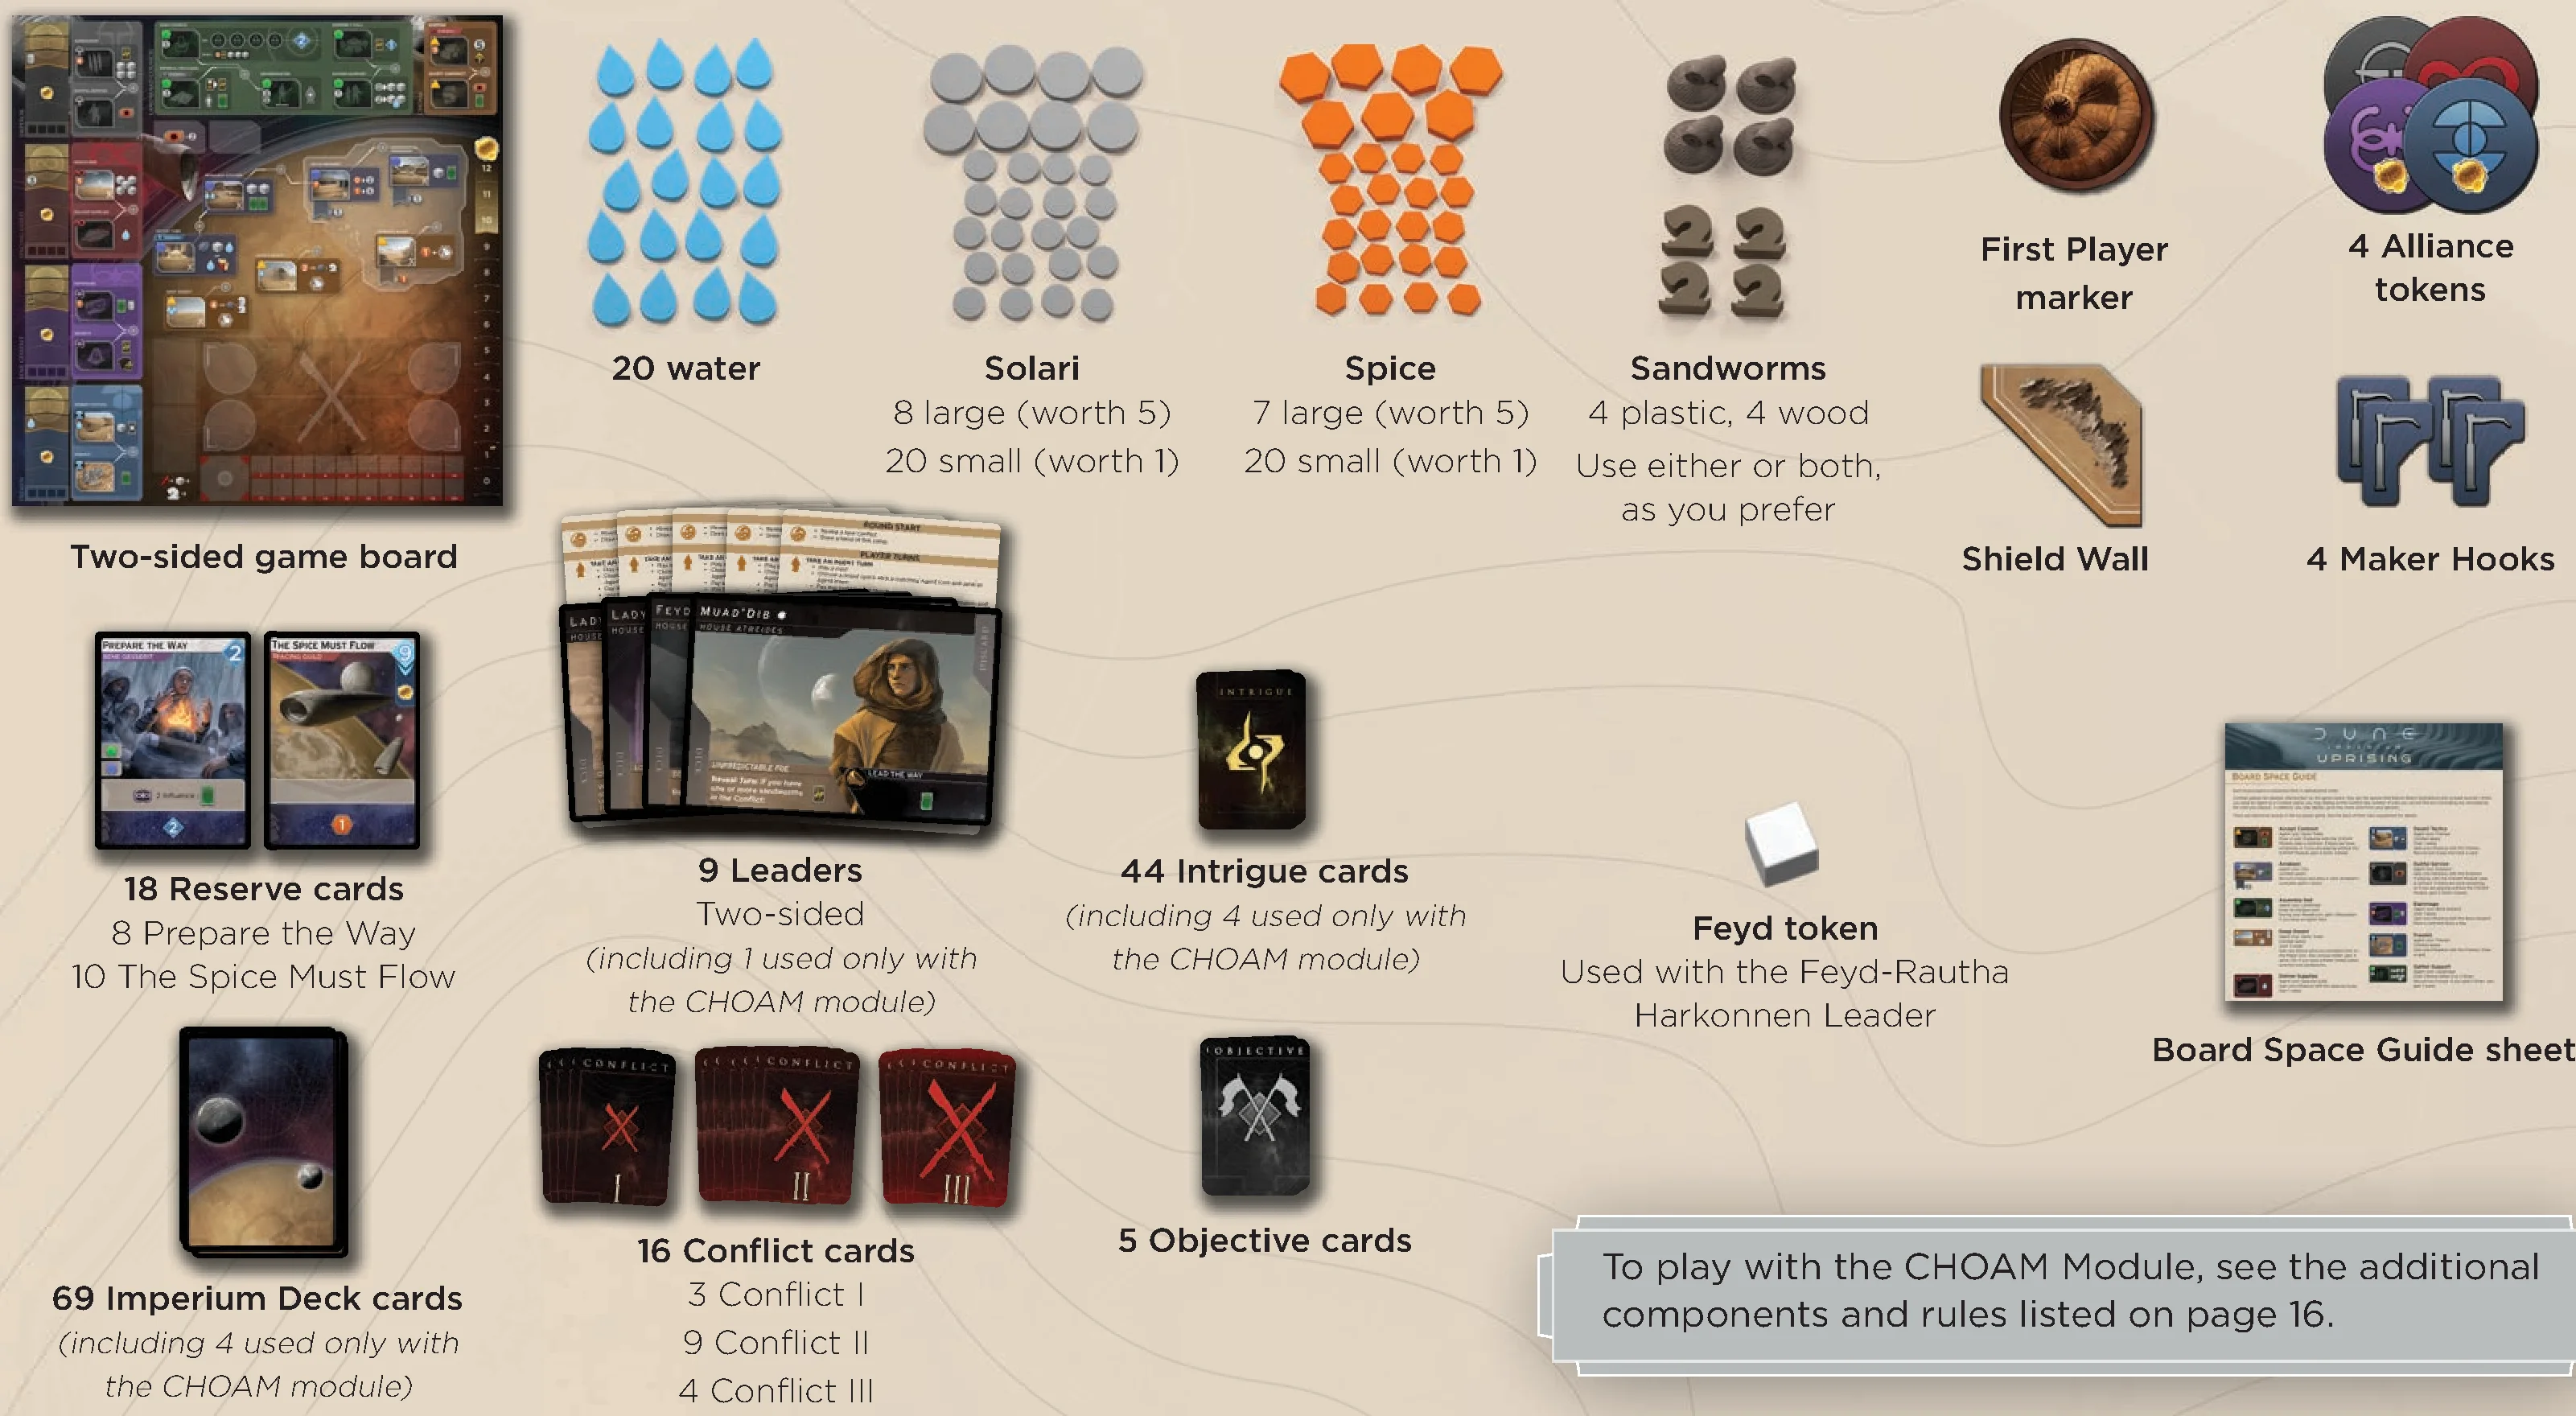
- 1 Two-sided game board
- 18 Reserve cards (8 Prepare the Way, 10 The Spice Must Flow)
- 69 Imperium Deck cards (including 4 used only with the CHOAM module)
- 44 Intrigue cards (including 4 used only with the CHOAM module)
- 16 Conflict cards (3 Conflict I, 9 Conflict II, 4 Conflict III)
- 5 Objective cards
- 9 Leaders (Two-sided, including 1 used only with the CHOAM module)
- 1 Feyd token (Used with the Feyd-Rautha Harkonnen Leader)
- 1 Shield Wall token
- 4 Maker Hooks
- 4 Alliance tokens
- 1 First Player marker
- 20 Water tokens
- Solari tokens: 8 large (worth 5), 20 small (worth 1)
- Spice tokens: 7 large (worth 5), 20 small (worth 1)
- 8 Sandworms (4 plastic, 4 wood — use either or both, as you prefer)
- 1 Board Space Guide sheet
To play with the CHOAM Module, see the additional components and rules listed on page 16.
For games with one or two players, see the additional components and rules in the Rivals rules supplement. For games with six players, see the additional components and rules in the Six-Player Games rules supplement.
Player Components
The player components come in different colors for each player (red is shown as an example):
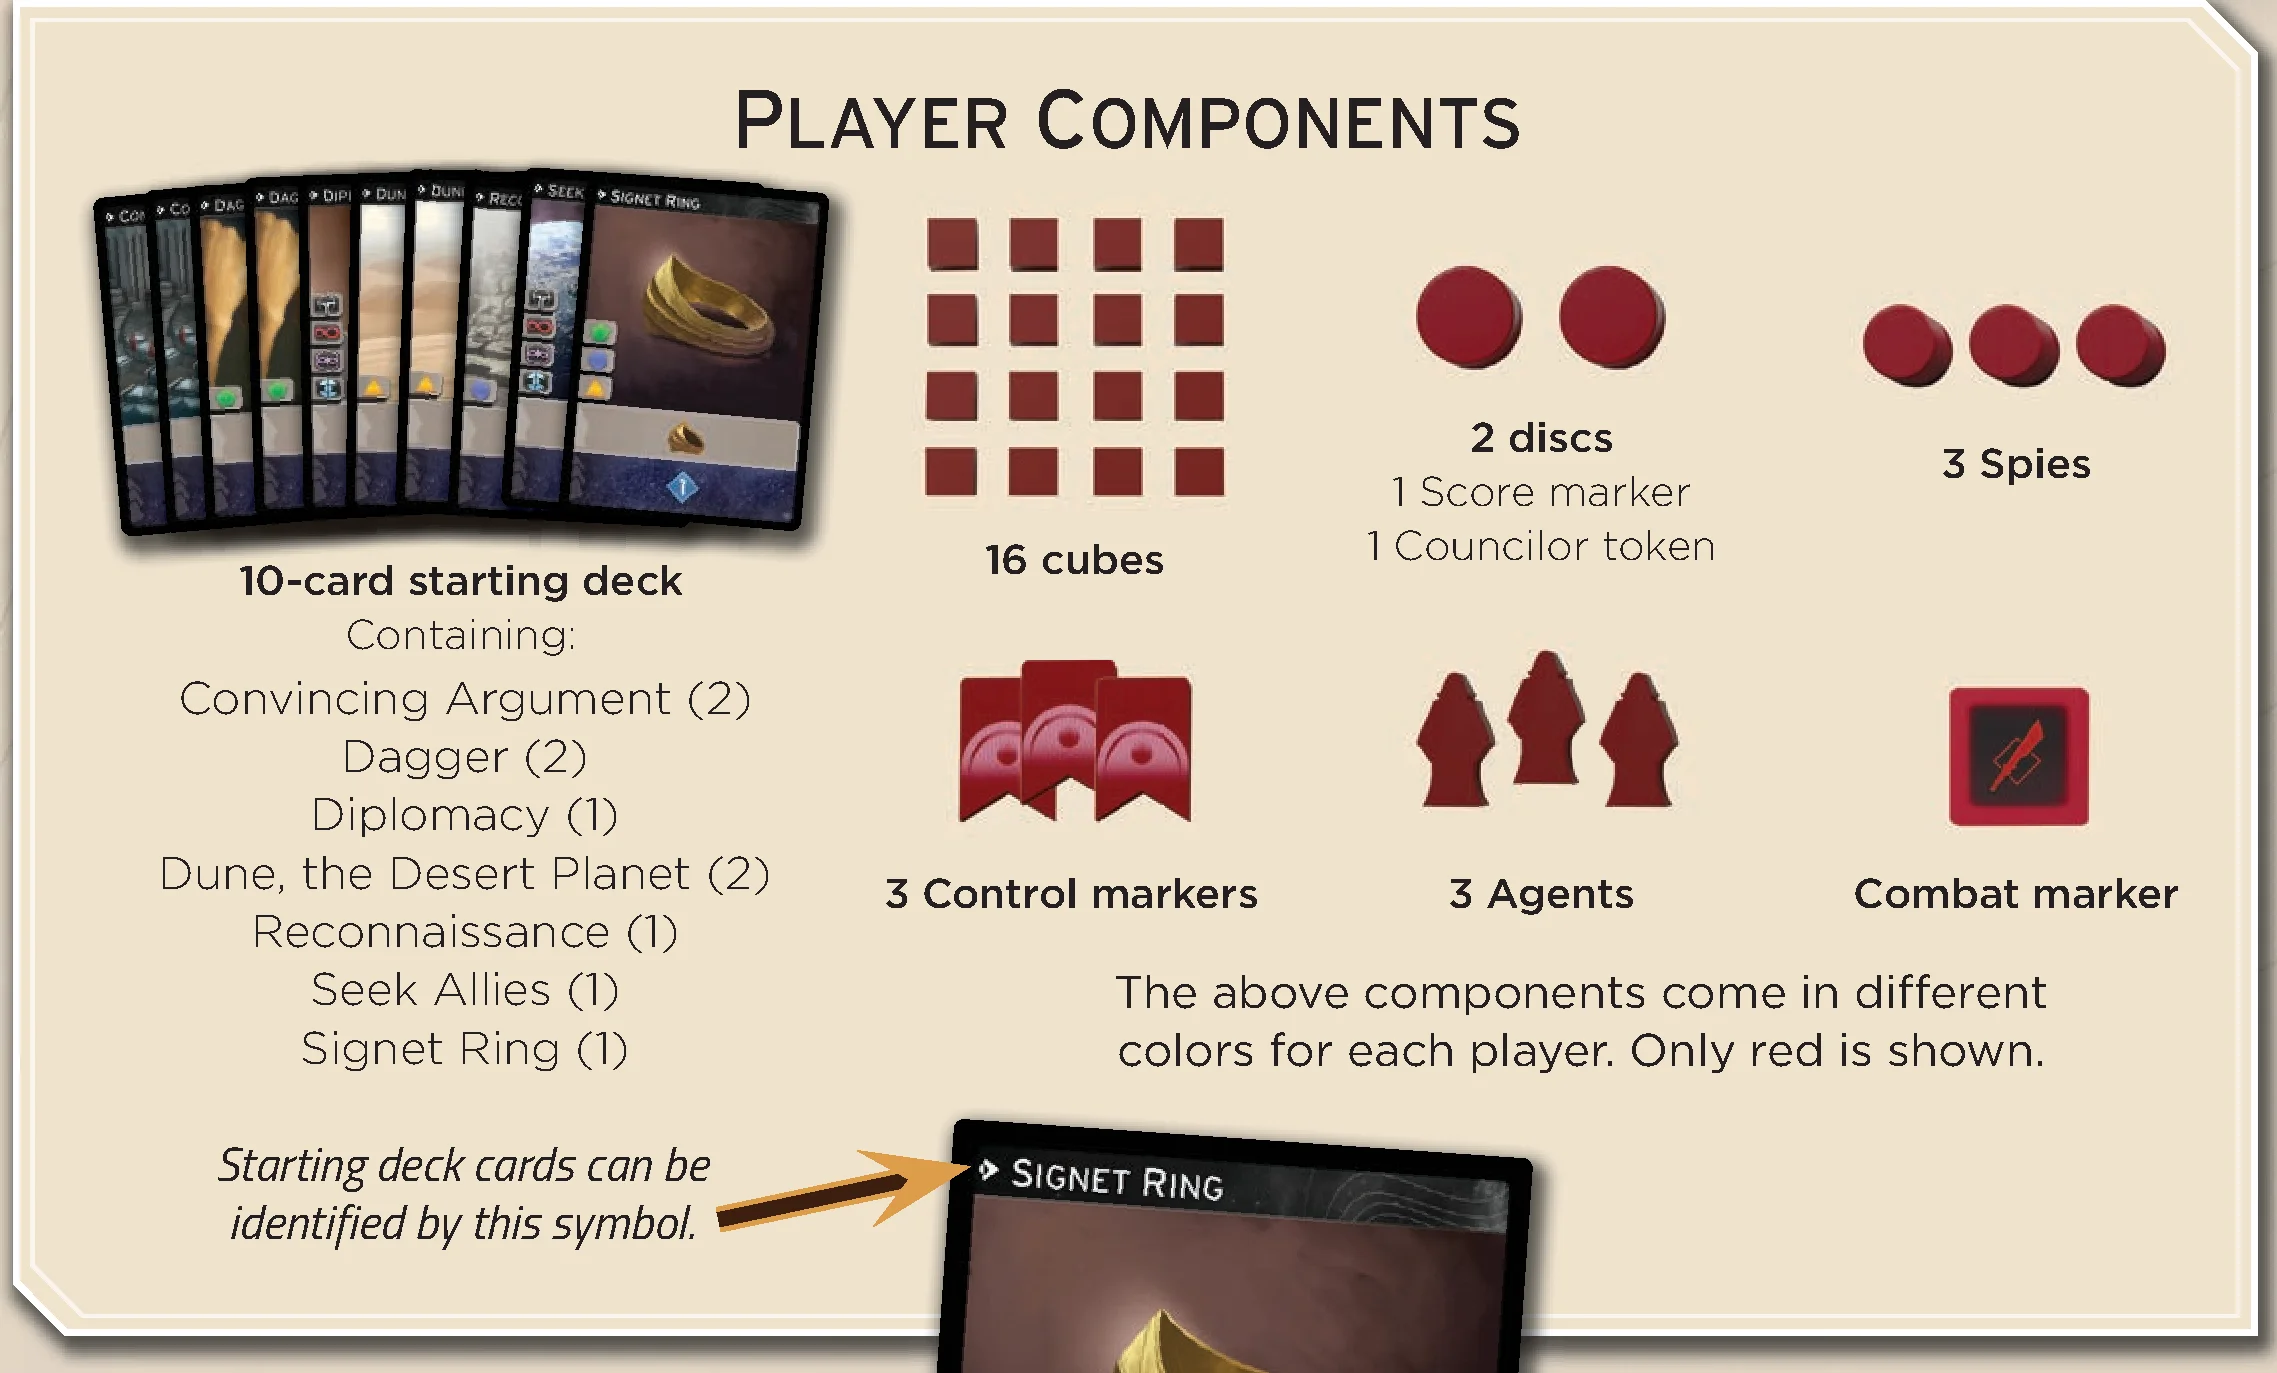
- 10-card starting deck containing:
- Convincing Argument (2)
- Dagger (2)
- Diplomacy (1)
- Dune, the Desert Planet (2)
- Reconnaissance (1)
- Seek Allies (1)
- Signet Ring (1)
Starting deck cards can be identified by the matching starting deck symbol.
- 16 Cubes (troops & influence markers)
- 2 Discs (1 Score marker, 1 Councilor token)
- 3 Spies
- 3 Control markers
- 3 Agents
- 1 Combat marker
Do you prefer to learn by watching a video? Scan the QR code on the setup page.
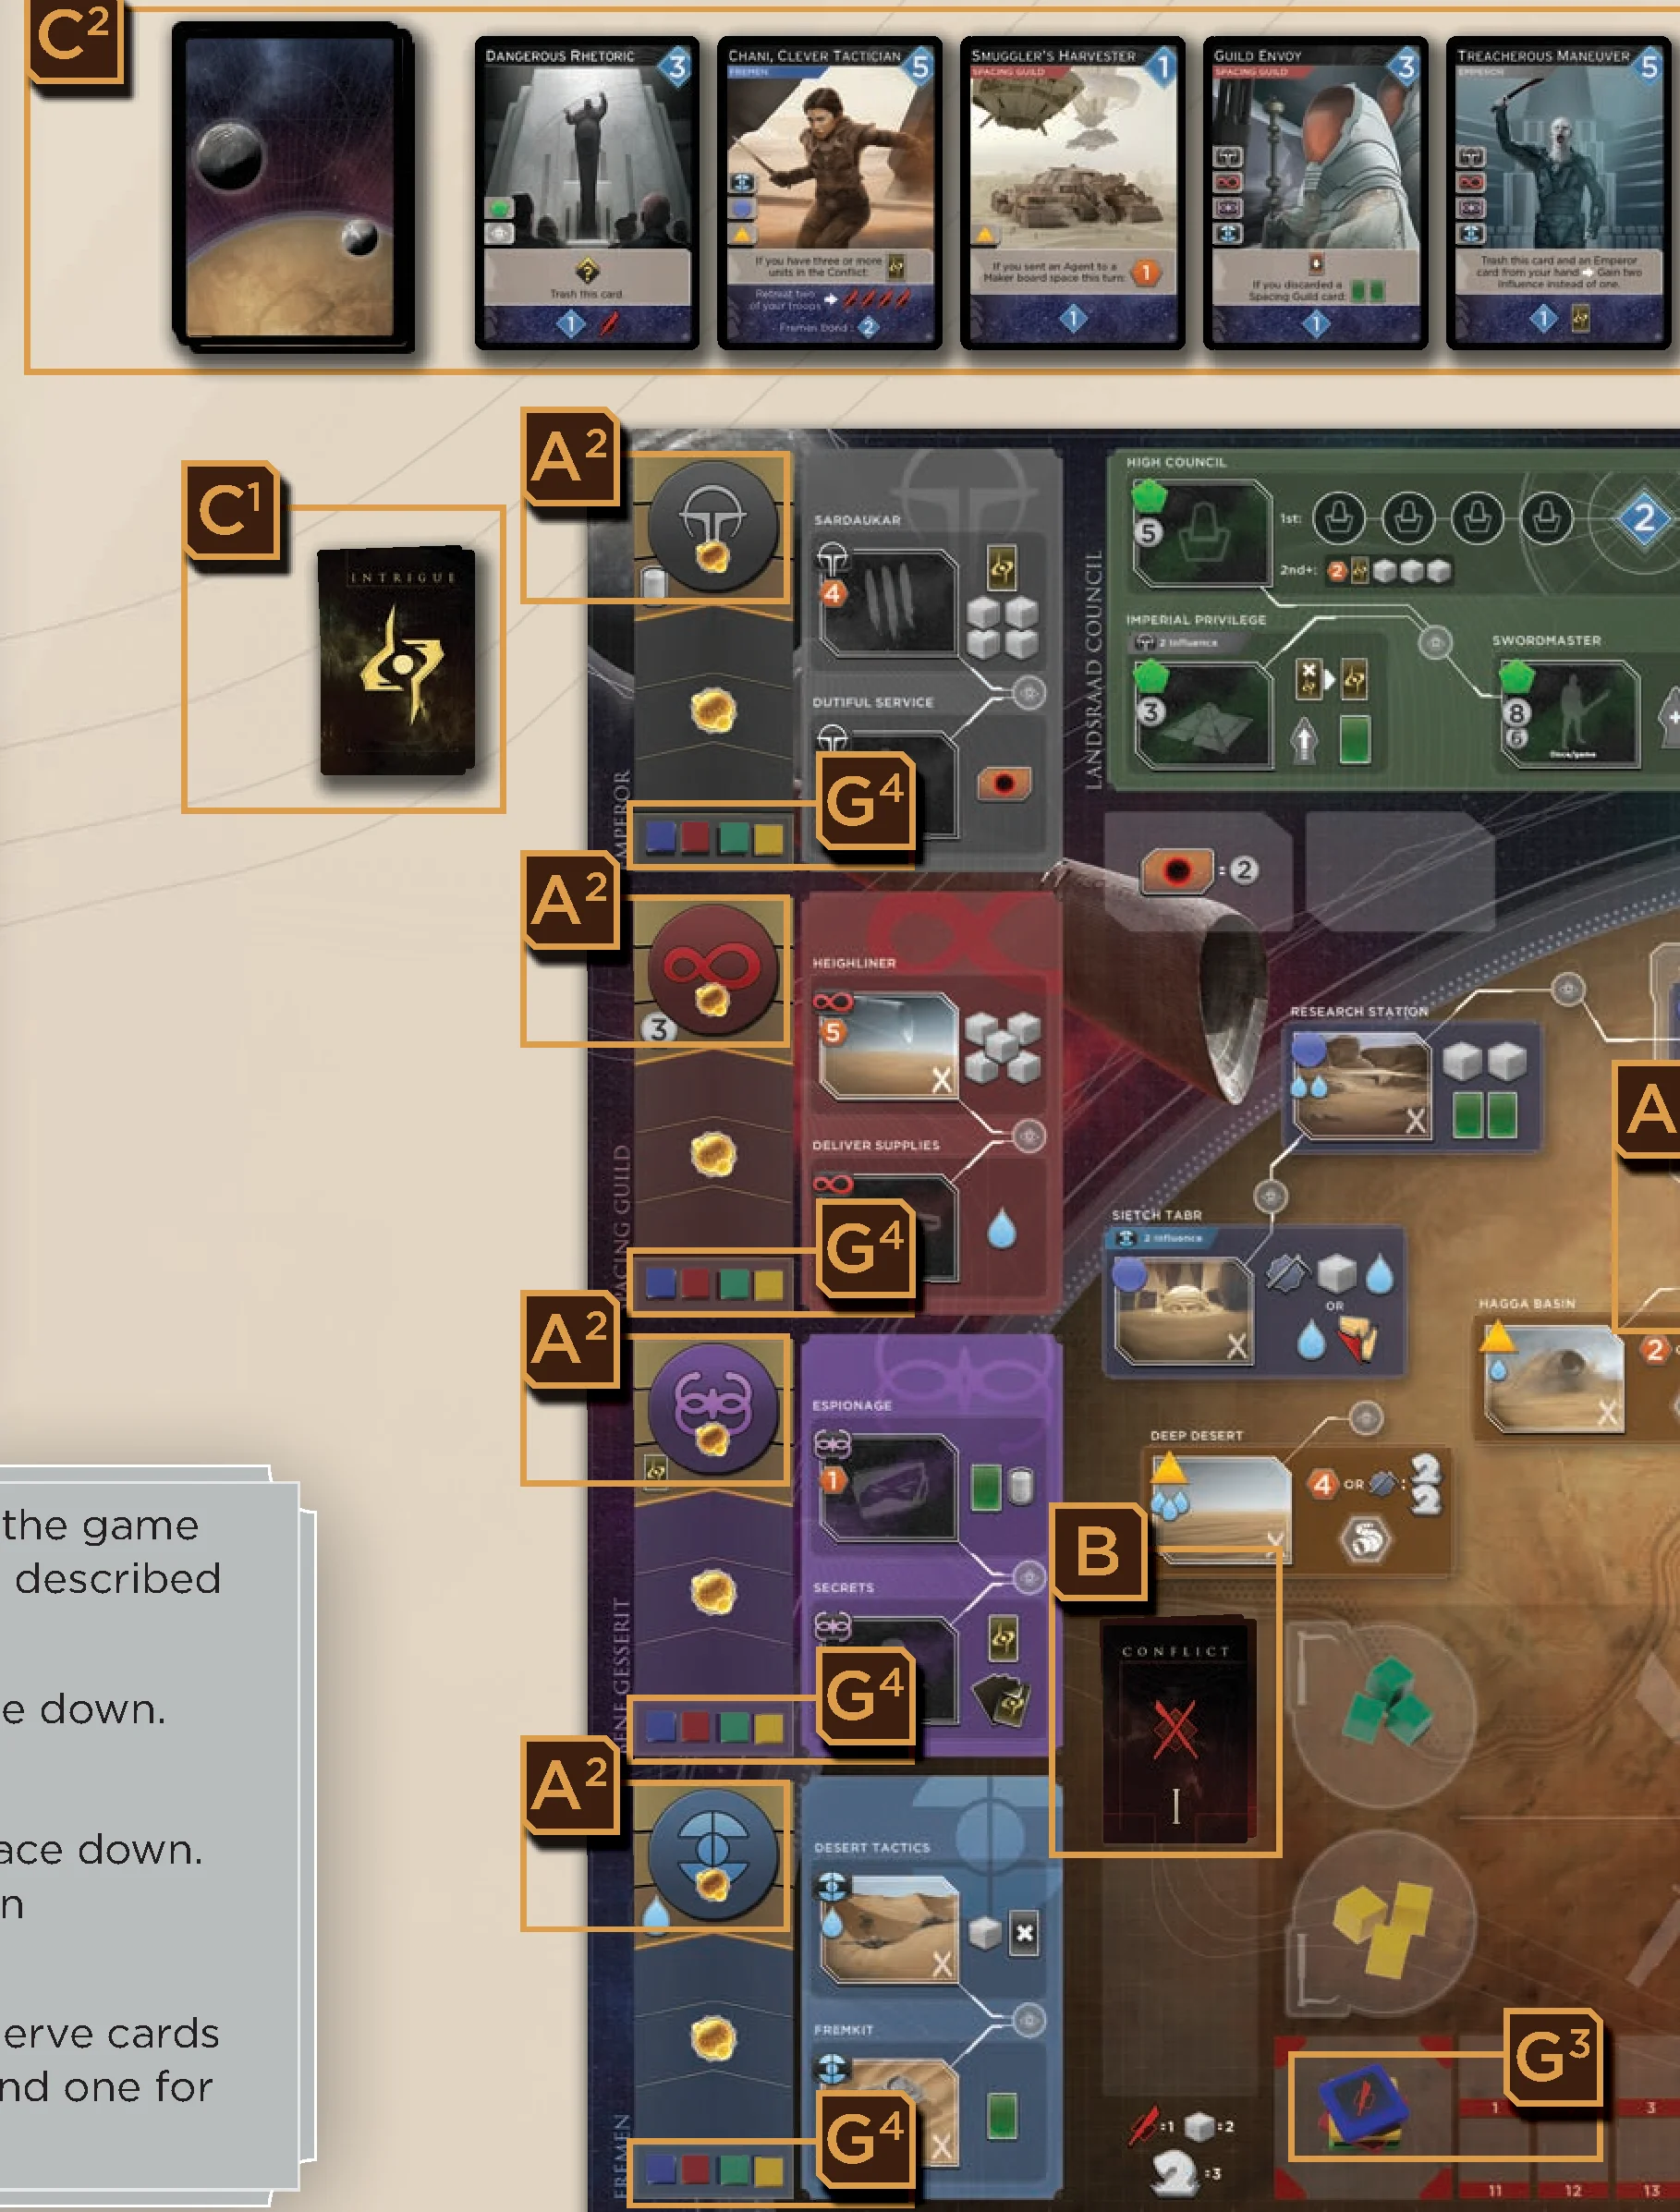
Board and Global Setup
- Place the game board in your play area (with the side shown face up), and then place the following components on it:
- A1: Place the Shield Wall token in the marked area below the Spice Refinery board space.
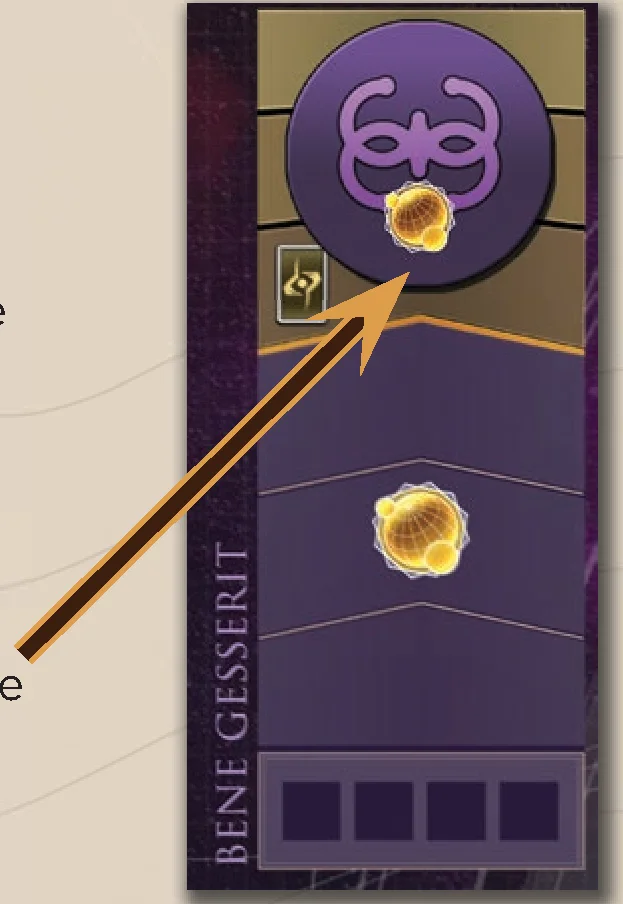
- A2: Place the four Alliance tokens on the marked areas of the Faction’s Influence tracks (Emperor, Spacing Guild, Bene Gesserit, and Fremen).
- Create a Conflict Deck:
- Separate the Conflict cards by their backs: Conflict I, Conflict II, and Conflict III.
- Shuffle the four Conflict III cards and place all of them face down in the marked area of the game board.
- Shuffle the nine Conflict II cards, then deal five face down on top of the Conflict III cards.
- Shuffle the three Conflict I cards, then deal one face down on top of the Conflict II cards.
You should now have a 10-card Conflict Deck on the game board, with one Conflict I card on top, five Conflict II cards below it, then the four Conflict III cards on the bottom. Return the unused Conflict cards to the game box without looking at them.
- Prepare cards along the edge of the game board:
(If you’re not using the CHOAM module described on page 16, omit any cards marked with the CHOAM symbol.)
- C1: Shuffle the Intrigue Deck and place it face down.
- C2: Shuffle the Imperium Deck and place it face down. From it, deal five cards face up to form an Imperium Row.
- C3: Next to the Imperium Row, place the Reserve cards in two stacks: one for Prepare the Way and one for The Spice Must Flow.
- Leader Selection: Each player takes a Leader and places it in front of them. (You may choose or select at random.) Do not use Shaddam Corrino IV unless you are using the CHOAM module.
Leaders have from one to three icons after their names. Leaders with more icons are more strategically complex. For your first game, it is recommended that each player chooses a Leader with just one icon.
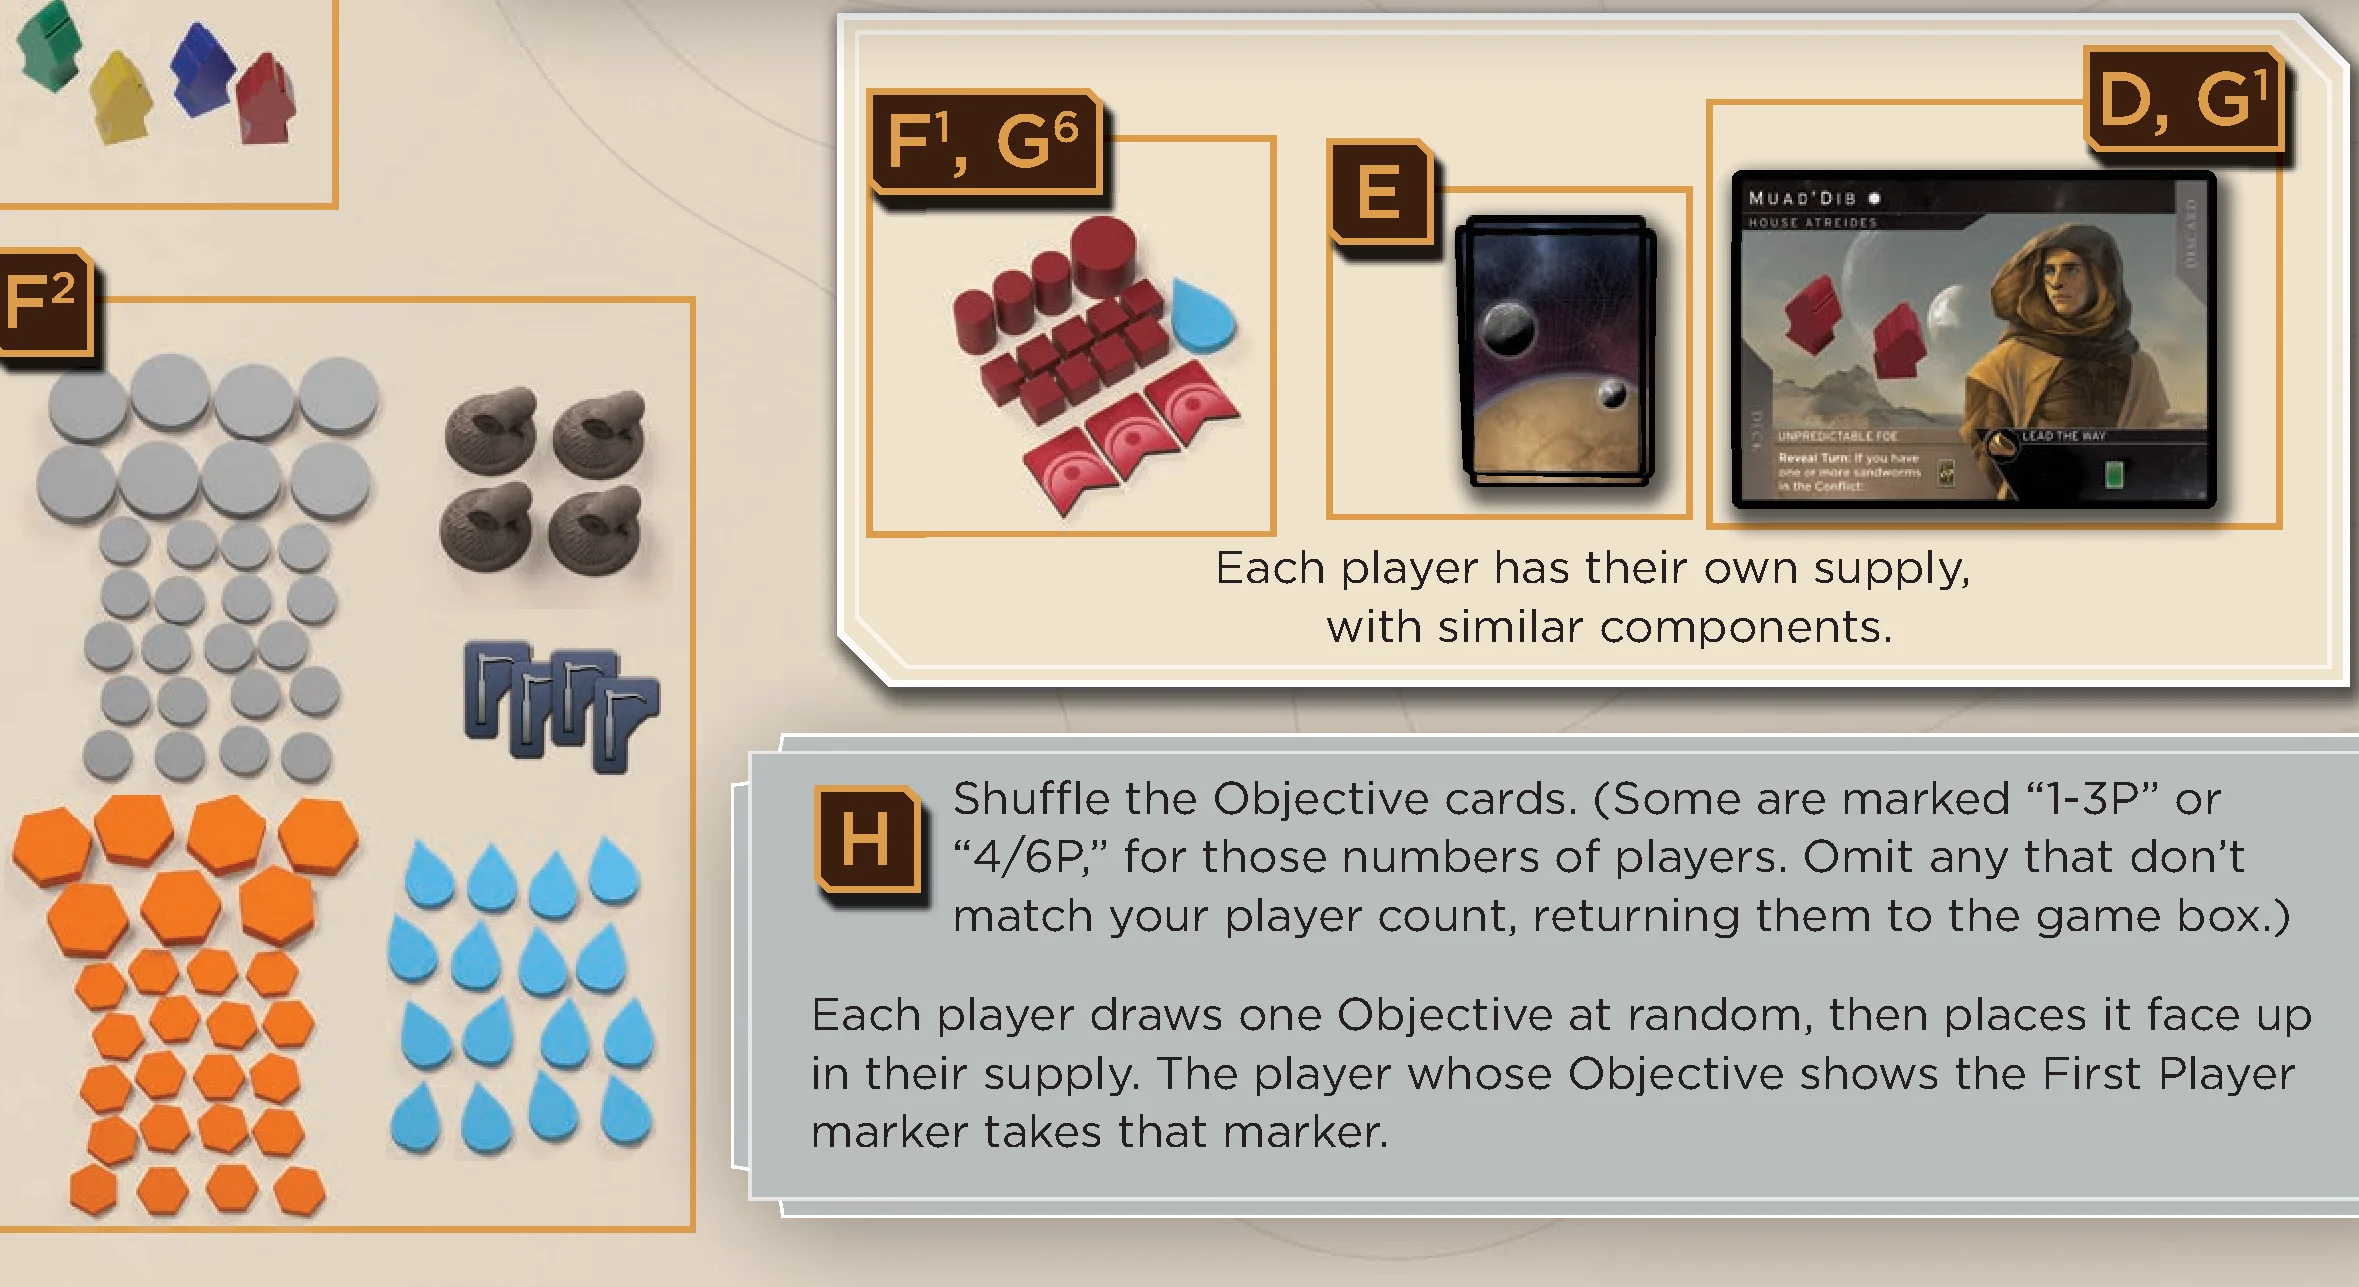
Player Setup and Bank
- Starting Deck: Each player takes a 10-card starting deck, shuffles it, and places it face down in their supply to the left of their Leader.
- Resources and Bank:
- F1: Each player takes 1 water and places it in their supply.
- F2: Create a bank next to the game board containing the Solari, spice, remaining water tokens, and the sandworms you prefer (either wood, plastic, or both). These are not meant to be limited; if you run out and need more, make any convenient substitution. Also, add the 4 Maker Hooks tokens to the bank.
- Player Setup: Each player chooses a color and takes all of its components:
- G1: Place two of your Agents on your Leader. Place your third Agent (your Swordmaster) next to the game board.
- G2: Place one of your two discs on the Score track. In a 4-player game, place it on the 1 space. Otherwise, place it on the 0 space.
- G3: Place your Combat marker (with the side shown face up) on the 0 space of the Combat track.
- G4: Place four cubes, one each, on the bottom spaces of the Influence tracks of the four Factions.
- G5: The other 12 cubes represent your troops. Place three in one of the four circular garrisons on the game board (each player taking the one closest to them).
- G6: Place your remaining components in your supply, in clear view of all players.
- Objective Cards & First Player: Shuffle the Objective cards. (Some are marked “1-3P” or “4/6P,” for those numbers of players. Omit any that don’t match your player count, returning them to the game box.) Each player draws one Objective at random, then places it face up in their supply. The player whose Objective shows the First Player marker takes that marker.
Objective
You are a Leader representing one of the Great Houses of the Landsraad (or another powerful figure on the galactic stage). Defeat your rivals in Combat, wield political Influence, and form alliances with the four major Factions. Your successes will be measured in Victory Points.
Whenever you gain or lose a Victory Point, move your Score marker up or down one space on the Score track. At the end of a round, if any player has reached 10 or more Victory Points (or if the Conflict Deck is empty), the game ends, and whoever has the most Victory Points wins.
Leaders
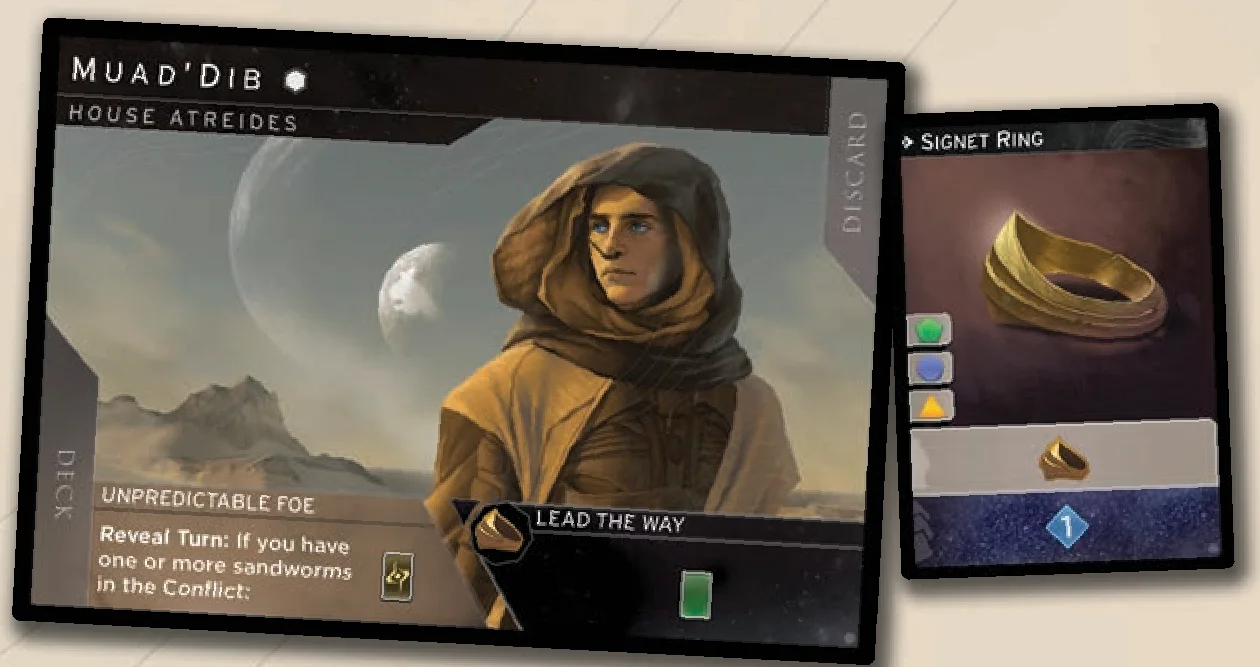
Each Leader has two different unique abilities:
- The first, on the left, is used during play as described on the Leader.
- The second, on the right and marked by the Signet Ring icon, is activated when you play your Signet Ring card on one of your Agent turns.
Deck-Building
You start the game with a 10-card deck containing the same cards as the other players. Adding to and changing that deck is the key element of play in a deck-building game. During each round, you may acquire new cards to add to your deck. Because cards do many different things, each player’s deck and strategy will diverge from the others as the game unfolds.
- Whenever you acquire a new Imperium or Reserve card, it is first placed in your discard pile.
- Any time you’re unable to draw a card because your deck is empty, you reshuffle your discard pile to form a new deck, then continue to draw as needed.
- There are also ways to “trash” cards, removing them from your deck altogether for the rest of the game. By strategically removing weaker cards from your deck, you increase the chances of drawing your stronger cards more often.
Cards of any type can override the usual rules of the game!
Agents
You start the game with two Agents (and can gain a third during play). You send Agents to spaces on the game board, sometimes gathering resources, sometimes paying resources to advance your strategy. (This is explained fully in Phase 2: Player Turns, while board spaces are described in detail in the separate Board Space Guide sheet.)
In DUNE: IMPERIUM — UPRISING, Agents and cards are tightly linked; you can’t send an Agent to a board space without first playing a card that allows it.
There is no Mentat Agent in UPRISING.
Factions & Influence
In DUNE: IMPERIUM — UPRISING, the four Factions represent powerful forces on Dune and elsewhere in the Imperium. Increasing your Influence and earning an Alliance with one or more of them is one of the key routes to victory in the game.
Your Faction cubes begin at the bottom of each Faction’s Influence track. Throughout the game, your Influence with a Faction will increase or decrease, depending on the cards you play and the actions you take. When you send an Agent to a Faction’s board space, gain one Influence with that Faction by advancing your cube one space on its Influence track. Other game effects can also move your cube up (and occasionally down) the track.
- Reaching 2 Influence: When you reach 2 Influence with a Faction, you gain a Victory Point. If you drop back below 2 Influence, you lose that Victory Point.
- Reaching 4 Influence: When you reach 4 Influence, you earn the bonus shown on that space of the track. If you drop back below 4 Influence, you do not give back the bonus. (It’s possible—though unusual—to earn the same bonus more than once, if you move back then advance again.)
- Alliances: The first player to reach 4 Influence with a Faction also earns an Alliance with that Faction. They take the Alliance token from the track, put it in their supply, and gain the Victory Point shown on the Alliance token. If they are ever passed by an opponent rising to a higher space on the track, they must give the Alliance token to that opponent; they lose that Victory Point and the opponent gains it.
Intrigue Cards
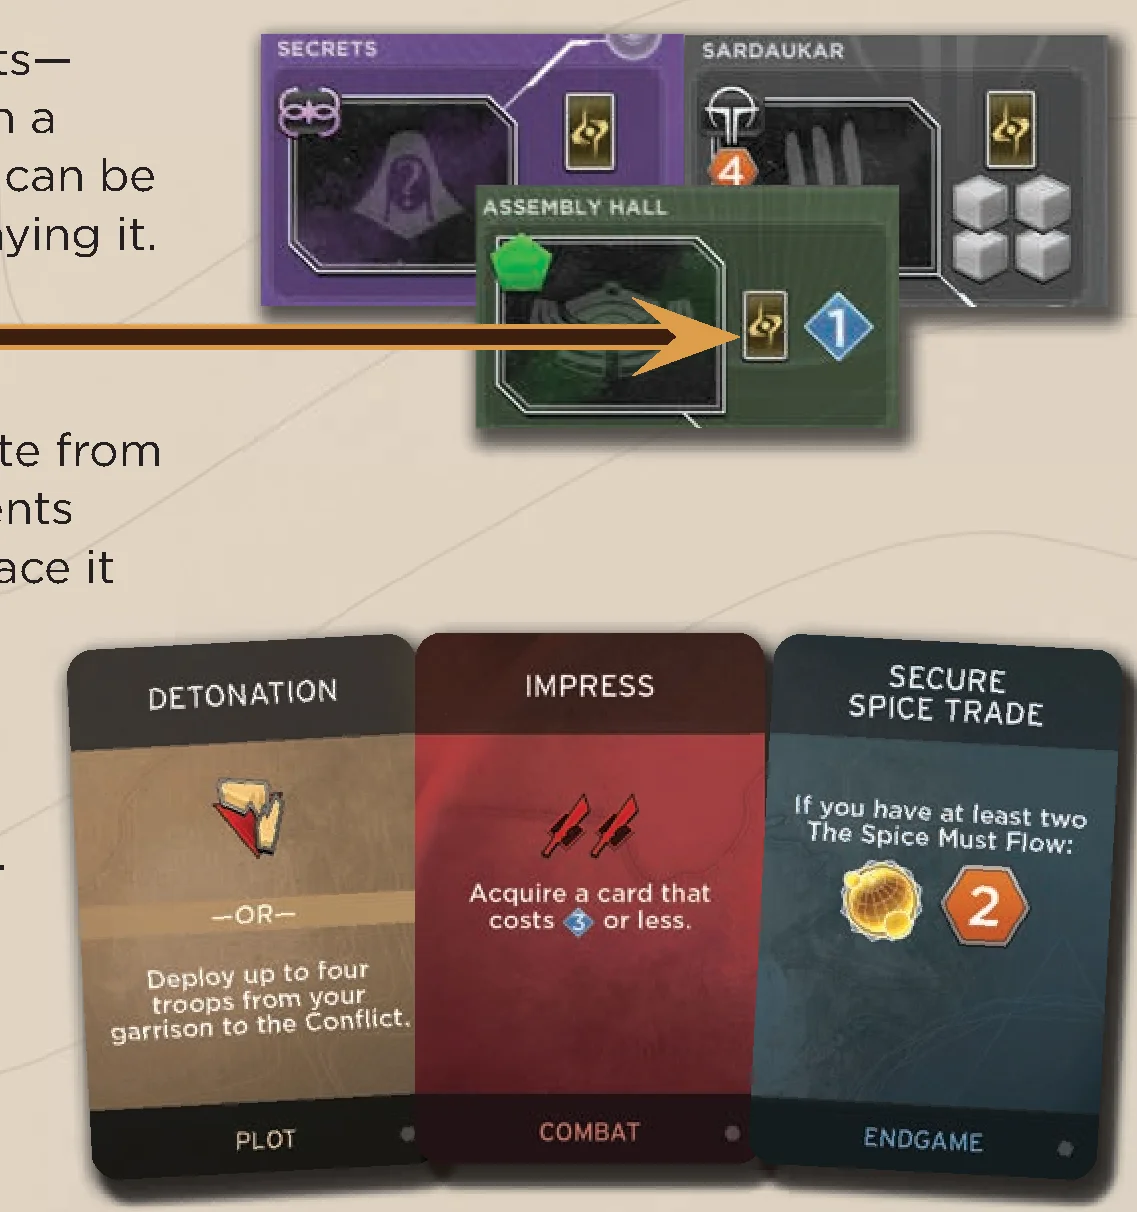
Intrigue cards represent subterfuge, backroom dealings, and surprise twists—they can provide resources like water or spice, increase your Influence with a Faction, or even score Victory Points. Each Intrigue card indicates when it can be played, what effect it has, and whether there are costs or conditions to playing it.
You receive Intrigue cards primarily from board spaces such as Secrets, Sardaukar, and Assembly Hall. (But look for other opportunities on cards, wherever you see the Intrigue card icon.) They are kept face down, separate from your deck. You may look at them at any time. Reveal them to your opponents only when you play them. Once an Intrigue card is played and resolved, place it face up in a discard pile next to the Intrigue Deck.
There are three types of Intrigue cards:
- Plot: You may play a Plot Intrigue card any time during one of your Agent or Reveal turns.
- Combat: You may play a Combat Intrigue card only during Combat.
- Endgame: You may play an Endgame Intrigue card only at the end of the game.
DUNE: IMPERIUM — UPRISING is played in a series of rounds. Each round consists of five phases, in this order:
- Round Start
- Player Turns (Agent Turn, Reveal Turn)
- Combat
- Makers
- Recall

Phase 1: Round Start
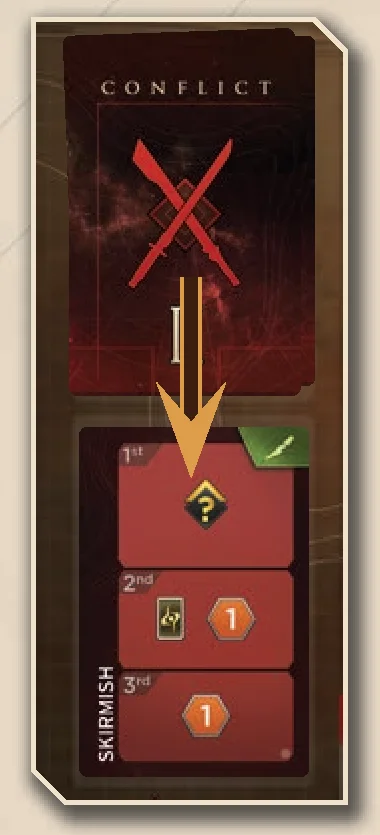
- Each round begins by revealing a new Conflict card from the top of the Conflict Deck. Place it face up in the space next to the Conflict Deck (on top of any Conflict cards that might remain from previous rounds).
- Next, each player draws five cards from their own deck, forming their hand for the round.
Phase 2: Player Turns Overview
Starting with the player who has the First Player marker and continuing clockwise, players take one turn at a time.
On your turn, you will take either an Agent turn or a Reveal turn. Generally, you will take Agent turns until you run out of Agents to place, then you will take a Reveal turn. (Note that Agent turns are optional. If you choose to, you can take a Reveal turn while you still have Agents instead of taking an Agent turn.)
Once you’ve taken a Reveal turn, your turns are skipped for the rest of the phase, while other players finish taking their turns. Once all players have taken a Reveal turn, this phase ends.
You may play any Plot Intrigue cards you have during this phase, at any point during one of your own Agent or Reveal turns.
Card Anatomy
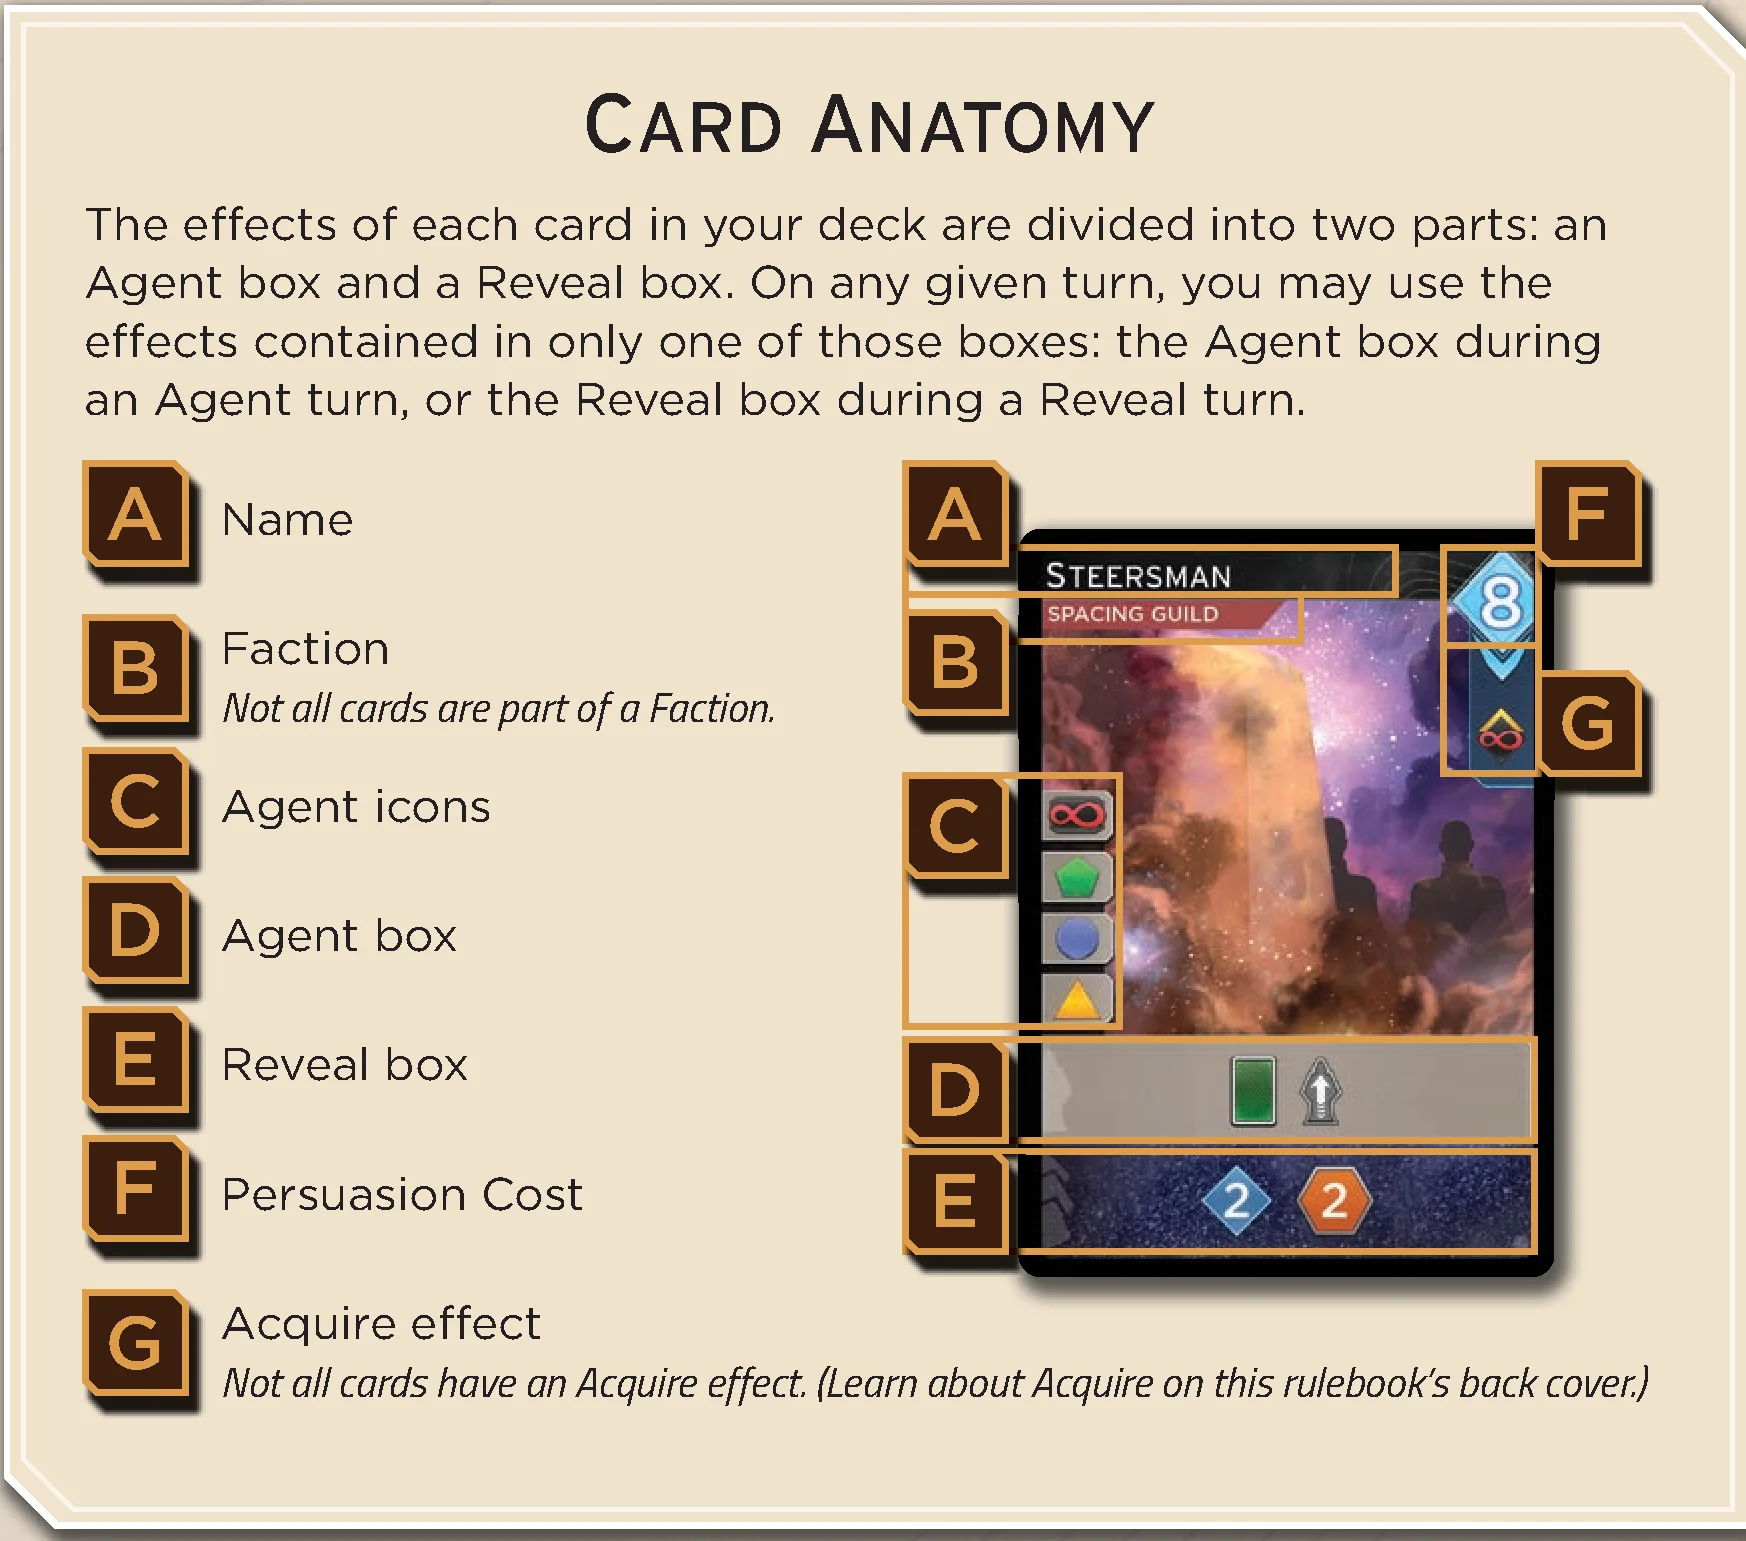
The effects of each card in your deck are divided into two parts: an Agent box and a Reveal box. On any given turn, you may use the effects contained in only one of those boxes: the Agent box during an Agent turn, or the Reveal box during a Reveal turn.
- A – Name
- B – Faction: Not all cards are part of a Faction.
- C – Agent icons
- D – Agent box
- E – Reveal box
- F – Persuasion Cost
- G – Acquire effect: Not all cards have an Acquire effect.
Agent Turns
In an Agent turn, you play one card from your hand face up in front of you, using it to send an Agent from your Leader to an unoccupied space on the game board.
- This board space must have an icon in its upper left corner matching one of the Agent icons on the card. (Though Spies provide an alternative to this.)
- You must choose only one Agent icon on your card; one card can’t send multiple Agents.
- You can’t send an Agent to a board space that already has one. (Though Spies can provide a way around this.)
- You must pay any costs and meet any requirements of the board space you choose.
- In addition, the Agent box of the card you played may provide an effect when you play it on an Agent turn. (You ignore the Reveal box of the card during Agent turns.)
- If a card does not have any Agent icons on it, you may not play it during an Agent turn. It may only be revealed during a Reveal turn.
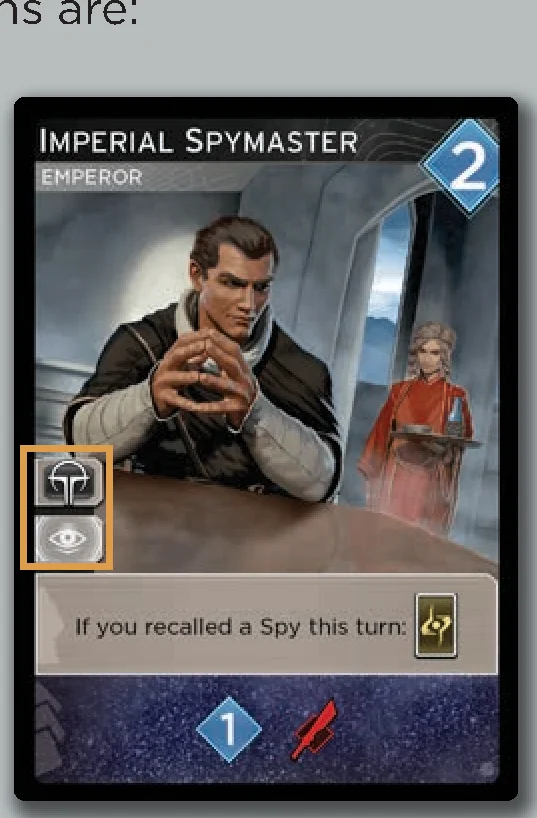
The eight different Agent icons are:
- Emperor
- Spacing Guild
- Bene Gesserit
- Fremen
- Landsraad
- City
- Spice Trade
- Spy
When you play a card and send an Agent to a board space, you gain the effects of the board space as well as the effects contained in the Agent box of the card. If the board space belongs to one of the Factions, you also move your cube one space up on its Influence track. You may carry out all these effects in any order.
Arrows on cards and on the board () indicate that there is a cost (left of the arrow, or above it) you must pay to get the effect (right of the arrow, or below it). You are never forced to pay such a cost. However, if you don’t, you won’t gain the effect. You may only pay the cost and gain the effect once during your turn.
Board Space Costs
To send an Agent to some board spaces, you must pay a cost. If you can’t pay the cost immediately (before resolving any effects of the space or the card you played), you can’t send your Agent there.
Influence Requirements
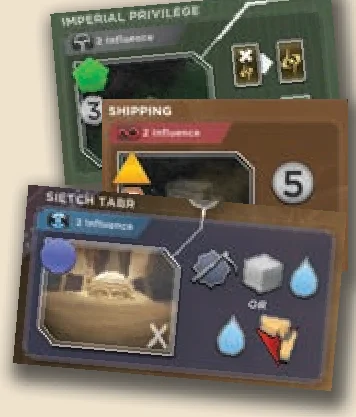
To send an Agent to certain board spaces, you must have enough Influence with a particular Faction:
- Imperial Privilege: requires 2 or more Influence with the Emperor.
- Shipping: requires 2 or more Influence with the Spacing Guild.
- Sietch Tabr: requires 2 or more Influence with the Fremen.
Units and Conflict Deployment
At the start of each round, the current Conflict card is revealed, offering rewards for which the players will compete in Combat. Players will need to deploy units to fight for these rewards. There are two types of units: troops and sandworms.
- Recruiting Troops: Whenever the cube icon appears on a card or board space, you recruit one troop. Take a troop from your supply and place it in your garrison on the game board. (If you run out of troops in your supply, you can’t recruit more until some return there.)
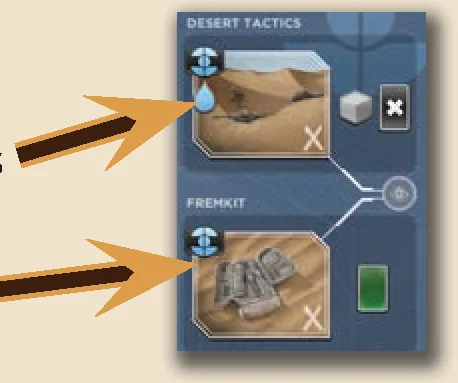
- Deploying to Conflict: Units won’t help you win combats while in your garrison, however. You may deploy them to a Conflict when you send an Agent to a Combat space (spaces featuring a desert illustration and crossed swords). While most of these appear on the planet Dune itself, three appear with the Factions: Heighliner (Spacing Guild), Desert Tactics (Fremen), and Fremkit (Fremen).
- When you send an Agent to a Combat space, you may deploy units to the Conflict area: you may deploy any or all units recruited during your current turn (from the board space and card), plus up to two more units from your garrison.
- Sandworms: Whenever the sandworm icon appears on a card or board space, you summon and immediately deploy a sandworm to the Conflict. (A sandworm can never be placed in a garrison.) Two restrictions limit the summoning of sandworms:
- The sandworm icon is usually prefaced by a requirement to have a Maker Hooks token on your garrison (obtained at Sietch Tabr).
- A sandworm cannot be summoned to a Conflict protected by the Shield Wall.

Critical Locations and the Shield Wall
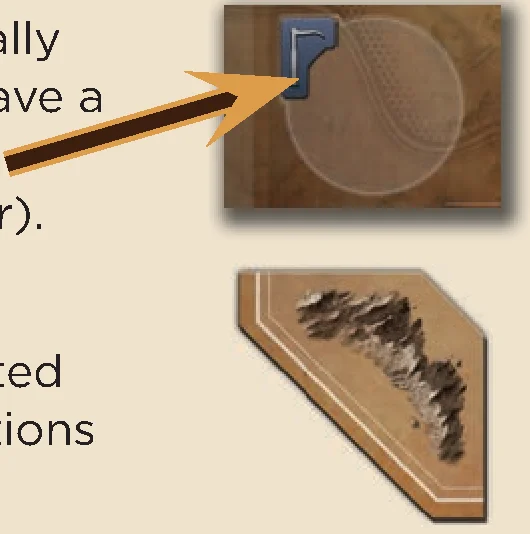
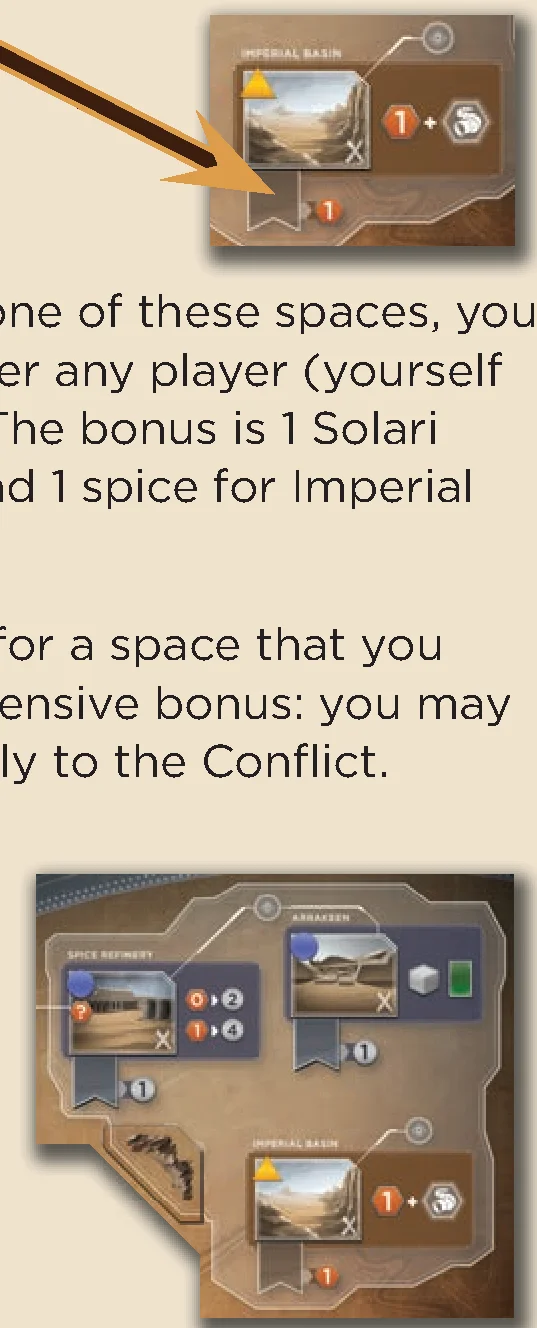
Some Conflict cards represent a struggle taking place at one of three locations on Dune: Arrakeen, Spice Refinery, or Imperial Basin. If you win such a Conflict, your rewards include control of the board space: take a Control marker from your supply and place it on the flag below the appropriate space.
- While your Control marker is on one of these spaces, you receive the bonus shown whenever any player (yourself included) sends an Agent there: 1 Solari for Arrakeen or Spice Refinery, and 1 spice for Imperial Basin.
- When a Conflict card is revealed for a space that you already control, you receive a defensive bonus: you may deploy one troop from your supply to the Conflict.
These three important locations are protected from storms and sandworms by a Shield Wall token placed on the board during setup. While this token remains in place, no sandworms can be summoned to a Conflict at one of these three protected locations. However, when the Shield Wall detonation icon appears on a card or board space, you may remove the Shield Wall token from its place on the board (returning it to the box). Once removed, sandworms may be summoned to any Conflict.
Spies
Across the board are various observation posts where players may place Spies. Each of these is connected to one or more board spaces.
- Placing a Spy: Whenever the Spy icon appears on a card or board space, you may place a Spy from your supply on an unoccupied observation post on the board. If you have no Spies in your supply when you need to place one, you may first recall one of your Spies for no effect. (Some effects specify a particular Agent icon that must be connected to the post).
- Recalling a Spy: When the Recall Spy icon appears on a card, you may return one of your Spies from an observation post to your supply to pay for a powerful effect.
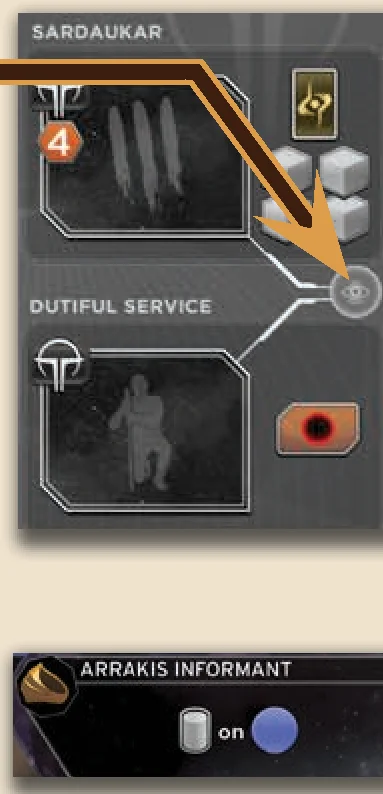
- Infiltrate: If you wish to send an Agent to a board space occupied by another player, you may recall your own Spy from a connected observation post to ignore the other player’s Agent and send your Agent to that same board space.
- Gather Intelligence: Whenever you send an Agent to a board space, you may recall your own Spy from a connected observation post to draw a card. You must choose whether to do this immediately after placing your Agent (before receiving any effects of the board space or card you played).
- Note: You cannot recall the same Spy to both Infiltrate and Gather Intelligence.
- The Spy Agent Icon: The Spy Agent icon allows you to send an Agent to a board space connected to an observation post where you currently have a Spy. You do not recall the Spy for this purpose.
Agent Turn Examples
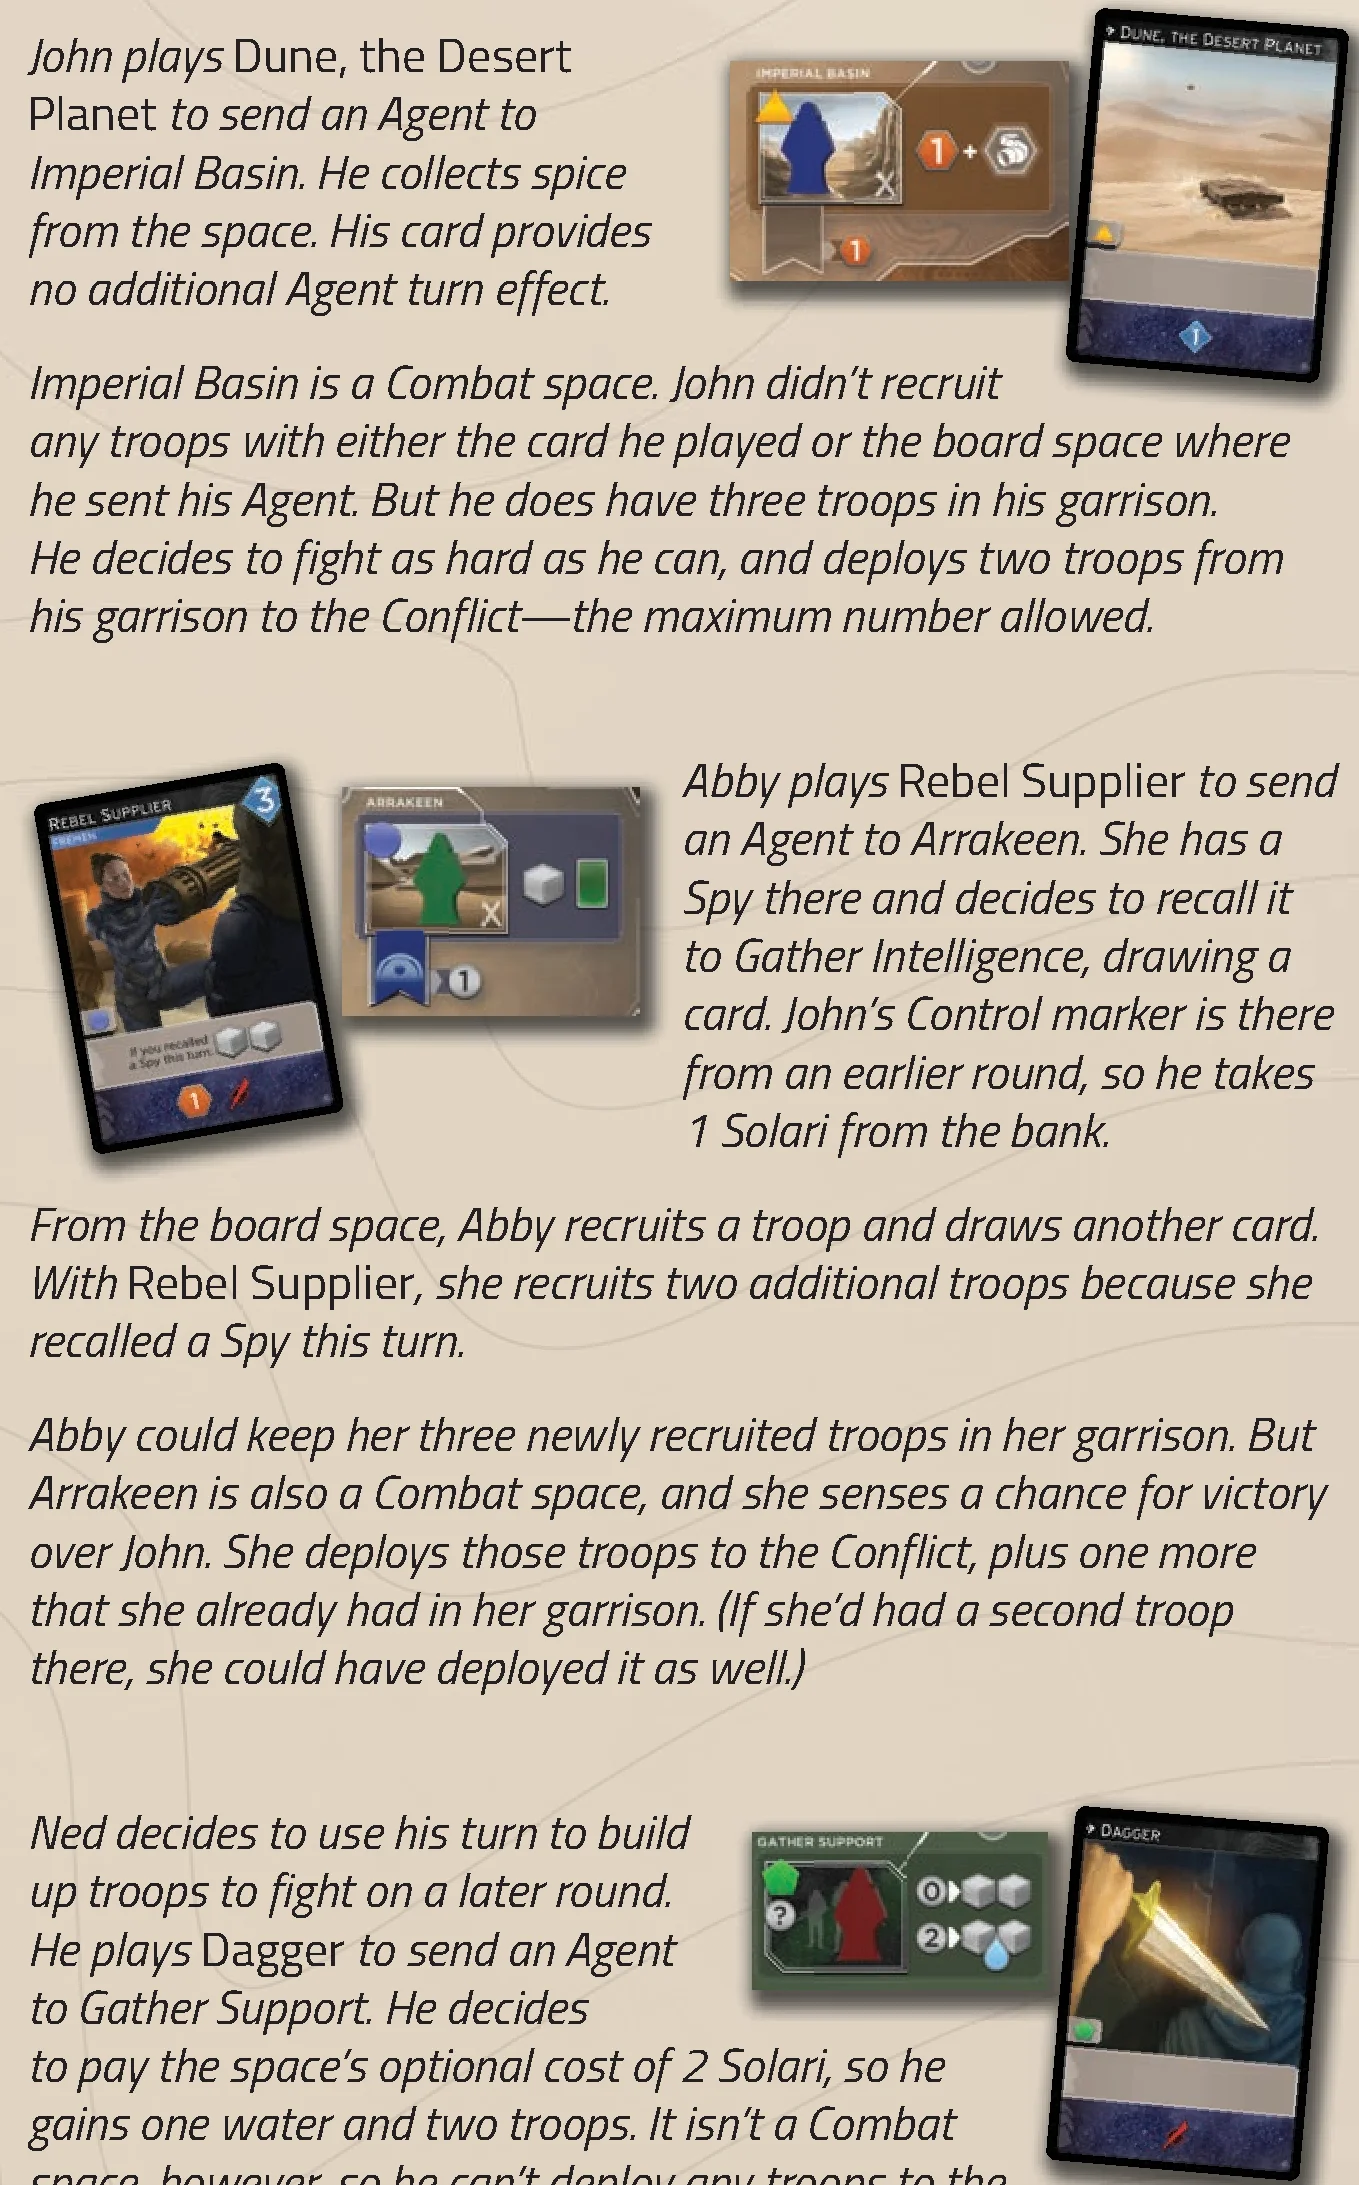
- John: Plays Dune, the Desert Planet to send an Agent to Imperial Basin. He collects spice from the space. Imperial Basin is a Combat space. John deploys two troops from his garrison to the Conflict (the maximum allowed).
- Abby: Plays Rebel Supplier to send an Agent to Arrakeen. She recalls her Spy there to Gather Intelligence, drawing a card. John has a Control marker there, so he receives 1 Solari. From Arrakeen, Abby recruits a troop and draws a card. Her card recruits two more troops (because she recalled a Spy). She deploys all three recruited troops plus one troop from her garrison into the Conflict.
- Ned: Plays Dagger to send an Agent to Gather Support. He pays 2 Solari to gain one water and two troops. Because it’s not a Combat space, he places the troops in his garrison.
Reveal Turns
When a player has no more Agents for Agent turns (or chooses not to use any Agents they have remaining), that player takes a Reveal turn. This consists of the following steps in order:
- Reveal Cards: Reveal all cards remaining in your hand, placing them face up in play in front of you. Keep them separate from other cards you played previously on Agent turns.
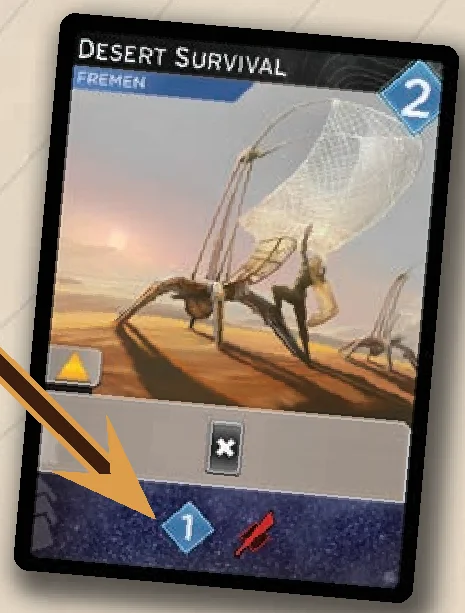
- Resolve Reveal Effects: Gain the effects in the Reveal boxes of all the cards you just revealed (but not cards played during Agent turns). You may resolve Reveal effects in any order. In addition, you may use Persuasion gained to acquire new cards for your deck before, between, or after your Reveal effects.
- Clean Up: Remove all the cards from in front of you (from your Agent and Reveal turns) and put them in your discard pile.
Setting Your Strength
After you Reveal Cards, but before you Clean Up, you also total your strength for the Combat this round:
- Each troop you have in the Conflict adds 2 strength.
- Each sandworm you have in the Conflict adds 3 strength.
- Each sword you revealed during your Reveal turn adds 1 strength.
- Requirement: You must have at least one unit in the Conflict to have any strength. If your last unit is ever removed, your strength becomes 0.
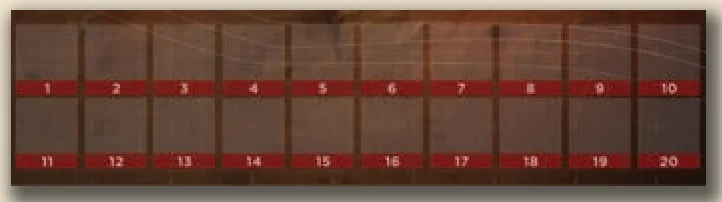
Move your Combat marker to the corresponding space on the Combat track. If your strength is over 20, flip the marker to the +20 side and start again from the beginning of the track.
Acquiring Cards
The Persuasion you gain during a round is used during your Reveal turn to acquire new cards for your deck:
- You may acquire any of the five cards in the Imperium Row, or Prepare the Way or The Spice Must Flow from the Reserve.
- The cost to acquire a card is shown at the top right of that card. You may acquire as many cards as you like, as long as you have enough Persuasion to spend.
- You may pool Persuasion from multiple sources to acquire one card, and split Persuasion from a single source to pay for different cards. Any unspent Persuasion is lost at the end of your Reveal turn.
- When you acquire a card, place it face up in your discard pile (to the right of your Leader).
- The Imperium Row must always have five cards; whenever a card is taken, immediately replace it from the top of the Imperium Deck.
Reveal Turn Example
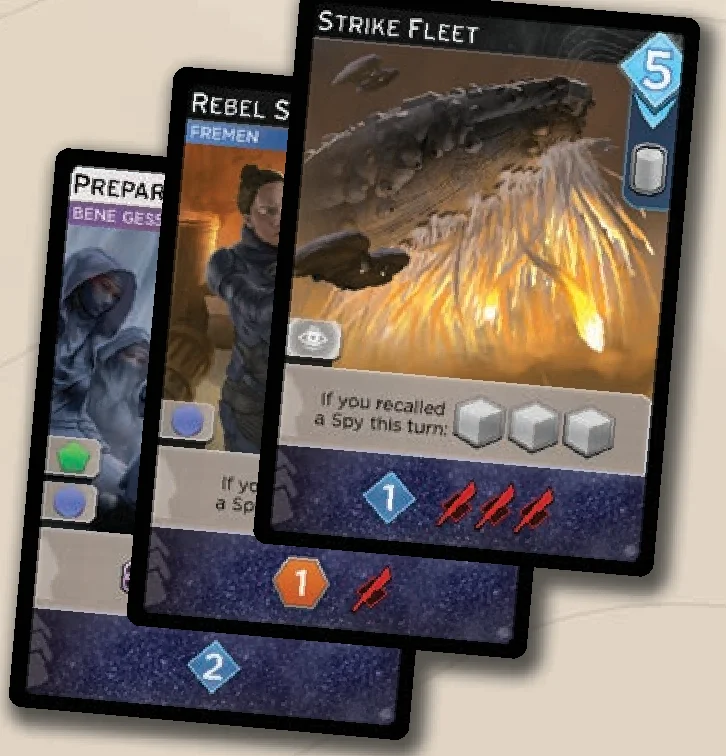
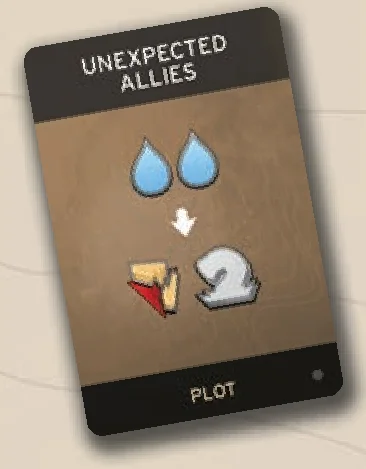
John takes a Reveal turn, revealing Prepare the Way, Rebel Supplier, and Strike Fleet. Rebel Supplier gives 1 spice. He gains 3 Persuasion total and spends 2 to acquire Desert Survival, refilling the Imperium Row. He has two troops in Conflict (4 strength) and 4 swords from cards (total 8 strength). He plays an Intrigue card, Unexpected Allies: pays 2 water, removes the Shield Wall token, and summons a sandworm (+3 strength, total 11 strength). He then places his cards in his discard pile.
Combat is resolved during this phase, but first, players have the chance to play Combat Intrigue cards.
Combat Intrigue Cards
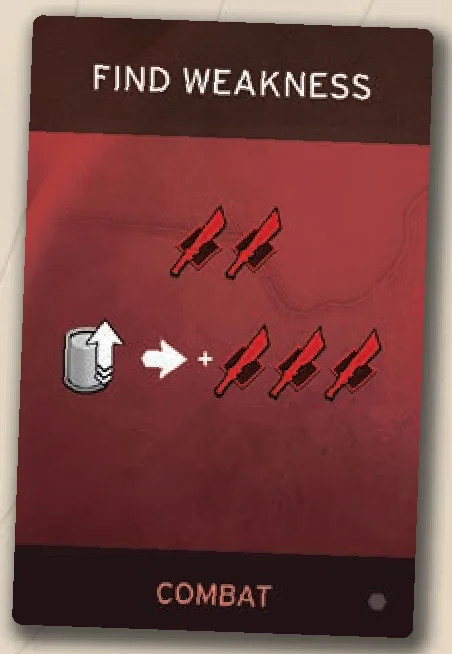
Starting with the player who has the First Player marker and continuing clockwise, each player with at least one unit in the Conflict may play any number of Combat Intrigue cards, or may pass. Passing does not prevent you from playing a card later if another player acts. Once all players involved in Combat pass consecutively, resolve Combat.
Resolve Combat
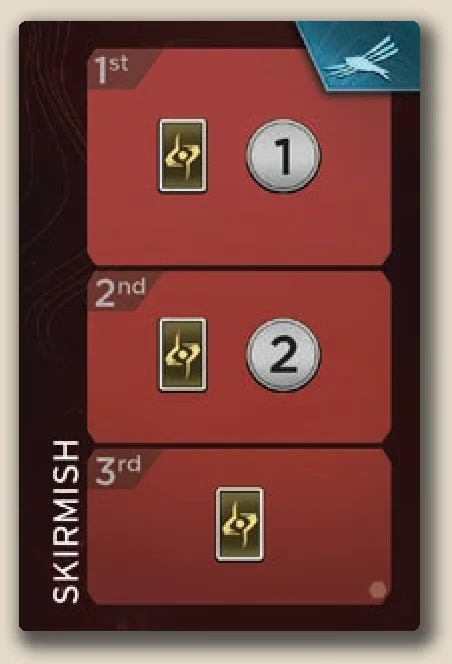
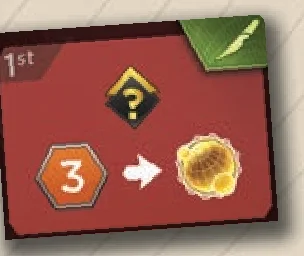
Rewards from the Conflict card are given to players based on their strength, as shown on the Combat track:
- 1st place (highest strength): Wins the Conflict and gains the first reward, then takes the Conflict card into their supply face up.
- 2nd place: Gains the second reward.
- 3rd place: In a 4- or 6-player game, gains the third reward. (In 1-3 player games, 3rd reward is only used in ties for 2nd).
- A player with 0 strength receives no reward.
Ties
- Tie for 1st place: Tied players each gain the second reward. No one wins the Conflict or takes the Conflict card. In a 3-player game, no other rewards are given. In a 4- or 6-player game, if exactly two players tied for first, remaining players compete for the third reward.
- Tie for 2nd place: Tied players each gain the third reward. The winner keeps the 1st reward and card, but no further rewards are given.
- Tie for 3rd place: Tied players receive nothing.
Battle Icons
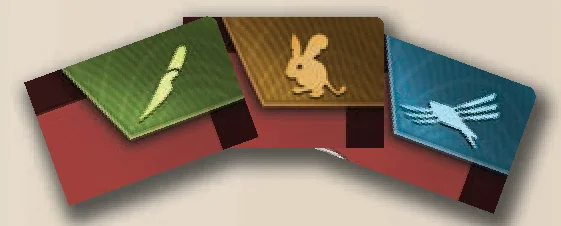
There are three battle icons: Crysknife, Desert Mouse, and Ornithopter. When you win a Conflict and take that card into your supply, check if you have another face-up Conflict or Objective card in your supply with the same battle icon. If you do, you must flip the matching pair of cards face down and gain 1 Victory Point.
Sandworm Reward Doubling
When taking rewards, if you have one or more sandworms in the Conflict, double the rewards you take. Most rewards can be doubled (except gaining control of a location or battle icons). When a reward offers the option to pay a cost to gain something, you may pay the cost a second time to gain it a second time.
Combat Cleanup
Once all rewards have been given, each player takes their troops from the Conflict and puts them in their supply (not their garrison). Reset all Combat markers to 0 on the Combat track. Return any sandworms from the Conflict to the bank.
Combat Phase Example
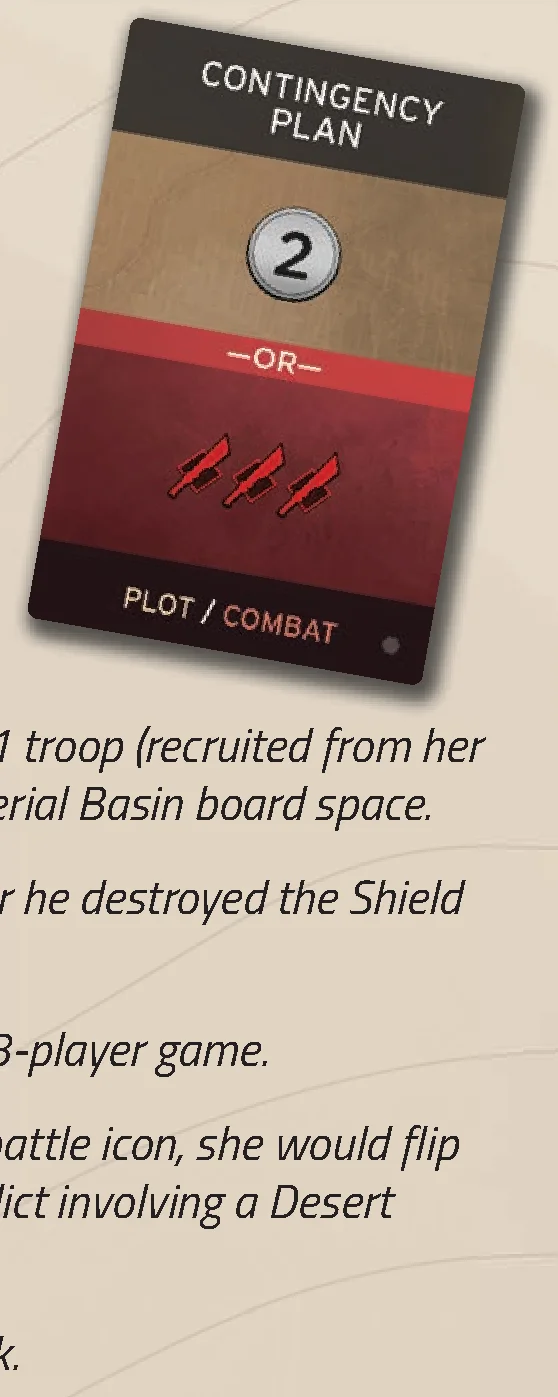
John has 11 strength and Abby has 9 strength. John passes. Abby plays Contingency Plan (+3 strength, moving to 12). Ned has 0 strength. John has no Combat Intrigue cards and passes. Abby passes. Abby wins 1st place (Secure Imperial Basin: 2 spice, 1 troop, control of Imperial Basin). John takes 2nd place, doubled by his sandworm (4 water, 2 troops). Troops return to supply; sandworm returns to bank.
Phase 4: Makers
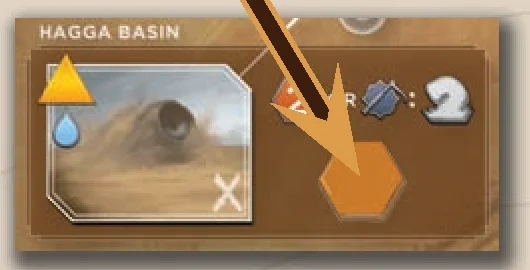
In this phase, spice can accumulate on Maker board spaces. Check each of the board spaces with a Maker icon: Deep Desert, Hagga Basin, and Imperial Basin. (In a six-player game, there is another: Habbanya Erg.)
If the space does not have an Agent, place 1 spice from the bank on that space (in the spot designated for bonus spice). This spice is added to any bonus spice that may already be there from previous rounds.
Phase 5: Recall
If any player is at 10 or more Victory Points on the Score track, or if the Conflict Deck is empty, the Endgame is triggered.
If no one has won, prepare the next round:
- Players recall their Agents, returning them to their Leaders.
- Pass the First Player marker clockwise to the next player, then begin a new round with Phase 1.
Endgame
- First, players may play and resolve any Endgame Intrigue cards they have.
- Whoever has the most Victory Points is declared the winner.
Tiebreakers: In the case of a tie, tiebreakers are, in order: amount of spice, Solari, water, and garrisoned troops.
DUNE: IMPERIUM — UPRISING comes with a mini-expansion called the CHOAM Module. We recommend that you play without it at least once to familiarize yourself with the game. When you feel comfortable, you can add the CHOAM Module for more strategic depth.
Components
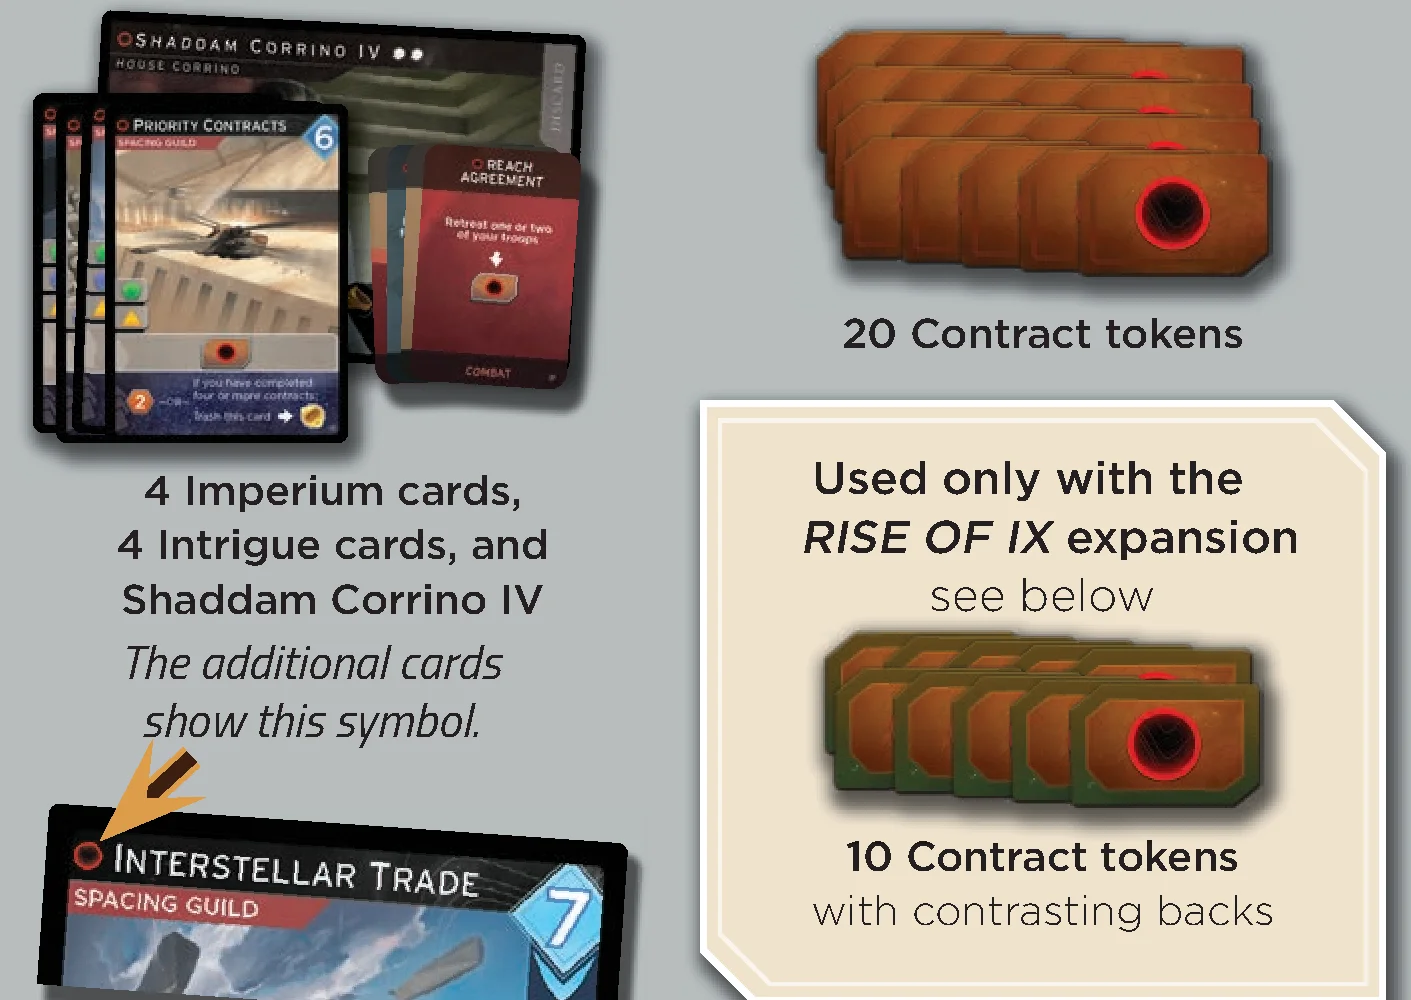
- 20 Contract tokens
- 10 Contract tokens with contrasting backs (used only with the Rise of Ix expansion)
- 4 Imperium cards, 4 Intrigue cards, and Shaddam Corrino IV leader (marked with the CHOAM module symbol)
Setup
Add or modify the following steps of your setup:
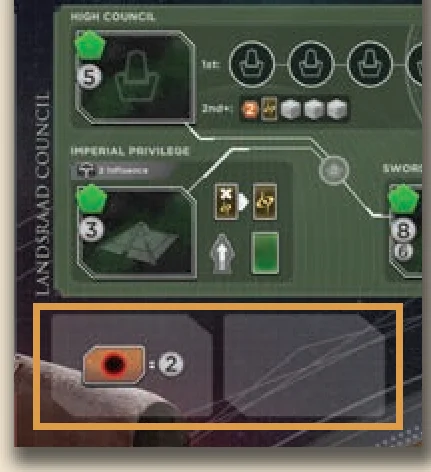
- A3: Shuffle the 20 contracts face down, then flip two of them face up and place them on the marked spaces on the board beneath the Landsraad Council. Place the remaining 18 face down in the bank.
- C1: Shuffle the four additional Intrigue cards into your Intrigue Deck.
- C2: Shuffle the four additional Imperium cards into your Imperium Deck.
- D: A player has the option to choose Shaddam Corrino IV as their Leader.
Taking Contracts
When playing without the CHOAM Module, the contract icon means that you simply gain 2 Solari, as indicated on the board. But when playing with the CHOAM Module, this icon means that you take one of the two face-up contracts on the board and place it in your supply. When you take one, replace it with another contract from the bank, flipped face up. (If all contracts have been taken by players, the icon reverts to giving you 2 Solari.)
Completing Contracts
A contract represents your promise to fulfill a service for the CHOAM Corporation. Only when you have made good on that promise will you receive a “payment.”
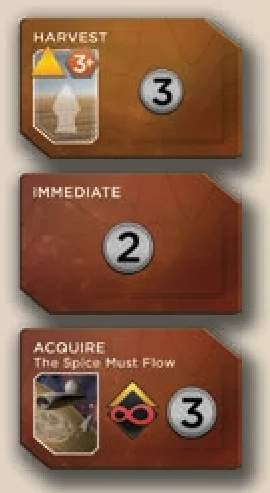
- Most contracts name a specific board space, and are completed by sending an Agent to that space.
- A Harvest contract is completed by sending an Agent to a Maker board space and gaining the amount of spice shown during that turn (in total, including from sources other than the space itself).
- The Immediate contract is completed as soon as you take it.
- The Acquire The Spice Must Flow contract is completed when you next acquire that card.
When you complete a contract, announce that you have done so, gain the rewards it shows, then flip it face down. Leave it in your supply, as certain cards refer to “completed contracts.”
If you take a contract involving the board space where you’ve already sent your Agent this turn, you must wait until a future turn to complete the contract.
Playing the CHOAM Module with RISE OF IX
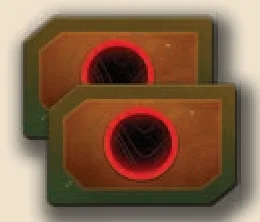
The RISE OF IX expansion replaces one of the locations on the UPRISING board where you can take a new contract. To compensate and jumpstart the completion of contracts, UPRISING includes 10 additional contracts (with different backs) to use specifically when playing with RISE OF IX.
After setting up the 20 standard contracts, shuffle the 10 RISE OF IX contracts and give two to each player. Each player looks at the two they’ve been given, choosing simultaneously which contract they want to begin the game with (placing it face up in their supply). Return all of the unchosen RISE OF IX contracts to the box.
DUNE: IMPERIUM — UPRISING is compatible with all previous DUNE: IMPERIUM products.
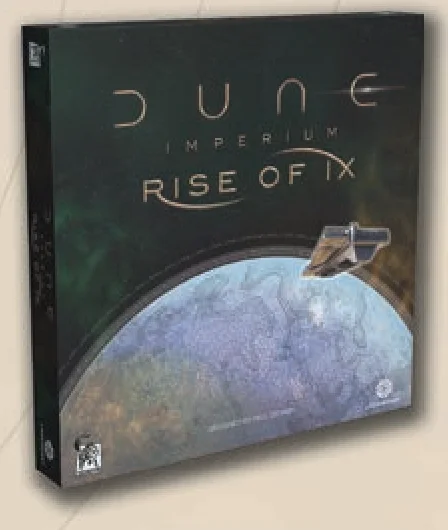
Adding Rise of Ix
- During setup, keep the CHOAM board overlay folded in half and cover only the top-right corner of the UPRISING board. This will create a new CHOAM section and cover the Assembly Hall and Gather Support board spaces in the Landsraad, while leaving the rest of the Landsraad board spaces in UPRISING unchanged.
- Because RISE OF IX was produced before UPRISING, the CHOAM board overlay and Ix board don’t have observation posts printed on them. Play as if there is one observation post on each of those boards: one observation post connects to Interstellar Shipping and Smuggling and the other connects to Tech Negotiation and Dreadnought.
- We recommend that you do not add the Conflict cards from RISE OF IX. You may do so if you wish, but it will make matching battle icons slightly harder. (However, you will need one additional Conflict III card to play the Epic Game Mode. In this situation, you should add Economic Supremacy.)
- Using Ilesa Ecaz requires the Foldspace cards from DUNE: IMPERIUM. (Allow Ilesa Ecaz to acquire Foldspace cards, even though they can’t be acquired by anyone else.)
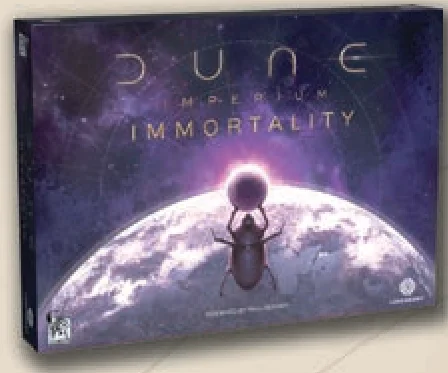
Adding Immortality
Although the Research Station in UPRISING is different from the one on the original DUNE: IMPERIUM game board, you should still cover it with the Research Station overlay.
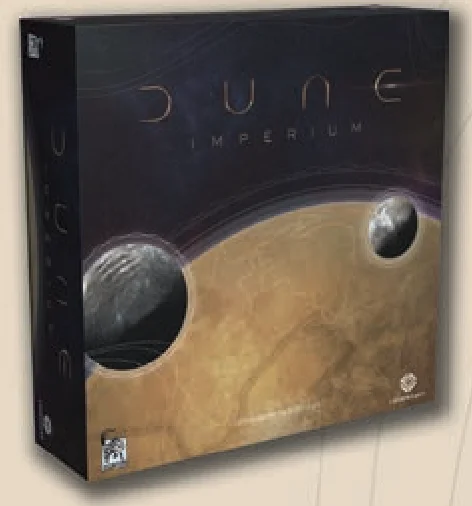
Combining with Base Dune: Imperium
- We recommend that you don’t add the Conflict cards from DUNE: IMPERIUM. You may do so if you wish, but it will make matching battle icons harder.
- As there is no Mentat in UPRISING, you should remove the Calculated Hire Intrigue card (and the Sort Through the Chaos Conflict card, if you’ve chosen to use the Conflict cards from DUNE: IMPERIUM).
- You may shuffle all other Intrigue and Imperium cards with UPRISING if you wish, or create your own custom blend of select DUNE: IMPERIUM and UPRISING cards.
Clarifications
- Feyd-Rautha Harkonnen: During setup, place the Feyd token on the leftmost space of the Training track printed on the Leader. When the token reaches the rightmost space, it remains there for the rest of the game.
- Lady Jessica: You begin the game with this side of the Leader (not Reverend Mother Jessica) face up.
- Lady Margot Fenring / Princess Irulan: You “reach” 2 Influence even when you move past 2 while gaining multiple Influence at the same time. You can reach 2 Influence with the same Faction more than once per game by losing Influence and later regaining it—though you only reach 2 Influence when moving up the Influence track, not down.
- Shaddam Corrino IV: When you play your Signet Ring to send an Agent to a board space, the Emperor of the Known Universe restriction on deploying units to the Conflict takes effect immediately.
- Spacing Guild’s Favor: Moving this card from in play to your discard pile during Clean Up does not trigger the discard ability. Only discarding it from your hand triggers the ability.
Strategy Tips
- Water: Water is rare and precious on Dune, and essential to harvesting the valuable spice. The Spacing Guild can provide vital supplies, if you find yourself in need. An alternative approach is to gain the favor of the Fremen and visit Sietch Tabr.
- Spice: Spice is a versatile substance and there are many ways to use it. Three Factions provide valuable services in exchange for varying amounts of spice.
- Solari: Solari is the currency of the Imperium and greases the workings of the Landsraad Council. Whether you’re looking to make upgrades in the form of a Swordmaster or High Council seat, or just need some additional troops, don’t come empty-handed.
- Acquiring Cards: Remember, when you’re acquiring cards for your deck, part of what you’re paying for is access to the various Factions. Take care not to leave yourself without the right tools to send Agents to key board spaces.
- 2 Influence Threshold: Gaining 2 Influence with a Faction not only provides a Victory Point, but also unlocks a unique ability related to that Faction. For the Emperor, Spacing Guild, and Fremen, a new board space will become available. For the Bene Gesserit, several cards become stronger. Try to unlock some of these abilities quickly and use them to your advantage.
- Conflict Timing: When it comes to winning Conflicts, position is everything. The longer you can wait to commit your units, the more information you’ll have when you do so and the less opportunity your opponents will have to react. Sometimes in a Conflict, a lesser victory achieved at a lower cost can be more valuable than a greater victory dearly bought.
- Intrigue Cards: Intrigue cards mean you can never be too certain which way a Conflict is going to break.
- Alliances: Gaining an Alliance with one of the Factions can be a powerful asset on your path to victory. Watch out for other players trying to race past you, and don’t miss an opportunity to do the same to them!
- Spies: Spies can provide a sense of security; their Infiltrate ability means you can’t be blocked from sending an Agent to a space they are spying on. However, don’t be shy about recalling them to Gather Intelligence—especially when you have multiple Spies in the field.
- Sandworms: The sandworms of Dune are powerful forces of nature. However, with the aid of the Fremen, it is possible to become a sandrider. Realize your investment by summoning sandworms whenever you have an opportunity to secure rewards from a Conflict. Even if you don’t win a Conflict, doubling second or third place rewards can be important!
Icon Guide and Additional Terms
 Acquire: Some cards have a special acquire box, shown underneath their cost. You gain the effect here one time, at the moment you acquire the card (and not later, when you play it from your hand).
 Agent: From the Swordmaster space, you can gain your third Agent (that was placed next to the board during setup of the game), then use it for the rest of the game.
 Alliance: You may use this effect only if you have the Alliance token of the Faction shown.
 Battle Icon: When you win a Conflict and take that card into your supply, check if you have another face-up card there with the same battle icon (Crysknife, Desert Mouse, or Ornithopter). If you do, flip the matching pair of cards face down and gain 1 Victory Point.
 Wild Battle Icon: During the Endgame, you may match the wild battle icon with any one of the three Battle Icons in your supply. Flip the matching pair of cards face down and gain 1 Victory Point.
 Contract: If playing without the CHOAM Module, gain 2 Solari. If playing with the CHOAM Module, take a face-up contract (or, if there are none left, gain 2 Solari).
 Control: If you win a Conflict with a Control reward (of Arrakeen, Spice Refinery, or Imperial Basin), place your Control marker on the flag below that space (replacing any opponent’s marker there). When a Conflict card is revealed for a space that you already control, you may deploy one troop from your supply to the Conflict.
 Discard: Discard a card of your choice from your hand. (For this and any other time you’re directed to discard a card, it cannot be an Intrigue card, unless specified.)
 Draw Card: Draw a card from your deck. If your deck is empty, reshuffle the discard pile in your supply to form a new deck, then continue to draw.
 Draw Intrigue: Draw an Intrigue card from the Intrigue Deck. Keep it face down until you play it. You may look at it at any time.
- Fremen Bond: You may use this effect if you have one or more other Fremen cards in play. Two cards with Fremen Bond can activate one another, regardless of order played.
- In Play: Cards you play on Agent turns and reveal during your Reveal turn remain face up and “in play” until you clean up at the end of your Reveal turn (unless they are trashed first).
 Influence Requirement: You may use this effect only if you have at least the amount of Influence indicated with the given Faction.
- Gain Influence: Gain Influence with the Faction shown: Emperor, Spacing Guild, Bene Gesserit, or Fremen.
- Gain/Lose Influence (Choice): Gain one, gain two, lose one Influence. Choose any one of the four Factions. (When gaining two Influence, you can’t choose two different Factions.)
 Maker: The board spaces with the Maker icon each gain 1 bonus spice during Phase 4: Makers if no Agent is present. When you send an Agent to one of these board spaces, you gain all bonus spice there.
 Maker Hooks: Take a Maker Hooks token from the bank, if you don’t already have one. Place it on your garrison, indicating that you now have the ability to summon sandworms. When this icon is used before a colon, it indicates a requirement to have a Maker Hooks token on your garrison.
- Paying a Cost: An arrow indicates a cost (left of the arrow, or above it) and an effect (right of the arrow, or below it). If you don’t pay the cost, you don’t get the effect. You do not have to pay such a cost on a card. You can’t pay the cost more than once per turn (except when sandworm reward doubling applies to a reward on a Conflict card).
 Persuasion: You receive Persuasion mainly from the Reveal boxes on your cards. You use it to acquire Imperium or Reserve cards, paying the cost shown in the top right corner of a card.
 Recall Agent: Return one of your other Agents on the board to your Leader (not the Agent you sent during this turn). You may use it again on another Agent turn in the same round.
 Recall Spy: Return one of your Spies from an observation post on the board to your supply.
- Resources (Solari, Spice, Water): When you gain a resource or pay one as a cost, it’s taken from or returned to the bank. (For Solari and spice, gain or pay the amount shown.)
 Retreat: When you retreat a troop, move it from the Conflict back to your garrison.
 Sandworm: Does nothing if the current Conflict is protected by the Shield Wall. Otherwise, summon and deploy one sandworm; take it from the bank and put it in your quadrant of the Conflict.
 Shield Wall Detonation: You may remove the Shield Wall token from the game board.
 Signet Ring: When you play your Signet Ring card on an Agent turn, you use the Signet Ring ability (with the corresponding icon) on your Leader.
 Spy: Place one Spy; take it from your supply and put it on an unoccupied observation post on the board. If you have no Spies in your supply, you may first recall one of your Spies for no effect.
 Steal Intrigue: Each opponent who has four or more Intrigue cards must give you one of them (selected at random).
 Sword: Each sword adds 1 strength to your strength total in a Conflict.
 Trash Intrigue: Trash an Intrigue card of your choice from your hand.
 Trash: Trash one card from your hand, discard pile, or in play. Return it to the game box; it won’t be used for the rest of the game. (Reserve cards are returned to their stack in the Reserve instead.) Trashing is optional unless it’s paying a cost, or if a card directs you to trash itself.
 Troop: Recruit one troop; take it from your supply and put it in your garrison on the game board. (If you recruited the troop while sending an Agent to a Combat space, you may deploy it to the Conflict.)
 Uprising: This icon appears near the lower right corner of all cards in this expansion. It is purely for reference.
 Victory Point: When you gain a Victory Point, move your Score marker one space up on the Score track. When you lose one, move your Score marker one space down.
Credits
Game Design: Paul Dennen
Executive Producer: Scott Martins
Art Direction and Graphic Design: Clay Brooks, Nate Storm
Card Illustration: Clay Brooks, Atilla Guzey, Derek Herring, Kenan Jackson, Chris Mercado, Brett Nienburg, Raul Ramos, Nate Storm, Dan Taylor
Production: Evan Lorentz, Marshall Britt
Game Development: Justin Cohen, Paul Dennen, Caleb Vance
Additional Game Development: Phil Amylon, Andy Clautice, Julia Duga, Evan Lorentz, Kevin Spak, Yuri Tolpin, Jay Treat
GALE FORCE 9:
Producer & Brand Manager: Joe LeFavi
Genuine Entertainment Co-Producer: John-Paul Brisigotti
Special thanks to all those involved in the creation of this game: Brian Herbert, Kevin J. Anderson, Byron Merritt, and the Herbert Properties, LLC. Our partners at Legendary Entertainment. All of the awesome Dire Wolf Digital team members, and their friends and families, who helped to playtest DUNE: IMPERIUM — UPRISING.
Introduction & Across the Imperium
Arrakis. Dune. Desert Planet. Home to the most precious resource in the universe—the spice melange. After betraying and destroying House Atreides, the Emperor Shaddam Corrino IV has given House Harkonnen control over the planet Arrakis once more.
But a mysterious warrior named Muad’Dib has risen to power among the Fremen, threatening the schemes of the Emperor and his allies. Other factions have taken notice, as the conflict on Arrakis has reached a breaking point. What was once a blood feud between rival Great Houses has become something greater. From lowly smugglers to Bene Gesserit sisters to the Emperor himself, many have critical roles to play in determining the future of the Imperium. As always, one thing remains true:
Whoever controls the spice controls the universe…
Across the Imperium
This page contains no game rules; you can skip ahead if you’d like. But if you don’t know much about the world of Dune, or want to learn how the game board connects to the story, see below.
DUNE: IMPERIUM — UPRISING is a deck-building worker placement game that finds inspiration in elements and characters from the Dune legacy, both the films from Legendary Pictures and the seminal literary series from Frank Herbert, Brian Herbert, and Kevin J. Anderson.
Note: The game comes with multiple leaders from some of the Great Houses. For the most authentic story experience, more than one leader from the same House shouldn’t be used in the same game. But the game is also designed to allow nonstandard leader combinations and “What If?” scenarios.
- The Emperor / Shaddam IV: Shaddam IV of House Corrino is the ruthless Emperor of the Known Universe. Through inroads with him, your wealth will increase and you may be granted assistance from his elite military—the Sardaukar.
- The Landsraad: The Emperor presides over the Landsraad, the governing body that represents the Great Houses of the Imperium. It’s no coincidence that Solari goes a long way here at making connections, earning favors, or gaining a permanent strategic advantage.
- CHOAM: The Combine Honnete Ober Advancer Mercantiles (or simply CHOAM) is a massive commercial organization that spans the Imperium. Filling their trade contracts yields Solari, the main currency of the Imperium, while selling them your spice brings even greater payoffs and strengthens important political pacts.
- The Spacing Guild: The Spacing Guild has a monopoly on foldspace travel. Their massive heighliners can deliver critical supplies and large numbers of troops, if you can afford to pay the high price they ask in spice.
- The Bene Gesserit: The intrigues and machinations of the Bene Gesserit sisterhood and their generations-long planning are everywhere in the Imperium, seen and unseen.
- The Fremen: The harsh landscape of Dune has molded the Fremen into fierce warriors. You may seek to befriend them to amass desert power and the incredible ability to ride sandworms into battle.
- The Populated Areas: The populated areas of Dune are important sites from which to stage any military campaigns, as you can muster troops at most of these locations. And some of the locations (along with Imperial Basin) are protected from the sandworms by a mighty shield wall of solid rock.
- The Deserts: The deserts of Dune are where you’ll harvest the most precious substance in the Imperium: the spice melange. They are also home to colossal sandworms. Spice harvesters must flee when they approach, but those who master the ways of the Fremen and their maker hooks might have other plans…
Game Components
General Components
- 1 Two-sided game board
- 18 Reserve cards (8 Prepare the Way, 10 The Spice Must Flow)
- 69 Imperium Deck cards (including 4 used only with the CHOAM module)
- 44 Intrigue cards (including 4 used only with the CHOAM module)
- 16 Conflict cards (3 Conflict I, 9 Conflict II, 4 Conflict III)
- 5 Objective cards
- 9 Leaders (Two-sided, including 1 used only with the CHOAM module)
- 1 Feyd token (Used with the Feyd-Rautha Harkonnen Leader)
- 1 Shield Wall token
- 4 Maker Hooks
- 4 Alliance tokens
- 1 First Player marker
- 20 Water tokens
- Solari tokens: 8 large (worth 5), 20 small (worth 1)
- Spice tokens: 7 large (worth 5), 20 small (worth 1)
- 8 Sandworms (4 plastic, 4 wood — use either or both, as you prefer)
- 1 Board Space Guide sheet
To play with the CHOAM Module, see the additional components and rules listed on page 16.
For games with one or two players, see the additional components and rules in the Rivals rules supplement. For games with six players, see the additional components and rules in the Six-Player Games rules supplement.
Player Components
The player components come in different colors for each player (red is shown as an example):
- 10-card starting deck containing:
- Convincing Argument (2)
- Dagger (2)
- Diplomacy (1)
- Dune, the Desert Planet (2)
- Reconnaissance (1)
- Seek Allies (1)
- Signet Ring (1)
Starting deck cards can be identified by the matching starting deck symbol.
- 16 Cubes (troops & influence markers)
- 2 Discs (1 Score marker, 1 Councilor token)
- 3 Spies
- 3 Control markers
- 3 Agents
- 1 Combat marker
Setup
Do you prefer to learn by watching a video? Scan the QR code on the setup page.
Board and Global Setup
- Place the game board in your play area (with the side shown face up), and then place the following components on it:
- A1: Place the Shield Wall token in the marked area below the Spice Refinery board space.
- A2: Place the four Alliance tokens on the marked areas of the Faction’s Influence tracks (Emperor, Spacing Guild, Bene Gesserit, and Fremen).
- Create a Conflict Deck:
- Separate the Conflict cards by their backs: Conflict I, Conflict II, and Conflict III.
- Shuffle the four Conflict III cards and place all of them face down in the marked area of the game board.
- Shuffle the nine Conflict II cards, then deal five face down on top of the Conflict III cards.
- Shuffle the three Conflict I cards, then deal one face down on top of the Conflict II cards.
You should now have a 10-card Conflict Deck on the game board, with one Conflict I card on top, five Conflict II cards below it, then the four Conflict III cards on the bottom. Return the unused Conflict cards to the game box without looking at them.
- Prepare cards along the edge of the game board:
(If you’re not using the CHOAM module described on page 16, omit any cards marked with the CHOAM symbol.)
- C1: Shuffle the Intrigue Deck and place it face down.
- C2: Shuffle the Imperium Deck and place it face down. From it, deal five cards face up to form an Imperium Row.
- C3: Next to the Imperium Row, place the Reserve cards in two stacks: one for Prepare the Way and one for The Spice Must Flow.
- Leader Selection: Each player takes a Leader and places it in front of them. (You may choose or select at random.) Do not use Shaddam Corrino IV unless you are using the CHOAM module.
Leaders have from one to three icons after their names. Leaders with more icons are more strategically complex. For your first game, it is recommended that each player chooses a Leader with just one icon.
Player Setup and Bank
- Starting Deck: Each player takes a 10-card starting deck, shuffles it, and places it face down in their supply to the left of their Leader.
- Resources and Bank:
- F1: Each player takes 1 water and places it in their supply.
- F2: Create a bank next to the game board containing the Solari, spice, remaining water tokens, and the sandworms you prefer (either wood, plastic, or both). These are not meant to be limited; if you run out and need more, make any convenient substitution. Also, add the 4 Maker Hooks tokens to the bank.
- Player Setup: Each player chooses a color and takes all of its components:
- G1: Place two of your Agents on your Leader. Place your third Agent (your Swordmaster) next to the game board.
- G2: Place one of your two discs on the Score track. In a 4-player game, place it on the 1 space. Otherwise, place it on the 0 space.
- G3: Place your Combat marker (with the side shown face up) on the 0 space of the Combat track.
- G4: Place four cubes, one each, on the bottom spaces of the Influence tracks of the four Factions.
- G5: The other 12 cubes represent your troops. Place three in one of the four circular garrisons on the game board (each player taking the one closest to them).
- G6: Place your remaining components in your supply, in clear view of all players.
- Objective Cards & First Player: Shuffle the Objective cards. (Some are marked “1-3P” or “4/6P,” for those numbers of players. Omit any that don’t match your player count, returning them to the game box.) Each player draws one Objective at random, then places it face up in their supply. The player whose Objective shows the First Player marker takes that marker.
Core Concepts
Objective
You are a Leader representing one of the Great Houses of the Landsraad (or another powerful figure on the galactic stage). Defeat your rivals in Combat, wield political Influence, and form alliances with the four major Factions. Your successes will be measured in Victory Points.
Whenever you gain or lose a Victory Point, move your Score marker up or down one space on the Score track. At the end of a round, if any player has reached 10 or more Victory Points (or if the Conflict Deck is empty), the game ends, and whoever has the most Victory Points wins.
Leaders
Each Leader has two different unique abilities:
- The first, on the left, is used during play as described on the Leader.
- The second, on the right and marked by the Signet Ring icon, is activated when you play your Signet Ring card on one of your Agent turns.
Deck-Building
You start the game with a 10-card deck containing the same cards as the other players. Adding to and changing that deck is the key element of play in a deck-building game. During each round, you may acquire new cards to add to your deck. Because cards do many different things, each player’s deck and strategy will diverge from the others as the game unfolds.
- Whenever you acquire a new Imperium or Reserve card, it is first placed in your discard pile.
- Any time you’re unable to draw a card because your deck is empty, you reshuffle your discard pile to form a new deck, then continue to draw as needed.
- There are also ways to “trash” cards, removing them from your deck altogether for the rest of the game. By strategically removing weaker cards from your deck, you increase the chances of drawing your stronger cards more often.
Cards of any type can override the usual rules of the game!
Agents
You start the game with two Agents (and can gain a third during play). You send Agents to spaces on the game board, sometimes gathering resources, sometimes paying resources to advance your strategy. (This is explained fully in Phase 2: Player Turns, while board spaces are described in detail in the separate Board Space Guide sheet.)
In DUNE: IMPERIUM — UPRISING, Agents and cards are tightly linked; you can’t send an Agent to a board space without first playing a card that allows it.
There is no Mentat Agent in UPRISING.
Factions & Influence
In DUNE: IMPERIUM — UPRISING, the four Factions represent powerful forces on Dune and elsewhere in the Imperium. Increasing your Influence and earning an Alliance with one or more of them is one of the key routes to victory in the game.
Your Faction cubes begin at the bottom of each Faction’s Influence track. Throughout the game, your Influence with a Faction will increase or decrease, depending on the cards you play and the actions you take. When you send an Agent to a Faction’s board space, gain one Influence with that Faction by advancing your cube one space on its Influence track. Other game effects can also move your cube up (and occasionally down) the track.
- Reaching 2 Influence: When you reach 2 Influence with a Faction, you gain a Victory Point. If you drop back below 2 Influence, you lose that Victory Point.
- Reaching 4 Influence: When you reach 4 Influence, you earn the bonus shown on that space of the track. If you drop back below 4 Influence, you do not give back the bonus. (It’s possible—though unusual—to earn the same bonus more than once, if you move back then advance again.)
- Alliances: The first player to reach 4 Influence with a Faction also earns an Alliance with that Faction. They take the Alliance token from the track, put it in their supply, and gain the Victory Point shown on the Alliance token. If they are ever passed by an opponent rising to a higher space on the track, they must give the Alliance token to that opponent; they lose that Victory Point and the opponent gains it.
Intrigue Cards
Intrigue cards represent subterfuge, backroom dealings, and surprise twists—they can provide resources like water or spice, increase your Influence with a Faction, or even score Victory Points. Each Intrigue card indicates when it can be played, what effect it has, and whether there are costs or conditions to playing it.
You receive Intrigue cards primarily from board spaces such as Secrets, Sardaukar, and Assembly Hall. (But look for other opportunities on cards, wherever you see the Intrigue card icon.) They are kept face down, separate from your deck. You may look at them at any time. Reveal them to your opponents only when you play them. Once an Intrigue card is played and resolved, place it face up in a discard pile next to the Intrigue Deck.
There are three types of Intrigue cards:
- Plot: You may play a Plot Intrigue card any time during one of your Agent or Reveal turns.
- Combat: You may play a Combat Intrigue card only during Combat.
- Endgame: You may play an Endgame Intrigue card only at the end of the game.
Phase 1 & Phase 2: Round Start and Player Turns
DUNE: IMPERIUM — UPRISING is played in a series of rounds. Each round consists of five phases, in this order:
- Round Start
- Player Turns (Agent Turn, Reveal Turn)
- Combat
- Makers
- Recall
Phase 1: Round Start
- Each round begins by revealing a new Conflict card from the top of the Conflict Deck. Place it face up in the space next to the Conflict Deck (on top of any Conflict cards that might remain from previous rounds).
- Next, each player draws five cards from their own deck, forming their hand for the round.
Phase 2: Player Turns Overview
Starting with the player who has the First Player marker and continuing clockwise, players take one turn at a time.
On your turn, you will take either an Agent turn or a Reveal turn. Generally, you will take Agent turns until you run out of Agents to place, then you will take a Reveal turn. (Note that Agent turns are optional. If you choose to, you can take a Reveal turn while you still have Agents instead of taking an Agent turn.)
Once you’ve taken a Reveal turn, your turns are skipped for the rest of the phase, while other players finish taking their turns. Once all players have taken a Reveal turn, this phase ends.
You may play any Plot Intrigue cards you have during this phase, at any point during one of your own Agent or Reveal turns.
Card Anatomy
The effects of each card in your deck are divided into two parts: an Agent box and a Reveal box. On any given turn, you may use the effects contained in only one of those boxes: the Agent box during an Agent turn, or the Reveal box during a Reveal turn.
- A – Name
- B – Faction: Not all cards are part of a Faction.
- C – Agent icons
- D – Agent box
- E – Reveal box
- F – Persuasion Cost
- G – Acquire effect: Not all cards have an Acquire effect.
Agent Turns
In an Agent turn, you play one card from your hand face up in front of you, using it to send an Agent from your Leader to an unoccupied space on the game board.
- This board space must have an icon in its upper left corner matching one of the Agent icons on the card. (Though Spies provide an alternative to this.)
- You must choose only one Agent icon on your card; one card can’t send multiple Agents.
- You can’t send an Agent to a board space that already has one. (Though Spies can provide a way around this.)
- You must pay any costs and meet any requirements of the board space you choose.
- In addition, the Agent box of the card you played may provide an effect when you play it on an Agent turn. (You ignore the Reveal box of the card during Agent turns.)
- If a card does not have any Agent icons on it, you may not play it during an Agent turn. It may only be revealed during a Reveal turn.
The eight different Agent icons are:
- Emperor
- Spacing Guild
- Bene Gesserit
- Fremen
- Landsraad
- City
- Spice Trade
- Spy
When you play a card and send an Agent to a board space, you gain the effects of the board space as well as the effects contained in the Agent box of the card. If the board space belongs to one of the Factions, you also move your cube one space up on its Influence track. You may carry out all these effects in any order.
Arrows on cards and on the board () indicate that there is a cost (left of the arrow, or above it) you must pay to get the effect (right of the arrow, or below it). You are never forced to pay such a cost. However, if you don’t, you won’t gain the effect. You may only pay the cost and gain the effect once during your turn.
Board Space Costs
To send an Agent to some board spaces, you must pay a cost. If you can’t pay the cost immediately (before resolving any effects of the space or the card you played), you can’t send your Agent there.
Influence Requirements
To send an Agent to certain board spaces, you must have enough Influence with a particular Faction:
- Imperial Privilege: requires 2 or more Influence with the Emperor.
- Shipping: requires 2 or more Influence with the Spacing Guild.
- Sietch Tabr: requires 2 or more Influence with the Fremen.
Units and Conflict Deployment
At the start of each round, the current Conflict card is revealed, offering rewards for which the players will compete in Combat. Players will need to deploy units to fight for these rewards. There are two types of units: troops and sandworms.
- Recruiting Troops: Whenever the cube icon appears on a card or board space, you recruit one troop. Take a troop from your supply and place it in your garrison on the game board. (If you run out of troops in your supply, you can’t recruit more until some return there.)
- Deploying to Conflict: Units won’t help you win combats while in your garrison, however. You may deploy them to a Conflict when you send an Agent to a Combat space (spaces featuring a desert illustration and crossed swords). While most of these appear on the planet Dune itself, three appear with the Factions: Heighliner (Spacing Guild), Desert Tactics (Fremen), and Fremkit (Fremen).
- When you send an Agent to a Combat space, you may deploy units to the Conflict area: you may deploy any or all units recruited during your current turn (from the board space and card), plus up to two more units from your garrison.
- Sandworms: Whenever the sandworm icon appears on a card or board space, you summon and immediately deploy a sandworm to the Conflict. (A sandworm can never be placed in a garrison.) Two restrictions limit the summoning of sandworms:
- The sandworm icon is usually prefaced by a requirement to have a Maker Hooks token on your garrison (obtained at Sietch Tabr).
- A sandworm cannot be summoned to a Conflict protected by the Shield Wall.
Critical Locations and the Shield Wall
Some Conflict cards represent a struggle taking place at one of three locations on Dune: Arrakeen, Spice Refinery, or Imperial Basin. If you win such a Conflict, your rewards include control of the board space: take a Control marker from your supply and place it on the flag below the appropriate space.
- While your Control marker is on one of these spaces, you receive the bonus shown whenever any player (yourself included) sends an Agent there: 1 Solari for Arrakeen or Spice Refinery, and 1 spice for Imperial Basin.
- When a Conflict card is revealed for a space that you already control, you receive a defensive bonus: you may deploy one troop from your supply to the Conflict.
These three important locations are protected from storms and sandworms by a Shield Wall token placed on the board during setup. While this token remains in place, no sandworms can be summoned to a Conflict at one of these three protected locations. However, when the Shield Wall detonation icon appears on a card or board space, you may remove the Shield Wall token from its place on the board (returning it to the box). Once removed, sandworms may be summoned to any Conflict.
Spies
Across the board are various observation posts where players may place Spies. Each of these is connected to one or more board spaces.
- Placing a Spy: Whenever the Spy icon appears on a card or board space, you may place a Spy from your supply on an unoccupied observation post on the board. If you have no Spies in your supply when you need to place one, you may first recall one of your Spies for no effect. (Some effects specify a particular Agent icon that must be connected to the post).
- Recalling a Spy: When the Recall Spy icon appears on a card, you may return one of your Spies from an observation post to your supply to pay for a powerful effect.
- Infiltrate: If you wish to send an Agent to a board space occupied by another player, you may recall your own Spy from a connected observation post to ignore the other player’s Agent and send your Agent to that same board space.
- Gather Intelligence: Whenever you send an Agent to a board space, you may recall your own Spy from a connected observation post to draw a card. You must choose whether to do this immediately after placing your Agent (before receiving any effects of the board space or card you played).
- Note: You cannot recall the same Spy to both Infiltrate and Gather Intelligence.
- The Spy Agent Icon: The Spy Agent icon allows you to send an Agent to a board space connected to an observation post where you currently have a Spy. You do not recall the Spy for this purpose.
Agent Turn Examples
- John: Plays Dune, the Desert Planet to send an Agent to Imperial Basin. He collects spice from the space. Imperial Basin is a Combat space. John deploys two troops from his garrison to the Conflict (the maximum allowed).
- Abby: Plays Rebel Supplier to send an Agent to Arrakeen. She recalls her Spy there to Gather Intelligence, drawing a card. John has a Control marker there, so he receives 1 Solari. From Arrakeen, Abby recruits a troop and draws a card. Her card recruits two more troops (because she recalled a Spy). She deploys all three recruited troops plus one troop from her garrison into the Conflict.
- Ned: Plays Dagger to send an Agent to Gather Support. He pays 2 Solari to gain one water and two troops. Because it’s not a Combat space, he places the troops in his garrison.
Reveal Turns
When a player has no more Agents for Agent turns (or chooses not to use any Agents they have remaining), that player takes a Reveal turn. This consists of the following steps in order:
- Reveal Cards: Reveal all cards remaining in your hand, placing them face up in play in front of you. Keep them separate from other cards you played previously on Agent turns.
- Resolve Reveal Effects: Gain the effects in the Reveal boxes of all the cards you just revealed (but not cards played during Agent turns). You may resolve Reveal effects in any order. In addition, you may use Persuasion gained to acquire new cards for your deck before, between, or after your Reveal effects.
- Clean Up: Remove all the cards from in front of you (from your Agent and Reveal turns) and put them in your discard pile.
Setting Your Strength
After you Reveal Cards, but before you Clean Up, you also total your strength for the Combat this round:
- Each troop you have in the Conflict adds 2 strength.
- Each sandworm you have in the Conflict adds 3 strength.
- Each sword you revealed during your Reveal turn adds 1 strength.
- Requirement: You must have at least one unit in the Conflict to have any strength. If your last unit is ever removed, your strength becomes 0.
Move your Combat marker to the corresponding space on the Combat track. If your strength is over 20, flip the marker to the +20 side and start again from the beginning of the track.
Acquiring Cards
The Persuasion you gain during a round is used during your Reveal turn to acquire new cards for your deck:
- You may acquire any of the five cards in the Imperium Row, or Prepare the Way or The Spice Must Flow from the Reserve.
- The cost to acquire a card is shown at the top right of that card. You may acquire as many cards as you like, as long as you have enough Persuasion to spend.
- You may pool Persuasion from multiple sources to acquire one card, and split Persuasion from a single source to pay for different cards. Any unspent Persuasion is lost at the end of your Reveal turn.
- When you acquire a card, place it face up in your discard pile (to the right of your Leader).
- The Imperium Row must always have five cards; whenever a card is taken, immediately replace it from the top of the Imperium Deck.
Reveal Turn Example
John takes a Reveal turn, revealing Prepare the Way, Rebel Supplier, and Strike Fleet. Rebel Supplier gives 1 spice. He gains 3 Persuasion total and spends 2 to acquire Desert Survival, refilling the Imperium Row. He has two troops in Conflict (4 strength) and 4 swords from cards (total 8 strength). He plays an Intrigue card, Unexpected Allies: pays 2 water, removes the Shield Wall token, and summons a sandworm (+3 strength, total 11 strength). He then places his cards in his discard pile.
Phase 3: Combat
Combat is resolved during this phase, but first, players have the chance to play Combat Intrigue cards.
Combat Intrigue Cards
Starting with the player who has the First Player marker and continuing clockwise, each player with at least one unit in the Conflict may play any number of Combat Intrigue cards, or may pass. Passing does not prevent you from playing a card later if another player acts. Once all players involved in Combat pass consecutively, resolve Combat.
Resolve Combat
Rewards from the Conflict card are given to players based on their strength, as shown on the Combat track:
- 1st place (highest strength): Wins the Conflict and gains the first reward, then takes the Conflict card into their supply face up.
- 2nd place: Gains the second reward.
- 3rd place: In a 4- or 6-player game, gains the third reward. (In 1-3 player games, 3rd reward is only used in ties for 2nd).
- A player with 0 strength receives no reward.
Ties
- Tie for 1st place: Tied players each gain the second reward. No one wins the Conflict or takes the Conflict card. In a 3-player game, no other rewards are given. In a 4- or 6-player game, if exactly two players tied for first, remaining players compete for the third reward.
- Tie for 2nd place: Tied players each gain the third reward. The winner keeps the 1st reward and card, but no further rewards are given.
- Tie for 3rd place: Tied players receive nothing.
Battle Icons
There are three battle icons: Crysknife, Desert Mouse, and Ornithopter. When you win a Conflict and take that card into your supply, check if you have another face-up Conflict or Objective card in your supply with the same battle icon. If you do, you must flip the matching pair of cards face down and gain 1 Victory Point.
Sandworm Reward Doubling
When taking rewards, if you have one or more sandworms in the Conflict, double the rewards you take. Most rewards can be doubled (except gaining control of a location or battle icons). When a reward offers the option to pay a cost to gain something, you may pay the cost a second time to gain it a second time.
Combat Cleanup
Once all rewards have been given, each player takes their troops from the Conflict and puts them in their supply (not their garrison). Reset all Combat markers to 0 on the Combat track. Return any sandworms from the Conflict to the bank.
Combat Phase Example
John has 11 strength and Abby has 9 strength. John passes. Abby plays Contingency Plan (+3 strength, moving to 12). Ned has 0 strength. John has no Combat Intrigue cards and passes. Abby passes. Abby wins 1st place (Secure Imperial Basin: 2 spice, 1 troop, control of Imperial Basin). John takes 2nd place, doubled by his sandworm (4 water, 2 troops). Troops return to supply; sandworm returns to bank.
Phases 4 & 5: Makers, Recall & Endgame
Phase 4: Makers
In this phase, spice can accumulate on Maker board spaces. Check each of the board spaces with a Maker icon: Deep Desert, Hagga Basin, and Imperial Basin. (In a six-player game, there is another: Habbanya Erg.)
If the space does not have an Agent, place 1 spice from the bank on that space (in the spot designated for bonus spice). This spice is added to any bonus spice that may already be there from previous rounds.
Phase 5: Recall
If any player is at 10 or more Victory Points on the Score track, or if the Conflict Deck is empty, the Endgame is triggered.
If no one has won, prepare the next round:
- Players recall their Agents, returning them to their Leaders.
- Pass the First Player marker clockwise to the next player, then begin a new round with Phase 1.
Endgame
- First, players may play and resolve any Endgame Intrigue cards they have.
- Whoever has the most Victory Points is declared the winner.
Tiebreakers: In the case of a tie, tiebreakers are, in order: amount of spice, Solari, water, and garrisoned troops.
Mini-Expansion: CHOAM Module
DUNE: IMPERIUM — UPRISING comes with a mini-expansion called the CHOAM Module. We recommend that you play without it at least once to familiarize yourself with the game. When you feel comfortable, you can add the CHOAM Module for more strategic depth.
Components
- 20 Contract tokens
- 10 Contract tokens with contrasting backs (used only with the Rise of Ix expansion)
- 4 Imperium cards, 4 Intrigue cards, and Shaddam Corrino IV leader (marked with the CHOAM module symbol)
Setup
Add or modify the following steps of your setup:
- A3: Shuffle the 20 contracts face down, then flip two of them face up and place them on the marked spaces on the board beneath the Landsraad Council. Place the remaining 18 face down in the bank.
- C1: Shuffle the four additional Intrigue cards into your Intrigue Deck.
- C2: Shuffle the four additional Imperium cards into your Imperium Deck.
- D: A player has the option to choose Shaddam Corrino IV as their Leader.
Taking Contracts
When playing without the CHOAM Module, the contract icon means that you simply gain 2 Solari, as indicated on the board. But when playing with the CHOAM Module, this icon means that you take one of the two face-up contracts on the board and place it in your supply. When you take one, replace it with another contract from the bank, flipped face up. (If all contracts have been taken by players, the icon reverts to giving you 2 Solari.)
Completing Contracts
A contract represents your promise to fulfill a service for the CHOAM Corporation. Only when you have made good on that promise will you receive a “payment.”
- Most contracts name a specific board space, and are completed by sending an Agent to that space.
- A Harvest contract is completed by sending an Agent to a Maker board space and gaining the amount of spice shown during that turn (in total, including from sources other than the space itself).
- The Immediate contract is completed as soon as you take it.
- The Acquire The Spice Must Flow contract is completed when you next acquire that card.
When you complete a contract, announce that you have done so, gain the rewards it shows, then flip it face down. Leave it in your supply, as certain cards refer to “completed contracts.”
If you take a contract involving the board space where you’ve already sent your Agent this turn, you must wait until a future turn to complete the contract.
Playing the CHOAM Module with RISE OF IX
The RISE OF IX expansion replaces one of the locations on the UPRISING board where you can take a new contract. To compensate and jumpstart the completion of contracts, UPRISING includes 10 additional contracts (with different backs) to use specifically when playing with RISE OF IX.
After setting up the 20 standard contracts, shuffle the 10 RISE OF IX contracts and give two to each player. Each player looks at the two they’ve been given, choosing simultaneously which contract they want to begin the game with (placing it face up in their supply). Return all of the unchosen RISE OF IX contracts to the box.
Combining with Other Dune: Imperium Products
DUNE: IMPERIUM — UPRISING is compatible with all previous DUNE: IMPERIUM products.
Adding Rise of Ix
- During setup, keep the CHOAM board overlay folded in half and cover only the top-right corner of the UPRISING board. This will create a new CHOAM section and cover the Assembly Hall and Gather Support board spaces in the Landsraad, while leaving the rest of the Landsraad board spaces in UPRISING unchanged.
- Because RISE OF IX was produced before UPRISING, the CHOAM board overlay and Ix board don’t have observation posts printed on them. Play as if there is one observation post on each of those boards: one observation post connects to Interstellar Shipping and Smuggling and the other connects to Tech Negotiation and Dreadnought.
- We recommend that you do not add the Conflict cards from RISE OF IX. You may do so if you wish, but it will make matching battle icons slightly harder. (However, you will need one additional Conflict III card to play the Epic Game Mode. In this situation, you should add Economic Supremacy.)
- Using Ilesa Ecaz requires the Foldspace cards from DUNE: IMPERIUM. (Allow Ilesa Ecaz to acquire Foldspace cards, even though they can’t be acquired by anyone else.)
Adding Immortality
Although the Research Station in UPRISING is different from the one on the original DUNE: IMPERIUM game board, you should still cover it with the Research Station overlay.
Combining with Base Dune: Imperium
- We recommend that you don’t add the Conflict cards from DUNE: IMPERIUM. You may do so if you wish, but it will make matching battle icons harder.
- As there is no Mentat in UPRISING, you should remove the Calculated Hire Intrigue card (and the Sort Through the Chaos Conflict card, if you’ve chosen to use the Conflict cards from DUNE: IMPERIUM).
- You may shuffle all other Intrigue and Imperium cards with UPRISING if you wish, or create your own custom blend of select DUNE: IMPERIUM and UPRISING cards.
Clarifications & Strategy Tips
Clarifications
- Feyd-Rautha Harkonnen: During setup, place the Feyd token on the leftmost space of the Training track printed on the Leader. When the token reaches the rightmost space, it remains there for the rest of the game.
- Lady Jessica: You begin the game with this side of the Leader (not Reverend Mother Jessica) face up.
- Lady Margot Fenring / Princess Irulan: You “reach” 2 Influence even when you move past 2 while gaining multiple Influence at the same time. You can reach 2 Influence with the same Faction more than once per game by losing Influence and later regaining it—though you only reach 2 Influence when moving up the Influence track, not down.
- Shaddam Corrino IV: When you play your Signet Ring to send an Agent to a board space, the Emperor of the Known Universe restriction on deploying units to the Conflict takes effect immediately.
- Spacing Guild’s Favor: Moving this card from in play to your discard pile during Clean Up does not trigger the discard ability. Only discarding it from your hand triggers the ability.
Strategy Tips
- Water: Water is rare and precious on Dune, and essential to harvesting the valuable spice. The Spacing Guild can provide vital supplies, if you find yourself in need. An alternative approach is to gain the favor of the Fremen and visit Sietch Tabr.
- Spice: Spice is a versatile substance and there are many ways to use it. Three Factions provide valuable services in exchange for varying amounts of spice.
- Solari: Solari is the currency of the Imperium and greases the workings of the Landsraad Council. Whether you’re looking to make upgrades in the form of a Swordmaster or High Council seat, or just need some additional troops, don’t come empty-handed.
- Acquiring Cards: Remember, when you’re acquiring cards for your deck, part of what you’re paying for is access to the various Factions. Take care not to leave yourself without the right tools to send Agents to key board spaces.
- 2 Influence Threshold: Gaining 2 Influence with a Faction not only provides a Victory Point, but also unlocks a unique ability related to that Faction. For the Emperor, Spacing Guild, and Fremen, a new board space will become available. For the Bene Gesserit, several cards become stronger. Try to unlock some of these abilities quickly and use them to your advantage.
- Conflict Timing: When it comes to winning Conflicts, position is everything. The longer you can wait to commit your units, the more information you’ll have when you do so and the less opportunity your opponents will have to react. Sometimes in a Conflict, a lesser victory achieved at a lower cost can be more valuable than a greater victory dearly bought.
- Intrigue Cards: Intrigue cards mean you can never be too certain which way a Conflict is going to break.
- Alliances: Gaining an Alliance with one of the Factions can be a powerful asset on your path to victory. Watch out for other players trying to race past you, and don’t miss an opportunity to do the same to them!
- Spies: Spies can provide a sense of security; their Infiltrate ability means you can’t be blocked from sending an Agent to a space they are spying on. However, don’t be shy about recalling them to Gather Intelligence—especially when you have multiple Spies in the field.
- Sandworms: The sandworms of Dune are powerful forces of nature. However, with the aid of the Fremen, it is possible to become a sandrider. Realize your investment by summoning sandworms whenever you have an opportunity to secure rewards from a Conflict. Even if you don’t win a Conflict, doubling second or third place rewards can be important!
Icon Guide and Additional Terms
Icon Guide and Additional Terms
- Acquire: Some cards have a special acquire box, shown underneath their cost. You gain the effect here one time, at the moment you acquire the card (and not later, when you play it from your hand).
- Agent: From the Swordmaster space, you can gain your third Agent (that was placed next to the board during setup of the game), then use it for the rest of the game.
- Alliance: You may use this effect only if you have the Alliance token of the Faction shown.
- Battle Icon: When you win a Conflict and take that card into your supply, check if you have another face-up card there with the same battle icon (Crysknife, Desert Mouse, or Ornithopter). If you do, flip the matching pair of cards face down and gain 1 Victory Point.
- Wild Battle Icon: During the Endgame, you may match the wild battle icon with any one of the three Battle Icons in your supply. Flip the matching pair of cards face down and gain 1 Victory Point.
- Contract: If playing without the CHOAM Module, gain 2 Solari. If playing with the CHOAM Module, take a face-up contract (or, if there are none left, gain 2 Solari).
- Control: If you win a Conflict with a Control reward (of Arrakeen, Spice Refinery, or Imperial Basin), place your Control marker on the flag below that space (replacing any opponent’s marker there). When a Conflict card is revealed for a space that you already control, you may deploy one troop from your supply to the Conflict.
- Discard: Discard a card of your choice from your hand. (For this and any other time you’re directed to discard a card, it cannot be an Intrigue card, unless specified.)
- Draw Card: Draw a card from your deck. If your deck is empty, reshuffle the discard pile in your supply to form a new deck, then continue to draw.
- Draw Intrigue: Draw an Intrigue card from the Intrigue Deck. Keep it face down until you play it. You may look at it at any time.
- Fremen Bond: You may use this effect if you have one or more other Fremen cards in play. Two cards with Fremen Bond can activate one another, regardless of order played.
- In Play: Cards you play on Agent turns and reveal during your Reveal turn remain face up and “in play” until you clean up at the end of your Reveal turn (unless they are trashed first).
- Influence Requirement: You may use this effect only if you have at least the amount of Influence indicated with the given Faction.
- Gain Influence: Gain Influence with the Faction shown: Emperor, Spacing Guild, Bene Gesserit, or Fremen.
- Gain/Lose Influence (Choice): Gain one, gain two, lose one Influence. Choose any one of the four Factions. (When gaining two Influence, you can’t choose two different Factions.)
- Maker: The board spaces with the Maker icon each gain 1 bonus spice during Phase 4: Makers if no Agent is present. When you send an Agent to one of these board spaces, you gain all bonus spice there.
- Maker Hooks: Take a Maker Hooks token from the bank, if you don’t already have one. Place it on your garrison, indicating that you now have the ability to summon sandworms. When this icon is used before a colon, it indicates a requirement to have a Maker Hooks token on your garrison.
- Paying a Cost: An arrow indicates a cost (left of the arrow, or above it) and an effect (right of the arrow, or below it). If you don’t pay the cost, you don’t get the effect. You do not have to pay such a cost on a card. You can’t pay the cost more than once per turn (except when sandworm reward doubling applies to a reward on a Conflict card).
- Persuasion: You receive Persuasion mainly from the Reveal boxes on your cards. You use it to acquire Imperium or Reserve cards, paying the cost shown in the top right corner of a card.
- Recall Agent: Return one of your other Agents on the board to your Leader (not the Agent you sent during this turn). You may use it again on another Agent turn in the same round.
- Recall Spy: Return one of your Spies from an observation post on the board to your supply.
- Resources (Solari, Spice, Water): When you gain a resource or pay one as a cost, it’s taken from or returned to the bank. (For Solari and spice, gain or pay the amount shown.)
- Retreat: When you retreat a troop, move it from the Conflict back to your garrison.
- Sandworm: Does nothing if the current Conflict is protected by the Shield Wall. Otherwise, summon and deploy one sandworm; take it from the bank and put it in your quadrant of the Conflict.
- Shield Wall Detonation: You may remove the Shield Wall token from the game board.
- Signet Ring: When you play your Signet Ring card on an Agent turn, you use the Signet Ring ability (with the corresponding icon) on your Leader.
- Spy: Place one Spy; take it from your supply and put it on an unoccupied observation post on the board. If you have no Spies in your supply, you may first recall one of your Spies for no effect.
- Steal Intrigue: Each opponent who has four or more Intrigue cards must give you one of them (selected at random).
- Sword: Each sword adds 1 strength to your strength total in a Conflict.
- Trash Intrigue: Trash an Intrigue card of your choice from your hand.
- Trash: Trash one card from your hand, discard pile, or in play. Return it to the game box; it won’t be used for the rest of the game. (Reserve cards are returned to their stack in the Reserve instead.) Trashing is optional unless it’s paying a cost, or if a card directs you to trash itself.
- Troop: Recruit one troop; take it from your supply and put it in your garrison on the game board. (If you recruited the troop while sending an Agent to a Combat space, you may deploy it to the Conflict.)
- Uprising: This icon appears near the lower right corner of all cards in this expansion. It is purely for reference.
- Victory Point: When you gain a Victory Point, move your Score marker one space up on the Score track. When you lose one, move your Score marker one space down.
Credits
Credits
Game Design: Paul Dennen
Executive Producer: Scott Martins
Art Direction and Graphic Design: Clay Brooks, Nate Storm
Card Illustration: Clay Brooks, Atilla Guzey, Derek Herring, Kenan Jackson, Chris Mercado, Brett Nienburg, Raul Ramos, Nate Storm, Dan Taylor
Production: Evan Lorentz, Marshall Britt
Game Development: Justin Cohen, Paul Dennen, Caleb Vance
Additional Game Development: Phil Amylon, Andy Clautice, Julia Duga, Evan Lorentz, Kevin Spak, Yuri Tolpin, Jay Treat
GALE FORCE 9:
Producer & Brand Manager: Joe LeFavi
Genuine Entertainment Co-Producer: John-Paul Brisigotti
Special thanks to all those involved in the creation of this game: Brian Herbert, Kevin J. Anderson, Byron Merritt, and the Herbert Properties, LLC. Our partners at Legendary Entertainment. All of the awesome Dire Wolf Digital team members, and their friends and families, who helped to playtest DUNE: IMPERIUM — UPRISING.
Expansions for
Dune: Imperium – Uprising
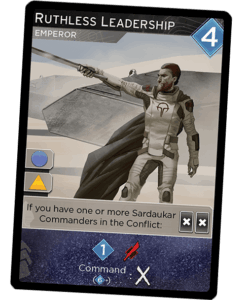
Dune: Imperium – Ruthless Leadership Promo Card
2024
A ruthless promo card rewarding Sardaukar Commanders and powerful reveals.
120
minutes
View expansion
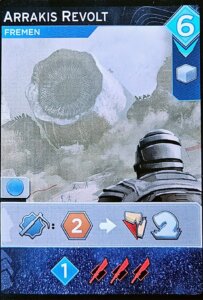
Dune: Imperium – Uprising: Arrakis Revolt Promo Card
2023
A Fremen promo card with spice-fueled power and a sand worm effect.
Medium Heavy
View expansion
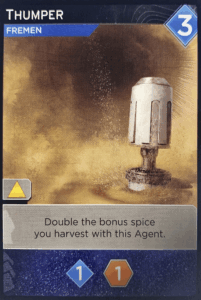
Dune: Imperium – Thumper Promo Card
2023
Double harvested spice and reveal for one persuasion and one spice.
120
minutes
Medium

View expansion
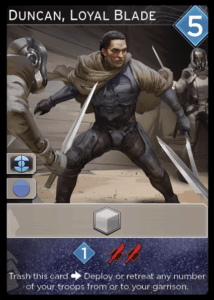
Dune: Imperium – Duncan, Loyal Blade Promo Card
2021
Recruit troops, gain persuasion, and command the garrison
120
minutes
Medium
View expansion
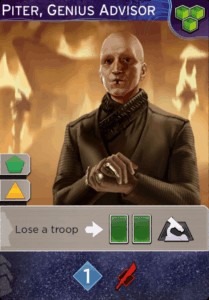
Dune: Imperium – Piter, Genius Advisor Promo Card
2022
A Tleilaxu advisor who turns a troop into cards, research, and battle points.
120
minutes
Medium
View expansion
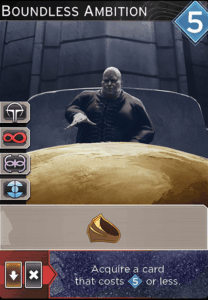
Dune: Imperium – Boundless Ambition Promo Card
2021
A strategic promo card with signet-ring activation and a powerful unload effect.
120
minutes
Medium
View expansion
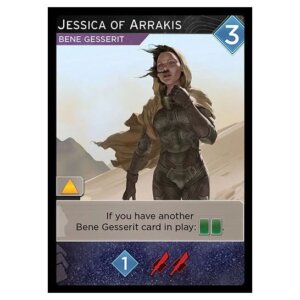
Dune: Imperium – Jessica of Arrakis Promo Card
2020
A Bene Gesserit promo card with powerful draw and reveal abilities.
120
minutes
Medium
View expansion

Dune: Imperium – Bloodlines
2025
Forge powerful bloodlines and shape the Imperium across generations.
120
minutes
Medium Heavy
View expansion

Dune: Imperium – Immortality
2022
Trade in genetic innovation and empower Agents with grafted cards.
120
minutes
Medium Heavy
View expansion

Dune: Imperium – Rise of Ix
2022
Expand your influence with Ixian technology, dreadnoughts, and covert infiltrators.
120
minutes
Medium Heavy
View expansion
