
EXIT: The Game – Advent Calendar: The Mystery of the Ice Cave
2020
An avalanche traps you in a mysterious cave. Open each daily door, solve its riddle, and work toward finding a way out.
90
minutes
1 - 99
player(s)
10+
Medium

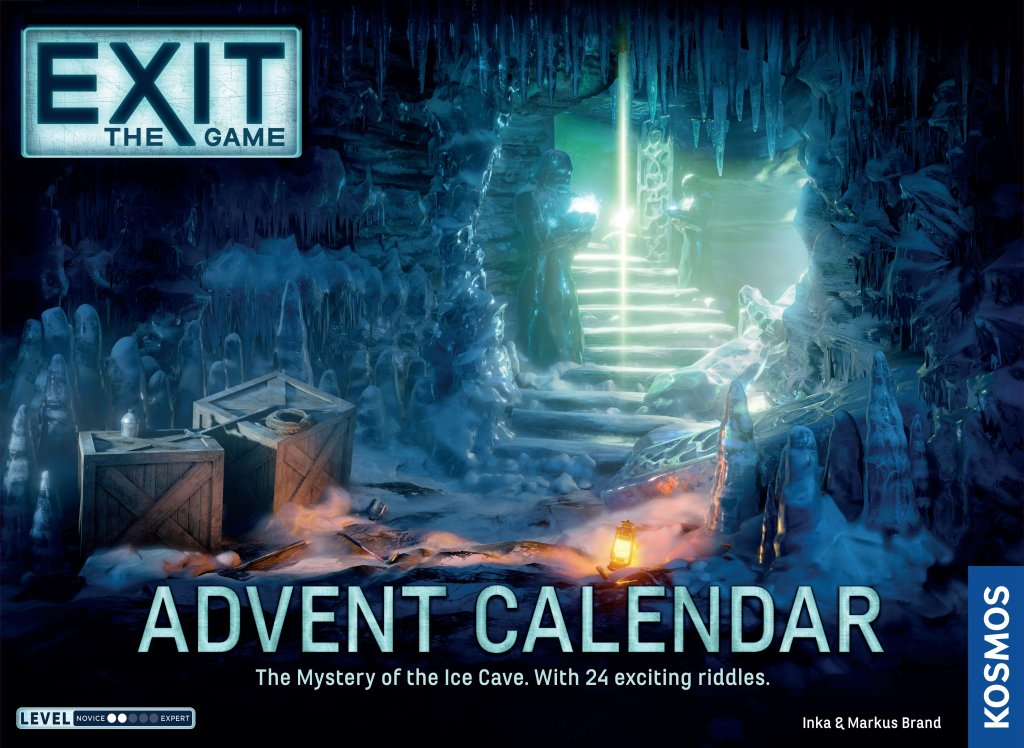
About this board game
EXIT: The Game – Advent Calendar: The Mystery of the Ice Cave is an adventure game and advent calendar for 1–99 players, with a listed play time of 90 minutes.
Your pre-Christmas ski trip takes a terrifying turn when an avalanche comes crashing down the mountain. After grabbing your seven things and racing down the slope, you escape the snow by throwing yourself into a niche in the rocks. When the danger passes, you discover that you are alive—but apparently inside a cave.
This game combines the format of an EXIT game with an unfolding adventure story. To escape your predicament, open a new door of the calendar each day. Behind every door is an exciting riddle, and solving each one brings you closer to escaping the ice cave.
As the mystery develops, pay attention to the clues and use your solutions to make progress through the story. The central challenge is simple to understand but difficult to complete: can you uncover what is happening in the cave and find the exit?
- Format: Advent calendar with a daily riddle
- Players: 1–99
- Listed play time: 90 minutes
- Difficulty: Level 2 of 5
- Release year: 2020
With its wintry setting, steadily unfolding puzzles, and escape-room-inspired premise, EXIT: The Game – Advent Calendar: The Mystery of the Ice Cave offers a seasonal mystery built around discovery, deduction, and the search for a way out.

Board Game Rules for
EXIT: The Game – Advent Calendar: The Mystery of the Ice Cave
The Mystery of the Ice Cave
For 1 player or one team • 10 years and up
ATTENTION! Do not look at the game components (the other book, the decoding table, the panoramic image, etc.) in more detail yet! Read this rule sheet and carefully follow all the instructions first. Following the rule sheet you will find the help section. You won’t need this until later on in the game.
Start by reading HERE!
IMPORTANT: Before playing, do not take a closer look at any of the game components or open any of the doors! Wait until the game tells you to do so in the text. Read through this rule sheet carefully first.
What’s the story?
This is definitely not what you had in mind for your pre-Christmas ski trip: taken by surprise by an avalanche, you take cover in a rock alcove using the last of your strength before the snow buries everything behind you. Although you are safe for now, how do you get back out of here? You look around and discover that you are trapped in a cave. The way back is blocked, so your only hope is to press on ahead. Make a move and start exploring the cave. You may be able to find another exit.
Where is the gameboard?
In this game, the advent calendar itself is your gameboard. You also have the story book. Here you will find out how you came to be in this predicament and every day has an introductory chapter that continues to tell the story. Other than this, you don’t have anything else available to you at the start of the game.
Game components
- 1 Story book: tells a little bit more of the story day-by-day
- 1 Help book with rule sheet: get help here if you ever can’t move forwards
- 1 Decoding table
- 3 Decoding strips in the help book and additional secret material for the riddles, hidden behind the 24 doors of the advent calendar

Game preparation
Before you can start, you need to prepare the decoder. Take some scissors and carefully cut out the three decoding strips shown here. Then thread them through the holes in the decoding table.


Thread the three strips through the corresponding holes horizontally as shown – the red at the top, the blue in the middle and the yellow at the bottom. It’s important to thread the three strips in this exact order. Take care not to mix them up, otherwise the decoder won’t work correctly.
The numbers are now visible through the central holes on the front of the decoding table.

You will then find an arrow and an EXIT symbol on the back of each strip. You only ever need to pay attention to the arrows and the EXIT symbols which are beneath one another in the centre.
The decoding table is ready to use. Place it on the table, together with the story book.


Additional game components required
You will also need:
- pens (a ballpoint pen, a black waterproof pen and a pencil are best)
- at least one pair of scissors
- some paper for notes, should you need it.
You will find everything else you need behind the doors of the advent calendar.
Solve riddles step-by-step
Perform the following steps each day:
- Carefully tear out the current calendar sheet from the story book along the perforated line. The date for the current day can be found at the top of the sheet in the pad.
- Read the introductory chapter.
- Open the next door as soon as you are told to do so in the text. Behind this door you will find various things that will help you to solve the riddle of the day. These could be riddle cards and various strange items or objects.
- Solve the riddle. In general, you may, and must, use everything you find in the current room or in the story book. This is the only way to solve the current riddle.
ATTENTION:
- To solve the riddle you can LABEL, FOLD OR CUT UP THE MATERIAL… anything is allowed, and much of it is even necessary.
- Keep hold of all of the game components until you have reached the last day of the advent calendar. DO NOT THROW ANYTHING AWAY! You may need it again.
- ONLY EVER READ THE CURRENT CALENDAR SHEET. Only read the next sheet when you want to start the next riddle.
What door do I continue at?
Don’t be surprised that the doors of your calendar do not have any numbers. Only the first door is labelled.
In order to escape from the ice cave, you have to solve riddles from door to door — one day at a time. The solution to the current riddle will show you where to start from the next day. This is how it works:
The solution to each riddle is always a three-digit numerical code. Set the retrieved numerical code on the decoding table using the three decoding strips. Always make sure the numbers are in the correct order.
Have you set the code? Then turn the decoding table over without moving the strips. Now look at the back of the decoding table so that you can read the text and so the polar bear is not upside down. You will now see three arrows in the white region from top to bottom.
These three arrows show you the way to the next door. You always start at your current door. From here, follow the arrows from one door to the next. If you have followed all three of the directions correctly, you will land at a destination door.
Example:
The solution to your current riddle is 533. You set this code on the decoding table and turn it over.
On the back you will find the arrows: left, top-left, down. If your code is correct, you will find the door for the next day at the specified location. You can check this in the next step.

Have you found the correct destination door?
In order to check this, compare the three symbols on the destination door with the three symbols on your decoding table.
Do the symbols NOT match up?
Carefully check your route again. Have you followed the directions from the starting door to the destination door accurately? If yes, then your code is probably incorrect. Take a look at the riddle again. Have you missed anything?
If you get stuck and can’t continue, don’t despair. Take a look at the help pad. Here you will find clues for each riddle which will give you a helping hand. You will find an explanation of how to use the help system below.
Note: The arrows will never direct you beyond the edge of the advent calendar during the game. If a direction should lead you beyond the advent calendar, your code was probably incorrect.
Do the symbols match up?
You have solved the riddle correctly and will arrive at the next door.
Write the date of the next day on the snowball on the new door. The next riddle will then start here tomorrow — of course only after you have read the next chapter in the story pad.
Example:
You have solved the riddle for the first day. You set the code and follow the arrows on the decoding table. At the destination you compare the symbols on the new door with the decoding table. They match up, so you write a “2” in the snowball on the destination door.

IMPORTANT:
- You must solve the riddles in order! This means: you can, and may, only ever move forward with the next riddle and open the next door if you have figured out the code beforehand and the text in the game allows you to!
- All the codes can be cracked logically. It’s not just about trying out every possible combination on the decoding table.
- Do not forget to label the next door! This is the only way you will immediately know where to continue the next day.
The game begins
What are you waiting for? Get going! Take the story book, open the first page and start reading the introduction. The first riddle begins on the calendar sheet “1st December”.
We hope you enjoy EXIT – ADVENT CALENDAR. The Mystery of the Ice Cave.
How does the game end?
The game ends when you have solved the last riddle and have escaped from the secret ice cave. A clue will inform you of this. After this, read the final chapter of the story book.
Do you need any help?
If ever you cannot continue, the game help pad will prove useful.
Look for the page with the puzzle date on in the help pad. If you now fold the bottom edge upwards to the corresponding mark, the relevant text will be visible.
- Each “1st clue” indicates a first useful clue and shows you what you need in order to be able to solve the corresponding riddle.
- The “2nd clue” will give you more specific help in order to find a solution to the corresponding riddle.
- The “solution” shows you how to solve it and the correct code for the riddle.
Don’t be afraid to use the clues if you cannot continue.
Room for notes
Carefully tear out this sheet if needed!
Help: 1st DECEMBER
You will need: Riddle card A, “swan” strange item card, room 1
1ST CLUE
What a beautiful swan! Unfortunately, he cannot help you in any way himself. Did you notice the small blue diamonds on the strange item card and on riddle card A? What could all that be about?
2ND CLUE
Have a look at what’s left when you remove the swan from the die-cut sheet. You can also press out the small diamonds. You may then need to place the strange item card so that the holes where the diamonds were are directly on top of the diamonds on riddle card A…
SOLUTION
Remove the swan and the small diamonds from the strange item. A frame is then left. Place this accurately on top of riddle card A so that the diamonds of the riddle card are visible through the holes in the frame. The frame now covers some of the text on the card. The sentence “find the red items in the room” remains.
In addition, riddle card A states that you need to solve the code from left to right. Look at room 1 more closely. In it you will find three red things provided with numbers. This will give you the numerical code 815 from left to right.
Set the code on the decoding table and then follow the arrows on the back.
Write a 2 in the snowball on this door.

Help: 2nd DECEMBER
You will need: Riddle card B, “fire” strange item card (made up of two pieces), room 2
1ST CLUE
On the floor of room 2 you will find a fire pit that looks as though it was made for this clue. Look at the colourful points that glow on the firewood closely. They will help you put the two parts of the fire together correctly. Once you have placed the fire in the room, riddle card B will show you what to do.
2ND CLUE
Once the points that glow on the floor of room 2 correspond to the points that glow on the fire and the fire is in the room, you have done everything correctly so far. On riddle card B you will see: “connected in thought”. In addition, you will see several symbols on this card. They are arranged in three groups. You will also find the same symbols in the flames of the fire. Can you connect the symbols with imaginary lines. Does it make any sense?
SOLUTION
Have you put the fire together correctly and placed it in the room? Then each of the symbols on riddle card B is only visible in the fire once. Now connect the symbols in the fire in your mind using lines. Riddle card B tells you which symbols you need to connect in the given order – sometimes going beyond the edges of the fire, too. You will therefore be given a digit for each of the three rows of symbols on riddle card B. This will give you the numerical code 426.
Set the code on the decoding table and then follow the arrows on the back.
Write a 3 in the snowball on this door.

Help: 3rd DECEMBER
You will need: Riddle card C, “sticker” strange item, calendar sheet “3rd December”, pencil
1ST CLUE
You should bake some cookies. How fortunate that you have found two trays half-filled with cookies on the calendar sheet “3rd December”. There are still a few free spaces on the trays. Take a look at the sticker from room 3 for this. It seems to fit in some way or another. But how can you close the oven door?
2ND CLUE
The stickers match the outlines on the two trays exactly. Their edges tell you which sticker must go where. Have you stuck them down accurately? Then you have done everything correctly for now. Now fold the calendar sheet “3rd December” so that the oven gloves lie on top of one another. If you fold it correctly, you will see a closed oven door in front of you.
On riddle card C you will read that everything turns completely grey. Hmm… a pencil would be grey…
SOLUTION
If you have stuck down all the stickers correctly in the right places and then folded the calendar sheet “3rd December” once, you will see the closed oven in front of you. Now use the pencil to shade in the window of the oven until you have coloured it in grey. The numerical code 962 will appear on the surface that you have coloured in grey.
Set the code on the decoding table and then follow the arrows on the back.
Write a 4 in the snowball on this door.

Help: 4th DECEMBER
You will need: Riddle cards D1 and D2, 3 wooden rods, room 4
1ST CLUE
Place the wooden rods vertically in room 4 in the form of columns. This will be very easy if you firstly push them into the holes in the ceiling and then anchor them at the bottom in the holes in the floor. Riddle card D1 shows you WHAT you actually need to count, riddle card D2 will tell you WHERE.
2ND CLUE
Have you positioned the three columns vertically in the room and anchored them in the holes? Good. The markings next to the holes assign a letter A, B and C to each column. Riddle card D2 shows you which columns you need to count blue books between. Select the relevant columns and look between them. But what could the message “The view can alter” mean?
SOLUTION
Anchor the columns in the room. Always look between two columns and count the blue books that you see. But look closely: some of the books are well hidden in the blind spot behind a column. You will only notice them if you look around the room from all angles. And we really mean ALL angles! Don’t forget to look from a very flat angle from each side, too.
You will find 7 blue books between columns A and B, 4 between columns B and C and another 4 between columns A and C. This will give you the code 744.
Set the code on the decoding table and then follow the arrows on the back.
Write a 5 in the snowball on this door.
Example: Depicted above, you’ll find the solution for columns A and B. If you look between these two columns from ALL ANGLES, you will discover a total of 7 blue books. The solutions for the other columns work in a similar way. Take care to really look from all angles between the according columns each time.

Help: 5th DECEMBER
You will need: Riddle card E, 2 “disc” strange items, 1 pushpin, advent calendar box, room 5
1ST CLUE
Who is Reinhold? Good question. He is obviously not a stranger to these parts. Find out whether he has left anything behind, perhaps even in the “area” outside the ice cave. Once you have found the location, look at the interesting objects there and those in room 5. How does it all fit together with the two rotary discs?
2ND CLUE
Reinhold has left some graffiti on the inside of the cover flap. Assemble the two parts of the rotary disc and pin them on the cover flap at the dot of the “i” on Reinhold’s writing “Reinhold was here”. On the pinboard in room 5 you will find three eye-catching pieces of paper. Each note has a date and an object pinned to it. You will also find very similar objects directly next to the pinned rotary discs. Can you find a connection?
SOLUTION
Pin the two-part rotary disc precisely through the dot of the “i” in Reinhold’s message “Reinhold was here” on the inside of the advent calendar. Now take a look at the pieces of paper in room 5 one after the other. Always set the rotary discs to the date of the relevant post-it note and rotate them such that they point to the associated object: left glove to right glove, left sandal to right sandal, comb to hairbrush. Each time, look through the holes in the rotary disc and note down how many dashes you can see on the wall. You will find the numbers 7, 2 and 1. Riddle card E will confirm the order for you. You will then find the numerical code 721.
Set the code on the decoding table and then follow the arrows on the back.
Write a 6 in the snowball on this door.

Help: 6th DECEMBER
You will need: Riddle card F, calendar sheet “6th December”, scissors
1ST CLUE
Have you cut out the strip with the strange markings from the calendar sheet “6th December”? Take a closer look at it. It has coloured regions at two ends, one looks like piano keys and the other like buttons. In addition, the strips have a grey edge to the left and right, which is divided by small dashes into portions of equal width. Carefully fold these portions into a zigzag to make a small accordion model. If you then lightly squeeze and look at both sides, you should be able to notice something on the fold edges.
2ND CLUE
Start by reading at the point marked “start”. The text on the two sides of the accordion reads: “edges on door one”. “But which edges?” you ask yourself. Can you find something on the outside of door 1 that has edges? Or better still, three things that have a certain number of edges?
SOLUTION
You have folded the accordion and found the text “edges on door one” on the fold edges. Take a look at door 1 again more closely. Here you will find the symbols: triangle, hexagon, triangle. Of course! If you count the edges of the individual symbols, you will get the numerical code 663 (hexagon = 6, hexagon = 6, triangle = 3 edges).
Set the code on the decoding table and then follow the arrows on the back.
Write a 7 in the snowball on this door.

Help: 7th DECEMBER
You will need: Riddle card G, calendar sheet “7th December”, room 7, scissors
1ST CLUE
In room 7, you will find three colourful boxes on the wall. And on the calendar sheet “7th December” you will find a shape with very similar patterns on it. You are best off cutting it along the dashed line. What could you fold out of this cut-out shape?
2ND CLUE
Firstly, fold a cube-shaped box out of the cut-out shape. Look at the sides of the box closely as a number is hidden on each side. The boxes in room 7 are each depicted from a different perspective so that it is only ever possible to see certain sides of them. What could this mean? Don’t forget your host IS COUNTING on you!
SOLUTION
Have you made a box from the cut-out shape? Great, then you can now orient them one after the other in the exact same way as the three boxes in room 7. Incidentally, there is still only ever one option for this. As a result, you will then always see three of the sides of the box you have made. Look at these sides more closely. Can you see the hidden numbers? If you add these up for each of the three alignments, you will arrive at the numerical code 753.
Set the code on the decoding table and then follow the arrows on the back.
Write an 8 in the snowball on this door.

Help: 8th DECEMBER
You will need: Riddle card H, 4 “laundry” strange items, 5 “clothes pegs” strange items, room 8
1ST CLUE
Someone needs to hang up the laundry and that’s exactly what you need to do. You have clothes pegs and laundry. The matching line is printed on the inside of door 8. The exact places for the clothes pegs are even already depicted. With precision, carefully hang the washing up. Every peg and each piece of laundry where it belongs. Pay attention to the ANGLE of the laundry pegs too.
2ND CLUE
Have you hung the washing up on the inside of the door? Have you also paid attention to the colours and angles of the laundry pegs? Have you also noticed the hand towel that is hanging on the inside of the door? This is because someone appears to be a big Rome fan. But how do you now find the correct numerical code? On the large box in room 8 you will find 3 two-tone fields that will help you find out this code. Take a look at these fields and now the clothes pegs on the door…
SOLUTION
Provided that you have hung the laundry up exactly as prescribed by the markings on the inside of the door, these clothes pegs will form roman numerals. On the box in room 8 you will see three two-tone fields. For each of these fields, only ever take notice of the clothes pegs in the corresponding colour:
- 1st colour field: only the blue and the white clothes pegs → IV (4)
- 2nd colour field: the white and the black clothes pegs → VI (6)
- 3rd colour field: the black and the yellow pegs → II (2)
You will then have the roman numerals IV, VI and II. This gives the numerical code 462.
Set the code on the decoding table and then follow the arrows on the back.
Write a 9 in the snowball on this door.

Help: 9th DECEMBER
You will need: Riddle cards i1, i2 and i3
1ST CLUE
Riddle card i1 shows you that you need to look for dots. Hmm… the room is so dark that you unfortunately can’t see anything in here. You therefore have to look for them somewhere else. But where? Also, two of the three riddle cards are completely black. That’s strange. Why then are there three riddle cards in the room if only one of them has anything of any interest on it?
2ND CLUE
Look at the three riddle cards very closely. Too quickly and you will miss one or more details. Sometimes every dot matters. You will see that more or fewer dots can be found here. The dots determine the order in which the numbers form the code. “Which numbers?” do you ask yourself? Of course, they are also there on the riddle cards.
SOLUTION
If you don’t look closely you will miss something far too easily: On the backs of the riddle cards is the word “riddle card”, once written with one dot over the “i”, once with two and one with three dots over the “i”. The dots indicate the order.
You therefore need to place the riddle cards down in the corresponding order. THEN have a closer look at the “numbers” on the riddle cards. Riddle card i3 will be first, followed by i1 and i2. This gives the code 312.
Enter the code on the decoding table and then follow the arrows on the back.
Write a 10 in the snowball on this door.
Help: 10th DECEMBER
You will need: Riddle card J, calendar sheet “10th December”, advent calendar box
1ST CLUE
Interesting, everything seems to revolve around stars here. On riddle card J you will find four peculiar festive constellations. To make them easier for you to see, someone has also connected the stars with lines. How nice. Did you also notice the stars on today’s calendar sheet, “10th December”? They seem to be the same constellations that are on riddle card J. Only the connecting lines are missing. Have a go at drawing them in.
2ND CLUE
Have you connected the stars on the calendar sheet “10th December” in exactly the same way as on riddle card J? Great. The intersections then mark four words in the text. If you now read these words in the order prescribed by riddle card J, the following comment is revealed: “Fox found the secret”. Odd, have you seen a fox anywhere around here? He seems to be good at hiding. Find him and you will also quickly find the numerical code.
SOLUTION
The four intersections of the constellations mark the words “fox” “found” “the” “secret”. But which fox? Take a close look at the advent calendar box. There, on the left-hand side you will find an Arctic fox. He is easy to miss because of his white fur. He is sniffing the ground as if he is looking for something there. Perhaps you should look there too. Open the box flap of the box.
There are several three-digit numerical codes there. But the fox is only sniffing precisely one of these codes. It is code 573.
Set the code on the decoding table and then follow the arrows on the back.
Write an 11 in the snowball on this door.

Help: 11th DECEMBER
You will need: Riddle card K, rooms 1, 3, 4, 6, 7, 8 and 10, advent calendar box
1ST CLUE
Riddle card K asks you to make an inventory. Outrageous, actually, but you don’t have anything better to do as long as you are stuck in the ice cave. This means that you have to count certain things. Which things – the riddle card will tell you: lanterns, forks and candles. Of course, these things can be lying about anywhere in the cave… but only where you have already been before.
2ND CLUE
Look for the things you are searching for in all the open rooms. And perhaps also on the cover of the advent calendar. So, have you found everything? Riddle card K will tell you what the things you are looking for look like. The number of these things will give you three digits. You will therefore find the correct numerical code with the order indicated on riddle card K.
SOLUTION
On the cover of the advent calendar you will find a lantern (1). In room 1, you will find a fork, in room 3 precisely four forks and in room 6 a fork is sticking in the wall. You therefore have a total of six forks (6). You discover two candles in room 1 and you find one candle in each of rooms 4, 7, 8 and 10, and therefore have a total of six candles altogether (6). The code is 166.
Set the code on the decoding table and then follow the arrows on the back.
Write a 12 in the snowball on this door.
Help: 12th DECEMBER
You will need: Riddle cards L1 and L2, room 12, advent calendar box, scissors
1ST CLUE
On riddle cards L1 and L2 you will find two rather strange texts. At a first glance, this is a chain of disconnected words. But only if you look at each card on its own. Place them next to one another so that two texts become one. The contents now make sense, right? But which mountain could it mean? Have another look around the room, perhaps you will then know what this text is talking about. And perhaps you also now know what you need to do…
Yes, a pair of scissors would be very useful, why did you ask?
2ND CLUE
Have you found the painting in room 12? It depicts the same mountain that can also be found on the inside of the advent calendar cover. That is pretty coincidental, right? You will also see a dotted line around the mountain on the painting in the room. Don’t be afraid to cut away everything that does not belong to this mountain from the cover of the advent calendar. Then fold the mountain backwards onto the back of the advent calendar. The red flag mentioned in the poem should now show you the solution.
SOLUTION
Cut out the mountain on the advent calendar cover exactly as shown in the painting in room 12. You have to cut off and remove everything that does not belong to the mountain. Now fold the rest of the cover, i.e. the big mountain, backwards on the back of the calendar. The three red flags are then located at the edges of this mountain. Look at what they point to. They point to the word “seven”, the number 2 in the field “24 riddles” and the number 3 of “3 decoding strips”.
According to riddle cards L1 and L2, the numbers need to be arranged according to “middle”, “large” and “small”. This gives the code 372.
Set the code on the decoding table and then follow the arrows on the back.
Write a 13 in the snowball on this door.

Help: 13th DECEMBER
You will need: Riddle card M, calendar sheet “13th December”, room 13
1ST CLUE
Welcome to the games room. Here you will have to play three games in order to arrive at the desired code. You will find the game rules, or some of them, on riddle card M. The first game is also a memory game where you need to find identical pairs. In addition, you will have to play “town, country, river”. You remember that you have to find terms relating to different categories as quickly as possible in this game. The starting letters are very important here. And then there is still a chess round. That’s odd — only the black appears to possess playing pieces here.
2ND CLUE
Take a close look at the game rules on riddle card M. It looks as though you have to colour all the memory cards that you find in black. How convenient — on the calendar sheet “13th December” you will find a ready-to-use memory game with baby animals on it.
In “town, country, river”, the column with the towns grab your attention in particular. Why else is the small house depicted on riddle card M? And what about the chess? It seems as though you have to colour the squares in black here, too. But which ones? This must relate to the figures.
SOLUTION
When you have coloured all the memory pairs in black, these small black cards form the number 6.
Now look at the column with the towns in on the Alphabet game table. That’s correct, the starting letters of the five towns give the word EIGHT (Edinburgh, Inverness, Glasgow, Hungary, Truro → 8).
And if you simply colour in all fields on the chessboard that have a figure on in black, the remaining white fields form the number 6.
The code therefore reads 686.
Set the code on the decoding table and then follow the arrows on the back.
Write a 14 in the snowball on this door.

Help: 14th DECEMBER
You will need: Riddle cards N1 and N2, calendar sheet “14th December”, scissors
1ST CLUE
Hmm…your host thinks you should make a garland here. But how? Together, riddle cards N1 and N2 form the instructions. You need to place them down next to one another so that their contents make sense. Something should be placed at a right-angle, arrow on arrow. But what? Have you seen the two strips on the calendar sheet for today’s date? Perhaps now would be the right time to cut these out.
2ND CLUE
Have you cut out the two strips and placed them one on top of the other at a right-angle so that the two arrows also lay on top of one another? Is the word “start” visible? Good. Then there is nothing standing in the way of the solution to the riddle. Simply follow the instructions in the poem step-by-step. Start by always taking it in turns to fold the strips backwards. The coloured dots could be helpful. Each two same-coloured dots belong together…
SOLUTION
If you accurately follow the instructions in the poem, the strips are always alternately folded backwards and with each fold they overlap the other strip. You thereby always move two dots that are the same colour very close to one another and gradually make a small paper Christmas garland. Perhaps you also know the folding pattern as the “witch’s ladder”. Have you finished making it? Then begin at the “start” and read the letters from top to bottom in the direction of the arrow. You will have to pull the “steps” of the witch’s ladder apart slightly and peek inside. Follow the fold edges in a circle until you get to the “end”. You will find the words FOUR, ZERO, TWO.
The code therefore reads: 402.
Set the code on the decoding table and then follow the arrows on the back.
Write a 15 in the snowball on this door.
Example: If you pull the witch’s ladder apart slightly and peek inside the gaps, you will firstly see the letters F and O, next the letters U and R – FOUR. Always follow around the fold edges to the next letter.

Help: 15th DECEMBER
You will need: Riddle cards O1, O2 and O3, insides of doors 7 and 14, scissors
1ST CLUE
Riddle card O1 shows you what you will need for this riddle. In addition to riddle cards O2 and O3, it would appear another two additional “parts” of the frozen lake are required, on which the ice skates have left tracks. These scratch marks appear to be hidden elsewhere — but where? One of the cards shall now show you: you will need a pair of scissors in any case.
2ND CLUE
You will find two parts of the frozen lake on riddle cards O2 and O3. The two other parts can be found on the insides of doors 7 and 14. Carefully cut along the dashed lines on the four rectangular surfaces. It should then be clear what you need to do, right? Another useful clue: since everything can play a role in this advent calendar, you should not throw away the scraps you cut off either — keep hold of everything! They may be of use again later on.
SOLUTION
If you have carefully cut everything out, place four puzzle parts of the frozen lake in front of you. Join them together to form a rectangular surface to give a matching puzzle image. Finished? Then the scratch marks of the ice skates will show you how to proceed. They form three legible word combinations: “red zero”, “blue seven” and “yellow seven”. The words therefore not only reveal the desired numbers but also the colours of the decoding strips on which you need to set these numbers.
The code therefore reads: 077.
Set the code on the decoding table and then follow the arrows on the back.
Write a 16 in the snowball on this door.

Help: 16th DECEMBER
You will need: Riddle card P, “rope” strange item, room 16, doors 1, 2, 3, 4, 6, 8, 11, 12, 15 and 16
1ST CLUE
What do the number combinations on riddle card P mean? Each row could stand for a digit in the code…but how can a single digit be made from a row of numbers? And why is there a “rope” in this room? And what kind of strange images are those between the holds on the climbing wall? Question after question… you will presumably need to collect everything together. Does it help to know that none of the numbers on the card are greater than 16 and today is the 16th December?
2ND CLUE
The image on riddle card P shows you that this riddle must have something to do with doors that can be interconnected in some manner. Interestingly, on each door on the calendar there is a small semi-circular bracket — precisely these brackets can also be seen in the image on the riddle card P, where a rope is tensioned from one bracket to the other. What can this mean for this riddle? And how do the number sequences come into play? Do you maybe need to tension the rope between certain brackets?
SOLUTION
Have you tensioned the rope around the brackets on the doors that are arranged behind the other in a line on riddle card P? Good, then the rope will give a certain pattern or specific shape. You can also find this shape on one of the images on the climbing wall in room 16. Each of the three lines on riddle card P then gives its own pattern. By means of the images in room 16, the pattern can be translated into numbers and thus create the code 298.
Set the code on the decoding table and then follow the arrows on the back.
Write a 17 in the snowball on this door.

Help: 17th DECEMBER
You will need: Riddle card Q, 2 additional things with numbers
1ST CLUE
Welcome to the hall of mirrors. Would you care for a little dance? No time? Good. You won’t find much else other than riddle card Q here. Where is the riddle? Perhaps in the image of the card? It may be that this gives a clue as to where the code can be found?
2ND CLUE
Riddle card Q depicts a door. Perhaps this is a clue that you are looking for doors in this riddle? It says there that two of them are different…
Have you discovered two doors that are different to all the others? And where can you find the desired numbers here? Simply take a look at what you’ve discovered.
SOLUTION
Door 6 and door 11 are different to all the others, since they can be opened from left to right and not from right to left. They bear the numbers 6 and 11. If these numbers (not their digits!) are sorted from small to large, the code 611 is given.
Set the code on the decoding table and then follow the arrows on the back.
Write an 18 in the snowball on this door.
Help: 18th DECEMBER
You will need: Riddle card R, calendar sheet “18th December”, room 18
1ST CLUE
Your host has a wonderful model railway there, doesn’t he? You can see it on the calendar sheet “18th December”. Do you feel the desire to send the locomotive on a trip? Can you follow the path of the track it travels along? Perhaps riddle card R will give you a clue as to how the switches are adjusted and what this riddle is all about.
2ND CLUE
You can see what direction the train is currently travelling in. If it reaches a switch, you can look at riddle card R to see how this is adjusted. You therefore know which route the train will take. You do not have to pay attention to all the switches either. This is because the train can sometimes only take one direction. Riddle card R therefore only shows the switches that need to be set.
But what do the images of the houses between the switches mean? Perhaps the letters next to the houses mean something. It may be that you first have to take into consideration all the black houses along the route? After the fourth switch, the red houses then appear to be important.
SOLUTION
In your mind, follow the route that the train travels. Riddle card R shows you how the switches that the train passes are set. You therefore also know where it will continue to travel. At the first switch, it turns in the “green” direction, for example. If the train arrives at a switch where it can only travel in one direction, this switch is not noted on riddle card R.
Riddle card R also shows you which houses you need to pay attention to at the wayside. As far as the fourth switch, you only need to pay attention to black houses, after the fourth switch you need to pay attention to red houses first, and then after that to green houses. Each of these houses is provided with a letter. The letter sequence that you thereby determine reads: B,L,U,E, R,E,D, G,R,E,Y – or: blue, red, grey.
In order to now translate the colours into numbers, you need to take a closer look at room 18. Here you will find a train with numerous carriages in different colours on the shelf. The blue carriage bears the number 9, the red carriage bears the number 1 and the grey carriage bears the number 7. The code therefore reads: 917.
You will arrive at the door with these symbols.
Write a 19 in the snowball on this door.

Help: 19th DECEMBER
You will need: Riddle card S, calendar sheet “19th December”, scissors
1ST CLUE
Riddle card S looks like handicraft instructions. You need to place the same-coloured Christmas baubles on top of one another seven times before then cutting along the dashed lines in the 8th step. You then need to unfold something before sorting something from large to small in the final step… but what? Have you already taken a look at the colourful image on the calendar sheet “19th December”?
2ND CLUE
Cut the red square out of the calendar sheet “19th December”. On the square you will find a number of small images of Christmas baubles. There are always two of the same colour, one of which is particularly shiny. Look for the two red Christmas baubles and place the shiny one on top of the other. This looks like it should be folded, right? And very handy guide lines are even drawn on. Now carefully follow the instructions step-by-step.
SOLUTION
Once you have folded everything neatly, you will be left with a small Santa Claus, as shown in the picture. You now need to cut along the dashed lines. The candy cane and the semi-circular cookie may have to go. Finished? Then unfold Santa again. Do you see the numbers 3 8 0 on the paper? When sorted from large to small, these give the code 830.
Set the code on the decoding table and then follow the arrows on the back.
Write a 20 in the snowball on this door.

Help: 20th DECEMBER
You will need: Riddle cards A, E, H, O1, O3, M, N1 and T, room 20
1ST CLUE
In this room are three piles of presents, one on the left-hand wall, one in the middle and the last on the right-hand wall. You have seen these presents before. In fact, you have actually seen one present every day since 1st December. Try and find PRECISELY these presents. Once you have them, pile them up in three groups as they are in the room.
2ND CLUE
Have you found all the riddle cards with the matching presents? Then look at the backs of the riddle cards. A letter is pictured on each of them. Can you maybe form words from the letters? For this, the riddle cards that lie in a pile in room 20 always belong together. You therefore need to create three words.
SOLUTION
Find the presents depicted in room 20 on the riddle cards that have been collected thus far. Once you have found all 8 riddle cards, pile them up in three groups just like the presents in the room. Now look at the letters on the riddle cards. You can form a word out of each group.
- The first group contains the riddle cards A, T and E. This gives ATE (8).
- The second group contains the riddle cards O1 and H. This makes the word OH (0).
- The third group contains the riddle cards M, O3, and N. The gift on card M is in a different location to the other gifts. Turn the card around and you will have a ‘W’ instead. The word here is WON (1).
Read the words phonetically and you will hear 801, which is your numerical code.
Set the code on the decoding table and then follow the arrows on the back.
Write a 21 in the snowball on this door.
Help: 21st DECEMBER
You will need: Riddle cards U1, U2 and U3 and U4, calendar sheet “21st December”, room 21
1ST CLUE
On the calendar sheet “21st December” you will find a map. You can draw the movements of the animals on it. The images on the wall in room 21 show you which animal starts where. You will find the rules, according to how each animal moves, on one of the four riddle cards. You have to get every animal into a cave. However, the important thing is not which animal ends up in which cave, but something else. But what? You will also find the answer in room 21.
2ND CLUE
Each of the riddle cards shows how the animal depicted on that card moves. Riddle card U1 says, for example, that the wolf always travels one field west AND one field south. This is one complete movement step. If he cannot perform the movement step fully, he travels just one field south instead. In addition, at the top of the riddle card you can see that the wolf cannot step on any mountain or water fields. You must of course bear this in mind when drawing the movements on. Have you entered the movements for all the animals onto the map? Then you need to find a field where all the animals have been. This only applies to a single field. The post-it note on the floor of room 21 shows you how you can now use this information to arrive at the code.
SOLUTION
Have you drawn the movements of the animals on correctly? Then you will discover that all the animals were on the field in front of the bridge. Now take a look at the post-it note on the floor of room 21. The field where all the animals have been is marked with a cross. In order to find the code, you now have to look at the three adjacent fields marked A, B and C on the map. Here you will find the numbers 5, 9 and 0. This gives the numerical code 590.
Set the code on the decoding table and then follow the arrows on the back.
Write a 22 in the snowball on this door.

Help: 22nd DECEMBER
You will need: Riddle card V, room 22, advent calendar box, scissors
1ST CLUE
Look around room 22. You will find a strange coordinate system in which three points are highlighted. You firstly need to find out what the coordinate system relates to. Perhaps you can see something that has the same shape? Riddle card V urges you to “uncover” something – ideally the points marked in the coordinate system.
2ND CLUE
Does the coordinate system not look exactly like the advent calendar? The three crosses seem to mark specific strips between the doors. You can take the text on riddle card V quite literally and uncover the corresponding points. You’ll then be sure to find the numerical code. The images on the pinboard in room 22 will help you with the order of the digits.
SOLUTION
The coordinate system shows the advent calendar. The three crosses mark the strips between doors 19 and 3, between doors 14 and 7 and between doors 7 and 17. Cut away the strips. Underneath, you will find – hurrah – three gemstones marked with numbers. If you now place the gemstones in the order shown on the pinboard in room 22, you will get the numerical code 138.
Set the code on the decoding table and then follow the arrows on the back.
Write a 23 in the snowball on this door.

Help: 23rd DECEMBER
You will need: Riddle cards W1 and W2, 4 strange items (“moose”, “triangle”, 2 stands), room 23, advent calendar box
1ST CLUE
You don’t appear to need riddle card W2 until later. Set it aside at first. Now take the “moose” and “triangle” strange items, fold them along the black line and place each one on the grey mark in a stand. You now have two figures that you can set down. But where? Riddle card W1 will reveal this to you. Can you see the round marks on the box face? One of them shows a triangle. Place the “moose” on fields A, B and C, one after the other. If you set the cover of the advent calendar up at a 90° angle and then look through the triangular window for each of the three moose positions, you should be able to notice something in the gap between its antlers. Room 23 shows you how you can translate everything into digits.
2ND CLUE
You have placed the figures in the correct positions. Now move your eye close to the “triangle” strange item and look through the triangular hole at the “moose”. You should then always be able to see one of the colourful flags on the inside of the calendar cover in the gap between its antlers. If the moose is on field A, you will see the turquoise flag, on field B the orange flag and on field C the black flag. You will also find these flags in room 23. Here, they are numbered, making it easy for you to find a code. Set the code on the decoding table and follow the arrows. Are you surprised about where you end up? Then it’s time to look at riddle card W2 more closely. For this, some of the symbols can be converted into others. Try doing this at the place of arrival, perhaps you are right after all and will even find a second snowball…
SOLUTION
Have you set the “triangle” and “moose” strange items down correctly and found the three turquoise, orange and black flags when looking through them? Then the image in room 23 will give you the code 327.
Set the code on the decoding table and then follow the arrows on the back.
That’s right, you have been here before. Riddle card W2 shows you that you need to convert the symbols which appear on the back of the decoding table. You therefore know, contrary to expectation, you are in the right place here.
On the inside of the door is an extra snowball that you can use. Write a 24 in the snowball on this door.
Help: 24th DECEMBER
You will need: Calendar sheet “24th December”, room 11, scissors
1ST CLUE
That’s odd, you have been in this room before… since you are in fact in the right place here, you will also see a fire burning in the fireplace. You now also notice the message on the carpet: Welcome back! Of course, other than that you won’t find anything new in this room. You have already used riddle card K. What can this room be all about? Perhaps you need to look at the calendar sheet “24th December” again. Can you find any clues there that could help you?
2ND CLUE
“Have you looked behind the fireplace?”. How should you do this? How are you going to look behind the fireplace? Perhaps you should also follow the second clue and make the passageway bigger. Could it be that this means the opening to this room? Where are your scissors again? Simply give it a try.
SOLUTION
Have you made the opening to this room slightly larger? Then you will discover that the room has a “false back”. Yes, the entire room can be removed. And behind it you will find a second, completely transformed room with a fireplace. This time everything is decorated for Christmas. Your host appears to have made a lot of effort. And there in the room is also a clue to a present. It apparently lies behind all of these rooms. Hmm, perhaps it is time to open the box at the edge, remove all the rooms and then take a proper look behind them. Good luck and Merry Christmas!
Credits
KOSMOS and Inka & Markus Brand would like to thank all test players and rule readers.
The authors: Inka & Markus Brand live in Gummersbach with their children, Lukas and Emely. Together, they have published a number of both children’s games and family games and won several prizes. Of course, they are enthusiastic riddle and live escape fans.
EXIT concept: Ralph Querfurth, Sandra Dochtermann
Cover illustration: Martin Hoffmann
Illustrations: Florian Biege
Story: Lena Ollefs
Graphics: Andreas Resch, Fine Tuning
Editing: Christian Sachseneder
English language editing: Nicky Thomas-Davies, Pamela Evans
Technical development: Monika Schall
Customer Service & Replacement Parts
Note: All components of this game have been carefully designed and packaged. If the cards and strange items in a room get muddled up, you can find a Refill Guide for the advent calendar at www.thamesandkosmos.co.uk/product/exit-advent-calendar/. This shows you where the individual components belong. Let someone that is not participating in the game sort the calendar. You can then easily continue with the game.
Please note: This advent calendar contains lots of different creative ideas. In order to make all of them work, it is necessary that every single copy is assembled by hand. Of course this is done with great care. However, mistakes happen. In the unlikely case that a piece of the game material is missing, please don’t hesitate to contact our service desk at: [email protected]. Our colleagues will do their best to support you and to provide spare parts, if necessary.
Can you solve the riddles and stop the kidnapping before it is too late?
Criminal activity is rampant in the frontier town of Fortune City, and now the sheriff has disappeared without a trace. With precious little time to find him, players need to work together to solve the crime. Over the course of the game, your investigation will lead you through Fortune City, with clues and strange items to be found throughout. You will need to search for answers in the saloon, drugstore, gunsmith, post office, prison, and bank. But in a unique twist, you will decide the order in which you will visit these locations and who you will interrogate along the way. Together with your team, you will collect clues and evaluate the townspeoples’ testimonies. But will you get the answers you need to rescue the sheriff in time?
In the style of Dead Man on the Orient Express and Theft on the Mississippi, players must get to the bottom of a kidnapping in the Wild West in addition to solving all the riddles.
Level: 3.5 / 5
www.thamesandkosmos.co.uk

Introduction & Overview
The Mystery of the Ice Cave
For 1 player or one team • 10 years and up
ATTENTION! Do not look at the game components (the other book, the decoding table, the panoramic image, etc.) in more detail yet! Read this rule sheet and carefully follow all the instructions first. Following the rule sheet you will find the help section. You won’t need this until later on in the game.
Start by reading HERE!
IMPORTANT: Before playing, do not take a closer look at any of the game components or open any of the doors! Wait until the game tells you to do so in the text. Read through this rule sheet carefully first.
What’s the story?
This is definitely not what you had in mind for your pre-Christmas ski trip: taken by surprise by an avalanche, you take cover in a rock alcove using the last of your strength before the snow buries everything behind you. Although you are safe for now, how do you get back out of here? You look around and discover that you are trapped in a cave. The way back is blocked, so your only hope is to press on ahead. Make a move and start exploring the cave. You may be able to find another exit.
Where is the gameboard?
In this game, the advent calendar itself is your gameboard. You also have the story book. Here you will find out how you came to be in this predicament and every day has an introductory chapter that continues to tell the story. Other than this, you don’t have anything else available to you at the start of the game.
Game components
- 1 Story book: tells a little bit more of the story day-by-day
- 1 Help book with rule sheet: get help here if you ever can’t move forwards
- 1 Decoding table
- 3 Decoding strips in the help book and additional secret material for the riddles, hidden behind the 24 doors of the advent calendar
Setup & Decoder Assembly
Game preparation
Before you can start, you need to prepare the decoder. Take some scissors and carefully cut out the three decoding strips shown here. Then thread them through the holes in the decoding table.
Thread the three strips through the corresponding holes horizontally as shown – the red at the top, the blue in the middle and the yellow at the bottom. It’s important to thread the three strips in this exact order. Take care not to mix them up, otherwise the decoder won’t work correctly.
The numbers are now visible through the central holes on the front of the decoding table.
You will then find an arrow and an EXIT symbol on the back of each strip. You only ever need to pay attention to the arrows and the EXIT symbols which are beneath one another in the centre.
The decoding table is ready to use. Place it on the table, together with the story book.
Additional game components required
You will also need:
- pens (a ballpoint pen, a black waterproof pen and a pencil are best)
- at least one pair of scissors
- some paper for notes, should you need it.
You will find everything else you need behind the doors of the advent calendar.
How to Play
Solve riddles step-by-step
Perform the following steps each day:
- Carefully tear out the current calendar sheet from the story book along the perforated line. The date for the current day can be found at the top of the sheet in the pad.
- Read the introductory chapter.
- Open the next door as soon as you are told to do so in the text. Behind this door you will find various things that will help you to solve the riddle of the day. These could be riddle cards and various strange items or objects.
- Solve the riddle. In general, you may, and must, use everything you find in the current room or in the story book. This is the only way to solve the current riddle.
ATTENTION:
- To solve the riddle you can LABEL, FOLD OR CUT UP THE MATERIAL… anything is allowed, and much of it is even necessary.
- Keep hold of all of the game components until you have reached the last day of the advent calendar. DO NOT THROW ANYTHING AWAY! You may need it again.
- ONLY EVER READ THE CURRENT CALENDAR SHEET. Only read the next sheet when you want to start the next riddle.
What door do I continue at?
Don’t be surprised that the doors of your calendar do not have any numbers. Only the first door is labelled.
In order to escape from the ice cave, you have to solve riddles from door to door — one day at a time. The solution to the current riddle will show you where to start from the next day. This is how it works:
The solution to each riddle is always a three-digit numerical code. Set the retrieved numerical code on the decoding table using the three decoding strips. Always make sure the numbers are in the correct order.
Have you set the code? Then turn the decoding table over without moving the strips. Now look at the back of the decoding table so that you can read the text and so the polar bear is not upside down. You will now see three arrows in the white region from top to bottom.
These three arrows show you the way to the next door. You always start at your current door. From here, follow the arrows from one door to the next. If you have followed all three of the directions correctly, you will land at a destination door.
Example:
The solution to your current riddle is 533. You set this code on the decoding table and turn it over.
On the back you will find the arrows: left, top-left, down. If your code is correct, you will find the door for the next day at the specified location. You can check this in the next step.
Have you found the correct destination door?
In order to check this, compare the three symbols on the destination door with the three symbols on your decoding table.
Do the symbols NOT match up?
Carefully check your route again. Have you followed the directions from the starting door to the destination door accurately? If yes, then your code is probably incorrect. Take a look at the riddle again. Have you missed anything?
If you get stuck and can’t continue, don’t despair. Take a look at the help pad. Here you will find clues for each riddle which will give you a helping hand. You will find an explanation of how to use the help system below.
Note: The arrows will never direct you beyond the edge of the advent calendar during the game. If a direction should lead you beyond the advent calendar, your code was probably incorrect.
Do the symbols match up?
You have solved the riddle correctly and will arrive at the next door.
Write the date of the next day on the snowball on the new door. The next riddle will then start here tomorrow — of course only after you have read the next chapter in the story pad.
Example:
You have solved the riddle for the first day. You set the code and follow the arrows on the decoding table. At the destination you compare the symbols on the new door with the decoding table. They match up, so you write a “2” in the snowball on the destination door.
IMPORTANT:
- You must solve the riddles in order! This means: you can, and may, only ever move forward with the next riddle and open the next door if you have figured out the code beforehand and the text in the game allows you to!
- All the codes can be cracked logically. It’s not just about trying out every possible combination on the decoding table.
- Do not forget to label the next door! This is the only way you will immediately know where to continue the next day.
The game begins
What are you waiting for? Get going! Take the story book, open the first page and start reading the introduction. The first riddle begins on the calendar sheet “1st December”.
We hope you enjoy EXIT – ADVENT CALENDAR. The Mystery of the Ice Cave.
How does the game end?
The game ends when you have solved the last riddle and have escaped from the secret ice cave. A clue will inform you of this. After this, read the final chapter of the story book.
Help System
Do you need any help?
If ever you cannot continue, the game help pad will prove useful.
Look for the page with the puzzle date on in the help pad. If you now fold the bottom edge upwards to the corresponding mark, the relevant text will be visible.
- Each “1st clue” indicates a first useful clue and shows you what you need in order to be able to solve the corresponding riddle.
- The “2nd clue” will give you more specific help in order to find a solution to the corresponding riddle.
- The “solution” shows you how to solve it and the correct code for the riddle.
Don’t be afraid to use the clues if you cannot continue.
Room for notes
Carefully tear out this sheet if needed!
Daily Riddle Solutions & Hints
Help: 1st DECEMBER
You will need: Riddle card A, “swan” strange item card, room 1
1ST CLUE
What a beautiful swan! Unfortunately, he cannot help you in any way himself. Did you notice the small blue diamonds on the strange item card and on riddle card A? What could all that be about?
2ND CLUE
Have a look at what’s left when you remove the swan from the die-cut sheet. You can also press out the small diamonds. You may then need to place the strange item card so that the holes where the diamonds were are directly on top of the diamonds on riddle card A…
SOLUTION
Remove the swan and the small diamonds from the strange item. A frame is then left. Place this accurately on top of riddle card A so that the diamonds of the riddle card are visible through the holes in the frame. The frame now covers some of the text on the card. The sentence “find the red items in the room” remains.
In addition, riddle card A states that you need to solve the code from left to right. Look at room 1 more closely. In it you will find three red things provided with numbers. This will give you the numerical code 815 from left to right.
Set the code on the decoding table and then follow the arrows on the back.
Write a 2 in the snowball on this door.
Help: 2nd DECEMBER
You will need: Riddle card B, “fire” strange item card (made up of two pieces), room 2
1ST CLUE
On the floor of room 2 you will find a fire pit that looks as though it was made for this clue. Look at the colourful points that glow on the firewood closely. They will help you put the two parts of the fire together correctly. Once you have placed the fire in the room, riddle card B will show you what to do.
2ND CLUE
Once the points that glow on the floor of room 2 correspond to the points that glow on the fire and the fire is in the room, you have done everything correctly so far. On riddle card B you will see: “connected in thought”. In addition, you will see several symbols on this card. They are arranged in three groups. You will also find the same symbols in the flames of the fire. Can you connect the symbols with imaginary lines. Does it make any sense?
SOLUTION
Have you put the fire together correctly and placed it in the room? Then each of the symbols on riddle card B is only visible in the fire once. Now connect the symbols in the fire in your mind using lines. Riddle card B tells you which symbols you need to connect in the given order – sometimes going beyond the edges of the fire, too. You will therefore be given a digit for each of the three rows of symbols on riddle card B. This will give you the numerical code 426.
Set the code on the decoding table and then follow the arrows on the back.
Write a 3 in the snowball on this door.
Help: 3rd DECEMBER
You will need: Riddle card C, “sticker” strange item, calendar sheet “3rd December”, pencil
1ST CLUE
You should bake some cookies. How fortunate that you have found two trays half-filled with cookies on the calendar sheet “3rd December”. There are still a few free spaces on the trays. Take a look at the sticker from room 3 for this. It seems to fit in some way or another. But how can you close the oven door?
2ND CLUE
The stickers match the outlines on the two trays exactly. Their edges tell you which sticker must go where. Have you stuck them down accurately? Then you have done everything correctly for now. Now fold the calendar sheet “3rd December” so that the oven gloves lie on top of one another. If you fold it correctly, you will see a closed oven door in front of you.
On riddle card C you will read that everything turns completely grey. Hmm… a pencil would be grey…
SOLUTION
If you have stuck down all the stickers correctly in the right places and then folded the calendar sheet “3rd December” once, you will see the closed oven in front of you. Now use the pencil to shade in the window of the oven until you have coloured it in grey. The numerical code 962 will appear on the surface that you have coloured in grey.
Set the code on the decoding table and then follow the arrows on the back.
Write a 4 in the snowball on this door.
Help: 4th DECEMBER
You will need: Riddle cards D1 and D2, 3 wooden rods, room 4
1ST CLUE
Place the wooden rods vertically in room 4 in the form of columns. This will be very easy if you firstly push them into the holes in the ceiling and then anchor them at the bottom in the holes in the floor. Riddle card D1 shows you WHAT you actually need to count, riddle card D2 will tell you WHERE.
2ND CLUE
Have you positioned the three columns vertically in the room and anchored them in the holes? Good. The markings next to the holes assign a letter A, B and C to each column. Riddle card D2 shows you which columns you need to count blue books between. Select the relevant columns and look between them. But what could the message “The view can alter” mean?
SOLUTION
Anchor the columns in the room. Always look between two columns and count the blue books that you see. But look closely: some of the books are well hidden in the blind spot behind a column. You will only notice them if you look around the room from all angles. And we really mean ALL angles! Don’t forget to look from a very flat angle from each side, too.
You will find 7 blue books between columns A and B, 4 between columns B and C and another 4 between columns A and C. This will give you the code 744.
Set the code on the decoding table and then follow the arrows on the back.
Write a 5 in the snowball on this door.
Example: Depicted above, you’ll find the solution for columns A and B. If you look between these two columns from ALL ANGLES, you will discover a total of 7 blue books. The solutions for the other columns work in a similar way. Take care to really look from all angles between the according columns each time.
Help: 5th DECEMBER
You will need: Riddle card E, 2 “disc” strange items, 1 pushpin, advent calendar box, room 5
1ST CLUE
Who is Reinhold? Good question. He is obviously not a stranger to these parts. Find out whether he has left anything behind, perhaps even in the “area” outside the ice cave. Once you have found the location, look at the interesting objects there and those in room 5. How does it all fit together with the two rotary discs?
2ND CLUE
Reinhold has left some graffiti on the inside of the cover flap. Assemble the two parts of the rotary disc and pin them on the cover flap at the dot of the “i” on Reinhold’s writing “Reinhold was here”. On the pinboard in room 5 you will find three eye-catching pieces of paper. Each note has a date and an object pinned to it. You will also find very similar objects directly next to the pinned rotary discs. Can you find a connection?
SOLUTION
Pin the two-part rotary disc precisely through the dot of the “i” in Reinhold’s message “Reinhold was here” on the inside of the advent calendar. Now take a look at the pieces of paper in room 5 one after the other. Always set the rotary discs to the date of the relevant post-it note and rotate them such that they point to the associated object: left glove to right glove, left sandal to right sandal, comb to hairbrush. Each time, look through the holes in the rotary disc and note down how many dashes you can see on the wall. You will find the numbers 7, 2 and 1. Riddle card E will confirm the order for you. You will then find the numerical code 721.
Set the code on the decoding table and then follow the arrows on the back.
Write a 6 in the snowball on this door.
Help: 6th DECEMBER
You will need: Riddle card F, calendar sheet “6th December”, scissors
1ST CLUE
Have you cut out the strip with the strange markings from the calendar sheet “6th December”? Take a closer look at it. It has coloured regions at two ends, one looks like piano keys and the other like buttons. In addition, the strips have a grey edge to the left and right, which is divided by small dashes into portions of equal width. Carefully fold these portions into a zigzag to make a small accordion model. If you then lightly squeeze and look at both sides, you should be able to notice something on the fold edges.
2ND CLUE
Start by reading at the point marked “start”. The text on the two sides of the accordion reads: “edges on door one”. “But which edges?” you ask yourself. Can you find something on the outside of door 1 that has edges? Or better still, three things that have a certain number of edges?
SOLUTION
You have folded the accordion and found the text “edges on door one” on the fold edges. Take a look at door 1 again more closely. Here you will find the symbols: triangle, hexagon, triangle. Of course! If you count the edges of the individual symbols, you will get the numerical code 663 (hexagon = 6, hexagon = 6, triangle = 3 edges).
Set the code on the decoding table and then follow the arrows on the back.
Write a 7 in the snowball on this door.
Help: 7th DECEMBER
You will need: Riddle card G, calendar sheet “7th December”, room 7, scissors
1ST CLUE
In room 7, you will find three colourful boxes on the wall. And on the calendar sheet “7th December” you will find a shape with very similar patterns on it. You are best off cutting it along the dashed line. What could you fold out of this cut-out shape?
2ND CLUE
Firstly, fold a cube-shaped box out of the cut-out shape. Look at the sides of the box closely as a number is hidden on each side. The boxes in room 7 are each depicted from a different perspective so that it is only ever possible to see certain sides of them. What could this mean? Don’t forget your host IS COUNTING on you!
SOLUTION
Have you made a box from the cut-out shape? Great, then you can now orient them one after the other in the exact same way as the three boxes in room 7. Incidentally, there is still only ever one option for this. As a result, you will then always see three of the sides of the box you have made. Look at these sides more closely. Can you see the hidden numbers? If you add these up for each of the three alignments, you will arrive at the numerical code 753.
Set the code on the decoding table and then follow the arrows on the back.
Write an 8 in the snowball on this door.
Help: 8th DECEMBER
You will need: Riddle card H, 4 “laundry” strange items, 5 “clothes pegs” strange items, room 8
1ST CLUE
Someone needs to hang up the laundry and that’s exactly what you need to do. You have clothes pegs and laundry. The matching line is printed on the inside of door 8. The exact places for the clothes pegs are even already depicted. With precision, carefully hang the washing up. Every peg and each piece of laundry where it belongs. Pay attention to the ANGLE of the laundry pegs too.
2ND CLUE
Have you hung the washing up on the inside of the door? Have you also paid attention to the colours and angles of the laundry pegs? Have you also noticed the hand towel that is hanging on the inside of the door? This is because someone appears to be a big Rome fan. But how do you now find the correct numerical code? On the large box in room 8 you will find 3 two-tone fields that will help you find out this code. Take a look at these fields and now the clothes pegs on the door…
SOLUTION
Provided that you have hung the laundry up exactly as prescribed by the markings on the inside of the door, these clothes pegs will form roman numerals. On the box in room 8 you will see three two-tone fields. For each of these fields, only ever take notice of the clothes pegs in the corresponding colour:
- 1st colour field: only the blue and the white clothes pegs → IV (4)
- 2nd colour field: the white and the black clothes pegs → VI (6)
- 3rd colour field: the black and the yellow pegs → II (2)
You will then have the roman numerals IV, VI and II. This gives the numerical code 462.
Set the code on the decoding table and then follow the arrows on the back.
Write a 9 in the snowball on this door.
Help: 9th DECEMBER
You will need: Riddle cards i1, i2 and i3
1ST CLUE
Riddle card i1 shows you that you need to look for dots. Hmm… the room is so dark that you unfortunately can’t see anything in here. You therefore have to look for them somewhere else. But where? Also, two of the three riddle cards are completely black. That’s strange. Why then are there three riddle cards in the room if only one of them has anything of any interest on it?
2ND CLUE
Look at the three riddle cards very closely. Too quickly and you will miss one or more details. Sometimes every dot matters. You will see that more or fewer dots can be found here. The dots determine the order in which the numbers form the code. “Which numbers?” do you ask yourself? Of course, they are also there on the riddle cards.
SOLUTION
If you don’t look closely you will miss something far too easily: On the backs of the riddle cards is the word “riddle card”, once written with one dot over the “i”, once with two and one with three dots over the “i”. The dots indicate the order.
You therefore need to place the riddle cards down in the corresponding order. THEN have a closer look at the “numbers” on the riddle cards. Riddle card i3 will be first, followed by i1 and i2. This gives the code 312.
Enter the code on the decoding table and then follow the arrows on the back.
Write a 10 in the snowball on this door.
Help: 10th DECEMBER
You will need: Riddle card J, calendar sheet “10th December”, advent calendar box
1ST CLUE
Interesting, everything seems to revolve around stars here. On riddle card J you will find four peculiar festive constellations. To make them easier for you to see, someone has also connected the stars with lines. How nice. Did you also notice the stars on today’s calendar sheet, “10th December”? They seem to be the same constellations that are on riddle card J. Only the connecting lines are missing. Have a go at drawing them in.
2ND CLUE
Have you connected the stars on the calendar sheet “10th December” in exactly the same way as on riddle card J? Great. The intersections then mark four words in the text. If you now read these words in the order prescribed by riddle card J, the following comment is revealed: “Fox found the secret”. Odd, have you seen a fox anywhere around here? He seems to be good at hiding. Find him and you will also quickly find the numerical code.
SOLUTION
The four intersections of the constellations mark the words “fox” “found” “the” “secret”. But which fox? Take a close look at the advent calendar box. There, on the left-hand side you will find an Arctic fox. He is easy to miss because of his white fur. He is sniffing the ground as if he is looking for something there. Perhaps you should look there too. Open the box flap of the box.
There are several three-digit numerical codes there. But the fox is only sniffing precisely one of these codes. It is code 573.
Set the code on the decoding table and then follow the arrows on the back.
Write an 11 in the snowball on this door.
Help: 11th DECEMBER
You will need: Riddle card K, rooms 1, 3, 4, 6, 7, 8 and 10, advent calendar box
1ST CLUE
Riddle card K asks you to make an inventory. Outrageous, actually, but you don’t have anything better to do as long as you are stuck in the ice cave. This means that you have to count certain things. Which things – the riddle card will tell you: lanterns, forks and candles. Of course, these things can be lying about anywhere in the cave… but only where you have already been before.
2ND CLUE
Look for the things you are searching for in all the open rooms. And perhaps also on the cover of the advent calendar. So, have you found everything? Riddle card K will tell you what the things you are looking for look like. The number of these things will give you three digits. You will therefore find the correct numerical code with the order indicated on riddle card K.
SOLUTION
On the cover of the advent calendar you will find a lantern (1). In room 1, you will find a fork, in room 3 precisely four forks and in room 6 a fork is sticking in the wall. You therefore have a total of six forks (6). You discover two candles in room 1 and you find one candle in each of rooms 4, 7, 8 and 10, and therefore have a total of six candles altogether (6). The code is 166.
Set the code on the decoding table and then follow the arrows on the back.
Write a 12 in the snowball on this door.
Help: 12th DECEMBER
You will need: Riddle cards L1 and L2, room 12, advent calendar box, scissors
1ST CLUE
On riddle cards L1 and L2 you will find two rather strange texts. At a first glance, this is a chain of disconnected words. But only if you look at each card on its own. Place them next to one another so that two texts become one. The contents now make sense, right? But which mountain could it mean? Have another look around the room, perhaps you will then know what this text is talking about. And perhaps you also now know what you need to do…
Yes, a pair of scissors would be very useful, why did you ask?
2ND CLUE
Have you found the painting in room 12? It depicts the same mountain that can also be found on the inside of the advent calendar cover. That is pretty coincidental, right? You will also see a dotted line around the mountain on the painting in the room. Don’t be afraid to cut away everything that does not belong to this mountain from the cover of the advent calendar. Then fold the mountain backwards onto the back of the advent calendar. The red flag mentioned in the poem should now show you the solution.
SOLUTION
Cut out the mountain on the advent calendar cover exactly as shown in the painting in room 12. You have to cut off and remove everything that does not belong to the mountain. Now fold the rest of the cover, i.e. the big mountain, backwards on the back of the calendar. The three red flags are then located at the edges of this mountain. Look at what they point to. They point to the word “seven”, the number 2 in the field “24 riddles” and the number 3 of “3 decoding strips”.
According to riddle cards L1 and L2, the numbers need to be arranged according to “middle”, “large” and “small”. This gives the code 372.
Set the code on the decoding table and then follow the arrows on the back.
Write a 13 in the snowball on this door.
Help: 13th DECEMBER
You will need: Riddle card M, calendar sheet “13th December”, room 13
1ST CLUE
Welcome to the games room. Here you will have to play three games in order to arrive at the desired code. You will find the game rules, or some of them, on riddle card M. The first game is also a memory game where you need to find identical pairs. In addition, you will have to play “town, country, river”. You remember that you have to find terms relating to different categories as quickly as possible in this game. The starting letters are very important here. And then there is still a chess round. That’s odd — only the black appears to possess playing pieces here.
2ND CLUE
Take a close look at the game rules on riddle card M. It looks as though you have to colour all the memory cards that you find in black. How convenient — on the calendar sheet “13th December” you will find a ready-to-use memory game with baby animals on it.
In “town, country, river”, the column with the towns grab your attention in particular. Why else is the small house depicted on riddle card M? And what about the chess? It seems as though you have to colour the squares in black here, too. But which ones? This must relate to the figures.
SOLUTION
When you have coloured all the memory pairs in black, these small black cards form the number 6.
Now look at the column with the towns in on the Alphabet game table. That’s correct, the starting letters of the five towns give the word EIGHT (Edinburgh, Inverness, Glasgow, Hungary, Truro → 8).
And if you simply colour in all fields on the chessboard that have a figure on in black, the remaining white fields form the number 6.
The code therefore reads 686.
Set the code on the decoding table and then follow the arrows on the back.
Write a 14 in the snowball on this door.
Help: 14th DECEMBER
You will need: Riddle cards N1 and N2, calendar sheet “14th December”, scissors
1ST CLUE
Hmm…your host thinks you should make a garland here. But how? Together, riddle cards N1 and N2 form the instructions. You need to place them down next to one another so that their contents make sense. Something should be placed at a right-angle, arrow on arrow. But what? Have you seen the two strips on the calendar sheet for today’s date? Perhaps now would be the right time to cut these out.
2ND CLUE
Have you cut out the two strips and placed them one on top of the other at a right-angle so that the two arrows also lay on top of one another? Is the word “start” visible? Good. Then there is nothing standing in the way of the solution to the riddle. Simply follow the instructions in the poem step-by-step. Start by always taking it in turns to fold the strips backwards. The coloured dots could be helpful. Each two same-coloured dots belong together…
SOLUTION
If you accurately follow the instructions in the poem, the strips are always alternately folded backwards and with each fold they overlap the other strip. You thereby always move two dots that are the same colour very close to one another and gradually make a small paper Christmas garland. Perhaps you also know the folding pattern as the “witch’s ladder”. Have you finished making it? Then begin at the “start” and read the letters from top to bottom in the direction of the arrow. You will have to pull the “steps” of the witch’s ladder apart slightly and peek inside. Follow the fold edges in a circle until you get to the “end”. You will find the words FOUR, ZERO, TWO.
The code therefore reads: 402.
Set the code on the decoding table and then follow the arrows on the back.
Write a 15 in the snowball on this door.
Example: If you pull the witch’s ladder apart slightly and peek inside the gaps, you will firstly see the letters F and O, next the letters U and R – FOUR. Always follow around the fold edges to the next letter.
Help: 15th DECEMBER
You will need: Riddle cards O1, O2 and O3, insides of doors 7 and 14, scissors
1ST CLUE
Riddle card O1 shows you what you will need for this riddle. In addition to riddle cards O2 and O3, it would appear another two additional “parts” of the frozen lake are required, on which the ice skates have left tracks. These scratch marks appear to be hidden elsewhere — but where? One of the cards shall now show you: you will need a pair of scissors in any case.
2ND CLUE
You will find two parts of the frozen lake on riddle cards O2 and O3. The two other parts can be found on the insides of doors 7 and 14. Carefully cut along the dashed lines on the four rectangular surfaces. It should then be clear what you need to do, right? Another useful clue: since everything can play a role in this advent calendar, you should not throw away the scraps you cut off either — keep hold of everything! They may be of use again later on.
SOLUTION
If you have carefully cut everything out, place four puzzle parts of the frozen lake in front of you. Join them together to form a rectangular surface to give a matching puzzle image. Finished? Then the scratch marks of the ice skates will show you how to proceed. They form three legible word combinations: “red zero”, “blue seven” and “yellow seven”. The words therefore not only reveal the desired numbers but also the colours of the decoding strips on which you need to set these numbers.
The code therefore reads: 077.
Set the code on the decoding table and then follow the arrows on the back.
Write a 16 in the snowball on this door.
Help: 16th DECEMBER
You will need: Riddle card P, “rope” strange item, room 16, doors 1, 2, 3, 4, 6, 8, 11, 12, 15 and 16
1ST CLUE
What do the number combinations on riddle card P mean? Each row could stand for a digit in the code…but how can a single digit be made from a row of numbers? And why is there a “rope” in this room? And what kind of strange images are those between the holds on the climbing wall? Question after question… you will presumably need to collect everything together. Does it help to know that none of the numbers on the card are greater than 16 and today is the 16th December?
2ND CLUE
The image on riddle card P shows you that this riddle must have something to do with doors that can be interconnected in some manner. Interestingly, on each door on the calendar there is a small semi-circular bracket — precisely these brackets can also be seen in the image on the riddle card P, where a rope is tensioned from one bracket to the other. What can this mean for this riddle? And how do the number sequences come into play? Do you maybe need to tension the rope between certain brackets?
SOLUTION
Have you tensioned the rope around the brackets on the doors that are arranged behind the other in a line on riddle card P? Good, then the rope will give a certain pattern or specific shape. You can also find this shape on one of the images on the climbing wall in room 16. Each of the three lines on riddle card P then gives its own pattern. By means of the images in room 16, the pattern can be translated into numbers and thus create the code 298.
Set the code on the decoding table and then follow the arrows on the back.
Write a 17 in the snowball on this door.
Help: 17th DECEMBER
You will need: Riddle card Q, 2 additional things with numbers
1ST CLUE
Welcome to the hall of mirrors. Would you care for a little dance? No time? Good. You won’t find much else other than riddle card Q here. Where is the riddle? Perhaps in the image of the card? It may be that this gives a clue as to where the code can be found?
2ND CLUE
Riddle card Q depicts a door. Perhaps this is a clue that you are looking for doors in this riddle? It says there that two of them are different…
Have you discovered two doors that are different to all the others? And where can you find the desired numbers here? Simply take a look at what you’ve discovered.
SOLUTION
Door 6 and door 11 are different to all the others, since they can be opened from left to right and not from right to left. They bear the numbers 6 and 11. If these numbers (not their digits!) are sorted from small to large, the code 611 is given.
Set the code on the decoding table and then follow the arrows on the back.
Write an 18 in the snowball on this door.
Help: 18th DECEMBER
You will need: Riddle card R, calendar sheet “18th December”, room 18
1ST CLUE
Your host has a wonderful model railway there, doesn’t he? You can see it on the calendar sheet “18th December”. Do you feel the desire to send the locomotive on a trip? Can you follow the path of the track it travels along? Perhaps riddle card R will give you a clue as to how the switches are adjusted and what this riddle is all about.
2ND CLUE
You can see what direction the train is currently travelling in. If it reaches a switch, you can look at riddle card R to see how this is adjusted. You therefore know which route the train will take. You do not have to pay attention to all the switches either. This is because the train can sometimes only take one direction. Riddle card R therefore only shows the switches that need to be set.
But what do the images of the houses between the switches mean? Perhaps the letters next to the houses mean something. It may be that you first have to take into consideration all the black houses along the route? After the fourth switch, the red houses then appear to be important.
SOLUTION
In your mind, follow the route that the train travels. Riddle card R shows you how the switches that the train passes are set. You therefore also know where it will continue to travel. At the first switch, it turns in the “green” direction, for example. If the train arrives at a switch where it can only travel in one direction, this switch is not noted on riddle card R.
Riddle card R also shows you which houses you need to pay attention to at the wayside. As far as the fourth switch, you only need to pay attention to black houses, after the fourth switch you need to pay attention to red houses first, and then after that to green houses. Each of these houses is provided with a letter. The letter sequence that you thereby determine reads: B,L,U,E, R,E,D, G,R,E,Y – or: blue, red, grey.
In order to now translate the colours into numbers, you need to take a closer look at room 18. Here you will find a train with numerous carriages in different colours on the shelf. The blue carriage bears the number 9, the red carriage bears the number 1 and the grey carriage bears the number 7. The code therefore reads: 917.
You will arrive at the door with these symbols.
Write a 19 in the snowball on this door.
Help: 19th DECEMBER
You will need: Riddle card S, calendar sheet “19th December”, scissors
1ST CLUE
Riddle card S looks like handicraft instructions. You need to place the same-coloured Christmas baubles on top of one another seven times before then cutting along the dashed lines in the 8th step. You then need to unfold something before sorting something from large to small in the final step… but what? Have you already taken a look at the colourful image on the calendar sheet “19th December”?
2ND CLUE
Cut the red square out of the calendar sheet “19th December”. On the square you will find a number of small images of Christmas baubles. There are always two of the same colour, one of which is particularly shiny. Look for the two red Christmas baubles and place the shiny one on top of the other. This looks like it should be folded, right? And very handy guide lines are even drawn on. Now carefully follow the instructions step-by-step.
SOLUTION
Once you have folded everything neatly, you will be left with a small Santa Claus, as shown in the picture. You now need to cut along the dashed lines. The candy cane and the semi-circular cookie may have to go. Finished? Then unfold Santa again. Do you see the numbers 3 8 0 on the paper? When sorted from large to small, these give the code 830.
Set the code on the decoding table and then follow the arrows on the back.
Write a 20 in the snowball on this door.
Help: 20th DECEMBER
You will need: Riddle cards A, E, H, O1, O3, M, N1 and T, room 20
1ST CLUE
In this room are three piles of presents, one on the left-hand wall, one in the middle and the last on the right-hand wall. You have seen these presents before. In fact, you have actually seen one present every day since 1st December. Try and find PRECISELY these presents. Once you have them, pile them up in three groups as they are in the room.
2ND CLUE
Have you found all the riddle cards with the matching presents? Then look at the backs of the riddle cards. A letter is pictured on each of them. Can you maybe form words from the letters? For this, the riddle cards that lie in a pile in room 20 always belong together. You therefore need to create three words.
SOLUTION
Find the presents depicted in room 20 on the riddle cards that have been collected thus far. Once you have found all 8 riddle cards, pile them up in three groups just like the presents in the room. Now look at the letters on the riddle cards. You can form a word out of each group.
- The first group contains the riddle cards A, T and E. This gives ATE (8).
- The second group contains the riddle cards O1 and H. This makes the word OH (0).
- The third group contains the riddle cards M, O3, and N. The gift on card M is in a different location to the other gifts. Turn the card around and you will have a ‘W’ instead. The word here is WON (1).
Read the words phonetically and you will hear 801, which is your numerical code.
Set the code on the decoding table and then follow the arrows on the back.
Write a 21 in the snowball on this door.
Help: 21st DECEMBER
You will need: Riddle cards U1, U2 and U3 and U4, calendar sheet “21st December”, room 21
1ST CLUE
On the calendar sheet “21st December” you will find a map. You can draw the movements of the animals on it. The images on the wall in room 21 show you which animal starts where. You will find the rules, according to how each animal moves, on one of the four riddle cards. You have to get every animal into a cave. However, the important thing is not which animal ends up in which cave, but something else. But what? You will also find the answer in room 21.
2ND CLUE
Each of the riddle cards shows how the animal depicted on that card moves. Riddle card U1 says, for example, that the wolf always travels one field west AND one field south. This is one complete movement step. If he cannot perform the movement step fully, he travels just one field south instead. In addition, at the top of the riddle card you can see that the wolf cannot step on any mountain or water fields. You must of course bear this in mind when drawing the movements on. Have you entered the movements for all the animals onto the map? Then you need to find a field where all the animals have been. This only applies to a single field. The post-it note on the floor of room 21 shows you how you can now use this information to arrive at the code.
SOLUTION
Have you drawn the movements of the animals on correctly? Then you will discover that all the animals were on the field in front of the bridge. Now take a look at the post-it note on the floor of room 21. The field where all the animals have been is marked with a cross. In order to find the code, you now have to look at the three adjacent fields marked A, B and C on the map. Here you will find the numbers 5, 9 and 0. This gives the numerical code 590.
Set the code on the decoding table and then follow the arrows on the back.
Write a 22 in the snowball on this door.
Help: 22nd DECEMBER
You will need: Riddle card V, room 22, advent calendar box, scissors
1ST CLUE
Look around room 22. You will find a strange coordinate system in which three points are highlighted. You firstly need to find out what the coordinate system relates to. Perhaps you can see something that has the same shape? Riddle card V urges you to “uncover” something – ideally the points marked in the coordinate system.
2ND CLUE
Does the coordinate system not look exactly like the advent calendar? The three crosses seem to mark specific strips between the doors. You can take the text on riddle card V quite literally and uncover the corresponding points. You’ll then be sure to find the numerical code. The images on the pinboard in room 22 will help you with the order of the digits.
SOLUTION
The coordinate system shows the advent calendar. The three crosses mark the strips between doors 19 and 3, between doors 14 and 7 and between doors 7 and 17. Cut away the strips. Underneath, you will find – hurrah – three gemstones marked with numbers. If you now place the gemstones in the order shown on the pinboard in room 22, you will get the numerical code 138.
Set the code on the decoding table and then follow the arrows on the back.
Write a 23 in the snowball on this door.
Help: 23rd DECEMBER
You will need: Riddle cards W1 and W2, 4 strange items (“moose”, “triangle”, 2 stands), room 23, advent calendar box
1ST CLUE
You don’t appear to need riddle card W2 until later. Set it aside at first. Now take the “moose” and “triangle” strange items, fold them along the black line and place each one on the grey mark in a stand. You now have two figures that you can set down. But where? Riddle card W1 will reveal this to you. Can you see the round marks on the box face? One of them shows a triangle. Place the “moose” on fields A, B and C, one after the other. If you set the cover of the advent calendar up at a 90° angle and then look through the triangular window for each of the three moose positions, you should be able to notice something in the gap between its antlers. Room 23 shows you how you can translate everything into digits.
2ND CLUE
You have placed the figures in the correct positions. Now move your eye close to the “triangle” strange item and look through the triangular hole at the “moose”. You should then always be able to see one of the colourful flags on the inside of the calendar cover in the gap between its antlers. If the moose is on field A, you will see the turquoise flag, on field B the orange flag and on field C the black flag. You will also find these flags in room 23. Here, they are numbered, making it easy for you to find a code. Set the code on the decoding table and follow the arrows. Are you surprised about where you end up? Then it’s time to look at riddle card W2 more closely. For this, some of the symbols can be converted into others. Try doing this at the place of arrival, perhaps you are right after all and will even find a second snowball…
SOLUTION
Have you set the “triangle” and “moose” strange items down correctly and found the three turquoise, orange and black flags when looking through them? Then the image in room 23 will give you the code 327.
Set the code on the decoding table and then follow the arrows on the back.
That’s right, you have been here before. Riddle card W2 shows you that you need to convert the symbols which appear on the back of the decoding table. You therefore know, contrary to expectation, you are in the right place here.
On the inside of the door is an extra snowball that you can use. Write a 24 in the snowball on this door.
Help: 24th DECEMBER
You will need: Calendar sheet “24th December”, room 11, scissors
1ST CLUE
That’s odd, you have been in this room before… since you are in fact in the right place here, you will also see a fire burning in the fireplace. You now also notice the message on the carpet: Welcome back! Of course, other than that you won’t find anything new in this room. You have already used riddle card K. What can this room be all about? Perhaps you need to look at the calendar sheet “24th December” again. Can you find any clues there that could help you?
2ND CLUE
“Have you looked behind the fireplace?”. How should you do this? How are you going to look behind the fireplace? Perhaps you should also follow the second clue and make the passageway bigger. Could it be that this means the opening to this room? Where are your scissors again? Simply give it a try.
SOLUTION
Have you made the opening to this room slightly larger? Then you will discover that the room has a “false back”. Yes, the entire room can be removed. And behind it you will find a second, completely transformed room with a fireplace. This time everything is decorated for Christmas. Your host appears to have made a lot of effort. And there in the room is also a clue to a present. It apparently lies behind all of these rooms. Hmm, perhaps it is time to open the box at the edge, remove all the rooms and then take a proper look behind them. Good luck and Merry Christmas!
Credits & Support
Credits
KOSMOS and Inka & Markus Brand would like to thank all test players and rule readers.
The authors: Inka & Markus Brand live in Gummersbach with their children, Lukas and Emely. Together, they have published a number of both children’s games and family games and won several prizes. Of course, they are enthusiastic riddle and live escape fans.
EXIT concept: Ralph Querfurth, Sandra Dochtermann
Cover illustration: Martin Hoffmann
Illustrations: Florian Biege
Story: Lena Ollefs
Graphics: Andreas Resch, Fine Tuning
Editing: Christian Sachseneder
English language editing: Nicky Thomas-Davies, Pamela Evans
Technical development: Monika Schall
Customer Service & Replacement Parts
Note: All components of this game have been carefully designed and packaged. If the cards and strange items in a room get muddled up, you can find a Refill Guide for the advent calendar at www.thamesandkosmos.co.uk/product/exit-advent-calendar/. This shows you where the individual components belong. Let someone that is not participating in the game sort the calendar. You can then easily continue with the game.
Please note: This advent calendar contains lots of different creative ideas. In order to make all of them work, it is necessary that every single copy is assembled by hand. Of course this is done with great care. However, mistakes happen. In the unlikely case that a piece of the game material is missing, please don’t hesitate to contact our service desk at: [email protected]. Our colleagues will do their best to support you and to provide spare parts, if necessary.
Other Games: EXIT: Kidnapped in Fortune City
Can you solve the riddles and stop the kidnapping before it is too late?
Criminal activity is rampant in the frontier town of Fortune City, and now the sheriff has disappeared without a trace. With precious little time to find him, players need to work together to solve the crime. Over the course of the game, your investigation will lead you through Fortune City, with clues and strange items to be found throughout. You will need to search for answers in the saloon, drugstore, gunsmith, post office, prison, and bank. But in a unique twist, you will decide the order in which you will visit these locations and who you will interrogate along the way. Together with your team, you will collect clues and evaluate the townspeoples’ testimonies. But will you get the answers you need to rescue the sheriff in time?
In the style of Dead Man on the Orient Express and Theft on the Mississippi, players must get to the bottom of a kidnapping in the Wild West in addition to solving all the riddles.
Level: 3.5 / 5
www.thamesandkosmos.co.uk
