
Horrified
2019
Cooperate to defeat seven iconic monsters before terror overwhelms the town or the Monster deck runs out.
60
minutes
1 - 5
player(s)
10+
Medium

About this board game
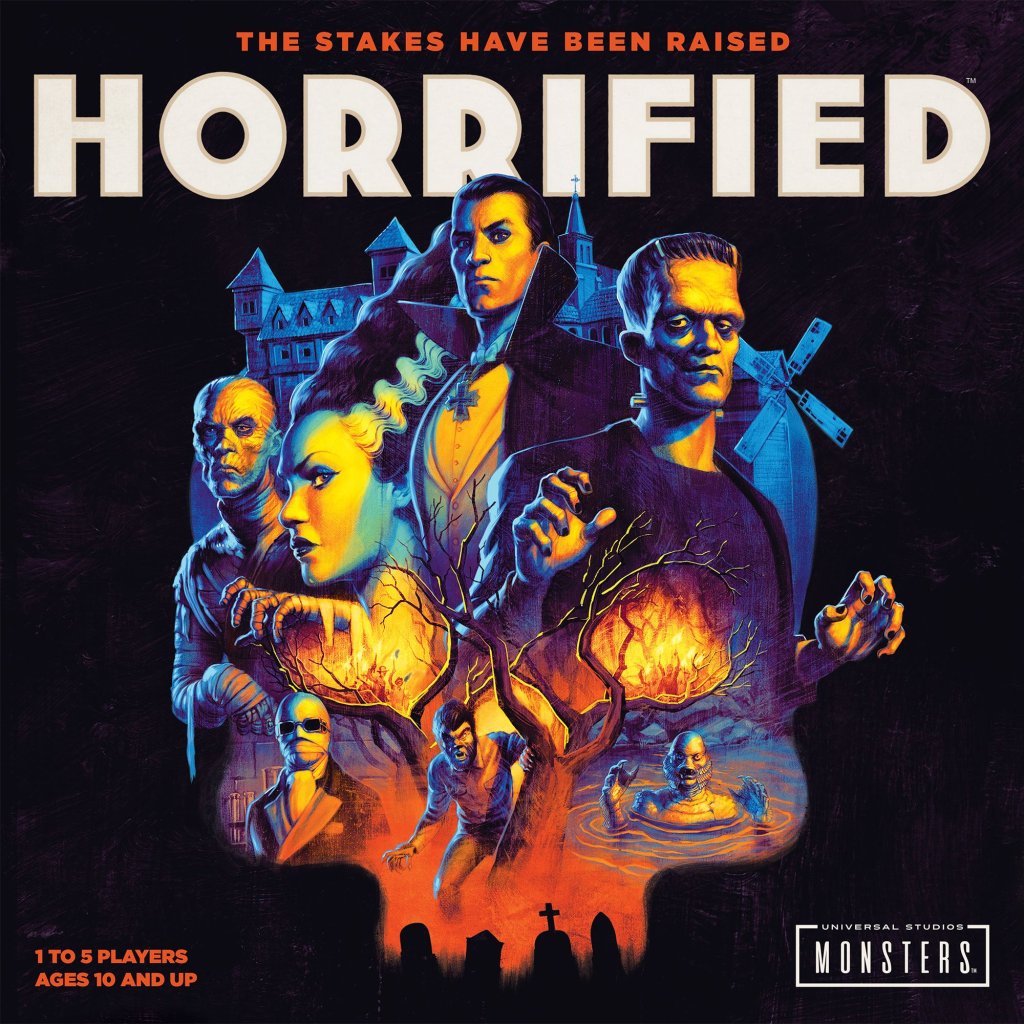
Horrified is a cooperative board game for 1–5 players, with games lasting about 60 minutes. Players work together to rid the town of seven classic Universal movie monsters before it is too late.
Each player takes a turn in the Hero phase, carrying out actions to help the group confront the creatures. The monsters then act during the Monster phase, while Event cards determine which monster is in play.
The game offers a shared challenge: everyone wins or loses together. To win, the players must defeat all the monsters. They lose if the Terror track reaches the skull space or if the Monster deck is empty when a card needs to be drawn.
Every creature is unique, bringing different strategies and tactics to the table. The included monsters are:
- Frankenstein
- The Bride of Frankenstein
- The Wolf Man
- Dracula
- The Mummy
- The Invisible Man
- Creature from the Black Lagoon
Horrified includes high-quality sculpted miniatures for the classic monsters and features innovative, easy-to-learn cooperative gameplay. Players must coordinate their efforts and respond to the distinct challenges presented by each creature, with varying levels of difficulty available.
Released in 2019, this accessible team game brings famous movie monsters together in one tense struggle. Whether players are managing the Terror track, surviving the Monster phase, or working toward the final defeat, every decision contributes to the group’s shared fate.

Board Game Rules for
Horrified
Players: 1 to 5 | Ages: 10 and up | Duration: 60 minutes
To learn how to play, watch the video: Ravensburger.com/HorrifiedGamePlay
Game Components

- 1 Game Board

- 7 Hero Badges

- 7 Hero Movers (Insert into matching colored bases)

- 6 Monster Mats

- 10 Villager Movers (Insert into clear bases)

- 7 Monster Figures

- 60 Item Tokens

- 1 Frenzy Marker (Insert into a clear base)
- 1 Terror Marker (Insert into a clear base)
- 1 Item Bag
- 3 Dice
- 5 Reference Cards
- 30 Monster Cards
- 20 Perk Cards

20 Monster Tokens
(Only used when playing against that Monster)
- Creature from the Black Lagoon: 1 Boat (Insert into a clear base), 1 Camp Overlay
- Dracula: 4 Coffins
- Frankenstein and the Bride: 1 Frankenstein Dial, 1 Bride Dial
- The Invisible Man: 1 Precinct Overlay
- The Mummy: 1 Soul Sign, 6 Scarabs, 1 Museum Overlay
- The Wolf Man: 1 Cure, 1 Hunted Emblem, 1 Laboratory Overlay
Difficulty Levels
Adjust the game’s difficulty by playing against a different number of Monsters:
- Your First Game: Creature from the Black Lagoon & Dracula
- Novice Game: Any two Monsters (Recommended whenever you play against a Monster for the first time)
- Standard Game: Any three Monsters
- Challenging Game: Any four Monsters
Monster Setup
- Unfold the game board and familiarize yourself with the locations (spaces with names). As you set up and play the game, instructions and components will reference these locations.
- Place the Terror Marker on the “0” of the Terror Level Track in the top-left corner of the board.
- Place the 10 Villager movers and 3 dice next to the board.
- Shuffle the Monster cards and place them in a deck face down next to the board.
- Choose which Monsters to play against. (See Difficulty Levels above.)
- Take each chosen Monster’s corresponding Monster mat. Place the mats in a row next to the board, from lowest to highest Frenzy Order. The Frenzy Order is in the upper left of each mat.
- Complete the setup for each Monster in your game, using the back of one of the other Monster mats. Then return all unused Monster mats, figures, and tokens to the box.
- Place the Frenzy Marker on the mat with the lowest Frenzy Order.
Player Setup
- Mix up the Hero Badges face down and give one at random to each player. Give each player their corresponding Hero mover and a Reference card. Return the remaining Badges, Heroes, and Reference cards to the box.
- Place your Hero at the starting location indicated on your Badge.
- Shuffle the Perk cards and give one at random to each player, face up. Place the remaining Perk cards in a deck face down next to the board.
- Place all 60 Item tokens in the Item bag and mix them up. Draw 12 Items from the bag and place each one at the location indicated on the Item. Place the Item bag next to the board.
First Player: The player who most recently ate garlic takes the first turn.
Solo Play: If you are the only player, see Solo Play rules in the Appendix.

Objective
Horrified is a cooperative game in which all the players win or lose together. The players win if they defeat all of the Monsters they are playing against. In order to defeat a Monster, you must first complete a task.
Each Monster’s task and subsequent defeat is unique:
- Creature from the Black Lagoon: Find the Creature’s hidden lair, then drive the Creature away.
- Dracula: Smash Dracula’s four coffins, then overcome Dracula.
- Frankenstein and the Bride: Teach Frankenstein and the Bride what it means to be human so they can live peacefully. (Frankenstein is actually the name of the scientist who created these Monsters. However, with so many Monsters plaguing their village, the villagers have come to refer to these particular Monsters as just “Frankenstein” and the “Bride.”)
- The Invisible Man: Supply evidence to the police of the Invisible Man’s existence, then trap him.
- The Mummy: Break the Mummy’s curse, then return him to his tomb.
- The Wolf Man: Discover the cure for lycanthropy, then administer it to the Wolf Man.
The players lose immediately if one of the following occurs:
- Terror: Each time a Hero or Villager is defeated, the Terror Level will increase. If the Terror Level reaches its maximum, indicated by the skull, the Monsters have overrun the village and the players lose.
- Out Of Time: Each turn, you will draw a card from the Monster deck. If you need to draw a Monster card but the deck is empty, you have taken too long to defeat the Monsters and the players lose.
On Your Turn
Each turn has two phases, performed in this order:
- Hero Phase: Take as many actions as indicated on your Badge. In addition, any player may play any number of Perk cards.
- Monster Phase: Draw one Monster card from the top of the Monster deck and resolve all three parts of the card.
After completing both phases, play proceeds clockwise, starting with the next player’s Hero Phase.

Actions
Take up to the number of actions indicated on your Badge. You may choose to take fewer. Actions may be taken multiple times and in any order. The possible actions are:
- Move: Move your Hero along a lit path to an adjacent space. You cannot move to water spaces and can only cross the river using one of the two bridge spaces. In addition, you may take any number of Villagers in your Hero’s space with you when you move.
Note: Monsters do not affect movement. You may move into, out of, or end your turn in a space with one or more Monsters. However, this could make you more vulnerable to their attacks during the Monster Phase. - Guide: Move one Villager from your Hero’s space to an adjacent space, or move one Villager from an adjacent space to your Hero’s space. Villagers also cannot move to water spaces, and Monsters do not affect their movement.
- Special Action: Some Heroes have a special action, as indicated on their Badge. Just like other actions, special actions count as one of the total number of actions for your turn and can be taken multiple times.
- Pick Up: Take any number of Items from your Hero’s space. Keep all your Items in front of you, next to your Badge.
- Share: All Heroes in the same space as your Hero may freely give or take any number of Items from each other.
Note: Sharing does not require one-to-one trades and does not need to involve you, as long as all Heroes giving or taking Items are on your Hero’s space. - Advance: At a specific location, use one of your Items to advance a Monster’s task. Refer to the
 on that Monster’s mat and The Monsters section for details.
- Defeat: In a Monster’s space, use your Items to defeat that Monster. Refer to the
 on that Monster’s mat and The Monsters section for details.
Note: You must complete the Monster’s task, before you can take the action to defeat that Monster.
Strategy Tip: It’s a good idea to pick up Items on your first turn. You need certain Items to advance tasks and defeat Monsters, but Items can also be used to defend against Monster attacks, as explained later.
Villagers

Villagers may appear in the village during the Monster Phase. You will be directed to place the Villager at a specific location. There is no limit to the number of Villagers that can be on the board at one time. Each Villager has a safe location they are trying to reach, as indicated at the top of their mover. You can use the Move and Guide actions to usher Villagers to their safe location.
As soon as a Villager reaches their safe location, they reward you for your assistance. The current player removes the Villager from the board and draws a Perk card from the deck.
Perk Cards

Each player starts the game with a Perk card, and more Perk cards can be earned by getting Villagers to their safe locations. Keep all your Perk cards face up in front of you. It’s a good idea to discuss your Perk cards, and when to play them, with the other players.
Perks may be played on any player’s turn, but only during the Hero Phase. When you play a Perk card, do what the card says, and then put it in a discard pile face up. Playing a Perk card does not take an action.
Items

Items are important for advancing tasks and defeating Monsters, as well as defending yourself from the Monsters’ attacks. Each Item has a color, indicating its type, and a strength, which is the number at the top. Each Item also has a location, which indicates where the Item is placed when it is drawn from the Item bag.
- Red Items are physical.
- Blue Items are intellectual.
- Yellow Items are spiritual.
The color, strength, and location may be important when using Items, as shown on each Monster’s mat:

- Single Item icon: Only one Item of the color shown may be played per action.
- Multiple Items icon: Any number of Items of the color shown may be played in a single action. Add together their strengths to meet or exceed the number.
When you use an Item, whether to take an action or to defend against an attack, place it in a discard pile next to the board unless the action tells you to place it on a Monster’s mat (as when advancing the Invisible Man or the Wolf Man’s tasks). Don’t return Items to the Item bag unless specifically instructed to do so.
Hero Phase Example

It’s the Archaeologist’s turn and he may take 4 actions, as noted on his Badge. After some discussion with the other players, he decides to do the following during the Hero Phase:
- Action 1: Guide Wilbur & Chick from the bridge space to the Theatre, where he is.
- Action 2: Take his Special Action—pick up Items from an adjacent space—to take the pitchfork Item from the Barn.
The Explorer (Green) then plays her Perk card, which allows each Hero to move up to two spaces. The Explorer moves to the Dungeon. The Archaeologist also moves to the Dungeon, taking Wilbur & Chick along. Whenever your Hero moves, whether by an action or a Perk card, you may take any Villagers in your space with you.
Wilbur & Chick are now at the Dungeon, which is their safe location. The Archaeologist removes Wilbur & Chick from the board and then draws a Perk card from the deck. He reads the card aloud, choosing to keep it for later, and places it face up in front of him.
- Action 3: Share, which allows the Explorer to give him a knife Item.
- Action 4: Advance to smash the Coffin at the Dungeon. The Archaeologist uses the knife and pitchfork Items, which have a total strength of 7. He discards the Items, takes the Coffin off the board, flips it to show the smashed side, and places it on the Dungeon area of Dracula’s mat.
The Archaeologist has taken 4 actions and none of the players wish to play any other Perk cards. He will now proceed to the Monster Phase by drawing a card from the Monster deck.
Draw a card from the top of the Monster deck and resolve the three parts of the card, from top to bottom. After resolving the entire Monster card, put it in a discard pile face up.

- Items: Draw the number of Items listed at the top of the card, if any, from the Item bag. Place each Item at the location indicated on the Item. If you need to draw an Item when the Item bag is empty, place all the Items from the discard pile into the bag, mix them up, and continue drawing.
- Event: Each Event either involves one of the Monsters or the Villagers. The card’s color, as well as the symbol above the Event’s name, indicates who the Event is about. Gray cards are about the Villagers. Colored cards are about a specific Monster. Refer to your Reference card for the symbols. If the Event Monster is not in your game, completely ignore the Event and continue with the Monster Strike. Otherwise, read the Event out loud and do what it says.
- Monster Strike: Certain Monsters move and attack, as indicated by the symbols at the bottom of the card. In order from left to right, move and attack with the first Monster before proceeding to the next Monster. If an indicated Monster is not in your game, ignore that symbol. If the Frenzy symbol is shown, the Monster with the Frenzy Marker moves and attacks. This could result in the same Monster moving and attacking twice in one turn.
Note: The Event Monster never attacks on that turn, unless they are Frenzied.

Monster Movement
Move the Monster the number of spaces indicated on the card towards the closest person (Hero or Villager). As soon as the Monster is in a space with a person, they stop moving. If the Monster started in a space with a person, they don’t move at all.
- Path Toward: If you are directed to move a Monster, Hero, or Villager toward someone or somewhere, you must move them along the shortest possible path. If there are multiple shortest paths, the current player decides which they take. Once they reach whatever they are moving toward, they stop moving.
Note: Only the Creature can move to water spaces. Unless the Creature is moving, only consider lit paths when determining the shortest path—do not consider water paths. - Closest Person: If there are multiple people equally close to a Monster, the Monster moves toward a Hero rather than a Villager. If there are still multiple closest people, the current player chooses one of them.
- Other Ties: If an Event or Monster Strike could apply to multiple characters or locations, the current player decides which one to apply it to.
Monster Attack
Attack one person in the Monster’s space by rolling the number of attack dice indicated. If there are no people in the Monster’s space, the Monster does not attack—do not roll dice. If there are multiple people in that space, the Monster will attack a Hero rather than a Villager. If there are still multiple people the Monster could attack, the current player chooses one to attack before rolling.
 Power Symbol: If this symbol is rolled, the Monster’s Power is activated, once for each Power symbol rolled. Refer to the power on that Monster’s mat and The Monsters section for details.
 Hit Symbol: If this symbol is rolled, the person was hit by the Monster’s attack, once for each Hit symbol rolled. See below for how hits are applied.
Hit by a Monster
Heroes
To ignore being hit by a Monster’s attack, a Hero may discard one Item for each Hit symbol rolled. If the Hero does not have enough Items, or does not wish to discard any Items, they are defeated. One hit defeats a Hero.
When a Hero is defeated, increase the Terror Level by moving the Terror Marker one space and remove that Hero from the board. At the start of that player’s next turn, they place their Hero at the Hospital and take their turn as normal, including their full number of actions. A defeated Hero does not lose any Items or Perk cards.
Note: Resolve each Monster’s move and attack before proceeding to the next Monster. If a Hero discards Items to ignore an attack, they may still be defeated by a subsequent attack. If a Hero is defeated, they cannot be the target of any other attacks this turn.
Villagers
A Villager does not have any Items and is therefore defeated immediately when hit. When a Villager is defeated, increase the Terror Level by moving the Terror Marker one space and remove that Villager from the board.
Note: The target of an attack must be stated before rolling, and a Hero cannot discard Items to save a Villager.
Monster Phase Example

The Inspector (Orange) is starting the Monster Phase of her turn, drawing the top card of the Monster deck. She resolves the card as follows:
- Items: She draws 2 Items out of the Item bag and places them on the board at the locations specified on those Items.
- Event: She can tell that the Event is about the Wolf Man because the card is brown and has the Wolf Man’s symbol above the Event’s name. Since the Wolf Man is in this game, she reads the Event out loud. Nobody has the Hunted emblem, and because it’s her turn, she takes it and places it in front of her. Then she moves the Wolf Man to her space. The Monster stops moving when it reaches her, even though it moved fewer spaces than the number listed on the card. Even though the Wolf Man is in her space, he does not attack. A Monster only attacks if the Monster’s symbol appears in the Monster Strike box at the bottom of the card.
- Monster Strike: The first symbol in the Monster Strike box is the Creature, who is not in the game. She ignores it and proceeds to the next symbol, which is Dracula. Although both the Courier (Pink) and Dr. Cranley are equally close, Dracula prioritizes Heroes over Villagers. So the Inspector moves Dracula to the space with the Courier and then rolls two dice, getting a Power symbol and a Hit symbol. The Courier decides to discard one of his Items to ignore the hit, and Dracula’s Power causes the Inspector to place her mover in Dracula’s space.
Now the Frenzied Monster strikes. Dracula has the Frenzy Marker, so he strikes a second time. Because Dracula is already in a space with people, he does not move. The Inspector must choose who Dracula attacks. She says that Dracula attacks herself and rolls two dice, getting a blank and a Hit symbol. Although she has an Item, she chooses not to discard it and is defeated. She increases the Terror Level by one and removes her Hero from the board. At the start of her next turn, she’ll place her Hero at the Hospital.
The following rules contain information specific to each Monster, including how to complete their task, how to defeat them, and their Power, which may be activated when they attack. Before you begin playing, read the section for each Monster in your game, as well as the information below, which applies to all games.
Frenzied Monster
The Monsters are agitated by your efforts to defeat them, and there is always one Monster who is frenzied. At the start of the game, place the Frenzy marker on the Monster mat with the lowest Frenzy Order. When the Frenzy symbol appears on a Monster card, the Frenzied Monster moves and attacks. This could result in the same Monster moving and attacking twice in one turn.
Some Events will direct you to place the Frenzy Marker on the next Monster. When this happens, place it on the Monster mat with the next highest Frenzy Order. For example, if the Frenzy Marker is on Dracula’s mat (Frenzy Order 1) and the Creature (4) and the Wolf Man (6) are also in your game, move it to the Creature’s mat. If there are no Monsters with a higher Frenzy Order, place the Frenzy Marker on the Monster mat with the lowest Frenzy Order. If there are no other Monsters left in the game, the Frenzy Marker remains on the same Monster.
Note: There is one Frenzied Monster at all times during the game. The Frenzied Monster will move and attack more frequently, because they strike each time the Frenzy symbol or their own symbol appears on a Monster card.
Defeated by a Hero
When a Monster is defeated, they are no longer considered to be in your game. Ignore all Events and Monster Strikes for all defeated Monsters for the rest of the game.
Remove the Monster’s figure and location overlay (if they have one) from the board. If the defeated Monster had the Frenzy Marker, place it on the next Monster according to the rules above. If there are any Items on the Monster mat (the Wolf Man or the Invisible Man), place those Items in the Item discard pile. Then return all of the Monster’s components to the box, including their mat, figure, and tokens. If a Hero has one of the Monster’s tokens (Soul sign or Hunted emblem), it is also returned to the box.
Creature from the Black Lagoon

Complexity: Medium | Frenzy Order: 4
Water Spaces
There are three water spaces on the board: the Lagoon, the River, and the Waterfront. Only the Creature can move to or be placed at these spaces. When the Creature strikes, consider water spaces and water paths when determining who is closest to him and the shortest path toward his target.
Advance: Find the Hidden Lair
The Heroes must embark on an expedition aboard the Rita to explore the Lagoon and find the Creature’s hidden lair. While at the Camp, a Hero may take the Advance action to search the Lagoon. Discard one Item of any color and move the Boat on the Creature’s mat to the next  of that color. By carefully choosing which color to use, you can move the Boat further into the lagoon and complete the task more quickly. The Creature’s Lair is represented by the final blue X at the center of the mat—to complete the task, the last Item used must be blue.
Note: The Boat could move off the Lair—see the Creature’s Power below.
Defeat: Drive Him Away
If the Boat is at the Lair, you can defeat the Creature by driving it away. A Hero must be in the same space as the Creature and take the Defeat action. Discard one red, one blue, and one yellow Item. The strengths of the Items do not matter. You’ve defeated the Creature!
Power: Rock the Boat
If the Power symbol is rolled when the Creature attacks, the Creature rocks the boat. Move the Boat backward, one space for each Power symbol rolled. If the Boat is at the Start, the Power has no effect. If the Power moves the Boat off of the Lair, you cannot defeat the Creature. A Hero must take the Advance action again to move the Boat back to the Lair before the Creature can be defeated.

Dracula

Complexity: Low | Frenzy Order: 1
Advance: Smash the Coffins
The Heroes must find and smash Dracula’s four Coffins, which are situated around the village. While in a space with a Coffin, a Hero may take the Advance action to smash it. Discard any number of red Items with a total strength of 6 or more. Then take the Coffin, flip it to show it’s been smashed, and place it on Dracula’s mat in the corresponding spot.
Note: Coffins are not Items and cannot be picked up.
Defeat: Overcome Him
If all four Coffins are on Dracula’s mat, you can defeat Dracula by overcoming him. A Hero must be in the same space as Dracula and take the Defeat action. Discard any number of yellow Items with a total strength of 6 or more. You’ve defeated Dracula!
Power: Dark Charm
If the Power symbol is rolled when Dracula attacks, Dracula charms a Hero to come to him. Place the current player’s Hero in Dracula’s space. If that Hero is already in Dracula’s space, the Power has no effect.
Note: Dracula charms the current player’s Hero, which may not be the same Hero that Dracula just attacked.
Frankenstein and the Bride

Complexity: High | Frenzy Order: 3 | Only Frankenstein may become Frenzied.
Frankenstein is actually the name of the scientist who created these Monsters. However, with so many Monsters plaguing their village, the villagers have come to refer to these particular Monsters as just “Frankenstein” and the “Bride.”
Two Monsters
Frankenstein and the Bride are two of the most frightening Monsters, and if you choose to play against one, you must face them both. To defeat them, you must teach them what it means to be human so they can live happily together. However, if they meet before you complete this task, they will send each other into a fit of rage.
If Frankenstein and the Bride are ever in the same space before their task is completed, increase the Terror Level by one, place Frankenstein at the Graveyard and place the Bride at the Dungeon. This may happen multiple times in one game.
Monster Strikes and Frenzied Monster
Frankenstein and the Bride have their own Monster symbols, and are treated as separate Monsters for Monster Strikes. However, if they have the Frenzy Marker, only Frankenstein is frenzied. Each time the Frenzy symbol appears, move and attack with only Frankenstein—not the Bride.
Advance: Teach the Monsters
The Heroes must teach Frankenstein and the Bride what it means to be human. However, each Monster is different. Frankenstein requires yellow Items and must reach a humanity score of 11. The Bride requires blue Items and must reach a humanity score of 8.
- To teach Frankenstein to be more human, a Hero in the same space as Frankenstein may take the Advance action. Discard one yellow Item and increase Frankenstein’s humanity score by the strength of the discarded Item, turning his dial clockwise. Then, you may move Frankenstein in any direction that same number of spaces. In this way, you can prevent him from meeting the Bride too soon, or bring them together once both their scores are at their maximum.
- To teach the Bride to be more human, a Hero in the same space as the Bride may take the Advance action. Discard one blue Item and increase the Bride’s humanity score by the strength of the Item, turning her dial clockwise. You may also move her in any direction, up to the number of spaces equal to the discarded Item’s strength.
As soon as a Monster’s humanity score reaches its maximum (11 for Frankenstein and 8 for the Bride), flip over that Monster’s dial so it’s showing their face. An exact number is not required—you may exceed the maximum. Once both dials are flipped over, Frankenstein and the Bride will be defeated when they meet.
Note: You may still take the Advance action to move Frankenstein or the Bride, even if their dial has been flipped.
Defeated When They Meet
Once you have taught Frankenstein and the Bride what it means to be human and they meet, they will live peacefully together and cease terrorizing the village. As soon as Frankenstein and the Bride are in the same space and both of their dials are showing their faces, they are defeated. This does not require taking a Defeat action.
Power: Here Comes the Bride
If the Power symbol is rolled when either Frankenstein or the Bride attacks, the Bride approaches Frankenstein. After all hits are resolved, move the Bride toward Frankenstein, one space for each Power symbol rolled.

Example: Frankenstein’s dial is currently pointing to the “3.” A Hero takes the Advance action in Frankenstein’s space and discards a yellow Item with a strength of 2. They turn Frankenstein’s dial clockwise so it points to the “5” and then moves Frankenstein 2 spaces, choosing to move him away from the Bride while also avoiding Heroes and Villagers.

Example: The Frenzy Marker is on the Frankenstein and the Bride mat when “The Innocent” Monster card is drawn. The current player draws and places 3 Items on the board. Next, they place the Villager Maria at the Barn. Then they resolve the Monster Strike. They move Frankenstein 1 space and attack with 3 dice. Then they move the Bride 1 space and attack with 3 dice. Lastly, they move Frankenstein 1 space and attack with 3 dice. As normal, if either Monster is already in a space with a person, they do not move, and if there is no person in the space when they attack, they do not roll dice.
The Invisible Man

Complexity: Low | Frenzy Order: 6
Advance: Supply Evidence
The Heroes must supply evidence to prove to the police that the Invisible Man exists. While at the Precinct, a Hero may take the Advance action to supply evidence. Use one Item of any color, as long as the location on the Item matches an empty spot on the Invisible Man’s mat. Place the Item on the matching spot.
Defeat: Trap Him
If all five spots are filled on the Invisible Man’s mat, you can defeat the Invisible Man by trapping him. A Hero must be in the same space as the Invisible Man and take the Defeat action. Discard any number of red Items with a total strength of 9 or more. You’ve defeated the Invisible Man!
Power: Stalk Unseen
If the Power symbol is rolled when the Invisible Man attacks, the Invisible Man stalks a Villager. After all hits are resolved, move the Invisible Man toward the closest Villager, two spaces for each Power symbol rolled. If there are no Villagers on the board, the Power has no effect.
Note: The Invisible Man does not immediately attack the Villager, but could strike again this turn.

Example: A Hero at the Precinct takes the Advance action and places an Item from the Barn on the Invisible Man’s mat. If a Hero takes one more Advance action and places an Item from the Mansion, any Hero will be able to defeat the Invisible Man.
The Mummy

Complexity: High | Frenzy Order: 2
Reincarnated Soul
The Mummy believes that one of the Heroes is the reincarnated soul of his true love, and will lure that Hero to him. The first time a Mummy Event is resolved, the current player takes the Soul sign and that player’s Hero moves toward the Mummy. That player keeps the Soul sign for the rest of the game.
Advance: Break the Curse
The Heroes must break the Mummy’s curse by aligning the six Scarabs on the tablet. While at the Museum, a Hero may take the Advance action to move the Scarabs. Discard one yellow Item and then make as many moves as the strength of the discarded Item. A single move is sliding a Scarab along a groove to an adjacent spot or flipping a Scarab face up (see the Mummy’s Power below). You are not required to make the full number of moves.
Defeat: Entomb Him
If all six Scarabs are face up and in the spot matching their number on the Mummy’s mat, you can defeat the Mummy by returning him to his tomb. A Hero must be in the same space as the Mummy and take the Defeat action. Discard any number of red Items with a total strength of 9 or more. You’ve defeated the Mummy!
Power: Fortify the Curse
If the Power symbol is rolled when the Mummy attacks, the Mummy fortifies the curse. Flip one Scarab face down for each Power symbol rolled. Always flip over the Scarab with the lowest number showing, whether it is in its proper spot or not. If all of the Scarabs are face down, the Power has no effect.
A Scarab that is face down cannot be moved. Also, the Mummy cannot be defeated if any Scarab is face down. When you take the Advance action, you may use one of your moves to flip a Scarab face up.

Example: A Hero at the Museum takes the Advance action. They discard a yellow Item with a strength of 4, so they may make 4 moves with the Scarabs. They choose to flip the two Scarabs that are face down, slide the “3” Scarab into its spot, and slide the “2” Scarab into its spot. Now all the Scarabs are face up in their proper spot. As long as the Mummy’s Power is not activated, any Hero will be able to defeat the Mummy.
The Wolf Man

Complexity: Medium | Frenzy Order: 5
Hunted by the Wolf
The Wolf Man has a vision of which Hero will be his next victim, and is compelled to hunt that Hero down. The first time a Wolf Man Event is resolved, the current player takes the Hunted emblem and the Wolf Man moves toward that player’s Hero. That player keeps the Hunted emblem for the rest of the game.
Advance: Discover the Cure
The Heroes must discover the cure for lycanthropy by testing ingredients and formulating the antidote. While at the Laboratory, a Hero may take the Advance action to test an ingredient. Use one blue Item, as long as the Item’s strength matches an empty spot on the Wolf Man’s mat. Place the Item on the matching spot. As soon as all six spots are filled, the current player takes the Cure from the mat. The Cure may be given to another Hero using the Share action.
Note: The Cure cannot be discarded to ignore a hit from a Monster attack.
Defeat: Cure Him
If a Hero has the Cure, that Hero can defeat the Wolf Man by administering it to him. The Hero must be in the same space as the Wolf Man and take the Defeat action. Discard the Cure and any number of red Items with a total strength of 6 or more. You’ve defeated the Wolf Man!
Power: Vicious Bite
If the Power symbol is rolled when the Wolf Man attacks, the Wolf Man bites everyone in his space. Each Hero and Villager in the Wolf Man’s space is hit (including the person he just attacked)—one hit for each Power symbol rolled. Heroes may discard Items to ignore the Hits, as normal. Villagers in the Wolf Man’s space are immediately defeated.

Example: The Wolf Man attacks a Hero with 3 dice, rolling one Power symbol and two Hit symbols. The attacked Hero is hit three times. Every other Hero and Villager in that space is hit once.
The game can end in one of three ways:
- Heroes Triumph: If you defeat all the Monsters, the game immediately ends and the players have won! You’ve saved the village from a horrific fate, and perhaps even the Monsters themselves.
- Terror!: If the Terror Level reaches its maximum, indicated by the skull, the game immediately ends and the players have lost. Everyone, including the Heroes, are too horrified to continue. You abandon the village to the Monsters.
- Out Of Time: If you need to draw a card when the Monster deck is empty, the game immediately ends and the players have lost. You’ve taken too long to save the village. The Villagers have fled and you aren’t able to continue.
Note: The game ends only if you need to draw a card, but none remain. After resolving the last Monster card, play one final Hero Phase to try and defeat any remaining Monsters.
Playing Again
Try playing against different Monsters, or adding additional Monsters to increase the game’s difficulty. For a more strategic setup, the players may choose which Heroes to play and who will be first player. Be sure to consider which Monsters you are playing against, which Heroes’ special actions will be the most useful, and who is most vulnerable or best positioned to take the first turn.
Clarifications
Terms
- Moving: Requires following paths to adjacent spaces.
- Placing: Does not require following paths. Pick up the person or Monster indicated and place them at the specified location.
- A Person or People: Refers to both Heroes and Villagers.
- A Monster: Refers to any of the seven characters you are playing against.
Heroes and Perk Cards
- You must get permission from a player to move or affect that player’s Hero or Items.
- Movement from a Perk card or special action follows all the normal rules for the Move action. A Hero may take any Villagers in their space with them.
- The Archaeologist’s Special Action cannot be used to take Items from another Hero.
- The Scientist’s Ability is always in effect. It does not take an action.
- Conduct an Investigation and Taxi Ride cannot be used to place a Hero who is not already on the board (from being defeated).
- Special Delivery may affect any two players, even if their Hero is not on the board (from being defeated).
Monster Cards
- If The Hunt Is On is drawn and the Hero with the Hunted emblem is not on the board (because they were defeated), the Event has no effect.
- If Reincarnated Soul is drawn and the Hero with the Soul sign is not on the board, the Event has no effect.
- If Thief is drawn, be sure to draw and place Items before resolving the Event. If multiple locations are tied for having the most Items, the current player places the Invisible Man on the tied location of their choice. Only Items on the board are discarded—Heroes in that space keep their Items.
Solo Play
The Villagers are more fearful if there is only one Hero trying to save the village. Begin the game with the Terror Marker on the “3” of the Terror Level Track.
All the rules remain the same. However:
- Do not play as the Courier—that Hero’s Special Action cannot be taken in a solo game.
- The Perk cards “Special Delivery” and “Conduct An Investigation” cannot be used. Either remove these cards before playing, or when drawn, immediately discard and draw a new Perk card to replace it.
Game Contents Summary & Credits
Contents:
- 1 Game Board
- 6 Monster Mats
- 7 Monster Figures
- 7 Hero Badges
- 7 Hero Movers
- 10 Villager Movers
- 20 Bases
- 60 Item Tokens
- 20 Monster Tokens
- 1 Terror Marker
- 1 Frenzy Marker
- 30 Monster Cards
- 20 Perk Cards
- 5 Reference Cards
- 1 Item Bag
- 3 Dice
- Instructions
Instructions: © 2019 Ravensburger North America, Inc. All rights reserved. USe01
All characters are trademarks and copyrights of Universal Studios. Licensed by Universal Studios. All Rights Reserved.
Introduction & Components
Players: 1 to 5 | Ages: 10 and up | Duration: 60 minutes
To learn how to play, watch the video: Ravensburger.com/HorrifiedGamePlay
Game Components
- 1 Game Board
- 7 Hero Badges
- 7 Hero Movers (Insert into matching colored bases)
- 6 Monster Mats
- 10 Villager Movers (Insert into clear bases)
- 7 Monster Figures
- 60 Item Tokens
- 1 Frenzy Marker (Insert into a clear base)
- 1 Terror Marker (Insert into a clear base)
- 1 Item Bag
- 3 Dice
- 5 Reference Cards
- 30 Monster Cards
- 20 Perk Cards
20 Monster Tokens
(Only used when playing against that Monster)
- Creature from the Black Lagoon: 1 Boat (Insert into a clear base), 1 Camp Overlay
- Dracula: 4 Coffins
- Frankenstein and the Bride: 1 Frankenstein Dial, 1 Bride Dial
- The Invisible Man: 1 Precinct Overlay
- The Mummy: 1 Soul Sign, 6 Scarabs, 1 Museum Overlay
- The Wolf Man: 1 Cure, 1 Hunted Emblem, 1 Laboratory Overlay
Setup & Difficulty
Difficulty Levels
Adjust the game’s difficulty by playing against a different number of Monsters:
- Your First Game: Creature from the Black Lagoon & Dracula
- Novice Game: Any two Monsters (Recommended whenever you play against a Monster for the first time)
- Standard Game: Any three Monsters
- Challenging Game: Any four Monsters
Monster Setup
- Unfold the game board and familiarize yourself with the locations (spaces with names). As you set up and play the game, instructions and components will reference these locations.
- Place the Terror Marker on the “0” of the Terror Level Track in the top-left corner of the board.
- Place the 10 Villager movers and 3 dice next to the board.
- Shuffle the Monster cards and place them in a deck face down next to the board.
- Choose which Monsters to play against. (See Difficulty Levels above.)
- Take each chosen Monster’s corresponding Monster mat. Place the mats in a row next to the board, from lowest to highest Frenzy Order. The Frenzy Order is in the upper left of each mat.
- Complete the setup for each Monster in your game, using the back of one of the other Monster mats. Then return all unused Monster mats, figures, and tokens to the box.
- Place the Frenzy Marker on the mat with the lowest Frenzy Order.
Player Setup
- Mix up the Hero Badges face down and give one at random to each player. Give each player their corresponding Hero mover and a Reference card. Return the remaining Badges, Heroes, and Reference cards to the box.
- Place your Hero at the starting location indicated on your Badge.
- Shuffle the Perk cards and give one at random to each player, face up. Place the remaining Perk cards in a deck face down next to the board.
- Place all 60 Item tokens in the Item bag and mix them up. Draw 12 Items from the bag and place each one at the location indicated on the Item. Place the Item bag next to the board.
First Player: The player who most recently ate garlic takes the first turn.
Solo Play: If you are the only player, see Solo Play rules in the Appendix.
Game Overview & Turn Structure
Objective
Horrified is a cooperative game in which all the players win or lose together. The players win if they defeat all of the Monsters they are playing against. In order to defeat a Monster, you must first complete a task.
Each Monster’s task and subsequent defeat is unique:
- Creature from the Black Lagoon: Find the Creature’s hidden lair, then drive the Creature away.
- Dracula: Smash Dracula’s four coffins, then overcome Dracula.
- Frankenstein and the Bride: Teach Frankenstein and the Bride what it means to be human so they can live peacefully. (Frankenstein is actually the name of the scientist who created these Monsters. However, with so many Monsters plaguing their village, the villagers have come to refer to these particular Monsters as just “Frankenstein” and the “Bride.”)
- The Invisible Man: Supply evidence to the police of the Invisible Man’s existence, then trap him.
- The Mummy: Break the Mummy’s curse, then return him to his tomb.
- The Wolf Man: Discover the cure for lycanthropy, then administer it to the Wolf Man.
The players lose immediately if one of the following occurs:
- Terror: Each time a Hero or Villager is defeated, the Terror Level will increase. If the Terror Level reaches its maximum, indicated by the skull, the Monsters have overrun the village and the players lose.
- Out Of Time: Each turn, you will draw a card from the Monster deck. If you need to draw a Monster card but the deck is empty, you have taken too long to defeat the Monsters and the players lose.
On Your Turn
Each turn has two phases, performed in this order:
- Hero Phase: Take as many actions as indicated on your Badge. In addition, any player may play any number of Perk cards.
- Monster Phase: Draw one Monster card from the top of the Monster deck and resolve all three parts of the card.
After completing both phases, play proceeds clockwise, starting with the next player’s Hero Phase.
Hero Phase
Actions
Take up to the number of actions indicated on your Badge. You may choose to take fewer. Actions may be taken multiple times and in any order. The possible actions are:
- Move: Move your Hero along a lit path to an adjacent space. You cannot move to water spaces and can only cross the river using one of the two bridge spaces. In addition, you may take any number of Villagers in your Hero’s space with you when you move.
Note: Monsters do not affect movement. You may move into, out of, or end your turn in a space with one or more Monsters. However, this could make you more vulnerable to their attacks during the Monster Phase. - Guide: Move one Villager from your Hero’s space to an adjacent space, or move one Villager from an adjacent space to your Hero’s space. Villagers also cannot move to water spaces, and Monsters do not affect their movement.
- Special Action: Some Heroes have a special action, as indicated on their Badge. Just like other actions, special actions count as one of the total number of actions for your turn and can be taken multiple times.
- Pick Up: Take any number of Items from your Hero’s space. Keep all your Items in front of you, next to your Badge.
- Share: All Heroes in the same space as your Hero may freely give or take any number of Items from each other.
Note: Sharing does not require one-to-one trades and does not need to involve you, as long as all Heroes giving or taking Items are on your Hero’s space. - Advance: At a specific location, use one of your Items to advance a Monster’s task. Refer to the on that Monster’s mat and The Monsters section for details.
- Defeat: In a Monster’s space, use your Items to defeat that Monster. Refer to the on that Monster’s mat and The Monsters section for details.
Note: You must complete the Monster’s task, before you can take the action to defeat that Monster.
Strategy Tip: It’s a good idea to pick up Items on your first turn. You need certain Items to advance tasks and defeat Monsters, but Items can also be used to defend against Monster attacks, as explained later.
Villagers
Villagers may appear in the village during the Monster Phase. You will be directed to place the Villager at a specific location. There is no limit to the number of Villagers that can be on the board at one time. Each Villager has a safe location they are trying to reach, as indicated at the top of their mover. You can use the Move and Guide actions to usher Villagers to their safe location.
As soon as a Villager reaches their safe location, they reward you for your assistance. The current player removes the Villager from the board and draws a Perk card from the deck.
Perk Cards
Each player starts the game with a Perk card, and more Perk cards can be earned by getting Villagers to their safe locations. Keep all your Perk cards face up in front of you. It’s a good idea to discuss your Perk cards, and when to play them, with the other players.
Perks may be played on any player’s turn, but only during the Hero Phase. When you play a Perk card, do what the card says, and then put it in a discard pile face up. Playing a Perk card does not take an action.
Items
Items are important for advancing tasks and defeating Monsters, as well as defending yourself from the Monsters’ attacks. Each Item has a color, indicating its type, and a strength, which is the number at the top. Each Item also has a location, which indicates where the Item is placed when it is drawn from the Item bag.
- Red Items are physical.
- Blue Items are intellectual.
- Yellow Items are spiritual.
The color, strength, and location may be important when using Items, as shown on each Monster’s mat:
- Single Item icon: Only one Item of the color shown may be played per action.
- Multiple Items icon: Any number of Items of the color shown may be played in a single action. Add together their strengths to meet or exceed the number.
When you use an Item, whether to take an action or to defend against an attack, place it in a discard pile next to the board unless the action tells you to place it on a Monster’s mat (as when advancing the Invisible Man or the Wolf Man’s tasks). Don’t return Items to the Item bag unless specifically instructed to do so.
Hero Phase Example
It’s the Archaeologist’s turn and he may take 4 actions, as noted on his Badge. After some discussion with the other players, he decides to do the following during the Hero Phase:
- Action 1: Guide Wilbur & Chick from the bridge space to the Theatre, where he is.
- Action 2: Take his Special Action—pick up Items from an adjacent space—to take the pitchfork Item from the Barn.
The Explorer (Green) then plays her Perk card, which allows each Hero to move up to two spaces. The Explorer moves to the Dungeon. The Archaeologist also moves to the Dungeon, taking Wilbur & Chick along. Whenever your Hero moves, whether by an action or a Perk card, you may take any Villagers in your space with you.
Wilbur & Chick are now at the Dungeon, which is their safe location. The Archaeologist removes Wilbur & Chick from the board and then draws a Perk card from the deck. He reads the card aloud, choosing to keep it for later, and places it face up in front of him.
- Action 3: Share, which allows the Explorer to give him a knife Item.
- Action 4: Advance to smash the Coffin at the Dungeon. The Archaeologist uses the knife and pitchfork Items, which have a total strength of 7. He discards the Items, takes the Coffin off the board, flips it to show the smashed side, and places it on the Dungeon area of Dracula’s mat.
The Archaeologist has taken 4 actions and none of the players wish to play any other Perk cards. He will now proceed to the Monster Phase by drawing a card from the Monster deck.
Monster Phase & Combat
Draw a card from the top of the Monster deck and resolve the three parts of the card, from top to bottom. After resolving the entire Monster card, put it in a discard pile face up.
- Items: Draw the number of Items listed at the top of the card, if any, from the Item bag. Place each Item at the location indicated on the Item. If you need to draw an Item when the Item bag is empty, place all the Items from the discard pile into the bag, mix them up, and continue drawing.
- Event: Each Event either involves one of the Monsters or the Villagers. The card’s color, as well as the symbol above the Event’s name, indicates who the Event is about. Gray cards are about the Villagers. Colored cards are about a specific Monster. Refer to your Reference card for the symbols. If the Event Monster is not in your game, completely ignore the Event and continue with the Monster Strike. Otherwise, read the Event out loud and do what it says.
- Monster Strike: Certain Monsters move and attack, as indicated by the symbols at the bottom of the card. In order from left to right, move and attack with the first Monster before proceeding to the next Monster. If an indicated Monster is not in your game, ignore that symbol. If the Frenzy symbol is shown, the Monster with the Frenzy Marker moves and attacks. This could result in the same Monster moving and attacking twice in one turn.
Note: The Event Monster never attacks on that turn, unless they are Frenzied.
Monster Movement
Move the Monster the number of spaces indicated on the card towards the closest person (Hero or Villager). As soon as the Monster is in a space with a person, they stop moving. If the Monster started in a space with a person, they don’t move at all.
- Path Toward: If you are directed to move a Monster, Hero, or Villager toward someone or somewhere, you must move them along the shortest possible path. If there are multiple shortest paths, the current player decides which they take. Once they reach whatever they are moving toward, they stop moving.
Note: Only the Creature can move to water spaces. Unless the Creature is moving, only consider lit paths when determining the shortest path—do not consider water paths. - Closest Person: If there are multiple people equally close to a Monster, the Monster moves toward a Hero rather than a Villager. If there are still multiple closest people, the current player chooses one of them.
- Other Ties: If an Event or Monster Strike could apply to multiple characters or locations, the current player decides which one to apply it to.
Monster Attack
Attack one person in the Monster’s space by rolling the number of attack dice indicated. If there are no people in the Monster’s space, the Monster does not attack—do not roll dice. If there are multiple people in that space, the Monster will attack a Hero rather than a Villager. If there are still multiple people the Monster could attack, the current player chooses one to attack before rolling.
- Power Symbol: If this symbol is rolled, the Monster’s Power is activated, once for each Power symbol rolled. Refer to the power on that Monster’s mat and The Monsters section for details.
- Hit Symbol: If this symbol is rolled, the person was hit by the Monster’s attack, once for each Hit symbol rolled. See below for how hits are applied.
Hit by a Monster
Heroes
To ignore being hit by a Monster’s attack, a Hero may discard one Item for each Hit symbol rolled. If the Hero does not have enough Items, or does not wish to discard any Items, they are defeated. One hit defeats a Hero.
When a Hero is defeated, increase the Terror Level by moving the Terror Marker one space and remove that Hero from the board. At the start of that player’s next turn, they place their Hero at the Hospital and take their turn as normal, including their full number of actions. A defeated Hero does not lose any Items or Perk cards.
Note: Resolve each Monster’s move and attack before proceeding to the next Monster. If a Hero discards Items to ignore an attack, they may still be defeated by a subsequent attack. If a Hero is defeated, they cannot be the target of any other attacks this turn.
Villagers
A Villager does not have any Items and is therefore defeated immediately when hit. When a Villager is defeated, increase the Terror Level by moving the Terror Marker one space and remove that Villager from the board.
Note: The target of an attack must be stated before rolling, and a Hero cannot discard Items to save a Villager.
Monster Phase Example
The Inspector (Orange) is starting the Monster Phase of her turn, drawing the top card of the Monster deck. She resolves the card as follows:
- Items: She draws 2 Items out of the Item bag and places them on the board at the locations specified on those Items.
- Event: She can tell that the Event is about the Wolf Man because the card is brown and has the Wolf Man’s symbol above the Event’s name. Since the Wolf Man is in this game, she reads the Event out loud. Nobody has the Hunted emblem, and because it’s her turn, she takes it and places it in front of her. Then she moves the Wolf Man to her space. The Monster stops moving when it reaches her, even though it moved fewer spaces than the number listed on the card. Even though the Wolf Man is in her space, he does not attack. A Monster only attacks if the Monster’s symbol appears in the Monster Strike box at the bottom of the card.
- Monster Strike: The first symbol in the Monster Strike box is the Creature, who is not in the game. She ignores it and proceeds to the next symbol, which is Dracula. Although both the Courier (Pink) and Dr. Cranley are equally close, Dracula prioritizes Heroes over Villagers. So the Inspector moves Dracula to the space with the Courier and then rolls two dice, getting a Power symbol and a Hit symbol. The Courier decides to discard one of his Items to ignore the hit, and Dracula’s Power causes the Inspector to place her mover in Dracula’s space.
Now the Frenzied Monster strikes. Dracula has the Frenzy Marker, so he strikes a second time. Because Dracula is already in a space with people, he does not move. The Inspector must choose who Dracula attacks. She says that Dracula attacks herself and rolls two dice, getting a blank and a Hit symbol. Although she has an Item, she chooses not to discard it and is defeated. She increases the Terror Level by one and removes her Hero from the board. At the start of her next turn, she’ll place her Hero at the Hospital.
The Monsters
The following rules contain information specific to each Monster, including how to complete their task, how to defeat them, and their Power, which may be activated when they attack. Before you begin playing, read the section for each Monster in your game, as well as the information below, which applies to all games.
Frenzied Monster
The Monsters are agitated by your efforts to defeat them, and there is always one Monster who is frenzied. At the start of the game, place the Frenzy marker on the Monster mat with the lowest Frenzy Order. When the Frenzy symbol appears on a Monster card, the Frenzied Monster moves and attacks. This could result in the same Monster moving and attacking twice in one turn.
Some Events will direct you to place the Frenzy Marker on the next Monster. When this happens, place it on the Monster mat with the next highest Frenzy Order. For example, if the Frenzy Marker is on Dracula’s mat (Frenzy Order 1) and the Creature (4) and the Wolf Man (6) are also in your game, move it to the Creature’s mat. If there are no Monsters with a higher Frenzy Order, place the Frenzy Marker on the Monster mat with the lowest Frenzy Order. If there are no other Monsters left in the game, the Frenzy Marker remains on the same Monster.
Note: There is one Frenzied Monster at all times during the game. The Frenzied Monster will move and attack more frequently, because they strike each time the Frenzy symbol or their own symbol appears on a Monster card.
Defeated by a Hero
When a Monster is defeated, they are no longer considered to be in your game. Ignore all Events and Monster Strikes for all defeated Monsters for the rest of the game.
Remove the Monster’s figure and location overlay (if they have one) from the board. If the defeated Monster had the Frenzy Marker, place it on the next Monster according to the rules above. If there are any Items on the Monster mat (the Wolf Man or the Invisible Man), place those Items in the Item discard pile. Then return all of the Monster’s components to the box, including their mat, figure, and tokens. If a Hero has one of the Monster’s tokens (Soul sign or Hunted emblem), it is also returned to the box.
Creature from the Black Lagoon
Complexity: Medium | Frenzy Order: 4
Water Spaces
There are three water spaces on the board: the Lagoon, the River, and the Waterfront. Only the Creature can move to or be placed at these spaces. When the Creature strikes, consider water spaces and water paths when determining who is closest to him and the shortest path toward his target.
Advance: Find the Hidden Lair
The Heroes must embark on an expedition aboard the Rita to explore the Lagoon and find the Creature’s hidden lair. While at the Camp, a Hero may take the Advance action to search the Lagoon. Discard one Item of any color and move the Boat on the Creature’s mat to the next of that color. By carefully choosing which color to use, you can move the Boat further into the lagoon and complete the task more quickly. The Creature’s Lair is represented by the final blue X at the center of the mat—to complete the task, the last Item used must be blue.
Note: The Boat could move off the Lair—see the Creature’s Power below.
Defeat: Drive Him Away
If the Boat is at the Lair, you can defeat the Creature by driving it away. A Hero must be in the same space as the Creature and take the Defeat action. Discard one red, one blue, and one yellow Item. The strengths of the Items do not matter. You’ve defeated the Creature!
Power: Rock the Boat
If the Power symbol is rolled when the Creature attacks, the Creature rocks the boat. Move the Boat backward, one space for each Power symbol rolled. If the Boat is at the Start, the Power has no effect. If the Power moves the Boat off of the Lair, you cannot defeat the Creature. A Hero must take the Advance action again to move the Boat back to the Lair before the Creature can be defeated.
Dracula
Complexity: Low | Frenzy Order: 1
Advance: Smash the Coffins
The Heroes must find and smash Dracula’s four Coffins, which are situated around the village. While in a space with a Coffin, a Hero may take the Advance action to smash it. Discard any number of red Items with a total strength of 6 or more. Then take the Coffin, flip it to show it’s been smashed, and place it on Dracula’s mat in the corresponding spot.
Note: Coffins are not Items and cannot be picked up.
Defeat: Overcome Him
If all four Coffins are on Dracula’s mat, you can defeat Dracula by overcoming him. A Hero must be in the same space as Dracula and take the Defeat action. Discard any number of yellow Items with a total strength of 6 or more. You’ve defeated Dracula!
Power: Dark Charm
If the Power symbol is rolled when Dracula attacks, Dracula charms a Hero to come to him. Place the current player’s Hero in Dracula’s space. If that Hero is already in Dracula’s space, the Power has no effect.
Note: Dracula charms the current player’s Hero, which may not be the same Hero that Dracula just attacked.
Frankenstein and the Bride
Complexity: High | Frenzy Order: 3 | Only Frankenstein may become Frenzied.
Frankenstein is actually the name of the scientist who created these Monsters. However, with so many Monsters plaguing their village, the villagers have come to refer to these particular Monsters as just “Frankenstein” and the “Bride.”
Two Monsters
Frankenstein and the Bride are two of the most frightening Monsters, and if you choose to play against one, you must face them both. To defeat them, you must teach them what it means to be human so they can live happily together. However, if they meet before you complete this task, they will send each other into a fit of rage.
If Frankenstein and the Bride are ever in the same space before their task is completed, increase the Terror Level by one, place Frankenstein at the Graveyard and place the Bride at the Dungeon. This may happen multiple times in one game.
Monster Strikes and Frenzied Monster
Frankenstein and the Bride have their own Monster symbols, and are treated as separate Monsters for Monster Strikes. However, if they have the Frenzy Marker, only Frankenstein is frenzied. Each time the Frenzy symbol appears, move and attack with only Frankenstein—not the Bride.
Advance: Teach the Monsters
The Heroes must teach Frankenstein and the Bride what it means to be human. However, each Monster is different. Frankenstein requires yellow Items and must reach a humanity score of 11. The Bride requires blue Items and must reach a humanity score of 8.
- To teach Frankenstein to be more human, a Hero in the same space as Frankenstein may take the Advance action. Discard one yellow Item and increase Frankenstein’s humanity score by the strength of the discarded Item, turning his dial clockwise. Then, you may move Frankenstein in any direction that same number of spaces. In this way, you can prevent him from meeting the Bride too soon, or bring them together once both their scores are at their maximum.
- To teach the Bride to be more human, a Hero in the same space as the Bride may take the Advance action. Discard one blue Item and increase the Bride’s humanity score by the strength of the Item, turning her dial clockwise. You may also move her in any direction, up to the number of spaces equal to the discarded Item’s strength.
As soon as a Monster’s humanity score reaches its maximum (11 for Frankenstein and 8 for the Bride), flip over that Monster’s dial so it’s showing their face. An exact number is not required—you may exceed the maximum. Once both dials are flipped over, Frankenstein and the Bride will be defeated when they meet.
Note: You may still take the Advance action to move Frankenstein or the Bride, even if their dial has been flipped.
Defeated When They Meet
Once you have taught Frankenstein and the Bride what it means to be human and they meet, they will live peacefully together and cease terrorizing the village. As soon as Frankenstein and the Bride are in the same space and both of their dials are showing their faces, they are defeated. This does not require taking a Defeat action.
Power: Here Comes the Bride
If the Power symbol is rolled when either Frankenstein or the Bride attacks, the Bride approaches Frankenstein. After all hits are resolved, move the Bride toward Frankenstein, one space for each Power symbol rolled.
Example: Frankenstein’s dial is currently pointing to the “3.” A Hero takes the Advance action in Frankenstein’s space and discards a yellow Item with a strength of 2. They turn Frankenstein’s dial clockwise so it points to the “5” and then moves Frankenstein 2 spaces, choosing to move him away from the Bride while also avoiding Heroes and Villagers.
Example: The Frenzy Marker is on the Frankenstein and the Bride mat when “The Innocent” Monster card is drawn. The current player draws and places 3 Items on the board. Next, they place the Villager Maria at the Barn. Then they resolve the Monster Strike. They move Frankenstein 1 space and attack with 3 dice. Then they move the Bride 1 space and attack with 3 dice. Lastly, they move Frankenstein 1 space and attack with 3 dice. As normal, if either Monster is already in a space with a person, they do not move, and if there is no person in the space when they attack, they do not roll dice.
The Invisible Man
Complexity: Low | Frenzy Order: 6
Advance: Supply Evidence
The Heroes must supply evidence to prove to the police that the Invisible Man exists. While at the Precinct, a Hero may take the Advance action to supply evidence. Use one Item of any color, as long as the location on the Item matches an empty spot on the Invisible Man’s mat. Place the Item on the matching spot.
Defeat: Trap Him
If all five spots are filled on the Invisible Man’s mat, you can defeat the Invisible Man by trapping him. A Hero must be in the same space as the Invisible Man and take the Defeat action. Discard any number of red Items with a total strength of 9 or more. You’ve defeated the Invisible Man!
Power: Stalk Unseen
If the Power symbol is rolled when the Invisible Man attacks, the Invisible Man stalks a Villager. After all hits are resolved, move the Invisible Man toward the closest Villager, two spaces for each Power symbol rolled. If there are no Villagers on the board, the Power has no effect.
Note: The Invisible Man does not immediately attack the Villager, but could strike again this turn.
Example: A Hero at the Precinct takes the Advance action and places an Item from the Barn on the Invisible Man’s mat. If a Hero takes one more Advance action and places an Item from the Mansion, any Hero will be able to defeat the Invisible Man.
The Mummy
Complexity: High | Frenzy Order: 2
Reincarnated Soul
The Mummy believes that one of the Heroes is the reincarnated soul of his true love, and will lure that Hero to him. The first time a Mummy Event is resolved, the current player takes the Soul sign and that player’s Hero moves toward the Mummy. That player keeps the Soul sign for the rest of the game.
Advance: Break the Curse
The Heroes must break the Mummy’s curse by aligning the six Scarabs on the tablet. While at the Museum, a Hero may take the Advance action to move the Scarabs. Discard one yellow Item and then make as many moves as the strength of the discarded Item. A single move is sliding a Scarab along a groove to an adjacent spot or flipping a Scarab face up (see the Mummy’s Power below). You are not required to make the full number of moves.
Defeat: Entomb Him
If all six Scarabs are face up and in the spot matching their number on the Mummy’s mat, you can defeat the Mummy by returning him to his tomb. A Hero must be in the same space as the Mummy and take the Defeat action. Discard any number of red Items with a total strength of 9 or more. You’ve defeated the Mummy!
Power: Fortify the Curse
If the Power symbol is rolled when the Mummy attacks, the Mummy fortifies the curse. Flip one Scarab face down for each Power symbol rolled. Always flip over the Scarab with the lowest number showing, whether it is in its proper spot or not. If all of the Scarabs are face down, the Power has no effect.
A Scarab that is face down cannot be moved. Also, the Mummy cannot be defeated if any Scarab is face down. When you take the Advance action, you may use one of your moves to flip a Scarab face up.
Example: A Hero at the Museum takes the Advance action. They discard a yellow Item with a strength of 4, so they may make 4 moves with the Scarabs. They choose to flip the two Scarabs that are face down, slide the “3” Scarab into its spot, and slide the “2” Scarab into its spot. Now all the Scarabs are face up in their proper spot. As long as the Mummy’s Power is not activated, any Hero will be able to defeat the Mummy.
The Wolf Man
Complexity: Medium | Frenzy Order: 5
Hunted by the Wolf
The Wolf Man has a vision of which Hero will be his next victim, and is compelled to hunt that Hero down. The first time a Wolf Man Event is resolved, the current player takes the Hunted emblem and the Wolf Man moves toward that player’s Hero. That player keeps the Hunted emblem for the rest of the game.
Advance: Discover the Cure
The Heroes must discover the cure for lycanthropy by testing ingredients and formulating the antidote. While at the Laboratory, a Hero may take the Advance action to test an ingredient. Use one blue Item, as long as the Item’s strength matches an empty spot on the Wolf Man’s mat. Place the Item on the matching spot. As soon as all six spots are filled, the current player takes the Cure from the mat. The Cure may be given to another Hero using the Share action.
Note: The Cure cannot be discarded to ignore a hit from a Monster attack.
Defeat: Cure Him
If a Hero has the Cure, that Hero can defeat the Wolf Man by administering it to him. The Hero must be in the same space as the Wolf Man and take the Defeat action. Discard the Cure and any number of red Items with a total strength of 6 or more. You’ve defeated the Wolf Man!
Power: Vicious Bite
If the Power symbol is rolled when the Wolf Man attacks, the Wolf Man bites everyone in his space. Each Hero and Villager in the Wolf Man’s space is hit (including the person he just attacked)—one hit for each Power symbol rolled. Heroes may discard Items to ignore the Hits, as normal. Villagers in the Wolf Man’s space are immediately defeated.
Example: The Wolf Man attacks a Hero with 3 dice, rolling one Power symbol and two Hit symbols. The attacked Hero is hit three times. Every other Hero and Villager in that space is hit once.
End of the Game
The game can end in one of three ways:
- Heroes Triumph: If you defeat all the Monsters, the game immediately ends and the players have won! You’ve saved the village from a horrific fate, and perhaps even the Monsters themselves.
- Terror!: If the Terror Level reaches its maximum, indicated by the skull, the game immediately ends and the players have lost. Everyone, including the Heroes, are too horrified to continue. You abandon the village to the Monsters.
- Out Of Time: If you need to draw a card when the Monster deck is empty, the game immediately ends and the players have lost. You’ve taken too long to save the village. The Villagers have fled and you aren’t able to continue.
Note: The game ends only if you need to draw a card, but none remain. After resolving the last Monster card, play one final Hero Phase to try and defeat any remaining Monsters.
Playing Again
Try playing against different Monsters, or adding additional Monsters to increase the game’s difficulty. For a more strategic setup, the players may choose which Heroes to play and who will be first player. Be sure to consider which Monsters you are playing against, which Heroes’ special actions will be the most useful, and who is most vulnerable or best positioned to take the first turn.
Appendix & Solo Play
Clarifications
Terms
- Moving: Requires following paths to adjacent spaces.
- Placing: Does not require following paths. Pick up the person or Monster indicated and place them at the specified location.
- A Person or People: Refers to both Heroes and Villagers.
- A Monster: Refers to any of the seven characters you are playing against.
Heroes and Perk Cards
- You must get permission from a player to move or affect that player’s Hero or Items.
- Movement from a Perk card or special action follows all the normal rules for the Move action. A Hero may take any Villagers in their space with them.
- The Archaeologist’s Special Action cannot be used to take Items from another Hero.
- The Scientist’s Ability is always in effect. It does not take an action.
- Conduct an Investigation and Taxi Ride cannot be used to place a Hero who is not already on the board (from being defeated).
- Special Delivery may affect any two players, even if their Hero is not on the board (from being defeated).
Monster Cards
- If The Hunt Is On is drawn and the Hero with the Hunted emblem is not on the board (because they were defeated), the Event has no effect.
- If Reincarnated Soul is drawn and the Hero with the Soul sign is not on the board, the Event has no effect.
- If Thief is drawn, be sure to draw and place Items before resolving the Event. If multiple locations are tied for having the most Items, the current player places the Invisible Man on the tied location of their choice. Only Items on the board are discarded—Heroes in that space keep their Items.
Solo Play
The Villagers are more fearful if there is only one Hero trying to save the village. Begin the game with the Terror Marker on the “3” of the Terror Level Track.
All the rules remain the same. However:
- Do not play as the Courier—that Hero’s Special Action cannot be taken in a solo game.
- The Perk cards “Special Delivery” and “Conduct An Investigation” cannot be used. Either remove these cards before playing, or when drawn, immediately discard and draw a new Perk card to replace it.
Game Contents Summary & Credits
Contents:
- 1 Game Board
- 6 Monster Mats
- 7 Monster Figures
- 7 Hero Badges
- 7 Hero Movers
- 10 Villager Movers
- 20 Bases
- 60 Item Tokens
- 20 Monster Tokens
- 1 Terror Marker
- 1 Frenzy Marker
- 30 Monster Cards
- 20 Perk Cards
- 5 Reference Cards
- 1 Item Bag
- 3 Dice
- Instructions
Instructions: © 2019 Ravensburger North America, Inc. All rights reserved. USe01
All characters are trademarks and copyrights of Universal Studios. Licensed by Universal Studios. All Rights Reserved.
