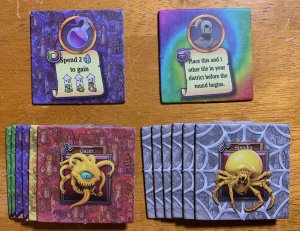
Sorcerer City
2020
Race to build the most prosperous magical city district in five frantic rounds while expanding your tile pool and managing monster attacks.
60
minutes
1 - 6
player(s)
14+
Medium


About this board game
Sorcerer City is a competitive city-building board game for 1–6 players, lasting about 60 minutes, in which rival wizard architects construct and rebuild a magical district over five years.
Every year, the city changes in strange and unpredictable ways, with blocks moving and rotating in crazy directions. Each player begins with a personal set of tiles and has just two minutes in every round to build a city as optimally as possible.
Speed and planning are essential as you expand your district and seek to earn money, influence, magic, and victory. Between rounds, you buy new tiles to add to your pool and gain other rewards, giving you more options for future construction.
- Build a city under a strict two-minute time limit.
- Buy new tiles between rounds to expand your building pool.
- Manage monsters that enter your deck and disrupt later plans.
- Compete across five rounds to earn the most victory points.
There is one major threat to your ambitions: Sorcerer City has a monster problem. Marauding creatures attack your district, and monster cards added to your deck can bring additional chaos in later rounds. You must work hard to mitigate their effects while continuing to develop your city.
After the fifth round, players add up their victory points. The wizard architect with the highest total becomes the new head wizard of all Sorcerer City, proving they have mastered the challenge of fast, flexible, and magical urban construction.
Designer
Useful links
 View board game on
Board Game Geek
Board Game Rules for
Sorcerer City
A game by Scott Caputo
1-6 players | Ages 14+ | 45-60 minutes
Introduction
Every year, Sorcerer City is built and rebuilt in magical new ways, with city blocks moving and rotating in crazy directions.
You and your fellow players are rival wizard architects in charge of building the same district over five years, expanding and rebuilding to gain the most Money, Influence, Raw Magic, and Prestige. Unfortunately, Sorcerer City has a bit of a monster problem, so you must work hard to mitigate the effects of marauding creatures that attack your district.
Architects compete against each other for the title of Head Wizard.
Goal of the Game
To be crowned Head Wizard you must possess the most Prestige after five rounds, each round being one year passing in Sorcerer City.
Game Components
- 6 sets of 12 Starting tiles
- 115 Market tiles across 4 Vendor tiers
- 102 Monster tiles (60 Tier 1 tiles, 42 Tier 2 tiles)
- 12 Rainbow Vendor tiles
- 12 Artifact tiles
- 1 Influence Rewards board
- 15 Influence Reward cards
- 80 Prestige tokens
- 14 Monster Randomizer cards
- 5 sets of 3 Mystery Player cards
- 24 “+30” Annual Progress tokens
- 24 Annual Progress markers
- 1 Market board
- 6 sets of 3 Magic Transformation cards
- 6 Annual Progress tracks
- 1 Sand timer

Tile Backs
All tiles have an identifying code on the back, and each type of tile has a unique icon on the back in the lower left corner.
The code is unique to that particular tile type, and the number after the dot tells you how many copies of that tile are in the game.
- Starting tiles: Starting tiles are a special set of twelve that all share the same symbol on the tile back. Each symbol is used to mark one complete set of Starting tiles. No symbol is better than any other since each set of Starting tiles is the same.
- Market tiles: Market tiles are marked with a Money bag icon, and separated into four Vendor tiers by the number on the bag.
- Monster tiles: Monster tiles have one or two swords to show their tier.
- Rainbow tiles: Rainbow tiles have a rainbow icon. Note: not all tiles with a multi-colored front are Rainbow tiles.
- Artifact tiles: Artifact tiles have a wooden chest icon.

Tile Faces
Different types of tiles have different features on their faces (the front side of the tile):
- Market tiles always have a gold Money bag in the top right corner that shows the price to purchase that tile at the Market.
- Some Market tiles have Goals which are shown on a colored shield.
- Some Market tiles contain Spells which are depicted with a scroll and an icon to tell you when the spell activates.
- Other Market tiles may contain a Goal and a Spell, while yet others may contain neither of these things.
- Monster tiles always contain a Monster illustration. See page 15 for more information about Monsters.
- Rainbow tiles always show a multi-colored swirl over the entire tile background. Some Rainbow tiles are also available in the Market, and these can include Spells or Goals. See page 15 for more information about Rainbow tiles.

Game Setup
- Give each player a set of twelve Starting tiles (A), a set of Raw Magic Transformation cards (B), an Annual Progress track (C), and four Annual Progress markers to place one per row on the Annual Progress track at the 0 position (D).
- To set up the Market, place the Market board in the center of the table (E). Take each set of Vendor tiles and shuffle them independently to form four Vendor decks. There are five Vendors on the Market board. Reveal three tiles at the bottom of the first, second, third and fourth Vendors (F). Place each Vendor deck face-down above the Market board (G). Place the stack of twelve Rainbow tiles costing 7 Money at the bottom edge of the fifth Vendor (H).
- Place the Influence Rewards board (I) near the center of the table. Take the Year 5 Influence Reward card from the deck of Influence rewards and place it below the Year 5 position (J). Shuffle the Influence Reward cards and reveal cards one at a time to fill the positions on the Influence Rewards board labeled Year 1 through Year 4 (K). Note that some Influence Rewards cannot be used in the 1st Year of the game: if one of these cards is revealed for Year 1, return it to the bottom of the deck and reveal another in its place. Return the unused Influence Rewards cards back to the game box.
- For a 2-player game only, randomly select one Mystery Player card from each Year, being sure to keep the cards face down. Place these five cards at the bottom edge of the five Influence Reward cards.
- To set up the Monsters (L):
- Shuffle the Tier 1 Monster Randomizer cards and reveal one to use as the Monster at the conclusion of Year 1. Place the stack of Monster tiles that match the revealed Monster next to the Year 1 position of the Influence Reward board. The Monster Randomizer card contains a summary of that Monster’s ability so place the card at the side of the playing area for reference during the game.
- Reveal a second Tier 1 Randomizer card to use as the Monster at the conclusion of Year 2. Place the stack of Monster tiles that match the revealed Monster next to the Year 2 position of the Influence Reward board. Place the card at the side of the playing area for reference during the game. Put the remaining Tier 1 Monster cards and tiles back in the box.
- Shuffle the Tier 2 Monster Randomizer cards and reveal one to be the Monster at the conclusion of Year 3. Place the stack of Monster tiles that match the revealed Monster next to the Year 3 position of the Influence Reward board. Place the card at the side of the playing area for reference during the game.
- Reveal a second Tier 2 Monster Randomizer card to be the Monster at the conclusion of Year 4. Place the stack of Monster tiles that match the revealed Monster next to the Year 4 position of the Influence Reward board. Place the card at the side of the playing area for reference during the game, and put the remaining Tier 2 Monster cards and tiles back in the box.


Notes on Monsters: If playing with 3 or fewer players, you may choose the same Tier 1 Monster for both Year 1 and 2, and/or the same Tier 2 Monster for both Year 3 and 4. Don’t choose both the Skeleton and the Lich for the Tier 1 Monsters when playing with 5 or 6 players.
- Place Prestige tokens conveniently within reach of all players (M).
- Each player shuffles their starting City deck tiles and keeps that deck face down. Each player should make sure they have enough room in front of them to build their district, and store their Annual Progress markers, Raw Magic Transformation cards, and Annual Progress track off to one side.
- Give the timer (N) to the player who most recently saw a fantasy movie or TV show to indicate they are the current starting player.
After a Few Games: Artifact Tiles
Once you are comfortable playing Sorcerer City, consider playing with Artifacts. During Game Setup, randomly deal each player two Artifact tiles. Each player chooses one Artifact tile to keep and one Artifact tile to return to the box. All unused Artifact tiles are also returned to the box. Each player shuffles their chosen Artifact tile into their Starting tiles so they start with thirteen tiles. Details about the Artifacts can be found on page 21. Artifact tiles show the unique ability that Artifact bestows when played.
Round Overview
Each round follows the same mandatory phases:
- Prepare phase
 : Each player shuffles their tiles and places them face down as their new City deck for the next round.
- Build phase
 : The player who has the timer starts it and everyone simultaneously builds their district. Monsters marked with the Build phase icon (hammer) activate immediately when they are built. You must resolve them before building another tile. Once built in your district, all non-Monster tiles (including Artifacts) marked with the Build phase icon may be used at any point until the timer runs out. Once the timer runs out, all players must stop building. Any tiles not placed in their districts do not count toward scoring.
- Score phase
 : Monsters marked with the Score phase icon (color swirl) activate now. They may be used in any order you choose. Each player scores their own district on their Annual Progress track. Spells marked with the Score phase icon activate now. They may be used in any order you choose. Raw Magic points are transformed into another form.
- Influence & Buy phase

 : Step 10 contains 3 substeps that are completed by a single player before passing to the next player. The player who has the greatest Influence begins the phase, and when they complete all 3 substeps, it passes to the next player in order of descending Influence.
- Influence Rewards are awarded to the players with the most Influence. Rewards marked with the Reward phase icon (wax seal) activate now.
- Players may buy up to two new tiles from the Market (see page 10).
- Rewards and Spells marked with the Buy phase icon (coin) activate now. They may be used in any order you choose.
- Prestige phase: All players determine the quantity of Prestige they have and take Prestige tokens equal to that amount.
- Cleanup phase: Shuffle the Monster deck for the next round face-down and give one to each player. Each player dismantles their district and returns all their tiles to form their City deck for the next round. All Annual Progress tracks are reset to zero. Pass the timer to the next player on the left ready for the next round.
Round Overview (Quick Reference)
Each round follows the same mandatory steps:
Prepare
- Shuffle tiles; place them face down ready for the round.
Build
- Start the timer; everyone builds simultaneously.
- Monsters marked with the Build phase icon activate immediately when they are built.
- Market tiles and Artifacts marked with the Build phase icon may be used at any point until the timer runs out.
- Once the timer runs out, all players must stop building.
Score
- Monsters marked with the Score phase icon activate now.
- Score districts individually on Annual Progress tracks.
- Spells marked with the Score phase icon activate now.
- Raw Magic points are transformed into another form.
Award Influence Rewards & Buy Tiles
- Step 10 contains 3 substeps that are completed together, one player at a time beginning with the player with the greatest Influence and then going in descending order for each other player.
- Influence Rewards are awarded to the players with the most Influence. Rewards marked with the Reward phase icon () activate now.
- Players may buy new tiles.
- Rewards and Spells marked with the Buy phase icon () activate now. They may be used in any order you choose.
- Influence Rewards are awarded to the players with the most Influence. Rewards marked with the Reward phase icon (
Collect Prestige
- Determine Prestige quantities; take Prestige tokens equal to that amount.
Cleanup
- Shuffle the Monsters for the next round; give one to each player.
- Dismantle districts. Reset all Annual Progress tracks to zero.
- Pass the timer to the next player on the left.
1. Prepare Phase
Each player shuffles their tiles and places them face down as their new City deck for the next round.
Some players may have abilities that allow them to place tiles during this phase.
2. Build Phase
Place Tiles to Complete Goals
Each round, players are trying to build their district in order to satisfy as many Goals as possible to score Money, Influence, Raw Magic, and Prestige. Players’ districts are not connected to each other.
Each player reveals one tile at a time from their personal City deck. They can place the first tile as they wish to start their district, and all tiles after that must be placed adjacent (with one or more sides touching) to a tile already placed. Once a tile is placed, it cannot be moved or rotated. Also, players may stop building their district at any time, so they are not forced to keep drawing tiles if they don’t want to keep going. Note that once a tile is revealed, it must be placed in your district.
Goals are represented by a shield, and each Goal contains two parts: the resource produced (Money, Influence, Raw Magic, or Prestige) and the structure needed to complete the Goal.

Adjacent Tiles and Neighboring Tiles
- If a tile is adjacent to another tile, it is immediately above, below, or to the left or right of the other tile. It is not diagonal to the other tile.
- If a tile neighbors another tile, it is in one of the eight possible positions around the other tile.

Goal Types
Group Goal
To complete this Goal, you must create a group of 3 or more connected tiles of the marked color. This group of connected tiles can be any shape, not just the L-shape shown on the Goal. To work out the score, simply count the number of tiles in the group. Note: just having a group of connected tiles of the same color does not score any points unless it includes a tile with a Group Goal shield of that color.


Line Goal
To complete this Goal, you must create a horizontal or vertical line of three or more connected tiles of the marked color regardless of the angle of the line. To work out the score, simply count the number of tiles in the line.
If a Line Goal is in both a horizontal and vertical line, it still only scores once, but the player may choose which line to score.
Simply having a line of connected tiles of the same color does not score any points unless it includes a tile with a Line Goal shield of that color.


Shield Goal
To complete this Goal, the tile with this Goal must have at least two neighboring tiles with a shield of any type or color on them.
To work out the score, simply count 1 for each shield on the center tile and add 1 for every shield on a neighboring tile. If a tile has two Goals of this type on it, score each Goal separately.


District Disconnection
Watch out for disconnection. Some effects can remove or destroy tiles, which could lead to your district becoming disconnected. When placing tiles, it’s possible for you to replace these spaces and reconnect your district.
Abilities: Monsters, Spells and Artifacts
Some Monsters, Spells and Artifacts have extra abilities. Each is marked with an icon showing the point during each round it takes effect: Prepare, Build, Score, Influence Rewards, or Buy.
If a tile is not built in your district, its ability does not activate unless it activates during the Prepare phase.
Refer to the Monster Randomizer Card for details on the various Monsters during play. See “Monsters in Detail” on page 15 for complete information.
3. Score Phase
Scoring Your District
Each player scores their district on the annual Progress track to see how much Money, Influence, Raw Magic and Prestige they produced. Use the markers on your Annual Progress tracker to keep track of how much Raw Magic, Money, Influence, and Prestige you have earned this Year.
- Flip the matching Annual Progress token to the “+30” side if you exceed 30 points on a track.
- During the scoring phase, players may not score higher than 60 in any Annual Progress category. Any excess points are lost.
- Annual Progress scores are public information so everyone can figure out if they have a chance to have the most Influence that round.
- In a 2-player game, each player must also consider how much Influence the Mystery Player might have, which is represented by the Mystery Player card for that Year. The three possible Influence values are shown on the front of the card.
Raw Magic Transformation
After scoring, each player has Raw Magic recorded on their Annual Progress track. Each player transforms all of their Raw Magic into one resource of another type: Money (yellow), Influence (red) or Prestige (green).
To do this, each player looks at the other players’ Annual Progress track, and then secretly chooses the Raw Magic Transformation card matching the resource they want to convert their own Raw Magic into.
All players reveal their Raw Magic Transformation cards simultaneously and adjust their Annual Progress tracks accordingly.
Example: if you have 5 Raw Magic and 5 Money and decide to transform Raw Magic into Money, you would then have zero Raw Magic and 10 Money.
4. Influence & Buy Phase
Awarding Influence Rewards
- 1st Place: The player with the highest Influence (red) wins both the Prestige and Influence Reward shown on the Influence Reward board for the current Year.
- 2nd Place: The player with the next highest Influence chooses to take the Prestige OR the Reward shown on the Influence Reward board for the current Year. If there is a tie for 2nd Place, no 3rd place is awarded.
- 3rd Place:
- If there are 3 or fewer players then the player with the next highest Influence points may choose to take 5 Money or an extra buy. See “The Mystery Player” below for more information on how this affects 2-player games.
- If there are 4 or more players then the player with the next highest Influence points gains the effect that the 2nd place player did NOT choose unless there was a tie for 2nd place.
- 4th – 6th Place: All remaining players may choose to take either 5 Money or an extra buy.
If there is a tie for any place, all tied players receive the effects listed for that place.
| Place | 2 players (Mystery Player as 3rd player) | 3 players | 4-6 players |
|---|---|---|---|
| 1st place | Influence Reward + Prestige for that Year | ||
| 2nd place | Choice of Influence Reward OR Prestige for that Year | ||
| 3rd place | 5 Money OR +1 Buy | Whatever was not chosen by the 2nd place winner | |
| 4th – 6th place | N/A | 5 Money OR +1 Buy | |
The Mystery Player
In a 2-player game, there is still a 1st and 2nd place, but the Mystery Player’s card is revealed which represents the Mystery Player’s Influence. The Mystery Player could end up winning 1st or 2nd place. However, the Mystery Player performs no other tasks besides vying for the most Influence. For 3rd place in a 2-player game, you may choose to either take 5 Money OR an extra buy (i.e. buy up to three tiles).
As Influence Rewards are awarded, each player adjusts their Prestige Annual Progress track to record Prestige earned from an Influence win (if any) and their Reward (if any). As with all Annual Progress tracks, a player may not earn more than 60 Prestige in a round.
Buying Tiles
Going in order from most Influence to least, each player may spend their Money to buy tiles from the Market. All players may buy up to two tiles, and some spells and Influence Rewards give the ability to purchase additional tiles also.
- If a player scores more than 20 Money in a round, they are also awarded an additional buy at the Market.
- In case of ties, the player closest to the timer, going clockwise, buys first. Once a tile is purchased by a player, it is added to that player’s deck.
- As each tile is bought, a new tile is revealed immediately from that Vendor’s deck.
- Additionally, some Spells marked with the Money icon activate during this phase, such as “Gain a tile costing up to 6 for free”.
- Once per round, a player may pay 1 Money to discard a tile to the bottom of that Vendor’s deck and reveal the next tile from that same deck.
- Once bought, all tiles are discarded to be shuffled into the player’s deck during the Prepare phase.
5. Prestige Phase
After all players have bought their tiles, all players collect Prestige tokens equal to the Prestige score on their Annual Progress track.
The player who scored the least Prestige on their Annual Progress track that round receives a Market tile for free:
- Year 1: from the top of the Vendor 1 deck.
- Year 2: from the top of the Vendor 2 deck.
- Year 3: from the top of the Vendor 3 deck.
- Year 4: from the top of the Vendor 4 deck.
- Year 5: no tile is given away since there will be no more building.
If multiple players tie for the fewest points earned that round, each of those players receives a tile for free. If a player is supposed to receive a tile for free from a given Vendor, but no more tiles are available from that Vendor, then no tile is given out for free.
6. Cleanup Phase
Discarded Tiles
Return all discarded tiles to players’ decks.
Monsters
Monsters are selected before the game begins and are added to the game at the end of Years 1, 2, 3, and 4.
Shuffle the stack of Monsters to be dealt and turn the stack face down. Deal a Monster from the stack to each player, with the following exceptions:
- If the Monster is the Skeleton, deal two Skeletons to each player.
- If the Monster is a Lich, also make the stack of Skeletons ready for use. Put the stack of Skeletons face down in the middle of the table within easy reach of all players.
Variations for Round 5
The rules for the 5th round vary slightly:
- There is no Influence Reward. Only the player(s) with the most Influence wins the Prestige.
- There is no 2nd or 3rd place.
- Players do not buy any more Market or Rainbow tiles.
- Players do not acquire a new Monster.
- There is no additional end game scoring beyond what players normally receive in a given round.
Determining the Winner
At the end of the Year 5, count up all Prestige earned during the game to determine the winner! In the event of a tie on Prestige, the player with the most Money is the winner.
While Monsters have negative effects on your districts, you still get to count any colored districts that are part of their tile.
All Monsters have an icon that show you when their ability activates.
Four different Monsters are selected at the start of the game. Tier 1 Monsters are added to the game at the end of Years 1 and 2. Tier 2 Monsters are added to the game at the end of Years 3 and 4.
Monsters and District Disconnection
Watch out for disconnection. Some Monsters may remove or destroy tiles, which could lead to your district becoming disconnected. Keep in mind that all Goals only count tiles that are connected. When placing tiles, it’s possible for you to replace these spaces and reconnect your district.
Some Monsters force you to remove or discard tiles from your district, and then place them at the bottom of your draw deck. With quick play, you may get a second chance to place removed tiles back in your district.

Level 1 Monsters
Dragon Building phase
As soon as the Dragon tile is placed in the district, it permanently destroys one city tile adjacent to it. Once the Dragon has destroyed the tile, your district may be disconnected. The Dragon can be used to kill other Monsters.
Dark Mage Scoring phase
When scoring your district, all Goals neighboring the Dark Mage are treated as if no longer present. They cannot be scored and they also no longer contribute to any neighboring Goals.
Gelatinous Cube Building phase
When you draw a Gelatinous Cube tile, remove one tile with a shield on it (if possible) from your district and put it on the bottom of your City deck. Then place the Gelatinous Cube in your district. Once the Gelatinous Cube has removed the tile, your district may be disconnected.

Golem Building phase
When you draw a Golem tile immediately determine the longest open straight line of the same color in your district and put the Golem at the end of that line. If you have several open lines, you may choose where to place the Golem. If you have no open lines, place the Golem anywhere in your district.
Kraken Building phase
As soon as you draw a Kraken tile, remove three tiles from your district and place them at the bottom of your City deck. Then place the Kraken in your district. If your district has three tiles or fewer, then the entire district is put on the bottom of the City deck. Once the Kraken has removed these tiles, your district may be disconnected.
Lich Building phase
When you draw a Lich tile, place it in your district, and then draw one Skeleton tile from the middle of the table and immediately add it to your district. This Skeleton tile will stay in your deck for the rest of the game. In this way, the Lich will progressively add more Skeletons to your deck over the course of the game.

Skeleton Building phase
You must place the Skeleton so that the jagged black sides are not connected to any other tile. You may not place any tile adjacent to one of the jagged black sides of the Skeleton. If you notice later that you have mistakenly placed a tile next to a jagged black edge, discard the wrongly-placed tile.
Level 2 Monsters
Chimera Scoring phase
Before scoring your district, the Chimera destroys one city tile containing a Goal that is in the same row or column. Once the Chimera has destroyed the tile, your district may be disconnected. If there are multiple such tiles, choose which is destroyed. If there are no such tiles, no tile is destroyed.
Demon Building phase
When you draw a Demon tile, discard two tiles from your district with red on them, including Rainbow tiles. Then place the Demon tile in your district. Once the Demon has discarded these tiles, your district may be disconnected. If there are no such tiles, then play the Demon normally. If there is only one red tile, then just discard that tile. You may discard Monster tiles with red on them.

Genie Scoring phase
Before scoring your district, you must place all visible Monster tiles in your district (including the Genie) on top of other non-Monster tiles in your district. If a monster tile is uncovered by the Genie’s action, move that monster also. Skeleton tiles may be placed without restriction on top of other non-Monster tiles.
Giant Building phase
As soon as you draw a Giant tile, you must place the Giant on top of a bought tile (one with a cost value on it) of your choice. If there is no such tile, then play the giant tile normally.
Goblin Building phase
As soon as you draw a Goblin tile, you must discard two tiles from your district with yellow on them of your choice. Then place the Goblin tile in your district. Once the Goblin has discarded these tiles, your district may be disconnected. If there are no such tiles, play the Goblin normally. If there is only one yellow tile, then discard only that tile. You may discard Monster tiles with yellow on them.

Invisible Stalker Building phase
When you draw an Invisible Stalker tile, place it in your district, and then place the next two tiles FACE DOWN without looking at their fronts. Before scoring your district, turn over the face down tiles. You may orient the flipped tiles any way you wish. If a face down tile is a Monster, resolve its effect immediately.
Pixie Building phase
As soon as you draw a Pixie tile, place the Pixie on top of a Goal tile of your choice. If there is no such tile, then place the Pixie tile anywhere you wish.

Influence Rewards in Detail
Influence Rewards are chosen randomly at the start of the game. Some Rewards cannot be used in the first round of the game. These are noted at the bottom of the card itself. If one of these is drawn in Year 1, simply discard and replace it with the next card. Rewards not selected for the game are returned to the box and are referred to as “Unused Rewards”.
- Kill 2 Monsters in your district: Only visible Monsters in your district can be killed. Killed Monsters are removed from the game. If this Reward is drawn for the Year 1 Reward, discard it and draw a different Reward. Do not use for Year 1.
- Choose 2 tiles from the Market: each of which would normally cost you no more than 7, and add them to your district deck for free. Any discounts still apply, such as “All tiles cost 2 less”.
- Gain 1 tile of any cost from the Market for free.
- +1 Buy. Tiles cost you 2 less: For all buys you have this round, you may buy tiles at 2 less than the normal price. This discount happens first before any other discounts. The minimum cost of any tile is 1. Additionally, you may buy 1 more tile than normal.
- Buy tiles at half price rounded up: For all buys you have this round, you may buy tiles at half price rounded up. This discount happens first before any other discounts. If a player receives this Reward twice, all tiles would be quarter price rounded up. The minimum cost of any tile is 1.
- Gain a Rainbow tile from the Rainbow Vendor: Rainbow-patterned tiles from the other Market vendors do not qualify.
- Discard up to 4 tiles from Market: While buying tiles from the Market, you may discard up to 4 tiles from the Market for free. These tiles can be from the same or different vendor, and you may discard before or after buying a tile.
- Give a Monster from your district to any other player: Only visible Monsters in your district can be given away. If this Reward is drawn for the Year 1 Reward, discard it and draw a different Reward. Do not use for Year 1.
- Score 5 Prestige per Monster in your district (not in your City deck): If this Reward is drawn for the Year 1 Reward, discard it and draw a different Reward. Do not use for Year 1.
- Gain 2 tiles from any single Vendor: including the Rainbow Vendor. In turn order, each other player gains 1 tile from the same Vendor. Fill the vacant spaces in the Market as soon as they are created.
- Each other player must destroy a non-Monster tile in their deck of tiles: Destroyed tiles are removed from the game. Do not use for Solo Mode.
- Choose 1 tile from the Market to give to any other player: Gain Prestige or Money equal to the cost of that tile.
- Select 2 tiles from your deck and place on the table before the next round begins: If you play any Monster tiles in this way, ignore the effects of those Monsters.
- You may kill 1 Monster in any other player’s city to gain either 10 Prestige or 10 Money: If this Reward is drawn for the Year 1 Reward, discard it and draw a different Reward. Do not use for Year 1 or Solo Mode.
- No Influence Reward for Year 5: This card is always used for Year 5 – there is no Influence Reward awarded at the conclusion of the final round.

Spells in Detail
As soon as you place a Spell tile in your district you may use it. However, only Spells with the hammer-shaped Build phase icon may be used during the Building phase. Any Spells still in your City deck once the timer runs out cannot be used this round. Each Spell may only be used once per round. However, if you have multiple Spells of the same type, you receive the benefit multiple times.
Purple: Raw Magic
- Move a Monster: Once per round, you may move a Monster tile to a new location in your district. You may disconnect your district when you use this Spell. You may move a Monster off a tile.
- Gain 3 Money when you buy purple: Every time you buy a tile with any purple on it (including a Rainbow tile), gain 3 Money on your Annual Progress tracker.
- Move a purple tile: Once per round, you may move a tile with purple on it to a new location in your district. You may disconnect your district when you use this Spell. You may not move a purple tile that is covered by a Monster.
- Kill a Monster: Once per round, you may kill a visible Monster in your district. Killed Monsters are removed from the game. You may disconnect your district when you use this Spell.
- Spend 3 Magic to gain 3 Money, 3 Influence, 3 Prestige: Before your Magic is transformed this round, you may transform 3 Magic into 3 Money, 3 Influence, and 3 Prestige. Then transform your remaining Magic as normal.
- Spend 5 Magic to gain 5 Money, 5 Influence, 5 Prestige: Before your Magic is transformed this round, you may transform 5 Magic into 5 Money, 5 Influence, and 5 Prestige. Then transform your remaining Magic as normal.
Green: Prestige
- Move a green tile: Once per round, you may move a tile with green on it to a new location in your district. You may disconnect your district when you use this Spell. You may not move a green tile that is covered by a Monster.
- Move a Goal tile: Once per round, you may move a tile with Goal on it to a new location in your district. You may disconnect your district when you use this Spell. You may not move a Goal tile that is covered by a Monster.
- For every 2 Goals gain 1 Prestige: Gain 1 Prestige per two Goals anywhere in your district. This Prestige is in addition to any Prestige scored from the Shield Goal on this tile.

Yellow: Money
- Move a yellow tile: Once per round, you may move a tile with yellow on it to a new location in your district. You may disconnect your district when you use this Spell. You may not move a yellow tile that is covered by a Monster.
- Gain a tile costing up to 6 for free: Gain a free tile costing up to 6. This triggers before you buy tiles. You are not allowed to use any discounts such as “All tiles 2 cheaper” when using this Spell.
- Discard 2 Market tiles for free: While you are buying, you may discard 2 Market tiles for free. Discarded tiles go on the bottom of each Vendor’s stack. The 2 tiles you discard can be from the same Vendor or different Vendors. You may choose to discard in between buys: you could use one free discard, buy a first tile, and then discard again.
- All tiles 2 cheaper, +1 Buy: For all of your buys, the cost is 2 cheaper. The minimum cost of any tile is 1. An extra buy means you can buy up to 3 tiles on your turn.
- For every 3 Money gain 1 Prestige: Before your Magic is transformed this round, gain 1 Prestige for every 3 Money you have. You still keep all of your money.
- Gain a tile costing up to 10 for free: Gain a tile costing up to 10 for free. This triggers before you buy tiles. You are not allowed to use any discounts (for example, “All Tiles 2 Cheaper”) when using this Spell.
Red: Influence
- Move a red tile: Once per round, you may move a tile with red on it to a new location in your district. You may disconnect your district when you use this Spell. You may not move a red tile that is covered by a Monster.
- Choose any Reward when you gain a reward: When you gain an Influence Reward, you may choose any of the 4 Rewards including Rewards from previous or later Years.
- Gain Influence Reward: Gain the Influence Reward for the current round even if you would not normally earn it from being in 1st, 2nd, or 3rd place. You only gain the Reward, not the points. If you gained the Influence Reward by being in 1st, 2nd, or 3rd place, you may gain the Reward again!
- For every 3 Influence gain 1 Prestige: Before your Magic is transformed this round, gain 1 Prestige for every 3 Influence you have. You still keep all of your Influence.
- Gain an unused Reward: Take the stack of unused Rewards (those not used during game setup) and choose one Reward to activate. This Reward activates before you buy tiles. You may choose to use it either before or after you receive any other Reward(s) this round. Once a Reward is used in this way, it is discarded and may not be used again this game. If multiple players have this tile in their city, then the stack of unused Rewards is passed between players as each player takes their turn. This tile is not recommended for new players.

Wild/Rainbow
A Rainbow tile counts for every color and all colors, so it can be used to complete multiple Goals at the same time.
- Rainbow Vendor tile (cost 7): The entry level Rainbow tiles are only available from the Rainbow Vendor.
- Gain a Rainbow tile costing up to 7 for free: This activates before you buy tiles.
- Move any Rainbow tile: Once per round, you may move any Rainbow tile (including this one) and place it on top of any tile in your district including on top of a Monster. You may disconnect your district when you use this Spell. You may not move the Rainbow tile if it is covered by a Monster.
- Wild Group Goal: A Group Goal of all four types at the same time. It’s possible to score any one of the four colors with this Goal but you may only use it to score for a single color each round.

Artifacts in Detail
When added to the game, Artifacts give each player a unique bonus ability.
Some Artifacts act as a partial rainbow or wild tile, matching to two specific colors rather than all colors. This is shown with a swirl pattern in the colors it matches against.
- The Magic Boots Artifact: is both red and green on all sides. After you build this tile, you may move a tile with red or green on it to a new location in your district. Once you have used this ability, your district may be disconnected.
- The Armor Artifact tile: is both red and purple on all sides. It also contains a red Shield Goal.
- The Helmet Artifact: is both yellow and purple on all sides. It also contains a yellow Line Goal.
- The Amulet Artifact: is both green and purple on all sides. It also contains a green Line Goal.
- The Cloak Artifact: contains a purple Shield Goal.
- The Staff Artifact: when choosing your Raw Magic Transformation cards, you may choose two cards instead of one. The number of cards you select is public knowledge. If you have an odd number of Raw Magic points, select one card to receive the leftover point.
- The Wand Artifact: gives a discount at the Market: all tiles cost 1 less Money to buy. You also receive an extra buy at the Market.
- The Gem Artifact: gain a tile costing up to 5 for free. This activates before you buy tiles. You may not use any discounts (for example, “All tiles 2 cheaper”) when using this Spell.
- The Gauntlet Artifact: packs a mighty punch: after you build this tile, you may kill a Monster adjacent to this tile. That Monster is permanently removed from the game, and placed back in the box.
- The Golden Ring Artifact: is both red and yellow on all sides. When you receive an Influence Reward, you may choose any of the four Rewards including Rewards from previous or future Years.
- The Chalice Artifact: contains a green Group Goal.
- The Crown Artifact: makes all tiles with green on them cost 3 less Money to buy.

All of the other wizards are away on travels when suddenly a huge army of Monsters threatens to overrun Sorcerer City. Can you keep the Monsters at bay long enough until the other wizards return?
Setup
Follow the normal setup rules for 2 players with the following exceptions:
- Only one player (you) needs four Annual Progress markers, a set of twelve starting City deck tiles, a set of three Raw Magic Transformation cards, and one Annual Progress track.
- Randomly pick two Mystery Player cards from each Year, being sure to keep the cards face down. Put these ten cards below the five Influence Reward cards.
- Remove the following Influence Rewards as they don’t make sense for a single player:
- All players must destroy a non-Monster tile.
- Kill a Monster in another player’s district.
Goal
The solo game can end in two ways:
- If every Market tile (all thirteen tiles: every tile in the four Vendors and the Rainbow tiles) are covered by Monsters, then you lose immediately.
- Or, if you have no valid place to place a Monster in the Market, you also lose immediately.
If you make it to the end of Year 5, you are ranked based on your final Prestige total:
- 0-50 points: Junior Wizard
- 51-100 points: Veteran Wizard
- 101-150 points: Head Wizard
- 151+ points: Legendary Wizard
Solo Mode Game Play
Follow the normal game play rules with the following exceptions:
- When determining if you have the most Influence each round, reveal both Mystery Player cards for that round and compare your Influence total to both of those Influence amounts. It’s possible for you to be in 1st, 2nd, or 3rd place in Influence.
- At the end of each buying round, distribute the remaining five Monsters for that round using the following method:
- Reveal each Monster and place the Monster on top of a tile in the Market that matches at least one color on the Monster tile. For example, a Monster with red/purple on it could be placed on top of a red tile, a purple tile, a red and purple tile, or a rainbow tile.
- Only one Monster may be placed on top of each Market tile. (It is suggested that Monsters are placed on top of Market tiles in an overlapping fashion so that part of the tile below it can still be seen.)
- If there is no valid place in the Market to place the Monster, then you lose immediately. If the Monster covers the last tile in the Market, then you lose immediately.
- If you buy a Market tile with a placed Monster on it, gain the tile and the Monster, and include both in your deck.
- If you discard a Market tile with a Monster placed on it, the tile is discarded to the bottom of its Vendor deck, and the Monster is destroyed (removed from the game entirely). Remember you can pay 1 Money to discard a Market tile once per round in the buying part of play.

Influence Reward Modifications
The effect of certain Influence Rewards are modified in a solo game:
- Give one Market tile to another player: Choose one Market tile to discard and gain Prestige or Money on your Annual Progress tracker equal to the marked costs on the tile/s. Any Monsters on those tiles are also discarded.
- Give away a Monster: Just discard a Monster from your district.
Expert Variant
If you have played the game many times and are familiar with all of the Monsters, try this challenging variant:
- Take half the Skeletons and set them aside. Add the other half into Tier 1 Monster pile and shuffle well.
- Shuffle all Tier II Monsters together well.
- Draw six Tier I Monsters for Year 1 and six for Year 2. Whenever you draw a Skeleton, take a second Skeleton from the group set aside and place the pair together in the Market.
- Draw six Tier II Monsters for Year 3 and six for Year 4.
One of the six Monsters each round will go directly into your district, while you will need to place the other five Monsters in the Market per the normal rules.
Good luck!
Glossary
- Ability: Certain Market or Artifact tiles with Spells, and Influence Rewards give players an ability to perform a particular action.
- Adjacent: Immediately above, below, or to the left or right of a tile. Not diagonal.
- Annual Progress: The measurement of how well you did during each round of the game which is a Year in the life of Sorcerer City.
- Artifact: A set of optional tiles that give each player a unique ability.
- District: The region of Sorcerer City built by each player.
- Collect: Take Prestige tokens equal to the quantity of Prestige gained during a round and marked on your Annual Progress track.
- Deck: A set of tiles that is randomized and kept face-down, revealed one at a time.
- Destroy: Remove a non-Monster tile permanently for the rest of the game and return to the box.
- Discard: Discarded tiles are not destroyed; they return to your deck during Cleanup and are shuffled in in preparation for the next round.
- Gain: To receive Money, Influence, Raw Magic, or Prestige during a round. Also refers to tiles received for free through a Spell or Influence Reward.
- Goal: Goals are shown on tiles by a large Shield with a symbol on it. Goals may be Line, Group, or Shield.
- Influence: Produced by tiles with stone towers and blocks, colored red.
- Influence Reward: Awarded to the player with the greatest amount of Influence at the conclusion of each round.
- Kill: Remove a Monster permanently for the rest of the game and return to the box.
- Market: A collection of Vendors, each selling a stack of city tiles of a particular value.
- Money: Produced by tiles with Market stall tents, colored yellow.
- Monster: A tile with a negative effect. That effect takes place either when the tile is played, or at the end of the round as shown on each Monster tile. Monster tiles show the Monster in a frame with the name of the Monster printed on it.
- Neighboring: A tile that is neighboring is in one of the eight possible positions around the other tile, orthogonally or diagonally.
- Prestige: The highest form of income in the game. Shown on tiles in green with trees and statues.
- Rainbow: Rainbows are wild tiles that match any color.
- Rainbow Vendor tiles: Tiles with a Rainbow icon on the back. These are only sold by the Rainbow Vendor.
- Raw Magic: Produced by tiles with glowing crystal towers and trees, colored purple. It must be transformed into either Money, Influence, or Prestige each round.
- Raw Magic Transformation: The process of changing Raw Magic into either Money, Influence, or Prestige.
- Round: One round of the game covers six phases: Prepare, Build, Score, Award Influence Rewards & Buy Tiles, Collect Prestige, and Cleanup. Each game has five rounds.
- Score: The individual quantities of Money, Influence, Raw Magic, or Prestige attained by a player.
- Shield: Shows that the tile has a Goal on it.
- Shuffle: Randomize a set of tiles or cards.
- Spell: An ability bestowed by a tile. Presented on a scroll image on the tile.
- Stack: A set of tiles kept face-up.
- Tier: Levels of power across Monsters are broken into two tiers.
- Token: Used for tallying Prestige attained during each round of the game.
- Vendor: Sells a stack of tiles all of the same type and range of values.
- Year: One round of the game.
Game Credits
Design: Scott Caputo
Additional development: Tim Eisner, Ben Eisner, Doug Butler
Illustration: Damien Mammoliti
Box illustration: David Kegg
Additional illustration: David Kegg, Mr Cuddington, Justin Chan
Graphic design & layout: Kate Finch, Joel Finch
Rulebook: Kate Finch, Joel Finch, William Sobel
Druid City Games Director: James Hudson
Staff writer: Derek Funkhouser
Thanks: The game designer would like to thank the following people for their help in playtesting this game: his wonderful wife, Melissa Caputo; his parents, Stephen and Sharon Caputo; as well as Dedan Anderson, Nick Brown, Jennifer Bautista, Jon Leupp, Babak Namaziyan, Sam Holzman, Stephen Edwards, Michael Shorrock, Ben Zoltewicz, Colin Ferris, Shara Miller, John Thompson, Robert Weaver, Seokjune Hong, Luke Laurie, Candy Weber, Teale Fristoe, Andrew McLennan, Linda McLennan, Kevin Russ, Jay Vowles, and folks at Prototype Night in San Jose.
With thanks from James: Oscar Valera, Axel Wittenstein.
Introduction & Components
A game by Scott Caputo
1-6 players | Ages 14+ | 45-60 minutes
Introduction
Every year, Sorcerer City is built and rebuilt in magical new ways, with city blocks moving and rotating in crazy directions.
You and your fellow players are rival wizard architects in charge of building the same district over five years, expanding and rebuilding to gain the most Money, Influence, Raw Magic, and Prestige. Unfortunately, Sorcerer City has a bit of a monster problem, so you must work hard to mitigate the effects of marauding creatures that attack your district.
Architects compete against each other for the title of Head Wizard.
Goal of the Game
To be crowned Head Wizard you must possess the most Prestige after five rounds, each round being one year passing in Sorcerer City.
Game Components
- 6 sets of 12 Starting tiles
- 115 Market tiles across 4 Vendor tiers
- 102 Monster tiles (60 Tier 1 tiles, 42 Tier 2 tiles)
- 12 Rainbow Vendor tiles
- 12 Artifact tiles
- 1 Influence Rewards board
- 15 Influence Reward cards
- 80 Prestige tokens
- 14 Monster Randomizer cards
- 5 sets of 3 Mystery Player cards
- 24 “+30” Annual Progress tokens
- 24 Annual Progress markers
- 1 Market board
- 6 sets of 3 Magic Transformation cards
- 6 Annual Progress tracks
- 1 Sand timer
Identifying and Sorting Tiles
Tile Backs
All tiles have an identifying code on the back, and each type of tile has a unique icon on the back in the lower left corner.
The code is unique to that particular tile type, and the number after the dot tells you how many copies of that tile are in the game.
- Starting tiles: Starting tiles are a special set of twelve that all share the same symbol on the tile back. Each symbol is used to mark one complete set of Starting tiles. No symbol is better than any other since each set of Starting tiles is the same.
- Market tiles: Market tiles are marked with a Money bag icon, and separated into four Vendor tiers by the number on the bag.
- Monster tiles: Monster tiles have one or two swords to show their tier.
- Rainbow tiles: Rainbow tiles have a rainbow icon. Note: not all tiles with a multi-colored front are Rainbow tiles.
- Artifact tiles: Artifact tiles have a wooden chest icon.
Tile Faces
Different types of tiles have different features on their faces (the front side of the tile):
- Market tiles always have a gold Money bag in the top right corner that shows the price to purchase that tile at the Market.
- Some Market tiles have Goals which are shown on a colored shield.
- Some Market tiles contain Spells which are depicted with a scroll and an icon to tell you when the spell activates.
- Other Market tiles may contain a Goal and a Spell, while yet others may contain neither of these things.
- Monster tiles always contain a Monster illustration. See page 15 for more information about Monsters.
- Rainbow tiles always show a multi-colored swirl over the entire tile background. Some Rainbow tiles are also available in the Market, and these can include Spells or Goals. See page 15 for more information about Rainbow tiles.
Setup
Game Setup
- Give each player a set of twelve Starting tiles (A), a set of Raw Magic Transformation cards (B), an Annual Progress track (C), and four Annual Progress markers to place one per row on the Annual Progress track at the 0 position (D).
- To set up the Market, place the Market board in the center of the table (E). Take each set of Vendor tiles and shuffle them independently to form four Vendor decks. There are five Vendors on the Market board. Reveal three tiles at the bottom of the first, second, third and fourth Vendors (F). Place each Vendor deck face-down above the Market board (G). Place the stack of twelve Rainbow tiles costing 7 Money at the bottom edge of the fifth Vendor (H).
- Place the Influence Rewards board (I) near the center of the table. Take the Year 5 Influence Reward card from the deck of Influence rewards and place it below the Year 5 position (J). Shuffle the Influence Reward cards and reveal cards one at a time to fill the positions on the Influence Rewards board labeled Year 1 through Year 4 (K). Note that some Influence Rewards cannot be used in the 1st Year of the game: if one of these cards is revealed for Year 1, return it to the bottom of the deck and reveal another in its place. Return the unused Influence Rewards cards back to the game box.
- For a 2-player game only, randomly select one Mystery Player card from each Year, being sure to keep the cards face down. Place these five cards at the bottom edge of the five Influence Reward cards.
- To set up the Monsters (L):
- Shuffle the Tier 1 Monster Randomizer cards and reveal one to use as the Monster at the conclusion of Year 1. Place the stack of Monster tiles that match the revealed Monster next to the Year 1 position of the Influence Reward board. The Monster Randomizer card contains a summary of that Monster’s ability so place the card at the side of the playing area for reference during the game.
- Reveal a second Tier 1 Randomizer card to use as the Monster at the conclusion of Year 2. Place the stack of Monster tiles that match the revealed Monster next to the Year 2 position of the Influence Reward board. Place the card at the side of the playing area for reference during the game. Put the remaining Tier 1 Monster cards and tiles back in the box.
- Shuffle the Tier 2 Monster Randomizer cards and reveal one to be the Monster at the conclusion of Year 3. Place the stack of Monster tiles that match the revealed Monster next to the Year 3 position of the Influence Reward board. Place the card at the side of the playing area for reference during the game.
- Reveal a second Tier 2 Monster Randomizer card to be the Monster at the conclusion of Year 4. Place the stack of Monster tiles that match the revealed Monster next to the Year 4 position of the Influence Reward board. Place the card at the side of the playing area for reference during the game, and put the remaining Tier 2 Monster cards and tiles back in the box.
Notes on Monsters: If playing with 3 or fewer players, you may choose the same Tier 1 Monster for both Year 1 and 2, and/or the same Tier 2 Monster for both Year 3 and 4. Don’t choose both the Skeleton and the Lich for the Tier 1 Monsters when playing with 5 or 6 players.
- Place Prestige tokens conveniently within reach of all players (M).
- Each player shuffles their starting City deck tiles and keeps that deck face down. Each player should make sure they have enough room in front of them to build their district, and store their Annual Progress markers, Raw Magic Transformation cards, and Annual Progress track off to one side.
- Give the timer (N) to the player who most recently saw a fantasy movie or TV show to indicate they are the current starting player.
After a Few Games: Artifact Tiles
Once you are comfortable playing Sorcerer City, consider playing with Artifacts. During Game Setup, randomly deal each player two Artifact tiles. Each player chooses one Artifact tile to keep and one Artifact tile to return to the box. All unused Artifact tiles are also returned to the box. Each player shuffles their chosen Artifact tile into their Starting tiles so they start with thirteen tiles. Details about the Artifacts can be found on page 21. Artifact tiles show the unique ability that Artifact bestows when played.
How to Play: Round Structure
Round Overview
Each round follows the same mandatory phases:
- Prepare phase : Each player shuffles their tiles and places them face down as their new City deck for the next round.
- Build phase : The player who has the timer starts it and everyone simultaneously builds their district. Monsters marked with the Build phase icon (hammer) activate immediately when they are built. You must resolve them before building another tile. Once built in your district, all non-Monster tiles (including Artifacts) marked with the Build phase icon may be used at any point until the timer runs out. Once the timer runs out, all players must stop building. Any tiles not placed in their districts do not count toward scoring.
- Score phase : Monsters marked with the Score phase icon (color swirl) activate now. They may be used in any order you choose. Each player scores their own district on their Annual Progress track. Spells marked with the Score phase icon activate now. They may be used in any order you choose. Raw Magic points are transformed into another form.
- Influence & Buy phase : Step 10 contains 3 substeps that are completed by a single player before passing to the next player. The player who has the greatest Influence begins the phase, and when they complete all 3 substeps, it passes to the next player in order of descending Influence.
- Influence Rewards are awarded to the players with the most Influence. Rewards marked with the Reward phase icon (wax seal) activate now.
- Players may buy up to two new tiles from the Market (see page 10).
- Rewards and Spells marked with the Buy phase icon (coin) activate now. They may be used in any order you choose.
- Prestige phase: All players determine the quantity of Prestige they have and take Prestige tokens equal to that amount.
- Cleanup phase: Shuffle the Monster deck for the next round face-down and give one to each player. Each player dismantles their district and returns all their tiles to form their City deck for the next round. All Annual Progress tracks are reset to zero. Pass the timer to the next player on the left ready for the next round.
Round Overview (Quick Reference)
Each round follows the same mandatory steps:
Prepare
- Shuffle tiles; place them face down ready for the round.
Build
- Start the timer; everyone builds simultaneously.
- Monsters marked with the Build phase icon activate immediately when they are built.
- Market tiles and Artifacts marked with the Build phase icon may be used at any point until the timer runs out.
- Once the timer runs out, all players must stop building.
Score
- Monsters marked with the Score phase icon activate now.
- Score districts individually on Annual Progress tracks.
- Spells marked with the Score phase icon activate now.
- Raw Magic points are transformed into another form.
Award Influence Rewards & Buy Tiles
- Step 10 contains 3 substeps that are completed together, one player at a time beginning with the player with the greatest Influence and then going in descending order for each other player.
- Influence Rewards are awarded to the players with the most Influence. Rewards marked with the Reward phase icon () activate now.
- Players may buy new tiles.
- Rewards and Spells marked with the Buy phase icon () activate now. They may be used in any order you choose.
- Influence Rewards are awarded to the players with the most Influence. Rewards marked with the Reward phase icon (
Collect Prestige
- Determine Prestige quantities; take Prestige tokens equal to that amount.
Cleanup
- Shuffle the Monsters for the next round; give one to each player.
- Dismantle districts. Reset all Annual Progress tracks to zero.
- Pass the timer to the next player on the left.
Round Phases in Detail
1. Prepare Phase
Each player shuffles their tiles and places them face down as their new City deck for the next round.
Some players may have abilities that allow them to place tiles during this phase.
2. Build Phase
Place Tiles to Complete Goals
Each round, players are trying to build their district in order to satisfy as many Goals as possible to score Money, Influence, Raw Magic, and Prestige. Players’ districts are not connected to each other.
Each player reveals one tile at a time from their personal City deck. They can place the first tile as they wish to start their district, and all tiles after that must be placed adjacent (with one or more sides touching) to a tile already placed. Once a tile is placed, it cannot be moved or rotated. Also, players may stop building their district at any time, so they are not forced to keep drawing tiles if they don’t want to keep going. Note that once a tile is revealed, it must be placed in your district.
Goals are represented by a shield, and each Goal contains two parts: the resource produced (Money, Influence, Raw Magic, or Prestige) and the structure needed to complete the Goal.
Adjacent Tiles and Neighboring Tiles
- If a tile is adjacent to another tile, it is immediately above, below, or to the left or right of the other tile. It is not diagonal to the other tile.
- If a tile neighbors another tile, it is in one of the eight possible positions around the other tile.
Goal Types
Group Goal
To complete this Goal, you must create a group of 3 or more connected tiles of the marked color. This group of connected tiles can be any shape, not just the L-shape shown on the Goal. To work out the score, simply count the number of tiles in the group. Note: just having a group of connected tiles of the same color does not score any points unless it includes a tile with a Group Goal shield of that color.
Line Goal
To complete this Goal, you must create a horizontal or vertical line of three or more connected tiles of the marked color regardless of the angle of the line. To work out the score, simply count the number of tiles in the line.
If a Line Goal is in both a horizontal and vertical line, it still only scores once, but the player may choose which line to score.
Simply having a line of connected tiles of the same color does not score any points unless it includes a tile with a Line Goal shield of that color.
Shield Goal
To complete this Goal, the tile with this Goal must have at least two neighboring tiles with a shield of any type or color on them.
To work out the score, simply count 1 for each shield on the center tile and add 1 for every shield on a neighboring tile. If a tile has two Goals of this type on it, score each Goal separately.
District Disconnection
Watch out for disconnection. Some effects can remove or destroy tiles, which could lead to your district becoming disconnected. When placing tiles, it’s possible for you to replace these spaces and reconnect your district.
Abilities: Monsters, Spells and Artifacts
Some Monsters, Spells and Artifacts have extra abilities. Each is marked with an icon showing the point during each round it takes effect: Prepare, Build, Score, Influence Rewards, or Buy.
If a tile is not built in your district, its ability does not activate unless it activates during the Prepare phase.
Refer to the Monster Randomizer Card for details on the various Monsters during play. See “Monsters in Detail” on page 15 for complete information.
3. Score Phase
Scoring Your District
Each player scores their district on the annual Progress track to see how much Money, Influence, Raw Magic and Prestige they produced. Use the markers on your Annual Progress tracker to keep track of how much Raw Magic, Money, Influence, and Prestige you have earned this Year.
- Flip the matching Annual Progress token to the “+30” side if you exceed 30 points on a track.
- During the scoring phase, players may not score higher than 60 in any Annual Progress category. Any excess points are lost.
- Annual Progress scores are public information so everyone can figure out if they have a chance to have the most Influence that round.
- In a 2-player game, each player must also consider how much Influence the Mystery Player might have, which is represented by the Mystery Player card for that Year. The three possible Influence values are shown on the front of the card.
Raw Magic Transformation
After scoring, each player has Raw Magic recorded on their Annual Progress track. Each player transforms all of their Raw Magic into one resource of another type: Money (yellow), Influence (red) or Prestige (green).
To do this, each player looks at the other players’ Annual Progress track, and then secretly chooses the Raw Magic Transformation card matching the resource they want to convert their own Raw Magic into.
All players reveal their Raw Magic Transformation cards simultaneously and adjust their Annual Progress tracks accordingly.
Example: if you have 5 Raw Magic and 5 Money and decide to transform Raw Magic into Money, you would then have zero Raw Magic and 10 Money.
4. Influence & Buy Phase
Awarding Influence Rewards
- 1st Place: The player with the highest Influence (red) wins both the Prestige and Influence Reward shown on the Influence Reward board for the current Year.
- 2nd Place: The player with the next highest Influence chooses to take the Prestige OR the Reward shown on the Influence Reward board for the current Year. If there is a tie for 2nd Place, no 3rd place is awarded.
- 3rd Place:
- If there are 3 or fewer players then the player with the next highest Influence points may choose to take 5 Money or an extra buy. See “The Mystery Player” below for more information on how this affects 2-player games.
- If there are 4 or more players then the player with the next highest Influence points gains the effect that the 2nd place player did NOT choose unless there was a tie for 2nd place.
- 4th – 6th Place: All remaining players may choose to take either 5 Money or an extra buy.
If there is a tie for any place, all tied players receive the effects listed for that place.
| Place | 2 players (Mystery Player as 3rd player) | 3 players | 4-6 players |
|---|---|---|---|
| 1st place | Influence Reward + Prestige for that Year | ||
| 2nd place | Choice of Influence Reward OR Prestige for that Year | ||
| 3rd place | 5 Money OR +1 Buy | Whatever was not chosen by the 2nd place winner | |
| 4th – 6th place | N/A | 5 Money OR +1 Buy | |
The Mystery Player
In a 2-player game, there is still a 1st and 2nd place, but the Mystery Player’s card is revealed which represents the Mystery Player’s Influence. The Mystery Player could end up winning 1st or 2nd place. However, the Mystery Player performs no other tasks besides vying for the most Influence. For 3rd place in a 2-player game, you may choose to either take 5 Money OR an extra buy (i.e. buy up to three tiles).
As Influence Rewards are awarded, each player adjusts their Prestige Annual Progress track to record Prestige earned from an Influence win (if any) and their Reward (if any). As with all Annual Progress tracks, a player may not earn more than 60 Prestige in a round.
Buying Tiles
Going in order from most Influence to least, each player may spend their Money to buy tiles from the Market. All players may buy up to two tiles, and some spells and Influence Rewards give the ability to purchase additional tiles also.
- If a player scores more than 20 Money in a round, they are also awarded an additional buy at the Market.
- In case of ties, the player closest to the timer, going clockwise, buys first. Once a tile is purchased by a player, it is added to that player’s deck.
- As each tile is bought, a new tile is revealed immediately from that Vendor’s deck.
- Additionally, some Spells marked with the Money icon activate during this phase, such as “Gain a tile costing up to 6 for free”.
- Once per round, a player may pay 1 Money to discard a tile to the bottom of that Vendor’s deck and reveal the next tile from that same deck.
- Once bought, all tiles are discarded to be shuffled into the player’s deck during the Prepare phase.
5. Prestige Phase
After all players have bought their tiles, all players collect Prestige tokens equal to the Prestige score on their Annual Progress track.
The player who scored the least Prestige on their Annual Progress track that round receives a Market tile for free:
- Year 1: from the top of the Vendor 1 deck.
- Year 2: from the top of the Vendor 2 deck.
- Year 3: from the top of the Vendor 3 deck.
- Year 4: from the top of the Vendor 4 deck.
- Year 5: no tile is given away since there will be no more building.
If multiple players tie for the fewest points earned that round, each of those players receives a tile for free. If a player is supposed to receive a tile for free from a given Vendor, but no more tiles are available from that Vendor, then no tile is given out for free.
6. Cleanup Phase
Discarded Tiles
Return all discarded tiles to players’ decks.
Monsters
Monsters are selected before the game begins and are added to the game at the end of Years 1, 2, 3, and 4.
Shuffle the stack of Monsters to be dealt and turn the stack face down. Deal a Monster from the stack to each player, with the following exceptions:
- If the Monster is the Skeleton, deal two Skeletons to each player.
- If the Monster is a Lich, also make the stack of Skeletons ready for use. Put the stack of Skeletons face down in the middle of the table within easy reach of all players.
End of the Game & Year 5
Variations for Round 5
The rules for the 5th round vary slightly:
- There is no Influence Reward. Only the player(s) with the most Influence wins the Prestige.
- There is no 2nd or 3rd place.
- Players do not buy any more Market or Rainbow tiles.
- Players do not acquire a new Monster.
- There is no additional end game scoring beyond what players normally receive in a given round.
Determining the Winner
At the end of the Year 5, count up all Prestige earned during the game to determine the winner! In the event of a tie on Prestige, the player with the most Money is the winner.
Monsters in Detail
While Monsters have negative effects on your districts, you still get to count any colored districts that are part of their tile.
All Monsters have an icon that show you when their ability activates.
Four different Monsters are selected at the start of the game. Tier 1 Monsters are added to the game at the end of Years 1 and 2. Tier 2 Monsters are added to the game at the end of Years 3 and 4.
Monsters and District Disconnection
Watch out for disconnection. Some Monsters may remove or destroy tiles, which could lead to your district becoming disconnected. Keep in mind that all Goals only count tiles that are connected. When placing tiles, it’s possible for you to replace these spaces and reconnect your district.
Some Monsters force you to remove or discard tiles from your district, and then place them at the bottom of your draw deck. With quick play, you may get a second chance to place removed tiles back in your district.
Level 1 Monsters
Dragon Building phase
As soon as the Dragon tile is placed in the district, it permanently destroys one city tile adjacent to it. Once the Dragon has destroyed the tile, your district may be disconnected. The Dragon can be used to kill other Monsters.
Dark Mage Scoring phase
When scoring your district, all Goals neighboring the Dark Mage are treated as if no longer present. They cannot be scored and they also no longer contribute to any neighboring Goals.
Gelatinous Cube Building phase
When you draw a Gelatinous Cube tile, remove one tile with a shield on it (if possible) from your district and put it on the bottom of your City deck. Then place the Gelatinous Cube in your district. Once the Gelatinous Cube has removed the tile, your district may be disconnected.
Golem Building phase
When you draw a Golem tile immediately determine the longest open straight line of the same color in your district and put the Golem at the end of that line. If you have several open lines, you may choose where to place the Golem. If you have no open lines, place the Golem anywhere in your district.
Kraken Building phase
As soon as you draw a Kraken tile, remove three tiles from your district and place them at the bottom of your City deck. Then place the Kraken in your district. If your district has three tiles or fewer, then the entire district is put on the bottom of the City deck. Once the Kraken has removed these tiles, your district may be disconnected.
Lich Building phase
When you draw a Lich tile, place it in your district, and then draw one Skeleton tile from the middle of the table and immediately add it to your district. This Skeleton tile will stay in your deck for the rest of the game. In this way, the Lich will progressively add more Skeletons to your deck over the course of the game.
Skeleton Building phase
You must place the Skeleton so that the jagged black sides are not connected to any other tile. You may not place any tile adjacent to one of the jagged black sides of the Skeleton. If you notice later that you have mistakenly placed a tile next to a jagged black edge, discard the wrongly-placed tile.
Level 2 Monsters
Chimera Scoring phase
Before scoring your district, the Chimera destroys one city tile containing a Goal that is in the same row or column. Once the Chimera has destroyed the tile, your district may be disconnected. If there are multiple such tiles, choose which is destroyed. If there are no such tiles, no tile is destroyed.
Demon Building phase
When you draw a Demon tile, discard two tiles from your district with red on them, including Rainbow tiles. Then place the Demon tile in your district. Once the Demon has discarded these tiles, your district may be disconnected. If there are no such tiles, then play the Demon normally. If there is only one red tile, then just discard that tile. You may discard Monster tiles with red on them.
Genie Scoring phase
Before scoring your district, you must place all visible Monster tiles in your district (including the Genie) on top of other non-Monster tiles in your district. If a monster tile is uncovered by the Genie’s action, move that monster also. Skeleton tiles may be placed without restriction on top of other non-Monster tiles.
Giant Building phase
As soon as you draw a Giant tile, you must place the Giant on top of a bought tile (one with a cost value on it) of your choice. If there is no such tile, then play the giant tile normally.
Goblin Building phase
As soon as you draw a Goblin tile, you must discard two tiles from your district with yellow on them of your choice. Then place the Goblin tile in your district. Once the Goblin has discarded these tiles, your district may be disconnected. If there are no such tiles, play the Goblin normally. If there is only one yellow tile, then discard only that tile. You may discard Monster tiles with yellow on them.
Invisible Stalker Building phase
When you draw an Invisible Stalker tile, place it in your district, and then place the next two tiles FACE DOWN without looking at their fronts. Before scoring your district, turn over the face down tiles. You may orient the flipped tiles any way you wish. If a face down tile is a Monster, resolve its effect immediately.
Pixie Building phase
As soon as you draw a Pixie tile, place the Pixie on top of a Goal tile of your choice. If there is no such tile, then place the Pixie tile anywhere you wish.
Spells, Influence Rewards & Artifacts Reference
Influence Rewards in Detail
Influence Rewards are chosen randomly at the start of the game. Some Rewards cannot be used in the first round of the game. These are noted at the bottom of the card itself. If one of these is drawn in Year 1, simply discard and replace it with the next card. Rewards not selected for the game are returned to the box and are referred to as “Unused Rewards”.
- Kill 2 Monsters in your district: Only visible Monsters in your district can be killed. Killed Monsters are removed from the game. If this Reward is drawn for the Year 1 Reward, discard it and draw a different Reward. Do not use for Year 1.
- Choose 2 tiles from the Market: each of which would normally cost you no more than 7, and add them to your district deck for free. Any discounts still apply, such as “All tiles cost 2 less”.
- Gain 1 tile of any cost from the Market for free.
- +1 Buy. Tiles cost you 2 less: For all buys you have this round, you may buy tiles at 2 less than the normal price. This discount happens first before any other discounts. The minimum cost of any tile is 1. Additionally, you may buy 1 more tile than normal.
- Buy tiles at half price rounded up: For all buys you have this round, you may buy tiles at half price rounded up. This discount happens first before any other discounts. If a player receives this Reward twice, all tiles would be quarter price rounded up. The minimum cost of any tile is 1.
- Gain a Rainbow tile from the Rainbow Vendor: Rainbow-patterned tiles from the other Market vendors do not qualify.
- Discard up to 4 tiles from Market: While buying tiles from the Market, you may discard up to 4 tiles from the Market for free. These tiles can be from the same or different vendor, and you may discard before or after buying a tile.
- Give a Monster from your district to any other player: Only visible Monsters in your district can be given away. If this Reward is drawn for the Year 1 Reward, discard it and draw a different Reward. Do not use for Year 1.
- Score 5 Prestige per Monster in your district (not in your City deck): If this Reward is drawn for the Year 1 Reward, discard it and draw a different Reward. Do not use for Year 1.
- Gain 2 tiles from any single Vendor: including the Rainbow Vendor. In turn order, each other player gains 1 tile from the same Vendor. Fill the vacant spaces in the Market as soon as they are created.
- Each other player must destroy a non-Monster tile in their deck of tiles: Destroyed tiles are removed from the game. Do not use for Solo Mode.
- Choose 1 tile from the Market to give to any other player: Gain Prestige or Money equal to the cost of that tile.
- Select 2 tiles from your deck and place on the table before the next round begins: If you play any Monster tiles in this way, ignore the effects of those Monsters.
- You may kill 1 Monster in any other player’s city to gain either 10 Prestige or 10 Money: If this Reward is drawn for the Year 1 Reward, discard it and draw a different Reward. Do not use for Year 1 or Solo Mode.
- No Influence Reward for Year 5: This card is always used for Year 5 – there is no Influence Reward awarded at the conclusion of the final round.
Spells in Detail
As soon as you place a Spell tile in your district you may use it. However, only Spells with the hammer-shaped Build phase icon may be used during the Building phase. Any Spells still in your City deck once the timer runs out cannot be used this round. Each Spell may only be used once per round. However, if you have multiple Spells of the same type, you receive the benefit multiple times.
Purple: Raw Magic
- Move a Monster: Once per round, you may move a Monster tile to a new location in your district. You may disconnect your district when you use this Spell. You may move a Monster off a tile.
- Gain 3 Money when you buy purple: Every time you buy a tile with any purple on it (including a Rainbow tile), gain 3 Money on your Annual Progress tracker.
- Move a purple tile: Once per round, you may move a tile with purple on it to a new location in your district. You may disconnect your district when you use this Spell. You may not move a purple tile that is covered by a Monster.
- Kill a Monster: Once per round, you may kill a visible Monster in your district. Killed Monsters are removed from the game. You may disconnect your district when you use this Spell.
- Spend 3 Magic to gain 3 Money, 3 Influence, 3 Prestige: Before your Magic is transformed this round, you may transform 3 Magic into 3 Money, 3 Influence, and 3 Prestige. Then transform your remaining Magic as normal.
- Spend 5 Magic to gain 5 Money, 5 Influence, 5 Prestige: Before your Magic is transformed this round, you may transform 5 Magic into 5 Money, 5 Influence, and 5 Prestige. Then transform your remaining Magic as normal.
Green: Prestige
- Move a green tile: Once per round, you may move a tile with green on it to a new location in your district. You may disconnect your district when you use this Spell. You may not move a green tile that is covered by a Monster.
- Move a Goal tile: Once per round, you may move a tile with Goal on it to a new location in your district. You may disconnect your district when you use this Spell. You may not move a Goal tile that is covered by a Monster.
- For every 2 Goals gain 1 Prestige: Gain 1 Prestige per two Goals anywhere in your district. This Prestige is in addition to any Prestige scored from the Shield Goal on this tile.
Yellow: Money
- Move a yellow tile: Once per round, you may move a tile with yellow on it to a new location in your district. You may disconnect your district when you use this Spell. You may not move a yellow tile that is covered by a Monster.
- Gain a tile costing up to 6 for free: Gain a free tile costing up to 6. This triggers before you buy tiles. You are not allowed to use any discounts such as “All tiles 2 cheaper” when using this Spell.
- Discard 2 Market tiles for free: While you are buying, you may discard 2 Market tiles for free. Discarded tiles go on the bottom of each Vendor’s stack. The 2 tiles you discard can be from the same Vendor or different Vendors. You may choose to discard in between buys: you could use one free discard, buy a first tile, and then discard again.
- All tiles 2 cheaper, +1 Buy: For all of your buys, the cost is 2 cheaper. The minimum cost of any tile is 1. An extra buy means you can buy up to 3 tiles on your turn.
- For every 3 Money gain 1 Prestige: Before your Magic is transformed this round, gain 1 Prestige for every 3 Money you have. You still keep all of your money.
- Gain a tile costing up to 10 for free: Gain a tile costing up to 10 for free. This triggers before you buy tiles. You are not allowed to use any discounts (for example, “All Tiles 2 Cheaper”) when using this Spell.
Red: Influence
- Move a red tile: Once per round, you may move a tile with red on it to a new location in your district. You may disconnect your district when you use this Spell. You may not move a red tile that is covered by a Monster.
- Choose any Reward when you gain a reward: When you gain an Influence Reward, you may choose any of the 4 Rewards including Rewards from previous or later Years.
- Gain Influence Reward: Gain the Influence Reward for the current round even if you would not normally earn it from being in 1st, 2nd, or 3rd place. You only gain the Reward, not the points. If you gained the Influence Reward by being in 1st, 2nd, or 3rd place, you may gain the Reward again!
- For every 3 Influence gain 1 Prestige: Before your Magic is transformed this round, gain 1 Prestige for every 3 Influence you have. You still keep all of your Influence.
- Gain an unused Reward: Take the stack of unused Rewards (those not used during game setup) and choose one Reward to activate. This Reward activates before you buy tiles. You may choose to use it either before or after you receive any other Reward(s) this round. Once a Reward is used in this way, it is discarded and may not be used again this game. If multiple players have this tile in their city, then the stack of unused Rewards is passed between players as each player takes their turn. This tile is not recommended for new players.
Wild/Rainbow
A Rainbow tile counts for every color and all colors, so it can be used to complete multiple Goals at the same time.
- Rainbow Vendor tile (cost 7): The entry level Rainbow tiles are only available from the Rainbow Vendor.
- Gain a Rainbow tile costing up to 7 for free: This activates before you buy tiles.
- Move any Rainbow tile: Once per round, you may move any Rainbow tile (including this one) and place it on top of any tile in your district including on top of a Monster. You may disconnect your district when you use this Spell. You may not move the Rainbow tile if it is covered by a Monster.
- Wild Group Goal: A Group Goal of all four types at the same time. It’s possible to score any one of the four colors with this Goal but you may only use it to score for a single color each round.
Artifacts in Detail
When added to the game, Artifacts give each player a unique bonus ability.
Some Artifacts act as a partial rainbow or wild tile, matching to two specific colors rather than all colors. This is shown with a swirl pattern in the colors it matches against.
- The Magic Boots Artifact: is both red and green on all sides. After you build this tile, you may move a tile with red or green on it to a new location in your district. Once you have used this ability, your district may be disconnected.
- The Armor Artifact tile: is both red and purple on all sides. It also contains a red Shield Goal.
- The Helmet Artifact: is both yellow and purple on all sides. It also contains a yellow Line Goal.
- The Amulet Artifact: is both green and purple on all sides. It also contains a green Line Goal.
- The Cloak Artifact: contains a purple Shield Goal.
- The Staff Artifact: when choosing your Raw Magic Transformation cards, you may choose two cards instead of one. The number of cards you select is public knowledge. If you have an odd number of Raw Magic points, select one card to receive the leftover point.
- The Wand Artifact: gives a discount at the Market: all tiles cost 1 less Money to buy. You also receive an extra buy at the Market.
- The Gem Artifact: gain a tile costing up to 5 for free. This activates before you buy tiles. You may not use any discounts (for example, “All tiles 2 cheaper”) when using this Spell.
- The Gauntlet Artifact: packs a mighty punch: after you build this tile, you may kill a Monster adjacent to this tile. That Monster is permanently removed from the game, and placed back in the box.
- The Golden Ring Artifact: is both red and yellow on all sides. When you receive an Influence Reward, you may choose any of the four Rewards including Rewards from previous or future Years.
- The Chalice Artifact: contains a green Group Goal.
- The Crown Artifact: makes all tiles with green on them cost 3 less Money to buy.
Solo Mode
All of the other wizards are away on travels when suddenly a huge army of Monsters threatens to overrun Sorcerer City. Can you keep the Monsters at bay long enough until the other wizards return?
Setup
Follow the normal setup rules for 2 players with the following exceptions:
- Only one player (you) needs four Annual Progress markers, a set of twelve starting City deck tiles, a set of three Raw Magic Transformation cards, and one Annual Progress track.
- Randomly pick two Mystery Player cards from each Year, being sure to keep the cards face down. Put these ten cards below the five Influence Reward cards.
- Remove the following Influence Rewards as they don’t make sense for a single player:
- All players must destroy a non-Monster tile.
- Kill a Monster in another player’s district.
Goal
The solo game can end in two ways:
- If every Market tile (all thirteen tiles: every tile in the four Vendors and the Rainbow tiles) are covered by Monsters, then you lose immediately.
- Or, if you have no valid place to place a Monster in the Market, you also lose immediately.
If you make it to the end of Year 5, you are ranked based on your final Prestige total:
- 0-50 points: Junior Wizard
- 51-100 points: Veteran Wizard
- 101-150 points: Head Wizard
- 151+ points: Legendary Wizard
Solo Mode Game Play
Follow the normal game play rules with the following exceptions:
- When determining if you have the most Influence each round, reveal both Mystery Player cards for that round and compare your Influence total to both of those Influence amounts. It’s possible for you to be in 1st, 2nd, or 3rd place in Influence.
- At the end of each buying round, distribute the remaining five Monsters for that round using the following method:
- Reveal each Monster and place the Monster on top of a tile in the Market that matches at least one color on the Monster tile. For example, a Monster with red/purple on it could be placed on top of a red tile, a purple tile, a red and purple tile, or a rainbow tile.
- Only one Monster may be placed on top of each Market tile. (It is suggested that Monsters are placed on top of Market tiles in an overlapping fashion so that part of the tile below it can still be seen.)
- If there is no valid place in the Market to place the Monster, then you lose immediately. If the Monster covers the last tile in the Market, then you lose immediately.
- If you buy a Market tile with a placed Monster on it, gain the tile and the Monster, and include both in your deck.
- If you discard a Market tile with a Monster placed on it, the tile is discarded to the bottom of its Vendor deck, and the Monster is destroyed (removed from the game entirely). Remember you can pay 1 Money to discard a Market tile once per round in the buying part of play.
Influence Reward Modifications
The effect of certain Influence Rewards are modified in a solo game:
- Give one Market tile to another player: Choose one Market tile to discard and gain Prestige or Money on your Annual Progress tracker equal to the marked costs on the tile/s. Any Monsters on those tiles are also discarded.
- Give away a Monster: Just discard a Monster from your district.
Expert Variant
If you have played the game many times and are familiar with all of the Monsters, try this challenging variant:
- Take half the Skeletons and set them aside. Add the other half into Tier 1 Monster pile and shuffle well.
- Shuffle all Tier II Monsters together well.
- Draw six Tier I Monsters for Year 1 and six for Year 2. Whenever you draw a Skeleton, take a second Skeleton from the group set aside and place the pair together in the Market.
- Draw six Tier II Monsters for Year 3 and six for Year 4.
One of the six Monsters each round will go directly into your district, while you will need to place the other five Monsters in the Market per the normal rules.
Good luck!
Glossary & Credits
Glossary
- Ability: Certain Market or Artifact tiles with Spells, and Influence Rewards give players an ability to perform a particular action.
- Adjacent: Immediately above, below, or to the left or right of a tile. Not diagonal.
- Annual Progress: The measurement of how well you did during each round of the game which is a Year in the life of Sorcerer City.
- Artifact: A set of optional tiles that give each player a unique ability.
- District: The region of Sorcerer City built by each player.
- Collect: Take Prestige tokens equal to the quantity of Prestige gained during a round and marked on your Annual Progress track.
- Deck: A set of tiles that is randomized and kept face-down, revealed one at a time.
- Destroy: Remove a non-Monster tile permanently for the rest of the game and return to the box.
- Discard: Discarded tiles are not destroyed; they return to your deck during Cleanup and are shuffled in in preparation for the next round.
- Gain: To receive Money, Influence, Raw Magic, or Prestige during a round. Also refers to tiles received for free through a Spell or Influence Reward.
- Goal: Goals are shown on tiles by a large Shield with a symbol on it. Goals may be Line, Group, or Shield.
- Influence: Produced by tiles with stone towers and blocks, colored red.
- Influence Reward: Awarded to the player with the greatest amount of Influence at the conclusion of each round.
- Kill: Remove a Monster permanently for the rest of the game and return to the box.
- Market: A collection of Vendors, each selling a stack of city tiles of a particular value.
- Money: Produced by tiles with Market stall tents, colored yellow.
- Monster: A tile with a negative effect. That effect takes place either when the tile is played, or at the end of the round as shown on each Monster tile. Monster tiles show the Monster in a frame with the name of the Monster printed on it.
- Neighboring: A tile that is neighboring is in one of the eight possible positions around the other tile, orthogonally or diagonally.
- Prestige: The highest form of income in the game. Shown on tiles in green with trees and statues.
- Rainbow: Rainbows are wild tiles that match any color.
- Rainbow Vendor tiles: Tiles with a Rainbow icon on the back. These are only sold by the Rainbow Vendor.
- Raw Magic: Produced by tiles with glowing crystal towers and trees, colored purple. It must be transformed into either Money, Influence, or Prestige each round.
- Raw Magic Transformation: The process of changing Raw Magic into either Money, Influence, or Prestige.
- Round: One round of the game covers six phases: Prepare, Build, Score, Award Influence Rewards & Buy Tiles, Collect Prestige, and Cleanup. Each game has five rounds.
- Score: The individual quantities of Money, Influence, Raw Magic, or Prestige attained by a player.
- Shield: Shows that the tile has a Goal on it.
- Shuffle: Randomize a set of tiles or cards.
- Spell: An ability bestowed by a tile. Presented on a scroll image on the tile.
- Stack: A set of tiles kept face-up.
- Tier: Levels of power across Monsters are broken into two tiers.
- Token: Used for tallying Prestige attained during each round of the game.
- Vendor: Sells a stack of tiles all of the same type and range of values.
- Year: One round of the game.
Game Credits
Design: Scott Caputo
Additional development: Tim Eisner, Ben Eisner, Doug Butler
Illustration: Damien Mammoliti
Box illustration: David Kegg
Additional illustration: David Kegg, Mr Cuddington, Justin Chan
Graphic design & layout: Kate Finch, Joel Finch
Rulebook: Kate Finch, Joel Finch, William Sobel
Druid City Games Director: James Hudson
Staff writer: Derek Funkhouser
Thanks: The game designer would like to thank the following people for their help in playtesting this game: his wonderful wife, Melissa Caputo; his parents, Stephen and Sharon Caputo; as well as Dedan Anderson, Nick Brown, Jennifer Bautista, Jon Leupp, Babak Namaziyan, Sam Holzman, Stephen Edwards, Michael Shorrock, Ben Zoltewicz, Colin Ferris, Shara Miller, John Thompson, Robert Weaver, Seokjune Hong, Luke Laurie, Candy Weber, Teale Fristoe, Andrew McLennan, Linda McLennan, Kevin Russ, Jay Vowles, and folks at Prototype Night in San Jose.
With thanks from James: Oscar Valera, Axel Wittenstein.