
The 7th Citadel
2024
A cooperative post-apocalyptic fantasy adventure of exploration, discovery, choices, and city-building for 1–4 players.
1000
minutes
1 - 4
player(s)
14+
Medium


About this board game
The 7th Citadel is a cooperative exploration and adventure game for 1–4 players, with an approximately 1000-minute play time. Set in a post-apocalyptic medieval fantasy world, it follows a slave-gardener escaping from the Citadel of Necrodruid Ninidazir’.
Freedom brings no safety. After escaping the citadel, you are confronted by an even greater Threat, sending you into the desolate region known as the Collapsing Lands. Your journey unfolds through exploration, interaction, and decisions that shape the scenarios ahead.
Explore freely by gradually unveiling the board with numbered terrain and event cards. As new areas and situations are revealed, interact with your environment and converse with the inhabitants you encounter while uncovering the path through this ruined world.
- Cooperative adventure for 1–4 players
- Freely explore the Collapsing Lands
- Reveal the board with numbered terrain and event cards
- Interact with the environment and its inhabitants
- Build a city to signal the world’s renewal
Alongside exploration, you will build a city intended to signal the renewal of this desolate world. The scenarios develop through your actions and decisions, with choices for better or worse leading inexorably toward an epic finale against the Threat.
From the creators of The 7th Continent, The 7th Citadel presents a vast post-apocalyptic fantasy journey in which discovery, conversation, construction, and consequence are central to the unfolding adventure.
/pic7182955.jpg)
Board Game Rules for
The 7th Citadel
Overview and Object of the Game
The 7th Citadel is a cooperative exploration and adventure board game, in which you play against the game and try to beat a Threat that looms over you. You may take on the challenge alone or in a team of 2, 3, or 4 adventurers.
You win!
You win if you manage to overcome the Threat you chose to face. When this happens, it will be clearly stated by the game.
You lose…
You lose if one of the following occurs:
- All characters are unconscious (see “Unconsciousness” p. 20).
- An in-game effect reads: “Your adventure ends here.”
When you beat a Threat or your adventure ends prematurely, you must start a new adventure by playing the introductory scenario “A new beginning”. Everything you gained and achieved during the previous adventure is lost.
Rules Summary
You are facing a threat – in the form of a Threat Booklet divided into scenarios – that will inevitably strike you (unless you die in the meantime!).
Note: This box contains an introductory scenario, and the “Dadachaem’s awakening” and “Drums of desolation” Threat Booklets.
You explore the world of the Collapsing Lands by resolving Exploration cards, putting into play numbered Adventure cards (Terrain and Permanent event cards) that gradually form the Board, and talking with the inhabitants of the Collapsing Lands (by means of the Dialogue Book).
During the game, you decide collectively which character will take an action  from among those that can be seen on the Terrain card their figure is standing on, the Permanent event cards attached to that Terrain card, and their Character, Skill
  , Purse
  and Quest item
  cards.
In order to perform actions, you will use your personal Action Deck.
Every action works the same way. The active player, who chose to take the action, must go through the following steps in this order:
- Gear up: Select which of their cards they can and wish to use. Their effects include lowering the amount of energy the player must spend to perform the action and increasing chances of success.
- Draw: Spend energy, which is represented by the action’s cost, by drawing cards from their Action Deck.
- Result: Reveal any drawn cards, which are worth variable amounts of successes, and then compare their total number of successes with the action’s difficulty (the more cards they drew, the more successes they should obtain, but the faster they are spending their energy).
- Consequence: Apply the consequences of the action, which vary depending on whether it succeeded or failed.
Once the active player has finished an action, another turn begins: One player (either the same or another one) takes another action.
Note: Certain actions – called “compound” actions – must be performed multiple times to be finished, but they essentially follow the same process (with a few minor differences, detailed later).
When you no longer have (enough) cards in your Action Deck, you must perform a Recovery to shuffle cards from your Discard Pile back into your Action Deck. However, this causes you to lose life points (see “Recovery”, p. 20).
When you run low on life points or you think you have achieved the goal(s) set by the scenario, it is time for you to return to the Citadel to discover the consequences of your actions!
Throughout the game, your group of adventurers will progress by accumulating hope, represented by specific cards, and trading it for precious bonuses on the Destiny page of the Citadel leaflet.
Unlike most board games, The 7th Citadel will give you the experience of a long-term adventure, while the easy saving system enables you to suspend your adventure at any time and resume it later on.
Components
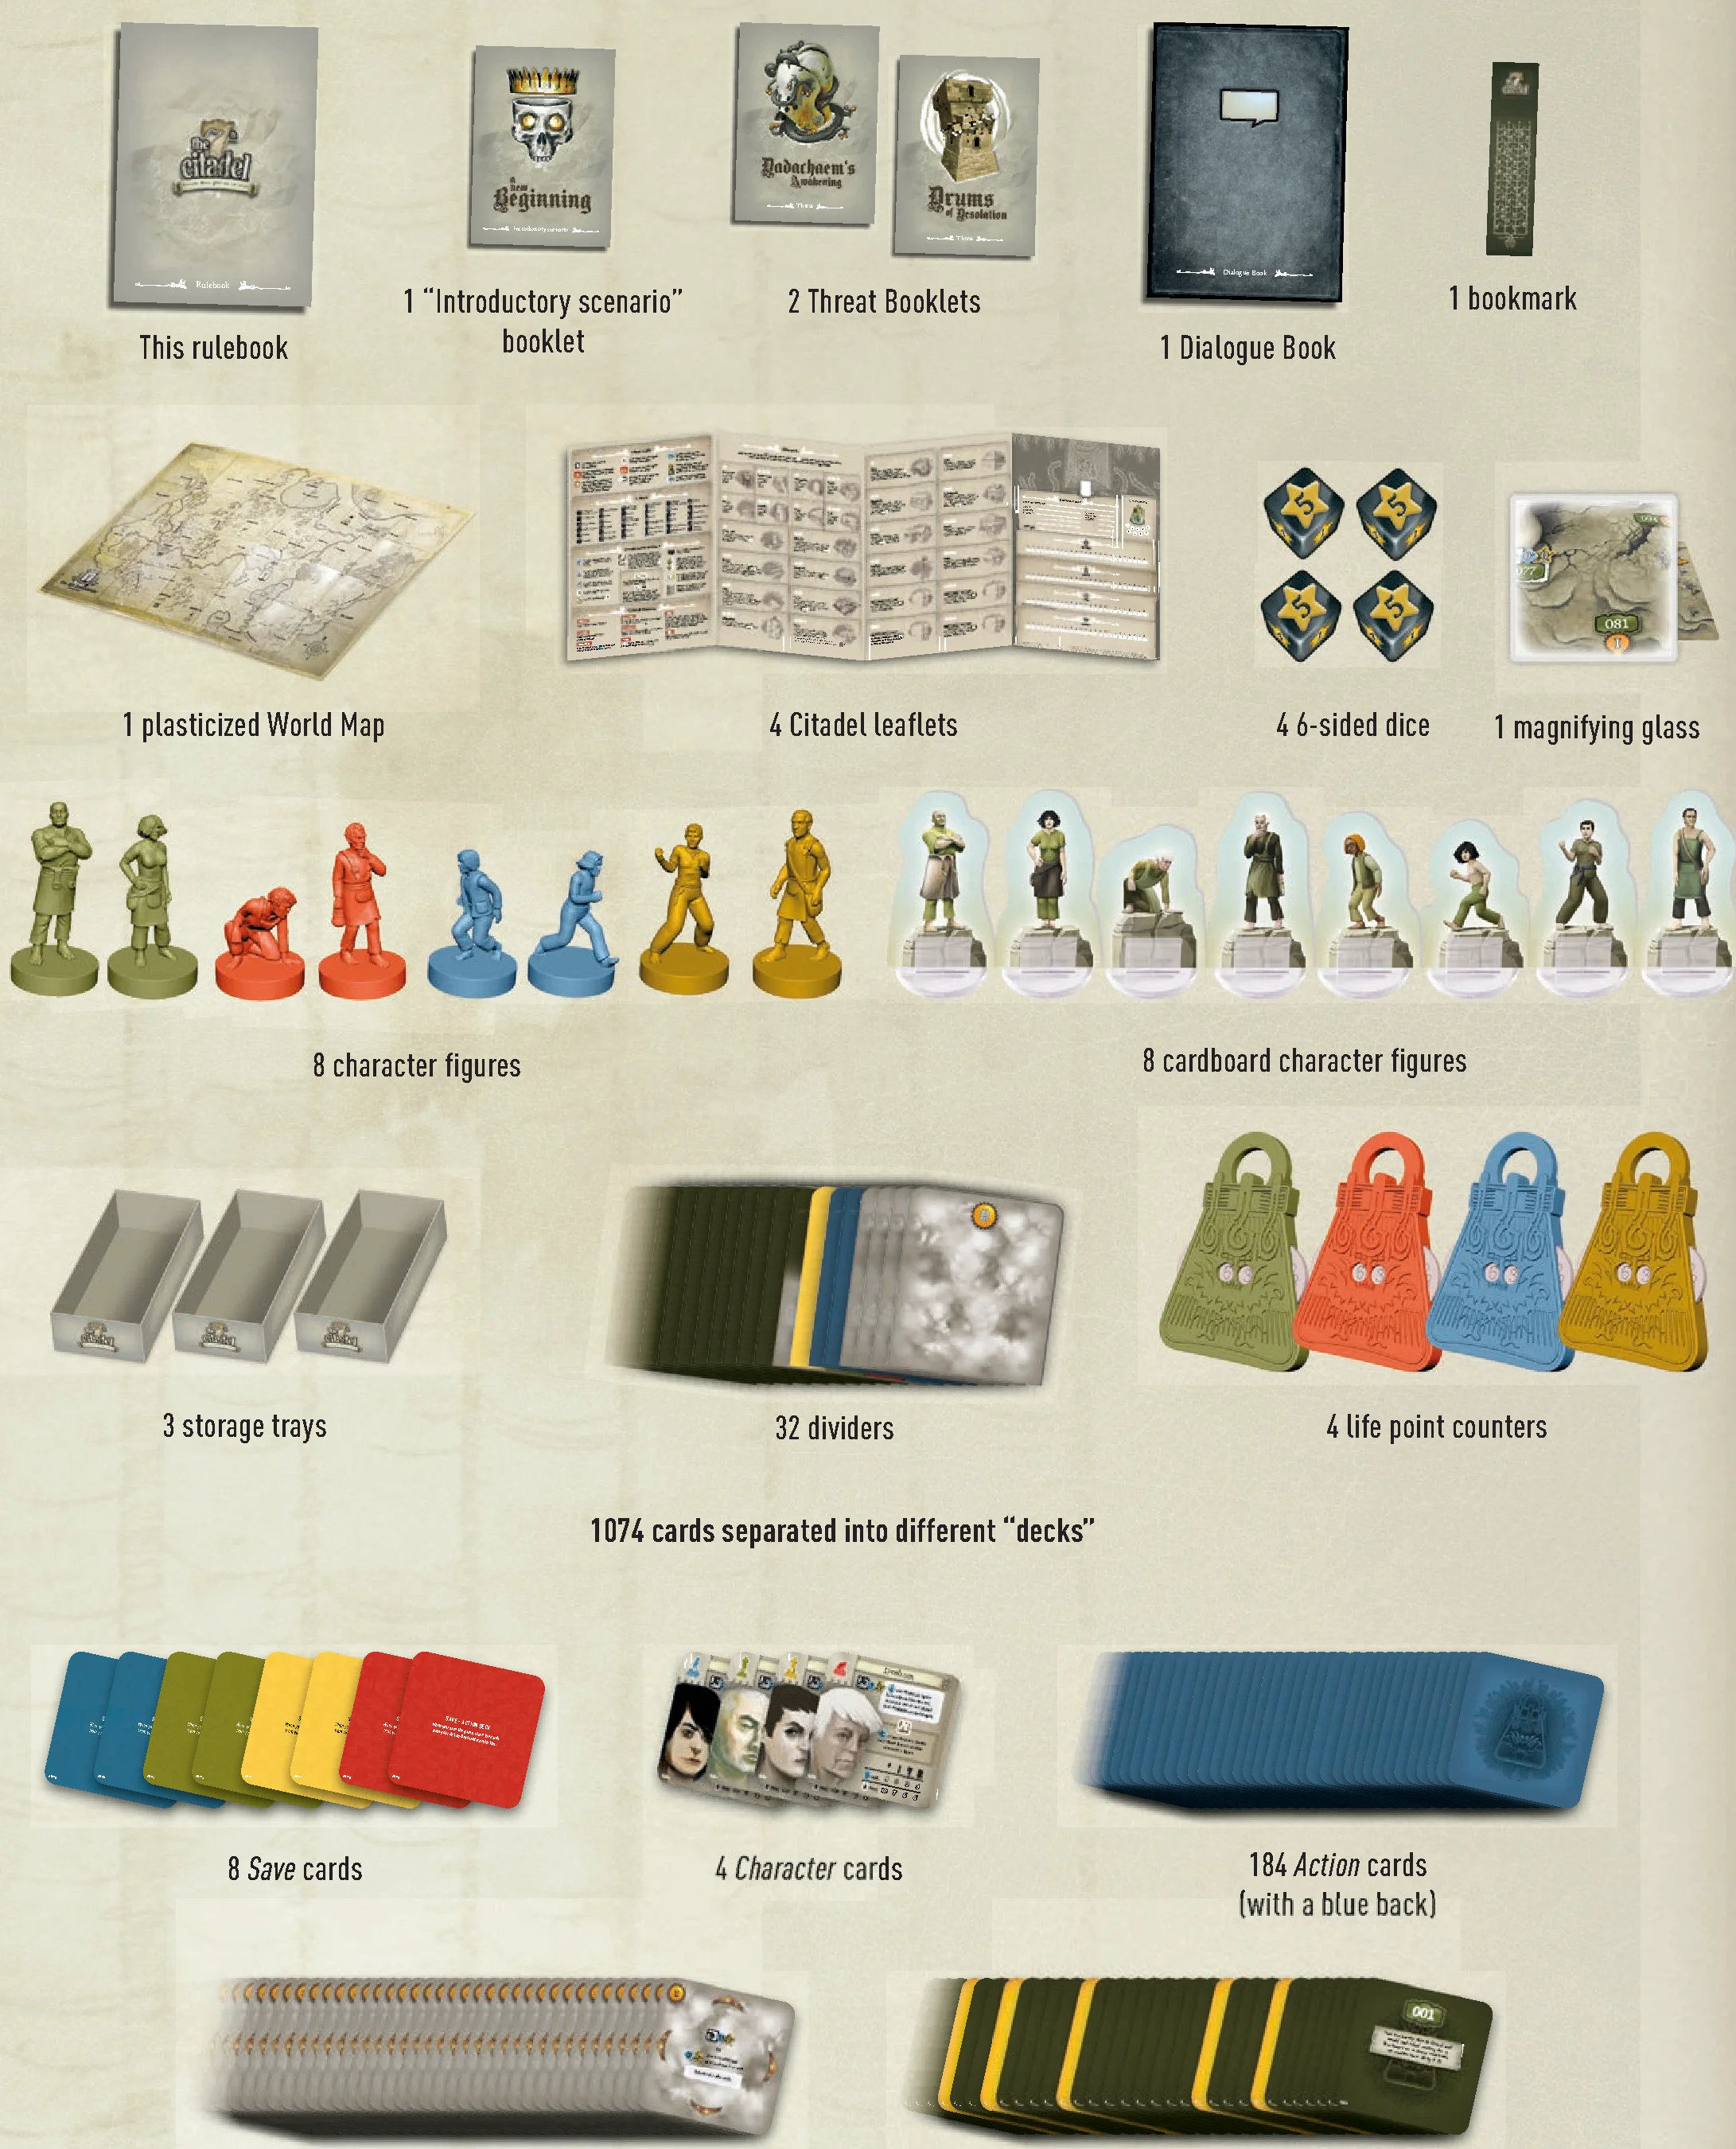
- This rulebook
- 1 “Introductory scenario” booklet
- 2 Threat Booklets
- 1 Dialogue Book
- 1 bookmark
- 1 plasticized World Map
- 4 Citadel leaflets
- 4 6-sided dice
- 1 magnifying glass
- 8 character figures
- 8 cardboard character figures
- 3 storage trays
- 32 dividers
- 4 life point counters
- 1074 cards separated into different “decks”:
- 8 Save cards
- 4 Character cards
- 184 Action cards (with a blue back)
- 151 Exploration cards (with a foggy back)
- 727 Adventure cards (with a green or gold back)
Sorting and Storing Game Components
Golden rule! You may not look at the contents of the cards, Threat Booklets, and Dialogue Book until the game invites you to do so.
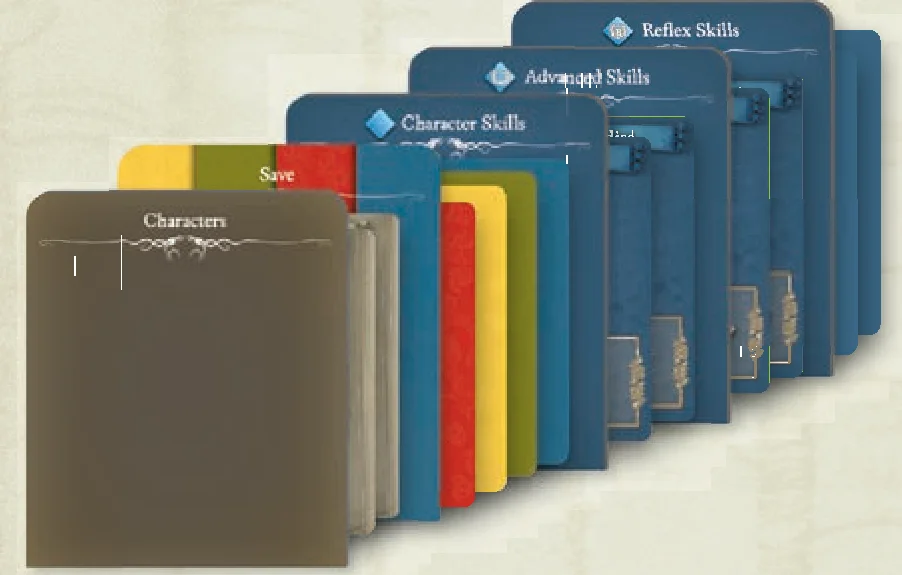
- Behind the “Characters” divider, store the 4 Character cards.
- Behind the “Save” divider, store the 8 Save cards.
- Behind the “Character Skills” divider, store the 84 Character Skill (blue back Action cards) identified by a
 icon on the front (top left corner) containing the character’s initial A, B, C, D or the letter “X”.
 - Behind the “Advanced Skills” divider, store the 76 Advanced Skill cards (blue back Action cards), identified by a
 icon.
icon. - Behind the “Reflex Skills” divider, store the 24 Reflex Skill cards (blue back Action cards), identified by a
 icon.
icon. - Store the Exploration cards, foggy side towards you, behind the dividers matching their respective areas (I, II, etc.).
- Sort the Adventure cards – green or gold back – towards you, in ascending order of their numbered backs and store them behind the appropriate dividers (cards 000 to 049 behind divider “000”, 050 to 099 behind divider “050”, etc.).
During the game, you will store:
- Any cards behind (or on) the “Quest items” divider.
- Any discarded Adventure and Exploration cards behind (or on) the “The Past” divider.
- Any banished cards behind the “Banished cards” divider.
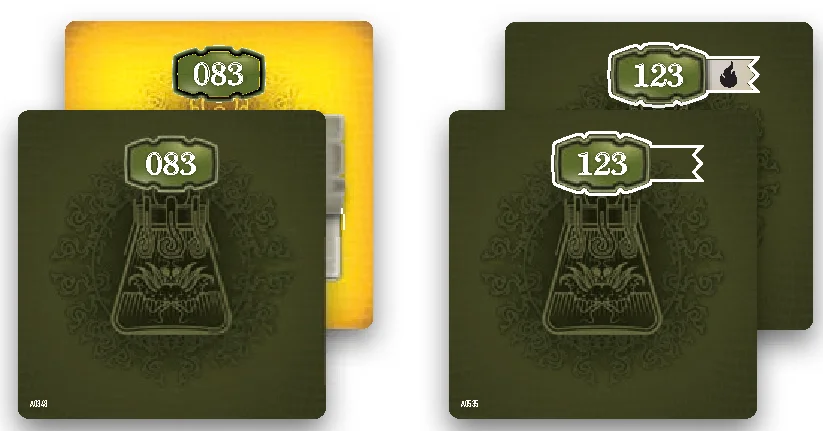
Golden rule! Green Adventure cards must always be placed before any gold Adventure cards bearing the same number. Then, among the cards of the same color, any  Adventure cards must always be placed before any
  Adventure cards bearing the same number.
Note: Some Adventure cards exist only with a gold back. Some Adventure cards with a have no alternative version with a .
Note: As stated on the “Quest items” and “The Past” dividers, you may lay these dividers flat near the Board and place the applicable cards on them.
Begin a New Adventure
You will choose your character and their starting skills during the introductory scenario “A new beginning”.
When you have finished reading the rules and are ready to begin a new adventure, open the introductory scenario’s booklet to page 3 and read until the booklet tells you to stop.
Components & Booklets Overview
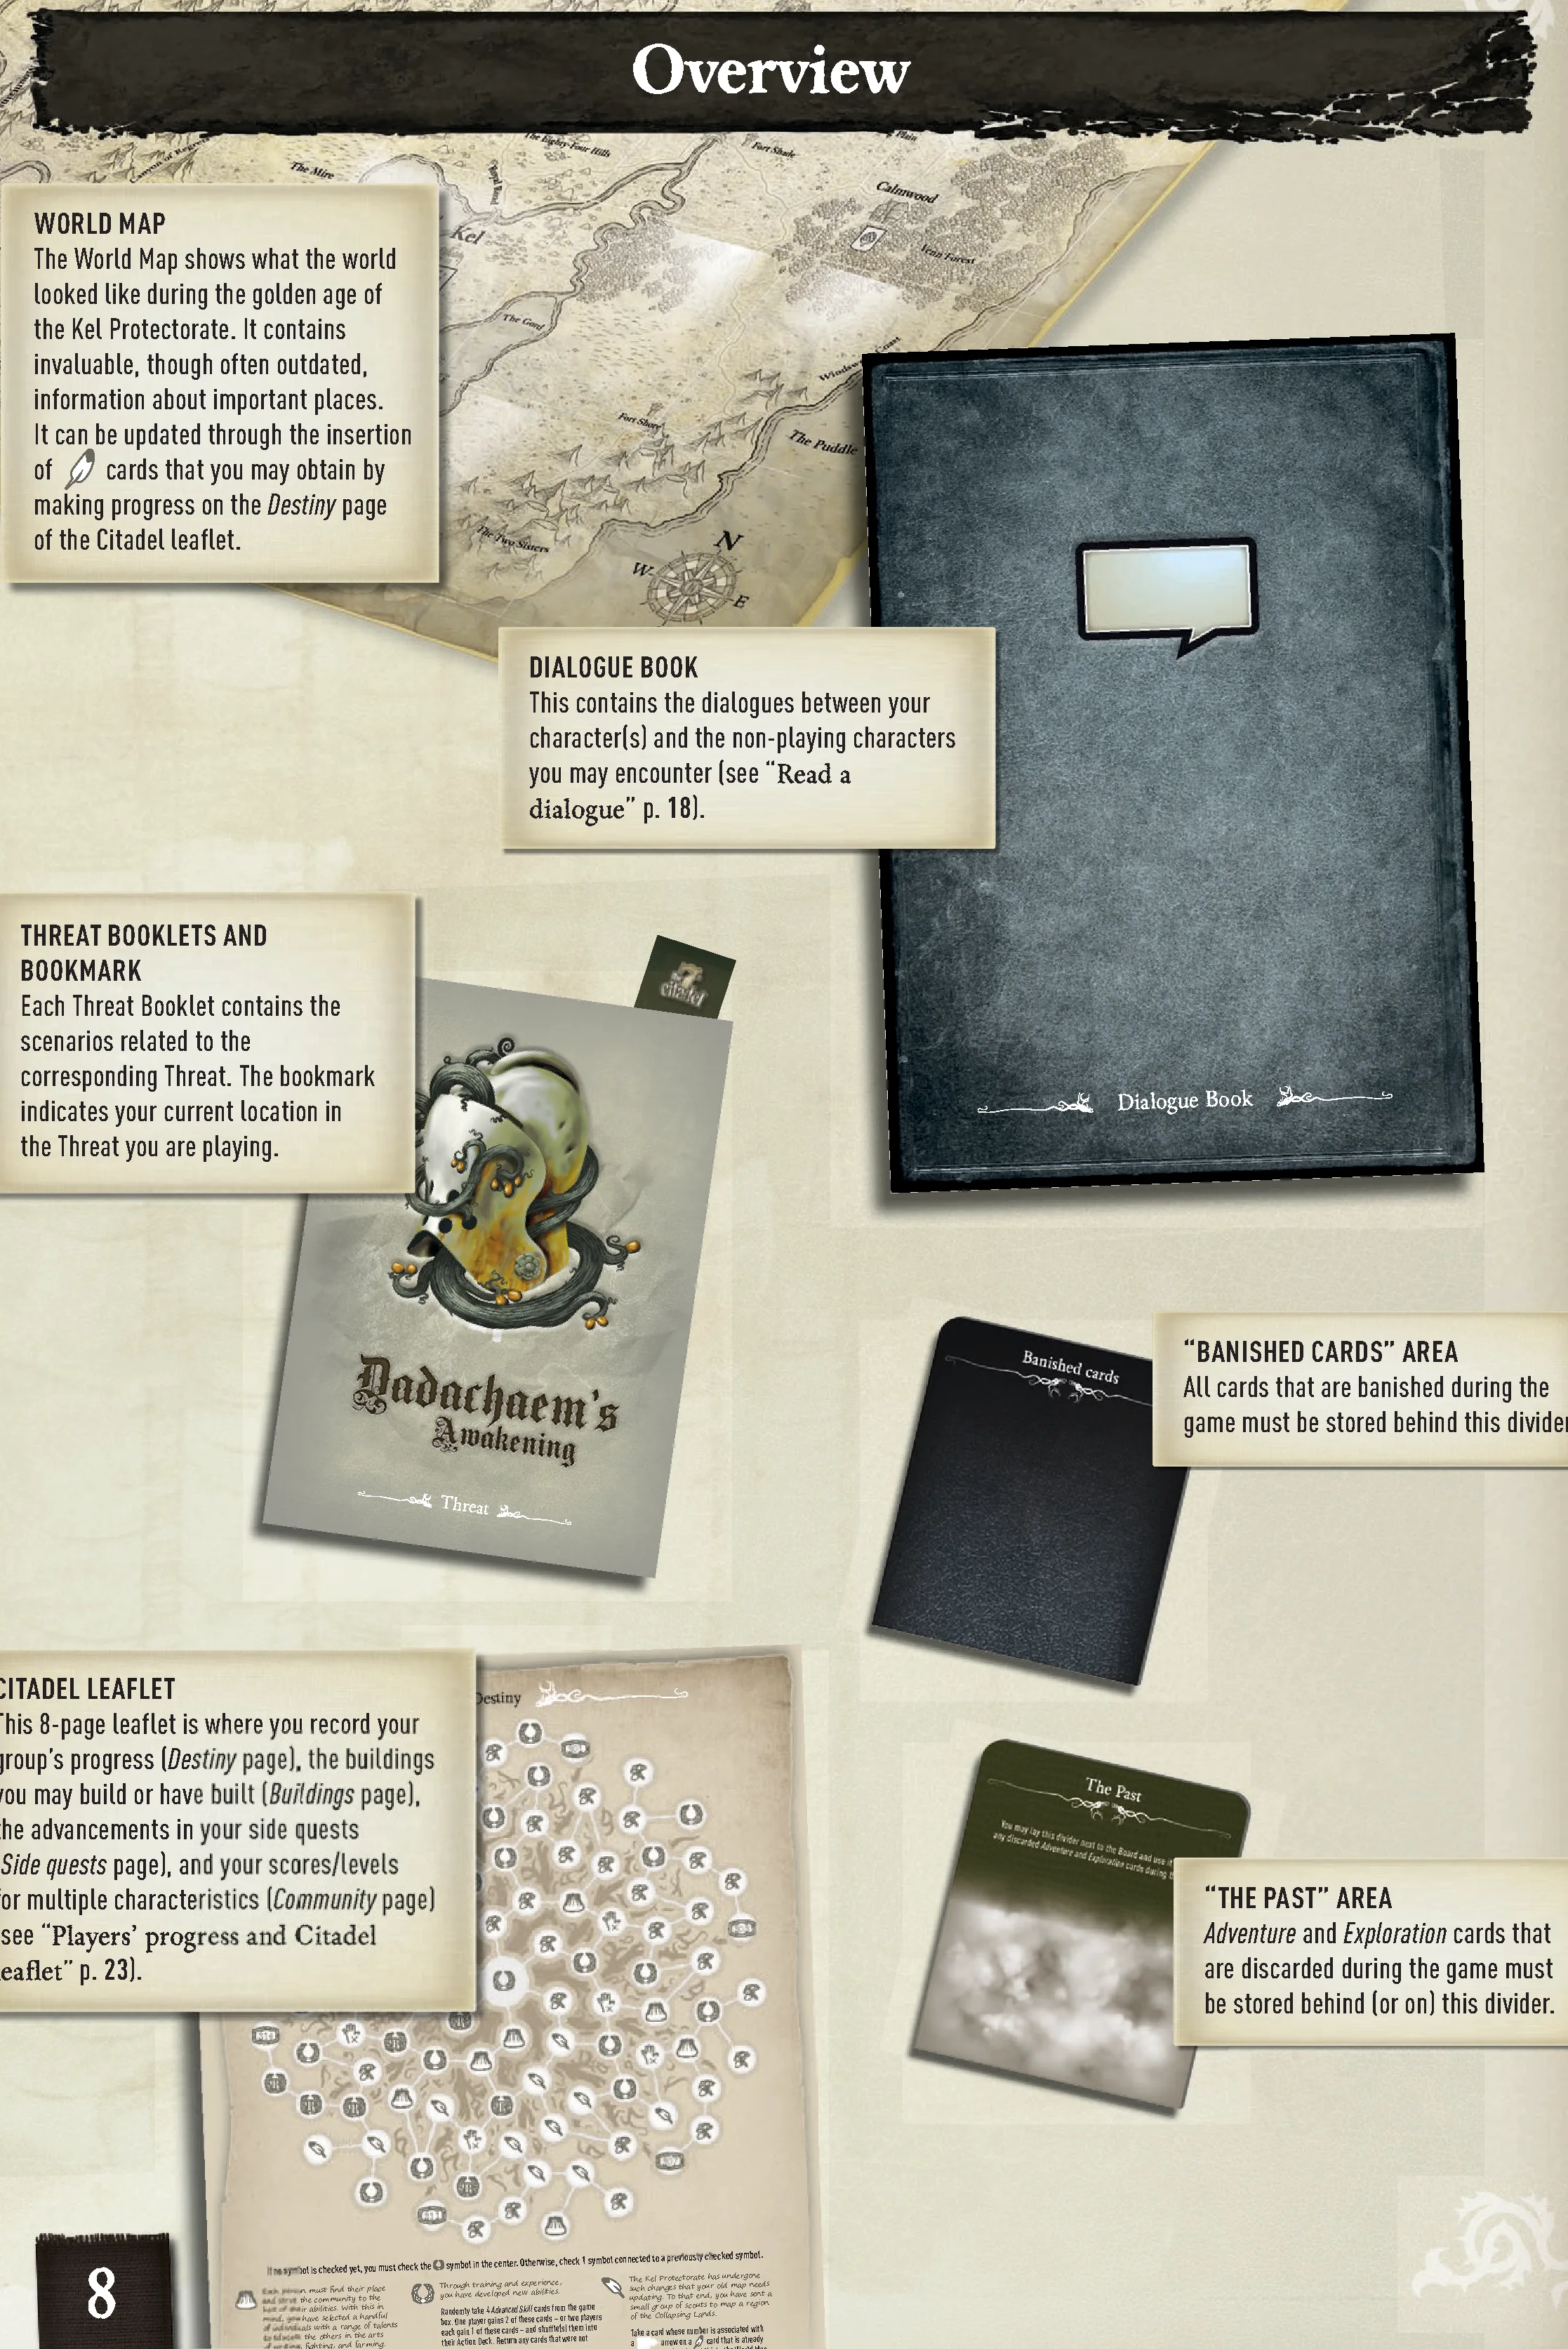
Here is an overview of the key play areas and booklets used in the game:
- World Map: The World Map shows what the world looked like during the golden age of the Kel Protectorate. It contains invaluable, though often outdated, information about important places. It can be updated through the insertion of cards that you may obtain by making progress on the Destiny page of the Citadel leaflet.
- Dialogue Book: This contains the dialogues between your character(s) and the non-playing characters you may encounter (see “Read a dialogue” p. 18).
- Threat Booklets and Bookmark: Each Threat Booklet contains the scenarios related to the corresponding Threat. The bookmark indicates your current location in the Threat you are playing.
- Citadel Leaflet: This 8-page leaflet is where you record your group’s progress (Destiny page), the buildings you may build or have built (Buildings page), the advancements in your side quests (Side quests page), and your scores/levels for multiple characteristics (Community page) (see “Players’ progress and Citadel leaflet” p. 23).
- “The Past” Area: Adventure and Exploration cards that are discarded during the game must be stored behind (or on) this divider.
- “Banished Cards” Area: All cards that are banished during the game must be stored behind this divider.
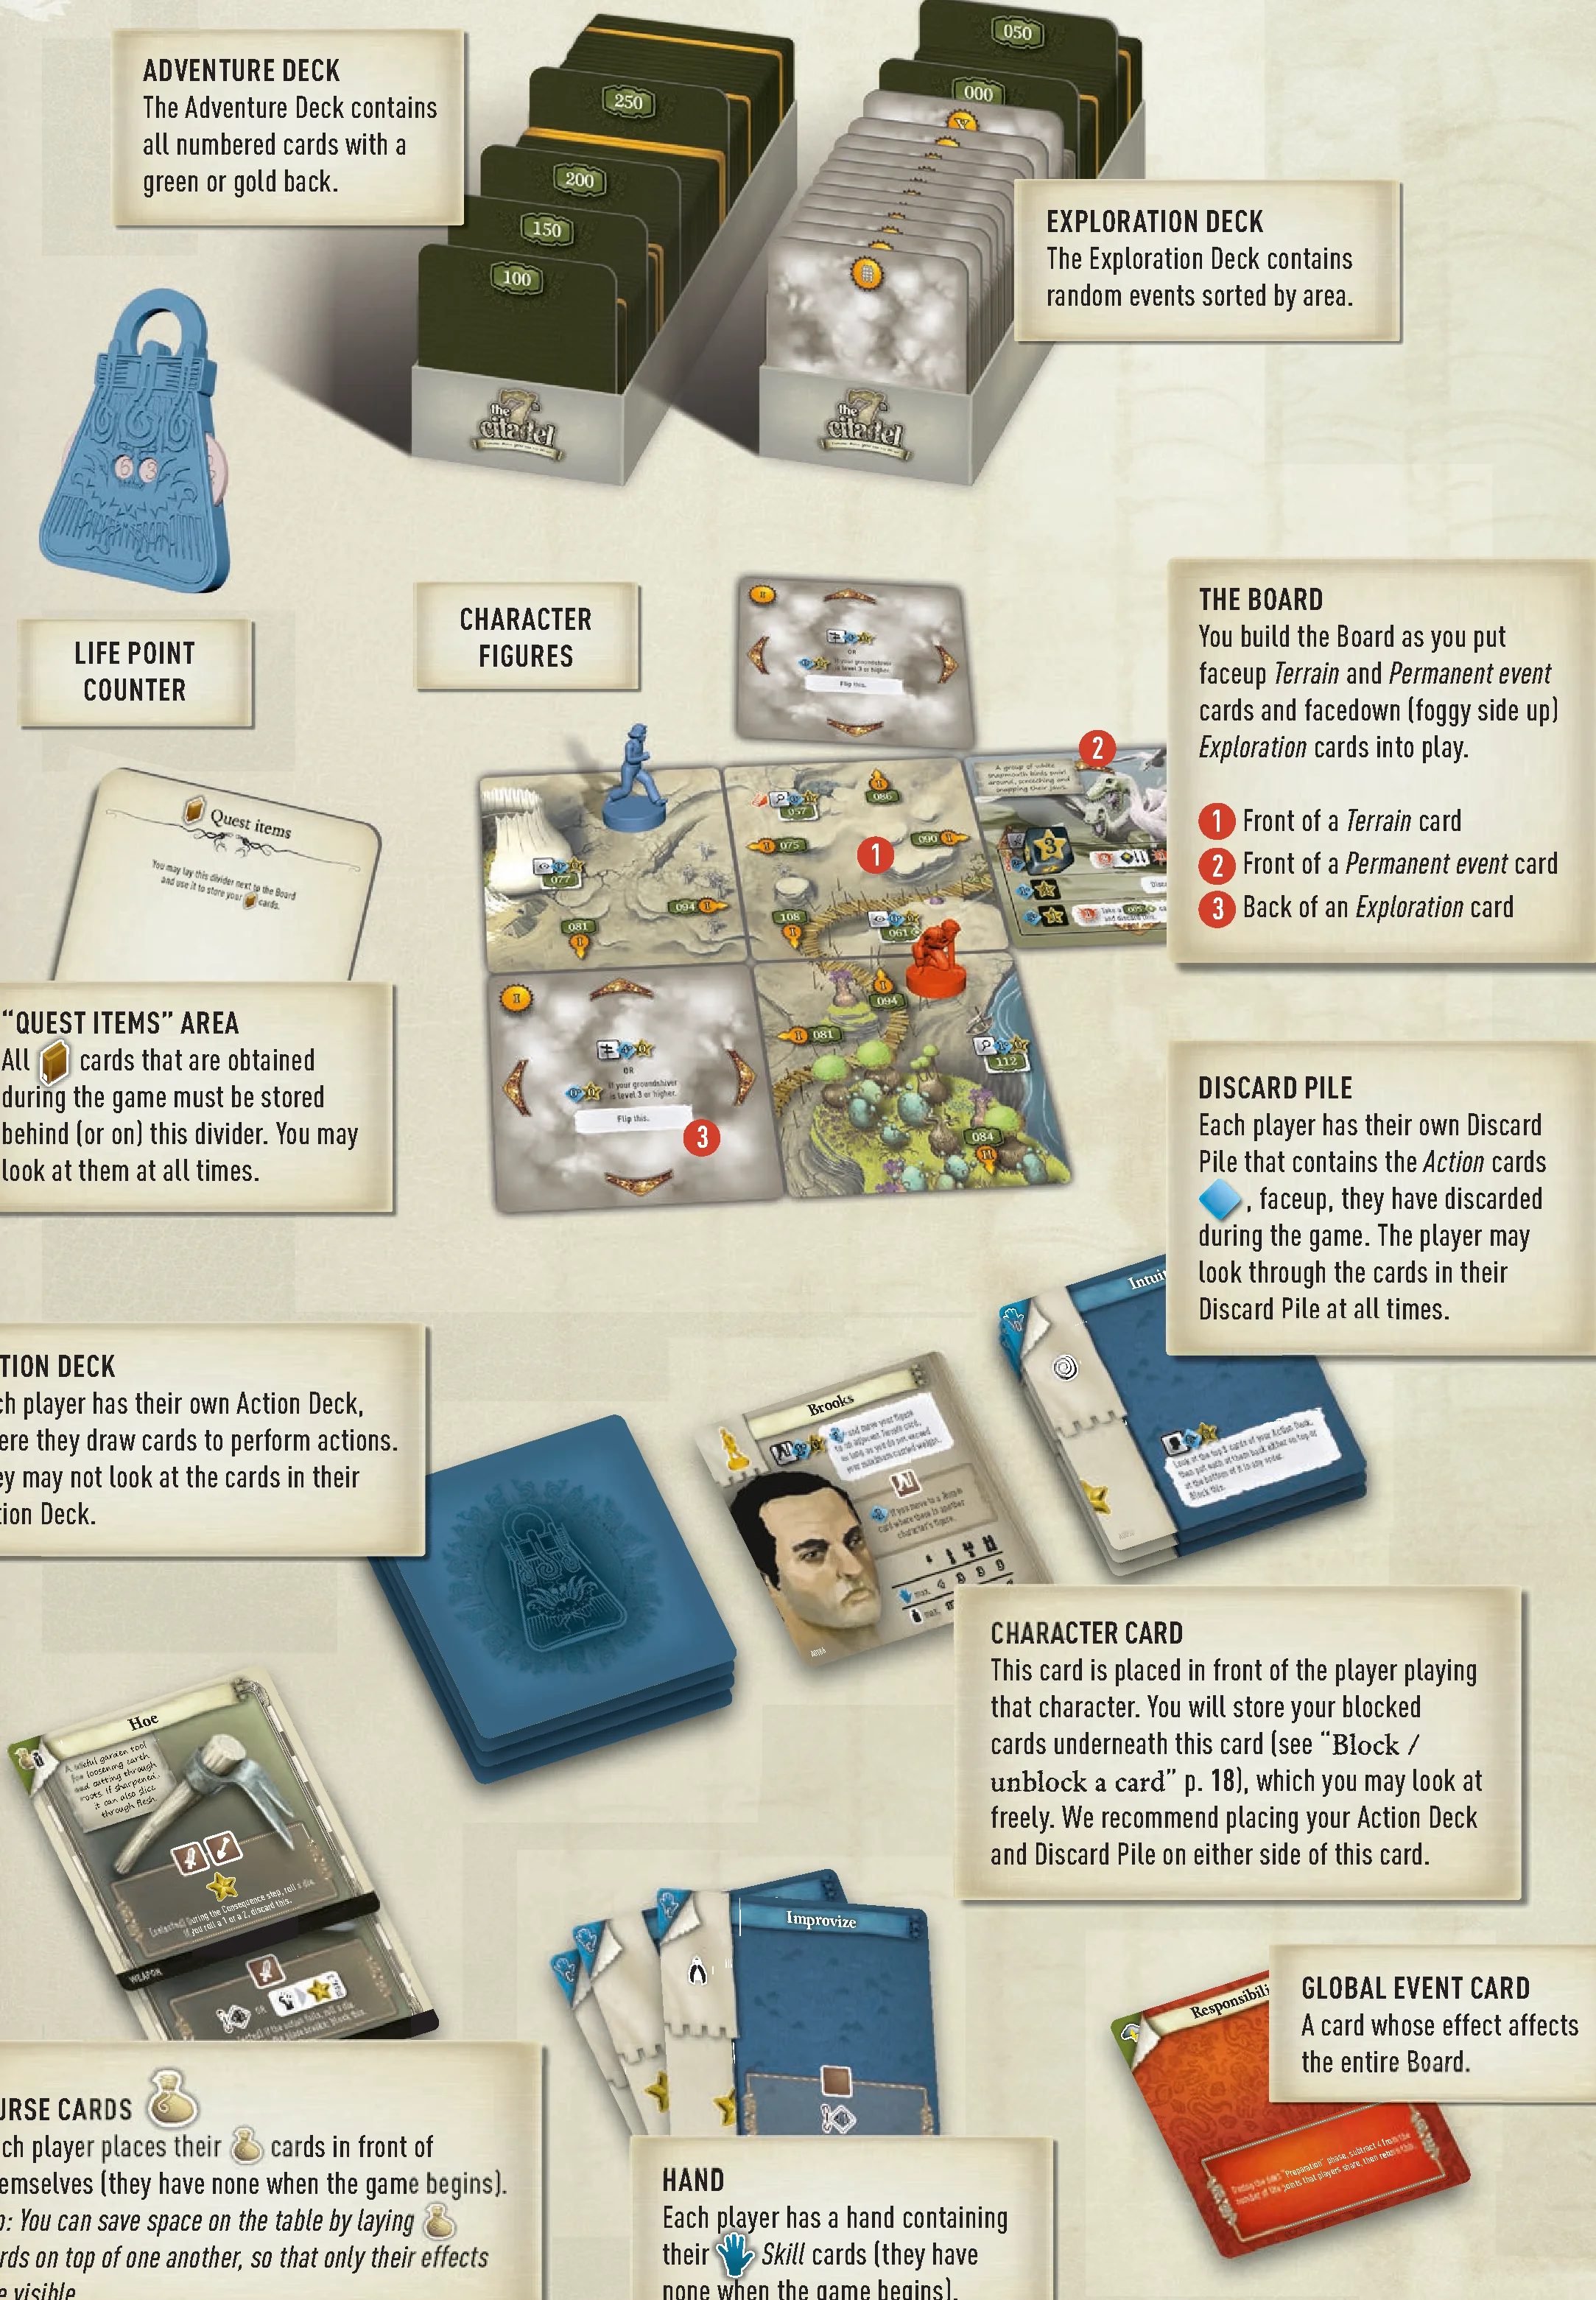
Play Area Elements
- Life Point Counter: Tracks each character’s life points.
- Adventure Deck: Contains all numbered cards with a green or gold back.
- Exploration Deck: Contains random events sorted by area.
- “Quest Items” Area: All cards that are obtained during the game must be stored behind (or on) this divider. You may look at them at all times.
- Character Figures: Miniatures representing characters on the Board.
- The Board: You build the Board as you put faceup Terrain and Permanent event cards and facedown (foggy side up) Exploration cards into play.
- Front of a Terrain card
- Front of a Permanent event card
- Back of an Exploration card
- Discard Pile: Each player has their own Discard Pile that contains the Action cards
 , faceup, they have discarded during the game. The player may look through the cards in their Discard Pile at all times.
 - Action Deck: Each player has their own Action Deck, where they draw cards to perform actions. They may not look at the cards in their Action Deck.
- Character Card: This card is placed in front of the player playing that character. You will store your blocked cards underneath this card (see “Block / unblock a card” p. 18), which you may look at freely. We recommend placing your Action Deck and Discard Pile on either side of this card.
- Global Event Card: A card whose effect affects the entire Board.
- Purse Cards: Each player places their cards in front of themselves (they have none when the game begins). Tip: You can save space on the table by laying cards on top of one another, so that only their effects are visible.
- Hand: Each player has a hand containing their Skill cards (they have none when the game begins).
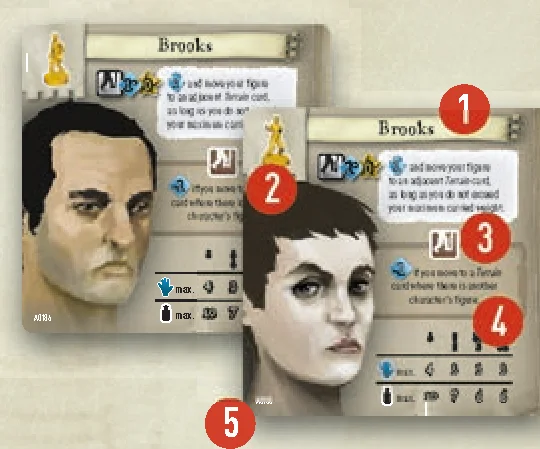
Character Cards
A Character card represents the character you are playing and enables you to take the  move action. It also acts as a reminder of the maximum number of Skill cards you may have in hand and the maximum weight you may carry. These values depend on player count.
- Character’s name
- Corresponding figure (in the character’s color)
- Available action and effect
- Default maximum hand size and carried weight (depends on player count)
- Unique ID number
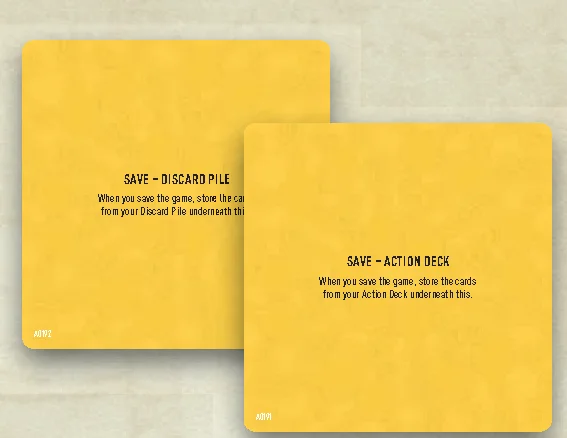
Save Cards
Save cards are used to save the game (see “Saving the game” p. 25).
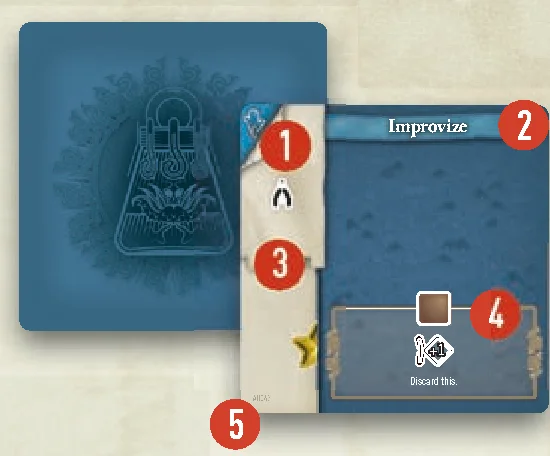
Action Cards
Each player has a personal Action Deck, made only of Action cards. These represent the life force you are spending when drawing them to pay the cost of your actions or when an in-game effect compels you to discard them. When in your hand, they represent your skills . These skills help you when you perform actions or enable you to take new actions.
- Card type – Skill
- Title
- Result area: Contains successes and class icons obtained during the Result step of an action
- Effect(s) and/or available action
- Unique ID number
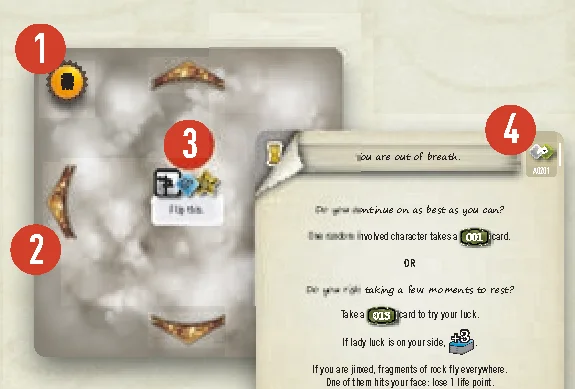
Exploration Cards
The cards with a “foggy” back are events that occur randomly as players explore the Collapsing Lands. They can be permanent events, temporary events, found items, etc. Each Exploration card belongs to an area, usually represented by a Roman numeral (I, II, etc.) on the back of the card and on the Terrain card it is attached to.
- Area
- Placement arrows (one of them points towards the Terrain card that caused the Exploration card to be put into play)
- Available action
- Unique ID number (on the front only)
Note: To prevent these cards from being identifiable, their unique ID numbers are located on their fronts (top right corner).
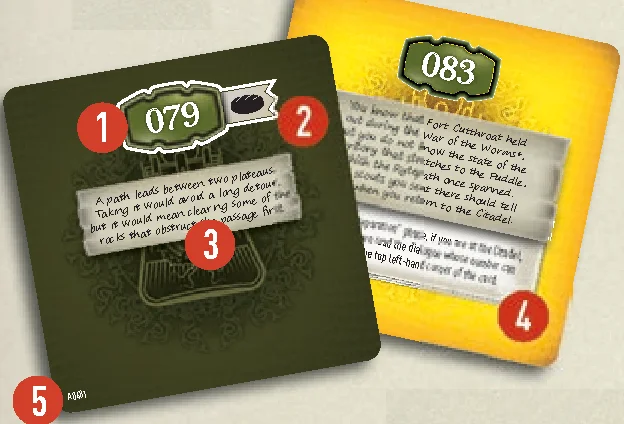
Adventure Cards
Green or gold numbered cards contain the terrains you will discover as you explore, the predefined events you can trigger (places, encounters, etc.), items you can find and many more surprises to be discovered!
- Card number
- Scenario-specific card (see “Take a numbered card” p. 16)
- Informative flavor text
- Effect(s)
- Unique ID number
Adventure cards include various types of cards:
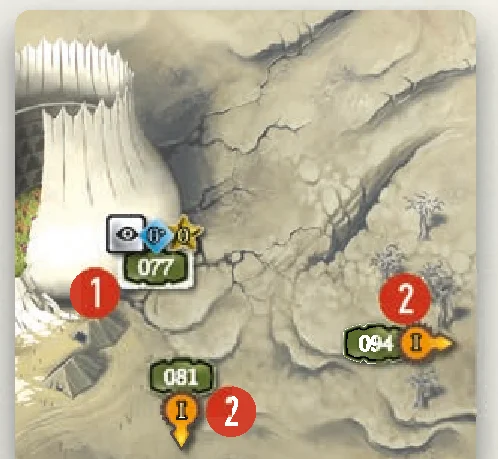
Terrain
Terrain cards are portions of the Collapsing Lands that form the Board. You may move your figure onto them and take actions from them.
- Available action(s)
- Exploration card(s) to be put into play in the space indicated by the arrow
Permanent Event
Permanent event cards are put into play on the Board after being revealed (see “Permanent event card” p. 17). They are attached to the Terrain card in the direction their placement arrow points.
- Placement arrow (points towards the Terrain card the event is attached to)
- Performed action that has caused the event to be put into play
- Effect(s) and/or available action(s)
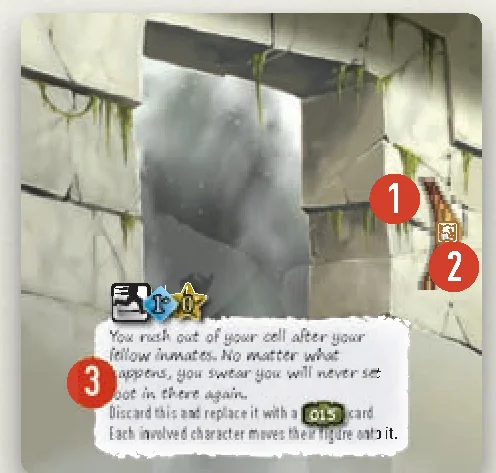
Temporary Event
Temporary event cards are resolved as soon as they are revealed, before being discarded (unless otherwise stated on the card) into a play area called “The Past”, represented by a divider.
- Card type – Temporary event
- Flavor text
- Effect(s) and/or available action(s)
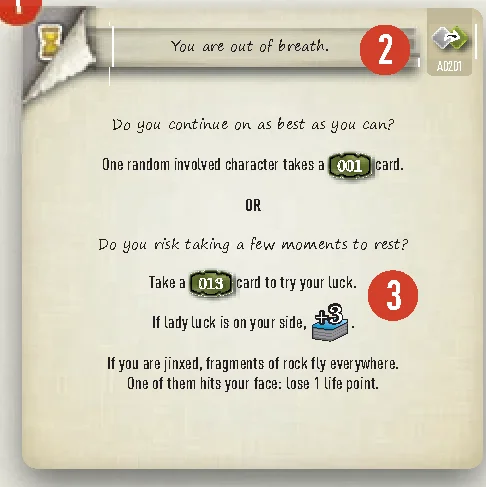
Global Event
These cards are placed near the Board and do not leave play until an effect makes you discard them. Their effects apply to the entire Board as long as they are in play.
- Card type – Global event
- Title
- Effect(s) and/or available action(s)
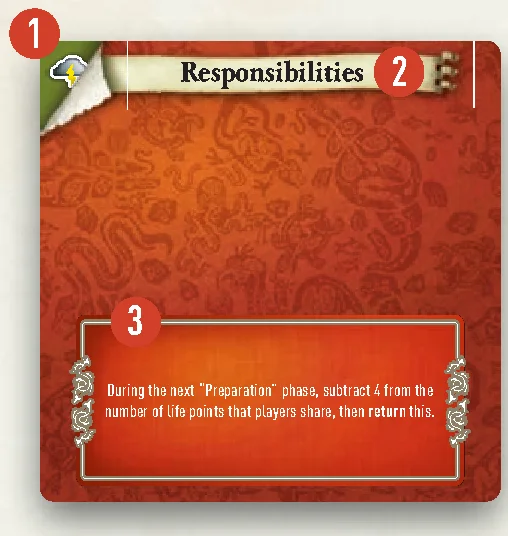
Purse
These cards include items, companions, positive or negative states, etc., that you can gain during the adventure. They help you – or hinder you – when you perform actions, or enable you to take new actions. They are the only cards bearing one or more KEYWORDS.
- Card type – Purse
- Weight
- Title
- Flavor text
- Effect(s) and/or available action(s)
- Keywords
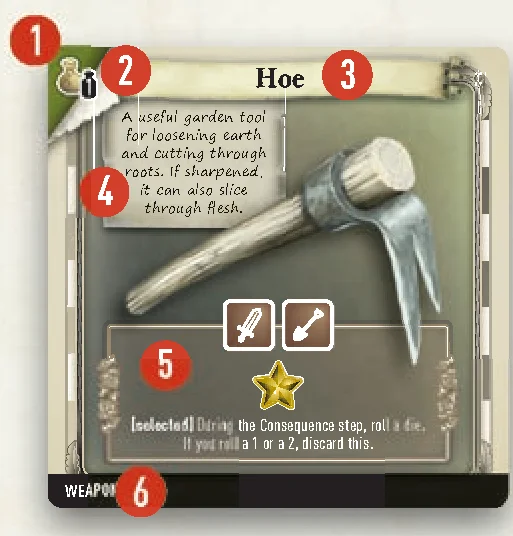
Quest Item
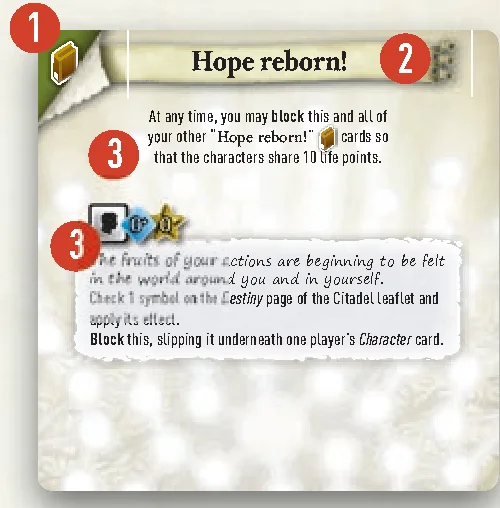
These cards are common to all players and provide you with helpful information. In some cases, they enable you to benefit from positive effects or take new actions. They are stored behind (or on) the “Quest items” divider and the players may look at them freely. Unless told otherwise, you may not discard them.
- Card type – Quest item
- Title
- Effect(s) and/or available action(s)
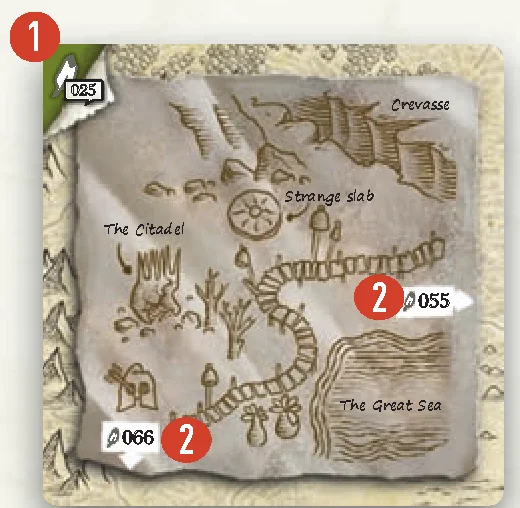
World Map
These cards must be inserted into a slot of the World Map (see “World Map” p. 8).
- Card type – World Map
- Arrows showing where to place any future cards
Turn Sequence
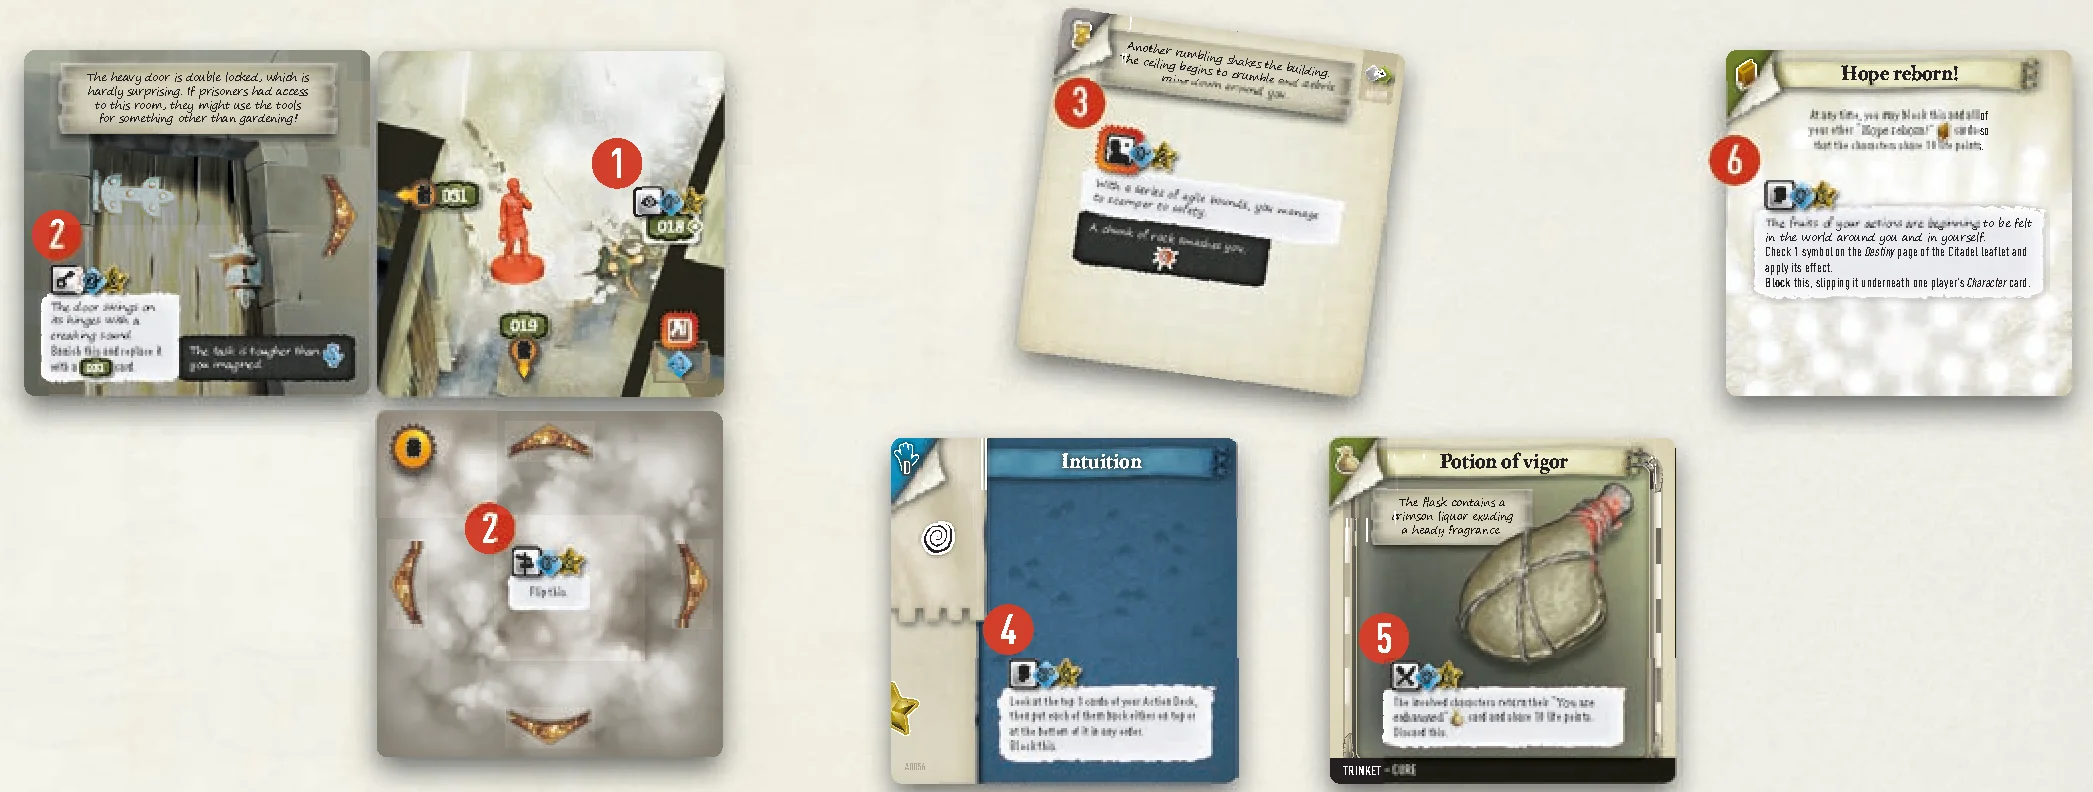
1. Choose the active player and the action to be taken
Each turn, one player is collectively chosen to be the “active player”. They choose the available action they wish to take.
This action will always be represented by an icon in a white square  visible on one of the following:
- The Terrain card (1) their figure is standing on.
- A Permanent event card (2) attached to the Terrain card their figure is standing on.
- A Temporary event card (3) that has just been revealed (this action is mandatory).
- One of their Skill cards (4) they have in hand.
- One of their Purse cards (5).
- A Quest Item card (6).
2. Check for other involved characters
Each character whose figure is on the active player’s Terrain card…
- May get involved in the action if it is not mandatory and the active player agrees.
- Must get involved in the action if it is mandatory
 (see “Mandatory actions” p. 11).
Unless otherwise stated, only the active player may use and/or cards during the action and they may only use their own cards.
Note: Getting involved in another player’s action may be helpful where some skills can be used to help the active player.
3. Resolve the action
The active player resolves the 4 steps of the action: Gear up, Draw, Result, and Consequence (see “Action resolution steps” p. 12).
4. Start a new turn
A new turn begins with a new active player being appointed. It may be the player from the previous turn, if all players agree. If you cannot reach an agreement, the player to the left of the last active player becomes the new active player.
Action Types
- Simple actions : Most actions in the game are “simple” actions that end immediately after the Consequence step.
- Compound actions
 : “Compound” actions feature one or more rows, each with consequence sections for success and failure. The current action row is the one where a die lies on the icon representing the action’s difficulty. A compound action is resolved over several turns. If it is mandatory, you must take it again right after resolving the Consequence step, and again until it is over. If it is not mandatory, you may choose to resume it later, when you decide to.
 - Group actions
 : An action with the icon may not be taken unless all conscious characters get involved.
 - Mandatory actions : A mandatory action has a red outline . When it can be seen on a Temporary event card or in a dialogue
 , all characters on the same Terrain card as the player who revealed it must immediately get involved in the action. The involved characters choose which of them is the active player. When it can be seen on a Terrain card, all characters on that terrain must immediately get involved in the action, provided it can still be taken. The involved characters choose which of them is the active player.
 - Forbidden actions: An action cannot be taken if:
- Another action is already being performed.
- It has a prerequisite that players cannot meet.
- It has the icon and not all conscious characters are involved in it.
- An icon for this action
 can be seen on a Permanent event card attached to the Terrain card showing the action – this means the action has already been performed and cannot be performed again on this Terrain card.
Resolving an Action
All actions have:
- A icon showing what action it is.
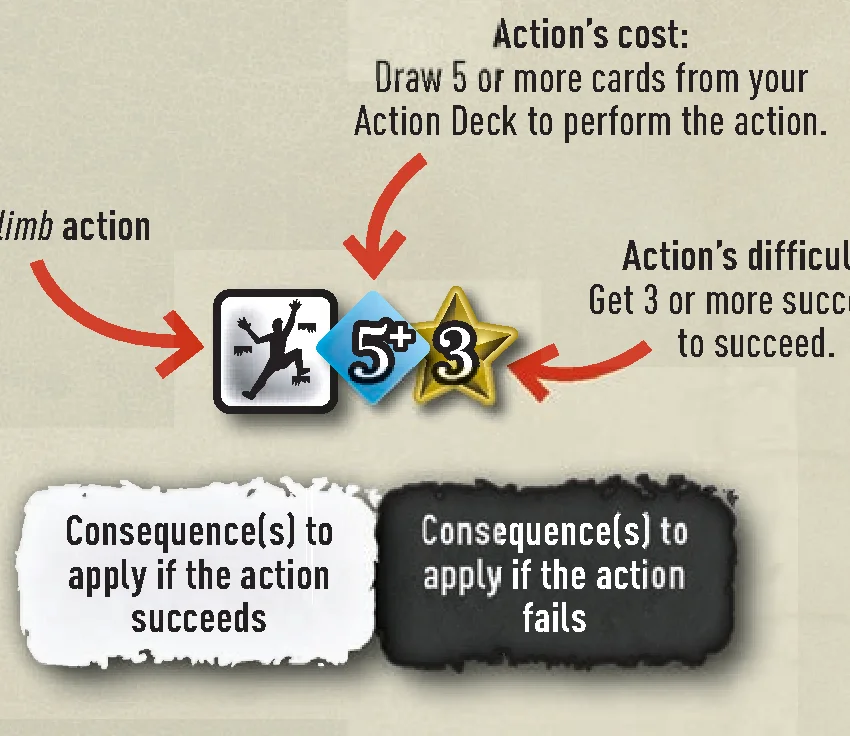
- A default cost
 , i.e. the minimum number of cards the active player must draw from their Action Deck to perform the action.
 - A difficulty
 , i.e. the minimum number of successes to obtain for the action to succeed.
 - Consequences if the action succeeds and, usually, consequences if the action fails
 .
.
Compound actions come with a slot for a die, showing the action’s difficulty. When the active player takes the action, if there is no die on the card, they must place one in the  slot on the first action row, making sure that its value matches the shown difficulty . If no die is available, the active player must take one from another card.
The default cost of some actions is associated with a “chain” icon  , which caps the number of cards whose successes you may take into account (more information below).
Action Resolution Steps
1. Gear up
The active player selects, from among their cards, those whose effects (some or all) they wish to apply. Each effect may be used only once during the action.
A card may only be selected if it has a condition icon  that matches the taken action AND no KEYWORD in common with another selected card.
Golden rule! When a  icon can be seen on one of the active player’s cards – or on a card – and the active player takes the corresponding action, they MUST select that card AND apply its effects.
Clarifications:
- You do not need to select the Skill cards whose effects you want to apply during the action.
- When the active player takes an action available on one of their cards, that card is automatically selected.
- When “[selected]” can be read as part of an effect on a card, you must apply the effect that follows if you have selected the card during the Gear up step of the action.
- An empty
 icon on a card means the associated effect may be applied during any action.
2. Draw
The active player determines the cost of the action and draws that many cards.
A. Determine the cost of the action
Cost is shown in the blue diamond . It represents the number of cards the active player must draw (the energy they must spend) from their Action Deck to perform the action.
- A
 effect increases the action’s cost by X.
 - A
 effect reduces the action’s cost by X.
The cost of an action may be 0. In cases where the cost is lowered below 0, consider it to be 0.
B. Draw Action cards
The active player draws a number of cards from the top of their Action Deck equal to the cost of the action, and places them face down in front of themselves. If they choose to, they may draw any number of additional cards from the top of their Action Deck to increase their chances of success. Any such additional cards are placed face down with those previously drawn.
If their Action Deck contains fewer cards than they should be drawing, the active player must immediately draw the remaining cards and perform a Recovery (see “Recovery” p. 20) – which does not end the action – and then continues to draw from the replenished deck enough cards to pay the action’s cost, provided their character is still conscious.
3. Result
The active player reveals the cards they drew, counts the obtained successes, and then compares the total with the action’s difficulty.
A. Reveal the cards
The active player reveals the cards they just drew (by flipping them face up).
B. Take successes into account
The active player may take into account any obtained successes visible in the result areas (left-hand strip) of the cards they just revealed. They obtain:
- 1 success for each full star
 .
. - 1 success for each pair of “half-stars”
 they manage to combine to construct a full star, provided the halves are oriented so when combined they form one complete star (i.e., one left half and one right half-star).
The active player is not compelled to take all obtained successes into account; they may even choose to ignore them all if they wish.
Important exception! Some actions with a “chain” icon are less likely to succeed without the appropriate skills and/or equipment. The  icon means the active player may take into account the successes (stars and half-stars) in the result areas of X revealed cards at most (player’s choice), where X is the action’s default cost . For example, if the action’s default cost is
  , the active player may take into account the star and half-star icons in the result areas of no more than 3 revealed cards of their choice, regardless of how many they chose to draw. They must ignore any stars and half-stars shown on the other cards they have revealed.
This restriction only applies to the successes in the revealed cards’ result areas.
C. Apply the effects of their cards
The active player may apply the effects of one or more of their cards (selected cards, effect areas of cards from their hand, cards, etc.) in order to get additional successes and/or take additional cards into account and/or convert class icons into various bonuses.
Important! Any ,  ,
,  ,
,  ,
,  ,
,  icons in the result area of cards are only ever taken into account when they are revealed from the active player’s Action Deck during the Result step of an action.
- Get additional successes: Each icon is worth 1 additional success.
- Take additional cards into account: When the action’s cost has a icon, the
 effect enables the active player to take into account the successes in the result area(s) of Y additional revealed card(s).
 - Convert class icons into various bonuses: Some effects enable the active player to convert into various bonuses the , , , class icons shown in the result areas of the revealed cards, on the cards they have selected, on the cards in their hand, on their cards, etc.
Clarifications:
- Even when the action’s cost has a icon, you may take every class icon in every revealed card’s result area into account and apply the effect of every Reflex Skill card and every card you selected.
- Each class icon obtained may be used only once, only by the active player, and for a single effect.
- When an effect comes with “max. X”, the active player may apply that effect X times at most.
- The icon is “wild” – it may represent any of the following class icons: , , , or .
- The
 icon means you may “spend” any of the following icons to apply the shown effect: , , , or .
D. Check the number of successes obtained against the action’s difficulty
Finally, the active player compares the successes they obtained with the action’s difficulty.
In a simple action, that is the number in a gold star  , and in a compound action, it is the number in a gold star shown on the upper face of the die resting on the card
  .
.
- Simple action: If the active player takes into account as many successes as (or more than) the number shown in the star, the action succeeds. Otherwise, the action fails.
- Compound action: If the active player takes into account as many successes as (or more than) the number shown on the die, the action succeeds. Otherwise, it fails, in which case they must reduce the value of the die by 1 for each success taken into account and apply the consequence of failure.
Clarifications:
- If the active player gets more successes than needed, any “excess” successes are lost.
- When a card is discarded, returned, or banished, any die resting on it is removed from it and returned to the game box.
Note: When a compound action succeeds, either the die is moved to another action row or the card is discarded. Most compound actions end with a success on the last action row.
4. Consequence
The active player applies the action’s consequences and then discards all cards revealed during the Result step.
A. Apply the consequences
If the action:
- Succeeds: they must apply the effects shown in the white section .
- Fails: they must apply the effects shown in the black section . If there is no such section, failing this action has no consequence.
The main consequences of actions are detailed on pages 16 to 18.
B. Discard the revealed cards
Lastly, the active player discards all cards revealed during the Result step. The  effect means the active player may add up to X of these cards to their hand, instead of discarding them.
Golden rule! Unless explicitly stated otherwise (e.g. “each involved character…”, “one involved character…”, “one random involved character…”), the consequence of an action applies ONLY to the active player.
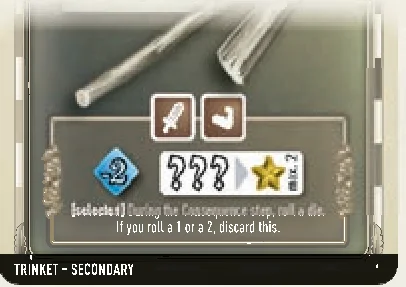
Simple Action Examples
Bruno wants to move a massive boulder by taking the following pull / push / lift action. No other character gets involved in it.

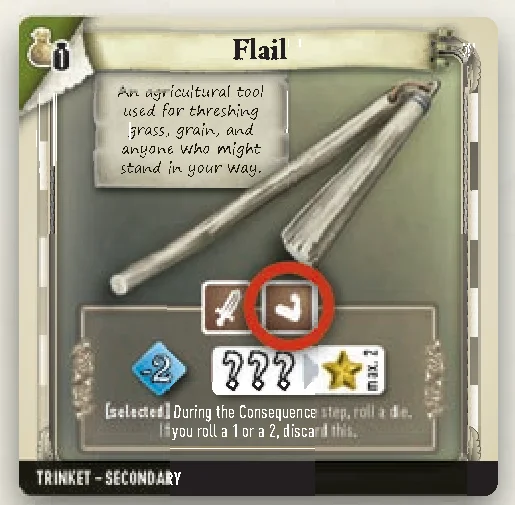
- Gear up: Bruno selects his “Flail” card, whose effects can be applied during a pull / push / lift action .
- Draw: Bruno is supposed to draw 5 cards, but he decides to apply the effect of his flail in order to draw 2 fewer cards
 , bringing the action’s cost from
  down to
  . Bruno draws 3 cards from his Action Deck and places them face down in front of him.
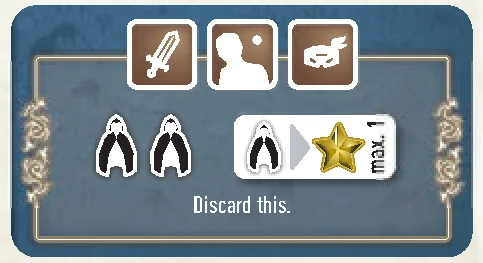
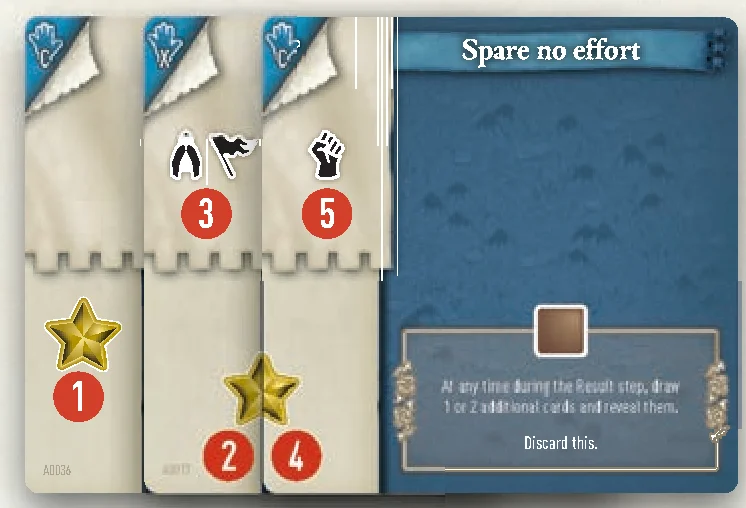
 - Result: Bruno reveals the 3 cards he just drew. The first card shows a full star (1), i.e. 1 success. The second shows 1 left half of a gold star (2) and two class icons, and (3). The third shows 1 right half of a gold star (4) and 1 class icon (5). Bruno manages to couple both half-stars (2 and 4) and obtains a second success. His flail enables him to convert any 3 class icons (3 and 5) into 1 success, at most twice (max. 2), which gives him a third success. Since this is greater than or equal to the action’s difficulty (3 successes required), the action succeeds.
- Consequence: Bruno applies the consequence in the white section (success), taking 1 049 card (the
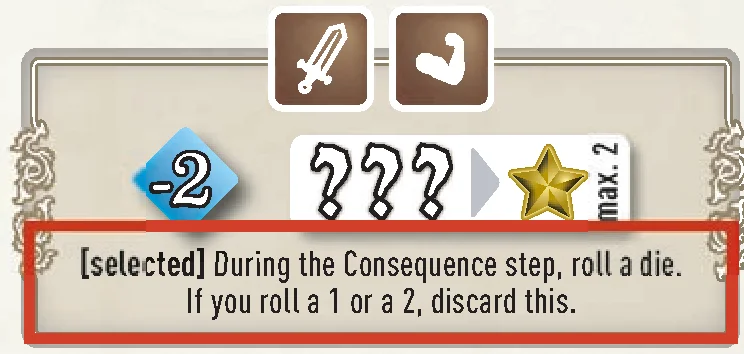
 icon means “if it is available in the Adventure Deck”) and discarding the Event card with the obstructing boulder. He discards the 3 cards he revealed during the Result step. Finally, he must apply the effect after “[selected]” since that card was selected. He rolls a 2 on the die, so he must discard his flail into the Past.
Ludovic takes the pathfind action shown on the back of an Exploration card.
- Gear up: Ludovic does not select any of his cards.
- Draw: Ludovic does not draw any cards (the action’s cost is
 ).
). - Result: Since Ludovic needs 0 successes (the action’s difficulty is
 ), the action succeeds.
 - Consequence: Ludovic applies the consequence of success (white section) – he flips the card.
Compound Action Example
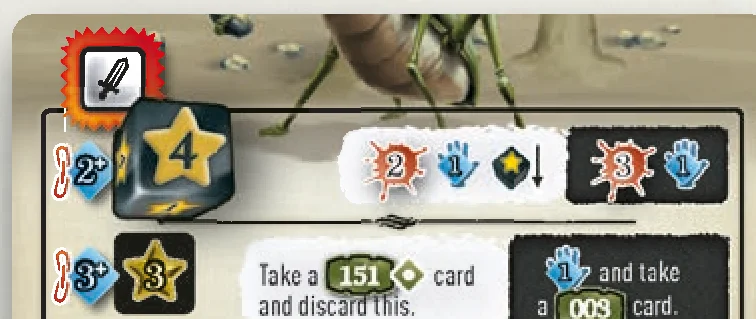
The card Ludovic has revealed shows a mandatory, compound  fight action. Ludovic and all the characters on his Terrain card – in this case, Bruno – must immediately get involved in it. Ludovic and Bruno choose Bruno to be the new active player. Bruno places the die on the action’s first row, showing the action’s difficulty (4) on its upper face.
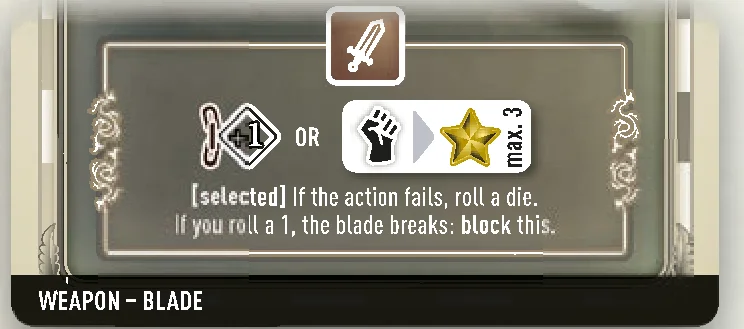
- Gear up: Bruno selects his “Sword” card, which allows him to either take into account the successes on 1 additional card during a fight action associated with a icon or to convert 1 class icon into 1 success, up to 3 times (max. 3). He may not select his “Gladius” card, as it shares the keyword WEAPON with his “Sword” card.
- Draw: The action’s cost is
 , but Bruno decides to draw 4 cards to increase his chance of success.
 - Result: Bruno needs 4 successes for the action to succeed. Because of the action’s “chain” effect , he may take into account the successes on no more than 2 revealed cards (out of the 4 he drew). He takes 2 successes into account (1). He could use the
 effect on his “Sword” card to take the successes on a 3rd revealed card into account. However, he prefers to apply the other effect – converting 1 class icon and 1 icon (which he treats as a icon), seen in the result areas of the revealed cards (2), into 2 successes. This brings his total to 4 successes and he reduces the die’s value by 4. Since that value is now less than 1, the action succeeds.
Important! Had Bruno only obtained 3 successes, the action would have failed, but Bruno would have reduced the die’s value by 1 for each success taken into account. The die’s value / action’s difficulty would now have been 1 (instead of 4). - Consequence: Bruno applies the consequences of success. He suffers 2
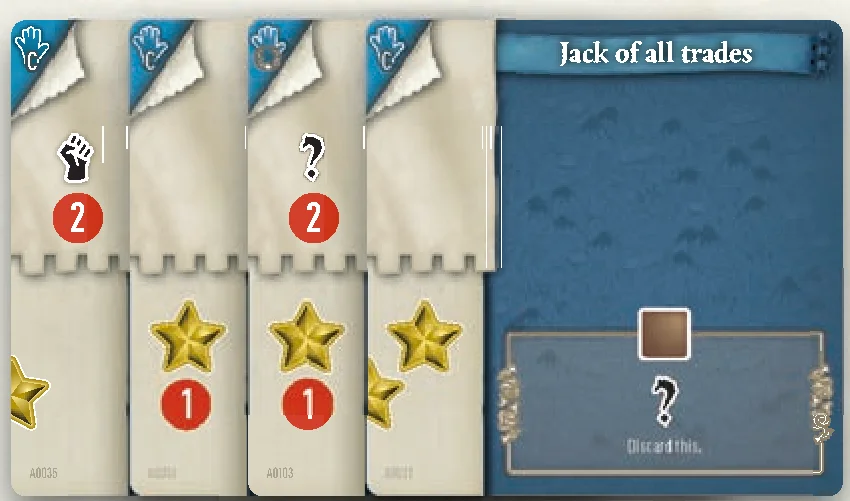
 (thus losing 2 life points); he may add 1 of the revealed cards to his hand
  ; and he moves the die to the next action row
  , setting it to the same value as the action’s difficulty .
Finally, Bruno discards the other 3 cards revealed during the Result step.
A new turn begins. Ludovic and Bruno decide that Ludovic becomes the new active player and Ludovic must then continue with the fight, since the action is mandatory.

Action Consequences: General Rules
Golden rule! Card text and dialogue text override this rulebook. When in doubt about a rule or in-game effect, interpret it in the most logical way to you or, if you cannot resolve the issue, the way most in your favor.
The most frequent consequence you will apply is taking a card.
Take a Numbered Card 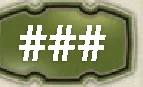
When taking a numbered card as a consequence of an action or event, the active player must take it from the Adventure Deck.
Note: The flavor text on Adventure cards often contains helpful details. Be sure to read it carefully!
If multiple cards with the same number are available:
The active player randomly takes one of the green cards (with exceptions – see “Golden rule!” below), reads the flavor text on the back, and reveals it.
Golden rule! Some Adventure cards are linked to a specific scenario – or card. You may not take them unless you are playing that scenario or possess that card.
When the back of an Adventure card shows a numbox associated with the  shape, it means there are possibly multiple versions of this card (bearing the same number) AND one of them is linked to a specific scenario – or card.
When the back of a card shows a pictograph inside a  icon, if that pictograph corresponds to the scenario you are playing or matches a pictograph shown on another card in your possession –
  ,
,  ,
,  , etc. – you must take it as a priority. Otherwise, you may not take it and you must take another card (bearing the same number) with the shape.
Example: Bruno must take the 123 card. There are 3 available 123 cards: one with the shape, one with the  icon, and one with the
  icon. Bruno opens the Threat Booklet to the bookmark and sees the current scenario is associated with the
  icon. He may take neither the card, nor the card, so he takes the card.

Example: Ludovic must take the 456 card. There are 2 available 456 cards: one with the shape, and one with a  icon. Ludovic then opens the Threat Booklet to the bookmark and sees the current scenario is associated with the icon. He must therefore take the card and may not take the other card.
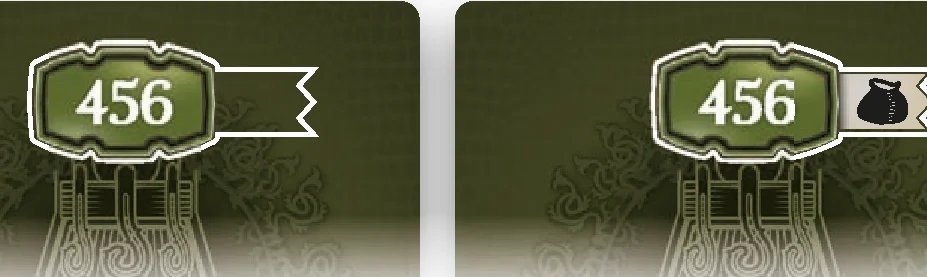
If no green card is available:
The active player must take a gold card instead.
Golden rule! A player may only take a gold card if there are no available green cards bearing the same number in the Adventure Deck.
If no card with that number is available:
When the numbox of the card you must take is followed by a icon, it means you need not do anything if the card is not available in the Adventure Deck. Otherwise, you must immediately return all the cards in the Past and then take the newly available card.
If several involved players need to take a numbered card:
The active player takes their card first and resolves it before the next involved player in clockwise order does the same.
Resolving Cards Taken
Once the card has been taken and revealed, what you must do depends on the card:
- Terrain card: One involved character must put this card into play by placing it on the Board like in a jigsaw puzzle, making sure that it is oriented the same way as the other cards on the Board. Terrain cards are generally put into play after an Exploration card has been resolved (see “Exploring the Collapsing Lands” p. 21).
Note: When you put a new Terrain card into play, you do not automatically move your figure onto it. - Permanent event card: One involved character must put this card into play by placing it on the Board with its placement arrow
 pointing towards the Terrain card their figure is standing on, and with the card oriented the same way as the other cards on the Board. This Permanent event card is now attached to the Terrain card towards which its placement arrow points, meaning that any actions and effects shown on the card are now available to any player whose figure is on the attached Terrain card.
Golden rule! The action icon in the placement arrow reminds you which action caused you to put the card into play. As long as this event is in play, that action may not be taken again from the Terrain card to which the event is attached. - Temporary event card: One involved character must immediately resolve this event and then discard the card into the Past, unless the card states otherwise (banish it, return it, etc.). If this card shows a mandatory action , all the characters on the Terrain card of the player who revealed it must immediately get involved in that action – they choose which of them is the active player.
- Global event card: One involved character must put this card into play near the Board, where it stays until an effect makes you discard, return, or banish it. Its effects apply to the entire Board as long as it is in play.
- Purse card: One involved character may either keep this card by putting it into play in front of themselves, or discard it into the Past if it has no
 icon (see “Purse cards and maximum carried weight” p. 19).
 - Quest item card: One involved character must store this card behind (or on) the “Quest items” divider. All players may look at it and/or use it.
Take a Card Not Directly Summoned by a Numbox
The players may have to take a card in the Adventure Deck without the card’s number being shown in a numbox – for instance, when they find a hidden number (see “Spotting a hidden number”, p. 22) or solve a riddle.
When this is the case, a  icon must be visible on the back of the card you take, with “###” being the number of the card that enabled you to take it. If that icon is not visible, then you have taken the wrong card and must return it.
Other Consequences of Actions and Events
- Read a dialogue : The active player opens the Dialogue Book and goes to the indicated numbered paragraph. They read it – out loud if they wish – and apply any applicable effects (new paragraph to read, action to take, choice to make, etc.). If a dialogue contains a mandatory action , the involved players may freely choose which of them will be the active player for that action. While reading a dialogue, you may not take an action shown on a card, unless the dialogue invites you to do so. Quoted text in italics is dialogue spoken by non-playing characters. Quoted text in bold italics is dialogue spoken by the active player. Underlined text refers to a side quest. When a word is followed by an asterisk (“*”), it means your character knows about it and you can read its definition on pages 2 and 3 of the Dialogue Book’s Glossary.
- Add Skill cards to your hand : The effect allows the active player to add up to X cards drawn and revealed during the Result step to their hand.
- Discard a card: When an in-game effect instructs you to discard a card, the active player must immediately put that card into their Discard Pile if it is an Action card (blue back), or into the Past if it is either an Adventure card (green or gold back) or an Exploration card (foggy back). The cards in the Past may not be looked at, unless an in-game effect allows you to.
The effect means the active player must discard the top X cards of their Action Deck. If you must discard more cards than your Action Deck contains, you must immediately perform a Recovery (see “Recovery” p. 20).
 - Banish a card: When an in-game effect instructs you to banish a card, the active player must immediately remove that card from play permanently by storing it behind the “Banished cards” divider in the box. All banished cards may not be looked at, unless an in-game effect allows you to. They will be returned to their original decks as soon as the players vanquish the Threat (or lose).
- Return a card: When an in-game effect instructs you to return a card, the active player must immediately put that card back in its place in its original deck.
- Block / unblock a card: When an in-game effect instructs you to block a card, the affected player must immediately slip it underneath their Character card. A blocked card may be looked at at all times. However, as long as it is blocked, it has no effect and may not be used. If it is a card, its weight must still be taken into account and you may discard it if you wish to. If it is a
 or card, you may not discard it.
When an in-game effect allows you to unblock a card, take it from under your Character card, then either shuffle it back into your Action Deck if it is a card, or put it into play in front of yourself if it is one of your cards. - Gain / lose life points: The affected player increases or decreases the value on their life point counter by the indicated amount (see “Life points” p. 20).
- Suffer damage: The effect means you lose X life points.
The effect cancels , but it cannot prevent damage taken from an in-game effect reading “You lose X life points”.
 - Move the die to another row (compound action only): The effect means you need to move the die to the next row, and in some cases skip one or more rows in the process (
 ). The active player places the die on the appropriate slot of the new row, making sure its value matches the shown difficulty .
 - Increase your community scores: The following in-game effects enable players to increase (+X) or decrease (−X), by the indicated amount, the Influence
 , Knowledge
  , Production
  , or Defense
  scores on the Community page of the Citadel leaflet (see “Players’ progress and Citadel leaflet” p. 23). None of these scores may ever go below 0 or above 25.
Skill Cards and Hand Size
Skill Cards
Your Skill cards help you when you perform actions or enable you to take new actions.
They exist in 3 types:
- Character Skills : These are the skills that characters begin the adventure with. Their effects can only be applied from a player’s hand.
- Advanced Skills : These are cards that players may gain during the adventure (see “Destiny page” p. 24). Their effects can only be applied from a player’s hand.
- Reflex Skills : These are gained just like Advanced Skills, but their effect is only applied when they are revealed during the Result step.
Most effects on Skill cards imply discarding them or blocking them. When this is not the case, their effect applies as long as you have them in hand.
Hand Size
Unless otherwise stated, the maximum number of Skill cards you may have in hand is shown on your Character card and depends on player count. At any time – except during an action you are involved in – if you have more cards in hand than your allowed hand size, you must discard any excess cards of your choice.
Take an Action / Apply an Effect (Skills)
You may take an action visible on one of your cards.
When you are the active player, you may apply some or all of the effects shown on the cards you have in hand, provided the condition associated with the effect(s) matches the action being performed .
Discard / Give (Skills)
You may discard cards from your hand into your Discard Pile at any time.
You may not give any of your cards to another player.
Purse Cards and Maximum Carried Weight
Purse Cards
Your cards help you when you perform actions or enable you to take new actions.
They usually have one or more KEYWORDS that limit the number of these cards that may be selected during an action – you may not select (in order to apply their effects) more than one card which has a given KEYWORD.
Reminder! You may not select multiple cards with the same KEYWORD.
(Maximum) Carried Weight
The maximum weight you are allowed to carry can be found on your Character card and depends on player count.
Your carried weight is the total weight of your  cards, including your blocked cards. It may exceed your maximum carried weight; however, as long as this is the case, you may not take the move action on your Character card.
Take an Action / Apply an Effect (Purse)
You may take an action visible on one of your cards.
When you are the active player, you may apply some or all of the effects shown on the cards you choose to select (during the Gear up step of an action), provided the condition associated with the effect(s) matches the action being performed (example: fight condition, fight action).
Discard / Give (Purse)
You may freely discard your cards, even if they are blocked, as long as they do not have a icon.
Golden rule! A player may not decide to discard a card or give it to another player.
A character may give a card to another character as long as they are both on the same Terrain card and not performing an action.
When this happens, the player who gives OR the one who receives the card must (discard the top X cards of their Action Deck), where X is equal to the weight of the item being given .
You may give one of your blocked cards (unless it has a icon), but it remains blocked.
Life Points
Every time you begin a new scenario, the Threat Booklet tells you how many life points each character receives and must indicate on their life point counter (this amount varies based on player count).
During the adventure, when gaining or losing life points, you will adjust your life point counter accordingly.
You may exceed your initial number of life points (defined by the scenario), but you may never have more than 99 life points.
When you drop to 0 life points (or below), your counter is set to 0 and you fall unconscious.
Unconsciousness
When you become unconscious (0 life points), you must immediately:
- Remove your figure from the Board.
- Return all of your cards with the keyword TEMPORARY.
- Discard all cards you have in hand.
- Shuffle all the cards in your Discard Pile back into your Action Deck.
- Draw 3 cards from your Action Deck to form your hand*, and then banish 1 of these cards of your choosing.
*You will be able to use these cards once you regain consciousness.
If all characters are unconscious, the adventure ends immediately and the players lose.
If every character involved in an action shown on a  card falls unconscious, that card is returned.
When an unconscious character regains at least 1 life point, they regain consciousness. They therefore put their figure back into play on the active player’s Terrain card. If there is no active player, they put their figure onto any chosen character’s Terrain card. This happens thanks to in-game effects or, in the worst case, when players are at the Citadel.
Recovery
Your Action Deck represents your life force. When it becomes (nearly) depleted, it is time for you to perform a Recovery.
At any time, you may perform a Recovery to shuffle cards from your Discard Pile back into your Action Deck (even if the latter still contains cards).
To perform a Recovery, you must lose 1 life point for each 2 cards you choose to randomly take in your Discard Pile and shuffle back into your Action Deck.
You may not choose to lose more life points than you have in order to recover more cards.
Example: Ludovic wants to perform a Recovery in order to shuffle 8 random cards from his Discard Pile back into his Action Deck. To do this, he loses 4 life points.
When you must draw or discard more cards than your Action Deck contains:
- Draw or discard whatever cards remain in your Action Deck.
- Perform a Recovery.
- Draw or discard the remaining cards you were unable to draw or discard before.
Variants
- “Story” mode (for adventurers who value storytelling more than survival): To perform a Recovery, you must lose 1 life point for each 3 cards you choose to randomly take in your Discard Pile and shuffle back into your Action Deck.
- “Survival” mode (for adventurers with taste for a challenge): To perform a Recovery, you must lose 2 life points for each 3 cards you choose to randomly take in your Discard Pile and shuffle back into your Action Deck.
Exploring the Collapsing Lands
Opening the space occupied by an Exploration card
An Exploration card is a random event that hides a portion of the Collapsing Lands. You need to resolve an Exploration card in order to remove it and put into play the Adventure card (generally a Terrain card) that belongs there. This is how you explore the Collapsing Lands.
Once the Exploration card has been resolved and removed from the Board, the active player must put an Adventure card into play  , right where the Exploration card used to be. The number of this Adventure card is shown in the numbox associated with the arrow on the Terrain card that points towards the newly opened space.
If that Adventure card is a Terrain card, the active player must make sure that it fits with each adjacent Terrain card like in a jigsaw puzzle, and then put the new Exploration cards into play (foggy side up) in each free adjacent space to which an  arrow on the new Terrain card is pointing. Each of these new Exploration cards must carry the same pictograph – usually a Roman numeral
  – as the one in the arrow that points to its space and that caused it to be put into play.
If you must put an Exploration card into play and it is not available, you must immediately return all the cards in the Past and then take one of the newly available cards.
Note: An Exploration card may be a permanent event, a temporary event, etc. If it is a permanent event, the card remains in play (making it impossible to discover the terrain it hides) until it is resolved.
Example:
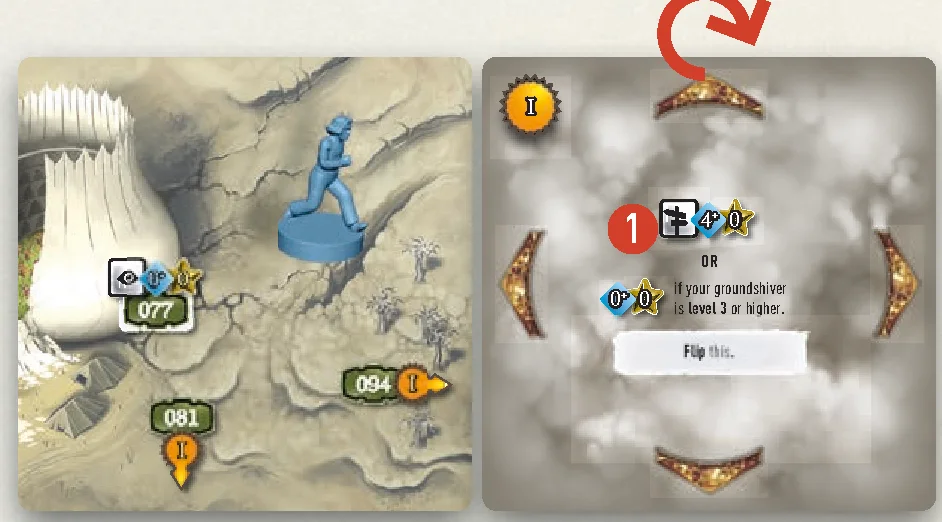
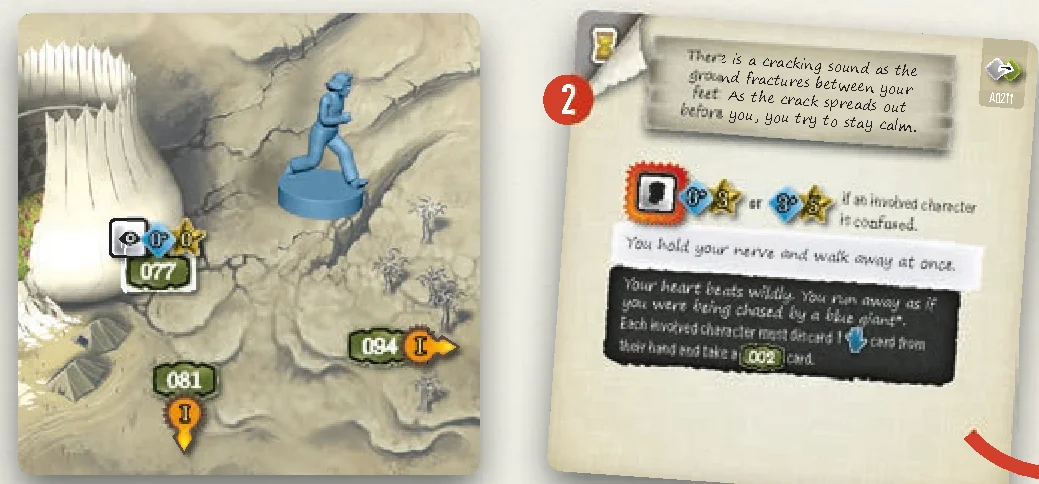
- Bruno performs the pathfind action and applies its consequence by flipping the Exploration card over.
- It is a temporary event , which he resolves before discarding it to the Past.
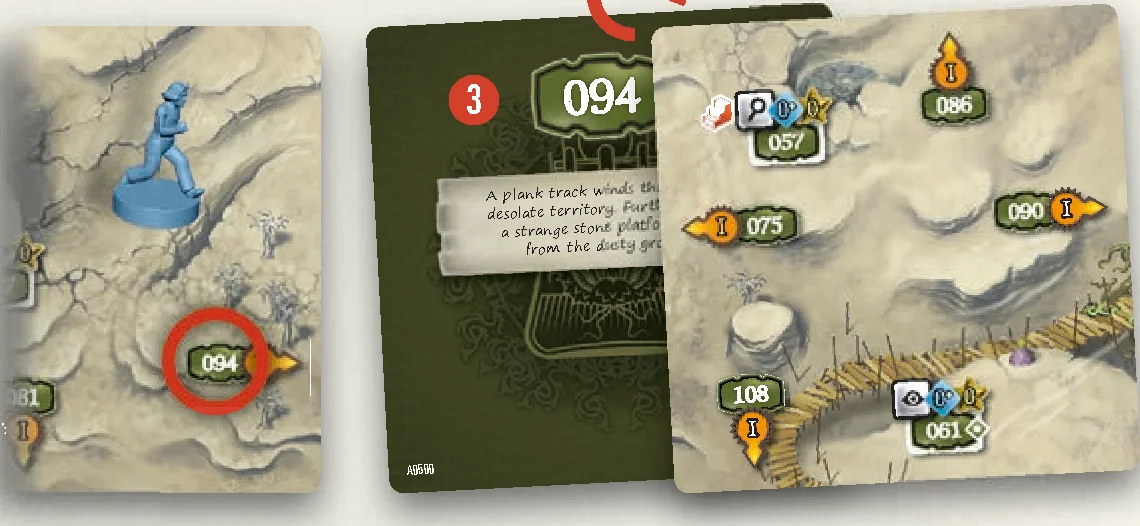
- The space the Exploration card used to occupy is now open, so Bruno takes the 094 Adventure card associated with the arrow , and puts it into play in the newly opened space. He will now be able to move to this new Terrain card by performing the move action visible on his Character card. Then, he puts 3
 Exploration cards into play – one next to each arrow.
Moving a Figure on the Board
To move your figure on the Board, you must (with exceptions) take the move action shown on your Character card, which allows you to move your (and only your) figure to an adjacent Terrain card, provided your carried weight does not exceed your maximum carried weight.
Other effects you will discover as you play (skill, event, etc.) may move figures.
Some cards refer to the cardinal points: north, south, east, and west. In this regard, assume card text and icons are oriented to be read from west to east.
Reminder! If a mandatory action can be seen on a Terrain card, players whose figures arrive onto that Terrain card must immediately take it collectively, unless it can no longer be taken.
Note: It may happen that some permanent events (cliff, bottomless pit, etc.), showing several placement arrows, separate two Terrain cards. In this case, these events feature an action whose consequence is to move the figure to the Terrain card on the other side of the obstacle.
Not Enough Room to Put a Card into Play
When there is not enough space on the table to put a card into play, all characters must take actions to meet on the same Terrain card. Then, players must return the Terrain cards of their choice – except the one containing their figures – along with the Permanent event cards attached to them, making sure that all remaining Terrain cards are reachable. If applicable, you must put a new Exploration card into play in every adjacent empty space towards which an arrow on a Terrain card points.
Spotting a Hidden Number
Some cards – Terrain, Permanent event, Temporary event , Purse , etc. – may contain hidden numbers. When you spot one, you may take the card bearing that number and then, after making sure it is the right card, discard the card on which you spotted the hidden number, and replace it with the new one.
When a hidden number can be seen on a Terrain card, or on a Permanent event card attached to it, you may not take the corresponding card unless you are on that terrain.
Example: On the 154 Terrain card, Ludovic has spotted the hidden number 316. He discards the 154 card and takes the 316 card, which has the  icon on its back, confirming it is the right card.
Note: A hidden number is always made of 3 digits. On the back of the card matching the hidden number, you should see the number of the card on which you spotted it. If that icon is not there, or if it does not match the number of the card where you spotted the hidden number, then you must have taken the wrong card and must return it.
Threat Booklets, Scenarios, and Bookmark
Threat Booklets are divided into scenarios and narrate the story that players live as they travel through the Collapsing Lands.
Each scenario sets one or more goals that players must reach. At the end of each scenario, you read its epilogue. This happens once you are back at the Citadel (unless clearly stated otherwise by the scenario), usually because the characters run low on life points (and prefer returning before all falling unconscious) or have achieved their goals.
The Threat Booklet then details the consequences of your actions, which vary based on your choices and your performance during the scenario (whether you reached your goals or not). The booklet then guides you to a new scenario, and so on until the final confrontation against the Threat you have chosen to face.
The position of the bookmark in the Threat Booklet is defined by the scenario and reminds you which scenario you are playing.
Note: There are several ways to go back to the Citadel. The most common one is by moving the characters’ figures along the Terrain cards that lead back to the Citadel, and then resolving the permanent event that enables you to end the current scenario.
Players’ Progress and Citadel Leaflet
The Citadel leaflet is shared by all players. It consists of several pages that track your group’s progress through the adventure, among other things.
Player Aid Page
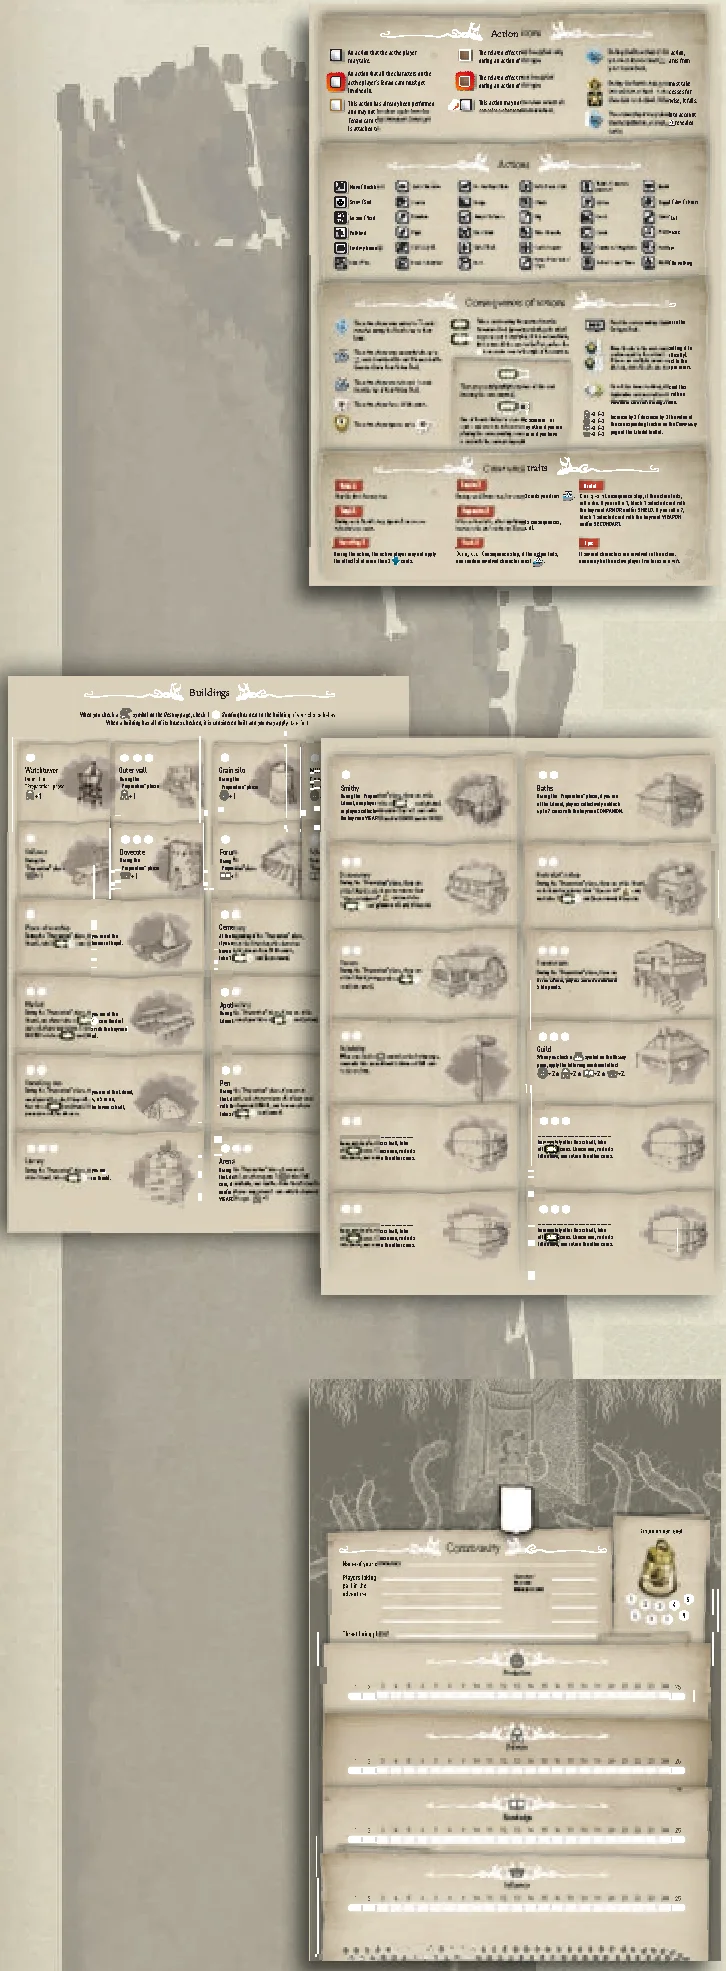
This page contains a reminder of the main action consequences and a description of creature traits  .
.
Some creatures you will fight during the adventure have generic abilities called “traits”: When performing the  fight action, you must apply the effect of each trait displayed next to the action. The effect of each creature trait is detailed on this player aid.
Buildings Pages
This is where players construct buildings by checking boxes on the buildings of their choice. When a building has all of its boxes checked, it is considered to be “built” and its effect may be applied.
Community Page
On this page you can write down the names of the players taking part in the adventure and record each character’s life point total when you end a scenario or save the game. You can sketch your community’s coat of arms here.
This page is also where you keep track of:
- The level of your groundshiver (an artifact you begin every scenario with, except for the introductory scenario “A new beginning”). That level is given by the scenario, and enables you to reduce the amount of energy you spend to explore the Collapsing Lands.
- Your tracks: Influence, Knowledge, Defense, and Production scores, in the form of tracks extending from 1 to 25.
These scores may fluctuate up or down throughout your adventure, and may be taken into account for certain in-game effects, and at the end of scenarios, to measure how well you completed your goals. You may not reduce a score to less than 0 or increase it to more than 25. If the prerequisite of an in-game effect requires you to reduce a score to less than 0, you may not apply that effect. If a score must be increased to more than 25, set it to 25.
- Production : Represents the community’s capacity to produce food.
- Defense : Represents the community’s capacity to defend itself and secure the surrounding territories.
- Influence : Represents the relationships between the community and the other inhabitants and institutions of the Collapsing Lands.
- Knowledge : Represents the knowledge, information and rumors the community holds.
Destiny Page
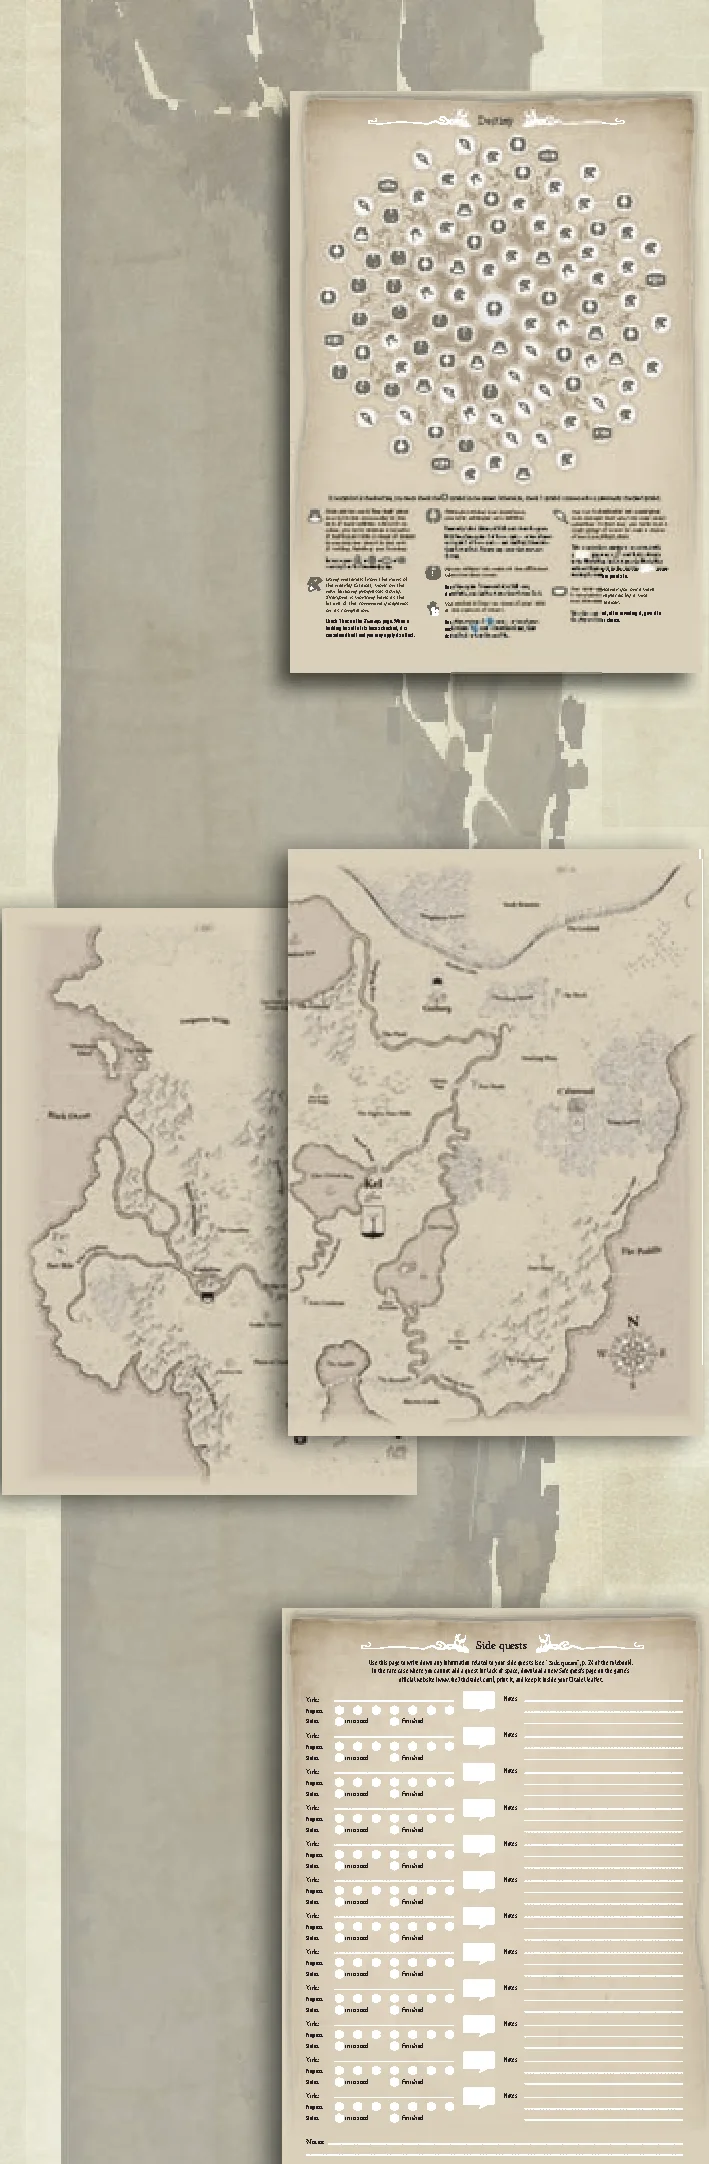
During the game, you gain “Hope reborn!” cards that you can “spend” (these cards will let you know how) to check symbols on this page, granting you helpful bonuses. These bonuses are detailed on the Destiny page and enable you to gain new Skill cards, construct helpful buildings, etc.
Map of the Kel Protectorate Pages
The map of the Old World, which you may annotate.
Side Quests Page
This is where you list all the side quests obtained during the adventure. Each side quest may only appear here once.
Tip: Many side quests can be obtained at the tavern, a building you can build on the Buildings page of the Citadel leaflet.
A side quest generally invites you to write down its title and the dialogue (from the Dialogue Book) that caused you to obtain the quest. You may freely reread that dialogue to be reminded of the context and goal(s) of the quest.
You may use the “notes” section to record information that might help you complete the quest, such as the name of a place or character.
When you add a side quest to the Side quests page of the Citadel leaflet, it is active (but not necessarily initiated yet).
When a quest becomes “initiated” – which will be explicitly instructed by an in-game effect – it means you have made a step towards its completion. Some side quests do not need that status to reach completion.
When a quest is marked as “finished” – which it becomes through an explicit in-game effect – it is no longer active: Ignore any in-game effects that concern it.
Reminder! Underlined text on a card or dialogue refers to a side quest.
Note: Some side quests cannot be finished unless you are at the Citadel.
Saving the Game
You may save the game only once during each scenario.
You may save the game at any time as long as the bookmark is in the Threat Booklet, all conscious characters are on the same Terrain card, and no player is:
- Reading a dialogue in the Dialogue Book.
- Performing an action.
- Compelled to take a mandatory action.
When you save the game:
- Each player discards all of their cards.
- Discard all the cards on the Board into the Past, except for the
 cards that are in play, and the Terrain card all characters’ figures are standing on.
 - Stack the remaining cards in the following order (from the top down) and put them behind the “Save” divider in the game box:
- The Terrain card where the figures were standing, and the cards.
- For each player, their:
- Character card with their blocked cards underneath it.
- Save – Action Deck card, with all the cards in their Action Deck underneath it.
- Save – Discard Pile card, with all the cards in their Discard Pile underneath it.
- cards.
- The Terrain card where the figures were standing, and the
- Each player stores their life point counter in the box as a record of the number of life points they had when the game was saved (it is also recommended to replicate that number on the Community page of the Citadel leaflet).
Resuming the Game
When you resume a game after suspending it:
- Return all the cards in the Past (Adventure and Exploration).
- Put the cards and the saved Terrain card back into play. Place the figures of all conscious characters onto the latter and put one Exploration card into play in front of each arrow shown on it.
Then, each player puts back into play their:
- Character card with their blocked cards underneath.
- Action Deck (and returns their Save – Action Deck card).
- Discard Pile (and returns their Save – Discard Pile card).
- cards.
Reminder! The position of the bookmark in the Threat Booklet reminds you which scenario you are playing. Leave it there!
Note: Between two sessions, all cards and cards in the Past are stored behind their respective dividers.
Leaving the Adventure Partway Through
When a character leaves the adventure permanently, the player returns their figure, their Character card, their Character Skill cards (bearing the character’s initial or the letter “X”) that were blocked underneath it and those they have in hand, the cards in their Action Deck and their Discard Pile, and finally their cards.
They must give their Advanced Skill and Reflex Skill cards to the other players, who discard them. They also give them their (blocked or not) cards without the icon, and the cards that were blocked underneath their Character card. Any blocked and cards remain blocked.
Before they put their life point counter away, their life points are divided equally among the remaining conscious characters.
Joining the Adventure Partway Through
A player can easily join the adventure, or continue it with a new character if their previous character has left the adventure. They may only do so before a new scenario begins, when the players are at the Citadel.
To do so, they choose a character and form their Action Deck as explained on pages 5 to 7 of the introductory scenario.
Easily Forgotten Golden Rules
- Any Adventure card whose numbox (on the back) is associated with a icon is linked to a specific scenario or card. You must take it over any other if the pictograph inside the icon matches that of the scenario you are playing, or can be seen on another card you possess. Otherwise, you may not take it and you must take another card (bearing the same number) with the shape.
- When an action is mandatory , all characters on the same Terrain card as the player who revealed it must get involved in the action. The involved characters choose which of them is the active player.
- During the Gear up step of an action, the active player may not select multiple cards that have a KEYWORD in common.
- During the Draw step of an action, the active player may choose to draw MORE cards than the number ( default cost) shown on the action.
- Any , , , , , icons in the result area of cards are only ever taken into account when they are revealed from the active player’s Action Deck during the Result step of an action.
- The icon on certain actions limits only the number of cards whose successes you may take into account. It does not forbid you to draw more cards or to take class icons on every drawn card into account.
- During the Result step of a compound action, reduce the die’s value by 1 for each success taken into account (even if the action fails).
Glossary
- Action Deck: Contains a player’s Action cards (blue back), which they draw to perform actions.
- Active player (p. 10): The player whose turn it is; the one who takes an action.
- Advanced Skill (p. 19): A Skill card that players can gain when they make progress on the Destiny page of the Citadel leaflet, and whose effect(s) may be applied from a player’s hand.
- Adventure Deck: Contains the numbered Adventure cards (green or gold back).
- Available (card) (p. 16): A card is said to be available when it can be found in its original deck.
- Banish (p. 18): To remove a card from play once and for all. The card goes into the game box, behind the “Banished cards” divider.
- Block (p. 18): To slip a card under one’s Character card. A blocked card loses all of its effects until it is unblocked, but its weight must still be taken into account.
- Board: The area formed by the Terrain and Permanent event cards that are in play.
- Buildings (page) (p. 23): A page of the Citadel leaflet that lists the buildings that may be constructed (through the Destiny page) by players, providing them with bonuses.
- Class icon (p. 13): An icon that can be converted to obtain additional successes, cancel damage, etc.
- Compound action (p. 11): An action usually made up of multiple rows and taking several turns to be finished. It usually ends with a success during the Consequence step of the last action row.
- Cost (p. 12): The minimum number of Action cards that must be drawn to perform the action.
- Destiny (page) (p. 24): A page of the Citadel leaflet where players can make progress by spending “Hope reborn!” cards in order to check symbols that unlock powerful bonuses.
- Dialogue (p. 18): A numbered paragraph in the Dialogue Book that you must read when a “Read ### ” effect instructs you to.
- Discard (p. 18): To put an Action card (blue back) into one’s Discard Pile or an Adventure or Exploration card into the Past.
- Discard Pile: The play area into which you discard your Action cards (blue back).
- Draw (p. 12): To take the top card(s) of one’s Action Deck.
- Exploration Deck: Contains the Exploration cards (foggy back) that players must resolve to continue exploring the world.
- Involved character (p. 10): A character taking part in an action (including the active player).
- Keyword (p. 12): A word in capital letters visible at the bottom of cards. During the Gear up step of an action, the active player may not select multiple cards that have the same keyword.
- max. X (p. 13): The maximum number of times (“X”) you may apply the corresponding effect.
- Numbox (p. 16): The dark-green icon in which the number of a card can be seen.
- Past: The play area into which players discard Adventure (green or gold back) and Exploration (foggy back) cards.
- Recovery (perform a) (p. 20): At any time, you may choose to lose life points to shuffle random cards from your Discard Pile back into your Action Deck.
- Reflex Skill (p. 19): A Skill card that players can gain when they make progress on the Destiny page of the Citadel leaflet, and whose effect is applied when the active player reveals it from their Action Deck during the Result step of an action.
- Return (p. 18): To put a card back in its place in its original deck. In the Adventure Deck, sort cards by number – green cards always come before any gold cards bearing the same number, and cards always come before cards bearing the same number.
- Reveal: Look at / read the contents of a card.
- [selected] (p. 12): When this word can be seen between brackets on a card, you must apply the associated effect if you have selected that card during the Gear up step of the action.
- Simple action (p. 11): An action that ends immediately after the Consequence step.
- Skill (p. 19): A card that the player has in hand.
- Success (p. 12): icons needed to successfully perform an action.
- Take into account (p. 12): When talking about a card revealed during the Result step, to count the successes shown in the card’s result area.
- Terrain (p. 17): A card that represents a portion of the Collapsing Lands.
- This: Designates the card you are reading.
- Trait (p. 23): An effect you must apply when fighting certain opponents. Traits are explained in detail on the Player aid page of the Citadel leaflet.
- Unconscious (p. 20): A player with 0 life points is said to be unconscious. When they gain 1 or more life points, they regain consciousness.
- World Map: The plasticized screen representing the map of the Kel Protectorate as it used to look. It contains invaluable, though often outdated, information about the important places of the world. It can be updated by inserting cards obtained through the Destiny page of the Citadel leaflet.
- You: As part of an in-game effect, “you” refers to the active player.
Icon Reference
Decks
 Action cards
 Adventure cards
 Exploration cards
Card Types
 A Skill card in your hand.
 A card representing an item, state, companion, etc.
- You may not choose to discard this card or give it to another player.
 An item’s weight (equal to X).
 A Quest item card common to all characters.
 A World Map card that must be inserted into the World Map.
 A Global event whose effects apply to the whole Board.
 A Temporary event that must be resolved immediately.
 A Permanent event that must be put into play, oriented in the same way as the other cards on the Board, with its placement arrow pointing to the Terrain card your figure is standing on. It is thus said to be “attached” to that Terrain card.
Actions
- An action that the active player may take.
- An action that all the characters on the active player’s Terrain card must get involved in.
 This action has already been performed and may not be taken again from the Terrain card this event is attached to.
 The related effect may be applied only during an action of this type.
 The related effect must be applied during an action of this type.
- An action all conscious characters must be involved in.
- The default cost of the action, i.e. the minimum number of cards to be drawn to perform the action.
- During the Result step of the action, the active player may take the successes shown on no more than X revealed cards into account, where X is equal to the default cost of the action .
- / The difficulty of the action, i.e. the minimum number of successes (full gold stars) you must obtain for the action to succeed.
- Consequences that must be applied if the action succeeds.
- Consequences that must be applied if the action fails.
Card Effects
 During the Draw step, the active player may draw up to X fewer cards.
 During the Draw step, the active player must draw X additional cards.
 During the Result step, the active player takes 1 success into account.
 During the Result step, the active player may take successes on Y additional revealed cards into account.
- , , , , , Class icons, with context-dependent effects.
 For each obtained class icon, you get 1 success .
 For each obtained class icon, you cancel 1 damage .
- You obtain any one of the following: or or or .
- You may replace this with any one of the following: or or or .
Action Consequences and In-Game Effects
- The active player may add up to X cards revealed during the Result step to their hand.
 The active player may randomly take up to X cards from their Discard Pile and shuffle them back into their Action Deck.
- The active player must discard X cards from the top of their Action Deck.
 Lose X life points.
- Cancel up to X .
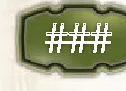 Take a card bearing this number from the Adventure Deck (green by default; gold only if no green card is available). This icon is referred to as a “numbox”. If no corresponding card is available and there is no icon to the right of the numbox, first return all the cards in the Past.
- There are possibly multiple versions of this card (bearing the same number). One of them is linked to a specific scenario – or card – and must be taken over any other if you are playing the corresponding scenario or if you have a card with the same pictograph.
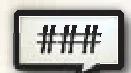 Read the corresponding paragraph in the Dialogue Book.
- Move the die to the next row (setting it to a value equal to the action’s difficulty). If there are multiple arrows next to the die icon, move the die that many rows down.
 Once this card has been resolved (and discarded, returned, banished, etc.), replace it with an Adventure card that belongs there.
 Situational icons used for some rare in-game effects.
- , , , Increase by X / decrease by X the corresponding score on the Community page of the Citadel leaflet.
Credits
- Original design: Ludovic Roudy and Bruno Sautter
- Artwork: Ludovic Roudy
- Texts / dialogues: Bruno Sautter, Erwan Pressensé
- English translation: Pierre Gamberoni, Ian Stephenson
- French proofreading: Erwan Pressensé, Pierre Gamberoni, Kudos (rulebook)
- English proofreading: Pierre Gamberoni, Matthew Bauer
- A game published by Serious Poulp · www.the7thcitadel.com · ©2023 SERIOUS POULP.
- SERIOUS POULP, THE 7TH CITADEL and their logos are registered trademarks of SERIOUS POULP.
- Special thanks to our families, friends, and playtesters. And a warm thank you to all 33 353 backers who made this adventure possible!
Introduction & Overview
Overview and Object of the Game
The 7th Citadel is a cooperative exploration and adventure board game, in which you play against the game and try to beat a Threat that looms over you. You may take on the challenge alone or in a team of 2, 3, or 4 adventurers.
You win!
You win if you manage to overcome the Threat you chose to face. When this happens, it will be clearly stated by the game.
You lose…
You lose if one of the following occurs:
- All characters are unconscious (see “Unconsciousness” p. 20).
- An in-game effect reads: “Your adventure ends here.”
When you beat a Threat or your adventure ends prematurely, you must start a new adventure by playing the introductory scenario “A new beginning”. Everything you gained and achieved during the previous adventure is lost.
Rules Summary
You are facing a threat – in the form of a Threat Booklet divided into scenarios – that will inevitably strike you (unless you die in the meantime!).
Note: This box contains an introductory scenario, and the “Dadachaem’s awakening” and “Drums of desolation” Threat Booklets.
You explore the world of the Collapsing Lands by resolving Exploration cards, putting into play numbered Adventure cards (Terrain and Permanent event cards) that gradually form the Board, and talking with the inhabitants of the Collapsing Lands (by means of the Dialogue Book).
During the game, you decide collectively which character will take an action from among those that can be seen on the Terrain card their figure is standing on, the Permanent event cards attached to that Terrain card, and their Character, Skill , Purse and Quest item cards.
In order to perform actions, you will use your personal Action Deck.
Every action works the same way. The active player, who chose to take the action, must go through the following steps in this order:
- Gear up: Select which of their cards they can and wish to use. Their effects include lowering the amount of energy the player must spend to perform the action and increasing chances of success.
- Draw: Spend energy, which is represented by the action’s cost, by drawing cards from their Action Deck.
- Result: Reveal any drawn cards, which are worth variable amounts of successes, and then compare their total number of successes with the action’s difficulty (the more cards they drew, the more successes they should obtain, but the faster they are spending their energy).
- Consequence: Apply the consequences of the action, which vary depending on whether it succeeded or failed.
Once the active player has finished an action, another turn begins: One player (either the same or another one) takes another action.
Note: Certain actions – called “compound” actions – must be performed multiple times to be finished, but they essentially follow the same process (with a few minor differences, detailed later).
When you no longer have (enough) cards in your Action Deck, you must perform a Recovery to shuffle cards from your Discard Pile back into your Action Deck. However, this causes you to lose life points (see “Recovery”, p. 20).
When you run low on life points or you think you have achieved the goal(s) set by the scenario, it is time for you to return to the Citadel to discover the consequences of your actions!
Throughout the game, your group of adventurers will progress by accumulating hope, represented by specific cards, and trading it for precious bonuses on the Destiny page of the Citadel leaflet.
Unlike most board games, The 7th Citadel will give you the experience of a long-term adventure, while the easy saving system enables you to suspend your adventure at any time and resume it later on.
Components & Setup
Components
- This rulebook
- 1 “Introductory scenario” booklet
- 2 Threat Booklets
- 1 Dialogue Book
- 1 bookmark
- 1 plasticized World Map
- 4 Citadel leaflets
- 4 6-sided dice
- 1 magnifying glass
- 8 character figures
- 8 cardboard character figures
- 3 storage trays
- 32 dividers
- 4 life point counters
- 1074 cards separated into different “decks”:
- 8 Save cards
- 4 Character cards
- 184 Action cards (with a blue back)
- 151 Exploration cards (with a foggy back)
- 727 Adventure cards (with a green or gold back)
Sorting and Storing Game Components
Golden rule! You may not look at the contents of the cards, Threat Booklets, and Dialogue Book until the game invites you to do so.
- Behind the “Characters” divider, store the 4 Character cards.
- Behind the “Save” divider, store the 8 Save cards.
- Behind the “Character Skills” divider, store the 84 Character Skill (blue back Action cards) identified by a icon on the front (top left corner) containing the character’s initial A, B, C, D or the letter “X”.
- Behind the “Advanced Skills” divider, store the 76 Advanced Skill cards (blue back Action cards), identified by a icon.
- Behind the “Reflex Skills” divider, store the 24 Reflex Skill cards (blue back Action cards), identified by a icon.
- Store the Exploration cards, foggy side towards you, behind the dividers matching their respective areas (I, II, etc.).
- Sort the Adventure cards – green or gold back – towards you, in ascending order of their numbered backs and store them behind the appropriate dividers (cards 000 to 049 behind divider “000”, 050 to 099 behind divider “050”, etc.).
During the game, you will store:
- Any cards behind (or on) the “Quest items” divider.
- Any discarded Adventure and Exploration cards behind (or on) the “The Past” divider.
- Any banished cards behind the “Banished cards” divider.
Golden rule! Green Adventure cards must always be placed before any gold Adventure cards bearing the same number. Then, among the cards of the same color, any Adventure cards must always be placed before any Adventure cards bearing the same number.
Note: Some Adventure cards exist only with a gold back. Some Adventure cards with a have no alternative version with a .
Note: As stated on the “Quest items” and “The Past” dividers, you may lay these dividers flat near the Board and place the applicable cards on them.
Begin a New Adventure
You will choose your character and their starting skills during the introductory scenario “A new beginning”.
When you have finished reading the rules and are ready to begin a new adventure, open the introductory scenario’s booklet to page 3 and read until the booklet tells you to stop.
Play Area & Layout
Components & Booklets Overview
Here is an overview of the key play areas and booklets used in the game:
- World Map: The World Map shows what the world looked like during the golden age of the Kel Protectorate. It contains invaluable, though often outdated, information about important places. It can be updated through the insertion of cards that you may obtain by making progress on the Destiny page of the Citadel leaflet.
- Dialogue Book: This contains the dialogues between your character(s) and the non-playing characters you may encounter (see “Read a dialogue” p. 18).
- Threat Booklets and Bookmark: Each Threat Booklet contains the scenarios related to the corresponding Threat. The bookmark indicates your current location in the Threat you are playing.
- Citadel Leaflet: This 8-page leaflet is where you record your group’s progress (Destiny page), the buildings you may build or have built (Buildings page), the advancements in your side quests (Side quests page), and your scores/levels for multiple characteristics (Community page) (see “Players’ progress and Citadel leaflet” p. 23).
- “The Past” Area: Adventure and Exploration cards that are discarded during the game must be stored behind (or on) this divider.
- “Banished Cards” Area: All cards that are banished during the game must be stored behind this divider.
Play Area Elements
- Life Point Counter: Tracks each character’s life points.
- Adventure Deck: Contains all numbered cards with a green or gold back.
- Exploration Deck: Contains random events sorted by area.
- “Quest Items” Area: All cards that are obtained during the game must be stored behind (or on) this divider. You may look at them at all times.
- Character Figures: Miniatures representing characters on the Board.
- The Board: You build the Board as you put faceup Terrain and Permanent event cards and facedown (foggy side up) Exploration cards into play.
- Front of a Terrain card
- Front of a Permanent event card
- Back of an Exploration card
- Discard Pile: Each player has their own Discard Pile that contains the Action cards , faceup, they have discarded during the game. The player may look through the cards in their Discard Pile at all times.
- Action Deck: Each player has their own Action Deck, where they draw cards to perform actions. They may not look at the cards in their Action Deck.
- Character Card: This card is placed in front of the player playing that character. You will store your blocked cards underneath this card (see “Block / unblock a card” p. 18), which you may look at freely. We recommend placing your Action Deck and Discard Pile on either side of this card.
- Global Event Card: A card whose effect affects the entire Board.
- Purse Cards: Each player places their cards in front of themselves (they have none when the game begins). Tip: You can save space on the table by laying cards on top of one another, so that only their effects are visible.
- Hand: Each player has a hand containing their Skill cards (they have none when the game begins).
Card Types
Character Cards
A Character card represents the character you are playing and enables you to take the move action. It also acts as a reminder of the maximum number of Skill cards you may have in hand and the maximum weight you may carry. These values depend on player count.
- Character’s name
- Corresponding figure (in the character’s color)
- Available action and effect
- Default maximum hand size and carried weight (depends on player count)
- Unique ID number
Save Cards
Save cards are used to save the game (see “Saving the game” p. 25).
Action Cards
Each player has a personal Action Deck, made only of Action cards. These represent the life force you are spending when drawing them to pay the cost of your actions or when an in-game effect compels you to discard them. When in your hand, they represent your skills . These skills help you when you perform actions or enable you to take new actions.
- Card type – Skill
- Title
- Result area: Contains successes and class icons obtained during the Result step of an action
- Effect(s) and/or available action
- Unique ID number
Exploration Cards
The cards with a “foggy” back are events that occur randomly as players explore the Collapsing Lands. They can be permanent events, temporary events, found items, etc. Each Exploration card belongs to an area, usually represented by a Roman numeral (I, II, etc.) on the back of the card and on the Terrain card it is attached to.
- Area
- Placement arrows (one of them points towards the Terrain card that caused the Exploration card to be put into play)
- Available action
- Unique ID number (on the front only)
Note: To prevent these cards from being identifiable, their unique ID numbers are located on their fronts (top right corner).
Adventure Cards
Green or gold numbered cards contain the terrains you will discover as you explore, the predefined events you can trigger (places, encounters, etc.), items you can find and many more surprises to be discovered!
- Card number
- Scenario-specific card (see “Take a numbered card” p. 16)
- Informative flavor text
- Effect(s)
- Unique ID number
Adventure cards include various types of cards:
Terrain
Terrain cards are portions of the Collapsing Lands that form the Board. You may move your figure onto them and take actions from them.
- Available action(s)
- Exploration card(s) to be put into play in the space indicated by the arrow
Permanent Event
Permanent event cards are put into play on the Board after being revealed (see “Permanent event card” p. 17). They are attached to the Terrain card in the direction their placement arrow points.
- Placement arrow (points towards the Terrain card the event is attached to)
- Performed action that has caused the event to be put into play
- Effect(s) and/or available action(s)
Temporary Event
Temporary event cards are resolved as soon as they are revealed, before being discarded (unless otherwise stated on the card) into a play area called “The Past”, represented by a divider.
- Card type – Temporary event
- Flavor text
- Effect(s) and/or available action(s)
Global Event
These cards are placed near the Board and do not leave play until an effect makes you discard them. Their effects apply to the entire Board as long as they are in play.
- Card type – Global event
- Title
- Effect(s) and/or available action(s)
Purse
These cards include items, companions, positive or negative states, etc., that you can gain during the adventure. They help you – or hinder you – when you perform actions, or enable you to take new actions. They are the only cards bearing one or more KEYWORDS.
- Card type – Purse
- Weight
- Title
- Flavor text
- Effect(s) and/or available action(s)
- Keywords
Quest Item
These cards are common to all players and provide you with helpful information. In some cases, they enable you to benefit from positive effects or take new actions. They are stored behind (or on) the “Quest items” divider and the players may look at them freely. Unless told otherwise, you may not discard them.
- Card type – Quest item
- Title
- Effect(s) and/or available action(s)
World Map
These cards must be inserted into a slot of the World Map (see “World Map” p. 8).
- Card type – World Map
- Arrows showing where to place any future cards
Turn Sequence & Actions
Turn Sequence
1. Choose the active player and the action to be taken
Each turn, one player is collectively chosen to be the “active player”. They choose the available action they wish to take.
This action will always be represented by an icon in a white square visible on one of the following:
- The Terrain card (1) their figure is standing on.
- A Permanent event card (2) attached to the Terrain card their figure is standing on.
- A Temporary event card (3) that has just been revealed (this action is mandatory).
- One of their Skill cards (4) they have in hand.
- One of their Purse cards (5).
- A Quest Item card (6).
2. Check for other involved characters
Each character whose figure is on the active player’s Terrain card…
- May get involved in the action if it is not mandatory and the active player agrees.
- Must get involved in the action if it is mandatory (see “Mandatory actions” p. 11).
Unless otherwise stated, only the active player may use and/or cards during the action and they may only use their own cards.
Note: Getting involved in another player’s action may be helpful where some skills can be used to help the active player.
3. Resolve the action
The active player resolves the 4 steps of the action: Gear up, Draw, Result, and Consequence (see “Action resolution steps” p. 12).
4. Start a new turn
A new turn begins with a new active player being appointed. It may be the player from the previous turn, if all players agree. If you cannot reach an agreement, the player to the left of the last active player becomes the new active player.
Action Types
- Simple actions : Most actions in the game are “simple” actions that end immediately after the Consequence step.
- Compound actions : “Compound” actions feature one or more rows, each with consequence sections for success and failure. The current action row is the one where a die lies on the icon representing the action’s difficulty. A compound action is resolved over several turns. If it is mandatory, you must take it again right after resolving the Consequence step, and again until it is over. If it is not mandatory, you may choose to resume it later, when you decide to.
- Group actions : An action with the icon may not be taken unless all conscious characters get involved.
- Mandatory actions : A mandatory action has a red outline . When it can be seen on a Temporary event card or in a dialogue , all characters on the same Terrain card as the player who revealed it must immediately get involved in the action. The involved characters choose which of them is the active player. When it can be seen on a Terrain card, all characters on that terrain must immediately get involved in the action, provided it can still be taken. The involved characters choose which of them is the active player.
- Forbidden actions: An action cannot be taken if:
- Another action is already being performed.
- It has a prerequisite that players cannot meet.
- It has the icon and not all conscious characters are involved in it.
- An icon for this action can be seen on a Permanent event card attached to the Terrain card showing the action – this means the action has already been performed and cannot be performed again on this Terrain card.
Resolving an Action
All actions have:
- A icon showing what action it is.
- A default cost , i.e. the minimum number of cards the active player must draw from their Action Deck to perform the action.
- A difficulty , i.e. the minimum number of successes to obtain for the action to succeed.
- Consequences if the action succeeds and, usually, consequences if the action fails .
Compound actions come with a slot for a die, showing the action’s difficulty. When the active player takes the action, if there is no die on the card, they must place one in the slot on the first action row, making sure that its value matches the shown difficulty . If no die is available, the active player must take one from another card.
The default cost of some actions is associated with a “chain” icon , which caps the number of cards whose successes you may take into account (more information below).
Action Resolution Steps
1. Gear up
The active player selects, from among their cards, those whose effects (some or all) they wish to apply. Each effect may be used only once during the action.
A card may only be selected if it has a condition icon that matches the taken action AND no KEYWORD in common with another selected card.
Golden rule! When a icon can be seen on one of the active player’s cards – or on a card – and the active player takes the corresponding action, they MUST select that card AND apply its effects.
Clarifications:
- You do not need to select the Skill cards whose effects you want to apply during the action.
- When the active player takes an action available on one of their cards, that card is automatically selected.
- When “[selected]” can be read as part of an effect on a card, you must apply the effect that follows if you have selected the card during the Gear up step of the action.
- An empty icon on a card means the associated effect may be applied during any action.
2. Draw
The active player determines the cost of the action and draws that many cards.
A. Determine the cost of the action
Cost is shown in the blue diamond . It represents the number of cards the active player must draw (the energy they must spend) from their Action Deck to perform the action.
- A effect increases the action’s cost by X.
- A effect reduces the action’s cost by X.
The cost of an action may be 0. In cases where the cost is lowered below 0, consider it to be 0.
B. Draw Action cards
The active player draws a number of cards from the top of their Action Deck equal to the cost of the action, and places them face down in front of themselves. If they choose to, they may draw any number of additional cards from the top of their Action Deck to increase their chances of success. Any such additional cards are placed face down with those previously drawn.
If their Action Deck contains fewer cards than they should be drawing, the active player must immediately draw the remaining cards and perform a Recovery (see “Recovery” p. 20) – which does not end the action – and then continues to draw from the replenished deck enough cards to pay the action’s cost, provided their character is still conscious.
3. Result
The active player reveals the cards they drew, counts the obtained successes, and then compares the total with the action’s difficulty.
A. Reveal the cards
The active player reveals the cards they just drew (by flipping them face up).
B. Take successes into account
The active player may take into account any obtained successes visible in the result areas (left-hand strip) of the cards they just revealed. They obtain:
- 1 success for each full star .
- 1 success for each pair of “half-stars” they manage to combine to construct a full star, provided the halves are oriented so when combined they form one complete star (i.e., one left half and one right half-star).
The active player is not compelled to take all obtained successes into account; they may even choose to ignore them all if they wish.
Important exception! Some actions with a “chain” icon are less likely to succeed without the appropriate skills and/or equipment. The icon means the active player may take into account the successes (stars and half-stars) in the result areas of X revealed cards at most (player’s choice), where X is the action’s default cost . For example, if the action’s default cost is , the active player may take into account the star and half-star icons in the result areas of no more than 3 revealed cards of their choice, regardless of how many they chose to draw. They must ignore any stars and half-stars shown on the other cards they have revealed.
This restriction only applies to the successes in the revealed cards’ result areas.
C. Apply the effects of their cards
The active player may apply the effects of one or more of their cards (selected cards, effect areas of cards from their hand, cards, etc.) in order to get additional successes and/or take additional cards into account and/or convert class icons into various bonuses.
Important! Any , , , , , icons in the result area of cards are only ever taken into account when they are revealed from the active player’s Action Deck during the Result step of an action.
- Get additional successes: Each icon is worth 1 additional success.
- Take additional cards into account: When the action’s cost has a icon, the effect enables the active player to take into account the successes in the result area(s) of Y additional revealed card(s).
- Convert class icons into various bonuses: Some effects enable the active player to convert into various bonuses the , , , class icons shown in the result areas of the revealed cards, on the cards they have selected, on the cards in their hand, on their cards, etc.
Clarifications:
- Even when the action’s cost has a icon, you may take every class icon in every revealed card’s result area into account and apply the effect of every Reflex Skill card and every card you selected.
- Each class icon obtained may be used only once, only by the active player, and for a single effect.
- When an effect comes with “max. X”, the active player may apply that effect X times at most.
- The icon is “wild” – it may represent any of the following class icons: , , , or .
- The icon means you may “spend” any of the following icons to apply the shown effect: , , , or .
D. Check the number of successes obtained against the action’s difficulty
Finally, the active player compares the successes they obtained with the action’s difficulty.
In a simple action, that is the number in a gold star , and in a compound action, it is the number in a gold star shown on the upper face of the die resting on the card .
- Simple action: If the active player takes into account as many successes as (or more than) the number shown in the star, the action succeeds. Otherwise, the action fails.
- Compound action: If the active player takes into account as many successes as (or more than) the number shown on the die, the action succeeds. Otherwise, it fails, in which case they must reduce the value of the die by 1 for each success taken into account and apply the consequence of failure.
Clarifications:
- If the active player gets more successes than needed, any “excess” successes are lost.
- When a card is discarded, returned, or banished, any die resting on it is removed from it and returned to the game box.
Note: When a compound action succeeds, either the die is moved to another action row or the card is discarded. Most compound actions end with a success on the last action row.
4. Consequence
The active player applies the action’s consequences and then discards all cards revealed during the Result step.
A. Apply the consequences
If the action:
- Succeeds: they must apply the effects shown in the white section .
- Fails: they must apply the effects shown in the black section . If there is no such section, failing this action has no consequence.
The main consequences of actions are detailed on pages 16 to 18.
B. Discard the revealed cards
Lastly, the active player discards all cards revealed during the Result step. The effect means the active player may add up to X of these cards to their hand, instead of discarding them.
Golden rule! Unless explicitly stated otherwise (e.g. “each involved character…”, “one involved character…”, “one random involved character…”), the consequence of an action applies ONLY to the active player.
Action Resolution Examples
Simple Action Examples
Bruno wants to move a massive boulder by taking the following pull / push / lift action. No other character gets involved in it.
- Gear up: Bruno selects his “Flail” card, whose effects can be applied during a pull / push / lift action .
- Draw: Bruno is supposed to draw 5 cards, but he decides to apply the effect of his flail in order to draw 2 fewer cards , bringing the action’s cost from down to . Bruno draws 3 cards from his Action Deck and places them face down in front of him.
- Result: Bruno reveals the 3 cards he just drew. The first card shows a full star (1), i.e. 1 success. The second shows 1 left half of a gold star (2) and two class icons, and (3). The third shows 1 right half of a gold star (4) and 1 class icon (5). Bruno manages to couple both half-stars (2 and 4) and obtains a second success. His flail enables him to convert any 3 class icons (3 and 5) into 1 success, at most twice (max. 2), which gives him a third success. Since this is greater than or equal to the action’s difficulty (3 successes required), the action succeeds.
- Consequence: Bruno applies the consequence in the white section (success), taking 1 049 card (the icon means “if it is available in the Adventure Deck”) and discarding the Event card with the obstructing boulder. He discards the 3 cards he revealed during the Result step. Finally, he must apply the effect after “[selected]” since that card was selected. He rolls a 2 on the die, so he must discard his flail into the Past.
Ludovic takes the pathfind action shown on the back of an Exploration card.
- Gear up: Ludovic does not select any of his cards.
- Draw: Ludovic does not draw any cards (the action’s cost is ).
- Result: Since Ludovic needs 0 successes (the action’s difficulty is ), the action succeeds.
- Consequence: Ludovic applies the consequence of success (white section) – he flips the card.
Compound Action Example
The card Ludovic has revealed shows a mandatory, compound fight action. Ludovic and all the characters on his Terrain card – in this case, Bruno – must immediately get involved in it. Ludovic and Bruno choose Bruno to be the new active player. Bruno places the die on the action’s first row, showing the action’s difficulty (4) on its upper face.
- Gear up: Bruno selects his “Sword” card, which allows him to either take into account the successes on 1 additional card during a fight action associated with a icon or to convert 1 class icon into 1 success, up to 3 times (max. 3). He may not select his “Gladius” card, as it shares the keyword WEAPON with his “Sword” card.
- Draw: The action’s cost is , but Bruno decides to draw 4 cards to increase his chance of success.
- Result: Bruno needs 4 successes for the action to succeed. Because of the action’s “chain” effect , he may take into account the successes on no more than 2 revealed cards (out of the 4 he drew). He takes 2 successes into account (1). He could use the effect on his “Sword” card to take the successes on a 3rd revealed card into account. However, he prefers to apply the other effect – converting 1 class icon and 1 icon (which he treats as a icon), seen in the result areas of the revealed cards (2), into 2 successes. This brings his total to 4 successes and he reduces the die’s value by 4. Since that value is now less than 1, the action succeeds.
Important! Had Bruno only obtained 3 successes, the action would have failed, but Bruno would have reduced the die’s value by 1 for each success taken into account. The die’s value / action’s difficulty would now have been 1 (instead of 4). - Consequence: Bruno applies the consequences of success. He suffers 2 (thus losing 2 life points); he may add 1 of the revealed cards to his hand ; and he moves the die to the next action row , setting it to the same value as the action’s difficulty .
Finally, Bruno discards the other 3 cards revealed during the Result step.
A new turn begins. Ludovic and Bruno decide that Ludovic becomes the new active player and Ludovic must then continue with the fight, since the action is mandatory.
Consequences of Actions & Events
Action Consequences: General Rules
Golden rule! Card text and dialogue text override this rulebook. When in doubt about a rule or in-game effect, interpret it in the most logical way to you or, if you cannot resolve the issue, the way most in your favor.
The most frequent consequence you will apply is taking a card.
Take a Numbered Card
When taking a numbered card as a consequence of an action or event, the active player must take it from the Adventure Deck.
Note: The flavor text on Adventure cards often contains helpful details. Be sure to read it carefully!
If multiple cards with the same number are available:
The active player randomly takes one of the green cards (with exceptions – see “Golden rule!” below), reads the flavor text on the back, and reveals it.
Golden rule! Some Adventure cards are linked to a specific scenario – or card. You may not take them unless you are playing that scenario or possess that card.
When the back of an Adventure card shows a numbox associated with the shape, it means there are possibly multiple versions of this card (bearing the same number) AND one of them is linked to a specific scenario – or card.
When the back of a card shows a pictograph inside a icon, if that pictograph corresponds to the scenario you are playing or matches a pictograph shown on another card in your possession – , , , etc. – you must take it as a priority. Otherwise, you may not take it and you must take another card (bearing the same number) with the shape.
Example: Bruno must take the 123 card. There are 3 available 123 cards: one with the shape, one with the icon, and one with the icon. Bruno opens the Threat Booklet to the bookmark and sees the current scenario is associated with the icon. He may take neither the card, nor the card, so he takes the card.
Example: Ludovic must take the 456 card. There are 2 available 456 cards: one with the shape, and one with a icon. Ludovic then opens the Threat Booklet to the bookmark and sees the current scenario is associated with the icon. He must therefore take the card and may not take the other card.
If no green card is available:
The active player must take a gold card instead.
Golden rule! A player may only take a gold card if there are no available green cards bearing the same number in the Adventure Deck.
If no card with that number is available:
When the numbox of the card you must take is followed by a icon, it means you need not do anything if the card is not available in the Adventure Deck. Otherwise, you must immediately return all the cards in the Past and then take the newly available card.
If several involved players need to take a numbered card:
The active player takes their card first and resolves it before the next involved player in clockwise order does the same.
Resolving Cards Taken
Once the card has been taken and revealed, what you must do depends on the card:
- Terrain card: One involved character must put this card into play by placing it on the Board like in a jigsaw puzzle, making sure that it is oriented the same way as the other cards on the Board. Terrain cards are generally put into play after an Exploration card has been resolved (see “Exploring the Collapsing Lands” p. 21).
Note: When you put a new Terrain card into play, you do not automatically move your figure onto it. - Permanent event card: One involved character must put this card into play by placing it on the Board with its placement arrow pointing towards the Terrain card their figure is standing on, and with the card oriented the same way as the other cards on the Board. This Permanent event card is now attached to the Terrain card towards which its placement arrow points, meaning that any actions and effects shown on the card are now available to any player whose figure is on the attached Terrain card.
Golden rule! The action icon in the placement arrow reminds you which action caused you to put the card into play. As long as this event is in play, that action may not be taken again from the Terrain card to which the event is attached. - Temporary event card: One involved character must immediately resolve this event and then discard the card into the Past, unless the card states otherwise (banish it, return it, etc.). If this card shows a mandatory action , all the characters on the Terrain card of the player who revealed it must immediately get involved in that action – they choose which of them is the active player.
- Global event card: One involved character must put this card into play near the Board, where it stays until an effect makes you discard, return, or banish it. Its effects apply to the entire Board as long as it is in play.
- Purse card: One involved character may either keep this card by putting it into play in front of themselves, or discard it into the Past if it has no icon (see “Purse cards and maximum carried weight” p. 19).
- Quest item card: One involved character must store this card behind (or on) the “Quest items” divider. All players may look at it and/or use it.
Take a Card Not Directly Summoned by a Numbox
The players may have to take a card in the Adventure Deck without the card’s number being shown in a numbox – for instance, when they find a hidden number (see “Spotting a hidden number”, p. 22) or solve a riddle.
When this is the case, a icon must be visible on the back of the card you take, with “###” being the number of the card that enabled you to take it. If that icon is not visible, then you have taken the wrong card and must return it.
Other Consequences of Actions and Events
- Read a dialogue : The active player opens the Dialogue Book and goes to the indicated numbered paragraph. They read it – out loud if they wish – and apply any applicable effects (new paragraph to read, action to take, choice to make, etc.). If a dialogue contains a mandatory action , the involved players may freely choose which of them will be the active player for that action. While reading a dialogue, you may not take an action shown on a card, unless the dialogue invites you to do so. Quoted text in italics is dialogue spoken by non-playing characters. Quoted text in bold italics is dialogue spoken by the active player. Underlined text refers to a side quest. When a word is followed by an asterisk (“*”), it means your character knows about it and you can read its definition on pages 2 and 3 of the Dialogue Book’s Glossary.
- Add Skill cards to your hand : The effect allows the active player to add up to X cards drawn and revealed during the Result step to their hand.
- Discard a card: When an in-game effect instructs you to discard a card, the active player must immediately put that card into their Discard Pile if it is an Action card (blue back), or into the Past if it is either an Adventure card (green or gold back) or an Exploration card (foggy back). The cards in the Past may not be looked at, unless an in-game effect allows you to.
The effect means the active player must discard the top X cards of their Action Deck. If you must discard more cards than your Action Deck contains, you must immediately perform a Recovery (see “Recovery” p. 20). - Banish a card: When an in-game effect instructs you to banish a card, the active player must immediately remove that card from play permanently by storing it behind the “Banished cards” divider in the box. All banished cards may not be looked at, unless an in-game effect allows you to. They will be returned to their original decks as soon as the players vanquish the Threat (or lose).
- Return a card: When an in-game effect instructs you to return a card, the active player must immediately put that card back in its place in its original deck.
- Block / unblock a card: When an in-game effect instructs you to block a card, the affected player must immediately slip it underneath their Character card. A blocked card may be looked at at all times. However, as long as it is blocked, it has no effect and may not be used. If it is a card, its weight must still be taken into account and you may discard it if you wish to. If it is a or card, you may not discard it.
When an in-game effect allows you to unblock a card, take it from under your Character card, then either shuffle it back into your Action Deck if it is a card, or put it into play in front of yourself if it is one of your cards. - Gain / lose life points: The affected player increases or decreases the value on their life point counter by the indicated amount (see “Life points” p. 20).
- Suffer damage: The effect means you lose X life points.
The effect cancels , but it cannot prevent damage taken from an in-game effect reading “You lose X life points”. - Move the die to another row (compound action only): The effect means you need to move the die to the next row, and in some cases skip one or more rows in the process (). The active player places the die on the appropriate slot of the new row, making sure its value matches the shown difficulty .
- Increase your community scores: The following in-game effects enable players to increase (+X) or decrease (−X), by the indicated amount, the Influence , Knowledge , Production , or Defense scores on the Community page of the Citadel leaflet (see “Players’ progress and Citadel leaflet” p. 23). None of these scores may ever go below 0 or above 25.
Character Management: Skills, Purse & Equipment
Skill Cards and Hand Size
Skill Cards
Your Skill cards help you when you perform actions or enable you to take new actions.
They exist in 3 types:
- Character Skills : These are the skills that characters begin the adventure with. Their effects can only be applied from a player’s hand.
- Advanced Skills : These are cards that players may gain during the adventure (see “Destiny page” p. 24). Their effects can only be applied from a player’s hand.
- Reflex Skills : These are gained just like Advanced Skills, but their effect is only applied when they are revealed during the Result step.
Most effects on Skill cards imply discarding them or blocking them. When this is not the case, their effect applies as long as you have them in hand.
Hand Size
Unless otherwise stated, the maximum number of Skill cards you may have in hand is shown on your Character card and depends on player count. At any time – except during an action you are involved in – if you have more cards in hand than your allowed hand size, you must discard any excess cards of your choice.
Take an Action / Apply an Effect (Skills)
You may take an action visible on one of your cards.
When you are the active player, you may apply some or all of the effects shown on the cards you have in hand, provided the condition associated with the effect(s) matches the action being performed .
Discard / Give (Skills)
You may discard cards from your hand into your Discard Pile at any time.
You may not give any of your cards to another player.
Purse Cards and Maximum Carried Weight
Purse Cards
Your cards help you when you perform actions or enable you to take new actions.
They usually have one or more KEYWORDS that limit the number of these cards that may be selected during an action – you may not select (in order to apply their effects) more than one card which has a given KEYWORD.
Reminder! You may not select multiple cards with the same KEYWORD.
(Maximum) Carried Weight
The maximum weight you are allowed to carry can be found on your Character card and depends on player count.
Your carried weight is the total weight of your cards, including your blocked cards. It may exceed your maximum carried weight; however, as long as this is the case, you may not take the move action on your Character card.
Take an Action / Apply an Effect (Purse)
You may take an action visible on one of your cards.
When you are the active player, you may apply some or all of the effects shown on the cards you choose to select (during the Gear up step of an action), provided the condition associated with the effect(s) matches the action being performed (example: fight condition, fight action).
Discard / Give (Purse)
You may freely discard your cards, even if they are blocked, as long as they do not have a icon.
Golden rule! A player may not decide to discard a card or give it to another player.
A character may give a card to another character as long as they are both on the same Terrain card and not performing an action.
When this happens, the player who gives OR the one who receives the card must (discard the top X cards of their Action Deck), where X is equal to the weight of the item being given .
You may give one of your blocked cards (unless it has a icon), but it remains blocked.
Health, Recovery & Variants
Life Points
Every time you begin a new scenario, the Threat Booklet tells you how many life points each character receives and must indicate on their life point counter (this amount varies based on player count).
During the adventure, when gaining or losing life points, you will adjust your life point counter accordingly.
You may exceed your initial number of life points (defined by the scenario), but you may never have more than 99 life points.
When you drop to 0 life points (or below), your counter is set to 0 and you fall unconscious.
Unconsciousness
When you become unconscious (0 life points), you must immediately:
- Remove your figure from the Board.
- Return all of your cards with the keyword TEMPORARY.
- Discard all cards you have in hand.
- Shuffle all the cards in your Discard Pile back into your Action Deck.
- Draw 3 cards from your Action Deck to form your hand*, and then banish 1 of these cards of your choosing.
*You will be able to use these cards once you regain consciousness.
If all characters are unconscious, the adventure ends immediately and the players lose.
If every character involved in an action shown on a card falls unconscious, that card is returned.
When an unconscious character regains at least 1 life point, they regain consciousness. They therefore put their figure back into play on the active player’s Terrain card. If there is no active player, they put their figure onto any chosen character’s Terrain card. This happens thanks to in-game effects or, in the worst case, when players are at the Citadel.
Recovery
Your Action Deck represents your life force. When it becomes (nearly) depleted, it is time for you to perform a Recovery.
At any time, you may perform a Recovery to shuffle cards from your Discard Pile back into your Action Deck (even if the latter still contains cards).
To perform a Recovery, you must lose 1 life point for each 2 cards you choose to randomly take in your Discard Pile and shuffle back into your Action Deck.
You may not choose to lose more life points than you have in order to recover more cards.
Example: Ludovic wants to perform a Recovery in order to shuffle 8 random cards from his Discard Pile back into his Action Deck. To do this, he loses 4 life points.
When you must draw or discard more cards than your Action Deck contains:
- Draw or discard whatever cards remain in your Action Deck.
- Perform a Recovery.
- Draw or discard the remaining cards you were unable to draw or discard before.
Variants
- “Story” mode (for adventurers who value storytelling more than survival): To perform a Recovery, you must lose 1 life point for each 3 cards you choose to randomly take in your Discard Pile and shuffle back into your Action Deck.
- “Survival” mode (for adventurers with taste for a challenge): To perform a Recovery, you must lose 2 life points for each 3 cards you choose to randomly take in your Discard Pile and shuffle back into your Action Deck.
Exploration & Movement
Exploring the Collapsing Lands
Opening the space occupied by an Exploration card
An Exploration card is a random event that hides a portion of the Collapsing Lands. You need to resolve an Exploration card in order to remove it and put into play the Adventure card (generally a Terrain card) that belongs there. This is how you explore the Collapsing Lands.
Once the Exploration card has been resolved and removed from the Board, the active player must put an Adventure card into play , right where the Exploration card used to be. The number of this Adventure card is shown in the numbox associated with the arrow on the Terrain card that points towards the newly opened space.
If that Adventure card is a Terrain card, the active player must make sure that it fits with each adjacent Terrain card like in a jigsaw puzzle, and then put the new Exploration cards into play (foggy side up) in each free adjacent space to which an arrow on the new Terrain card is pointing. Each of these new Exploration cards must carry the same pictograph – usually a Roman numeral – as the one in the arrow that points to its space and that caused it to be put into play.
If you must put an Exploration card into play and it is not available, you must immediately return all the cards in the Past and then take one of the newly available cards.
Note: An Exploration card may be a permanent event, a temporary event, etc. If it is a permanent event, the card remains in play (making it impossible to discover the terrain it hides) until it is resolved.
Example:
- Bruno performs the pathfind action and applies its consequence by flipping the Exploration card over.
- It is a temporary event , which he resolves before discarding it to the Past.
- The space the Exploration card used to occupy is now open, so Bruno takes the 094 Adventure card associated with the arrow , and puts it into play in the newly opened space. He will now be able to move to this new Terrain card by performing the move action visible on his Character card. Then, he puts 3 Exploration cards into play – one next to each arrow.
Moving a Figure on the Board
To move your figure on the Board, you must (with exceptions) take the move action shown on your Character card, which allows you to move your (and only your) figure to an adjacent Terrain card, provided your carried weight does not exceed your maximum carried weight.
Other effects you will discover as you play (skill, event, etc.) may move figures.
Some cards refer to the cardinal points: north, south, east, and west. In this regard, assume card text and icons are oriented to be read from west to east.
Reminder! If a mandatory action can be seen on a Terrain card, players whose figures arrive onto that Terrain card must immediately take it collectively, unless it can no longer be taken.
Note: It may happen that some permanent events (cliff, bottomless pit, etc.), showing several placement arrows, separate two Terrain cards. In this case, these events feature an action whose consequence is to move the figure to the Terrain card on the other side of the obstacle.
Not Enough Room to Put a Card into Play
When there is not enough space on the table to put a card into play, all characters must take actions to meet on the same Terrain card. Then, players must return the Terrain cards of their choice – except the one containing their figures – along with the Permanent event cards attached to them, making sure that all remaining Terrain cards are reachable. If applicable, you must put a new Exploration card into play in every adjacent empty space towards which an arrow on a Terrain card points.
Spotting a Hidden Number
Some cards – Terrain, Permanent event, Temporary event , Purse , etc. – may contain hidden numbers. When you spot one, you may take the card bearing that number and then, after making sure it is the right card, discard the card on which you spotted the hidden number, and replace it with the new one.
When a hidden number can be seen on a Terrain card, or on a Permanent event card attached to it, you may not take the corresponding card unless you are on that terrain.
Example: On the 154 Terrain card, Ludovic has spotted the hidden number 316. He discards the 154 card and takes the 316 card, which has the icon on its back, confirming it is the right card.
Note: A hidden number is always made of 3 digits. On the back of the card matching the hidden number, you should see the number of the card on which you spotted it. If that icon is not there, or if it does not match the number of the card where you spotted the hidden number, then you must have taken the wrong card and must return it.
Campaign & Progression
Threat Booklets, Scenarios, and Bookmark
Threat Booklets are divided into scenarios and narrate the story that players live as they travel through the Collapsing Lands.
Each scenario sets one or more goals that players must reach. At the end of each scenario, you read its epilogue. This happens once you are back at the Citadel (unless clearly stated otherwise by the scenario), usually because the characters run low on life points (and prefer returning before all falling unconscious) or have achieved their goals.
The Threat Booklet then details the consequences of your actions, which vary based on your choices and your performance during the scenario (whether you reached your goals or not). The booklet then guides you to a new scenario, and so on until the final confrontation against the Threat you have chosen to face.
The position of the bookmark in the Threat Booklet is defined by the scenario and reminds you which scenario you are playing.
Note: There are several ways to go back to the Citadel. The most common one is by moving the characters’ figures along the Terrain cards that lead back to the Citadel, and then resolving the permanent event that enables you to end the current scenario.
Players’ Progress and Citadel Leaflet
The Citadel leaflet is shared by all players. It consists of several pages that track your group’s progress through the adventure, among other things.
Player Aid Page
This page contains a reminder of the main action consequences and a description of creature traits .
Some creatures you will fight during the adventure have generic abilities called “traits”: When performing the fight action, you must apply the effect of each trait displayed next to the action. The effect of each creature trait is detailed on this player aid.
Buildings Pages
This is where players construct buildings by checking boxes on the buildings of their choice. When a building has all of its boxes checked, it is considered to be “built” and its effect may be applied.
Community Page
On this page you can write down the names of the players taking part in the adventure and record each character’s life point total when you end a scenario or save the game. You can sketch your community’s coat of arms here.
This page is also where you keep track of:
- The level of your groundshiver (an artifact you begin every scenario with, except for the introductory scenario “A new beginning”). That level is given by the scenario, and enables you to reduce the amount of energy you spend to explore the Collapsing Lands.
- Your tracks: Influence, Knowledge, Defense, and Production scores, in the form of tracks extending from 1 to 25.
These scores may fluctuate up or down throughout your adventure, and may be taken into account for certain in-game effects, and at the end of scenarios, to measure how well you completed your goals. You may not reduce a score to less than 0 or increase it to more than 25. If the prerequisite of an in-game effect requires you to reduce a score to less than 0, you may not apply that effect. If a score must be increased to more than 25, set it to 25.
- Production : Represents the community’s capacity to produce food.
- Defense : Represents the community’s capacity to defend itself and secure the surrounding territories.
- Influence : Represents the relationships between the community and the other inhabitants and institutions of the Collapsing Lands.
- Knowledge : Represents the knowledge, information and rumors the community holds.
Destiny Page
During the game, you gain “Hope reborn!” cards that you can “spend” (these cards will let you know how) to check symbols on this page, granting you helpful bonuses. These bonuses are detailed on the Destiny page and enable you to gain new Skill cards, construct helpful buildings, etc.
Map of the Kel Protectorate Pages
The map of the Old World, which you may annotate.
Side Quests Page
This is where you list all the side quests obtained during the adventure. Each side quest may only appear here once.
Tip: Many side quests can be obtained at the tavern, a building you can build on the Buildings page of the Citadel leaflet.
A side quest generally invites you to write down its title and the dialogue (from the Dialogue Book) that caused you to obtain the quest. You may freely reread that dialogue to be reminded of the context and goal(s) of the quest.
You may use the “notes” section to record information that might help you complete the quest, such as the name of a place or character.
When you add a side quest to the Side quests page of the Citadel leaflet, it is active (but not necessarily initiated yet).
When a quest becomes “initiated” – which will be explicitly instructed by an in-game effect – it means you have made a step towards its completion. Some side quests do not need that status to reach completion.
When a quest is marked as “finished” – which it becomes through an explicit in-game effect – it is no longer active: Ignore any in-game effects that concern it.
Reminder! Underlined text on a card or dialogue refers to a side quest.
Note: Some side quests cannot be finished unless you are at the Citadel.
Saving the Game & Party Changes
Saving the Game
You may save the game only once during each scenario.
You may save the game at any time as long as the bookmark is in the Threat Booklet, all conscious characters are on the same Terrain card, and no player is:
- Reading a dialogue in the Dialogue Book.
- Performing an action.
- Compelled to take a mandatory action.
When you save the game:
- Each player discards all of their cards.
- Discard all the cards on the Board into the Past, except for the cards that are in play, and the Terrain card all characters’ figures are standing on.
- Stack the remaining cards in the following order (from the top down) and put them behind the “Save” divider in the game box:
- The Terrain card where the figures were standing, and the cards.
- For each player, their:
- Character card with their blocked cards underneath it.
- Save – Action Deck card, with all the cards in their Action Deck underneath it.
- Save – Discard Pile card, with all the cards in their Discard Pile underneath it.
- cards.
- The Terrain card where the figures were standing, and the
- Each player stores their life point counter in the box as a record of the number of life points they had when the game was saved (it is also recommended to replicate that number on the Community page of the Citadel leaflet).
Resuming the Game
When you resume a game after suspending it:
- Return all the cards in the Past (Adventure and Exploration).
- Put the cards and the saved Terrain card back into play. Place the figures of all conscious characters onto the latter and put one Exploration card into play in front of each arrow shown on it.
Then, each player puts back into play their:
- Character card with their blocked cards underneath.
- Action Deck (and returns their Save – Action Deck card).
- Discard Pile (and returns their Save – Discard Pile card).
- cards.
Reminder! The position of the bookmark in the Threat Booklet reminds you which scenario you are playing. Leave it there!
Note: Between two sessions, all cards and cards in the Past are stored behind their respective dividers.
Leaving the Adventure Partway Through
When a character leaves the adventure permanently, the player returns their figure, their Character card, their Character Skill cards (bearing the character’s initial or the letter “X”) that were blocked underneath it and those they have in hand, the cards in their Action Deck and their Discard Pile, and finally their cards.
They must give their Advanced Skill and Reflex Skill cards to the other players, who discard them. They also give them their (blocked or not) cards without the icon, and the cards that were blocked underneath their Character card. Any blocked and cards remain blocked.
Before they put their life point counter away, their life points are divided equally among the remaining conscious characters.
Joining the Adventure Partway Through
A player can easily join the adventure, or continue it with a new character if their previous character has left the adventure. They may only do so before a new scenario begins, when the players are at the Citadel.
To do so, they choose a character and form their Action Deck as explained on pages 5 to 7 of the introductory scenario.
Rules Reference, Glossary & Credits
Easily Forgotten Golden Rules
- Any Adventure card whose numbox (on the back) is associated with a icon is linked to a specific scenario or card. You must take it over any other if the pictograph inside the icon matches that of the scenario you are playing, or can be seen on another card you possess. Otherwise, you may not take it and you must take another card (bearing the same number) with the shape.
- When an action is mandatory , all characters on the same Terrain card as the player who revealed it must get involved in the action. The involved characters choose which of them is the active player.
- During the Gear up step of an action, the active player may not select multiple cards that have a KEYWORD in common.
- During the Draw step of an action, the active player may choose to draw MORE cards than the number ( default cost) shown on the action.
- Any , , , , , icons in the result area of cards are only ever taken into account when they are revealed from the active player’s Action Deck during the Result step of an action.
- The icon on certain actions limits only the number of cards whose successes you may take into account. It does not forbid you to draw more cards or to take class icons on every drawn card into account.
- During the Result step of a compound action, reduce the die’s value by 1 for each success taken into account (even if the action fails).
Glossary
- Action Deck: Contains a player’s Action cards (blue back), which they draw to perform actions.
- Active player (p. 10): The player whose turn it is; the one who takes an action.
- Advanced Skill (p. 19): A Skill card that players can gain when they make progress on the Destiny page of the Citadel leaflet, and whose effect(s) may be applied from a player’s hand.
- Adventure Deck: Contains the numbered Adventure cards (green or gold back).
- Available (card) (p. 16): A card is said to be available when it can be found in its original deck.
- Banish (p. 18): To remove a card from play once and for all. The card goes into the game box, behind the “Banished cards” divider.
- Block (p. 18): To slip a card under one’s Character card. A blocked card loses all of its effects until it is unblocked, but its weight must still be taken into account.
- Board: The area formed by the Terrain and Permanent event cards that are in play.
- Buildings (page) (p. 23): A page of the Citadel leaflet that lists the buildings that may be constructed (through the Destiny page) by players, providing them with bonuses.
- Class icon (p. 13): An icon that can be converted to obtain additional successes, cancel damage, etc.
- Compound action (p. 11): An action usually made up of multiple rows and taking several turns to be finished. It usually ends with a success during the Consequence step of the last action row.
- Cost (p. 12): The minimum number of Action cards that must be drawn to perform the action.
- Destiny (page) (p. 24): A page of the Citadel leaflet where players can make progress by spending “Hope reborn!” cards in order to check symbols that unlock powerful bonuses.
- Dialogue (p. 18): A numbered paragraph in the Dialogue Book that you must read when a “Read ### ” effect instructs you to.
- Discard (p. 18): To put an Action card (blue back) into one’s Discard Pile or an Adventure or Exploration card into the Past.
- Discard Pile: The play area into which you discard your Action cards (blue back).
- Draw (p. 12): To take the top card(s) of one’s Action Deck.
- Exploration Deck: Contains the Exploration cards (foggy back) that players must resolve to continue exploring the world.
- Involved character (p. 10): A character taking part in an action (including the active player).
- Keyword (p. 12): A word in capital letters visible at the bottom of cards. During the Gear up step of an action, the active player may not select multiple cards that have the same keyword.
- max. X (p. 13): The maximum number of times (“X”) you may apply the corresponding effect.
- Numbox (p. 16): The dark-green icon in which the number of a card can be seen.
- Past: The play area into which players discard Adventure (green or gold back) and Exploration (foggy back) cards.
- Recovery (perform a) (p. 20): At any time, you may choose to lose life points to shuffle random cards from your Discard Pile back into your Action Deck.
- Reflex Skill (p. 19): A Skill card that players can gain when they make progress on the Destiny page of the Citadel leaflet, and whose effect is applied when the active player reveals it from their Action Deck during the Result step of an action.
- Return (p. 18): To put a card back in its place in its original deck. In the Adventure Deck, sort cards by number – green cards always come before any gold cards bearing the same number, and cards always come before cards bearing the same number.
- Reveal: Look at / read the contents of a card.
- [selected] (p. 12): When this word can be seen between brackets on a card, you must apply the associated effect if you have selected that card during the Gear up step of the action.
- Simple action (p. 11): An action that ends immediately after the Consequence step.
- Skill (p. 19): A card that the player has in hand.
- Success (p. 12): icons needed to successfully perform an action.
- Take into account (p. 12): When talking about a card revealed during the Result step, to count the successes shown in the card’s result area.
- Terrain (p. 17): A card that represents a portion of the Collapsing Lands.
- This: Designates the card you are reading.
- Trait (p. 23): An effect you must apply when fighting certain opponents. Traits are explained in detail on the Player aid page of the Citadel leaflet.
- Unconscious (p. 20): A player with 0 life points is said to be unconscious. When they gain 1 or more life points, they regain consciousness.
- World Map: The plasticized screen representing the map of the Kel Protectorate as it used to look. It contains invaluable, though often outdated, information about the important places of the world. It can be updated by inserting cards obtained through the Destiny page of the Citadel leaflet.
- You: As part of an in-game effect, “you” refers to the active player.
Icon Reference
Decks
- Action cards
- Adventure cards
- Exploration cards
Card Types
- A Skill card in your hand.
- A card representing an item, state, companion, etc.
- You may not choose to discard this card or give it to another player.
- An item’s weight (equal to X).
- A Quest item card common to all characters.
- A World Map card that must be inserted into the World Map.
- A Global event whose effects apply to the whole Board.
- A Temporary event that must be resolved immediately.
- A Permanent event that must be put into play, oriented in the same way as the other cards on the Board, with its placement arrow pointing to the Terrain card your figure is standing on. It is thus said to be “attached” to that Terrain card.
Actions
- An action that the active player may take.
- An action that all the characters on the active player’s Terrain card must get involved in.
- This action has already been performed and may not be taken again from the Terrain card this event is attached to.
- The related effect may be applied only during an action of this type.
- The related effect must be applied during an action of this type.
- An action all conscious characters must be involved in.
- The default cost of the action, i.e. the minimum number of cards to be drawn to perform the action.
- During the Result step of the action, the active player may take the successes shown on no more than X revealed cards into account, where X is equal to the default cost of the action .
- / The difficulty of the action, i.e. the minimum number of successes (full gold stars) you must obtain for the action to succeed.
- Consequences that must be applied if the action succeeds.
- Consequences that must be applied if the action fails.
Card Effects
- During the Draw step, the active player may draw up to X fewer cards.
- During the Draw step, the active player must draw X additional cards.
- During the Result step, the active player takes 1 success into account.
- During the Result step, the active player may take successes on Y additional revealed cards into account.
- , , , , , Class icons, with context-dependent effects.
- For each obtained class icon, you get 1 success .
- For each obtained class icon, you cancel 1 damage .
- You obtain any one of the following: or or or .
- You may replace this with any one of the following: or or or .
Action Consequences and In-Game Effects
- The active player may add up to X cards revealed during the Result step to their hand.
- The active player may randomly take up to X cards from their Discard Pile and shuffle them back into their Action Deck.
- The active player must discard X cards from the top of their Action Deck.
- Lose X life points.
- Cancel up to X .
- Take a card bearing this number from the Adventure Deck (green by default; gold only if no green card is available). This icon is referred to as a “numbox”. If no corresponding card is available and there is no icon to the right of the numbox, first return all the cards in the Past.
- There are possibly multiple versions of this card (bearing the same number). One of them is linked to a specific scenario – or card – and must be taken over any other if you are playing the corresponding scenario or if you have a card with the same pictograph.
- Read the corresponding paragraph in the Dialogue Book.
- Move the die to the next row (setting it to a value equal to the action’s difficulty). If there are multiple arrows next to the die icon, move the die that many rows down.
- Once this card has been resolved (and discarded, returned, banished, etc.), replace it with an Adventure card that belongs there.
- Situational icons used for some rare in-game effects.
- , , , Increase by X / decrease by X the corresponding score on the Community page of the Citadel leaflet.
Credits
- Original design: Ludovic Roudy and Bruno Sautter
- Artwork: Ludovic Roudy
- Texts / dialogues: Bruno Sautter, Erwan Pressensé
- English translation: Pierre Gamberoni, Ian Stephenson
- French proofreading: Erwan Pressensé, Pierre Gamberoni, Kudos (rulebook)
- English proofreading: Pierre Gamberoni, Matthew Bauer
- A game published by Serious Poulp · www.the7thcitadel.com · ©2023 SERIOUS POULP.
- SERIOUS POULP, THE 7TH CITADEL and their logos are registered trademarks of SERIOUS POULP.
- Special thanks to our families, friends, and playtesters. And a warm thank you to all 33 353 backers who made this adventure possible!
Expansions for
The 7th Citadel
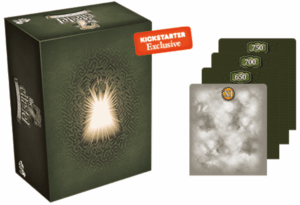
The 7th Citadel: Season 2 Collector’s Box
2026
Explore new regions and face a fresh Threat in the Collapsing Lands.
1000
minutes
View expansion
The 7th Citadel: On the Edge of Peril
2024
Push back the peril and uncover secrets beneath the Collapsing Lands.
1000
minutes
Light

View expansion
The 7th Citadel: The Alembic of Valengarde
2024
Reassemble a legendary artifact before its pieces wander away
1000
minutes
Medium Heavy

View expansion
The 7th Citadel: The Final Throne
2024
Forge wise alliances in a political struggle where trust is never certain.
1000
minutes
View expansion
The 7th Citadel: The Unveilers
2024
Follow magical ladybugs and uncover whatever has drawn them to the terrain.
1000
minutes
Medium
View expansion
The 7th Citadel: Knowledge is Power
2024
A 40-card expansion for readers and curious minds
1000
minutes
Medium Heavy
View expansion
