
Twilight Imperium: Third Edition
2005
Lead an ancient civilization in a dynamic struggle for the imperial throne, balancing warfare, diplomacy, trade, technology, and command.
240
minutes
3 - 6
player(s)
14+
Heavy

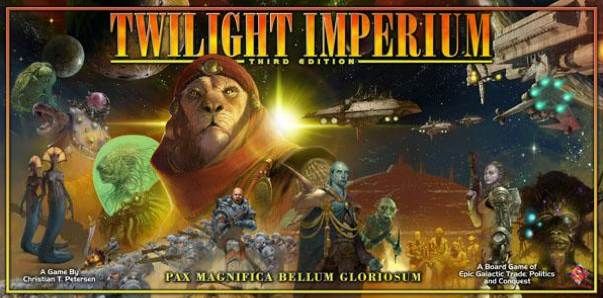
About this board game
Twilight Imperium: Third Edition is an epic empire-building board game for 3–6 players, with games lasting about 240 minutes. Released in 2005, it casts players as ancient galactic civilizations competing for the imperial throne through warfare, diplomacy, trade, and technological progression.
The game map is built with geomorphic board tiles, while basic player progress and overall victory are dynamically determined. This creates a strategic experience in which players can refocus their game plans as the struggle for power develops.
Ten possible alien races give the game a range of distinctive advantages and quirks. The Command system manages turn-based activity and limits the size of armies, while also allowing weakened players to recover if they use their cards effectively.
- Geomorphic board tiles for a dynamically determined map
- Exquisite plastic miniatures
- Hundreds of cards
- Ten alien races, each with individual advantages and quirks
- A Command system that governs activity and army size
Twilight Imperium: Third Edition combines conflict, trade, diplomacy, and technological development in an iteratively complex yet fast-paced experience with little downtime. Its strategic structure draws inspiration from several popular games: the governing element recalls Puerto Rico, the map and progress echo Catan, and the Command system improves on the logistical mechanism of Attack!
The rulebook’s designer notes openly acknowledge these inspirations while explaining how they contribute to the updated design. This edition re-implements Twilight Imperium: Second Edition and belongs to the Twilight Imperium series. It was expanded by Shattered Empire and Shards of the Throne, and later re-implemented as Twilight Imperium: Fourth Edition.
Thematics
Mechanics
Designer
Illustrators
Useful links
 View board game on
Board Game Geek
Board Game Rules for
Twilight Imperium: Third Edition
Dedications
To J.R.R. Tolkien, for endless inspiration and the courage to dream of new worlds
To George Lucas, for he once understood the star in our mind’s eye
To Frank Herbert, for bringing intrigue and spice to the stars
To Gene Roddenberry, for his continuing mission
To Isaac Asimov, for showing us to look in, so that we may look out
To Dad, for the quest of knowledge, and for the games
To Gretchen, for her love
To Lars, forever
– CTP
Prologue: The Fall and the Rebirth
My name is Mahthom Iq Seerva.
I am the Winnaran keeper of the Custodian Chronicle, and I write this from the ancient Tower of Annals in old Mecatol City. Since inheriting the duties of the chronicle from my father, I have enjoyed the view of our city from my wide windows; enjoyed the old buildings, ancient towers, and bright lights that proudly stretch into the remote distance. Yet, like the shadow at my feet, I can never escape or forget the lethal finite borders of my city. I cannot cast aside the fact that less than a hundred leagues from this tower, our city shields rise to protect us from the poisonous dust that is the Sea of Desolation. The terrible wasteland that covers our planet.
My people, the Winnarans, have kept this city safe for more than three thousand years. Ever since the time of the great scourge, we have been the custodians of the imperial throne, the imperial records, and the galactic council here on Mecatol Rex. We have indeed been faithful to the promise that we made to the last emperor.
My hands tremble as I write this. Events are now unfolding which I believe to be the harbinger of great change. I foresee that, in my lifetime, our custodianship will come to an end. This is why I have contacted you. I will here seek to give you a brief, but true, summary of the recent history of our galaxy. I give this to you, because I know that you will spread this knowledge far and wide. As we enter the dangerous years before us, I fear that the galaxy shall have a great need of the past.
It is told that the Lazax emperors arose from the ashes of the Mahact kings. Little is known of their early ascension, but it is impossible to deny that the Lazax must have been a profoundly intelligent, benevolent, and wise people. After their prehistoric rise to power, we know that they chose the central planet of Mecatol Rex as their home world. The year that the Lazax first arrived on Mecatol Rex is recorded in the Imperial Chronicle as “first” and marks the beginning of my account.
For untold ages, the Lazax ruled the known galaxy. As new races came into contact with the empire, they would be allowed to join the Galactic Council that represented the needs and voices of the empires people. The great races: Xxcha, Hacan, Letnev, Hylar, Sol, and N’orr were all represented in the council during the last time of the Lazax empire.
Yet, as the years passed, discoveries of new races and planetary systems began to slow. Little by little the mood of the empire changed as technological and intellectual growth began to diminish. In their need for advancement, the great races began instead to look to the power of the Lazax and the resources of their neighbors. Greed and ambition slowly grew in the hearts of statesmen and councilors. The spirit of the empire turned suspicious and fearful. It is during this time that the first conflicts between the great races are recorded in the Imperial Chronicle. The Galactic Council became a seedbed of intrigue, ushering in an era of spies and assassins. First in secret, and later in public, the great races began at this time to build their military capabilities. Many started territorial expansions that extended beyond their original charter. Border strife and resource disputes began to proliferate, gnawing at the very foundations of the empire. This was a time of growing darkness that is now known as the Age of Dusk.
Throughout most of this age, the Lazax held authority without question. Except for a few minor and unsuccessful rebellions, few dared to openly challenge the emperors. Yet, blinded by assurance of eternal rule, the Lazax did not perceive the threat of ambition that grew around them. As years passed, tensions between the great races grew deeper, and so did their hunger for power. In the end, they held only one thing in common: They hated the Lazax, hated the imperial rule, and hated the benevolent arrogance of the emperors.
A small affair near the Quann wormhole was the spark that set the galaxy aflame. In protest over imperial trade oversight, the Baron of Letnev had begun a blockade of trade traffic through the Quann wormhole. As this had been far from the first trouble with the Letnev, an unconcerned Lazax emperor sought to solve the conflict peacefully in the Galactic Council.
Then, without warning, the blockading Letnev ships were attacked and annihilated by a Sol task force acting without imperial mandate. Losing valuable trade-income, the Sol federation had lost patience, and had acted in its own interest.
Angered, the emperor attempted to consolidate his control by issuing the Maandu edict, which would place all warships under direct imperial supervision. The Maandu edict would be the stone that shattered a brittle empire. After this proclamation, the Letnev, Sol, and Jol-Nar civilizations announced their immediate withdrawal from the council, drawing the galaxy into civil war.
The Quann conflict marks the beginning of the Age of Twilight.
As race fought race, as a thousand territorial disputes erupted over a few years, the Lazax desperately sought to assert their authority. Holding together a crumbling empire, Lazax fleets fought across the galaxy. The final days of the Lazax began in the seventy-third year of the war. Without warning, an alliance of Sol, N’orr, and Hacan attacked Mecatol Rex itself.
Of all the planets in the galaxy, no planet was more war-torn than Mecatol Rex. Over the course of only a few years, the planet’s ecology was ravaged by bombardments, its population decimated, and its green fields blasted into a toxic wasteland. The last Lazax emperor and his entire family were executed during an early Sol incursion and no successor was named.
After the death of the last emperor, all semblance of Lazax control collapsed. The Lazax people became hunted across the galaxy in the vengeful wave of murder that is known as the great scourge. Lasting only twenty years, the scourge resulted in the complete annihilation of the Lazax race. Until now, no Lazax had been seen in the known galaxy for more than 3000 years.
The Twilight Wars continued for centuries. Yet no race was powerful enough to seize the throne and risk the fate of the Lazax. Slowly the strength of the great civilizations failed as their economies crumbled and whole technologies were lost from the strain of long war.
The Twilight Wars died in a slow whisper. The time that followed, now known as the Dark Years, was a period of economic, cultural, and intellectual collapse. The great races had by then retreated into their own small, safe areas of space.
With time, the Dark Years did come to an end, and a calm but uncertain period of rebuilding began. As I write this, the great races have regained elements of their former strength. In my city, the Galactic Council is growing in influence once more, while the great races are embarking on the colonization of neighboring systems, abandoned during the Dark Years.
The signs of great change are everywhere. I taste it in the air I breathe. This year, as if walking out of ancient prophecy, the Lazax returned from the darkness of history in a foreboding cybernetic form. To me, their coming is like the first wind of a terrible storm. I feel as if the galaxy is waking. As if an ancient beast stirs from slumber in a dark cave.
The day will soon come when a new empire will rise. For the sake of all, may the new emperor not only have the power to seize the throne, but the strength to conquer the peace.
If not, I fear that a sea of desolation will drown us all.
Welcome
Welcome to a galaxy of epic conquest, interstellar trade, and political intrigue. TWILIGHT IMPERIUM is an exciting board game in which 3-6 players seek to build a galactic empire by the cunning use of strategy, diplomacy, and resource management. By taking on the role of a great interstellar race, players will seek the ultimate goal: to claim the Imperial Throne on Mecatol Rex and lead the galaxy to a new age of glory.
But the road to the Imperial Throne is long and the galaxy holds many dangers. Do you have what it takes to lead your race out of the troubled Twilight Age? Do you have the determination to move your race forward using a balance of diplomacy, careful planning, and the use of force? Are you ready to direct the scientific development, military might, and economic growth for an entire interstellar civilization?
If so, your time has come!
The Object of the Game
To win a game of TWILIGHT IMPERIUM (“TI”), players seek to accumulate a total of 10 victory points by achieving objectives and carefully choosing helpful strategies. The game ends when one player gains his 10th victory point or immediately after any other game-ending condition applies.
Game Contents and Preparation
Enclosed in your TI box, you will find the following components:
- Six frames of highly detailed plastic components in six colors. Each frame contains the following:
- 5 Dreadnoughts
- 4 Carriers
- 8 Cruisers
- 8 Destroyers
- 2 War Suns
- 12 Ground Forces
- 10 Fighters
- 6 Planetary Defense Systems (PDS)
- 3 Space Docks
- 144 Technology Cards (24 each in six decks separated by color)
- 51 Planet Cards
- 103 Action Cards
- 60 Political Cards
- 30 Objective Cards (Secret and Public)
- 20 Trade Cards (2 each for 10 races)
- 10 Race Sheets
- 30 Leader Counters
- 8 Cardboard Strategy Cards
- 160 Command Counters (16 each for 10 races)
- 150 Control Markers (15 each for 10 races)
- 8 Bonus Counters
- 40 Trade Goods Counters
- 23 Fighter Supplement Counters
- 23 Ground Force Supplement Counters
- 1 Speaker Token
- 1 Victory Point Track
- 43 Hexagonal Board Tiles
- This rules booklet
- 4 10-sided dice (note that in TI, the “0” result represents the number “10”)
- 44 Domain Counters
Before you play your first game of TWILIGHT IMPERIUM, carefully detach the plastic components from their frames and separate all cards into individual deck types. Carefully punch out the cardboard pieces so that they do not tear. Be sure to keep all components out of the reach of small children and animals.
Component Overview
We will here summarize the various components of TI, so that you may recognize them while reading these rules.
The Map Hexes
Before every game of TI, players will create a unique game board by connecting the provided hexagon map pieces. Each individual piece is called a “system.” The systems of TI each represent an area of space, its planets, and/or other elements of interest. Systems that contain an interior yellow outline are Home Systems from which the great races hail. Systems containing an interior red outline are Special Systems (such as Asteroid Fields) governed by special rules.
The Plastic Game Units
The detailed plastic pieces of TI (collectively called “units”) represent the military personnel, shipyards, defense systems, and spaceships that players will command. Units not employed on the game board are kept in a player’s reinforcement area.
The Planet Cards
Representing the multitude of planets in TI, Planet Cards are used by players to indicate ownership over each individual planet and are “exhausted” (turned face down) when their owner “spends” the planets’ resources or influence.
The Technology Cards
At the beginning of the game, each player receives an identical Technology Deck (separated by color) consisting of 24 technology advances. Throughout the game, when a player purchases (or otherwise acquires) a technology, the corresponding Technology Card is taken from his deck and placed face-up before him.

The Action Cards
The Action Cards of TI provide players with a variety of helpful events, maneuvers, bonuses, and other advantages. Players receive Action Cards throughout the game by a variety of activities.
The Political Cards
Often the representatives of the great races must meet in the hallowed halls of the Galactic Council on Mecatol Rex to debate, deliberate, and enact policy for the custodial imperial charter. When a player executes the primary ability of the Political Strategy Card during the Action Phase, he must draw and resolve the top card of the Political Deck. Each Political Card contains an agenda that all players must vote upon. The effects of an agenda can range from a minor formality, to a major change in the very structure of the game.
The Objective Cards (Public and Secret)
In order to win TI, players need to accumulate 10 victory points. The primary way for players to receive such is by qualifying for the requirements of an Objective Card. The victory points provided by Public Objective Cards are attainable by all players, whereas those from Secret Objective Cards are individual to each player.
The Trade Cards
Each race has two Trade Contract cards which they can use to form trade agreements with other players. Each Trade Card has a numerical trade value which varies from race to race.
The Strategy Cards
Each of the eight cardboard Strategy Cards represents a powerful short-term strategy. During the Strategy Phase of each game round, each player will select one Strategy Card and must later use its primary ability. Each Strategy Card also enables an important secondary ability that other players may execute after the primary ability is resolved.
The Bonus Counters
After all players have selected a Strategy Card during the Strategy Phase, there will (in a six-player game) be two Strategy Cards remaining in the common play area. Before the Strategy Phase ends, the two remaining Strategy Cards both receive a Bonus Counter that is placed on top of the Strategy Card itself. A player that later selects such a Strategy Card will be able to use the Bonus Counter to receive an additional Command Counter or Trade Good.
Command Counters
The Command Counter in TI is the abstract but integral resource representing the domestic mandate, budget, organization, logistics, and preparedness of your race. When a player receives a Command Counter from his reinforcements, he must place it in either the Fleet Supply area, Strategy Allocation area, or Command Pool area on his Race Sheet. In order to execute tactical actions (such as moving, building, or initiating combat on the board), take advantage of the secondary abilities of Strategy Cards, or manage his fleets, a player must wisely allocate and spend Command Counters.
The Control Markers
At the beginning of the game, each player is provided with a generous number of flag-shaped Control Markers, each bearing the insignia of that player’s race. The Control Markers are used to represent a race wherever appropriate, such as on the Victory Point Track, on successfully achieved Objective Cards, and (most often) to indicate ownership of planets.
The Trade Good Counters
These counters represent the wealth and rewards of interstellar commerce. They are primarily obtained by active trade agreements while the Trade Strategy Card is being executed. A player’s Trade Goods can be used as a direct substitute for either resources or influence, and are frequently used as currency among players to pay for bribes or other considerations.

Reinforcements and Additional Details
Every player maintains a “reinforcement” area consisting of his unused plastic units and Command Counters. Whenever a player builds a unit, it is taken from his available reinforcements and thereafter placed on the board. (An exception to this is the Fighter and Ground Force Supplement counter). Whenever a player receives a new Command Counter, it is taken from his available reinforcements and placed in one of the three appropriate boxes on his Race Sheet (Command Pool, Fleet Supply, or Strategy Allocation).
Component Details
- The Victory Point Track: Used to indicate each player’s accumulation of victory points. The main side has spaces numbered 0 to 10; the reverse side is numbered 0 to 14 (used with the optional rule “The Long War”).
- The Speaker (First Player) Token: Claimed each round by the player who selects the Initiative Strategy Card during the Strategy Phase. The player who controls the Speaker Token always chooses the first Strategy Card during the next Strategy Phase.
- Ground Force and Fighter Unit Supplement Tokens: The Ground Force and the Fighter units are the only units in the game that players may purchase unlimited quantities of. All other unit types are limited to the figures provided with the game.
- The Race Sheets: Provide specific race information, setup units, starting technologies, special abilities, and tables for phases, sequences, and unit stats. Also tracks active Command Counters and Trade Goods.
Game Setup
These rules are written assuming that you will be playing TI with 6 players. TI plays just as well with fewer players, and rules for playing with 3-5 players are provided on page 31 of this rules set.
Setup Steps
- Determine Race and Components: Separate the 10 Home Systems from the other hexagonal gameboard pieces. Randomize the Home Systems face down and allow every player to draw one at random. This process determines which race a player will control throughout the game. All players then take the Race Sheet, Control Markers, Trade Cards, and Command Counters corresponding to their race.
- Select Color and Units: Each player selects one of the six available colors and takes the plastic units and Technology Deck corresponding to that color.
- Common Play Area: Find an area of the table that is convenient for all players to reach. Designate this space the “common play area.” Then shuffle the Action Card deck and the Political Card deck and place them separately in the common play area. Also place the Fighter and Ground Force Supplement Counters in the common play area.
- Planet Cards: Each player takes the individual Planet Cards corresponding to the planets of his Home System and places these face up in his play area. Place the remaining Planet Cards, representing the neutral planets at the start of the game, in the common play area.
- Trade Supply: Place all the Trade Goods Counters in a single pile (the “Trade Supply”) in the common play area.
- Strategy Cards: Place the 8 Strategy Cards side-by-side in numerical order with their “active” side up, prominently in the common play area.
- Objective Deck: Create the Objective Deck, by following the directions in the “Preparing the Objective Cards” sidebar. Do not forget to place the unused Secret and Public Objective Cards back in the box, while allowing no players to look at them.
- Victory Point Track: Place the Victory Point Track in the common play area and place one Control Marker for each player in the space marked “0.”
- Create Galaxy: Players must now create the game board (or “galaxy”). Please read and carry out the instructions for doing so in the “Setting up the Galaxy” sidebar on page 8 before proceeding.
- Setup Units & Starting Technologies: After the galaxy has been created, all players place their “setup units” (as indicated by their Race Sheets) on their Home Systems. If a Home System contains several planets, any Space Dock, Ground Forces, and PDS may be placed among them according to the player’s wishes. All players then find and place their “Starting Technology” cards face up in their respective play areas.
- Starting Command Counters: All players now take their starting Command Counters from their reinforcements, placing them on their Race Sheets as follows:
- 2 Command Counters in the Strategy Allocation area
- 3 Command Counters in the Command Pool area
- 3 Command Counters in the Fleet Supply area (with the “Fleet” side up).
You are now ready to start the game.
Preparing the Objective Cards
Before the game begins, the Secret Objective Cards must be distributed and the Public Objective Deck properly prepared.
First separate all the Objective Cards into the three different types: Secret Objectives, Public “Stage I” Objectives, and Public “Stage II” Objectives. Then proceed to the following:
- Secret Objectives: Shuffle the 10 Secret Objective Cards and deal a random card face down to every player. All players should read their Secret Objective Card and then place the card face down in their play area. A player is never allowed, for whatever reason, to show an opponent his Secret Objective Card. Place the remaining Secret Objective Cards back in the box, allowing no player to look at them.
- Stage II Public Objectives: Take the 10 Stage II Public Objective Cards and remove the “Game Over” card. Shuffle the remaining 9 Stage II cards and draw 3 random cards (at all times keeping them hidden from all players). After drawing the 3 random cards, take the “Game Over” card and shuffle it with the 3 randomly chosen cards. You should now have 4 randomized Stage II Public Objective Cards, one of which is the “Game Over” card. Place these 4 cards face down in a stack in the common play area. Place the remaining Stage II cards back in the box, allowing no player to look at them.
- Stage I Public Objectives: Shuffle the 10 Stage I Public Objective Cards and draw 6 random cards. Place the 6 cards on top of the 4 Stage II cards, now forming a single deck of 10 Public Objective Cards in the common play area. This deck always consists of 6 random “Stage I” cards on top of 4 random “Stage II” cards (one of which is the “Game Over” card). This deck is the “Public Objective Deck.”
NOTE: It is important that the unused Objective Cards (Secret, Public Stage I & II) are placed back in the box so they remain hidden from players both before and during the game. Otherwise, experienced players would be able to deduce which objectives are in play before they are revealed.
Creating the Galaxy
TI uses a unique game board consisting of multiple hexagon pieces (“systems”) that are brought together in a unique combination at the beginning of every game. Before a game of TI begins, players build the galaxy by following these steps:
- Preparation & Deal: After all players have drawn their Home Systems, find the Mecatol Rex system and place it in the middle of the table. Then randomly determine one player to be “first player.“ Give the “Speaker“ Token to the first player. He then shuffles the remaining 32 systems, randomly removes two systems (by placing them back in the box without looking at them), and deals five systems, face down, to every player. Players may look at their dealt systems but should not show them to the other players.
- Place Home Systems: The first player selects one of the sides of Mecatol Rex, and drags his Home System about two feet towards himself in a straight line away from the chosen side (see diagram). Then the player to his left does the same, etc., until all players have chosen a side and placed their Home Systems on the table (the sixth player must choose the last remaining side of Mecatol Rex). Players should now shift their seating around the table to best accommodate their Home System placement.
- Building the Rings: Players, in clockwise order, starting with the first player, begin creating the galaxy by placing, one at a time, a single system face up adjacent to the Mecatol Rex system. After the first ring around Mecatol is completed, players continue to place systems in the second ring until that is completed, and then finally proceed to the third ring. When all the systems are placed, the galaxy is finally created.
Rules for System Placement
- Ring Order: A system cannot be placed in the second ring before the first ring surrounding Mecatol Rex has been completed. Likewise, a tile cannot be placed in the third ring before the second ring is completed.
- Connecting Home Systems: As soon as the correct placement for your Home System becomes available, connect your Home System to the galaxy at its fixed spot (which is exactly 3 systems out from the chosen side of Mecatol Rex). Connecting your Home System is automatic and does not cost you a placement “turn.”
- Special Systems: You may not place a Special System (with an inner red border) adjacent to another Special System, unless you have no other option.
- Turn Order Direction: The order of placement switches counterclockwise after all players have placed a round of tiles, and yet again clockwise after that, etc. This makes the player who placed the last system place the first system in the next round (thus placing two systems in a row). Example: P1, P2, P3, P4, P5, P6, P6, P5, P4, P3, P2, P1, P1, P2…
- Planet Placement Alternation: If you placed a system that did not contain a planet during your last placement, you must, if able, place a system that does contain a planet during your next placement. If unable to do so, reveal your remaining systems to the other players to prove this, then place one of your available systems.
When creating the board, the actual shape of the galaxy and the position of Home Systems will differ depending on the number of players. For fewer than 6 players, consult the optional rules on page 31.

The Game Round
TWILIGHT IMPERIUM is played over a consecutive number of game rounds with each round consisting of the following phases:
- The Strategy Phase
- The Action Phase
- The Status Phase
After every Status Phase, if no player has yet declared victory, simply begin another game round starting with another Strategy Phase. In this way the game continues, repeating the three phases above, until a player has achieved 10 victory points or until another game-ending condition is met.
Victory points are generally claimed during the Status Phase as players fulfill the requirements printed on the Public and Secret Objective Cards.
The Strategy Phase
During every Strategy Phase, each player must choose one available Strategy Card from the common play area. (The chosen Strategy Card grants its player a special ability during the upcoming Action Phase.) At the beginning of every Strategy Phase, there are 8 possible Strategy Cards (or “strategies”) that players may choose from: Warfare, Political, Trade, Initiative, Imperial, Logistics, Diplomacy, or Technology.
The Strategy Card provides an important ability, and also determines the order of play (as indicated by its initiative number).
Selecting Strategy Cards
- The player who controls the Speaker Token (the “Speaker”) chooses the first Strategy Card from the common play area and places it before him with the “active” side facing up.
- In clockwise order from the Speaker, each other player selects one of the remaining Strategy Cards. Being farther clockwise from the Speaker gives a player an increasingly limited choice (the player to the immediate right of the Speaker will only have three cards to choose from).
- After all players have selected a Strategy Card, there will be two cards remaining in the common play area (in a 6-player game). The Speaker places a Bonus Counter on each of the two unchosen Strategy Cards.
Should a Strategy Card not be picked for several consecutive rounds, multiple Bonus Counters will accumulate on it. When a player selects a Strategy Card that contains one or more Bonus Counters, that player may immediately exchange each Bonus Counter for either a Trade Good or a Command Counter (placed immediately on the player’s Race Sheet).
The player with the Speaker Token keeps it until another player selects the Initiative Strategy Card during a future Strategy Phase.


Overview
The Action Phase forms the heart of TI. It is during the Action Phase that players execute the special abilities of their Strategy Cards, produce new units at their Space Docks, conquer new planets, and move their fleets into battle.
The Action Phase is resolved over a number of player turns. Each player turn is taken in the order of play, with players taking one action at a time. After the last player in turn order has taken his turn, play returns once more to the first player, and so on, until all players have passed.
The player currently taking his turn is called the active player.
The Player Action
When it is a player’s turn to take an action, he must execute one of the following:
- Strategic Action
- Tactical Action
- Transfer Action
- Pass
Order of Play
Each Strategy Card has an Initiative Number printed near its top, determining the turn order:
- Initiative Strategy
- Diplomacy Strategy
- Political Strategy
- Logistics Strategy
- Trade Strategy
- Warfare Strategy
- Technology Strategy
- Imperial Strategy
When turn order advances to an unchosen Strategy Card, simply skip it and proceed to the next number.
“Friendly” and “Enemy”
- Friendly: Refers to a unit or planet belonging to you (a single player). Regardless of alliances or personal agreements, only your own units and planets are friendly.
- Enemy: Refers to any unit or planet not controlled by you (belonging to any other player).
The Strategic Action
A player must, at some point during the Action Phase, execute a Strategic Action (except for the player holding the Initiative Strategy Card, who has no Strategic Action). When taking a Strategic Action:
- The active player reads and resolves the Primary Ability as printed on his Strategy Card.
- After resolving the Primary Ability, the other players, in clockwise order from the active player, may each spend one Command Counter from their Strategy Allocation area on their Race Sheet to execute the Secondary Ability of the card.
Important Exceptions and Rules for Strategic Actions:
- Logistics Secondary: Players do not have to spend a Command Counter from Strategy Allocation when executing the Secondary Ability of the Logistics Strategy Card.
- The active player may never execute the Secondary Ability of his own Strategy Card.
- After resolving, flip the Strategy Card to its “Inactive” side.
- A player may only take one Strategic Action per round. A player may execute any given Secondary Ability once, but may participate in multiple secondary abilities across the round as long as he has sufficient Command Counters in Strategy Allocation.
- Strategy Cards may be executed at any time during the Action Phase, regardless of their initiative number.
The Tactical Action
The Tactical Action is the primary function for engagement on the game board: moving fleets, engaging in space battles, transporting Ground Forces, conquering planets, and building units.
The Activation Sequence
- Activate a system
- Move ships into the system
- PDS fire
- Space Battle
- Planetary Landings
- Invasion Combat
- Produce Units
Except for step 1 (activation), each step is only resolved if conditions apply or if initiated by the active player. Steps 2 through 7 cannot be executed without initial activation. If a player has no Command Counters left in his Command Pool, he cannot take a Tactical Action.
The Activation Sequence in Detail
1) Activate a System
Take an available Command Counter from your Command Pool and place it face up (with your race’s insignia showing) directly on a system.
- You cannot activate a system if one of your own Command Counters is already in the system.
- You may activate a system containing Command Counters of other races (ignore their presence).
- A system containing a friendly Command Counter is considered “activated” by that player. Opponents’ activated systems cannot be activated again by that opponent this round, nor can their ships within those systems move.
2) Move Ships into System
After activating a system, you may move friendly ships within movement range into the activated system. Only movement into the activated system is allowed.
- Movement Values: Found on the Race Sheet unit table. Movement “1” means adjacent systems; “2” means up to two systems away, etc.
- Carrying Units: A Carrier/War Sun may pick up Ground Force and PDS units at any stage during movement (before, during, and in the activated system). These units cannot be dropped off until Planetary Landings. If the last Ground Force on a planet is picked up, place a Control Marker on the planet to maintain control.
- Enemy Ships Block Movement: A ship is never allowed to move through a system occupied by enemy ships (except Fighters). The only way to enter an enemy-occupied system is to activate that system itself.
- Activated Systems Prohibit Exit: A ship may not move if it is located in a system already activated by the active player (containing a friendly Command Counter placed prior to this activation). Ships may, however, move through systems containing friendly Command Counters.
- All moving ships must end their movement in the newly activated system.
3) PDS Fire
- Defending PDS Fire: After movement, enemy PDS units in range may fire at the active player’s fleet. For every hit, the activating player removes a casualty (Dreadnoughts and War Suns can absorb one damage before destruction).
- Attacking PDS Fire: After enemy PDS units have fired, any PDS in range owned by the active player may fire at enemy ships in the activated system.
4) Space Battles
If the active player moved one or more ships into a system containing opponent ships (even a single Fighter), a Space Battle must be fought. The active player is the attacker; the defender is the player whose ships were in the system before activation. The battle continues until only one player has ships remaining.
5) Planetary Landings
After Space Battles are completed, the active player may land Ground Force and PDS units from Carriers/War Suns onto planets in the activated system. Landing forces can be split among multiple planets in the system.
- Friendly Landing: Landing units on a planet already under your control. Simply add them to existing forces.
- Neutral Landing: Landing on an uncolonized planet. Active player takes the corresponding Planet Card from the deck and places it exhausted in his play area. Only Ground Forces can claim a planet; a PDS landing alone on a neutral/enemy planet is destroyed.
- Hostile Landing (Invasion): Landing on a planet containing enemy Ground Forces initiates Invasion Combat. If an enemy planet has no Ground Forces, it falls without resistance: remove enemy Control Marker and take the Planet Card exhausted.
6) Invasion Combat
Resolved after landings when Ground Forces of two players occupy the same planet. Multiple planet invasions are resolved one at a time in the active player’s choice of order. PDS units landed during an invasion do not fight or take casualties, and are destroyed if all friendly Ground Forces perish.
7) Produce Units
The active player may produce new units at one or more friendly Space Docks in the activated system. A new Space Dock may also be produced on an eligible planet controlled for the entire round, paying 4 resources.
Concluding a Tactical Action
After completing all applicable steps, the Tactical Action ends and the next player in order of play takes their turn.

Example of Activation and Movement
- Dreadnought: Has a movement rate of 1. Since the activated system is 2 spaces away, it cannot reach the activated system.
- Cruisers: Although in two different systems, each has movement 2, allowing them to reach the activated system. The top Cruiser moves legally through a system containing a friendly Command Counter.
- Carrier Fleet: Fleet of 1 Destroyer, 1 Carrier, and 4 Fighters are within range and may move into the activated system. The player may choose to move only some of the ships.
- Activated Destroyers: Two Destroyers are in range, but their system was already activated earlier by the player, preventing them from moving.
- Blocked Cruiser: In range, but cannot move through the Supernova or through the system containing two enemy Destroyers.
Definition of a Fleet: All spaceships (Fighters, Cruisers, Carriers, Dreadnoughts, Destroyers, and War Suns) controlled by one player in one system at any given time.
The Transfer Action
The Transfer Action reorganizes units and simultaneously activates two adjacent systems containing only units belonging to the active player (and absolutely no enemy units). Units may move between the two systems, and production may take place at a Space Dock in one of the systems.
The Transfer Sequence
- Activate Two Systems: Place one Command Counter from your Command Pool onto one system, and one Command Counter from reinforcements onto an adjacent system. Both systems must contain friendly units and zero enemy units.
- Movement Between Systems: Friendly ships may move between the two activated systems. Ground Forces and PDS must be transported by Carriers/War Suns.
- PDS Fire: Enemy PDS in range may fire at friendly fleets in the activated systems (a PDS in range of both may fire at only one system).
- Planetary Landings: Ground Forces/PDS aboard Carriers may land on friendly planets in the systems (cannot land on neutral planets or enemy-controlled planets).
- Production: Produce units at Space Docks in one of the activated systems (not both).
Passing and Ending the Action Phase
Passing
A player may choose to pass only if he has already taken his Strategic Action (except the player holding the Initiative Strategy, who has no Strategic Action). Once a player passes, he cannot take further actions this round.
Exception: A player who has passed is still allowed to execute the Secondary Ability of Strategy Cards resolved later during the phase.
End of the Action Phase
The Action Phase continues in turn order until all players have passed. Once everyone has passed, proceed to the Status Phase.
Space Battles
A Space Battle is fought whenever the active player moves ships into an enemy-occupied system, lasting until only one player’s ships remain (or all are destroyed).
Before Combat
- Sabotage Runs: Optional rule (page 35).
- Destroyer Anti-Fighter Barrage: Before the first round of battle, roll two dice for each Destroyer. For each roll equal to or higher than the Destroyer’s combat value (normally 9), the opponent immediately removes one Fighter to reinforcements (no return fire).
The Space Battle Sequence
- Announce Withdrawals/Retreats: Attacker announces whether he will withdraw. If not, defender may announce a retreat. Retreats occur at the end of the round; at least one round must be fought.
- Roll Combat Dice: Both players simultaneously roll one die per ship (War Suns roll three dice). A hit is scored for each result equal to or higher than the unit’s combat value.
- Remove Casualties: Attacker removes casualties first, then defender. Each casualty destroys one ship of choice or damages a Dreadnought/War Sun. Fighters are typically chosen first as cannon fodder.
- Execute Withdrawals/Retreats: The retreating fleet moves to an adjacent system previously activated by that player. If no adjacent system was previously activated, retreat is impossible. If all enemy units were destroyed during step 2-3, the retreat is cancelled. Check fleet supply and fighter capacity in the new system; excess units are destroyed.

Invasion Combat
Initiated when Ground Forces land on an enemy planet. Retreats and withdrawals are not allowed.
Before Combat
- Planetary Bombardment: Dreadnoughts (1 die) and War Suns (3 dice) roll combat dice against Ground Forces on the planet. Hits eliminate defending Ground Forces immediately (no return fire). Dreadnoughts cannot bombard a planet with a PDS (planetary shield); War Suns ignore planetary shields.
- Defensive PDS Fire: Defending PDS on the planet fire a single shot each at invading Ground Forces (normally hits on 6+). Hits eliminate invading Ground Forces immediately without return fire.
The Invasion Combat Round
- Roll Combat Dice: Both players simultaneously roll one die per friendly Ground Force on the planet (hits on combat value).
- Remove Casualties: Remove casualties simultaneously. Repeat rounds until one or no Ground Forces remain.
Invasion Outcome
- Invasion Success: If defending Ground Forces are eliminated and at least one attacking Ground Force survives, the planet is captured. All defending PDS and Space Docks are destroyed. Attacker takes the Planet Card exhausted.
- Mutual Elimination: If all Ground Forces on both sides perish, defender retains control (places a Control Marker on the vacant planet).
The Systems of Twilight Imperium
- Home Systems (Interior Yellow Border): Starting systems of the 10 races. Mecatol Rex is always placed at the center of the galaxy.
- Special Systems (Interior Red Border):
- Asteroid Field: Cannot be moved through without Anti-mass Deflector technology. Ships can never end movement in an Asteroid Field. Asteroid Fields may never be activated.
- Nebula: Defending fleets receive +1 to combat rolls. Ships cannot move through a Nebula (only into it). Ships leaving a Nebula have their movement reduced to 1.
- Supernova: Impassible dying stars. May never be activated or entered.
- Regular Systems: Empty space or systems containing 1–2 planets, possibly with Alpha or Beta Wormhole entrances.
- Wormholes: Systems containing identical wormhole letters (Alpha to Alpha, Beta to Beta) are considered adjacent for movement and transfer.

Planetary Resources, Influence, and Tech Specialties
- Resources: Planet’s economic surplus used to purchase units and technologies.
- Influence: Planet’s political importance used to acquire Command Counters, play Action Cards, and vote in the Galactic Council.
- Technology Specialties: Provides a 1-resource discount when buying technologies of that specific color (Red, Green, or Blue) via the Technology Strategy secondary ability. Planet need not be exhausted to grant this discount, but must be unexhausted.
- Exhausting Planets: Turn card face down to receive either its resources or its influence (never both). Unused portions are lost. Cards refresh in the Status Phase.
Command Counters and Race Sheet Areas
Players start with 16 Command Counters total. They are allocated into three areas on the Race Sheet:
- Command Pool: Counters spent to activate systems for Tactical and Transfer Actions.
- Fleet Supply: Flipped to “Fleet” side. Determines maximum number of capital ships (everything except Fighters) allowed in any single system. Excess ships must be removed immediately.
- Strategy Allocation: Counters spent to execute Secondary Abilities of Strategy Cards or special abilities.
Counters can only be redistributed among these three areas during the Status Phase.


Action Cards and the Galactic Council
Action Cards
- Hand limit is 7 cards. Discard excess immediately when drawn.
- Cannot play two identical Action Cards for the same situation/entity in the same round.
- Must publicly announce intent to play, then resolve in order of play.
- Sabotage: Can be played immediately when another card is revealed, cancelling it without prior announcement.
- “Play: As an action”: Played on the player’s turn instead of taking a regular action.
Political Cards and the Galactic Council
Triggered when the Political Strategy Card’s primary ability is used:
- Debate & Bribes: Players discuss and bribe with Trade Goods (agreements are non-binding).
- Voting: Proceed clockwise starting left of Speaker (Speaker votes last). Votes equal total influence of unexhausted planets (minimum 1 vote). All votes must be cast together on one outcome; voting does not exhaust planets. Trade Goods cannot buy extra votes.
- Voting Types:
- “Elect” Votes: Players nominate an entity; candidate with most votes wins.
- “For or Against” Votes: Majority decides.
- Laws: Permanent rule modifications placed face up in play area if passed.
- Abstaining & Ties: Players may abstain. The Speaker breaks ties.
Technology Advances and Trade
Technology Advances
- Four Disciplines: Warfare (Red), Biotechnology (Green), Propulsion (Blue), General (Yellow).
- Acquisition: Through the Technology Strategy Card (primary gives 1 free; secondary allows buying 1 for 8 resources). Must fulfill prerequisites on the card.
Trade Agreements
- Each race has 2 Trade Cards with fixed trade values. When Trade Strategy primary resolves, trade agreements can be negotiated (must be approved by active player).
- Players exchange cards; agreements yield Trade Goods when Trade Strategy primary or secondary is resolved.
- Agreements break automatically upon open war (Space Battle or Invasion Combat between partners) or unilaterally during Status Phase.
- Trade Goods: Can be spent as 1 resource or 1 influence each, or traded freely to other players at any time. Maximum 40 in the game supply.
- Empty Systems: A system with zero units (no ships, Ground Forces, PDS, or Space Docks). Special Systems are never empty systems.
Unit Limitations & Scuttling
- Unit Limits: Players are limited to the plastic pieces in the box, except Fighters and Ground Forces.
- Scuttling: During the Status Phase, a player may voluntarily destroy any of his own units to return them to reinforcements.
- Supplement Counters: Used when running out of plastic Fighters or Ground Forces. There must always be at least one physical plastic unit in the system/planet with the supplement counters.
Unit Specifications
The Space Dock
- Cost: 4 | Limit: 3
- Building: Built during Production step on a planet controlled since the start of the round in an activated system with no enemy ships.
- Production Capacity: Planet resource value + 2. Can produce that many units total.
- Fighter Support: Supports up to 3 Fighters in its system.
- Blockade: If an enemy ship is in the system, the Space Dock cannot produce ships (may still produce Ground Forces and PDS).
The Ground Force Unit
- Cost: 1 (produces 2 units) | Limit: 12 + supplements
- Essential for taking planets, invading, and defending. Transported by Carriers/War Suns.
The Carrier Unit
- Cost: 3 | Limit: 4 | Capacity: 6
- Transports Ground Forces, PDS, and Fighters. Can pick up units during movement through systems that are not yet activated and contain no enemy ships.
The Planetary Defense System (PDS) Unit
- Cost: 2 | Limit: 6 (max 2 per planet)
- Planetary Shield: Blocks Dreadnought planetary bombardment.
- Space Cannon: Fires at enemy ships entering the system during activation step 3. Deep Space Cannon tech allows firing into adjacent systems. Defending PDS also fires at invading Ground Forces before Invasion Combat.
The Fighter Unit
- Cost: 1 (produces 2 units) | Limit: 10 + supplements
- Requires Carrier, Space Dock, or War Sun capacity. Inexpensive combat screen.
The Cruiser Unit
- Cost: 2 | Limit: 8
- Fast (movement 2), balanced combat ship.
The Destroyer Unit
- Cost: 1 | Limit: 8
- Cheap screen. Features pre-combat Anti-Fighter Barrage (2 dice hitting on 9+).
The Dreadnought Unit
- Cost: 5 | Limit: 5
- Sustain Damage: Absorbs 1 hit (turn on side); repaired in Status Phase.
- Planetary Bombardment: Rolls 1 die before invasion combat against defending Ground Forces (blocked by PDS).
The War Sun Unit
- Cost: 12 | Limit: 2 (requires War Sun tech)
- Rolls 3 dice in combat and bombardment. Movement 2, capacity 6, sustains damage. Ignores planetary shields when bombarding.


The Status Phase
During the Status Phase, game functions reset and victory points are scored. Resolve the following steps in sequence:
The Status Sequence
- Qualify for Public/Secret Objective Cards: In order of play, each player may announce that he has met the requirements of one face-up Public Objective Card and/or his Secret Objective Card. Prove the claim, place a Control Marker on the card, and advance on the Victory Point Track. A player may never qualify for an objective if he does not control all planets in his Home System.
- Repair Damaged Ships: Return all damaged Dreadnoughts and War Suns to their upright position.
- Remove Command Counters: Remove all friendly Command Counters from the game board to your reinforcements.
- Refresh Planet Cards: Turn all exhausted Planet Cards face up.
- Receive 1 Action Card and 2 Command Counters: Draw 1 Action Card from the deck and take 2 Command Counters from reinforcements, placing them in any of the three areas on your Race Sheet.
- Redistribute Command Areas: You may redistribute Command Counters between Strategy Allocation, Command Pool, and Fleet Supply. Ensure fleets comply with any reduced Fleet Supply limit.
- Return Strategy Cards: Return Strategy Cards to the common play area face up.
Winning the Game
When a player advances to the 10th space on the Victory Point Track, he claims the Imperial Throne on Mecatol Rex and immediately wins the game.
The “Imperium Rex“ Objective Card: If drawn during the Imperial Strategy resolution, the game ends immediately. The player with the most victory points wins (the active player does not get the 2 VP for drawing it). Tie-breakers: most resolved Objective Cards, then most planets, then most unused Command Counters, then total Command Counters on Race Sheet.
Strategy Card Reference Summary
- Initiative: Takes Speaker Token (first pick of Strategy Cards next round). Free execution of other cards’ Secondary Abilities without spending Command Counters. Cannot be picked two rounds in a row.
- Diplomacy: Target player and active player cannot activate each other’s systems for the round. Secondary: Refresh 2 exhausted non-Home planets.
- Political: Draw 3 Action Cards, 1 Command Counter. Draw and vote on top Political Card; manipulate top 3 cards of Political Deck. Secondary: Draw 1 Action Card.
- Logistics: Gain 4 Command Counters. Secondary: Spend 3 influence per Command Counter gained (does not require spending a Strategy Allocation counter).
- Trade: Gain 3 Trade Goods + trade agreement income, approve new trade agreements. Or option b: Cancel all trade agreements. Secondary: Collect trade agreement income.
- Warfare: Retrieve 1 Command Counter from board back to Command Pool. Secondary: Move 2 Cruisers/Destroyers to adjacent empty systems (activates with reinforcement counters).
- Technology: Gain 1 free technology advance. Secondary: Spend 8 resources to gain 1 technology advance.
- Imperial: Reveal 1 Public Objective Card and gain 2 Victory Points. Secondary: Build units at an activated Space Dock or build at an unactivated Space Dock without activating the system.
Technology Tree Reference


Warfare Technologies (Red)
- Hylar V Assault Laser: Cruisers and Destroyers receive +1 on all combat rolls.
- Deep Space Cannon: Prerequisite: Hylar V. Enemy fleets in adjacent systems are now in range of your PDS units.
- Graviton Laser System: When you miss with a PDS roll, make a single re-roll.
- Magen Defense Grid: Prerequisites: Deep Space Cannon AND Graviton Laser. All PDS units receive +1 on combat rolls; defending Ground Forces on a planet with PDS receive +1.
- Assault Cannon: Before any Space Battle begins, each Dreadnought may fire one shot; hits applied immediately without return fire.
- Graviton Negator: Dreadnoughts may bombard planets containing PDS units. Fighters may participate in Invasion Combat.
Biotechnologies (Green)
- Stasis Capsules: Cruisers and Dreadnoughts may carry 1 Ground Force unit.
- Cybernetics: Prerequisite: Stasis Capsules. All Fighters receive +1 on combat rolls.
- Gen Synthesis: Ground Forces receive +1 on combat rolls. When destroyed, roll die: on 5+, returned to Home System planet.
- Neural Motivator: Draw one extra Action Card during each Status Phase.
- Dacxive Animators: If you win Invasion Combat, roll for every killed Ground Force: on 6+, place 1 friendly Ground Force on the planet.
- X-89 Bacterial Weapon: Prerequisites: Assault Cannon AND Transit Diodes. Dreadnought/War Sun may destroy all enemy Ground Forces on a planet before bombarding; discard all your Action Cards.
Propulsion Technologies (Blue)
- Antimass Deflectors: Ships may move through Asteroid Fields (never end movement there).
- XRD Transporters: Prerequisite: Antimass Deflectors. All Carriers receive +1 movement.
- Type IV Drive: Cruisers and Dreadnoughts receive +1 movement.
- Light/Wave Deflector: Prerequisites: XRD Transporters AND Enviro Compensator. Ships may move through systems containing enemy ships to continue toward the activated system.
- Advanced Fighters: Fighters move independently with movement 2, receive +1 on combat rolls, do not require capacity, and block enemy movement.
- Fleet Logistics: When taking a Tactical Action, take two Tactical Actions in succession before your turn ends.
General Technologies (Yellow)
- Enviro Compensator: Production capacity of Space Docks increased by 1.
- Sarween Tools: Prerequisite: Enviro Compensator. Receive 1 additional resource to build units whenever producing at a Space Dock.
- Micro Technology: Prerequisites: Stasis Capsules OR Sarween Tools. Gain 1 extra Trade Good for each active trade agreement during Trade secondary.
- Transit Diodes: As an action, spend 1 Strategy Allocation counter to move up to 4 Ground Forces between any friendly planets.
- Integrated Economy: When producing units, place new units in any activated adjacent empty or friendly system. Place PDS and Ground Forces on any friendly planet in range.
- War Sun: Prerequisites: Sarween Tools AND Deep Space Cannon. Allowed to produce War Sun units.
Three, Four, and Five Player Games
- Three Players: Remove 3 empty systems and 1 Asteroid Field before shuffling; remove 4 random systems; deal 8 systems per player. Each player chooses 2 Strategy Cards in the Strategy Phase and takes two Strategic Actions.
- Four Players: Deal 8 systems per player. Each player chooses 2 Strategy Cards. Bonus counters are not used.
- Five Players: Deal 6 systems per player. Position 1 and 4 receive 4 Trade Goods; position 5 receives 6 Trade Goods. Three unchosen Strategy Cards receive bonus counters.

Game Option: The Long War
Play to 14 victory points using the reverse side of the track. Prepare Public Objective deck with 8 Stage I and 5 Stage II cards plus “Game Over”.
Game Option: Age of Empire
All Public Objectives are revealed at setup in a line. A Turn marker advances each round, making objectives fully known from turn one.
Game Option: Distant Suns
Place face-down Domain Counters on every neutral planet. Revealed upon landing Ground Forces.
- Probing: A player with Fighters in the system may secretly look at face-down counters instead of landing forces.
- Razing: Dreadnoughts and War Suns may destroy face-down counters instead of landing, rolling for possible political backlash:
- 1-7: No effect
- 8-9: Lose 3 random Action Cards
- 10 (0): Lose 3 Action Cards and exhaust all ready planets
Domain Counter Reference (Distant Suns Option)
- Biohazard: First Ground Force landing here is eliminated while token remains. Discard after successful invasion.
- Radiation: Kill all Ground Forces of initial landing, then remove counter.
- Hostile Locals: Indicated number of local Ground Forces fight invader (no bombardment allowed). Resets if invasion fails. Discard upon conquest.
- Lazax Survivors: Gain 3 additional votes on all future political agendas. (If probed, gain 1 VP and 3 Action Cards).
- Settlers: Return Ground Forces to carrier. Roll die: 6+, gain 2 free Ground Forces; 1-5, random opponent gains 2 free Ground Forces here. Discard counter.
- Peaceful Annexation: Landing proceeds without incident. Discard counter.
- Industrial Society: Place a free Space Dock immediately. Planet card is received unexhausted. Discard counter.
- Technological Society: Player to left gives you a free technology advance from your deck whose prerequisites you meet. Discard counter.
- Wormhole Discovery: Place in center of system as an Alpha or Beta wormhole.
- Natural Wealth: Receive indicated number of Trade Goods immediately. Discard counter.
Game Option: Leaders
Each race receives 3 Leaders (Generals, Admirals, Diplomats, Agents, Scientists). Transported without taking capacity. Captured or killed if ship or planet is lost.
- Scientist: Extra tech discount, cheaper Space Docks (2 resources), +1 to PDS rolls, protects planet against War Sun bombardment.
- Diplomat: Delays invasion by 1 round; allows fleet to pass through enemy systems with permission.
- General: Reroll 2 dice during Invasion Combat attack, -4 to enemy bombardment, +1 to defending Ground Forces.
- Admiral: +1 die to carrying ship, +1 movement to Dreadnought, prevents enemy retreat unless enemy has Admiral.
- Agent: Blocks enemy PDS fire during invasion; captures enemy PDS/Docks intact on invasion; sacrifice to act as Sabotage card.
Game Option: Sabotage Runs
Fighters may launch pre-combat attacks against enemy War Suns. Roll 9-10 to breach Outer Defenses, then roll 10 on Inner Defenses to instantly destroy the War Sun.
Introduction & Lore
Dedications
To J.R.R. Tolkien, for endless inspiration and the courage to dream of new worlds
To George Lucas, for he once understood the star in our mind’s eye
To Frank Herbert, for bringing intrigue and spice to the stars
To Gene Roddenberry, for his continuing mission
To Isaac Asimov, for showing us to look in, so that we may look out
To Dad, for the quest of knowledge, and for the games
To Gretchen, for her love
To Lars, forever
– CTP
Prologue: The Fall and the Rebirth
My name is Mahthom Iq Seerva.
I am the Winnaran keeper of the Custodian Chronicle, and I write this from the ancient Tower of Annals in old Mecatol City. Since inheriting the duties of the chronicle from my father, I have enjoyed the view of our city from my wide windows; enjoyed the old buildings, ancient towers, and bright lights that proudly stretch into the remote distance. Yet, like the shadow at my feet, I can never escape or forget the lethal finite borders of my city. I cannot cast aside the fact that less than a hundred leagues from this tower, our city shields rise to protect us from the poisonous dust that is the Sea of Desolation. The terrible wasteland that covers our planet.
My people, the Winnarans, have kept this city safe for more than three thousand years. Ever since the time of the great scourge, we have been the custodians of the imperial throne, the imperial records, and the galactic council here on Mecatol Rex. We have indeed been faithful to the promise that we made to the last emperor.
My hands tremble as I write this. Events are now unfolding which I believe to be the harbinger of great change. I foresee that, in my lifetime, our custodianship will come to an end. This is why I have contacted you. I will here seek to give you a brief, but true, summary of the recent history of our galaxy. I give this to you, because I know that you will spread this knowledge far and wide. As we enter the dangerous years before us, I fear that the galaxy shall have a great need of the past.
It is told that the Lazax emperors arose from the ashes of the Mahact kings. Little is known of their early ascension, but it is impossible to deny that the Lazax must have been a profoundly intelligent, benevolent, and wise people. After their prehistoric rise to power, we know that they chose the central planet of Mecatol Rex as their home world. The year that the Lazax first arrived on Mecatol Rex is recorded in the Imperial Chronicle as “first” and marks the beginning of my account.
For untold ages, the Lazax ruled the known galaxy. As new races came into contact with the empire, they would be allowed to join the Galactic Council that represented the needs and voices of the empires people. The great races: Xxcha, Hacan, Letnev, Hylar, Sol, and N’orr were all represented in the council during the last time of the Lazax empire.
Yet, as the years passed, discoveries of new races and planetary systems began to slow. Little by little the mood of the empire changed as technological and intellectual growth began to diminish. In their need for advancement, the great races began instead to look to the power of the Lazax and the resources of their neighbors. Greed and ambition slowly grew in the hearts of statesmen and councilors. The spirit of the empire turned suspicious and fearful. It is during this time that the first conflicts between the great races are recorded in the Imperial Chronicle. The Galactic Council became a seedbed of intrigue, ushering in an era of spies and assassins. First in secret, and later in public, the great races began at this time to build their military capabilities. Many started territorial expansions that extended beyond their original charter. Border strife and resource disputes began to proliferate, gnawing at the very foundations of the empire. This was a time of growing darkness that is now known as the Age of Dusk.
Throughout most of this age, the Lazax held authority without question. Except for a few minor and unsuccessful rebellions, few dared to openly challenge the emperors. Yet, blinded by assurance of eternal rule, the Lazax did not perceive the threat of ambition that grew around them. As years passed, tensions between the great races grew deeper, and so did their hunger for power. In the end, they held only one thing in common: They hated the Lazax, hated the imperial rule, and hated the benevolent arrogance of the emperors.
A small affair near the Quann wormhole was the spark that set the galaxy aflame. In protest over imperial trade oversight, the Baron of Letnev had begun a blockade of trade traffic through the Quann wormhole. As this had been far from the first trouble with the Letnev, an unconcerned Lazax emperor sought to solve the conflict peacefully in the Galactic Council.
Then, without warning, the blockading Letnev ships were attacked and annihilated by a Sol task force acting without imperial mandate. Losing valuable trade-income, the Sol federation had lost patience, and had acted in its own interest.
Angered, the emperor attempted to consolidate his control by issuing the Maandu edict, which would place all warships under direct imperial supervision. The Maandu edict would be the stone that shattered a brittle empire. After this proclamation, the Letnev, Sol, and Jol-Nar civilizations announced their immediate withdrawal from the council, drawing the galaxy into civil war.
The Quann conflict marks the beginning of the Age of Twilight.
As race fought race, as a thousand territorial disputes erupted over a few years, the Lazax desperately sought to assert their authority. Holding together a crumbling empire, Lazax fleets fought across the galaxy. The final days of the Lazax began in the seventy-third year of the war. Without warning, an alliance of Sol, N’orr, and Hacan attacked Mecatol Rex itself.
Of all the planets in the galaxy, no planet was more war-torn than Mecatol Rex. Over the course of only a few years, the planet’s ecology was ravaged by bombardments, its population decimated, and its green fields blasted into a toxic wasteland. The last Lazax emperor and his entire family were executed during an early Sol incursion and no successor was named.
After the death of the last emperor, all semblance of Lazax control collapsed. The Lazax people became hunted across the galaxy in the vengeful wave of murder that is known as the great scourge. Lasting only twenty years, the scourge resulted in the complete annihilation of the Lazax race. Until now, no Lazax had been seen in the known galaxy for more than 3000 years.
The Twilight Wars continued for centuries. Yet no race was powerful enough to seize the throne and risk the fate of the Lazax. Slowly the strength of the great civilizations failed as their economies crumbled and whole technologies were lost from the strain of long war.
The Twilight Wars died in a slow whisper. The time that followed, now known as the Dark Years, was a period of economic, cultural, and intellectual collapse. The great races had by then retreated into their own small, safe areas of space.
With time, the Dark Years did come to an end, and a calm but uncertain period of rebuilding began. As I write this, the great races have regained elements of their former strength. In my city, the Galactic Council is growing in influence once more, while the great races are embarking on the colonization of neighboring systems, abandoned during the Dark Years.
The signs of great change are everywhere. I taste it in the air I breathe. This year, as if walking out of ancient prophecy, the Lazax returned from the darkness of history in a foreboding cybernetic form. To me, their coming is like the first wind of a terrible storm. I feel as if the galaxy is waking. As if an ancient beast stirs from slumber in a dark cave.
The day will soon come when a new empire will rise. For the sake of all, may the new emperor not only have the power to seize the throne, but the strength to conquer the peace.
If not, I fear that a sea of desolation will drown us all.
Welcome
Welcome to a galaxy of epic conquest, interstellar trade, and political intrigue. TWILIGHT IMPERIUM is an exciting board game in which 3-6 players seek to build a galactic empire by the cunning use of strategy, diplomacy, and resource management. By taking on the role of a great interstellar race, players will seek the ultimate goal: to claim the Imperial Throne on Mecatol Rex and lead the galaxy to a new age of glory.
But the road to the Imperial Throne is long and the galaxy holds many dangers. Do you have what it takes to lead your race out of the troubled Twilight Age? Do you have the determination to move your race forward using a balance of diplomacy, careful planning, and the use of force? Are you ready to direct the scientific development, military might, and economic growth for an entire interstellar civilization?
If so, your time has come!
The Object of the Game
To win a game of TWILIGHT IMPERIUM (“TI”), players seek to accumulate a total of 10 victory points by achieving objectives and carefully choosing helpful strategies. The game ends when one player gains his 10th victory point or immediately after any other game-ending condition applies.
Components & Materials
Game Contents and Preparation
Enclosed in your TI box, you will find the following components:
- Six frames of highly detailed plastic components in six colors. Each frame contains the following:
- 5 Dreadnoughts
- 4 Carriers
- 8 Cruisers
- 8 Destroyers
- 2 War Suns
- 12 Ground Forces
- 10 Fighters
- 6 Planetary Defense Systems (PDS)
- 3 Space Docks
- 144 Technology Cards (24 each in six decks separated by color)
- 51 Planet Cards
- 103 Action Cards
- 60 Political Cards
- 30 Objective Cards (Secret and Public)
- 20 Trade Cards (2 each for 10 races)
- 10 Race Sheets
- 30 Leader Counters
- 8 Cardboard Strategy Cards
- 160 Command Counters (16 each for 10 races)
- 150 Control Markers (15 each for 10 races)
- 8 Bonus Counters
- 40 Trade Goods Counters
- 23 Fighter Supplement Counters
- 23 Ground Force Supplement Counters
- 1 Speaker Token
- 1 Victory Point Track
- 43 Hexagonal Board Tiles
- This rules booklet
- 4 10-sided dice (note that in TI, the “0” result represents the number “10”)
- 44 Domain Counters
Before you play your first game of TWILIGHT IMPERIUM, carefully detach the plastic components from their frames and separate all cards into individual deck types. Carefully punch out the cardboard pieces so that they do not tear. Be sure to keep all components out of the reach of small children and animals.
Component Overview
We will here summarize the various components of TI, so that you may recognize them while reading these rules.
The Map Hexes
Before every game of TI, players will create a unique game board by connecting the provided hexagon map pieces. Each individual piece is called a “system.” The systems of TI each represent an area of space, its planets, and/or other elements of interest. Systems that contain an interior yellow outline are Home Systems from which the great races hail. Systems containing an interior red outline are Special Systems (such as Asteroid Fields) governed by special rules.
The Plastic Game Units
The detailed plastic pieces of TI (collectively called “units”) represent the military personnel, shipyards, defense systems, and spaceships that players will command. Units not employed on the game board are kept in a player’s reinforcement area.
The Planet Cards
Representing the multitude of planets in TI, Planet Cards are used by players to indicate ownership over each individual planet and are “exhausted” (turned face down) when their owner “spends” the planets’ resources or influence.
The Technology Cards
At the beginning of the game, each player receives an identical Technology Deck (separated by color) consisting of 24 technology advances. Throughout the game, when a player purchases (or otherwise acquires) a technology, the corresponding Technology Card is taken from his deck and placed face-up before him.
The Action Cards
The Action Cards of TI provide players with a variety of helpful events, maneuvers, bonuses, and other advantages. Players receive Action Cards throughout the game by a variety of activities.
The Political Cards
Often the representatives of the great races must meet in the hallowed halls of the Galactic Council on Mecatol Rex to debate, deliberate, and enact policy for the custodial imperial charter. When a player executes the primary ability of the Political Strategy Card during the Action Phase, he must draw and resolve the top card of the Political Deck. Each Political Card contains an agenda that all players must vote upon. The effects of an agenda can range from a minor formality, to a major change in the very structure of the game.
The Objective Cards (Public and Secret)
In order to win TI, players need to accumulate 10 victory points. The primary way for players to receive such is by qualifying for the requirements of an Objective Card. The victory points provided by Public Objective Cards are attainable by all players, whereas those from Secret Objective Cards are individual to each player.
The Trade Cards
Each race has two Trade Contract cards which they can use to form trade agreements with other players. Each Trade Card has a numerical trade value which varies from race to race.
The Strategy Cards
Each of the eight cardboard Strategy Cards represents a powerful short-term strategy. During the Strategy Phase of each game round, each player will select one Strategy Card and must later use its primary ability. Each Strategy Card also enables an important secondary ability that other players may execute after the primary ability is resolved.
The Bonus Counters
After all players have selected a Strategy Card during the Strategy Phase, there will (in a six-player game) be two Strategy Cards remaining in the common play area. Before the Strategy Phase ends, the two remaining Strategy Cards both receive a Bonus Counter that is placed on top of the Strategy Card itself. A player that later selects such a Strategy Card will be able to use the Bonus Counter to receive an additional Command Counter or Trade Good.
Command Counters
The Command Counter in TI is the abstract but integral resource representing the domestic mandate, budget, organization, logistics, and preparedness of your race. When a player receives a Command Counter from his reinforcements, he must place it in either the Fleet Supply area, Strategy Allocation area, or Command Pool area on his Race Sheet. In order to execute tactical actions (such as moving, building, or initiating combat on the board), take advantage of the secondary abilities of Strategy Cards, or manage his fleets, a player must wisely allocate and spend Command Counters.
The Control Markers
At the beginning of the game, each player is provided with a generous number of flag-shaped Control Markers, each bearing the insignia of that player’s race. The Control Markers are used to represent a race wherever appropriate, such as on the Victory Point Track, on successfully achieved Objective Cards, and (most often) to indicate ownership of planets.
The Trade Good Counters
These counters represent the wealth and rewards of interstellar commerce. They are primarily obtained by active trade agreements while the Trade Strategy Card is being executed. A player’s Trade Goods can be used as a direct substitute for either resources or influence, and are frequently used as currency among players to pay for bribes or other considerations.
Reinforcements and Additional Details
Every player maintains a “reinforcement” area consisting of his unused plastic units and Command Counters. Whenever a player builds a unit, it is taken from his available reinforcements and thereafter placed on the board. (An exception to this is the Fighter and Ground Force Supplement counter). Whenever a player receives a new Command Counter, it is taken from his available reinforcements and placed in one of the three appropriate boxes on his Race Sheet (Command Pool, Fleet Supply, or Strategy Allocation).
Component Details
- The Victory Point Track: Used to indicate each player’s accumulation of victory points. The main side has spaces numbered 0 to 10; the reverse side is numbered 0 to 14 (used with the optional rule “The Long War”).
- The Speaker (First Player) Token: Claimed each round by the player who selects the Initiative Strategy Card during the Strategy Phase. The player who controls the Speaker Token always chooses the first Strategy Card during the next Strategy Phase.
- Ground Force and Fighter Unit Supplement Tokens: The Ground Force and the Fighter units are the only units in the game that players may purchase unlimited quantities of. All other unit types are limited to the figures provided with the game.
- The Race Sheets: Provide specific race information, setup units, starting technologies, special abilities, and tables for phases, sequences, and unit stats. Also tracks active Command Counters and Trade Goods.
Setup & Galaxy Creation
Game Setup
These rules are written assuming that you will be playing TI with 6 players. TI plays just as well with fewer players, and rules for playing with 3-5 players are provided on page 31 of this rules set.
Setup Steps
- Determine Race and Components: Separate the 10 Home Systems from the other hexagonal gameboard pieces. Randomize the Home Systems face down and allow every player to draw one at random. This process determines which race a player will control throughout the game. All players then take the Race Sheet, Control Markers, Trade Cards, and Command Counters corresponding to their race.
- Select Color and Units: Each player selects one of the six available colors and takes the plastic units and Technology Deck corresponding to that color.
- Common Play Area: Find an area of the table that is convenient for all players to reach. Designate this space the “common play area.” Then shuffle the Action Card deck and the Political Card deck and place them separately in the common play area. Also place the Fighter and Ground Force Supplement Counters in the common play area.
- Planet Cards: Each player takes the individual Planet Cards corresponding to the planets of his Home System and places these face up in his play area. Place the remaining Planet Cards, representing the neutral planets at the start of the game, in the common play area.
- Trade Supply: Place all the Trade Goods Counters in a single pile (the “Trade Supply”) in the common play area.
- Strategy Cards: Place the 8 Strategy Cards side-by-side in numerical order with their “active” side up, prominently in the common play area.
- Objective Deck: Create the Objective Deck, by following the directions in the “Preparing the Objective Cards” sidebar. Do not forget to place the unused Secret and Public Objective Cards back in the box, while allowing no players to look at them.
- Victory Point Track: Place the Victory Point Track in the common play area and place one Control Marker for each player in the space marked “0.”
- Create Galaxy: Players must now create the game board (or “galaxy”). Please read and carry out the instructions for doing so in the “Setting up the Galaxy” sidebar on page 8 before proceeding.
- Setup Units & Starting Technologies: After the galaxy has been created, all players place their “setup units” (as indicated by their Race Sheets) on their Home Systems. If a Home System contains several planets, any Space Dock, Ground Forces, and PDS may be placed among them according to the player’s wishes. All players then find and place their “Starting Technology” cards face up in their respective play areas.
- Starting Command Counters: All players now take their starting Command Counters from their reinforcements, placing them on their Race Sheets as follows:
- 2 Command Counters in the Strategy Allocation area
- 3 Command Counters in the Command Pool area
- 3 Command Counters in the Fleet Supply area (with the “Fleet” side up).
You are now ready to start the game.
Preparing the Objective Cards
Before the game begins, the Secret Objective Cards must be distributed and the Public Objective Deck properly prepared.
First separate all the Objective Cards into the three different types: Secret Objectives, Public “Stage I” Objectives, and Public “Stage II” Objectives. Then proceed to the following:
- Secret Objectives: Shuffle the 10 Secret Objective Cards and deal a random card face down to every player. All players should read their Secret Objective Card and then place the card face down in their play area. A player is never allowed, for whatever reason, to show an opponent his Secret Objective Card. Place the remaining Secret Objective Cards back in the box, allowing no player to look at them.
- Stage II Public Objectives: Take the 10 Stage II Public Objective Cards and remove the “Game Over” card. Shuffle the remaining 9 Stage II cards and draw 3 random cards (at all times keeping them hidden from all players). After drawing the 3 random cards, take the “Game Over” card and shuffle it with the 3 randomly chosen cards. You should now have 4 randomized Stage II Public Objective Cards, one of which is the “Game Over” card. Place these 4 cards face down in a stack in the common play area. Place the remaining Stage II cards back in the box, allowing no player to look at them.
- Stage I Public Objectives: Shuffle the 10 Stage I Public Objective Cards and draw 6 random cards. Place the 6 cards on top of the 4 Stage II cards, now forming a single deck of 10 Public Objective Cards in the common play area. This deck always consists of 6 random “Stage I” cards on top of 4 random “Stage II” cards (one of which is the “Game Over” card). This deck is the “Public Objective Deck.”
NOTE: It is important that the unused Objective Cards (Secret, Public Stage I & II) are placed back in the box so they remain hidden from players both before and during the game. Otherwise, experienced players would be able to deduce which objectives are in play before they are revealed.
Creating the Galaxy
TI uses a unique game board consisting of multiple hexagon pieces (“systems”) that are brought together in a unique combination at the beginning of every game. Before a game of TI begins, players build the galaxy by following these steps:
- Preparation & Deal: After all players have drawn their Home Systems, find the Mecatol Rex system and place it in the middle of the table. Then randomly determine one player to be “first player.“ Give the “Speaker“ Token to the first player. He then shuffles the remaining 32 systems, randomly removes two systems (by placing them back in the box without looking at them), and deals five systems, face down, to every player. Players may look at their dealt systems but should not show them to the other players.
- Place Home Systems: The first player selects one of the sides of Mecatol Rex, and drags his Home System about two feet towards himself in a straight line away from the chosen side (see diagram). Then the player to his left does the same, etc., until all players have chosen a side and placed their Home Systems on the table (the sixth player must choose the last remaining side of Mecatol Rex). Players should now shift their seating around the table to best accommodate their Home System placement.
- Building the Rings: Players, in clockwise order, starting with the first player, begin creating the galaxy by placing, one at a time, a single system face up adjacent to the Mecatol Rex system. After the first ring around Mecatol is completed, players continue to place systems in the second ring until that is completed, and then finally proceed to the third ring. When all the systems are placed, the galaxy is finally created.
Rules for System Placement
- Ring Order: A system cannot be placed in the second ring before the first ring surrounding Mecatol Rex has been completed. Likewise, a tile cannot be placed in the third ring before the second ring is completed.
- Connecting Home Systems: As soon as the correct placement for your Home System becomes available, connect your Home System to the galaxy at its fixed spot (which is exactly 3 systems out from the chosen side of Mecatol Rex). Connecting your Home System is automatic and does not cost you a placement “turn.”
- Special Systems: You may not place a Special System (with an inner red border) adjacent to another Special System, unless you have no other option.
- Turn Order Direction: The order of placement switches counterclockwise after all players have placed a round of tiles, and yet again clockwise after that, etc. This makes the player who placed the last system place the first system in the next round (thus placing two systems in a row). Example: P1, P2, P3, P4, P5, P6, P6, P5, P4, P3, P2, P1, P1, P2…
- Planet Placement Alternation: If you placed a system that did not contain a planet during your last placement, you must, if able, place a system that does contain a planet during your next placement. If unable to do so, reveal your remaining systems to the other players to prove this, then place one of your available systems.
When creating the board, the actual shape of the galaxy and the position of Home Systems will differ depending on the number of players. For fewer than 6 players, consult the optional rules on page 31.
Game Round & The Strategy Phase
The Game Round
TWILIGHT IMPERIUM is played over a consecutive number of game rounds with each round consisting of the following phases:
- The Strategy Phase
- The Action Phase
- The Status Phase
After every Status Phase, if no player has yet declared victory, simply begin another game round starting with another Strategy Phase. In this way the game continues, repeating the three phases above, until a player has achieved 10 victory points or until another game-ending condition is met.
Victory points are generally claimed during the Status Phase as players fulfill the requirements printed on the Public and Secret Objective Cards.
The Strategy Phase
During every Strategy Phase, each player must choose one available Strategy Card from the common play area. (The chosen Strategy Card grants its player a special ability during the upcoming Action Phase.) At the beginning of every Strategy Phase, there are 8 possible Strategy Cards (or “strategies”) that players may choose from: Warfare, Political, Trade, Initiative, Imperial, Logistics, Diplomacy, or Technology.
The Strategy Card provides an important ability, and also determines the order of play (as indicated by its initiative number).
Selecting Strategy Cards
- The player who controls the Speaker Token (the “Speaker”) chooses the first Strategy Card from the common play area and places it before him with the “active” side facing up.
- In clockwise order from the Speaker, each other player selects one of the remaining Strategy Cards. Being farther clockwise from the Speaker gives a player an increasingly limited choice (the player to the immediate right of the Speaker will only have three cards to choose from).
- After all players have selected a Strategy Card, there will be two cards remaining in the common play area (in a 6-player game). The Speaker places a Bonus Counter on each of the two unchosen Strategy Cards.
Should a Strategy Card not be picked for several consecutive rounds, multiple Bonus Counters will accumulate on it. When a player selects a Strategy Card that contains one or more Bonus Counters, that player may immediately exchange each Bonus Counter for either a Trade Good or a Command Counter (placed immediately on the player’s Race Sheet).
The player with the Speaker Token keeps it until another player selects the Initiative Strategy Card during a future Strategy Phase.
The Action Phase
Overview
The Action Phase forms the heart of TI. It is during the Action Phase that players execute the special abilities of their Strategy Cards, produce new units at their Space Docks, conquer new planets, and move their fleets into battle.
The Action Phase is resolved over a number of player turns. Each player turn is taken in the order of play, with players taking one action at a time. After the last player in turn order has taken his turn, play returns once more to the first player, and so on, until all players have passed.
The player currently taking his turn is called the active player.
The Player Action
When it is a player’s turn to take an action, he must execute one of the following:
- Strategic Action
- Tactical Action
- Transfer Action
- Pass
Order of Play
Each Strategy Card has an Initiative Number printed near its top, determining the turn order:
- Initiative Strategy
- Diplomacy Strategy
- Political Strategy
- Logistics Strategy
- Trade Strategy
- Warfare Strategy
- Technology Strategy
- Imperial Strategy
When turn order advances to an unchosen Strategy Card, simply skip it and proceed to the next number.
“Friendly” and “Enemy”
- Friendly: Refers to a unit or planet belonging to you (a single player). Regardless of alliances or personal agreements, only your own units and planets are friendly.
- Enemy: Refers to any unit or planet not controlled by you (belonging to any other player).
The Strategic Action
A player must, at some point during the Action Phase, execute a Strategic Action (except for the player holding the Initiative Strategy Card, who has no Strategic Action). When taking a Strategic Action:
- The active player reads and resolves the Primary Ability as printed on his Strategy Card.
- After resolving the Primary Ability, the other players, in clockwise order from the active player, may each spend one Command Counter from their Strategy Allocation area on their Race Sheet to execute the Secondary Ability of the card.
Important Exceptions and Rules for Strategic Actions:
- Logistics Secondary: Players do not have to spend a Command Counter from Strategy Allocation when executing the Secondary Ability of the Logistics Strategy Card.
- The active player may never execute the Secondary Ability of his own Strategy Card.
- After resolving, flip the Strategy Card to its “Inactive” side.
- A player may only take one Strategic Action per round. A player may execute any given Secondary Ability once, but may participate in multiple secondary abilities across the round as long as he has sufficient Command Counters in Strategy Allocation.
- Strategy Cards may be executed at any time during the Action Phase, regardless of their initiative number.
The Tactical Action
The Tactical Action is the primary function for engagement on the game board: moving fleets, engaging in space battles, transporting Ground Forces, conquering planets, and building units.
The Activation Sequence
- Activate a system
- Move ships into the system
- PDS fire
- Space Battle
- Planetary Landings
- Invasion Combat
- Produce Units
Except for step 1 (activation), each step is only resolved if conditions apply or if initiated by the active player. Steps 2 through 7 cannot be executed without initial activation. If a player has no Command Counters left in his Command Pool, he cannot take a Tactical Action.
The Activation Sequence in Detail
1) Activate a System
Take an available Command Counter from your Command Pool and place it face up (with your race’s insignia showing) directly on a system.
- You cannot activate a system if one of your own Command Counters is already in the system.
- You may activate a system containing Command Counters of other races (ignore their presence).
- A system containing a friendly Command Counter is considered “activated” by that player. Opponents’ activated systems cannot be activated again by that opponent this round, nor can their ships within those systems move.
2) Move Ships into System
After activating a system, you may move friendly ships within movement range into the activated system. Only movement into the activated system is allowed.
- Movement Values: Found on the Race Sheet unit table. Movement “1” means adjacent systems; “2” means up to two systems away, etc.
- Carrying Units: A Carrier/War Sun may pick up Ground Force and PDS units at any stage during movement (before, during, and in the activated system). These units cannot be dropped off until Planetary Landings. If the last Ground Force on a planet is picked up, place a Control Marker on the planet to maintain control.
- Enemy Ships Block Movement: A ship is never allowed to move through a system occupied by enemy ships (except Fighters). The only way to enter an enemy-occupied system is to activate that system itself.
- Activated Systems Prohibit Exit: A ship may not move if it is located in a system already activated by the active player (containing a friendly Command Counter placed prior to this activation). Ships may, however, move through systems containing friendly Command Counters.
- All moving ships must end their movement in the newly activated system.
3) PDS Fire
- Defending PDS Fire: After movement, enemy PDS units in range may fire at the active player’s fleet. For every hit, the activating player removes a casualty (Dreadnoughts and War Suns can absorb one damage before destruction).
- Attacking PDS Fire: After enemy PDS units have fired, any PDS in range owned by the active player may fire at enemy ships in the activated system.
4) Space Battles
If the active player moved one or more ships into a system containing opponent ships (even a single Fighter), a Space Battle must be fought. The active player is the attacker; the defender is the player whose ships were in the system before activation. The battle continues until only one player has ships remaining.
5) Planetary Landings
After Space Battles are completed, the active player may land Ground Force and PDS units from Carriers/War Suns onto planets in the activated system. Landing forces can be split among multiple planets in the system.
- Friendly Landing: Landing units on a planet already under your control. Simply add them to existing forces.
- Neutral Landing: Landing on an uncolonized planet. Active player takes the corresponding Planet Card from the deck and places it exhausted in his play area. Only Ground Forces can claim a planet; a PDS landing alone on a neutral/enemy planet is destroyed.
- Hostile Landing (Invasion): Landing on a planet containing enemy Ground Forces initiates Invasion Combat. If an enemy planet has no Ground Forces, it falls without resistance: remove enemy Control Marker and take the Planet Card exhausted.
6) Invasion Combat
Resolved after landings when Ground Forces of two players occupy the same planet. Multiple planet invasions are resolved one at a time in the active player’s choice of order. PDS units landed during an invasion do not fight or take casualties, and are destroyed if all friendly Ground Forces perish.
7) Produce Units
The active player may produce new units at one or more friendly Space Docks in the activated system. A new Space Dock may also be produced on an eligible planet controlled for the entire round, paying 4 resources.
Concluding a Tactical Action
After completing all applicable steps, the Tactical Action ends and the next player in order of play takes their turn.
Example of Activation and Movement
- Dreadnought: Has a movement rate of 1. Since the activated system is 2 spaces away, it cannot reach the activated system.
- Cruisers: Although in two different systems, each has movement 2, allowing them to reach the activated system. The top Cruiser moves legally through a system containing a friendly Command Counter.
- Carrier Fleet: Fleet of 1 Destroyer, 1 Carrier, and 4 Fighters are within range and may move into the activated system. The player may choose to move only some of the ships.
- Activated Destroyers: Two Destroyers are in range, but their system was already activated earlier by the player, preventing them from moving.
- Blocked Cruiser: In range, but cannot move through the Supernova or through the system containing two enemy Destroyers.
Definition of a Fleet: All spaceships (Fighters, Cruisers, Carriers, Dreadnoughts, Destroyers, and War Suns) controlled by one player in one system at any given time.
The Transfer Action
The Transfer Action reorganizes units and simultaneously activates two adjacent systems containing only units belonging to the active player (and absolutely no enemy units). Units may move between the two systems, and production may take place at a Space Dock in one of the systems.
The Transfer Sequence
- Activate Two Systems: Place one Command Counter from your Command Pool onto one system, and one Command Counter from reinforcements onto an adjacent system. Both systems must contain friendly units and zero enemy units.
- Movement Between Systems: Friendly ships may move between the two activated systems. Ground Forces and PDS must be transported by Carriers/War Suns.
- PDS Fire: Enemy PDS in range may fire at friendly fleets in the activated systems (a PDS in range of both may fire at only one system).
- Planetary Landings: Ground Forces/PDS aboard Carriers may land on friendly planets in the systems (cannot land on neutral planets or enemy-controlled planets).
- Production: Produce units at Space Docks in one of the activated systems (not both).
Passing and Ending the Action Phase
Passing
A player may choose to pass only if he has already taken his Strategic Action (except the player holding the Initiative Strategy, who has no Strategic Action). Once a player passes, he cannot take further actions this round.
Exception: A player who has passed is still allowed to execute the Secondary Ability of Strategy Cards resolved later during the phase.
End of the Action Phase
The Action Phase continues in turn order until all players have passed. Once everyone has passed, proceed to the Status Phase.
Combat: Space Battles & Planetary Invasions
Space Battles
A Space Battle is fought whenever the active player moves ships into an enemy-occupied system, lasting until only one player’s ships remain (or all are destroyed).
Before Combat
- Sabotage Runs: Optional rule (page 35).
- Destroyer Anti-Fighter Barrage: Before the first round of battle, roll two dice for each Destroyer. For each roll equal to or higher than the Destroyer’s combat value (normally 9), the opponent immediately removes one Fighter to reinforcements (no return fire).
The Space Battle Sequence
- Announce Withdrawals/Retreats: Attacker announces whether he will withdraw. If not, defender may announce a retreat. Retreats occur at the end of the round; at least one round must be fought.
- Roll Combat Dice: Both players simultaneously roll one die per ship (War Suns roll three dice). A hit is scored for each result equal to or higher than the unit’s combat value.
- Remove Casualties: Attacker removes casualties first, then defender. Each casualty destroys one ship of choice or damages a Dreadnought/War Sun. Fighters are typically chosen first as cannon fodder.
- Execute Withdrawals/Retreats: The retreating fleet moves to an adjacent system previously activated by that player. If no adjacent system was previously activated, retreat is impossible. If all enemy units were destroyed during step 2-3, the retreat is cancelled. Check fleet supply and fighter capacity in the new system; excess units are destroyed.
Invasion Combat
Initiated when Ground Forces land on an enemy planet. Retreats and withdrawals are not allowed.
Before Combat
- Planetary Bombardment: Dreadnoughts (1 die) and War Suns (3 dice) roll combat dice against Ground Forces on the planet. Hits eliminate defending Ground Forces immediately (no return fire). Dreadnoughts cannot bombard a planet with a PDS (planetary shield); War Suns ignore planetary shields.
- Defensive PDS Fire: Defending PDS on the planet fire a single shot each at invading Ground Forces (normally hits on 6+). Hits eliminate invading Ground Forces immediately without return fire.
The Invasion Combat Round
- Roll Combat Dice: Both players simultaneously roll one die per friendly Ground Force on the planet (hits on combat value).
- Remove Casualties: Remove casualties simultaneously. Repeat rounds until one or no Ground Forces remain.
Invasion Outcome
- Invasion Success: If defending Ground Forces are eliminated and at least one attacking Ground Force survives, the planet is captured. All defending PDS and Space Docks are destroyed. Attacker takes the Planet Card exhausted.
- Mutual Elimination: If all Ground Forces on both sides perish, defender retains control (places a Control Marker on the vacant planet).
Systems, Planetary Economy & Governance
The Systems of Twilight Imperium
- Home Systems (Interior Yellow Border): Starting systems of the 10 races. Mecatol Rex is always placed at the center of the galaxy.
- Special Systems (Interior Red Border):
- Asteroid Field: Cannot be moved through without Anti-mass Deflector technology. Ships can never end movement in an Asteroid Field. Asteroid Fields may never be activated.
- Nebula: Defending fleets receive +1 to combat rolls. Ships cannot move through a Nebula (only into it). Ships leaving a Nebula have their movement reduced to 1.
- Supernova: Impassible dying stars. May never be activated or entered.
- Regular Systems: Empty space or systems containing 1–2 planets, possibly with Alpha or Beta Wormhole entrances.
- Wormholes: Systems containing identical wormhole letters (Alpha to Alpha, Beta to Beta) are considered adjacent for movement and transfer.
Planetary Resources, Influence, and Tech Specialties
- Resources: Planet’s economic surplus used to purchase units and technologies.
- Influence: Planet’s political importance used to acquire Command Counters, play Action Cards, and vote in the Galactic Council.
- Technology Specialties: Provides a 1-resource discount when buying technologies of that specific color (Red, Green, or Blue) via the Technology Strategy secondary ability. Planet need not be exhausted to grant this discount, but must be unexhausted.
- Exhausting Planets: Turn card face down to receive either its resources or its influence (never both). Unused portions are lost. Cards refresh in the Status Phase.
Command Counters and Race Sheet Areas
Players start with 16 Command Counters total. They are allocated into three areas on the Race Sheet:
- Command Pool: Counters spent to activate systems for Tactical and Transfer Actions.
- Fleet Supply: Flipped to “Fleet” side. Determines maximum number of capital ships (everything except Fighters) allowed in any single system. Excess ships must be removed immediately.
- Strategy Allocation: Counters spent to execute Secondary Abilities of Strategy Cards or special abilities.
Counters can only be redistributed among these three areas during the Status Phase.
Action Cards and the Galactic Council
Action Cards
- Hand limit is 7 cards. Discard excess immediately when drawn.
- Cannot play two identical Action Cards for the same situation/entity in the same round.
- Must publicly announce intent to play, then resolve in order of play.
- Sabotage: Can be played immediately when another card is revealed, cancelling it without prior announcement.
- “Play: As an action”: Played on the player’s turn instead of taking a regular action.
Political Cards and the Galactic Council
Triggered when the Political Strategy Card’s primary ability is used:
- Debate & Bribes: Players discuss and bribe with Trade Goods (agreements are non-binding).
- Voting: Proceed clockwise starting left of Speaker (Speaker votes last). Votes equal total influence of unexhausted planets (minimum 1 vote). All votes must be cast together on one outcome; voting does not exhaust planets. Trade Goods cannot buy extra votes.
- Voting Types:
- “Elect” Votes: Players nominate an entity; candidate with most votes wins.
- “For or Against” Votes: Majority decides.
- Laws: Permanent rule modifications placed face up in play area if passed.
- Abstaining & Ties: Players may abstain. The Speaker breaks ties.
Technology Advances and Trade
Technology Advances
- Four Disciplines: Warfare (Red), Biotechnology (Green), Propulsion (Blue), General (Yellow).
- Acquisition: Through the Technology Strategy Card (primary gives 1 free; secondary allows buying 1 for 8 resources). Must fulfill prerequisites on the card.
Trade Agreements
- Each race has 2 Trade Cards with fixed trade values. When Trade Strategy primary resolves, trade agreements can be negotiated (must be approved by active player).
- Players exchange cards; agreements yield Trade Goods when Trade Strategy primary or secondary is resolved.
- Agreements break automatically upon open war (Space Battle or Invasion Combat between partners) or unilaterally during Status Phase.
- Trade Goods: Can be spent as 1 resource or 1 influence each, or traded freely to other players at any time. Maximum 40 in the game supply.
- Empty Systems: A system with zero units (no ships, Ground Forces, PDS, or Space Docks). Special Systems are never empty systems.
Unit Limitations & Scuttling
- Unit Limits: Players are limited to the plastic pieces in the box, except Fighters and Ground Forces.
- Scuttling: During the Status Phase, a player may voluntarily destroy any of his own units to return them to reinforcements.
- Supplement Counters: Used when running out of plastic Fighters or Ground Forces. There must always be at least one physical plastic unit in the system/planet with the supplement counters.
Rules for Units
Unit Specifications
The Space Dock
- Cost: 4 | Limit: 3
- Building: Built during Production step on a planet controlled since the start of the round in an activated system with no enemy ships.
- Production Capacity: Planet resource value + 2. Can produce that many units total.
- Fighter Support: Supports up to 3 Fighters in its system.
- Blockade: If an enemy ship is in the system, the Space Dock cannot produce ships (may still produce Ground Forces and PDS).
The Ground Force Unit
- Cost: 1 (produces 2 units) | Limit: 12 + supplements
- Essential for taking planets, invading, and defending. Transported by Carriers/War Suns.
The Carrier Unit
- Cost: 3 | Limit: 4 | Capacity: 6
- Transports Ground Forces, PDS, and Fighters. Can pick up units during movement through systems that are not yet activated and contain no enemy ships.
The Planetary Defense System (PDS) Unit
- Cost: 2 | Limit: 6 (max 2 per planet)
- Planetary Shield: Blocks Dreadnought planetary bombardment.
- Space Cannon: Fires at enemy ships entering the system during activation step 3. Deep Space Cannon tech allows firing into adjacent systems. Defending PDS also fires at invading Ground Forces before Invasion Combat.
The Fighter Unit
- Cost: 1 (produces 2 units) | Limit: 10 + supplements
- Requires Carrier, Space Dock, or War Sun capacity. Inexpensive combat screen.
The Cruiser Unit
- Cost: 2 | Limit: 8
- Fast (movement 2), balanced combat ship.
The Destroyer Unit
- Cost: 1 | Limit: 8
- Cheap screen. Features pre-combat Anti-Fighter Barrage (2 dice hitting on 9+).
The Dreadnought Unit
- Cost: 5 | Limit: 5
- Sustain Damage: Absorbs 1 hit (turn on side); repaired in Status Phase.
- Planetary Bombardment: Rolls 1 die before invasion combat against defending Ground Forces (blocked by PDS).
The War Sun Unit
- Cost: 12 | Limit: 2 (requires War Sun tech)
- Rolls 3 dice in combat and bombardment. Movement 2, capacity 6, sustains damage. Ignores planetary shields when bombarding.
The Status Phase & Winning the Game
The Status Phase
During the Status Phase, game functions reset and victory points are scored. Resolve the following steps in sequence:
The Status Sequence
- Qualify for Public/Secret Objective Cards: In order of play, each player may announce that he has met the requirements of one face-up Public Objective Card and/or his Secret Objective Card. Prove the claim, place a Control Marker on the card, and advance on the Victory Point Track. A player may never qualify for an objective if he does not control all planets in his Home System.
- Repair Damaged Ships: Return all damaged Dreadnoughts and War Suns to their upright position.
- Remove Command Counters: Remove all friendly Command Counters from the game board to your reinforcements.
- Refresh Planet Cards: Turn all exhausted Planet Cards face up.
- Receive 1 Action Card and 2 Command Counters: Draw 1 Action Card from the deck and take 2 Command Counters from reinforcements, placing them in any of the three areas on your Race Sheet.
- Redistribute Command Areas: You may redistribute Command Counters between Strategy Allocation, Command Pool, and Fleet Supply. Ensure fleets comply with any reduced Fleet Supply limit.
- Return Strategy Cards: Return Strategy Cards to the common play area face up.
Winning the Game
When a player advances to the 10th space on the Victory Point Track, he claims the Imperial Throne on Mecatol Rex and immediately wins the game.
The “Imperium Rex“ Objective Card: If drawn during the Imperial Strategy resolution, the game ends immediately. The player with the most victory points wins (the active player does not get the 2 VP for drawing it). Tie-breakers: most resolved Objective Cards, then most planets, then most unused Command Counters, then total Command Counters on Race Sheet.
Strategy Cards Reference
Strategy Card Reference Summary
- Initiative: Takes Speaker Token (first pick of Strategy Cards next round). Free execution of other cards’ Secondary Abilities without spending Command Counters. Cannot be picked two rounds in a row.
- Diplomacy: Target player and active player cannot activate each other’s systems for the round. Secondary: Refresh 2 exhausted non-Home planets.
- Political: Draw 3 Action Cards, 1 Command Counter. Draw and vote on top Political Card; manipulate top 3 cards of Political Deck. Secondary: Draw 1 Action Card.
- Logistics: Gain 4 Command Counters. Secondary: Spend 3 influence per Command Counter gained (does not require spending a Strategy Allocation counter).
- Trade: Gain 3 Trade Goods + trade agreement income, approve new trade agreements. Or option b: Cancel all trade agreements. Secondary: Collect trade agreement income.
- Warfare: Retrieve 1 Command Counter from board back to Command Pool. Secondary: Move 2 Cruisers/Destroyers to adjacent empty systems (activates with reinforcement counters).
- Technology: Gain 1 free technology advance. Secondary: Spend 8 resources to gain 1 technology advance.
- Imperial: Reveal 1 Public Objective Card and gain 2 Victory Points. Secondary: Build units at an activated Space Dock or build at an unactivated Space Dock without activating the system.
Technology Tree Reference
Technology Tree Reference
Warfare Technologies (Red)
- Hylar V Assault Laser: Cruisers and Destroyers receive +1 on all combat rolls.
- Deep Space Cannon: Prerequisite: Hylar V. Enemy fleets in adjacent systems are now in range of your PDS units.
- Graviton Laser System: When you miss with a PDS roll, make a single re-roll.
- Magen Defense Grid: Prerequisites: Deep Space Cannon AND Graviton Laser. All PDS units receive +1 on combat rolls; defending Ground Forces on a planet with PDS receive +1.
- Assault Cannon: Before any Space Battle begins, each Dreadnought may fire one shot; hits applied immediately without return fire.
- Graviton Negator: Dreadnoughts may bombard planets containing PDS units. Fighters may participate in Invasion Combat.
Biotechnologies (Green)
- Stasis Capsules: Cruisers and Dreadnoughts may carry 1 Ground Force unit.
- Cybernetics: Prerequisite: Stasis Capsules. All Fighters receive +1 on combat rolls.
- Gen Synthesis: Ground Forces receive +1 on combat rolls. When destroyed, roll die: on 5+, returned to Home System planet.
- Neural Motivator: Draw one extra Action Card during each Status Phase.
- Dacxive Animators: If you win Invasion Combat, roll for every killed Ground Force: on 6+, place 1 friendly Ground Force on the planet.
- X-89 Bacterial Weapon: Prerequisites: Assault Cannon AND Transit Diodes. Dreadnought/War Sun may destroy all enemy Ground Forces on a planet before bombarding; discard all your Action Cards.
Propulsion Technologies (Blue)
- Antimass Deflectors: Ships may move through Asteroid Fields (never end movement there).
- XRD Transporters: Prerequisite: Antimass Deflectors. All Carriers receive +1 movement.
- Type IV Drive: Cruisers and Dreadnoughts receive +1 movement.
- Light/Wave Deflector: Prerequisites: XRD Transporters AND Enviro Compensator. Ships may move through systems containing enemy ships to continue toward the activated system.
- Advanced Fighters: Fighters move independently with movement 2, receive +1 on combat rolls, do not require capacity, and block enemy movement.
- Fleet Logistics: When taking a Tactical Action, take two Tactical Actions in succession before your turn ends.
General Technologies (Yellow)
- Enviro Compensator: Production capacity of Space Docks increased by 1.
- Sarween Tools: Prerequisite: Enviro Compensator. Receive 1 additional resource to build units whenever producing at a Space Dock.
- Micro Technology: Prerequisites: Stasis Capsules OR Sarween Tools. Gain 1 extra Trade Good for each active trade agreement during Trade secondary.
- Transit Diodes: As an action, spend 1 Strategy Allocation counter to move up to 4 Ground Forces between any friendly planets.
- Integrated Economy: When producing units, place new units in any activated adjacent empty or friendly system. Place PDS and Ground Forces on any friendly planet in range.
- War Sun: Prerequisites: Sarween Tools AND Deep Space Cannon. Allowed to produce War Sun units.
Optional Rules & Variants
Three, Four, and Five Player Games
- Three Players: Remove 3 empty systems and 1 Asteroid Field before shuffling; remove 4 random systems; deal 8 systems per player. Each player chooses 2 Strategy Cards in the Strategy Phase and takes two Strategic Actions.
- Four Players: Deal 8 systems per player. Each player chooses 2 Strategy Cards. Bonus counters are not used.
- Five Players: Deal 6 systems per player. Position 1 and 4 receive 4 Trade Goods; position 5 receives 6 Trade Goods. Three unchosen Strategy Cards receive bonus counters.
Game Option: The Long War
Play to 14 victory points using the reverse side of the track. Prepare Public Objective deck with 8 Stage I and 5 Stage II cards plus “Game Over”.
Game Option: Age of Empire
All Public Objectives are revealed at setup in a line. A Turn marker advances each round, making objectives fully known from turn one.
Game Option: Distant Suns
Place face-down Domain Counters on every neutral planet. Revealed upon landing Ground Forces.
- Probing: A player with Fighters in the system may secretly look at face-down counters instead of landing forces.
- Razing: Dreadnoughts and War Suns may destroy face-down counters instead of landing, rolling for possible political backlash:
- 1-7: No effect
- 8-9: Lose 3 random Action Cards
- 10 (0): Lose 3 Action Cards and exhaust all ready planets
Domain Counter Reference (Distant Suns Option)
- Biohazard: First Ground Force landing here is eliminated while token remains. Discard after successful invasion.
- Radiation: Kill all Ground Forces of initial landing, then remove counter.
- Hostile Locals: Indicated number of local Ground Forces fight invader (no bombardment allowed). Resets if invasion fails. Discard upon conquest.
- Lazax Survivors: Gain 3 additional votes on all future political agendas. (If probed, gain 1 VP and 3 Action Cards).
- Settlers: Return Ground Forces to carrier. Roll die: 6+, gain 2 free Ground Forces; 1-5, random opponent gains 2 free Ground Forces here. Discard counter.
- Peaceful Annexation: Landing proceeds without incident. Discard counter.
- Industrial Society: Place a free Space Dock immediately. Planet card is received unexhausted. Discard counter.
- Technological Society: Player to left gives you a free technology advance from your deck whose prerequisites you meet. Discard counter.
- Wormhole Discovery: Place in center of system as an Alpha or Beta wormhole.
- Natural Wealth: Receive indicated number of Trade Goods immediately. Discard counter.
Game Option: Leaders
Each race receives 3 Leaders (Generals, Admirals, Diplomats, Agents, Scientists). Transported without taking capacity. Captured or killed if ship or planet is lost.
- Scientist: Extra tech discount, cheaper Space Docks (2 resources), +1 to PDS rolls, protects planet against War Sun bombardment.
- Diplomat: Delays invasion by 1 round; allows fleet to pass through enemy systems with permission.
- General: Reroll 2 dice during Invasion Combat attack, -4 to enemy bombardment, +1 to defending Ground Forces.
- Admiral: +1 die to carrying ship, +1 movement to Dreadnought, prevents enemy retreat unless enemy has Admiral.
- Agent: Blocks enemy PDS fire during invasion; captures enemy PDS/Docks intact on invasion; sacrifice to act as Sabotage card.
Game Option: Sabotage Runs
Fighters may launch pre-combat attacks against enemy War Suns. Roll 9-10 to breach Outer Defenses, then roll 10 on Inner Defenses to instantly destroy the War Sun.
Rules explaination videos
Expansions for
Twilight Imperium: Third Edition

Twilight Imperium: Third Edition – Shards of the Throne
2011
Expand the galactic struggle with new races, units, technologies, and intrigue.
240
minutes
Heavy
View expansion

Twilight Imperium: Third Edition – Shattered Empire
2006
Expand the galactic conflict with new races, units, objectives, and variants.
240
minutes
Heavy
View expansion
