
Zombicide: 2nd Edition
2021
Team up as survivors, find gear, and battle through a branching campaign across a city overrun by the undead.
60
minutes
1 - 6
player(s)
14+
Medium


About this board game
Zombicide: 2nd Edition is a cooperative zombie-survival board game for 1–6 players, with sessions lasting about 60 minutes. Players take on the roles of survivors while the game controls the bloodthirsty undead.
Work together to survive and thrive in an infested city. Search for guns and gear, then use what you find to take the fight to the zombies across 25 scenarios linked by a branching story.
This edition refines and streamlines the Zombicide experience with updated rules for several important parts of play. Ranged attacks feature revised target-priority rules, while interactions with doors and vehicle mechanisms have also been updated.
- Dark zones: New areas that hide zombies from survivors’ attacks.
- New components: Includes plastic dashboards and new child survivors.
- Linked scenarios: Follow a branching story through an infested city.
- Cooperative play: Coordinate survivor actions against zombies controlled by the game.
Released in 2021, Zombicide: 2nd Edition offers a streamlined way to experience cooperative zombie slaying while retaining compatibility with existing collections from previous Zombicide releases. Returning players can use their earlier content alongside the new edition’s components and miniatures.
Mechanics
Illustrators


Board Game Rules for
Zombicide: 2nd Edition
Components List


88 Miniatures:
- 12 Survivors (Josh, Doug, Elle, Amy, Ned, Wanda, Lili, Tiger Sam, Ostara, Odin, Bunny G, Lou)
- 76 Zombies:
- 40 Walkers (5 sculpts x 8)
- 16 Runners (2 sculpts x 8)
- 16 Fatties (2 sculpts x 8)
- 4 Abominations
- 12 ID Cards
- 9 Double-Sided Tiles

103 Mini Cards:
- 63 Equipment Cards:
- 6 Starting Equipment: 1 Baseball Bat, 1 Crowbar, 1 Fire Axe, 3 Pistol
- 45 Equipment: 4 Aaahh!!, 2 Bag Of Rice, 2 Canned Food, 2 Chainsaw, 1 Crowbar, 1 Fire Axe, 2 Flashlight, 2 Katana, 2 Kukri, 4 Machete, 4 Molotov, 1 Pistol, 3 Plenty Of Bullets, 3 Plenty Of Shells, 4 Sawed-Off, 2 Shotgun, 2 Sniper Rifle, 2 Sub-MG, 2 Water
- 11 Pimpweapons: 2 Aaahh!, 1 Army Sniper Rifle, 1 Automatic Shotgun, 1 Evil Twins, 1 Golden AK-47, 1 Golden Kukri, 1 Gunblades, 1 Ma’s Shotgun, 1 Nailbat, 1 Zantetsuken
- 1 Reference Card: Car
- 40 Zombie Cards
68 Tokens:
- 2 Car (Pimpmobile/Police Car)
- 1 Door (Blue – open/closed)
- 1 Door (Green – open/closed)
- 15 Door (Red – open/closed)
- 1 Exit Zone
- 1 First Player
- 18 Noise tokens
- 1 Objective (Red/Blue)
- 1 Objective (Red/Green)
- 9 Objective (Red/Red)
- 12 Pimpweapon Crate
- 1 Zombie Spawn (Red/Spawn Start)
- 1 Zombie Spawn (Red/Blue)
- 1 Zombie Spawn (Red/Green)
- 2 Zombie Spawn (Red/Red)
Other Components:
- 6 Survivor Dashboards
- 6 Survivor Color Bases
- 6 Dice
- 48 Trackers
Time for Zombicide!
Not so long ago, most of us were ordinary people leading ordinary lives, our dreams bound by ordinary laws. And then, the zombies came, storming humanity by surprise. The infected destroyed the old world in a matter of days.
Facing the apocalypse, a few of us showed their true selves, and survived, all guns blazing. We are no longer the people we used to be. The past is gone, we are now free to choose our fate. It won’t be a zombie world. It is time for payback. Time for Zombicide!
Zombicide is a cooperative game where 1 to 6 players take the roles of Survivors battling Zombies controlled by the game itself. The theme is about fellowship, heart-pounding action, and reaching victory against impossible odds.
The game’s goal is to choose a Mission and complete its objective, killing as many Zombies as possible. The monsters may be unpredictable, and come in greater number as adrenaline builds up, threatening to overwhelm the Survivors. Keep an eye on each other’s back!
Survivors use whatever weapon they can get to kill Zombies and slow down the invasion. The better the weapon, the higher the body count, but the more Zombie appear, attracted by the onslaught.
Your best weapon, however, is cooperation. All players win or lose together, and only through team spirit will the Survivors give the best of themselves, unlocking powerful Skills and access to the best weapons. Cooperation is the key to survival and victory!
Round Structure
Our infected foes no longer use the weapons they tried to defend their former lives with. In some places, you can just pick one up and start firing on the spot. On the other hand, zombies are not to be underestimated. They find strength in numbers and may prove unpredictable. This is a war no one was prepared for.
Zombicide is played over a series of Game Rounds, which proceed as follows:
1. PLAYERS’ PHASE
The player with the First Player token takes their Turn, activating their Survivors one at a time, in the order of their choice. Each Survivor can initially perform 3 Action per Turn, though they may gain Skills allowing them to perform extra Actions as the game progresses. The Survivor may use their Actions to kill Zombies, move around the board, and perform other tasks to accomplish the various Mission objectives.
Once a player has activated all their Survivors, the player to the left takes their Turn, activating their Survivors in the same manner.
When all the players have completed their Turns, the Player’s Phase ends.
2. ZOMBIES’ PHASE
All Zombies on the board activate and spend 1 Action either to attack a Survivor standing in their Zone or, if they have nobody to attack, to Move toward the Survivors.
Some Zombies, called Runners, get 2 Actions, so they can attack twice, attack and move, move and attack, or move twice.
Once all Zombies have performed their Actions, new Zombies appear in all active Spawn Zones on the board.
3. END PHASE
The first player hands the First Player token to the player to their left. Another Game Round then begins.
Winning and Losing
- The game is won immediately when all of the Mission objectives have been accomplished.
- The game is lost whenever:
- A Survivor is eliminated,
- The Mission objectives can no longer be fulfilled, or
- A specified losing condition is met.
Zombicide is a cooperative game, so all players win and lose together.
Game Setup
Yes, we wander from a city to the next. This is where we can find quick meals, fancy clothes, soap, cars, and guns. You don’t seem to understand, so let me be clear: we live here not in spite of the zombie population, but because of it. A predator always follow its prey!
A Zombicide game usually features 6 Survivors, distributed in any way you see fit among players. We recommend new players join the game with a single Survivor to get a quick grasp on the game mechanics. A veteran player can easily control a whole team of 6 Survivors and blast their way through the fateful night!
- Choose a Mission.
- Place the tiles.
- Place the Spawn Zones, tokens and miniatures as indicated by the Mission.
Veteran Zombicide players, please note:
- The tiles predefine places for Pimpweapon Crates and Objective tokens.
- Closed doors are already drawn on buildings.

- Select the indicated amount of Survivors and distribute them between the players as you see fit. As they are cooperating against the game, all players form a single team. Players sit around the table in any order they choose.
- Players take 1 Dashboard for each of their Survivors, placing the Survivor’s ID Card on it. They take a colored plastic base and attach it to the Survivor’s miniature to help identify it. They also take 5 plastic trackers of the same color as their base.
- Set the following cards in separate decks, they are identified by their category, as written on their back, and their respective color. Shuffle each of these decks, and place them facedown close to the board:
- Starting Equipment (grey).
- Equipment (blue).
- Pimpweapons (red).
- Zombies (yellow).
Place the Car reference card within view of all players. This card act as a reminder of car rules and stats, and do not belong to any single player.

- Take all Starting Equipment cards, then deal them randomly and as evenly as possible among Survivors. If needed, choose the Survivors who receive more than 1 card.
- Place the miniatures representing the chosen Survivors in the Survivor Starting Zone(s), as indicated by the Mission.
- Each player places their Survivors’ Dashboard(s) in front of them:
- Make sure the sliding arrow is on the 0 space in the blue area of the Danger Bar.
- Place a tracker in the highest slot of their Wound Bar.
- Place another tracker in the slot for the first (Blue) Skill.
- Place 3 more trackers in the reserve slots on the top of the Dashboard.
- Starting Equipment may be set in “Hand” or “Backpack” slots of the Dashboard.

Survivor Types
There are 2 Survivor types in Zombicide – classic Survivors and Kids:
- Classic Survivors have no distinguishing features. They usually start with Health 3.
- Kids have their own symbol
 on their ID Card. They usually start with Health 2, and can use the Slippery Skill once per Activation, with a single Move.
- The player with the Fire Axe as a Starting Equipment is the first player for the first Game Round. Give them the First Player token.

Useful Definitions
One rule: no rules. Well, almost. Find cool weapons, stick together, kill zombies, enjoy life, and everything should be fine.
- Actor: A Survivor or Zombie.
- Zone: Inside a building, a Zone is a room. On a street, a Zone is the area between two linear markings (or a linear marking and the board’s edge), and the walls of buildings.

Line of Sight
Lines Of Sight define whether Actors can see each other, such as whether a Survivor can see a Zombie through a door opening, from a room to the next, across the street, etc.
- In street Zones: Actors see in straight lines that run parallel to the edges of the board. Actors cannot see diagonally. Their Line of Sight covers as many Zones as the line can pass through before reaching a wall or the edge of the board.
- In building Zones: An Actor sees into all the Zones that share an opening with the room the Actor currently occupies. If there is an opening, the walls do not block Line of Sight between 2 Zones. An Actor’s Line of Sight is limited, however, to the distance of 1 Zone.
- If the Survivor is looking from a building Zone out into street Zones, the Line Of Sight can go through any number of street Zones into a straight line.
- If the Survivor is looking from a street Zone into a building, the Line Of Sight can go only 1 Zone into the building.
NOTE: Closed Doors interrupt Lines of Sight.

Movement Basics
Movement is life. Keep on moving!
— Wanda
Actors can move from a Zone to the next as long as the first Zone shares at least an edge with the destination Zone. Corners do not count. This means Actors cannot make diagonal movements.
- In street Zones: Movement from one Zone to another has no restrictions. However, Actors must go through an open door (or opening) to move from a room to exterior and vice-versa.
- In building Zones: Actors may move from one Zone to another as long as their Zones are linked by an opening (such as an open door). The position of a miniature in the Zone and the layout of the walls do not matter as long as the Zones share an opening.

Noise
Keeping quiet? What for? I have fun, and fun makes noise!
— Bunny G
Running a chainsaw or going full auto makes Noise, and Noise attracts Zombies. Each Action used to attack or open a door with noisy Equipment produces a Noise token.
- Place the Noise token in the Zone where the Survivor resolved the Action. It stays in the Zone it was produced, even if the Survivor moves.
- A single Action can only produce a single Noise token, no matter how many dice are rolled, how many hits are obtained, or whether Dual weapons are used.
- Noise tokens are removed from the board during the End Phase.
NOTE: Each Survivor miniature also counts as a Noise token. Zombicide Survivors can’t stay quiet, and don’t even get me started on the kids!
EXAMPLE: Ned spends his first Action with a Katana to eliminate a Walker in his own Zone. The Katana is a Silent weapon, and doesn’t produce Noise tokens.
The second Action is spent to fire one Zone away with a Shotgun. It is a noisy weapon. Even if multiple dice were rolled, only a single Action was spent: a single Noise token is set in Ned’s Zone.
Ned spends his third Action to Move away. The Noise token remains in the Zone it was produced, and does not follow Ned.
Adrenaline, Danger Level, and Skills
Tell me how you kill zombies, and I’ll tell you who you are.
— Elle
For each Zombie eliminated, a Survivor gains 1 Adrenaline Point (AP) and moves up a notch on their Danger Bar. Some game features provide additional AP, like taking Objective tokens or consuming food.
There are 4 Danger Levels on the Danger Bar:
- Blue Level: A Survivor starts the game at Blue Level, with 0 Adrenaline Points, and a single Skill.
- Yellow Level: Reached with 7 Adrenaline Points. The Survivor gains a fourth Action.
- Orange Danger Level: Reached with 19 Adrenaline Points. Choose a Skill among the 2 indicated at this Level.
- Red Danger Level: Reached with 43 Adrenaline Points. Choose a Skill among the 3 indicated at this Level.
Skills stack across Danger Levels. As new Skills are unlocked, place new trackers on the Survivor Dashboard to indicate them.
Building up Adrenaline has a side effect: when you draw a Zombie card to spawn Zombies, read the line that corresponds to the Survivor with the highest Danger Level. The stronger the Survivor is, the more Zombies appear.

Inventory Management
Mister? You’ve got the weapon I’m looking for.
— I was about to tell you the same thing. What’s your name, young punk?
— Ostara. You?
— Ned.
— Nice to meet you. Can I have this weapon? Please?
Each Survivor can carry up to 5 Equipment cards, divided into two types of Equipment slots on their Dashboard: 2 Hand, and 3 Backpack slots. You may discard cards from your Survivor’s inventory to make room for new cards at any time, for free (even during another player’s Turn).
- Hand slots: Each Hand slot may receive 1 Equipment card. Weapons and other items in Hand slots may be used normally. Both hands are used for Combat.
- Backpack slots: The Backpack can hold up to 3 Equipment cards. Characteristics and game effects described on Equipment cards cannot be used until they are moved to a Hand inventory slot.
- Equipment cards bearing “May be used in the Backpack” may be used indiscriminately in Hand or Backpack slots.

Reading an Equipment Card
I know better. Rate of fire is life. Keep on firing!
— Doug
Zombicide features many different Equipment cards. The ones your Survivors use to eliminate Zombies have Combat characteristics displayed at the bottom:
Weapons fall into 2 categories: Melee weapons and Ranged weapons. The Melee and Ranged symbols are used to distinguish each type.
 Melee weapons: Bear the Melee symbol. They have a Range 0 value and thus can only be used in the same Zone as the Survivor. They are used with Melee Actions (e.g. Baseball Bats, Crowbars, and Fire Axes).
 Ranged weapons: Bear the Ranged symbol. They usually have a maximum Range value of 1 (or more). They are used with Ranged Actions. Attacking at Range 0 with a Ranged weapon is still a Ranged Action (e.g. Pistols, Shotguns, and Sniper Rifles).
Ammo Type
Ranged weapons use ammunition to kill Zombies. They have infinite ammo (enjoy!). However, they don’t all use the same type of Ammo.
 Bullets: Weapons with the Bullets symbol fire small-caliber ammunition at Zombies. They may use the Plenty Of Bullets card to provide the Survivor with handy re-rolls.
 Shells: Weapons with the Shells symbol work with higher caliber ammunition. Having the Plenty Of Shells card allows for re-rolls against the tougher targets.


Zombie-Killing, Door-Opening, and Noisy Equipment
Many Equipment cards, such as the Crowbar, Fire Axe, and Chainsaw allow Survivors to open doors as well as eliminate Zombies.
 Equipment that allows Survivors to kill Zombies has either the Ranged or Melee symbol.
 Equipment that allows you to open Doors has this symbol.
Each of these symbols is accompanied by a second symbol related to Noise, defining if the Action is noisy or not. Noise attract Zombies!
 This Action is noisy and produces a Noise token.
 This Action is not noisy and does not produce a Noise token.


Combat Characteristics
Weapons display Combat characteristics used to eliminate Zombies in many ways:
- Weapon type: Indicates whether this Equipment is a Melee or Ranged weapon.
- Dual:
 If you have Dual weapons with the same name in each Hand slot, you may use them both with a single Action (they must be aimed at the same Zone).
- Range: Min and max number of Zones the weapon can reach. 0 indicates it can only be used in the Survivor’s Zone.
- Dice: Roll this many dice when an Action is spent to use this weapon.
- Accuracy: Each roll that equals or exceeds this value is a success. Lower results are failures.
- Damage: Damage inflicted with each success. Damage does not stack up with multiple successes.
- Ammo type: Shows the type of ammunition used (e.g. Bullets or Shells).
Equipment Traits
No matter what, fight with style!
— Lili
Flashlight
Flashlights help finding the best Equipment early in the game.
The Survivor benefits from the Search: +1 card (Search: 2 cards) Skill. Draw 2 cards when Searching with the Survivor. Please note the game effect does not stack upon itself: having multiple Flashlights does not provide more than 2 cards.
Molotov
A Molotov kills all Actors in its target Zone. Keep them for Abominations and emergency situations!
Perform a Ranged Action with a Molotov equipped in Hand, discard the card, and burn! A Molotov effect is created in the targeted Zone: all Actors are eliminated, no matter their Damage threshold (yes, it includes Abominations!). The Survivor earns all related Adrenaline Points.
Reload
Reloadable weapons have powerful burst power, but need to be reloaded before being fired again.
Weapons with the Reload trait require spending an Action to reload them between shots if you want to fire multiple times in the same Game Round. All such weapons are freely reloaded during the End Phase, so they start each Game Round ready to fire.
- If such a weapon is fired and passed to another Survivor without reloading, it must still be reloaded before the new owner can use it in the same Game Round.
- A single Action is enough to reload two weapons fired in a Dual manner.
- Firing with a single Dual reloadable weapon in a Zone, then firing at another Zone with the other Dual reloadable weapon, is allowed.
Sniper
Crowd control? I’ll show you crowd control!
The Survivor benefits from the Sniper Skill when performing a Ranged Action with a weapon featuring that trait. They ignore Targeting Priority Order and may freely choose their target. Sniper also cancels any chances of Friendly Fire!

Survivor Actions Overview
I don’t have time for dummies. Get out of my way!
— Lili
Starting with whoever holds the First Player token, each player activates their Survivors one after the others, in the order of their choice. Each Survivor can perform up to 3 Actions at the Blue Danger Level (not counting any free Action their Blue Level Skill may give them). The possible Actions are listed below.
MOVE
Let’s head this way! More zombies to kill!
— Josh
The Survivor moves from a Zone to the next but cannot move through walls or closed doors.
- A Survivor must spend 1 additional Action per Zombie standing in the Zone they’re attempting to leave. REMEMBER: Kids can use the Slippery Skill, once per Turn.
- Entering a Zone containing Zombies ends the Survivor’s Move Action (save if they have the Slippery Skill).
EXAMPLE 1: Doug is in a Zone with 2 Walkers. To leave this Zone, he spends 1 Move Action, then 2 more Actions (1 per Walker), for a total of 3 Actions. If there had been 3 Zombies in the Zone, Doug would have needed 4 Actions (1 + 3) to Move.
EXAMPLE 2: Wanda is next to a Zone containing a Zombie when she moves. Her Move Action ends in the Zone with the Zombie, even though her Sprint Skill would normally allow her to Move up to three Zones.
SEARCH
Open the door, open the door! I want to see what’s inside! What? Curious, me?
— Ostara
A Survivor can only Search building Zones and only if there are no Zombies in that Zone. The player draws a card from the Equipment deck. They may then either place it in the Survivor’s inventory, reorganizing it for free, or immediately discard it. A Survivor can only perform a single Search Action per Turn (even if it’s a free Action). When the Equipment deck runs out, reshuffle all its discarded cards (including Starting Equipment cards) to make a new deck.
DOOR ACTION
Life is like a closed building. You never know what you gonna get.
— Ned
Equipment that allows you to open Doors has this symbol:
The Survivor uses a Door-opening Equipment to open a door in their Zone. No roll is required. Set a Door token on its open side where the closed Door was (if it was a closed Door token, simply flip it to its open side instead).
Remember to place a Noise token in the Zone if the Survivor used a noisy Equipment to open the Door.
NOTE: Open Doors cannot be closed again.
Some Missions feature colored doors. Usually, these cannot be opened until some conditions are met, like finding an Objective of the matching color. Read the Mission description to know more.

Spawning in Buildings
Entering a building is quite a thrill. Whenever they don’t chase someone, zombies gather in the dark, waiting for a victim to ambush. It’s better than an amusement park!
— Lou
Opening a building for the first time reveals all the Zombies waiting inside, in the dark. A single building extends to all rooms connected by openings, sometimes straddling several tiles.
Zombies waiting in a building only spawn in darkened rooms, called Dark Zones. Indicate each Dark Zone of the building, one after the other in any order you choose (we suggest starting from the farthest to the closest).
Draw a Zombie card for each of them. Place the corresponding number and type of Zombies in the indicated Dark Zone.
When the Zombie deck runs out, reshuffle all the discarded cards to make a new deck.
- When you draw a Zombie card featuring the Rush keyword, place the corresponding Zombie miniatures normally. Then, these Zombies immediately perform a free Activation! Then, resume building spawning.
- When you draw an Extra Activation Zombie card, no Zombie appears in the designated Dark Zone. Instead, all Zombies of the indicated type on the board immediately perform an extra Activation. Notice that these cards have no effect at Blue Danger Level.
NOTE: Buildings that are open at the start of the game are never spawned in.

REORGANIZE/TRADE
Kids, it’s snack time! Ok, let me see in my rucksack. Canned beans, dry rice, some water, plushies, a pair of pistols, a machete, a picture of mommy…
— Ned
The Survivor can reorganize the cards in their inventory in any way the player wishes.
The Survivor can simultaneously exchange any number of cards with 1 (and only 1) other Survivor currently in the same Zone. This other Survivor may reorganize their own inventory for free.
A Trade Action doesn’t have to be equal. You can trade everything for nothing, if both parties agree!
COMBAT ACTIONS
Combat Actions use Melee and Ranged Equipment cards to eliminate Zombies.
Melee Action
We have a running contest about the farthest distance a zombie head can fly with a decapitating strike. Do you want to join? The entry fee is… reasonable.
— Odin
The Survivor uses a Melee weapon they are holding in Hand to attack Zombies in their own Zone. Missed Melee strikes cannot cause Friendly Fire.
Ranged Action
Impossible, you say? You talk like a grown-up. Let me show you.
— Tiger Sam
The Survivor uses a Ranged weapon they are holding in Hand to fire at a single Zone within the Range shown on the weapon’s card, and within Line of Sight. Survivors shoot at Zones, not Actors. This is especially important for Targeting Priority Order. Using a Ranged weapon at Range 0 is still a Ranged Action.
TAKE OR ACTIVATE AN OBJECTIVE
This new world offers a great boon: we just have to look down to find what we need. Batteries, blankets, clothes, soap, and the like. And it’s free! We feed off the city’s remains to hunt and kill zombies.
The Survivor takes an Objective or activates an Objective in the same Zone. The game effects are explained in the Mission’s description.
Please note the tiles predefine places for Pimpweapon Crates and Objective tokens.
Unless otherwise stated, each Objective token gives 5 Adrenaline Points to the Survivor who takes it.
Zombicide features Pimpweapon Crate tokens, marking the places where these superweapons can be found. They can be taken in the same way as Objectives. The Survivor immediately gains a random Pimpweapon among those still available. They can then reorganize their inventory, for free.

MAKE NOISE
… and this is how I learned to whistle.
— Bunny G
The Survivor makes Noise in an attempt to attract Zombies. Place a Noise token in the Survivor’s Zone.
DO NOTHING
The Survivor does nothing and prematurely ends their Turn. The remaining Actions are lost.
Combat Resolution
This is not only about revenge, it’s about the future. We spent most of our lives bending the knee to the rich and famous. This is the time we can fight and party hard!
— Amy
 DICE SYMBOL: When a Survivor performs a Melee or Ranged Action to attack Zombies, roll as many dice as the Dice number of the weapon used.
- DUAL SYMBOLS (MELEE AND RANGED): If the active Survivor has 2 identical weapons with the Dual symbol equipped in their Hands, they can use both weapons at the same time at the cost of a single Action. Both weapons must be aimed at the same Zone.
 ACCURACY SYMBOL: Each die that equals or exceeds the Accuracy value of the weapon scores a successful hit. IMPORTANT: The minimum Accuracy is always 2+.
 DAMAGE SYMBOL: Each hit inflicts the amount of Damage specified by the Damage value of the weapon to a single target. If all targets get eliminated, extra hits are lost.
- Walkers and Runners are killed with a Damage 1 (or more) hit.
- Fatties are killed with a Damage 2 hit. Damage 1 has no effect on them, no matter the amount of times a Survivor hits them.
- Abominations are killed with a Damage 3 hit. In any case, a Molotov works!
Resolving Melee Actions
I fight with anything I find, but have a crush with hand-to-hand fighting. Melee weapons are more… wild, you know. Especially chainsaws.
— Wanda
A Survivor holding a Melee weapon in their Hand can attack Zombies in their own Zone. Each die that rolls equals to or higher than the Accuracy value on the weapon’s card is a successful hit. The player divides their hits as they wish among the possible targets in their Zone.
Missed Melee strikes cannot cause Friendly Fire.
EXAMPLE: Doug and Ostara are in the same Zone as a Fatty, a Walker and a Runner. Ostara attacks with her Katana. She rolls 1 and 4, which means 1 hit. The Katana has Damage 1, so it cannot hurt the Fatty. Ostara allocates her hit to the Runner, eliminating it. It is a Melee Action: although a miss was obtained, Doug is safe from Ostara’s slashes.
Resolving Ranged Actions
Zombies fight bare-handed, like beasts. That’s why I prefer fighting them from a distance. Why expose ourselves if civilization provided us with the safety of distance and superior firepower?
— Elle
A Survivor holding a Ranged weapon in their Hand can shoot at a Zone within the weapon’s Range and in Line of Sight.
REMEMBER:
- In building Zones, the Line of Sight is limited to the Zones that shares an opening and just 1 Zone away.
- In street Zones, the Line of Sight goes in a straight line parallel to the board’s edge, until it meets a wall or the board’s edge.
- Missed shots can cause Friendly Fire, so carefully consider the risks!
 RANGE SYMBOL: The Range of a weapon, indicated by the Range value on its card, is the number of Zones it can shoot across. The first value shows the minimum Range; the second value shows the maximum Range.
Ignore any Actors in the Zones between the shooter and the target Zone. Survivors may shoot through occupied Zones without danger to either fellow Survivors or Zombies. A Survivor can even shoot at another Zone while there are Zombies in their own Zone!
Targeting Priority Order
When using a Ranged weapon (even at Range 0), the shooting Survivor does not choose the targets hit by successful rolls. Hits are assigned to Actors in the targeted Zone according to the Targeting Priority Order:
- Fatty or Abomination (the shooter chooses)
- Walker
- Runner
The hits are assigned to targets of the highest Priority until they have all been eliminated, then to targets of the next priority Level until they have all been eliminated, and so on. If several targets share the same Targeting Priority Order, players choose the targets hit among them.
Remember: Targeting Priority Order doesn’t apply to Melee Actions.
| TARGETING PRIORITY | NAME | ACTIONS | MIN. DAMAGE TO KILL | ADRENALINE EARNED |
|---|---|---|---|---|
| 1 | Fatty / Abomination | 1 | 2 / 3 | 1 / 5 |
| 2 | Walker | 1 | 1 | 1 |
| 3 | Runner | 2 | 1 | 1 |
NOTE: Fatties are first in the Targeting Priority Order and are immune to Damage 1 weapons. It means they can protect Walkers and Runners in their Zone from all Damage 1 Ranged Actions, as they need to be removed first. The same applies to Abominations, requiring Damage 3 (or a Molotov) to be eliminated.
Friendly Fire
Oops.
A Survivor can’t hit themselves with their own attacks. However, emergency situations can call for Ranged Actions aimed at a Zone where a teammate is stuck.
In that case, misses on the Attack roll automatically hit Survivors standing in the target Zone. Assign these Friendly Fire hits in any way you want and apply Damage normally (Damage 2 weapons inflict 2 Wounds).
Remember: Friendly Fire doesn’t apply to Melee Actions.
EXAMPLE 1: Amy shoots with a Sawed-Off at a Zone containing Ned and a Walker. Rolling 4 and 1, she obtains a hit… and a miss. The hit eliminates the Walker. The miss, however, hits Ned for Damage 1. Ned suffers 1 Wound.
EXAMPLE 2: Lili shoots with a Shotgun at a Zone where Odin and a Runner stand. She rolls 5 and 6, 2 successes! One is enough to kill the Runner. The other success is lost. Only missed shots are assigned to Survivors, so Odin is safe.
Zombie Types
I’m no doctor but as far as I can see, zombies are dead hosts infected by something. We don’t know what it is and how it spreads. They no longer need to eat or sleep, and don’t show signs of pain. They are basically bloodthirsty puppets, but don’t underestimate them. They can endure a lot of punishment and will chase you tirelessly for days. The only cure I know is summary execution.
— Amy
Zombicide features 4 types of Zombies. They have a single Action to spend each time they activate. A Zombie is eliminated as soon as it is successfully hit with an attack that has the minimum required Damage value. Then its assailant immediately earns the listed Adrenaline Points.
- WALKER
It stinks, it’s nasty, and it’s slow.- Wounds dealt: 1
- To eliminate: Damage 1
- Adrenaline provided: 1 point
- FATTY
Big, bloated, and tough, these Zombies are hard to put down. Weapons dealing only 1 Damage can’t hurt them… at all.- Wounds dealt: 1
- To eliminate: Damage 2
- Adrenaline provided: 1 point
- RUNNER
Amped up for some reason, these guys move twice as fast as Walkers.- Wounds dealt: 1
- To eliminate: Damage 1
- Adrenaline provided: 1 point
- Special rule: Runners have 2 Actions every time they are activated.
- ABOMINATION
Mutated beyond recognition, the Abomination is the Survivors’ worst nightmare. Only weapons dealing 3 Damage or more can kill this monster. A well-aimed Molotov will do the trick, as it kills everything in its target Zone.- Wounds dealt: 1
- To eliminate: Damage 3 (or Molotov).
- Adrenaline provided: 5 points
- Special rules: A Molotov or a Damage 3 weapon is required to eliminate an Abomination. No weapon in Zombicide’s core box has a natural Damage 3 value. It can be reached with Skills (like +1 Damage), or Mission special rules.
- Zombicide comes with 4 Abomination miniatures. Classic Missions only use 1 of them. You may add more to spice up the difficulty, or feature special Zombie characters. The more you use, the harder the game gets!
Zombie Phase Steps
Once the players have activated all their Survivors, the Zombies activate. No single player controls them: they do it themselves, performing the following steps in order.
STEP 1: ACTIVATION
Each Zombie activates and spends its Action on either an Attack or a Move, depending on the situation. Resolve all the Attacks first, then all the Moves. Each Zombie performs either an Attack OR a Move with a single Action.
Attack
Each Zombie in the same Zone as Survivors performs an Attack. A Zombie’s Attack is always successful and does not require any die rolls.
- Survivors in the same Zone split the Zombies’ Attacks in any way the players prefer.
- Each Zombie Attack deals 1 Wound.
- The Wound Bar’s tracker is moved 1 point lower per Wound received.
- A Survivor is eliminated as soon as their Wound Bar reaches the bottom (usually after taking 3 Wounds for a classic Survivor, 2 Wounds for a Kid). At that point, the game is lost!
Zombies fight in group: all Zombies activated in the same Zone as a Survivor join the Attack, even if there so many Wounds being dealt that it would be overkill.
EXAMPLE 1: A Walker in a Zone with two Survivors inflicts 1 Wound during its Activation. The players choose which Survivor endures the Wound.
EXAMPLE 2: A group of four Walkers activates in the same Zone as two Survivors. Players choose the way Wounds are dealt. As these Survivor are eliminated upon enduring their third Wound, thus ending the game, the players choose to deal 2 Wounds to each Survivor. The team must react fast!

Move
The Zombies that have not Attacked use their Action to Move 1 Zone toward Survivors:
- Zombies select their destination Zone:
- The first Zone they select is the one with Survivors in Line of Sight that has the most Noise tokens. Remember, each Survivor counts as a Noise token.
- If no Survivors are visible, they select the noisiest Zone.
In both cases, distance doesn’t matter. A Zombie always goes for the noisiest target they can see or hear.
- Zombies move 1 Zone toward their destination Zone by taking the shortest available path.
In case there are no open paths to their destination Zone, the Zombies don’t move.
If there is more than one route of the same length, Zombies split into groups of equal numbers to follow all possible routes. They also split up if different target Zones contain the same number of Noise tokens.
Uneven Zombie groups are split the same way. Decide which splitting group gets the extra Zombie and which direction the uneven split groups go. In case of a single Zombie being offered multiple routes, the players decide which direction it goes.
EXAMPLE: A group of 4 Walkers, 3 Fatties, and 1 Runner move toward a group of Survivors. The Zombies can take 2 routes of the same length, so they split into 2 groups: 2 Walkers go one way, the other 2 take the other route; 2 Fatties go one way, the last one takes the other route (players choose); players choose which route the Runner takes.

Playing Runners
Runners are fast-moving, tricky, formidable targets. They are a challenge, and I like challenges. Let me show you how to hunt them.
— Elle
Runners have 2 Actions per Activation. After all Zombies (including Runners) have gone through the Activation Step and resolved their first Action, Runners go through the Activation step again, using their second Action to attack a Survivor in their Zone or Move if there is nobody to Attack.
EXAMPLE 1: At the beginning of the Zombies’ Phase, a Runner stands in the same Zone as a Survivor. The Zombie spends its first Action to Attack, inflicting 1 Wound. Then, the Runner performs its second Action, Attacking again for another 1 Wound.
EXAMPLE 2: A group of 2 Runners and 1 Fatty is 1 Zone away from a Survivor. For their first Action, since they have nobody to Attack in their Zone, the Zombies Move into the Survivor’s Zone. The Runners then perform their second Action. Since they now occupy the same Zone as a Survivor, they Attack. Each Runner inflicts 1 Wound.
STEP 2: SPAWN
Using Zombie Spawn tokens, the Mission maps show where Zombies appear at the end of each Zombies’ Phase. These are the Spawn Zones.
- Spot the “Spawn Start” Zombie Spawn token, then draw a Zombie card.
- Read the Zombie type and the line that corresponds to the Danger Level of the Survivor with the highest Adrenaline (Blue, Yellow, Orange, or Red).
- Place the indicated amount of the corresponding Zombie type in the Starting Spawn Zone. The Starting Spawn Zone is always the first one to spawn.
- Repeat this for each Spawn Zone, one after the other, going clockwise from the Starting Spawn Zone.
When the Zombie deck runs out, reshuffle all the discarded Zombie cards to make a new deck.
COLORED SPAWN ZONES: Some Missions feature a Blue and/or Green-colored Zombie Spawn tokens. Unless otherwise stated, these Zones don’t spawn Zombies until a specific event (like taking an Objective of the matching color) happens, which then activates them.


Special Spawn Rules
Zombie Rush Cards
Once in a while, a zombie does something unexpected. It keeps your senses sharp and prevents you from getting bad habits. Zombies are a girl’s best friends.
— Amy
Some Zombie cards feature the Rush keyword. When drawing such a card, place the corresponding Zombie miniatures normally. Then, these Zombies immediately perform a free Activation!
NOTE: Runners don’t have Rush cards.

Extra Activation Cards
There was a mass uprising among the zombies, all around the place. As if they had a death drive aimed right at us, and went for our throats all at once. I don’t have much time to wonder about the phenomenon, but since that days, such outbursts keep me on my toes.
When you draw an Extra Activation Zombie card, no Zombie appears in the designated Zone. Instead, all Zombies of the indicated type immediately perform an extra Activation.
NOTE: These cards have no effect at Blue Danger Level.

Running Out of Miniatures
You may run out of miniatures of the indicated type when required to place a Zombie on the board through spawning. In this case, the remaining Zombie miniatures are placed (if there are any). Then, all Zombies of the indicated type immediately resolve an extra Activation. Multiple extra Activations may occur in a row. Keep an eye on the Zombie population!
Additional Game Modes
The additional game modes described in this chapter deepen Zombicide’s atmosphere with new rules. Use them to enrich your games, replay previous Missions with new possibilities, and create your own thematic challenges!
Car Actions
Everyday cars, with the plastic parts, hybrid stuff and all, proved useless both to evade the invasion and move around an apocalypse town. We favor the good old muscle cars, made of steel and pure badass spirit. As my friends never remember the brands, we simply call them pimpmobiles. We also look for police cars with upgraded engines and reinforced hulls. They carry us around, smash zombies, and sometime carry our stuff. As, for one, consider them our best allies.
— Josh
Zombicide features 2 car types on double-sided tokens. Some Missions allows Survivors to drive them to go faster around the board and crush Zombies. Both play in the same way, but each has a special ability.
At the cost of 1 Action, the Survivor may perform 1 of the Actions listed below. Unless they are car-related, the Survivor’s Skills don’t apply to the car itself or the attacks performed with it. Unless otherwise stated, a car cannot be attacked or destroyed. A Survivor sitting in a car can still be attacked normally, as if the Survivor was just standing in the Zone.
- GET IN OR OUT OF A CAR: The Survivor gets in a car in their Zone, only if there are no Zombies in that Zone. Set the Survivor’s miniature either on the Driver’s seat, or on another seat as a Passenger. The car can hold a single Driver, and up to 3 Passengers. There are no restriction to getting out of a car.
- CHANGE SEATS IN A CAR: The Survivor becomes either the Driver or a Passenger. Swap the Survivor miniatures accordingly. Changing seats is not a Move Action, and does not depend on Move-related rules. Please note Changing seats can be done with Zombies in the Zone.
- DRIVE A CAR: The car can only be driven by the Driver (obviously), and only if the Mission allows it. A car cannot be driven into building Zones. This Action is not a Move and is not subject to movement modifiers: the car can leave or go through Zones with Zombies without spending extra Actions, or stopping. Choose a driving mode with each Drive Action spent for the car:
- Slow Drive Action: The car drives 1 Zone. No Attack is performed.
- Fast Drive Action: The car drives 2 consecutive Zones (no U-turn!). Perform a Car Attack in each Zone with Zombies the car enters (RANGE 0 – 3 DICE – ACCURACY 4+ – DAMAGE 2). Killing Zombies with Car Attacks earns the Driver the corresponding Adrenaline Points.

Car Attacks may cause Friendly Fire to pedestrian Survivors if you drive into Zones mixing Zombies and pedestrian Survivors! Survivors in the car, or in another car in the same Zone, are immune. No Car Attack occurs if the car enters a Zone with pedestrian Survivors only.
For simplicity’s sake, driving a car makes no Noise.
- TAKE A PIMPWEAPON CRATE IN A PIMPMOBILE: Pimpmobile may hold Pimpweapon Crates. These can be taken in the same way as Objectives. Remove the Pimpweapon Crate from the Pimpmobile token: The Survivor immediately earns a random Pimpweapon among those still available. They can then reorganize their inventory, for free. A Pimpmobile may be driven while still holding its Pimpweapon Crate (stashed in the trunk, does not occupy a seat).
- SEARCH A POLICE CAR: Each Pimpmobile contains a single Pimpweapon. Police Cars contain an unlimited amount of weapon cards. Police Cars may be Searched for weapons. Search-related game effects apply when Searching a car. When Searching a Police Car, draw cards until you find a weapon. Discard the other cards. The “Aaahh!!” card triggers the appearance of a Walker as usual and interrupts the Search.
Dark Zones
It’s all dark in this massive building. Keep your eyes and ears open.
— Hey, it reminds me of a game…
Using Dark Zone rules make the game a little harder, and instills a deep sense of dread in Survivors. The following rules apply when using this game mode:
- Actors can’t trace Lines Of Sight to Dark Zones, except at Range 0-1.
- Ranged Attacks aimed at Dark Zones have Accuracy 6 (rolling 6 is required to hit). Having a Flashlight cancels this rule. Game effects altering the Accuracy still apply (like +1 to dice roll: Ranged). Automatic success, like throwing a Molotov, also still apply.
- Melee Attacks are not affected by Dark Zones.

Companions
— You are so cute! Would you like me to adopt you?
— Whatever, as long as you have candies and chocolate.
— Amy and Bunny G
Some Missions feature Survivor miniatures as objective or support characters. They are called Companions, and either play as described on the Mission or follow Survivors. Players choose which Companion is set in each of the spots indicated by the Mission. Set aside their ID Cards during Setup, for all players to see. Mission descriptions may differ from the rules below; in that case, the Mission’s special rules have priority.
Escorting a Companion
According to the Mission, a Companion may be linked to a given Survivor during Setup. The Survivor gets the corresponding ID Card and benefits of the Companion’s Blue Danger Level Skill (if the Companion has several Blue Skills, only the first in the list applies). This ID Card doesn’t take up an Inventory slot. The Companion’s miniature is placed next to the Survivor’s.
The Companion’s ID Card may be traded, along with the corresponding miniature and Skill, in the same way as an Equipment card.
The Survivor possessing the Companion’s ID Card is called their Leader. A Survivor may be the Leader of several Companions.
The Mission may also feature lone Companions, standing on their own. Any Survivor may spend an Action to rally a lone Companion standing in the same Zone: they become their Leader and acquire their ID Card.
Companions General Traits
A Companion:
- Is a Survivor. It also means they count as 1 Noise.
- Is eliminated upon receiving any Wound. Unless otherwise stated by the Mission, the game is lost if they are eliminated.
- Always stays together with their Leader. All special rules, Move-related Skill, and Car-related Actions, also apply to the Companion. A Companion takes a Passenger seat in a car.
- Does not have an Inventory.
- Does not have any Actions.
EXAMPLE 1: Wanda spends 1 Action to rally Bunny G, standing as a lone Companion in her Zone. Wanda becomes Bunny G’s Leader, gets his ID Card, and Bunny G’s miniature is placed next to hers. From now on, Wanda benefits of Bunny G’s “Lucky” Blue Level Skill. In return, Bunny G benefits of Wanda’s Sprint Skill, in order to follow her everywhere.
EXAMPLE 2: Josh joins Wanda and Bunny G in their Zone, then spends 1 Action for a Trade. Josh is now Bunny G’s Leader, gaining his ID Card and Blue Level Skill. Josh’s got a lucky charm!
Ultrared Mode
Angry? You don’t want me angry!
The Ultrared Mode allows your Survivors to gain Adrenaline Points beyond the Red Danger Level and pick up additional Skills. This mode is great for reaching amazing body counts and completing very large Missions.
Ultrared Mode rule: When your Survivor reaches the Red Level, move the Adrenaline tracker back to 0 and add any Adrenaline Points gained past the minimum required to hit the Red Level. Your Survivor is still on the Red Level and keeps their Skills. Count additional Adrenaline Points as usual and gain unselected Skills upon reaching Danger Levels again. When all the Survivor’s Skills have been selected, choose a Skill in the list upon reaching Orange and then Red Level.
Tuning the Difficulty
— I think we’re done. Let’s move!
— Can we stay a little longer? I’m having fun.
Sometimes the game may be too easy, or just too hard, for you and your playing group. In that case, sort your Zombie cards using their card number:
- Zombie cards #1 to #18 form the easier part of a Zombie invasion. Zombies appear in lower amount, but still benefit from Rush rules. There is no Abomination at Blue Danger Level.
- Zombie cards #19 to #36 are the harder part. Zombies come in greater numbers, especially at low Danger Levels. Abominations appear at Blue Danger Level. Keep these cards for experienced player groups and Zombicide veterans.
- Zombie cards #37 to #40 are Extra Activations. They make the Zombies less predictable and put more pressure on the Survivors.
These elements can be mixed in any way you see fit to create your own game experience!
Game Components
Components List
88 Miniatures:
- 12 Survivors (Josh, Doug, Elle, Amy, Ned, Wanda, Lili, Tiger Sam, Ostara, Odin, Bunny G, Lou)
- 76 Zombies:
- 40 Walkers (5 sculpts x 8)
- 16 Runners (2 sculpts x 8)
- 16 Fatties (2 sculpts x 8)
- 4 Abominations
- 12 ID Cards
- 9 Double-Sided Tiles
103 Mini Cards:
- 63 Equipment Cards:
- 6 Starting Equipment: 1 Baseball Bat, 1 Crowbar, 1 Fire Axe, 3 Pistol
- 45 Equipment: 4 Aaahh!!, 2 Bag Of Rice, 2 Canned Food, 2 Chainsaw, 1 Crowbar, 1 Fire Axe, 2 Flashlight, 2 Katana, 2 Kukri, 4 Machete, 4 Molotov, 1 Pistol, 3 Plenty Of Bullets, 3 Plenty Of Shells, 4 Sawed-Off, 2 Shotgun, 2 Sniper Rifle, 2 Sub-MG, 2 Water
- 11 Pimpweapons: 2 Aaahh!, 1 Army Sniper Rifle, 1 Automatic Shotgun, 1 Evil Twins, 1 Golden AK-47, 1 Golden Kukri, 1 Gunblades, 1 Ma’s Shotgun, 1 Nailbat, 1 Zantetsuken
- 1 Reference Card: Car
- 40 Zombie Cards
68 Tokens:
- 2 Car (Pimpmobile/Police Car)
- 1 Door (Blue – open/closed)
- 1 Door (Green – open/closed)
- 15 Door (Red – open/closed)
- 1 Exit Zone
- 1 First Player
- 18 Noise tokens
- 1 Objective (Red/Blue)
- 1 Objective (Red/Green)
- 9 Objective (Red/Red)
- 12 Pimpweapon Crate
- 1 Zombie Spawn (Red/Spawn Start)
- 1 Zombie Spawn (Red/Blue)
- 1 Zombie Spawn (Red/Green)
- 2 Zombie Spawn (Red/Red)
Other Components:
- 6 Survivor Dashboards
- 6 Survivor Color Bases
- 6 Dice
- 48 Trackers
Introduction & Overview
Time for Zombicide!
Not so long ago, most of us were ordinary people leading ordinary lives, our dreams bound by ordinary laws. And then, the zombies came, storming humanity by surprise. The infected destroyed the old world in a matter of days.
Facing the apocalypse, a few of us showed their true selves, and survived, all guns blazing. We are no longer the people we used to be. The past is gone, we are now free to choose our fate. It won’t be a zombie world. It is time for payback. Time for Zombicide!
Zombicide is a cooperative game where 1 to 6 players take the roles of Survivors battling Zombies controlled by the game itself. The theme is about fellowship, heart-pounding action, and reaching victory against impossible odds.
The game’s goal is to choose a Mission and complete its objective, killing as many Zombies as possible. The monsters may be unpredictable, and come in greater number as adrenaline builds up, threatening to overwhelm the Survivors. Keep an eye on each other’s back!
Survivors use whatever weapon they can get to kill Zombies and slow down the invasion. The better the weapon, the higher the body count, but the more Zombie appear, attracted by the onslaught.
Your best weapon, however, is cooperation. All players win or lose together, and only through team spirit will the Survivors give the best of themselves, unlocking powerful Skills and access to the best weapons. Cooperation is the key to survival and victory!
Round Structure
Our infected foes no longer use the weapons they tried to defend their former lives with. In some places, you can just pick one up and start firing on the spot. On the other hand, zombies are not to be underestimated. They find strength in numbers and may prove unpredictable. This is a war no one was prepared for.
Zombicide is played over a series of Game Rounds, which proceed as follows:
1. PLAYERS’ PHASE
The player with the First Player token takes their Turn, activating their Survivors one at a time, in the order of their choice. Each Survivor can initially perform 3 Action per Turn, though they may gain Skills allowing them to perform extra Actions as the game progresses. The Survivor may use their Actions to kill Zombies, move around the board, and perform other tasks to accomplish the various Mission objectives.
Once a player has activated all their Survivors, the player to the left takes their Turn, activating their Survivors in the same manner.
When all the players have completed their Turns, the Player’s Phase ends.
2. ZOMBIES’ PHASE
All Zombies on the board activate and spend 1 Action either to attack a Survivor standing in their Zone or, if they have nobody to attack, to Move toward the Survivors.
Some Zombies, called Runners, get 2 Actions, so they can attack twice, attack and move, move and attack, or move twice.
Once all Zombies have performed their Actions, new Zombies appear in all active Spawn Zones on the board.
3. END PHASE
The first player hands the First Player token to the player to their left. Another Game Round then begins.
Winning and Losing
- The game is won immediately when all of the Mission objectives have been accomplished.
- The game is lost whenever:
- A Survivor is eliminated,
- The Mission objectives can no longer be fulfilled, or
- A specified losing condition is met.
Zombicide is a cooperative game, so all players win and lose together.
Setup
Game Setup
Yes, we wander from a city to the next. This is where we can find quick meals, fancy clothes, soap, cars, and guns. You don’t seem to understand, so let me be clear: we live here not in spite of the zombie population, but because of it. A predator always follow its prey!
A Zombicide game usually features 6 Survivors, distributed in any way you see fit among players. We recommend new players join the game with a single Survivor to get a quick grasp on the game mechanics. A veteran player can easily control a whole team of 6 Survivors and blast their way through the fateful night!
- Choose a Mission.
- Place the tiles.
- Place the Spawn Zones, tokens and miniatures as indicated by the Mission.
Veteran Zombicide players, please note:
- The tiles predefine places for Pimpweapon Crates and Objective tokens.
- Closed doors are already drawn on buildings.
- Select the indicated amount of Survivors and distribute them between the players as you see fit. As they are cooperating against the game, all players form a single team. Players sit around the table in any order they choose.
- Players take 1 Dashboard for each of their Survivors, placing the Survivor’s ID Card on it. They take a colored plastic base and attach it to the Survivor’s miniature to help identify it. They also take 5 plastic trackers of the same color as their base.
- Set the following cards in separate decks, they are identified by their category, as written on their back, and their respective color. Shuffle each of these decks, and place them facedown close to the board:
- Starting Equipment (grey).
- Equipment (blue).
- Pimpweapons (red).
- Zombies (yellow).
Place the Car reference card within view of all players. This card act as a reminder of car rules and stats, and do not belong to any single player.
- Take all Starting Equipment cards, then deal them randomly and as evenly as possible among Survivors. If needed, choose the Survivors who receive more than 1 card.
- Place the miniatures representing the chosen Survivors in the Survivor Starting Zone(s), as indicated by the Mission.
- Each player places their Survivors’ Dashboard(s) in front of them:
- Make sure the sliding arrow is on the 0 space in the blue area of the Danger Bar.
- Place a tracker in the highest slot of their Wound Bar.
- Place another tracker in the slot for the first (Blue) Skill.
- Place 3 more trackers in the reserve slots on the top of the Dashboard.
- Starting Equipment may be set in “Hand” or “Backpack” slots of the Dashboard.
Survivor Types
There are 2 Survivor types in Zombicide – classic Survivors and Kids:
- Classic Survivors have no distinguishing features. They usually start with Health 3.
- Kids have their own symbol on their ID Card. They usually start with Health 2, and can use the Slippery Skill once per Activation, with a single Move.
- The player with the Fire Axe as a Starting Equipment is the first player for the first Game Round. Give them the First Player token.
Core Concepts
Useful Definitions
One rule: no rules. Well, almost. Find cool weapons, stick together, kill zombies, enjoy life, and everything should be fine.
- Actor: A Survivor or Zombie.
- Zone: Inside a building, a Zone is a room. On a street, a Zone is the area between two linear markings (or a linear marking and the board’s edge), and the walls of buildings.
Line of Sight
Lines Of Sight define whether Actors can see each other, such as whether a Survivor can see a Zombie through a door opening, from a room to the next, across the street, etc.
- In street Zones: Actors see in straight lines that run parallel to the edges of the board. Actors cannot see diagonally. Their Line of Sight covers as many Zones as the line can pass through before reaching a wall or the edge of the board.
- In building Zones: An Actor sees into all the Zones that share an opening with the room the Actor currently occupies. If there is an opening, the walls do not block Line of Sight between 2 Zones. An Actor’s Line of Sight is limited, however, to the distance of 1 Zone.
- If the Survivor is looking from a building Zone out into street Zones, the Line Of Sight can go through any number of street Zones into a straight line.
- If the Survivor is looking from a street Zone into a building, the Line Of Sight can go only 1 Zone into the building.
NOTE: Closed Doors interrupt Lines of Sight.
Movement Basics
Movement is life. Keep on moving!
— Wanda
Actors can move from a Zone to the next as long as the first Zone shares at least an edge with the destination Zone. Corners do not count. This means Actors cannot make diagonal movements.
- In street Zones: Movement from one Zone to another has no restrictions. However, Actors must go through an open door (or opening) to move from a room to exterior and vice-versa.
- In building Zones: Actors may move from one Zone to another as long as their Zones are linked by an opening (such as an open door). The position of a miniature in the Zone and the layout of the walls do not matter as long as the Zones share an opening.
Noise
Keeping quiet? What for? I have fun, and fun makes noise!
— Bunny G
Running a chainsaw or going full auto makes Noise, and Noise attracts Zombies. Each Action used to attack or open a door with noisy Equipment produces a Noise token.
- Place the Noise token in the Zone where the Survivor resolved the Action. It stays in the Zone it was produced, even if the Survivor moves.
- A single Action can only produce a single Noise token, no matter how many dice are rolled, how many hits are obtained, or whether Dual weapons are used.
- Noise tokens are removed from the board during the End Phase.
NOTE: Each Survivor miniature also counts as a Noise token. Zombicide Survivors can’t stay quiet, and don’t even get me started on the kids!
EXAMPLE: Ned spends his first Action with a Katana to eliminate a Walker in his own Zone. The Katana is a Silent weapon, and doesn’t produce Noise tokens.
The second Action is spent to fire one Zone away with a Shotgun. It is a noisy weapon. Even if multiple dice were rolled, only a single Action was spent: a single Noise token is set in Ned’s Zone.
Ned spends his third Action to Move away. The Noise token remains in the Zone it was produced, and does not follow Ned.
Adrenaline, Danger Level, and Skills
Tell me how you kill zombies, and I’ll tell you who you are.
— Elle
For each Zombie eliminated, a Survivor gains 1 Adrenaline Point (AP) and moves up a notch on their Danger Bar. Some game features provide additional AP, like taking Objective tokens or consuming food.
There are 4 Danger Levels on the Danger Bar:
- Blue Level: A Survivor starts the game at Blue Level, with 0 Adrenaline Points, and a single Skill.
- Yellow Level: Reached with 7 Adrenaline Points. The Survivor gains a fourth Action.
- Orange Danger Level: Reached with 19 Adrenaline Points. Choose a Skill among the 2 indicated at this Level.
- Red Danger Level: Reached with 43 Adrenaline Points. Choose a Skill among the 3 indicated at this Level.
Skills stack across Danger Levels. As new Skills are unlocked, place new trackers on the Survivor Dashboard to indicate them.
Building up Adrenaline has a side effect: when you draw a Zombie card to spawn Zombies, read the line that corresponds to the Survivor with the highest Danger Level. The stronger the Survivor is, the more Zombies appear.
Inventory Management
Mister? You’ve got the weapon I’m looking for.
— I was about to tell you the same thing. What’s your name, young punk?
— Ostara. You?
— Ned.
— Nice to meet you. Can I have this weapon? Please?
Each Survivor can carry up to 5 Equipment cards, divided into two types of Equipment slots on their Dashboard: 2 Hand, and 3 Backpack slots. You may discard cards from your Survivor’s inventory to make room for new cards at any time, for free (even during another player’s Turn).
- Hand slots: Each Hand slot may receive 1 Equipment card. Weapons and other items in Hand slots may be used normally. Both hands are used for Combat.
- Backpack slots: The Backpack can hold up to 3 Equipment cards. Characteristics and game effects described on Equipment cards cannot be used until they are moved to a Hand inventory slot.
- Equipment cards bearing “May be used in the Backpack” may be used indiscriminately in Hand or Backpack slots.
Equipment & Weapons
Reading an Equipment Card
I know better. Rate of fire is life. Keep on firing!
— Doug
Zombicide features many different Equipment cards. The ones your Survivors use to eliminate Zombies have Combat characteristics displayed at the bottom:
Weapons fall into 2 categories: Melee weapons and Ranged weapons. The Melee and Ranged symbols are used to distinguish each type.
- Melee weapons: Bear the Melee symbol. They have a Range 0 value and thus can only be used in the same Zone as the Survivor. They are used with Melee Actions (e.g. Baseball Bats, Crowbars, and Fire Axes).
- Ranged weapons: Bear the Ranged symbol. They usually have a maximum Range value of 1 (or more). They are used with Ranged Actions. Attacking at Range 0 with a Ranged weapon is still a Ranged Action (e.g. Pistols, Shotguns, and Sniper Rifles).
Ammo Type
Ranged weapons use ammunition to kill Zombies. They have infinite ammo (enjoy!). However, they don’t all use the same type of Ammo.
- Bullets: Weapons with the Bullets symbol fire small-caliber ammunition at Zombies. They may use the Plenty Of Bullets card to provide the Survivor with handy re-rolls.
- Shells: Weapons with the Shells symbol work with higher caliber ammunition. Having the Plenty Of Shells card allows for re-rolls against the tougher targets.
Zombie-Killing, Door-Opening, and Noisy Equipment
Many Equipment cards, such as the Crowbar, Fire Axe, and Chainsaw allow Survivors to open doors as well as eliminate Zombies.
- Equipment that allows Survivors to kill Zombies has either the Ranged or Melee symbol.
- Equipment that allows you to open Doors has this symbol.
Each of these symbols is accompanied by a second symbol related to Noise, defining if the Action is noisy or not. Noise attract Zombies!
- This Action is noisy and produces a Noise token.
- This Action is not noisy and does not produce a Noise token.
Combat Characteristics
Weapons display Combat characteristics used to eliminate Zombies in many ways:
- Weapon type: Indicates whether this Equipment is a Melee or Ranged weapon.
- Dual: If you have Dual weapons with the same name in each Hand slot, you may use them both with a single Action (they must be aimed at the same Zone).
- Range: Min and max number of Zones the weapon can reach. 0 indicates it can only be used in the Survivor’s Zone.
- Dice: Roll this many dice when an Action is spent to use this weapon.
- Accuracy: Each roll that equals or exceeds this value is a success. Lower results are failures.
- Damage: Damage inflicted with each success. Damage does not stack up with multiple successes.
- Ammo type: Shows the type of ammunition used (e.g. Bullets or Shells).
Equipment Traits
No matter what, fight with style!
— Lili
Flashlight
Flashlights help finding the best Equipment early in the game.
The Survivor benefits from the Search: +1 card (Search: 2 cards) Skill. Draw 2 cards when Searching with the Survivor. Please note the game effect does not stack upon itself: having multiple Flashlights does not provide more than 2 cards.
Molotov
A Molotov kills all Actors in its target Zone. Keep them for Abominations and emergency situations!
Perform a Ranged Action with a Molotov equipped in Hand, discard the card, and burn! A Molotov effect is created in the targeted Zone: all Actors are eliminated, no matter their Damage threshold (yes, it includes Abominations!). The Survivor earns all related Adrenaline Points.
Reload
Reloadable weapons have powerful burst power, but need to be reloaded before being fired again.
Weapons with the Reload trait require spending an Action to reload them between shots if you want to fire multiple times in the same Game Round. All such weapons are freely reloaded during the End Phase, so they start each Game Round ready to fire.
- If such a weapon is fired and passed to another Survivor without reloading, it must still be reloaded before the new owner can use it in the same Game Round.
- A single Action is enough to reload two weapons fired in a Dual manner.
- Firing with a single Dual reloadable weapon in a Zone, then firing at another Zone with the other Dual reloadable weapon, is allowed.
Sniper
Crowd control? I’ll show you crowd control!
The Survivor benefits from the Sniper Skill when performing a Ranged Action with a weapon featuring that trait. They ignore Targeting Priority Order and may freely choose their target. Sniper also cancels any chances of Friendly Fire!
Player Phase & Survivor Actions
Survivor Actions Overview
I don’t have time for dummies. Get out of my way!
— Lili
Starting with whoever holds the First Player token, each player activates their Survivors one after the others, in the order of their choice. Each Survivor can perform up to 3 Actions at the Blue Danger Level (not counting any free Action their Blue Level Skill may give them). The possible Actions are listed below.
MOVE
Let’s head this way! More zombies to kill!
— Josh
The Survivor moves from a Zone to the next but cannot move through walls or closed doors.
- A Survivor must spend 1 additional Action per Zombie standing in the Zone they’re attempting to leave. REMEMBER: Kids can use the Slippery Skill, once per Turn.
- Entering a Zone containing Zombies ends the Survivor’s Move Action (save if they have the Slippery Skill).
EXAMPLE 1: Doug is in a Zone with 2 Walkers. To leave this Zone, he spends 1 Move Action, then 2 more Actions (1 per Walker), for a total of 3 Actions. If there had been 3 Zombies in the Zone, Doug would have needed 4 Actions (1 + 3) to Move.
EXAMPLE 2: Wanda is next to a Zone containing a Zombie when she moves. Her Move Action ends in the Zone with the Zombie, even though her Sprint Skill would normally allow her to Move up to three Zones.
SEARCH
Open the door, open the door! I want to see what’s inside! What? Curious, me?
— Ostara
A Survivor can only Search building Zones and only if there are no Zombies in that Zone. The player draws a card from the Equipment deck. They may then either place it in the Survivor’s inventory, reorganizing it for free, or immediately discard it. A Survivor can only perform a single Search Action per Turn (even if it’s a free Action). When the Equipment deck runs out, reshuffle all its discarded cards (including Starting Equipment cards) to make a new deck.
DOOR ACTION
Life is like a closed building. You never know what you gonna get.
— Ned
Equipment that allows you to open Doors has this symbol:
The Survivor uses a Door-opening Equipment to open a door in their Zone. No roll is required. Set a Door token on its open side where the closed Door was (if it was a closed Door token, simply flip it to its open side instead).
Remember to place a Noise token in the Zone if the Survivor used a noisy Equipment to open the Door.
NOTE: Open Doors cannot be closed again.
Some Missions feature colored doors. Usually, these cannot be opened until some conditions are met, like finding an Objective of the matching color. Read the Mission description to know more.
Spawning in Buildings
Entering a building is quite a thrill. Whenever they don’t chase someone, zombies gather in the dark, waiting for a victim to ambush. It’s better than an amusement park!
— Lou
Opening a building for the first time reveals all the Zombies waiting inside, in the dark. A single building extends to all rooms connected by openings, sometimes straddling several tiles.
Zombies waiting in a building only spawn in darkened rooms, called Dark Zones. Indicate each Dark Zone of the building, one after the other in any order you choose (we suggest starting from the farthest to the closest).
Draw a Zombie card for each of them. Place the corresponding number and type of Zombies in the indicated Dark Zone.
When the Zombie deck runs out, reshuffle all the discarded cards to make a new deck.
- When you draw a Zombie card featuring the Rush keyword, place the corresponding Zombie miniatures normally. Then, these Zombies immediately perform a free Activation! Then, resume building spawning.
- When you draw an Extra Activation Zombie card, no Zombie appears in the designated Dark Zone. Instead, all Zombies of the indicated type on the board immediately perform an extra Activation. Notice that these cards have no effect at Blue Danger Level.
NOTE: Buildings that are open at the start of the game are never spawned in.
REORGANIZE/TRADE
Kids, it’s snack time! Ok, let me see in my rucksack. Canned beans, dry rice, some water, plushies, a pair of pistols, a machete, a picture of mommy…
— Ned
The Survivor can reorganize the cards in their inventory in any way the player wishes.
The Survivor can simultaneously exchange any number of cards with 1 (and only 1) other Survivor currently in the same Zone. This other Survivor may reorganize their own inventory for free.
A Trade Action doesn’t have to be equal. You can trade everything for nothing, if both parties agree!
COMBAT ACTIONS
Combat Actions use Melee and Ranged Equipment cards to eliminate Zombies.
Melee Action
We have a running contest about the farthest distance a zombie head can fly with a decapitating strike. Do you want to join? The entry fee is… reasonable.
— Odin
The Survivor uses a Melee weapon they are holding in Hand to attack Zombies in their own Zone. Missed Melee strikes cannot cause Friendly Fire.
Ranged Action
Impossible, you say? You talk like a grown-up. Let me show you.
— Tiger Sam
The Survivor uses a Ranged weapon they are holding in Hand to fire at a single Zone within the Range shown on the weapon’s card, and within Line of Sight. Survivors shoot at Zones, not Actors. This is especially important for Targeting Priority Order. Using a Ranged weapon at Range 0 is still a Ranged Action.
TAKE OR ACTIVATE AN OBJECTIVE
This new world offers a great boon: we just have to look down to find what we need. Batteries, blankets, clothes, soap, and the like. And it’s free! We feed off the city’s remains to hunt and kill zombies.
The Survivor takes an Objective or activates an Objective in the same Zone. The game effects are explained in the Mission’s description.
Please note the tiles predefine places for Pimpweapon Crates and Objective tokens.
Unless otherwise stated, each Objective token gives 5 Adrenaline Points to the Survivor who takes it.
Zombicide features Pimpweapon Crate tokens, marking the places where these superweapons can be found. They can be taken in the same way as Objectives. The Survivor immediately gains a random Pimpweapon among those still available. They can then reorganize their inventory, for free.
MAKE NOISE
… and this is how I learned to whistle.
— Bunny G
The Survivor makes Noise in an attempt to attract Zombies. Place a Noise token in the Survivor’s Zone.
DO NOTHING
The Survivor does nothing and prematurely ends their Turn. The remaining Actions are lost.
Combat Rules
Combat Resolution
This is not only about revenge, it’s about the future. We spent most of our lives bending the knee to the rich and famous. This is the time we can fight and party hard!
— Amy
- DICE SYMBOL: When a Survivor performs a Melee or Ranged Action to attack Zombies, roll as many dice as the Dice number of the weapon used.
- DUAL SYMBOLS (MELEE AND RANGED): If the active Survivor has 2 identical weapons with the Dual symbol equipped in their Hands, they can use both weapons at the same time at the cost of a single Action. Both weapons must be aimed at the same Zone.
- ACCURACY SYMBOL: Each die that equals or exceeds the Accuracy value of the weapon scores a successful hit. IMPORTANT: The minimum Accuracy is always 2+.
- DAMAGE SYMBOL: Each hit inflicts the amount of Damage specified by the Damage value of the weapon to a single target. If all targets get eliminated, extra hits are lost.
- Walkers and Runners are killed with a Damage 1 (or more) hit.
- Fatties are killed with a Damage 2 hit. Damage 1 has no effect on them, no matter the amount of times a Survivor hits them.
- Abominations are killed with a Damage 3 hit. In any case, a Molotov works!
Resolving Melee Actions
I fight with anything I find, but have a crush with hand-to-hand fighting. Melee weapons are more… wild, you know. Especially chainsaws.
— Wanda
A Survivor holding a Melee weapon in their Hand can attack Zombies in their own Zone. Each die that rolls equals to or higher than the Accuracy value on the weapon’s card is a successful hit. The player divides their hits as they wish among the possible targets in their Zone.
Missed Melee strikes cannot cause Friendly Fire.
EXAMPLE: Doug and Ostara are in the same Zone as a Fatty, a Walker and a Runner. Ostara attacks with her Katana. She rolls 1 and 4, which means 1 hit. The Katana has Damage 1, so it cannot hurt the Fatty. Ostara allocates her hit to the Runner, eliminating it. It is a Melee Action: although a miss was obtained, Doug is safe from Ostara’s slashes.
Resolving Ranged Actions
Zombies fight bare-handed, like beasts. That’s why I prefer fighting them from a distance. Why expose ourselves if civilization provided us with the safety of distance and superior firepower?
— Elle
A Survivor holding a Ranged weapon in their Hand can shoot at a Zone within the weapon’s Range and in Line of Sight.
REMEMBER:
- In building Zones, the Line of Sight is limited to the Zones that shares an opening and just 1 Zone away.
- In street Zones, the Line of Sight goes in a straight line parallel to the board’s edge, until it meets a wall or the board’s edge.
- Missed shots can cause Friendly Fire, so carefully consider the risks!
RANGE SYMBOL: The Range of a weapon, indicated by the Range value on its card, is the number of Zones it can shoot across. The first value shows the minimum Range; the second value shows the maximum Range.
Ignore any Actors in the Zones between the shooter and the target Zone. Survivors may shoot through occupied Zones without danger to either fellow Survivors or Zombies. A Survivor can even shoot at another Zone while there are Zombies in their own Zone!
Targeting Priority Order
When using a Ranged weapon (even at Range 0), the shooting Survivor does not choose the targets hit by successful rolls. Hits are assigned to Actors in the targeted Zone according to the Targeting Priority Order:
- Fatty or Abomination (the shooter chooses)
- Walker
- Runner
The hits are assigned to targets of the highest Priority until they have all been eliminated, then to targets of the next priority Level until they have all been eliminated, and so on. If several targets share the same Targeting Priority Order, players choose the targets hit among them.
Remember: Targeting Priority Order doesn’t apply to Melee Actions.
| TARGETING PRIORITY | NAME | ACTIONS | MIN. DAMAGE TO KILL | ADRENALINE EARNED |
|---|---|---|---|---|
| 1 | Fatty / Abomination | 1 | 2 / 3 | 1 / 5 |
| 2 | Walker | 1 | 1 | 1 |
| 3 | Runner | 2 | 1 | 1 |
NOTE: Fatties are first in the Targeting Priority Order and are immune to Damage 1 weapons. It means they can protect Walkers and Runners in their Zone from all Damage 1 Ranged Actions, as they need to be removed first. The same applies to Abominations, requiring Damage 3 (or a Molotov) to be eliminated.
Friendly Fire
Oops.
A Survivor can’t hit themselves with their own attacks. However, emergency situations can call for Ranged Actions aimed at a Zone where a teammate is stuck.
In that case, misses on the Attack roll automatically hit Survivors standing in the target Zone. Assign these Friendly Fire hits in any way you want and apply Damage normally (Damage 2 weapons inflict 2 Wounds).
Remember: Friendly Fire doesn’t apply to Melee Actions.
EXAMPLE 1: Amy shoots with a Sawed-Off at a Zone containing Ned and a Walker. Rolling 4 and 1, she obtains a hit… and a miss. The hit eliminates the Walker. The miss, however, hits Ned for Damage 1. Ned suffers 1 Wound.
EXAMPLE 2: Lili shoots with a Shotgun at a Zone where Odin and a Runner stand. She rolls 5 and 6, 2 successes! One is enough to kill the Runner. The other success is lost. Only missed shots are assigned to Survivors, so Odin is safe.
Zombies & Zombie Phase
Zombie Types
I’m no doctor but as far as I can see, zombies are dead hosts infected by something. We don’t know what it is and how it spreads. They no longer need to eat or sleep, and don’t show signs of pain. They are basically bloodthirsty puppets, but don’t underestimate them. They can endure a lot of punishment and will chase you tirelessly for days. The only cure I know is summary execution.
— Amy
Zombicide features 4 types of Zombies. They have a single Action to spend each time they activate. A Zombie is eliminated as soon as it is successfully hit with an attack that has the minimum required Damage value. Then its assailant immediately earns the listed Adrenaline Points.
- WALKER
It stinks, it’s nasty, and it’s slow.- Wounds dealt: 1
- To eliminate: Damage 1
- Adrenaline provided: 1 point
- FATTY
Big, bloated, and tough, these Zombies are hard to put down. Weapons dealing only 1 Damage can’t hurt them… at all.- Wounds dealt: 1
- To eliminate: Damage 2
- Adrenaline provided: 1 point
- RUNNER
Amped up for some reason, these guys move twice as fast as Walkers.- Wounds dealt: 1
- To eliminate: Damage 1
- Adrenaline provided: 1 point
- Special rule: Runners have 2 Actions every time they are activated.
- ABOMINATION
Mutated beyond recognition, the Abomination is the Survivors’ worst nightmare. Only weapons dealing 3 Damage or more can kill this monster. A well-aimed Molotov will do the trick, as it kills everything in its target Zone.- Wounds dealt: 1
- To eliminate: Damage 3 (or Molotov).
- Adrenaline provided: 5 points
- Special rules: A Molotov or a Damage 3 weapon is required to eliminate an Abomination. No weapon in Zombicide’s core box has a natural Damage 3 value. It can be reached with Skills (like +1 Damage), or Mission special rules.
- Zombicide comes with 4 Abomination miniatures. Classic Missions only use 1 of them. You may add more to spice up the difficulty, or feature special Zombie characters. The more you use, the harder the game gets!
Zombie Phase Steps
Once the players have activated all their Survivors, the Zombies activate. No single player controls them: they do it themselves, performing the following steps in order.
STEP 1: ACTIVATION
Each Zombie activates and spends its Action on either an Attack or a Move, depending on the situation. Resolve all the Attacks first, then all the Moves. Each Zombie performs either an Attack OR a Move with a single Action.
Attack
Each Zombie in the same Zone as Survivors performs an Attack. A Zombie’s Attack is always successful and does not require any die rolls.
- Survivors in the same Zone split the Zombies’ Attacks in any way the players prefer.
- Each Zombie Attack deals 1 Wound.
- The Wound Bar’s tracker is moved 1 point lower per Wound received.
- A Survivor is eliminated as soon as their Wound Bar reaches the bottom (usually after taking 3 Wounds for a classic Survivor, 2 Wounds for a Kid). At that point, the game is lost!
Zombies fight in group: all Zombies activated in the same Zone as a Survivor join the Attack, even if there so many Wounds being dealt that it would be overkill.
EXAMPLE 1: A Walker in a Zone with two Survivors inflicts 1 Wound during its Activation. The players choose which Survivor endures the Wound.
EXAMPLE 2: A group of four Walkers activates in the same Zone as two Survivors. Players choose the way Wounds are dealt. As these Survivor are eliminated upon enduring their third Wound, thus ending the game, the players choose to deal 2 Wounds to each Survivor. The team must react fast!
Move
The Zombies that have not Attacked use their Action to Move 1 Zone toward Survivors:
- Zombies select their destination Zone:
- The first Zone they select is the one with Survivors in Line of Sight that has the most Noise tokens. Remember, each Survivor counts as a Noise token.
- If no Survivors are visible, they select the noisiest Zone.
In both cases, distance doesn’t matter. A Zombie always goes for the noisiest target they can see or hear.
- Zombies move 1 Zone toward their destination Zone by taking the shortest available path.
In case there are no open paths to their destination Zone, the Zombies don’t move.
If there is more than one route of the same length, Zombies split into groups of equal numbers to follow all possible routes. They also split up if different target Zones contain the same number of Noise tokens.
Uneven Zombie groups are split the same way. Decide which splitting group gets the extra Zombie and which direction the uneven split groups go. In case of a single Zombie being offered multiple routes, the players decide which direction it goes.
EXAMPLE: A group of 4 Walkers, 3 Fatties, and 1 Runner move toward a group of Survivors. The Zombies can take 2 routes of the same length, so they split into 2 groups: 2 Walkers go one way, the other 2 take the other route; 2 Fatties go one way, the last one takes the other route (players choose); players choose which route the Runner takes.
Playing Runners
Runners are fast-moving, tricky, formidable targets. They are a challenge, and I like challenges. Let me show you how to hunt them.
— Elle
Runners have 2 Actions per Activation. After all Zombies (including Runners) have gone through the Activation Step and resolved their first Action, Runners go through the Activation step again, using their second Action to attack a Survivor in their Zone or Move if there is nobody to Attack.
EXAMPLE 1: At the beginning of the Zombies’ Phase, a Runner stands in the same Zone as a Survivor. The Zombie spends its first Action to Attack, inflicting 1 Wound. Then, the Runner performs its second Action, Attacking again for another 1 Wound.
EXAMPLE 2: A group of 2 Runners and 1 Fatty is 1 Zone away from a Survivor. For their first Action, since they have nobody to Attack in their Zone, the Zombies Move into the Survivor’s Zone. The Runners then perform their second Action. Since they now occupy the same Zone as a Survivor, they Attack. Each Runner inflicts 1 Wound.
STEP 2: SPAWN
Using Zombie Spawn tokens, the Mission maps show where Zombies appear at the end of each Zombies’ Phase. These are the Spawn Zones.
- Spot the “Spawn Start” Zombie Spawn token, then draw a Zombie card.
- Read the Zombie type and the line that corresponds to the Danger Level of the Survivor with the highest Adrenaline (Blue, Yellow, Orange, or Red).
- Place the indicated amount of the corresponding Zombie type in the Starting Spawn Zone. The Starting Spawn Zone is always the first one to spawn.
- Repeat this for each Spawn Zone, one after the other, going clockwise from the Starting Spawn Zone.
When the Zombie deck runs out, reshuffle all the discarded Zombie cards to make a new deck.
COLORED SPAWN ZONES: Some Missions feature a Blue and/or Green-colored Zombie Spawn tokens. Unless otherwise stated, these Zones don’t spawn Zombies until a specific event (like taking an Objective of the matching color) happens, which then activates them.
Special Spawn Rules
Zombie Rush Cards
Once in a while, a zombie does something unexpected. It keeps your senses sharp and prevents you from getting bad habits. Zombies are a girl’s best friends.
— Amy
Some Zombie cards feature the Rush keyword. When drawing such a card, place the corresponding Zombie miniatures normally. Then, these Zombies immediately perform a free Activation!
NOTE: Runners don’t have Rush cards.
Extra Activation Cards
There was a mass uprising among the zombies, all around the place. As if they had a death drive aimed right at us, and went for our throats all at once. I don’t have much time to wonder about the phenomenon, but since that days, such outbursts keep me on my toes.
When you draw an Extra Activation Zombie card, no Zombie appears in the designated Zone. Instead, all Zombies of the indicated type immediately perform an extra Activation.
NOTE: These cards have no effect at Blue Danger Level.
Running Out of Miniatures
You may run out of miniatures of the indicated type when required to place a Zombie on the board through spawning. In this case, the remaining Zombie miniatures are placed (if there are any). Then, all Zombies of the indicated type immediately resolve an extra Activation. Multiple extra Activations may occur in a row. Keep an eye on the Zombie population!
Additional Rules & Variants
Additional Game Modes
The additional game modes described in this chapter deepen Zombicide’s atmosphere with new rules. Use them to enrich your games, replay previous Missions with new possibilities, and create your own thematic challenges!
Car Actions
Everyday cars, with the plastic parts, hybrid stuff and all, proved useless both to evade the invasion and move around an apocalypse town. We favor the good old muscle cars, made of steel and pure badass spirit. As my friends never remember the brands, we simply call them pimpmobiles. We also look for police cars with upgraded engines and reinforced hulls. They carry us around, smash zombies, and sometime carry our stuff. As, for one, consider them our best allies.
— Josh
Zombicide features 2 car types on double-sided tokens. Some Missions allows Survivors to drive them to go faster around the board and crush Zombies. Both play in the same way, but each has a special ability.
At the cost of 1 Action, the Survivor may perform 1 of the Actions listed below. Unless they are car-related, the Survivor’s Skills don’t apply to the car itself or the attacks performed with it. Unless otherwise stated, a car cannot be attacked or destroyed. A Survivor sitting in a car can still be attacked normally, as if the Survivor was just standing in the Zone.
- GET IN OR OUT OF A CAR: The Survivor gets in a car in their Zone, only if there are no Zombies in that Zone. Set the Survivor’s miniature either on the Driver’s seat, or on another seat as a Passenger. The car can hold a single Driver, and up to 3 Passengers. There are no restriction to getting out of a car.
- CHANGE SEATS IN A CAR: The Survivor becomes either the Driver or a Passenger. Swap the Survivor miniatures accordingly. Changing seats is not a Move Action, and does not depend on Move-related rules. Please note Changing seats can be done with Zombies in the Zone.
- DRIVE A CAR: The car can only be driven by the Driver (obviously), and only if the Mission allows it. A car cannot be driven into building Zones. This Action is not a Move and is not subject to movement modifiers: the car can leave or go through Zones with Zombies without spending extra Actions, or stopping. Choose a driving mode with each Drive Action spent for the car:
- Slow Drive Action: The car drives 1 Zone. No Attack is performed.
- Fast Drive Action: The car drives 2 consecutive Zones (no U-turn!). Perform a Car Attack in each Zone with Zombies the car enters (RANGE 0 – 3 DICE – ACCURACY 4+ – DAMAGE 2). Killing Zombies with Car Attacks earns the Driver the corresponding Adrenaline Points.
Car Attacks may cause Friendly Fire to pedestrian Survivors if you drive into Zones mixing Zombies and pedestrian Survivors! Survivors in the car, or in another car in the same Zone, are immune. No Car Attack occurs if the car enters a Zone with pedestrian Survivors only.
For simplicity’s sake, driving a car makes no Noise.
- TAKE A PIMPWEAPON CRATE IN A PIMPMOBILE: Pimpmobile may hold Pimpweapon Crates. These can be taken in the same way as Objectives. Remove the Pimpweapon Crate from the Pimpmobile token: The Survivor immediately earns a random Pimpweapon among those still available. They can then reorganize their inventory, for free. A Pimpmobile may be driven while still holding its Pimpweapon Crate (stashed in the trunk, does not occupy a seat).
- SEARCH A POLICE CAR: Each Pimpmobile contains a single Pimpweapon. Police Cars contain an unlimited amount of weapon cards. Police Cars may be Searched for weapons. Search-related game effects apply when Searching a car. When Searching a Police Car, draw cards until you find a weapon. Discard the other cards. The “Aaahh!!” card triggers the appearance of a Walker as usual and interrupts the Search.
Dark Zones
It’s all dark in this massive building. Keep your eyes and ears open.
— Hey, it reminds me of a game…
Using Dark Zone rules make the game a little harder, and instills a deep sense of dread in Survivors. The following rules apply when using this game mode:
- Actors can’t trace Lines Of Sight to Dark Zones, except at Range 0-1.
- Ranged Attacks aimed at Dark Zones have Accuracy 6 (rolling 6 is required to hit). Having a Flashlight cancels this rule. Game effects altering the Accuracy still apply (like +1 to dice roll: Ranged). Automatic success, like throwing a Molotov, also still apply.
- Melee Attacks are not affected by Dark Zones.
Companions
— You are so cute! Would you like me to adopt you?
— Whatever, as long as you have candies and chocolate.
— Amy and Bunny G
Some Missions feature Survivor miniatures as objective or support characters. They are called Companions, and either play as described on the Mission or follow Survivors. Players choose which Companion is set in each of the spots indicated by the Mission. Set aside their ID Cards during Setup, for all players to see. Mission descriptions may differ from the rules below; in that case, the Mission’s special rules have priority.
Escorting a Companion
According to the Mission, a Companion may be linked to a given Survivor during Setup. The Survivor gets the corresponding ID Card and benefits of the Companion’s Blue Danger Level Skill (if the Companion has several Blue Skills, only the first in the list applies). This ID Card doesn’t take up an Inventory slot. The Companion’s miniature is placed next to the Survivor’s.
The Companion’s ID Card may be traded, along with the corresponding miniature and Skill, in the same way as an Equipment card.
The Survivor possessing the Companion’s ID Card is called their Leader. A Survivor may be the Leader of several Companions.
The Mission may also feature lone Companions, standing on their own. Any Survivor may spend an Action to rally a lone Companion standing in the same Zone: they become their Leader and acquire their ID Card.
Companions General Traits
A Companion:
- Is a Survivor. It also means they count as 1 Noise.
- Is eliminated upon receiving any Wound. Unless otherwise stated by the Mission, the game is lost if they are eliminated.
- Always stays together with their Leader. All special rules, Move-related Skill, and Car-related Actions, also apply to the Companion. A Companion takes a Passenger seat in a car.
- Does not have an Inventory.
- Does not have any Actions.
EXAMPLE 1: Wanda spends 1 Action to rally Bunny G, standing as a lone Companion in her Zone. Wanda becomes Bunny G’s Leader, gets his ID Card, and Bunny G’s miniature is placed next to hers. From now on, Wanda benefits of Bunny G’s “Lucky” Blue Level Skill. In return, Bunny G benefits of Wanda’s Sprint Skill, in order to follow her everywhere.
EXAMPLE 2: Josh joins Wanda and Bunny G in their Zone, then spends 1 Action for a Trade. Josh is now Bunny G’s Leader, gaining his ID Card and Blue Level Skill. Josh’s got a lucky charm!
Ultrared Mode
Angry? You don’t want me angry!
The Ultrared Mode allows your Survivors to gain Adrenaline Points beyond the Red Danger Level and pick up additional Skills. This mode is great for reaching amazing body counts and completing very large Missions.
Ultrared Mode rule: When your Survivor reaches the Red Level, move the Adrenaline tracker back to 0 and add any Adrenaline Points gained past the minimum required to hit the Red Level. Your Survivor is still on the Red Level and keeps their Skills. Count additional Adrenaline Points as usual and gain unselected Skills upon reaching Danger Levels again. When all the Survivor’s Skills have been selected, choose a Skill in the list upon reaching Orange and then Red Level.
Tuning the Difficulty
— I think we’re done. Let’s move!
— Can we stay a little longer? I’m having fun.
Sometimes the game may be too easy, or just too hard, for you and your playing group. In that case, sort your Zombie cards using their card number:
- Zombie cards #1 to #18 form the easier part of a Zombie invasion. Zombies appear in lower amount, but still benefit from Rush rules. There is no Abomination at Blue Danger Level.
- Zombie cards #19 to #36 are the harder part. Zombies come in greater numbers, especially at low Danger Levels. Abominations appear at Blue Danger Level. Keep these cards for experienced player groups and Zombicide veterans.
- Zombie cards #37 to #40 are Extra Activations. They make the Zombies less predictable and put more pressure on the Survivors.
These elements can be mixed in any way you see fit to create your own game experience!
Expansions for
Zombicide: 2nd Edition

Zombicide: 2nd Edition – Supernatural: Join the Hunt – Pack 1
2023
Bring Sam and Dean Winchester into the zombie apocalypse hunt.
View expansion

Zombicide: 2nd Edition – The Boys: Pack 2 – The Boys
2023
Bring The Boys and The Seven into the zombie fight.
Medium
View expansion

Zombicide (2nd Edition): Nico
2021
A promotional survivor wielding the power of dual katanas
120
minutes
View expansion

Zombicide: Second Edition – CMON Comics: Vol. 2 Promos
2023
A comic-linked collection with Survivors, Zombies, tiles, cards, and missions.
60
minutes
View expansion

Zombicide: 2nd Edition – Dark Nights Metal: Pack #5
2023
Face the Batman Who Frags and his horrific minions across the multiverse.
120
minutes
View expansion

Zombicide: 2nd Edition – Iron Maiden: Original Eddie
2023
A preorder-exclusive bonus pack featuring Iron Maiden’s original Eddie.
60
minutes
Medium
View expansion

Zombicide: 2nd Edition – Dark Nights Metal: Pack #4
2023
Face deadly Justice League horrors from beyond the dimensions.
120
minutes
View expansion

Zombicide: 2nd Edition – Dark Nights Metal: Pack #3
2023
Face interdimensional horrors alongside Earth's Justice League.
120
minutes
View expansion

Zombicide: 2nd Edition – Dark Nights Metal: Pack #2
2023
Face horrors from beyond the dimensions in a Justice League battle for Earth.
120
minutes
View expansion
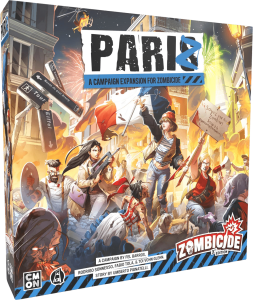
Zombicide (2nd Edition): PariZ
2025
Survive ten missions through a zombie-filled Paris
120
minutes
Medium
View expansion
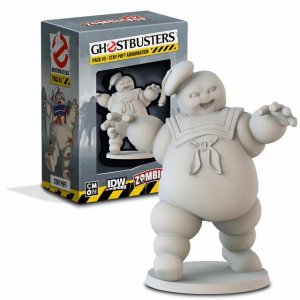
Zombicide: Ghostbusters Pack #3 – Stay Puft Abomination
2022
Face Stay Puft’s greatest challenge and cross the streams to eliminate him.
View expansion
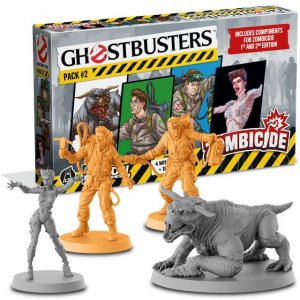
Zombicide: Ghostbusters Pack #2
2022
Bring Ray and Egon into the fight against Gozer and Vinz Clortho.
View expansion
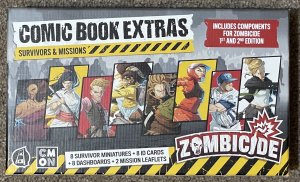
Zombicide Survivor: CMON Comics – Vol. 1 extras
2021
Eight Kickstarter survivors and a three-mission mini-campaign for Zombicide
View expansion
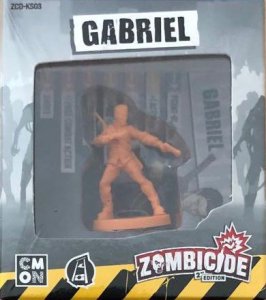
Zombicide (2nd Edition): Gabriel
2021
A wise gunslinger and legendary survivor ready to fight for a good cause.
60
minutes
Medium Heavy

View expansion
Zombicide: 2nd Edition – Dark Nights Metal: Pack #1
2023
Face the Batman Who Laughs and his horrific minions across the multiverse.
120
minutes
View expansion
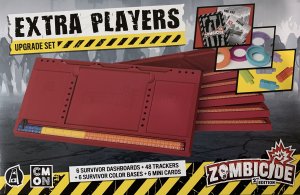
Zombicide (2nd Edition): Extra Players Upgrade Pack
2021
Bring larger groups to the table with room for up to 12 players.
120
minutes
View expansion
Zombicide: Ghostbusters Pack #1
2022
Venkman, Winston, and Slimer face Zuul and a surge of Abominations.
View expansion
Zombicide: 2nd Edition – Monty Python’s Flying Circus: A Rather Silly Expansion
2024
Bring absurd sketches, silly walkers, and pining foes to the zombie apocalypse.
60
minutes
View expansion
Zombicide (2nd Edition): Zombies & Companions Upgrade Kit
2021
Bring classic Zombie and Companion types into your 2nd Edition decks.
60
minutes
Medium
View expansion
Zombicide: 2nd Edition – The Boys: Pack 1 – The Seven
2023
Bring The Seven into the zombie apocalypse with iconic super hero Survivors.
Medium
View expansion
Zombicide (2nd Edition): Complete Upgrade Kit
2022
Bring classic Zombicide characters and special Zombies into 2nd Edition
60
minutes
View expansion
Zombicide (2nd Edition): Daily Zombie Spawn Set
2021
A Kickstarter-exclusive extra with 31 Daily Zombie Spawn Figures
60
minutes
View expansion
Zombicide (2nd Edition): Presidential Box
2021
Bring six former presidents—and a powerful Red Button—to the zombie fight.
60
minutes
Medium
View expansion
Zombicide (2nd Edition): Danny Trejo – Badass Survivor and Zombie Set
2021
Add a badass Survivor, Walker, and Abomination figures and cards to your collection.
60
minutes
Medium
View expansion
