Clans of Caledonia
2017
Lead a historic Scottish clan in a five-round economic contest of production, trade, exports, and whisky.
120
minutes
1 - 4
player(s)
12+
Medium Heavy

About this board game
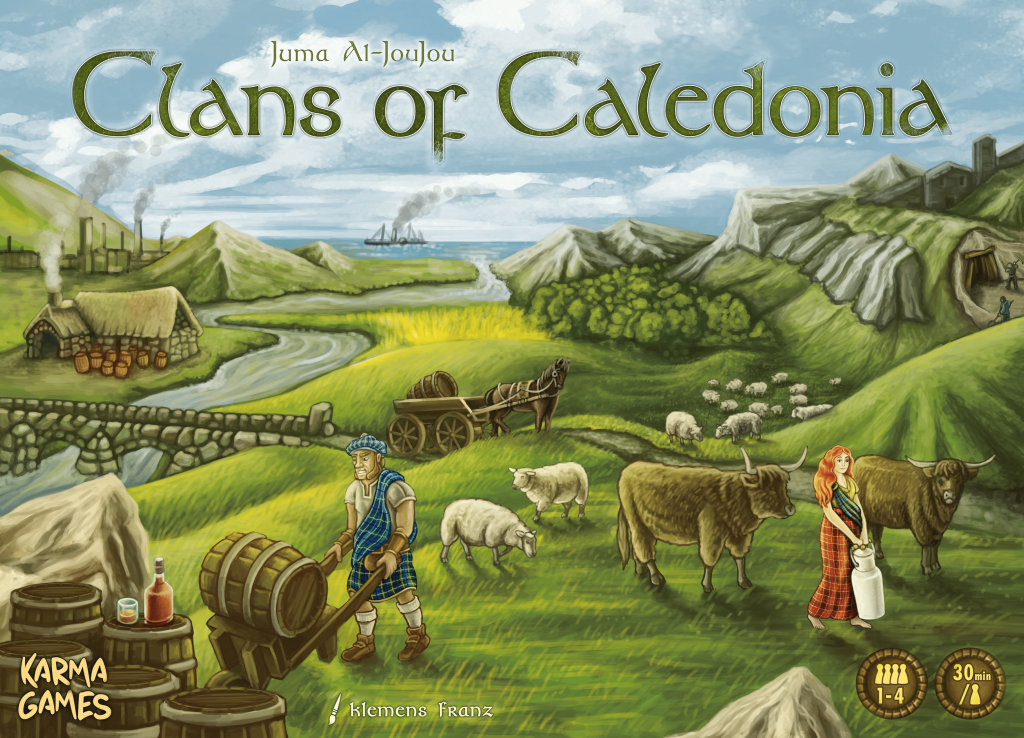
Clans of Caledonia is a mid-to-heavy economic board game for 1–4 players, with play lasting about 120 minutes. Set in 19th-century Scotland, it follows the country’s transition from an agricultural society to an industrialized economy built on trade and export.
Each player represents a historic clan competing to produce, trade, and export agricultural goods—and, of course, whisky. Food production, sheep raising, linen, cotton, and distilleries all reflect the changing Scottish economy and provide the foundation for your clan’s progress.
The game lasts five rounds. During each round, players take turns performing one of eight possible actions, including building, upgrading, trading, and exporting. When money runs out, a player passes and collects a passing bonus.
The round then moves through three distinct phases:
- Players’ turns: Take actions to develop your clan and compete in the market.
- Production: Collect basic resources, refined goods, and cash from production units built on the map.
- Round scoring: Receive victory points according to the current round’s scoring tile.
Production units make their income visible on each player mat, while refined goods require their respective basic resources. This creates a clear connection between the units you build and the resources and goods your clan can produce.
Clans of Caledonia includes eight clans with unique abilities, a modular board with 16 configurations, eight port bonuses, and eight round scoring tiles. Together, these components provide a varied setting for an economic contest shaped by production, trade, exports, and Scotland’s celebrated whisky industry.
/pic7182955.jpg)
Clans of Caledonia
Board Game Rules
Clans of Caledonia is a strategic economic game set in 19th-century Scotland.
During this period, Scotland made the transition from a predominantly agricultural economy to an industrialised one, heavily reliant on trade and export. As a consequence, food production increased to support the growth in population, cheap cotton imports increasingly replaced linen, and raising sheep gained importance. When European wine and brandy production was ravaged by a plague of insects in the late 19th century, Scotch whisky was drafted as a substitute for cognac. The whisky industry exploded into life, turning it into the premium alcoholic beverage in Europe.
In Clans of Caledonia, players represent unique historical clans competing to produce, trade, and export agricultural goods, as well as their famous whisky!
- Players: 1–4
- Play time: 30 min per player
- Age: 12 and up
- Game Designer: Juma Al-JouJou
- Illustrator: Klemens Franz
- Publisher: Karma Games
Game Components
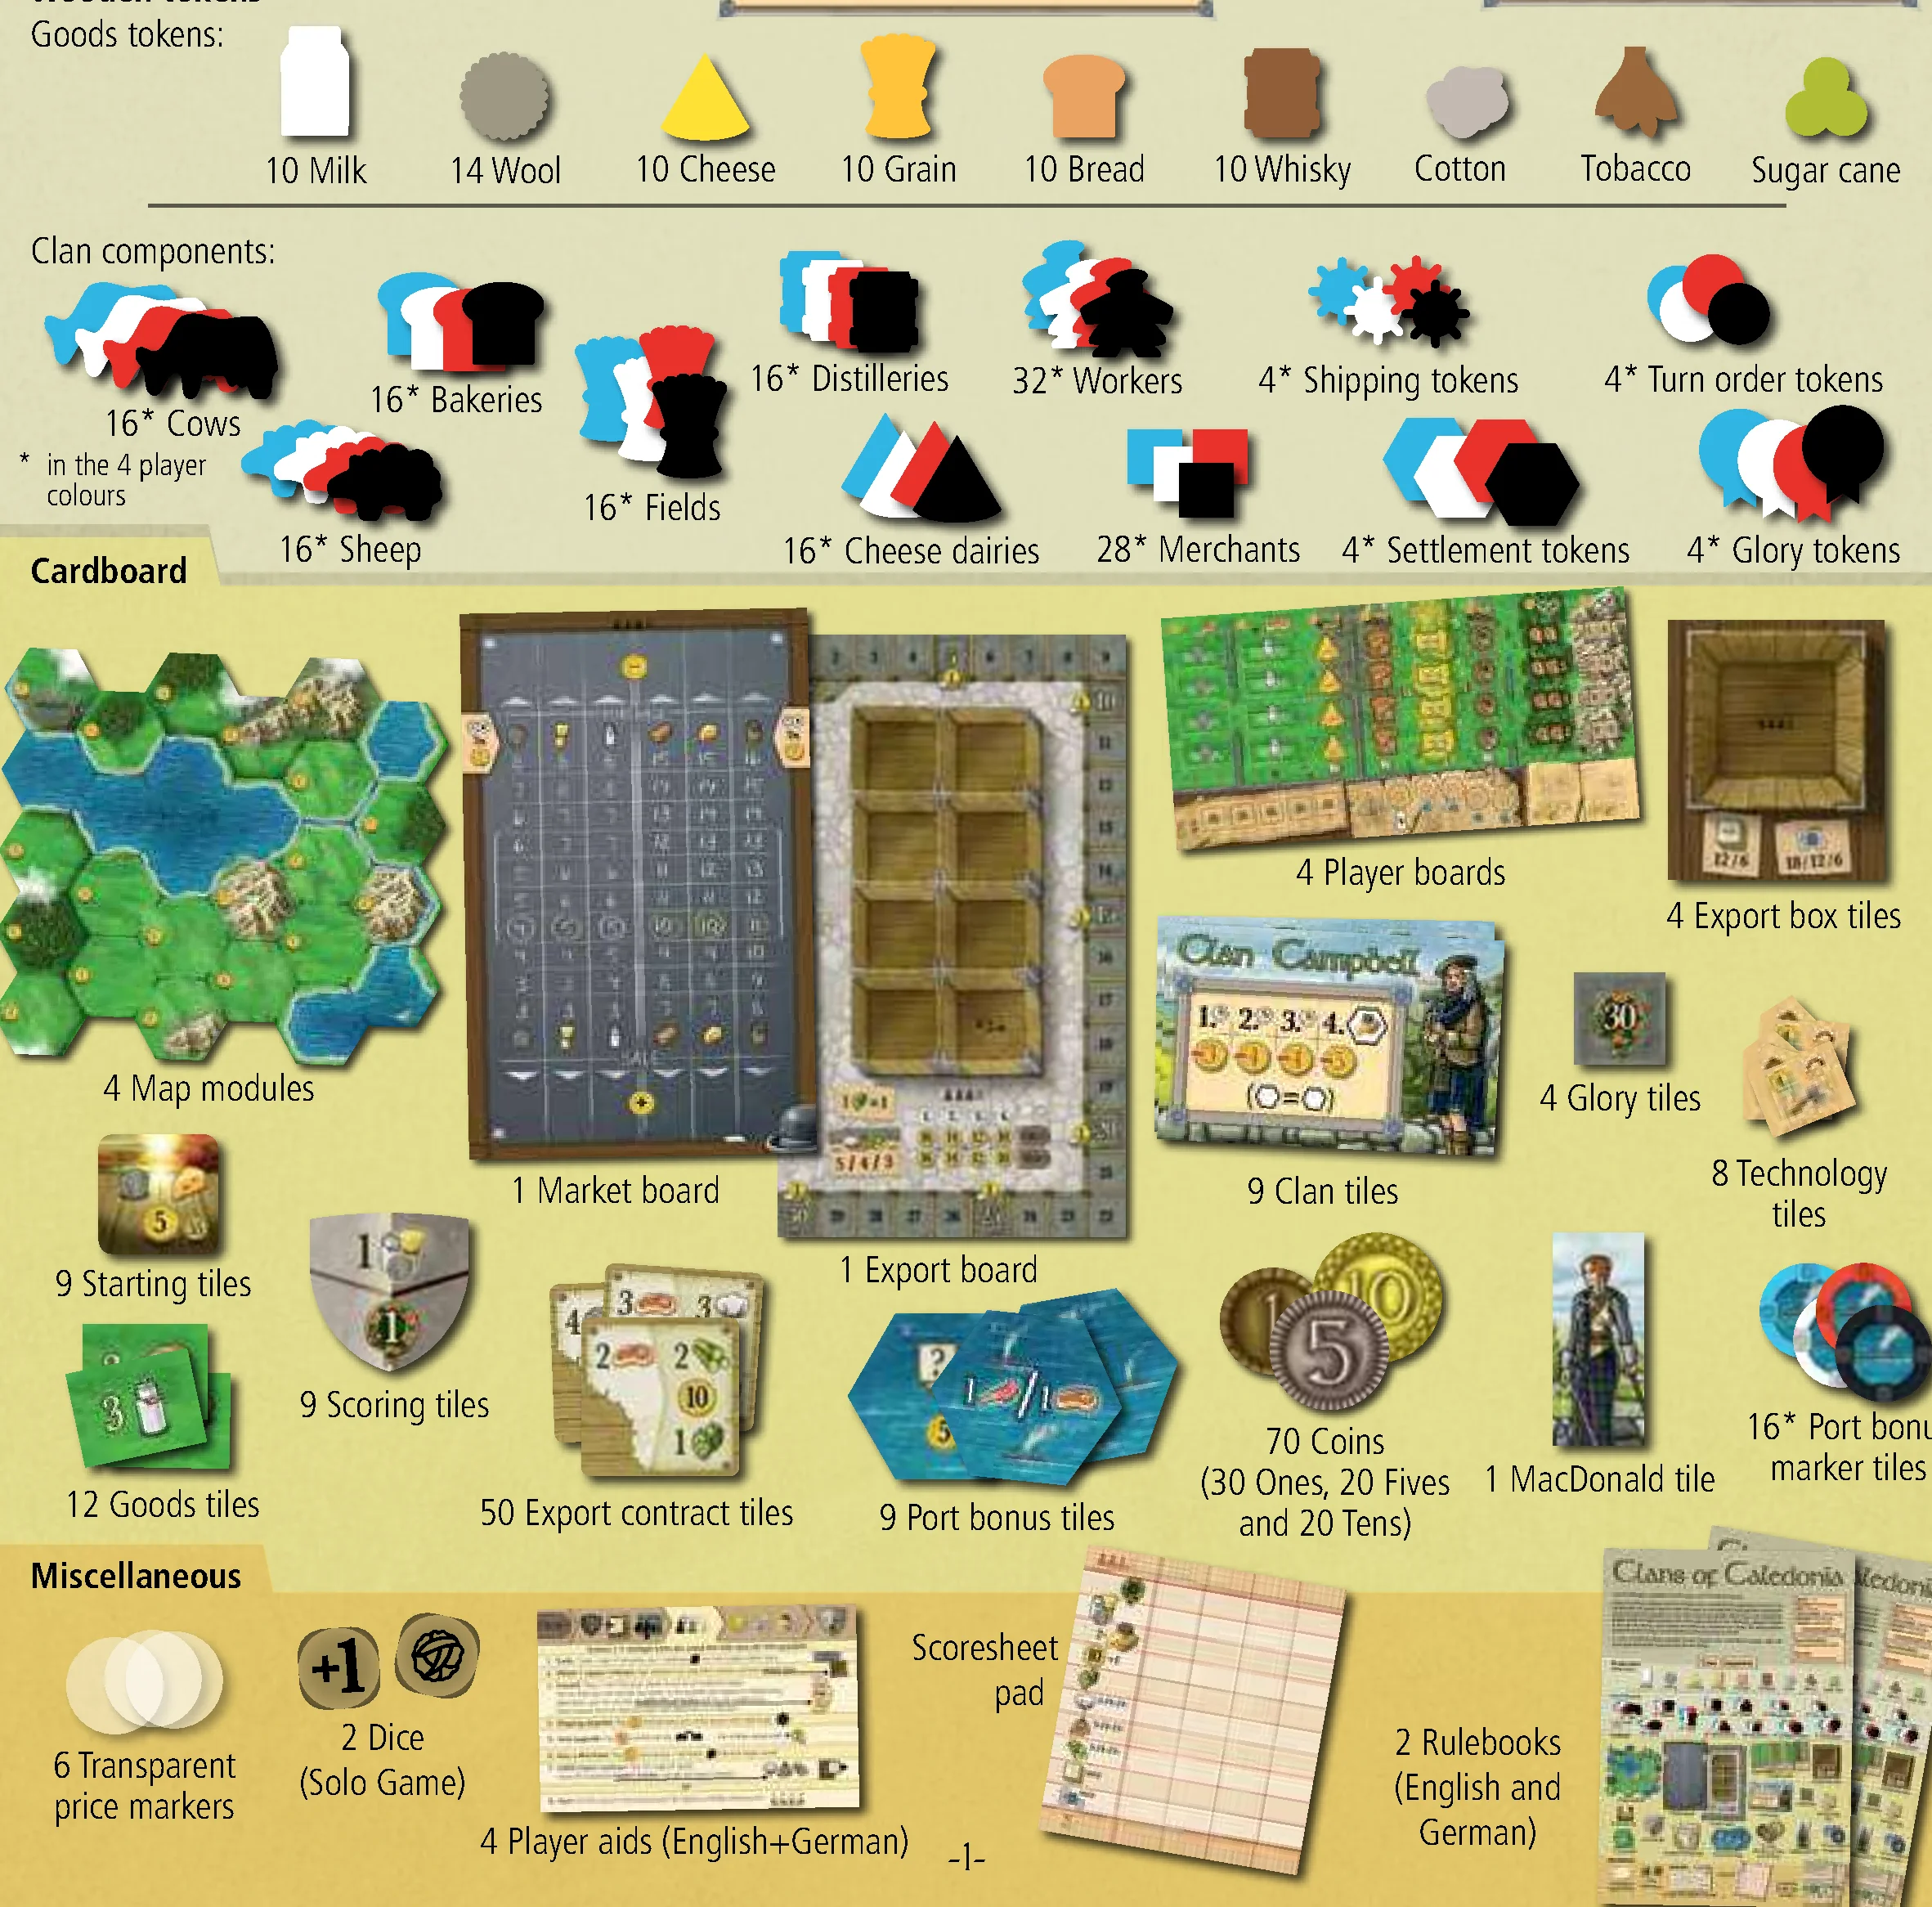
Wooden tokens
Goods tokens:
- 10 Milk
- 14 Wool
- 10 Cheese
- 10 Grain
- 10 Bread
- 10 Whisky
- Cotton
- Tobacco
- Sugar cane
Clan components (in the 4 player colours):
- 16 Cows
- 16 Sheep
- 16 Fields
- 16 Bakeries
- 16 Distilleries
- 16 Cheese dairies
- 32 Workers
- 28 Merchants
- 4 Shipping tokens
- 4 Turn order tokens
- 4 Settlement tokens
- 4 Glory tokens
Cardboard
- 4 Map modules
- 1 Market board
- 1 Export board
- 4 Player boards
- 4 Export box tiles
- 9 Starting tiles
- 9 Scoring tiles
- 9 Clan tiles
- 4 Glory tiles
- 8 Technology tiles
- 12 Goods tiles
- 50 Export contract tiles
- 9 Port bonus tiles
- 70 Coins (30 Ones, 20 Fives and 20 Tens)
- 1 MacDonald tile
- 16 Port bonus marker tiles
Miscellaneous
- 6 Transparent price markers
- 2 Dice (Solo Game)
- Scoresheet pad
- 4 Player aids (English + German)
- 2 Rulebooks (English and German)
Note: Money and goods are unlimited; if the tokens run out players can use the Goods tiles or other suitable materials.
First Play: When you play Clans of Caledonia for the first time, please consider playing with a simplified ruleset. See appendix for simplification variants.
1. Map Modules
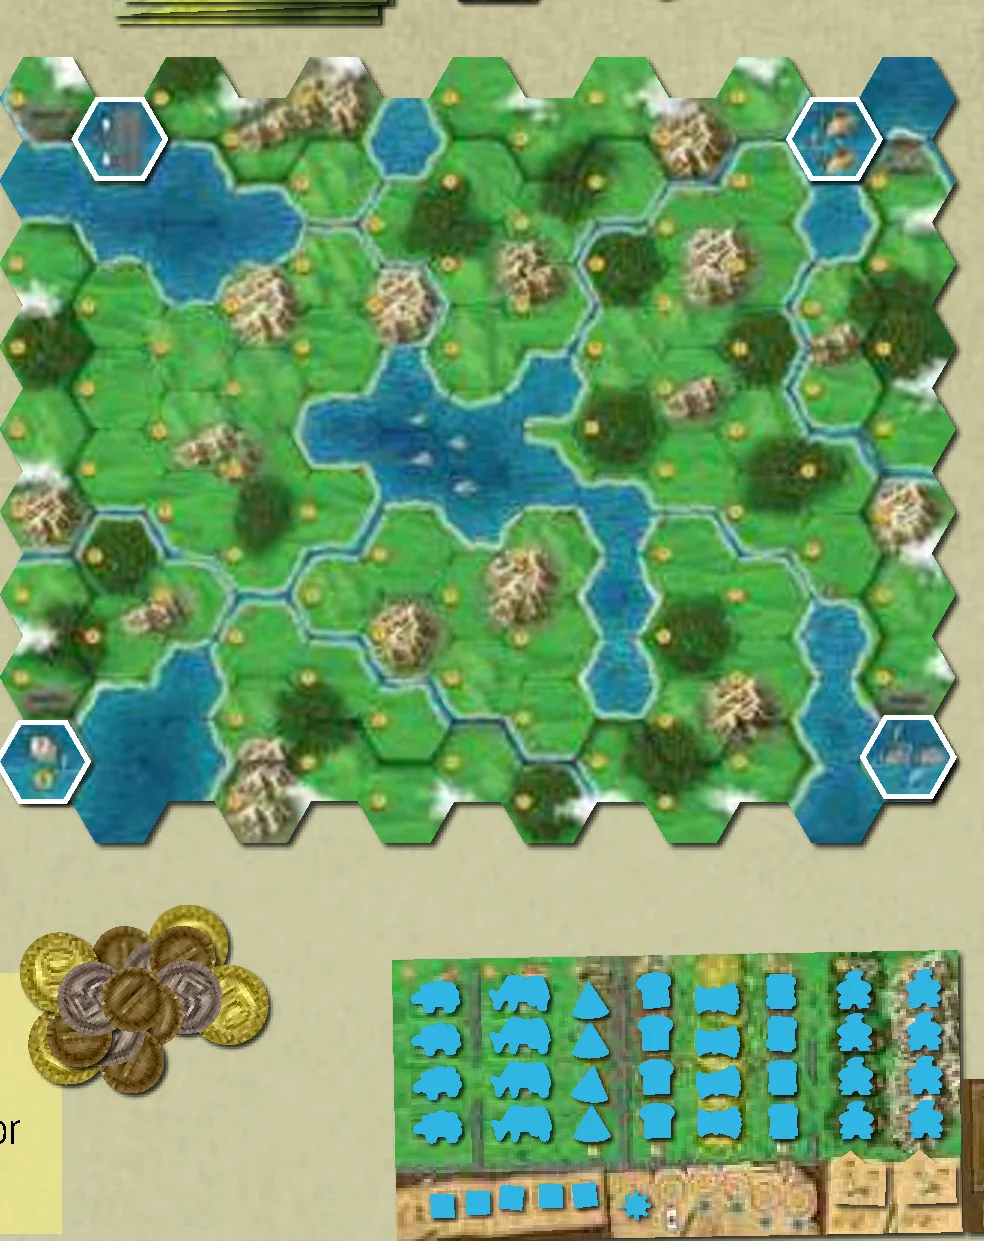
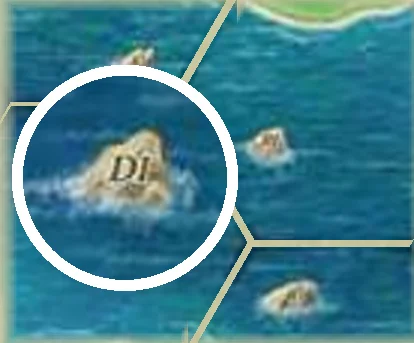
The game map consists of four double-sided Map modules which are labelled both by module (A–D) and by side (1–2), offering 16 different map configurations. Randomly choose a side for each Map module and construct the game map by making sure the rocks showing the module letter are in alphabetical order in a clockwise direction and are adjacent in the middle of the map.
2. Port Bonus Tiles
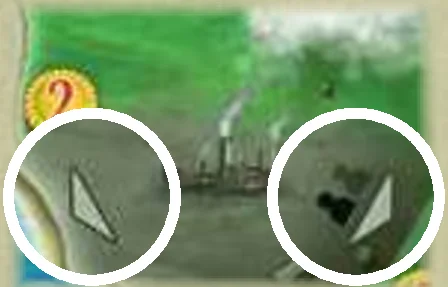
Shuffle all the Port bonus tiles and randomly choose four. Place one tile adjacent to a factory at each corner of the map, with its exact location depending on the player number:
- The 1–2 player icon indicates the space to put the Port bonus tiles in a 1 or 2 player game.
- The arrow icon indicates the space for a 3 or 4 player game.
- Return all unused Port bonus tiles back to the game box.
3. Market Board
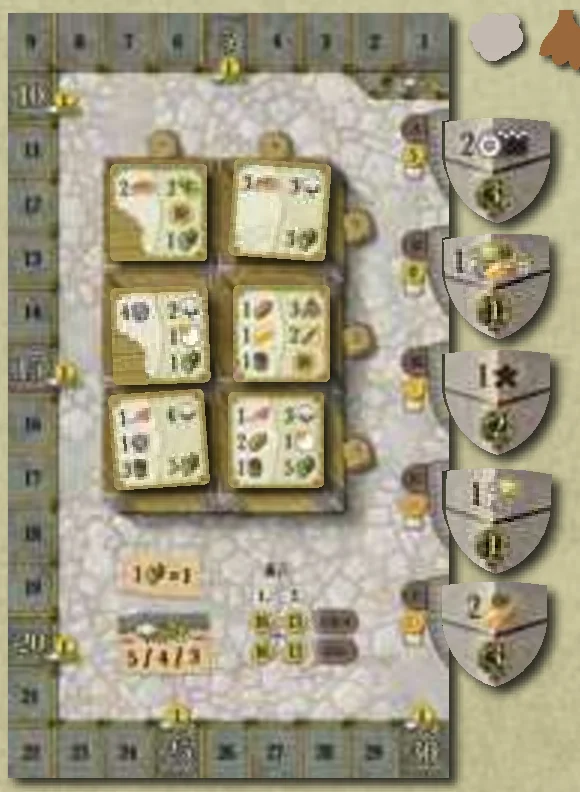
Flip the Market board to the appropriate side for the number of players and place the transparent Price markers on the encircled starting prices. Place the six types of Goods tokens (Wool, Milk, Grain, Bread, Cheese and Whisky) and their tiles below the Market in separate piles.
4. Export Board
Place the Export board beside the map, with the side face-up showing the icon matching the number of players. Then:
- Shuffle the Scoring tiles and choose five randomly. Place these face-up in a random order in the five slots on the edge of the Export board.
- Shuffle the Export contracts and create a face-down draw pile. Put one Export contract from the draw pile face-up on each box on the Export board (in a solo and 3 player game, one box remains empty).
- Place the players’ Glory tokens and the Import tokens (Cotton, Tobacco and Sugar cane) off the board. On the 1–2 player side, the dice icons are only relevant for the solo game.
5. Player Starting Items
Each player chooses a colour and takes one Player board and all of the game tokens of their colour. Then each player performs the following actions:
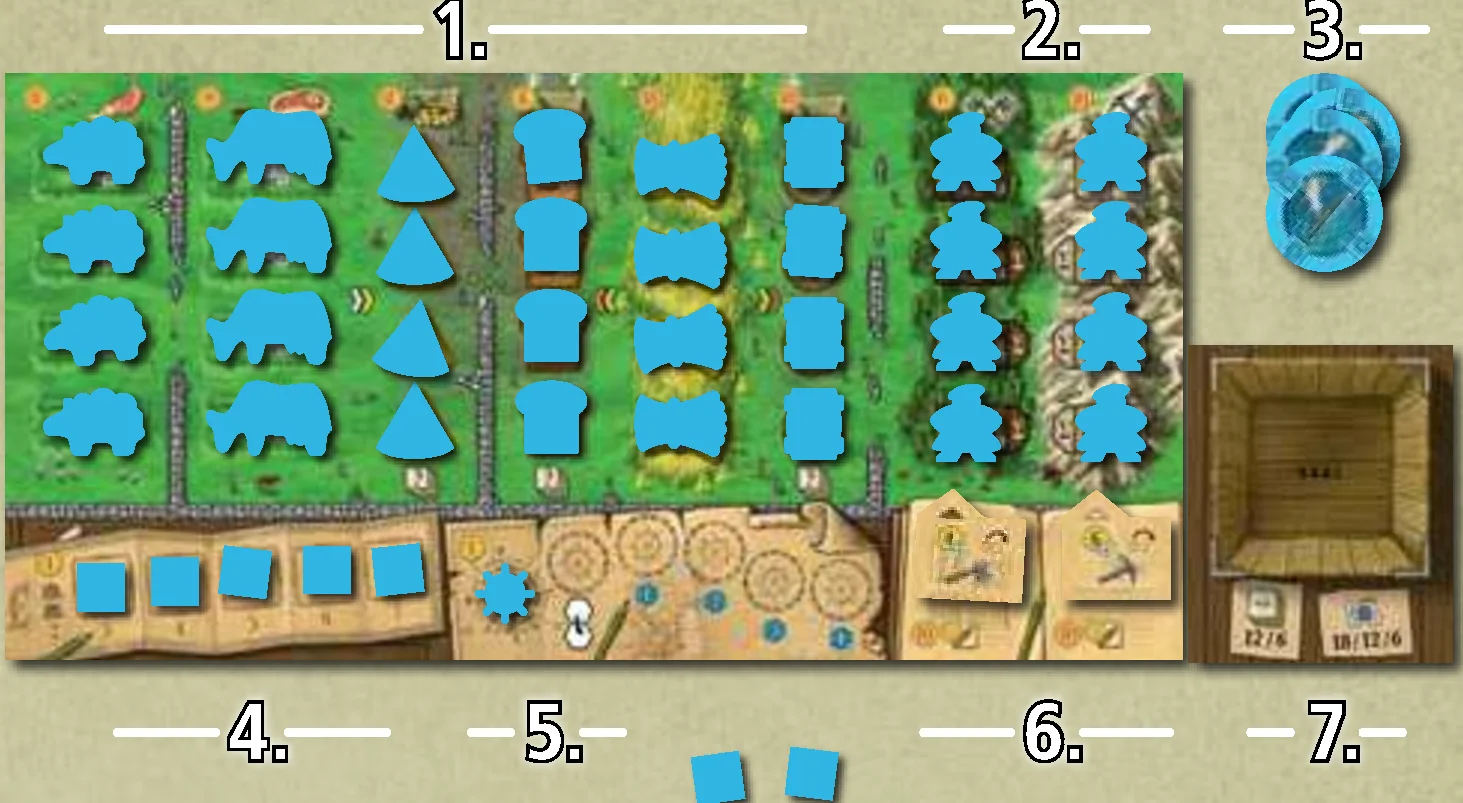
- Place all of your tokens on the corresponding locations on your Player board, four of each of the following: Sheep, Cows, Cheese Dairies, Bakeries, Fields and Distilleries.
- Place the eight Workers on the four forest locations (representing Woodcutters) and on the four mountain locations (representing Miners).
- Take four Port markers in your colour.
- Fill the Merchant track with five cubes, representing Merchants. The remaining two cubes go below your Player board as starting stock.
- Place the Shipping token on the first location on the left of the Shipping track.
- Place the two Technology tiles flipped to the side with the arrow on the upper left-hand side on the respective locations below the Workers.
- Take one Export box tile and place it next to your Player board with the side face-up showing the icon matching the number of players.
6. Turn Order
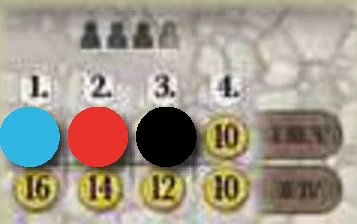
Determine a starting player randomly. The turn order in the first round is clockwise. Put all players’ Turn order tokens accordingly on the Turn order track on the Export board. In subsequent rounds the turn order is determined by the order in which players pass.
7. Clans & Starting Tiles
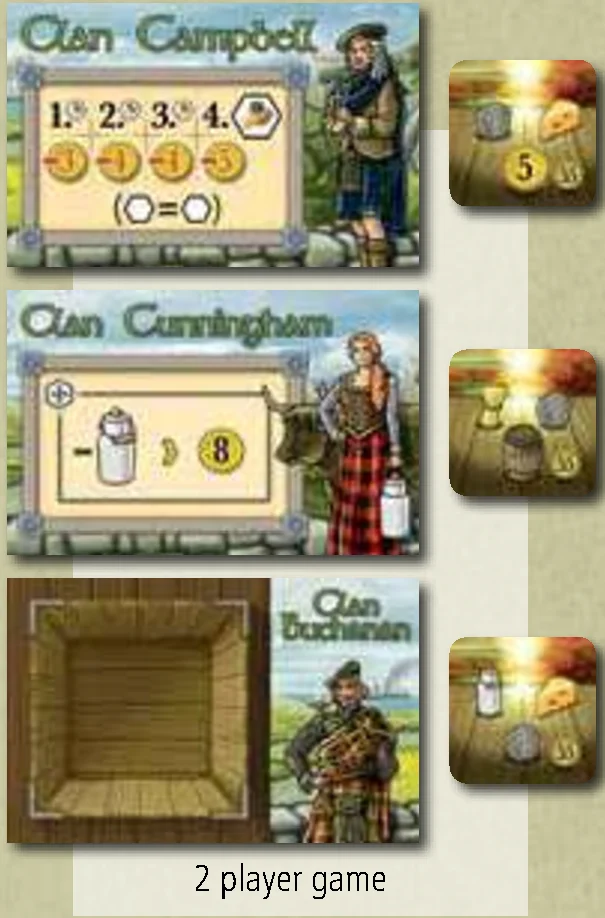
Randomly draw one more Clan tile than the number of players (e.g. four Clan tiles in a 3 player game). Then, randomly draw as many Starting tiles as Clan tiles and randomly allocate one next to each Clan tile.
Starting with the last player and going in reverse turn order (counter-clockwise), each player chooses a Clan tile and its corresponding Starting tile and places both in front of themselves. The starting player will thus choose last and will choose between the remaining two clans. The clans are explained in detail in the appendix. Players receive both the Goods and the money shown on their Starting tiles.
Note: Players may never hide any information.
8. Placing the First Workers
Beginning with the starting player and continuing in a clockwise order, each player places one Worker (Woodcutter or Miner) from the top of their Player board onto an empty hexagonal space on the game map. Woodcutters must be placed on an empty space with a forest and Miners must be placed on any empty space with a mountain.
Then in reverse turn order (starting with the player who placed last and continuing in counter-clockwise order), each player places a second Worker. The second Worker does not need to be adjacent to the first placed Worker. Each space can only ever have one unit (Worker, Sheep, Cow, Cheese dairy, Bakery, Field or Distillery) on it at any time.
Each time a Worker is placed (including during the initial setup) players must pay both for the land where they place their Worker and for the Worker itself. The cost of land is indicated by numbers on each space on the map, ranging from £1 to £6. The cost of a Worker is £6 for a Woodcutter and £10 for a Miner (as indicated above the Workers at the top of the Player boards).
Money Icons: Red numbers on the coin icon indicate a cost that you pay. Black numbers indicate money that you receive.
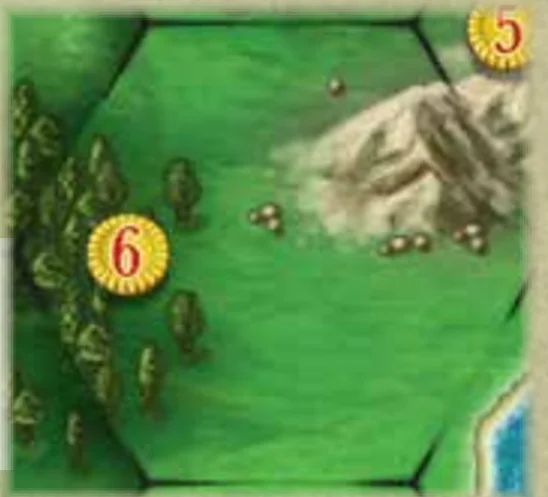
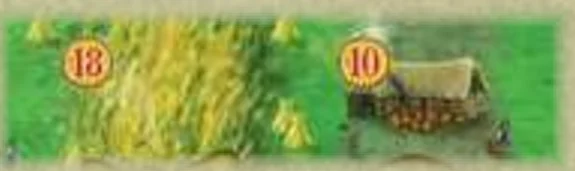
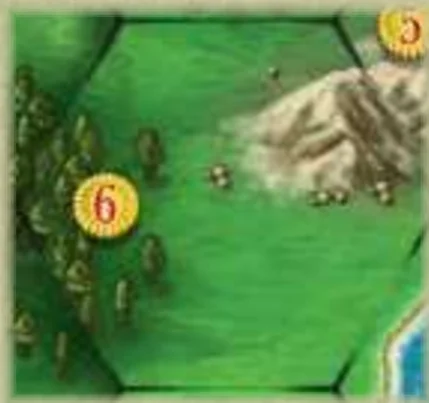
Example: The space shown contains both forest and mountain. Thus, players can place either a Woodcutter (for £6 + £6 = £12) or a Miner (for £10 + £6 = £16) on this space.
There are five rounds and four Phases per round. Each round contains the following Phases:
- Phase 1: Preparation Phase — Flip the Scoring tile of the previous round, refill any empty boxes on the Export board and retrieve your Merchants (skip this phase in the first round).
- Phase 2: Action Phase — Players take Actions until all players have passed.
- Phase 3: Production Phase — Units on the game board produce Goods and Income.
- Phase 4: Scoring Phase — Players receive Glory according to the current round’s Scoring tile.
At the end of the fifth round, final scores are calculated and the player with the most Victory Points (VP) is the winner.
Phase 1: Preparation
Flip the previous round’s Scoring tile face-down. If needed, refill any empty boxes on the Export board with Export contracts (according to player count). Players retrieve their own Merchants from the Market and place them next to their Player boards.
During the Action phase, each player takes exactly one Action per turn, in turn order. Play continues until all players have passed. There are eight possible Actions to choose from, each of which (except for Passing), can be taken multiple times during a round:
- Trade
- Obtain an Export Contract
- Expand
- Upgrade Shipping
- Upgrade Technology
- Hire a Merchant
- Fulfil an Export Contract
- Pass
1. Trade
The Merchants that are in your stock, not on your Player board, are ready to be used in a Trade action. You can send these Merchants to the Market to buy or sell Goods. Place as many Merchants on the buy or sell area of a single Good (designated by the up and down arrows respectively) as the quantity of Goods you wish to buy or sell. These Merchants remain on the Market board until retrieved in the subsequent Preparation phase. You then pay/receive the Good’s current price multiplied by the number of Goods bought or sold. All trades are made with the common Goods pools. Afterwards, the traded Good’s price is adjusted by moving the Price marker according to the arrow of the area (up when buying or down when selling) by as many steps as the number of Goods traded.
- Players may only buy or sell one type of Good during a Trade action. In order to trade different types of Goods they must take the Trade action multiple times.
- It is prohibited to have Merchants from the same player on both the buy and sell area of the same Good. High-speed trading was not common in 19th-century Scotland!
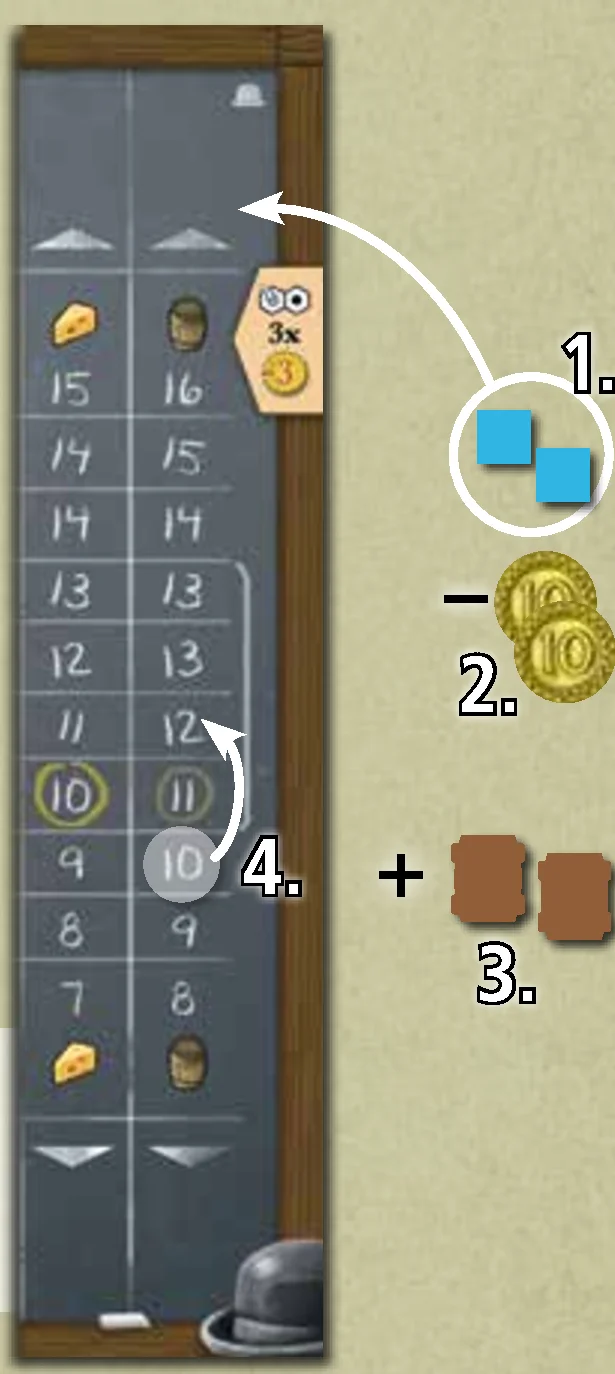
Example: A player wants to buy two units of Whisky at the current price of £10. They place two Merchants above the up arrow of the Whisky column, pay £20, take two Whisky barrels from the supply, and put them into their stock. The Whisky price then increases by two steps to £12.
2. Obtain an Export Contract
Pay the current round cost to take any Export contract from the Export board and place it on your empty Export box. The cost is determined by the game round and is indicated next to the Scoring tiles on the Export board. Note that in the first round, players receive £5 when obtaining an Export contract rather than paying a cost.
You can have only one unfulfilled Export contract on your Export box (exception: Clan Buchanan). You must fulfil your Export contract before obtaining a new one. It is not possible to get rid of unfulfilled Export contracts.
3. Expand
Place one unit (Sheep, Cow, Cheese dairy, Bakery, Field, Distillery, Woodcutter or Miner) from the top of the respective column of your Player board onto any empty space of the map that is neighbouring or within Shipping reach of any of your units. Pay for the costs of the unit (coin with red number above the respective unit) and for the space (coin with red number between £1 and £6).
Expansion Rules & Definitions
- Neighbouring: adjacent space with no river in between.
- Within Shipping reach: a space that you can reach with your current Shipping level.
- Land Restrictions: Land types only support specific units:
- Grasslands: Sheep, Cows, Cheese dairies, Bakeries, Fields and Distilleries
- Forests: Woodcutters
- Mountains: Miners
If a space contains more than one of these land types, you can place any corresponding unit on it. If you have deployed all your Woodcutters you cannot expand to a space that contains only forest. Likewise, if you have deployed all your Miners you cannot expand to a space that contains only mountain.
Neighbourhood Bonus
If you expand into a space neighbouring another player’s unit (adjacent and no river in between), you may immediately perform an additional Trade action and buy the type of Good produced by the neighbouring unit from the common stock.
- You cannot buy more than three pieces of the same type of Good per turn (four pieces in a 2 player game).
- The price of Basic goods (Wool, Grain, Milk) is reduced by £2.
- The price of Processed goods (Bread, Cheese, Whisky) is reduced by £3.
- Proceed with the purchase as explained under the Trade action. You need to have the appropriate number of Merchants available to use this bonus. Prices are adjusted the same way as in the Trade action.
- If you expand into a space neighbouring several opponent spaces with units deployed, you may use the Neighbourhood bonus for each of these units.
- The Neighbourhood bonus can only be used immediately after expanding.
Example: If a player expands into a space neighbouring another player’s Distillery, they may buy Whisky. If the current Whisky price is £10, then they could buy three Whisky (or four in a 2 player game) from the general supply at £7 each by placing the appropriate number of their Merchants on the Whisky’s up arrow. If there was also an opponent’s Cheese dairy neighbouring the space they expanded into, that current player could also buy up to three Cheese at a discount (or four in a 2 player game) if they had sufficient Merchants to do so.
Building Bonus
If you deploy your fourth building of one type onto the map (Cheese dairy, Bakery or Distillery) AND your Export box is empty, you may immediately draw three Export contracts from the draw pile. Take either one or none of the Export contracts, and the unselected Export contracts are returned to the bottom of the draw pile. If you take an Export contract you pay the costs as if you performed the action Obtain an Export Contract. This bonus is still considered part of the Expand action.
4. Upgrade Shipping
Pay £4 to move your Shipping marker forward one space to increase your Shipping reach. Doing so allows you to expand across rivers and lochs. Regardless of Shipping level, a player may never hop across a land space, not even along a river.
Shipping Levels:
- No shipping: You cannot expand across any type of water.
- River-crossing: You can now expand directly across a river to an adjacent space.
- 1-loch: In addition to river-crossing, you can now expand across one loch space.
- 2-loch: In addition to river-crossing, you can now expand across two loch spaces etc.
5. Upgrade Technology
Players can increase the income from their Workers (Woodcutters and Miners) by upgrading their equipment. Upgraded Workers produce £2 more in the Production Phase of each round. To upgrade a Worker technology, pay £10 and flip over the corresponding Technology tile on your Player board.
If you receive a Bonus Upgrade (see Direct Export Bonuses below) and you choose the Technology upgrade action you pay £5 instead of £10.
6. Hire a Merchant
Players start with two Merchants in their stock. To hire a new Merchant, pay £4 and take an additional Merchant from your Player board and add it to your stock. From now on, you may use this Merchant for future Trade actions.
7. Fulfil an Export Contract
To fulfil an Export contract that is on your Export box, pay the Goods listed on the left half of the Export contract tile. Then you receive the benefits shown on the right half of the tile. These benefits include Import goods such as Hops, Cotton, Tobacco or Sugar cane and Direct export bonuses.
When a player fulfils an Export contract with the import goods Cotton, Tobacco or Sugar cane, they move the respective token on the Export board track by as many steps as the amount imported. If the token reaches or passes a marked step, the player gains £1 (if they forget to move the import token at the point of fulfilling an Export contract, they do not get the bonus afterwards!). As soon as the player has fulfilled an Export contract, they place the Export contract tile face-up next to their Export box, which is open again for a new Export contract.
- Export contracts never require Grain or Milk but may require any combination of the other goods.
- Export contracts that require Meat (Beef or Mutton) can only be fulfilled by slaughtering Cows or Sheep. A player slaughters their animals, as part of the Fulfil an Export Contract action, by removing the animal from the map and placing it back onto their Player board. Note that this will reduce their Milk or Wool production. It will also free the space where the animal was and any player will be able to expand there, subject to the normal expansion rules. Slaughtering is only allowed to fulfil an Export contract and does not require a separate turn.
Direct Export Bonuses
There are three Direct export bonuses that players can take in any order to gain an immediate advantage:
- Money: taken immediately from the supply.
- Free space: allows the player to immediately take an Expand action without paying the land cost of the space into which they expand. The player must still pay the unit cost, and all rules for expanding and Neighbourhood bonuses apply.
- Bonus Upgrade action: choose one of the following Actions:
- A Technology upgrade action for the discounted price of £5.
- A Shipping upgrade action at no cost.
- Hire a Merchant from the Player board at no cost. Alternatively, the player may take one of their Merchants back from the Market instead of hiring a new one.
If a player obtains multiple Bonus upgrade actions they can choose the same or different upgrades.
8. Pass
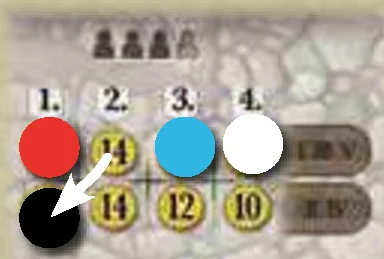
On your turn, if you cannot or do not want to take any more Actions, you must Pass and stop taking Actions for the remainder of this round. After Passing, move your Turn order token to the leftmost available position of the next round and receive the Pass bonus money indicated. The order in which players pass determines the turn order for the next round.
Free Action: Using a Port bonus tile
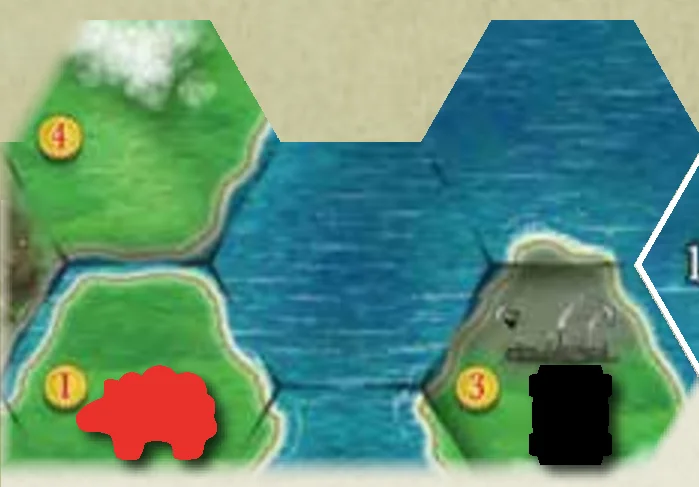
If a Port bonus tile is neighbouring, or within Shipping reach of, any of a player’s units, that player may use the corresponding Port bonus in addition to whatever Action they perform on their turn (a Port bonus tile can be used before or after the player’s main Action). A player can use the Port bonus immediately or in any future turn (as long as the player’s unit is neighbouring or within shipping reach).
Once you use the Port bonus, put a Port bonus marker of your colour next to the used Port bonus tile to indicate you have used it. Each player can use each Port bonus tile only once in the game (several players can use the same Port bonus tile, though). A player may use multiple Port bonus tiles in one turn.
Phase 3: Production
During the Production phase players receive Income and produce Goods from units that are deployed on the map. The amount of money and Goods produced in this phase is indicated by the empty slots on the Player board from which the units have been removed and that now show the Income icon  .
.
The Production phase follows this order:
- Worker Income: Each deployed Worker earns you money:
- Each Woodcutter earns £4 (£6 with the Technology upgrade).
- Each Miner earns £6 (£8 with the Technology upgrade).
- Produce Basic goods:
- Each Sheep produces one Wool.
- Each Cow produces one Milk.
- Each Field produces two Grain.
- Produce Processed goods (optional):
- Each Cheese dairy may process one Milk into one Cheese.
- Each Bakery may process one Grain into one Bread.
- Each Distillery may process one Grain into one Whisky.
The Basic goods spent to produce the Processed goods can come from anywhere: including received during the current Production phase, a previous Production phase, purchased from the Market on a previous turn, etc.
- Hint: It is recommended that players store their current Goods and money below their Player boards and put the Goods they just produced above their Player board so players can check if they took the correct amount of Goods.
- Hint: Once players are familiar with how the Production phase works they can collect their Income after Passing to speed up the game.
Phase 4: Scoring
In this phase players earn the Glory bonus indicated on the bottom half of the current Scoring tile, if they have fulfilled the requirement in the top half. Glory is tracked by moving the Glory markers on the track on the Export board (take or flip a Glory marker when you complete a lap). Each Scoring tile is explained in the Appendix.
Final Scoring takes place after five rounds are completed. Fill in the VP for each player on the Scoresheet. The player with the most VP is proclaimed the greatest Clan Chief of Caledonia and wins the game!
Final Scoring Categories
- Glory: 1 VP for each step on the Glory track.
- Basic goods: 1 VP for each Basic Good in your stock.
- Processed goods: 2 VP for each Processed good in your stock.
- Money: 1 VP for every £10. Leftover money breaks ties on the final score.
- Hops: 1 VP for each Hops imported listed on your fulfilled Export contracts.
- Cotton, Tobacco and Sugar cane: 3, 4 or 5 VP each according to their rarity. The Import token that was moved the furthest along the track (imported the most by all players) is worth 3 VP each, the second most is worth 4 VP each, and the least Imported Good is worth 5 VP each. In case of a tie, Cotton is the rarest, followed by Tobacco, then Sugar cane. Multiply the number of Imported Goods on your fulfilled contracts by their respective VP.
- Export Scoring: Count the number of fulfilled Export contracts:
- 3 or 4 players: 12 VP for the player with the most fulfilled Export contracts, 6 VP for the second most.
- 2 players: 8 VP for the player with the most fulfilled Export contracts only.
- Ties: Evenly divide the VP of the respective tiers among tied players (round down if necessary).
Settlement Scoring
Each player counts the number of their Settlements within Shipping reach of each other. A Settlement is defined as a cluster of neighbouring units of one colour (adjacent and no river in between). Single units that are not neighbouring to any other unit of the same colour are also considered Settlements. If not all of your Settlements are within Shipping reach of each other, the biggest group of Settlements within Shipping reach of each other counts in this scoring.
- 3–4 players: The player with the most Settlements within Shipping reach: 18 VP; second-most: 12 VP; third-most: 6 VP.
- 2 players: The player with the most Settlements within Shipping reach: 12 VP; second-most: 0 VP.
- Tied players share the points the same way as in the Export scoring.
This scoring is NOT about having expanded to the most spaces, nor is it about having built the biggest settlement!
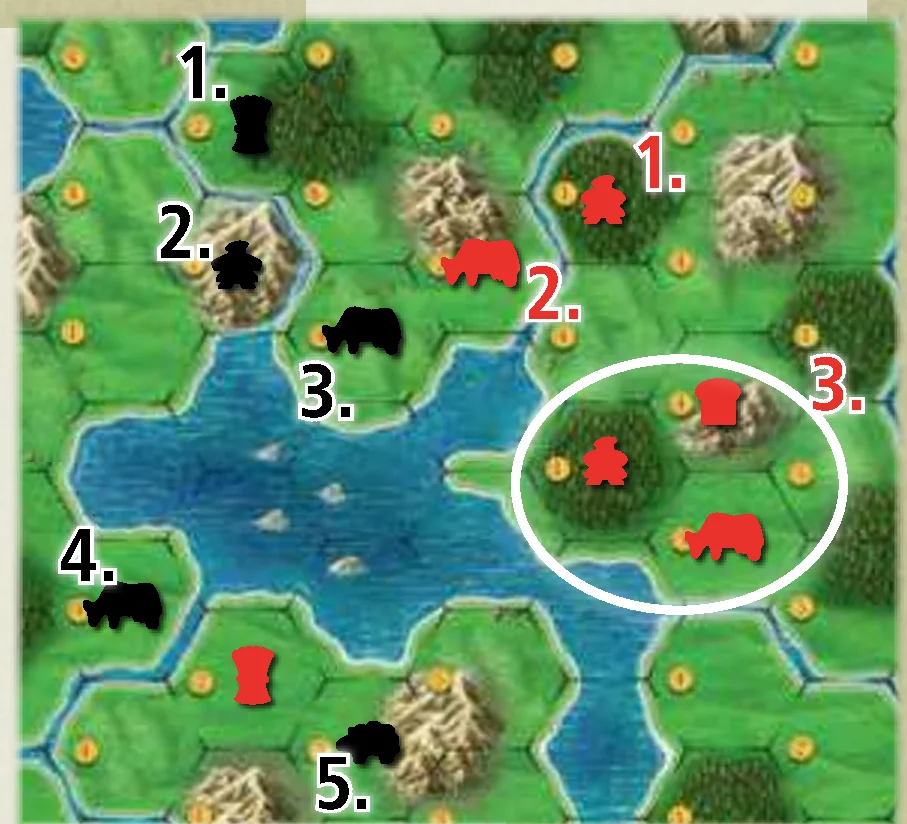
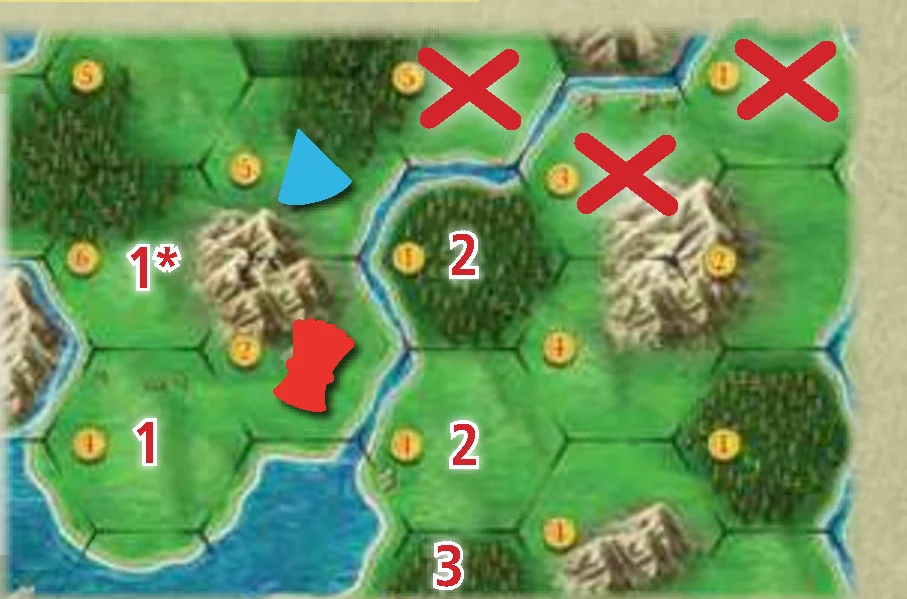
Example: If the red player has 1-loch Shipping level, red has only three Settlements within Shipping reach. If the black player has 2-loch Shipping level, the black player has five Settlements within Shipping reach. The three encircled red units are a single Settlement because they are neighbouring each other. All other red units are single-unit Settlements. The two red units at the top are two Settlements because they are separated by a river. Red has four Settlements in total. However, the Settlement at the very bottom left is two loch spaces away from the three-unit Settlement and thus not within Shipping reach of any of the red Settlements. Nevertheless, this is enough to connect the Settlement with three units to the two single Settlements at the top, since 1-loch Shipping is sufficient for red to cross the one loch space in between. Therefore, only three of the red player’s four Settlements are within Shipping reach and count towards the Settlement scoring.
- Hint: Slaughtering your animals can be beneficial or detrimental for this scoring. You can create more Settlements by slaughtering (splitting one bigger Settlement into two smaller Settlements) or harm your scoring because some Settlements might no longer be within Shipping reach.
- Note: If desired, starting in the fourth or fifth round of the game, you can start to track the number of settlements within shipping range per player on the Export board track using the Settlement tokens.
2 Player Game
In the 2 player game you play on a smaller map. The shaded land spaces at the edge (additionally marked by mist) are not part of the active map and so players cannot expand into them. The non-shaded spaces adjacent to the shaded spaces are the border spaces of the active map. This is relevant for Scoring tile #5 and Clan Fergusson. All loch spaces are part of the active map.
Solo Game
In this variant you try to achieve the highest possible score. You play with the same smaller map as in the 2 player game. Use Workers of different player colours to act as neutral pieces and put them on all spaces of the active map that have a cost of £1. All these spaces will be unavailable for you for the whole game. In a solo game you cannot take a Neighbourhood bonus or track Imported goods on the Export board.
Randomly draw and place five Export contracts face-up on the Export board before you start the game. Each time you pass you receive a Passing bonus of £16.
Additional Phase: Market Phase
At the beginning of rounds 2-5 during the Preparation phase and after Merchants were retrieved, the prices of three randomly chosen Goods are changed once each. Roll the Goods and the Price dice. The Goods die shows the price of which Good is changed. Reroll the Goods die if it shows a Good whose price was already changed in this phase.
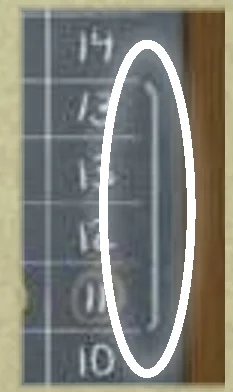
Check whether the price of this Good is below (low prices) or above (high prices) the brackets on the Market. The brackets next to the Market indicate the medium range. Prices above are high, and those below are low.
- When the price is low or high then you ignore the algebraic symbol (- or +).
- When the price is low then the price increases by the absolute value of the Price die.
- When the price is high then the price decreases by the absolute value of the Price die.
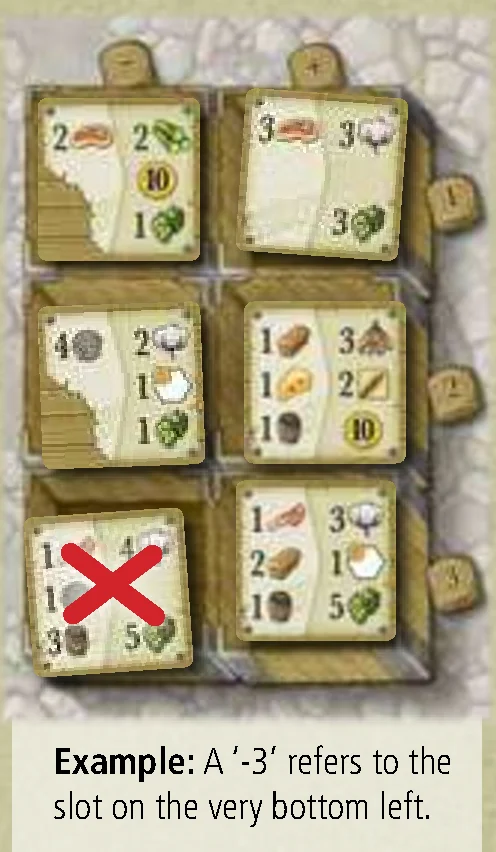
- When the price is in the medium range, then the price changes exactly according to the Price die. A ‘-3’ will cause the price to decrease by three steps. A ‘+1’ will increase the price by one step.
Market Dice: Goods die (Wool, Grain, Milk, Bread, Cheese, Whisky); Price die (-3, -2, -1, +1, +2, +3).
Solo Refill Export Contracts
Fill all empty slots on the Export board with new Export contracts from the draw pile. Your last Price die roll shows which of the six Export contracts gets removed. Find the intersection of the algebraic symbol and the numeral on the Export board and remove that Export contract from the game. Each Action phase starts with five Export contracts.
Solo Export Scoring
- Fulfilled Export contracts: 7 or more → 12 VP
- Fulfilled Export contracts: 6 → 8 VP
- Fulfilled Export contracts: 5 → 4 VP
Solo Settlement Scoring
- 14 or more Settlements → 18 VP
- 11–13 Settlements → 12 VP
- 8–10 Settlements → 6 VP
Solo Result Tiers
- 0–115 VP: Newbie
- 116–130 VP: Rookie
- 131–145 VP: Average
- 146–160 VP: Expert
- 161+ VP: Genius!
Game Variants
These variants can be played in any combination.
Simplifications (for your first game)
- Static Import Goods: No matter how much Cotton, Tobacco or Sugar cane was imported, each is worth 4 VP each at the end of the game. There is no need to track Imported goods on the Export board.
- Without Scoring and/or Port Tiles: Players can simplify the game by ignoring the Scoring tiles and/or the Port tiles during setup and play.
Tighter Game Map
If players prefer a tighter game map, they can agree to use the backsides of four spare Port tiles to cover any four land spaces of the active map during setup in a 2-3 player game, preferably one tile per module. These spaces are not available for the Expand action.
Without Clans
If players prefer more symmetric starting conditions they can ignore the clans during setup and play. In addition to the Goods and money on the chosen Starting tiles, players receive:
- Starting player: £0
- Second player: £2
- Third player: £4
- Fourth player: £6
Clan Auction (for experienced Clan Chiefs)
If players play very competitively, they may auction the clans:
- Randomly draw as many Clan tiles as the number of players and allocate each Clan tile a random Starting tile.
- Randomly determine a player who bids any number of VP (or 0) to be able to choose a clan first. The player to their left can bid any higher amount of VP and so on until there is a winning bid that no player wants to outbid (30 VP is the highest possible bid).
- If a player does not want to bid higher, they cannot bid again this auction round.
- The player with the winning bid writes down their bid as negative VPs on the Scoresheet, places their token on the first space of the Turn order track and takes the Clan tile along with the corresponding Starting tile.
- The player to their left bids for one of the remaining clans and so on until the second clan is chosen by the player with the winning bid, who then is second on the Turn order track etc.
- The last player without a clan is given the remaining Clan tile and Starting tile without losing any VP and is designated last in turn order.
Clan Buchanan
Several members of this clan were prosperous ‘Tobacco Lords’ in Glasgow. Buchanan Street in Glasgow was named after Andrew Buchanan.
- You have an additional Export box and can thus obtain one or two Export contracts in one turn.
- If you obtain just one Export contract per turn, you pay the regular cost of the current round. However, if you obtain two Export contracts (from the Obtain an Export contract action or from the Building bonus) in one turn, you pay the cost only once instead of twice.
- If you are given the Building bonus, you draw six instead of three Export contracts and you can select 0–2 Export contracts (this also applies to Port bonus tile #8).
- Fulfil an Export contract action: You can fulfil up to two Export contracts per turn.
- In the first round: If you obtain two Export contracts in a single turn, you receive the +£5 bonus only once. However, during each turn in which you obtain an Export contract you gain the £5.
Strategy: Focus on smaller Export contracts and fulfil most in the last two rounds.
Clan Campbell
Colen Campbell was a pioneering Scottish architect and architectural writer, credited as a founder of the Georgian style.
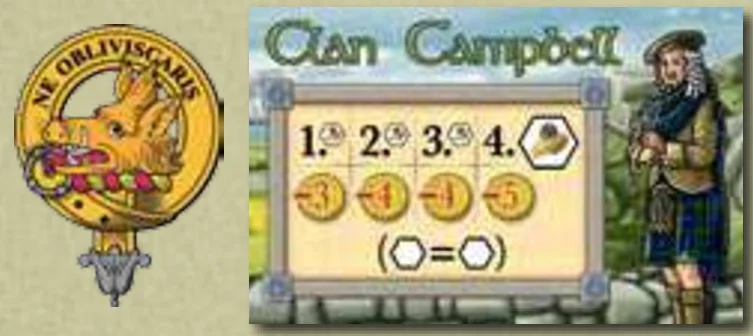
This clan gets better at building factories of Processed goods the more often the clan builds them:
- The first factory of each type is £3 cheaper.
- The second and third factory of each type is £4 cheaper.
- The fourth factory of one kind is £5 cheaper.
Example: Campbell builds three Bakeries and one Distillery. The first Bakery costs £8 – £3 = £5, the 2nd and the 3rd Bakeries cost £8 – £4 = £4. The Distillery is £3 cheaper and costs £10 – £3 = £7.
Strategy: Produce a lot of one type of Processed good that is in high demand in Export contracts. Selling your Processed goods is a good source of income too.
Clan Cunningham
Cunninghame is the northern part of Ayrshire, one of the most agriculturally fertile regions of Scotland where raising cattle has traditionally been important.
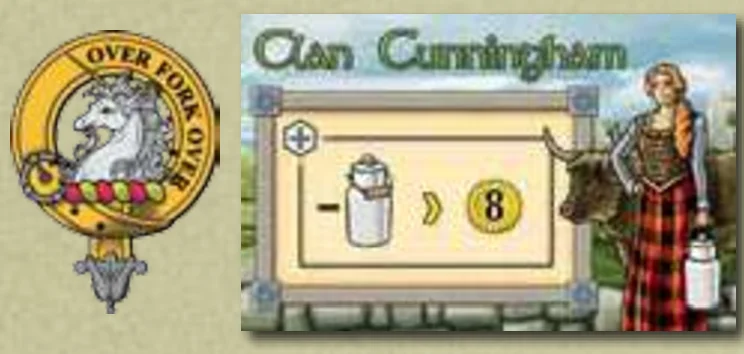
You produce butter out of Milk. At the end of the Production phase, you may discard any number of Milk tokens in your stock (no merchants needed). For each Milk token you discard, gain £8. Do not adjust the Milk price.
Strategy: Produce as much Milk as possible and buy some if the price is low. Avoid producing Cheese as it consumes your precious Milk!
Clan Fergusson
Clan Fergusson was historically widespread across Scotland from Ross-shire in the north to Dumfriesshire in the south.
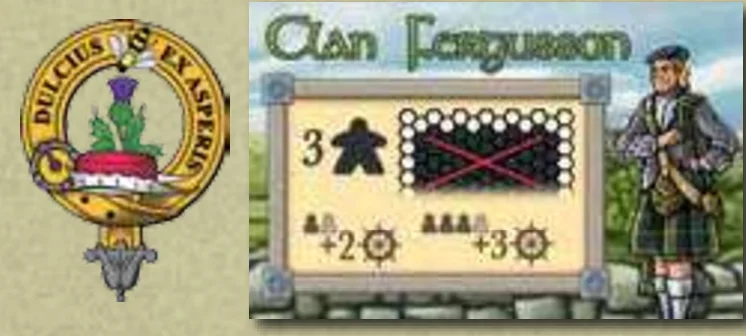
- Placing initial Workers: You start with three starting Workers (for which you still must fully pay). In addition you start with 2-loch Shipping level for free in a 3–4 player game (1-loch Shipping in a 1–2 player game).
- You place your third Worker after all other players have placed theirs.
- You must place all three starting Workers on border spaces of the active map. You must still pay for all three workers and the land costs.
Strategy: Use your Shipping reach and Port bonus tiles!
Clan MacDonald
Clan MacDonald is a Highland clan from the Inner Hebrides with the clan motto per mare per terras (‘by sea and by land’).
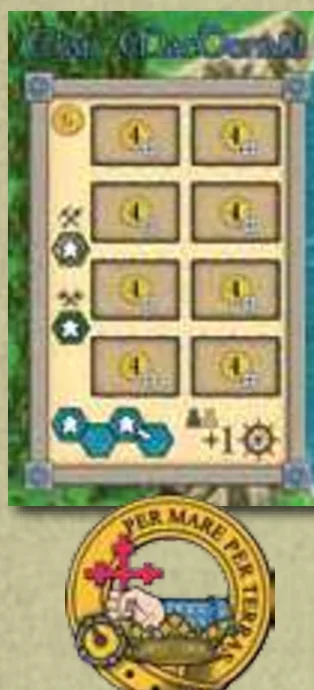
Your Clan tile is put on top of the Miner/Woodcutter area of your Player board. Your Technology area remains empty because you cannot perform the Technology upgrade action.
You have three abilities:
- You can use all of your Workers either as Woodcutters, Miners or as Fishermen (even when placing the first workers); all your Workers cost £6 and provide £4 income. Fishermen can be placed on or moved to all empty loch spaces and Port bonus tiles, even in a 1–2 player game. There are no land costs on loch placements. Two Fishermen may never be adjacent to each other.
- Once per turn, you can move a Fisherman to an adjacent loch space by rowing but only before your main Action.
- In 1–2 player games, you start with river-crossing Shipping for free.
You still need the appropriate Shipping reach to expand across loch spaces. Land spaces adjacent to Fishermen are considered to be neighbouring and thus accessible in the Expand action even without any Shipping reach. The Neighbourhood bonus can be taken advantage of when deploying a Fisherman as well, but not when rowing.
Strategy: Use your rowing ability to increase your reach and for your Settlement scoring.
Clan MacKenzie
Clan MacKenzie bought the Dalmore Distillery in 1867, known for its very exclusive whiskies.
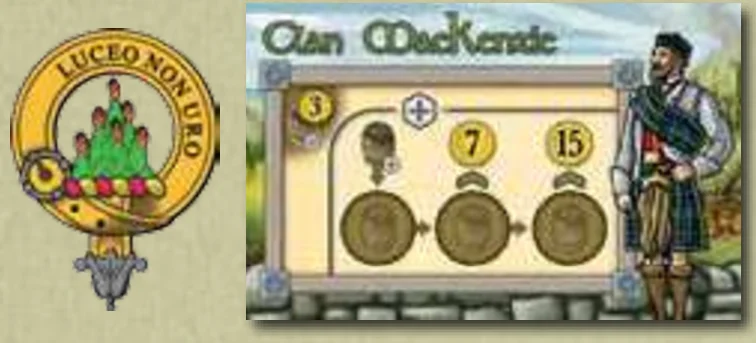
- In the Production phase you gain £3 for each unit of Whisky you produce. You do not have to discard any Whisky to get this money.
- Whisky Cellar: At the beginning of each Production phase, Whisky barrels already in the cellar age and are moved one spot to the right. The Whisky barrel starting a Production phase in the rightmost space of the cellar is placed into your stock. You can move any Whisky barrel from the cellar into your stock at any time. When you move aged Whisky out of the cellar into your stock, you gain £7 or £15 respectively.
- At the end of each Production phase you may then put one freshly-produced Whisky barrel in the cellar on the left spot so it can age in later Production phases. For the purposes of Scoring tile #2, Whisky in the cellar does score.
Strategy: As long as the Whisky price is medium or high, selling Whisky provides you with a lot of money to reinvest. When the Whisky price drops, ageing the Whisky and/or exporting it is better.
Clan Robertson
Clan Robertson is one of the oldest clans of Scotland, from the district ‘Struan’ at the confluence of the Errochty Water and Garry rivers (‘Sruthan’ meaning ‘streams’).
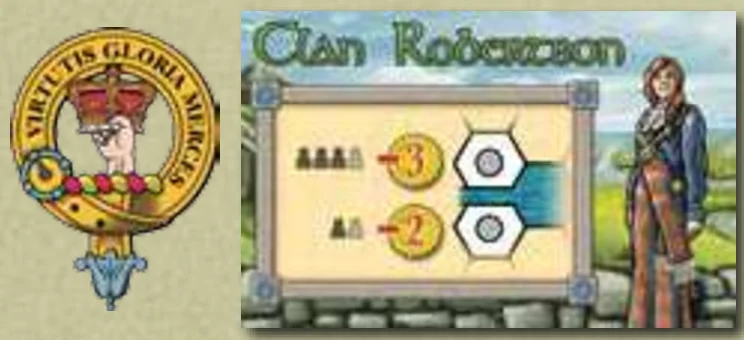
Each time you place a unit in a river delta (a space that is adjacent to a river just flowing into a loch) you pay £3 less (£2 less in games with 1–2 players) off the total cost. This applies to placing your initial two Workers as well.
Example: In a 4 player game, you build a Bakery (cost £8) on a river delta space with cost £1. The final cost is £8 + £1 – £3 = £6.
Strategy: Start at or near to river deltas and expand as much into river delta spaces as possible. Slaughtering livestock on river deltas allows you to expand on river deltas more often.
Clan Stewart
Clan Stewart is a Highland clan which produced monarchs such as Mary Stuart and Queen Anne.
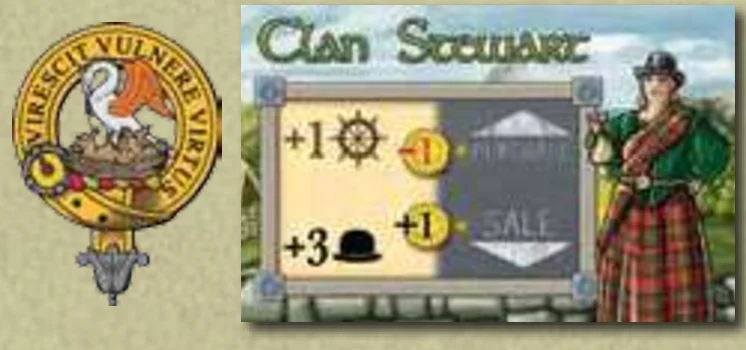
- You start with three additional Merchants (five total) and river-crossing Shipping level for free.
- Furthermore, you gain £1 each time you trade at the Market (in the case of making a purchase, you receive the money before paying), no matter how many units you trade.
- If you use the Neighbourhood bonus and trade multiple types of Goods in one turn, you gain £1 for each type of Good traded.
Hint: It is easier to simply take a £1 Coin each time you visit the Market.
Strategy: Try to get the +£1 bonus on the Market as often as possible. It can help producing a bit of everything and selling and buying small amounts of each type of Good.
Port Bonus Tiles
- Gain £10: Gain £10 immediately.
- Manipulate Price: Manipulate the price of one Good by three steps on the Market before trading this Good.
- Exchange Units: Take any two of your units from your Player board (other than Fields) and exchange them with any two of your units on the map (other than Fields) at no cost. The two new units must be different from the two old units. The new units must match the land type on which they are deployed. If you qualify you can obtain the Building bonus. You cannot obtain any Neighbourhood bonus during this port action.
- Gain £5 & Building Bonus: You gain £5. If your Export box is empty you can perform the Building bonus (and pay the respective costs if you decide to take an Export contract, as normal).
- Meat Contract Discount: Use this bonus in a turn when you fulfil an Export contract requiring Meat. The fulfilled Export contract requires 1 fewer slaughtered animals.
- Trade Basic Goods: Discard one Basic good of your choice and gain any three Basic goods of your choice (including the type you discarded).
- Trade Processed Goods: Discard one Processed good of your choice and gain any two Processed goods of your choice (including the type you discarded).
- Upgrade & Glory: Receive one Bonus upgrade and gain 3 Glory.
Scoring Tiles
- Basic Goods: Gain 1 Glory for each Basic good in your stock.
- Processed Goods: Gain 3 Glory for each two Processed goods in your stock.
- Deployed Livestock & Production Buildings: Gain 1 Glory for each of your deployed Sheep, Cows, Cheese dairies, Bakeries and Distilleries and 2 Glory for each Field.
- Deployed Workers: Gain 2 Glory for each of your deployed Workers (including Fishermen if you are Clan MacDonald).
- Border Space Units: Gain 3 Glory for every two units on border spaces of the active map. In a game with 1-2 players, spaces adjacent to the shaded mist spaces are considered border spaces.
- Export Contract Goods (Cotton, Tobacco, Sugar cane): Gain 1 Glory for each unit of Cotton, Tobacco and Sugar cane on your fulfilled Export contracts.
- Export Contract Meat: Gain 2 Glory for each unit of Meat on your fulfilled Export contracts.
- Upgrades: Gain 1 Glory for each of your Upgrades (Technology upgrades, Shipping upgrades and hired Merchants). Just count each spot left of your Shipping marker, each free Merchant spot and each upgraded (flipped) Technology tile. You also gain Glory for Upgrades your clan started with.
Kickstarter-Contributed Tiles
These tiles were created and selected by the Kickstarter community during the initial funding campaign and were not playtested by Karma Games.
- Port Tile: Pay £3, put a Port bonus marker on this tile, and then use any one of the other three Port tiles in play.
- Scoring Tile: Gain 2 Glory for each of your occupied spaces with the cost of £5 or £6.
- Clan ClachSwen Tile: Each time you fulfil an Export contract which gives you Hops, you can immediately produce 1 Beer for each unit of Hops imported at the cost of 1 Grain each. For each unit of Beer produced, you gain a certain amount of money. You can produce max. 3 Beer per Export contract.

Introduction & Components
Clans of Caledonia is a strategic economic game set in 19th-century Scotland.
During this period, Scotland made the transition from a predominantly agricultural economy to an industrialised one, heavily reliant on trade and export. As a consequence, food production increased to support the growth in population, cheap cotton imports increasingly replaced linen, and raising sheep gained importance. When European wine and brandy production was ravaged by a plague of insects in the late 19th century, Scotch whisky was drafted as a substitute for cognac. The whisky industry exploded into life, turning it into the premium alcoholic beverage in Europe.
In Clans of Caledonia, players represent unique historical clans competing to produce, trade, and export agricultural goods, as well as their famous whisky!
- Players: 1–4
- Play time: 30 min per player
- Age: 12 and up
- Game Designer: Juma Al-JouJou
- Illustrator: Klemens Franz
- Publisher: Karma Games
Game Components
Wooden tokens
Goods tokens:
- 10 Milk
- 14 Wool
- 10 Cheese
- 10 Grain
- 10 Bread
- 10 Whisky
- Cotton
- Tobacco
- Sugar cane
Clan components (in the 4 player colours):
- 16 Cows
- 16 Sheep
- 16 Fields
- 16 Bakeries
- 16 Distilleries
- 16 Cheese dairies
- 32 Workers
- 28 Merchants
- 4 Shipping tokens
- 4 Turn order tokens
- 4 Settlement tokens
- 4 Glory tokens
Cardboard
- 4 Map modules
- 1 Market board
- 1 Export board
- 4 Player boards
- 4 Export box tiles
- 9 Starting tiles
- 9 Scoring tiles
- 9 Clan tiles
- 4 Glory tiles
- 8 Technology tiles
- 12 Goods tiles
- 50 Export contract tiles
- 9 Port bonus tiles
- 70 Coins (30 Ones, 20 Fives and 20 Tens)
- 1 MacDonald tile
- 16 Port bonus marker tiles
Miscellaneous
- 6 Transparent price markers
- 2 Dice (Solo Game)
- Scoresheet pad
- 4 Player aids (English + German)
- 2 Rulebooks (English and German)
Setup
Note: Money and goods are unlimited; if the tokens run out players can use the Goods tiles or other suitable materials.
First Play: When you play Clans of Caledonia for the first time, please consider playing with a simplified ruleset. See appendix for simplification variants.
1. Map Modules
The game map consists of four double-sided Map modules which are labelled both by module (A–D) and by side (1–2), offering 16 different map configurations. Randomly choose a side for each Map module and construct the game map by making sure the rocks showing the module letter are in alphabetical order in a clockwise direction and are adjacent in the middle of the map.
2. Port Bonus Tiles
Shuffle all the Port bonus tiles and randomly choose four. Place one tile adjacent to a factory at each corner of the map, with its exact location depending on the player number:
- The 1–2 player icon indicates the space to put the Port bonus tiles in a 1 or 2 player game.
- The arrow icon indicates the space for a 3 or 4 player game.
- Return all unused Port bonus tiles back to the game box.
3. Market Board
Flip the Market board to the appropriate side for the number of players and place the transparent Price markers on the encircled starting prices. Place the six types of Goods tokens (Wool, Milk, Grain, Bread, Cheese and Whisky) and their tiles below the Market in separate piles.
4. Export Board
Place the Export board beside the map, with the side face-up showing the icon matching the number of players. Then:
- Shuffle the Scoring tiles and choose five randomly. Place these face-up in a random order in the five slots on the edge of the Export board.
- Shuffle the Export contracts and create a face-down draw pile. Put one Export contract from the draw pile face-up on each box on the Export board (in a solo and 3 player game, one box remains empty).
- Place the players’ Glory tokens and the Import tokens (Cotton, Tobacco and Sugar cane) off the board. On the 1–2 player side, the dice icons are only relevant for the solo game.
5. Player Starting Items
Each player chooses a colour and takes one Player board and all of the game tokens of their colour. Then each player performs the following actions:
- Place all of your tokens on the corresponding locations on your Player board, four of each of the following: Sheep, Cows, Cheese Dairies, Bakeries, Fields and Distilleries.
- Place the eight Workers on the four forest locations (representing Woodcutters) and on the four mountain locations (representing Miners).
- Take four Port markers in your colour.
- Fill the Merchant track with five cubes, representing Merchants. The remaining two cubes go below your Player board as starting stock.
- Place the Shipping token on the first location on the left of the Shipping track.
- Place the two Technology tiles flipped to the side with the arrow on the upper left-hand side on the respective locations below the Workers.
- Take one Export box tile and place it next to your Player board with the side face-up showing the icon matching the number of players.
6. Turn Order
Determine a starting player randomly. The turn order in the first round is clockwise. Put all players’ Turn order tokens accordingly on the Turn order track on the Export board. In subsequent rounds the turn order is determined by the order in which players pass.
7. Clans & Starting Tiles
Randomly draw one more Clan tile than the number of players (e.g. four Clan tiles in a 3 player game). Then, randomly draw as many Starting tiles as Clan tiles and randomly allocate one next to each Clan tile.
Starting with the last player and going in reverse turn order (counter-clockwise), each player chooses a Clan tile and its corresponding Starting tile and places both in front of themselves. The starting player will thus choose last and will choose between the remaining two clans. The clans are explained in detail in the appendix. Players receive both the Goods and the money shown on their Starting tiles.
Note: Players may never hide any information.
8. Placing the First Workers
Beginning with the starting player and continuing in a clockwise order, each player places one Worker (Woodcutter or Miner) from the top of their Player board onto an empty hexagonal space on the game map. Woodcutters must be placed on an empty space with a forest and Miners must be placed on any empty space with a mountain.
Then in reverse turn order (starting with the player who placed last and continuing in counter-clockwise order), each player places a second Worker. The second Worker does not need to be adjacent to the first placed Worker. Each space can only ever have one unit (Worker, Sheep, Cow, Cheese dairy, Bakery, Field or Distillery) on it at any time.
Each time a Worker is placed (including during the initial setup) players must pay both for the land where they place their Worker and for the Worker itself. The cost of land is indicated by numbers on each space on the map, ranging from £1 to £6. The cost of a Worker is £6 for a Woodcutter and £10 for a Miner (as indicated above the Workers at the top of the Player boards).
Money Icons: Red numbers on the coin icon indicate a cost that you pay. Black numbers indicate money that you receive.
Example: The space shown contains both forest and mountain. Thus, players can place either a Woodcutter (for £6 + £6 = £12) or a Miner (for £10 + £6 = £16) on this space.
Game Structure & Phase 1: Preparation
There are five rounds and four Phases per round. Each round contains the following Phases:
- Phase 1: Preparation Phase — Flip the Scoring tile of the previous round, refill any empty boxes on the Export board and retrieve your Merchants (skip this phase in the first round).
- Phase 2: Action Phase — Players take Actions until all players have passed.
- Phase 3: Production Phase — Units on the game board produce Goods and Income.
- Phase 4: Scoring Phase — Players receive Glory according to the current round’s Scoring tile.
At the end of the fifth round, final scores are calculated and the player with the most Victory Points (VP) is the winner.
Phase 1: Preparation
Flip the previous round’s Scoring tile face-down. If needed, refill any empty boxes on the Export board with Export contracts (according to player count). Players retrieve their own Merchants from the Market and place them next to their Player boards.
Phase 2: Actions
During the Action phase, each player takes exactly one Action per turn, in turn order. Play continues until all players have passed. There are eight possible Actions to choose from, each of which (except for Passing), can be taken multiple times during a round:
- Trade
- Obtain an Export Contract
- Expand
- Upgrade Shipping
- Upgrade Technology
- Hire a Merchant
- Fulfil an Export Contract
- Pass
1. Trade
The Merchants that are in your stock, not on your Player board, are ready to be used in a Trade action. You can send these Merchants to the Market to buy or sell Goods. Place as many Merchants on the buy or sell area of a single Good (designated by the up and down arrows respectively) as the quantity of Goods you wish to buy or sell. These Merchants remain on the Market board until retrieved in the subsequent Preparation phase. You then pay/receive the Good’s current price multiplied by the number of Goods bought or sold. All trades are made with the common Goods pools. Afterwards, the traded Good’s price is adjusted by moving the Price marker according to the arrow of the area (up when buying or down when selling) by as many steps as the number of Goods traded.
- Players may only buy or sell one type of Good during a Trade action. In order to trade different types of Goods they must take the Trade action multiple times.
- It is prohibited to have Merchants from the same player on both the buy and sell area of the same Good. High-speed trading was not common in 19th-century Scotland!
Example: A player wants to buy two units of Whisky at the current price of £10. They place two Merchants above the up arrow of the Whisky column, pay £20, take two Whisky barrels from the supply, and put them into their stock. The Whisky price then increases by two steps to £12.
2. Obtain an Export Contract
Pay the current round cost to take any Export contract from the Export board and place it on your empty Export box. The cost is determined by the game round and is indicated next to the Scoring tiles on the Export board. Note that in the first round, players receive £5 when obtaining an Export contract rather than paying a cost.
You can have only one unfulfilled Export contract on your Export box (exception: Clan Buchanan). You must fulfil your Export contract before obtaining a new one. It is not possible to get rid of unfulfilled Export contracts.
3. Expand
Place one unit (Sheep, Cow, Cheese dairy, Bakery, Field, Distillery, Woodcutter or Miner) from the top of the respective column of your Player board onto any empty space of the map that is neighbouring or within Shipping reach of any of your units. Pay for the costs of the unit (coin with red number above the respective unit) and for the space (coin with red number between £1 and £6).
Expansion Rules & Definitions
- Neighbouring: adjacent space with no river in between.
- Within Shipping reach: a space that you can reach with your current Shipping level.
- Land Restrictions: Land types only support specific units:
- Grasslands: Sheep, Cows, Cheese dairies, Bakeries, Fields and Distilleries
- Forests: Woodcutters
- Mountains: Miners
If a space contains more than one of these land types, you can place any corresponding unit on it. If you have deployed all your Woodcutters you cannot expand to a space that contains only forest. Likewise, if you have deployed all your Miners you cannot expand to a space that contains only mountain.
Neighbourhood Bonus
If you expand into a space neighbouring another player’s unit (adjacent and no river in between), you may immediately perform an additional Trade action and buy the type of Good produced by the neighbouring unit from the common stock.
- You cannot buy more than three pieces of the same type of Good per turn (four pieces in a 2 player game).
- The price of Basic goods (Wool, Grain, Milk) is reduced by £2.
- The price of Processed goods (Bread, Cheese, Whisky) is reduced by £3.
- Proceed with the purchase as explained under the Trade action. You need to have the appropriate number of Merchants available to use this bonus. Prices are adjusted the same way as in the Trade action.
- If you expand into a space neighbouring several opponent spaces with units deployed, you may use the Neighbourhood bonus for each of these units.
- The Neighbourhood bonus can only be used immediately after expanding.
Example: If a player expands into a space neighbouring another player’s Distillery, they may buy Whisky. If the current Whisky price is £10, then they could buy three Whisky (or four in a 2 player game) from the general supply at £7 each by placing the appropriate number of their Merchants on the Whisky’s up arrow. If there was also an opponent’s Cheese dairy neighbouring the space they expanded into, that current player could also buy up to three Cheese at a discount (or four in a 2 player game) if they had sufficient Merchants to do so.
Building Bonus
If you deploy your fourth building of one type onto the map (Cheese dairy, Bakery or Distillery) AND your Export box is empty, you may immediately draw three Export contracts from the draw pile. Take either one or none of the Export contracts, and the unselected Export contracts are returned to the bottom of the draw pile. If you take an Export contract you pay the costs as if you performed the action Obtain an Export Contract. This bonus is still considered part of the Expand action.
4. Upgrade Shipping
Pay £4 to move your Shipping marker forward one space to increase your Shipping reach. Doing so allows you to expand across rivers and lochs. Regardless of Shipping level, a player may never hop across a land space, not even along a river.
Shipping Levels:
- No shipping: You cannot expand across any type of water.
- River-crossing: You can now expand directly across a river to an adjacent space.
- 1-loch: In addition to river-crossing, you can now expand across one loch space.
- 2-loch: In addition to river-crossing, you can now expand across two loch spaces etc.
5. Upgrade Technology
Players can increase the income from their Workers (Woodcutters and Miners) by upgrading their equipment. Upgraded Workers produce £2 more in the Production Phase of each round. To upgrade a Worker technology, pay £10 and flip over the corresponding Technology tile on your Player board.
If you receive a Bonus Upgrade (see Direct Export Bonuses below) and you choose the Technology upgrade action you pay £5 instead of £10.
6. Hire a Merchant
Players start with two Merchants in their stock. To hire a new Merchant, pay £4 and take an additional Merchant from your Player board and add it to your stock. From now on, you may use this Merchant for future Trade actions.
7. Fulfil an Export Contract
To fulfil an Export contract that is on your Export box, pay the Goods listed on the left half of the Export contract tile. Then you receive the benefits shown on the right half of the tile. These benefits include Import goods such as Hops, Cotton, Tobacco or Sugar cane and Direct export bonuses.
When a player fulfils an Export contract with the import goods Cotton, Tobacco or Sugar cane, they move the respective token on the Export board track by as many steps as the amount imported. If the token reaches or passes a marked step, the player gains £1 (if they forget to move the import token at the point of fulfilling an Export contract, they do not get the bonus afterwards!). As soon as the player has fulfilled an Export contract, they place the Export contract tile face-up next to their Export box, which is open again for a new Export contract.
- Export contracts never require Grain or Milk but may require any combination of the other goods.
- Export contracts that require Meat (Beef or Mutton) can only be fulfilled by slaughtering Cows or Sheep. A player slaughters their animals, as part of the Fulfil an Export Contract action, by removing the animal from the map and placing it back onto their Player board. Note that this will reduce their Milk or Wool production. It will also free the space where the animal was and any player will be able to expand there, subject to the normal expansion rules. Slaughtering is only allowed to fulfil an Export contract and does not require a separate turn.
Direct Export Bonuses
There are three Direct export bonuses that players can take in any order to gain an immediate advantage:
- Money: taken immediately from the supply.
- Free space: allows the player to immediately take an Expand action without paying the land cost of the space into which they expand. The player must still pay the unit cost, and all rules for expanding and Neighbourhood bonuses apply.
- Bonus Upgrade action: choose one of the following Actions:
- A Technology upgrade action for the discounted price of £5.
- A Shipping upgrade action at no cost.
- Hire a Merchant from the Player board at no cost. Alternatively, the player may take one of their Merchants back from the Market instead of hiring a new one.
If a player obtains multiple Bonus upgrade actions they can choose the same or different upgrades.
8. Pass
On your turn, if you cannot or do not want to take any more Actions, you must Pass and stop taking Actions for the remainder of this round. After Passing, move your Turn order token to the leftmost available position of the next round and receive the Pass bonus money indicated. The order in which players pass determines the turn order for the next round.
Free Action: Using a Port bonus tile
If a Port bonus tile is neighbouring, or within Shipping reach of, any of a player’s units, that player may use the corresponding Port bonus in addition to whatever Action they perform on their turn (a Port bonus tile can be used before or after the player’s main Action). A player can use the Port bonus immediately or in any future turn (as long as the player’s unit is neighbouring or within shipping reach).
Once you use the Port bonus, put a Port bonus marker of your colour next to the used Port bonus tile to indicate you have used it. Each player can use each Port bonus tile only once in the game (several players can use the same Port bonus tile, though). A player may use multiple Port bonus tiles in one turn.
Phases 3 & 4: Production & Round Scoring
Phase 3: Production
During the Production phase players receive Income and produce Goods from units that are deployed on the map. The amount of money and Goods produced in this phase is indicated by the empty slots on the Player board from which the units have been removed and that now show the Income icon .
The Production phase follows this order:
- Worker Income: Each deployed Worker earns you money:
- Each Woodcutter earns £4 (£6 with the Technology upgrade).
- Each Miner earns £6 (£8 with the Technology upgrade).
- Produce Basic goods:
- Each Sheep produces one Wool.
- Each Cow produces one Milk.
- Each Field produces two Grain.
- Produce Processed goods (optional):
- Each Cheese dairy may process one Milk into one Cheese.
- Each Bakery may process one Grain into one Bread.
- Each Distillery may process one Grain into one Whisky.
The Basic goods spent to produce the Processed goods can come from anywhere: including received during the current Production phase, a previous Production phase, purchased from the Market on a previous turn, etc.
- Hint: It is recommended that players store their current Goods and money below their Player boards and put the Goods they just produced above their Player board so players can check if they took the correct amount of Goods.
- Hint: Once players are familiar with how the Production phase works they can collect their Income after Passing to speed up the game.
Phase 4: Scoring
In this phase players earn the Glory bonus indicated on the bottom half of the current Scoring tile, if they have fulfilled the requirement in the top half. Glory is tracked by moving the Glory markers on the track on the Export board (take or flip a Glory marker when you complete a lap). Each Scoring tile is explained in the Appendix.
End of Game & Final Scoring
Final Scoring takes place after five rounds are completed. Fill in the VP for each player on the Scoresheet. The player with the most VP is proclaimed the greatest Clan Chief of Caledonia and wins the game!
Final Scoring Categories
- Glory: 1 VP for each step on the Glory track.
- Basic goods: 1 VP for each Basic Good in your stock.
- Processed goods: 2 VP for each Processed good in your stock.
- Money: 1 VP for every £10. Leftover money breaks ties on the final score.
- Hops: 1 VP for each Hops imported listed on your fulfilled Export contracts.
- Cotton, Tobacco and Sugar cane: 3, 4 or 5 VP each according to their rarity. The Import token that was moved the furthest along the track (imported the most by all players) is worth 3 VP each, the second most is worth 4 VP each, and the least Imported Good is worth 5 VP each. In case of a tie, Cotton is the rarest, followed by Tobacco, then Sugar cane. Multiply the number of Imported Goods on your fulfilled contracts by their respective VP.
- Export Scoring: Count the number of fulfilled Export contracts:
- 3 or 4 players: 12 VP for the player with the most fulfilled Export contracts, 6 VP for the second most.
- 2 players: 8 VP for the player with the most fulfilled Export contracts only.
- Ties: Evenly divide the VP of the respective tiers among tied players (round down if necessary).
Settlement Scoring
Each player counts the number of their Settlements within Shipping reach of each other. A Settlement is defined as a cluster of neighbouring units of one colour (adjacent and no river in between). Single units that are not neighbouring to any other unit of the same colour are also considered Settlements. If not all of your Settlements are within Shipping reach of each other, the biggest group of Settlements within Shipping reach of each other counts in this scoring.
- 3–4 players: The player with the most Settlements within Shipping reach: 18 VP; second-most: 12 VP; third-most: 6 VP.
- 2 players: The player with the most Settlements within Shipping reach: 12 VP; second-most: 0 VP.
- Tied players share the points the same way as in the Export scoring.
This scoring is NOT about having expanded to the most spaces, nor is it about having built the biggest settlement!
Example: If the red player has 1-loch Shipping level, red has only three Settlements within Shipping reach. If the black player has 2-loch Shipping level, the black player has five Settlements within Shipping reach. The three encircled red units are a single Settlement because they are neighbouring each other. All other red units are single-unit Settlements. The two red units at the top are two Settlements because they are separated by a river. Red has four Settlements in total. However, the Settlement at the very bottom left is two loch spaces away from the three-unit Settlement and thus not within Shipping reach of any of the red Settlements. Nevertheless, this is enough to connect the Settlement with three units to the two single Settlements at the top, since 1-loch Shipping is sufficient for red to cross the one loch space in between. Therefore, only three of the red player’s four Settlements are within Shipping reach and count towards the Settlement scoring.
- Hint: Slaughtering your animals can be beneficial or detrimental for this scoring. You can create more Settlements by slaughtering (splitting one bigger Settlement into two smaller Settlements) or harm your scoring because some Settlements might no longer be within Shipping reach.
- Note: If desired, starting in the fourth or fifth round of the game, you can start to track the number of settlements within shipping range per player on the Export board track using the Settlement tokens.
Game Modes & Variants
2 Player Game
In the 2 player game you play on a smaller map. The shaded land spaces at the edge (additionally marked by mist) are not part of the active map and so players cannot expand into them. The non-shaded spaces adjacent to the shaded spaces are the border spaces of the active map. This is relevant for Scoring tile #5 and Clan Fergusson. All loch spaces are part of the active map.
Solo Game
In this variant you try to achieve the highest possible score. You play with the same smaller map as in the 2 player game. Use Workers of different player colours to act as neutral pieces and put them on all spaces of the active map that have a cost of £1. All these spaces will be unavailable for you for the whole game. In a solo game you cannot take a Neighbourhood bonus or track Imported goods on the Export board.
Randomly draw and place five Export contracts face-up on the Export board before you start the game. Each time you pass you receive a Passing bonus of £16.
Additional Phase: Market Phase
At the beginning of rounds 2-5 during the Preparation phase and after Merchants were retrieved, the prices of three randomly chosen Goods are changed once each. Roll the Goods and the Price dice. The Goods die shows the price of which Good is changed. Reroll the Goods die if it shows a Good whose price was already changed in this phase.
Check whether the price of this Good is below (low prices) or above (high prices) the brackets on the Market. The brackets next to the Market indicate the medium range. Prices above are high, and those below are low.
- When the price is low or high then you ignore the algebraic symbol (- or +).
- When the price is low then the price increases by the absolute value of the Price die.
- When the price is high then the price decreases by the absolute value of the Price die.
- When the price is in the medium range, then the price changes exactly according to the Price die. A ‘-3’ will cause the price to decrease by three steps. A ‘+1’ will increase the price by one step.
Market Dice: Goods die (Wool, Grain, Milk, Bread, Cheese, Whisky); Price die (-3, -2, -1, +1, +2, +3).
Solo Refill Export Contracts
Fill all empty slots on the Export board with new Export contracts from the draw pile. Your last Price die roll shows which of the six Export contracts gets removed. Find the intersection of the algebraic symbol and the numeral on the Export board and remove that Export contract from the game. Each Action phase starts with five Export contracts.
Solo Export Scoring
- Fulfilled Export contracts: 7 or more → 12 VP
- Fulfilled Export contracts: 6 → 8 VP
- Fulfilled Export contracts: 5 → 4 VP
Solo Settlement Scoring
- 14 or more Settlements → 18 VP
- 11–13 Settlements → 12 VP
- 8–10 Settlements → 6 VP
Solo Result Tiers
- 0–115 VP: Newbie
- 116–130 VP: Rookie
- 131–145 VP: Average
- 146–160 VP: Expert
- 161+ VP: Genius!
Game Variants
These variants can be played in any combination.
Simplifications (for your first game)
- Static Import Goods: No matter how much Cotton, Tobacco or Sugar cane was imported, each is worth 4 VP each at the end of the game. There is no need to track Imported goods on the Export board.
- Without Scoring and/or Port Tiles: Players can simplify the game by ignoring the Scoring tiles and/or the Port tiles during setup and play.
Tighter Game Map
If players prefer a tighter game map, they can agree to use the backsides of four spare Port tiles to cover any four land spaces of the active map during setup in a 2-3 player game, preferably one tile per module. These spaces are not available for the Expand action.
Without Clans
If players prefer more symmetric starting conditions they can ignore the clans during setup and play. In addition to the Goods and money on the chosen Starting tiles, players receive:
- Starting player: £0
- Second player: £2
- Third player: £4
- Fourth player: £6
Clan Auction (for experienced Clan Chiefs)
If players play very competitively, they may auction the clans:
- Randomly draw as many Clan tiles as the number of players and allocate each Clan tile a random Starting tile.
- Randomly determine a player who bids any number of VP (or 0) to be able to choose a clan first. The player to their left can bid any higher amount of VP and so on until there is a winning bid that no player wants to outbid (30 VP is the highest possible bid).
- If a player does not want to bid higher, they cannot bid again this auction round.
- The player with the winning bid writes down their bid as negative VPs on the Scoresheet, places their token on the first space of the Turn order track and takes the Clan tile along with the corresponding Starting tile.
- The player to their left bids for one of the remaining clans and so on until the second clan is chosen by the player with the winning bid, who then is second on the Turn order track etc.
- The last player without a clan is given the remaining Clan tile and Starting tile without losing any VP and is designated last in turn order.
Clans Reference
Clan Buchanan
Several members of this clan were prosperous ‘Tobacco Lords’ in Glasgow. Buchanan Street in Glasgow was named after Andrew Buchanan.
- You have an additional Export box and can thus obtain one or two Export contracts in one turn.
- If you obtain just one Export contract per turn, you pay the regular cost of the current round. However, if you obtain two Export contracts (from the Obtain an Export contract action or from the Building bonus) in one turn, you pay the cost only once instead of twice.
- If you are given the Building bonus, you draw six instead of three Export contracts and you can select 0–2 Export contracts (this also applies to Port bonus tile #8).
- Fulfil an Export contract action: You can fulfil up to two Export contracts per turn.
- In the first round: If you obtain two Export contracts in a single turn, you receive the +£5 bonus only once. However, during each turn in which you obtain an Export contract you gain the £5.
Strategy: Focus on smaller Export contracts and fulfil most in the last two rounds.
Clan Campbell
Colen Campbell was a pioneering Scottish architect and architectural writer, credited as a founder of the Georgian style.
This clan gets better at building factories of Processed goods the more often the clan builds them:
- The first factory of each type is £3 cheaper.
- The second and third factory of each type is £4 cheaper.
- The fourth factory of one kind is £5 cheaper.
Example: Campbell builds three Bakeries and one Distillery. The first Bakery costs £8 – £3 = £5, the 2nd and the 3rd Bakeries cost £8 – £4 = £4. The Distillery is £3 cheaper and costs £10 – £3 = £7.
Strategy: Produce a lot of one type of Processed good that is in high demand in Export contracts. Selling your Processed goods is a good source of income too.
Clan Cunningham
Cunninghame is the northern part of Ayrshire, one of the most agriculturally fertile regions of Scotland where raising cattle has traditionally been important.
You produce butter out of Milk. At the end of the Production phase, you may discard any number of Milk tokens in your stock (no merchants needed). For each Milk token you discard, gain £8. Do not adjust the Milk price.
Strategy: Produce as much Milk as possible and buy some if the price is low. Avoid producing Cheese as it consumes your precious Milk!
Clan Fergusson
Clan Fergusson was historically widespread across Scotland from Ross-shire in the north to Dumfriesshire in the south.
- Placing initial Workers: You start with three starting Workers (for which you still must fully pay). In addition you start with 2-loch Shipping level for free in a 3–4 player game (1-loch Shipping in a 1–2 player game).
- You place your third Worker after all other players have placed theirs.
- You must place all three starting Workers on border spaces of the active map. You must still pay for all three workers and the land costs.
Strategy: Use your Shipping reach and Port bonus tiles!
Clan MacDonald
Clan MacDonald is a Highland clan from the Inner Hebrides with the clan motto per mare per terras (‘by sea and by land’).
Your Clan tile is put on top of the Miner/Woodcutter area of your Player board. Your Technology area remains empty because you cannot perform the Technology upgrade action.
You have three abilities:
- You can use all of your Workers either as Woodcutters, Miners or as Fishermen (even when placing the first workers); all your Workers cost £6 and provide £4 income. Fishermen can be placed on or moved to all empty loch spaces and Port bonus tiles, even in a 1–2 player game. There are no land costs on loch placements. Two Fishermen may never be adjacent to each other.
- Once per turn, you can move a Fisherman to an adjacent loch space by rowing but only before your main Action.
- In 1–2 player games, you start with river-crossing Shipping for free.
You still need the appropriate Shipping reach to expand across loch spaces. Land spaces adjacent to Fishermen are considered to be neighbouring and thus accessible in the Expand action even without any Shipping reach. The Neighbourhood bonus can be taken advantage of when deploying a Fisherman as well, but not when rowing.
Strategy: Use your rowing ability to increase your reach and for your Settlement scoring.
Clan MacKenzie
Clan MacKenzie bought the Dalmore Distillery in 1867, known for its very exclusive whiskies.
- In the Production phase you gain £3 for each unit of Whisky you produce. You do not have to discard any Whisky to get this money.
- Whisky Cellar: At the beginning of each Production phase, Whisky barrels already in the cellar age and are moved one spot to the right. The Whisky barrel starting a Production phase in the rightmost space of the cellar is placed into your stock. You can move any Whisky barrel from the cellar into your stock at any time. When you move aged Whisky out of the cellar into your stock, you gain £7 or £15 respectively.
- At the end of each Production phase you may then put one freshly-produced Whisky barrel in the cellar on the left spot so it can age in later Production phases. For the purposes of Scoring tile #2, Whisky in the cellar does score.
Strategy: As long as the Whisky price is medium or high, selling Whisky provides you with a lot of money to reinvest. When the Whisky price drops, ageing the Whisky and/or exporting it is better.
Clan Robertson
Clan Robertson is one of the oldest clans of Scotland, from the district ‘Struan’ at the confluence of the Errochty Water and Garry rivers (‘Sruthan’ meaning ‘streams’).
Each time you place a unit in a river delta (a space that is adjacent to a river just flowing into a loch) you pay £3 less (£2 less in games with 1–2 players) off the total cost. This applies to placing your initial two Workers as well.
Example: In a 4 player game, you build a Bakery (cost £8) on a river delta space with cost £1. The final cost is £8 + £1 – £3 = £6.
Strategy: Start at or near to river deltas and expand as much into river delta spaces as possible. Slaughtering livestock on river deltas allows you to expand on river deltas more often.
Clan Stewart
Clan Stewart is a Highland clan which produced monarchs such as Mary Stuart and Queen Anne.
- You start with three additional Merchants (five total) and river-crossing Shipping level for free.
- Furthermore, you gain £1 each time you trade at the Market (in the case of making a purchase, you receive the money before paying), no matter how many units you trade.
- If you use the Neighbourhood bonus and trade multiple types of Goods in one turn, you gain £1 for each type of Good traded.
Hint: It is easier to simply take a £1 Coin each time you visit the Market.
Strategy: Try to get the +£1 bonus on the Market as often as possible. It can help producing a bit of everything and selling and buying small amounts of each type of Good.
Appendix: Port & Scoring Tiles
Port Bonus Tiles
- Gain £10: Gain £10 immediately.
- Manipulate Price: Manipulate the price of one Good by three steps on the Market before trading this Good.
- Exchange Units: Take any two of your units from your Player board (other than Fields) and exchange them with any two of your units on the map (other than Fields) at no cost. The two new units must be different from the two old units. The new units must match the land type on which they are deployed. If you qualify you can obtain the Building bonus. You cannot obtain any Neighbourhood bonus during this port action.
- Gain £5 & Building Bonus: You gain £5. If your Export box is empty you can perform the Building bonus (and pay the respective costs if you decide to take an Export contract, as normal).
- Meat Contract Discount: Use this bonus in a turn when you fulfil an Export contract requiring Meat. The fulfilled Export contract requires 1 fewer slaughtered animals.
- Trade Basic Goods: Discard one Basic good of your choice and gain any three Basic goods of your choice (including the type you discarded).
- Trade Processed Goods: Discard one Processed good of your choice and gain any two Processed goods of your choice (including the type you discarded).
- Upgrade & Glory: Receive one Bonus upgrade and gain 3 Glory.
Scoring Tiles
- Basic Goods: Gain 1 Glory for each Basic good in your stock.
- Processed Goods: Gain 3 Glory for each two Processed goods in your stock.
- Deployed Livestock & Production Buildings: Gain 1 Glory for each of your deployed Sheep, Cows, Cheese dairies, Bakeries and Distilleries and 2 Glory for each Field.
- Deployed Workers: Gain 2 Glory for each of your deployed Workers (including Fishermen if you are Clan MacDonald).
- Border Space Units: Gain 3 Glory for every two units on border spaces of the active map. In a game with 1-2 players, spaces adjacent to the shaded mist spaces are considered border spaces.
- Export Contract Goods (Cotton, Tobacco, Sugar cane): Gain 1 Glory for each unit of Cotton, Tobacco and Sugar cane on your fulfilled Export contracts.
- Export Contract Meat: Gain 2 Glory for each unit of Meat on your fulfilled Export contracts.
- Upgrades: Gain 1 Glory for each of your Upgrades (Technology upgrades, Shipping upgrades and hired Merchants). Just count each spot left of your Shipping marker, each free Merchant spot and each upgraded (flipped) Technology tile. You also gain Glory for Upgrades your clan started with.
Kickstarter-Contributed Tiles
These tiles were created and selected by the Kickstarter community during the initial funding campaign and were not playtested by Karma Games.
- Port Tile: Pay £3, put a Port bonus marker on this tile, and then use any one of the other three Port tiles in play.
- Scoring Tile: Gain 2 Glory for each of your occupied spaces with the cost of £5 or £6.
- Clan ClachSwen Tile: Each time you fulfil an Export contract which gives you Hops, you can immediately produce 1 Beer for each unit of Hops imported at the cost of 1 Grain each. For each unit of Beer produced, you gain a certain amount of money. You can produce max. 3 Beer per Export contract.