
A Feast for Odin
2016
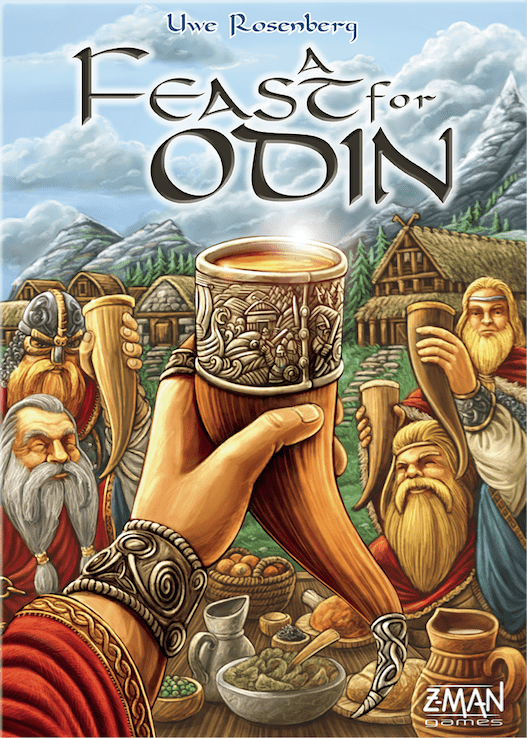
Lead a Viking tribe through raids, exploration, trade, and tile placement as you build wealth and cover the penalties in your central hall.
120
minutes
1 - 4
player(s)
12+
Medium Heavy

About this board game
A Feast for Odin is a saga-inspired board game for 1–4 players, with games lasting about 120 minutes. Players relive the achievements, expeditions, and pillages of the peoples known today as Vikings, while pursuing a financially secure position in society.
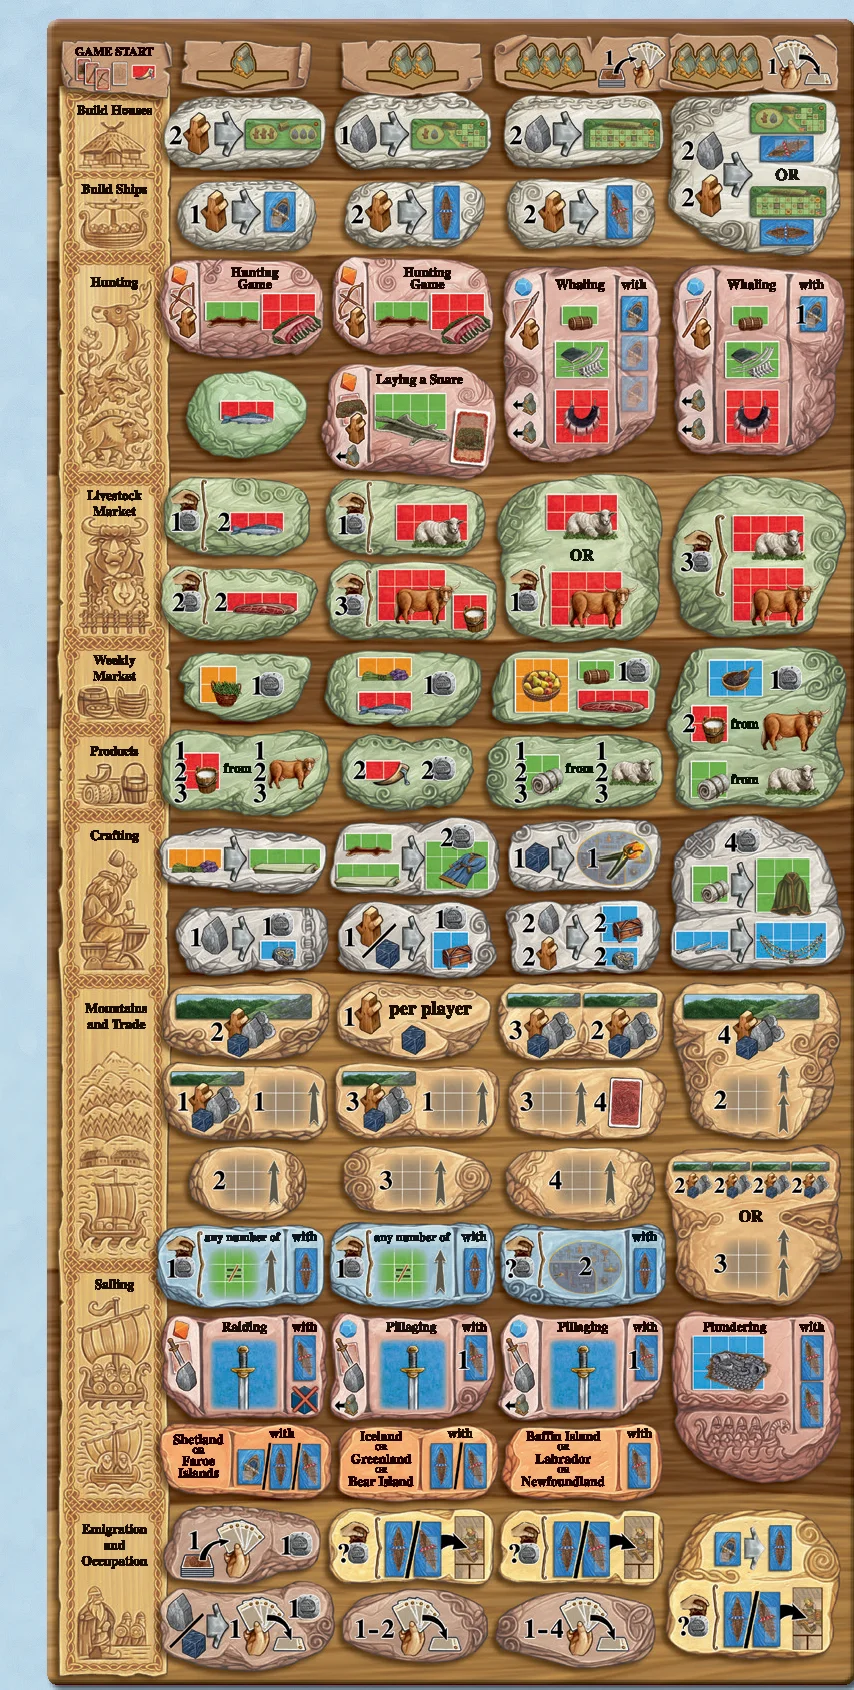
Each year follows a familiar sequence of preparation, worker placement, and meeting the requirements of your feast. The central action phase offers 61 different options, arranged across four columns. Activating options in later columns requires more Vikings, but these actions are proportionally more powerful.
You can raid and explore new territories, collect goods, and develop your growing engine. Expansion and hunting alternate with development and cultivation, creating a constant balance between the rewards you want and the risks you are willing to accept.
- Tile placement: Cover the substantial negative value in your central hall with green and blue tiles.
- Economic growth: Arrange tiles to cover coin icons, increase income, and encircle printed icons for additional value.
- Feasting: At the end of each round, fill your feast table with alternating types of food.
- Expansion: Long halls and island colonies can provide major rewards, but bring penalties of their own.
The game’s many routes to victory support different approaches, with risks balanced against rewards. Your possessions determine your final result, so every raid, trade, development, and placement contributes to the value of your growing Viking domain.
Released in 2016, A Feast for Odin combines worker placement, exploration, collecting goods, and spatial tile placement into a broad Viking-era challenge.
Mechanics
Designer
Illustrator
/pic7182955.jpg)

Board Game Rules for
A Feast for Odin
By Uwe Rosenberg — Rulebook
“A Feast for Odin” is a saga in the form of a board game. You are reliving the cultural achievements, mercantile expeditions, and pillages of those tribes we know as “Vikings” today—a term that was used quite differently towards the end of the first millennium.
When the northerners went out for a raid, they used to say they headed out for a “viking.” Their Scandinavian ancestors, however, were much more than just pirates. They were explorers and founders of states. Leif Eriksson is said to be the first European in America, long long before Columbus.
In what is known today as Normandy, the intruders were not called Vikings but “Normans.” One of them is the famous William the Conqueror who invaded England in 1066. He managed to do what the king of Norway failed to do only a few years prior: conquer the Throne of England.
The reason why the people of these times became such strong seafarers is due to their unfortunate agricultural situation. Crop shortfalls caused great distress.
In this game, you will raid and explore new territories. You will also experience their day-to-day activities: collecting goods to achieve a financially secure position in society.
In the end, the player whose possessions bear the greatest value will be declared the winner.
Component List
Goods boxes and Dice
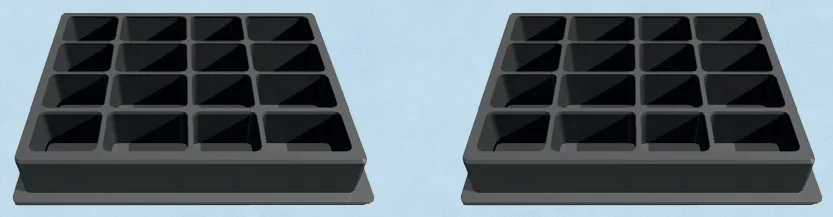
- 2 goods boxes to store the goods tiles
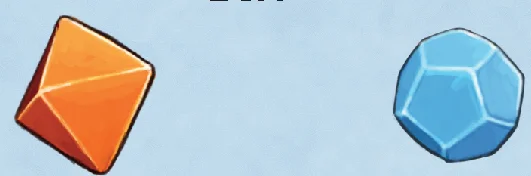
- 1 orange eight-sided die
- 1 blue twelve-sided die
Game Boards
- 1 large action board with action spaces
- 4 home boards (one for each player)
- 1 small supply board for the ships
- 4 two-sided exploration boards
- 1 oval supply board for the special tiles
Tiles
- 15 special tiles
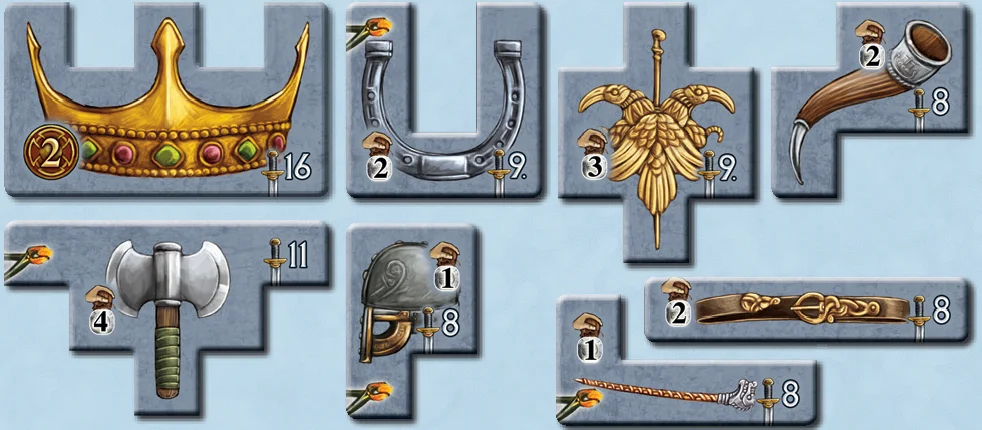
- 2 extension tiles to extend the action board
- 1 large round overview tile
- Building tiles:
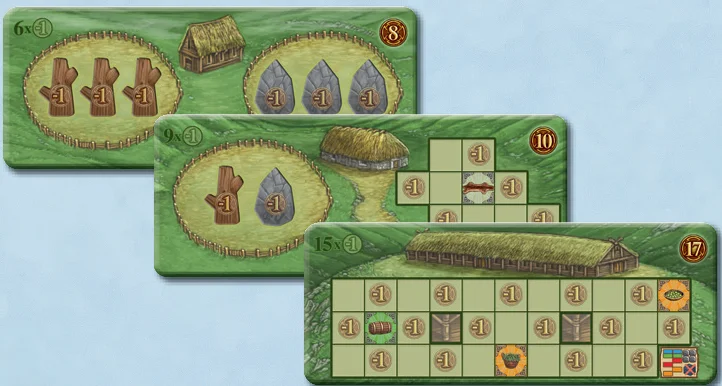
- 3 “shed” building tiles
- 3 “stone house” building tiles
- 5 “long house” building tiles
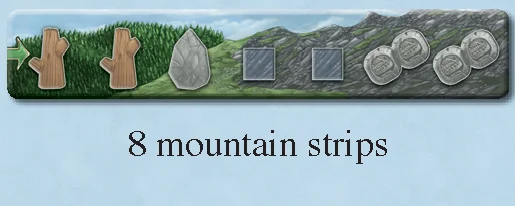
- 8 mountain strips
- 32 ship tiles, including:
- 10x whaling boats
- 12x knarrs
- 10x longships

Money, Wooden Goods, and Other Components
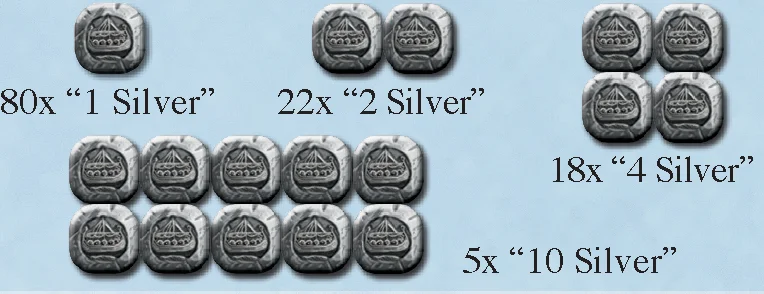
- Money: 125 silver coins, including:
- 80x “1 Silver”
- 22x “2 Silver”
- 18x “4 Silver”
- 5x “10 Silver”
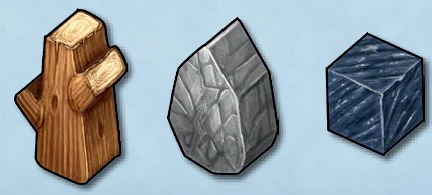
- Wooden Goods: 32x wood, 24x stone, and 40x ore
- Other Wooden Components:
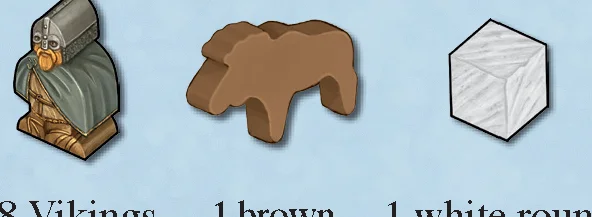
- 48 Vikings (12 for each player)
- 1 brown start player moose
- 1 white round tracking cube
- 7 “Thing Penalty” tiles (The back of each is different: 5 wood, 5 stone, 3 ore, 3 bow and arrow, 3 snares, 3 spears, and 3 long swords)
- 12 plastic bags, 1 appendix, 1 almanac, and this rulebook.
Cards and Goods
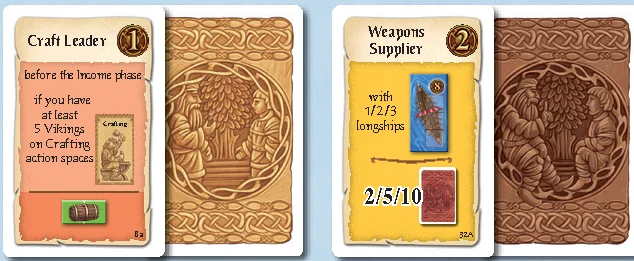
- 190 Occupations, divided in three decks A, B, and C:
- 45 light brown starting occupation cards
- 145 dark brown occupation cards
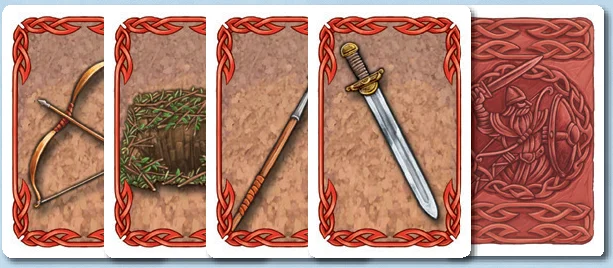
- 47 red Weapon cards:
- 12x bow and arrow
- 12x snare
- 12x spear
- 11x long sword
- 346 goods tiles, including:
- Food (front side: farm product / back side: animal product):
- 25x peas / mead
- 20x flax / stockfish
- 20x beans / milk
- 20x grain / salt meat
- 17x cabbage / game meat
- 15x fruits / whale meat
- Animals (front side: livestock / back side: pregnant dam):
- 18x sheep / pregnant sheep
- 15x cattle / pregnant cattle
- Equipment (front side: craft product / back side: luxury good):
- 43x oil / rune stone
- 30x hide / silverware
- 30x wool / chest
- 20x linen / silk
- 20x skin and bones / spices
- 20x fur / jewelry
- 18x robe / treasure chest
- 15x clothing / silver hoard
- Food (front side: farm product / back side: animal product):
Before Your First Game: Organizing the Goods
This game comes with a large number of goods tiles. In order to save you the hassle of storing the tiles in an assortment of plastic bags, we have provided two goods boxes so that you can better store and organize the goods tiles.
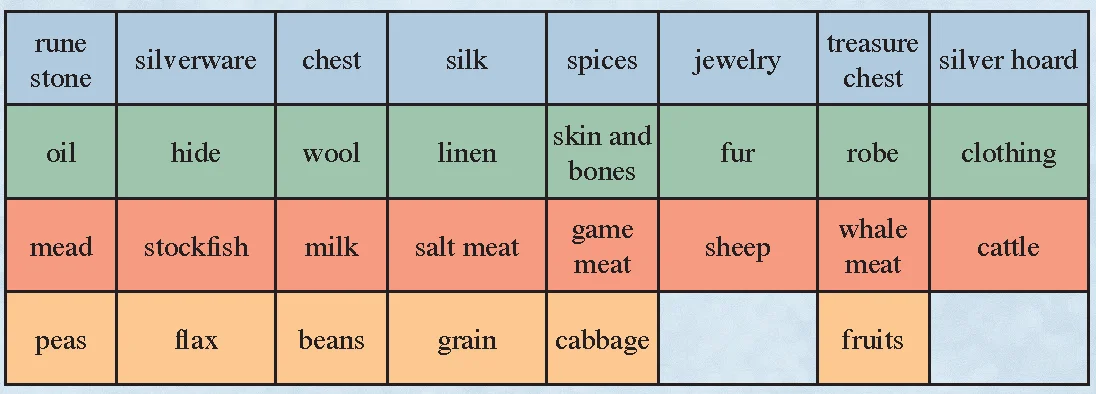
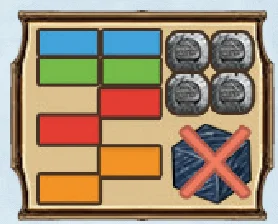
Each row stores goods of the same color and each column stores goods of the same shape. Note that orange and red goods of the same shape are on two sides of the same tile, as are green and blue goods. Divide these goods (except for sheep and cattle) into two piles and place each pile in its designated compartment.
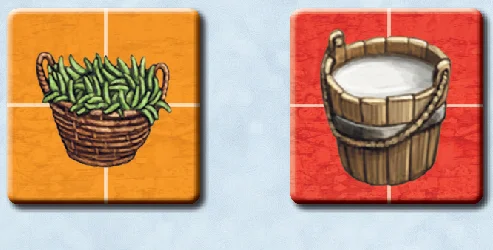
For example, every “beans” tile has milk on the other side. Peas and mead are two sides of the same tile, as are oil and rune stone. Sheep and cattle are on both sides of their respective tiles.
The game provides more tiles than you would normally need, even more than you can fit into the goods boxes. Store any excess tiles as a reserve in the provided bags.
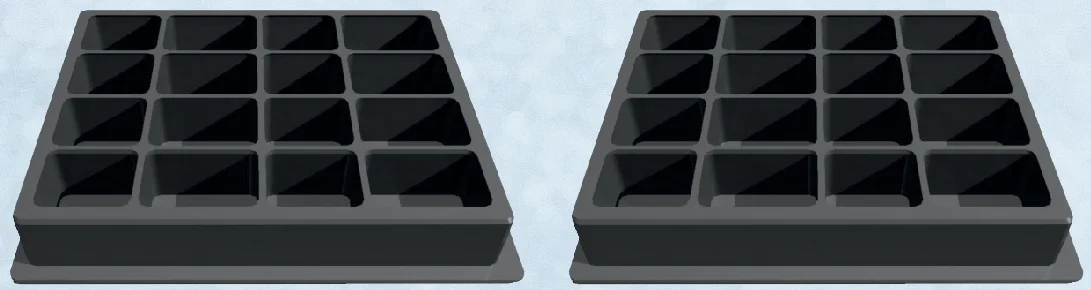
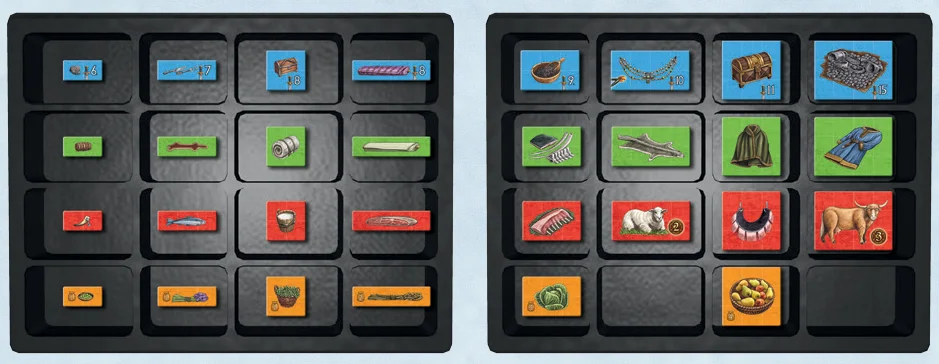
The following table shows how you should organize the goods tiles in the goods boxes. The goods boxes have alternating small and large compartments. In the first goods box, the small compartments are reserved for goods of the size of peas and beans, and the large ones are reserved for goods of the size of flax and grain. In the second goods box, the small compartments are meant for goods of the size of cabbage and fruits, and the large ones for goods of the size of sheep and cattle.
Action Board and Goods Boxes
- Place the large action board in the middle of the table.
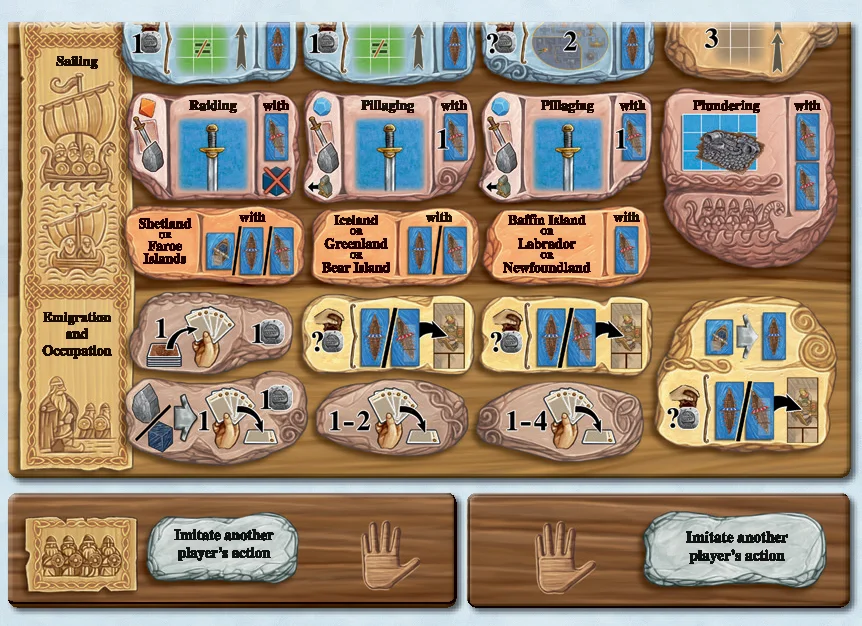
- In a 4-player game, add the two extension tiles to the game board as shown in the illustration, randomly choosing which side is face up. (In games with 1 to 3 players, you do not need these tiles.)
- Open the goods boxes and place them on the table next to each other, so that all players can easily access them.
Supply Boards for Special Tiles and Ships
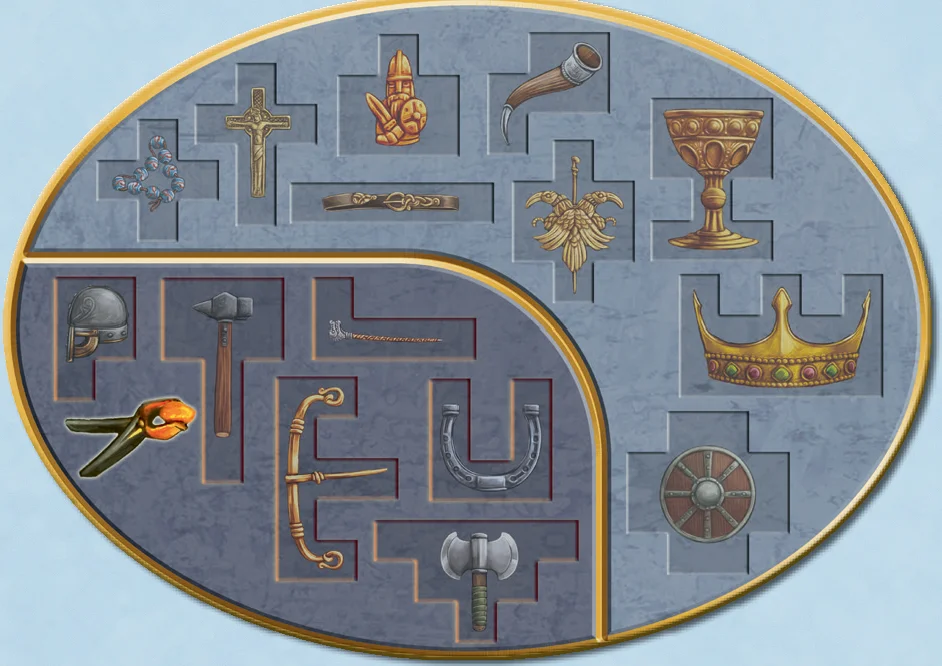
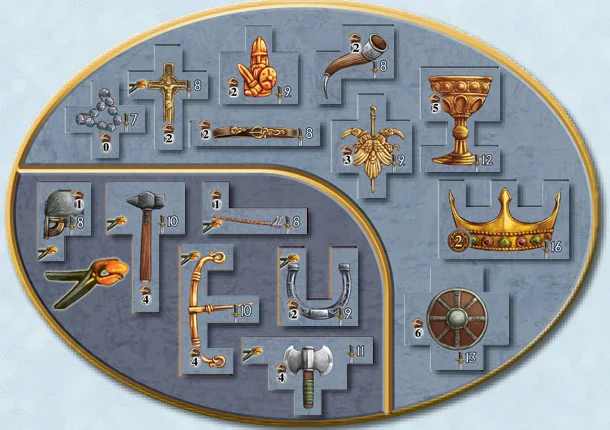
Place the supply boards for special tiles and ships next to the goods boxes. Aside from the blue standard goods in the top row of the goods boxes, there is a number of special tiles. Unlike the standard goods, which are supposed to be in unlimited supply, there is only one copy of each special tile. They are considered to be blue and follow the same rules as the blue good tiles. (Also, the special tiles are the same color on both sides.)
- Place the special tiles on the oval supply board.
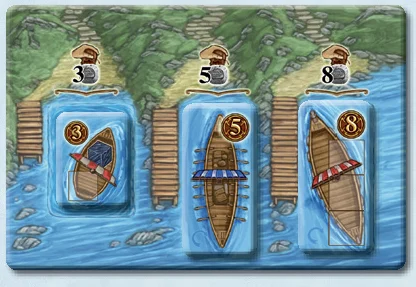
- The other supply board is for the three types of ships. Sort the ships by type and place them face up in separate stacks on the supply board.
Occupation and Weapon Cards
There is an “A”, “B” or “C” at the bottom right of the occupation cards, indicating to which deck each card belongs. We recommend beginners only use cards from deck A, while experienced players use cards from both deck B and C, or just shuffle every deck together. Sort the occupation cards according to their light or dark brown back to form two stacks.
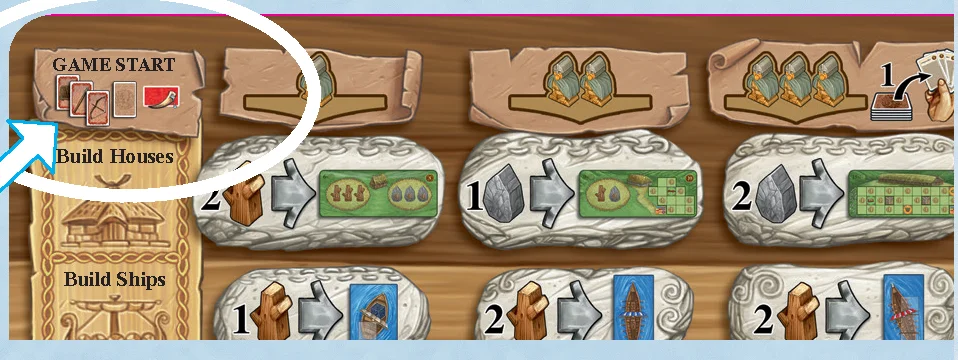
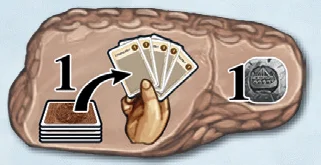
An illustration at the top left of the game board indicates what you receive at the start of the game:
- Each player draws 1 starting card from the stack of light brown occupation cards into their hand. (After that, remove the remaining light brown cards from the game.)
- Each player takes 1 “bow and arrow”, 1 “snare”, and 1 “spear” weapon card.
- Each player takes 1 “mead” goods tile.
Always keep all tiles and cards face up in front of you and visible to all players. Your starting card suggests which path you might want to take during the course of the game.
Shuffle the remaining weapon cards and place them face down in a stack on the table. Shuffle the occupation cards with a dark brown back and also place them face down in a stack on the table. (By no means will you need all of the cards each game. Set up only part of them and replenish the stack later, if need be.)
Your Personal Boards and the Vikings
Each player takes a home board. The home boards are two-sided:
- One side is for a game lasting 7 rounds (long game).
- The other side is for a game lasting 6 rounds (short game).
Decide how many rounds you wish to play and place the according side face up. (The long game is the main version of the game. We recommend the short game to all players who would like to familiarize themselves with the game mechanics first. Veteran players who know every aspect of the game by heart might find the shorter version more challenging.)
Setup of your personal components:
- Each player chooses a color and takes the 12 Vikings in their color.
- Place a Viking on each numbered space of the “Banquet Table” track (at the top right) of your home board: place 7 Vikings in the long game, or 6 in the short game.
- Place the rest of your Vikings on the “Thing Square” (the Vikings’ meeting place). These are your starting Vikings. (Consequently, in the short game, you start the game with one more Viking.)
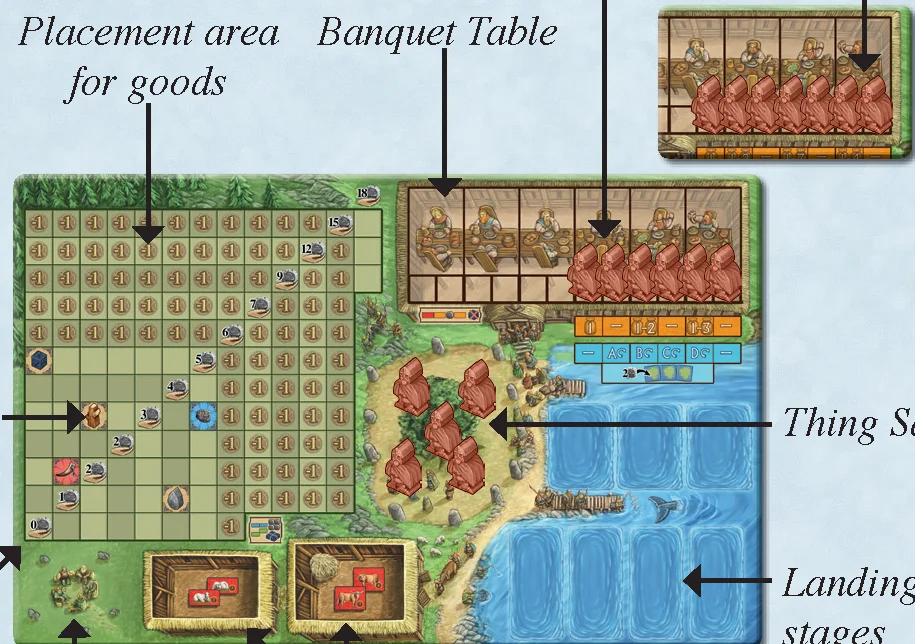
Board layout overview:
- To the right of the Thing Square: the bay with landing stages for ships.
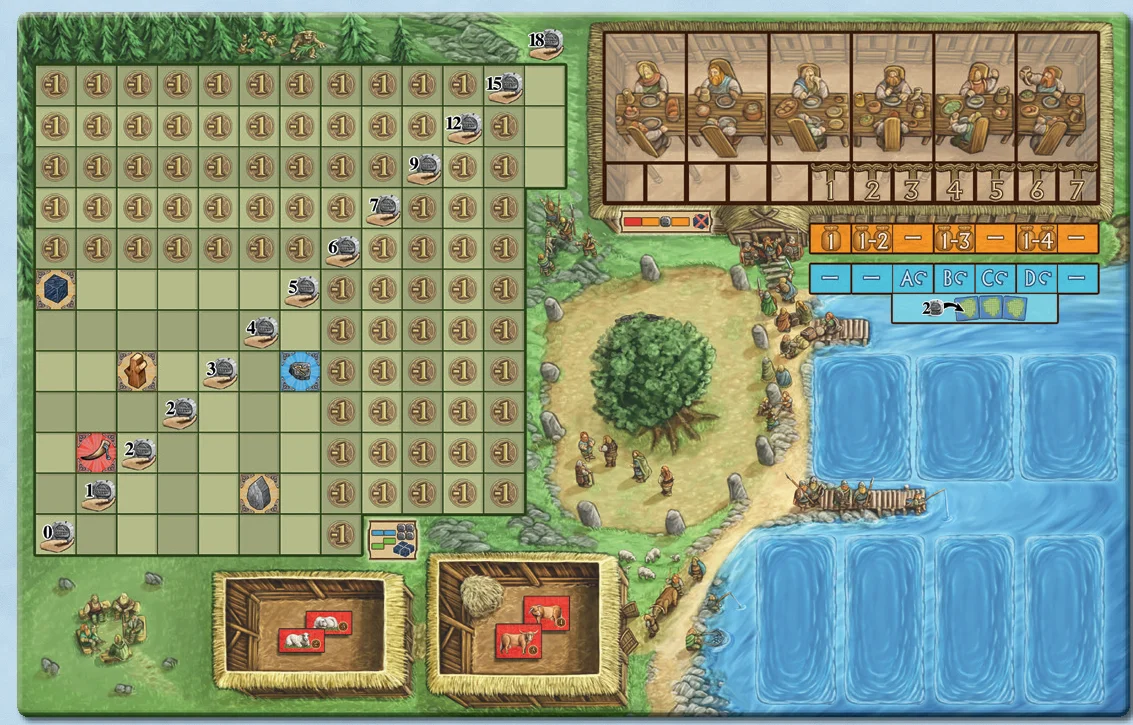
- To the left of the Thing Square: the main placement area for your valuable goods.
- At the bottom right: stables for sheep and cattle.
- Bottom left of the Goods space: Income diagonal.
- Special waiting space is reserved for the solo game.
Mountain Strips, Building Resources, and Silver
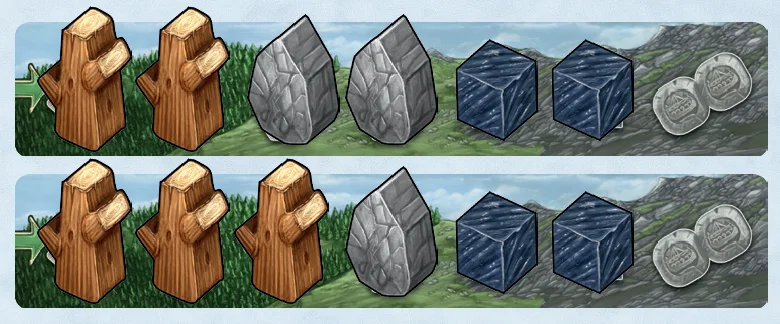
- Shuffle the eight mountain strips and turn two of them face up (three strips in a 4-player game).
- The remaining mountain strips form a face down draw pile.
- Place the depicted goods on the spaces of the face up mountain strips.
- Sort the remaining wood, stone, ore, and silver tokens by type and place them ready at hand.
Exploration Boards
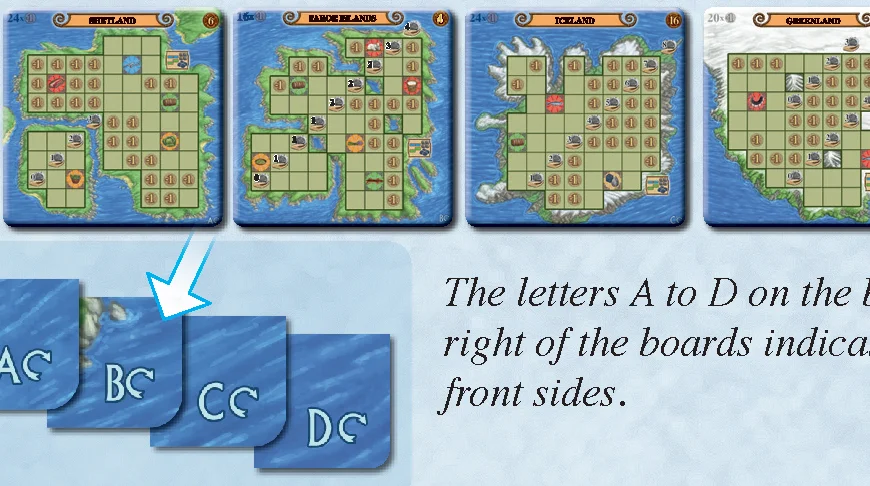
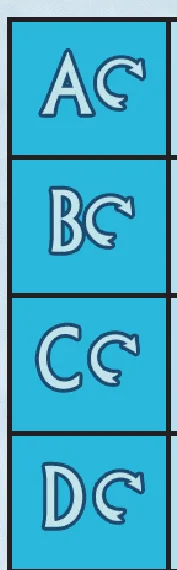
Lay out the four exploration boards with their “Shetland”, “Faroe Islands”, “Iceland”, and “Greenland” sides facing up in that order. The letters A to D on the bottom right of the boards indicate their front sides.
Building Tiles
Place the “shed”, “stone house”, and “long house” building tiles in separate stacks on the table.

Overview Tiles
Place the round overview tile on the table and place the white round tracking cube on space 1.
How to Play the Game
The basic principle of the game is simple. Each round, you place your Vikings on the spaces of the action board and take the chosen actions immediately. Because each action space can only be occupied once per round, you will quickly get in each other’s way.
What You Want to Achieve
Your goal is to cover the spaces in the placement area of your home board with green and blue goods tiles. If you leave gaps, you can fill them with ore and silver (as shown below).
To get the goods tiles in the first place, you will either need to obtain them by raiding (in the Viking fashion) or receive them in exchange for farm goods.
At any time, you can place tiles, ore tokens and silver coins from your supply onto your home board. Once on your home board, you cannot take them back.
Overseas trading plays a special role in all of this. It allows you to turn any number of different green goods (representing craft products) into blue luxury goods in a single action. (How turning a lot of green goods into blue ones may benefit you is explained in the “Anytime Actions” section on page 12.)
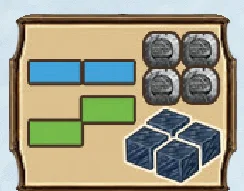
Income
The big numbers across the placement area of your home board represent income values. The smallest visible income value indicates your income for the current round (described further on page 9).
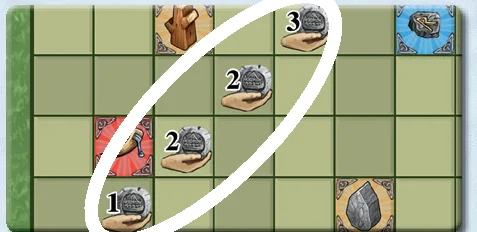
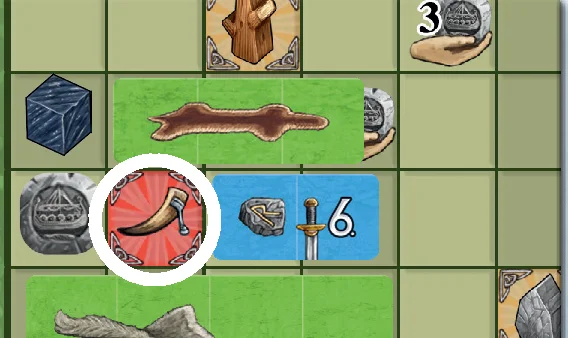
Bonus
Some spaces of your home board feature goods symbols (there are five goods spaces on your home board). You receive these goods each round as a bonus once you have covered all spaces surrounding them.
- Sooner or later you may wish to cover the goods spaces to increase your income. (By doing so, you forfeit the bonus.)
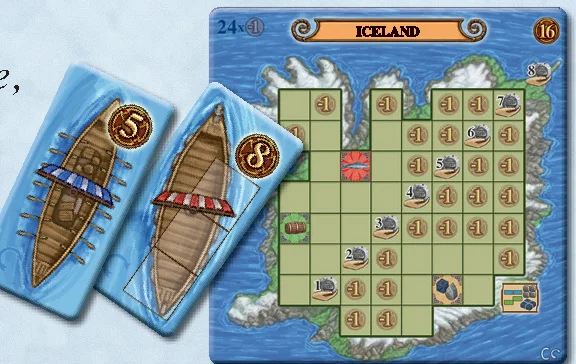
- During the game, you can explore new territories and add them to your home board. You will need ships to do so. (To explore Iceland, for instance, you would need a knarr or a longship.)
What You Get Points For
At the end of the game, you will add the values of your ships, houses, exploration boards, and goods. Points are indicated by the shield symbol.
- Emigration: Your large ships can increase in value if you use them for emigration. (Simply turn them to the other side when that happens.) After each emigration, you will have one fewer ship at your disposal.
- Covering Negative Points: Your home board and the exploration boards have spaces that you must cover with goods tiles to avoid negative points. (“Fur” can be effectively worth 8 points if you use it to cover eight spaces with negative points.)
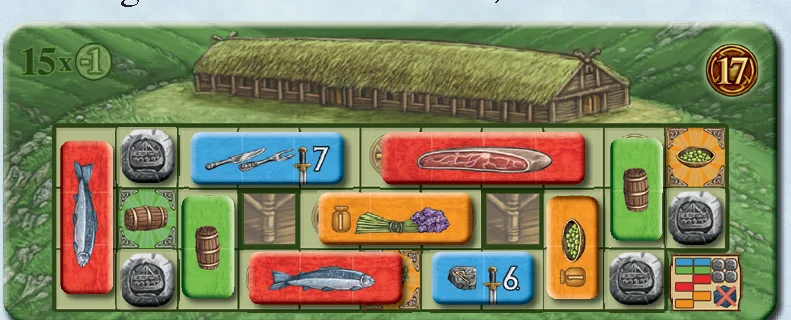
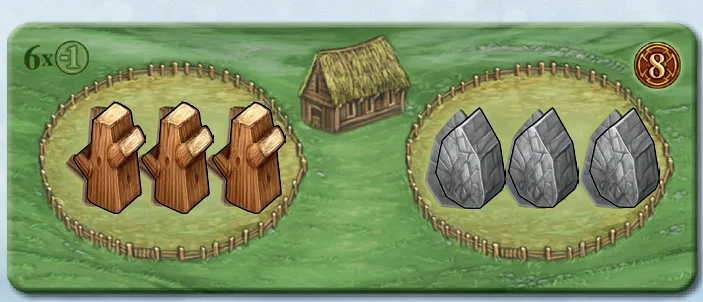
- Houses & Sheds: The sheds, stone houses, and long houses also have spaces with negative points, which you should cover with goods tiles. Sheds require wood and stone. The stone and long houses are special in that they allow you to place orange and red food tiles in them as well as the usual green and blue goods and silver coins, but not ore. (Note the two supporting pillars in the center of the long house: these cannot be covered.)
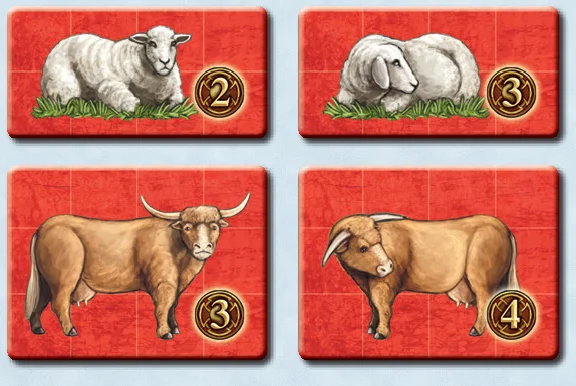
- Animals: You gain additional points for sheep and cattle, which breed every other round. The back sides of the animal tiles show pregnant dams, which are worth 1 additional point.
- Occupation Cards: Points are scored for the occupation cards you have played. Occupations can also be worth negative points (e.g., the Undertaker is worth -1 point).
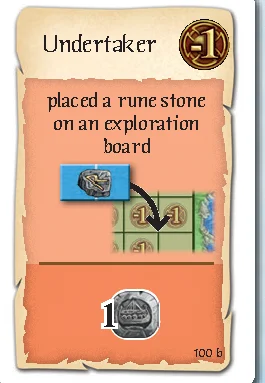
Randomly determine who receives the grey start player moose. The long game is played over 7 rounds (the short game over 6 rounds).
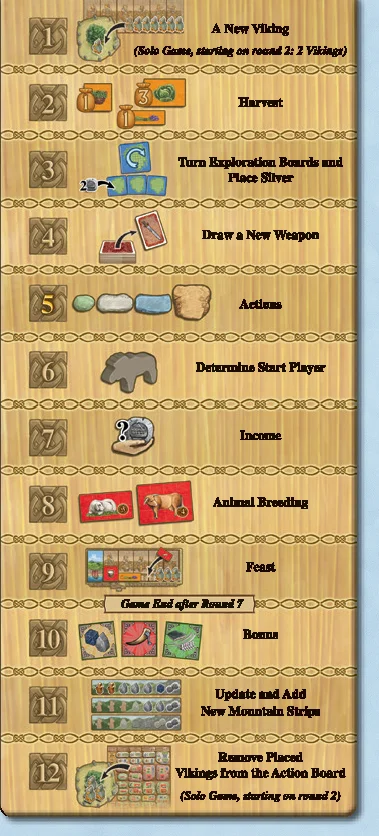
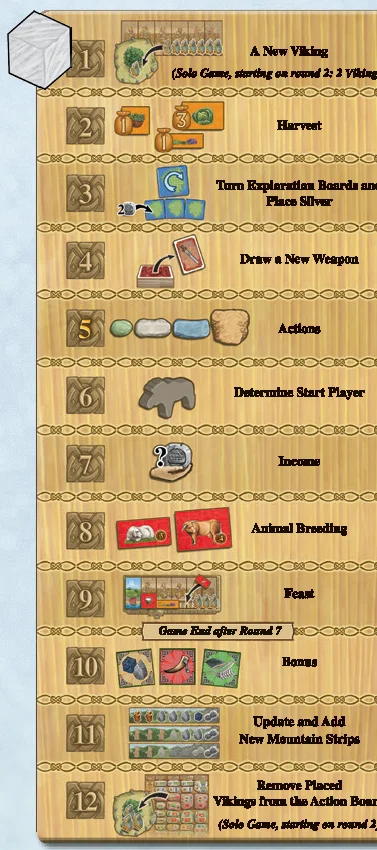
Each round consists of the following 12 phases, played one after another in that order:
- A New Viking
- Harvest
- Turn Exploration Boards and Placing Silver
- Draw a New Weapon
- Actions
- Determine Start Player
- Income
- Animal Breeding
- Feast
- Bonus
- Update and Add New Mountain Strips
- Remove Placed Vikings from the Action Board
Phase 1: A New Viking
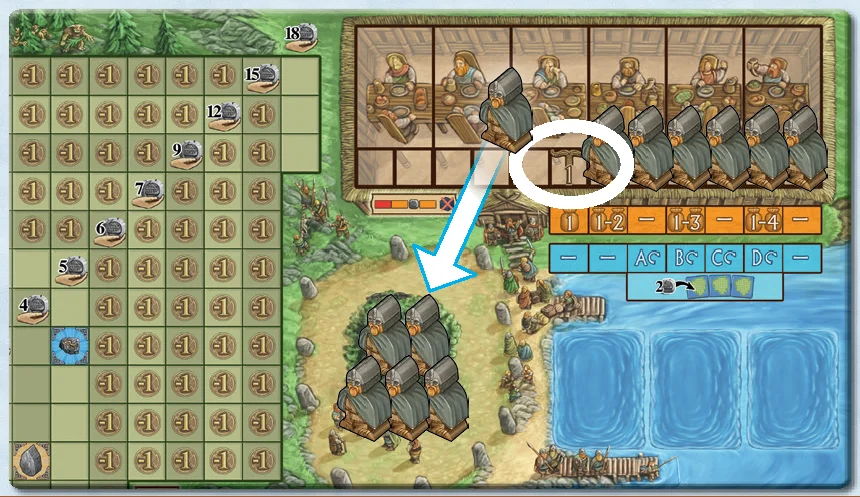
Take the leftmost Viking from the “Banquet Table” of your home board and place it with your other Vikings on the Thing Square. (The now empty space indicates the number of the current round.)
Each round, including the first, you receive a new Viking.
Phase 2: Harvest
Below the new round number, there is a note indicating what you will receive during harvest. During harvest, you can only get orange goods. Take the goods from the general supply and place them in your personal supply.
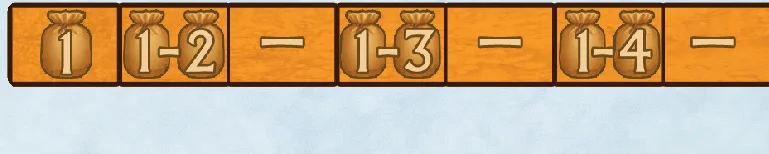
The numbers on the tiles mean:
- 1: You receive one of each crop with a 1: peas, beans, and flax.
- 1-2: You receive one of each crop with a 1 or 2: peas, beans, flax, and grain.
- 1-3: You receive one of each crop with a 1, 2, or 3: peas, beans, flax, grain, and cabbage.
- 1-4: You receive one of each crop with a 1, 2, 3, or 4: peas, beans, flax, grain, cabbage, and fruits.
- “No Harvest”: You do not get any goods in the harvest phase of that round.
Phase 3: Turn Exploration Boards and Placing Silver
In the action phase (phase 5), you can use your ships to claim additional placement areas on the exploration boards. Some exploration boards are available at the start, others become available later. This is why each exploration board that has not been claimed by a player is turned to its back side at some point. A symbol below the harvest notes on your home board indicates when to turn each exploration board:
- In round 3 (round 2 in short game): Turn Shetland, introducing Bear Island.
- In round 4 (round 3 in short game): Turn the Faroe Islands, introducing Baffin Island.
- In round 5 (round 4 in short game): Turn Iceland, introducing Labrador.
- In round 6 (round 5 in short game): Turn Greenland, introducing Newfoundland.
Increasing the Value of an Unclaimed Exploration Board
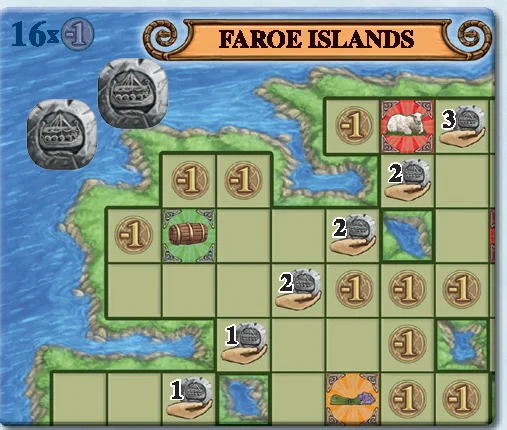
Each round in which you should turn an exploration board (short game: rounds 2 to 5; long game: rounds 3 to 6), place 2 silver on each unclaimed exploration board not being turned. Exploration boards that players have already taken do not receive silver.
- When you turn an exploration board with silver on it, return the silver to the general supply.
- Place silver on the other exploration boards even if the exploration board that is supposed to be turned has already been claimed by a player.
- There is no phase 3 in the first and last round. In those rounds, no exploration board is turned and no silver is placed on any of them.
Phase 4: Draw a New Weapon
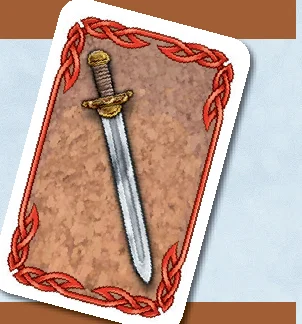
Each player draws a new weapon card and places it face up in their supply. (You could draw a long sword, the only type of weapon you do not have from the start.)
Phase 5: Actions
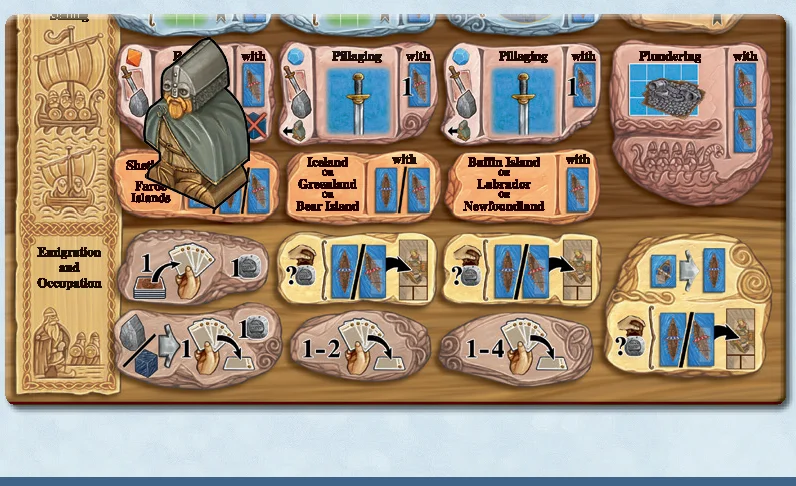
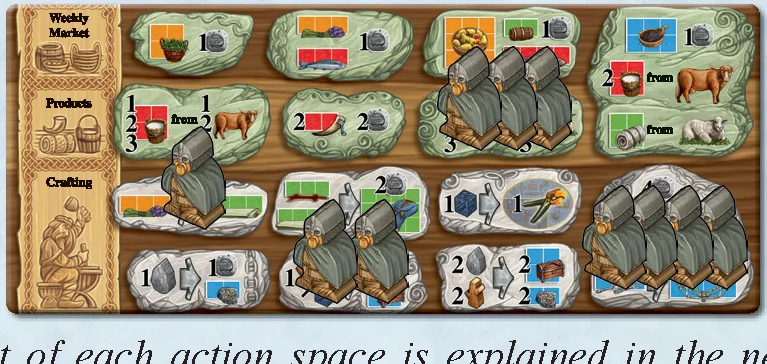
Beginning with the start player and in clockwise order, take one or more Vikings from your Thing Square and place them on exactly one unoccupied action space of the action board. Continue doing so until all players have passed or placed all of their available Vikings.
- You can pass even if you have Vikings left in your Thing Square. Once you have passed, you cannot place any more Vikings that round. (When you have none left, you must pass.)
- Important: each action space can only be occupied once per round.
- Viking costs by column:
- Each action space in the first column requires 1 Viking.
- Each action space in the second column requires 2 Vikings.
- Each action space in the third column requires 3 Vikings.
- Each action space in the fourth column requires 4 Vikings.
- You must use an action space immediately after you occupy it. To occupy an action space, you must use at least one of its effects (paying a cost is also considered an effect in and of itself).
- The action spaces on the action board are organized in groups of similar effects. The wood grain background helps to emphasize this. The type of action spaces in each group is stated in the left margin of the action board.
- The action phase ends as soon as all players have placed all of their Vikings or passed.
Phase 6: Determine Start Player
The player who placed Vikings last in the action phase receives the start player moose and will be the start player in the next action phase.
Phase 7: Income
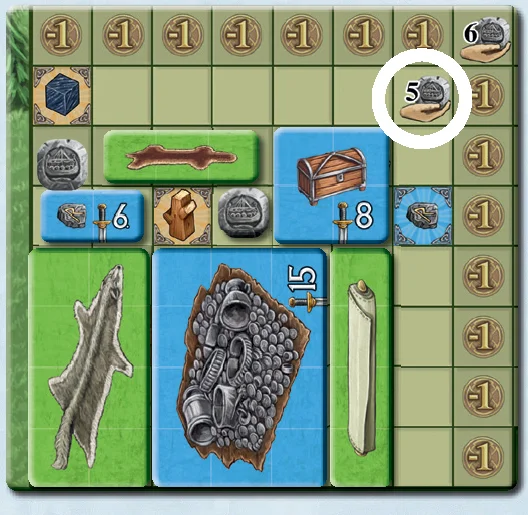
During the game, you will place green, blue goods tiles, ore tokens and silver coins on your home board. The smallest uncovered value on the “income diagonal” indicates the amount of silver you receive this phase.
- Important: You must cover the income values in ascending diagonal order. This is explained further on page 12 (Anytime Actions).
- Income is paid in silver (this phase), whereas bonuses are paid in goods (phase 10).
- By claiming exploration boards, you can produce additional income. Income from an exploration board is handled like income from your home board.
Phase 8: Animal Breeding
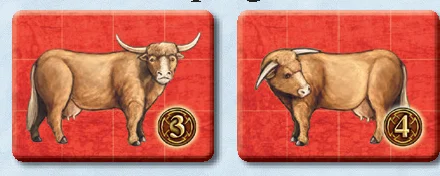
At the bottom right of your home board, you can find storage spaces (stables) for your “sheep” and “cattle” goods tiles. Please note that these tiles show the same animal on both sides—one side shows the non-pregnant animal, the other the pregnant one.
In this phase, your animals breed, according to the following rules:
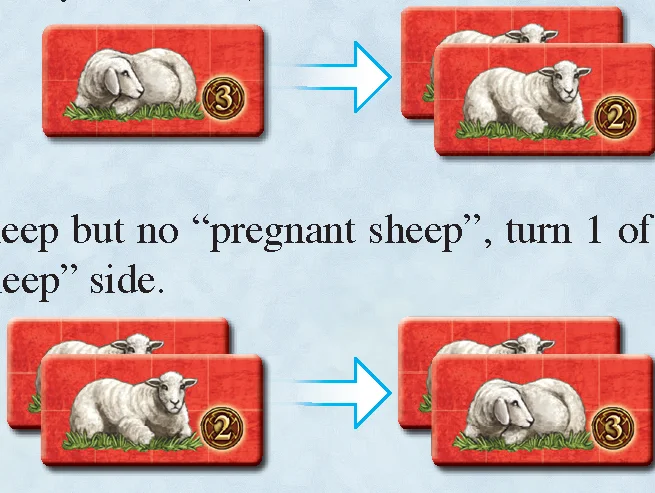
- If you have at least 1 sheep with the “pregnant sheep” side facing up, turn all of them to the other side and take 1 “sheep” tile for each tile you just turned (and place them with the “non-pregnant” side facing up in your stable).
- If you have at least 2 sheep but no “pregnant sheep”, turn 1 of them to the “pregnant sheep” side.
- The same applies to cattle. Consequently, your sheep and cattle can breed every 2 rounds.
Examples of Animal Breeding:
- You have three sheep, one of which is pregnant. The pregnant one gets a newborn, the other two remain non-pregnant. Afterward you have four non-pregnant sheep.
- You have four non-pregnant sheep. Still, you can only turn one of them to the pregnant side.
- You have two sheep, one of which is pregnant. During the action phase, you spend the non-pregnant one. In the breeding phase of that round, you are now left with a single pregnant sheep. It still receives a newborn, even though it is the only sheep in the stable.
Phase 9: Feast
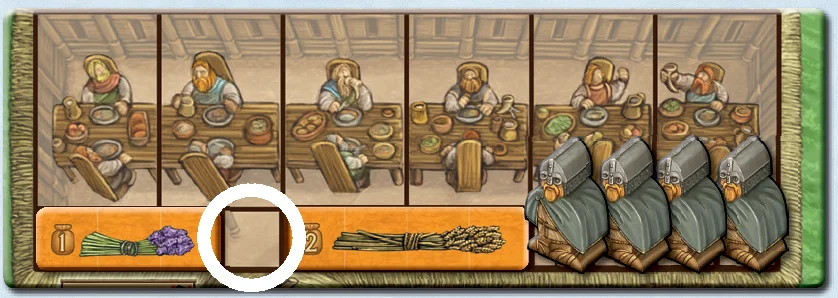
This phase focuses on the spaces of the “Banquet Table” track with no Vikings.
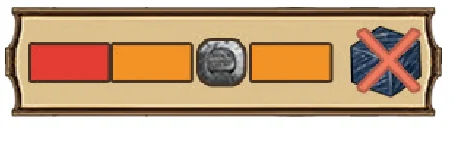
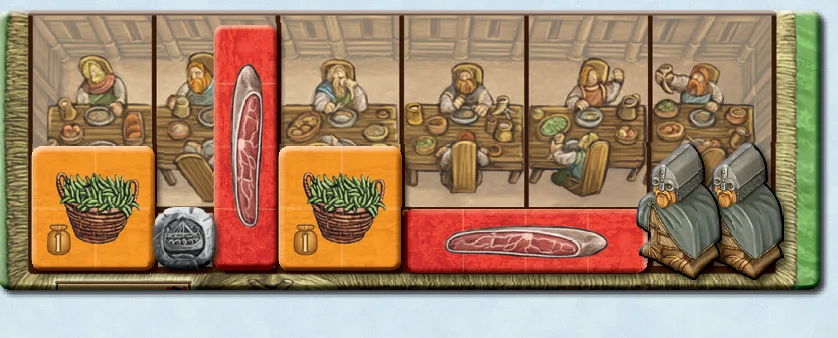
Place orange and red food tiles from your supply (or stable) and/or “1 silver” coins on each empty space of the “Banquet Table”, according to the following rules:
- Orange tiles (farm products) cannot be placed next to each other.
- Red tiles (animal products) also cannot be placed next to each other.
- Silver coins can be placed next to each other. (Ore cannot be placed on the “Banquet Table”.)
- Orientation rule: One tile of each type may be placed horizontally to take up more space at the table. All other tiles of that type must be placed vertically (square tiles are exempt from this rule, as it does not matter).
- Every tile you place on the “Banquet Table” must cover at least one of the squares below the table and fit in the allowed space (it cannot overhang).

Thing Penalty
- For each space of your “Banquet Table” on which you could not or did not want to place anything, you must take a “Thing Penalty” tile and place it in your supply. You must keep these tiles for the rest of the game. (This should not happen too often, because the feast happens after you receive income. Income should always provide enough silver to cover the spaces.)
- At the end of the game, you lose 3 points for each penalty tile you have.
- At the end of this phase, move the goods on your “Banquet Table” to the general supply.
Phase 10: Bonus
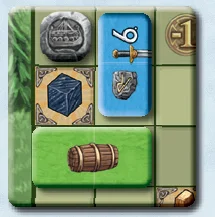
Some spaces in the placement area of your home board show a goods symbol. These spaces count as already covered, but you can cover them with goods tiles, if need be (according to the placement rules). If you leave a goods space uncovered, but instead cover the 8 spaces around it, you will receive that good as a bonus each round.
- Spaces on the edge of the placement area require fewer spaces (e.g., the ore space on the edge only needs 5 spaces covered around it).
- You receive your bonus all at the same time.
- Tip for experienced players: If you place goods tiles in your placement area before the income phase, you will then receive silver that you can use right away to possibly get bonuses as well.
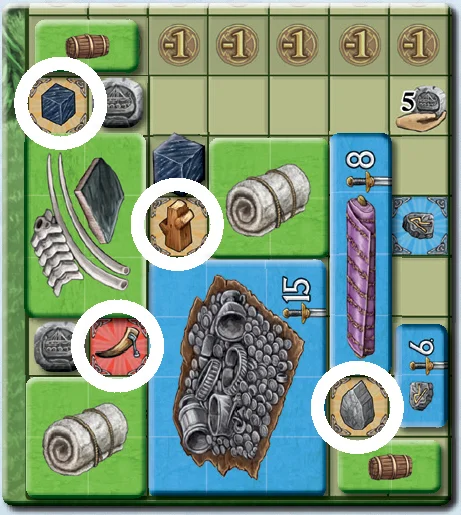
Phase 11: Update and Add New Mountain Strips
Mountain strips provide building resources that you can get during the action phase.
- In this phase, remove the leftmost resource (i.e., closest to the arrow) from each face-up mountain strip and return it to the general supply (this can be wood, stone, ore or silver). If all spaces are empty, remove the mountain strip.
- Then turn a new mountain strip face up and place the depicted goods on it. (This way there can be more face-up mountain strips than at the start of the game.)
- In the 4-player long game, there are not enough mountain strips for all 7 rounds. You simply do not add any in round 7.

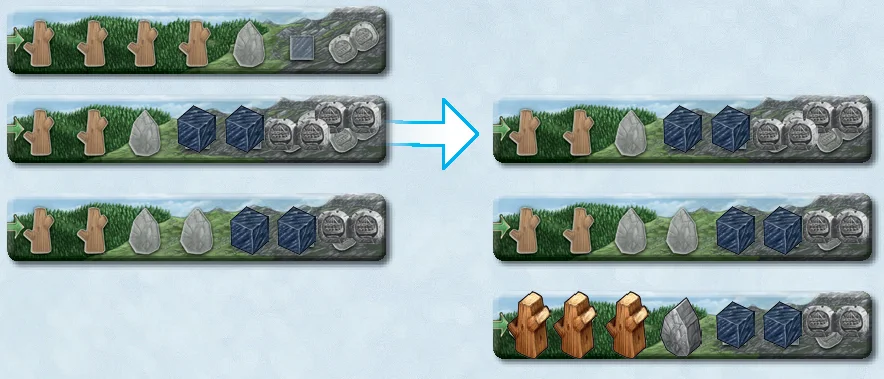
Phase 12: Remove Placed Vikings from the Action Board
Return your Vikings from the action board to your Thing Square. (Then proceed with phase 1 of the next round.)
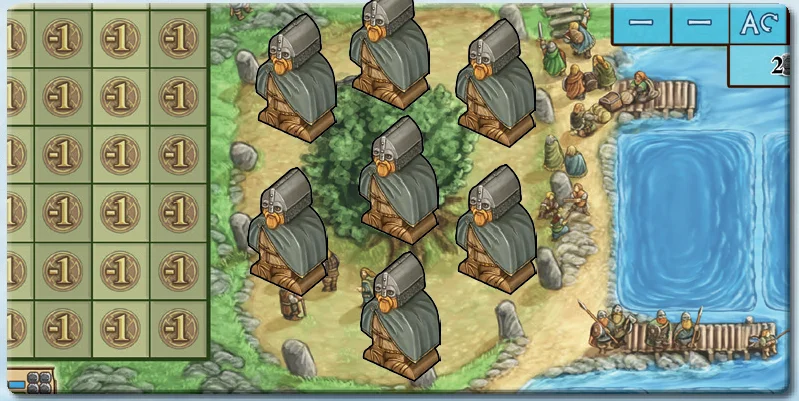
The action board features a variety of action spaces. General rule: Some actions require you to have a specific type of ship. You may use the same ship multiple times per round for different actions.
Example: You have a single longship in your bay. With this ship, you can head out on a raid first, then explore “Newfoundland”, and emigrate that same round.

Production Spaces
On the green spaces of the action board, you receive exactly what is depicted (e.g., 1 stockfish). In particular:
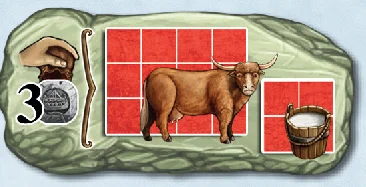
- Milk production: You receive 1 milk if you have 1 cattle, 2 milk if you have 2 cattle, and 3 milk if you have 3 or more cattle.
- Wool production: You receive 1 wool if you have 1 sheep, 2 wool if you have 2 sheep, and 3 wool if you have 3 or more sheep.
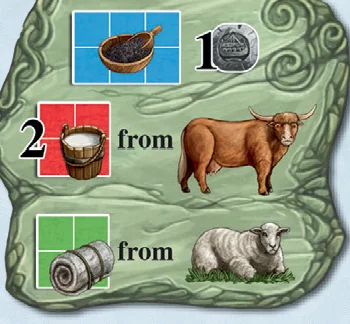
- Weekly Market / Mixed: You receive 1 spices and 1 silver. Additionally, you receive 2 milk if you have at least 1 cattle, and 1 wool if you have at least 1 sheep.
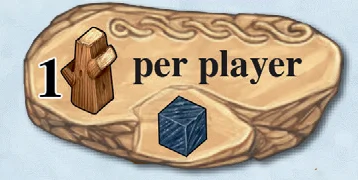
- Wood & Ore per player: You receive wood and ore from the general supply. While you only ever get 1 ore here, you also get 1 wood per player: in a 1/2/3/4 player game, this is 1/2/3/4 wood.
- Buying Goods with Silver: If a good costs silver, the price is printed below a purse icon at the left of the action space. (For example, 1 cattle and 1 milk cost a total of 3 silver.)
Tip: Most new players overrate the Weekly Market. Your Vikings are well provided for during the harvests. Usually, you will not need much more food than that. On the other hand, they tend to overlook the long-term potential of animal breeding.
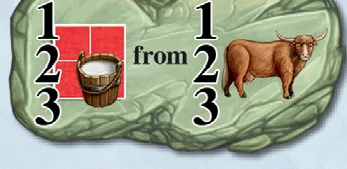

Exchange Spaces
The dark yellow action spaces relate to house building, ship building, and crafting. On these, you exchange something (usually building resources from your supply) for something else, but only once:
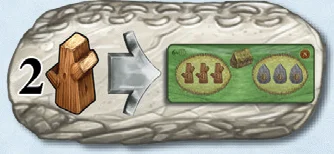
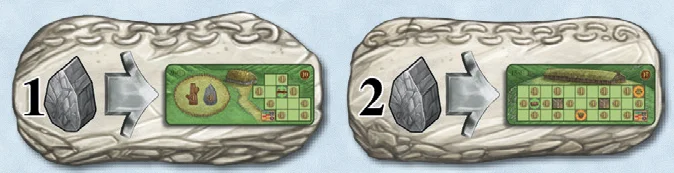
- Build Shed: Pay 2 wood to receive a shed.
- Build Houses: Build a “stone house” and “long house” for 1 and 2 stone, respectively. (Note that the number of shed and house tiles is limited.)
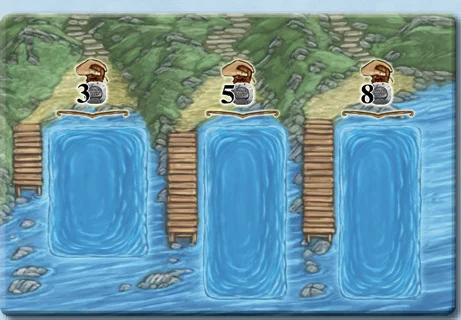
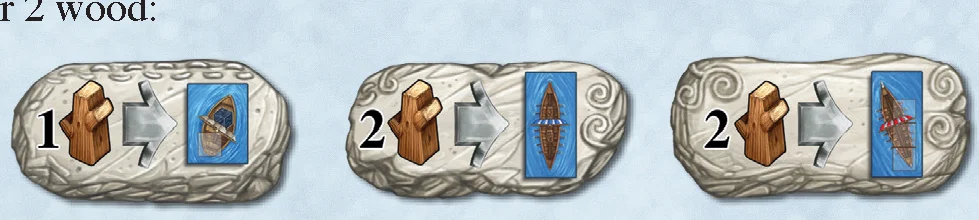
- Build Ships: Build the indicated ship for 1 or 2 wood. The number of ships is not limited; the only limitation is the landing stages in your bay (up to 3 whaling boats, up to 4 large ships).
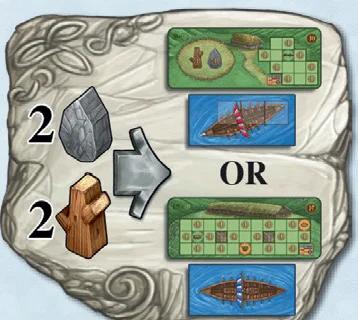
- House/Ship Choice: For 2 stone and 2 wood, take either a stone house and a longship, or a long house and a knarr.
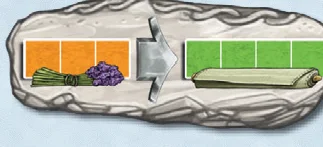
- Flax to Linen: Exchange an orange “flax” tile for a green “linen” tile.
- Hide & Linen to Clothing: Spend green “hide” and “linen” tiles to make “clothing”, and receive 2 silver.
- Smithy: Spend 1 ore to receive a tile with a forge tongs symbol. Jewelry tiles show a forge tongs symbol, as well as all special tiles.
- Trade Goods & Silver: Receive 4 silver. Additionally, exchange a green “wool” tile for a “robe” tile, and/or a blue “silverware” tile for a “jewelry” tile.
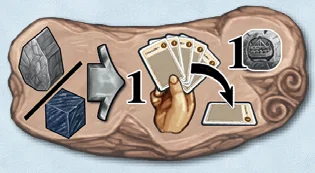
- Rune Stone / Chest: Exchange stone and/or wood or ore for blue “rune stone” and “chest” tiles. On the first two of these spaces, you also receive 1 silver.
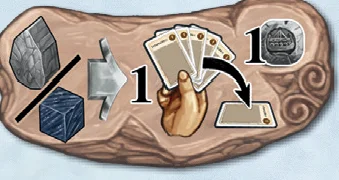
- Occupation: Playing a single occupation costs 1 stone or 1 ore, and you receive 1 silver.
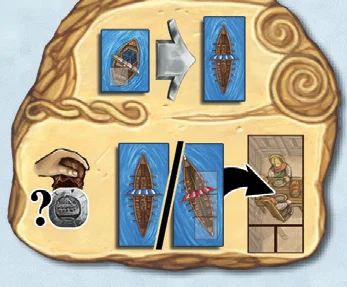
- Upgrade Whaling Boat & Emigrate: Exchange a whaling boat for a knarr (if you wish), before using that knarr or another large ship to emigrate. (If the whaling boat you exchange has ore on it, you lose that ore.)
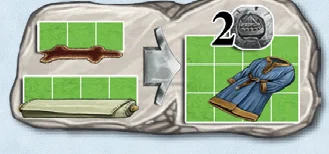
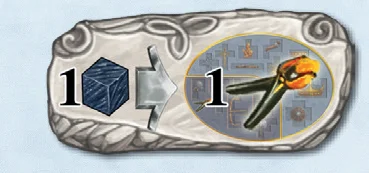
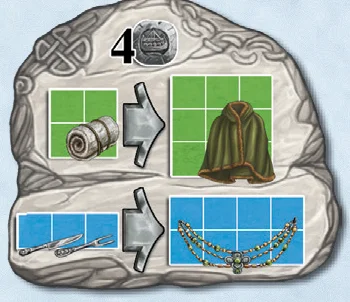
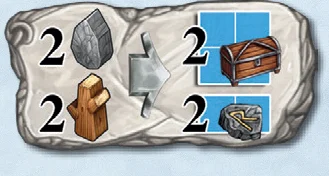
Mountain and Trading Actions
Mountain Actions
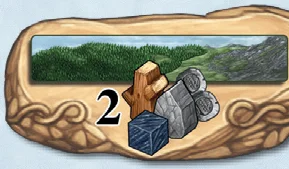
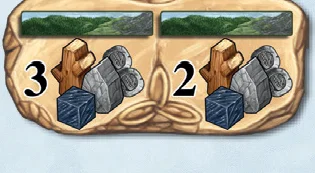
Some of the golden brown action spaces allow you to take building resources and silver from mountain strips. When taking resources from a mountain strip, always take them from left to right (i.e., goods closest to the arrow first). The 2 silver at the right are considered a single item. After taking the last “2 silver”, remove the mountain strip from the game.
- Take 2 Building Resources: Take up to 2 items from one mountain strip of your choice. (You may choose a mountain strip with fewer resources, but may not take resources from another strip to make up for it.)
- Take 3+2 Building Resources: Take up to 3 items from one mountain strip and up to 2 items from another mountain strip. You may not take 5 resources from the same strip.
- Take 2+2+2+2 Building Resources: Take up to 2 items each from up to four mountain strips. Here, you cannot take 4 or 6 items from one strip.
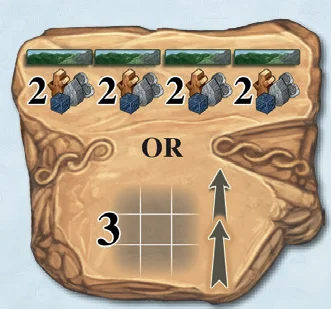
Trading Actions
The other golden brown action spaces allow you to exchange goods in your supply for more valuable ones:
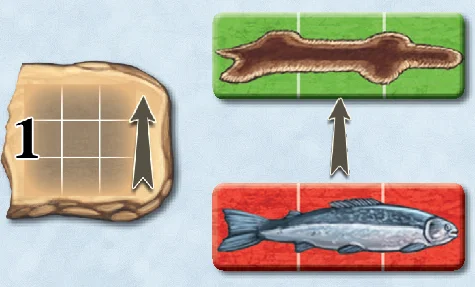
- ↑ 1 Good: Exchange exactly 1 goods tile for the next more valuable one: orange to red, red to green, or green to blue. The old and new tile must have the same shape and dimensions. (E.g., exchange game meat for skin and bones.)
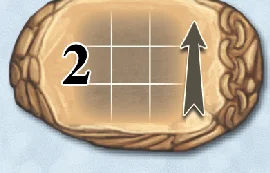
- ↑ 2 Goods: Exchange up to 2 goods tiles for the next more valuable one. Both tiles may be of the same type, but you may not “upgrade” a single tile twice.
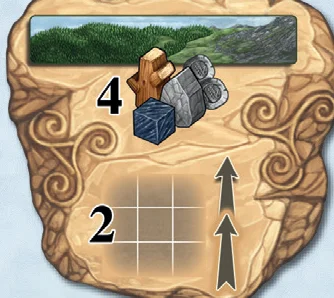
- ↑↑ 2 Goods: Upgrade 2 goods twice: orange to green, or red to blue. (In addition, take 4 resources from one mountain strip.)
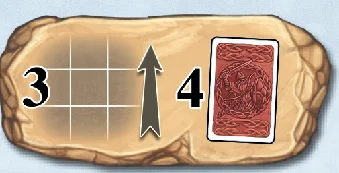
- Other action spaces provide 4 weapon cards (draw 4 random weapons face up).
Tip: Before you exchange your goods for more valuable ones via upgrade actions, check how many and which goods you will need for the Feast phase. We recommend you place those goods on the “Banquet Table” during the action phase ahead of time.
Knarr Action Spaces
Blue is the color of action spaces that require a knarr, providing blue luxury goods for trade.
Overseas Trading
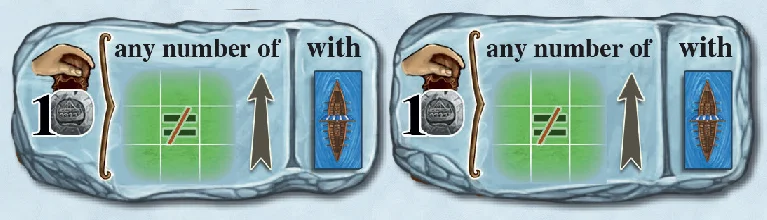
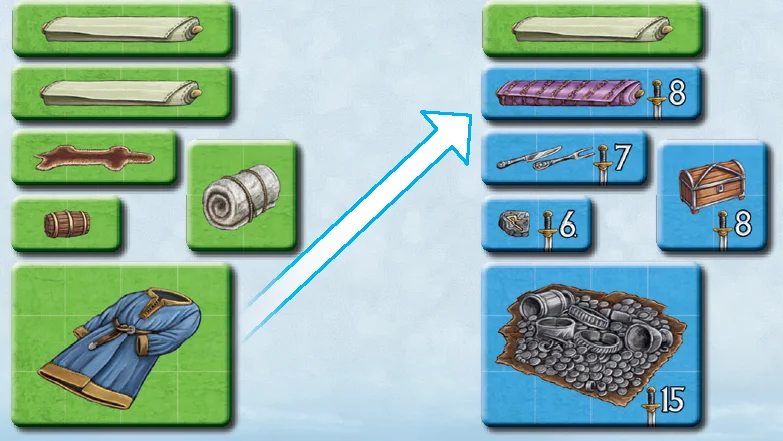
The two “Overseas Trading” action spaces are located in the first and second column. On these spaces, you can pay 1 silver to turn any number of different green goods tiles to their blue side. To do so, however, you must have at least one knarr in your bay.
- Green tiles in the placement areas of your boards may not be turned to their blue sides.
- Each good converted must be different (e.g., you can turn 1 oil, 1 hide, 1 wool, 1 linen, and 1 clothing to blue, but a second linen must stay green).
Special Sale
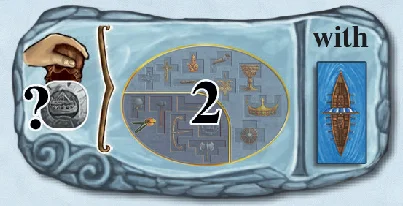
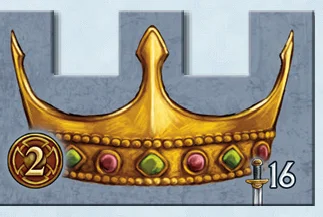
The “Special Sale” action space is located in the third column of the action board. Each special tile shows a silver cost. If you have at least one knarr, you can buy up to 2 special tiles by paying their cost. (The English Crown is the only special tile that may not be bought.)
Emigration
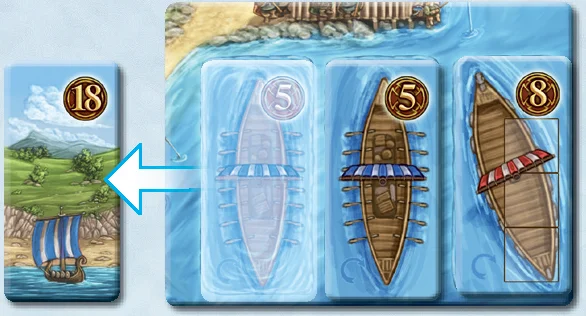
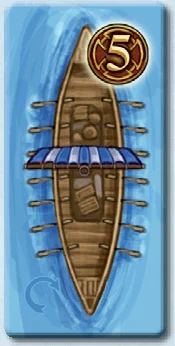
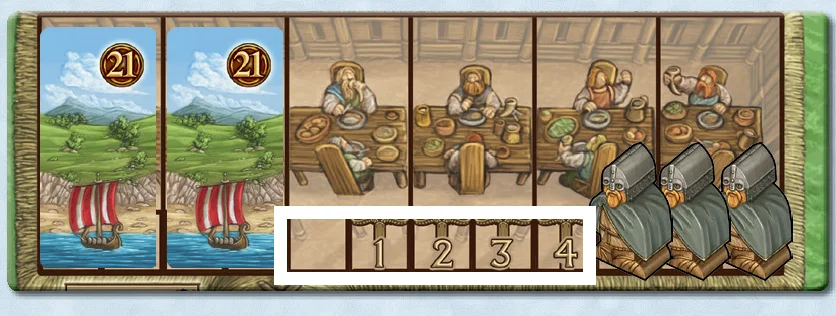
Yellow is the color of emigration. On “Emigration” action spaces, you may turn a knarr or a longship in your possession to its back side and place it on the leftmost space of your “Banquet Table.” This tile is no longer a ship, but it reduces the amount of food you have to serve during a feast.
- The next time you emigrate, place the second ship to the right of the first one.
- To take this action, you must pay an amount of silver equal to the current round.
- You lose the ore on the longship, if any.
- You do not lose any Vikings in the process of emigration.
- In the very rare case that you emigrated so frequently that there is no more space for another ship on the Banquet Table, you cannot take the emigration action anymore.
Raiding, Pillaging, and Hunting
Red action spaces provide actions that require you to roll a die.
- Orange eight-sided die: used on spaces with an orange die symbol.
- Blue twelve-sided die: used on spaces with a blue die symbol.
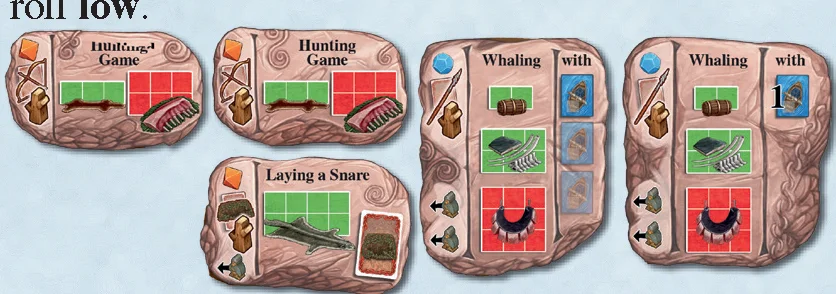
- Rolling High vs. Low: When raiding and pillaging, you want to roll high. On spaces with a die symbol at the top of the action board (Hunting Game, Laying a Snare, Whaling), you want to roll low.
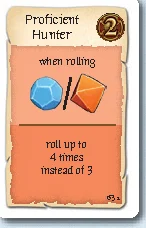
- Re-rolls: You may roll the die up to three times. Each re-roll invalidates the previous roll. You can stop rolling at any time. When finished, announce your battle result, then declare your action a success or failure.
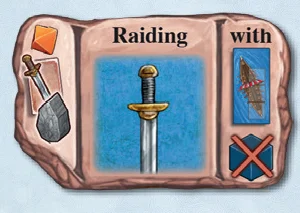
Raiding
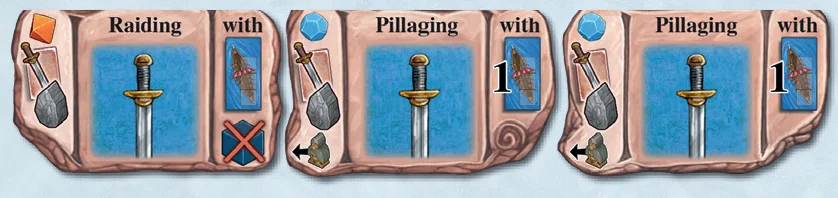
To take a “Raiding” action, you must have at least one longship. (Ore on the ship cannot be used for raiding.)
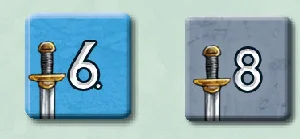
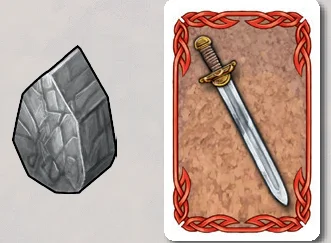
- Success: Every blue goods tile has a sword value. After you roll the orange eight-sided die, you can take exactly one blue goods tile with a sword value equal to or lower than you rolled. Each stone and “long sword” weapon card you spend increases your die roll by 1 (even above 8). This modified value is considered your “battle result.”
- Failure: Your raid automatically fails if your battle result is 5 or less. Regardless of the result, you may willingly declare your raid a failure. Upon failure, you receive a consolatory 1 stone and 1 long sword from the general supply.
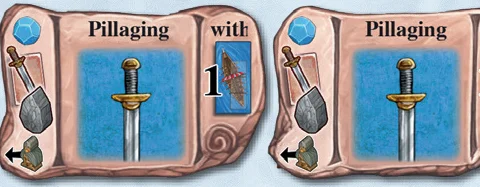
Pillaging
As with “Raiding”, you want to roll high when pillaging. You must have a longship. If you have more than one longship, you must use the longship with the most ore on it.
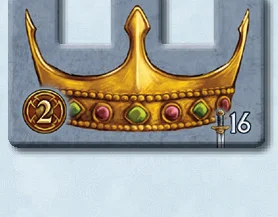
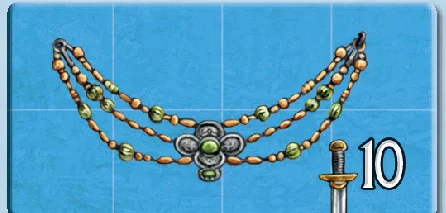
- Success: Add 1 to your dice roll for each ore on your longship (even above 12), keeping the ore. After rolling the blue twelve-sided die, take exactly one blue goods tile (regular or special tile) with a sword value equal to or lower than your roll. You can spend stone and long swords from your supply to increase the roll by 1 per item spent.
- Failure: Your pillage automatically fails if your battle result is 5 or less. You may willingly declare it a failure regardless of the result. Upon failure, you receive a consolatory 1 stone and 1 long sword. Additionally, after each failed pillaging attempt, you may return 1 Viking from the action space to your Thing Square and use it again later that round.
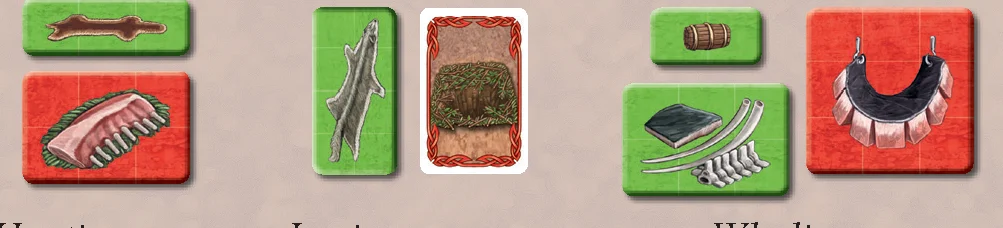
Hunting Game, Laying a Snare and Whaling
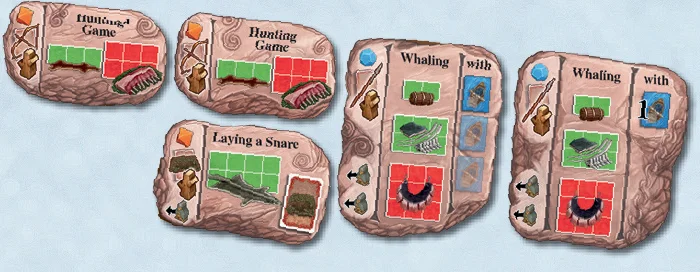
When hunting game and laying a snare, you roll the orange eight-sided die. When whaling, you roll the blue twelve-sided die. In all of these cases, you want to roll low.
- Success:
- When whaling, reduce the value of your roll by one for each ore (even preprinted ore) on the whaling boat(s) you are using to perform the action (you keep the ore). Negative values are treated as 0.
- Pay a number of wood and/or proper weapons equal to the final value to declare a successful action and receive the reward:
- Hunting game: Requires bow and arrow; reward: 1 hide and 1 game meat.
- Laying a snare: Requires snare; reward: 1 fur and 1 “snare” weapon card.
- Whaling: Requires spear; reward: 1 oil, 1 “skin and bones”, and 1 whale meat.
- If your battle result is 0, you may not declare the attempt a failure; you must stop immediately and cannot re-roll.
- Failure:
- If you declare your attempt a failure, you do not pay anything. (You may not declare a result of 0 as a failure.)
- You receive a consolatory 1 wood and 1 weapon of the proper type.
- Additionally, when you fail laying a snare, you return 1 Viking to your Thing Square. When you fail whaling, you return 2 Vikings. You may use returned Vikings again later that round.
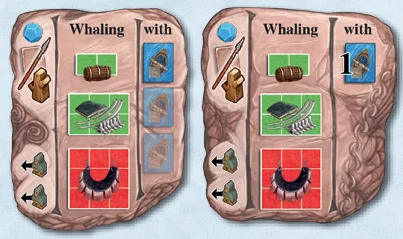
Peculiarities of Whaling and Plundering
- Whaling spaces: On the major “Whaling” action space (left, 3 Vikings), you can use 1 to 3 whaling boats. In column 4 (4 Vikings), there is a minor “Whaling” action space where you can only use a single whaling boat.
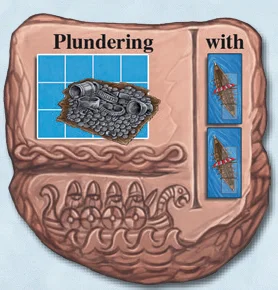
- Plundering: The “Plundering” action space is also considered a red action space. Here, you can extort ransom money in the form of a blue “silver hoard” goods tile without battle—but you must have at least two longships to do so.
Exploration
Orange is the color of exploration. By exploring, you may add exploration boards to your home board to gain additional placement areas. There are four unique exploration boards—which side faces up depends on the current round. Place the required number of Vikings on the action space and take the corresponding exploration board. If there is silver on it, place it in your supply. You keep the ship you explore with.
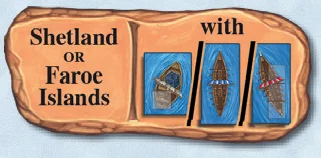
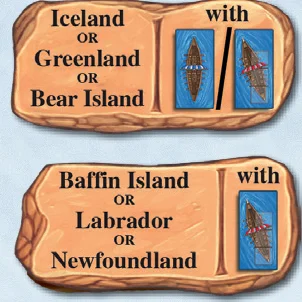
- Shetland or Faroe Islands: Requires a whaling boat, knarr, or longship, and 1 Viking (only on the space requiring 1 Viking).
- Iceland, Greenland, and Bear Island: Each require a knarr or longship, and 2 Vikings.
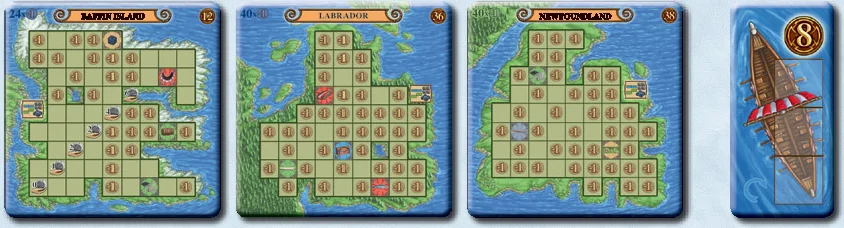
- Baffin Island, Labrador, and Newfoundland: Each require 3 Vikings and a longship.
Occupation Spaces
You start the game with a single light brown occupation card in hand. During the game, you will receive additional dark brown occupation cards. You must play an occupation card before you can use its effect.
- Draw an Occupation: Draw a random dark brown occupation card and receive 1 silver.
- Play 1 Occupation: Pay 1 stone or 1 ore to play an occupation card from hand and receive 1 silver.
- Play up to 2 Occupations: Play up to 2 occupation cards from your hand, one after another.
- Play up to 4 Occupations: Play up to 4 occupation cards from hand, one after another.
- Bonus for Placing Three Vikings: Each time you place three Vikings on an action space in the third column, before taking the action, you draw 1 dark brown occupation card into your hand.
- Bonus for Placing Four Vikings: Each time you place four Vikings on an action space in the fourth column, before or after taking the action, you may play an occupation card from your hand.
Extension Tiles in the 4-Player Game
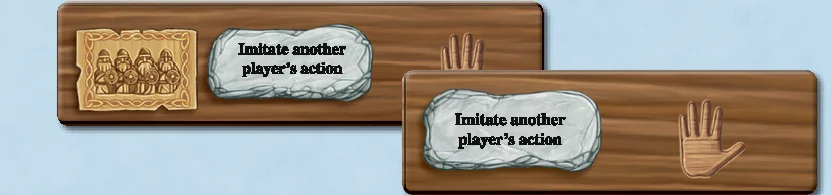
The grey action spaces on the extension tiles allow you to imitate an action space in the same column that is occupied by another player. (You cannot imitate unoccupied spaces or spaces occupied by your own Vikings.) Imitation spaces can only be used once per round.

There is a variety of actions you can take literally at any time during the game (usually even during a main action).
Placing Goods on the Home Board
At any time, you can place green craft products and blue luxury goods as well as silver coins and ore tokens on empty spaces in the placement area of your home board, according to the following rules:
- Income Diagonal Rule: The spaces with the big numbers (0, 1, 2, 3, …) form the “income diagonal”. You can only cover a space in the income diagonal if you also cover (or have already covered) all spaces:
- to the left of that space,
- below that space,
- as well as all spaces in the square to the bottom left of the space.
Spaces with goods symbols are considered covered already. The placement areas depict growing squares in order to remind you of these placement rules.
- Adjacency Rule for Green Goods: Green tiles cannot be orthogonally adjacent to other green tiles (diagonal adjacency is allowed).
- Adjacency for Other Items: Blue tiles can be adjacent to other blue tiles, as can silver coins to other silver coins, and ore tokens to other ore tokens.
- No Overlapping: When you place a good, you cannot place it on top of another good that is already there (not even partially). You can, however, cover spaces with goods symbols.
- Within Bounds: Each good you place must be placed within the bounds of the placement area. (The home board has three additional spaces at the top right, so that you can place bigger tiles like the treasure chest during the end game.)
- Special Tiles: The special tiles are considered to be blue and follow the same rules as the blue goods tiles.
- Covering Anywhere: To avoid negative points, you are explicitly allowed to place goods wherever you like in the placement area, as long as you do not cover income spaces that you are not allowed to cover.
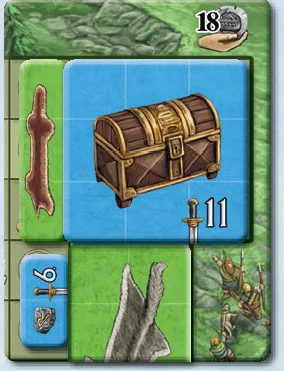
Placing Goods on the Exploration Boards
As with the home board: at any time, you may place green craft products and blue luxury goods as well as silver coins and ore tokens on empty spaces of the exploration boards, according to the same rules.
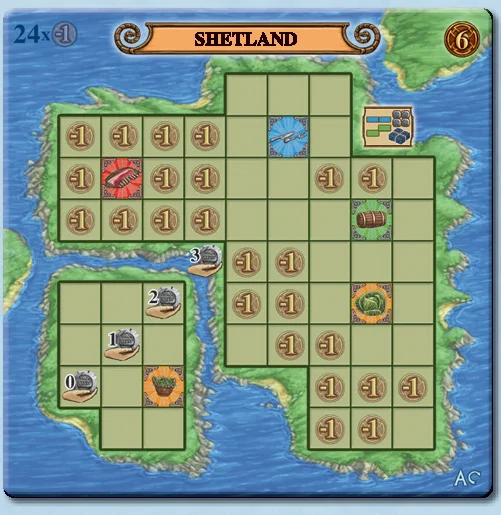
- A lot of goods spaces on the exploration boards are surrounded by less than 8 other spaces, which makes it easier to enclose them for the bonus. (To unlock the rune stone and ore bonus on Bear Island, you only need to cover six spaces.)
- Note that there might be spaces in the center of an exploration board that you are not allowed to cover with goods, like the “5” on Bear Island. These spaces have a very prominent green border.
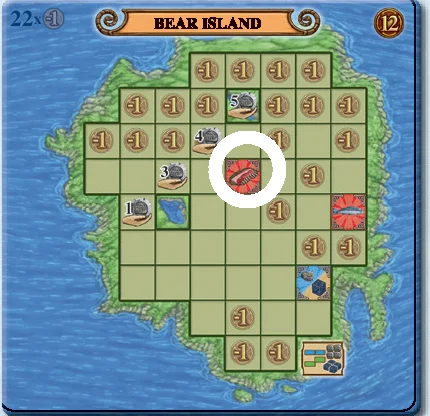
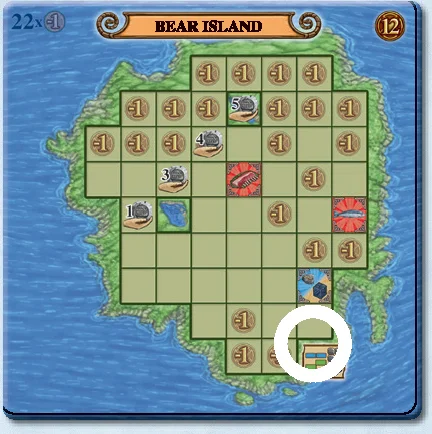
Placing Goods on the House Tiles
At any time, you may place orange farm goods, red animal products, green craft products, and blue luxury goods as well as silver coins on empty spaces of your houses.
- Orange tiles cannot be orthogonally adjacent to other orange tiles, and red tiles cannot be orthogonally adjacent to other red tiles (diagonal adjacency is allowed).
- Note that you cannot cover the pillar spaces in the long house.
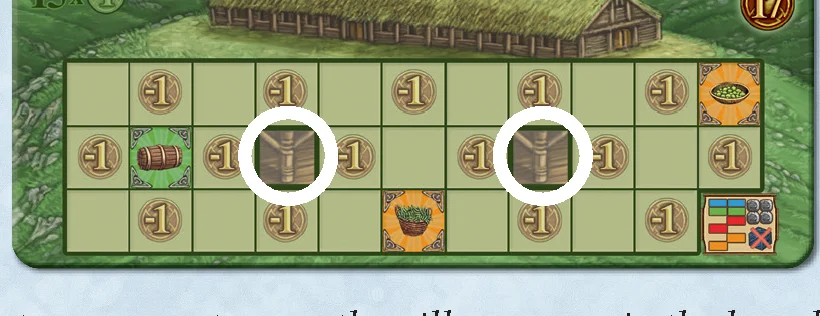
Rules Applying to All Anytime Actions
- Once you place a goods tile on a board or house, you cannot take it back. (You may test tile placements to plan ahead, as long as you take them back before continuing.)
- During phases 7 and 10, all income and bonuses are generated at the same time; consequently, you may not use the income/bonuses from one board to place game pieces on another board in the same phase.
Buying Ships
At any time, you may buy a ship by paying its cost in silver. The cost of a ship is equal to its value:
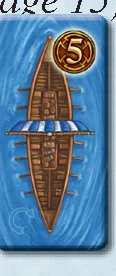
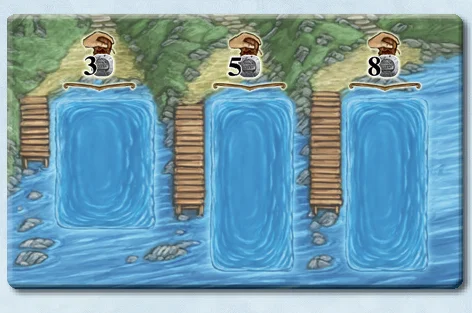
- Each whaling boat costs 3 silver (small boat).
- Each knarr costs 5 silver (large ship).
- Each longship costs 8 silver (large ship).
Each ship you acquire must be placed in your bay, on a landing stage of appropriate size (you cannot place whaling boats on the larger spaces).
Changing Silver
At any time, you may make change with your silver coins. Silver comes in denominations of “1 silver”, “2 silver”, “4 silver”, and “10 silver”. The silver coins are designed such that you can place them in the placement areas and houses.
Arming
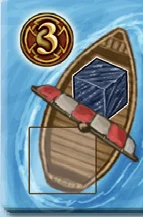
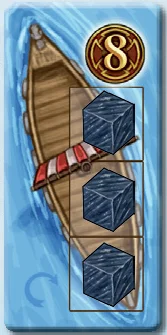
At any time (including immediately before, but not during an action), you may place ore from your supply on the designated spaces of your whaling boats and longships. You may not take back the ore you place on your ships.
- Longships are used for raiding and pillaging.
- Whaling boats are used for whaling. They show 1 preprinted ore and provide space for 1 more ore.
Occupations (Anytime Actions)
Many occupations provide actions you can take at any time. The blue background color indicates an anytime action on an occupation card.
Giving Away
You cannot simply give away or discard goods, ships, boards, or cards outside of an action.
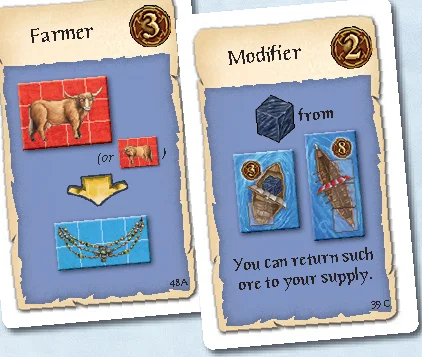
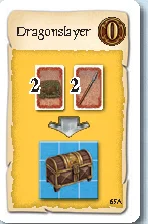
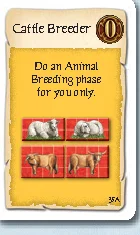
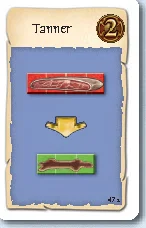
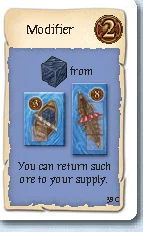
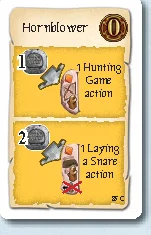
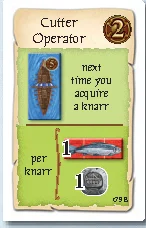
Every occupation card has the same layout: its name at the top left, its point value at the top right, and its effect at the bottom.
The Slash (/)
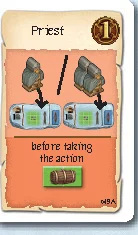
The slash stands for “either—or”. If a card has multiple elements with slashes, these relate to each other in respective order. You only choose at most one of the listed elements.
Card Categories
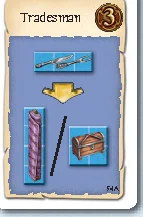
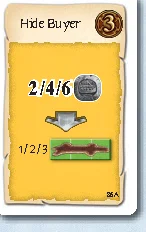
- Immediate Cards (Yellow background): One-time only effect carried out immediately when played. A grey arrow indicates a one-time exchange.
- Anytime Cards (Blue background): Permanent effect that can be used at any time and any number of times (indicated by a yellow arrow). Some anytime cards bend rules without arrows.
- Each Time Cards (Red background): Two parts: light red condition, dark red action. Take the action each time the condition is met.
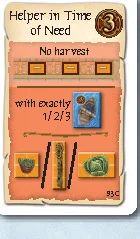
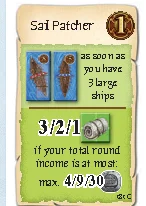
- As Soon As Cards (Green background, decks B and C): Effect triggers only once per game, as soon as the condition is first met.
Running Out of Components
- Limited components: Sheds and houses (cannot take more once depleted); Exploration boards (players may only explore up to 4 times).
- Unlimited components: Ships, goods tiles, building resources, weapon cards.
- Ships: Improvise if depleted.
- Goods tiles: Return goods from sections that are fully covered, replace with silver/other goods or remember.
- Building resources: Use the reverse side of the 7 “Thing Penalty” tiles (depicting 5 wood, 5 stone, 3 ore, etc.).
- Weapon cards: Shuffle discard pile; if still out, use penalty tile backs (worth 3 weapons of one kind).
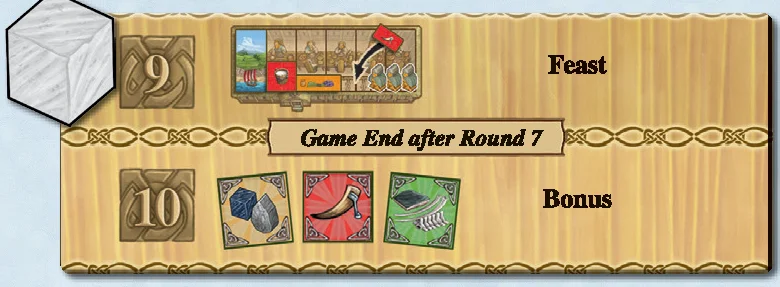
The game ends immediately after the Feast phase of the final round. You do not receive any bonus during the final round.
- Place any remaining wood and stone on sheds or stone houses.
- Place remaining goods tiles in placement areas of boards and houses if possible.
- Score points using the scoring pad. Highest total wins; ties are shared.
Positive Points
- Ships: Whaling boat = 3 pts, Knarr = 5 pts, Longship = 8 pts.
- Emigrations: Emigrated knarr = 18 pts, emigrated longship = 21 pts.
- Exploration: Exploration boards value = 4 to 38 points (printed in top right corner).
- Sheds and Houses: Shed = 8 pts, stone house = 10 pts, long house = 17 pts.
- Sheep and Cattle: Sheep = 2 pts (3 if pregnant), Cattle = 3 pts (4 if pregnant).
- Occupations: Printed value on played cards.
- Silver: Silver in supply only (silver on boards does not count here).
- Final Income: Value of income achieved in the final round.
- English Crown: 2 additional points.
Negative Points
- Subtract all visible negative point spaces on boards, sheds, and houses.
- Subtract 3 points for each Thing Penalty tile.
- Penalty for illegally placed adjacent green goods: -3 points (1 Thing Penalty) for each illegally adjacent pair of green tiles.
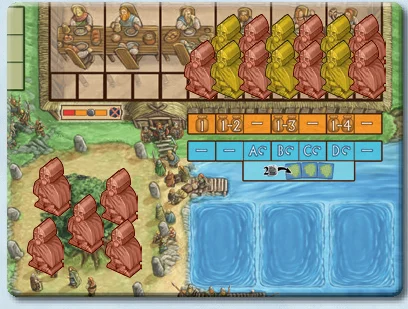
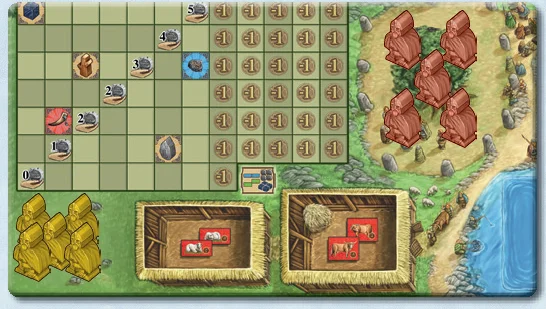
In the solo game, use whichever side of the home board you like. You will need a second set of Vikings of a different color.
Setup
- Place 1 Viking (2 in short game) of color 1 (red) on round space 1 of the Banquet Table, and 2 Vikings each on spaces 3, 5, and 7.
- Place 2 Vikings of color 2 (yellow) on round spaces 2, 4, and 6.
- Place 5 Vikings of color 1 on the Thing Square.
- Place 5 Vikings (6 in short game) of color 2 on the waiting space of your home board.
- Remove the remaining Viking of color 2 from the game (in short game, remove 1 Viking of color 1 instead).
Course of a Round (Solo)
Play the game as though it were a multiplayer game. Since you have no opponents, Vikings from the previous round remain on the action board, blocking those spaces.
- In round 1, play normally with color 1. In phase 12, leave color 1 Vikings on the action board; move the 5 color 2 Vikings from the waiting space to the Thing Square.
- In round 2, you receive 2 additional color 2 Vikings from the banquet table.
- At the end of round 2, leave color 2 Vikings on the board and return color 1 Vikings from round 1 to your home board to be placed in round 3. Continue alternating.
Special Rules for Solo Game
- Skip phase 6 (you are always first player).
- In phase 12, look at the Banquet Table to see which color Vikings to remove.
- A score of 100 points is considered very good.
“A Feast for Odin” was published in June 2016 and designed in May 2013. Extensive testing started in August 2014.
- Game Design: Uwe Rosenberg
- Illustration & Graphic Design: Dennis Lohausen
- Realization: Frank Heeren
- Typesetting: Christof Tisch (cards), Hans-Georg Schneider (rule book)
- English Translation: Grzegorz Kobiela
- Historical Texts: Gernot Köpke, Uwe Rosenberg
- Proofreading: Janina Kleinemenke, Gabriele Goldschmidt, Mario Wiese, Kerstin Herdzina, Steffen Jost, Patrick Korner, Adam Marostica, Michael Young
- Special thanks: Andreas “Ode” Odendahl for the crucial idea to implement bonuses.
Introduction & Components
By Uwe Rosenberg — Rulebook
“A Feast for Odin” is a saga in the form of a board game. You are reliving the cultural achievements, mercantile expeditions, and pillages of those tribes we know as “Vikings” today—a term that was used quite differently towards the end of the first millennium.
When the northerners went out for a raid, they used to say they headed out for a “viking.” Their Scandinavian ancestors, however, were much more than just pirates. They were explorers and founders of states. Leif Eriksson is said to be the first European in America, long long before Columbus.
In what is known today as Normandy, the intruders were not called Vikings but “Normans.” One of them is the famous William the Conqueror who invaded England in 1066. He managed to do what the king of Norway failed to do only a few years prior: conquer the Throne of England.
The reason why the people of these times became such strong seafarers is due to their unfortunate agricultural situation. Crop shortfalls caused great distress.
In this game, you will raid and explore new territories. You will also experience their day-to-day activities: collecting goods to achieve a financially secure position in society.
In the end, the player whose possessions bear the greatest value will be declared the winner.
Component List
Goods boxes and Dice
- 2 goods boxes to store the goods tiles
- 1 orange eight-sided die
- 1 blue twelve-sided die
Game Boards
- 1 large action board with action spaces
- 4 home boards (one for each player)
- 1 small supply board for the ships
- 4 two-sided exploration boards
- 1 oval supply board for the special tiles
Tiles
- 15 special tiles
- 2 extension tiles to extend the action board
- 1 large round overview tile
- Building tiles:
- 3 “shed” building tiles
- 3 “stone house” building tiles
- 5 “long house” building tiles
- 8 mountain strips
- 32 ship tiles, including:
- 10x whaling boats
- 12x knarrs
- 10x longships
Money, Wooden Goods, and Other Components
- Money: 125 silver coins, including:
- 80x “1 Silver”
- 22x “2 Silver”
- 18x “4 Silver”
- 5x “10 Silver”
- Wooden Goods: 32x wood, 24x stone, and 40x ore
- Other Wooden Components:
- 48 Vikings (12 for each player)
- 1 brown start player moose
- 1 white round tracking cube
- 7 “Thing Penalty” tiles (The back of each is different: 5 wood, 5 stone, 3 ore, 3 bow and arrow, 3 snares, 3 spears, and 3 long swords)
- 12 plastic bags, 1 appendix, 1 almanac, and this rulebook.
Cards and Goods
- 190 Occupations, divided in three decks A, B, and C:
- 45 light brown starting occupation cards
- 145 dark brown occupation cards
- 47 red Weapon cards:
- 12x bow and arrow
- 12x snare
- 12x spear
- 11x long sword
- 346 goods tiles, including:
- Food (front side: farm product / back side: animal product):
- 25x peas / mead
- 20x flax / stockfish
- 20x beans / milk
- 20x grain / salt meat
- 17x cabbage / game meat
- 15x fruits / whale meat
- Animals (front side: livestock / back side: pregnant dam):
- 18x sheep / pregnant sheep
- 15x cattle / pregnant cattle
- Equipment (front side: craft product / back side: luxury good):
- 43x oil / rune stone
- 30x hide / silverware
- 30x wool / chest
- 20x linen / silk
- 20x skin and bones / spices
- 20x fur / jewelry
- 18x robe / treasure chest
- 15x clothing / silver hoard
- Food (front side: farm product / back side: animal product):
Before Your First Game: Organizing the Goods
This game comes with a large number of goods tiles. In order to save you the hassle of storing the tiles in an assortment of plastic bags, we have provided two goods boxes so that you can better store and organize the goods tiles.
Each row stores goods of the same color and each column stores goods of the same shape. Note that orange and red goods of the same shape are on two sides of the same tile, as are green and blue goods. Divide these goods (except for sheep and cattle) into two piles and place each pile in its designated compartment.
For example, every “beans” tile has milk on the other side. Peas and mead are two sides of the same tile, as are oil and rune stone. Sheep and cattle are on both sides of their respective tiles.
The game provides more tiles than you would normally need, even more than you can fit into the goods boxes. Store any excess tiles as a reserve in the provided bags.
The following table shows how you should organize the goods tiles in the goods boxes. The goods boxes have alternating small and large compartments. In the first goods box, the small compartments are reserved for goods of the size of peas and beans, and the large ones are reserved for goods of the size of flax and grain. In the second goods box, the small compartments are meant for goods of the size of cabbage and fruits, and the large ones for goods of the size of sheep and cattle.
Setup
Action Board and Goods Boxes
- Place the large action board in the middle of the table.
- In a 4-player game, add the two extension tiles to the game board as shown in the illustration, randomly choosing which side is face up. (In games with 1 to 3 players, you do not need these tiles.)
- Open the goods boxes and place them on the table next to each other, so that all players can easily access them.
Supply Boards for Special Tiles and Ships
Place the supply boards for special tiles and ships next to the goods boxes. Aside from the blue standard goods in the top row of the goods boxes, there is a number of special tiles. Unlike the standard goods, which are supposed to be in unlimited supply, there is only one copy of each special tile. They are considered to be blue and follow the same rules as the blue good tiles. (Also, the special tiles are the same color on both sides.)
- Place the special tiles on the oval supply board.
- The other supply board is for the three types of ships. Sort the ships by type and place them face up in separate stacks on the supply board.
Occupation and Weapon Cards
There is an “A”, “B” or “C” at the bottom right of the occupation cards, indicating to which deck each card belongs. We recommend beginners only use cards from deck A, while experienced players use cards from both deck B and C, or just shuffle every deck together. Sort the occupation cards according to their light or dark brown back to form two stacks.
An illustration at the top left of the game board indicates what you receive at the start of the game:
- Each player draws 1 starting card from the stack of light brown occupation cards into their hand. (After that, remove the remaining light brown cards from the game.)
- Each player takes 1 “bow and arrow”, 1 “snare”, and 1 “spear” weapon card.
- Each player takes 1 “mead” goods tile.
Always keep all tiles and cards face up in front of you and visible to all players. Your starting card suggests which path you might want to take during the course of the game.
Shuffle the remaining weapon cards and place them face down in a stack on the table. Shuffle the occupation cards with a dark brown back and also place them face down in a stack on the table. (By no means will you need all of the cards each game. Set up only part of them and replenish the stack later, if need be.)
Your Personal Boards and the Vikings
Each player takes a home board. The home boards are two-sided:
- One side is for a game lasting 7 rounds (long game).
- The other side is for a game lasting 6 rounds (short game).
Decide how many rounds you wish to play and place the according side face up. (The long game is the main version of the game. We recommend the short game to all players who would like to familiarize themselves with the game mechanics first. Veteran players who know every aspect of the game by heart might find the shorter version more challenging.)
Setup of your personal components:
- Each player chooses a color and takes the 12 Vikings in their color.
- Place a Viking on each numbered space of the “Banquet Table” track (at the top right) of your home board: place 7 Vikings in the long game, or 6 in the short game.
- Place the rest of your Vikings on the “Thing Square” (the Vikings’ meeting place). These are your starting Vikings. (Consequently, in the short game, you start the game with one more Viking.)
Board layout overview:
- To the right of the Thing Square: the bay with landing stages for ships.
- To the left of the Thing Square: the main placement area for your valuable goods.
- At the bottom right: stables for sheep and cattle.
- Bottom left of the Goods space: Income diagonal.
- Special waiting space is reserved for the solo game.
Mountain Strips, Building Resources, and Silver
- Shuffle the eight mountain strips and turn two of them face up (three strips in a 4-player game).
- The remaining mountain strips form a face down draw pile.
- Place the depicted goods on the spaces of the face up mountain strips.
- Sort the remaining wood, stone, ore, and silver tokens by type and place them ready at hand.
Exploration Boards
Lay out the four exploration boards with their “Shetland”, “Faroe Islands”, “Iceland”, and “Greenland” sides facing up in that order. The letters A to D on the bottom right of the boards indicate their front sides.
Building Tiles
Place the “shed”, “stone house”, and “long house” building tiles in separate stacks on the table.
Overview Tiles
Place the round overview tile on the table and place the white round tracking cube on space 1.
Core Concepts & Overview
How to Play the Game
The basic principle of the game is simple. Each round, you place your Vikings on the spaces of the action board and take the chosen actions immediately. Because each action space can only be occupied once per round, you will quickly get in each other’s way.
What You Want to Achieve
Your goal is to cover the spaces in the placement area of your home board with green and blue goods tiles. If you leave gaps, you can fill them with ore and silver (as shown below).
To get the goods tiles in the first place, you will either need to obtain them by raiding (in the Viking fashion) or receive them in exchange for farm goods.
At any time, you can place tiles, ore tokens and silver coins from your supply onto your home board. Once on your home board, you cannot take them back.
Overseas trading plays a special role in all of this. It allows you to turn any number of different green goods (representing craft products) into blue luxury goods in a single action. (How turning a lot of green goods into blue ones may benefit you is explained in the “Anytime Actions” section on page 12.)
Income
The big numbers across the placement area of your home board represent income values. The smallest visible income value indicates your income for the current round (described further on page 9).
Bonus
Some spaces of your home board feature goods symbols (there are five goods spaces on your home board). You receive these goods each round as a bonus once you have covered all spaces surrounding them.
- Sooner or later you may wish to cover the goods spaces to increase your income. (By doing so, you forfeit the bonus.)
- During the game, you can explore new territories and add them to your home board. You will need ships to do so. (To explore Iceland, for instance, you would need a knarr or a longship.)
What You Get Points For
At the end of the game, you will add the values of your ships, houses, exploration boards, and goods. Points are indicated by the shield symbol.
- Emigration: Your large ships can increase in value if you use them for emigration. (Simply turn them to the other side when that happens.) After each emigration, you will have one fewer ship at your disposal.
- Covering Negative Points: Your home board and the exploration boards have spaces that you must cover with goods tiles to avoid negative points. (“Fur” can be effectively worth 8 points if you use it to cover eight spaces with negative points.)
- Houses & Sheds: The sheds, stone houses, and long houses also have spaces with negative points, which you should cover with goods tiles. Sheds require wood and stone. The stone and long houses are special in that they allow you to place orange and red food tiles in them as well as the usual green and blue goods and silver coins, but not ore. (Note the two supporting pillars in the center of the long house: these cannot be covered.)
- Animals: You gain additional points for sheep and cattle, which breed every other round. The back sides of the animal tiles show pregnant dams, which are worth 1 additional point.
- Occupation Cards: Points are scored for the occupation cards you have played. Occupations can also be worth negative points (e.g., the Undertaker is worth -1 point).
Round Structure (Phases 1–12)
Randomly determine who receives the grey start player moose. The long game is played over 7 rounds (the short game over 6 rounds).
Each round consists of the following 12 phases, played one after another in that order:
- A New Viking
- Harvest
- Turn Exploration Boards and Placing Silver
- Draw a New Weapon
- Actions
- Determine Start Player
- Income
- Animal Breeding
- Feast
- Bonus
- Update and Add New Mountain Strips
- Remove Placed Vikings from the Action Board
Phase 1: A New Viking
Take the leftmost Viking from the “Banquet Table” of your home board and place it with your other Vikings on the Thing Square. (The now empty space indicates the number of the current round.)
Each round, including the first, you receive a new Viking.
Phase 2: Harvest
Below the new round number, there is a note indicating what you will receive during harvest. During harvest, you can only get orange goods. Take the goods from the general supply and place them in your personal supply.
The numbers on the tiles mean:
- 1: You receive one of each crop with a 1: peas, beans, and flax.
- 1-2: You receive one of each crop with a 1 or 2: peas, beans, flax, and grain.
- 1-3: You receive one of each crop with a 1, 2, or 3: peas, beans, flax, grain, and cabbage.
- 1-4: You receive one of each crop with a 1, 2, 3, or 4: peas, beans, flax, grain, cabbage, and fruits.
- “No Harvest”: You do not get any goods in the harvest phase of that round.
Phase 3: Turn Exploration Boards and Placing Silver
In the action phase (phase 5), you can use your ships to claim additional placement areas on the exploration boards. Some exploration boards are available at the start, others become available later. This is why each exploration board that has not been claimed by a player is turned to its back side at some point. A symbol below the harvest notes on your home board indicates when to turn each exploration board:
- In round 3 (round 2 in short game): Turn Shetland, introducing Bear Island.
- In round 4 (round 3 in short game): Turn the Faroe Islands, introducing Baffin Island.
- In round 5 (round 4 in short game): Turn Iceland, introducing Labrador.
- In round 6 (round 5 in short game): Turn Greenland, introducing Newfoundland.
Increasing the Value of an Unclaimed Exploration Board
Each round in which you should turn an exploration board (short game: rounds 2 to 5; long game: rounds 3 to 6), place 2 silver on each unclaimed exploration board not being turned. Exploration boards that players have already taken do not receive silver.
- When you turn an exploration board with silver on it, return the silver to the general supply.
- Place silver on the other exploration boards even if the exploration board that is supposed to be turned has already been claimed by a player.
- There is no phase 3 in the first and last round. In those rounds, no exploration board is turned and no silver is placed on any of them.
Phase 4: Draw a New Weapon
Each player draws a new weapon card and places it face up in their supply. (You could draw a long sword, the only type of weapon you do not have from the start.)
Phase 5: Actions
Beginning with the start player and in clockwise order, take one or more Vikings from your Thing Square and place them on exactly one unoccupied action space of the action board. Continue doing so until all players have passed or placed all of their available Vikings.
- You can pass even if you have Vikings left in your Thing Square. Once you have passed, you cannot place any more Vikings that round. (When you have none left, you must pass.)
- Important: each action space can only be occupied once per round.
- Viking costs by column:
- Each action space in the first column requires 1 Viking.
- Each action space in the second column requires 2 Vikings.
- Each action space in the third column requires 3 Vikings.
- Each action space in the fourth column requires 4 Vikings.
- You must use an action space immediately after you occupy it. To occupy an action space, you must use at least one of its effects (paying a cost is also considered an effect in and of itself).
- The action spaces on the action board are organized in groups of similar effects. The wood grain background helps to emphasize this. The type of action spaces in each group is stated in the left margin of the action board.
- The action phase ends as soon as all players have placed all of their Vikings or passed.
Phase 6: Determine Start Player
The player who placed Vikings last in the action phase receives the start player moose and will be the start player in the next action phase.
Phase 7: Income
During the game, you will place green, blue goods tiles, ore tokens and silver coins on your home board. The smallest uncovered value on the “income diagonal” indicates the amount of silver you receive this phase.
- Important: You must cover the income values in ascending diagonal order. This is explained further on page 12 (Anytime Actions).
- Income is paid in silver (this phase), whereas bonuses are paid in goods (phase 10).
- By claiming exploration boards, you can produce additional income. Income from an exploration board is handled like income from your home board.
Phase 8: Animal Breeding
At the bottom right of your home board, you can find storage spaces (stables) for your “sheep” and “cattle” goods tiles. Please note that these tiles show the same animal on both sides—one side shows the non-pregnant animal, the other the pregnant one.
In this phase, your animals breed, according to the following rules:
- If you have at least 1 sheep with the “pregnant sheep” side facing up, turn all of them to the other side and take 1 “sheep” tile for each tile you just turned (and place them with the “non-pregnant” side facing up in your stable).
- If you have at least 2 sheep but no “pregnant sheep”, turn 1 of them to the “pregnant sheep” side.
- The same applies to cattle. Consequently, your sheep and cattle can breed every 2 rounds.
Examples of Animal Breeding:
- You have three sheep, one of which is pregnant. The pregnant one gets a newborn, the other two remain non-pregnant. Afterward you have four non-pregnant sheep.
- You have four non-pregnant sheep. Still, you can only turn one of them to the pregnant side.
- You have two sheep, one of which is pregnant. During the action phase, you spend the non-pregnant one. In the breeding phase of that round, you are now left with a single pregnant sheep. It still receives a newborn, even though it is the only sheep in the stable.
Phase 9: Feast
This phase focuses on the spaces of the “Banquet Table” track with no Vikings.
Place orange and red food tiles from your supply (or stable) and/or “1 silver” coins on each empty space of the “Banquet Table”, according to the following rules:
- Orange tiles (farm products) cannot be placed next to each other.
- Red tiles (animal products) also cannot be placed next to each other.
- Silver coins can be placed next to each other. (Ore cannot be placed on the “Banquet Table”.)
- Orientation rule: One tile of each type may be placed horizontally to take up more space at the table. All other tiles of that type must be placed vertically (square tiles are exempt from this rule, as it does not matter).
- Every tile you place on the “Banquet Table” must cover at least one of the squares below the table and fit in the allowed space (it cannot overhang).
Thing Penalty
- For each space of your “Banquet Table” on which you could not or did not want to place anything, you must take a “Thing Penalty” tile and place it in your supply. You must keep these tiles for the rest of the game. (This should not happen too often, because the feast happens after you receive income. Income should always provide enough silver to cover the spaces.)
- At the end of the game, you lose 3 points for each penalty tile you have.
- At the end of this phase, move the goods on your “Banquet Table” to the general supply.
Phase 10: Bonus
Some spaces in the placement area of your home board show a goods symbol. These spaces count as already covered, but you can cover them with goods tiles, if need be (according to the placement rules). If you leave a goods space uncovered, but instead cover the 8 spaces around it, you will receive that good as a bonus each round.
- Spaces on the edge of the placement area require fewer spaces (e.g., the ore space on the edge only needs 5 spaces covered around it).
- You receive your bonus all at the same time.
- Tip for experienced players: If you place goods tiles in your placement area before the income phase, you will then receive silver that you can use right away to possibly get bonuses as well.
Phase 11: Update and Add New Mountain Strips
Mountain strips provide building resources that you can get during the action phase.
- In this phase, remove the leftmost resource (i.e., closest to the arrow) from each face-up mountain strip and return it to the general supply (this can be wood, stone, ore or silver). If all spaces are empty, remove the mountain strip.
- Then turn a new mountain strip face up and place the depicted goods on it. (This way there can be more face-up mountain strips than at the start of the game.)
- In the 4-player long game, there are not enough mountain strips for all 7 rounds. You simply do not add any in round 7.
Phase 12: Remove Placed Vikings from the Action Board
Return your Vikings from the action board to your Thing Square. (Then proceed with phase 1 of the next round.)
Action Spaces in Detail
The action board features a variety of action spaces. General rule: Some actions require you to have a specific type of ship. You may use the same ship multiple times per round for different actions.
Example: You have a single longship in your bay. With this ship, you can head out on a raid first, then explore “Newfoundland”, and emigrate that same round.
Production Spaces
On the green spaces of the action board, you receive exactly what is depicted (e.g., 1 stockfish). In particular:
- Milk production: You receive 1 milk if you have 1 cattle, 2 milk if you have 2 cattle, and 3 milk if you have 3 or more cattle.
- Wool production: You receive 1 wool if you have 1 sheep, 2 wool if you have 2 sheep, and 3 wool if you have 3 or more sheep.
- Weekly Market / Mixed: You receive 1 spices and 1 silver. Additionally, you receive 2 milk if you have at least 1 cattle, and 1 wool if you have at least 1 sheep.
- Wood & Ore per player: You receive wood and ore from the general supply. While you only ever get 1 ore here, you also get 1 wood per player: in a 1/2/3/4 player game, this is 1/2/3/4 wood.
- Buying Goods with Silver: If a good costs silver, the price is printed below a purse icon at the left of the action space. (For example, 1 cattle and 1 milk cost a total of 3 silver.)
Tip: Most new players overrate the Weekly Market. Your Vikings are well provided for during the harvests. Usually, you will not need much more food than that. On the other hand, they tend to overlook the long-term potential of animal breeding.
Exchange Spaces
The dark yellow action spaces relate to house building, ship building, and crafting. On these, you exchange something (usually building resources from your supply) for something else, but only once:
- Build Shed: Pay 2 wood to receive a shed.
- Build Houses: Build a “stone house” and “long house” for 1 and 2 stone, respectively. (Note that the number of shed and house tiles is limited.)
- Build Ships: Build the indicated ship for 1 or 2 wood. The number of ships is not limited; the only limitation is the landing stages in your bay (up to 3 whaling boats, up to 4 large ships).
- House/Ship Choice: For 2 stone and 2 wood, take either a stone house and a longship, or a long house and a knarr.
- Flax to Linen: Exchange an orange “flax” tile for a green “linen” tile.
- Hide & Linen to Clothing: Spend green “hide” and “linen” tiles to make “clothing”, and receive 2 silver.
- Smithy: Spend 1 ore to receive a tile with a forge tongs symbol. Jewelry tiles show a forge tongs symbol, as well as all special tiles.
- Trade Goods & Silver: Receive 4 silver. Additionally, exchange a green “wool” tile for a “robe” tile, and/or a blue “silverware” tile for a “jewelry” tile.
- Rune Stone / Chest: Exchange stone and/or wood or ore for blue “rune stone” and “chest” tiles. On the first two of these spaces, you also receive 1 silver.
- Occupation: Playing a single occupation costs 1 stone or 1 ore, and you receive 1 silver.
- Upgrade Whaling Boat & Emigrate: Exchange a whaling boat for a knarr (if you wish), before using that knarr or another large ship to emigrate. (If the whaling boat you exchange has ore on it, you lose that ore.)
Mountain and Trading Actions
Mountain Actions
Some of the golden brown action spaces allow you to take building resources and silver from mountain strips. When taking resources from a mountain strip, always take them from left to right (i.e., goods closest to the arrow first). The 2 silver at the right are considered a single item. After taking the last “2 silver”, remove the mountain strip from the game.
- Take 2 Building Resources: Take up to 2 items from one mountain strip of your choice. (You may choose a mountain strip with fewer resources, but may not take resources from another strip to make up for it.)
- Take 3+2 Building Resources: Take up to 3 items from one mountain strip and up to 2 items from another mountain strip. You may not take 5 resources from the same strip.
- Take 2+2+2+2 Building Resources: Take up to 2 items each from up to four mountain strips. Here, you cannot take 4 or 6 items from one strip.
Trading Actions
The other golden brown action spaces allow you to exchange goods in your supply for more valuable ones:
- ↑ 1 Good: Exchange exactly 1 goods tile for the next more valuable one: orange to red, red to green, or green to blue. The old and new tile must have the same shape and dimensions. (E.g., exchange game meat for skin and bones.)
- ↑ 2 Goods: Exchange up to 2 goods tiles for the next more valuable one. Both tiles may be of the same type, but you may not “upgrade” a single tile twice.
- ↑↑ 2 Goods: Upgrade 2 goods twice: orange to green, or red to blue. (In addition, take 4 resources from one mountain strip.)
- Other action spaces provide 4 weapon cards (draw 4 random weapons face up).
Tip: Before you exchange your goods for more valuable ones via upgrade actions, check how many and which goods you will need for the Feast phase. We recommend you place those goods on the “Banquet Table” during the action phase ahead of time.
Knarr Action Spaces
Blue is the color of action spaces that require a knarr, providing blue luxury goods for trade.
Overseas Trading
The two “Overseas Trading” action spaces are located in the first and second column. On these spaces, you can pay 1 silver to turn any number of different green goods tiles to their blue side. To do so, however, you must have at least one knarr in your bay.
- Green tiles in the placement areas of your boards may not be turned to their blue sides.
- Each good converted must be different (e.g., you can turn 1 oil, 1 hide, 1 wool, 1 linen, and 1 clothing to blue, but a second linen must stay green).
Special Sale
The “Special Sale” action space is located in the third column of the action board. Each special tile shows a silver cost. If you have at least one knarr, you can buy up to 2 special tiles by paying their cost. (The English Crown is the only special tile that may not be bought.)
Emigration
Yellow is the color of emigration. On “Emigration” action spaces, you may turn a knarr or a longship in your possession to its back side and place it on the leftmost space of your “Banquet Table.” This tile is no longer a ship, but it reduces the amount of food you have to serve during a feast.
- The next time you emigrate, place the second ship to the right of the first one.
- To take this action, you must pay an amount of silver equal to the current round.
- You lose the ore on the longship, if any.
- You do not lose any Vikings in the process of emigration.
- In the very rare case that you emigrated so frequently that there is no more space for another ship on the Banquet Table, you cannot take the emigration action anymore.
Raiding, Pillaging, and Hunting
Red action spaces provide actions that require you to roll a die.
- Orange eight-sided die: used on spaces with an orange die symbol.
- Blue twelve-sided die: used on spaces with a blue die symbol.
- Rolling High vs. Low: When raiding and pillaging, you want to roll high. On spaces with a die symbol at the top of the action board (Hunting Game, Laying a Snare, Whaling), you want to roll low.
- Re-rolls: You may roll the die up to three times. Each re-roll invalidates the previous roll. You can stop rolling at any time. When finished, announce your battle result, then declare your action a success or failure.
Raiding
To take a “Raiding” action, you must have at least one longship. (Ore on the ship cannot be used for raiding.)
- Success: Every blue goods tile has a sword value. After you roll the orange eight-sided die, you can take exactly one blue goods tile with a sword value equal to or lower than you rolled. Each stone and “long sword” weapon card you spend increases your die roll by 1 (even above 8). This modified value is considered your “battle result.”
- Failure: Your raid automatically fails if your battle result is 5 or less. Regardless of the result, you may willingly declare your raid a failure. Upon failure, you receive a consolatory 1 stone and 1 long sword from the general supply.
Pillaging
As with “Raiding”, you want to roll high when pillaging. You must have a longship. If you have more than one longship, you must use the longship with the most ore on it.
- Success: Add 1 to your dice roll for each ore on your longship (even above 12), keeping the ore. After rolling the blue twelve-sided die, take exactly one blue goods tile (regular or special tile) with a sword value equal to or lower than your roll. You can spend stone and long swords from your supply to increase the roll by 1 per item spent.
- Failure: Your pillage automatically fails if your battle result is 5 or less. You may willingly declare it a failure regardless of the result. Upon failure, you receive a consolatory 1 stone and 1 long sword. Additionally, after each failed pillaging attempt, you may return 1 Viking from the action space to your Thing Square and use it again later that round.
Hunting Game, Laying a Snare and Whaling
When hunting game and laying a snare, you roll the orange eight-sided die. When whaling, you roll the blue twelve-sided die. In all of these cases, you want to roll low.
- Success:
- When whaling, reduce the value of your roll by one for each ore (even preprinted ore) on the whaling boat(s) you are using to perform the action (you keep the ore). Negative values are treated as 0.
- Pay a number of wood and/or proper weapons equal to the final value to declare a successful action and receive the reward:
- Hunting game: Requires bow and arrow; reward: 1 hide and 1 game meat.
- Laying a snare: Requires snare; reward: 1 fur and 1 “snare” weapon card.
- Whaling: Requires spear; reward: 1 oil, 1 “skin and bones”, and 1 whale meat.
- If your battle result is 0, you may not declare the attempt a failure; you must stop immediately and cannot re-roll.
- Failure:
- If you declare your attempt a failure, you do not pay anything. (You may not declare a result of 0 as a failure.)
- You receive a consolatory 1 wood and 1 weapon of the proper type.
- Additionally, when you fail laying a snare, you return 1 Viking to your Thing Square. When you fail whaling, you return 2 Vikings. You may use returned Vikings again later that round.
Peculiarities of Whaling and Plundering
- Whaling spaces: On the major “Whaling” action space (left, 3 Vikings), you can use 1 to 3 whaling boats. In column 4 (4 Vikings), there is a minor “Whaling” action space where you can only use a single whaling boat.
- Plundering: The “Plundering” action space is also considered a red action space. Here, you can extort ransom money in the form of a blue “silver hoard” goods tile without battle—but you must have at least two longships to do so.
Exploration
Orange is the color of exploration. By exploring, you may add exploration boards to your home board to gain additional placement areas. There are four unique exploration boards—which side faces up depends on the current round. Place the required number of Vikings on the action space and take the corresponding exploration board. If there is silver on it, place it in your supply. You keep the ship you explore with.
- Shetland or Faroe Islands: Requires a whaling boat, knarr, or longship, and 1 Viking (only on the space requiring 1 Viking).
- Iceland, Greenland, and Bear Island: Each require a knarr or longship, and 2 Vikings.
- Baffin Island, Labrador, and Newfoundland: Each require 3 Vikings and a longship.
Occupation Spaces
You start the game with a single light brown occupation card in hand. During the game, you will receive additional dark brown occupation cards. You must play an occupation card before you can use its effect.
- Draw an Occupation: Draw a random dark brown occupation card and receive 1 silver.
- Play 1 Occupation: Pay 1 stone or 1 ore to play an occupation card from hand and receive 1 silver.
- Play up to 2 Occupations: Play up to 2 occupation cards from your hand, one after another.
- Play up to 4 Occupations: Play up to 4 occupation cards from hand, one after another.
- Bonus for Placing Three Vikings: Each time you place three Vikings on an action space in the third column, before taking the action, you draw 1 dark brown occupation card into your hand.
- Bonus for Placing Four Vikings: Each time you place four Vikings on an action space in the fourth column, before or after taking the action, you may play an occupation card from your hand.
Extension Tiles in the 4-Player Game
The grey action spaces on the extension tiles allow you to imitate an action space in the same column that is occupied by another player. (You cannot imitate unoccupied spaces or spaces occupied by your own Vikings.) Imitation spaces can only be used once per round.
Anytime Actions & Placement Rules
There is a variety of actions you can take literally at any time during the game (usually even during a main action).
Placing Goods on the Home Board
At any time, you can place green craft products and blue luxury goods as well as silver coins and ore tokens on empty spaces in the placement area of your home board, according to the following rules:
- Income Diagonal Rule: The spaces with the big numbers (0, 1, 2, 3, …) form the “income diagonal”. You can only cover a space in the income diagonal if you also cover (or have already covered) all spaces:
- to the left of that space,
- below that space,
- as well as all spaces in the square to the bottom left of the space.
Spaces with goods symbols are considered covered already. The placement areas depict growing squares in order to remind you of these placement rules.
- Adjacency Rule for Green Goods: Green tiles cannot be orthogonally adjacent to other green tiles (diagonal adjacency is allowed).
- Adjacency for Other Items: Blue tiles can be adjacent to other blue tiles, as can silver coins to other silver coins, and ore tokens to other ore tokens.
- No Overlapping: When you place a good, you cannot place it on top of another good that is already there (not even partially). You can, however, cover spaces with goods symbols.
- Within Bounds: Each good you place must be placed within the bounds of the placement area. (The home board has three additional spaces at the top right, so that you can place bigger tiles like the treasure chest during the end game.)
- Special Tiles: The special tiles are considered to be blue and follow the same rules as the blue goods tiles.
- Covering Anywhere: To avoid negative points, you are explicitly allowed to place goods wherever you like in the placement area, as long as you do not cover income spaces that you are not allowed to cover.
Placing Goods on the Exploration Boards
As with the home board: at any time, you may place green craft products and blue luxury goods as well as silver coins and ore tokens on empty spaces of the exploration boards, according to the same rules.
- A lot of goods spaces on the exploration boards are surrounded by less than 8 other spaces, which makes it easier to enclose them for the bonus. (To unlock the rune stone and ore bonus on Bear Island, you only need to cover six spaces.)
- Note that there might be spaces in the center of an exploration board that you are not allowed to cover with goods, like the “5” on Bear Island. These spaces have a very prominent green border.
Placing Goods on the House Tiles
At any time, you may place orange farm goods, red animal products, green craft products, and blue luxury goods as well as silver coins on empty spaces of your houses.
- Orange tiles cannot be orthogonally adjacent to other orange tiles, and red tiles cannot be orthogonally adjacent to other red tiles (diagonal adjacency is allowed).
- Note that you cannot cover the pillar spaces in the long house.
Rules Applying to All Anytime Actions
- Once you place a goods tile on a board or house, you cannot take it back. (You may test tile placements to plan ahead, as long as you take them back before continuing.)
- During phases 7 and 10, all income and bonuses are generated at the same time; consequently, you may not use the income/bonuses from one board to place game pieces on another board in the same phase.
Buying Ships
At any time, you may buy a ship by paying its cost in silver. The cost of a ship is equal to its value:
- Each whaling boat costs 3 silver (small boat).
- Each knarr costs 5 silver (large ship).
- Each longship costs 8 silver (large ship).
Each ship you acquire must be placed in your bay, on a landing stage of appropriate size (you cannot place whaling boats on the larger spaces).
Changing Silver
At any time, you may make change with your silver coins. Silver comes in denominations of “1 silver”, “2 silver”, “4 silver”, and “10 silver”. The silver coins are designed such that you can place them in the placement areas and houses.
Arming
At any time (including immediately before, but not during an action), you may place ore from your supply on the designated spaces of your whaling boats and longships. You may not take back the ore you place on your ships.
- Longships are used for raiding and pillaging.
- Whaling boats are used for whaling. They show 1 preprinted ore and provide space for 1 more ore.
Occupations (Anytime Actions)
Many occupations provide actions you can take at any time. The blue background color indicates an anytime action on an occupation card.
Giving Away
You cannot simply give away or discard goods, ships, boards, or cards outside of an action.
Occupation Cards Guide
Every occupation card has the same layout: its name at the top left, its point value at the top right, and its effect at the bottom.
The Slash (/)
The slash stands for “either—or”. If a card has multiple elements with slashes, these relate to each other in respective order. You only choose at most one of the listed elements.
Card Categories
- Immediate Cards (Yellow background): One-time only effect carried out immediately when played. A grey arrow indicates a one-time exchange.
- Anytime Cards (Blue background): Permanent effect that can be used at any time and any number of times (indicated by a yellow arrow). Some anytime cards bend rules without arrows.
- Each Time Cards (Red background): Two parts: light red condition, dark red action. Take the action each time the condition is met.
- As Soon As Cards (Green background, decks B and C): Effect triggers only once per game, as soon as the condition is first met.
Component Limits
Running Out of Components
- Limited components: Sheds and houses (cannot take more once depleted); Exploration boards (players may only explore up to 4 times).
- Unlimited components: Ships, goods tiles, building resources, weapon cards.
- Ships: Improvise if depleted.
- Goods tiles: Return goods from sections that are fully covered, replace with silver/other goods or remember.
- Building resources: Use the reverse side of the 7 “Thing Penalty” tiles (depicting 5 wood, 5 stone, 3 ore, etc.).
- Weapon cards: Shuffle discard pile; if still out, use penalty tile backs (worth 3 weapons of one kind).
End of the Game & Scoring
The game ends immediately after the Feast phase of the final round. You do not receive any bonus during the final round.
- Place any remaining wood and stone on sheds or stone houses.
- Place remaining goods tiles in placement areas of boards and houses if possible.
- Score points using the scoring pad. Highest total wins; ties are shared.
Positive Points
- Ships: Whaling boat = 3 pts, Knarr = 5 pts, Longship = 8 pts.
- Emigrations: Emigrated knarr = 18 pts, emigrated longship = 21 pts.
- Exploration: Exploration boards value = 4 to 38 points (printed in top right corner).
- Sheds and Houses: Shed = 8 pts, stone house = 10 pts, long house = 17 pts.
- Sheep and Cattle: Sheep = 2 pts (3 if pregnant), Cattle = 3 pts (4 if pregnant).
- Occupations: Printed value on played cards.
- Silver: Silver in supply only (silver on boards does not count here).
- Final Income: Value of income achieved in the final round.
- English Crown: 2 additional points.
Negative Points
- Subtract all visible negative point spaces on boards, sheds, and houses.
- Subtract 3 points for each Thing Penalty tile.
- Penalty for illegally placed adjacent green goods: -3 points (1 Thing Penalty) for each illegally adjacent pair of green tiles.
The Solo Game
In the solo game, use whichever side of the home board you like. You will need a second set of Vikings of a different color.
Setup
- Place 1 Viking (2 in short game) of color 1 (red) on round space 1 of the Banquet Table, and 2 Vikings each on spaces 3, 5, and 7.
- Place 2 Vikings of color 2 (yellow) on round spaces 2, 4, and 6.
- Place 5 Vikings of color 1 on the Thing Square.
- Place 5 Vikings (6 in short game) of color 2 on the waiting space of your home board.
- Remove the remaining Viking of color 2 from the game (in short game, remove 1 Viking of color 1 instead).
Course of a Round (Solo)
Play the game as though it were a multiplayer game. Since you have no opponents, Vikings from the previous round remain on the action board, blocking those spaces.
- In round 1, play normally with color 1. In phase 12, leave color 1 Vikings on the action board; move the 5 color 2 Vikings from the waiting space to the Thing Square.
- In round 2, you receive 2 additional color 2 Vikings from the banquet table.
- At the end of round 2, leave color 2 Vikings on the board and return color 1 Vikings from round 1 to your home board to be placed in round 3. Continue alternating.
Special Rules for Solo Game
- Skip phase 6 (you are always first player).
- In phase 12, look at the Banquet Table to see which color Vikings to remove.
- A score of 100 points is considered very good.
Credits
“A Feast for Odin” was published in June 2016 and designed in May 2013. Extensive testing started in August 2014.
- Game Design: Uwe Rosenberg
- Illustration & Graphic Design: Dennis Lohausen
- Realization: Frank Heeren
- Typesetting: Christof Tisch (cards), Hans-Georg Schneider (rule book)
- English Translation: Grzegorz Kobiela
- Historical Texts: Gernot Köpke, Uwe Rosenberg
- Proofreading: Janina Kleinemenke, Gabriele Goldschmidt, Mario Wiese, Kerstin Herdzina, Steffen Jost, Patrick Korner, Adam Marostica, Michael Young
- Special thanks: Andreas “Ode” Odendahl for the crucial idea to implement bonuses.
Expansions for
A Feast for Odin
A Feast for Odin: New Special Tiles
2017
A compact 2017 mini expansion featuring new special tiles.
120
minutes
Medium

View expansion
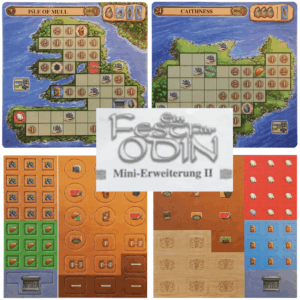
A Feast for Odin: Mini Expansion #2
2019
Fresh islands, harvest twists, and new resources for every Viking table.
120
minutes
Medium Heavy
View expansion
A Feast for Odin: The Norwegians
2018
Expand your Viking strategy with new actions, puzzles, islands, and buildings.
120
minutes
Medium Heavy
View expansion
