
Arkham Horror: The Card Game (Revised Core Set)
2021
Build a custom deck, uncover terrifying mysteries, and carry your choices and earned experience into future scenarios.
180
minutes
1 - 4
player(s)
14+
Medium Heavy


About this board game
Arkham Horror: The Card Game (Revised Core Set) is a campaign-based card game for 1–4 players, with adventures that can take up to 180 minutes. Set in Arkham, Massachusetts, it casts players as investigators confronting strange happenings, hidden mysteries, and unspeakable horrors.
The boundaries between worlds have grown dangerously thin, while an Ancient One manipulates events from beyond the veil. Playing alone or with friends, you investigate the quiet New England town and work to unravel the terrifying forces gathering there.
Each player becomes a character with their own talents and flaws. These strengths and weaknesses are reflected in a custom deck of cards, which provides the resources you use while investigating and working together. Every adventure carries you deeper into the mystery.
- Cooperative play for 1–4 players
- A campaign structure where choices have consequences beyond the current scenario
- Custom character decks shaped by investigators’ strengths and weaknesses
- Experience earned during play to help prepare for future adventures
Because this is a campaign game, the outcome of one scenario can affect what lies ahead. Your actions may bring valuable experience, helping you prepare for the adventures still to come as the investigation unfolds.
The 2021 revised edition is fully compatible with previously published material. It contains the same cards as the earlier core set, but includes more copies of them and some cards with new art. Players with earlier content can continue their campaigns under the newer two-box campaign format, beginning with Edge of the Earth.
With its ongoing story, cooperative investigation, and lasting consequences, Arkham Horror: The Card Game offers a connected series of mysteries in which every decision can matter beyond the immediate scenario.
Thematics
Mechanics
Designers
Illustrators
Useful links
 View board game on
Board Game Geek
Board Game Rules for
Arkham Horror: The Card Game (Revised Core Set)
Beyond Time and Space…
Assuming that I was sane and awake, my experience on that night was such as has befallen no man before. It was, moreover, a frightful confirmation of all I had sought to dismiss as myth and dream.
—H. P. Lovecraft, The Shadow Out of Time
Game Overview
Arkham Horror: The Card Game is a cooperative Living Card Game® (LCG®) in which one to four investigators work together to unravel arcane mysteries and conspiracies, while simultaneously overcoming the personal demons that haunt their past.
Each player takes on the role of a single investigator and builds a deck around that investigator’s abilities. A series of interrelated scenarios creates a narrative campaign through which a broader mystery is unraveled. In each of these scenarios, the investigators move through and explore a number of menacing locations, look for clues that enable them to advance the story, and attempt to evade or defeat the treacherous forces of the Mythos.
As progress is made in the campaign, each investigator gains experience and insight, which allows them to develop in a variety of ways by adding powerful new high-level cards to their deck. But beware: As one’s exposure to the arcane world increases, so too does the risk of insanity. The investigators must protect themselves against this tightening grip of madness, all the while attempting to survive and solve the mystery.
Using This Book
This Learn to Play book is written as an introduction to Arkham Horror: The Card Game for new players. It should be used as a guide while learning and playing the first game. We recommend that new players learn the basics of the game using the introductory scenario with the pre-constructed decks described in “Starter Decks” on page 20. The end of this book also contains an introduction to campaign play and rules for customizing original decks. A quick reference of keywords, icons, and important game symbols can be found on the back cover of this book.
The complete rules of play can be found in the Rules Reference book, which also addresses more advanced topics such as the interpretation of card text, the resolution of timing conflicts, and a detailed phase sequence. We recommend that new players become familiar with the game using this Learn to Play book and only look up details in the Rules Reference as they occur in play.
A Living Card Game
Arkham Horror: The Card Game is a one-to-four-player cooperative game. One to four players can play using just the contents of this core set. In addition, Arkham Horror: The Card Game is a Living Card Game® (LCG®), and the experience of the game can be customized and enhanced through the purchase of regularly released expansions. Expansions may introduce new investigators, additional scenarios or campaigns, and new player cards that add variety and depth to investigator decks. While playing through an entire campaign creates the best experience, each scenario in a campaign may instead be played as a standalone adventure. Unlike collectible card games, all LCG expansions have a fixed distribution; there is no randomization to their contents.
Game Components
Examples of the components in the game are presented here for identification purposes. A complete card anatomy can be found on pages 28–31 of the Rules Reference.
- 44 Chaos Tokens
- Chaos Bag
- 40 Damage Tokens (1s and 3s)
- 61 Resource Tokens (1s, 3s, and 5s)
- 57 Clue/Doom Tokens (double-sided) (1s and 3s)
- 27 Horror Tokens (1s and 3s)
- 5 Investigator Cards
- 5 Investigator Mini-Cards
- Lead Investigator Token
- 245 Player Cards (Player Reference Card, Asset Cards, Skill Cards, Event Cards, Weakness Cards)
- 111 Scenario Cards (Scenario Reference Card, Location Cards, Agenda Cards, Act Cards, Enemy Cards, Treachery Cards)

Fundamental Concepts
This section introduces a number of fundamental concepts important to learning and playing the game.
Winning and Losing
Each game is a single scenario during which the investigators are gathering clues and working to unravel a mystery. As the investigators advance through a scenario, they might reach a resolution. Typically, a scenario ends by advancing either the act deck or the agenda deck, which are described below. If the investigators advance the act deck, the scenario’s resolution is typically favorable (and can be considered a “win”); other resolutions are usually less favorable and leave the investigators in a more dire situation.
When any encounter card triggers a resolution—denoted by the text “(→R#)”—the players have completed the scenario and should refer to the resolution text that matches that number in the Campaign Guide to discover what happens next.
Should all investigators be eliminated during a scenario, the “if no resolution was reached” conclusion in the Campaign Guide is used.
Scenario Decks
Each scenario is represented by three distinct decks of cards. These decks provide the investigators with a scenario-specific narrative, objectives, and encounters, including a variety of monsters and other perils.
Agenda Deck
The agenda deck represents the progress made by the dark forces of the Mythos. During the game, the agenda deck gradually advances toward a resolution that is often unfavorable for the investigators. Generally, the investigators want to prevent this from happening.
Act Deck
The act deck represents progress made by the investigators toward solving a mystery or achieving their objectives during a scenario. Generally, the investigators want to advance the act deck to reach a more favorable resolution for the scenario.

When placed side by side in the play area, the act and agenda decks form the image of a storybook, and these decks work together to create the plot of each scenario.
Encounter Deck
Throughout the game, investigators draw encounter cards from the encounter deck, which represents perils, monsters, madnesses, and other afflictions the investigators must overcome, in the form of enemy and treachery cards.

Lead Investigator & The Grim Rule
The lead investigator (chosen during setup) is the player who breaks ties and makes decisions for the group whenever there is a conflict. The lead investigator is identified by the lead investigator token, which they place in their play area.
- If the players are required to make a choice among two or more equally valid options (for example, an enemy must move toward the “nearest investigator,” and the two nearest investigators are an equal distance away), the lead investigator chooses among those options.
- If the players are unsure how to resolve a rules or timing conflict, the lead investigator should resolve the conflict in the manner they perceive as the worst possible at that moment with regard to winning the scenario, and continue with the game. This is known as “The Grim Rule,” and using this rule keeps the game moving without forcing the players to look up every conflict they discover.
“In Player Order”
The phrase “in player order” is used to dictate the order in which players resolve or execute a game step. When players are instructed to do something “in player order,” the lead investigator does so first, followed by each other player, one player at a time, in clockwise order around the table.
Per Investigator ( )
The symbol next to a value multiplies that value by the number of investigators who started the scenario. The number of clues placed on a location and the number of clues necessary to advance the current act are often denoted with this symbol.
Locations
Locations represent the various places the investigators travel to during a scenario while looking for clues. Each location has two sides: a revealed side and an unrevealed side. The unrevealed side can be identified by the presence of a keyhole symbol below its title.

A location enters play with its unrevealed side faceup. When an investigator enters a location for the first time, it is revealed (turned to its revealed side), and clues equal to that location’s clue value are placed on that location (from the token pool).
A location card may be revealed during setup if the investigators begin play at a location, or if the setup rules instruct the players to reveal a location.
Ready and Exhausted
Cards enter play in a “ready” position (upright, so that the ability text can be read from left to right). Some game steps and card abilities require cards to “exhaust,” which is indicated by rotating the card 90 degrees (sideways). A card in the exhausted position cannot exhaust again until it is readied by a game step or card ability.

Weakness Cards
A weakness card is a card in an investigator’s deck that has a negative effect when drawn. These cards are identified by the label “Weakness” or “Basic Weakness” beneath the card’s title or artwork. When one of these cards is drawn, the investigator who drew the card must resolve its “Revelation –” ability immediately. (See “Weakness” on page 21 of the Rules Reference for more details on weakness cards.)

First Game Setup
To set up the first game, perform the following steps in order. The game is best learned with one or two players.
Step 1: Choose Investigator(s)
Each player chooses an investigator and takes that investigator’s pack of cards. If playing solo, Roland Banks is the recommended investigator choice.
The Investigators
- Roland Banks: Roland is a federal agent in over his head. He excels at dispatching enemies and discovering the clues left behind in the conflict.
- Agnes Baker: Agnes is a waitress whose powers of sorcery are only just starting to manifest. She excels at using her willpower to defend against the forces of the Mythos, and turning her fear into raw power.
- Daisy Walker: Daisy is a librarian at Miskatonic University. She is great at discovering clues and supporting her teammates with her various Tome and Spell cards.
- Wendy Adams: Wendy is a scrappy young orphan who can take care of herself. She is skilled at evading enemies and avoiding combat, and can succeed at tests even when the odds are stacked against her.
- “Skids” O’Toole: “Skids” is a slippery ex-con with a heart of gold. He is good at generating resources and using them to take extra actions. He also excels at dealing with enemies, either through combat or evasion.
Step 2: Gather Decks
Each player opens their investigator’s pack of cards, which includes an investigator card and that investigator’s starter deck. Each player places their investigator card faceup in their play area, and then shuffles their starter deck. If the pack is already opened, a complete list of the cards required for all five starter decks can be found on page 20.
- Set the investigator card aside and shuffle the starter deck.
Step 3: Choose Lead Investigator
Choose one of those investigators to be the lead investigator for this game, and give that player the lead investigator token and the Campaign Guide.
The lead investigator is the player who breaks ties and makes decisions for the group if there is a conflict.

Step 4: Assemble Token Pool
Place all of the damage tokens, horror tokens, clue/doom tokens, and resource tokens within easy reach of all investigators. The token pool is the repository for all tokens that are not in play.
Step 5: Assemble the Chaos Bag
Place the 16 chaos tokens shown into the chaos bag. Return the rest to the game box. (When setting up future games, refer to the desired difficulty setting for your scenario or campaign.)
Step 6: Take Starting Resources
Each investigator takes five resources from the token pool and places them near their investigator card. This is the investigator’s resource pool.
Step 7: Draw Opening Hand
Each investigator draws five cards from their deck. If a weakness card is drawn any time during setup, set it aside and draw an additional card.
- Each player may take a single mulligan at this time by setting aside up to five of the cards just drawn.
- Then, they draw an equivalent number of cards, setting aside weaknesses as normal. A mulligan is recommended if a player has a poor starting hand (i.e., a hand with no assets).
- At the end of this step, all set-aside cards are shuffled back into the investigator’s deck. (Weaknesses are set aside, then shuffled back into the deck.)

Scenario Setup: The Gathering
The remaining setup steps contain scenario-specific information for the first scenario in the Night of the Zealot campaign. Open the Campaign Guide to page 2 and follow along with the setup instructions for “The Gathering” while performing these steps.
These instructions are written as though Roland and Wendy are the two investigators in the game, but you may have different investigators or a different number of players during your first game.
Step 8: Gather Scenario Cards
Open the pack labeled “The Gathering.” This pack contains all the cards required to play the first scenario. If the pack is already opened, consult the sidebar to the right for a list of all cards needed to play “The Gathering.”
Each card included in any scenario is part of an encounter set, indicated by its encounter set icon. For future games, refer to the Campaign Guide in order to tell which encounter sets should be gathered according to their encounter sets.
Encounter Sets
To set up a scenario, players must gather all the cards of each encounter set shown for that scenario. Each encounter set is represented by an icon that appears on each encounter card in that set. When gathering encounter cards, gather all copies of each card in the listed encounter sets. Use the encounter set numbers (#/#) at the bottom of each encounter card to aid you.
The Gathering Card List
- The Gathering (16 cards): #104–119
- Rats (3 cards): #159
- Ghouls (7 cards): #160–162
- Striking Fear (7 cards): #163–165
- Ancient Evils (3 cards): #166
- Chilling Cold (4 cards): #167–168
Step 9: Set Agenda Deck
Assemble the agenda deck by stacking the agenda cards from The Gathering’s encounter set in sequential order (so that “1a” is on top, “2a” is next, etc). These cards are “What’s Going On?!,” “Rise of the Ghouls,” and “They’re Getting Out!”
Step 10: Set Act Deck
Assemble the act deck by stacking the act cards from The Gathering’s encounter set in sequential order (so that “1a” is on top, “2a” is next, etc). These cards are “Trapped,” “The Barrier,” and “What Have You Done?”

Step 11: Place Reference Card
Place the scenario reference card for “The Gathering” (card 104a) next to the agenda deck.
Step 12: Place Locations
Following the setup instructions on page 2 of the Campaign Guide, put the Study into play (card 111). When a location is put into play, it enters play with its unrevealed side faceup. Then, set aside all of the remaining locations.
The unrevealed side of a location can be identified by the presence of a keyhole symbol below its title.
Step 13: Assemble Encounter Deck
Following the scenario’s setup instructions, set aside the Ghoul Priest (card 116) and Lita Chantler (card 117). Then, take the remaining encounter cards and shuffle them together to create the encounter deck.
Step 14: Read Scenario Introduction
Read the scenario introduction for “The Gathering” followed by the text on the faceup agenda and act cards (“What’s Going On?!” and “Trapped”).
Step 15: Place Investigators
Each investigator begins play in the Study. Place each investigator’s mini-card next to the Study to represent their current location.
When the investigators are placed in the Study, it is revealed. Following the normal rules for revealing a location, place clue tokens on the Study equal to its clue value when it is revealed. (The Study’s clue value is 2. Clue tokens equal to two times the number of players are placed on the Study when it is revealed.)

Play Area Diagram
An investigator’s threat area is where engaged enemies, curses, injuries, and other afflictions are placed.

Round Sequence
Arkham Horror: The Card Game is played over a series of rounds. During a round, the investigators encounter the terrifying forces of the Mythos, explore mysterious locations, fend off dangerous enemies, and finally collect their bearings in anticipation of the next round. Each round is divided into four phases:
- Mythos Phase (skip during the first round of the game)
- Investigation Phase
- Enemy Phase
- Upkeep Phase
Important Note: During the first round of the game, skip the mythos phase and begin with the investigation phase. The mythos phase is described on page 13.
Once all four phases are complete, the round is over and play proceeds to the mythos phase of the next round. Each phase is described in detail below.
Phase 1: The Mythos Phase
In the mythos phase, the arcane forces pitted against the investigators seek to advance their fell agenda.
The mythos phase comprises three steps, described below:
- Place one doom token on the current agenda.
- Compare the total number of doom tokens in play (on the current agenda and on other cards in play) to the doom threshold of the current agenda. If the number of doom tokens in play is equal to or greater than the doom threshold of the current agenda, advance the agenda deck. This is done by discarding all doom tokens from play, turning the current agenda card over, following the instructions on its reverse side, and removing that agenda from play. Then, the front side of the next card in the agenda deck becomes the active agenda card. (Important Note: Unless a card specifies that it can advance the agenda, this is the only time the agenda can advance.)
- In player order, each investigator draws the top card of the encounter deck and resolves it. Instructions for resolving each type of encounter card are presented below:
- Treachery: When a treachery card is drawn, its ability is resolved, and the card is placed in the encounter discard pile unless it indicates that it is put into play.
- Enemy: When an enemy card is drawn, that enemy spawns engaged with the investigator who drew the card, unless it has a “Spawn –” instruction. If the enemy has a spawn instruction, it spawns at the location indicated by that instruction. If any investigators are at that location, it engages one of them as per the rules for enemy engagement listed below.


The Investigation Phase
In the investigation phase, the investigators take center stage. What they choose to do depends on the circumstances and the investigator in question.
During this phase, each investigator takes a separate turn. The investigators, as a group, choose which investigator takes the first turn. When that investigator’s turn ends, choose an investigator to take the next turn, and so on, until each investigator has taken their turn.
Each investigator has three actions during their turn that may be used to perform a variety of tasks. An investigator may perform any of the following, as many times as they would like, and in any order, provided the investigator has an action available to pay for that task. On their turn, an investigator may use an action to:
- Draw 1 card.
- Gain 1 Resource.
- Activate an
 (action trigger) ability.
- Engage an enemy at their current location.
- Investigate their current location.
- Move to a new connecting location.
- Play an asset or event card from their hand.
- Attempt to Evade an enemy engaged with them.
- Fight an enemy at their current location.
If an investigator is engaged with one or more ready enemies, performing any action other than Evade, Fight, or activating an ability with either a Parley or Resign designator in its text causes each of those enemies to attack the investigator. (See “The Enemy Phase” on page 15.) This is called an attack of opportunity.
An investigator may end their turn early if there are no other actions they wish to perform. To indicate that an investigator’s turn is over, flip their mini-card facedown, to its black-and-white side. Unused actions are lost and cannot be saved for future turns. After each investigator has completed their turn, play proceeds to the enemy phase.
Tutorial Tip
At the beginning of the game, the investigators are trapped in the Study. How should they proceed?
In this situation, some actions are better than others. If an investigator has asset cards in hand that seem as if they might be useful, that investigator should consider using the Play action to play one or two of those cards—this will ensure that the investigator is prepared when an unexpected challenge or enemy comes their way. There are also clues in the Study; the investigators should consider using the Investigate action in an attempt to find these clues so they can advance the act deck. Alternatively, the Draw action and the Resource action could be useful in helping an investigator build up cards and resources for later in the game.
A Cooperative Game & Table Talk
There are many possible choices during the investigation phase. The investigators are encouraged to work together and plan out what they hope to accomplish each round. The order in which the investigators take their turns, and the actions each investigator performs during their turn, can mean the difference between success and failure.
While the investigators may plan their turns as a group, each individual player has final authority over the actions their investigator performs. For further guidelines on investigator communication, see the “Table Talk” sidebar below.
Table Talk
Arkham Horror: The Card Game seeks to establish a roleplaying experience in which each player takes on the role of a specific investigator. The nature of the game encourages players to work together and communicate, but players are also encouraged to stay “in character” as much as possible while doing so. The game’s areas of hidden information (the cards in a player’s hand and deck) exist to maintain the feeling that each investigator is a unique individual in the game world, and makes their decisions without complete and perfect knowledge of what everyone else knows or is thinking. A good means of maintaining this illusion is to not name, read off, or allude to individual cards that are hidden information (i.e., in a player’s hand or deck).
For example: Wendy wants her partner, Roland, to take an investigate action, and she desires to communicate that she can help. Instead of saying something like, “Take an investigate action; I can commit Perception” or, “Investigate our location; I can contribute two icons,” Wendy stays in character by saying, “You should investigate. I can help!”
Investigation Phase Actions in Detail
Draw
The investigator using this action draws one card from the top of their deck.
Resource
The investigator using this action gains one resource from the token pool. (Resources are often used to pay for cards and effects.)
Strategy Tip: Spending actions to draw cards and gain resources can be effective when you have a specific card you need to play, but it is often time-consuming and inefficient. Use these actions when you aren’t sure what to do, or as a last resort!
Activate
The investigator using this action resolves an (action trigger) ability on a card in play that is under their control, on an encounter card at their location, or on the current act or agenda card. Abilities on cards not in play (such as in an investigator’s hand) cannot be activated.
Play
When an investigator uses this action, that investigator selects an asset or event card in their hand, pays its resource cost, and plays it. A card’s resource cost and cardtype are found in its upper left corner.
To pay a resource cost, the investigator playing the card must move a number of resources equal to the cost from their resource pool to the general token pool.
The rules for playing each cardtype are as follows:
- If the played card is an event card, the investigator resolves its effects, then places it in their discard pile.
- If the played card is an asset card, the investigator places it in their play area. It remains in play until an ability or game effect removes it.
- Skill cards are not played. For their abilities and icons to be used, these cards must be committed to a skill test from an investigator’s hand (“Modifying Skill Values for Skill Tests” on page 17).
Cards with the “fast” keyword do not cost an action to play.

Slots
Slots restrict the number of asset cards of a specific category an investigator can have in play simultaneously. The slots available to an investigator are:
- 1 ally slot
- 1 body slot
- 1 accessory slot
- 2 hand slots
- 2 arcane slots
The icons indicate that an asset counts against an investigator’s capacity for the indicated slot(s). If an asset has no slot symbols on it, it does not take up any slots.
If an investigator wishes to play or gains control of an asset and lacks an appropriate slot, the investigator must choose and discard an asset or assets under their control to make room for the newly acquired asset.

Move
The investigator using this action moves to a connecting location. Move that investigator’s mini-card to any other location marked as a connection on the investigator’s current location. A location’s connections are indicated by the icons at the bottom of the location card, each of which match an identical icon in the title area of one or more connecting locations.
If the connecting location is unrevealed, turn the location to its revealed side when an investigator moves to it. Remember to place the indicated number of clues on the location when this occurs (see “Locations” on page 4).

Investigate
The investigator using this action investigates their current location in an attempt to find clues. That investigator makes an intellect ( ) test against the shroud value of that location:
- If the skill test is successful, the investigator discovers one clue from the location. When an investigator discovers a clue from a location, that player takes one clue from the location and places it on their investigator card.
- If the investigator fails, no clues are discovered.

Advancing the Act Deck
The act deck represents progress the investigators can make in a scenario. Generally, the investigators advance the act deck by spending, as a group, an appropriate number of clues. Spent clues are returned from the investigators’ cards to the general token pool. Advancing the act in this way does not cost an action and may be done during any investigator’s turn. The number of clues required to advance to the next act can be found at the bottom of the current act card’s text box.
If the current act has a boldface “Objective —” instruction, that instruction either supplements or replaces the procedure for advancing the act deck described above.
To advance the act deck, flip the current act over to its “b” side, follow the instructions on the back, and set it aside, out of play. The next card in the act deck becomes the new current act. When advancing the act deck, the investigators keep any clues in excess of the required amount.
Engage
The investigator using this action engages one enemy that is at their location (either not currently engaged with an enemy, or currently engaged with another investigator). To engage an enemy, the investigator places that enemy in their threat area.
Strategy Tip: Engaging enemies lets you evade them or safely attack them without risking hitting your partner. Use this action to take the heat off your fellow investigators!

Evade
The investigator using this action attempts to evade one enemy they are engaged with. The investigator makes an agility ( ) test against that enemy’s evade value.
- If the skill test is successful, the investigator evades the enemy; the enemy is exhausted, and the engagement is broken. Move the enemy card from the investigator’s threat area to the investigator’s current location to mark that it is no longer engaged with that investigator.
- If the agility test fails, the enemy is not evaded and remains engaged with the investigator.
Strategy Tip: Evading enemies can be crucial to success. Exhausted enemies do not automatically engage investigators, do not perform attacks of opportunity, and do not attack during the enemy phase. If you are unarmed or need to get away from a deadly enemy, consider evading it instead of performing a futile attack.
Fight
The investigator using this action attacks one enemy that is at their location. That investigator makes a combat ( ) test against the enemy’s fight value.
- If the combat test is successful, the investigator deals one damage to the attacked enemy. Some weapons, spells, or other special attacks may modify the amount of damage dealt. Place a number of damage tokens equal to the amount of damage dealt on the enemy. If, at any time, an enemy has damage on it equal to or greater than its health, the enemy is defeated and placed in the encounter discard pile. If the bottom of the enemy’s text box indicates that it provides victory points (indicated by the “Victory X” keyword), place the card in a shared victory pile instead of discarding it.
- If the combat test fails, no damage is dealt to the attacked enemy.
Important Note: If an investigator fails a combat test against an enemy engaged with another investigator, the damage value of the failed attack is instead dealt to the investigator engaged with that enemy.

The Enemy Phase
In the enemy phase, the enemies come after the investigators, and if they are able to do so, they attack!
Resolve the following steps in order. If there are no enemies in play, proceed to the upkeep phase.
- Hunter enemies move. Some enemies have the “hunter” keyword. Each such enemy moves once, to a connecting location, in the direction of the nearest investigator. Exhausted hunter enemies and hunter enemies at a location with one or more investigators do not move.
If a hunter enemy moves to a location with one or more investigators, that enemy immediately engages one of those investigators (see “Enemy Engagement” on page 16). - Enemy attacks. Each ready, engaged enemy makes an attack against the investigator with whom it is engaged. The investigators resolve enemy attacks in player order, but may resolve the attacks of each enemy engaged with a particular investigator in any order.
When an enemy attacks, deal both its damage and its horror, simultaneously, to the engaged investigator (see “Damage and Horror,” below). The amount of damage and horror dealt by an enemy’s attack can be found at the bottom of the enemy’s text box.
After an enemy attacks during the enemy phase, exhaust it to indicate that it has attacked. (During other attacks, such as attacks of opportunity, enemies do not exhaust.)

Enemy Engagement
While an enemy card is in play, it is either engaged with an investigator (and placed in that player’s threat area), or it is unengaged (and placed at its location). Each enemy in an investigator’s threat area is at the same location as that investigator. Should the investigator move, the enemy remains engaged with the investigator and also moves to the new location.
Any time a ready, unengaged enemy is at the same location as an investigator, it engages that investigator and is placed in that investigator’s threat area. If multiple investigators are at the same location as a ready, unengaged enemy, the lead investigator generally chooses which of those investigators the enemy engages.
Some enemies have a “Prey –” instruction, which dictates whom it engages if there are multiple possibilities. (See “Prey” on page 17 of the Rules Reference.)
An enemy immediately engages if:
- It spawns (in a ready state) at the same location as an investigator.
- It moves (in a ready state) to the same location as an investigator.
- An investigator moves to the same location as a ready enemy.
- An exhausted enemy readies at the same location as an investigator.
Damage and Horror
An investigator may be dealt damage and/or horror during a scenario. Damage depletes an investigator’s health, and horror depletes an investigator’s sanity.
- When an investigator is dealt damage, place damage on the investigator card and/or on any of that investigator’s asset cards that have health, up to the amount of damage each card can hold. A card that has no health value cannot be dealt damage.
- When an investigator is dealt horror, place horror on the investigator card and/or on any of that investigator’s asset cards that have sanity, up to the amount of horror each card can hold. A card that has no sanity value cannot be dealt horror.
- If a card has an amount of damage that equals (or exceeds) its health, or an amount of horror that equals (or exceeds) its sanity, the card is defeated. A defeated asset card is discarded. A defeated investigator is eliminated. (See “Elimination” on page 10 in the Rules Reference.)

The Upkeep Phase
In the upkeep phase, the heroes and villains find their bearings and prepare for the next round.
Resolve the following steps in order:
- Each investigator turns their mini-card faceup.
- Ready all exhausted cards. Each unengaged enemy that readies at the same location as an investigator engages at this time. (See the “Enemy Engagement” sidebar.)
- Each investigator draws one card and gains one resource.
- Each investigator with more than eight cards in their hand chooses and discards cards from hand until only eight cards remain.
After the above steps are complete, the game round is over. Proceed to the mythos phase of the next game round.
Skills and Skill Tests
During the game, investigators frequently make skill tests to determine the outcome of various situations. A skill test uses an investigator’s skills, which are represented by four stats found on their investigator card:
- Willpower (
 )
- Intellect ()
- Combat ()
- Agility ()
The higher an investigator’s skill value, the more skilled they are.
During a skill test, one or more tokens are revealed from the chaos bag, modifying an investigator’s skill for that test. The investigator’s skill must equal or exceed the test’s difficulty for them to succeed. The complete rules for tests can be found under “Skills and Skill Tests” on page 17.

Each investigator possesses four skills: willpower (), intellect (), combat (), and agility (). The higher an investigator’s value for a particular skill, the better they are at performing tasks with that skill.
A number of situations require an investigator to make a skill test. A skill test pits the investigator’s value in a specified skill against a difficulty value determined by the ability or game step that initiated the test. To perform a skill test, the investigator reveals a random chaos token from the chaos bag, which modifies their skill value. If the modified skill value equals or exceeds the test’s difficulty, they succeed. If not, they fail. The consequences of success or failure are provided by the card or action that initiated the test.
The Chaos Bag
Throughout the game, the investigators are asked to randomly reveal tokens from the chaos bag to modify their chances of success or failure in a variety of situations. If an investigator reveals a token with a number value during a skill test, apply that modifier to the investigator’s skill value for that test. If a symbol is revealed, refer to the scenario’s reference card to determine that token’s effect.

Modifying Skill Values for Skill Tests
Before drawing a chaos token for a skill test, the investigator may boost their skill value. There are two ways to do this:
- Commit cards: The investigator may commit eligible cards from their hand to the test. An eligible card bears one or more icons matching the skill type of the test being performed. A wild icon (?) matches any skill type. Each matching icon committed to a test increases the investigator’s skill value by 1 for that test. The investigator performing the test may commit any number of cards from their hand to the test. Each other investigator at the same location as that investigator may commit one card from their hand to help.
Do not pay a card’s resource cost when committing it to a skill test. - Activate abilities: In addition, the investigator may activate
 (free triggered) abilities during a skill test, which may modify their skill for that test.

Chaos Token Effects
Each chaos token has a symbol or numerical modifier that influences the outcome of the skill test. The effect of each chaos token is described below:
 ,
 ,
 ,
 — Refer to the scenario reference card and resolve the corresponding effect.
 — Refer to your investigator card and resolve your investigator’s ability.
 — Indicates an automatic failure of the skill test.
If the revealed chaos token (or the effect referenced by a chaos token) has a numerical modifier, that modifier is applied to the investigator’s skill value for this test.
Concluding a Skill Test
If the investigator’s modified skill value is equal to or higher than the difficulty value of the skill test, the investigator succeeds at the test. Otherwise, the investigator fails. The ability or game step that initiated the skill test provides instructions for the consequences of succeeding and/or failing.
Some skill cards have an ability that resolves upon the completion of a skill test, if the card is committed to that test.
Upon completion of a skill test, discard all investigator cards committed to that test, and return the revealed chaos token to the chaos bag.
Skill Test Example
Wendy Adams draws the encounter card Grasping Hands, which reads: “Revelation – Test (3). For each point you fail by, take 1 damage.”
Wendy’s agility value is 4, and the difficulty of this test is 3. Wendy is low on health, so it’s important that she succeed at this test! Wendy has no cards in hand with icons that can be committed to this test. Her partner, Roland, is at her location and decides to commit one card to the skill test, which has one icon. This gives Wendy a +1 bonus to her agility skill for this test.
Wendy now pulls a chaos token at random from the chaos bag, and reveals a “–2.” This modifier is applied to Wendy’s agility value for this test. Her value is now: 4 (from base value) + 1 (from the card Roland committed) – 2 (from the chaos token), for a total of 3. Since Wendy’s modified skill value of 3 is equal to the skill test’s difficulty of 3, she succeeds at this test!
Wendy now applies the results of the successful skill test. The Grasping Hands card has no effect (as she did not fail the skill test). Roland’s committed card is now discarded, and the chaos token is returned to the chaos bag.
What’s Next?
After the mythos phase is resolved, play proceeds to the investigator phase as usual. Continue resolving game rounds until players reach the scenario’s resolution (see “Winning and Losing” on page 4).
After you’ve completed the game, you may wish to continue the campaign. To do so, read “Expanded Campaign Rules” on page 3 of the Campaign Guide. Then proceed to the next scenario, The Midnight Masks, using the setup rules found on “Appendix III: Setting Up The Game” on page 27 of the Rules Reference.
Some players may wish to practice using different investigators before proceeding with the campaign. To do so, use the “Custom Deckbuilding” rules below or use the starter decks listed under “Starter Decks” on page 20 to replay the first scenario, The Gathering.
A quick reference of keywords, icons, and important game symbols can be found on the back cover of this book. Additionally, the Rules Reference book thoroughly covers the finer points of the game. Be sure to use these references frequently while mastering the game.
Custom Deckbuilding
The Arkham Horror: The Card Game core set is designed to be a complete game experience with significant replayability. After learning the basics of the game, players may wish to explore building original decks.
Why Build a Custom Deck?
Deckbuilding is a process by which a player may customize their deck to take on the scenarios using original strategies and ideas. This allows a player to experience the game in new ways. Instead of adapting their play to the strategy of a starter deck, each player may construct a deck that functions as they desire. When a player constructs an original deck, that player doesn’t just participate in the game: They actively shape how it is played.
Deck Customization Rules
The following are the deck customization rules for Arkham Horror: The Card Game investigator decks. Note that for more deckbuilding options, players may want to obtain expansion sets containing new cards.
- Each player must choose exactly one investigator card.
- Each player’s investigator deck must include the exact number of standard player cards indicated on the back of their investigator card as their “Deck Size.” For each of the investigators in the core set, this number is 30. Weaknesses, investigator-specific cards, and scenario cards that are added to a player’s deck do not count toward this number.
- Each standard player card in a player’s deck must be chosen according to the “Deckbuilding Options” available on the back of their investigator card.
- Each player’s deck cannot include more than two copies (by title) of any given player card.
- Each player must observe any other “Deckbuilding Requirements” on the back of their investigator card when building their deck.
- At the beginning of a campaign, an investigator may only include level 0 cards in their deck (see “Card Levels,” below).
Card Levels
A card’s level is indicated by the presence of white pips beneath its cost. The card’s level is equal to the number of such pips on the card.
In campaign play, investigators may be rewarded with experience points upon the completion of a scenario. Investigators may spend these points to purchase higher-level cards to use in their decks during that campaign. (See “Campaign Play” on page 5 in the Rules Reference.)

Random Weakness
Most investigators have a deckbuilding requirement that instructs the player to add a random basic weakness to their deck.
Unlike investigator-specific weaknesses, basic weaknesses are identified by this symbol:

To select a random basic weakness, take the ten basic weaknesses in this core set, shuffle them together, and draw one at random to add to the investigator’s deck. Some Arkham Horror: The Card Game products add additional basic weakness cards to a player’s collection. Simply add these cards to the ten cards found in the core set when selecting random basic weaknesses in the future.
For example: Stephanie owns two copies of the core set, one copy of the first deluxe campaign expansion, and one copy of the first mythos pack. To create a single set of basic weaknesses, she takes all of the basic weaknesses from a single core set, her copy of the deluxe campaign expansion, and her copy of the first Mythos Pack. She shuffles them together and draws her basic weakness at random from this pool.
Do not select an investigator’s basic weakness until all other cards in that investigator’s deck have been chosen. Once this is done, add the weakness to your deck. In campaign mode, the selected weakness remains a part of the investigator’s deck for the entire campaign, unless it is removed by a card ability. New weaknesses are not automatically added at the beginning of subsequent campaign scenarios, but card abilities or scenario instructions may instruct an investigator to gain additional weaknesses.
Starter Decks
Investigating the events occurring throughout Arkham is dangerous work. You will confront monstrosities far beyond your ken, and the knowledge you seek may cause irreparable harm to your psyche. You’ll need strong allies, useful skills, and the best tools if you are to succeed in the campaigns to come.
To help you in your investigations, we have provided a sample starter deck for each of the five investigators in the core set. These decks are a gateway into the world of Arkham Horror, and are ideal for players who wish to get into the action as fast as possible, or for players who do not wish to use the deck customization rules to construct an original deck.
Each of the provided decks is accompanied by tips and tricks for playing that deck, explaining how to make the best use of an investigator’s ability, or demonstrating card synergy within the deck.
These starter decks are meant to be used at the beginning of a campaign, and thus have 0 experience points spent. The number in parentheses next to each card is its card collector number. If a card does not specify the number of copies you should use, use only 1 copy of that card. Each of these starter decks includes a specific basic weakness instead of a random basic weakness. Do not add another random basic weakness to the deck.
With the contents of this core set, players can have all five of these starter decks constructed at the same time.
Roland Banks Strategy Tips
Roland is a capable fighter and clue gatherer. Since his ability allows him to automatically discover clues by defeating enemies, you will want to hunt down any easy-to-kill enemies you can find, especially if they are in a location with a high shroud value. Try to get a weapon out as soon as possible (such as a .45 Automatic, Machete, or Roland’s .38 Special) so that you are prepared to tackle any enemies that may appear. Beat Cop, Guard Dog, and Physical Training can all help you take down enemies, as well.
If you are still having trouble investigating, you may wish to carry a Magnifying Glass or have Dr. Milan Christopher help you. Evidence! and Working a Hunch can also allow you to discover clues automatically in locations with a high shroud value.
While Roland is physically tough, he has a low sanity and is especially susceptible to horror. Allies like Beat Cop or Dr. Milan Christopher can help soak some horror if you uncover something terrifying. Otherwise, don’t be afraid to play First Aid and use an entire turn healing horror if you are close to being defeated—you want to avoid mental trauma at all costs!
Should you be compelled to Cover Up any strange events happening in your vicinity, don’t forget you can use card effects such as Roland’s ability, Evidence!, or Working a Hunch to remove these clues instead of investigating.
Roland Banks, the Fed Starter Deck
- Investigator: Roland Banks (1)
- Assets (17):
- Roland’s .38 Special (6)
- .45 Automatic (16)
- Physical Training (17)
- Beat Cop (18)
- First Aid (19)
- Machete (20)
- Guard Dog (21)
- Magnifying Glass (30)
- Old Book of Lore (31)
- Research Librarian (32)
- Dr. Milan Christopher (33)
- Hyperawareness (34)
- Medical Texts (35)
- 2x Knife (86)
- 2x Flashlight (87)
- Events (8):
- Evidence! (22)
- Dodge (23)
- Dynamite Blast (24)
- Mind over Matter (36)
- Working a Hunch (37)
- Barricade (38)
- 2x Emergency Cache (88)
- Skills (6):
- Vicious Blow (25)
- Deduction (39)
- 2x Guts (89)
- 2x Manual Dexterity (92)
- Weaknesses (2):
- Cover Up (7)
- Silver Twilight Acolyte (102)
Daisy Walker Strategy Tips
Daisy is a high-intellect investigator who favors a support role or a rush-for-clues approach. Since her ability is dependent upon Tome assets, getting one in play as soon as possible should be your primary concern. Old Book of Lore is the ideal Tome to get out early, but having Medical Texts with Daisy’s high intellect can be a lifesaver. If you don’t draw either of these cards in your opening hand, a Research Librarian can help you search for one, and also serves as a convenient damage buffer when the going gets rough.
Daisy doesn’t usually need help investigating, but if you’re trying to rush for clues, equip a Magnifying Glass and get Dr. Milan Christopher into play as soon as possible.
Because her combat and agility are both on the low end, dealing with enemies can be problematic for Daisy. Luckily, you have a few tricks up your sleeve. Blinding Light and Shrivelling allow you to use your willpower instead of agility or combat to evade or attack enemies, respectively. You can also use Holy Rosary to boost your willpower higher. If you find a location with lots of clues and there are hunter enemies around, you can use Barricade to gather those clues in relative safety.
If you already have both your Old Book of Lore and Medical Texts in play, try to get Daisy’s Tote Bag out before The Necronomicon enters play, otherwise you’ll end up losing one of your other books.
Daisy Walker, the Librarian Starter Deck
- Investigator: Daisy Walker (2)
- Assets (17):
- Daisy’s Tote Bag (8)
- Magnifying Glass (30)
- Old Book of Lore (31)
- Research Librarian (32)
- Dr. Milan Christopher (33)
- Hyperawareness (34)
- Medical Texts (35)
- Forbidden Knowledge (58)
- Holy Rosary (59)
- Shrivelling (60)
- Scrying (61)
- Arcane Studies (62)
- Arcane Initiate (63)
- 2x Knife (86)
- 2x Flashlight (87)
- Events (8):
- Mind over Matter (36)
- Working a Hunch (37)
- Barricade (38)
- Drawn to the Flame (64)
- Ward of Protection (65)
- Blinding Light (66)
- 2x Emergency Cache (88)
- Skills (6):
- Deduction (39)
- Fearless (67)
- 2x Perception (90)
- 2x Manual Dexterity (92)
- Weaknesses (2):
- The Necronomicon (John Dee Translation) (9)
- Paranoia (97)
“Skids” O’Toole Strategy Tips
“Skids” is a well-rounded character who is decent at combat, evasion, and investigation. Your investigator ability and weakness both require you to have resources, so keeping a high quantity in your resource pool is usually a good idea. You can generate extra resources by making judicious use of Burglary and Emergency Cache, or simply by taking a “resource” action whenever you’re unsure what to do.
Because “Skids” has high agility and decent combat, you have the option of deciding whether to take enemies on through brute force or avoid them altogether. It is usually best to decide based on the enemy in question—fight enemies with high evade values and evade enemies with high health and fight values. As you have quite a few weapons in your deck, don’t be afraid to take a guns-blazing approach when you have to!
Extra actions are your most powerful tool as “Skids.” Between Leo De Luca and your investigator ability, you may have as many as five actions in a single turn. Save your resources early on to play Leo and your other assets, but mid-to-late game, spend your money and use your extra actions to take out enemies, investigate locations, or move to right where you need to be.
Your low willpower means you are likely to succumb to many of the encounter deck’s tricks. If you’re feeling swamped, On the Lam is your panic button. The ability to essentially ignore all non-Elite enemies for a whole round is extremely potent. Use it to take move or investigate actions while engaged with enemies, or to engage enemies away from your allies without fear of reprisal.
“Skids” O’Toole, the Ex-Con Starter Deck
- Investigator: “Skids” O’Toole (3)
- Assets (16):
- .45 Automatic (16)
- Physical Training (17)
- Beat Cop (18)
- First Aid (19)
- Machete (20)
- Guard Dog (21)
- Switchblade (44)
- Burglary (45)
- Pickpocketing (46)
- .41 Derringer (47)
- Leo De Luca (48)
- Hard Knocks (49)
- 2x Knife (86)
- 2x Flashlight (87)
- Events (9):
- On the Lam (10)
- Evidence! (22)
- Dodge (23)
- Dynamite Blast (24)
- Elusive (50)
- Backstab (51)
- Sneak Attack (52)
- 2x Emergency Cache (88)
- Skills (6):
- Vicious Blow (25)
- Opportunist (53)
- 2x Guts (89)
- 2x Overpower (91)
- Weaknesses (2):
- Hospital Debts (11)
- Mob Enforcer (101)
Agnes Baker Strategy Tips
Agnes is a high-willpower spellcaster who is particularly good at dispatching enemies. Since her ability can trigger once per phase after she takes horror, the more on-demand ways you can deal horror to yourself, the better. Forbidden Knowledge is probably your best tool for fueling Agnes’s ability: Take one horror, gain one resource, and deal one damage anytime you want! You can also trigger her ability through Ward of Protection, or even Shrivelling if you are “lucky” enough to draw a chaos token with a symbol on it. But beware! Since Agnes’s ability only triggers when horror is actually placed on her, you’re going to want to soak or heal horror as well. Holy Rosary is a must-play card, since it boosts Agnes’s willpower and also provides you with a way to protect against horror when you don’t wish to trigger Agnes’s ability.
If you are having trouble investigating, you can use “Look what I found!” or Drawn to the Flame to discover as many as four clues without having to succeed at an intellect test.
Finally, since you are quite dependent upon your Spell cards, getting an Arcane Initiate in play early can be a huge benefit to you. Make sure the doom threshold on the current agenda isn’t close to being satisfied, then play Arcane Initiate and make the most out of its ability each turn. When doom is close to the threshold, if you can discard the initiate from play (usually by assigning damage or horror to it), you can be rid of the doom on it as well.
Agnes Baker, the Waitress Starter Deck
- Investigator: Agnes Baker (4)
- Assets (17):
- Heirloom of Hyperborea (12)
- Forbidden Knowledge (58)
- Holy Rosary (59)
- Shrivelling (60)
- Scrying (61)
- Arcane Studies (62)
- Arcane Initiate (63)
- Leather Coat (72)
- Scavenging (73)
- Baseball Bat (74)
- Rabbit’s Foot (75)
- Stray Cat (76)
- Dig Deep (77)
- 2x Knife (86)
- 2x Flashlight (87)
- Events (8):
- Drawn to the Flame (64)
- Ward of Protection (65)
- Blinding Light (66)
- Cunning Distraction (78)
- “Look what I found!” (79)
- Lucky! (80)
- 2x Emergency Cache (88)
- Skills (6):
- Fearless (67)
- Survival Instinct (81)
- 2x Perception (90)
- 2x Unexpected Courage (93)
- Weaknesses (2):
- Dark Memory (13)
- Haunted (98)
Wendy Adams Strategy Tips
Wendy is a slippery investigator who is great at avoiding danger. Making use of her ability to cancel and re-draw chaos tokens during critical skill tests is key to succeeding as Wendy. Be sure to keep enough cards in your hand to fuel her ability at all times. Pickpocketing and Rabbit’s Foot are both ideal cards to put into play early, allowing you to draw cards through evading enemies and failing tests.
Her high agility and low combat mean you should primarily be evading and running from enemies, but a well-timed Backstab or Sneak Attack can also get rid of a troublesome enemy. Stray Cat, Cunning Distraction, and Survival Instinct can all help you get out of sticky situations. When all else fails, pull out a .41 Derringer or a Baseball Bat and don’t be afraid to overcommit cards!
Wendy’s Amulet is a tricky card, but playing around its ability and Forced effect can be especially rewarding. It is usually best to keep the Amulet in hand until there are a few events in your discard pile. Once it’s in play, always be aware of the topmost event in your discard pile, (especially if it’s Lucky!) since you can play it using Wendy’s Amulet. Don’t forget that once the Amulet is in play, all events you play are placed on the bottom of your deck (regardless of whether you are playing the event from your hand or using the Amulet’s ability).
Wendy Adams, the Urchin Starter Deck
- Investigator: Wendy Adams (5)
- Assets (17):
- Wendy’s Amulet (14)
- Switchblade (44)
- Burglary (45)
- Pickpocketing (46)
- .41 Derringer (47)
- Leo De Luca (48)
- Hard Knocks (49)
- Leather Coat (72)
- Scavenging (73)
- Baseball Bat (74)
- Rabbit’s Foot (75)
- Stray Cat (76)
- Dig Deep (77)
- 2x Knife (86)
- 2x Flashlight (87)
- Events (8):
- Elusive (50)
- Backstab (51)
- Sneak Attack (52)
- Cunning Distraction (78)
- “Look what I found!” (79)
- Lucky! (80)
- 2x Emergency Cache (88)
- Skills (6):
- Opportunist (53)
- Survival Instinct (81)
- 2x Overpower (91)
- 2x Unexpected Courage (93)
- Weaknesses (2):
- Abandoned and Alone (15)
- Amnesia (96)
Quick Reference
Phase Sequence
- Mythos Phase (skip during the first round of the game)
- Investigation Phase
- Enemy Phase
- Upkeep Phase
Keywords
- Aloof: An aloof enemy does not engage investigators of its own accord. (An investigator may use an action or a card ability to engage it.) An investigator cannot attack an aloof enemy unless it is engaged with an investigator.
- Fast: A player may play a fast card without spending an action.
- Hunter: Each hunter enemy moves one location toward the nearest investigator during the first step of the enemy phase.
- Massive: A massive enemy is engaged with each investigator at its location.
- Peril: When an investigator draws a card with the peril keyword, that investigator cannot confer with or receive assistance from other players while resolving the card’s revelation ability or spawning it.
- Retaliate: If an investigator fails a skill test while attacking a ready enemy that has the retaliate keyword, that enemy attacks that investigator, dealing its damage and horror.
- Surge: After an investigator draws and resolves an encounter card that has the surge keyword, that investigator must draw and resolve an additional card.
- Uses (X): The uses keyword indicates a number of resource tokens to be placed on the card when it enters play. These tokens no longer count as resource tokens, but instead as tokens of the indicated type (ammo, charges, supplies, etc). These tokens are used in conjunction with the rest of the card’s ability.
Instructions
- Spawn: Indicates where an enemy spawns when drawn.
- Prey: Indicates which investigator an enemy will engage (or move toward if it has the hunter keyword) if there are multiple equally valid options.
Timing Triggers
- Action Trigger (): Costs an action to use this ability.
- Free Trigger (): Does not cost an action to use this ability.
- Reaction Trigger (
 ): May be used once each time the specified timing point occurs. Does not cost an action.
Symbols and Icons
General
- Per Investigator
Character Classes
 Guardian
 Seeker
 Mystic
 Rogue
 Survivor
Skills
- Willpower
- Intellect
- Combat
- Agility
 Wild
Chaos Tokens
- Elder Sign: Reference the investigator’s ability.
- Autofail: The investigator automatically fails.
- Skull: Reference the revealed token’s ability on the scenario reference card.
- Cultist: Reference the revealed token’s ability on the scenario reference card.
- Tablet: Reference the revealed token’s ability on the scenario reference card.
- Elder Thing: Reference the revealed token’s ability on the scenario reference card.
Credits & Playtesters
Game Design and Development: Nate French and Matthew Newman
Producer: Molly Glover
Technical Writing: Adam Baker
Editing: Patrick Brennan and B.D. Flory
Proofreading: Brad Andres, Christine Crabb, Erik Dahlman, Kristopher Fletcher, Alexander Hynes, and Kevin Tomczyk
Card Game Manager: Jim Cartwright
Arkham Horror Story Review: Dane Beltrami, Kara Centell-Dunk, Daniel Lovat Clark, and Philip Henry
Creative Director of Story and Setting: Katrina Ostrander
Graphic Design: Mercedes Opheim and Evan Simonet with Monica Helland
Graphic Design Coordinator: Joseph D. Olson
Graphic Design Manager: Christopher Hosch
Cover Art: Ignacio Bazán Lazcano
Art Direction: Deborah Garcia, Jeff Lee Johnson, and Zoë Robinson
Managing Art Director: Tony Bradt
Production Management: Justin Anger and Jason Glawe
Visual Creative Director: Brian Schomburg
Senior Project Manager: John Franz-Wichlacz
Executive Game Designer: Corey Konieczka
Head of Studio: Chris Gerber
Playtesters: Mark Anderson, Sam Bailey, Craig “Late to the Party” Bergman, Patrick Brennan, Mizuho Dahlman, Gareth Dean, Sunyi Dean, Andrea Dell’Agnese, Ali Eddy, Luke “Mining for Clues” Eddy, Julia Faeta, Jeff Farrell, Alex Filewood, Jeremy Fredin, Caleb Grace, Dominic Greene, Samuel Langenegger, Mark Larson, Lukas Litzinger, Rose Malloy, Ian Martin, Rick Meyer, Kathleen Miller, Patrice Mundinar, Teague “They Killed Me Again” Murphy, Alan Newman, Matt Pachefsky, Daniel Schaefer, Brian Schwebach, Paweł Smoczyk, Damon Stone, Mike “Autofail” Strunk, Zach “I Have Amnesia” Varberg, Aaron J. Wong, and Jeremy “Vicious Blow” Zwirn
Introduction & Game Overview
Beyond Time and Space…
Assuming that I was sane and awake, my experience on that night was such as has befallen no man before. It was, moreover, a frightful confirmation of all I had sought to dismiss as myth and dream.
—H. P. Lovecraft, The Shadow Out of Time
Game Overview
Arkham Horror: The Card Game is a cooperative Living Card Game® (LCG®) in which one to four investigators work together to unravel arcane mysteries and conspiracies, while simultaneously overcoming the personal demons that haunt their past.
Each player takes on the role of a single investigator and builds a deck around that investigator’s abilities. A series of interrelated scenarios creates a narrative campaign through which a broader mystery is unraveled. In each of these scenarios, the investigators move through and explore a number of menacing locations, look for clues that enable them to advance the story, and attempt to evade or defeat the treacherous forces of the Mythos.
As progress is made in the campaign, each investigator gains experience and insight, which allows them to develop in a variety of ways by adding powerful new high-level cards to their deck. But beware: As one’s exposure to the arcane world increases, so too does the risk of insanity. The investigators must protect themselves against this tightening grip of madness, all the while attempting to survive and solve the mystery.
Using This Book
This Learn to Play book is written as an introduction to Arkham Horror: The Card Game for new players. It should be used as a guide while learning and playing the first game. We recommend that new players learn the basics of the game using the introductory scenario with the pre-constructed decks described in “Starter Decks” on page 20. The end of this book also contains an introduction to campaign play and rules for customizing original decks. A quick reference of keywords, icons, and important game symbols can be found on the back cover of this book.
The complete rules of play can be found in the Rules Reference book, which also addresses more advanced topics such as the interpretation of card text, the resolution of timing conflicts, and a detailed phase sequence. We recommend that new players become familiar with the game using this Learn to Play book and only look up details in the Rules Reference as they occur in play.
A Living Card Game
Arkham Horror: The Card Game is a one-to-four-player cooperative game. One to four players can play using just the contents of this core set. In addition, Arkham Horror: The Card Game is a Living Card Game® (LCG®), and the experience of the game can be customized and enhanced through the purchase of regularly released expansions. Expansions may introduce new investigators, additional scenarios or campaigns, and new player cards that add variety and depth to investigator decks. While playing through an entire campaign creates the best experience, each scenario in a campaign may instead be played as a standalone adventure. Unlike collectible card games, all LCG expansions have a fixed distribution; there is no randomization to their contents.
Components
Game Components
Examples of the components in the game are presented here for identification purposes. A complete card anatomy can be found on pages 28–31 of the Rules Reference.
- 44 Chaos Tokens
- Chaos Bag
- 40 Damage Tokens (1s and 3s)
- 61 Resource Tokens (1s, 3s, and 5s)
- 57 Clue/Doom Tokens (double-sided) (1s and 3s)
- 27 Horror Tokens (1s and 3s)
- 5 Investigator Cards
- 5 Investigator Mini-Cards
- Lead Investigator Token
- 245 Player Cards (Player Reference Card, Asset Cards, Skill Cards, Event Cards, Weakness Cards)
- 111 Scenario Cards (Scenario Reference Card, Location Cards, Agenda Cards, Act Cards, Enemy Cards, Treachery Cards)
Fundamental Concepts
Fundamental Concepts
This section introduces a number of fundamental concepts important to learning and playing the game.
Winning and Losing
Each game is a single scenario during which the investigators are gathering clues and working to unravel a mystery. As the investigators advance through a scenario, they might reach a resolution. Typically, a scenario ends by advancing either the act deck or the agenda deck, which are described below. If the investigators advance the act deck, the scenario’s resolution is typically favorable (and can be considered a “win”); other resolutions are usually less favorable and leave the investigators in a more dire situation.
When any encounter card triggers a resolution—denoted by the text “(→R#)”—the players have completed the scenario and should refer to the resolution text that matches that number in the Campaign Guide to discover what happens next.
Should all investigators be eliminated during a scenario, the “if no resolution was reached” conclusion in the Campaign Guide is used.
Scenario Decks
Each scenario is represented by three distinct decks of cards. These decks provide the investigators with a scenario-specific narrative, objectives, and encounters, including a variety of monsters and other perils.
Agenda Deck
The agenda deck represents the progress made by the dark forces of the Mythos. During the game, the agenda deck gradually advances toward a resolution that is often unfavorable for the investigators. Generally, the investigators want to prevent this from happening.
Act Deck
The act deck represents progress made by the investigators toward solving a mystery or achieving their objectives during a scenario. Generally, the investigators want to advance the act deck to reach a more favorable resolution for the scenario.
When placed side by side in the play area, the act and agenda decks form the image of a storybook, and these decks work together to create the plot of each scenario.
Encounter Deck
Throughout the game, investigators draw encounter cards from the encounter deck, which represents perils, monsters, madnesses, and other afflictions the investigators must overcome, in the form of enemy and treachery cards.
Lead Investigator & The Grim Rule
The lead investigator (chosen during setup) is the player who breaks ties and makes decisions for the group whenever there is a conflict. The lead investigator is identified by the lead investigator token, which they place in their play area.
- If the players are required to make a choice among two or more equally valid options (for example, an enemy must move toward the “nearest investigator,” and the two nearest investigators are an equal distance away), the lead investigator chooses among those options.
- If the players are unsure how to resolve a rules or timing conflict, the lead investigator should resolve the conflict in the manner they perceive as the worst possible at that moment with regard to winning the scenario, and continue with the game. This is known as “The Grim Rule,” and using this rule keeps the game moving without forcing the players to look up every conflict they discover.
“In Player Order”
The phrase “in player order” is used to dictate the order in which players resolve or execute a game step. When players are instructed to do something “in player order,” the lead investigator does so first, followed by each other player, one player at a time, in clockwise order around the table.
Per Investigator ()
The symbol next to a value multiplies that value by the number of investigators who started the scenario. The number of clues placed on a location and the number of clues necessary to advance the current act are often denoted with this symbol.
Locations
Locations represent the various places the investigators travel to during a scenario while looking for clues. Each location has two sides: a revealed side and an unrevealed side. The unrevealed side can be identified by the presence of a keyhole symbol below its title.
A location enters play with its unrevealed side faceup. When an investigator enters a location for the first time, it is revealed (turned to its revealed side), and clues equal to that location’s clue value are placed on that location (from the token pool).
A location card may be revealed during setup if the investigators begin play at a location, or if the setup rules instruct the players to reveal a location.
Ready and Exhausted
Cards enter play in a “ready” position (upright, so that the ability text can be read from left to right). Some game steps and card abilities require cards to “exhaust,” which is indicated by rotating the card 90 degrees (sideways). A card in the exhausted position cannot exhaust again until it is readied by a game step or card ability.
Weakness Cards
A weakness card is a card in an investigator’s deck that has a negative effect when drawn. These cards are identified by the label “Weakness” or “Basic Weakness” beneath the card’s title or artwork. When one of these cards is drawn, the investigator who drew the card must resolve its “Revelation –” ability immediately. (See “Weakness” on page 21 of the Rules Reference for more details on weakness cards.)
Setup
First Game Setup
To set up the first game, perform the following steps in order. The game is best learned with one or two players.
Step 1: Choose Investigator(s)
Each player chooses an investigator and takes that investigator’s pack of cards. If playing solo, Roland Banks is the recommended investigator choice.
The Investigators
- Roland Banks: Roland is a federal agent in over his head. He excels at dispatching enemies and discovering the clues left behind in the conflict.
- Agnes Baker: Agnes is a waitress whose powers of sorcery are only just starting to manifest. She excels at using her willpower to defend against the forces of the Mythos, and turning her fear into raw power.
- Daisy Walker: Daisy is a librarian at Miskatonic University. She is great at discovering clues and supporting her teammates with her various Tome and Spell cards.
- Wendy Adams: Wendy is a scrappy young orphan who can take care of herself. She is skilled at evading enemies and avoiding combat, and can succeed at tests even when the odds are stacked against her.
- “Skids” O’Toole: “Skids” is a slippery ex-con with a heart of gold. He is good at generating resources and using them to take extra actions. He also excels at dealing with enemies, either through combat or evasion.
Step 2: Gather Decks
Each player opens their investigator’s pack of cards, which includes an investigator card and that investigator’s starter deck. Each player places their investigator card faceup in their play area, and then shuffles their starter deck. If the pack is already opened, a complete list of the cards required for all five starter decks can be found on page 20.
- Set the investigator card aside and shuffle the starter deck.
Step 3: Choose Lead Investigator
Choose one of those investigators to be the lead investigator for this game, and give that player the lead investigator token and the Campaign Guide.
The lead investigator is the player who breaks ties and makes decisions for the group if there is a conflict.
Step 4: Assemble Token Pool
Place all of the damage tokens, horror tokens, clue/doom tokens, and resource tokens within easy reach of all investigators. The token pool is the repository for all tokens that are not in play.
Step 5: Assemble the Chaos Bag
Place the 16 chaos tokens shown into the chaos bag. Return the rest to the game box. (When setting up future games, refer to the desired difficulty setting for your scenario or campaign.)
Step 6: Take Starting Resources
Each investigator takes five resources from the token pool and places them near their investigator card. This is the investigator’s resource pool.
Step 7: Draw Opening Hand
Each investigator draws five cards from their deck. If a weakness card is drawn any time during setup, set it aside and draw an additional card.
- Each player may take a single mulligan at this time by setting aside up to five of the cards just drawn.
- Then, they draw an equivalent number of cards, setting aside weaknesses as normal. A mulligan is recommended if a player has a poor starting hand (i.e., a hand with no assets).
- At the end of this step, all set-aside cards are shuffled back into the investigator’s deck. (Weaknesses are set aside, then shuffled back into the deck.)
Scenario Setup: The Gathering
The remaining setup steps contain scenario-specific information for the first scenario in the Night of the Zealot campaign. Open the Campaign Guide to page 2 and follow along with the setup instructions for “The Gathering” while performing these steps.
These instructions are written as though Roland and Wendy are the two investigators in the game, but you may have different investigators or a different number of players during your first game.
Step 8: Gather Scenario Cards
Open the pack labeled “The Gathering.” This pack contains all the cards required to play the first scenario. If the pack is already opened, consult the sidebar to the right for a list of all cards needed to play “The Gathering.”
Each card included in any scenario is part of an encounter set, indicated by its encounter set icon. For future games, refer to the Campaign Guide in order to tell which encounter sets should be gathered according to their encounter sets.
Encounter Sets
To set up a scenario, players must gather all the cards of each encounter set shown for that scenario. Each encounter set is represented by an icon that appears on each encounter card in that set. When gathering encounter cards, gather all copies of each card in the listed encounter sets. Use the encounter set numbers (#/#) at the bottom of each encounter card to aid you.
The Gathering Card List
- The Gathering (16 cards): #104–119
- Rats (3 cards): #159
- Ghouls (7 cards): #160–162
- Striking Fear (7 cards): #163–165
- Ancient Evils (3 cards): #166
- Chilling Cold (4 cards): #167–168
Step 9: Set Agenda Deck
Assemble the agenda deck by stacking the agenda cards from The Gathering’s encounter set in sequential order (so that “1a” is on top, “2a” is next, etc). These cards are “What’s Going On?!,” “Rise of the Ghouls,” and “They’re Getting Out!”
Step 10: Set Act Deck
Assemble the act deck by stacking the act cards from The Gathering’s encounter set in sequential order (so that “1a” is on top, “2a” is next, etc). These cards are “Trapped,” “The Barrier,” and “What Have You Done?”
Step 11: Place Reference Card
Place the scenario reference card for “The Gathering” (card 104a) next to the agenda deck.
Step 12: Place Locations
Following the setup instructions on page 2 of the Campaign Guide, put the Study into play (card 111). When a location is put into play, it enters play with its unrevealed side faceup. Then, set aside all of the remaining locations.
The unrevealed side of a location can be identified by the presence of a keyhole symbol below its title.
Step 13: Assemble Encounter Deck
Following the scenario’s setup instructions, set aside the Ghoul Priest (card 116) and Lita Chantler (card 117). Then, take the remaining encounter cards and shuffle them together to create the encounter deck.
Step 14: Read Scenario Introduction
Read the scenario introduction for “The Gathering” followed by the text on the faceup agenda and act cards (“What’s Going On?!” and “Trapped”).
Step 15: Place Investigators
Each investigator begins play in the Study. Place each investigator’s mini-card next to the Study to represent their current location.
When the investigators are placed in the Study, it is revealed. Following the normal rules for revealing a location, place clue tokens on the Study equal to its clue value when it is revealed. (The Study’s clue value is 2. Clue tokens equal to two times the number of players are placed on the Study when it is revealed.)
Play Area Diagram
An investigator’s threat area is where engaged enemies, curses, injuries, and other afflictions are placed.
Round Sequence & Mythos Phase
Round Sequence
Arkham Horror: The Card Game is played over a series of rounds. During a round, the investigators encounter the terrifying forces of the Mythos, explore mysterious locations, fend off dangerous enemies, and finally collect their bearings in anticipation of the next round. Each round is divided into four phases:
- Mythos Phase (skip during the first round of the game)
- Investigation Phase
- Enemy Phase
- Upkeep Phase
Important Note: During the first round of the game, skip the mythos phase and begin with the investigation phase. The mythos phase is described on page 13.
Once all four phases are complete, the round is over and play proceeds to the mythos phase of the next round. Each phase is described in detail below.
Phase 1: The Mythos Phase
In the mythos phase, the arcane forces pitted against the investigators seek to advance their fell agenda.
The mythos phase comprises three steps, described below:
- Place one doom token on the current agenda.
- Compare the total number of doom tokens in play (on the current agenda and on other cards in play) to the doom threshold of the current agenda. If the number of doom tokens in play is equal to or greater than the doom threshold of the current agenda, advance the agenda deck. This is done by discarding all doom tokens from play, turning the current agenda card over, following the instructions on its reverse side, and removing that agenda from play. Then, the front side of the next card in the agenda deck becomes the active agenda card. (Important Note: Unless a card specifies that it can advance the agenda, this is the only time the agenda can advance.)
- In player order, each investigator draws the top card of the encounter deck and resolves it. Instructions for resolving each type of encounter card are presented below:
- Treachery: When a treachery card is drawn, its ability is resolved, and the card is placed in the encounter discard pile unless it indicates that it is put into play.
- Enemy: When an enemy card is drawn, that enemy spawns engaged with the investigator who drew the card, unless it has a “Spawn –” instruction. If the enemy has a spawn instruction, it spawns at the location indicated by that instruction. If any investigators are at that location, it engages one of them as per the rules for enemy engagement listed below.
Phase 2: The Investigation Phase
The Investigation Phase
In the investigation phase, the investigators take center stage. What they choose to do depends on the circumstances and the investigator in question.
During this phase, each investigator takes a separate turn. The investigators, as a group, choose which investigator takes the first turn. When that investigator’s turn ends, choose an investigator to take the next turn, and so on, until each investigator has taken their turn.
Each investigator has three actions during their turn that may be used to perform a variety of tasks. An investigator may perform any of the following, as many times as they would like, and in any order, provided the investigator has an action available to pay for that task. On their turn, an investigator may use an action to:
- Draw 1 card.
- Gain 1 Resource.
- Activate an (action trigger) ability.
- Engage an enemy at their current location.
- Investigate their current location.
- Move to a new connecting location.
- Play an asset or event card from their hand.
- Attempt to Evade an enemy engaged with them.
- Fight an enemy at their current location.
If an investigator is engaged with one or more ready enemies, performing any action other than Evade, Fight, or activating an ability with either a Parley or Resign designator in its text causes each of those enemies to attack the investigator. (See “The Enemy Phase” on page 15.) This is called an attack of opportunity.
An investigator may end their turn early if there are no other actions they wish to perform. To indicate that an investigator’s turn is over, flip their mini-card facedown, to its black-and-white side. Unused actions are lost and cannot be saved for future turns. After each investigator has completed their turn, play proceeds to the enemy phase.
Tutorial Tip
At the beginning of the game, the investigators are trapped in the Study. How should they proceed?
In this situation, some actions are better than others. If an investigator has asset cards in hand that seem as if they might be useful, that investigator should consider using the Play action to play one or two of those cards—this will ensure that the investigator is prepared when an unexpected challenge or enemy comes their way. There are also clues in the Study; the investigators should consider using the Investigate action in an attempt to find these clues so they can advance the act deck. Alternatively, the Draw action and the Resource action could be useful in helping an investigator build up cards and resources for later in the game.
A Cooperative Game & Table Talk
There are many possible choices during the investigation phase. The investigators are encouraged to work together and plan out what they hope to accomplish each round. The order in which the investigators take their turns, and the actions each investigator performs during their turn, can mean the difference between success and failure.
While the investigators may plan their turns as a group, each individual player has final authority over the actions their investigator performs. For further guidelines on investigator communication, see the “Table Talk” sidebar below.
Table Talk
Arkham Horror: The Card Game seeks to establish a roleplaying experience in which each player takes on the role of a specific investigator. The nature of the game encourages players to work together and communicate, but players are also encouraged to stay “in character” as much as possible while doing so. The game’s areas of hidden information (the cards in a player’s hand and deck) exist to maintain the feeling that each investigator is a unique individual in the game world, and makes their decisions without complete and perfect knowledge of what everyone else knows or is thinking. A good means of maintaining this illusion is to not name, read off, or allude to individual cards that are hidden information (i.e., in a player’s hand or deck).
For example: Wendy wants her partner, Roland, to take an investigate action, and she desires to communicate that she can help. Instead of saying something like, “Take an investigate action; I can commit Perception” or, “Investigate our location; I can contribute two icons,” Wendy stays in character by saying, “You should investigate. I can help!”
Investigation Phase Actions in Detail
Draw
The investigator using this action draws one card from the top of their deck.
Resource
The investigator using this action gains one resource from the token pool. (Resources are often used to pay for cards and effects.)
Strategy Tip: Spending actions to draw cards and gain resources can be effective when you have a specific card you need to play, but it is often time-consuming and inefficient. Use these actions when you aren’t sure what to do, or as a last resort!
Activate
The investigator using this action resolves an (action trigger) ability on a card in play that is under their control, on an encounter card at their location, or on the current act or agenda card. Abilities on cards not in play (such as in an investigator’s hand) cannot be activated.
Play
When an investigator uses this action, that investigator selects an asset or event card in their hand, pays its resource cost, and plays it. A card’s resource cost and cardtype are found in its upper left corner.
To pay a resource cost, the investigator playing the card must move a number of resources equal to the cost from their resource pool to the general token pool.
The rules for playing each cardtype are as follows:
- If the played card is an event card, the investigator resolves its effects, then places it in their discard pile.
- If the played card is an asset card, the investigator places it in their play area. It remains in play until an ability or game effect removes it.
- Skill cards are not played. For their abilities and icons to be used, these cards must be committed to a skill test from an investigator’s hand (“Modifying Skill Values for Skill Tests” on page 17).
Cards with the “fast” keyword do not cost an action to play.
Slots
Slots restrict the number of asset cards of a specific category an investigator can have in play simultaneously. The slots available to an investigator are:
- 1 ally slot
- 1 body slot
- 1 accessory slot
- 2 hand slots
- 2 arcane slots
The icons indicate that an asset counts against an investigator’s capacity for the indicated slot(s). If an asset has no slot symbols on it, it does not take up any slots.
If an investigator wishes to play or gains control of an asset and lacks an appropriate slot, the investigator must choose and discard an asset or assets under their control to make room for the newly acquired asset.
Move
The investigator using this action moves to a connecting location. Move that investigator’s mini-card to any other location marked as a connection on the investigator’s current location. A location’s connections are indicated by the icons at the bottom of the location card, each of which match an identical icon in the title area of one or more connecting locations.
If the connecting location is unrevealed, turn the location to its revealed side when an investigator moves to it. Remember to place the indicated number of clues on the location when this occurs (see “Locations” on page 4).
Investigate
The investigator using this action investigates their current location in an attempt to find clues. That investigator makes an intellect () test against the shroud value of that location:
- If the skill test is successful, the investigator discovers one clue from the location. When an investigator discovers a clue from a location, that player takes one clue from the location and places it on their investigator card.
- If the investigator fails, no clues are discovered.
Advancing the Act Deck
The act deck represents progress the investigators can make in a scenario. Generally, the investigators advance the act deck by spending, as a group, an appropriate number of clues. Spent clues are returned from the investigators’ cards to the general token pool. Advancing the act in this way does not cost an action and may be done during any investigator’s turn. The number of clues required to advance to the next act can be found at the bottom of the current act card’s text box.
If the current act has a boldface “Objective —” instruction, that instruction either supplements or replaces the procedure for advancing the act deck described above.
To advance the act deck, flip the current act over to its “b” side, follow the instructions on the back, and set it aside, out of play. The next card in the act deck becomes the new current act. When advancing the act deck, the investigators keep any clues in excess of the required amount.
Engage
The investigator using this action engages one enemy that is at their location (either not currently engaged with an enemy, or currently engaged with another investigator). To engage an enemy, the investigator places that enemy in their threat area.
Strategy Tip: Engaging enemies lets you evade them or safely attack them without risking hitting your partner. Use this action to take the heat off your fellow investigators!
Evade
The investigator using this action attempts to evade one enemy they are engaged with. The investigator makes an agility () test against that enemy’s evade value.
- If the skill test is successful, the investigator evades the enemy; the enemy is exhausted, and the engagement is broken. Move the enemy card from the investigator’s threat area to the investigator’s current location to mark that it is no longer engaged with that investigator.
- If the agility test fails, the enemy is not evaded and remains engaged with the investigator.
Strategy Tip: Evading enemies can be crucial to success. Exhausted enemies do not automatically engage investigators, do not perform attacks of opportunity, and do not attack during the enemy phase. If you are unarmed or need to get away from a deadly enemy, consider evading it instead of performing a futile attack.
Fight
The investigator using this action attacks one enemy that is at their location. That investigator makes a combat () test against the enemy’s fight value.
- If the combat test is successful, the investigator deals one damage to the attacked enemy. Some weapons, spells, or other special attacks may modify the amount of damage dealt. Place a number of damage tokens equal to the amount of damage dealt on the enemy. If, at any time, an enemy has damage on it equal to or greater than its health, the enemy is defeated and placed in the encounter discard pile. If the bottom of the enemy’s text box indicates that it provides victory points (indicated by the “Victory X” keyword), place the card in a shared victory pile instead of discarding it.
- If the combat test fails, no damage is dealt to the attacked enemy.
Important Note: If an investigator fails a combat test against an enemy engaged with another investigator, the damage value of the failed attack is instead dealt to the investigator engaged with that enemy.
Phase 3: The Enemy Phase & Combat
The Enemy Phase
In the enemy phase, the enemies come after the investigators, and if they are able to do so, they attack!
Resolve the following steps in order. If there are no enemies in play, proceed to the upkeep phase.
- Hunter enemies move. Some enemies have the “hunter” keyword. Each such enemy moves once, to a connecting location, in the direction of the nearest investigator. Exhausted hunter enemies and hunter enemies at a location with one or more investigators do not move.
If a hunter enemy moves to a location with one or more investigators, that enemy immediately engages one of those investigators (see “Enemy Engagement” on page 16). - Enemy attacks. Each ready, engaged enemy makes an attack against the investigator with whom it is engaged. The investigators resolve enemy attacks in player order, but may resolve the attacks of each enemy engaged with a particular investigator in any order.
When an enemy attacks, deal both its damage and its horror, simultaneously, to the engaged investigator (see “Damage and Horror,” below). The amount of damage and horror dealt by an enemy’s attack can be found at the bottom of the enemy’s text box.
After an enemy attacks during the enemy phase, exhaust it to indicate that it has attacked. (During other attacks, such as attacks of opportunity, enemies do not exhaust.)
Enemy Engagement
While an enemy card is in play, it is either engaged with an investigator (and placed in that player’s threat area), or it is unengaged (and placed at its location). Each enemy in an investigator’s threat area is at the same location as that investigator. Should the investigator move, the enemy remains engaged with the investigator and also moves to the new location.
Any time a ready, unengaged enemy is at the same location as an investigator, it engages that investigator and is placed in that investigator’s threat area. If multiple investigators are at the same location as a ready, unengaged enemy, the lead investigator generally chooses which of those investigators the enemy engages.
Some enemies have a “Prey –” instruction, which dictates whom it engages if there are multiple possibilities. (See “Prey” on page 17 of the Rules Reference.)
An enemy immediately engages if:
- It spawns (in a ready state) at the same location as an investigator.
- It moves (in a ready state) to the same location as an investigator.
- An investigator moves to the same location as a ready enemy.
- An exhausted enemy readies at the same location as an investigator.
Damage and Horror
An investigator may be dealt damage and/or horror during a scenario. Damage depletes an investigator’s health, and horror depletes an investigator’s sanity.
- When an investigator is dealt damage, place damage on the investigator card and/or on any of that investigator’s asset cards that have health, up to the amount of damage each card can hold. A card that has no health value cannot be dealt damage.
- When an investigator is dealt horror, place horror on the investigator card and/or on any of that investigator’s asset cards that have sanity, up to the amount of horror each card can hold. A card that has no sanity value cannot be dealt horror.
- If a card has an amount of damage that equals (or exceeds) its health, or an amount of horror that equals (or exceeds) its sanity, the card is defeated. A defeated asset card is discarded. A defeated investigator is eliminated. (See “Elimination” on page 10 in the Rules Reference.)
Phase 4: The Upkeep Phase
The Upkeep Phase
In the upkeep phase, the heroes and villains find their bearings and prepare for the next round.
Resolve the following steps in order:
- Each investigator turns their mini-card faceup.
- Ready all exhausted cards. Each unengaged enemy that readies at the same location as an investigator engages at this time. (See the “Enemy Engagement” sidebar.)
- Each investigator draws one card and gains one resource.
- Each investigator with more than eight cards in their hand chooses and discards cards from hand until only eight cards remain.
After the above steps are complete, the game round is over. Proceed to the mythos phase of the next game round.
Skills & Skill Tests
Skills and Skill Tests
During the game, investigators frequently make skill tests to determine the outcome of various situations. A skill test uses an investigator’s skills, which are represented by four stats found on their investigator card:
- Willpower ()
- Intellect ()
- Combat ()
- Agility ()
The higher an investigator’s skill value, the more skilled they are.
During a skill test, one or more tokens are revealed from the chaos bag, modifying an investigator’s skill for that test. The investigator’s skill must equal or exceed the test’s difficulty for them to succeed. The complete rules for tests can be found under “Skills and Skill Tests” on page 17.
Each investigator possesses four skills: willpower (), intellect (), combat (), and agility (). The higher an investigator’s value for a particular skill, the better they are at performing tasks with that skill.
A number of situations require an investigator to make a skill test. A skill test pits the investigator’s value in a specified skill against a difficulty value determined by the ability or game step that initiated the test. To perform a skill test, the investigator reveals a random chaos token from the chaos bag, which modifies their skill value. If the modified skill value equals or exceeds the test’s difficulty, they succeed. If not, they fail. The consequences of success or failure are provided by the card or action that initiated the test.
The Chaos Bag
Throughout the game, the investigators are asked to randomly reveal tokens from the chaos bag to modify their chances of success or failure in a variety of situations. If an investigator reveals a token with a number value during a skill test, apply that modifier to the investigator’s skill value for that test. If a symbol is revealed, refer to the scenario’s reference card to determine that token’s effect.
Modifying Skill Values for Skill Tests
Before drawing a chaos token for a skill test, the investigator may boost their skill value. There are two ways to do this:
- Commit cards: The investigator may commit eligible cards from their hand to the test. An eligible card bears one or more icons matching the skill type of the test being performed. A wild icon (?) matches any skill type. Each matching icon committed to a test increases the investigator’s skill value by 1 for that test. The investigator performing the test may commit any number of cards from their hand to the test. Each other investigator at the same location as that investigator may commit one card from their hand to help.
Do not pay a card’s resource cost when committing it to a skill test. - Activate abilities: In addition, the investigator may activate (free triggered) abilities during a skill test, which may modify their skill for that test.
Chaos Token Effects
Each chaos token has a symbol or numerical modifier that influences the outcome of the skill test. The effect of each chaos token is described below:
- , , , — Refer to the scenario reference card and resolve the corresponding effect.
- — Refer to your investigator card and resolve your investigator’s ability.
- — Indicates an automatic failure of the skill test.
If the revealed chaos token (or the effect referenced by a chaos token) has a numerical modifier, that modifier is applied to the investigator’s skill value for this test.
Concluding a Skill Test
If the investigator’s modified skill value is equal to or higher than the difficulty value of the skill test, the investigator succeeds at the test. Otherwise, the investigator fails. The ability or game step that initiated the skill test provides instructions for the consequences of succeeding and/or failing.
Some skill cards have an ability that resolves upon the completion of a skill test, if the card is committed to that test.
Upon completion of a skill test, discard all investigator cards committed to that test, and return the revealed chaos token to the chaos bag.
Skill Test Example
Wendy Adams draws the encounter card Grasping Hands, which reads: “Revelation – Test (3). For each point you fail by, take 1 damage.”
Wendy’s agility value is 4, and the difficulty of this test is 3. Wendy is low on health, so it’s important that she succeed at this test! Wendy has no cards in hand with icons that can be committed to this test. Her partner, Roland, is at her location and decides to commit one card to the skill test, which has one icon. This gives Wendy a +1 bonus to her agility skill for this test.
Wendy now pulls a chaos token at random from the chaos bag, and reveals a “–2.” This modifier is applied to Wendy’s agility value for this test. Her value is now: 4 (from base value) + 1 (from the card Roland committed) – 2 (from the chaos token), for a total of 3. Since Wendy’s modified skill value of 3 is equal to the skill test’s difficulty of 3, she succeeds at this test!
Wendy now applies the results of the successful skill test. The Grasping Hands card has no effect (as she did not fail the skill test). Roland’s committed card is now discarded, and the chaos token is returned to the chaos bag.
Campaign Play & Custom Deckbuilding
What’s Next?
After the mythos phase is resolved, play proceeds to the investigator phase as usual. Continue resolving game rounds until players reach the scenario’s resolution (see “Winning and Losing” on page 4).
After you’ve completed the game, you may wish to continue the campaign. To do so, read “Expanded Campaign Rules” on page 3 of the Campaign Guide. Then proceed to the next scenario, The Midnight Masks, using the setup rules found on “Appendix III: Setting Up The Game” on page 27 of the Rules Reference.
Some players may wish to practice using different investigators before proceeding with the campaign. To do so, use the “Custom Deckbuilding” rules below or use the starter decks listed under “Starter Decks” on page 20 to replay the first scenario, The Gathering.
A quick reference of keywords, icons, and important game symbols can be found on the back cover of this book. Additionally, the Rules Reference book thoroughly covers the finer points of the game. Be sure to use these references frequently while mastering the game.
Custom Deckbuilding
The Arkham Horror: The Card Game core set is designed to be a complete game experience with significant replayability. After learning the basics of the game, players may wish to explore building original decks.
Why Build a Custom Deck?
Deckbuilding is a process by which a player may customize their deck to take on the scenarios using original strategies and ideas. This allows a player to experience the game in new ways. Instead of adapting their play to the strategy of a starter deck, each player may construct a deck that functions as they desire. When a player constructs an original deck, that player doesn’t just participate in the game: They actively shape how it is played.
Deck Customization Rules
The following are the deck customization rules for Arkham Horror: The Card Game investigator decks. Note that for more deckbuilding options, players may want to obtain expansion sets containing new cards.
- Each player must choose exactly one investigator card.
- Each player’s investigator deck must include the exact number of standard player cards indicated on the back of their investigator card as their “Deck Size.” For each of the investigators in the core set, this number is 30. Weaknesses, investigator-specific cards, and scenario cards that are added to a player’s deck do not count toward this number.
- Each standard player card in a player’s deck must be chosen according to the “Deckbuilding Options” available on the back of their investigator card.
- Each player’s deck cannot include more than two copies (by title) of any given player card.
- Each player must observe any other “Deckbuilding Requirements” on the back of their investigator card when building their deck.
- At the beginning of a campaign, an investigator may only include level 0 cards in their deck (see “Card Levels,” below).
Card Levels
A card’s level is indicated by the presence of white pips beneath its cost. The card’s level is equal to the number of such pips on the card.
In campaign play, investigators may be rewarded with experience points upon the completion of a scenario. Investigators may spend these points to purchase higher-level cards to use in their decks during that campaign. (See “Campaign Play” on page 5 in the Rules Reference.)
Random Weakness
Most investigators have a deckbuilding requirement that instructs the player to add a random basic weakness to their deck.
Unlike investigator-specific weaknesses, basic weaknesses are identified by this symbol:
To select a random basic weakness, take the ten basic weaknesses in this core set, shuffle them together, and draw one at random to add to the investigator’s deck. Some Arkham Horror: The Card Game products add additional basic weakness cards to a player’s collection. Simply add these cards to the ten cards found in the core set when selecting random basic weaknesses in the future.
For example: Stephanie owns two copies of the core set, one copy of the first deluxe campaign expansion, and one copy of the first mythos pack. To create a single set of basic weaknesses, she takes all of the basic weaknesses from a single core set, her copy of the deluxe campaign expansion, and her copy of the first Mythos Pack. She shuffles them together and draws her basic weakness at random from this pool.
Do not select an investigator’s basic weakness until all other cards in that investigator’s deck have been chosen. Once this is done, add the weakness to your deck. In campaign mode, the selected weakness remains a part of the investigator’s deck for the entire campaign, unless it is removed by a card ability. New weaknesses are not automatically added at the beginning of subsequent campaign scenarios, but card abilities or scenario instructions may instruct an investigator to gain additional weaknesses.
Starter Decks & Strategy
Starter Decks
Investigating the events occurring throughout Arkham is dangerous work. You will confront monstrosities far beyond your ken, and the knowledge you seek may cause irreparable harm to your psyche. You’ll need strong allies, useful skills, and the best tools if you are to succeed in the campaigns to come.
To help you in your investigations, we have provided a sample starter deck for each of the five investigators in the core set. These decks are a gateway into the world of Arkham Horror, and are ideal for players who wish to get into the action as fast as possible, or for players who do not wish to use the deck customization rules to construct an original deck.
Each of the provided decks is accompanied by tips and tricks for playing that deck, explaining how to make the best use of an investigator’s ability, or demonstrating card synergy within the deck.
These starter decks are meant to be used at the beginning of a campaign, and thus have 0 experience points spent. The number in parentheses next to each card is its card collector number. If a card does not specify the number of copies you should use, use only 1 copy of that card. Each of these starter decks includes a specific basic weakness instead of a random basic weakness. Do not add another random basic weakness to the deck.
With the contents of this core set, players can have all five of these starter decks constructed at the same time.
Roland Banks Strategy Tips
Roland is a capable fighter and clue gatherer. Since his ability allows him to automatically discover clues by defeating enemies, you will want to hunt down any easy-to-kill enemies you can find, especially if they are in a location with a high shroud value. Try to get a weapon out as soon as possible (such as a .45 Automatic, Machete, or Roland’s .38 Special) so that you are prepared to tackle any enemies that may appear. Beat Cop, Guard Dog, and Physical Training can all help you take down enemies, as well.
If you are still having trouble investigating, you may wish to carry a Magnifying Glass or have Dr. Milan Christopher help you. Evidence! and Working a Hunch can also allow you to discover clues automatically in locations with a high shroud value.
While Roland is physically tough, he has a low sanity and is especially susceptible to horror. Allies like Beat Cop or Dr. Milan Christopher can help soak some horror if you uncover something terrifying. Otherwise, don’t be afraid to play First Aid and use an entire turn healing horror if you are close to being defeated—you want to avoid mental trauma at all costs!
Should you be compelled to Cover Up any strange events happening in your vicinity, don’t forget you can use card effects such as Roland’s ability, Evidence!, or Working a Hunch to remove these clues instead of investigating.
Roland Banks, the Fed Starter Deck
- Investigator: Roland Banks (1)
- Assets (17):
- Roland’s .38 Special (6)
- .45 Automatic (16)
- Physical Training (17)
- Beat Cop (18)
- First Aid (19)
- Machete (20)
- Guard Dog (21)
- Magnifying Glass (30)
- Old Book of Lore (31)
- Research Librarian (32)
- Dr. Milan Christopher (33)
- Hyperawareness (34)
- Medical Texts (35)
- 2x Knife (86)
- 2x Flashlight (87)
- Events (8):
- Evidence! (22)
- Dodge (23)
- Dynamite Blast (24)
- Mind over Matter (36)
- Working a Hunch (37)
- Barricade (38)
- 2x Emergency Cache (88)
- Skills (6):
- Vicious Blow (25)
- Deduction (39)
- 2x Guts (89)
- 2x Manual Dexterity (92)
- Weaknesses (2):
- Cover Up (7)
- Silver Twilight Acolyte (102)
Daisy Walker Strategy Tips
Daisy is a high-intellect investigator who favors a support role or a rush-for-clues approach. Since her ability is dependent upon Tome assets, getting one in play as soon as possible should be your primary concern. Old Book of Lore is the ideal Tome to get out early, but having Medical Texts with Daisy’s high intellect can be a lifesaver. If you don’t draw either of these cards in your opening hand, a Research Librarian can help you search for one, and also serves as a convenient damage buffer when the going gets rough.
Daisy doesn’t usually need help investigating, but if you’re trying to rush for clues, equip a Magnifying Glass and get Dr. Milan Christopher into play as soon as possible.
Because her combat and agility are both on the low end, dealing with enemies can be problematic for Daisy. Luckily, you have a few tricks up your sleeve. Blinding Light and Shrivelling allow you to use your willpower instead of agility or combat to evade or attack enemies, respectively. You can also use Holy Rosary to boost your willpower higher. If you find a location with lots of clues and there are hunter enemies around, you can use Barricade to gather those clues in relative safety.
If you already have both your Old Book of Lore and Medical Texts in play, try to get Daisy’s Tote Bag out before The Necronomicon enters play, otherwise you’ll end up losing one of your other books.
Daisy Walker, the Librarian Starter Deck
- Investigator: Daisy Walker (2)
- Assets (17):
- Daisy’s Tote Bag (8)
- Magnifying Glass (30)
- Old Book of Lore (31)
- Research Librarian (32)
- Dr. Milan Christopher (33)
- Hyperawareness (34)
- Medical Texts (35)
- Forbidden Knowledge (58)
- Holy Rosary (59)
- Shrivelling (60)
- Scrying (61)
- Arcane Studies (62)
- Arcane Initiate (63)
- 2x Knife (86)
- 2x Flashlight (87)
- Events (8):
- Mind over Matter (36)
- Working a Hunch (37)
- Barricade (38)
- Drawn to the Flame (64)
- Ward of Protection (65)
- Blinding Light (66)
- 2x Emergency Cache (88)
- Skills (6):
- Deduction (39)
- Fearless (67)
- 2x Perception (90)
- 2x Manual Dexterity (92)
- Weaknesses (2):
- The Necronomicon (John Dee Translation) (9)
- Paranoia (97)
“Skids” O’Toole Strategy Tips
“Skids” is a well-rounded character who is decent at combat, evasion, and investigation. Your investigator ability and weakness both require you to have resources, so keeping a high quantity in your resource pool is usually a good idea. You can generate extra resources by making judicious use of Burglary and Emergency Cache, or simply by taking a “resource” action whenever you’re unsure what to do.
Because “Skids” has high agility and decent combat, you have the option of deciding whether to take enemies on through brute force or avoid them altogether. It is usually best to decide based on the enemy in question—fight enemies with high evade values and evade enemies with high health and fight values. As you have quite a few weapons in your deck, don’t be afraid to take a guns-blazing approach when you have to!
Extra actions are your most powerful tool as “Skids.” Between Leo De Luca and your investigator ability, you may have as many as five actions in a single turn. Save your resources early on to play Leo and your other assets, but mid-to-late game, spend your money and use your extra actions to take out enemies, investigate locations, or move to right where you need to be.
Your low willpower means you are likely to succumb to many of the encounter deck’s tricks. If you’re feeling swamped, On the Lam is your panic button. The ability to essentially ignore all non-Elite enemies for a whole round is extremely potent. Use it to take move or investigate actions while engaged with enemies, or to engage enemies away from your allies without fear of reprisal.
“Skids” O’Toole, the Ex-Con Starter Deck
- Investigator: “Skids” O’Toole (3)
- Assets (16):
- .45 Automatic (16)
- Physical Training (17)
- Beat Cop (18)
- First Aid (19)
- Machete (20)
- Guard Dog (21)
- Switchblade (44)
- Burglary (45)
- Pickpocketing (46)
- .41 Derringer (47)
- Leo De Luca (48)
- Hard Knocks (49)
- 2x Knife (86)
- 2x Flashlight (87)
- Events (9):
- On the Lam (10)
- Evidence! (22)
- Dodge (23)
- Dynamite Blast (24)
- Elusive (50)
- Backstab (51)
- Sneak Attack (52)
- 2x Emergency Cache (88)
- Skills (6):
- Vicious Blow (25)
- Opportunist (53)
- 2x Guts (89)
- 2x Overpower (91)
- Weaknesses (2):
- Hospital Debts (11)
- Mob Enforcer (101)
Agnes Baker Strategy Tips
Agnes is a high-willpower spellcaster who is particularly good at dispatching enemies. Since her ability can trigger once per phase after she takes horror, the more on-demand ways you can deal horror to yourself, the better. Forbidden Knowledge is probably your best tool for fueling Agnes’s ability: Take one horror, gain one resource, and deal one damage anytime you want! You can also trigger her ability through Ward of Protection, or even Shrivelling if you are “lucky” enough to draw a chaos token with a symbol on it. But beware! Since Agnes’s ability only triggers when horror is actually placed on her, you’re going to want to soak or heal horror as well. Holy Rosary is a must-play card, since it boosts Agnes’s willpower and also provides you with a way to protect against horror when you don’t wish to trigger Agnes’s ability.
If you are having trouble investigating, you can use “Look what I found!” or Drawn to the Flame to discover as many as four clues without having to succeed at an intellect test.
Finally, since you are quite dependent upon your Spell cards, getting an Arcane Initiate in play early can be a huge benefit to you. Make sure the doom threshold on the current agenda isn’t close to being satisfied, then play Arcane Initiate and make the most out of its ability each turn. When doom is close to the threshold, if you can discard the initiate from play (usually by assigning damage or horror to it), you can be rid of the doom on it as well.
Agnes Baker, the Waitress Starter Deck
- Investigator: Agnes Baker (4)
- Assets (17):
- Heirloom of Hyperborea (12)
- Forbidden Knowledge (58)
- Holy Rosary (59)
- Shrivelling (60)
- Scrying (61)
- Arcane Studies (62)
- Arcane Initiate (63)
- Leather Coat (72)
- Scavenging (73)
- Baseball Bat (74)
- Rabbit’s Foot (75)
- Stray Cat (76)
- Dig Deep (77)
- 2x Knife (86)
- 2x Flashlight (87)
- Events (8):
- Drawn to the Flame (64)
- Ward of Protection (65)
- Blinding Light (66)
- Cunning Distraction (78)
- “Look what I found!” (79)
- Lucky! (80)
- 2x Emergency Cache (88)
- Skills (6):
- Fearless (67)
- Survival Instinct (81)
- 2x Perception (90)
- 2x Unexpected Courage (93)
- Weaknesses (2):
- Dark Memory (13)
- Haunted (98)
Wendy Adams Strategy Tips
Wendy is a slippery investigator who is great at avoiding danger. Making use of her ability to cancel and re-draw chaos tokens during critical skill tests is key to succeeding as Wendy. Be sure to keep enough cards in your hand to fuel her ability at all times. Pickpocketing and Rabbit’s Foot are both ideal cards to put into play early, allowing you to draw cards through evading enemies and failing tests.
Her high agility and low combat mean you should primarily be evading and running from enemies, but a well-timed Backstab or Sneak Attack can also get rid of a troublesome enemy. Stray Cat, Cunning Distraction, and Survival Instinct can all help you get out of sticky situations. When all else fails, pull out a .41 Derringer or a Baseball Bat and don’t be afraid to overcommit cards!
Wendy’s Amulet is a tricky card, but playing around its ability and Forced effect can be especially rewarding. It is usually best to keep the Amulet in hand until there are a few events in your discard pile. Once it’s in play, always be aware of the topmost event in your discard pile, (especially if it’s Lucky!) since you can play it using Wendy’s Amulet. Don’t forget that once the Amulet is in play, all events you play are placed on the bottom of your deck (regardless of whether you are playing the event from your hand or using the Amulet’s ability).
Wendy Adams, the Urchin Starter Deck
- Investigator: Wendy Adams (5)
- Assets (17):
- Wendy’s Amulet (14)
- Switchblade (44)
- Burglary (45)
- Pickpocketing (46)
- .41 Derringer (47)
- Leo De Luca (48)
- Hard Knocks (49)
- Leather Coat (72)
- Scavenging (73)
- Baseball Bat (74)
- Rabbit’s Foot (75)
- Stray Cat (76)
- Dig Deep (77)
- 2x Knife (86)
- 2x Flashlight (87)
- Events (8):
- Elusive (50)
- Backstab (51)
- Sneak Attack (52)
- Cunning Distraction (78)
- “Look what I found!” (79)
- Lucky! (80)
- 2x Emergency Cache (88)
- Skills (6):
- Opportunist (53)
- Survival Instinct (81)
- 2x Overpower (91)
- 2x Unexpected Courage (93)
- Weaknesses (2):
- Abandoned and Alone (15)
- Amnesia (96)
Reference & Credits
Quick Reference
Phase Sequence
- Mythos Phase (skip during the first round of the game)
- Investigation Phase
- Enemy Phase
- Upkeep Phase
Keywords
- Aloof: An aloof enemy does not engage investigators of its own accord. (An investigator may use an action or a card ability to engage it.) An investigator cannot attack an aloof enemy unless it is engaged with an investigator.
- Fast: A player may play a fast card without spending an action.
- Hunter: Each hunter enemy moves one location toward the nearest investigator during the first step of the enemy phase.
- Massive: A massive enemy is engaged with each investigator at its location.
- Peril: When an investigator draws a card with the peril keyword, that investigator cannot confer with or receive assistance from other players while resolving the card’s revelation ability or spawning it.
- Retaliate: If an investigator fails a skill test while attacking a ready enemy that has the retaliate keyword, that enemy attacks that investigator, dealing its damage and horror.
- Surge: After an investigator draws and resolves an encounter card that has the surge keyword, that investigator must draw and resolve an additional card.
- Uses (X): The uses keyword indicates a number of resource tokens to be placed on the card when it enters play. These tokens no longer count as resource tokens, but instead as tokens of the indicated type (ammo, charges, supplies, etc). These tokens are used in conjunction with the rest of the card’s ability.
Instructions
- Spawn: Indicates where an enemy spawns when drawn.
- Prey: Indicates which investigator an enemy will engage (or move toward if it has the hunter keyword) if there are multiple equally valid options.
Timing Triggers
- Action Trigger (): Costs an action to use this ability.
- Free Trigger (): Does not cost an action to use this ability.
- Reaction Trigger (): May be used once each time the specified timing point occurs. Does not cost an action.
Symbols and Icons
General
- Per Investigator
Character Classes
- Guardian
- Seeker
- Mystic
- Rogue
- Survivor
Skills
- Willpower
- Intellect
- Combat
- Agility
- Wild
Chaos Tokens
- Elder Sign: Reference the investigator’s ability.
- Autofail: The investigator automatically fails.
- Skull: Reference the revealed token’s ability on the scenario reference card.
- Cultist: Reference the revealed token’s ability on the scenario reference card.
- Tablet: Reference the revealed token’s ability on the scenario reference card.
- Elder Thing: Reference the revealed token’s ability on the scenario reference card.
Credits & Playtesters
Game Design and Development: Nate French and Matthew Newman
Producer: Molly Glover
Technical Writing: Adam Baker
Editing: Patrick Brennan and B.D. Flory
Proofreading: Brad Andres, Christine Crabb, Erik Dahlman, Kristopher Fletcher, Alexander Hynes, and Kevin Tomczyk
Card Game Manager: Jim Cartwright
Arkham Horror Story Review: Dane Beltrami, Kara Centell-Dunk, Daniel Lovat Clark, and Philip Henry
Creative Director of Story and Setting: Katrina Ostrander
Graphic Design: Mercedes Opheim and Evan Simonet with Monica Helland
Graphic Design Coordinator: Joseph D. Olson
Graphic Design Manager: Christopher Hosch
Cover Art: Ignacio Bazán Lazcano
Art Direction: Deborah Garcia, Jeff Lee Johnson, and Zoë Robinson
Managing Art Director: Tony Bradt
Production Management: Justin Anger and Jason Glawe
Visual Creative Director: Brian Schomburg
Senior Project Manager: John Franz-Wichlacz
Executive Game Designer: Corey Konieczka
Head of Studio: Chris Gerber
Playtesters: Mark Anderson, Sam Bailey, Craig “Late to the Party” Bergman, Patrick Brennan, Mizuho Dahlman, Gareth Dean, Sunyi Dean, Andrea Dell’Agnese, Ali Eddy, Luke “Mining for Clues” Eddy, Julia Faeta, Jeff Farrell, Alex Filewood, Jeremy Fredin, Caleb Grace, Dominic Greene, Samuel Langenegger, Mark Larson, Lukas Litzinger, Rose Malloy, Ian Martin, Rick Meyer, Kathleen Miller, Patrice Mundinar, Teague “They Killed Me Again” Murphy, Alan Newman, Matt Pachefsky, Daniel Schaefer, Brian Schwebach, Paweł Smoczyk, Damon Stone, Mike “Autofail” Strunk, Zach “I Have Amnesia” Varberg, Aaron J. Wong, and Jeremy “Vicious Blow” Zwirn
Expansions for
Arkham Horror: The Card Game (Revised Core Set)
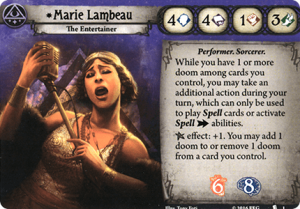
Arkham Horror: The Card Game – Marie Lambeau Promo Cards
2016
Preview Marie Lambeau and her signature cards before their normal release.
120
minutes
View expansion
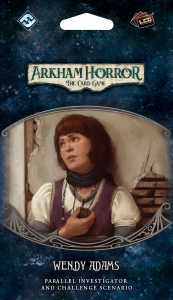
Arkham Horror: The Card Game – Red Tide Rising: Challenge Scenario
2021
Uncover Innsmouth’s secrets in a Wendy Adams challenge scenario.
120
minutes
Heavy

View expansion

Arkham Horror: The Card Game – By the Book: Challenge Scenario
2021
Uncover a deadly conspiracy in this print-and-play Arkham case.
120
minutes
Heavy
View expansion

Arkham Horror: The Card Game – Bad Blood: Challenge Scenario
2020
A haunting print-and-play challenge scenario designed for Agnes Baker.
120
minutes
Heavy
View expansion

Dark Matter (fan expansion for Arkham Horror Card Game)
2021
A sci-fi-horror campaign of cosmic mystery across the solar system
120
minutes
Medium Heavy
View expansion
Arkham Horror: The Card Game – The Night’s Usurper: Scenario Pack
2018
A standalone Arkham Nights scenario with campaign-shaping consequences.
View expansion
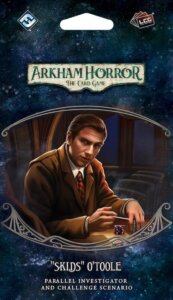
Arkham Horror: The Card Game – All or Nothing: Challenge Scenario
2020
Take the Clover Club for all you can before luck—and the gang—turns against you.
120
minutes
Medium Heavy
View expansion
Arkham Horror: The Card Game – Dexter Drake Promo Cards
2020
Add Dexter Drake to Arkham Horror with four exclusive promo cards.
120
minutes
Medium Heavy
View expansion
Arkham Horror: The Card Game – Read or Die: Challenge Scenario
2020
Uncover eldritch secrets in a print-and-play challenge for Daisy Walker.
120
minutes
Heavy
View expansion
Arkham Horror: The Card Game – Gloria Goldberg Promo Cards
2020
Meet writer and investigator Gloria Goldberg in four Arkham Horror promo cards.
120
minutes
Medium Heavy
View expansion
Arkham Horror: The Card Game – The Eternal Slumber: Scenario Pack
2018
A special-event side story with lasting community-wide consequences.
View expansion
Arkham Horror: The Card Game – Roland Banks Promo Cards
2018
Four promo cards adding Roland Banks to Arkham Horror: The Card Game
120
minutes
Medium Heavy
View expansion

Arkham Horror: The Card Game – Carolyn Fern Promo Cards
2018
Add four promotional cards featuring Carolyn Fern to your Arkham Horror game.
120
minutes
Medium Heavy
View expansion
Arkham Horror: The Card Game – Norman Withers Promo Cards
2017
Four promo cards featuring Norman Withers for Arkham Horror: The Card Game.
120
minutes
Medium Heavy
View expansion

Arkham Horror: The Card Game – Jenny Barnes Promo Cards
2017
Four alternate Jenny Barnes cards for Arkham Horror: The Card Game.
120
minutes
Medium Heavy
View expansion
Arkham Horror: The Card Game – Silas Marsh Promo Cards
2018
Four promo cards bringing Silas Marsh to Arkham Horror: The Card Game
120
minutes
View expansion
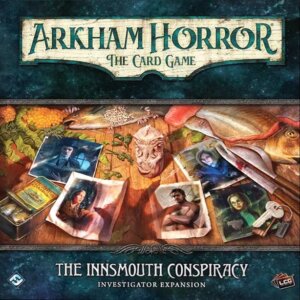
Arkham Horror: The Card Game – The Innsmouth Conspiracy: Investigator Expansion
2024
Five investigators face whispers, conspiracies, and secrets beneath the waves.
180
minutes
Medium Heavy
View expansion
Arkham Horror: The Card Game – Film Fatale: Scenario Pack
2025
Enter Hollywood’s Lot C, where silent-film fiction turns dangerously real.
120
minutes
Medium Heavy
View expansion
Arkham Horror: The Card Game – The Midwinter Gala: Scenario Pack
2024
Survive a deadly gala, choose your faction, and claim a powerful relic.
120
minutes
Medium Heavy
View expansion
Arkham Horror: The Card Game – The Drowned City: Campaign Expansion
2025
Journey to R’lyeh in a desperate confrontation with an awakened Cthulhu.
180
minutes
Medium Heavy
View expansion
Arkham Horror: The Card Game – The Drowned City: Investigator Expansion
2025
Six investigators and new Specialist cards face Arkham’s greatest threat.
180
minutes
Medium Heavy
View expansion
Arkham Horror: The Card Game – The Dream-Eaters: Investigator Expansion
2024
Five investigators and a wealth of cards for dreamlike Arkham adventures
180
minutes
Heavy
View expansion
Arkham Horror: The Card Game – The Dream-Eaters: Campaign Expansion
2024
Enter the Dreamlands and face terrors that threaten two worlds.
180
minutes
Medium Heavy
View expansion
Arkham Horror: The Card Game – The Innsmouth Conspiracy: Campaign Expansion
2024
Recover lost memories and uncover Innsmouth’s deadly conspiracy.
180
minutes
Medium Heavy
View expansion
