
BattleLore: Second Edition
2013
Lead Daqan Lords or Uthuk Y’llan forces, create a new battlefield, and use strategy and lore to seize victory in Terrinoth.
90
minutes
2 - 2
player(s)
14+
Medium


About this board game
BattleLore: Second Edition is a two-player fantasy board game of squad-based warfare, with games lasting about 90 minutes. Set in the realm of Terrinoth, it pits the hardy Daqan Lords of Nordgard Castle against the demon-worshipping Uthuk Y’llan.
Each battle begins with the creation of a new map and scenario, followed by the mustering of an army. This gives you the opportunity to tailor your forces to your preferred play style before sending fearsome warriors and deadly creatures into combat.
Strategic command is central to every game. Position your troops, direct your squads, and use the power of lore to influence the course of the battle. Victory comes from making effective choices on the battlefield and adapting your plans as the conflict develops.
Commanders can raise their banners by seizing victory points from objectives and eliminating enemy units. Whether you defend the borderlands with the Daqan Lords or unleash the ferocity of the Uthuk Y’llan, BattleLore: Second Edition delivers intense military strategy in a fantasy setting.
- Designed for 2 players
- Approximately 90 minutes per game
- Customizable maps, scenarios, and armies
- Includes 92 detailed figures, 43 map overlay pieces, more than 150 cards, and 4 custom dice
With its changing battlefields, varied armies, and opposing factions, BattleLore: Second Edition offers a fresh contest each time you enter the borderlands of Terrinoth.

Board Game Rules for
BattleLore: Second Edition
A Missive from the Northern Border
My lords,
My time is short, so I shall be brief. May this missive fall on ears less deaf than earlier pleas. Time and again the Daqan Lords have ignored the warnings of the Wise Knight. Would that you had listened! Would that Captain Alcaran yet lived; may this burden have fallen to his shoulders rather than mine.
This is the last warning the Citadel shall receive from the northern border. By the time this message reaches you, it is very likely that I and all the men under my command will be dead. If we are fortunate and our strength is sufficient, we may have died in battle. If our courage or our strength have failed, then we will have died upon the sacrificial altars of the Uthuk Y’llan.
The Uthuk Y’llan are not bandits, not marauding orcs from the Broken Plains. Long has Knight Captain Alcaran warned of a power stirring in the Ru Darklands. That power stands revealed; it marches now upon Nordgard Castle in great strength. The men who howl at our walls are men no longer. Not merely barbarians, but demon-touched. Their forebear Llovar first drank of that red cup and passed his curse through all the Loth K’har. Their bodies and minds twisted by the Ynferneal, they walk with demon creatures at their sides. Against this, what have we? A few handfuls of the Citadel Guard, a detachment of bowmen from the Crimson Forest, and those ancient Rune Golems prepared by our own wiser ancestors against the day they are needed.
The day is come. I have called the golems to life and I go now to my death. With my life and my sword I hope to buy the peoples of Terrinoth enough time to prepare. What few days you yet have were paid with the blood of brave men. Do not waste them.
Written in the light of the gods and in service to the Citadel,
Sir Patric Murtagh,
Earl of Greenbridge, Knight of the Citadel, and Castellan of Nordgard Castle.
Components

- 1 Game Board
- 4 Dice
- 1 Reference Book
- 40 Command Cards
- 40 Lore Cards (20 Daqan, 20 Uthuk)
- 6 Army Cards (3 Daqan, 3 Uthuk)
- 10 Unit Reference Cards (5 Daqan, 5 Uthuk)
- 14 Scenario Cards (7 Daqan, 7 Uthuk)
- 56 Deployment Cards (17 Daqan, 17 Uthuk, 22 Decoy)
- 35 Terrain Tiles
- 1 First Player Token
- 4 Terrain Tokens
- 4 Banner Markers
- 18 Lore Tokens (13 “1” Lore, 5 “5” Lore)
- 17 Victory Point Tokens (13 “1” VP, 4 “5” VP)
- 8 Damage Tokens
- 6 Poison Markers
- 2 Portal Markers
- 4 Stun Markers
- 3 Swarm Markers
- Daqan Figures:
- 15 Citadel Guards
- 15 Yeoman Archers
- 9 Riverwatch Riders
- 6 Rune Golems
- 1 Roc Warrior
- Uthuk Figures:
- 15 Blood Harvesters
- 15 Viper Legion
- 9 Flesh Ripper Brutes
- 6 Obscene
- 1 Chaos Lord
Game Overview
BattleLore Second Edition is a tactical game for two players set in the vibrant Runebound universe. Players command either the noble Daqan Lords or the bloodthirsty Uthuk Y’llan on the war-torn battlefields of Terrinoth. Players customize the battlefield, muster their armies, and secretly deploy their units. Then, through shrewd tactics and the cunning use of lore cards, players battle until one emerges victorious and his opponent’s army lay in shambles across the battlefield.
For Your First Game
For the first game of BattleLore Second Edition, players are encouraged to play the learning scenario. This scenario is designed for new players to quickly set up and play a game using basic units and rules.
Before players begin the learning scenario, they must understand the basic rules presented on pages 6–11 of this rulebook. To play the learning scenario, set up the game by following the learning scenario setup instructions on page 5.
After players play this scenario and have a better understanding of BattleLore Second Edition’s broad gameplay concepts, they will be ready to muster larger armies and build more complex scenarios as described in the expanded rules beginning on page 12.
Using this Rulebook
This rulebook is designed to teach new players how to play BattleLore Second Edition. In an effort to allow players to play the game immediately by teaching them only the basic rules, this rulebook omits many rules exceptions and complex game interactions. Due to the wealth of unit types, unit abilities, lore effects, and scenario-specific rules found in the game, many unique conflicts and interactions may arise during a game. If players have any questions during gameplay, they should use the reference book to help resolve and understand these situations instead of using this rulebook.
Faction Symbols
Each faction-specific component contains a faction symbol. Players use these faction symbols to identify which components belong to each player.

Unit Overview
A player’s army is represented on the game board by units. Each unit is composed of a figure or a group of figures that occupies a single hex on the game board.

Learning Scenario Setup
To set up the learning scenario, follow these steps:
- Place Game Board: Place the game board in the center of the game area.
- Choose Faction: Each player chooses a faction: either the Daqan (blue) or the Uthuk (red). If both players wish to control the same faction, players choose factions randomly.
- Place First Player Token: The Uthuk player is the first player. He places the first player token in his play area.
- Create Command Deck: Shuffle all the command cards into a deck and place it near the game board within reach of both players.
- Draw Starting Command Cards: Each player, starting with the Uthuk player, draws four command cards from the command card deck.
- Place Banner Markers: Place two-point banner markers on the three hexes shown in the diagram.
- Create the Supply: Separate the VP tokens, lore tokens, and poison markers by type and place them in piles to create the supply. Return all other markers and tokens to the game box.
- Deploy Units: Players gather the required figures:
- Daqan Figures: 15 Citadel Guard, 12 Yeoman Archers
- Uthuk Figures: 15 Blood Harvesters, 12 Viper Legion
Then, each player places his faction’s figures on the game board, three to a hex, as shown by the figure silhouettes in the diagram below.
- Take Unit Reference Cards: Each player takes the unit reference cards that correspond to his units on the game board and places them in his play area.


Complete Setup
The setup for BattleLore Second Edition is not only a process of gathering and placing game components, but also a strategic exercise in building the battlefield and constructing and deploying an army of units. Before playing each game, players perform the following steps:
- Place Game Board: Place the game board in the center of the game area.
- Choose Faction: Each player chooses a faction: either the Daqan (blue) or the Uthuk (red). If both players wish to control the same faction, players choose factions randomly.
- Gather Faction Components: Each player takes the plastic figures, unit reference cards, and deployment cards that correspond to his chosen faction and places them in his play area.
- Create the Supply: Separate all the tokens and markers by type and place them in piles to create the supply.
- Create Command Deck: Shuffle all the command cards into a deck and place it near the game board within reach of both players.
- Create Lore Decks and Scenario Decks: Each player takes the lore cards and scenario cards that correspond to his chosen faction, shuffles them into two separate decks, and places the decks facedown in his play area.

- Draw, Reveal, and Resolve Scenario Cards: Each player draws three scenario cards from his scenario deck, chooses one, and returns all other scenario cards to the game box. Then, both players simultaneously reveal and resolve their chosen scenario cards.
- Place First Player Token: The first player places the first player token in his play area.
- Muster Armies: Each player musters his army by spending muster points to purchase deployment cards. Then, he deploys his units on the game board.
- Draw Starting Cards: Each player draws six command cards from the command deck and three lore cards from his faction’s lore deck. Then, both players secretly and simultaneously choose two of their command cards and one of their lore cards to place on the bottom of the appropriate decks.
After both players have a hand consisting of four command cards and two lore cards, they are ready to begin the battle!
Scenario Building
Before playing a game of BattleLore Second Edition, players must set up the game by building a scenario. This section details the rules for using scenario cards.
Resolving Scenario Cards
Each faction has seven unique scenario cards. Each scenario card contains an image of that player’s half of the game board, depicting the location of various terrain tiles, terrain tokens, and banner markers. Additionally, each scenario card contains 18 hexes shaded in the corresponding faction color. These shaded hexes are that faction’s deployment hexes for that scenario.
To resolve a scenario card, both players reveal their selected cards simultaneously and follow these steps:
- Read Scenario Card Text
- Determine First Player
- Place Terrain Tiles and Banner Markers
- Place Fords
Read Scenario Card Text
Each scenario card contains text describing one or more rules that affect the scenario in unique ways. Some rules are preceded by a game phase or step to indicate when during that player’s turn he applies that rule.

Determine First Player
Each scenario card has an initiative indicator containing both a letter and number.
- The player who revealed the scenario card with an initiative letter that is alphabetically first is the first player and takes the first turn when the game begins.
- If both players revealed a scenario card with the same letter, the player who revealed the card with the lowest number is the first player.
- If both players revealed a scenario card with both the same letter and number, they must determine a first player randomly.
Place Terrain Tiles and Banner Markers
After determining the first player, each player takes all of the terrain tiles, terrain tokens, and banner markers that are necessary to set up his half of the game board and places them on the appropriate, corresponding hexes.
- If water hexes are placed adjacent to each other, the first player must replace them with river tiles so the rivers connect.
- If there is a river tile that creates an open river away from a game board edge, players replace that river tile with a lake tile (if able).
Place Fords
Starting with the first player, each player places one ford token on the game board on any water hex shown on his scenario card that does not already contain a ford or bridge token.

Scenario Card Resolution Example
- The Uthuk player has chosen the “Treasures of the Shadow Peaks” scenario card. The Daqan player has chosen the “Crossing the River of Sleep” scenario card.
- The Uthuk player’s initiative indicator (“B2”) is first in alphabetical order compared to the Daqan player’s (“C1”). The Uthuk player is the first player.
- To build the battlefield, both players place terrain tiles as shown on their chosen scenario cards. The partial row on each scenario card is the center row of the game board and is shared between the players.
- The river on the Daqan scenario card is connected to the river on the Uthuk scenario card by exchanging the straight river terrain tiles shown on the cards with the necessary river tiles to connect the river.
- The Uthuk player places his ford token on the game board on any water hex shown on his scenario card.
- The Daqan player places his ford token on the game board on any water hex shown on his scenario card.
Mustering an Army
After building a scenario, players must muster their armies. This section describes the rules for mustering an army and deploying an army to the battlefield.
Deployment Cards
Deployment cards represent units, terrain, and decoys. Units and terrain correspond to physical game components: figures and terrain tiles. Decoys are used as bluff cards to help hide the position of units or terrain before deploying them on the game board.

Mustering Units
To muster an army, each player performs the steps listed below:
- Choose Deployment Cards
- Place Deployment Cards
- Reveal Deployment Cards
- Place Units and Terrain
1. Choose Deployment Cards
Each player takes 11 decoy deployment cards and adds them to his faction’s deployment cards. Then, players simultaneously build their armies using their deployment cards.
- Each deployment card contains a muster value which indicates the number of muster points a player must spend to include that card in an army.
- Each player’s army can cost a total of 50 muster points and must consist of exactly 18 deployment cards comprising any combination of units, terrain, and decoys.
- When a player is finished choosing his unit cards, he must have a stack of 18 deployment cards, which represents his army. He returns his remaining deployment cards to the game box.
How to Muster an Army
Players muster their armies simultaneously by using their deployment cards. There is not a strict process for doing this. Some players may wish to lay all of their deployment cards on the table and assess them all at once while others may choose to keep their choices hidden from their opponent. All that matters is that both players finish the process with an army that consists of exactly 18 deployment cards and costs less than or equal to 50 muster points.
Army Cards
If a player does not want to spend time mustering their own army, army cards provide players with preconstructed armies valued at 50 muster points. When using an army card, the player takes a deployment card for each unit listed on the army card, a lore token for each lore listed on the army card, and enough decoy cards to reach the mandatory requirement of 18 deployment cards.

Command Tents
Each player can add one command tent to his army. A player who chooses a command tent has five extra muster points to use to muster his army. This means he can muster an army worth 55 muster points instead of 50. Command tents can also provide victory points to the player’s opponent as described on the card.
Command tents are their own type of terrain. They block line of sight, and a unit must end its movement when it moves into a command tent hex. A command tent hex is not a building hex.

2. Place Deployment Cards
Each player places his 18 deployment cards on the game board, placing one deployment card facedown on each of the 18 shaded deployment hexes as indicated on his chosen scenario card. A player can place each of his deployment cards on any of his deployment hexes of his choice; however, he must place deployment cards that feature terrain (such as Command Tents) on deployment hexes that do not contain terrain hexes.
3. Reveal Deployment Cards
After both players have placed all 18 of their deployment cards on the game board, they simultaneously reveal their placed deployment cards by flipping them faceup. Each player immediately removes all revealed decoys from the game board and returns them to the game box.
Lore Tokens
After revealing his deployment cards, each player receives one lore token, to a maximum of five, for each unspent muster point.
4. Place Units and Terrain
After revealing his deployment cards, each player removes them one at a time from the game board and replaces them with the appropriate figures and terrain tiles.
- Each player replaces his deployment cards corresponding to units with the figures that make up that unit. Each figure in a unit matches the silhouette shown on that unit’s deployment card.
- All units except legends consist of a number of figures equal to their health value. Legend units each consist of one figure.
- Each player replaces his deployment card corresponding to a command tent with command tent terrain tiles.
- Then, both players return all deployment cards to the game box.

Mustering Example
The Daqan player is mustering a 50-point army. He collects his faction’s deployment cards and places the following units into a deck in his play area:
- Citadel Guard: 4 points × 4 = 16
- Yeoman Archers: 4 points × 3 = 12
- Riverwatch Riders: 6 points × 2 = 12
- Rune Golems: 6 points × 2 = 12
- Command Tent: -5 points × 1 = -5
- Muster Point Total = 47
The player’s army now consists of 12 deployment cards. Before he can deploy his army, he must add 6 decoy deployment cards, bringing the total number of cards to 18.
The player has 3 muster points remaining. After revealing his deployment cards, he takes 3 lore tokens from the supply and places them in his play area.


Unit Deployment Example
- To deploy his units, the Daqan player places one deployment card from his army in each deployment hex as indicated on his scenario card, carefully choosing where to place units and placing decoy deployment cards where he does not want units.
- After both players have placed their deployment cards, they reveal their deployment cards and remove all the decoys from the game board.
- The Daqan player must replace each deployment card with the corresponding plastic figures to form a unit. To do this, the player gathers a number of figures matching the unit type equal to the unit’s health as shown on the deployment card.
- The Daqan player removes the deployment card from the game board and returns it to the game box. Then, he takes the Citadel Guard unit reference card and places it in his play area to use as a reference during the game.
- The Daqan player places the Citadel Guard unit on the hex that contained the corresponding Citadel Guard deployment card.
- The Daqan player repeats steps 3–5 for each of his unit deployment cards on the game board.
- Finally, he replaces his command tent deployment card with the Daqan command tent terrain tile.
After both players have deployed all of their units, the game is ready to begin.
Playing the Game
BattleLore Second Edition is played over a series of turns. The active player is the player currently taking his turn. Each turn is divided into two phases that the active player performs in the following order:
- Main Phase
- Upkeep Phase
After the active player completes his turn, his opponent becomes the new active player and he begins his turn. Turns alternate in this manner until one player wins the game.
Main Phase
During the Main Phase, the active player plays a command card, orders his units, moves them, and then uses them to attack opposing units. To resolve the Main Phase, the active player performs the following steps in order:
- Command Step
- Order Step
- Move Step
- Attack Step
Command Step
The active player must play one command card from his hand by reading the text on the card aloud and placing it faceup on the discard pile. Then, he either resolves the text on the played card or orders one friendly unit anywhere on the game board.

Order Step
During this step, the active player orders his units. To order a unit, he points to a unit on the game board and declares that unit as ordered. A player can only order each unit once per turn.
Each ordered unit may move during the Move Step and attack during the Attack Step this turn.
All command cards contain text describing which units the active player may order this turn. Each ordered unit must be within the appropriate section of the game board as dictated by the command card (right, left, or center). If the command card doesn’t specify a section, the active player may order units in any section.
Hexes divided by a section line are part of both sections. A player can order a unit in such a hex using a command card that indicates either section.
Note: The left and right sections of the game board are based on the perspective of the player playing the command card.

Move Step
During this step, the active player may move each ordered unit. Each unit can move a number of hexes up to its movement value as shown on its unit reference card.
- Only one unit can occupy a hex at a time.
- When a player moves a unit, the unit cannot move into or through a hex occupied by another unit.
- Units must move one at a time and in the sequence of the active player’s choice.
- A unit’s movement must be completed before the player can resolve another unit’s movement.
- The player must resolve movement for all ordered units before proceeding to the Attack Step.


Movement Example
Citadel Guard have a movement value of “2.” The example depicts where the Citadel Guard unit can move:
- The Citadel Guard unit can move to either of the two unoccupied hexes adjacent to the Viper Legion unit, or it can move to the hex adjacent to the Blood Harvesters unit.
- The Citadel Guard cannot move into a hex containing another unit.
Attack Step
During this step, the active player may use each ordered unit to perform one attack against one target unit. To perform an attack, the active player declares a target, rolls a number of dice equal to his attacking unit’s combat value as shown on its unit reference card, and resolves the dice results.
After resolving his Attack Step, the Main Phase ends and the active player proceeds to the Upkeep Phase.

Upkeep Phase
During the Upkeep Phase, the active player earns victory points, draws a command card, and replenishes his lore. To resolve the Upkeep Phase, the active player performs the following steps in order:
- Victory Point (VP) Step
- Draw Step
- Lore Step
Victory Point Step
During this step, the active player earns victory points (VPs) for each hex containing a banner marker that is occupied by a friendly unit.
Banner markers represent important strategic locations on the battlefield that are the keys to victory for each faction. The number on each banner marker indicates the number of victory points a player earns for occupying a hex containing that banner marker. Each time a player earns a victory point, he takes a VP token from the supply and places it in his play area.
Draw Step
During this step, the active player draws one card from the command deck.
Lore Step
During your first game, skip this step. The rules for the Lore Step are described in the “Lore in Detail” section on page 12.
Combat in Detail
This section describes the rules for resolving combat in BattleLore Second Edition.
Combat Sequence
During the Attack Step, the active player may perform one attack using each of his ordered units. The unit performing an attack is the attacking unit. To perform an attack, the active player must execute the following combat sequence:
- Declare Attack
- Perform Combat Roll
- Resolve Dice Results
After the active player performs one ordered unit’s attack, he may perform an attack for another ordered unit. He repeats the combat sequence for each ordered unit until all of those units have performed an attack. Attacking with an ordered unit is optional, and the active player determines the order in which he performs each of his attacks.
Declare Attack
The active player declares the attack type for his attacking unit: melee or ranged as shown on the unit’s corresponding unit reference card. He also declares an enemy unit as the target of the attack; this unit is the target unit during this attack.
- A unit with the melee trait can only perform a melee attack against a target unit in an adjacent hex.
- A unit with the ranged trait can only perform a ranged attack against a target unit that is within range and in line of sight.
Range
To determine range, the active player counts the number of hexes from the attacking unit to the target unit, excluding the attacking unit’s hex while including the target unit’s hex. The target is within range if the number of counted hexes is within the attack range shown on the attacking unit’s unit reference card.
Line of Sight
To determine if a target unit is in line of sight, the active player traces an imaginary line from the center of the attacking unit’s hex to the center of the target unit’s hex.
- If the line crosses through any part of a hex that is occupied by another unit or a hex of blocking terrain, line of sight is blocked, and the active player must choose a new target unit for his attack.
- Line of sight is not blocked by the attacking unit’s hex or the target unit’s hex.


Range and Line of Sight Example
Before proceeding with a ranged attack, a player must verify that the target unit is within range and in line of sight. In the example above, the Viper Legion unit is performing a ranged attack:
- The Citadel Guard unit is within range (three hexes) and in line of sight.
- The Yeoman Archers unit is within range (four hexes) and in line of sight.
- The Citadel Guard unit is out of range (five hexes) and line of sight is blocked by the adjacent Yeoman Archers unit.
- The Yeoman Archers unit is within range (three hexes) but line of sight is blocked by the Blood Harvesters unit.
Perform Combat Roll
Each unit has a combat value printed on its corresponding unit reference card. When resolving an attack or counter, the player controlling the attacking or countering unit rolls a number of dice equal to his unit’s combat value; this is a combat roll.
Resolve Dice Results
The active player resolves the die results of his combat roll by applying the following effects:
- Strike
 : For each Strike die result produced during a melee attack, the target unit suffers one damage.
- Cleave
 : For each Cleave die result produced during a melee attack, the target unit suffers one damage. If the attacking unit is weak it cannot cause damage from Cleave die results.
- Pierce
 : For each Pierce die result produced during a ranged attack, the target unit suffers one damage.
- Morale
 : For each Morale die result produced by a combat roll, the target unit must retreat one hex. Retreat effects are applied after all damage is suffered.
- Lore
 : For each Lore die result produced by a combat roll, the player who performed the combat roll takes one lore token from the supply and places it in his play area.
- Heroic
 : Heroic die results produced by combat rolls do not have any inherent effects, but are often used to trigger unit abilities.
Damage
Each time a unit suffers one damage, remove one figure from that unit from the game board. When the final figure in a unit is removed, that unit is eliminated. An eliminated unit is removed from the game.
Some units not included in the learning scenario suffer damage following different rules (see “Damage Tokens” on page 13).
Weak Units
A unit that has been reduced to one figure is a weak unit. Weak units cannot cause damage from die results produced by combat rolls.

Damage Example
- The Citadel Guard is attacking the Blood Harvesters. The Daqan player’s combat roll produces a , , and die result.
- For each and die result, the Uthuk player removes one figure from his Blood Harvesters unit.
Retreat and Support
Retreat
Specific card effects and unit abilities, as well as results produced during combat rolls, can force a unit to retreat. When retreating, the target unit must move one hex in the direction directly opposite the attacking unit for each retreat effect resolved.
If a unit is forced to retreat off the game board or into a hex containing impassible terrain or enemy units, the retreating unit ends its movement and suffers one damage for each unresolved retreat.

Retreating Example
- The Uthuk player produces two die results by a combat roll performed against the Yeoman Archers unit.
- The Yeoman Archers unit must retreat two hexes in the direction opposite the Blood Harvesters unit.
Support
A unit is supported if it would be forced to retreat into a hex occupied by a friendly unit. While supported, a unit ignores all retreats; ignored retreats do not cause damage.
Combat Reactions & Follow-ups
Counter
After a unit is attacked, if that unit is not eliminated and is adjacent to the attacking unit, it may counter. To perform a counter, the unit follows the combat sequence targeting the attacking unit. Performing a counter is optional, and a counter cannot trigger an additional counter.
Advance
After an attack eliminates an adjacent target unit or forces an adjacent target unit to move from its original hex during combat, the attacking unit may advance. To advance, the attacking unit moves into the target unit’s original hex.
A unit cannot advance if it is resolving a counter.
Abilities
Unit Abilities
Each unit has one or more unit abilities presented on its corresponding unit reference card. The reference book details additional information and clarifications about unit abilities.

Dice Abilities
Some unit abilities are dice abilities. Dice abilities are distinguished by having a die icon presented before the name of the ability. The icon indicates what kind of die results that unit must produce during a combat roll to trigger the ability. A player can commit a die result produced during a combat roll to trigger a dice ability. He triggers the ability once for each die result that he commits.
If a player commits a die result to trigger a dice ability, he does not resolve the normal effect for that die result.


Full Combat Example
- The Citadel Guard unit is performing a melee attack against the Blood Harvesters unit. The Daqan player rolls three dice which produce a , , and result.
- For each and die result, the Uthuk player removes one figure from the Blood Harvesters unit.
- The Blood Harvesters may counter because they remain adjacent to the Citadel Guard.
- The Blood Harvesters have the “Rage” unit ability which allows the Uthuk player to add an extra die to his combat roll for each figure missing from the Blood Harvesters unit. The Uthuk player rolls five dice which produce a , two , a , and a result.
- The die result causes one hit and the Daqan player removes one figure from the Citadel Guard unit. Because the Blood Harvesters unit is weak, the two die results have no effect.
- The die result forces the Daqan player to retreat his Citadel Guard unit by moving it one hex. Because the Blood Harvesters’ attack was a counter, it cannot advance.
Stop!
You are now ready to play the learning scenario. This will help you gain an understanding of the basic game mechanics before proceeding. All rules beyond this point are not necessary for the learning scenario as they describe how to build scenarios and armies and how to use lore cards, legends, and terrain.
If any questions arise while playing the learning scenario, such as what happens if a retreat path is blocked, what happens when line of sight is traced along a hex edge, or how the effects of poison work, refer to the Reference Book for more information.
Expanded Rules
The rules described in this section expand on those found in the previous section, broadening those concepts by introducing lore cards, legend units, and terrain.
Lore in Detail
Lore represents the magical forces of Mennara that allow players to use powerful abilities to help turn the tide of battle. This section describes the rules for lore in BattleLore Second Edition.
Lore in the Learning Scenario
For the first game, lore is only used to earn victory points. When playing the learning scenario, the active player may exchange 4 lore tokens for 1 VP token during the VP Step of his Upkeep Phase.
Lore Setup & Upkeep
During setup, each player shuffles his faction’s lore deck and places it in his play area. Each player also begins the game with two lore cards in his hand.
Lore Step
During the Lore Step of each Upkeep Phase, the active player replenishes his lore by resolving one of the following actions of his choice:
- He gains two lore tokens from the supply.
- He gains one lore token from the supply and draws one lore card from his faction’s lore deck.
- He draws two lore cards from his faction’s lore deck. Then, he discards one lore card from his hand (which includes the cards just drawn). This is a good way for a player to discard lore cards from his hand that he cannot play.
When a player needs to draw a lore card and the lore deck is depleted, he shuffles the discarded lore cards to form a new lore deck before drawing.
A player cannot have more than four lore cards in his hand at the end of the Lore Step. He must discard any excess lore cards of his choice at the end of this step.
Lore Cards
Lore cards represent the powerful actions and faction abilities wielded through the magical forces of Mennara. Each lore card contains timing text that informs the player when he may use the lore card. To use a lore card, a player performs the following steps:
- Spend Lore Tokens: The player must take a number of lore tokens equal to the card’s lore cost from his play area and place them in the supply.
- Read Lore Card: The player reads the text on the lore card aloud.
- Resolve Effect: The player resolves the card’s lore effect as described on the card.
- Discard Lore Card: The player places the lore card in a faceup discard pile next to his lore deck.
A player may use one lore card per turn. If both players play a lore card with the same timing, the active player resolves his lore effect first. The reference book provides additional information and clarifications about specific lore cards and effects.

Damage Tokens
Some unit reference cards display the damage token icon above their health value. These units only consist of one figure and do not suffer damage like other units.
- Each time one of these units suffers one damage, place one damage token on the game board near the unit.
- After a unit has accumulated damage tokens equal to or exceeding its health value, the unit is eliminated and its figure is removed from the game board.
- Even though these units only consist of one figure, they are never weak.


Damage Token Example
The Citadel Guard is attacking the Chaos Lord. The Daqan player’s combat roll produces a , , and result. The result causes one damage to the Chaos Lord. To track this damage, the Uthuk player places one damage token in the Chaos Lord’s hex.
Traits
Each unit has one or more traits. Traits are qualities associated with a particular unit including a unit’s type (infantry, cavalry, elite, or legend) and a unit’s attack type (ranged or melee). Certain cards and abilities may affect units with specific traits. Traits are listed under a unit’s name on its corresponding unit reference card.
Terrain
Terrain represents the natural and man-made features of the landscape of Mennara. Terrain can affect movement and combat in unique ways.

Blocking Terrain
Blocking terrain is terrain that blocks line of sight. Hills, forest, buildings, and command tents are all blocking terrain.
Some terrain has special movement or combat restrictions:
- Hills: Ranged units in hill hexes ignore all units when tracing line of sight. However, blocking terrain still blocks line of sight for units in hill hexes.
- Forest: A unit that moves into a forest hex must immediately end its movement. A unit in a forest hex rolls a maximum of two dice (before modifiers) when in combat. Additionally, a unit rolls a maximum of two dice (before modifiers) when in combat against a target unit that is in a forest hex.
- Buildings: A unit that moves into a building hex must immediately end its movement. A unit in a building hex may ignore one damage from each effect, including combat.
Impassable Terrain
Units cannot move into or through impassable terrain. All water hexes are impassable unless they contain a ford or bridge token. A unit that moves into a hex containing a ford must immediately end its movement.

Winning the Game
Each time the first player starts a new turn, check if either player has won the game:
- A player wins the game if he has 16 or more victory points and has more victory points than his opponent.
- Alternatively, a player wins the game if all of his opponent’s units have been eliminated. This happens immediately, regardless of the number of victory points each player has.
Credits
- Original BattleLore Game Design: Richard Borg
- BattleLore Second Edition Game Design: Robert A. Kouba
- Additional Development: Richard Borg, Corey Konieczka, and Nikki Valens
- Producer: Christopher Hosch with Jason Walden
- Technical Writing: Adam Baker
- Graphic Design: WiL Springer with Dallas Melhoff
- Graphic Design Manager: Brian Schomburg
- Managing Art Director: Andrew Navaro
- Art Direction: Andy Christensen
- Cover Art: Mathias Kollros
- Figure Design: Sylvain Decaux with Felicia Cano and Andrew Navaro
- Production Manager: Eric Knight
- Executive Game Designer: Corey Konieczka
- Executive Producer: Michael Hurley
- Publisher: Christian T. Petersen
Introduction & Components
A Missive from the Northern Border
My lords,
My time is short, so I shall be brief. May this missive fall on ears less deaf than earlier pleas. Time and again the Daqan Lords have ignored the warnings of the Wise Knight. Would that you had listened! Would that Captain Alcaran yet lived; may this burden have fallen to his shoulders rather than mine.
This is the last warning the Citadel shall receive from the northern border. By the time this message reaches you, it is very likely that I and all the men under my command will be dead. If we are fortunate and our strength is sufficient, we may have died in battle. If our courage or our strength have failed, then we will have died upon the sacrificial altars of the Uthuk Y’llan.
The Uthuk Y’llan are not bandits, not marauding orcs from the Broken Plains. Long has Knight Captain Alcaran warned of a power stirring in the Ru Darklands. That power stands revealed; it marches now upon Nordgard Castle in great strength. The men who howl at our walls are men no longer. Not merely barbarians, but demon-touched. Their forebear Llovar first drank of that red cup and passed his curse through all the Loth K’har. Their bodies and minds twisted by the Ynferneal, they walk with demon creatures at their sides. Against this, what have we? A few handfuls of the Citadel Guard, a detachment of bowmen from the Crimson Forest, and those ancient Rune Golems prepared by our own wiser ancestors against the day they are needed.
The day is come. I have called the golems to life and I go now to my death. With my life and my sword I hope to buy the peoples of Terrinoth enough time to prepare. What few days you yet have were paid with the blood of brave men. Do not waste them.
Written in the light of the gods and in service to the Citadel,
Sir Patric Murtagh,
Earl of Greenbridge, Knight of the Citadel, and Castellan of Nordgard Castle.
Components
- 1 Game Board
- 4 Dice
- 1 Reference Book
- 40 Command Cards
- 40 Lore Cards (20 Daqan, 20 Uthuk)
- 6 Army Cards (3 Daqan, 3 Uthuk)
- 10 Unit Reference Cards (5 Daqan, 5 Uthuk)
- 14 Scenario Cards (7 Daqan, 7 Uthuk)
- 56 Deployment Cards (17 Daqan, 17 Uthuk, 22 Decoy)
- 35 Terrain Tiles
- 1 First Player Token
- 4 Terrain Tokens
- 4 Banner Markers
- 18 Lore Tokens (13 “1” Lore, 5 “5” Lore)
- 17 Victory Point Tokens (13 “1” VP, 4 “5” VP)
- 8 Damage Tokens
- 6 Poison Markers
- 2 Portal Markers
- 4 Stun Markers
- 3 Swarm Markers
- Daqan Figures:
- 15 Citadel Guards
- 15 Yeoman Archers
- 9 Riverwatch Riders
- 6 Rune Golems
- 1 Roc Warrior
- Uthuk Figures:
- 15 Blood Harvesters
- 15 Viper Legion
- 9 Flesh Ripper Brutes
- 6 Obscene
- 1 Chaos Lord
Game Overview
BattleLore Second Edition is a tactical game for two players set in the vibrant Runebound universe. Players command either the noble Daqan Lords or the bloodthirsty Uthuk Y’llan on the war-torn battlefields of Terrinoth. Players customize the battlefield, muster their armies, and secretly deploy their units. Then, through shrewd tactics and the cunning use of lore cards, players battle until one emerges victorious and his opponent’s army lay in shambles across the battlefield.
For Your First Game
For the first game of BattleLore Second Edition, players are encouraged to play the learning scenario. This scenario is designed for new players to quickly set up and play a game using basic units and rules.
Before players begin the learning scenario, they must understand the basic rules presented on pages 6–11 of this rulebook. To play the learning scenario, set up the game by following the learning scenario setup instructions on page 5.
After players play this scenario and have a better understanding of BattleLore Second Edition’s broad gameplay concepts, they will be ready to muster larger armies and build more complex scenarios as described in the expanded rules beginning on page 12.
Using this Rulebook
This rulebook is designed to teach new players how to play BattleLore Second Edition. In an effort to allow players to play the game immediately by teaching them only the basic rules, this rulebook omits many rules exceptions and complex game interactions. Due to the wealth of unit types, unit abilities, lore effects, and scenario-specific rules found in the game, many unique conflicts and interactions may arise during a game. If players have any questions during gameplay, they should use the reference book to help resolve and understand these situations instead of using this rulebook.
Faction Symbols
Each faction-specific component contains a faction symbol. Players use these faction symbols to identify which components belong to each player.
Unit Overview
A player’s army is represented on the game board by units. Each unit is composed of a figure or a group of figures that occupies a single hex on the game board.
Learning Scenario Setup
Learning Scenario Setup
To set up the learning scenario, follow these steps:
- Place Game Board: Place the game board in the center of the game area.
- Choose Faction: Each player chooses a faction: either the Daqan (blue) or the Uthuk (red). If both players wish to control the same faction, players choose factions randomly.
- Place First Player Token: The Uthuk player is the first player. He places the first player token in his play area.
- Create Command Deck: Shuffle all the command cards into a deck and place it near the game board within reach of both players.
- Draw Starting Command Cards: Each player, starting with the Uthuk player, draws four command cards from the command card deck.
- Place Banner Markers: Place two-point banner markers on the three hexes shown in the diagram.
- Create the Supply: Separate the VP tokens, lore tokens, and poison markers by type and place them in piles to create the supply. Return all other markers and tokens to the game box.
- Deploy Units: Players gather the required figures:
- Daqan Figures: 15 Citadel Guard, 12 Yeoman Archers
- Uthuk Figures: 15 Blood Harvesters, 12 Viper Legion
Then, each player places his faction’s figures on the game board, three to a hex, as shown by the figure silhouettes in the diagram below.
- Take Unit Reference Cards: Each player takes the unit reference cards that correspond to his units on the game board and places them in his play area.
Complete Setup & Scenario Building
Complete Setup
The setup for BattleLore Second Edition is not only a process of gathering and placing game components, but also a strategic exercise in building the battlefield and constructing and deploying an army of units. Before playing each game, players perform the following steps:
- Place Game Board: Place the game board in the center of the game area.
- Choose Faction: Each player chooses a faction: either the Daqan (blue) or the Uthuk (red). If both players wish to control the same faction, players choose factions randomly.
- Gather Faction Components: Each player takes the plastic figures, unit reference cards, and deployment cards that correspond to his chosen faction and places them in his play area.
- Create the Supply: Separate all the tokens and markers by type and place them in piles to create the supply.
- Create Command Deck: Shuffle all the command cards into a deck and place it near the game board within reach of both players.
- Create Lore Decks and Scenario Decks: Each player takes the lore cards and scenario cards that correspond to his chosen faction, shuffles them into two separate decks, and places the decks facedown in his play area.
- Draw, Reveal, and Resolve Scenario Cards: Each player draws three scenario cards from his scenario deck, chooses one, and returns all other scenario cards to the game box. Then, both players simultaneously reveal and resolve their chosen scenario cards.
- Place First Player Token: The first player places the first player token in his play area.
- Muster Armies: Each player musters his army by spending muster points to purchase deployment cards. Then, he deploys his units on the game board.
- Draw Starting Cards: Each player draws six command cards from the command deck and three lore cards from his faction’s lore deck. Then, both players secretly and simultaneously choose two of their command cards and one of their lore cards to place on the bottom of the appropriate decks.
After both players have a hand consisting of four command cards and two lore cards, they are ready to begin the battle!
Scenario Building
Before playing a game of BattleLore Second Edition, players must set up the game by building a scenario. This section details the rules for using scenario cards.
Resolving Scenario Cards
Each faction has seven unique scenario cards. Each scenario card contains an image of that player’s half of the game board, depicting the location of various terrain tiles, terrain tokens, and banner markers. Additionally, each scenario card contains 18 hexes shaded in the corresponding faction color. These shaded hexes are that faction’s deployment hexes for that scenario.
To resolve a scenario card, both players reveal their selected cards simultaneously and follow these steps:
- Read Scenario Card Text
- Determine First Player
- Place Terrain Tiles and Banner Markers
- Place Fords
Read Scenario Card Text
Each scenario card contains text describing one or more rules that affect the scenario in unique ways. Some rules are preceded by a game phase or step to indicate when during that player’s turn he applies that rule.
Determine First Player
Each scenario card has an initiative indicator containing both a letter and number.
- The player who revealed the scenario card with an initiative letter that is alphabetically first is the first player and takes the first turn when the game begins.
- If both players revealed a scenario card with the same letter, the player who revealed the card with the lowest number is the first player.
- If both players revealed a scenario card with both the same letter and number, they must determine a first player randomly.
Place Terrain Tiles and Banner Markers
After determining the first player, each player takes all of the terrain tiles, terrain tokens, and banner markers that are necessary to set up his half of the game board and places them on the appropriate, corresponding hexes.
- If water hexes are placed adjacent to each other, the first player must replace them with river tiles so the rivers connect.
- If there is a river tile that creates an open river away from a game board edge, players replace that river tile with a lake tile (if able).
Place Fords
Starting with the first player, each player places one ford token on the game board on any water hex shown on his scenario card that does not already contain a ford or bridge token.
Scenario Card Resolution Example
- The Uthuk player has chosen the “Treasures of the Shadow Peaks” scenario card. The Daqan player has chosen the “Crossing the River of Sleep” scenario card.
- The Uthuk player’s initiative indicator (“B2”) is first in alphabetical order compared to the Daqan player’s (“C1”). The Uthuk player is the first player.
- To build the battlefield, both players place terrain tiles as shown on their chosen scenario cards. The partial row on each scenario card is the center row of the game board and is shared between the players.
- The river on the Daqan scenario card is connected to the river on the Uthuk scenario card by exchanging the straight river terrain tiles shown on the cards with the necessary river tiles to connect the river.
- The Uthuk player places his ford token on the game board on any water hex shown on his scenario card.
- The Daqan player places his ford token on the game board on any water hex shown on his scenario card.
Mustering and Deploying an Army
Mustering an Army
After building a scenario, players must muster their armies. This section describes the rules for mustering an army and deploying an army to the battlefield.
Deployment Cards
Deployment cards represent units, terrain, and decoys. Units and terrain correspond to physical game components: figures and terrain tiles. Decoys are used as bluff cards to help hide the position of units or terrain before deploying them on the game board.
Mustering Units
To muster an army, each player performs the steps listed below:
- Choose Deployment Cards
- Place Deployment Cards
- Reveal Deployment Cards
- Place Units and Terrain
1. Choose Deployment Cards
Each player takes 11 decoy deployment cards and adds them to his faction’s deployment cards. Then, players simultaneously build their armies using their deployment cards.
- Each deployment card contains a muster value which indicates the number of muster points a player must spend to include that card in an army.
- Each player’s army can cost a total of 50 muster points and must consist of exactly 18 deployment cards comprising any combination of units, terrain, and decoys.
- When a player is finished choosing his unit cards, he must have a stack of 18 deployment cards, which represents his army. He returns his remaining deployment cards to the game box.
How to Muster an Army
Players muster their armies simultaneously by using their deployment cards. There is not a strict process for doing this. Some players may wish to lay all of their deployment cards on the table and assess them all at once while others may choose to keep their choices hidden from their opponent. All that matters is that both players finish the process with an army that consists of exactly 18 deployment cards and costs less than or equal to 50 muster points.
Army Cards
If a player does not want to spend time mustering their own army, army cards provide players with preconstructed armies valued at 50 muster points. When using an army card, the player takes a deployment card for each unit listed on the army card, a lore token for each lore listed on the army card, and enough decoy cards to reach the mandatory requirement of 18 deployment cards.
Command Tents
Each player can add one command tent to his army. A player who chooses a command tent has five extra muster points to use to muster his army. This means he can muster an army worth 55 muster points instead of 50. Command tents can also provide victory points to the player’s opponent as described on the card.
Command tents are their own type of terrain. They block line of sight, and a unit must end its movement when it moves into a command tent hex. A command tent hex is not a building hex.
2. Place Deployment Cards
Each player places his 18 deployment cards on the game board, placing one deployment card facedown on each of the 18 shaded deployment hexes as indicated on his chosen scenario card. A player can place each of his deployment cards on any of his deployment hexes of his choice; however, he must place deployment cards that feature terrain (such as Command Tents) on deployment hexes that do not contain terrain hexes.
3. Reveal Deployment Cards
After both players have placed all 18 of their deployment cards on the game board, they simultaneously reveal their placed deployment cards by flipping them faceup. Each player immediately removes all revealed decoys from the game board and returns them to the game box.
Lore Tokens
After revealing his deployment cards, each player receives one lore token, to a maximum of five, for each unspent muster point.
4. Place Units and Terrain
After revealing his deployment cards, each player removes them one at a time from the game board and replaces them with the appropriate figures and terrain tiles.
- Each player replaces his deployment cards corresponding to units with the figures that make up that unit. Each figure in a unit matches the silhouette shown on that unit’s deployment card.
- All units except legends consist of a number of figures equal to their health value. Legend units each consist of one figure.
- Each player replaces his deployment card corresponding to a command tent with command tent terrain tiles.
- Then, both players return all deployment cards to the game box.
Mustering Example
The Daqan player is mustering a 50-point army. He collects his faction’s deployment cards and places the following units into a deck in his play area:
- Citadel Guard: 4 points × 4 = 16
- Yeoman Archers: 4 points × 3 = 12
- Riverwatch Riders: 6 points × 2 = 12
- Rune Golems: 6 points × 2 = 12
- Command Tent: -5 points × 1 = -5
- Muster Point Total = 47
The player’s army now consists of 12 deployment cards. Before he can deploy his army, he must add 6 decoy deployment cards, bringing the total number of cards to 18.
The player has 3 muster points remaining. After revealing his deployment cards, he takes 3 lore tokens from the supply and places them in his play area.
Unit Deployment Example
- To deploy his units, the Daqan player places one deployment card from his army in each deployment hex as indicated on his scenario card, carefully choosing where to place units and placing decoy deployment cards where he does not want units.
- After both players have placed their deployment cards, they reveal their deployment cards and remove all the decoys from the game board.
- The Daqan player must replace each deployment card with the corresponding plastic figures to form a unit. To do this, the player gathers a number of figures matching the unit type equal to the unit’s health as shown on the deployment card.
- The Daqan player removes the deployment card from the game board and returns it to the game box. Then, he takes the Citadel Guard unit reference card and places it in his play area to use as a reference during the game.
- The Daqan player places the Citadel Guard unit on the hex that contained the corresponding Citadel Guard deployment card.
- The Daqan player repeats steps 3–5 for each of his unit deployment cards on the game board.
- Finally, he replaces his command tent deployment card with the Daqan command tent terrain tile.
After both players have deployed all of their units, the game is ready to begin.
Turn Structure
Playing the Game
BattleLore Second Edition is played over a series of turns. The active player is the player currently taking his turn. Each turn is divided into two phases that the active player performs in the following order:
- Main Phase
- Upkeep Phase
After the active player completes his turn, his opponent becomes the new active player and he begins his turn. Turns alternate in this manner until one player wins the game.
Main Phase
During the Main Phase, the active player plays a command card, orders his units, moves them, and then uses them to attack opposing units. To resolve the Main Phase, the active player performs the following steps in order:
- Command Step
- Order Step
- Move Step
- Attack Step
Command Step
The active player must play one command card from his hand by reading the text on the card aloud and placing it faceup on the discard pile. Then, he either resolves the text on the played card or orders one friendly unit anywhere on the game board.
Order Step
During this step, the active player orders his units. To order a unit, he points to a unit on the game board and declares that unit as ordered. A player can only order each unit once per turn.
Each ordered unit may move during the Move Step and attack during the Attack Step this turn.
All command cards contain text describing which units the active player may order this turn. Each ordered unit must be within the appropriate section of the game board as dictated by the command card (right, left, or center). If the command card doesn’t specify a section, the active player may order units in any section.
Hexes divided by a section line are part of both sections. A player can order a unit in such a hex using a command card that indicates either section.
Note: The left and right sections of the game board are based on the perspective of the player playing the command card.
Move Step
During this step, the active player may move each ordered unit. Each unit can move a number of hexes up to its movement value as shown on its unit reference card.
- Only one unit can occupy a hex at a time.
- When a player moves a unit, the unit cannot move into or through a hex occupied by another unit.
- Units must move one at a time and in the sequence of the active player’s choice.
- A unit’s movement must be completed before the player can resolve another unit’s movement.
- The player must resolve movement for all ordered units before proceeding to the Attack Step.
Movement Example
Citadel Guard have a movement value of “2.” The example depicts where the Citadel Guard unit can move:
- The Citadel Guard unit can move to either of the two unoccupied hexes adjacent to the Viper Legion unit, or it can move to the hex adjacent to the Blood Harvesters unit.
- The Citadel Guard cannot move into a hex containing another unit.
Attack Step
During this step, the active player may use each ordered unit to perform one attack against one target unit. To perform an attack, the active player declares a target, rolls a number of dice equal to his attacking unit’s combat value as shown on its unit reference card, and resolves the dice results.
After resolving his Attack Step, the Main Phase ends and the active player proceeds to the Upkeep Phase.
Upkeep Phase
During the Upkeep Phase, the active player earns victory points, draws a command card, and replenishes his lore. To resolve the Upkeep Phase, the active player performs the following steps in order:
- Victory Point (VP) Step
- Draw Step
- Lore Step
Victory Point Step
During this step, the active player earns victory points (VPs) for each hex containing a banner marker that is occupied by a friendly unit.
Banner markers represent important strategic locations on the battlefield that are the keys to victory for each faction. The number on each banner marker indicates the number of victory points a player earns for occupying a hex containing that banner marker. Each time a player earns a victory point, he takes a VP token from the supply and places it in his play area.
Draw Step
During this step, the active player draws one card from the command deck.
Lore Step
During your first game, skip this step. The rules for the Lore Step are described in the “Lore in Detail” section on page 12.
Combat in Detail
Combat in Detail
This section describes the rules for resolving combat in BattleLore Second Edition.
Combat Sequence
During the Attack Step, the active player may perform one attack using each of his ordered units. The unit performing an attack is the attacking unit. To perform an attack, the active player must execute the following combat sequence:
- Declare Attack
- Perform Combat Roll
- Resolve Dice Results
After the active player performs one ordered unit’s attack, he may perform an attack for another ordered unit. He repeats the combat sequence for each ordered unit until all of those units have performed an attack. Attacking with an ordered unit is optional, and the active player determines the order in which he performs each of his attacks.
Declare Attack
The active player declares the attack type for his attacking unit: melee or ranged as shown on the unit’s corresponding unit reference card. He also declares an enemy unit as the target of the attack; this unit is the target unit during this attack.
- A unit with the melee trait can only perform a melee attack against a target unit in an adjacent hex.
- A unit with the ranged trait can only perform a ranged attack against a target unit that is within range and in line of sight.
Range
To determine range, the active player counts the number of hexes from the attacking unit to the target unit, excluding the attacking unit’s hex while including the target unit’s hex. The target is within range if the number of counted hexes is within the attack range shown on the attacking unit’s unit reference card.
Line of Sight
To determine if a target unit is in line of sight, the active player traces an imaginary line from the center of the attacking unit’s hex to the center of the target unit’s hex.
- If the line crosses through any part of a hex that is occupied by another unit or a hex of blocking terrain, line of sight is blocked, and the active player must choose a new target unit for his attack.
- Line of sight is not blocked by the attacking unit’s hex or the target unit’s hex.
Range and Line of Sight Example
Before proceeding with a ranged attack, a player must verify that the target unit is within range and in line of sight. In the example above, the Viper Legion unit is performing a ranged attack:
- The Citadel Guard unit is within range (three hexes) and in line of sight.
- The Yeoman Archers unit is within range (four hexes) and in line of sight.
- The Citadel Guard unit is out of range (five hexes) and line of sight is blocked by the adjacent Yeoman Archers unit.
- The Yeoman Archers unit is within range (three hexes) but line of sight is blocked by the Blood Harvesters unit.
Perform Combat Roll
Each unit has a combat value printed on its corresponding unit reference card. When resolving an attack or counter, the player controlling the attacking or countering unit rolls a number of dice equal to his unit’s combat value; this is a combat roll.
Resolve Dice Results
The active player resolves the die results of his combat roll by applying the following effects:
- Strike : For each Strike die result produced during a melee attack, the target unit suffers one damage.
- Cleave : For each Cleave die result produced during a melee attack, the target unit suffers one damage. If the attacking unit is weak it cannot cause damage from Cleave die results.
- Pierce : For each Pierce die result produced during a ranged attack, the target unit suffers one damage.
- Morale : For each Morale die result produced by a combat roll, the target unit must retreat one hex. Retreat effects are applied after all damage is suffered.
- Lore : For each Lore die result produced by a combat roll, the player who performed the combat roll takes one lore token from the supply and places it in his play area.
- Heroic : Heroic die results produced by combat rolls do not have any inherent effects, but are often used to trigger unit abilities.
Damage
Each time a unit suffers one damage, remove one figure from that unit from the game board. When the final figure in a unit is removed, that unit is eliminated. An eliminated unit is removed from the game.
Some units not included in the learning scenario suffer damage following different rules (see “Damage Tokens” on page 13).
Weak Units
A unit that has been reduced to one figure is a weak unit. Weak units cannot cause damage from die results produced by combat rolls.
Damage Example
- The Citadel Guard is attacking the Blood Harvesters. The Daqan player’s combat roll produces a , , and die result.
- For each and die result, the Uthuk player removes one figure from his Blood Harvesters unit.
Retreat and Support
Retreat
Specific card effects and unit abilities, as well as results produced during combat rolls, can force a unit to retreat. When retreating, the target unit must move one hex in the direction directly opposite the attacking unit for each retreat effect resolved.
If a unit is forced to retreat off the game board or into a hex containing impassible terrain or enemy units, the retreating unit ends its movement and suffers one damage for each unresolved retreat.
Retreating Example
- The Uthuk player produces two die results by a combat roll performed against the Yeoman Archers unit.
- The Yeoman Archers unit must retreat two hexes in the direction opposite the Blood Harvesters unit.
Support
A unit is supported if it would be forced to retreat into a hex occupied by a friendly unit. While supported, a unit ignores all retreats; ignored retreats do not cause damage.
Combat Reactions & Follow-ups
Counter
After a unit is attacked, if that unit is not eliminated and is adjacent to the attacking unit, it may counter. To perform a counter, the unit follows the combat sequence targeting the attacking unit. Performing a counter is optional, and a counter cannot trigger an additional counter.
Advance
After an attack eliminates an adjacent target unit or forces an adjacent target unit to move from its original hex during combat, the attacking unit may advance. To advance, the attacking unit moves into the target unit’s original hex.
A unit cannot advance if it is resolving a counter.
Abilities
Unit Abilities
Each unit has one or more unit abilities presented on its corresponding unit reference card. The reference book details additional information and clarifications about unit abilities.
Dice Abilities
Some unit abilities are dice abilities. Dice abilities are distinguished by having a die icon presented before the name of the ability. The icon indicates what kind of die results that unit must produce during a combat roll to trigger the ability. A player can commit a die result produced during a combat roll to trigger a dice ability. He triggers the ability once for each die result that he commits.
If a player commits a die result to trigger a dice ability, he does not resolve the normal effect for that die result.
Full Combat Example
- The Citadel Guard unit is performing a melee attack against the Blood Harvesters unit. The Daqan player rolls three dice which produce a , , and result.
- For each and die result, the Uthuk player removes one figure from the Blood Harvesters unit.
- The Blood Harvesters may counter because they remain adjacent to the Citadel Guard.
- The Blood Harvesters have the “Rage” unit ability which allows the Uthuk player to add an extra die to his combat roll for each figure missing from the Blood Harvesters unit. The Uthuk player rolls five dice which produce a , two , a , and a result.
- The die result causes one hit and the Daqan player removes one figure from the Citadel Guard unit. Because the Blood Harvesters unit is weak, the two die results have no effect.
- The die result forces the Daqan player to retreat his Citadel Guard unit by moving it one hex. Because the Blood Harvesters’ attack was a counter, it cannot advance.
Stop!
You are now ready to play the learning scenario. This will help you gain an understanding of the basic game mechanics before proceeding. All rules beyond this point are not necessary for the learning scenario as they describe how to build scenarios and armies and how to use lore cards, legends, and terrain.
If any questions arise while playing the learning scenario, such as what happens if a retreat path is blocked, what happens when line of sight is traced along a hex edge, or how the effects of poison work, refer to the Reference Book for more information.
Expanded Rules: Lore & Units
Expanded Rules
The rules described in this section expand on those found in the previous section, broadening those concepts by introducing lore cards, legend units, and terrain.
Lore in Detail
Lore represents the magical forces of Mennara that allow players to use powerful abilities to help turn the tide of battle. This section describes the rules for lore in BattleLore Second Edition.
Lore in the Learning Scenario
For the first game, lore is only used to earn victory points. When playing the learning scenario, the active player may exchange 4 lore tokens for 1 VP token during the VP Step of his Upkeep Phase.
Lore Setup & Upkeep
During setup, each player shuffles his faction’s lore deck and places it in his play area. Each player also begins the game with two lore cards in his hand.
Lore Step
During the Lore Step of each Upkeep Phase, the active player replenishes his lore by resolving one of the following actions of his choice:
- He gains two lore tokens from the supply.
- He gains one lore token from the supply and draws one lore card from his faction’s lore deck.
- He draws two lore cards from his faction’s lore deck. Then, he discards one lore card from his hand (which includes the cards just drawn). This is a good way for a player to discard lore cards from his hand that he cannot play.
When a player needs to draw a lore card and the lore deck is depleted, he shuffles the discarded lore cards to form a new lore deck before drawing.
A player cannot have more than four lore cards in his hand at the end of the Lore Step. He must discard any excess lore cards of his choice at the end of this step.
Lore Cards
Lore cards represent the powerful actions and faction abilities wielded through the magical forces of Mennara. Each lore card contains timing text that informs the player when he may use the lore card. To use a lore card, a player performs the following steps:
- Spend Lore Tokens: The player must take a number of lore tokens equal to the card’s lore cost from his play area and place them in the supply.
- Read Lore Card: The player reads the text on the lore card aloud.
- Resolve Effect: The player resolves the card’s lore effect as described on the card.
- Discard Lore Card: The player places the lore card in a faceup discard pile next to his lore deck.
A player may use one lore card per turn. If both players play a lore card with the same timing, the active player resolves his lore effect first. The reference book provides additional information and clarifications about specific lore cards and effects.
Damage Tokens
Some unit reference cards display the damage token icon above their health value. These units only consist of one figure and do not suffer damage like other units.
- Each time one of these units suffers one damage, place one damage token on the game board near the unit.
- After a unit has accumulated damage tokens equal to or exceeding its health value, the unit is eliminated and its figure is removed from the game board.
- Even though these units only consist of one figure, they are never weak.
Damage Token Example
The Citadel Guard is attacking the Chaos Lord. The Daqan player’s combat roll produces a , , and result. The result causes one damage to the Chaos Lord. To track this damage, the Uthuk player places one damage token in the Chaos Lord’s hex.
Traits
Each unit has one or more traits. Traits are qualities associated with a particular unit including a unit’s type (infantry, cavalry, elite, or legend) and a unit’s attack type (ranged or melee). Certain cards and abilities may affect units with specific traits. Traits are listed under a unit’s name on its corresponding unit reference card.
Terrain
Terrain
Terrain represents the natural and man-made features of the landscape of Mennara. Terrain can affect movement and combat in unique ways.
Blocking Terrain
Blocking terrain is terrain that blocks line of sight. Hills, forest, buildings, and command tents are all blocking terrain.
Some terrain has special movement or combat restrictions:
- Hills: Ranged units in hill hexes ignore all units when tracing line of sight. However, blocking terrain still blocks line of sight for units in hill hexes.
- Forest: A unit that moves into a forest hex must immediately end its movement. A unit in a forest hex rolls a maximum of two dice (before modifiers) when in combat. Additionally, a unit rolls a maximum of two dice (before modifiers) when in combat against a target unit that is in a forest hex.
- Buildings: A unit that moves into a building hex must immediately end its movement. A unit in a building hex may ignore one damage from each effect, including combat.
Impassable Terrain
Units cannot move into or through impassable terrain. All water hexes are impassable unless they contain a ford or bridge token. A unit that moves into a hex containing a ford must immediately end its movement.
Winning the Game
Winning the Game
Each time the first player starts a new turn, check if either player has won the game:
- A player wins the game if he has 16 or more victory points and has more victory points than his opponent.
- Alternatively, a player wins the game if all of his opponent’s units have been eliminated. This happens immediately, regardless of the number of victory points each player has.
Credits
Credits
- Original BattleLore Game Design: Richard Borg
- BattleLore Second Edition Game Design: Robert A. Kouba
- Additional Development: Richard Borg, Corey Konieczka, and Nikki Valens
- Producer: Christopher Hosch with Jason Walden
- Technical Writing: Adam Baker
- Graphic Design: WiL Springer with Dallas Melhoff
- Graphic Design Manager: Brian Schomburg
- Managing Art Director: Andrew Navaro
- Art Direction: Andy Christensen
- Cover Art: Mathias Kollros
- Figure Design: Sylvain Decaux with Felicia Cano and Andrew Navaro
- Production Manager: Eric Knight
- Executive Game Designer: Corey Konieczka
- Executive Producer: Michael Hurley
- Publisher: Christian T. Petersen
Expansions for
BattleLore: Second Edition
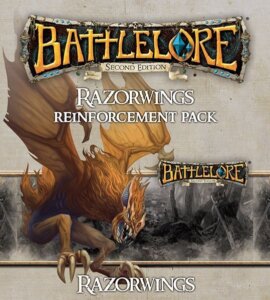
BattleLore: Second Edition – Razorwings Reinforcement Pack
2015
Unleash savage aerial predators and strike from the darkness.
90
minutes
Medium
View expansion
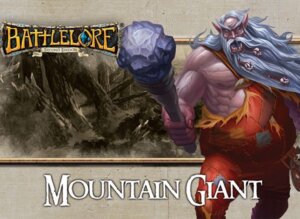
BattleLore: Second Edition – Mountain Giant Reinforcement Pack
2015
Unleash a Mountain Giant with crushing power and a thunderous new scenario.
90
minutes
Medium
View expansion
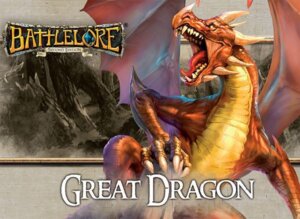
BattleLore: Second Edition – Great Dragon Reinforcement Pack
2015
Add a devastating dragon, new lore options, and a race for treasure.
90
minutes
Medium
View expansion
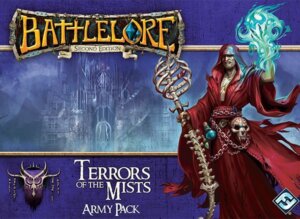
BattleLore: Second Edition – Terrors of the Mists Army Pack
2015
Unleash five Undead unit types in a brutal battle for the living.
90
minutes
Medium Heavy

View expansion
BattleLore: Second Edition – Heralds of Dreadfall Army Pack
2015
Unleash an Undead army with Blight, Wraiths, Death Knights, and more.
90
minutes
Medium Heavy
View expansion
BattleLore: Second Edition – Warband of Scorn Army Pack
2015
Unleash dark magic, savage units, and new tactical challenges in Terrinoth.
90
minutes
Medium
View expansion

BattleLore: Second Edition – Hernfar Guardians Army Pack
2015
Reinforce Daqan forces with powerful units, terrain, and tactical options.
90
minutes
Medium
View expansion
