
Gaia Project
2017
Lead one of 14 factions across a changing galaxy, terraforming planets, advancing technology, and competing for valuable space.
150
minutes
1 - 4
player(s)
12+
Heavy


About this board game
Gaia Project is a strategic board game for 1–4 players, with a playing time of about 150 minutes, in which rival factions expand, research, upgrade, and settle the galaxy.
As the follow-up to the critically acclaimed Terra Mystica, the game features 14 distinct factions. Each faction thrives on its own specific type of planet, so growth requires terraforming neighboring worlds into suitable environments while competing with other factions for room to develop.
The galaxy includes seven different kinds of planets, along with special worlds that broaden your options. Gaia planets can be used by every faction, while rare Transdimensional planets can be transformed into Gaia planets.
- Choose from 14 factions, each with unique skills and abilities.
- Terraform planets to create environments where your faction can thrive.
- Improve six unique areas of development to unlock advanced technology and special bonuses.
- Compete with other factions as you expand across the galaxy.
Progress depends on more than simply claiming territory. Developing your faction across the six areas of development can lead to powerful technological advances and valuable bonuses, while each faction’s special abilities offers additional ways to approach the challenges of expansion.
With its combination of planetary transformation, faction powers, technological development, and competition for space, Gaia Project offers a demanding galaxy-spanning challenge. A dedicated solo mode is also included for players who want to test their abilities alone.
Thematics
Mechanics
Designers
Illustrator
/pic7182955.jpg)

Board Game Rules for
Gaia Project
In Gaia Project, each player controls one of 14 factions striving to peacefully colonize the Terra Mystica galaxy. Each faction has different environmental needs to survive on a planet. These needs have led the factions to master terraforming, enabling them to make different planet types habitable for themselves.
During the game, you will colonize new planets, upgrade mines into better structures, and unite planets to form federations. The choice is yours: will you expand near other factions, which might give you power and trade partners, or will you look for solitude, where you can expand more freely?
In addition, you will need to research and discover new technologies to improve your skills. In the end, only the best developed faction will win.
Components
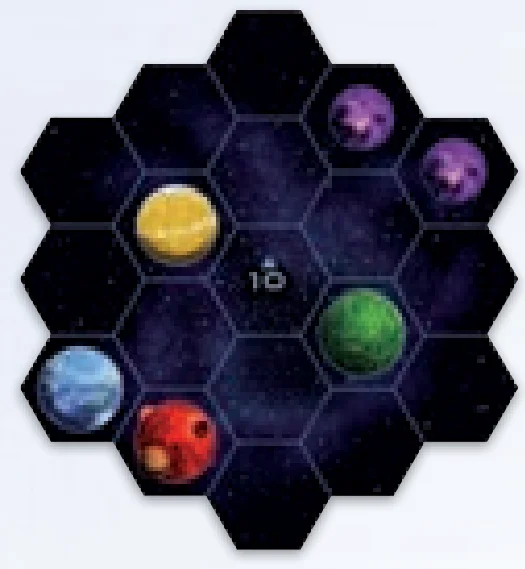
- 10 Space Sector Tiles: Numbered 01 to 10. Tiles 05, 06, and 07 are double-sided.
- 1 Research Board
- 7 Double-Sided Faction Boards: Each side shows a different faction.
- 1 Scoring Board
- 10 Round Scoring Tiles
- 6 Final Scoring Tiles
- 10 Round Boosters
- 36 Standard Tech Tiles (4 each of 9 types)
- 15 Advanced Tech Tiles
- 6 Space Stations
- 19 Federation Tokens
- 12 Gaia Planet Tokens
- 1 Lost Planet Token
- 15 Record Tokens
- 20 Action Tokens
Additional Components and Player Pieces
Structures (in each of the 7 player colors: Yellow, orange, brown, white, gray, blue, red):
- 8 Mines
- 4 Trading Stations
- 3 Research Labs
- 2 Academies
- 1 Planetary Institute
Other Player Pieces (in each player color):
- 3 Gaiaformers
- 7 Player Tokens
- 25 Satellites
Supply Tokens & Markers:
- 14 Credit Markers
- 7 Ore Markers
- 7 Knowledge Markers
- 30 Q.I.C. (Quantum Intelligence Cubes)
- 50 Power Tokens
- 1 Brainstone (purple)
- 1 First Player Marker
Cards & Solo (Automa) Components:
- 4 Player Aids
- 1 Turn Order Card
- 1 Terraforming Reference Card
- Automa Cards: 7 Faction Cards, 17 Decision Cards
- 1 Automa Rulebook
- 1 Automa Player Aid

For your first game, play with the following game board setup and factions. For future games, also use the Advanced Setup (which features a variable game board and all factions).
For a solo game, see the Automa rulebook. With two or more players, return the Automa cards and Automa player aid to the box.
Determine a first player using the method of your choice. That player takes the first player marker.
Game Board
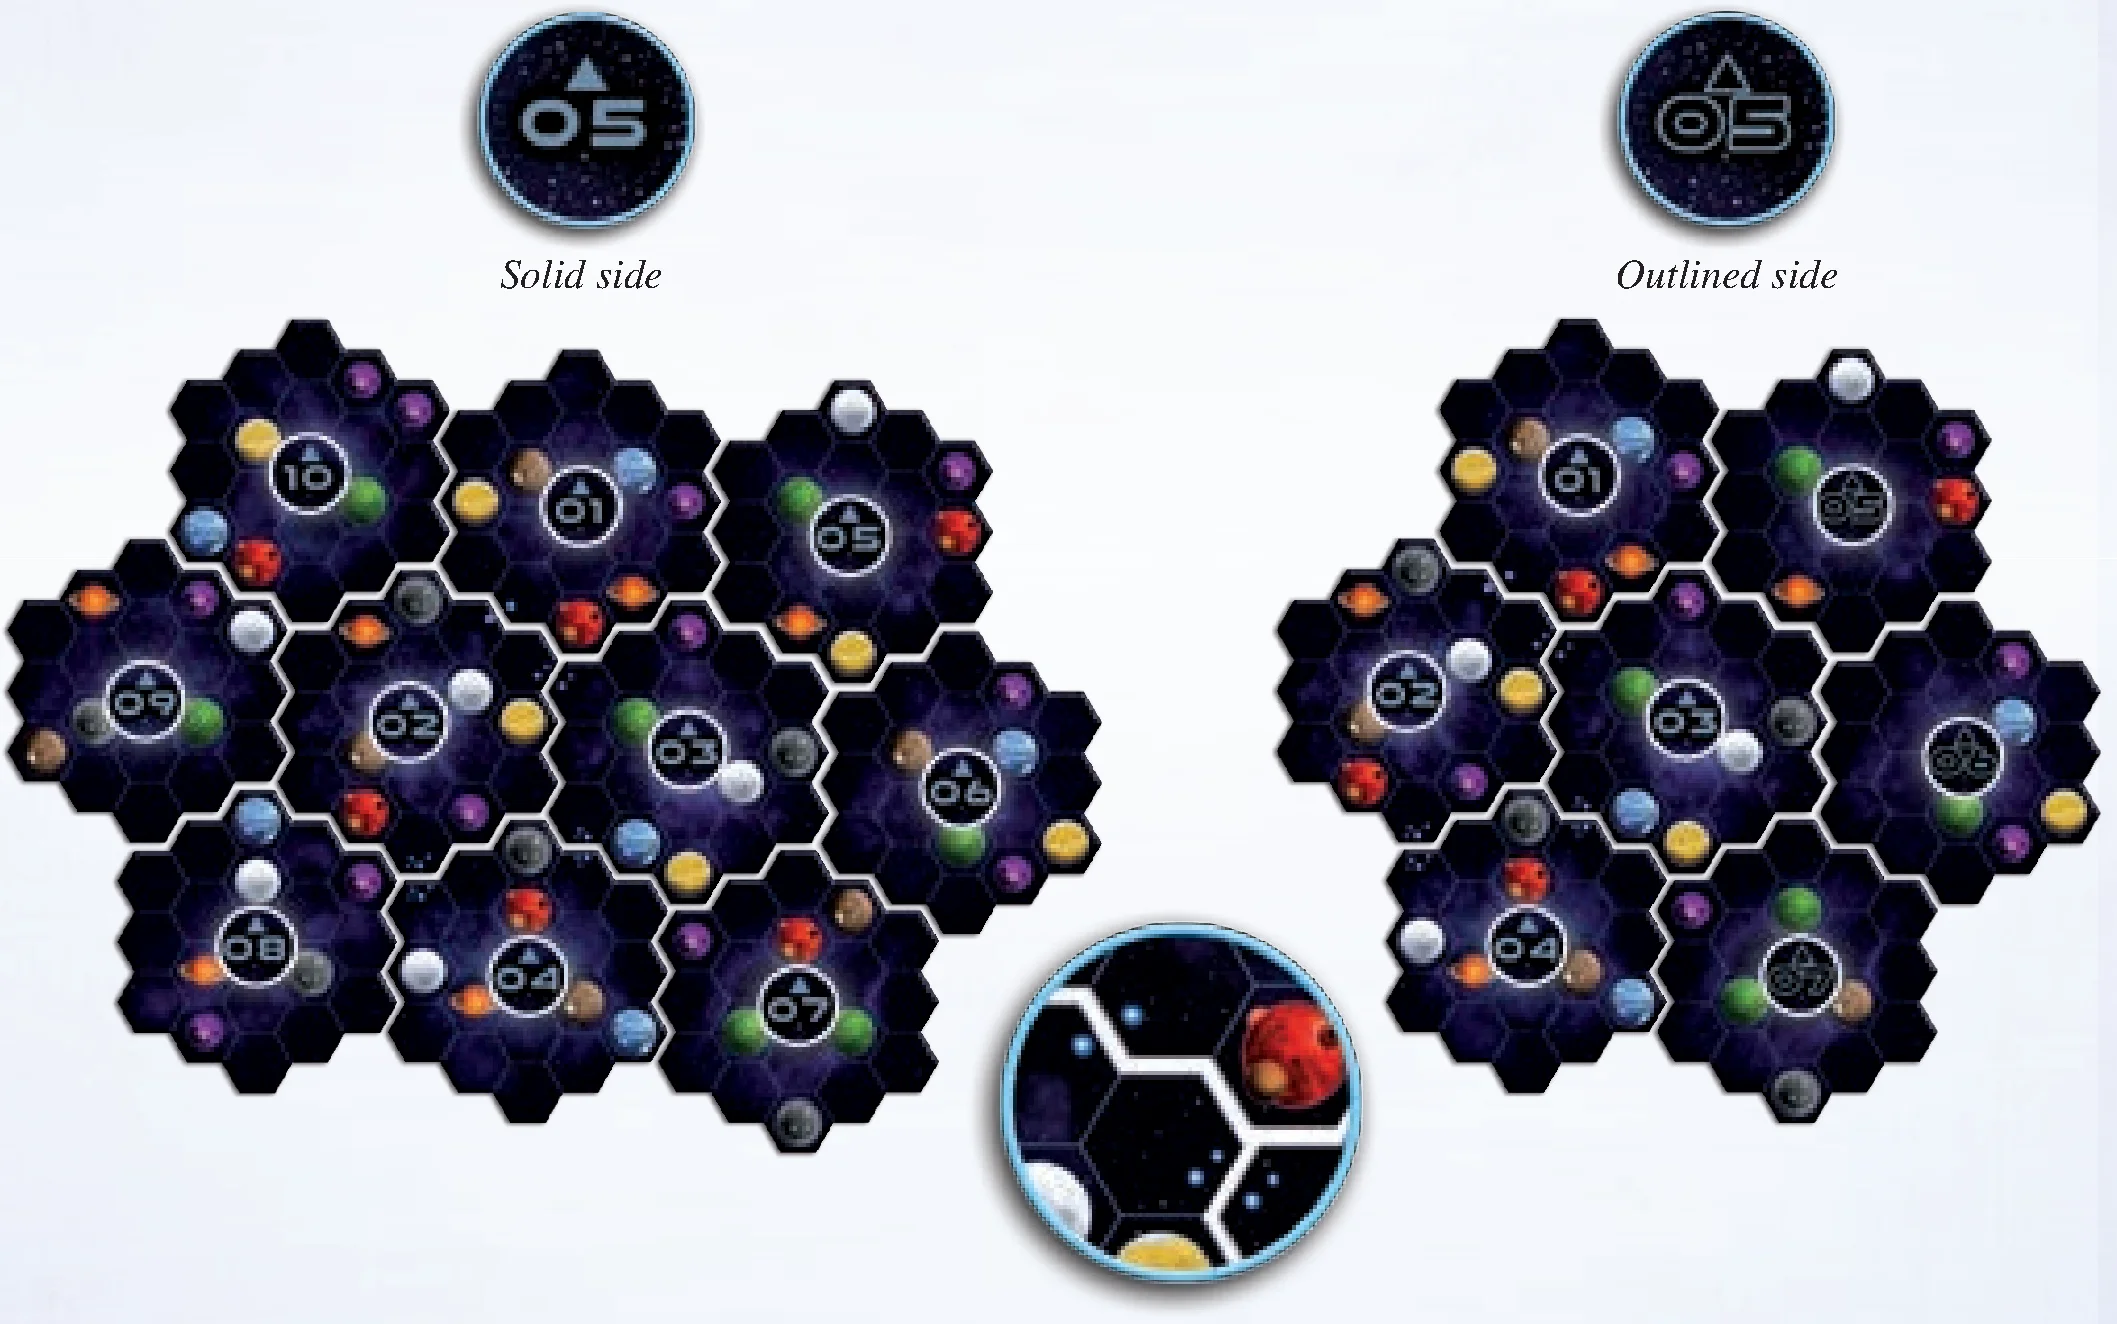
- Setup for 3 and 4 players: Assemble the game board by taking all 10 sector tiles and placing them as shown in the diagram. Make sure that sector tiles 05, 06, and 07 are solid-side up.
- Setup for 1 and 2 players: Assemble the game board by taking sector tiles 01 to 07 and placing them as shown. Make sure that sector tiles 05, 06, and 07 are outlined-side up. Return the unused sector tiles to the box.
Tip: Use the small groups of blue stars on sector tiles 01 to 04 to help you place them correctly.
Research Board and Federation Tokens
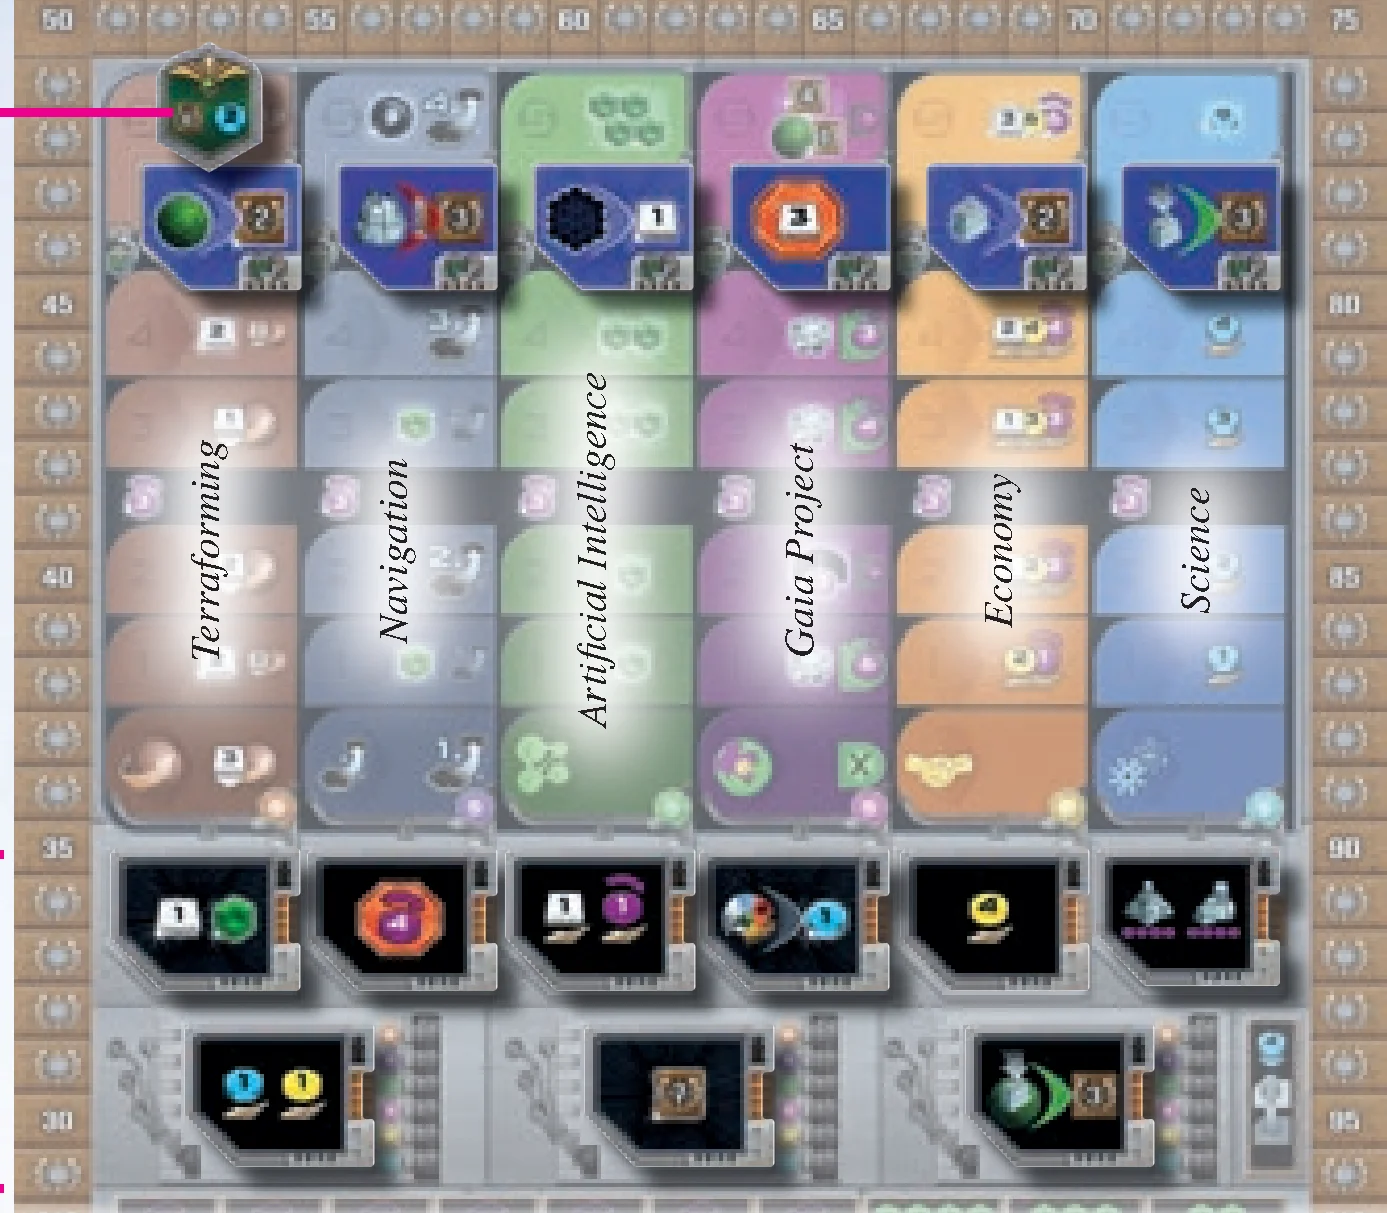
- Place the research board next to the game board.
- Take the nine standard tech tiles with green marks on the back and randomly place each of them faceup on a different tech space of the research board. Then stack the remaining standard tech tiles on the placed tiles of the same type; this will give you nine piles of four identical tech tiles.
- Randomly place one advanced tech tile faceup on each space between level 4 and 5 of the six research areas. Return the unused advanced tech tiles to the box.
- Set aside the Gleens faction’s federation token. Randomly take one federation token from those remaining and place it on level 5 of the “Terraforming” research area.
- Sort and stack the remaining federation tokens by type and place these six piles next to the game board with their green sides faceup (Exception: The 12 VP federation tokens have two gray sides).
Scoring Board, Round Boosters and General Supply
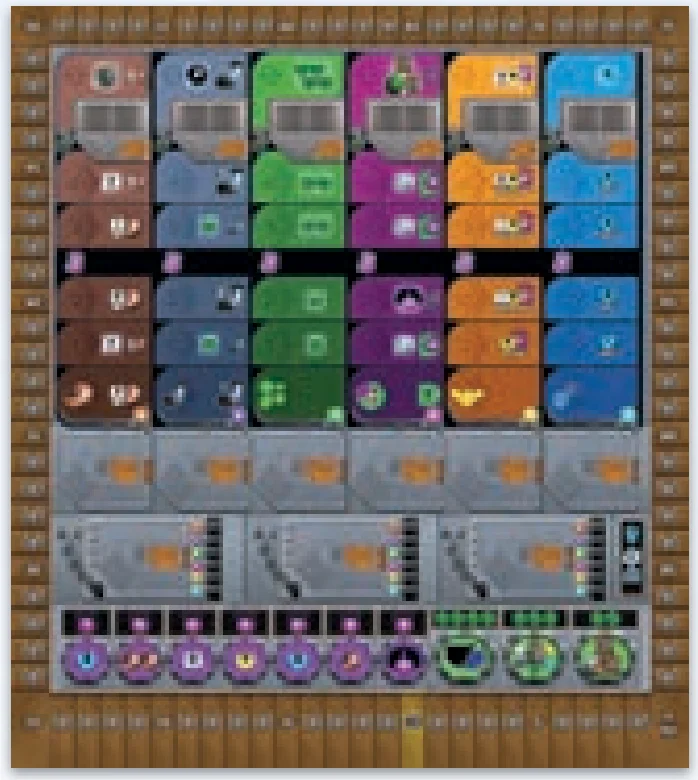
- Place the scoring board next to the game board.
- Randomly place one round scoring tile faceup on each numbered tile space of the scoring board. Return the unused round scoring tiles to the box.
- Randomly place one final scoring tile faceup on each tile space to the right of the green ranking tracks. Return the unused final scoring tiles to the box.
- Randomly select as many round boosters as there are players in the game plus three (e.g., seven round boosters in a 4-player game) and place them next to the game board. Return the unused round boosters to the box.
- Place all action tokens, Gaia Planet tokens, the Lost Planet token, power tokens, Q.I.C., and record tokens near the game board as a general supply.
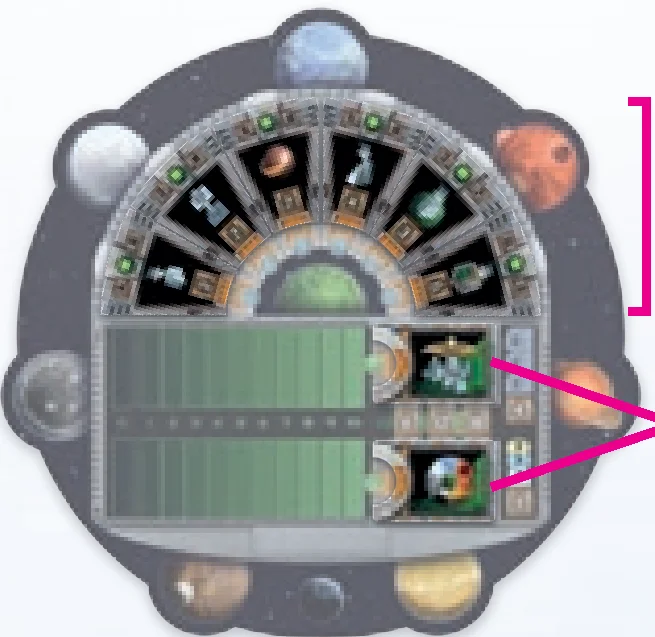
Choosing a Faction (The First Game)
The First Game recommendations:
- 1 player: Hadsch Hallas (Human), Taklons (Automa)
- 2 players: Hadsch Hallas, Xenos
- 3 players: Terrans, Taklons, Geodens
- 4 players: Terrans, Hadsch Hallas, Xenos, Taklons
The first player chooses one of the factions and takes the matching faction board. Continuing in clockwise order, each other player chooses one of the remaining factions. Place your faction board in front of you with the chosen faction faceup.
Setting Up Player Components
- Take all structures and Gaiaformers of your color. Place the structures on their corresponding spaces of your faction board. Place your three Gaiaformers near your faction board.
- Take one ore, one knowledge, and two credit markers and place them on the starting positions of your resource track. Return unused markers to the box.
- If your faction board shows at least one Q.I.C. below your name, take that many Q.I.C. from the supply and place them on your faction board.
- For each area of the power cycle on your faction board, take from the supply the number of power tokens shown and place them in that area.
- Take six player tokens of your color and place one of them on level 0 of each research area on the research board.
- If your faction board shows level 1 of a research area, advance your token one level in the corresponding area:
- If that level shows a resource marked by a star and a white outline, gain that resource immediately as a one-time bonus (ore, Q.I.C., or Gaiaformer).
- Note: The level 1 bonuses of the “Economy” and “Science” research areas are income bonuses and are not gained during setup.
- Take the seventh player token and place it on space 10 (10 VP) of the VP track.
- Take all satellites of your color; place one on each “0” space on the scoring board and the rest near your faction board.
- Take one player aid and place it faceup near your faction board.
- Faction-specific setup:
- Taklons: Take the brainstone and place it in area I of your power cycle.
- Gleens: Take the Gleens’ federation token and place it near your faction board.
- Ivits: Take the six space stations and place them near your faction board.
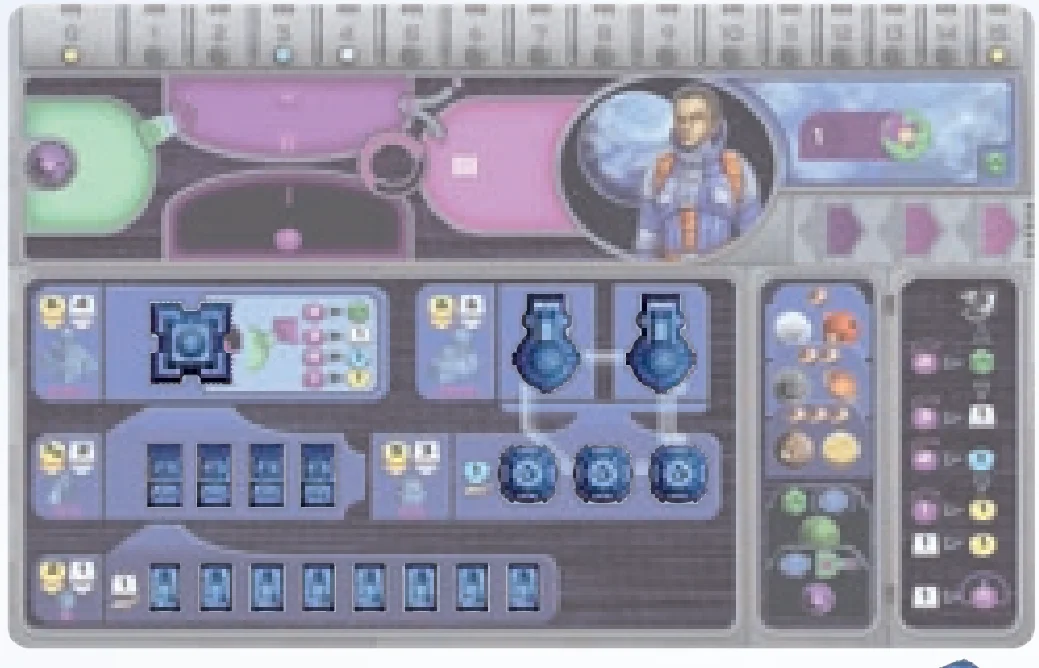
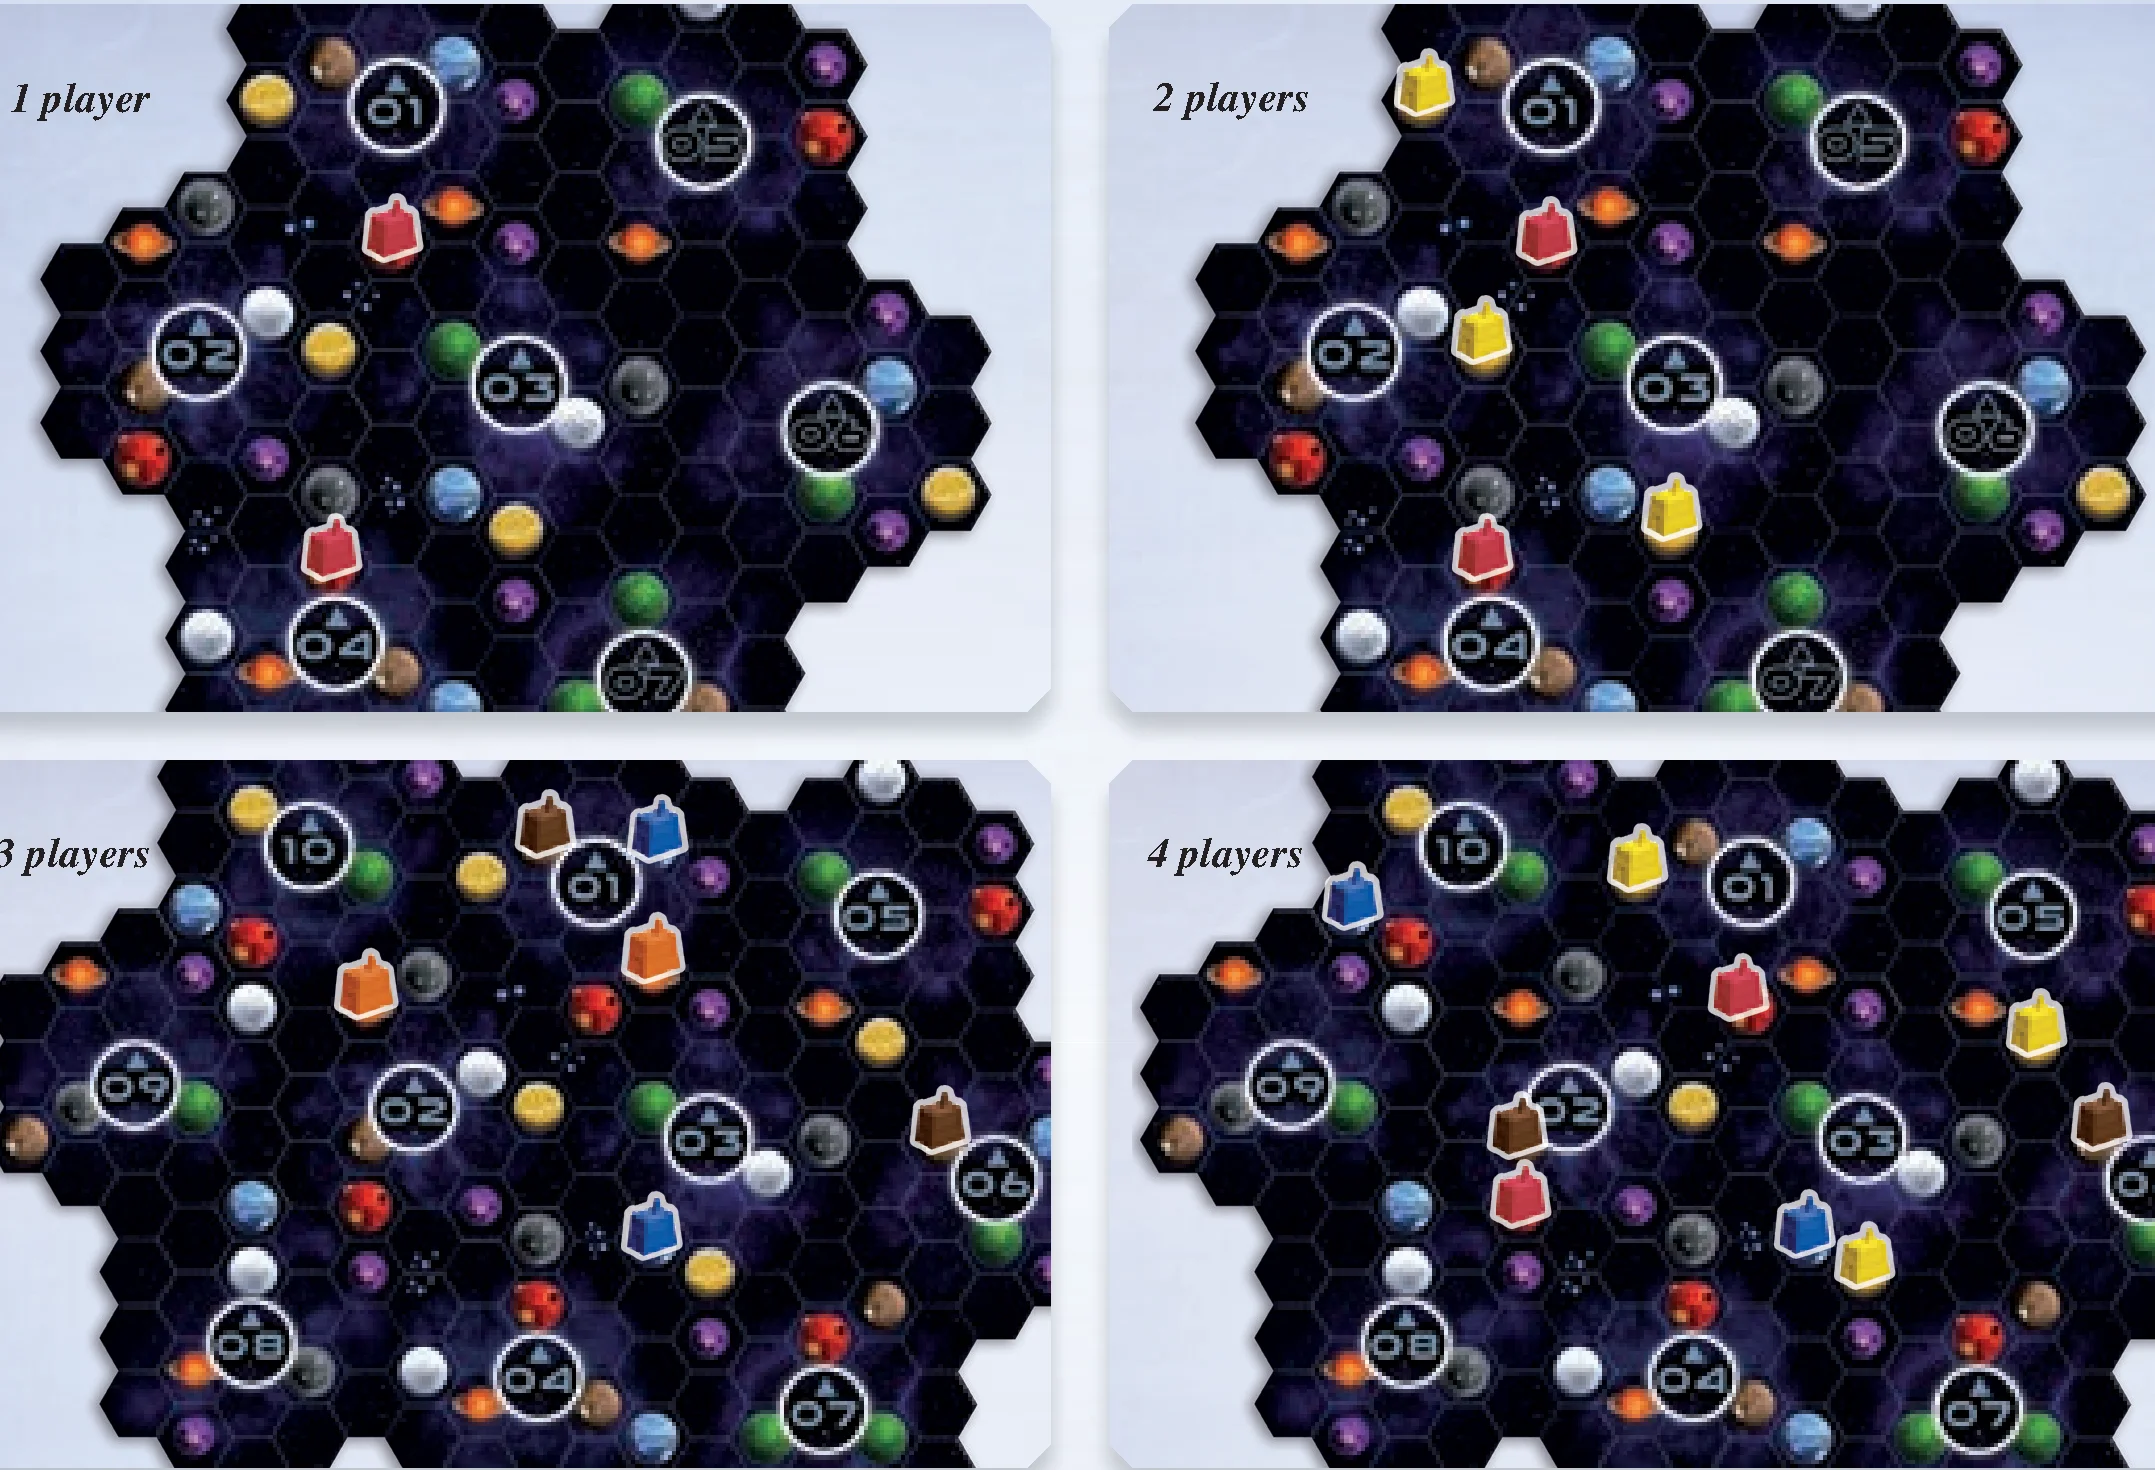
Placing Your First Structures (The First Game)
For your first game, place your mines as shown on the diagram for your player count. Always take your mines from left to right on your faction board.
By placing your first structures, you colonize your first planets, and you reveal spaces on your faction board, which is essential for your income.
Choosing Your First Round Booster
Starting with the last player and continuing in counterclockwise order, choose an available round booster and place it faceup in front of you. Unchosen round boosters will remain next to the board and be available for the first round.
Neutral Player (1–2 Players)
When playing with 1 or 2 players, a neutral player is added to affect final scoring. Take two satellites of an unused color and place one on each ranking track next to the final scoring tiles; the number on each final scoring tile determines the satellite’s starting position on that ranking track. During final scoring, these satellites count as a neutral player at the appropriate rank.
Return Player Components
Return all unused faction boards, structures, Gaiaformers, player tokens, satellites, resource markers, player aids, the brainstone, the Gleens’ federation token, space stations, and the turn order card to the box.
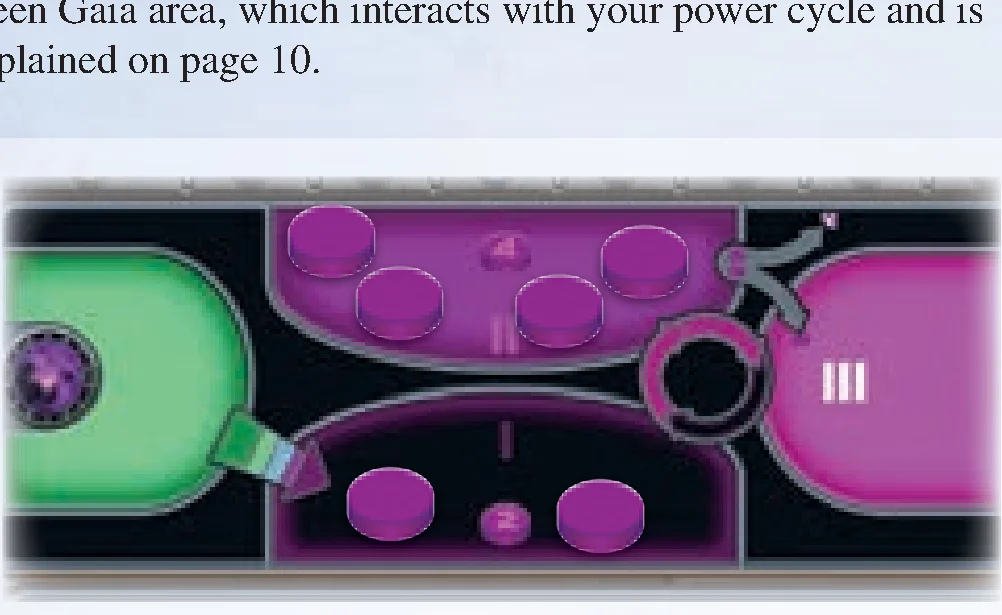
During the game, power will cycle through three numbered, connected power areas on your faction board. Charging power moves tokens toward area III, and spending power moves tokens from area III to area I.
Charging Power
For each power you need to charge, resolve the following in order:
- If there is at least one power token in area I, move a power token from area I to area II.
- If area I is empty, move a power token from area II to area III.
- If areas I and II are empty, you cannot charge any more power.
Spending Power
Some actions require you to spend power. You can spend only power tokens that are in area III. To spend power, move it from area III to area I.
Gaining and Discarding Power
- Gaining Power: Take power tokens from the supply and place them in area I.
- Discarding Power: Return power tokens from your faction board to the supply. Unless specified, you may discard power tokens from any combination of power areas except the Gaia area.
The game lasts a total of six rounds. During each round, players progress through four phases in order:
- Phase I: Income
- Phase II: Gaia
- Phase III: Actions
- Phase IV: Clean-Up
Phase I: Income
At the beginning of each round, income allows each player to gain resources from their faction board, round booster, tech tiles, and research tracks.
- Track ore, knowledge, and credits on your resource track. Maximum storage: 15 ore, 15 knowledge, and 30 credits (15 per token).
- You choose the order in which you charge and gain power. However, when gaining income from a single source icon, you must resolve it completely before taking income from another source.
Phase II: Gaia
- Move all power tokens in your Gaia area to area I of your power cycle (Exception: Terrans move them directly to area II).
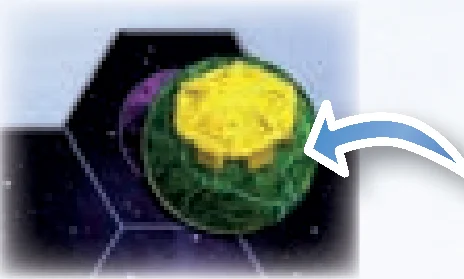
- If you have a Gaiaformer on a Transdim Planet, place a Gaia Planet token on that planet. It now counts as a Gaia Planet. The Gaiaformer remains on the planet until you build a mine there.
Phase III: Actions
Starting with the first player and continuing clockwise, players take turns taking a single action until all players have passed. Once a player passes, they take no more turns for the rest of the phase.
During your turn, you may take any number of free actions immediately before or after your action. During opponents’ turns, you may trigger the passive action to charge power.
Phase IV: Clean-Up
At the end of rounds 1 to 5 (skip after round 6):
- Remove all action tokens from power, Q.I.C., and special action spaces.
- Flip all round boosters faceup.
- Remove the current round’s scoring tile from the board and return it to the box.
Action 1: Build a Mine
You can build a mine on a planet, thereby colonizing it.
Cost: 2 credits and 1 ore (plus any terraforming or Q.I.C. costs). You must take the leftmost mine from your faction board.
Conditions to build a mine:
- The planet must be empty (no structures on it).
- The planet must be accessible from one of your colonized planets.
- The planet must be habitable (or terraformed/made habitable immediately).
You must complete this action entirely and pay all costs at once. You cannot partially terraform without building a mine.
Accessibility & Range
- Basic range is determined by your level in the Navigation research area:
- Level 0 or 1: Range 1
- Level 2 or 3: Range 2
- Level 4: Range 3
- Level 5: Range 4
- Range is measured along the shortest path of hexes from one of your colonized planets. Planets along the path do not block range.
- You can spend any number of Q.I.C. to increase your range by +2 spaces per Q.I.C. spent.
Habitability
- Home Planet Type: Fully habitable at no additional cost.
- Transdim Planets: Cannot be built on directly; must first be transformed via a Gaia Project.
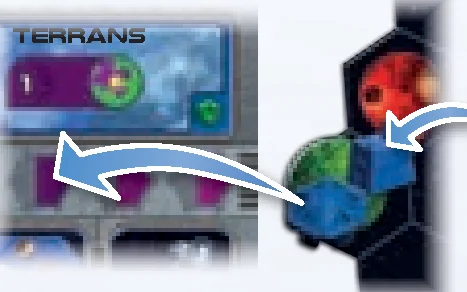
- Gaia Planets: Made habitable by paying 1 Q.I.C. (home planet type has no impact). If you have a Gaiaformer on the Gaia Planet:
- Only you can colonize it.
- It is considered accessible to you.
- You do not pay the 1 Q.I.C. cost.
- After building the mine, return the Gaiaformer to your faction board.
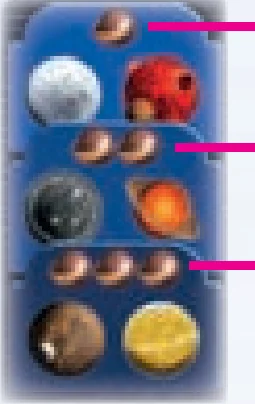
- The Seven Colored Planet Types: Require 1, 2, or 3 terraforming steps depending on the planet type wheel on your faction board.
- Ore Cost per Step: Determined by your Terraforming research track:
- Level 0–1: 3 ore per step
- Level 2: 2 ore per step
- Level 3–5: 1 ore per step
Action 2: Start a Gaia Project
To transform a Transdim Planet into a Gaia Planet, you can initiate a Gaia Project. It completes during the Gaia phase of the next round.
Requirements:
- Have an available Gaiaformer on your faction board.
- Have access to a Transdim Planet without any Gaiaformer on it (accessibility rules match “Build a Mine”).
- Move the required power tokens from your power cycle (areas I, II, or III) to your Gaia area.
Power Cost per Gaia Project: Based on the Gaia Project research area:
- Levels 1–2: 6 power tokens
- Level 3: 4 power tokens
- Levels 4–5: 3 power tokens
Note: A planet with a Gaiaformer does not count as colonized and cannot serve as a starting point to measure range to other planets. Any Gaia project started in round 6 will never complete.
Action 3: Upgrade Existing Structures
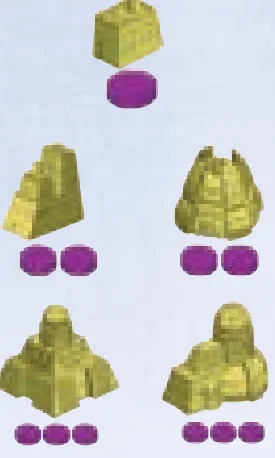
Structures are upgraded step-by-step. When upgrading, return the replaced structure to your faction board (placed from right to left in its row), and take the new structure from left to right. Pay the ore and credit costs shown on your faction board.
Possible Upgrades:
- Mine ➜ Trading Station: Costs 6 credits and 2 ore. Discount: If there is at least one opponent’s structure within 2 spaces (neighboring area), the cost is reduced to 3 credits and 2 ore.
- Trading Station ➜ Planetary Institute: Costs 6 credits and 4 ore. Unlocks your faction’s unique ability or special action.
- Trading Station ➜ Research Lab: Costs 5 credits and 3 ore. Immediately gain one tech tile.
- Research Lab ➜ Academy: Costs 6 credits and 6 ore. Choose which academy to build (one provides 2 knowledge income, the other provides an action to gain 1 Q.I.C.). Immediately gain one tech tile.
Gaining a Tech Tile
Whenever you gain a tech tile, keep it near your board and advance one level in a research area:
- Standard Tech Tile: You cannot take a standard tech tile you already own. If taken from below a research track, advance in that specific track. If taken from the bottom row of three tiles, advance in any research area of your choice.
- Advanced Tech Tile: Instead of a standard tech tile, you may claim an advanced tech tile if you meet three conditions:
- Your player token is on level 4 or 5 of that research area.
- You flip a faceup (green) federation token to its gray side.
- You place it covering an uncovered standard tech tile (the covered tile’s effect is lost).

Action 4: Form a Federation
Forming a federation unites several colonized planets to earn a federation token.
Requirements & Power Value
The colonized structures in the federation must have a total power value of at least 7:
- Mine = 1 power value
- Trading Station = 2 power value
- Research Lab = 2 power value
- Planetary Institute = 3 power value
- Academy = 3 power value
Connecting Planets with Satellites
- Adjacent colonized planets are automatically connected.
- To bridge empty space hexes, build satellites by discarding 1 power token from your faction board to the supply per satellite placed.
- Place satellites in empty hexes adjacent to your colonized planets or satellites. Satellites cannot be placed on planets. A hex can hold at most one satellite per player.
- Optimization rule: You cannot connect more planets or satellites than are strictly necessary to reach 7 power value. If the federation could be valid with fewer satellites or planets, you must use that minimal configuration.
- Each planet and satellite can belong to only one federation. Distinct federations cannot touch directly.
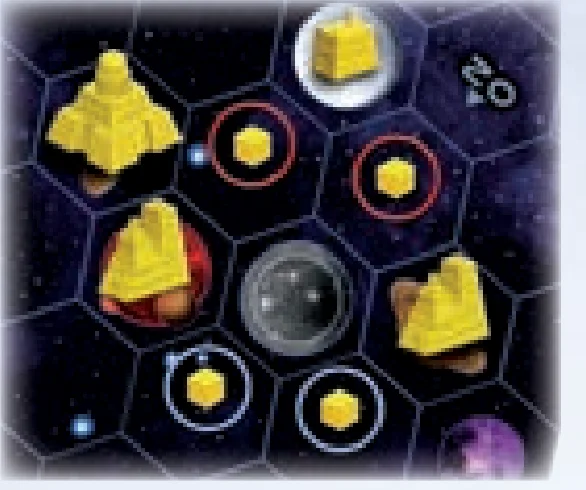
- If no satellites were needed to form the federation, mark it by placing a record token on one of its planets.
Gaining Federation Tokens
Choose an available federation token from the supply and place it green-side up. Immediately gain the VP and resources shown on it. (12 VP tokens have two gray sides and cannot be flipped later).
Action 5: Research Progress
Spend 4 knowledge to advance one level in any research area of your choice.
- One-time bonuses: Marked with a star and white outline; gained immediately upon reaching that level.
- Reaching Level 3: Whenever your marker moves from level 2 to level 3 in any track, charge 3 power immediately.
- Level 5: To advance to level 5, you must also flip a green federation token to its gray side. Only one player can occupy level 5 of each research track.
- End of Game Scoring: Each level 3, 4, and 5 reached scores 4 VP at game end.
Action 6: Power and Q.I.C. Actions
The octagonal spaces on the research board offer special actions for power or Q.I.C.:
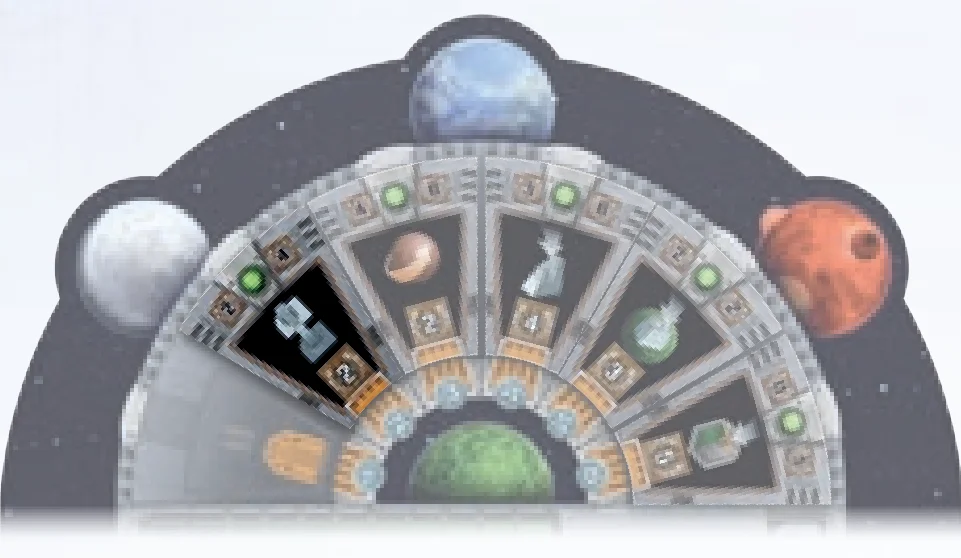
- Spend the indicated power (purple) or Q.I.C. (green) to trigger the action.
- Each space may be used only once per round across all players. Place an action token on the space when taken.
Action 7: Special Actions
Octagonal orange spaces on faction boards, round boosters, and tech tiles provide free, immediate special actions. Each may be used once per round (mark with an action token). They are exclusive to the player owning that component.
Action 8: Pass
When you cannot or choose not to take any more actions, you must pass:
- The first player to pass takes the First Player marker for the next round.
- Return your current round booster. If it has a “Pass” effect (red icon), trigger it now.
- Choose one of the three available round boosters and place it facedown in front of you. (In round 6, do not take a new booster).
Action 9: Free Actions
During your turn (before or after your main action, but not during), you may perform any number of free actions as often as you can afford:
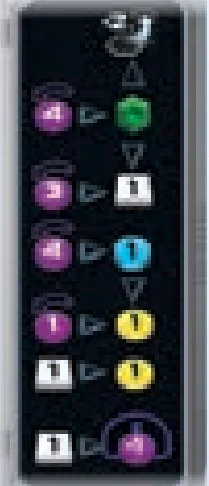
- Burn Power: Discard 1 power token from area II to move 1 power token from area II to area III.
- Spend 4 power ➜ Gain 1 Q.I.C.
- Spend 3 power ➜ Gain 1 ore.
- Spend 1 Q.I.C. ➜ Gain 1 ore.
- Spend 4 power ➜ Gain 1 knowledge.
- Spend 1 power ➜ Gain 1 credit.
- Spend 1 knowledge ➜ Gain 1 credit.
- Spend 1 ore ➜ Gain 1 credit.
- Spend 1 ore ➜ Gain 1 power (placed into area I).
Action 10: Passive Action: Charge Power
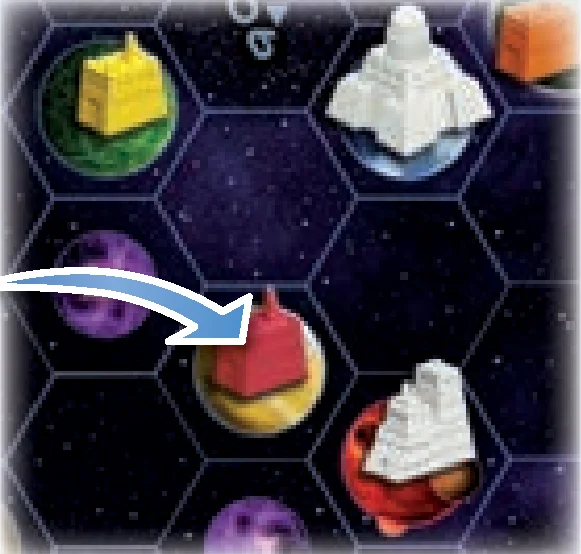
Whenever an opponent builds a mine or upgrades a structure, every other player with at least one structure within range 2 (neighboring area) may charge power by spending Victory Points:
- You may charge power up to the power value of your highest-value structure in that neighboring area (Mines=1, Trading Stations/Research Labs=2, Planetary Institutes/Academies=3).
- Cost in VP: Spend 1 fewer VP than the power charged:
- Charge 1 power: costs 0 VP
- Charge 2 power: costs 1 VP
- Charge 3 power: costs 2 VP
- Charge 4 power: costs 3 VP
- You cannot choose to charge less power to spend fewer VP: it is all-or-nothing, except:
- If your power cycle cannot absorb all the power, charge as much as possible and pay corresponding VP.
- If you do not have enough VP, spend all remaining VP and charge that amount + 1 power.
- An opponent who has already passed can still charge power passively.
At the end of the game, the player with the most VP wins. You will gain VP during the game as well as at the end of the game. Track your VP using your marker on the VP track.
Ways to Gain Victory Points (VP)
- Round Scoring Tiles: Six tiles are placed on the scoring board during setup, one for each round. Each round, you gain VP when you take the action shown on that round’s tile.
- Final Scoring Tiles: Two final scoring tiles award points at the end of the game based on players’ rankings on the corresponding tracks.
- Federation Tokens: Gained by uniting planets into federations, providing VP and resources immediately.
- Research Areas: At the end of the game, gain 4 VP for each level 3, 4, and 5 reached or passed in each research area (up to 12 VP per track).
- Tech Tiles: Both standard and advanced tech tiles can award VP and allow advancement in research.
- Resources at Game End: 1 VP for every 3 remaining credits, knowledge, or ore (in any combination).
Final Scoring
The game ends after the action phase of round 6, followed by final scoring:
1. Final Scoring Tiles (2 tiles)
For each final scoring tile, award VP according to players’ ranking:
- 1st place: 18 VP
- 2nd place: 12 VP
- 3rd place: 6 VP
- 4th place: 0 VP
Ties: Add the VP for the tied ranks together and divide evenly (rounded down). In 1–2 player games, include neutral player satellites.
Possible Final Scoring categories:
- Most structures part of federations
- Most total structures colonized
- Most different planet types colonized
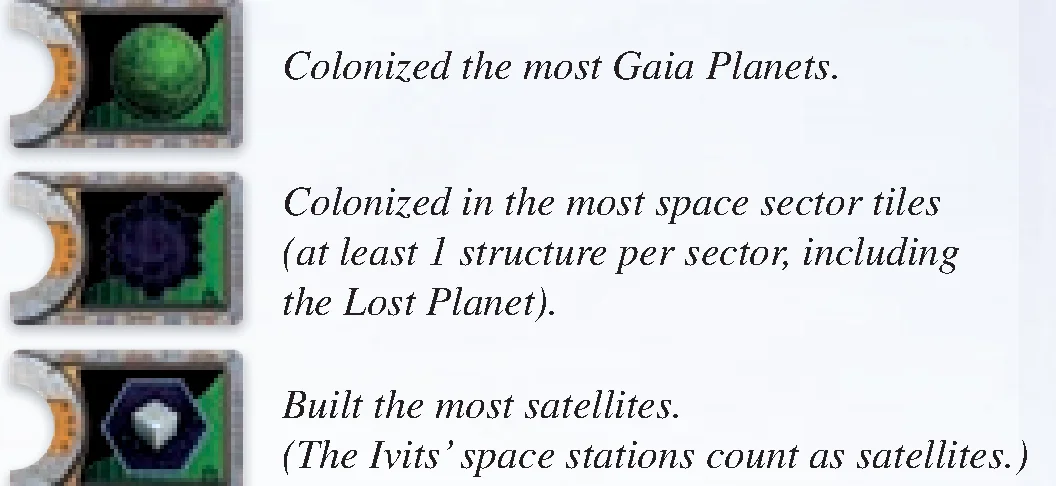
- Most Gaia Planets colonized
- Colonized in the most space sector tiles
- Built the most satellites
2. Research Scoring
Gain 4 VP for each level 3, 4, and 5 achieved in each research track (up to 12 VP per track, maximum 72 VP total).
3. Resource Scoring
Gain 1 VP for every 3 remaining resources (credits, knowledge, or ore in any combination).
Winner
The player with the most Victory Points wins. In case of a tie, tied players share the victory.
Choosing Your Faction
Instead of the fixed factions, the first player chooses any faction board, picks either side, and places it faceup. Continuing clockwise, each player chooses one of the remaining faction boards.
Placing Your First Structures
- In clockwise order from player 1, each player places their first mine on any home planet matching their color.
- Then, in counterclockwise order from the last player back to player 1, each player places their second mine on a different home planet.
- Xenos: Place their third mine after all players have placed their second.
- Ivits: Place their Planetary Institute last, after all mines have been placed.
Variable Turn Order
Use the turn order card. During setup, place player satellites on the left side from top to bottom in initial turn order. When a player passes during the round, they move their satellite to the topmost available space on the opposite side of the card.
Variable Game Board
The last player in turn order (or all players collaboratively) assembles the sector tiles. Rule: Two planets of the same color/type can never be directly adjacent.

Appendix I: Factions
Terrans (Terra – Blue)
- Ability: During the Gaia phase, move power tokens in your Gaia area to area II instead of area I.
- Planetary Institute: During the Gaia phase, when moving power from Gaia to area II, gain resources as if spending that power on free actions.
Lantids (Terra – Blue)
- Ability: When taking “Build a Mine”, you may build on an opponent’s colonized planet (including Lost Planet) without terraforming costs. This mine cannot be upgraded and does not count for planet variety or Gaia scoring.
- Planetary Institute: Gain 2 knowledge each time you build a mine on an opponent’s planet.
Xenos (Desert – Yellow)
- Ability: Place a 3rd starting mine after all other starting mines are placed.
- Planetary Institute: Form federations with 6 power value instead of 7. Gain 1 Q.I.C. income instead of 1 power token.
Gleens (Desert – Yellow)
- Ability: Whenever you would gain Q.I.C., gain that much ore instead (until upgrading the indicated academy). Pay 1 ore instead of 1 Q.I.C. to colonize Gaia Planets. Gain +2 VP per mine built on a Gaia Planet.
- Planetary Institute: Immediately gain the unique Gleens federation token.
Taklons (Swamp – Brown)
- Ability: Starts with the Brainstone, which counts as 1 token for movement but provides 3 power value when spent.
- Planetary Institute: Gain 1 power token each time you trigger passive power charging.
Ambas (Swamp – Brown)
- Ability: None.
- Planetary Institute: Once per round as an action, swap your Planetary Institute with one of your mines on the board.
Hadsch Hallas (Oxide – Red)
- Ability: None.
- Planetary Institute: You can spend credits instead of power tokens to perform resource free actions.
Ivits (Oxide – Red)
- Ability: Start with no mines; place your Planetary Institute on any red planet after all other players place mines. You can have only one single growing federation throughout the game (target power = 7X, where X is federation tokens owned + 1). Pay 1 Q.I.C. per satellite instead of power.
- Planetary Institute: Special action to place a space station (counts as 1 power and range extension).
Geodens (Volcanic – Orange)
- Ability: None.
- Planetary Institute: Gain 3 knowledge the first time you colonize each planet type.
Bal T’aks (Volcanic – Orange)
- Ability: Cannot advance in Navigation. Free action: Move a Gaiaformer to Gaia area to gain 1 Q.I.C.
- Planetary Institute: You can now advance in the Navigation research area.
Firaks (Titanium – Gray)
- Ability: None.
- Planetary Institute: Action: Downgrade a Research Lab to a Trading Station to immediately advance one level in any research area.
Bescods (Titanium – Gray)
- Ability: Planetary Institute and Academies swapped. Once per round as an action, advance your lowest-level token on the research board for free.
- Planetary Institute: Structures on gray planets have +1 power value.
Nevlas (Ice – White)
- Ability: Free action: Move 1 power token from area III to Gaia area to gain 1 knowledge.
- Planetary Institute: Power tokens in area III count as 2 power when spent.
Itars (Ice – White)
- Ability: When burning power (moving area II to III), place discarded tokens in Gaia area instead of supply.
- Planetary Institute: During Gaia phase, discard 4 power from Gaia area to gain a tech tile.
Appendix II: Research Board Areas
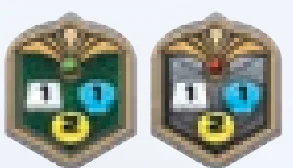
- Terraforming: Decreases ore cost per terraforming step (Level 0–1: 3 ore; Level 2: 2 ore; Level 3–5: 1 ore). Level 1 & 4 grant 2 ore. Level 5 grants the Terraforming federation token.
- Navigation: Increases basic range (Level 0–1: range 1; Level 2–3: range 2; Level 4: range 3; Level 5: range 4). Levels 1 & 3 grant 1 Q.I.C. Level 5 places the Lost Planet.
- Artificial Intelligence: Grants immediate Q.I.C. (Level 1: 1 QIC; Level 2: 1 QIC; Level 3: 2 QIC; Level 4: 2 QIC; Level 5: 4 QIC).
- Gaia Project: Decreases power cost to start Gaia Projects (Level 1–2: 6 power; Level 3: 4 power; Level 4–5: 3 power). Levels 1, 3, and 4 grant a Gaiaformer. Level 2 grants 3 power tokens. Level 5 grants 4 VP + 1 VP per colonized Gaia planet.
- Economy: Grants round income (Level 1: 2 credits, 1 charge; Level 2: 1 ore, 2 credits, 2 charge; Level 3: 1 ore, 3 credits, 3 charge; Level 4: 2 ore, 4 credits, 4 charge; Level 5: immediate 3 ore, 6 credits, 6 charge).
- Science: Grants round income in knowledge (Level 1: 1 knowledge; Level 2: 2 knowledge; Level 3: 3 knowledge; Level 4: 4 knowledge; Level 5: immediate 9 knowledge).
Appendix III: Power and Q.I.C. Action Spaces
- Power Action 1 (3/4/5/7 power): Gain resources (e.g. 2 knowledge, 2 ore, 7 credits, or 2 power tokens).
- Power Action 2 (4 or 5 power): Take 1 or 2 free terraforming steps and build a mine.
- Q.I.C. Action 1 (4 Q.I.C.): Immediately gain a tech tile (standard or advanced).
- Q.I.C. Action 2 (3 Q.I.C.): Score one of your federation tokens again (gain its VP and resources an additional time).
- Q.I.C. Action 3 (2 Q.I.C.): Gain 3 VP + 1 VP per different planet type colonized.
Appendix IV: Round Boosters
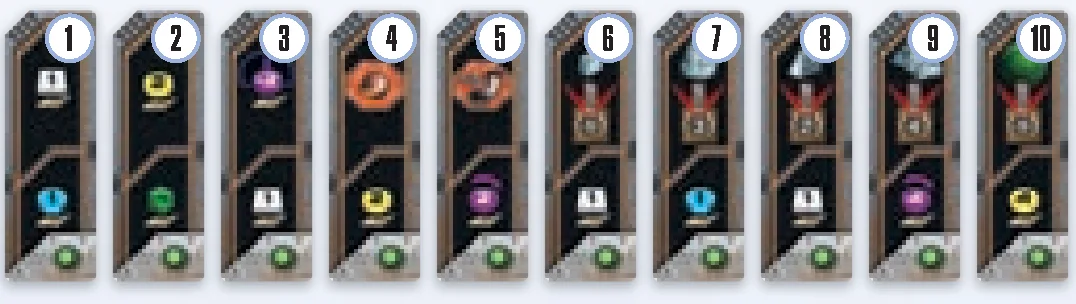
- Income: 1 ore, 1 knowledge.
- Income: 2 credits, 1 Q.I.C.
- Income: 2 power tokens, 1 ore.
- Income: 2 credits. Special Action: Build a mine with 1 free terraforming step.
- Income: Charge 2 power. Special Action: Build a mine or start Gaia project with +3 range.
- Income: 1 ore. Passing bonus: 1 VP per mine on the board.
- Income: 1 knowledge. Passing bonus: 3 VP per research lab on the board.
- Income: 1 ore. Passing bonus: 2 VP per trading station on the board.
- Income: Charge 4 power. Passing bonus: 4 VP per planetary institute and academy on the board.
- Income: 4 credits. Passing bonus: 1 VP per colonized Gaia Planet.
Appendix V: Round Scoring Tiles
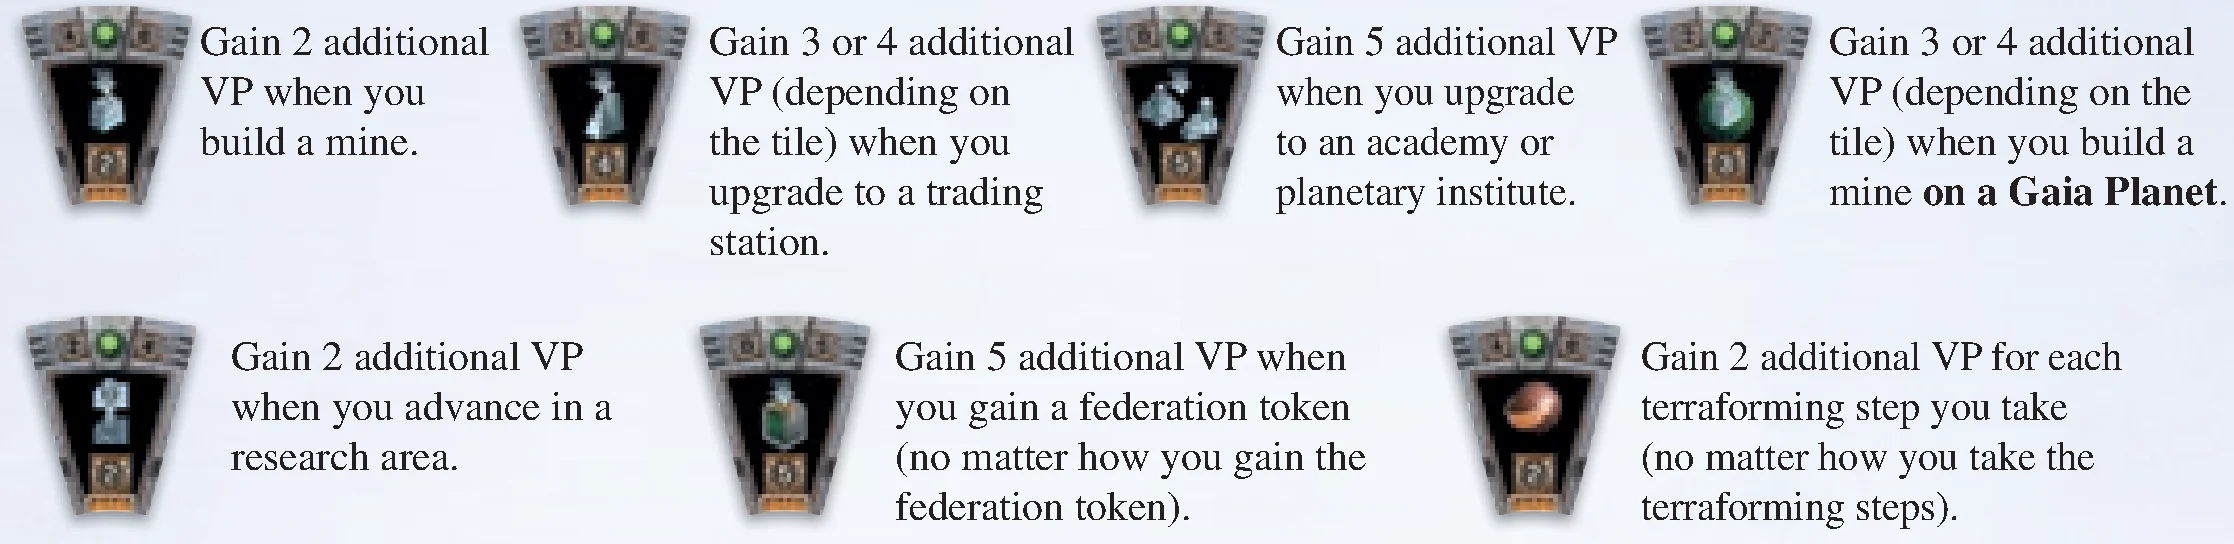
Each tile scores bonus VP during its round when performing the shown action:
- Gain 2 VP when you build a mine.
- Gain 3 or 4 VP when you upgrade to a trading station.
- Gain 5 VP when you upgrade to an academy or planetary institute.
- Gain 3 or 4 VP when you build a mine on a Gaia Planet.
- Gain 2 VP when you advance in a research area.
- Gain 5 VP when you gain a federation token.
- Gain 2 VP for each terraforming step taken.
Appendix VI: Tech Tiles
Tech tiles trigger benefits based on specific timings and conditions:
- Immediate: Gain resources when tile is taken.
- Income (Phase I): Gain resources every round.
- Triggered: Gain VP/resources whenever a condition is met (e.g. colonizing a Gaia planet, advancing in research).
- Passing: Gain VP when passing based on federations owned, planet types colonized, etc.
- Special Action: Once per round action (e.g., gain 1 Q.I.C. and 5 credits).
- Passive value modifier: e.g., Increases Planetary Institute and Academy power value to 4.
Introduction & Components
In Gaia Project, each player controls one of 14 factions striving to peacefully colonize the Terra Mystica galaxy. Each faction has different environmental needs to survive on a planet. These needs have led the factions to master terraforming, enabling them to make different planet types habitable for themselves.
During the game, you will colonize new planets, upgrade mines into better structures, and unite planets to form federations. The choice is yours: will you expand near other factions, which might give you power and trade partners, or will you look for solitude, where you can expand more freely?
In addition, you will need to research and discover new technologies to improve your skills. In the end, only the best developed faction will win.
Components
- 10 Space Sector Tiles: Numbered 01 to 10. Tiles 05, 06, and 07 are double-sided.
- 1 Research Board
- 7 Double-Sided Faction Boards: Each side shows a different faction.
- 1 Scoring Board
- 10 Round Scoring Tiles
- 6 Final Scoring Tiles
- 10 Round Boosters
- 36 Standard Tech Tiles (4 each of 9 types)
- 15 Advanced Tech Tiles
- 6 Space Stations
- 19 Federation Tokens
- 12 Gaia Planet Tokens
- 1 Lost Planet Token
- 15 Record Tokens
- 20 Action Tokens
Additional Components and Player Pieces
Structures (in each of the 7 player colors: Yellow, orange, brown, white, gray, blue, red):
- 8 Mines
- 4 Trading Stations
- 3 Research Labs
- 2 Academies
- 1 Planetary Institute
Other Player Pieces (in each player color):
- 3 Gaiaformers
- 7 Player Tokens
- 25 Satellites
Supply Tokens & Markers:
- 14 Credit Markers
- 7 Ore Markers
- 7 Knowledge Markers
- 30 Q.I.C. (Quantum Intelligence Cubes)
- 50 Power Tokens
- 1 Brainstone (purple)
- 1 First Player Marker
Cards & Solo (Automa) Components:
- 4 Player Aids
- 1 Turn Order Card
- 1 Terraforming Reference Card
- Automa Cards: 7 Faction Cards, 17 Decision Cards
- 1 Automa Rulebook
- 1 Automa Player Aid
Setup
For your first game, play with the following game board setup and factions. For future games, also use the Advanced Setup (which features a variable game board and all factions).
For a solo game, see the Automa rulebook. With two or more players, return the Automa cards and Automa player aid to the box.
Determine a first player using the method of your choice. That player takes the first player marker.
Game Board
- Setup for 3 and 4 players: Assemble the game board by taking all 10 sector tiles and placing them as shown in the diagram. Make sure that sector tiles 05, 06, and 07 are solid-side up.
- Setup for 1 and 2 players: Assemble the game board by taking sector tiles 01 to 07 and placing them as shown. Make sure that sector tiles 05, 06, and 07 are outlined-side up. Return the unused sector tiles to the box.
Tip: Use the small groups of blue stars on sector tiles 01 to 04 to help you place them correctly.
Research Board and Federation Tokens
- Place the research board next to the game board.
- Take the nine standard tech tiles with green marks on the back and randomly place each of them faceup on a different tech space of the research board. Then stack the remaining standard tech tiles on the placed tiles of the same type; this will give you nine piles of four identical tech tiles.
- Randomly place one advanced tech tile faceup on each space between level 4 and 5 of the six research areas. Return the unused advanced tech tiles to the box.
- Set aside the Gleens faction’s federation token. Randomly take one federation token from those remaining and place it on level 5 of the “Terraforming” research area.
- Sort and stack the remaining federation tokens by type and place these six piles next to the game board with their green sides faceup (Exception: The 12 VP federation tokens have two gray sides).
Scoring Board, Round Boosters and General Supply
- Place the scoring board next to the game board.
- Randomly place one round scoring tile faceup on each numbered tile space of the scoring board. Return the unused round scoring tiles to the box.
- Randomly place one final scoring tile faceup on each tile space to the right of the green ranking tracks. Return the unused final scoring tiles to the box.
- Randomly select as many round boosters as there are players in the game plus three (e.g., seven round boosters in a 4-player game) and place them next to the game board. Return the unused round boosters to the box.
- Place all action tokens, Gaia Planet tokens, the Lost Planet token, power tokens, Q.I.C., and record tokens near the game board as a general supply.
Choosing a Faction (The First Game)
The First Game recommendations:
- 1 player: Hadsch Hallas (Human), Taklons (Automa)
- 2 players: Hadsch Hallas, Xenos
- 3 players: Terrans, Taklons, Geodens
- 4 players: Terrans, Hadsch Hallas, Xenos, Taklons
The first player chooses one of the factions and takes the matching faction board. Continuing in clockwise order, each other player chooses one of the remaining factions. Place your faction board in front of you with the chosen faction faceup.
Setting Up Player Components
- Take all structures and Gaiaformers of your color. Place the structures on their corresponding spaces of your faction board. Place your three Gaiaformers near your faction board.
- Take one ore, one knowledge, and two credit markers and place them on the starting positions of your resource track. Return unused markers to the box.
- If your faction board shows at least one Q.I.C. below your name, take that many Q.I.C. from the supply and place them on your faction board.
- For each area of the power cycle on your faction board, take from the supply the number of power tokens shown and place them in that area.
- Take six player tokens of your color and place one of them on level 0 of each research area on the research board.
- If your faction board shows level 1 of a research area, advance your token one level in the corresponding area:
- If that level shows a resource marked by a star and a white outline, gain that resource immediately as a one-time bonus (ore, Q.I.C., or Gaiaformer).
- Note: The level 1 bonuses of the “Economy” and “Science” research areas are income bonuses and are not gained during setup.
- Take the seventh player token and place it on space 10 (10 VP) of the VP track.
- Take all satellites of your color; place one on each “0” space on the scoring board and the rest near your faction board.
- Take one player aid and place it faceup near your faction board.
- Faction-specific setup:
- Taklons: Take the brainstone and place it in area I of your power cycle.
- Gleens: Take the Gleens’ federation token and place it near your faction board.
- Ivits: Take the six space stations and place them near your faction board.
Placing Your First Structures (The First Game)
For your first game, place your mines as shown on the diagram for your player count. Always take your mines from left to right on your faction board.
By placing your first structures, you colonize your first planets, and you reveal spaces on your faction board, which is essential for your income.
Choosing Your First Round Booster
Starting with the last player and continuing in counterclockwise order, choose an available round booster and place it faceup in front of you. Unchosen round boosters will remain next to the board and be available for the first round.
Neutral Player (1–2 Players)
When playing with 1 or 2 players, a neutral player is added to affect final scoring. Take two satellites of an unused color and place one on each ranking track next to the final scoring tiles; the number on each final scoring tile determines the satellite’s starting position on that ranking track. During final scoring, these satellites count as a neutral player at the appropriate rank.
Return Player Components
Return all unused faction boards, structures, Gaiaformers, player tokens, satellites, resource markers, player aids, the brainstone, the Gleens’ federation token, space stations, and the turn order card to the box.
Core Concepts: The Power Cycle
During the game, power will cycle through three numbered, connected power areas on your faction board. Charging power moves tokens toward area III, and spending power moves tokens from area III to area I.
Charging Power
For each power you need to charge, resolve the following in order:
- If there is at least one power token in area I, move a power token from area I to area II.
- If area I is empty, move a power token from area II to area III.
- If areas I and II are empty, you cannot charge any more power.
Spending Power
Some actions require you to spend power. You can spend only power tokens that are in area III. To spend power, move it from area III to area I.
Gaining and Discarding Power
- Gaining Power: Take power tokens from the supply and place them in area I.
- Discarding Power: Return power tokens from your faction board to the supply. Unless specified, you may discard power tokens from any combination of power areas except the Gaia area.
Round Structure & Phases
The game lasts a total of six rounds. During each round, players progress through four phases in order:
- Phase I: Income
- Phase II: Gaia
- Phase III: Actions
- Phase IV: Clean-Up
Phase I: Income
At the beginning of each round, income allows each player to gain resources from their faction board, round booster, tech tiles, and research tracks.
- Track ore, knowledge, and credits on your resource track. Maximum storage: 15 ore, 15 knowledge, and 30 credits (15 per token).
- You choose the order in which you charge and gain power. However, when gaining income from a single source icon, you must resolve it completely before taking income from another source.
Phase II: Gaia
- Move all power tokens in your Gaia area to area I of your power cycle (Exception: Terrans move them directly to area II).
- If you have a Gaiaformer on a Transdim Planet, place a Gaia Planet token on that planet. It now counts as a Gaia Planet. The Gaiaformer remains on the planet until you build a mine there.
Phase III: Actions
Starting with the first player and continuing clockwise, players take turns taking a single action until all players have passed. Once a player passes, they take no more turns for the rest of the phase.
During your turn, you may take any number of free actions immediately before or after your action. During opponents’ turns, you may trigger the passive action to charge power.
Phase IV: Clean-Up
At the end of rounds 1 to 5 (skip after round 6):
- Remove all action tokens from power, Q.I.C., and special action spaces.
- Flip all round boosters faceup.
- Remove the current round’s scoring tile from the board and return it to the box.
Actions
Action 1: Build a Mine
You can build a mine on a planet, thereby colonizing it.
Cost: 2 credits and 1 ore (plus any terraforming or Q.I.C. costs). You must take the leftmost mine from your faction board.
Conditions to build a mine:
- The planet must be empty (no structures on it).
- The planet must be accessible from one of your colonized planets.
- The planet must be habitable (or terraformed/made habitable immediately).
You must complete this action entirely and pay all costs at once. You cannot partially terraform without building a mine.
Accessibility & Range
- Basic range is determined by your level in the Navigation research area:
- Level 0 or 1: Range 1
- Level 2 or 3: Range 2
- Level 4: Range 3
- Level 5: Range 4
- Range is measured along the shortest path of hexes from one of your colonized planets. Planets along the path do not block range.
- You can spend any number of Q.I.C. to increase your range by +2 spaces per Q.I.C. spent.
Habitability
- Home Planet Type: Fully habitable at no additional cost.
- Transdim Planets: Cannot be built on directly; must first be transformed via a Gaia Project.
- Gaia Planets: Made habitable by paying 1 Q.I.C. (home planet type has no impact). If you have a Gaiaformer on the Gaia Planet:
- Only you can colonize it.
- It is considered accessible to you.
- You do not pay the 1 Q.I.C. cost.
- After building the mine, return the Gaiaformer to your faction board.
- The Seven Colored Planet Types: Require 1, 2, or 3 terraforming steps depending on the planet type wheel on your faction board.
- Ore Cost per Step: Determined by your Terraforming research track:
- Level 0–1: 3 ore per step
- Level 2: 2 ore per step
- Level 3–5: 1 ore per step
Action 2: Start a Gaia Project
To transform a Transdim Planet into a Gaia Planet, you can initiate a Gaia Project. It completes during the Gaia phase of the next round.
Requirements:
- Have an available Gaiaformer on your faction board.
- Have access to a Transdim Planet without any Gaiaformer on it (accessibility rules match “Build a Mine”).
- Move the required power tokens from your power cycle (areas I, II, or III) to your Gaia area.
Power Cost per Gaia Project: Based on the Gaia Project research area:
- Levels 1–2: 6 power tokens
- Level 3: 4 power tokens
- Levels 4–5: 3 power tokens
Note: A planet with a Gaiaformer does not count as colonized and cannot serve as a starting point to measure range to other planets. Any Gaia project started in round 6 will never complete.
Action 3: Upgrade Existing Structures
Structures are upgraded step-by-step. When upgrading, return the replaced structure to your faction board (placed from right to left in its row), and take the new structure from left to right. Pay the ore and credit costs shown on your faction board.
Possible Upgrades:
- Mine ➜ Trading Station: Costs 6 credits and 2 ore. Discount: If there is at least one opponent’s structure within 2 spaces (neighboring area), the cost is reduced to 3 credits and 2 ore.
- Trading Station ➜ Planetary Institute: Costs 6 credits and 4 ore. Unlocks your faction’s unique ability or special action.
- Trading Station ➜ Research Lab: Costs 5 credits and 3 ore. Immediately gain one tech tile.
- Research Lab ➜ Academy: Costs 6 credits and 6 ore. Choose which academy to build (one provides 2 knowledge income, the other provides an action to gain 1 Q.I.C.). Immediately gain one tech tile.
Gaining a Tech Tile
Whenever you gain a tech tile, keep it near your board and advance one level in a research area:
- Standard Tech Tile: You cannot take a standard tech tile you already own. If taken from below a research track, advance in that specific track. If taken from the bottom row of three tiles, advance in any research area of your choice.
- Advanced Tech Tile: Instead of a standard tech tile, you may claim an advanced tech tile if you meet three conditions:
- Your player token is on level 4 or 5 of that research area.
- You flip a faceup (green) federation token to its gray side.
- You place it covering an uncovered standard tech tile (the covered tile’s effect is lost).
Action 4: Form a Federation
Forming a federation unites several colonized planets to earn a federation token.
Requirements & Power Value
The colonized structures in the federation must have a total power value of at least 7:
- Mine = 1 power value
- Trading Station = 2 power value
- Research Lab = 2 power value
- Planetary Institute = 3 power value
- Academy = 3 power value
Connecting Planets with Satellites
- Adjacent colonized planets are automatically connected.
- To bridge empty space hexes, build satellites by discarding 1 power token from your faction board to the supply per satellite placed.
- Place satellites in empty hexes adjacent to your colonized planets or satellites. Satellites cannot be placed on planets. A hex can hold at most one satellite per player.
- Optimization rule: You cannot connect more planets or satellites than are strictly necessary to reach 7 power value. If the federation could be valid with fewer satellites or planets, you must use that minimal configuration.
- Each planet and satellite can belong to only one federation. Distinct federations cannot touch directly.
- If no satellites were needed to form the federation, mark it by placing a record token on one of its planets.
Gaining Federation Tokens
Choose an available federation token from the supply and place it green-side up. Immediately gain the VP and resources shown on it. (12 VP tokens have two gray sides and cannot be flipped later).
Action 5: Research Progress
Spend 4 knowledge to advance one level in any research area of your choice.
- One-time bonuses: Marked with a star and white outline; gained immediately upon reaching that level.
- Reaching Level 3: Whenever your marker moves from level 2 to level 3 in any track, charge 3 power immediately.
- Level 5: To advance to level 5, you must also flip a green federation token to its gray side. Only one player can occupy level 5 of each research track.
- End of Game Scoring: Each level 3, 4, and 5 reached scores 4 VP at game end.
Action 6: Power and Q.I.C. Actions
The octagonal spaces on the research board offer special actions for power or Q.I.C.:
- Spend the indicated power (purple) or Q.I.C. (green) to trigger the action.
- Each space may be used only once per round across all players. Place an action token on the space when taken.
Action 7: Special Actions
Octagonal orange spaces on faction boards, round boosters, and tech tiles provide free, immediate special actions. Each may be used once per round (mark with an action token). They are exclusive to the player owning that component.
Action 8: Pass
When you cannot or choose not to take any more actions, you must pass:
- The first player to pass takes the First Player marker for the next round.
- Return your current round booster. If it has a “Pass” effect (red icon), trigger it now.
- Choose one of the three available round boosters and place it facedown in front of you. (In round 6, do not take a new booster).
Action 9: Free Actions
During your turn (before or after your main action, but not during), you may perform any number of free actions as often as you can afford:
- Burn Power: Discard 1 power token from area II to move 1 power token from area II to area III.
- Spend 4 power ➜ Gain 1 Q.I.C.
- Spend 3 power ➜ Gain 1 ore.
- Spend 1 Q.I.C. ➜ Gain 1 ore.
- Spend 4 power ➜ Gain 1 knowledge.
- Spend 1 power ➜ Gain 1 credit.
- Spend 1 knowledge ➜ Gain 1 credit.
- Spend 1 ore ➜ Gain 1 credit.
- Spend 1 ore ➜ Gain 1 power (placed into area I).
Action 10: Passive Action: Charge Power
Whenever an opponent builds a mine or upgrades a structure, every other player with at least one structure within range 2 (neighboring area) may charge power by spending Victory Points:
- You may charge power up to the power value of your highest-value structure in that neighboring area (Mines=1, Trading Stations/Research Labs=2, Planetary Institutes/Academies=3).
- Cost in VP: Spend 1 fewer VP than the power charged:
- Charge 1 power: costs 0 VP
- Charge 2 power: costs 1 VP
- Charge 3 power: costs 2 VP
- Charge 4 power: costs 3 VP
- You cannot choose to charge less power to spend fewer VP: it is all-or-nothing, except:
- If your power cycle cannot absorb all the power, charge as much as possible and pay corresponding VP.
- If you do not have enough VP, spend all remaining VP and charge that amount + 1 power.
- An opponent who has already passed can still charge power passively.
Goal, Game End & Scoring
At the end of the game, the player with the most VP wins. You will gain VP during the game as well as at the end of the game. Track your VP using your marker on the VP track.
Ways to Gain Victory Points (VP)
- Round Scoring Tiles: Six tiles are placed on the scoring board during setup, one for each round. Each round, you gain VP when you take the action shown on that round’s tile.
- Final Scoring Tiles: Two final scoring tiles award points at the end of the game based on players’ rankings on the corresponding tracks.
- Federation Tokens: Gained by uniting planets into federations, providing VP and resources immediately.
- Research Areas: At the end of the game, gain 4 VP for each level 3, 4, and 5 reached or passed in each research area (up to 12 VP per track).
- Tech Tiles: Both standard and advanced tech tiles can award VP and allow advancement in research.
- Resources at Game End: 1 VP for every 3 remaining credits, knowledge, or ore (in any combination).
Final Scoring
The game ends after the action phase of round 6, followed by final scoring:
1. Final Scoring Tiles (2 tiles)
For each final scoring tile, award VP according to players’ ranking:
- 1st place: 18 VP
- 2nd place: 12 VP
- 3rd place: 6 VP
- 4th place: 0 VP
Ties: Add the VP for the tied ranks together and divide evenly (rounded down). In 1–2 player games, include neutral player satellites.
Possible Final Scoring categories:
- Most structures part of federations
- Most total structures colonized
- Most different planet types colonized
- Most Gaia Planets colonized
- Colonized in the most space sector tiles
- Built the most satellites
2. Research Scoring
Gain 4 VP for each level 3, 4, and 5 achieved in each research track (up to 12 VP per track, maximum 72 VP total).
3. Resource Scoring
Gain 1 VP for every 3 remaining resources (credits, knowledge, or ore in any combination).
Winner
The player with the most Victory Points wins. In case of a tie, tied players share the victory.
Advanced Setup: Beyond the First Game
Choosing Your Faction
Instead of the fixed factions, the first player chooses any faction board, picks either side, and places it faceup. Continuing clockwise, each player chooses one of the remaining faction boards.
Placing Your First Structures
- In clockwise order from player 1, each player places their first mine on any home planet matching their color.
- Then, in counterclockwise order from the last player back to player 1, each player places their second mine on a different home planet.
- Xenos: Place their third mine after all players have placed their second.
- Ivits: Place their Planetary Institute last, after all mines have been placed.
Variable Turn Order
Use the turn order card. During setup, place player satellites on the left side from top to bottom in initial turn order. When a player passes during the round, they move their satellite to the topmost available space on the opposite side of the card.
Variable Game Board
The last player in turn order (or all players collaboratively) assembles the sector tiles. Rule: Two planets of the same color/type can never be directly adjacent.
Appendices
Appendix I: Factions
Terrans (Terra – Blue)
- Ability: During the Gaia phase, move power tokens in your Gaia area to area II instead of area I.
- Planetary Institute: During the Gaia phase, when moving power from Gaia to area II, gain resources as if spending that power on free actions.
Lantids (Terra – Blue)
- Ability: When taking “Build a Mine”, you may build on an opponent’s colonized planet (including Lost Planet) without terraforming costs. This mine cannot be upgraded and does not count for planet variety or Gaia scoring.
- Planetary Institute: Gain 2 knowledge each time you build a mine on an opponent’s planet.
Xenos (Desert – Yellow)
- Ability: Place a 3rd starting mine after all other starting mines are placed.
- Planetary Institute: Form federations with 6 power value instead of 7. Gain 1 Q.I.C. income instead of 1 power token.
Gleens (Desert – Yellow)
- Ability: Whenever you would gain Q.I.C., gain that much ore instead (until upgrading the indicated academy). Pay 1 ore instead of 1 Q.I.C. to colonize Gaia Planets. Gain +2 VP per mine built on a Gaia Planet.
- Planetary Institute: Immediately gain the unique Gleens federation token.
Taklons (Swamp – Brown)
- Ability: Starts with the Brainstone, which counts as 1 token for movement but provides 3 power value when spent.
- Planetary Institute: Gain 1 power token each time you trigger passive power charging.
Ambas (Swamp – Brown)
- Ability: None.
- Planetary Institute: Once per round as an action, swap your Planetary Institute with one of your mines on the board.
Hadsch Hallas (Oxide – Red)
- Ability: None.
- Planetary Institute: You can spend credits instead of power tokens to perform resource free actions.
Ivits (Oxide – Red)
- Ability: Start with no mines; place your Planetary Institute on any red planet after all other players place mines. You can have only one single growing federation throughout the game (target power = 7X, where X is federation tokens owned + 1). Pay 1 Q.I.C. per satellite instead of power.
- Planetary Institute: Special action to place a space station (counts as 1 power and range extension).
Geodens (Volcanic – Orange)
- Ability: None.
- Planetary Institute: Gain 3 knowledge the first time you colonize each planet type.
Bal T’aks (Volcanic – Orange)
- Ability: Cannot advance in Navigation. Free action: Move a Gaiaformer to Gaia area to gain 1 Q.I.C.
- Planetary Institute: You can now advance in the Navigation research area.
Firaks (Titanium – Gray)
- Ability: None.
- Planetary Institute: Action: Downgrade a Research Lab to a Trading Station to immediately advance one level in any research area.
Bescods (Titanium – Gray)
- Ability: Planetary Institute and Academies swapped. Once per round as an action, advance your lowest-level token on the research board for free.
- Planetary Institute: Structures on gray planets have +1 power value.
Nevlas (Ice – White)
- Ability: Free action: Move 1 power token from area III to Gaia area to gain 1 knowledge.
- Planetary Institute: Power tokens in area III count as 2 power when spent.
Itars (Ice – White)
- Ability: When burning power (moving area II to III), place discarded tokens in Gaia area instead of supply.
- Planetary Institute: During Gaia phase, discard 4 power from Gaia area to gain a tech tile.
Appendix II: Research Board Areas
- Terraforming: Decreases ore cost per terraforming step (Level 0–1: 3 ore; Level 2: 2 ore; Level 3–5: 1 ore). Level 1 & 4 grant 2 ore. Level 5 grants the Terraforming federation token.
- Navigation: Increases basic range (Level 0–1: range 1; Level 2–3: range 2; Level 4: range 3; Level 5: range 4). Levels 1 & 3 grant 1 Q.I.C. Level 5 places the Lost Planet.
- Artificial Intelligence: Grants immediate Q.I.C. (Level 1: 1 QIC; Level 2: 1 QIC; Level 3: 2 QIC; Level 4: 2 QIC; Level 5: 4 QIC).
- Gaia Project: Decreases power cost to start Gaia Projects (Level 1–2: 6 power; Level 3: 4 power; Level 4–5: 3 power). Levels 1, 3, and 4 grant a Gaiaformer. Level 2 grants 3 power tokens. Level 5 grants 4 VP + 1 VP per colonized Gaia planet.
- Economy: Grants round income (Level 1: 2 credits, 1 charge; Level 2: 1 ore, 2 credits, 2 charge; Level 3: 1 ore, 3 credits, 3 charge; Level 4: 2 ore, 4 credits, 4 charge; Level 5: immediate 3 ore, 6 credits, 6 charge).
- Science: Grants round income in knowledge (Level 1: 1 knowledge; Level 2: 2 knowledge; Level 3: 3 knowledge; Level 4: 4 knowledge; Level 5: immediate 9 knowledge).
Appendix III: Power and Q.I.C. Action Spaces
- Power Action 1 (3/4/5/7 power): Gain resources (e.g. 2 knowledge, 2 ore, 7 credits, or 2 power tokens).
- Power Action 2 (4 or 5 power): Take 1 or 2 free terraforming steps and build a mine.
- Q.I.C. Action 1 (4 Q.I.C.): Immediately gain a tech tile (standard or advanced).
- Q.I.C. Action 2 (3 Q.I.C.): Score one of your federation tokens again (gain its VP and resources an additional time).
- Q.I.C. Action 3 (2 Q.I.C.): Gain 3 VP + 1 VP per different planet type colonized.
Appendix IV: Round Boosters
- Income: 1 ore, 1 knowledge.
- Income: 2 credits, 1 Q.I.C.
- Income: 2 power tokens, 1 ore.
- Income: 2 credits. Special Action: Build a mine with 1 free terraforming step.
- Income: Charge 2 power. Special Action: Build a mine or start Gaia project with +3 range.
- Income: 1 ore. Passing bonus: 1 VP per mine on the board.
- Income: 1 knowledge. Passing bonus: 3 VP per research lab on the board.
- Income: 1 ore. Passing bonus: 2 VP per trading station on the board.
- Income: Charge 4 power. Passing bonus: 4 VP per planetary institute and academy on the board.
- Income: 4 credits. Passing bonus: 1 VP per colonized Gaia Planet.
Appendix V: Round Scoring Tiles
Each tile scores bonus VP during its round when performing the shown action:
- Gain 2 VP when you build a mine.
- Gain 3 or 4 VP when you upgrade to a trading station.
- Gain 5 VP when you upgrade to an academy or planetary institute.
- Gain 3 or 4 VP when you build a mine on a Gaia Planet.
- Gain 2 VP when you advance in a research area.
- Gain 5 VP when you gain a federation token.
- Gain 2 VP for each terraforming step taken.
Appendix VI: Tech Tiles
Tech tiles trigger benefits based on specific timings and conditions:
- Immediate: Gain resources when tile is taken.
- Income (Phase I): Gain resources every round.
- Triggered: Gain VP/resources whenever a condition is met (e.g. colonizing a Gaia planet, advancing in research).
- Passing: Gain VP when passing based on federations owned, planet types colonized, etc.
- Special Action: Once per round action (e.g., gain 1 Q.I.C. and 5 credits).
- Passive value modifier: e.g., Increases Planetary Institute and Academy power value to 4.

