
Last Will
2011
Race to squander your wealth through lavish properties, extravagant events, and costly companions before your rivals do.
75
minutes
2 - 5
player(s)
14+
Medium


About this board game
Last Will is a 2011 board game for 2–5 players that takes about 75 minutes. You are competing for a rich uncle’s inheritance by spending your fortune faster than the other heirs.
Each player begins with money, an individual player board, two errand boys, and cards representing properties and helpers. Every round, cards from the property, companion, event, helper, and expense decks are placed on offering boards, while special cards form a separate deck.
Before taking actions, players choose a plan for the round. The plan determines how many cards they draw, how many errand boys they can use, how many actions they receive, and their position in the playing order.
- Take displayed cards or draw from a regular deck.
- Visit the opera and spend money.
- Adjust property-market value modifiers.
- Take a player-board extension for additional card space.
During the action phase, players use cards to turn money into expenses. One-time events, recurring expenses, helpers, companions, and properties all offer ways to increase spending. Companions can join events or recurring expenses, while helpers and special cards provide unique powers.
Properties can depreciate, but selling them usually puts money back into your hands. Managing the property market and timing depreciation can therefore be essential to escaping your wealth. At the end of each round, players discard down to two cards and apply property depreciation.
In Last Will, bankruptcy ends the game at the conclusion of the round when a player has no money and no properties. Otherwise, the game ends after seven rounds, and the player with the least money—or the most debt—wins.

Board Game Rules for
Last Will
of Vladimír Suchý
Your uncle has died. Hooray!
This is your chance to become rich. You never knew your uncle, but you have heard stories. He was one of those millionaires who achieved staggering wealth during the development of Victorian England. He was also a bit of a hermit, too focused on his business to have any friends. On his deathbed he surveyed his vast riches and realised that he never took the time to enjoy them. And so he decided to leave his fortune to his most competent relative – the one who is the best at enjoying the pleasures money can bring. In his last will, your uncle stated that each surviving relative will receive a certain amount. Whoever can spend that amount the fastest will get the rest of the fortune. But don’t think that spending all that money will be as easy as it seems.
Goal of the Game
Your goal is to spend all your money as fast as you can, in accordance with your uncle’s last will.
Components
- Game board consisting of:
- double-sided planning board (side for 2–3 players / side for 4–5 players)
- double-sided card offering board (side for 2–3 players / side for 4–5 players)
- double-sided supplemental card offering board (side for 3 players / side for 5 players)
- 5 player boards and 12 player board extensions
- 140 cards:
- events
- helpers and expenses
- properties
- companions
- special cards
- wild cards
- last will
- 4 property market modifier tokens
- wooden errand boy figures shaped like hats (2 per player)
- wooden action counters (1 per player)
- wooden planning markers (1 per player)
- wooden companion tokens in 4 colours: dogs, horses, guests, chefs
- wooden property value markers shaped like houses
- wooden starting player marker
- wooden round counter
- money tokens in various denominations


- Place the planning board and the card offering board in the centre of the table. The numbers in the scrolls on the right hand side of the boards tell you which side to use, depending on the number of players. In a 3 or 5-player game, you will also need the supplemental card offering board, with the appropriate side face-up.
- Put the round counter on the “Round 1” space on the planning board. Place the 4 modifier tokens on the property market section of the planning board in a random order.
- Shuffle each regular deck of cards and place them face down near the game boards where all players can reach them. There are 4 regular decks, distinguished by their backs:
- Events – Cream-coloured cards with a cyclist.
- Helpers and Expenses – Wine-coloured cards with a gentleman.
- Properties – Sepia-coloured cards with a house.
- Companions – Slate-coloured cards with a lady and a dog.
- Other cards cannot be drawn directly, but only become available through the card offering board:
- Special Cards – Wine-coloured cards marked with crowns. These should be separated into 3 decks according to the number of crowns. Shuffle each deck separately and stack them so that all the 1-crown cards are on top, all the 2-crown cards are in the middle, and all the 3-crown cards are on the bottom. Place this combined deck near the card offering board.
- Companion Wild Cards – These are a special type of companion card. Place two wild cards near the card offering board.
- One deck of cards is only used at the beginning of the game:
- Last Will Cards – Leave these in the box for your first game. In later games, you may draw 1 of these cards at random to determine how much money players start with.
- Make a bank near the centre of the table for companion tokens, property value markers, money, and player board extensions. Leave space for discard piles for each type of card.
- Each player chooses a colour and takes 1 player board, 2 errand boy figures, and 1 planning marker in that colour. Each player also takes 1 grey action counter and places it on his or her player board on the zero space. In a 2-player game, each player will also need an additional planning marker. Choose from the colours not in the game.
- All players start with the same amount of money. For your first game, each player takes 70 pounds from the bank. For variety, you may instead choose the starting amount randomly by drawing 1 of the last will cards, but 70 pounds is a good number for players learning the game.
- Each player draws 3 cards from the helpers and expenses deck and 3 from the properties deck. From these 6 cards, each player chooses 2 (not necessarily one of each) and discards the others face-down to the appropriate discard piles after phase 1 of the first round.
- The starting player marker goes to the player who paid for something most recently.

A game will have at most 7 rounds. Each round has 5 phases:
- Setup
- Planning
- Errands
- Actions
- End of Round
If any player manages to get rid of all their money during any round of the game, the round is still played in full.
Phase 1: Setup
First you need to know what opportunities are available.
Deal one card onto each space of the card offering board. The icons indicate which type of card should be dealt where. On some spaces, the same deck will be used every round. On others, the deck changes as the game progresses:
- 1st and 2nd round: property card
- 3rd and subsequent rounds: event card
In the first round, after the setup, each player chooses only two cards from their hand to keep and discards the rest, face-down, to the appropriate discard pile.


Phase 2: Planning
This is when you decide how many opportunities you want to consider, how many errands you need to have done for you, and how much of the day you will set aside for enjoying your money.
Beginning with the starting player and continuing clockwise, each player makes a plan for the day by placing his or her planning marker on one of the hourglass spaces of the planning board.
Your choice determines:
- The number of cards you draw (you take them immediately).
- The number of errand boys you will have in the errand phase.
- The number of actions you will have in the action phase.
- The order in which you will play for the remainder of the round.
As soon as you declare your plan, draw the indicated number of cards. You may draw cards in any combination from the tops of the 4 regular decks. You cannot draw from the deck of special cards (with crowns on the backs). You cannot draw from the cards on the card offering board. (Those can only be taken in the errand phase.) You must make all your decisions concerning how many cards to draw from each deck before you know what cards you have drawn; i.e. do not look at any of your new cards until you have drawn all of them.
If a regular deck runs out of cards, shuffle that deck’s discard pile and use it to make a new deck. (The deck of special cards will have enough to last to the end of the game.)
Further phases of the round will be played according to the order of the tokens on the plan of the day board. The first player will be that who has their planning marker in the leftmost position, the last player will be the one with the rightmost planning token.
Note: The start player marker does not change, even if another player is temporarily the ‘first player’ for this round.
Example of a 5-player game
Red is the starting player, and the players are sitting in this order: Red, Purple, Blue, Yellow and Green.
At the end of the planning phase, the board looks like this:

Each player drew his or her cards immediately after choosing a plan. For the remaining phases of this round, players will play in this order: Purple, Yellow, Blue, Green, Red.
Planning in a 2-player game
In a 2-player game, the starting player begins the planning phase by placing one of the non-player planning markers on the board to block one of the plans. The other player places the other non-player planning marker on the board to block another plan and then chooses an available plan and draws his or her cards. Finally, the starting player chooses one of the remaining plans and draws cards. The non-player planning markers have no other effect this round.
Example of a 2-player game
Green is the starting player for this round. She uses the red planning marker to block one of the options:

Now it is Yellow’s turn. He uses the blue planning marker to block another option and then chooses a plan, with this result:

Yellow draws 2 cards. Now it is Green’s turn to choose a plan:

Green draws 7 cards, and the planning phase is done. Yellow will start the errand phase because his token is farther to the left.
Phase 3: Errands
Now that you have your plan for the day, you need to send out your errand boys to get you the best reservations, arrange the most expensive entertainments, and manipulate the prices of the properties you intend to deal in.
Players take turns beginning with the player whose plan is farthest to the left and proceeding in the order determined by the planning board. When it is your turn, you place one of your errand boy figures on one of the errand opportunities (explained below) and immediately perform that errand. You cannot choose a space that is already occupied by an errand boy figure.
Once everyone has placed one errand boy (and taken care of that errand), players take turns placing their second errand boy according to the same rules.
NOTE: Some plans have only one errand boy symbol. Players who chose these plans only place one errand boy figure. They do not get a turn when the other players take turns choosing their second errands.
Errand Opportunities
- Card Offering – Take the card corresponding to the space where you placed your errand boy figure. Note that on the card offering board for 2 or 3 players, two spaces correspond to three cards. The first player to place their figure on one of these spaces takes any one of the three cards. The player who chooses the remaining space chooses one of the two remaining cards. The final card cannot be taken.
- Player Board Extensions – Take one of the player board extensions from the bank (if there are any left) and put it on the right end of your player board. This will function as part of your player board for the rest of the game, giving you space to put down one more card. A player may have more than one player board extension.
- Property Market – You may rearrange the four property market modifier tokens in any order you like. You may also choose not to change them at all.
- Unknown Card – You may draw one card from any of the four regular decks (but not from the deck of special cards). To indicate that all players can use this errand once per round, the board has a space for each colour. You choose this errand by putting your figure on the space with your colour. It is not possible for you to choose this errand twice in the same round.
- Opera – Spend 2 pounds.


Phase 4: Actions
After the planning and errand phases, you will have some cards in your hand that will help you spend money. This phase is your chance to use them.
At the start of this phase, put your action counter on the space corresponding to the number of actions your chosen plan gives you. (Note: The numbers on your board exceed the maximum available from the planning board because some cards may give you additional actions.)
Players then play in turn, beginning with the one whose plan is farthest to the left and proceeding in the order determined by the planning board. Each player gets one turn to use as many cards as he or she wishes.
When it is your turn, you may play cards from your hand and activate cards you have played on your player board. A card will indicate how many actions it uses. If you play or activate a card that requires actions, move your action counter to indicate the number of actions used. If you don’t have enough actions remaining, you can’t use that card.
Some cards on your player board might not use any actions. You may use these any time during your turn, even if you have no actions left. Once you are done using your cards, inform the next player that it is his or her turn.
For details on how the cards work, see the section on Using Cards.

Phase 5: End of Round
Things fall apart. But now that works in your favour.
Once everyone is done playing actions, it is time to end the round. This phase has several steps, which all players can handle simultaneously:
- Discard Down to Two – You may only keep 2 cards in your hand for the next round. Discard those you choose not to keep. You are not allowed to keep a companion wild card in your hand. Even if you only have 1 or 2 cards left, you must return the companion wild card to the card offering board.
- Depreciate Properties – Properties that can depreciate have a scale printed on the card indicating the current state of repair. Any such property that was not maintained during the action phase will depreciate. Move the value marker down one space. If the value marker is on the lowest space (or if the property has no scale) the property does not depreciate. Even properties acquired this round will depreciate unless they were maintained. A property that was maintained (indicated by sliding the card so that the check mark is visible) will not depreciate in value this round.
- Reset Cards – Reset any activated cards on your player board so that they cover their check marks again.
- Clean Up Card Offering Board – All cards remaining on the card offering board should be moved to their discard piles. Special cards do not have a discard pile and should be placed in the box as they will not be used anymore in the game.
- Return Marker and Figures – Remove all planning markers and errand boy figures from the game boards and return them to the players.
- Move Round Counter – Move the round counter down to the next number.
- Pass On Starting Player Marker – The player with the starting player marker passes it to the left.


The decks are organised according to their backs, but the way a card is used is indicated on its front:
- White-bordered cards are used once and discarded.
- Black-bordered cards are played onto your player board.
- Slate-bordered cards are used in conjunction with other cards.
A card may also have a symbol in its upper left corner to indicate how it interacts with other cards.
Note: The colour of the symbol in the upper left (black on white or vice versa) has no effect on the game.

White-Bordered Cards
These cards represent experiences on which you can spend your uncle’s money. You can go out to dinner, you can take in a play, or you can go for a day trip. Because you want to spend as much as possible, it can be helpful to take a guest along to dinner, ride your horse to the theatre, or take your dog on the day trip. The faster you spend it, the sooner you can achieve your dream of bankruptcy.
When you play a white-bordered card, move your action counter to indicate the number of actions used and spend the number of pounds indicated in the coin symbol(s) of the card. Discard it to the appropriate discard pile.
Basic Cards
When you play a basic white-bordered card, such as Dinner, Carriage Ride, Boat Trip, Theatre, or Soirée, the number of actions used and the amount spent are indicated in the upper left corner.

Cards With Companions
Some events allow you to bring a guest, bring your dog, ride there on your horse, or choose your own chef. These have options to indicate the amount of additional money you spend if you play that type of (slate-bordered) companion card.
To play a white-bordered card with a companion card, use the indicated number of actions and spend the number of pounds indicated on the top-most coin plus the amount indicated on the coin corresponding to that type of companion. (The plus sign on the coin reminds you of this rule.) Discard the event card and the companion card.
If an event card allows multiple types of companions, you may use more than one of the options if you have the corresponding companion cards. The order of the companions does not matter on a white-bordered card. All companion cards played are discarded.
You may play such a card even without companions. Simply use the indicated number of actions and spend the number of pounds indicated on the top-most coin.

Savouring the Experience
Some white-bordered cards allow you to spend more actions, prolonging the experience and further diminishing your bank account. Choose one of the options, use the indicated number of actions, and spend the indicated number of pounds.

Black-Bordered Cards
To play a black-bordered card you must have an open space on your player board. If you have no open space, you may open up a space by discarding one of the black-bordered cards you played earlier in the game. You may even discard one that you have already activated this round. You can also discard a card that you played earlier in this round. This discarding uses no actions.
Exception: A property cannot be discarded this way.
Laying down a black-bordered card always uses at least one action. The  symbol on each space of your player board reminds you of this rule. In addition, you must pay any cost indicated in the upper left corner.
Cards on your player board can be activated any time during your action phase turn, even if they are new this round. A card can only be activated once per round. To indicate that a card has been activated, slide it down to reveal the check-mark symbol  . A card moved this way cannot be activated again this round.
When you activate a card, do what is indicated in the upper right corner. Some activations require you to use actions and some do not. If the card does not require actions, you may activate it even when all your actions have been used.


Expenses
It is fine to dine out and spend your money, but it is even finer to make reservations and pay for the meal whether you arrive or not.
Expenses are like events, except that you can use them round after round. When you activate an expense, do what is depicted in the upper right corner. Some expenses require you to use actions, but many do not.
Some expenses allow you to bring along one or more companions, as indicated by a symbol next to a coin. You must have a companion token sitting next to this option if you want to use it. Placing such tokens is described in the section on slate-bordered cards. If you do have a token there, then you have the option to spend that amount of money. The uppermost option (with no companion symbol) is always available.

Helpers
Helpers are not necessarily people you would normally associate with. Some of these scoundrels are actually stealing from you. Fortunately, their frauds are so artful that your uncle’s lawyers will mistake their services for legitimate expenses, so these con artists can be very helpful indeed.
A helper card has two independent parts:
- The upper part works the way expenses do: If the card has anything in the upper right corner, you can activate it (slide it down) and pay that amount.
- The lower part gives you a certain privilege that differs from the usual rules of play. The privilege can be used whenever it applies, whether the card has been activated or not. The privilege is not mandatory. You can choose to take advantage of it or not.
Individual cards are explained in the appendix on the back page of this rulebook.

Properties
Under normal circumstances, you would want to keep your properties in good order. Under the terms of your uncle’s will, however, maintenance and decay are both good. Proper upkeep can cost a lot of money, but if you don’t want to put in the effort, just let it rot. As the place declines in value, your chances of winning increase.
Properties are unlike the other black-bordered cards. You cannot simply discard them to make space for new cards. They must be sold on the property market. Furthermore, you cannot declare bankruptcy (and fulfil the terms of your uncle’s will) as long as you own properties.
Properties fall into four types, distinguished by the symbol in the upper left corner of the card:
- Mansions, town houses, and manor houses have the same symbol
 distinguished by colour.
- Properties with the green symbol
 are farms.
To purchase a property:
- Use one action and pay the price indicated on the highest banknote symbol in the upper left corner, adjusted by the modifier token in the corresponding space of the property market.
- Play the card on an open space of your player board.
- If it is not a farm, place a value marker next to the highest banknote symbol to indicate its current value. The property can lose its value every turn if you do not maintain it by activating it. Farms do not depreciate, so they do not get a property value marker. Fortunately, you can still spend money to maintain them.


Maintaining a property is just like activating an expense card. You use the number of actions and spend the number of pounds indicated in the upper right corner. Some properties allow you to add companion tokens which give you the option to spend more during maintenance. When you maintain a property, slide the card down to indicate (with the symbol) that it has been activated. Maintained properties will not depreciate at the end of the round. (Depreciation is explained in the section on the end of round phase, above.)
Note that maintaining a property does not make its value increase. Maintenance prevents the value marker from moving down the scale, but nothing can make the marker move up the scale.
You cannot go bankrupt while you own a property. However, you cannot simply discard a property; it must be sold on the property market. To sell a property, use an action, discard the property, and take money from the bank. The price is indicated by the banknote next to the value marker (or by the only banknote in the case of a farm) adjusted by the modifier token on the corresponding space of the market.
Sold properties are put on the properties discard pile. If a property’s adjusted price is 0 or less, you take no money when you sell it. You do not lose money if you sell it for less than 0.


Slate-Bordered Cards (Companions)
These cards give you convenient ways to spend extra money. Why not take your dog to dinner? Or ride your horse to the theatre? Or invite a lady on a carriage ride? And good chefs are so rare (and expensive) that you will want to take one of your own everywhere you go.
Slate-bordered companion cards come in 4 types: chefs, guests, dogs, and horses. These cards do not get played alone. They must be played in combination with a white or black-bordered card.
As explained above, a companion card allows you to spend more money when playing certain white-bordered cards. Once played, the cards are discarded.
Companions can also be used with certain black-bordered cards. If the upper right portion of a black-bordered card has multiple options marked with companion icons ( ,
 ,
 ,
 ) then you may add a companion token to it.

The black-bordered card must be in play on your player board. (It does not matter whether it is new this round or if it was played earlier.) A companion token can only be added to the uppermost empty space with a companion symbol. (This is unlike the white-bordered cards, where the order printed on the card does not matter.) The order is on black-bordered cards indicated by the arrows.
To add a companion to the uppermost empty space:
- Discard a slate-bordered card corresponding to the space’s symbol.
- Use one action.
- Place a token of the corresponding colour on that space. (To remind you that it costs an action, the space where you put the token is marked with the symbol .)
If you have enough actions and matching companion cards, you can fill in as many of the companion spaces as you like, but they must be filled in order, from top to bottom. Each token gives you another option when you activate the card.
Companion tokens stay on black cards permanently. Tokens are not movable. When a player discards a black card from his board, he also removes all tokens on it.


Companion Wild Card
The companion wild card can be used as any one of the four types of companion cards. It is not part of the companion deck. Instead it is among the card offerings every round. When you discard it, return it to the card offering board.
If you do not use the companion wild card during the action phase, you must return it to the card offering board at the end of the round.

Special Cards
Special cards, the ones with the crowns on the back, can be white-bordered or black-bordered. They tend to be a bit more powerful than the cards in the regular decks. Some of them, such as Hectic Day, are completely unlike the cards in the regular decks. These are explained on the back page of this rule book. When special cards are discarded, it is a good idea to return them to the box so that they won’t accidentally get shuffled in with the regular cards.
Unlike certain governments, players are only allowed to spend the money they have.
As long as you own a property, you are not allowed to go into debt. In other words, you cannot use a card effect that makes you spend more money than you have left. In this situation, you need to sell your properties before you can spend any more.
Once you have no properties, you are ready to go bankrupt. At the point where you are about to spend money to reduce your total to zero or less, you announce to the other players that you are declaring bankruptcy. If you still have cards and actions that you can use, you may continue to do so to run up a debt.
Money is not kept secret in this game. When asked, players must tell each other how much they have left.

Your houses are falling down, your racing dog never gets out of the starting gate, your favourite restaurant is overcharging you for every meal, and now you are debt. Congratulations! You win!
When a player has no money and no properties, he or she declares bankruptcy, which signals the end of the game. That round is played out to the end, but it is the final round. If no one declares bankruptcy in the first six rounds, then the seventh round is the final round.
The winner is the player who ran up the biggest debt. (See Spending Money, above.) If no one went into debt, the winner is the player who has the least money and property. For this comparison, properties are valued at their current value plus 5 pounds. (Your helper cards and the modifier tokens in the property market do not apply.) Ties are broken in favour of the player who chose the plan farther to the left in the final round.
Expenses
 Use 1 action and spend 4 pounds.
 Spend 2 pounds.
 Spend 2 pounds for every farm you have.
 Spend 2 pounds for every horse token you have on farms.
 Spend 1 pound for every farm you have and 1 pound for every dog token on them.
Events
 Use one action to place up to two animal tokens (2 dogs, 2 horses, or 1 of each). Tokens must be added in order, as usual.
- Use one action to gain three actions.
 Use 1 action and spend 2 pounds to gain 2 actions.
 Choose one option. Use that many actions and spend that many pounds.
 Use one action to depreciate your properties three times. You may depreciate the same property more than once.
Helpers
 Once per round, you may buy/sell a farm without an action. A farm may also be 2 pounds cheaper.
 Twice every round you may buy/sell a Mansion, Manor House or Town House without an action.
 While buying/selling a Mansion, Manor House or Town House, you may increase or decrease their price by 2 pounds.
 Once per round, you may activate a farm without using an action.
 Once per round, you may activate a Mansion, Manor House or Town House without an action.
 When you activate a property of either indicated type, you may spend an additional 3 pounds.
 When you use a card with the silverware symbol, you may spend 1 extra pound.
 When you use a card with the coach symbol, you may spend the indicated number of extra pounds.
 When you use a card with the mask symbol or send an errand boy to the opera, you may spend an extra 3 pounds.
 When you use a card with the helm symbol or the wine glass symbol you may spend 2 extra pounds.
 Each round, you have one extra action. This applies in the same round in which this helper comes into play.
 Once per round, you have one extra action for playing white-bordered cards.
 Each round, when you draw cards during planning, you draw 2 extra cards (as though the number for your chosen plan were 2 higher).
 Each round, when you draw cards during planning, you draw 3 extra event cards.
 Each round, when you draw cards during planning, you draw 3 extra companion cards.
 When discarding cards at the end of a round, you may keep an additional 2 cards in hand for each helper you have with this icon.
Credits
Designer: Vladimír Suchý
Main illustrator: Tomáš Kučerovský
Card illustrations: Václav Šlajch, Ján Lastomírský
Graphic design: František Horálek
Rules: Petr Murmak, Filip Murmak
Main tester: Petr Murmak
Testers: my wife Katka, Petr Holub, Vodka, Roneth, Rumun, Láďa Smejkal, Filip Murmak, Vláďa Chvátil, Miloš Procházka, dilli, Miloš Dubský, Radka, Vítek Vodička and many others.
Special thanks to: Paul Grogan, Phil Pettifer, David Murray and people from The Gathering of Friends.
© Czech Games Edition, October 2011
www.CzechGames.com
Introduction and Components
of Vladimír Suchý
Your uncle has died. Hooray!
This is your chance to become rich. You never knew your uncle, but you have heard stories. He was one of those millionaires who achieved staggering wealth during the development of Victorian England. He was also a bit of a hermit, too focused on his business to have any friends. On his deathbed he surveyed his vast riches and realised that he never took the time to enjoy them. And so he decided to leave his fortune to his most competent relative – the one who is the best at enjoying the pleasures money can bring. In his last will, your uncle stated that each surviving relative will receive a certain amount. Whoever can spend that amount the fastest will get the rest of the fortune. But don’t think that spending all that money will be as easy as it seems.
Goal of the Game
Your goal is to spend all your money as fast as you can, in accordance with your uncle’s last will.
Components
- Game board consisting of:
- double-sided planning board (side for 2–3 players / side for 4–5 players)
- double-sided card offering board (side for 2–3 players / side for 4–5 players)
- double-sided supplemental card offering board (side for 3 players / side for 5 players)
- 5 player boards and 12 player board extensions
- 140 cards:
- events
- helpers and expenses
- properties
- companions
- special cards
- wild cards
- last will
- 4 property market modifier tokens
- wooden errand boy figures shaped like hats (2 per player)
- wooden action counters (1 per player)
- wooden planning markers (1 per player)
- wooden companion tokens in 4 colours: dogs, horses, guests, chefs
- wooden property value markers shaped like houses
- wooden starting player marker
- wooden round counter
- money tokens in various denominations
Game Setup
- Place the planning board and the card offering board in the centre of the table. The numbers in the scrolls on the right hand side of the boards tell you which side to use, depending on the number of players. In a 3 or 5-player game, you will also need the supplemental card offering board, with the appropriate side face-up.
- Put the round counter on the “Round 1” space on the planning board. Place the 4 modifier tokens on the property market section of the planning board in a random order.
- Shuffle each regular deck of cards and place them face down near the game boards where all players can reach them. There are 4 regular decks, distinguished by their backs:
- Events – Cream-coloured cards with a cyclist.
- Helpers and Expenses – Wine-coloured cards with a gentleman.
- Properties – Sepia-coloured cards with a house.
- Companions – Slate-coloured cards with a lady and a dog.
- Other cards cannot be drawn directly, but only become available through the card offering board:
- Special Cards – Wine-coloured cards marked with crowns. These should be separated into 3 decks according to the number of crowns. Shuffle each deck separately and stack them so that all the 1-crown cards are on top, all the 2-crown cards are in the middle, and all the 3-crown cards are on the bottom. Place this combined deck near the card offering board.
- Companion Wild Cards – These are a special type of companion card. Place two wild cards near the card offering board.
- One deck of cards is only used at the beginning of the game:
- Last Will Cards – Leave these in the box for your first game. In later games, you may draw 1 of these cards at random to determine how much money players start with.
- Make a bank near the centre of the table for companion tokens, property value markers, money, and player board extensions. Leave space for discard piles for each type of card.
- Each player chooses a colour and takes 1 player board, 2 errand boy figures, and 1 planning marker in that colour. Each player also takes 1 grey action counter and places it on his or her player board on the zero space. In a 2-player game, each player will also need an additional planning marker. Choose from the colours not in the game.
- All players start with the same amount of money. For your first game, each player takes 70 pounds from the bank. For variety, you may instead choose the starting amount randomly by drawing 1 of the last will cards, but 70 pounds is a good number for players learning the game.
- Each player draws 3 cards from the helpers and expenses deck and 3 from the properties deck. From these 6 cards, each player chooses 2 (not necessarily one of each) and discards the others face-down to the appropriate discard piles after phase 1 of the first round.
- The starting player marker goes to the player who paid for something most recently.
How to Play: Round Structure
A game will have at most 7 rounds. Each round has 5 phases:
- Setup
- Planning
- Errands
- Actions
- End of Round
If any player manages to get rid of all their money during any round of the game, the round is still played in full.
Phase 1: Setup
First you need to know what opportunities are available.
Deal one card onto each space of the card offering board. The icons indicate which type of card should be dealt where. On some spaces, the same deck will be used every round. On others, the deck changes as the game progresses:
- 1st and 2nd round: property card
- 3rd and subsequent rounds: event card
In the first round, after the setup, each player chooses only two cards from their hand to keep and discards the rest, face-down, to the appropriate discard pile.
Phase 2: Planning
This is when you decide how many opportunities you want to consider, how many errands you need to have done for you, and how much of the day you will set aside for enjoying your money.
Beginning with the starting player and continuing clockwise, each player makes a plan for the day by placing his or her planning marker on one of the hourglass spaces of the planning board.
Your choice determines:
- The number of cards you draw (you take them immediately).
- The number of errand boys you will have in the errand phase.
- The number of actions you will have in the action phase.
- The order in which you will play for the remainder of the round.
As soon as you declare your plan, draw the indicated number of cards. You may draw cards in any combination from the tops of the 4 regular decks. You cannot draw from the deck of special cards (with crowns on the backs). You cannot draw from the cards on the card offering board. (Those can only be taken in the errand phase.) You must make all your decisions concerning how many cards to draw from each deck before you know what cards you have drawn; i.e. do not look at any of your new cards until you have drawn all of them.
If a regular deck runs out of cards, shuffle that deck’s discard pile and use it to make a new deck. (The deck of special cards will have enough to last to the end of the game.)
Further phases of the round will be played according to the order of the tokens on the plan of the day board. The first player will be that who has their planning marker in the leftmost position, the last player will be the one with the rightmost planning token.
Note: The start player marker does not change, even if another player is temporarily the ‘first player’ for this round.
Example of a 5-player game
Red is the starting player, and the players are sitting in this order: Red, Purple, Blue, Yellow and Green.
At the end of the planning phase, the board looks like this:
Each player drew his or her cards immediately after choosing a plan. For the remaining phases of this round, players will play in this order: Purple, Yellow, Blue, Green, Red.
Planning in a 2-player game
In a 2-player game, the starting player begins the planning phase by placing one of the non-player planning markers on the board to block one of the plans. The other player places the other non-player planning marker on the board to block another plan and then chooses an available plan and draws his or her cards. Finally, the starting player chooses one of the remaining plans and draws cards. The non-player planning markers have no other effect this round.
Example of a 2-player game
Green is the starting player for this round. She uses the red planning marker to block one of the options:
Now it is Yellow’s turn. He uses the blue planning marker to block another option and then chooses a plan, with this result:
Yellow draws 2 cards. Now it is Green’s turn to choose a plan:
Green draws 7 cards, and the planning phase is done. Yellow will start the errand phase because his token is farther to the left.
Phase 3: Errands
Now that you have your plan for the day, you need to send out your errand boys to get you the best reservations, arrange the most expensive entertainments, and manipulate the prices of the properties you intend to deal in.
Players take turns beginning with the player whose plan is farthest to the left and proceeding in the order determined by the planning board. When it is your turn, you place one of your errand boy figures on one of the errand opportunities (explained below) and immediately perform that errand. You cannot choose a space that is already occupied by an errand boy figure.
Once everyone has placed one errand boy (and taken care of that errand), players take turns placing their second errand boy according to the same rules.
NOTE: Some plans have only one errand boy symbol. Players who chose these plans only place one errand boy figure. They do not get a turn when the other players take turns choosing their second errands.
Errand Opportunities
- Card Offering – Take the card corresponding to the space where you placed your errand boy figure. Note that on the card offering board for 2 or 3 players, two spaces correspond to three cards. The first player to place their figure on one of these spaces takes any one of the three cards. The player who chooses the remaining space chooses one of the two remaining cards. The final card cannot be taken.
- Player Board Extensions – Take one of the player board extensions from the bank (if there are any left) and put it on the right end of your player board. This will function as part of your player board for the rest of the game, giving you space to put down one more card. A player may have more than one player board extension.
- Property Market – You may rearrange the four property market modifier tokens in any order you like. You may also choose not to change them at all.
- Unknown Card – You may draw one card from any of the four regular decks (but not from the deck of special cards). To indicate that all players can use this errand once per round, the board has a space for each colour. You choose this errand by putting your figure on the space with your colour. It is not possible for you to choose this errand twice in the same round.
- Opera – Spend 2 pounds.
Phase 4: Actions
After the planning and errand phases, you will have some cards in your hand that will help you spend money. This phase is your chance to use them.
At the start of this phase, put your action counter on the space corresponding to the number of actions your chosen plan gives you. (Note: The numbers on your board exceed the maximum available from the planning board because some cards may give you additional actions.)
Players then play in turn, beginning with the one whose plan is farthest to the left and proceeding in the order determined by the planning board. Each player gets one turn to use as many cards as he or she wishes.
When it is your turn, you may play cards from your hand and activate cards you have played on your player board. A card will indicate how many actions it uses. If you play or activate a card that requires actions, move your action counter to indicate the number of actions used. If you don’t have enough actions remaining, you can’t use that card.
Some cards on your player board might not use any actions. You may use these any time during your turn, even if you have no actions left. Once you are done using your cards, inform the next player that it is his or her turn.
For details on how the cards work, see the section on Using Cards.
Phase 5: End of Round
Things fall apart. But now that works in your favour.
Once everyone is done playing actions, it is time to end the round. This phase has several steps, which all players can handle simultaneously:
- Discard Down to Two – You may only keep 2 cards in your hand for the next round. Discard those you choose not to keep. You are not allowed to keep a companion wild card in your hand. Even if you only have 1 or 2 cards left, you must return the companion wild card to the card offering board.
- Depreciate Properties – Properties that can depreciate have a scale printed on the card indicating the current state of repair. Any such property that was not maintained during the action phase will depreciate. Move the value marker down one space. If the value marker is on the lowest space (or if the property has no scale) the property does not depreciate. Even properties acquired this round will depreciate unless they were maintained. A property that was maintained (indicated by sliding the card so that the check mark is visible) will not depreciate in value this round.
- Reset Cards – Reset any activated cards on your player board so that they cover their check marks again.
- Clean Up Card Offering Board – All cards remaining on the card offering board should be moved to their discard piles. Special cards do not have a discard pile and should be placed in the box as they will not be used anymore in the game.
- Return Marker and Figures – Remove all planning markers and errand boy figures from the game boards and return them to the players.
- Move Round Counter – Move the round counter down to the next number.
- Pass On Starting Player Marker – The player with the starting player marker passes it to the left.
Using Cards
The decks are organised according to their backs, but the way a card is used is indicated on its front:
- White-bordered cards are used once and discarded.
- Black-bordered cards are played onto your player board.
- Slate-bordered cards are used in conjunction with other cards.
A card may also have a symbol in its upper left corner to indicate how it interacts with other cards.
Note: The colour of the symbol in the upper left (black on white or vice versa) has no effect on the game.
White-Bordered Cards
These cards represent experiences on which you can spend your uncle’s money. You can go out to dinner, you can take in a play, or you can go for a day trip. Because you want to spend as much as possible, it can be helpful to take a guest along to dinner, ride your horse to the theatre, or take your dog on the day trip. The faster you spend it, the sooner you can achieve your dream of bankruptcy.
When you play a white-bordered card, move your action counter to indicate the number of actions used and spend the number of pounds indicated in the coin symbol(s) of the card. Discard it to the appropriate discard pile.
Basic Cards
When you play a basic white-bordered card, such as Dinner, Carriage Ride, Boat Trip, Theatre, or Soirée, the number of actions used and the amount spent are indicated in the upper left corner.
Cards With Companions
Some events allow you to bring a guest, bring your dog, ride there on your horse, or choose your own chef. These have options to indicate the amount of additional money you spend if you play that type of (slate-bordered) companion card.
To play a white-bordered card with a companion card, use the indicated number of actions and spend the number of pounds indicated on the top-most coin plus the amount indicated on the coin corresponding to that type of companion. (The plus sign on the coin reminds you of this rule.) Discard the event card and the companion card.
If an event card allows multiple types of companions, you may use more than one of the options if you have the corresponding companion cards. The order of the companions does not matter on a white-bordered card. All companion cards played are discarded.
You may play such a card even without companions. Simply use the indicated number of actions and spend the number of pounds indicated on the top-most coin.
Savouring the Experience
Some white-bordered cards allow you to spend more actions, prolonging the experience and further diminishing your bank account. Choose one of the options, use the indicated number of actions, and spend the indicated number of pounds.
Black-Bordered Cards
To play a black-bordered card you must have an open space on your player board. If you have no open space, you may open up a space by discarding one of the black-bordered cards you played earlier in the game. You may even discard one that you have already activated this round. You can also discard a card that you played earlier in this round. This discarding uses no actions.
Exception: A property cannot be discarded this way.
Laying down a black-bordered card always uses at least one action. The symbol on each space of your player board reminds you of this rule. In addition, you must pay any cost indicated in the upper left corner.
Cards on your player board can be activated any time during your action phase turn, even if they are new this round. A card can only be activated once per round. To indicate that a card has been activated, slide it down to reveal the check-mark symbol . A card moved this way cannot be activated again this round.
When you activate a card, do what is indicated in the upper right corner. Some activations require you to use actions and some do not. If the card does not require actions, you may activate it even when all your actions have been used.
Expenses
It is fine to dine out and spend your money, but it is even finer to make reservations and pay for the meal whether you arrive or not.
Expenses are like events, except that you can use them round after round. When you activate an expense, do what is depicted in the upper right corner. Some expenses require you to use actions, but many do not.
Some expenses allow you to bring along one or more companions, as indicated by a symbol next to a coin. You must have a companion token sitting next to this option if you want to use it. Placing such tokens is described in the section on slate-bordered cards. If you do have a token there, then you have the option to spend that amount of money. The uppermost option (with no companion symbol) is always available.
Helpers
Helpers are not necessarily people you would normally associate with. Some of these scoundrels are actually stealing from you. Fortunately, their frauds are so artful that your uncle’s lawyers will mistake their services for legitimate expenses, so these con artists can be very helpful indeed.
A helper card has two independent parts:
- The upper part works the way expenses do: If the card has anything in the upper right corner, you can activate it (slide it down) and pay that amount.
- The lower part gives you a certain privilege that differs from the usual rules of play. The privilege can be used whenever it applies, whether the card has been activated or not. The privilege is not mandatory. You can choose to take advantage of it or not.
Individual cards are explained in the appendix on the back page of this rulebook.
Properties
Under normal circumstances, you would want to keep your properties in good order. Under the terms of your uncle’s will, however, maintenance and decay are both good. Proper upkeep can cost a lot of money, but if you don’t want to put in the effort, just let it rot. As the place declines in value, your chances of winning increase.
Properties are unlike the other black-bordered cards. You cannot simply discard them to make space for new cards. They must be sold on the property market. Furthermore, you cannot declare bankruptcy (and fulfil the terms of your uncle’s will) as long as you own properties.
Properties fall into four types, distinguished by the symbol in the upper left corner of the card:
- Mansions, town houses, and manor houses have the same symbol distinguished by colour.
- Properties with the green symbol are farms.
To purchase a property:
- Use one action and pay the price indicated on the highest banknote symbol in the upper left corner, adjusted by the modifier token in the corresponding space of the property market.
- Play the card on an open space of your player board.
- If it is not a farm, place a value marker next to the highest banknote symbol to indicate its current value. The property can lose its value every turn if you do not maintain it by activating it. Farms do not depreciate, so they do not get a property value marker. Fortunately, you can still spend money to maintain them.
Maintaining a property is just like activating an expense card. You use the number of actions and spend the number of pounds indicated in the upper right corner. Some properties allow you to add companion tokens which give you the option to spend more during maintenance. When you maintain a property, slide the card down to indicate (with the symbol) that it has been activated. Maintained properties will not depreciate at the end of the round. (Depreciation is explained in the section on the end of round phase, above.)
Note that maintaining a property does not make its value increase. Maintenance prevents the value marker from moving down the scale, but nothing can make the marker move up the scale.
You cannot go bankrupt while you own a property. However, you cannot simply discard a property; it must be sold on the property market. To sell a property, use an action, discard the property, and take money from the bank. The price is indicated by the banknote next to the value marker (or by the only banknote in the case of a farm) adjusted by the modifier token on the corresponding space of the market.
Sold properties are put on the properties discard pile. If a property’s adjusted price is 0 or less, you take no money when you sell it. You do not lose money if you sell it for less than 0.
Slate-Bordered Cards (Companions)
These cards give you convenient ways to spend extra money. Why not take your dog to dinner? Or ride your horse to the theatre? Or invite a lady on a carriage ride? And good chefs are so rare (and expensive) that you will want to take one of your own everywhere you go.
Slate-bordered companion cards come in 4 types: chefs, guests, dogs, and horses. These cards do not get played alone. They must be played in combination with a white or black-bordered card.
As explained above, a companion card allows you to spend more money when playing certain white-bordered cards. Once played, the cards are discarded.
Companions can also be used with certain black-bordered cards. If the upper right portion of a black-bordered card has multiple options marked with companion icons (, , , ) then you may add a companion token to it.
The black-bordered card must be in play on your player board. (It does not matter whether it is new this round or if it was played earlier.) A companion token can only be added to the uppermost empty space with a companion symbol. (This is unlike the white-bordered cards, where the order printed on the card does not matter.) The order is on black-bordered cards indicated by the arrows.
To add a companion to the uppermost empty space:
- Discard a slate-bordered card corresponding to the space’s symbol.
- Use one action.
- Place a token of the corresponding colour on that space. (To remind you that it costs an action, the space where you put the token is marked with the symbol .)
If you have enough actions and matching companion cards, you can fill in as many of the companion spaces as you like, but they must be filled in order, from top to bottom. Each token gives you another option when you activate the card.
Companion tokens stay on black cards permanently. Tokens are not movable. When a player discards a black card from his board, he also removes all tokens on it.
Companion Wild Card
The companion wild card can be used as any one of the four types of companion cards. It is not part of the companion deck. Instead it is among the card offerings every round. When you discard it, return it to the card offering board.
If you do not use the companion wild card during the action phase, you must return it to the card offering board at the end of the round.
Special Cards
Special cards, the ones with the crowns on the back, can be white-bordered or black-bordered. They tend to be a bit more powerful than the cards in the regular decks. Some of them, such as Hectic Day, are completely unlike the cards in the regular decks. These are explained on the back page of this rule book. When special cards are discarded, it is a good idea to return them to the box so that they won’t accidentally get shuffled in with the regular cards.
Spending Money and Declaring Bankruptcy
Unlike certain governments, players are only allowed to spend the money they have.
As long as you own a property, you are not allowed to go into debt. In other words, you cannot use a card effect that makes you spend more money than you have left. In this situation, you need to sell your properties before you can spend any more.
Once you have no properties, you are ready to go bankrupt. At the point where you are about to spend money to reduce your total to zero or less, you announce to the other players that you are declaring bankruptcy. If you still have cards and actions that you can use, you may continue to do so to run up a debt.
Money is not kept secret in this game. When asked, players must tell each other how much they have left.
Ending the Game and Winning
Your houses are falling down, your racing dog never gets out of the starting gate, your favourite restaurant is overcharging you for every meal, and now you are debt. Congratulations! You win!
When a player has no money and no properties, he or she declares bankruptcy, which signals the end of the game. That round is played out to the end, but it is the final round. If no one declares bankruptcy in the first six rounds, then the seventh round is the final round.
The winner is the player who ran up the biggest debt. (See Spending Money, above.) If no one went into debt, the winner is the player who has the least money and property. For this comparison, properties are valued at their current value plus 5 pounds. (Your helper cards and the modifier tokens in the property market do not apply.) Ties are broken in favour of the player who chose the plan farther to the left in the final round.
Card Appendix and Credits
Expenses
- Use 1 action and spend 4 pounds.
- Spend 2 pounds.
- Spend 2 pounds for every farm you have.
- Spend 2 pounds for every horse token you have on farms.
- Spend 1 pound for every farm you have and 1 pound for every dog token on them.
Events
- Use one action to place up to two animal tokens (2 dogs, 2 horses, or 1 of each). Tokens must be added in order, as usual.
- Use one action to gain three actions.
- Use 1 action and spend 2 pounds to gain 2 actions.
- Choose one option. Use that many actions and spend that many pounds.
- Use one action to depreciate your properties three times. You may depreciate the same property more than once.
Helpers
- Once per round, you may buy/sell a farm without an action. A farm may also be 2 pounds cheaper.
- Twice every round you may buy/sell a Mansion, Manor House or Town House without an action.
- While buying/selling a Mansion, Manor House or Town House, you may increase or decrease their price by 2 pounds.
- Once per round, you may activate a farm without using an action.
- Once per round, you may activate a Mansion, Manor House or Town House without an action.
- When you activate a property of either indicated type, you may spend an additional 3 pounds.
- When you use a card with the silverware symbol, you may spend 1 extra pound.
- When you use a card with the coach symbol, you may spend the indicated number of extra pounds.
- When you use a card with the mask symbol or send an errand boy to the opera, you may spend an extra 3 pounds.
- When you use a card with the helm symbol or the wine glass symbol you may spend 2 extra pounds.
- Each round, you have one extra action. This applies in the same round in which this helper comes into play.
- Once per round, you have one extra action for playing white-bordered cards.
- Each round, when you draw cards during planning, you draw 2 extra cards (as though the number for your chosen plan were 2 higher).
- Each round, when you draw cards during planning, you draw 3 extra event cards.
- Each round, when you draw cards during planning, you draw 3 extra companion cards.
- When discarding cards at the end of a round, you may keep an additional 2 cards in hand for each helper you have with this icon.
Credits
Designer: Vladimír Suchý
Main illustrator: Tomáš Kučerovský
Card illustrations: Václav Šlajch, Ján Lastomírský
Graphic design: František Horálek
Rules: Petr Murmak, Filip Murmak
Main tester: Petr Murmak
Testers: my wife Katka, Petr Holub, Vodka, Roneth, Rumun, Láďa Smejkal, Filip Murmak, Vláďa Chvátil, Miloš Procházka, dilli, Miloš Dubský, Radka, Vítek Vodička and many others.
Special thanks to: Paul Grogan, Phil Pettifer, David Murray and people from The Gathering of Friends.
© Czech Games Edition, October 2011
www.CzechGames.com
Expansions for
Last Will
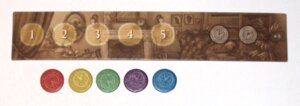
Last Will: Plan Order Board
2011
A clever order board that shapes planning and Errand Boy placement
45
minutes
Medium
View expansion
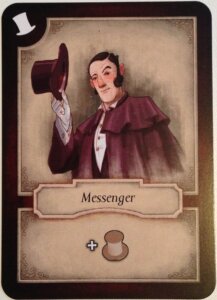
Last Will: Messenger Promo Card
2012
Add an extra Errand boy to Last Will with this two-card promo.
60
minutes
Medium
View expansion
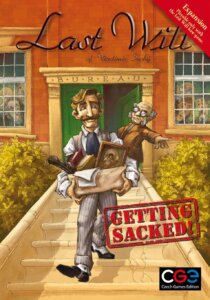
Last Will: Getting Sacked
2013
Lose your job, spend your fortune, and race toward inheritance.
75
minutes
Medium
View expansion
