
Root
2018
Lead a woodland faction with unique powers and goals in a richly interactive battle for control of the wilderness.
90
minutes
2 - 4
player(s)
14+
Medium Heavy


About this board game
Root is a 2–4 player game of adventure and war that plays in about 90 minutes, as rival factions battle for control of a vast wilderness.
Each player commands a group with unique capabilities and a different victory condition. This truly asymmetric design creates a contest where every role changes how the woodland conflict unfolds, while gorgeous, multi-use cards help make the experience accessible.
- Marquise de Cat: A nefarious ruler who has seized the great woodland and intends to harvest its riches.
- Woodland Alliance: A growing movement seeking to strengthen its resources and subvert Cat rule.
- Vagabonds: Wandering figures who can move through the more dangerous woodland paths and may sympathize with the Alliance.
- Eyrie: Proud, squabbling birds of prey hoping that a new commander will restore their ancient birthright.
In Root, players drive the narrative through the differences between their roles. The factions’ competing hopes, powers, and goals produce a high level of interaction and substantial replayability, with every contest offering a new struggle for the fate of the great woodland.
Whether you support the Cats, aid the Alliance, wander the forest as a Vagabond, or lead the Eyrie, the final outcome is decided by the players. Published in 2018, Root invites families and groups to explore a fantastic woodland world where only one faction can ultimately take root.
/pic7182955.jpg)
Board Game Rules for
Root
Using This Book
Root contains two rulebooks: this rules reference and the learning-to-play guide. If you like a conversational teaching style and many graphical examples, read the learning-to-play guide. If you like learning from strictly defined, formal rules in a concise reference style, read this book. The learning-to-play guide also contains instructions on using the winter map and playing with various faction mixes at all player counts.
Fifth Printing (July 13, 2020)
Text in small capitals defines key terms. Text in italics gives reminders and clarifications. Faction icons mark rules modified by Faction Rules and Abilities sections.
1. Golden Rules
1.1 Rules Conflicts
- 1.1.1 Precedence. If a card conflicts with the Law, follow the card. If the Learning to Play guide conflicts with the Law, follow the Law. If you can follow both a general rule and a faction rule, follow both; if you cannot, follow the faction rule.
- 1.1.2 Use of Cannot. The term cannot is absolute. It cannot be overridden unless explicitly instructed.
- 1.1.3 Simultaneous Effects. If two game effects occur simultaneously, the player taking the current turn chooses their order, unless explicitly instructed.
- 1.1.4 Use of Treat. If you are prompted to treat one thing as another, the former takes on all the properties of the latter. (For example, if you caused Outrage while treating yourself as another player, the other player would give the card.)
1.2 Public and Private Information
- 1.2.1 Hands. Players may only show or reveal cards in their hand if explicitly instructed, but the number of cards in their hand is public information.

- 1.2.2 Discard. The discard pile can be searched and inspected at any time.
1.3 Negotiation and Deals
- 1.3.1 Agreements. Players may discuss the game and make agreements, but they are non-binding.
- 1.3.2 Cards. Players may only give cards to each other if explicitly instructed.
1.4 Players and Factions
For simplicity, the Law refers to players, not factions. However, game effects (such as abilities and persistent effects) are properties of factions, not players. While controlling pieces of a faction they do not own, a player follows the rules of that faction unless explicitly instructed.
Reading the Law
These rules of thumb will help you interpret the Law.
Q1. I’d like to do something, and the rules don’t say that I can’t do it. Can I do it?
A1. Within the confines of the action, you can assume yes!
Q2. Can another player not consent to an action?
A2. Root has no actions that require consent. Just do the thing.
Q3. It seems like something should happen, but the rule doesn’t tell me to do that thing. What do I do?
A3. Follow the literal word of the Law, not your instinct.
Q4. A rule uses a specific term or action. Does it also include another, closely related term or action?
A4. Nope! Assume we mean only the original term and not any related terms. For example, “move” and “place” are different.
If you have any other questions, check our website for more answers: http://ledergames.com/root
2. Key Terms and Concepts
2.1 Cards
Each card has a suit: bird, fox, rabbit, or mouse. Most cards also have an effect you can craft (4.1).
- 2.1.1 Birds Are Wild. You can treat any bird card as a card of another suit, even if you must spend, take, or give multiple cards of the same suit.

- Forced Effects. If you are prompted to discard or give a fox, rabbit, or mouse card, you must treat your bird cards as the prompted suit.
- Reverse Substitution. If you are prompted to spend, discard, take, or give a bird card, you cannot substitute a card of another suit.
- 2.1.2 Drawing Cards. Whenever you are prompted to draw a card, take it from the shared deck. If the deck is ever empty, shuffle the discard pile immediately to form a new deck.
- 2.1.3 Spending and Discarding Cards. Whenever you are prompted to discard or spend a card, place it in the shared discard pile unless it is a dominance card (3.3).
- 2.1.4 Revealing Cards. Whenever you are prompted to reveal a card, place it in your play area (2.6).
- 2.1.5 Ambush Cards. There are five ambush cards: one mouse, one rabbit, one fox, and two birds. You may spend an ambush card for its suit, but it does not have a crafted effect. You may also play one in battle to deal hits (4.3.1).
- 2.1.6 Dominance Cards. There are four dominance cards matching the four suits. You may spend a dominance card for its suit, but it cannot be crafted. You may also play one to permanently change your victory condition (3.3).
2.2 Clearings and Paths
The map of the Woodland is composed of many clearings linked by paths.
- 2.2.1 Adjacency. A clearing is adjacent to all other clearings linked to it by a path.

- 2.2.2 Suit. Each clearing has a suit: mouse, rabbit, or fox.
- 2.2.3 Slots. Each clearing has a number of slots (white boxes). Whenever you place a building, it fills an open slot. You cannot place a building in a clearing with no open slots.
- 2.2.4 Ruins. Slots marked with a small “R” begin the game filled with ruins. Ruins can only be removed by the Vagabond’s Explore action (9.5.3).
2.3 Rivers
Many clearings are linked by rivers. By default rivers are not paths, but can be treated as paths if explicitly instructed. Rivers do not divide clearings or forests. 
2.4 Forests
Areas on the map enclosed by paths and clearings are called forests.
- 2.4.1 Adjacency. A forest is adjacent to all clearings that touch it without crossing a path, and it is adjacent to all forests that are separated by only one path.
2.5 Pieces
Each faction has a set of pieces listed on the back of its faction board. Pieces are limited by the contents of the game. If you are prompted to place, take, or remove any number of pieces but you cannot, you must place, take, or remove the maximum number possible.
- 2.5.1 Warriors. If you are prompted to place a warrior, take it from your supply. If one of your warriors is removed, return it to your supply. (The Vagabond pawn is not a warrior and cannot be removed.)

- 2.5.2 Buildings. If you are prompted to place a building, take the leftmost building from its track on your faction board. If one of your buildings is removed, return it to the rightmost empty space of its track.
- 2.5.3 Tokens. If you are prompted to place a token, take the leftmost token from its track, if any, or take it from your supply. If one of your tokens is removed, return it to the rightmost empty space of its track, if any, or to your supply.


- 2.5.4 Items. If you are prompted to take an item, take it from the shared supply on the map and place it in the Crafted Items box on your faction board. If you are prompted to remove an item, remove it from the game permanently.
- 2.5.5 Other. If you are prompted to use any other piece (pawn, marker, etc.), follow its explicit instructions.
2.6 Play Area
Your play area is the area around your faction board. Cards in your play area can only be spent, discarded, or used for other purposes if explicitly instructed.
2.7 Enemy
An enemy is any other player who you are not in a coalition with (9.2.8).
2.8 Ruler
The ruler of a clearing is the player with the most total warriors and buildings in that clearing. (Tokens and pawns do not contribute to rule.) If there is a tie between players in a clearing, no one there is the ruler.
Turn Structure
Each player’s turn has three phases: Birdsong, Daylight, and Evening. After a player completes all three phases, the next clockwise player begins their turn. Play continues until one player has won the game (3.1).
Standard Setup Procedure
- Step 1: Assign Factions and Starting Player. Assign one faction to each player using any method. The viable factions at each player count are listed in Player Combinations (Appendix A). Determine the starting player and seating order randomly. Each player takes their chosen faction board and all pieces, as listed on the back of the faction board.
- Step 2: Place Score Markers. Each player places their score marker on “0” on the score track.
- Step 3: Draw Starting Hands. If you are playing with two players, remove all four dominance cards from the deck. Shuffle the deck. Each player draws three cards.
- Step 4: Place Ruins. Place a ruin in each slot on the map marked with an “R” (four in total).
- Step 5: Form Item Supply. Place these items on the matching spaces of the item supply near the top of the map: 2
 , 2
, 2  , 1
, 1  , 1
, 1  , 2
, 2  , 2
, 2  , 2
, 2  .
. - Step 6: Gather Other Pieces. Hand out the 16 faction overview cards as desired, and place the two custom dice near the map.
- Step 7: Set Up Factions. In setup order (A, B, C, etc.), each player follows their faction’s setup instructions, listed in their rules section and on the back of their faction board.
Quick Reference: Setup
- Step 1: Assign factions, then determine starting player and seating order randomly. Give board and pieces.
- Step 2: Place score markers on the “0” space.
- Step 3: Draw and give three cards to each player.
- Step 4: Place ruins in the four slots marked with “R.”
- Step 5: Form item supply near the top of the map.
- Step 6: Gather overview cards and the two dice.
- Step 7: Set up factions in setup order (A, B, C, etc.).
Appendix A: Faction Combinations & Reach
There are hundreds of ways to play Root. To help you pick a faction combination that will produce an interesting game, use this simple system. Each faction has a specific value called Reach. To create a viable setup, the factions you choose should have a total Reach that equals or exceeds the number for your player count. Adventurous players are welcome to use any faction combination with at least 17 Reach.
Viable Game Sums
| Players | 2 | 3 | 4 | 5 | 6 |
|---|---|---|---|---|---|
| Total Reach | 17+ | 18+ | 21+ | 25+ | 28+ |
Reach Values
- Marquise de Cat: 10
- Underground Duchy: 8
- Eyrie Dynasties: 7
- Vagabond (first): 5
- Riverfolk Company: 5
- Woodland Alliance: 3
- Corvid Conspiracy: 3
- Vagabond (second): 2
- Lizard Cult: 2
4.1 Craft
You can craft most cards from your hand to gain an immediate or persistent effect.
- 4.1.1 Cost. To craft a card, you must activate crafting pieces of the suits listed in the card’s bottom-left corner. The suit of a crafting piece matches its clearing. Each crafting piece may be activated only once per turn. A three-color question mark denotes a crafting piece of any suit.
- 4.1.2 Immediate Effects. When you craft an immediate effect, resolve its effect and then discard the card. If it shows an item, take the matching item from the supply and place it in the Crafted Items box on your faction board. If the card lists an item not in the supply, the card cannot be crafted.
- 4.1.3 Persistent Effects. When you craft a persistent effect, place it in your play area. You may use the effect described on the card.
- 4.1.4 No Duplicates. You cannot craft a persistent effect if you have an identical persistent effect in your play area.
Quick Reference: Craft
Play a card and activate the crafting pieces of the suits listed in its bottom-left corner. (Vagabond exhausts .)
The suit of a crafting piece matches its clearing, and you can activate each crafting piece only once per turn.
If you craft an immediate effect, resolve it and discard the card. Often these effects will let you take an item from the supply on the map and score victory points. If the item supply on the map does not have the listed item to take, you cannot craft the card.
If you craft a persistent effect, place the card in your play area. You may use its effect. You cannot craft a persistent effect if you have one of the same name.
4.2 Move
When you move, take any number (more than zero) of your warriors or your pawn from one clearing and move them to one adjacent clearing.
- 4.2.1 You Must Rule. To take a move, you must rule the origin clearing, destination clearing, or both.
- 4.2.2 No Movement Limits. A given piece can be moved any number of times per turn. If you are prompted to take multiple moves, you may move the same or separate groups of warriors.
Quick Reference: Move
Take any number of your warriors or your pawn from one clearing and move them to one adjacent clearing.
You must rule the origin, destination, or both. A given piece can be moved any number of times per turn.
4.3 Battle
When you battle, choose a clearing where you have warriors or your pawn as the clearing of battle. You are the attacker. Choose another player in the clearing of battle to be the defender.
- 4.3.1 Step 1: Defender May Ambush. The defender may play one ambush card matching the clearing of battle. If the ambush is not foiled, the defender deals two hits immediately. Then, the defender discards the ambush card. If no attacking warriors or pawns remain, end the battle immediately.
- Foil Ambush. After the defender plays an ambush card, the attacker may cancel its effect by also playing an ambush card matching the clearing of the battle. (The defender still discards their ambush card.)
- 4.3.2 Step 2: Roll Dice and Add Extra Hits. Roll both dice. The attacker will deal hits equal to the higher roll, and the defender will deal hits equal to the lower roll. If the rolls are equal, attacker and defender will deal the same number of hits. (The use of “will” here reflects that hits are not dealt until step 3.)

- Maximum Rolled Hits. The maximum hits you can deal from rolling equals the number of your warriors in the clearing of battle, whether you are the attacker or defender.
- Extra Hits. After counting hits from rolling, the attacker and defender can add extra hits by using special abilities or other effects in their play areas. (Extra hits are not limited by the number of warriors in the clearing of battle.)
- Defenseless. If the defender has no warriors in the clearing of battle, the attacker will deal an extra hit.
- Maximum Rolled Hits. The maximum hits you can deal from rolling equals the number of your warriors in the clearing of battle, whether you are the attacker or defender.
- 4.3.3 Step 3: Deal Hits. Attacker and defender deal hits simultaneously. Each hit you deal removes one piece. The player taking hits chooses which of their pieces are removed from the clearing of battle, but must choose to remove all their warriors there before they choose to remove any of their buildings or tokens there in any order. (You score one victory point per enemy building or token removed.)
Quick Reference: Battle
You can battle in a clearing where you have warriors or your pawn.
- Step 1: Defender May Ambush. Attacker may cancel defender’s ambush card by also playing ambush card.
- Step 2: Roll Dice and Add Extra Hits. Attacker will deal hits equal to the higher roll, and defender will deal hits equal to the lower roll. The maximum hits you can deal by rolling equals your number of warriors in the clearing of battle. extra hits are not limited by warriors. If the defender has no warriors in the clearing of battle, the attacker deals an extra hit.
- Step 3: Deal Hits Simultaneously. Each hit removes one piece—warriors first, then buildings and tokens as chosen by the player taking the hits.
Remember: Score a victory point each time you remove an enemy building or token.
3.1 How to Win
The first player to reach 30 victory points immediately wins the game. If multiple players reach 30 or more victory points simultaneously, the player taking the current turn wins.
3.2 Scoring Victory Points
Each faction has a unique way to score victory points, but any faction can score victory points as follows.
- 3.2.1 Removing Buildings and Tokens. Whenever you remove an enemy’s building or token, you score one victory point.
- 3.2.2 Crafting Items. Whenever you craft an item (4.1), you score the victory points listed on the card.
3.3 Dominance Cards
The deck has four dominance cards, which let you win the game without scoring 30 victory points.
- 3.3.1 Activating. During your Daylight, if you have at least 10 victory points, you may activate a dominance card in your hand by placing it in your play area. Remove your score marker from the score track. You can no longer score victory points.
- Mouse, Rabbit, or Fox Dominance. You win the game immediately if you rule three clearings of the suit matching the activated dominance card at the start of your Birdsong.
- Bird Dominance. You win the game immediately if you rule two clearings in opposite corners at the start of your Birdsong.
- 3.3.2 Activated Cards. An activated dominance card does not count against your hand limit, and it cannot be removed from play. You cannot replace an activated dominance card with a different one.
- 3.3.3 Spending for Suit. A dominance card can be spent for its suit. However, when it would be placed in the discard pile, instead place it near the map to show it is available to be taken.
- 3.3.4 Taking Available Cards. During your Daylight, you can take an available dominance card into your hand by spending a card of matching suit.
6. Marquise de Cat 
6.1 Overview
The Marquise de Cat occupies the Woodland and wants to turn it into an industrial and military powerhouse. Each time the Marquise builds one of her buildings—a workshop, sawmill, or recruiter—she scores victory points. The more of the same building she has on the map, the more points she scores. However, to fuel ongoing construction, the Marquise must maintain and protect a strong, interconnected economy of wood.
6.2 Faction Rules and Abilities
- 6.2.1 Crafting. The Marquise crafts during Daylight by activating workshops.
- 6.2.2 The Keep. Only the Marquise can place pieces in the clearing with the keep token. (Pieces may be moved into this clearing.) If the keep token is removed, remove it from the game permanently.
- 6.2.3 Field Hospitals. Whenever any number of Marquise warriors are removed from a clearing, the Marquise may spend a card matching that clearing to place those warriors in the clearing with the keep token.
6.3 Faction Setup
- Step 1: Gather Warriors and Wood. Form supplies of 25 warriors and 8 wood tokens.
- Step 2: Place Keep. Place the keep token in the corner clearing of your choice.
- Step 3: Garrison. Place a warrior in each clearing except the clearing in the diagonally opposite corner from the clearing with the keep token.
- Step 4: Place Starting Buildings. Place 1 sawmill, 1 workshop, and 1 recruiter. You may place them among the clearing with the keep token and any adjacent clearings, in any combination.
- Step 5: Fill Buildings Tracks. Place your remaining 5 sawmills, 5 workshops, and 5 recruiters on your matching Buildings tracks from right to left. (This fills every space except the leftmost space of each track.)
6.4 Birdsong
Place wood tokens in each clearing with any number of sawmills, one wood per sawmill there.
6.5 Daylight
First, you may activate workshops to craft cards from your hand. Then, you may take up to three actions—plus one action per bird card you spend (not as part of an action)—in any order and number.
- 6.5.1 Battle. Initiate a battle.
- 6.5.2 March. Take up to two moves.
- 6.5.3 Recruit. Place one warrior at each recruiter. You may take this action only once per turn.
- 6.5.4 Build. Place a building.
- Choose Building. Choose whether you want to place a sawmill, workshop, or recruiter. Find the leftmost building of that type remaining on your faction board. Note that building’s cost, listed at the top of its column.
- Choose Clearing and Pay Wood. Choose any clearing you rule. Remove wood tokens equal in number to the building’s cost from the chosen clearing, any adjacent clearings you rule, or any clearings connected to the chosen clearing you rule through any number of clearings you rule.
- Place Building and Score. Place the chosen building on the chosen clearing, and score the victory points listed on the space uncovered on your faction board.
- 6.5.5 Overwork. Spend a card matching the clearing of a sawmill, and place a wood token there.
6.6 Evening
Draw one card, plus one card per uncovered draw bonus. Then, if you have more than five cards in your hand, discard cards of your choice until you have five.
7. Eyrie Dynasties
7.1 Overview
The Eyrie Dynasties wish to restore their once-dignified kind to their former glory in the Woodland by retaking control of the forest clearings. During their Evening, the Eyrie score victory points based on the number of roosts on the map. The greater their presence in the Woodland, the greater their gains. However, the Eyrie are bound by their Decree, an ever-increasing set of mandated actions promised by their leader. Each turn, they must take all of the actions on their Decree, or else fall into turmoil.
7.2 Faction Rules and Abilities
- 7.2.1 Crafting. The Eyrie craft before resolving the Decree during Daylight by activating roosts.
- 7.2.2 Lords of the Forest. The Eyrie rule a clearing when tied for most combined warriors and buildings there. They do not rule empty clearings.
- 7.2.3 Disdain for Trade. Whenever the Eyrie craft an item, they ignore the listed victory points and instead score only one victory point.
7.3 Faction Setup
- Step 1: Gather Warriors. Form a supply of 20 warriors.
- Step 2: Place Roost and Starting Warriors. Place 1 roost and 6 warriors in the corner clearing diagonally opposite from the clearing with the keep token. If the Marquise is not playing, place those pieces in the corner clearing of your choice.
- Step 3: Choose Leader. Choose 1 of the 4 Eyrie leader cards and place it in your Leader Card slot. Gather the remaining leaders face up near you.
- Step 4: Tuck Viziers. Tuck your 2 Loyal Vizier cards, showing their suit, into the Decree columns above your faction board as listed on your leader.
- Step 5: Fill Roosts Track. Place your 6 remaining roosts on your Roosts track from right to left.
7.4 Birdsong
Your Birdsong has three steps in the following order.
- 7.4.1 Emergency Orders. If you have no cards in your hand, draw one card.
- 7.4.2 Add to the Decree. You must add one or two cards to the Decree, but only one card added may be a bird card. You may play each card to any column, and each column can hold any number of cards.
- 7.4.3 A New Roost. If you have no roosts on the map, place a roost and three warriors in a clearing with the fewest warriors where all those pieces can be placed.
7.5 Daylight
Your Daylight has two steps in the following order.
- 7.5.1 Craft. You may activate roosts to craft cards from your hand.
- 7.5.2 Resolve the Decree. You must resolve the Decree, starting with the leftmost column and moving right. In each column, you must resolve all of its cards, but in any order. For each card, you must take the action listed for its column, as follows. If you cannot fully take an action, you immediately fall into turmoil (7.7).
- Recruit. Place a warrior in any clearing with a roost whose suit matches the card suit.
- Move. Move from any clearing whose suit matches the card suit. (You must move at least one warrior.)
- Battle. Initiate a battle in any clearing whose suit matches the card suit.
- Build. Place a roost in any clearing you rule whose suit matches the card suit and which has no roost.
7.6 Evening
Your Evening has two steps in the following order.
- 7.6.1 Score Points. Score the victory points listed on the rightmost empty space of your Roosts track.
- 7.6.2 Draw and Discard. Draw one card, plus one card per uncovered draw bonus. Then, if you have more than five cards in your hand, discard cards of your choice until you have five.
7.7 Turmoil
If you cannot fully take an action in the Decree (7.5.2) for any reason, you fall into turmoil, as follows.
- 7.7.1 Step 1: Humiliate. Lose one victory point per bird card (including Loyal Viziers) on the Decree.
- 7.7.2 Step 2: Purge. Discard all of the cards on the Decree except your Loyal Viziers.
- 7.7.3 Step 3: Depose. Flip your current leader face down and set it aside, choose a new leader from those face up, and place on your faction board. Tuck your Loyal Viziers into the Decree spaces listed on your new leader.
- A New Clutch. If you must choose a new leader but none are face up, flip them all face up.
- 7.7.4 Step 4: Rest. End Daylight and begin Evening.
7.8 Leaders Reference
The Eyrie have four leader cards, as follows.
- 7.8.1 Builder. Loyal Viziers begin on Recruit and Move. Whenever you craft, you ignore your Disdain for Trade special ability (7.2.3).
- 7.8.2 Charismatic. Loyal Viziers begin on Recruit and Battle. Whenever you take a Recruit action, you must place two warriors instead of one.
- 7.8.3 Commander. Loyal Viziers begin on Move and Battle. In battle as attacker, you deal an extra hit.
- 7.8.4 Despot. Loyal Viziers begin on Move and Build. Whenever you remove at least one enemy building or token in battle, you score one victory point.
8. Woodland Alliance 
8.1 Overview
The Woodland Alliance works to gain the sympathy of the various creatures of the Woodland who are dissatisfied with their present condition. Each time the Alliance places a sympathy token, they may score victory points. The more sympathy on the map they have, the more victory points they score. Gaining the sympathy of the people requires supporters. These supporters can also be put toward violent ends, inciting outright rebellion across the forest. When a revolt erupts, the Alliance will establish a base. Bases allow the Alliance to train officers, increasing their military flexibility.
8.2 Faction Rules and Abilities
- 8.2.1 Crafting. The Alliance crafts during Daylight by activating sympathy tokens.
- 8.2.2 Guerrilla War. As defender in battle, the Alliance will deal hits equal to the higher roll, and the attacker will deal hits equal to the lower roll.
- 8.2.3 The Supporters Stack. To take various actions, the Alliance spends supporters, which are cards on their Supporters stack. Supporters can only be spent for their suit and do not count against the Alliance’s hand size. Supporters are face down, but the Alliance may inspect them at any time.
- Capacity. If the Alliance has no bases on the map, the Supporters stack can only hold up to five cards. If the Alliance would gain a supporter but the stack cannot hold it, that card is discarded. If any bases are on the map, the Supporters stack can hold unlimited cards.
- 8.2.4 Removing Bases. Whenever a base is removed, the Alliance must discard all supporters matching the suit of the base (including birds) and remove half of their officers, rounded up. If the Alliance has no more bases on the map and has more than five supporters, they must discard down to five supporters.
- 8.2.5 Sympathy Tokens. The Alliance has 10 sympathy tokens.
- Placement Limits. A clearing can hold only one sympathy token.
- Terms. A sympathetic clearing is one with a sympathy token. An unsympathetic clearing is one without a sympathy token.
- 8.2.6 Outrage. Whenever another player removes a sympathy token or moves any warriors into a sympathetic clearing, they must add one card matching the affected clearing from their hand to the Supporters stack. If they have no matching cards (including no birds), they must show their hand to the Alliance, and then the Alliance draws a card from the deck and adds it to the Supporters stack.
8.3 Faction Setup
- Step 1: Gather Warriors. Form a supply of 10 warriors.
- Step 2: Place Bases. Place 3 bases on the matching spaces in your Bases box.
- Step 3: Fill Sympathy Track. Place 10 sympathy tokens on your Sympathy track.
- Step 4: Gain Supporters. Draw 3 cards and place them face down on your Supporters stack.
8.4 Birdsong
Your Birdsong has two steps in the following order.
- 8.4.1 Revolt. Remove enemy pieces and place a base and warriors, as follows. You may revolt any number of times.
- Choose Clearing. A sympathetic clearing matching an unbuilt base (cannot revolt if on map).
- Spend Supporters. Spend two supporters matching the suit of the chosen clearing.
- Resolve Effect. Remove all enemy pieces in the chosen clearing. Then, place the base matching the clearing there, and place warriors there equal to the number of sympathetic clearings matching the base’s suit. Finally, place one warrior in the Officers box. This warrior is now an officer. (Remember to score one victory point per token and building removed.)
- 8.4.2 Spread Sympathy. Place a sympathy token, as follows. You may spread sympathy any number of times.
- Choose Clearing. An unsympathetic clearing adjacent to a sympathetic clearing. If there are no sympathetic clearings, you may choose any clearing.
- Spend Supporters. Spend supporters matching the suit of the chosen clearing. The number of supporters that must be spent is listed above the sympathy token.
- Martial Law. You must spend another matching supporter if the target clearing has at least three warriors belonging to another player.
- Resolve Effect. Place a sympathy token in the chosen clearing. Score the victory points listed on the space uncovered on your faction board.
8.5 Daylight
You may take the following actions in any order and number.
- 8.5.1 Craft. You may activate sympathy tokens to craft a card from your hand.
- 8.5.2 Mobilize. Add a card from your hand to the Supporters stack.
- 8.5.3 Train. Spend a card whose suit matches a built base to place a warrior in the Officers box. This warrior is now an officer.
8.6 Evening
Your Evening has two steps in the following order.
- 8.6.1 Military Operations. You may take actions, as follows, up to your number of officers, in any order and number.
- Move. Take one move.
- Battle. Initiate a battle.
- Recruit. Place a warrior in any clearing with a base.
- Organize. Remove one of your warriors from an unsympathetic clearing, place a sympathy token there, and score the victory points listed on the space uncovered on your faction board.
- 8.6.2 Draw and Discard. Draw one card, plus one card per uncovered draw bonus. Then, if you have more than five cards in your hand, discard cards of your choice until you have five.
9. Vagabond
9.1 Overview
The Vagabond plays all sides of the conflict while going on quests to increase his renown throughout the wood. Each time the Vagabond improves his relationship with another faction, or removes a warrior belonging to a faction hostile toward him, he scores victory points. He can also complete quests to score victory points. To move and act effectively the Vagabond must manage his pack of items, expanding his selection by exploring the forest ruins and providing aid to other factions.
9.2 Faction Rules and Abilities
- 9.2.1 Crafting. The Vagabond exhausts to craft. All of his match the suit of his current clearing. If the Vagabond crafts an item, he may immediately take it, face up.
- 9.2.2 Lone Wanderer. The Vagabond pawn is not a warrior (so he cannot rule a clearing or stop another player from ruling one). The Vagabond pawn cannot be removed from the map.
- Full Removal. Whenever an enemy player uses an effect that says it removes all enemy pieces from a clearing (such as Alliance revolts, Favor of the Mice cards, Conspiracy bombs) with the Vagabond, the Vagabond damages three items.
- 9.2.3 Nimble. The Vagabond can move regardless of who rules his origin or destination clearing (4.2.1).
- 9.2.4 Defenseless. In battle, the Vagabond is defenseless (4.3.2.III) if he has no undamaged .
- 9.2.5 Items. The Vagabond’s capabilities depend on the items he acquires. Items on the Vagabond’s faction board can be face up or face down. The Vagabond exhausts face-up undamaged items, flipping them face down, to take many actions.
- Item Tracks. When gained, , , and are placed face up on their matching tracks. Each track can only hold three matching items.
- The Satchel. When gained, , , ,
 , and are placed face up in the Vagabond’s Satchel.
 - Moving Items. The Vagabond can freely move face-up, undamaged , , and between their tracks and the Satchel.
- Item Tracks. When gained,
- 9.2.6 Maximum Rolled Hits. In battle, the Vagabond’s maximum rolled hits (4.2.2.I) equals his undamaged , face up or face down, in his Satchel.
- 9.2.7 Taking Hits. Whenever the Vagabond takes a hit (4.3.3), he must damage one undamaged item, moving it to his Damaged box. If no undamaged items remain to damage, the Vagabond ignores any remaining hits.
- 9.2.8 Dominance Cards and Coalitions. In games with four or more players, the Vagabond can activate a dominance card to form a coalition with the player with the fewest victory points other than himself, placing his score marker on the chosen player’s faction board. If there is a tie for fewest, he chooses one tied player. If the chosen player wins the game, the Vagabond also wins. (The Vagabond no longer scores victory points. He cannot form a coalition with a player who has already activated a dominance card.)
- 9.2.9 Relationships. Your faction board shows a Relationships chart, which has four spaces on the Allied track and one Hostile box. It holds a relationship marker for each non-Vagabond player.
- Improving Relationships. You can improve a relationship with a non-Hostile player by taking the Aid action.
- Cost. Aid a non-Hostile player the number of times listed between their current Allied space and their next Allied space during the same turn. (A given Aid action counts toward only one improvement in relationship.)
- Effect. Advance that player’s relationship marker one space right on the track. Score the victory points listed in the new space.
- Allied Status. If a relationship marker reaches the final space on the Allied track, you are now Allied with the player shown by that relationship marker. (Their warriors trust you!)
- Aiding Ally. Each time you Aid an Allied player, score two victory points.
- Moving with Ally. Whenever you move to a clearing, you may also move warriors of one Allied player from your origin clearing to your destination clearing.
- Attacking with Ally. Whenever you initiate a battle, you may treat Allied warriors of one player in the clearing of battle as your own. The maximum hits you can roll equals the number of that Ally’s warriors there plus your total undamaged . You cannot treat Allied warriors as your own if that Ally is the defender.
- Taking Hits with Ally. In a battle where you treat Allied warriors as your own, you can take hits by removing Allied warriors. However, if you take more hits by removing Allied warriors than by damaging items during the same battle, that Allied player becomes Hostile (9.2.9.III) at the end of the battle. This rule overrides the condition for becoming Hostile in 9.2.9.III.
- Hostile Status. If you ever remove a warrior of a non-Hostile player, their relationship marker immediately moves to the Hostile box. This player is now Hostile.
- Infamy. Whenever you remove a piece of a Hostile player in battle during your turn, score one victory point. (Add this to points scored for enemy buildings and tokens. Do not score a point for removing the warrior that made the player Hostile.)
- Moving into Hostile Clearings. You must exhaust an extra to move into a clearing with any warriors of any Hostile players.
- Aiding Hostile Players. You cannot move a relationship marker out of the Hostile box by using Aid, but you can still Aid a Hostile player to take crafted items.
- Coalition with Hostile Player. You can form a coalition (9.2.8) with a Hostile player. If you do, move their relationship marker to the Indifferent space.
- Improving Relationships. You can improve a relationship with a non-Hostile player by taking the Aid action.
9.3 Faction Setup
- Step 1: Choose Character. Choose a character card and place it in your Character Card slot.
- Step 2: Place Pawn. Place your Vagabond pawn in any forest.
- Step 3: Get Quests. Shuffle your quest deck, draw 3 quest cards, and place them face up near you.
- Step 4: Populate Ruins. Take the 4 ruins from the map, and take the , , , and items marked with an “R.” Place one beneath each ruin and then shuffle each ruin stack. Then, return each stack to an empty ruin slot on the map.
- Step 5: Take Starting Items. Take the items marked with “S” listed on your character card. Place any listed , , and items face up on the matching tracks of your faction board. Place all other listed items face up in your Satchel. Return any remaining “S” items to the box.
- Step 6: Set Relationships. Take a relationship marker for each non-Vagabond faction and place them all on the Indifferent space of your Relationships chart.
9.4 Birdsong
Your Birdsong has two steps in the following order.
- 9.4.1 Refresh. Flip two exhausted items face up for each face up at the start of your Birdsong. Then flip up three more exhausted items.
- 9.4.2 Slip. You may move into an adjacent clearing or forest without exhausting any , even for moving into a Hostile clearing (9.2.9.IIIb). This move ignores all effects that prevent movement out of a clearing (such as the Corvids’ snare).
9.5 Daylight
You can exhaust items to take the following actions, in any order and number. If you exhaust a , , or on a track, move it to the Satchel.
- 9.5.1 Move. Exhaust one to move, plus one if the destination clearing has any Hostile warriors. You cannot move into a forest. If in a forest, you may only move into an adjacent clearing.
- 9.5.2 Battle. Exhaust one to initiate a battle. (Check your relationship with the defender.)
- 9.5.3 Explore. Exhaust one to take one item under a ruin in your clearing, reveal it, and place it face up in your Satchel or on its matching track. Then, you score one victory point. If you remove the last item from a ruin, remove the ruin.
- 9.5.4 Aid. Exhaust any one item, and give one of your cards matching your clearing to any player with at least one piece there (even Hostile). Then, you may take one item, if any, from that player’s Crafted Items box, and place it face up in your Satchel or on its matching track. (Check your relationship with that player.)
- 9.5.5 Quest. Choose a quest whose suit matches your clearing, and exhaust the two items listed on the quest to complete it. Place the quest in your play area, and then draw a new quest and place it near the map. You may score one victory point per quest of matching suit you have completed, including this one, or draw two cards from the deck.
- 9.5.6 Strike. Exhaust one to remove a warrior from your clearing. If a player has no warriors there, you may instead remove one building or token of that player. (Check your relationship with that player.)
- 9.5.7 Repair. Exhaust one to move one damaged item to the Satchel or to its matching track (if face up , , ), keeping the item on its current side.
- 9.5.8 Craft. Play a card from your hand, and exhaust the of listed suit to craft it. All of your match the suit of your clearing. If a card requires multiple of one suit to craft, you must exhaust the listed number of . If you craft an item, you may place it face up in your Satchel or on the matching track.
- 9.5.9 Special Action. Exhaust one to take the action listed on your character card.
9.6 Evening
Your Evening has four steps, as follows.
- 9.6.1 An Evening’s Rest. If you are in a forest, move all items in your Damaged box to your Satchel or their matching track, and flip them face up.
- 9.6.2 Draw Cards. Draw one card, plus one card per face up on the matching track.
- 9.6.3 Discard Cards. If you have more than five cards in your hand, discard cards of your choice until you have five.
- 9.6.4 Check Item Capacity. If you have more items total in your Satchel and Damaged box than your item limit—six plus two per face up on the matching track—remove items from your Satchel and Damaged box until you have items equal to your item limit, and remove them from the game permanently.
9.7 Playing with Two Vagabonds
If you have The Riverfolk Expansion, you can play a game with two Vagabonds by following these rules.
- 9.7.1 Add Extra Item to Ruins. During setup, use both sets of “R” items and place two “R” items in each ruin slot. When a Vagabond explores a ruin with two items, he may look at them and take one of his choice. (By taking two Explore actions, he could take both items from one ruin.) He cannot take an “R” item that matches an “R” item already on his faction board. If he explores but does not take an item, he does not score a victory point, but the torch is still exhausted.
- 9.7.2 Randomize Setup Order. Randomly determine which Vagabond sets up first.
- 9.7.3 Share Quests. Either Vagabond may complete any of the three face-up quests. Do not add extra quest cards during setup.
Appendix E: Vagabond Characters Reference
E.1 Thief
- E.1.1 Starting Items. Start with , , , .
- E.1.2 Special Action: Steal. Exhaust one to take a random card from any player in your clearing.
E.2 Tinker
- E.2.1 Starting Items. Start with , , , .
- E.2.2 Special Action: Day Labor. Exhaust one to take a card from the discard pile whose suit matches your clearing. (You can always take a bird card.)
E.3 Ranger
- E.3.1 Starting Items. Start with , , , .
- E.3.2 Special Action: Hideout. Exhaust one to repair three items. Then, immediately end Daylight and begin Evening.
E.4 Vagrant 
- E.4.1 Starting Items. Start with , , .
- E.4.2 Special Action: Instigate. Exhaust a to initiate a battle in your clearing. You choose the attacker and defender, you choose the order in which they each remove buildings and tokens, and you remove pieces for each. (Score a victory point per building or token of either player removed, and per Hostile piece of either player removed.)
E.5 Arbiter
- E.5.1 Starting Items. Start with , , , .
- E.5.2 Special Action: Protector. Immediately before dice are rolled in a battle, the defender may enlist the Arbiter in the clearing of battle. The Arbiter scores one victory point and adds all of his undamaged to the maximum rolled hits of the defender. The Arbiter cannot enlist himself.
E.6 Scoundrel
- E.6.1 Starting Items. Start with , , , .
- E.6.2 Special Action: Scorched Earth. Exhaust a and place it in your clearing. Remove all enemy pieces from that clearing. For the rest of the game, pieces cannot be placed in or moved into this clearing. (You remain in this clearing. Once you move out, you cannot move back in.)
E.7 Adventurer
- E.7.1 Starting Items. Start with , , .
- E.7.2 Special Action: Improvise. Once per turn while taking the Quest action, you may treat one unexhausted item as any other item. When you exhaust it to complete the quest, also damage that item.
E.8 Ronin
- E.8.1 Starting Items. Start with , , , .
- E.8.2 Special Action: Swift Strike. You may exhaust a to deal an extra hit in battle (after rolling).
E.9 Harrier
- E.9.1 Starting Items. Start with , , , .
- E.9.2 Special Action: Glide. Exhaust a to move to any clearing (even Hostile) on the map without exhausting any .
The next two sections refer to factions in The Riverfolk Expansion.
10. Lizard Cult
10.1 Overview
Catering to the discarded creatures of the Woodland, the Lizard Cult seeks to overwhelm its foes through sheer force of will. Wherever the Cult rules clearings, it can build gardens, using word of mouth and beak to spread its gospel to the animals living there. The firmer its hold over the hearts of its followers, the more victory points the Cult can score by completing the proper rituals. While other factions spend cards to achieve their aims, the Cult acts chiefly by revealing cards and gradually gathering a set of ideal followers. These revealed cards are returned to the Cult’s hand in Evening, unless discarded to score victory points. However, this gentler approach makes movement and battle difficult—the Cult can only take these actions with its radicalized acolytes, gained as the Cult’s warriors are slaughtered while defending in battle.
10.2 Faction Rules and Abilities
- 10.2.1 Crafting. The Cult crafts during Evening by activating gardens matching the Outcast suit (10.4.1).
- 10.2.2 Hatred of Birds. Bird cards are not wild for Cult rituals.
- 10.2.3 Revenge. Whenever a Cult warrior is removed while defending in battle, it is placed in the Acolytes box instead of the Cult’s supply.
- 10.2.4 Pilgrims. The Cult rules any clearings where they have any gardens. This overrides the Eyrie’s Lords of the Forest (7.2.2).
- 10.2.5 Fear of the Faithful. Whenever a garden is removed, the Cult must discard a random card.
- 10.2.6 The Lost Souls Pile. Whenever any card is spent or discarded (even a dominance card), place it in the Lost Souls pile instead of the discard pile. The Lost Souls pile can be inspected by any player at any time.
10.3 Faction Setup
- Step 1: Gather Warriors. Form a supply of 25 warriors.
- Step 2: Place Warriors. In the corner clearing diagonally opposite from the Marquise’s keep or Eyrie’s starting roost, place 4 warriors and 1 garden matching the clearing; if both the Marquise and Eyrie are in play, choose one of the two other corners. Then place 1 warrior in each adjacent clearing.
- Step 3: Choose Outcast. Place the outcast marker on any suit space in the Outcast box. The suit of this space is called the Outcast.
- Step 4: Fill Gardens Tracks. Place your 14 remaining gardens on the matching spaces of your Gardens tracks from right to left.
10.4 Birdsong
Your Birdsong has three steps in the following order.
- 10.4.1 Adjust Outcast. Look at the cards in the Lost Souls pile, ignoring birds. The suit with the most cards becomes the new Outcast—move the outcast marker, showing its Outcast side, to that suit. If that suit was already the Outcast, flip the marker to Hated. If no one suit had the most cards, the marker stays on its current suit and, if it is not Hated, flips to its Hated side.
- 10.4.2 Discard Lost Souls. Discard all of the cards in the Lost Souls pile to the discard pile. (Dominance cards become available to take.)
- 10.4.3 Perform Conspiracies. You can spend acolytes, returning them to your supply, to perform conspiracies in clearings matching the Outcast, in any order and number, as follows. If the Outcast is Hated, the conspiracy costs one fewer acolyte. If you perform Convert or Sanctify, you must complete the conspiracy.
- Crusade. Spend two acolytes to initiate a battle in an Outcast clearing or to move (at least one warrior) from an Outcast clearing and then, if you wish, initiate a battle in the destination clearing.
- Convert. Spend two acolytes to remove an enemy warrior from an Outcast clearing and then place one warrior there.
- Sanctify. Spend three acolytes to remove an enemy building from an Outcast clearing and then place a garden of matching suit there.
10.5 Daylight
You may reveal any number of cards from your hand (into your play area) and perform one ritual per card revealed, in any order and number, as follows. (Revealed cards cannot be used for any other purposes during Daylight.)
- 10.5.1 Build. In a clearing you rule matching the revealed card, place a matching garden.
- 10.5.2 Recruit. In a clearing matching the revealed card, place a warrior.
- 10.5.3 Score. Spend the same card you reveal (placing in Lost Souls) to score the victory points listed above the rightmost empty Gardens space of the suit matching the revealed card. You may perform this only once per turn per suit.
- 10.5.4 Sacrifice. Place a warrior in the Acolytes box. To perform this ritual, you must reveal a bird card.
10.6 Evening
Your Evening has three steps in the following order.
- 10.6.1 Return Revealed Cards. Return all cards you revealed this turn to your hand.
- 10.6.2 Craft. You may craft by activating gardens matching the Outcast suit.
- 10.6.3 Draw and Discard. Draw one card, plus one card per uncovered draw bonus. Then, if you have more than five cards in your hand, discard cards of your choice until you have five.
11. Riverfolk Company
11.1 Overview
When news arrived that the Woodland on the shore of the great lake was descending into all-out war, the Riverfolk Company quickly dispatched its officers to set up shop. As other factions purchase their services, the Riverfolk can further entrench their commercial interests by establishing trade posts along the river, scoring victory points. So too can they score points by raw accumulation of funds, but a big treasury makes for an easy target, so the Riverfolk must take care in expanding their operations across the dangerous forest.
11.2 Faction Rules and Abilities
- 11.2.1 Crafting. The Riverfolk craft during Daylight by committing funds to empty spaces on the Trade Posts tracks. (They have no crafting pieces.)
- 11.2.2 Swimmers. The Riverfolk treat rivers as paths and may move along rivers regardless of who rules their origin or destination clearing. (They can still move using paths.)
- 11.2.3 Public Hand. The Riverfolk place their hand face up above their faction board. If another player would take a random card from the Riverfolk’s hand, the cards are flipped face down, shuffled, drawn from, and then flipped face up.
- 11.2.4 Funds. To take many actions, the Riverfolk commit and spend funds: warriors in their Funds box.
- 11.2.5 Trade Posts. The Riverfolk score victory points when they place trade posts.
- Trade Disruption. Whenever a trade post is removed, the Riverfolk remove half of their funds, rounded up, and remove the trade post from the game permanently.
- 11.2.6 Buying Services. At the start of another player’s Birdsong, that player may buy Riverfolk services.
- Cost. The buyer must place warriors from their supply into the Riverfolk’s Payments box equal in number to the cost of that service listed on the Riverfolk’s Services track.
- Number of Services. Each turn, a player may buy one service plus one per clearing with a trade post and at least one piece of that player.
- Vagabond Funds. The Vagabond pays for services by exhausting items—for each item he exhausts to do so, the Riverfolk place one of their own warriors in the Payments box.
- 11.2.7 Riverfolk Services. The Riverfolk offer three services, as follows.
- Hand Card. The buyer takes any card from the Riverfolk’s hand and adds it to their hand. (The buyer may buy this service multiple times as long as they have access to enough trade posts.)
- Riverboats. The buyer treats rivers as paths until the end of their turn.
- Mercenaries. During Daylight and Evening of this turn, the buyer treats Riverfolk warriors as their own only for rule and for battle against factions other than the Riverfolk. (The buyer cannot move them, count them toward dominance, or remove them except by taking hits.)
- Taking Hits. The buyer must split hits, taking odd hits by removing owned (not Riverfolk) warriors, if any, or owned buildings or tokens only if they have no warriors (including Riverfolk) in the clearing of battle.
- Vagabond Mercenaries. The Vagabond cannot buy Riverfolk mercenaries.
11.3 Faction Setup
- Step 1: Gather Warriors. Form a supply of 15 warriors.
- Step 2: Place Warriors. Place 4 warriors in any clearings touching the river.
- Step 3: Fill Trade Posts Tracks. Place 9 trade posts on the matching spaces of your Trade Posts tracks.
- Step 4: Gain Starting Funds. Place 3 warriors in your Payments box.
- Step 5: Set Starting Prices. Place 1 service marker on any space of each of your Services tracks.
11.4 Birdsong
Your Birdsong has three steps in the following order.
- 11.4.1 Protectionism. If the Payments box is empty, place two warriors in it.
- 11.4.2 Score Dividends. If there are any trade posts on the map, score one victory point per two funds. (Do not score for warriors in Payments or Committed.)
- 11.4.3 Gather Funds. Move all warriors on your faction board to the Funds box.
11.5 Daylight
You can commit and spend funds to take actions, as follows, in any order and number. When you commit a fund, move the warrior to the Committed box. When you spend a fund, return the warrior to its owner’s supply.
- 11.5.1 Move. Commit one fund to take a move.
- 11.5.2 Battle. Commit one fund to initiate a battle.
- 11.5.3 Craft. Commit funds to craft a card from your hand. Instead of moving these warriors to the Committed box, you must place them on empty spaces of the Trade Posts tracks matching the suits listed on the crafting cost.
- Export. You may ignore the listed benefit of crafting a card, discarding it, to place one of your warriors in the Payments box.
- 11.5.4 Draw. Commit one fund to draw a card.
- 11.5.5 Recruit. Spend one fund to place a warrior in any clearing with a river.
- 11.5.6 Establish Trade Post with Garrison. Spend two funds to place a trade post and a warrior.
- Choose Clearing. Choose any clearing without a trade post that is ruled by any player.
- Spend Funds. Spend two funds of the player who rules the chosen clearing.
- Place and Score. Place the matching trade post and one warrior in the chosen clearing. Score the victory points listed on the space uncovered on your faction board.
11.6 Evening
Your Evening has two steps in the following order.
- 11.6.1 Discard Cards. If you have more than five cards in your hand, discard cards of your choice until there are five.
- 11.6.2 Set Costs. You may move each service marker to any space on its track, setting it to a new cost.
The next two sections refer to factions in The Underworld Expansion.
12. Underground Duchy
12.1 Overview
The Underground Duchy wants to show the foreign creatures of the Woodland that they would be better off as subjects. As they set up frontier outposts to show their power in the Woodland, the Duchy can sway ministers to the cause, scoring victory points and diverting more of the Duchy’s resources. But be careful—a reversal of fortune could spell public humiliation, leading ministers to abandon the task.
12.2 Faction Rules and Abilities
- 12.2.1 Crafting. The Duchy crafts during Evening by activating citadels and markets.
- 12.2.2 The Burrow. The Burrow is a clearing adjacent to each clearing with a tunnel token. Only the Duchy can place pieces in or move pieces into the Burrow. The Duchy always rules the Burrow (even with no pieces there).
- 12.2.3 The Price of Failure. Whenever any number of Duchy buildings are removed, the Duchy discards a random card, returns their swayed minister card of highest rank (lord, then noble, then squire) to their Unswayed Ministers pile, and removes its crown from the game permanently. If they have multiple swayed ministers of highest rank, the Duchy chooses which to return.
- 12.2.4 Tunnels. The Duchy has three tunnel tokens. If the Duchy is prompted to place a tunnel but all three tunnels are on the map, the Duchy may first remove any tunnel from the map.
12.3 Faction Setup
- Step 1: Gather Warriors and Tunnels. Form supplies of 20 warriors and 3 tunnel tokens.
- Step 2: Prepare the Burrow. Place the Burrow board near the map.
- Step 3: Surface. Place 2 warriors and 1 tunnel in a corner clearing that does not have the Marquise’s keep, Eyrie’s starting roost, or Cult’s starting garden, and is diagonally opposite from one of those starting clearings if possible. Then place 2 warriors in each clearing adjacent to the chosen corner clearing, except the Burrow.
- Step 4: Fill Buildings Tracks. Place 3 citadels and 3 markets on your matching Buildings spaces.
- Step 5: Collect Ministers. Place 9 minister cards face up on your Unswayed Ministers pile.
- Step 6: Fill Crown Spaces. Place 9 crowns on the spaces with victory points on your faction board.
12.4 Birdsong
Place one warrior, plus one warrior per warrior icon showing, in the Burrow.
12.5 Daylight
Your Daylight has three steps in the following order.
- 12.5.1 Assembly. You may take up to two actions in any order and number, as follows.
- Build. Reveal one card to place a citadel or market in a matching clearing you rule.
- Recruit. Place one warrior in the Burrow.
- Move. Take a move.
- Battle. Initiate a battle.
- Dig. Spend one card to place a tunnel token in a matching clearing without a tunnel token. Then, move up to four warriors from the Burrow to that clearing. (If all three tunnels are on the map, you may remove a tunnel first.)
- 12.5.2 Parliament. You may take the action of each swayed minister once in any order.
- Foremole. Reveal any card to place a citadel or market in any clearing (matching or not) you rule.
- Captain. Initiate a battle.
- Marshal. Take a move.
- Brigadier. Take up to two moves or initiate up to two battles.
- Banker. Spend any number of cards (even one) of the same suit to score victory points in equal number.
- Mayor. Take the action of any swayed noble or squire.
- Duchess of Mud. Score two victory points if all three tunnels are on the map.
- Baron of Dirt. Score one victory point per market on the map.
- Earl of Stone. Score one victory point per citadel on the map.
- 12.5.3 Sway. You may sway one minister, as follows.
- Choose Minister. Choose a minister card in your Unswayed Ministers pile. You must have a crown on your faction board matching the rank (squire, noble, lord) of that minister.
- Reveal Cards. Reveal the number of cards listed on the chosen minister. For each card you wish to reveal, you must have at least one piece in a clearing matching the suit of that card. Each clearing with any of your pieces only allows you to reveal one matching card.
- Sway Minister and Score. Take the chosen minister card and place it above your faction board. Take a crown of that minister’s rank from your faction board and place it on the minister card. Score the victory points listed on the space uncovered on your faction board.
12.6 Evening
Your Evening has three steps in the following order.
- 12.6.1 Discard and Return Revealed Cards. Discard any bird cards you revealed this turn, then return all other cards you revealed this turn to your hand.
- 12.6.2 Craft. You may craft by activating citadels and markets. (These are identical for crafting purposes.)
- 12.6.3 Draw and Discard. Draw one card, plus one card per card draw icon showing. Then, if you have more than five cards in your hand, discard cards of your choice until you have five.
13. Corvid Conspiracy
13.1 Overview
The Corvid Conspiracy seeks to strong-arm the Woodland into submission by completing criminal plots, scoring victory points each time they flip one. The more revealed plots on the map, the more they score. Misdirection is critical—if their plans are too obvious, the Corvids risk exposure. To avoid this, they must recruit carefully and look for any opportunities for subterfuge and extortion.
13.2 Faction Rules and Abilities
- 13.2.1 Crafting. The Corvids craft during Birdsong by activating plot tokens (whether face up or down).
- 13.2.2 Plot Tokens. The Corvids have eight infiltration tokens, two of each type.
- Token Facing. While in the Corvids’ supply, plot tokens are face down (feather). While on the map, a plot token can be face up (unique icon) or face down. The Corvids can inspect any facedown plot token at any time.
- Placement Limits. Each clearing can hold only one plot token.
- 13.2.3 Nimble. The Corvids can move regardless of who rules their origin or destination clearing.
- 13.2.4 Exposure. Anytime on their turn, but before drawing any cards in their Evening, an enemy player with at least one piece in a clearing with a facedown plot token may show the Corvids a matching card to guess the type of plot token in that clearing. If incorrect, the Corvids say “no,” and the enemy player gives that card to the Corvids. If correct, the enemy player removes the plot token (scoring a victory point) and ignores its effect.
- 13.2.5 Embedded Agents. As defender in battle, if the Corvids have a facedown plot token (even defenseless) in the clearing of battle, they deal an extra hit.
13.3 Faction Setup
- Step 1: Gather Warriors and Plots. Form supplies of 15 warriors and 8 plot tokens face down.
- Step 2: Scatter. Place 1 warrior in any clearing of each suit (total of 3).
13.4 Birdsong
Your Birdsong has three steps in the following order.
- 13.4.1 Craft. You may activate plot tokens (whether face up or down) to craft cards from your hand.
- 13.4.2 Flip Plots. Any number of times, flip a plot token face up in a clearing with any Corvid warriors, score one victory point per face-up plot token on the map (including the newly flipped one), and then resolve its flip effect if it is a bomb or extortion.
- 13.4.3 Recruit. Once per turn, you may spend any card to place one warrior in each matching clearing. (If you spend a bird, choose one suit to place warriors in.)
13.5 Daylight
You may take up to three actions, as follows.
- 13.5.1 Move. Take a move.
- 13.5.2 Plot. Remove a Corvid warrior, plus another Corvid warrior per plot you have placed this turn, from a clearing with no plot tokens to place a face-down plot token there.
- 13.5.3 Battle. Initiate a battle.
- 13.5.4 Trick. Swap two plot tokens on the map. Both plot tokens must be face up or face down.
13.6 Evening
Your Evening has two steps in the following order.
- 13.6.1 Exert. You may take one action listed in Daylight if you choose to not draw cards during Evening.
- 13.6.2 Draw. Draw one card plus one card per face-up extortion token on the map. Then, if you have more than five cards, discard down to five cards.
13.7 Plot Tokens Reference
- 13.7.1 Bomb. Whenever a bomb token is flipped, remove all enemy pieces in its clearing, then remove the bomb token.
- 13.7.2 Snare. While a snare token is face up, enemy pieces cannot be placed in or moved from its clearing.
- 13.7.3 Extortion. Whenever an extortion token is flipped, take a random card from each player with at least one piece in its clearing. While an extortion token is face up, you draw another card in Evening.
- 13.7.4 Raid. Whenever a raid token is removed (face up or down), place one warrior in each clearing adjacent to the clearing from which the raid was removed. (Ignore this effect if the raid is removed by Exposure.)
Appendix C: Variant Setup
Before step 1 in setup (5.1.1), you may choose to follow any of the following steps in the following order.
- C.1 Step C1: Choose Map. You may play on a map other than the fall map. If you do, collect the 12 suit markers, flip them face down, and shuffle them, then place one on each clearing, covering the printed suit symbols if any. Finally, follow the Setup Modifications section of the chosen map.
- C.2 Step C2: Choose Deck. You may replace the entire standard deck with the Exiles and Partisans deck.
- C.3 Step C3: Choose Bots. You may play with bots, as described in the Law of Rootbotics.
Appendix D: Variant Maps
D.1 Winter Map
- D.1.1 Raging River. The river divides forests as if each river section linking two clearings were a path.
D.2 Lake Map
- D.2.1 Setup Modifications. Place the ferry piece in the corner clearing that is also a coastal clearing.
- D.2.2 The Lake. The lake is in the center of the map. The lake is treated as rivers linking each coastal clearing to each other coastal clearing.
- D.2.3 Coastal Clearings. Clearings touching the lake (not separated by a forest) are coastal clearings.
- D.2.4 Coastal Forests. Forests touching the lake are coastal forests. Each coastal forest is adjacent to its two neighboring coastal forests (separated by one coastal clearing).
- D.2.5 The Ferry. Once per turn, a player taking a move from the coastal clearing with the ferry can move to another coastal clearing, moving the ferry as well. (This follows the normal move rules.) After taking this move, that player draws one card. The ferry cannot be battled or removed.
D.3 Mountain Map
- D.3.1 Setup Modifications. Place the 6 closed path markers to cover the 6 paths of darker color with excavated ground. Place the tower piece in the central clearing showing two towers.
- D.3.2 Closed Paths. A path covered with a closed path marker is a closed path. Clearings linked by a closed path are not adjacent. Closed paths enclose and divide forests as if they were paths (so the Vagabond can slip across it).
- D.3.3 Removing Closed Paths. Once per turn in their Daylight, a player can spend a card to remove a closed path marker from the game permanently and score one victory point. To remove it, that player must have at least one piece in either clearing linked by the closed path marker.
- D.3.4 The Pass. The clearing marked with the tower piece is the Pass. At the end of a player’s Evening, if that player rules the Pass, that player scores one victory point.
- D.3.5 Forests. All areas on the mountain map enclosed by paths and clearings are forests (2.2), regardless of the presence or placement of trees within.
Appendix B: Components
B.1 Root
- B.1.1 Booklets. Walkthrough, Learning to Play, and this Law.
- B.1.2 Cardboard Pieces. 28 Buildings (7 Roosts, 6 Sawmills, 6 Recruiters, 6 Workshops, 3 Bases), 19 Tokens (10 Sympathy, 8 Wood, 1 Keep), 12 Clearing Markers (4 Rabbit, 4 Fox, 4 Mouse), 4 Ruins, 4 Victory Point Markers, 3 Relationship Markers, 23 Items (4 Boots, 4 Swords, 4 Bags, 3 Hammers, 3 Tea, 2 Coins, 2 Crossbows, 1 Torch).
- B.1.3 Wooden Pieces. 55 Warriors (25 Marquise, 20 Eyrie, 10 Alliance), 1 Vagabond Pawn.
- B.1.4 Cards. 54 Cards for Shared Deck, 16 Faction Overviews, 4 Eyrie Leaders, 2 Loyal Viziers, 3 Vagabond Characters, 15 Quests, 4 Walkthroughs.
- B.1.5 Other. Board (Fall and Winter Maps), 2 Dice, 4 Faction Boards (Marquise, Eyrie, Alliance, Vagabond).
B.2 Riverfolk Expansion
- B.2.1 Booklets. Learning to Play.
- B.2.2 Cardboard Pieces. 15 Buildings (15 Gardens), 9 Tokens (9 Trade Posts), 3 Victory Point Markers, 1 Outcast Marker, 9 Relationship Markers, 11 Items (3 Boots, 3 Swords, 1 Bag, 1 Hammer, 1 Torch, 1 Coins, 1 Crossbow), and 17 spare pieces with letter backs for future scenarios.
- B.2.3 Wooden Pieces. 40 Warriors (25 Lizard, 15 Riverfolk), 1 Vagabond Pawn.
- B.2.4 Cards. 4 Spies, 2 Faction Overviews, 3 Vagabond Characters.
- B.2.5 Other. Faction Boards (Second Vagabond, Mechanical Marquise, Riverfolk Company, Lizard Cult).
B.3 Underworld Expansion
- B.3.1 Booklets. Learning to Play and this Law.
- B.3.2 Cardboard Pieces. 6 Buildings (3 Markets, 3 Citadels), 19 Tokens (8 Plots, 8 Spare Plots, 3 Tunnels), the Burrow, 4 Relationship Markers, 2 Victory Point Markers, 6 Closed Path Markers.
- B.3.3 Wooden Pieces. 35 Warriors (20 Duchy, 15 Corvid), 1 Ferry, 1 Tower.
- B.3.4 Cards. 9 Ministers, 2 Overviews.
- B.3.5 Other. Board (Lake and Mountain Maps), 2 Dice, 2 Faction Boards (Duchy, Corvid).
B.4 Clockwork Expansion
- B.4.1 Booklets. Law of Rootbotics.
- B.4.2 Cardboard Pieces. 12 Priority Markers.
- B.4.3 Cards. 12 Difficulties, 16 Traits, 3 Vagabots.
- B.4.4 Other. 4 Faction Boards.
B.5 Exiles and Partisans Deck
- B.5.1 Cards. 54 Cards for Shared Deck.
B.6 Vagabond Pack
- B.6.1 Cardboard Pieces. 3 Items (1 Coins, 1 Hammer, 1 Boot).
- B.6.2 Wooden Pieces. 7 Vagabond Pawns.
- B.6.3 Cards. 3 Vagabond Characters.
Credits & Dedications
Cole dedicates this game to his younger brothers and sisters, who never let him forget how to play.
Kyle dedicates this game to his children, who have always requested cute animal drawings.
- Game design: Cole Wehrle.
- Illustrations: Kyle Ferrin.
- Editing: Joshua Yearsley.
- Based on a concept by: Patrick Leder.
- Development: Leder Games’ St. Paul staff—Patrick Leder, Cole Wehrle, Jake Tonding, Clayton Capra, and Nick Brachmann—and by the intrepid Joshua Yearsley.
- Graphic design and layout: Cole Wehrle, Kyle Ferrin, Nick Brachmann, and Jaime Willems.
- Proofreading: Kate Unrau.
- Playtesting: Grayson Page and his amazing group (inc. Martin, Jared, Richard, Tony, Harvey), Chas Threlkeld, Drew Wehrle, Blake Wehrle, Corey Porter, Kyle Kirk, Matthew Root, Mark von Minden, Davey Janik-Jones, the stalwart players of First Minnesota, Jim Bolland, Melissa Lewis-Gentry and Modern Myths, Jennifer Gutterman and Hampshire College, Matthew Snow, Justin Dowd and the Brass Cat, the Owl & Raven crew, Josh Houser, Brian Peterson, Ethan Zimmerman, Brandi Leder, Heather Brian, Ted Scamp, Jenny and Matt Benusa, and many others.
- Underworld Expansion: Patrick Leder (design), Nick Brachmann (lead developer), and playtesting by Andrew Olson, Joel McGuire, Nathaniel Hicklin, Jacob Resler, Rae Kawalek, Nick Sopkowiak, Aaron Greatorex-Voith, Nicole Szajner, and the Brooklyn Game Lab (Robert Hewitt, Jack DeWald, Joseph Esbenshade, Nahvid Etedali, David Kanof, Mark Leiman, Jill Pullara).
Introduction & Core Concepts
Using This Book
Root contains two rulebooks: this rules reference and the learning-to-play guide. If you like a conversational teaching style and many graphical examples, read the learning-to-play guide. If you like learning from strictly defined, formal rules in a concise reference style, read this book. The learning-to-play guide also contains instructions on using the winter map and playing with various faction mixes at all player counts.
Fifth Printing (July 13, 2020)
Text in small capitals defines key terms. Text in italics gives reminders and clarifications. Faction icons mark rules modified by Faction Rules and Abilities sections.
1. Golden Rules
1.1 Rules Conflicts
- 1.1.1 Precedence. If a card conflicts with the Law, follow the card. If the Learning to Play guide conflicts with the Law, follow the Law. If you can follow both a general rule and a faction rule, follow both; if you cannot, follow the faction rule.
- 1.1.2 Use of Cannot. The term cannot is absolute. It cannot be overridden unless explicitly instructed.
- 1.1.3 Simultaneous Effects. If two game effects occur simultaneously, the player taking the current turn chooses their order, unless explicitly instructed.
- 1.1.4 Use of Treat. If you are prompted to treat one thing as another, the former takes on all the properties of the latter. (For example, if you caused Outrage while treating yourself as another player, the other player would give the card.)
1.2 Public and Private Information
- 1.2.1 Hands. Players may only show or reveal cards in their hand if explicitly instructed, but the number of cards in their hand is public information.
- 1.2.2 Discard. The discard pile can be searched and inspected at any time.
1.3 Negotiation and Deals
- 1.3.1 Agreements. Players may discuss the game and make agreements, but they are non-binding.
- 1.3.2 Cards. Players may only give cards to each other if explicitly instructed.
1.4 Players and Factions
For simplicity, the Law refers to players, not factions. However, game effects (such as abilities and persistent effects) are properties of factions, not players. While controlling pieces of a faction they do not own, a player follows the rules of that faction unless explicitly instructed.
Reading the Law
These rules of thumb will help you interpret the Law.
Q1. I’d like to do something, and the rules don’t say that I can’t do it. Can I do it?
A1. Within the confines of the action, you can assume yes!
Q2. Can another player not consent to an action?
A2. Root has no actions that require consent. Just do the thing.
Q3. It seems like something should happen, but the rule doesn’t tell me to do that thing. What do I do?
A3. Follow the literal word of the Law, not your instinct.
Q4. A rule uses a specific term or action. Does it also include another, closely related term or action?
A4. Nope! Assume we mean only the original term and not any related terms. For example, “move” and “place” are different.
If you have any other questions, check our website for more answers: http://ledergames.com/root
2. Key Terms and Concepts
2.1 Cards
Each card has a suit: bird, fox, rabbit, or mouse. Most cards also have an effect you can craft (4.1).
- 2.1.1 Birds Are Wild. You can treat any bird card as a card of another suit, even if you must spend, take, or give multiple cards of the same suit.
- Forced Effects. If you are prompted to discard or give a fox, rabbit, or mouse card, you must treat your bird cards as the prompted suit.
- Reverse Substitution. If you are prompted to spend, discard, take, or give a bird card, you cannot substitute a card of another suit.
- 2.1.2 Drawing Cards. Whenever you are prompted to draw a card, take it from the shared deck. If the deck is ever empty, shuffle the discard pile immediately to form a new deck.
- 2.1.3 Spending and Discarding Cards. Whenever you are prompted to discard or spend a card, place it in the shared discard pile unless it is a dominance card (3.3).
- 2.1.4 Revealing Cards. Whenever you are prompted to reveal a card, place it in your play area (2.6).
- 2.1.5 Ambush Cards. There are five ambush cards: one mouse, one rabbit, one fox, and two birds. You may spend an ambush card for its suit, but it does not have a crafted effect. You may also play one in battle to deal hits (4.3.1).
- 2.1.6 Dominance Cards. There are four dominance cards matching the four suits. You may spend a dominance card for its suit, but it cannot be crafted. You may also play one to permanently change your victory condition (3.3).
2.2 Clearings and Paths
The map of the Woodland is composed of many clearings linked by paths.
- 2.2.1 Adjacency. A clearing is adjacent to all other clearings linked to it by a path.
- 2.2.2 Suit. Each clearing has a suit: mouse, rabbit, or fox.
- 2.2.3 Slots. Each clearing has a number of slots (white boxes). Whenever you place a building, it fills an open slot. You cannot place a building in a clearing with no open slots.
- 2.2.4 Ruins. Slots marked with a small “R” begin the game filled with ruins. Ruins can only be removed by the Vagabond’s Explore action (9.5.3).
2.3 Rivers
Many clearings are linked by rivers. By default rivers are not paths, but can be treated as paths if explicitly instructed. Rivers do not divide clearings or forests.
2.4 Forests
Areas on the map enclosed by paths and clearings are called forests.
- 2.4.1 Adjacency. A forest is adjacent to all clearings that touch it without crossing a path, and it is adjacent to all forests that are separated by only one path.
2.5 Pieces
Each faction has a set of pieces listed on the back of its faction board. Pieces are limited by the contents of the game. If you are prompted to place, take, or remove any number of pieces but you cannot, you must place, take, or remove the maximum number possible.
- 2.5.1 Warriors. If you are prompted to place a warrior, take it from your supply. If one of your warriors is removed, return it to your supply. (The Vagabond pawn is not a warrior and cannot be removed.)
- 2.5.2 Buildings. If you are prompted to place a building, take the leftmost building from its track on your faction board. If one of your buildings is removed, return it to the rightmost empty space of its track.
- 2.5.3 Tokens. If you are prompted to place a token, take the leftmost token from its track, if any, or take it from your supply. If one of your tokens is removed, return it to the rightmost empty space of its track, if any, or to your supply.
- 2.5.4 Items. If you are prompted to take an item, take it from the shared supply on the map and place it in the Crafted Items box on your faction board. If you are prompted to remove an item, remove it from the game permanently.
- 2.5.5 Other. If you are prompted to use any other piece (pawn, marker, etc.), follow its explicit instructions.
2.6 Play Area
Your play area is the area around your faction board. Cards in your play area can only be spent, discarded, or used for other purposes if explicitly instructed.
2.7 Enemy
An enemy is any other player who you are not in a coalition with (9.2.8).
2.8 Ruler
The ruler of a clearing is the player with the most total warriors and buildings in that clearing. (Tokens and pawns do not contribute to rule.) If there is a tie between players in a clearing, no one there is the ruler.
Setup & Turn Structure
Turn Structure
Each player’s turn has three phases: Birdsong, Daylight, and Evening. After a player completes all three phases, the next clockwise player begins their turn. Play continues until one player has won the game (3.1).
Standard Setup Procedure
- Step 1: Assign Factions and Starting Player. Assign one faction to each player using any method. The viable factions at each player count are listed in Player Combinations (Appendix A). Determine the starting player and seating order randomly. Each player takes their chosen faction board and all pieces, as listed on the back of the faction board.
- Step 2: Place Score Markers. Each player places their score marker on “0” on the score track.
- Step 3: Draw Starting Hands. If you are playing with two players, remove all four dominance cards from the deck. Shuffle the deck. Each player draws three cards.
- Step 4: Place Ruins. Place a ruin in each slot on the map marked with an “R” (four in total).
- Step 5: Form Item Supply. Place these items on the matching spaces of the item supply near the top of the map: 2 , 2 , 1 , 1 , 2 , 2 , 2 .
- Step 6: Gather Other Pieces. Hand out the 16 faction overview cards as desired, and place the two custom dice near the map.
- Step 7: Set Up Factions. In setup order (A, B, C, etc.), each player follows their faction’s setup instructions, listed in their rules section and on the back of their faction board.
Quick Reference: Setup
- Step 1: Assign factions, then determine starting player and seating order randomly. Give board and pieces.
- Step 2: Place score markers on the “0” space.
- Step 3: Draw and give three cards to each player.
- Step 4: Place ruins in the four slots marked with “R.”
- Step 5: Form item supply near the top of the map.
- Step 6: Gather overview cards and the two dice.
- Step 7: Set up factions in setup order (A, B, C, etc.).
Appendix A: Faction Combinations & Reach
There are hundreds of ways to play Root. To help you pick a faction combination that will produce an interesting game, use this simple system. Each faction has a specific value called Reach. To create a viable setup, the factions you choose should have a total Reach that equals or exceeds the number for your player count. Adventurous players are welcome to use any faction combination with at least 17 Reach.
Viable Game Sums
| Players | 2 | 3 | 4 | 5 | 6 |
|---|---|---|---|---|---|
| Total Reach | 17+ | 18+ | 21+ | 25+ | 28+ |
Reach Values
- Marquise de Cat: 10
- Underground Duchy: 8
- Eyrie Dynasties: 7
- Vagabond (first): 5
- Riverfolk Company: 5
- Woodland Alliance: 3
- Corvid Conspiracy: 3
- Vagabond (second): 2
- Lizard Cult: 2
Key Actions: Craft, Move & Battle
4.1 Craft
You can craft most cards from your hand to gain an immediate or persistent effect.
- 4.1.1 Cost. To craft a card, you must activate crafting pieces of the suits listed in the card’s bottom-left corner. The suit of a crafting piece matches its clearing. Each crafting piece may be activated only once per turn. A three-color question mark denotes a crafting piece of any suit.
- 4.1.2 Immediate Effects. When you craft an immediate effect, resolve its effect and then discard the card. If it shows an item, take the matching item from the supply and place it in the Crafted Items box on your faction board. If the card lists an item not in the supply, the card cannot be crafted.
- 4.1.3 Persistent Effects. When you craft a persistent effect, place it in your play area. You may use the effect described on the card.
- 4.1.4 No Duplicates. You cannot craft a persistent effect if you have an identical persistent effect in your play area.
Quick Reference: Craft
Play a card and activate the crafting pieces of the suits listed in its bottom-left corner. (Vagabond exhausts .)
The suit of a crafting piece matches its clearing, and you can activate each crafting piece only once per turn.
If you craft an immediate effect, resolve it and discard the card. Often these effects will let you take an item from the supply on the map and score victory points. If the item supply on the map does not have the listed item to take, you cannot craft the card.
If you craft a persistent effect, place the card in your play area. You may use its effect. You cannot craft a persistent effect if you have one of the same name.
4.2 Move
When you move, take any number (more than zero) of your warriors or your pawn from one clearing and move them to one adjacent clearing.
- 4.2.1 You Must Rule. To take a move, you must rule the origin clearing, destination clearing, or both.
- 4.2.2 No Movement Limits. A given piece can be moved any number of times per turn. If you are prompted to take multiple moves, you may move the same or separate groups of warriors.
Quick Reference: Move
Take any number of your warriors or your pawn from one clearing and move them to one adjacent clearing.
You must rule the origin, destination, or both. A given piece can be moved any number of times per turn.
4.3 Battle
When you battle, choose a clearing where you have warriors or your pawn as the clearing of battle. You are the attacker. Choose another player in the clearing of battle to be the defender.
- 4.3.1 Step 1: Defender May Ambush. The defender may play one ambush card matching the clearing of battle. If the ambush is not foiled, the defender deals two hits immediately. Then, the defender discards the ambush card. If no attacking warriors or pawns remain, end the battle immediately.
- Foil Ambush. After the defender plays an ambush card, the attacker may cancel its effect by also playing an ambush card matching the clearing of the battle. (The defender still discards their ambush card.)
- 4.3.2 Step 2: Roll Dice and Add Extra Hits. Roll both dice. The attacker will deal hits equal to the higher roll, and the defender will deal hits equal to the lower roll. If the rolls are equal, attacker and defender will deal the same number of hits. (The use of “will” here reflects that hits are not dealt until step 3.)
- Maximum Rolled Hits. The maximum hits you can deal from rolling equals the number of your warriors in the clearing of battle, whether you are the attacker or defender.
- Extra Hits. After counting hits from rolling, the attacker and defender can add extra hits by using special abilities or other effects in their play areas. (Extra hits are not limited by the number of warriors in the clearing of battle.)
- Defenseless. If the defender has no warriors in the clearing of battle, the attacker will deal an extra hit.
- Maximum Rolled Hits. The maximum hits you can deal from rolling equals the number of your warriors in the clearing of battle, whether you are the attacker or defender.
- 4.3.3 Step 3: Deal Hits. Attacker and defender deal hits simultaneously. Each hit you deal removes one piece. The player taking hits chooses which of their pieces are removed from the clearing of battle, but must choose to remove all their warriors there before they choose to remove any of their buildings or tokens there in any order. (You score one victory point per enemy building or token removed.)
Quick Reference: Battle
You can battle in a clearing where you have warriors or your pawn.
- Step 1: Defender May Ambush. Attacker may cancel defender’s ambush card by also playing ambush card.
- Step 2: Roll Dice and Add Extra Hits. Attacker will deal hits equal to the higher roll, and defender will deal hits equal to the lower roll. The maximum hits you can deal by rolling equals your number of warriors in the clearing of battle. extra hits are not limited by warriors. If the defender has no warriors in the clearing of battle, the attacker deals an extra hit.
- Step 3: Deal Hits Simultaneously. Each hit removes one piece—warriors first, then buildings and tokens as chosen by the player taking the hits.
Remember: Score a victory point each time you remove an enemy building or token.
Victory & Dominance Cards
3.1 How to Win
The first player to reach 30 victory points immediately wins the game. If multiple players reach 30 or more victory points simultaneously, the player taking the current turn wins.
3.2 Scoring Victory Points
Each faction has a unique way to score victory points, but any faction can score victory points as follows.
- 3.2.1 Removing Buildings and Tokens. Whenever you remove an enemy’s building or token, you score one victory point.
- 3.2.2 Crafting Items. Whenever you craft an item (4.1), you score the victory points listed on the card.
3.3 Dominance Cards
The deck has four dominance cards, which let you win the game without scoring 30 victory points.
- 3.3.1 Activating. During your Daylight, if you have at least 10 victory points, you may activate a dominance card in your hand by placing it in your play area. Remove your score marker from the score track. You can no longer score victory points.
- Mouse, Rabbit, or Fox Dominance. You win the game immediately if you rule three clearings of the suit matching the activated dominance card at the start of your Birdsong.
- Bird Dominance. You win the game immediately if you rule two clearings in opposite corners at the start of your Birdsong.
- 3.3.2 Activated Cards. An activated dominance card does not count against your hand limit, and it cannot be removed from play. You cannot replace an activated dominance card with a different one.
- 3.3.3 Spending for Suit. A dominance card can be spent for its suit. However, when it would be placed in the discard pile, instead place it near the map to show it is available to be taken.
- 3.3.4 Taking Available Cards. During your Daylight, you can take an available dominance card into your hand by spending a card of matching suit.
Faction: Marquise de Cat
6. Marquise de Cat
6.1 Overview
The Marquise de Cat occupies the Woodland and wants to turn it into an industrial and military powerhouse. Each time the Marquise builds one of her buildings—a workshop, sawmill, or recruiter—she scores victory points. The more of the same building she has on the map, the more points she scores. However, to fuel ongoing construction, the Marquise must maintain and protect a strong, interconnected economy of wood.
6.2 Faction Rules and Abilities
- 6.2.1 Crafting. The Marquise crafts during Daylight by activating workshops.
- 6.2.2 The Keep. Only the Marquise can place pieces in the clearing with the keep token. (Pieces may be moved into this clearing.) If the keep token is removed, remove it from the game permanently.
- 6.2.3 Field Hospitals. Whenever any number of Marquise warriors are removed from a clearing, the Marquise may spend a card matching that clearing to place those warriors in the clearing with the keep token.
6.3 Faction Setup
- Step 1: Gather Warriors and Wood. Form supplies of 25 warriors and 8 wood tokens.
- Step 2: Place Keep. Place the keep token in the corner clearing of your choice.
- Step 3: Garrison. Place a warrior in each clearing except the clearing in the diagonally opposite corner from the clearing with the keep token.
- Step 4: Place Starting Buildings. Place 1 sawmill, 1 workshop, and 1 recruiter. You may place them among the clearing with the keep token and any adjacent clearings, in any combination.
- Step 5: Fill Buildings Tracks. Place your remaining 5 sawmills, 5 workshops, and 5 recruiters on your matching Buildings tracks from right to left. (This fills every space except the leftmost space of each track.)
6.4 Birdsong
Place wood tokens in each clearing with any number of sawmills, one wood per sawmill there.
6.5 Daylight
First, you may activate workshops to craft cards from your hand. Then, you may take up to three actions—plus one action per bird card you spend (not as part of an action)—in any order and number.
- 6.5.1 Battle. Initiate a battle.
- 6.5.2 March. Take up to two moves.
- 6.5.3 Recruit. Place one warrior at each recruiter. You may take this action only once per turn.
- 6.5.4 Build. Place a building.
- Choose Building. Choose whether you want to place a sawmill, workshop, or recruiter. Find the leftmost building of that type remaining on your faction board. Note that building’s cost, listed at the top of its column.
- Choose Clearing and Pay Wood. Choose any clearing you rule. Remove wood tokens equal in number to the building’s cost from the chosen clearing, any adjacent clearings you rule, or any clearings connected to the chosen clearing you rule through any number of clearings you rule.
- Place Building and Score. Place the chosen building on the chosen clearing, and score the victory points listed on the space uncovered on your faction board.
- 6.5.5 Overwork. Spend a card matching the clearing of a sawmill, and place a wood token there.
6.6 Evening
Draw one card, plus one card per uncovered draw bonus. Then, if you have more than five cards in your hand, discard cards of your choice until you have five.
Faction: Eyrie Dynasties
7. Eyrie Dynasties
7.1 Overview
The Eyrie Dynasties wish to restore their once-dignified kind to their former glory in the Woodland by retaking control of the forest clearings. During their Evening, the Eyrie score victory points based on the number of roosts on the map. The greater their presence in the Woodland, the greater their gains. However, the Eyrie are bound by their Decree, an ever-increasing set of mandated actions promised by their leader. Each turn, they must take all of the actions on their Decree, or else fall into turmoil.
7.2 Faction Rules and Abilities
- 7.2.1 Crafting. The Eyrie craft before resolving the Decree during Daylight by activating roosts.
- 7.2.2 Lords of the Forest. The Eyrie rule a clearing when tied for most combined warriors and buildings there. They do not rule empty clearings.
- 7.2.3 Disdain for Trade. Whenever the Eyrie craft an item, they ignore the listed victory points and instead score only one victory point.
7.3 Faction Setup
- Step 1: Gather Warriors. Form a supply of 20 warriors.
- Step 2: Place Roost and Starting Warriors. Place 1 roost and 6 warriors in the corner clearing diagonally opposite from the clearing with the keep token. If the Marquise is not playing, place those pieces in the corner clearing of your choice.
- Step 3: Choose Leader. Choose 1 of the 4 Eyrie leader cards and place it in your Leader Card slot. Gather the remaining leaders face up near you.
- Step 4: Tuck Viziers. Tuck your 2 Loyal Vizier cards, showing their suit, into the Decree columns above your faction board as listed on your leader.
- Step 5: Fill Roosts Track. Place your 6 remaining roosts on your Roosts track from right to left.
7.4 Birdsong
Your Birdsong has three steps in the following order.
- 7.4.1 Emergency Orders. If you have no cards in your hand, draw one card.
- 7.4.2 Add to the Decree. You must add one or two cards to the Decree, but only one card added may be a bird card. You may play each card to any column, and each column can hold any number of cards.
- 7.4.3 A New Roost. If you have no roosts on the map, place a roost and three warriors in a clearing with the fewest warriors where all those pieces can be placed.
7.5 Daylight
Your Daylight has two steps in the following order.
- 7.5.1 Craft. You may activate roosts to craft cards from your hand.
- 7.5.2 Resolve the Decree. You must resolve the Decree, starting with the leftmost column and moving right. In each column, you must resolve all of its cards, but in any order. For each card, you must take the action listed for its column, as follows. If you cannot fully take an action, you immediately fall into turmoil (7.7).
- Recruit. Place a warrior in any clearing with a roost whose suit matches the card suit.
- Move. Move from any clearing whose suit matches the card suit. (You must move at least one warrior.)
- Battle. Initiate a battle in any clearing whose suit matches the card suit.
- Build. Place a roost in any clearing you rule whose suit matches the card suit and which has no roost.
7.6 Evening
Your Evening has two steps in the following order.
- 7.6.1 Score Points. Score the victory points listed on the rightmost empty space of your Roosts track.
- 7.6.2 Draw and Discard. Draw one card, plus one card per uncovered draw bonus. Then, if you have more than five cards in your hand, discard cards of your choice until you have five.
7.7 Turmoil
If you cannot fully take an action in the Decree (7.5.2) for any reason, you fall into turmoil, as follows.
- 7.7.1 Step 1: Humiliate. Lose one victory point per bird card (including Loyal Viziers) on the Decree.
- 7.7.2 Step 2: Purge. Discard all of the cards on the Decree except your Loyal Viziers.
- 7.7.3 Step 3: Depose. Flip your current leader face down and set it aside, choose a new leader from those face up, and place on your faction board. Tuck your Loyal Viziers into the Decree spaces listed on your new leader.
- A New Clutch. If you must choose a new leader but none are face up, flip them all face up.
- 7.7.4 Step 4: Rest. End Daylight and begin Evening.
7.8 Leaders Reference
The Eyrie have four leader cards, as follows.
- 7.8.1 Builder. Loyal Viziers begin on Recruit and Move. Whenever you craft, you ignore your Disdain for Trade special ability (7.2.3).
- 7.8.2 Charismatic. Loyal Viziers begin on Recruit and Battle. Whenever you take a Recruit action, you must place two warriors instead of one.
- 7.8.3 Commander. Loyal Viziers begin on Move and Battle. In battle as attacker, you deal an extra hit.
- 7.8.4 Despot. Loyal Viziers begin on Move and Build. Whenever you remove at least one enemy building or token in battle, you score one victory point.
Faction: Woodland Alliance
8. Woodland Alliance
8.1 Overview
The Woodland Alliance works to gain the sympathy of the various creatures of the Woodland who are dissatisfied with their present condition. Each time the Alliance places a sympathy token, they may score victory points. The more sympathy on the map they have, the more victory points they score. Gaining the sympathy of the people requires supporters. These supporters can also be put toward violent ends, inciting outright rebellion across the forest. When a revolt erupts, the Alliance will establish a base. Bases allow the Alliance to train officers, increasing their military flexibility.
8.2 Faction Rules and Abilities
- 8.2.1 Crafting. The Alliance crafts during Daylight by activating sympathy tokens.
- 8.2.2 Guerrilla War. As defender in battle, the Alliance will deal hits equal to the higher roll, and the attacker will deal hits equal to the lower roll.
- 8.2.3 The Supporters Stack. To take various actions, the Alliance spends supporters, which are cards on their Supporters stack. Supporters can only be spent for their suit and do not count against the Alliance’s hand size. Supporters are face down, but the Alliance may inspect them at any time.
- Capacity. If the Alliance has no bases on the map, the Supporters stack can only hold up to five cards. If the Alliance would gain a supporter but the stack cannot hold it, that card is discarded. If any bases are on the map, the Supporters stack can hold unlimited cards.
- 8.2.4 Removing Bases. Whenever a base is removed, the Alliance must discard all supporters matching the suit of the base (including birds) and remove half of their officers, rounded up. If the Alliance has no more bases on the map and has more than five supporters, they must discard down to five supporters.
- 8.2.5 Sympathy Tokens. The Alliance has 10 sympathy tokens.
- Placement Limits. A clearing can hold only one sympathy token.
- Terms. A sympathetic clearing is one with a sympathy token. An unsympathetic clearing is one without a sympathy token.
- 8.2.6 Outrage. Whenever another player removes a sympathy token or moves any warriors into a sympathetic clearing, they must add one card matching the affected clearing from their hand to the Supporters stack. If they have no matching cards (including no birds), they must show their hand to the Alliance, and then the Alliance draws a card from the deck and adds it to the Supporters stack.
8.3 Faction Setup
- Step 1: Gather Warriors. Form a supply of 10 warriors.
- Step 2: Place Bases. Place 3 bases on the matching spaces in your Bases box.
- Step 3: Fill Sympathy Track. Place 10 sympathy tokens on your Sympathy track.
- Step 4: Gain Supporters. Draw 3 cards and place them face down on your Supporters stack.
8.4 Birdsong
Your Birdsong has two steps in the following order.
- 8.4.1 Revolt. Remove enemy pieces and place a base and warriors, as follows. You may revolt any number of times.
- Choose Clearing. A sympathetic clearing matching an unbuilt base (cannot revolt if on map).
- Spend Supporters. Spend two supporters matching the suit of the chosen clearing.
- Resolve Effect. Remove all enemy pieces in the chosen clearing. Then, place the base matching the clearing there, and place warriors there equal to the number of sympathetic clearings matching the base’s suit. Finally, place one warrior in the Officers box. This warrior is now an officer. (Remember to score one victory point per token and building removed.)
- 8.4.2 Spread Sympathy. Place a sympathy token, as follows. You may spread sympathy any number of times.
- Choose Clearing. An unsympathetic clearing adjacent to a sympathetic clearing. If there are no sympathetic clearings, you may choose any clearing.
- Spend Supporters. Spend supporters matching the suit of the chosen clearing. The number of supporters that must be spent is listed above the sympathy token.
- Martial Law. You must spend another matching supporter if the target clearing has at least three warriors belonging to another player.
- Resolve Effect. Place a sympathy token in the chosen clearing. Score the victory points listed on the space uncovered on your faction board.
8.5 Daylight
You may take the following actions in any order and number.
- 8.5.1 Craft. You may activate sympathy tokens to craft a card from your hand.
- 8.5.2 Mobilize. Add a card from your hand to the Supporters stack.
- 8.5.3 Train. Spend a card whose suit matches a built base to place a warrior in the Officers box. This warrior is now an officer.
8.6 Evening
Your Evening has two steps in the following order.
- 8.6.1 Military Operations. You may take actions, as follows, up to your number of officers, in any order and number.
- Move. Take one move.
- Battle. Initiate a battle.
- Recruit. Place a warrior in any clearing with a base.
- Organize. Remove one of your warriors from an unsympathetic clearing, place a sympathy token there, and score the victory points listed on the space uncovered on your faction board.
- 8.6.2 Draw and Discard. Draw one card, plus one card per uncovered draw bonus. Then, if you have more than five cards in your hand, discard cards of your choice until you have five.
Faction: Vagabond
9. Vagabond
9.1 Overview
The Vagabond plays all sides of the conflict while going on quests to increase his renown throughout the wood. Each time the Vagabond improves his relationship with another faction, or removes a warrior belonging to a faction hostile toward him, he scores victory points. He can also complete quests to score victory points. To move and act effectively the Vagabond must manage his pack of items, expanding his selection by exploring the forest ruins and providing aid to other factions.
9.2 Faction Rules and Abilities
- 9.2.1 Crafting. The Vagabond exhausts to craft. All of his match the suit of his current clearing. If the Vagabond crafts an item, he may immediately take it, face up.
- 9.2.2 Lone Wanderer. The Vagabond pawn is not a warrior (so he cannot rule a clearing or stop another player from ruling one). The Vagabond pawn cannot be removed from the map.
- Full Removal. Whenever an enemy player uses an effect that says it removes all enemy pieces from a clearing (such as Alliance revolts, Favor of the Mice cards, Conspiracy bombs) with the Vagabond, the Vagabond damages three items.
- 9.2.3 Nimble. The Vagabond can move regardless of who rules his origin or destination clearing (4.2.1).
- 9.2.4 Defenseless. In battle, the Vagabond is defenseless (4.3.2.III) if he has no undamaged .
- 9.2.5 Items. The Vagabond’s capabilities depend on the items he acquires. Items on the Vagabond’s faction board can be face up or face down. The Vagabond exhausts face-up undamaged items, flipping them face down, to take many actions.
- Item Tracks. When gained, , , and are placed face up on their matching tracks. Each track can only hold three matching items.
- The Satchel. When gained, , , , , and are placed face up in the Vagabond’s Satchel.
- Moving Items. The Vagabond can freely move face-up, undamaged , , and between their tracks and the Satchel.
- Item Tracks. When gained,
- 9.2.6 Maximum Rolled Hits. In battle, the Vagabond’s maximum rolled hits (4.2.2.I) equals his undamaged , face up or face down, in his Satchel.
- 9.2.7 Taking Hits. Whenever the Vagabond takes a hit (4.3.3), he must damage one undamaged item, moving it to his Damaged box. If no undamaged items remain to damage, the Vagabond ignores any remaining hits.
- 9.2.8 Dominance Cards and Coalitions. In games with four or more players, the Vagabond can activate a dominance card to form a coalition with the player with the fewest victory points other than himself, placing his score marker on the chosen player’s faction board. If there is a tie for fewest, he chooses one tied player. If the chosen player wins the game, the Vagabond also wins. (The Vagabond no longer scores victory points. He cannot form a coalition with a player who has already activated a dominance card.)
- 9.2.9 Relationships. Your faction board shows a Relationships chart, which has four spaces on the Allied track and one Hostile box. It holds a relationship marker for each non-Vagabond player.
- Improving Relationships. You can improve a relationship with a non-Hostile player by taking the Aid action.
- Cost. Aid a non-Hostile player the number of times listed between their current Allied space and their next Allied space during the same turn. (A given Aid action counts toward only one improvement in relationship.)
- Effect. Advance that player’s relationship marker one space right on the track. Score the victory points listed in the new space.
- Allied Status. If a relationship marker reaches the final space on the Allied track, you are now Allied with the player shown by that relationship marker. (Their warriors trust you!)
- Aiding Ally. Each time you Aid an Allied player, score two victory points.
- Moving with Ally. Whenever you move to a clearing, you may also move warriors of one Allied player from your origin clearing to your destination clearing.
- Attacking with Ally. Whenever you initiate a battle, you may treat Allied warriors of one player in the clearing of battle as your own. The maximum hits you can roll equals the number of that Ally’s warriors there plus your total undamaged . You cannot treat Allied warriors as your own if that Ally is the defender.
- Taking Hits with Ally. In a battle where you treat Allied warriors as your own, you can take hits by removing Allied warriors. However, if you take more hits by removing Allied warriors than by damaging items during the same battle, that Allied player becomes Hostile (9.2.9.III) at the end of the battle. This rule overrides the condition for becoming Hostile in 9.2.9.III.
- Hostile Status. If you ever remove a warrior of a non-Hostile player, their relationship marker immediately moves to the Hostile box. This player is now Hostile.
- Infamy. Whenever you remove a piece of a Hostile player in battle during your turn, score one victory point. (Add this to points scored for enemy buildings and tokens. Do not score a point for removing the warrior that made the player Hostile.)
- Moving into Hostile Clearings. You must exhaust an extra to move into a clearing with any warriors of any Hostile players.
- Aiding Hostile Players. You cannot move a relationship marker out of the Hostile box by using Aid, but you can still Aid a Hostile player to take crafted items.
- Coalition with Hostile Player. You can form a coalition (9.2.8) with a Hostile player. If you do, move their relationship marker to the Indifferent space.
- Improving Relationships. You can improve a relationship with a non-Hostile player by taking the Aid action.
9.3 Faction Setup
- Step 1: Choose Character. Choose a character card and place it in your Character Card slot.
- Step 2: Place Pawn. Place your Vagabond pawn in any forest.
- Step 3: Get Quests. Shuffle your quest deck, draw 3 quest cards, and place them face up near you.
- Step 4: Populate Ruins. Take the 4 ruins from the map, and take the , , , and items marked with an “R.” Place one beneath each ruin and then shuffle each ruin stack. Then, return each stack to an empty ruin slot on the map.
- Step 5: Take Starting Items. Take the items marked with “S” listed on your character card. Place any listed , , and items face up on the matching tracks of your faction board. Place all other listed items face up in your Satchel. Return any remaining “S” items to the box.
- Step 6: Set Relationships. Take a relationship marker for each non-Vagabond faction and place them all on the Indifferent space of your Relationships chart.
9.4 Birdsong
Your Birdsong has two steps in the following order.
- 9.4.1 Refresh. Flip two exhausted items face up for each face up at the start of your Birdsong. Then flip up three more exhausted items.
- 9.4.2 Slip. You may move into an adjacent clearing or forest without exhausting any , even for moving into a Hostile clearing (9.2.9.IIIb). This move ignores all effects that prevent movement out of a clearing (such as the Corvids’ snare).
9.5 Daylight
You can exhaust items to take the following actions, in any order and number. If you exhaust a , , or on a track, move it to the Satchel.
- 9.5.1 Move. Exhaust one to move, plus one if the destination clearing has any Hostile warriors. You cannot move into a forest. If in a forest, you may only move into an adjacent clearing.
- 9.5.2 Battle. Exhaust one to initiate a battle. (Check your relationship with the defender.)
- 9.5.3 Explore. Exhaust one to take one item under a ruin in your clearing, reveal it, and place it face up in your Satchel or on its matching track. Then, you score one victory point. If you remove the last item from a ruin, remove the ruin.
- 9.5.4 Aid. Exhaust any one item, and give one of your cards matching your clearing to any player with at least one piece there (even Hostile). Then, you may take one item, if any, from that player’s Crafted Items box, and place it face up in your Satchel or on its matching track. (Check your relationship with that player.)
- 9.5.5 Quest. Choose a quest whose suit matches your clearing, and exhaust the two items listed on the quest to complete it. Place the quest in your play area, and then draw a new quest and place it near the map. You may score one victory point per quest of matching suit you have completed, including this one, or draw two cards from the deck.
- 9.5.6 Strike. Exhaust one to remove a warrior from your clearing. If a player has no warriors there, you may instead remove one building or token of that player. (Check your relationship with that player.)
- 9.5.7 Repair. Exhaust one to move one damaged item to the Satchel or to its matching track (if face up , , ), keeping the item on its current side.
- 9.5.8 Craft. Play a card from your hand, and exhaust the of listed suit to craft it. All of your match the suit of your clearing. If a card requires multiple of one suit to craft, you must exhaust the listed number of . If you craft an item, you may place it face up in your Satchel or on the matching track.
- 9.5.9 Special Action. Exhaust one to take the action listed on your character card.
9.6 Evening
Your Evening has four steps, as follows.
- 9.6.1 An Evening’s Rest. If you are in a forest, move all items in your Damaged box to your Satchel or their matching track, and flip them face up.
- 9.6.2 Draw Cards. Draw one card, plus one card per face up on the matching track.
- 9.6.3 Discard Cards. If you have more than five cards in your hand, discard cards of your choice until you have five.
- 9.6.4 Check Item Capacity. If you have more items total in your Satchel and Damaged box than your item limit—six plus two per face up on the matching track—remove items from your Satchel and Damaged box until you have items equal to your item limit, and remove them from the game permanently.
9.7 Playing with Two Vagabonds
If you have The Riverfolk Expansion, you can play a game with two Vagabonds by following these rules.
- 9.7.1 Add Extra Item to Ruins. During setup, use both sets of “R” items and place two “R” items in each ruin slot. When a Vagabond explores a ruin with two items, he may look at them and take one of his choice. (By taking two Explore actions, he could take both items from one ruin.) He cannot take an “R” item that matches an “R” item already on his faction board. If he explores but does not take an item, he does not score a victory point, but the torch is still exhausted.
- 9.7.2 Randomize Setup Order. Randomly determine which Vagabond sets up first.
- 9.7.3 Share Quests. Either Vagabond may complete any of the three face-up quests. Do not add extra quest cards during setup.
Appendix E: Vagabond Characters Reference
E.1 Thief
- E.1.1 Starting Items. Start with , , , .
- E.1.2 Special Action: Steal. Exhaust one to take a random card from any player in your clearing.
E.2 Tinker
- E.2.1 Starting Items. Start with , , , .
- E.2.2 Special Action: Day Labor. Exhaust one to take a card from the discard pile whose suit matches your clearing. (You can always take a bird card.)
E.3 Ranger
- E.3.1 Starting Items. Start with , , , .
- E.3.2 Special Action: Hideout. Exhaust one to repair three items. Then, immediately end Daylight and begin Evening.
E.4 Vagrant
- E.4.1 Starting Items. Start with , , .
- E.4.2 Special Action: Instigate. Exhaust a to initiate a battle in your clearing. You choose the attacker and defender, you choose the order in which they each remove buildings and tokens, and you remove pieces for each. (Score a victory point per building or token of either player removed, and per Hostile piece of either player removed.)
E.5 Arbiter
- E.5.1 Starting Items. Start with , , , .
- E.5.2 Special Action: Protector. Immediately before dice are rolled in a battle, the defender may enlist the Arbiter in the clearing of battle. The Arbiter scores one victory point and adds all of his undamaged to the maximum rolled hits of the defender. The Arbiter cannot enlist himself.
E.6 Scoundrel
- E.6.1 Starting Items. Start with , , , .
- E.6.2 Special Action: Scorched Earth. Exhaust a and place it in your clearing. Remove all enemy pieces from that clearing. For the rest of the game, pieces cannot be placed in or moved into this clearing. (You remain in this clearing. Once you move out, you cannot move back in.)
E.7 Adventurer
- E.7.1 Starting Items. Start with , , .
- E.7.2 Special Action: Improvise. Once per turn while taking the Quest action, you may treat one unexhausted item as any other item. When you exhaust it to complete the quest, also damage that item.
E.8 Ronin
- E.8.1 Starting Items. Start with , , , .
- E.8.2 Special Action: Swift Strike. You may exhaust a to deal an extra hit in battle (after rolling).
E.9 Harrier
- E.9.1 Starting Items. Start with , , , .
- E.9.2 Special Action: Glide. Exhaust a to move to any clearing (even Hostile) on the map without exhausting any .
Expansion Factions: Lizard Cult & Riverfolk Company
The next two sections refer to factions in The Riverfolk Expansion.
10. Lizard Cult
10.1 Overview
Catering to the discarded creatures of the Woodland, the Lizard Cult seeks to overwhelm its foes through sheer force of will. Wherever the Cult rules clearings, it can build gardens, using word of mouth and beak to spread its gospel to the animals living there. The firmer its hold over the hearts of its followers, the more victory points the Cult can score by completing the proper rituals. While other factions spend cards to achieve their aims, the Cult acts chiefly by revealing cards and gradually gathering a set of ideal followers. These revealed cards are returned to the Cult’s hand in Evening, unless discarded to score victory points. However, this gentler approach makes movement and battle difficult—the Cult can only take these actions with its radicalized acolytes, gained as the Cult’s warriors are slaughtered while defending in battle.
10.2 Faction Rules and Abilities
- 10.2.1 Crafting. The Cult crafts during Evening by activating gardens matching the Outcast suit (10.4.1).
- 10.2.2 Hatred of Birds. Bird cards are not wild for Cult rituals.
- 10.2.3 Revenge. Whenever a Cult warrior is removed while defending in battle, it is placed in the Acolytes box instead of the Cult’s supply.
- 10.2.4 Pilgrims. The Cult rules any clearings where they have any gardens. This overrides the Eyrie’s Lords of the Forest (7.2.2).
- 10.2.5 Fear of the Faithful. Whenever a garden is removed, the Cult must discard a random card.
- 10.2.6 The Lost Souls Pile. Whenever any card is spent or discarded (even a dominance card), place it in the Lost Souls pile instead of the discard pile. The Lost Souls pile can be inspected by any player at any time.
10.3 Faction Setup
- Step 1: Gather Warriors. Form a supply of 25 warriors.
- Step 2: Place Warriors. In the corner clearing diagonally opposite from the Marquise’s keep or Eyrie’s starting roost, place 4 warriors and 1 garden matching the clearing; if both the Marquise and Eyrie are in play, choose one of the two other corners. Then place 1 warrior in each adjacent clearing.
- Step 3: Choose Outcast. Place the outcast marker on any suit space in the Outcast box. The suit of this space is called the Outcast.
- Step 4: Fill Gardens Tracks. Place your 14 remaining gardens on the matching spaces of your Gardens tracks from right to left.
10.4 Birdsong
Your Birdsong has three steps in the following order.
- 10.4.1 Adjust Outcast. Look at the cards in the Lost Souls pile, ignoring birds. The suit with the most cards becomes the new Outcast—move the outcast marker, showing its Outcast side, to that suit. If that suit was already the Outcast, flip the marker to Hated. If no one suit had the most cards, the marker stays on its current suit and, if it is not Hated, flips to its Hated side.
- 10.4.2 Discard Lost Souls. Discard all of the cards in the Lost Souls pile to the discard pile. (Dominance cards become available to take.)
- 10.4.3 Perform Conspiracies. You can spend acolytes, returning them to your supply, to perform conspiracies in clearings matching the Outcast, in any order and number, as follows. If the Outcast is Hated, the conspiracy costs one fewer acolyte. If you perform Convert or Sanctify, you must complete the conspiracy.
- Crusade. Spend two acolytes to initiate a battle in an Outcast clearing or to move (at least one warrior) from an Outcast clearing and then, if you wish, initiate a battle in the destination clearing.
- Convert. Spend two acolytes to remove an enemy warrior from an Outcast clearing and then place one warrior there.
- Sanctify. Spend three acolytes to remove an enemy building from an Outcast clearing and then place a garden of matching suit there.
10.5 Daylight
You may reveal any number of cards from your hand (into your play area) and perform one ritual per card revealed, in any order and number, as follows. (Revealed cards cannot be used for any other purposes during Daylight.)
- 10.5.1 Build. In a clearing you rule matching the revealed card, place a matching garden.
- 10.5.2 Recruit. In a clearing matching the revealed card, place a warrior.
- 10.5.3 Score. Spend the same card you reveal (placing in Lost Souls) to score the victory points listed above the rightmost empty Gardens space of the suit matching the revealed card. You may perform this only once per turn per suit.
- 10.5.4 Sacrifice. Place a warrior in the Acolytes box. To perform this ritual, you must reveal a bird card.
10.6 Evening
Your Evening has three steps in the following order.
- 10.6.1 Return Revealed Cards. Return all cards you revealed this turn to your hand.
- 10.6.2 Craft. You may craft by activating gardens matching the Outcast suit.
- 10.6.3 Draw and Discard. Draw one card, plus one card per uncovered draw bonus. Then, if you have more than five cards in your hand, discard cards of your choice until you have five.
11. Riverfolk Company
11.1 Overview
When news arrived that the Woodland on the shore of the great lake was descending into all-out war, the Riverfolk Company quickly dispatched its officers to set up shop. As other factions purchase their services, the Riverfolk can further entrench their commercial interests by establishing trade posts along the river, scoring victory points. So too can they score points by raw accumulation of funds, but a big treasury makes for an easy target, so the Riverfolk must take care in expanding their operations across the dangerous forest.
11.2 Faction Rules and Abilities
- 11.2.1 Crafting. The Riverfolk craft during Daylight by committing funds to empty spaces on the Trade Posts tracks. (They have no crafting pieces.)
- 11.2.2 Swimmers. The Riverfolk treat rivers as paths and may move along rivers regardless of who rules their origin or destination clearing. (They can still move using paths.)
- 11.2.3 Public Hand. The Riverfolk place their hand face up above their faction board. If another player would take a random card from the Riverfolk’s hand, the cards are flipped face down, shuffled, drawn from, and then flipped face up.
- 11.2.4 Funds. To take many actions, the Riverfolk commit and spend funds: warriors in their Funds box.
- 11.2.5 Trade Posts. The Riverfolk score victory points when they place trade posts.
- Trade Disruption. Whenever a trade post is removed, the Riverfolk remove half of their funds, rounded up, and remove the trade post from the game permanently.
- 11.2.6 Buying Services. At the start of another player’s Birdsong, that player may buy Riverfolk services.
- Cost. The buyer must place warriors from their supply into the Riverfolk’s Payments box equal in number to the cost of that service listed on the Riverfolk’s Services track.
- Number of Services. Each turn, a player may buy one service plus one per clearing with a trade post and at least one piece of that player.
- Vagabond Funds. The Vagabond pays for services by exhausting items—for each item he exhausts to do so, the Riverfolk place one of their own warriors in the Payments box.
- 11.2.7 Riverfolk Services. The Riverfolk offer three services, as follows.
- Hand Card. The buyer takes any card from the Riverfolk’s hand and adds it to their hand. (The buyer may buy this service multiple times as long as they have access to enough trade posts.)
- Riverboats. The buyer treats rivers as paths until the end of their turn.
- Mercenaries. During Daylight and Evening of this turn, the buyer treats Riverfolk warriors as their own only for rule and for battle against factions other than the Riverfolk. (The buyer cannot move them, count them toward dominance, or remove them except by taking hits.)
- Taking Hits. The buyer must split hits, taking odd hits by removing owned (not Riverfolk) warriors, if any, or owned buildings or tokens only if they have no warriors (including Riverfolk) in the clearing of battle.
- Vagabond Mercenaries. The Vagabond cannot buy Riverfolk mercenaries.
11.3 Faction Setup
- Step 1: Gather Warriors. Form a supply of 15 warriors.
- Step 2: Place Warriors. Place 4 warriors in any clearings touching the river.
- Step 3: Fill Trade Posts Tracks. Place 9 trade posts on the matching spaces of your Trade Posts tracks.
- Step 4: Gain Starting Funds. Place 3 warriors in your Payments box.
- Step 5: Set Starting Prices. Place 1 service marker on any space of each of your Services tracks.
11.4 Birdsong
Your Birdsong has three steps in the following order.
- 11.4.1 Protectionism. If the Payments box is empty, place two warriors in it.
- 11.4.2 Score Dividends. If there are any trade posts on the map, score one victory point per two funds. (Do not score for warriors in Payments or Committed.)
- 11.4.3 Gather Funds. Move all warriors on your faction board to the Funds box.
11.5 Daylight
You can commit and spend funds to take actions, as follows, in any order and number. When you commit a fund, move the warrior to the Committed box. When you spend a fund, return the warrior to its owner’s supply.
- 11.5.1 Move. Commit one fund to take a move.
- 11.5.2 Battle. Commit one fund to initiate a battle.
- 11.5.3 Craft. Commit funds to craft a card from your hand. Instead of moving these warriors to the Committed box, you must place them on empty spaces of the Trade Posts tracks matching the suits listed on the crafting cost.
- Export. You may ignore the listed benefit of crafting a card, discarding it, to place one of your warriors in the Payments box.
- 11.5.4 Draw. Commit one fund to draw a card.
- 11.5.5 Recruit. Spend one fund to place a warrior in any clearing with a river.
- 11.5.6 Establish Trade Post with Garrison. Spend two funds to place a trade post and a warrior.
- Choose Clearing. Choose any clearing without a trade post that is ruled by any player.
- Spend Funds. Spend two funds of the player who rules the chosen clearing.
- Place and Score. Place the matching trade post and one warrior in the chosen clearing. Score the victory points listed on the space uncovered on your faction board.
11.6 Evening
Your Evening has two steps in the following order.
- 11.6.1 Discard Cards. If you have more than five cards in your hand, discard cards of your choice until there are five.
- 11.6.2 Set Costs. You may move each service marker to any space on its track, setting it to a new cost.
Expansion Factions: Underground Duchy & Corvid Conspiracy
The next two sections refer to factions in The Underworld Expansion.
12. Underground Duchy
12.1 Overview
The Underground Duchy wants to show the foreign creatures of the Woodland that they would be better off as subjects. As they set up frontier outposts to show their power in the Woodland, the Duchy can sway ministers to the cause, scoring victory points and diverting more of the Duchy’s resources. But be careful—a reversal of fortune could spell public humiliation, leading ministers to abandon the task.
12.2 Faction Rules and Abilities
- 12.2.1 Crafting. The Duchy crafts during Evening by activating citadels and markets.
- 12.2.2 The Burrow. The Burrow is a clearing adjacent to each clearing with a tunnel token. Only the Duchy can place pieces in or move pieces into the Burrow. The Duchy always rules the Burrow (even with no pieces there).
- 12.2.3 The Price of Failure. Whenever any number of Duchy buildings are removed, the Duchy discards a random card, returns their swayed minister card of highest rank (lord, then noble, then squire) to their Unswayed Ministers pile, and removes its crown from the game permanently. If they have multiple swayed ministers of highest rank, the Duchy chooses which to return.
- 12.2.4 Tunnels. The Duchy has three tunnel tokens. If the Duchy is prompted to place a tunnel but all three tunnels are on the map, the Duchy may first remove any tunnel from the map.
12.3 Faction Setup
- Step 1: Gather Warriors and Tunnels. Form supplies of 20 warriors and 3 tunnel tokens.
- Step 2: Prepare the Burrow. Place the Burrow board near the map.
- Step 3: Surface. Place 2 warriors and 1 tunnel in a corner clearing that does not have the Marquise’s keep, Eyrie’s starting roost, or Cult’s starting garden, and is diagonally opposite from one of those starting clearings if possible. Then place 2 warriors in each clearing adjacent to the chosen corner clearing, except the Burrow.
- Step 4: Fill Buildings Tracks. Place 3 citadels and 3 markets on your matching Buildings spaces.
- Step 5: Collect Ministers. Place 9 minister cards face up on your Unswayed Ministers pile.
- Step 6: Fill Crown Spaces. Place 9 crowns on the spaces with victory points on your faction board.
12.4 Birdsong
Place one warrior, plus one warrior per warrior icon showing, in the Burrow.
12.5 Daylight
Your Daylight has three steps in the following order.
- 12.5.1 Assembly. You may take up to two actions in any order and number, as follows.
- Build. Reveal one card to place a citadel or market in a matching clearing you rule.
- Recruit. Place one warrior in the Burrow.
- Move. Take a move.
- Battle. Initiate a battle.
- Dig. Spend one card to place a tunnel token in a matching clearing without a tunnel token. Then, move up to four warriors from the Burrow to that clearing. (If all three tunnels are on the map, you may remove a tunnel first.)
- 12.5.2 Parliament. You may take the action of each swayed minister once in any order.
- Foremole. Reveal any card to place a citadel or market in any clearing (matching or not) you rule.
- Captain. Initiate a battle.
- Marshal. Take a move.
- Brigadier. Take up to two moves or initiate up to two battles.
- Banker. Spend any number of cards (even one) of the same suit to score victory points in equal number.
- Mayor. Take the action of any swayed noble or squire.
- Duchess of Mud. Score two victory points if all three tunnels are on the map.
- Baron of Dirt. Score one victory point per market on the map.
- Earl of Stone. Score one victory point per citadel on the map.
- 12.5.3 Sway. You may sway one minister, as follows.
- Choose Minister. Choose a minister card in your Unswayed Ministers pile. You must have a crown on your faction board matching the rank (squire, noble, lord) of that minister.
- Reveal Cards. Reveal the number of cards listed on the chosen minister. For each card you wish to reveal, you must have at least one piece in a clearing matching the suit of that card. Each clearing with any of your pieces only allows you to reveal one matching card.
- Sway Minister and Score. Take the chosen minister card and place it above your faction board. Take a crown of that minister’s rank from your faction board and place it on the minister card. Score the victory points listed on the space uncovered on your faction board.
12.6 Evening
Your Evening has three steps in the following order.
- 12.6.1 Discard and Return Revealed Cards. Discard any bird cards you revealed this turn, then return all other cards you revealed this turn to your hand.
- 12.6.2 Craft. You may craft by activating citadels and markets. (These are identical for crafting purposes.)
- 12.6.3 Draw and Discard. Draw one card, plus one card per card draw icon showing. Then, if you have more than five cards in your hand, discard cards of your choice until you have five.
13. Corvid Conspiracy
13.1 Overview
The Corvid Conspiracy seeks to strong-arm the Woodland into submission by completing criminal plots, scoring victory points each time they flip one. The more revealed plots on the map, the more they score. Misdirection is critical—if their plans are too obvious, the Corvids risk exposure. To avoid this, they must recruit carefully and look for any opportunities for subterfuge and extortion.
13.2 Faction Rules and Abilities
- 13.2.1 Crafting. The Corvids craft during Birdsong by activating plot tokens (whether face up or down).
- 13.2.2 Plot Tokens. The Corvids have eight infiltration tokens, two of each type.
- Token Facing. While in the Corvids’ supply, plot tokens are face down (feather). While on the map, a plot token can be face up (unique icon) or face down. The Corvids can inspect any facedown plot token at any time.
- Placement Limits. Each clearing can hold only one plot token.
- 13.2.3 Nimble. The Corvids can move regardless of who rules their origin or destination clearing.
- 13.2.4 Exposure. Anytime on their turn, but before drawing any cards in their Evening, an enemy player with at least one piece in a clearing with a facedown plot token may show the Corvids a matching card to guess the type of plot token in that clearing. If incorrect, the Corvids say “no,” and the enemy player gives that card to the Corvids. If correct, the enemy player removes the plot token (scoring a victory point) and ignores its effect.
- 13.2.5 Embedded Agents. As defender in battle, if the Corvids have a facedown plot token (even defenseless) in the clearing of battle, they deal an extra hit.
13.3 Faction Setup
- Step 1: Gather Warriors and Plots. Form supplies of 15 warriors and 8 plot tokens face down.
- Step 2: Scatter. Place 1 warrior in any clearing of each suit (total of 3).
13.4 Birdsong
Your Birdsong has three steps in the following order.
- 13.4.1 Craft. You may activate plot tokens (whether face up or down) to craft cards from your hand.
- 13.4.2 Flip Plots. Any number of times, flip a plot token face up in a clearing with any Corvid warriors, score one victory point per face-up plot token on the map (including the newly flipped one), and then resolve its flip effect if it is a bomb or extortion.
- 13.4.3 Recruit. Once per turn, you may spend any card to place one warrior in each matching clearing. (If you spend a bird, choose one suit to place warriors in.)
13.5 Daylight
You may take up to three actions, as follows.
- 13.5.1 Move. Take a move.
- 13.5.2 Plot. Remove a Corvid warrior, plus another Corvid warrior per plot you have placed this turn, from a clearing with no plot tokens to place a face-down plot token there.
- 13.5.3 Battle. Initiate a battle.
- 13.5.4 Trick. Swap two plot tokens on the map. Both plot tokens must be face up or face down.
13.6 Evening
Your Evening has two steps in the following order.
- 13.6.1 Exert. You may take one action listed in Daylight if you choose to not draw cards during Evening.
- 13.6.2 Draw. Draw one card plus one card per face-up extortion token on the map. Then, if you have more than five cards, discard down to five cards.
13.7 Plot Tokens Reference
- 13.7.1 Bomb. Whenever a bomb token is flipped, remove all enemy pieces in its clearing, then remove the bomb token.
- 13.7.2 Snare. While a snare token is face up, enemy pieces cannot be placed in or moved from its clearing.
- 13.7.3 Extortion. Whenever an extortion token is flipped, take a random card from each player with at least one piece in its clearing. While an extortion token is face up, you draw another card in Evening.
- 13.7.4 Raid. Whenever a raid token is removed (face up or down), place one warrior in each clearing adjacent to the clearing from which the raid was removed. (Ignore this effect if the raid is removed by Exposure.)
Variants, Alternate Maps & Components
Appendix C: Variant Setup
Before step 1 in setup (5.1.1), you may choose to follow any of the following steps in the following order.
- C.1 Step C1: Choose Map. You may play on a map other than the fall map. If you do, collect the 12 suit markers, flip them face down, and shuffle them, then place one on each clearing, covering the printed suit symbols if any. Finally, follow the Setup Modifications section of the chosen map.
- C.2 Step C2: Choose Deck. You may replace the entire standard deck with the Exiles and Partisans deck.
- C.3 Step C3: Choose Bots. You may play with bots, as described in the Law of Rootbotics.
Appendix D: Variant Maps
D.1 Winter Map
- D.1.1 Raging River. The river divides forests as if each river section linking two clearings were a path.
D.2 Lake Map
- D.2.1 Setup Modifications. Place the ferry piece in the corner clearing that is also a coastal clearing.
- D.2.2 The Lake. The lake is in the center of the map. The lake is treated as rivers linking each coastal clearing to each other coastal clearing.
- D.2.3 Coastal Clearings. Clearings touching the lake (not separated by a forest) are coastal clearings.
- D.2.4 Coastal Forests. Forests touching the lake are coastal forests. Each coastal forest is adjacent to its two neighboring coastal forests (separated by one coastal clearing).
- D.2.5 The Ferry. Once per turn, a player taking a move from the coastal clearing with the ferry can move to another coastal clearing, moving the ferry as well. (This follows the normal move rules.) After taking this move, that player draws one card. The ferry cannot be battled or removed.
D.3 Mountain Map
- D.3.1 Setup Modifications. Place the 6 closed path markers to cover the 6 paths of darker color with excavated ground. Place the tower piece in the central clearing showing two towers.
- D.3.2 Closed Paths. A path covered with a closed path marker is a closed path. Clearings linked by a closed path are not adjacent. Closed paths enclose and divide forests as if they were paths (so the Vagabond can slip across it).
- D.3.3 Removing Closed Paths. Once per turn in their Daylight, a player can spend a card to remove a closed path marker from the game permanently and score one victory point. To remove it, that player must have at least one piece in either clearing linked by the closed path marker.
- D.3.4 The Pass. The clearing marked with the tower piece is the Pass. At the end of a player’s Evening, if that player rules the Pass, that player scores one victory point.
- D.3.5 Forests. All areas on the mountain map enclosed by paths and clearings are forests (2.2), regardless of the presence or placement of trees within.
Appendix B: Components
B.1 Root
- B.1.1 Booklets. Walkthrough, Learning to Play, and this Law.
- B.1.2 Cardboard Pieces. 28 Buildings (7 Roosts, 6 Sawmills, 6 Recruiters, 6 Workshops, 3 Bases), 19 Tokens (10 Sympathy, 8 Wood, 1 Keep), 12 Clearing Markers (4 Rabbit, 4 Fox, 4 Mouse), 4 Ruins, 4 Victory Point Markers, 3 Relationship Markers, 23 Items (4 Boots, 4 Swords, 4 Bags, 3 Hammers, 3 Tea, 2 Coins, 2 Crossbows, 1 Torch).
- B.1.3 Wooden Pieces. 55 Warriors (25 Marquise, 20 Eyrie, 10 Alliance), 1 Vagabond Pawn.
- B.1.4 Cards. 54 Cards for Shared Deck, 16 Faction Overviews, 4 Eyrie Leaders, 2 Loyal Viziers, 3 Vagabond Characters, 15 Quests, 4 Walkthroughs.
- B.1.5 Other. Board (Fall and Winter Maps), 2 Dice, 4 Faction Boards (Marquise, Eyrie, Alliance, Vagabond).
B.2 Riverfolk Expansion
- B.2.1 Booklets. Learning to Play.
- B.2.2 Cardboard Pieces. 15 Buildings (15 Gardens), 9 Tokens (9 Trade Posts), 3 Victory Point Markers, 1 Outcast Marker, 9 Relationship Markers, 11 Items (3 Boots, 3 Swords, 1 Bag, 1 Hammer, 1 Torch, 1 Coins, 1 Crossbow), and 17 spare pieces with letter backs for future scenarios.
- B.2.3 Wooden Pieces. 40 Warriors (25 Lizard, 15 Riverfolk), 1 Vagabond Pawn.
- B.2.4 Cards. 4 Spies, 2 Faction Overviews, 3 Vagabond Characters.
- B.2.5 Other. Faction Boards (Second Vagabond, Mechanical Marquise, Riverfolk Company, Lizard Cult).
B.3 Underworld Expansion
- B.3.1 Booklets. Learning to Play and this Law.
- B.3.2 Cardboard Pieces. 6 Buildings (3 Markets, 3 Citadels), 19 Tokens (8 Plots, 8 Spare Plots, 3 Tunnels), the Burrow, 4 Relationship Markers, 2 Victory Point Markers, 6 Closed Path Markers.
- B.3.3 Wooden Pieces. 35 Warriors (20 Duchy, 15 Corvid), 1 Ferry, 1 Tower.
- B.3.4 Cards. 9 Ministers, 2 Overviews.
- B.3.5 Other. Board (Lake and Mountain Maps), 2 Dice, 2 Faction Boards (Duchy, Corvid).
B.4 Clockwork Expansion
- B.4.1 Booklets. Law of Rootbotics.
- B.4.2 Cardboard Pieces. 12 Priority Markers.
- B.4.3 Cards. 12 Difficulties, 16 Traits, 3 Vagabots.
- B.4.4 Other. 4 Faction Boards.
B.5 Exiles and Partisans Deck
- B.5.1 Cards. 54 Cards for Shared Deck.
B.6 Vagabond Pack
- B.6.1 Cardboard Pieces. 3 Items (1 Coins, 1 Hammer, 1 Boot).
- B.6.2 Wooden Pieces. 7 Vagabond Pawns.
- B.6.3 Cards. 3 Vagabond Characters.
Credits & Dedications
Cole dedicates this game to his younger brothers and sisters, who never let him forget how to play.
Kyle dedicates this game to his children, who have always requested cute animal drawings.
- Game design: Cole Wehrle.
- Illustrations: Kyle Ferrin.
- Editing: Joshua Yearsley.
- Based on a concept by: Patrick Leder.
- Development: Leder Games’ St. Paul staff—Patrick Leder, Cole Wehrle, Jake Tonding, Clayton Capra, and Nick Brachmann—and by the intrepid Joshua Yearsley.
- Graphic design and layout: Cole Wehrle, Kyle Ferrin, Nick Brachmann, and Jaime Willems.
- Proofreading: Kate Unrau.
- Playtesting: Grayson Page and his amazing group (inc. Martin, Jared, Richard, Tony, Harvey), Chas Threlkeld, Drew Wehrle, Blake Wehrle, Corey Porter, Kyle Kirk, Matthew Root, Mark von Minden, Davey Janik-Jones, the stalwart players of First Minnesota, Jim Bolland, Melissa Lewis-Gentry and Modern Myths, Jennifer Gutterman and Hampshire College, Matthew Snow, Justin Dowd and the Brass Cat, the Owl & Raven crew, Josh Houser, Brian Peterson, Ethan Zimmerman, Brandi Leder, Heather Brian, Ted Scamp, Jenny and Matt Benusa, and many others.
- Underworld Expansion: Patrick Leder (design), Nick Brachmann (lead developer), and playtesting by Andrew Olson, Joel McGuire, Nathaniel Hicklin, Jacob Resler, Rae Kawalek, Nick Sopkowiak, Aaron Greatorex-Voith, Nicole Szajner, and the Brooklyn Game Lab (Robert Hewitt, Jack DeWald, Joseph Esbenshade, Nahvid Etedali, David Kanof, Mark Leiman, Jill Pullara).
Expansions for
Root
Root: Homeland Hirelings Pack
2026
Add three hirelings, fresh meeples, and more variety to Root.
Medium Heavy
View expansion
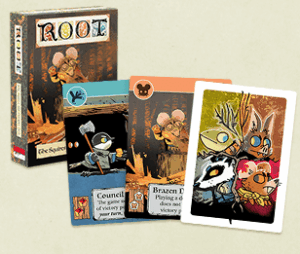
Root: The Squires and Disciples Deck
2026
A fresh card deck of faction-inspired strategies, hand tactics, and shenanigans.
Medium Heavy
View expansion
Root: The Homeland Expansion
2026
Three new factions and two maps bring fresh tensions to the Woodland.
90
minutes
Medium Heavy
View expansion
Root: Underworld Hirelings Pack
2022
Add six hirelings to bring new allies and tactical tension to the Woodland.
90
minutes
Medium Heavy
View expansion
Root: Landmarks Pack
2022
Bring the Woodland to life with four landmarks and unique clearing powers.
90
minutes
Medium

View expansion
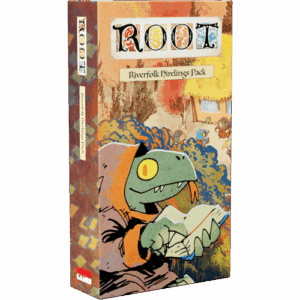
Root: Riverfolk Hirelings Pack
2022
Add six hirelings, new map pieces, and powerful strategies to Root.
90
minutes
Medium Heavy
View expansion

Root: The Clockwork Expansion
2020
Add automated factions for tense competition or cooperative play.
90
minutes
Medium Heavy
View expansion

Root: The Vagabond Pack
2020
Upgrade Root with seven custom Vagabond meeples and three new characters.
90
minutes
Medium Heavy
View expansion

Root: The Exiles and Partisans Deck
2020
Craft faction-inspired powers and embrace new strategic vulnerabilities.
Medium Heavy
View expansion

Root: The Marauder Expansion
2022
Two new factions and four hirelings bring fresh conflict to the Woodland.
90
minutes
Medium Heavy
View expansion

Root: The Riverfolk Expansion
2018
Add two factions, new scenarios, and expanded options for 1–6 players.
90
minutes
Medium Heavy
View expansion

Root: The Underworld Expansion
2020
Add two factions and two maps to the world of Root.
90
minutes
Medium Heavy
View expansion
